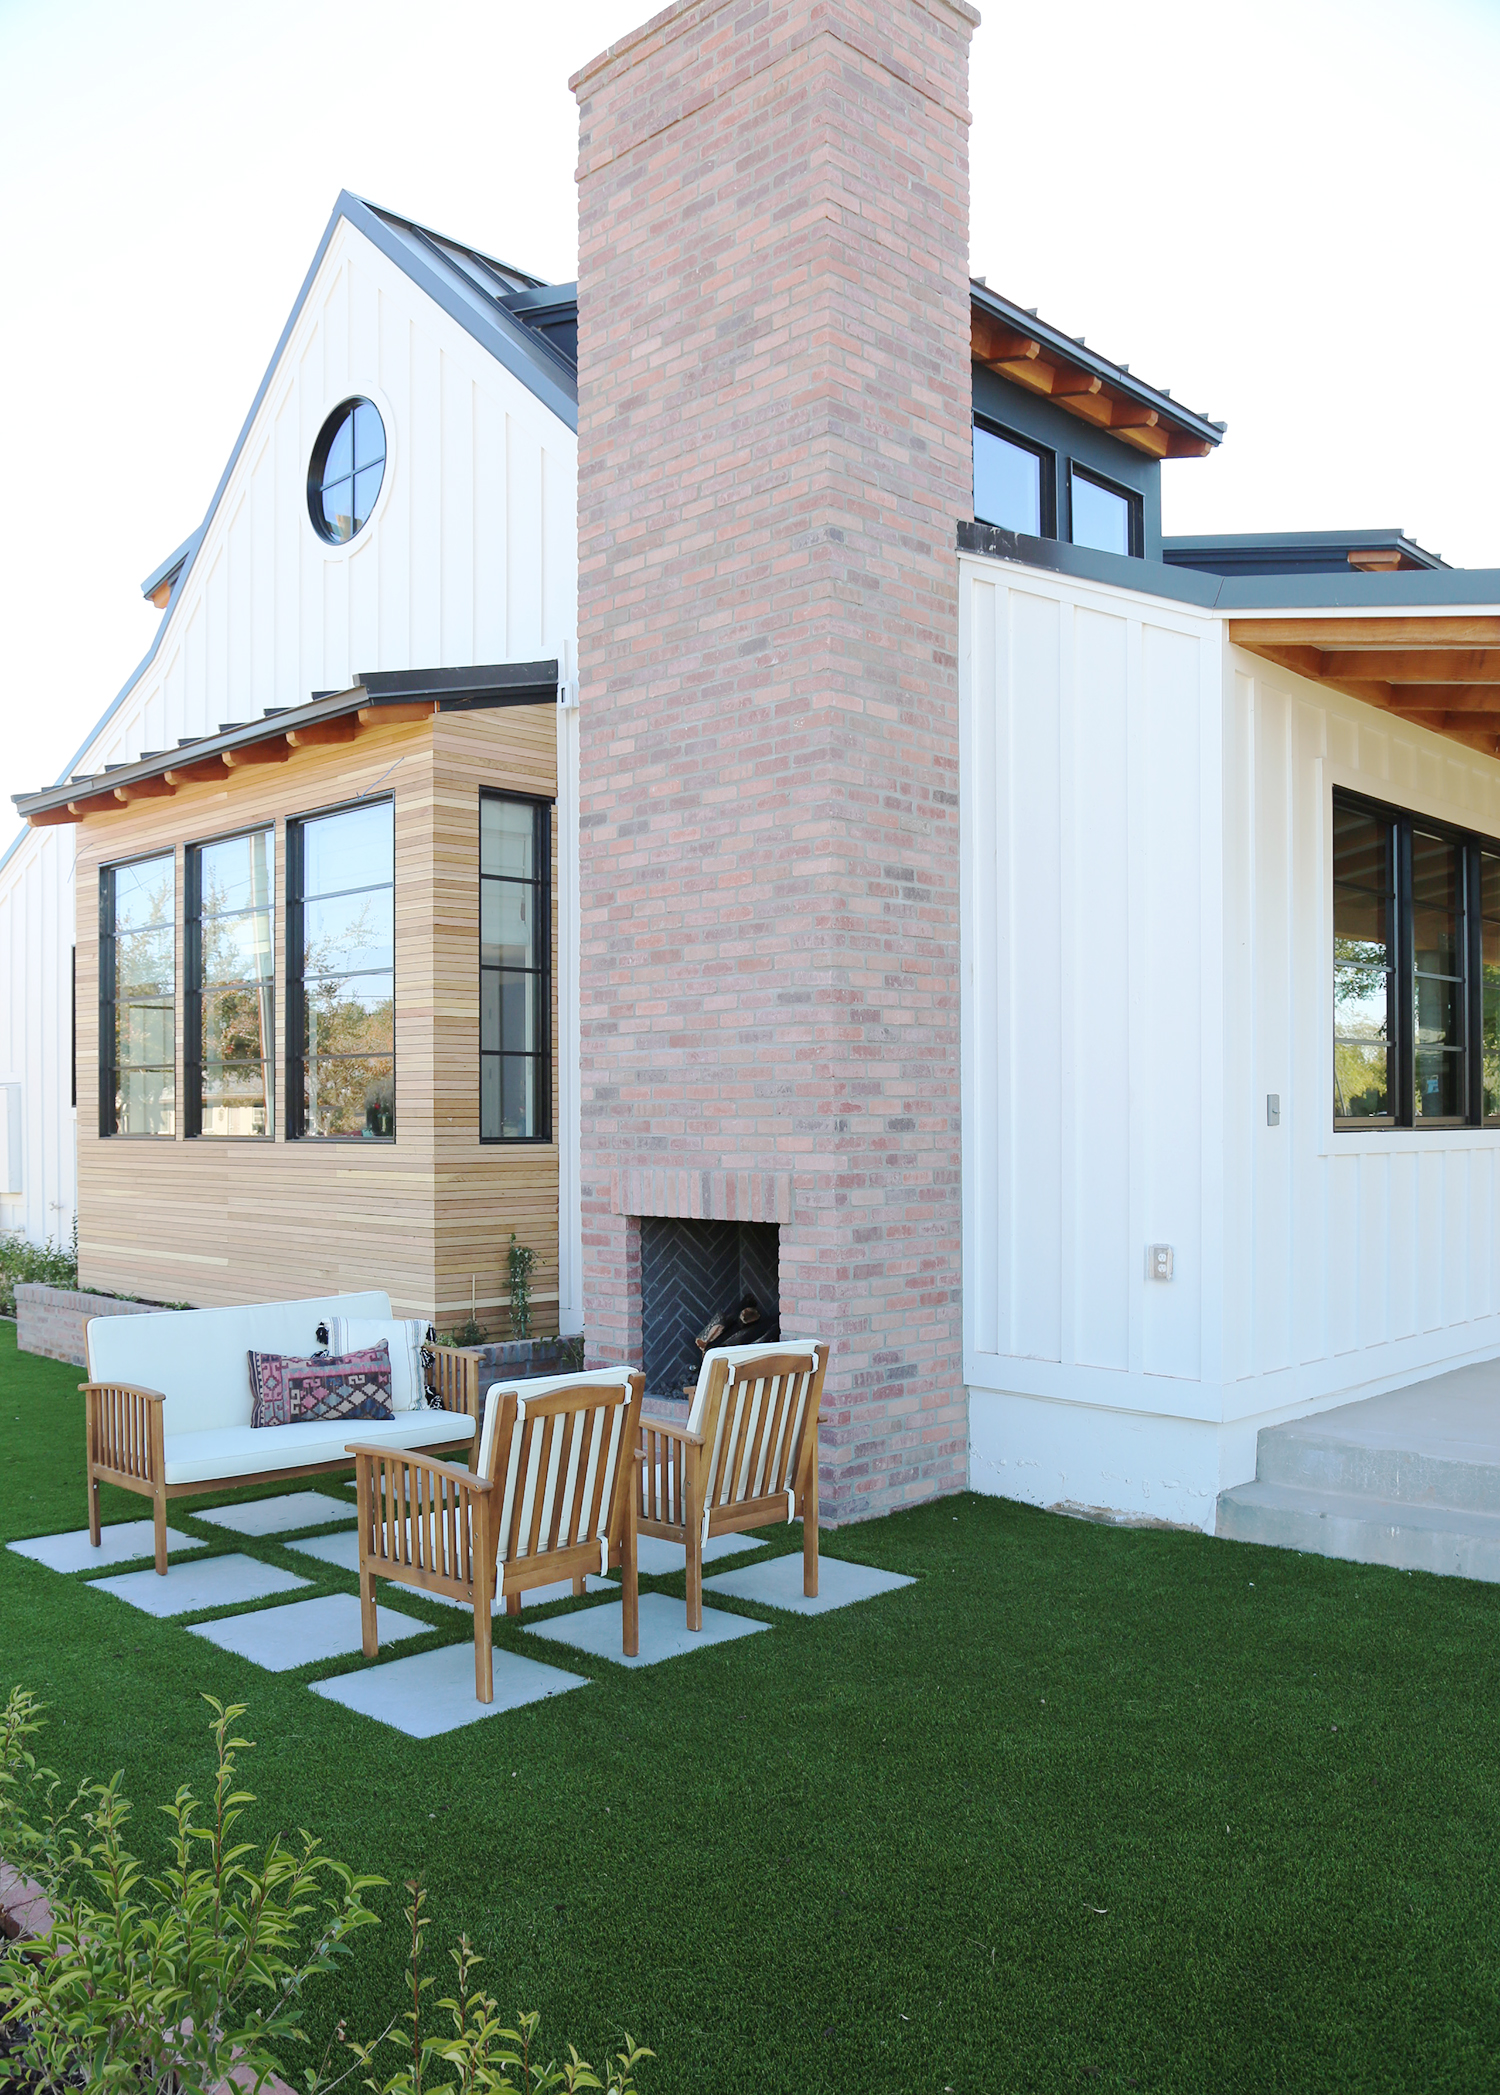
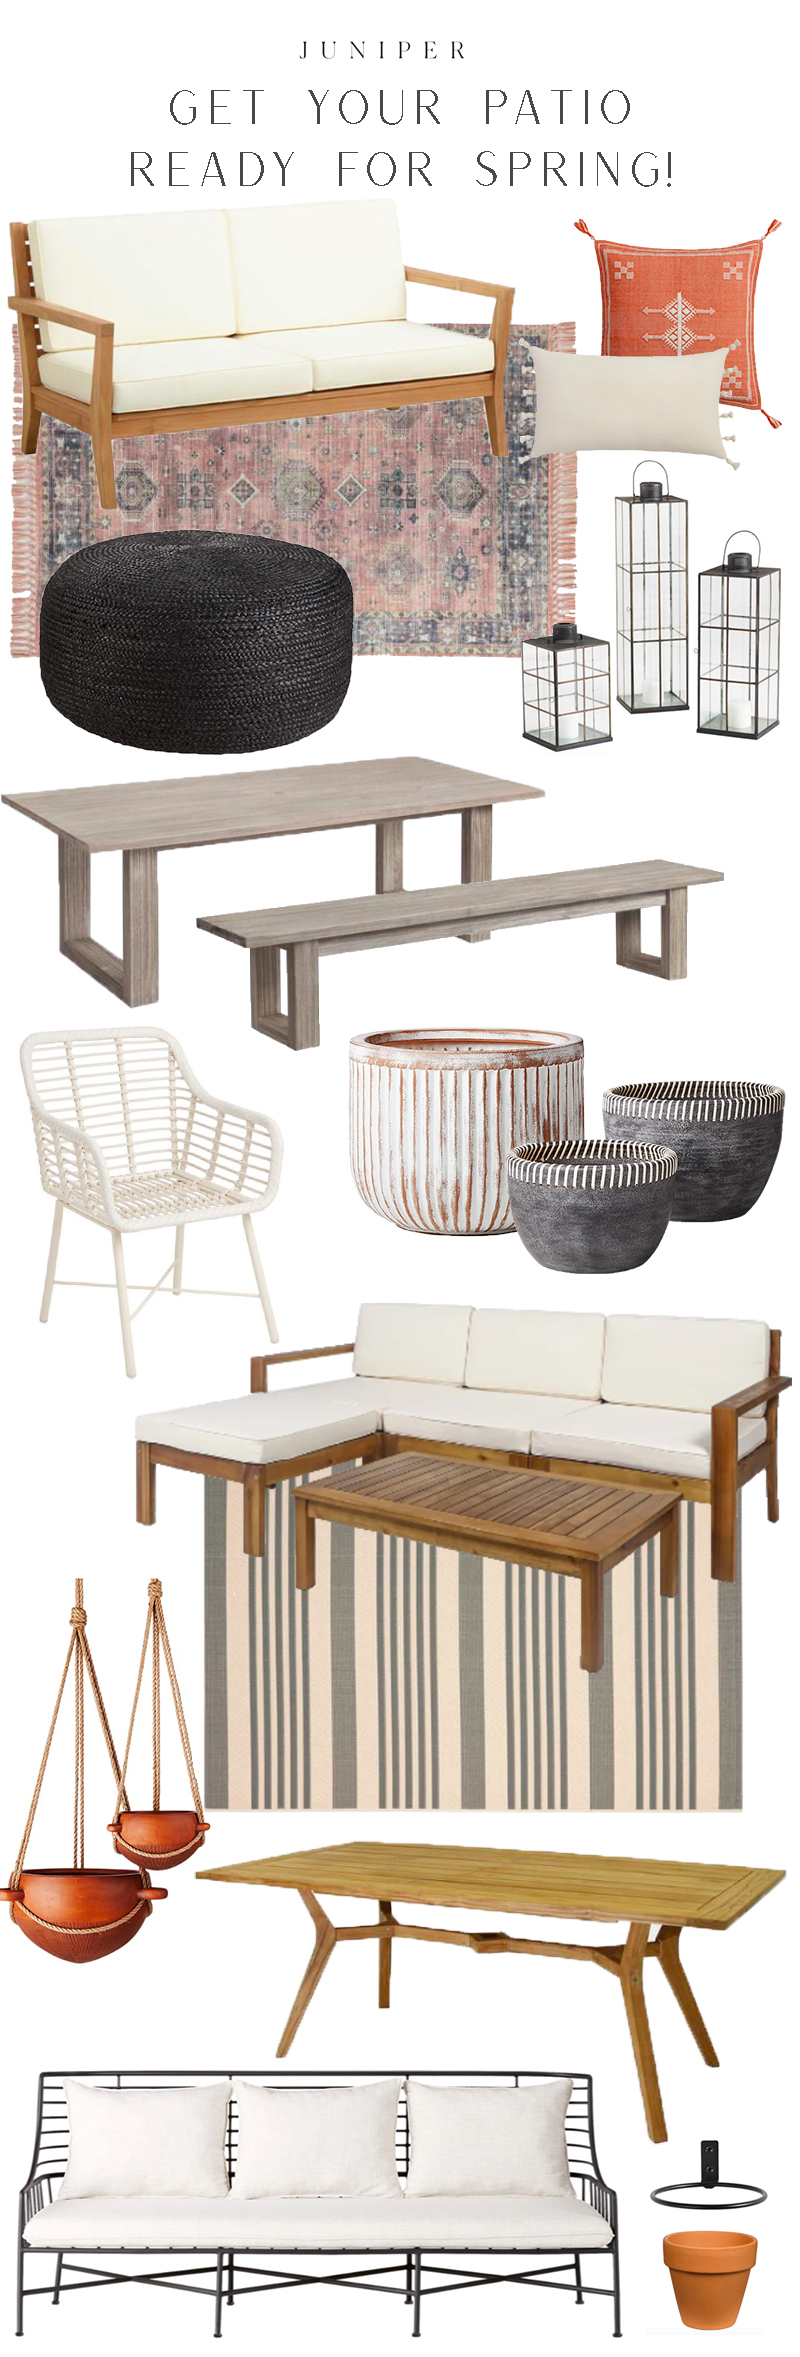
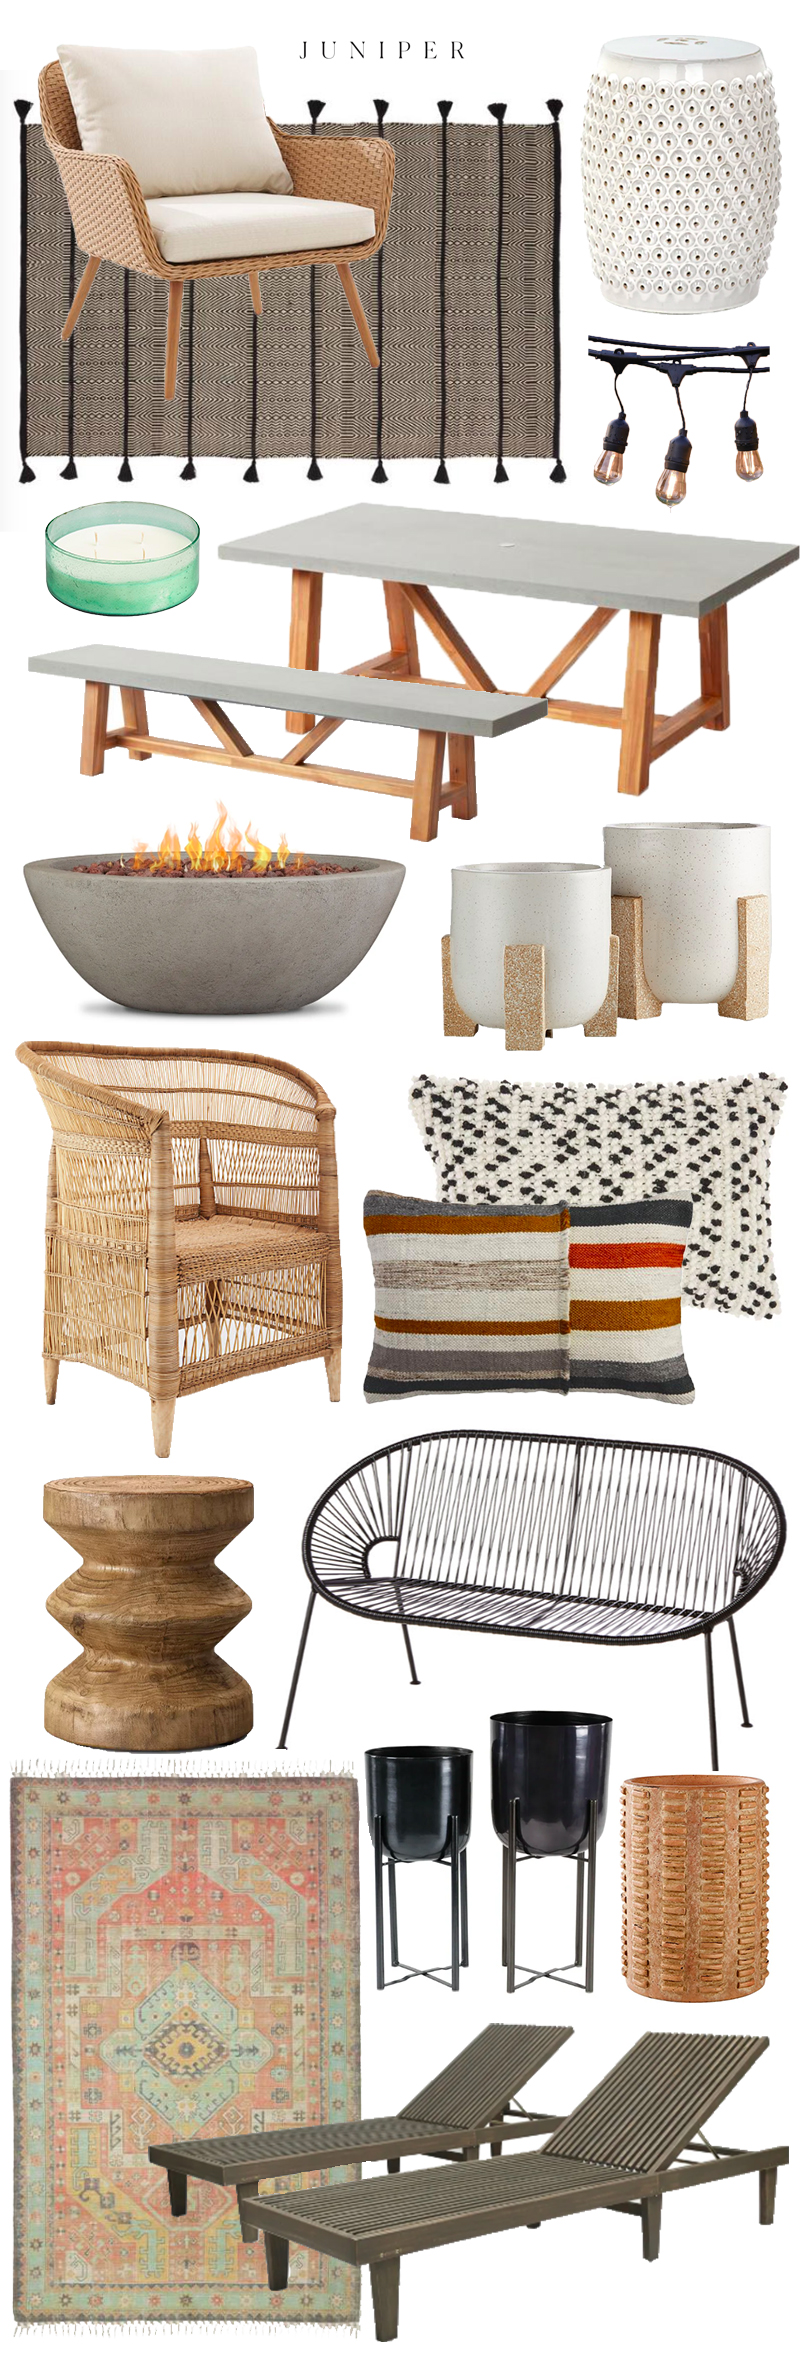
Spring is here and that means Patio Season! This is the ideal time for us here in Arizona to start getting our outdoor spaces in shape before it gets too hot outside! Here are some simple tips to help your outdoor space come to life! Patio Set // Pillow (similar) Table // Teak Chairs // …
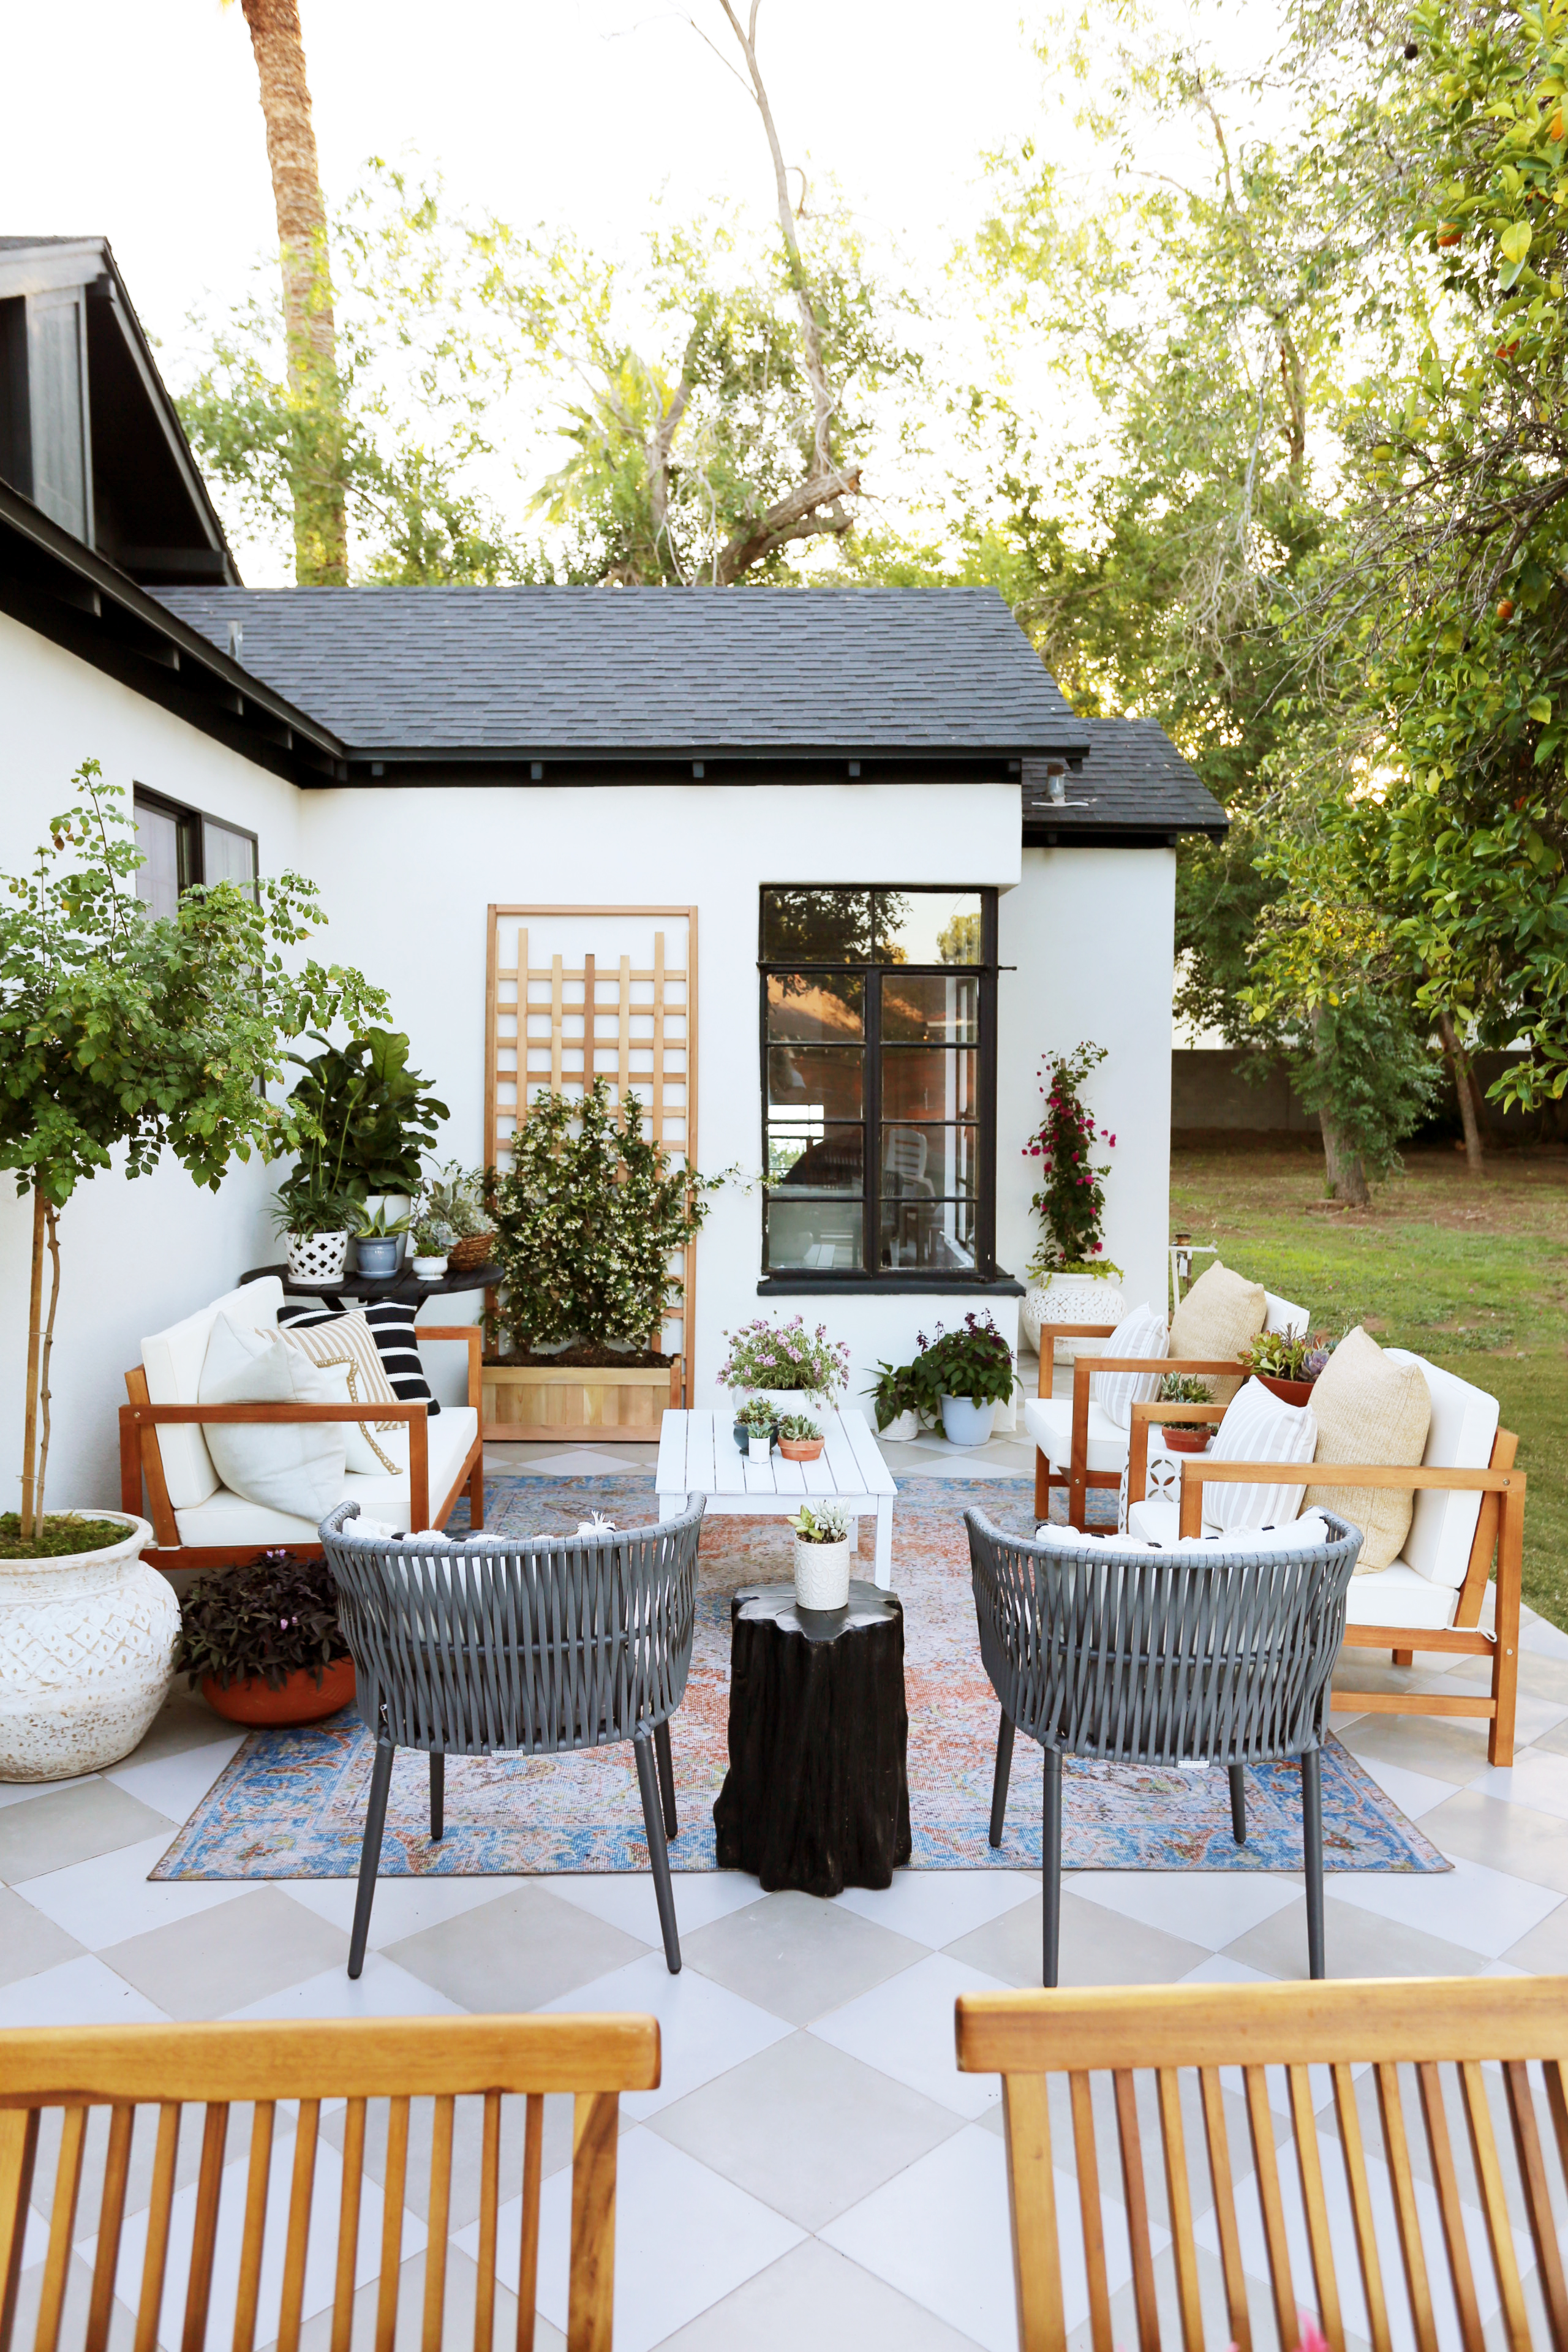
Spring is here and that means Patio Season! This is the ideal time for us here in Arizona to start getting our outdoor spaces in shape before it gets too hot outside! Here are some simple tips to help your outdoor space come to life!
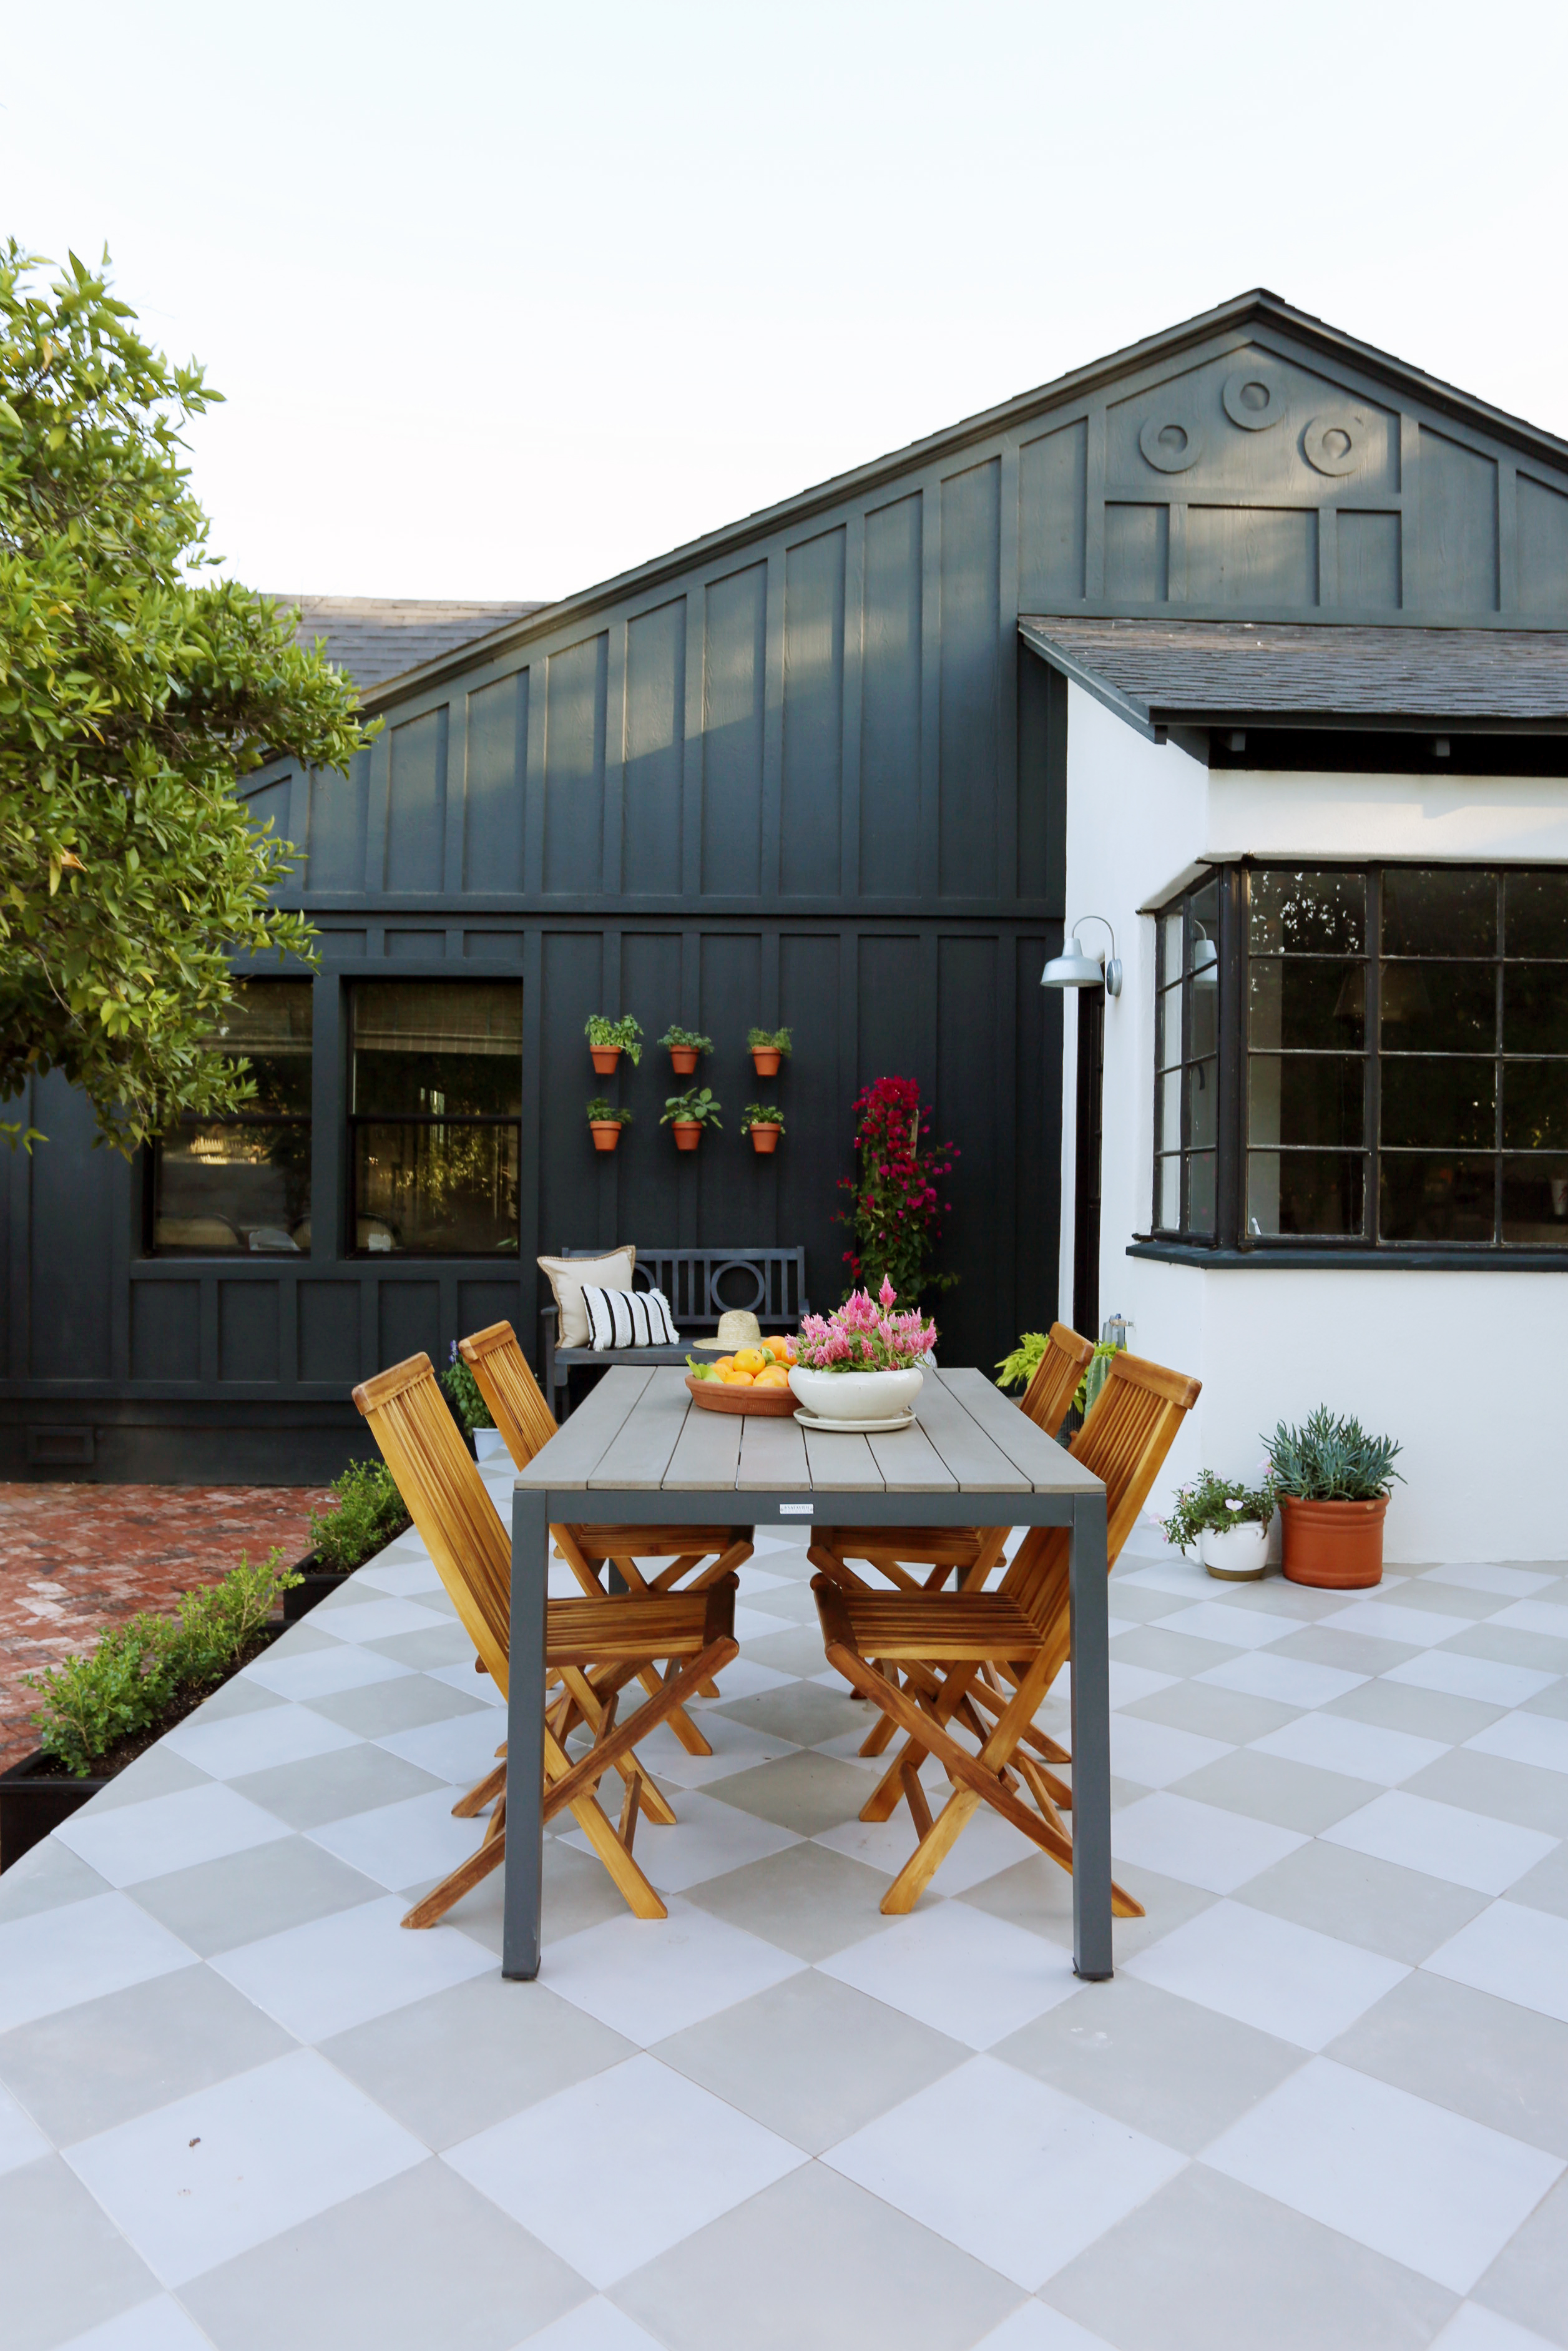
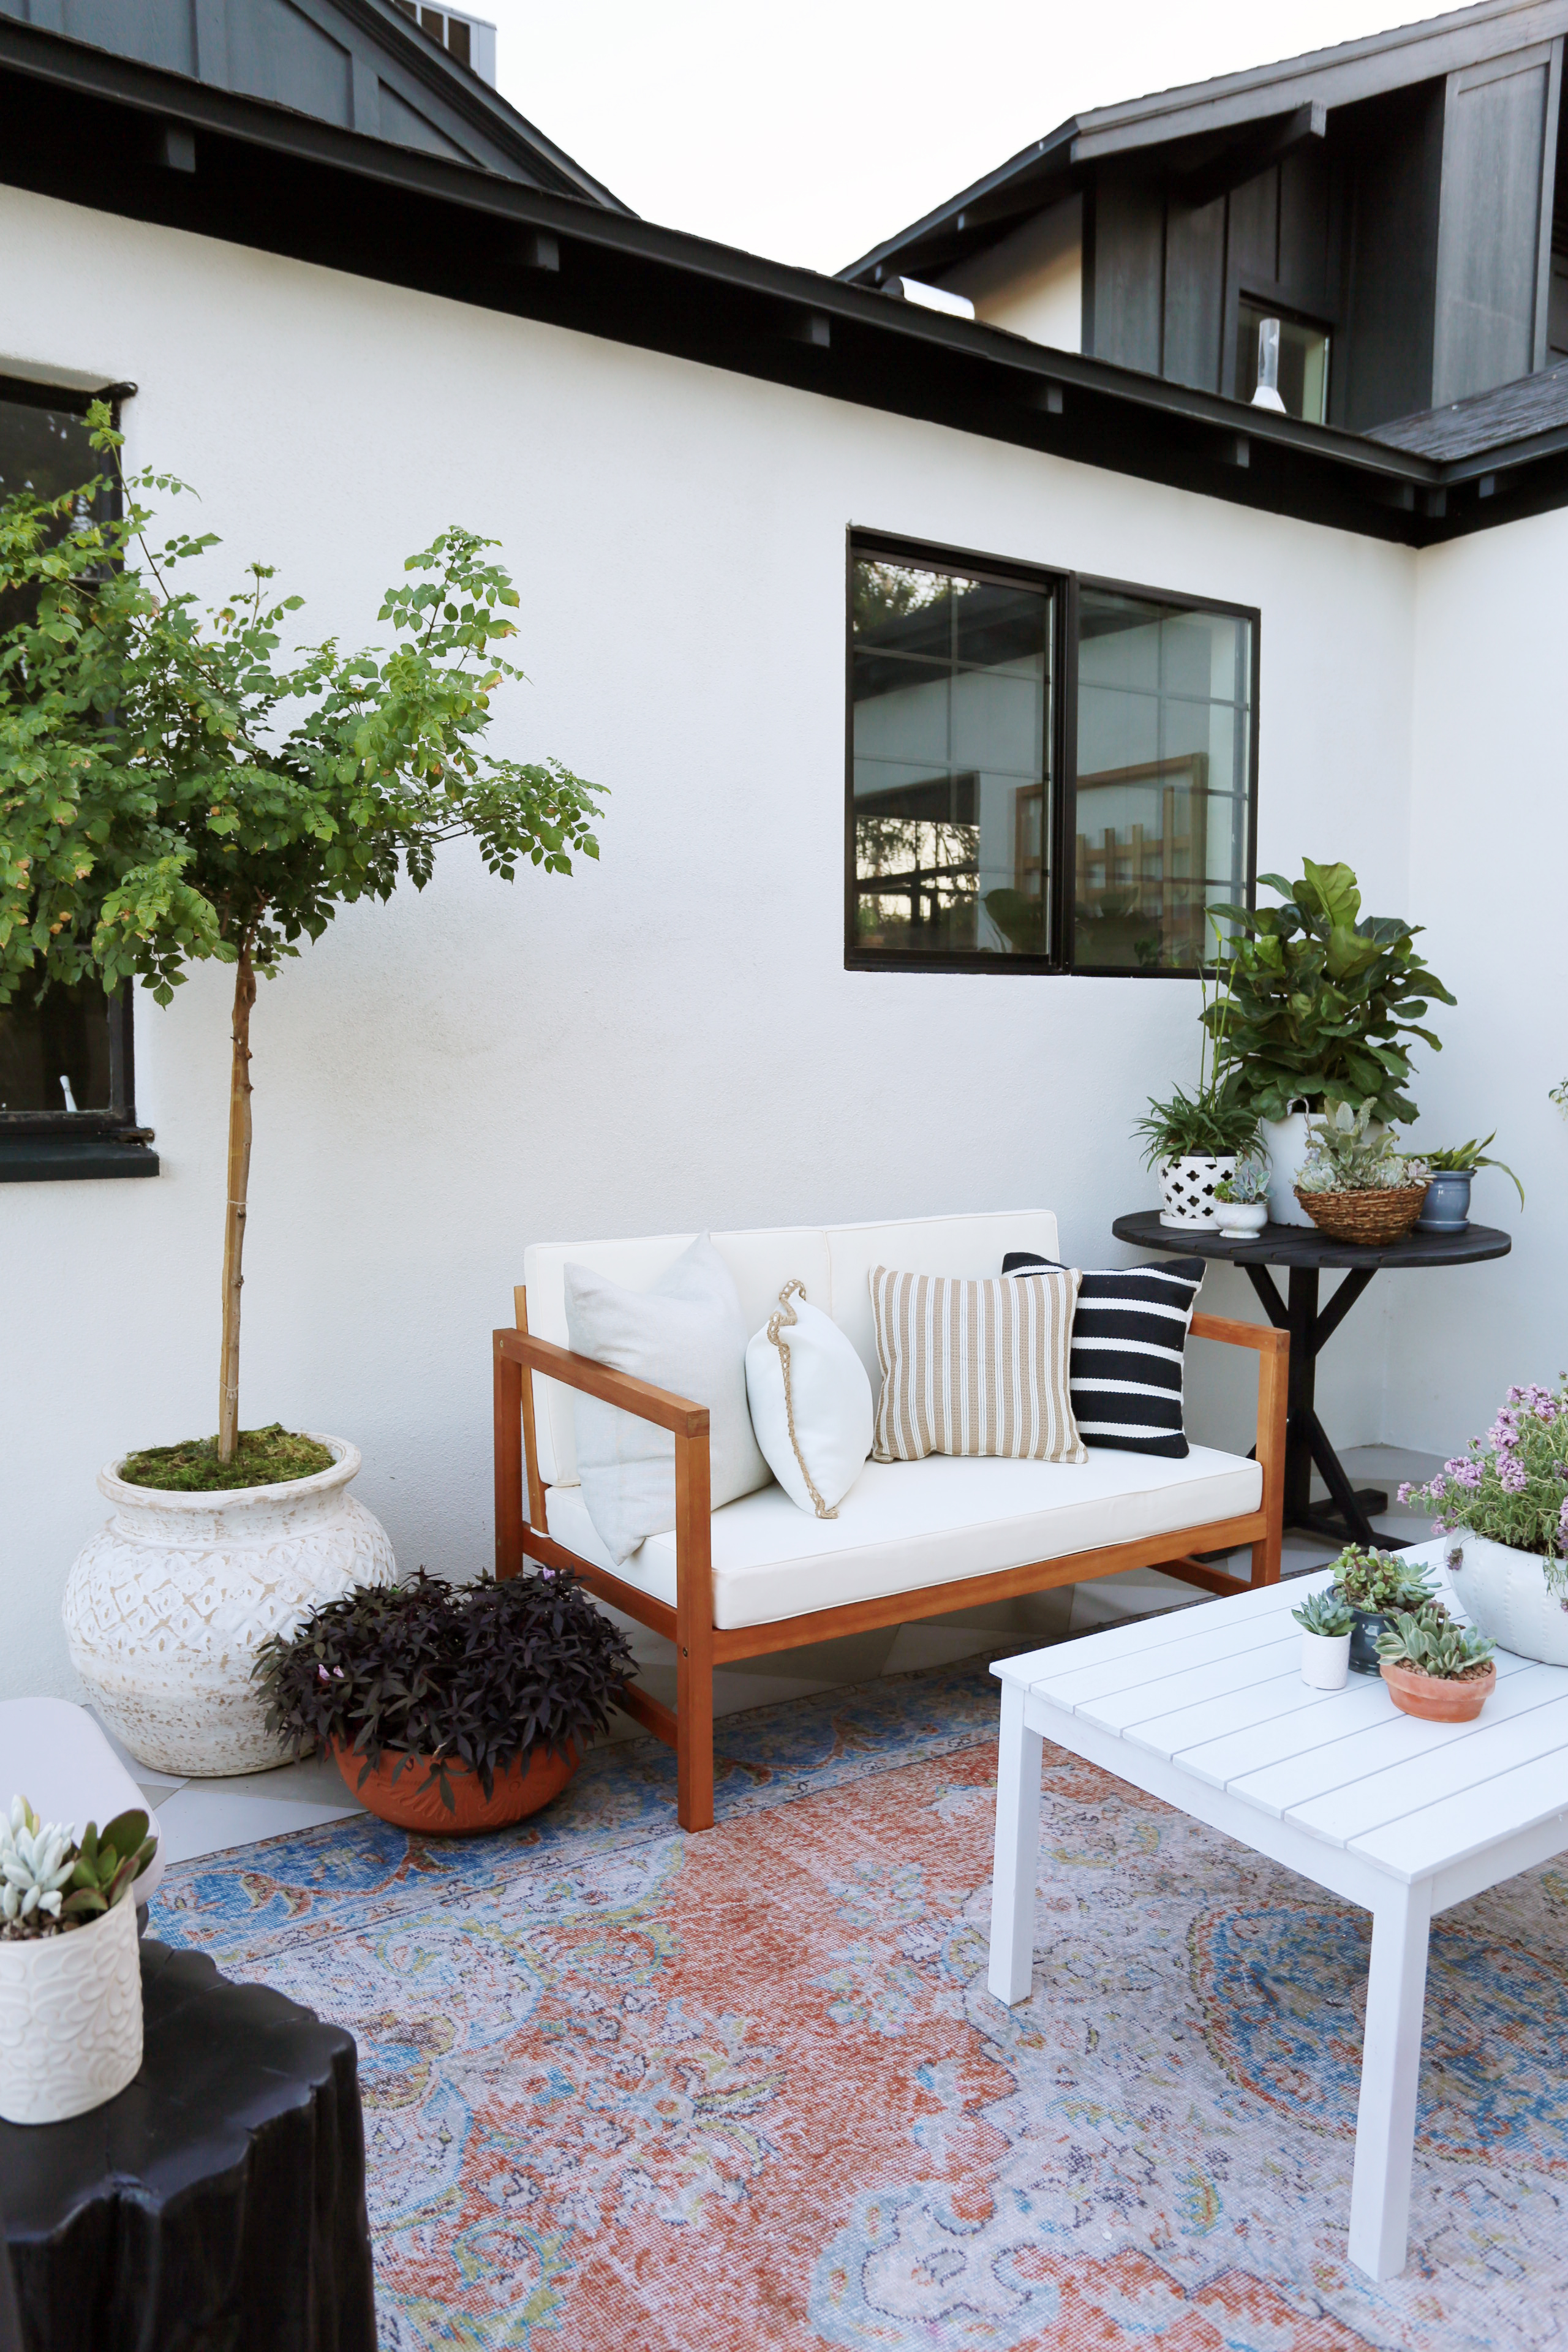
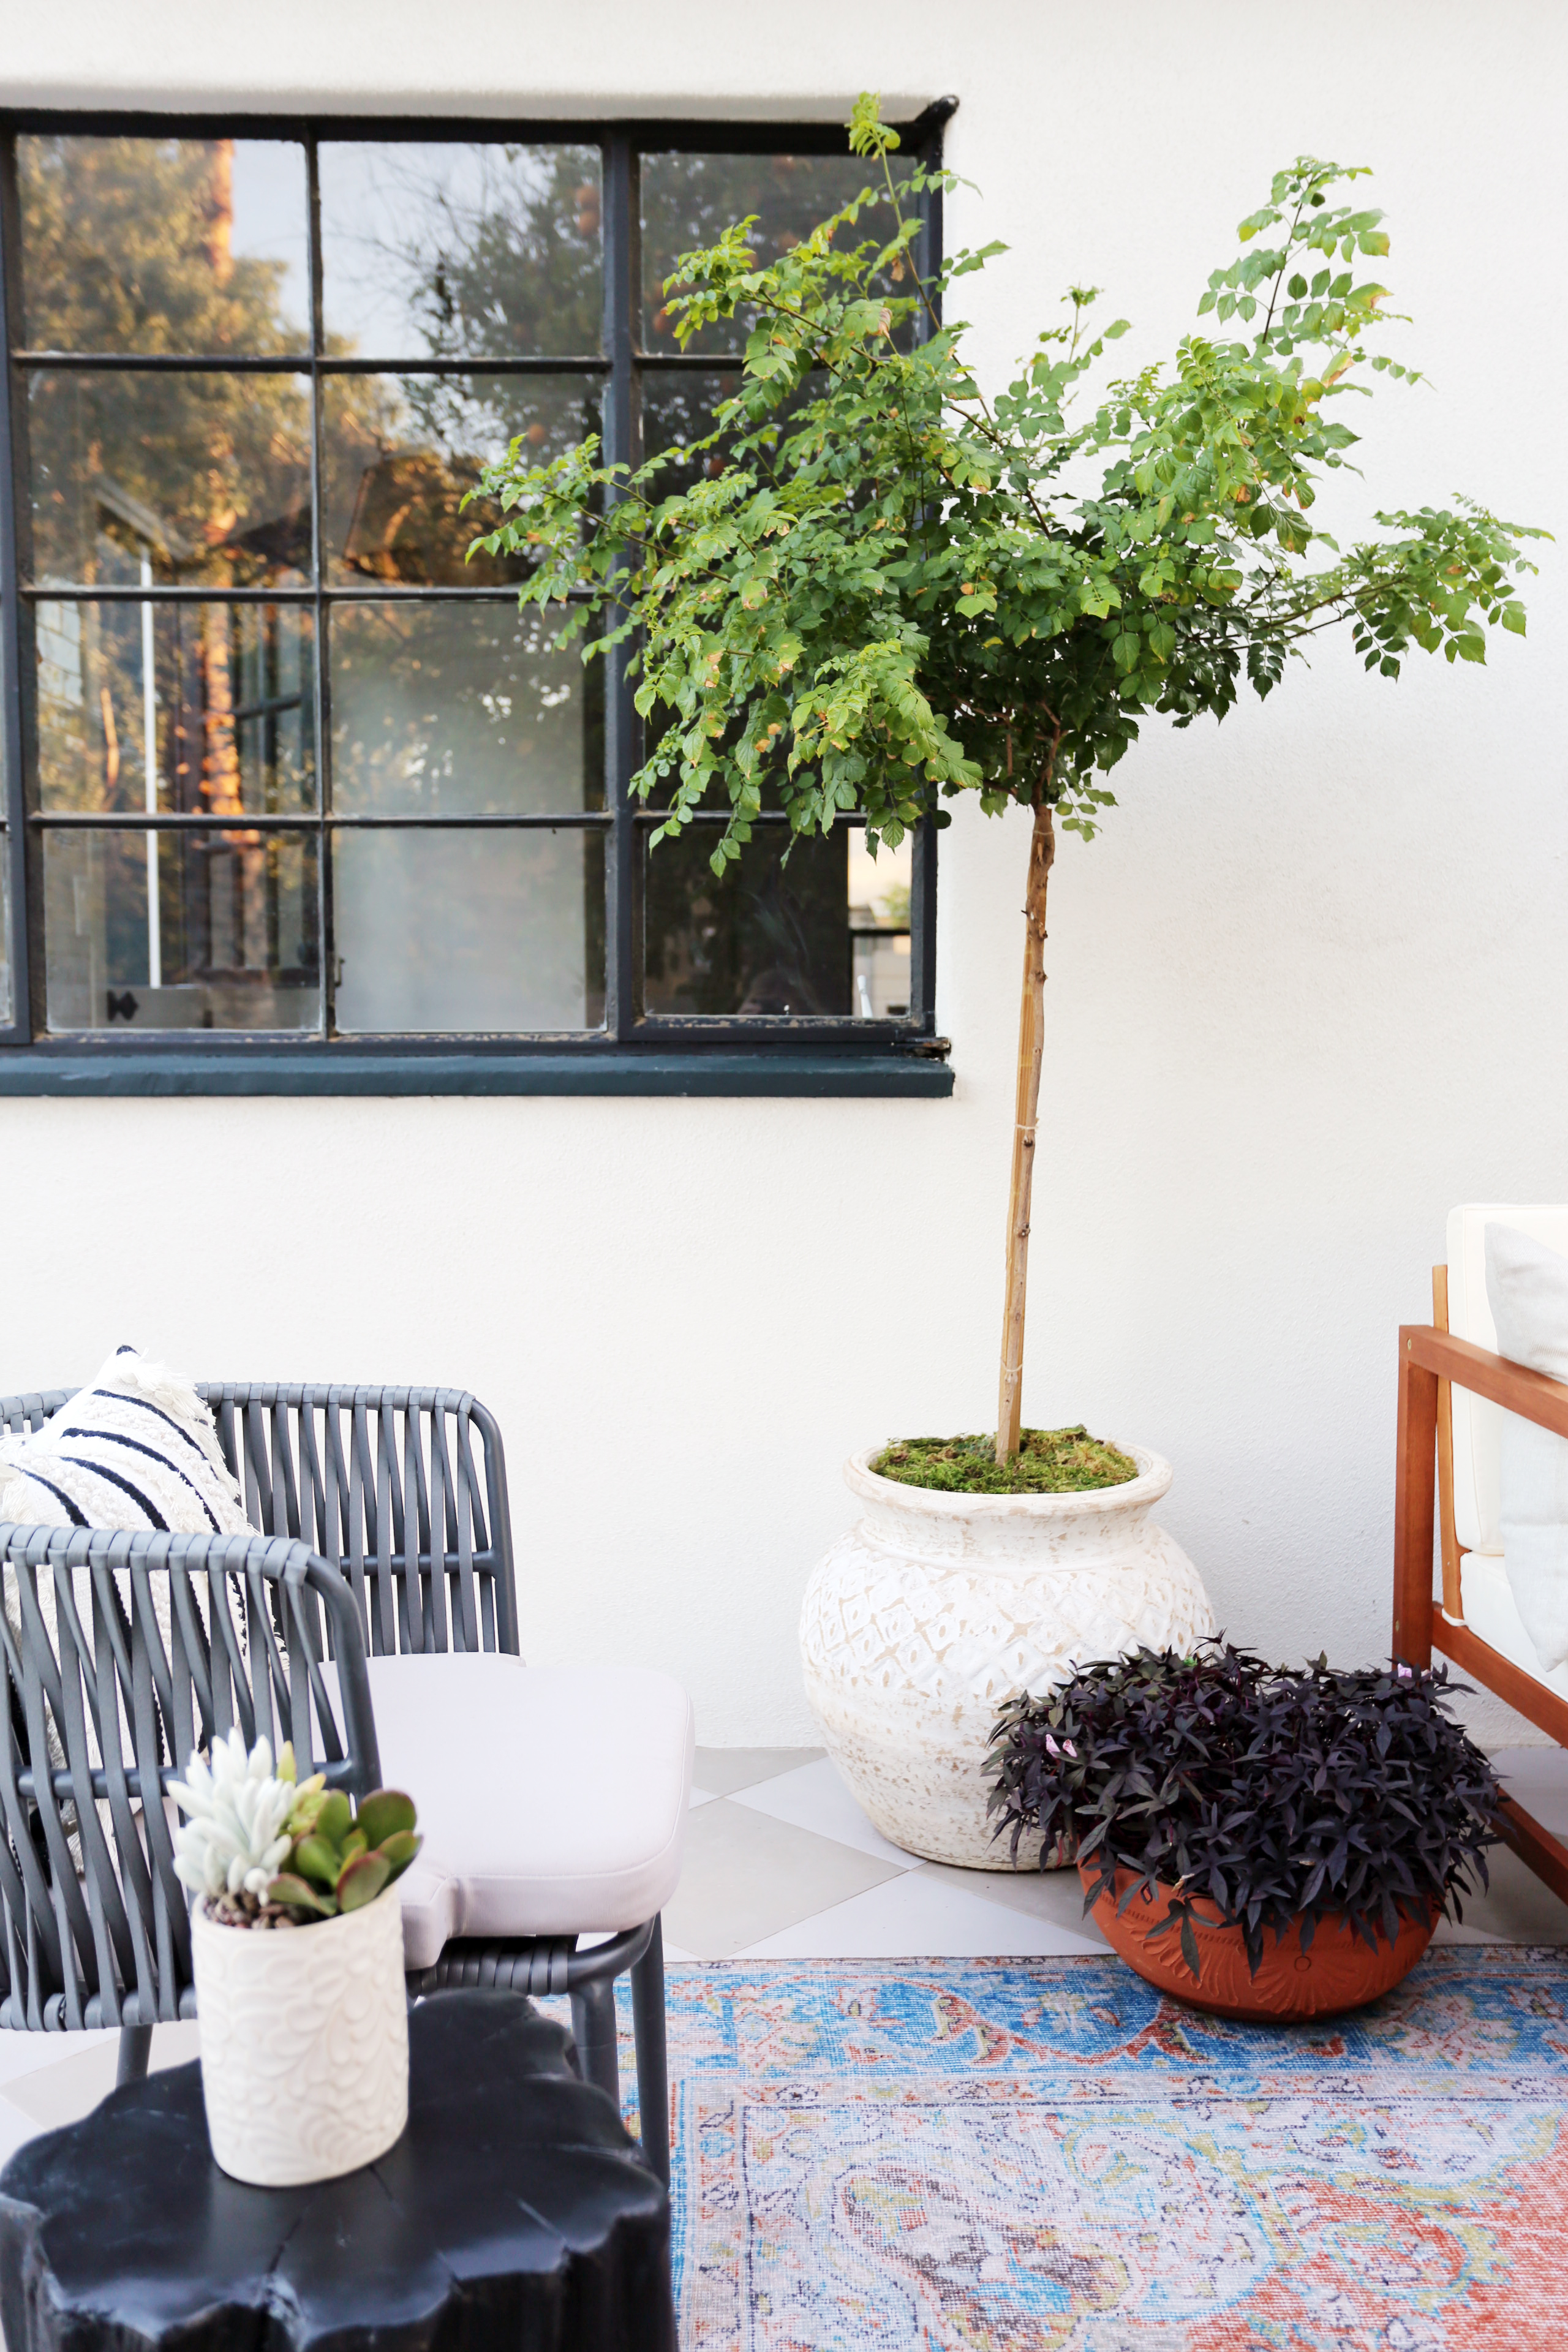
With all of the social distancing happening, we have also been spending a lot more time outdoors. Set up a dining table and chairs for relaxed outdoor dining Perfect for bbqs and date nights!
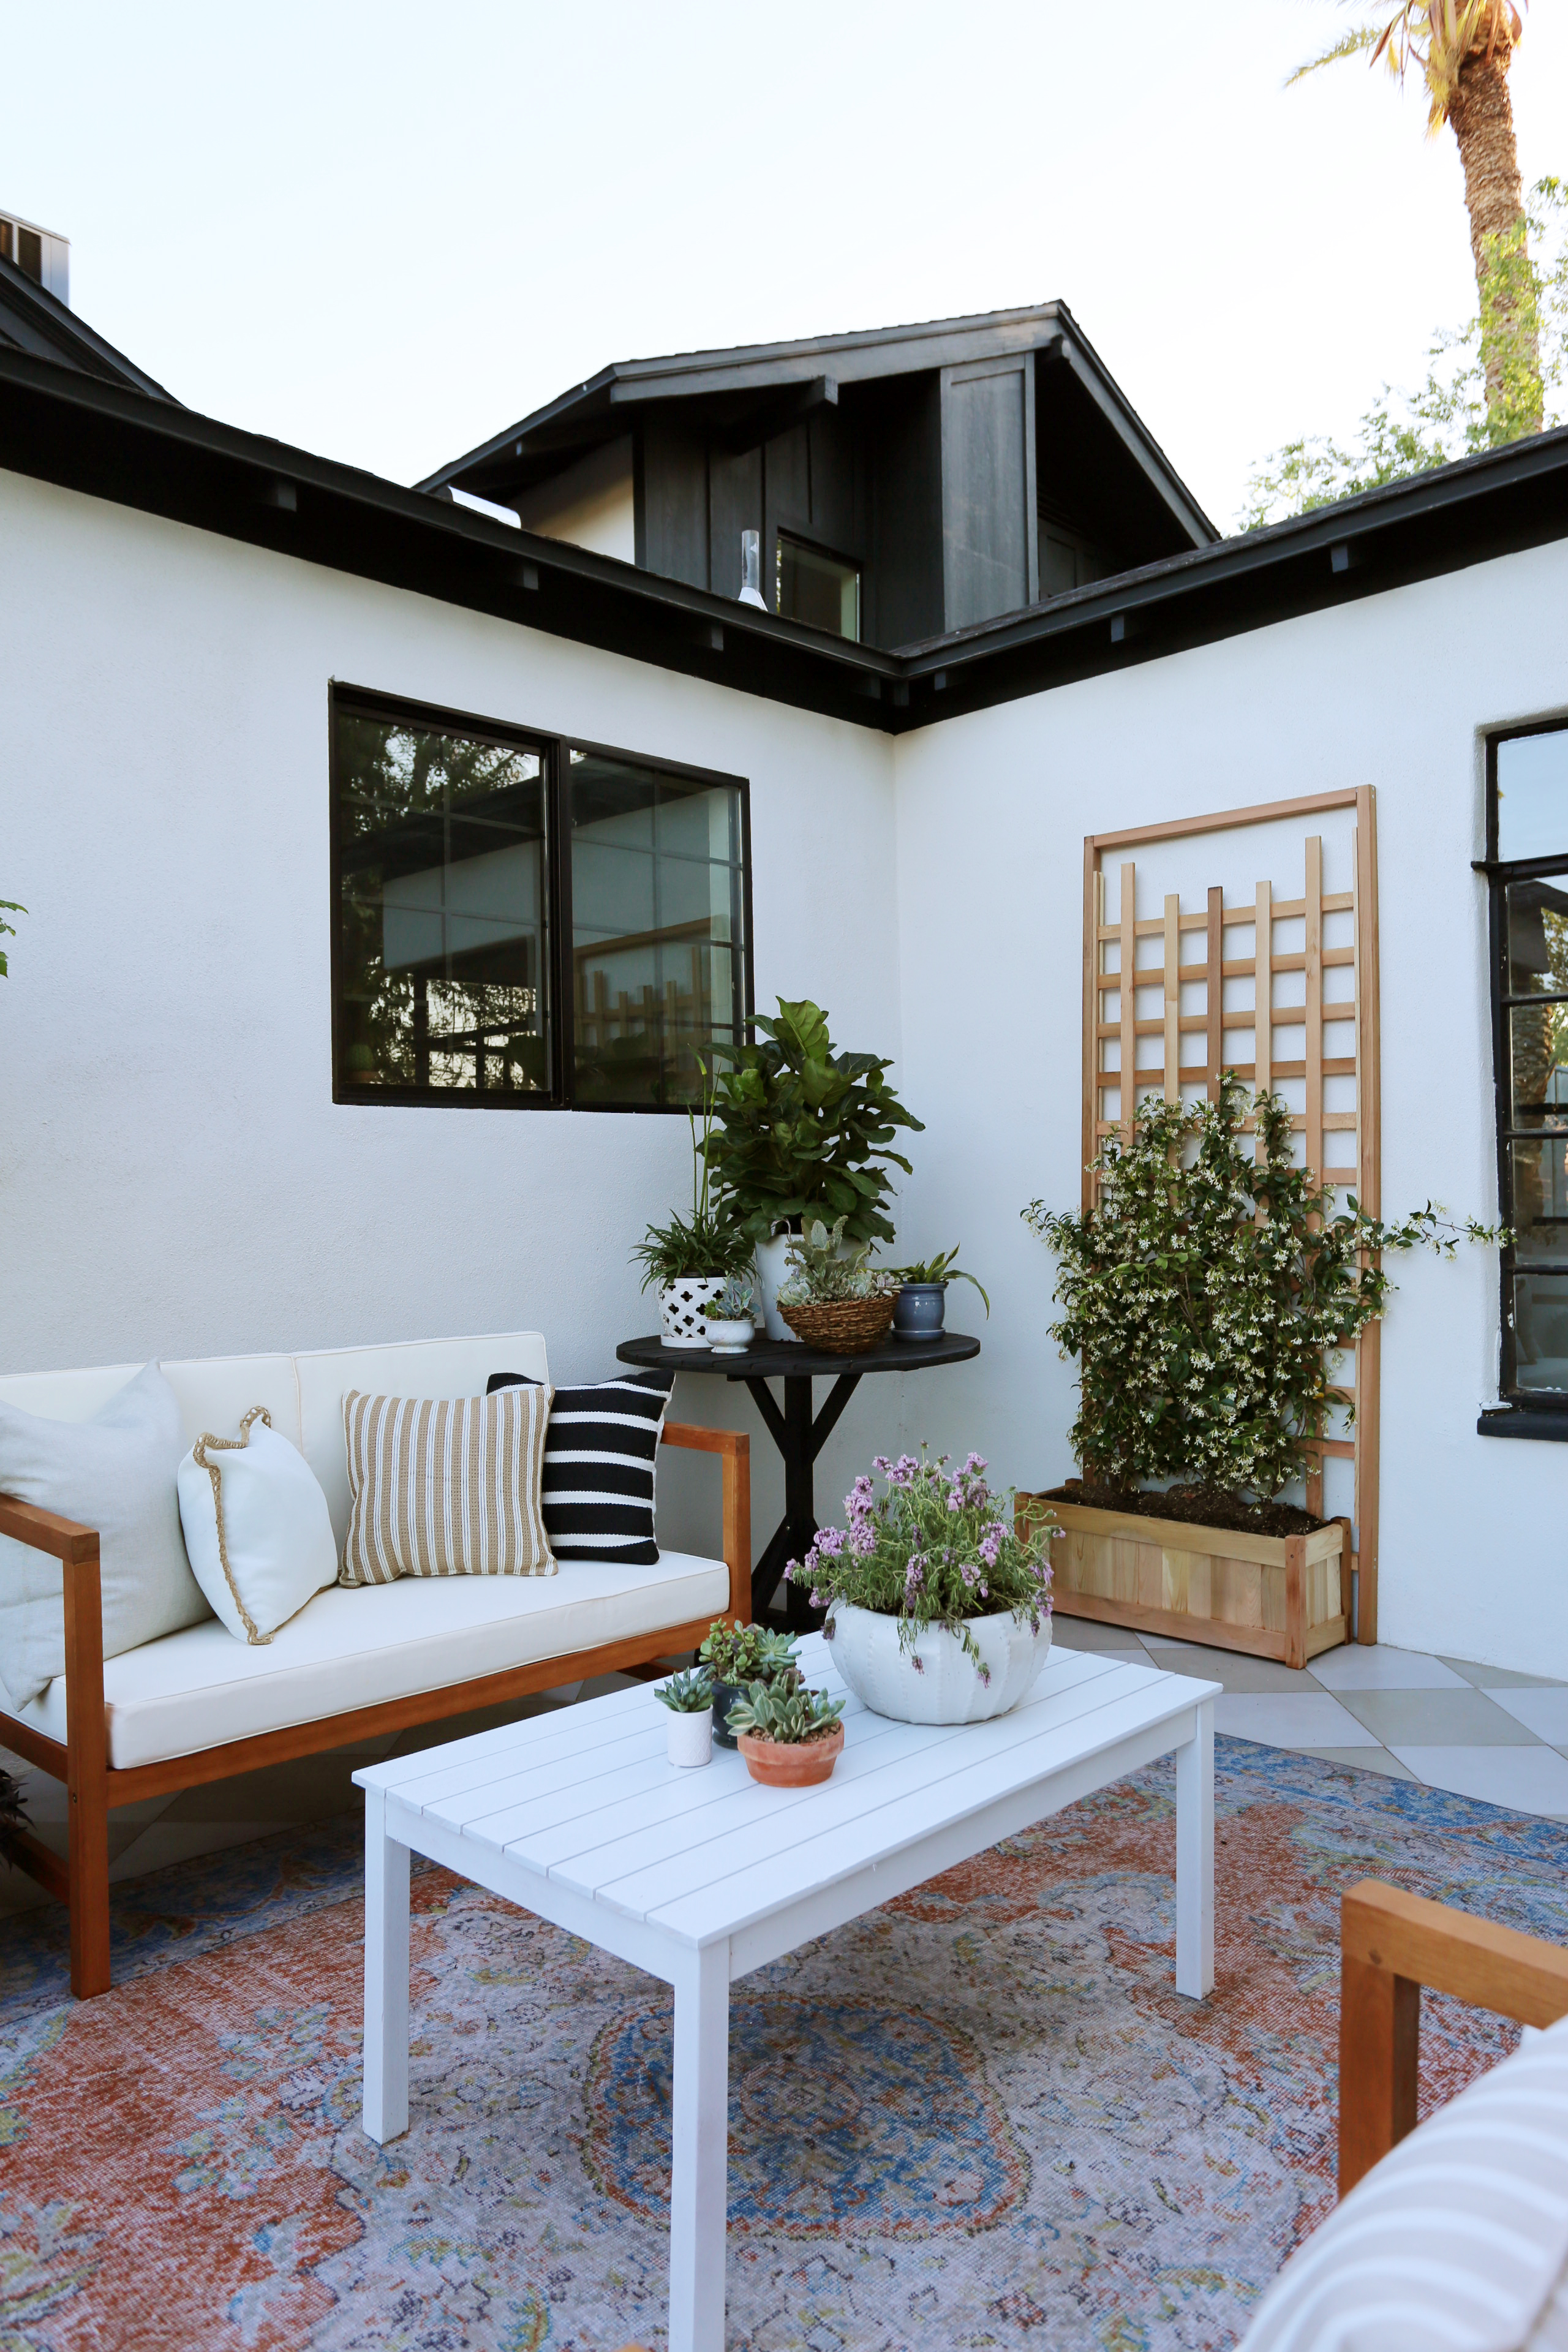
Bring the indoors out! This indoor/outdoor rug feels just like a faded vintage rug, but its easy to hose down and sun resistant! Layering pillows also helps create a cozy outdoor living room.
Remember to break up “sets”. We purchased this 4 piece set (sofa, 2 chairs and coffee table) because we loved the simplicity of the shape.. and the price! When it arrived we realized we wanted to break up all of the wood, so we painted just the coffee table white!
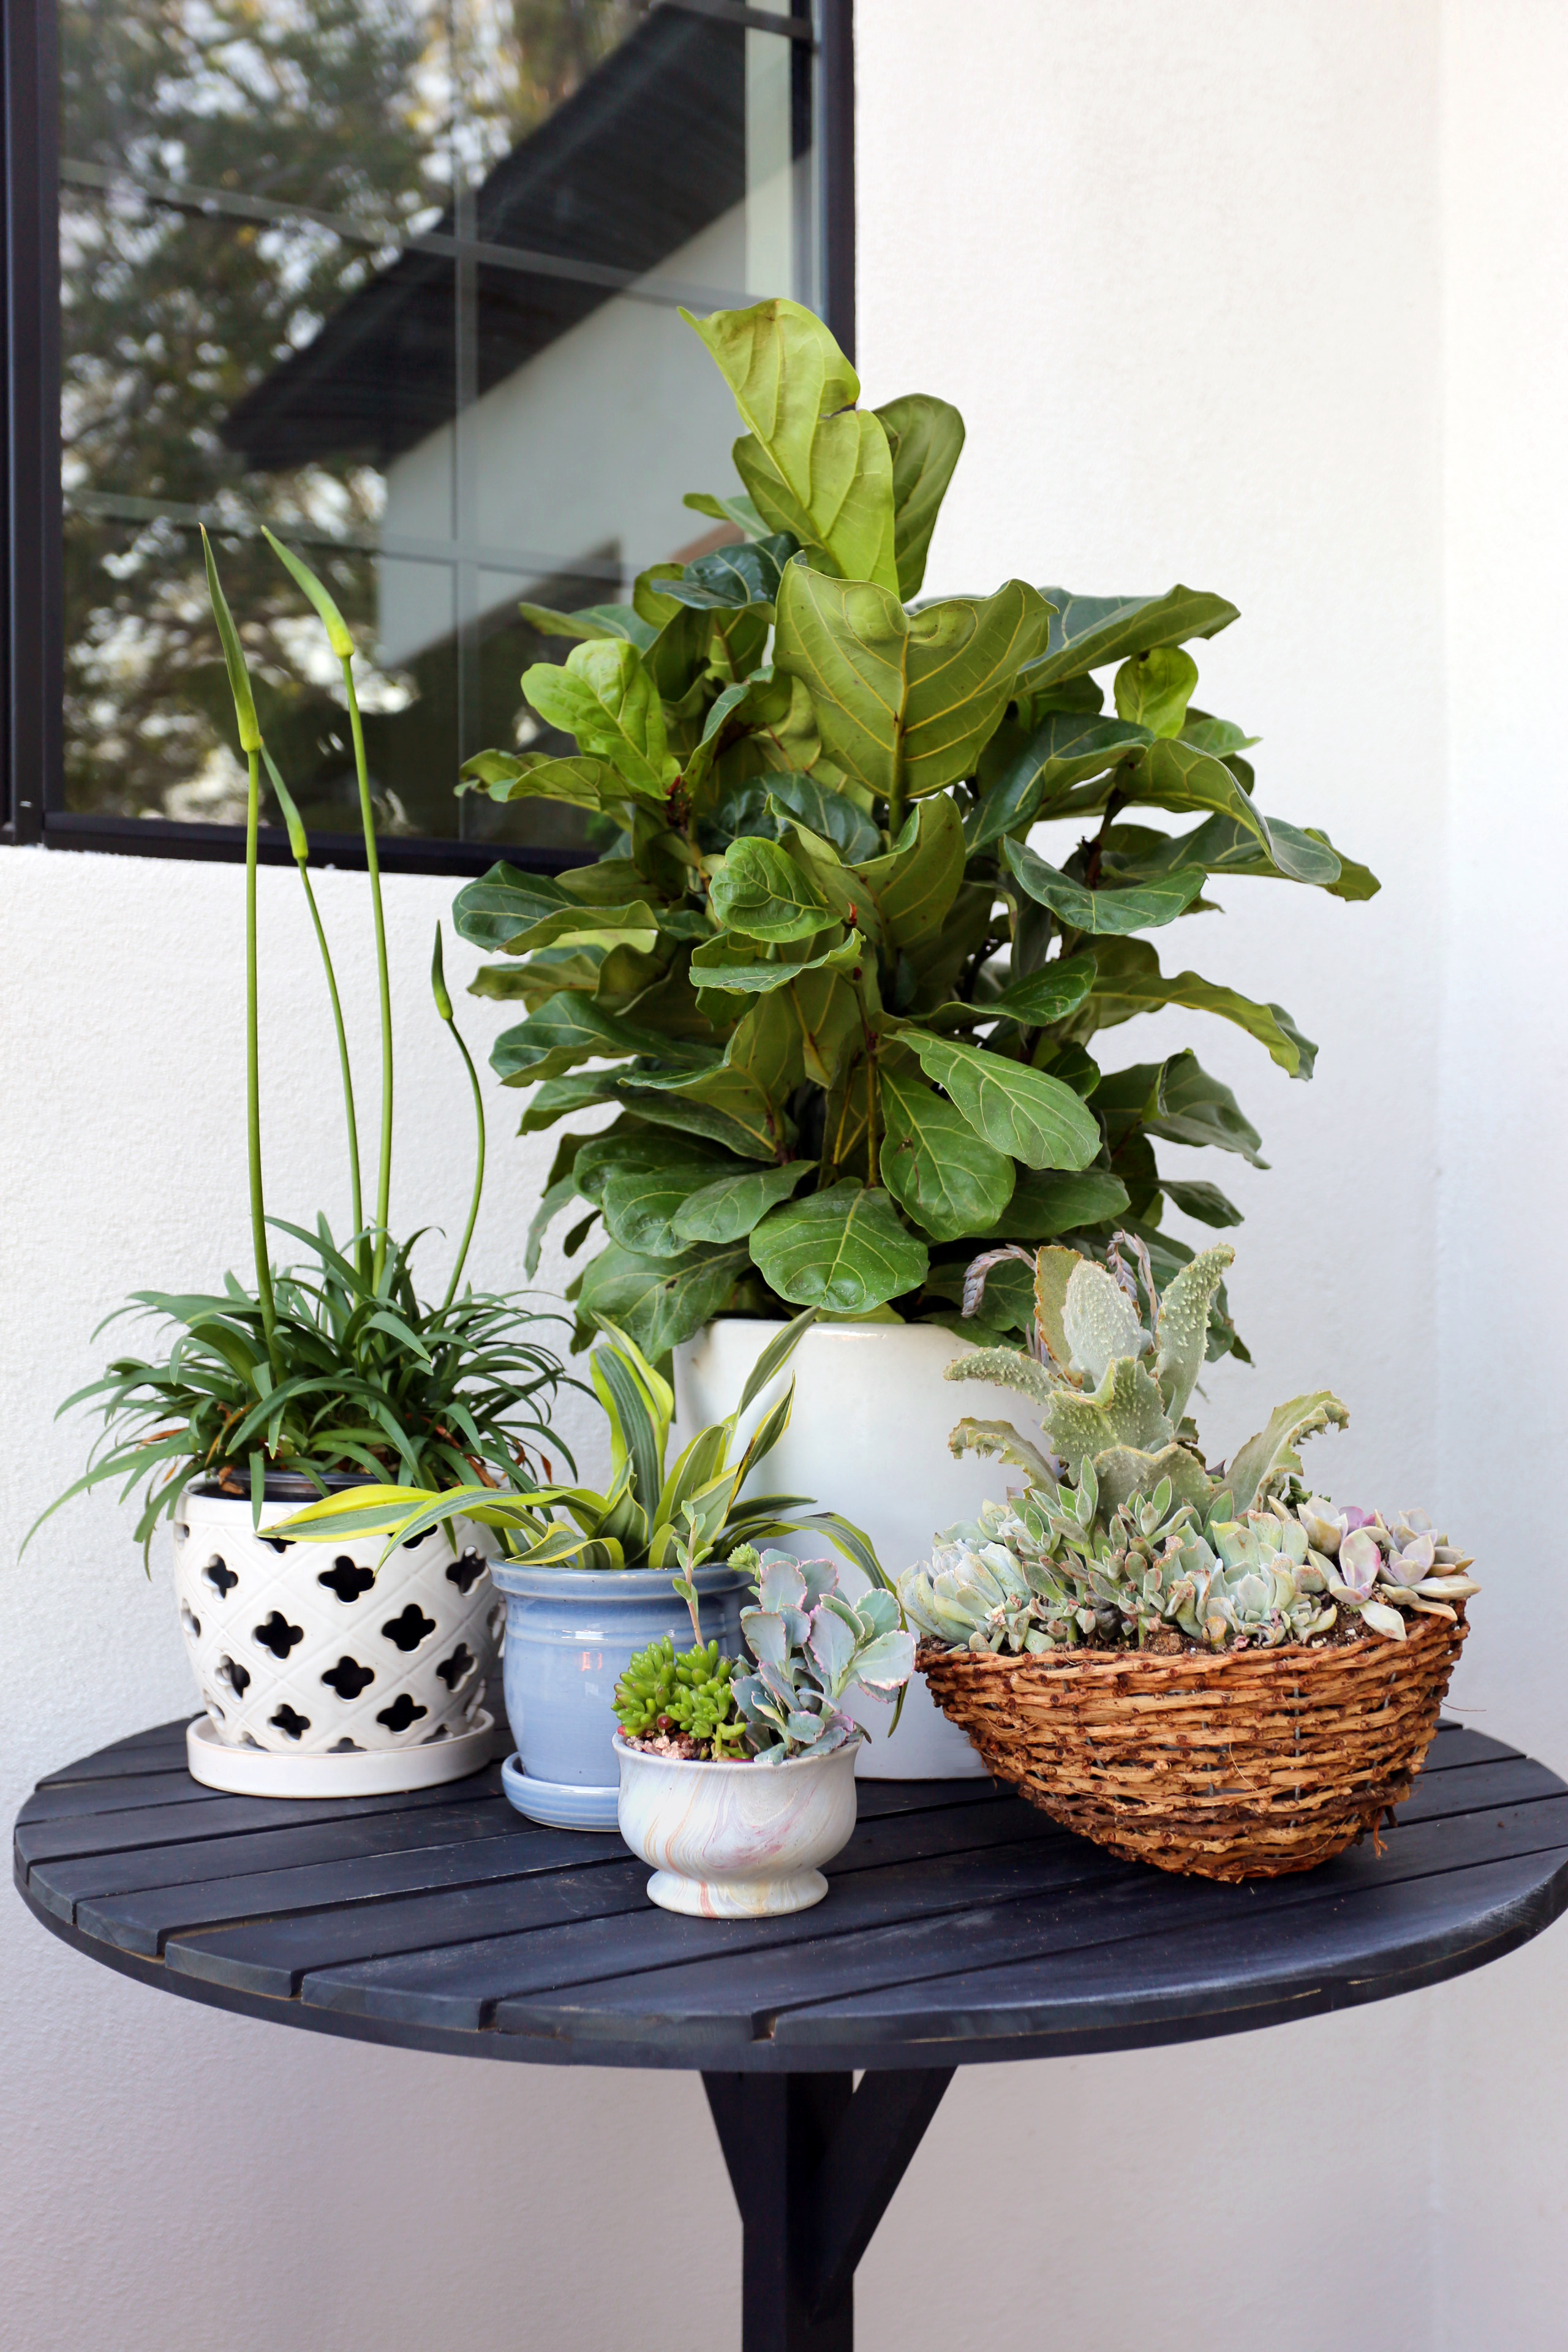
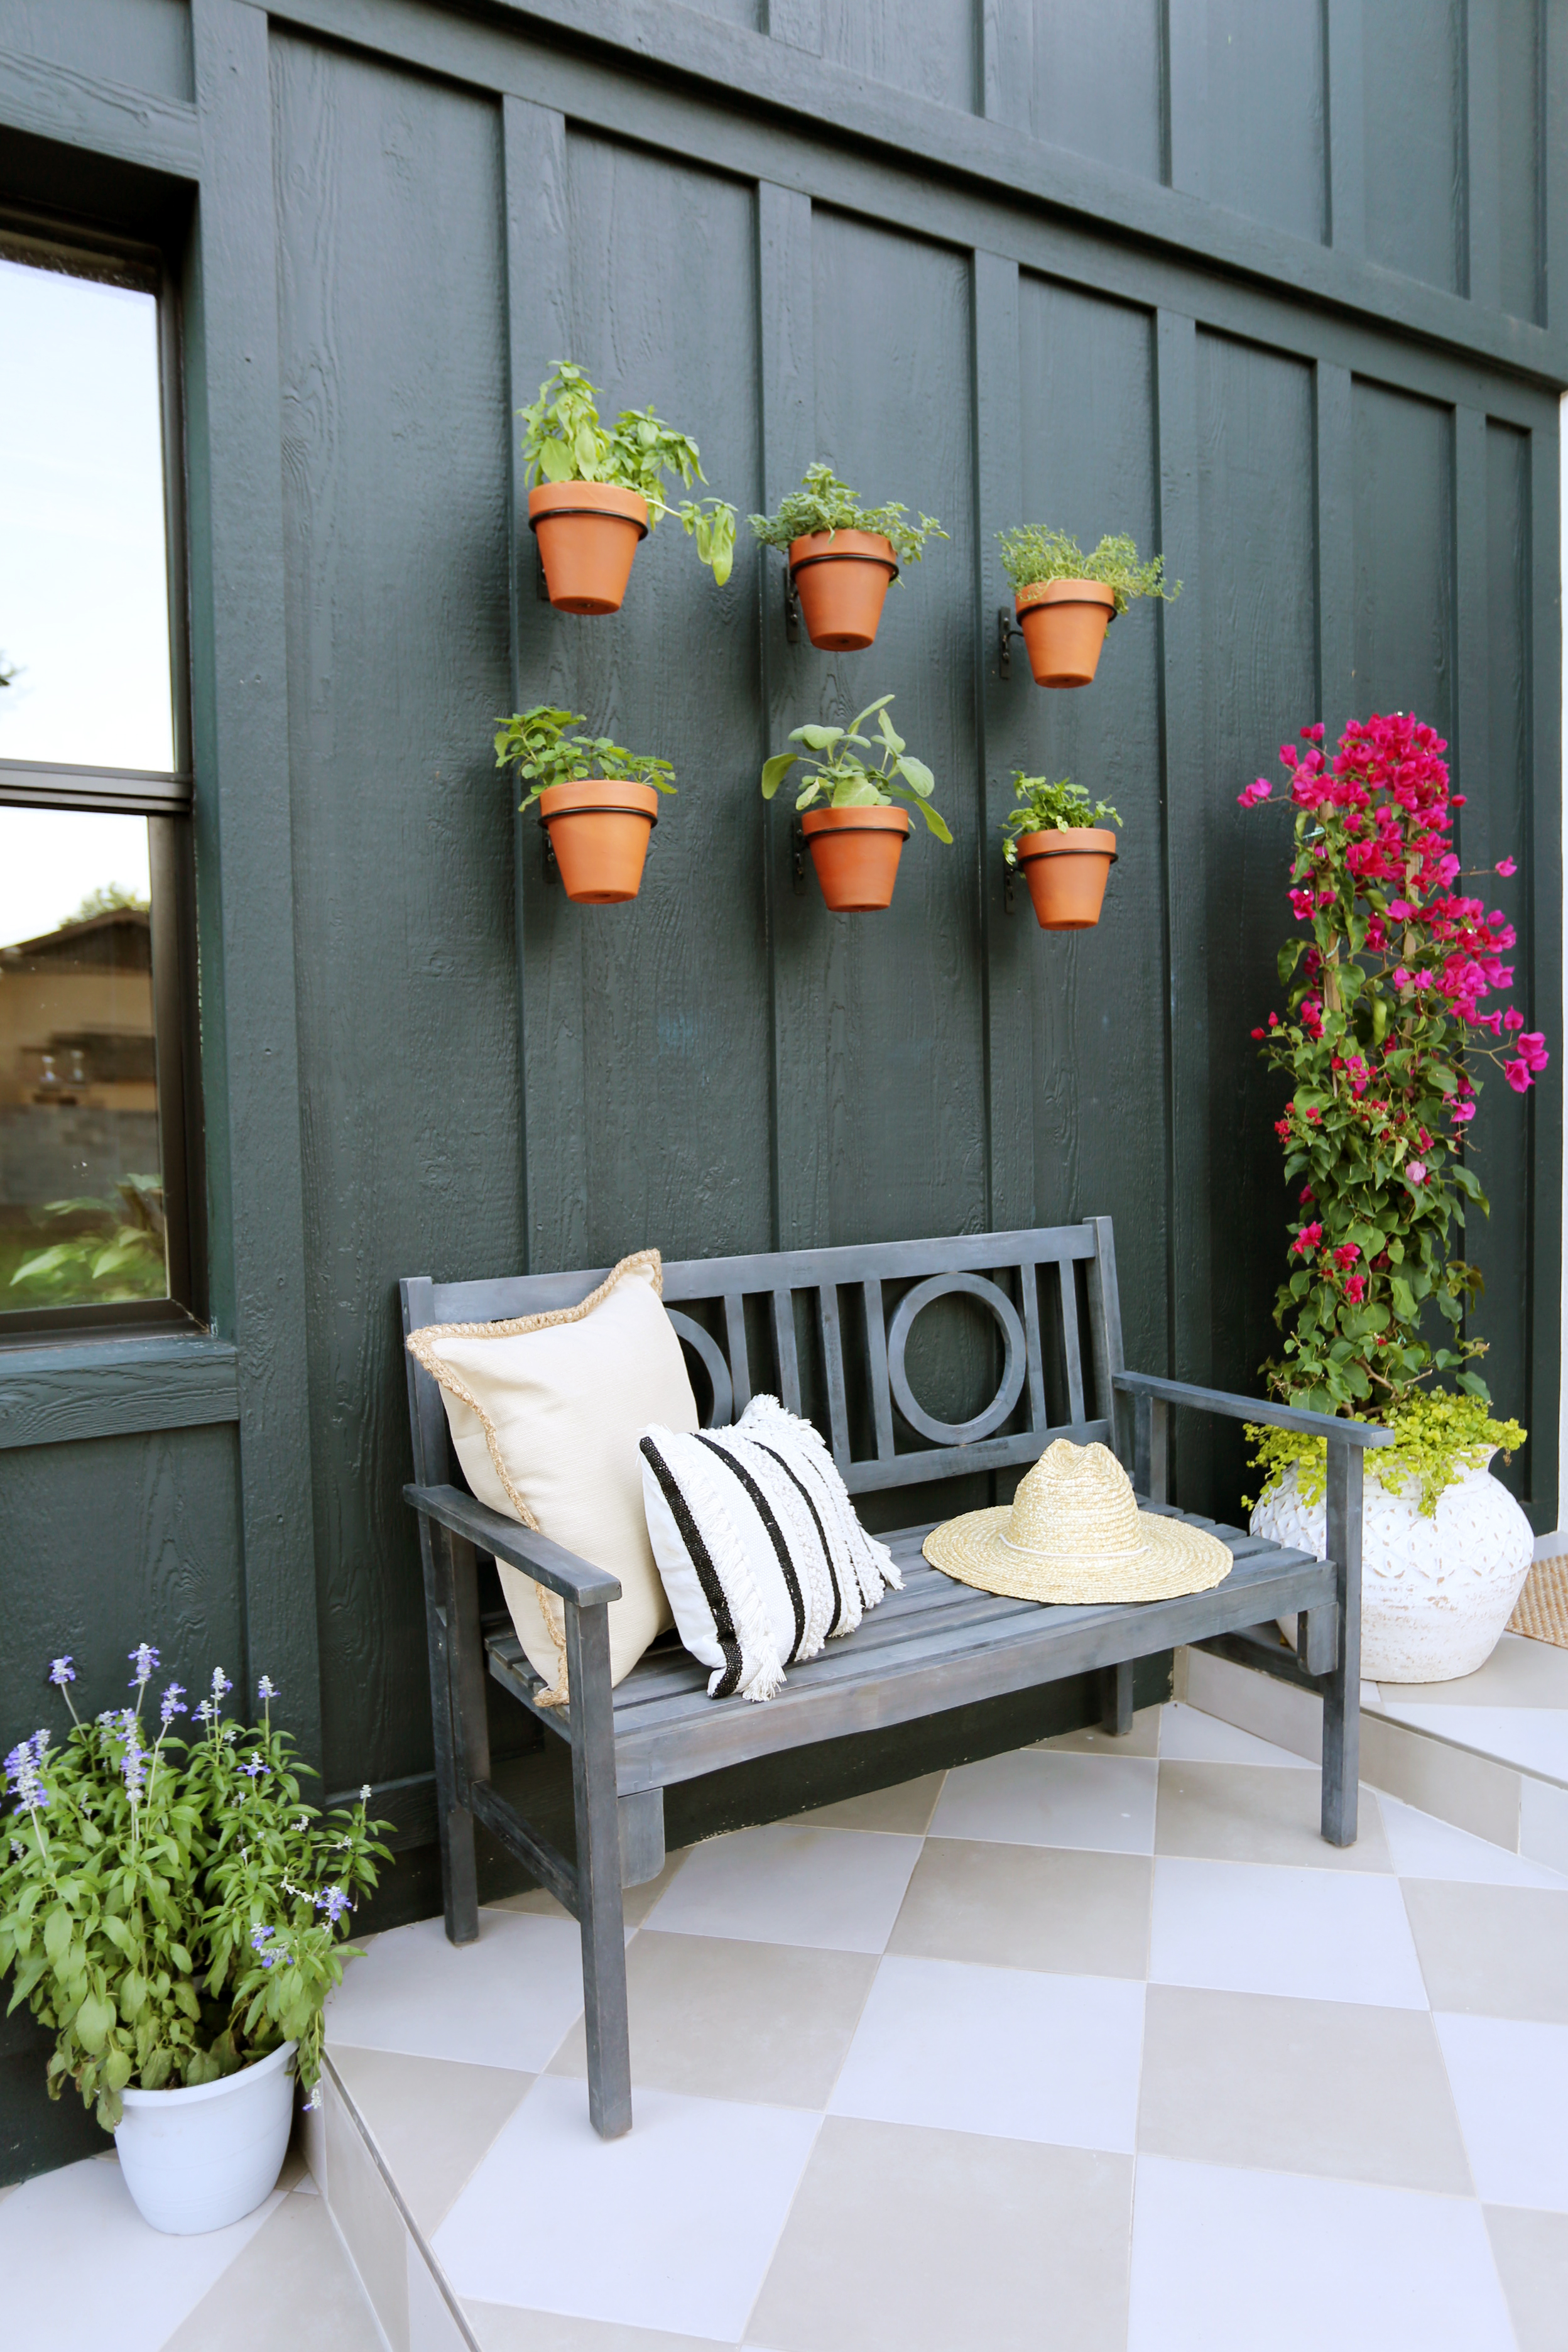
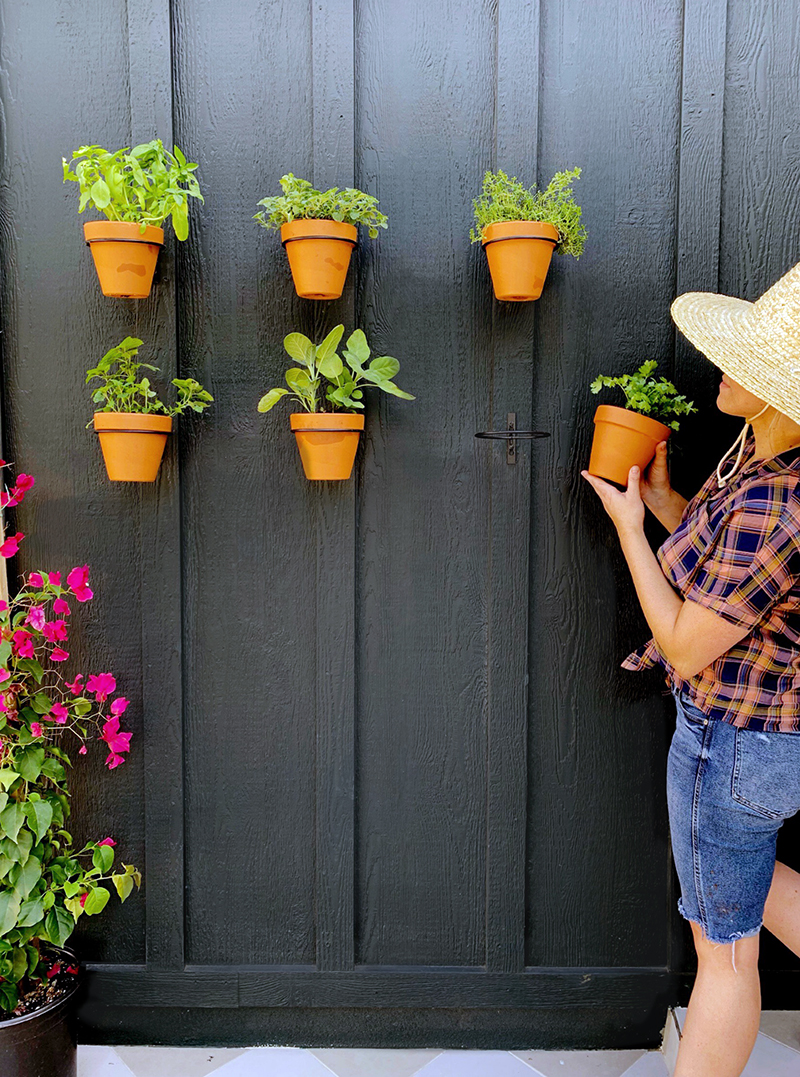
This area of the patio is right off of the kitchen and the perfect spot for planting herbs. We picked up these inexpensive wall mounted pot holders and attached them to the wall in a simple pattern. Big impact for a small price!
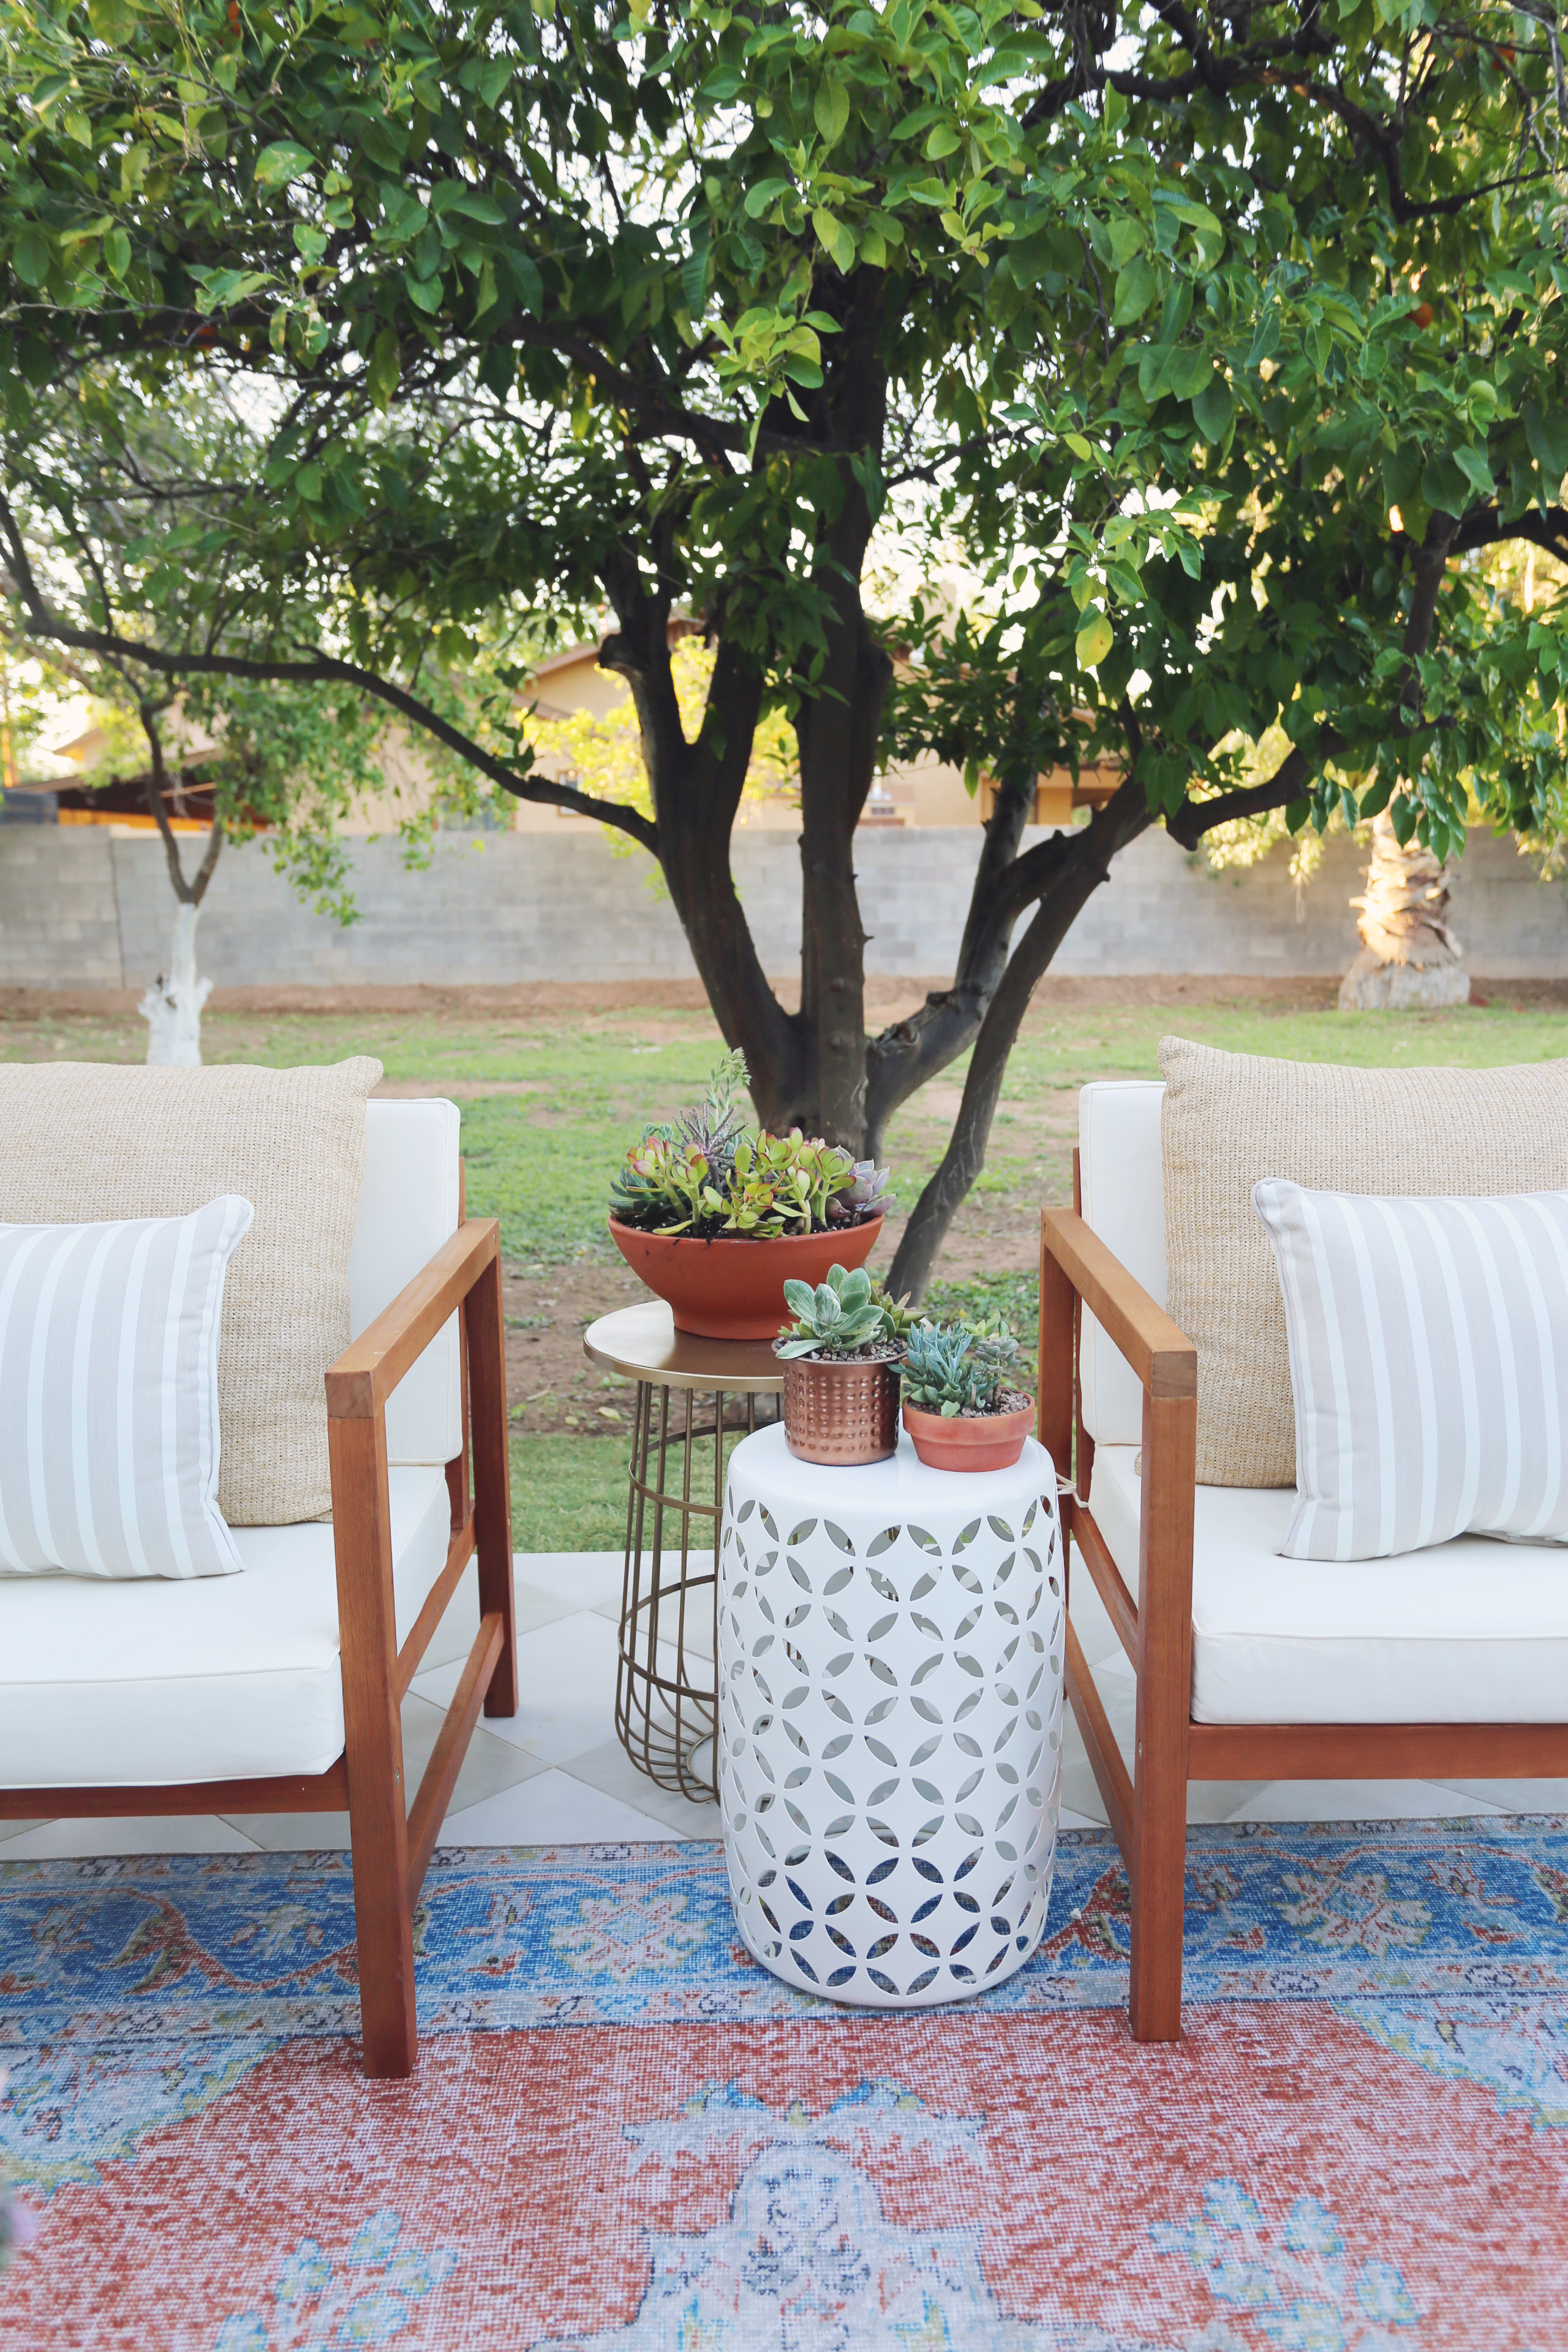
When it comes to your outdoor space, do you gravitate towards a neutral and relaxing space to unwind? Or a fun, vibrant party space for the whole family to enjoy? We love both! Tag us in your outdoor spaces on Instagram by using the hashtag #juniperhomespotlight
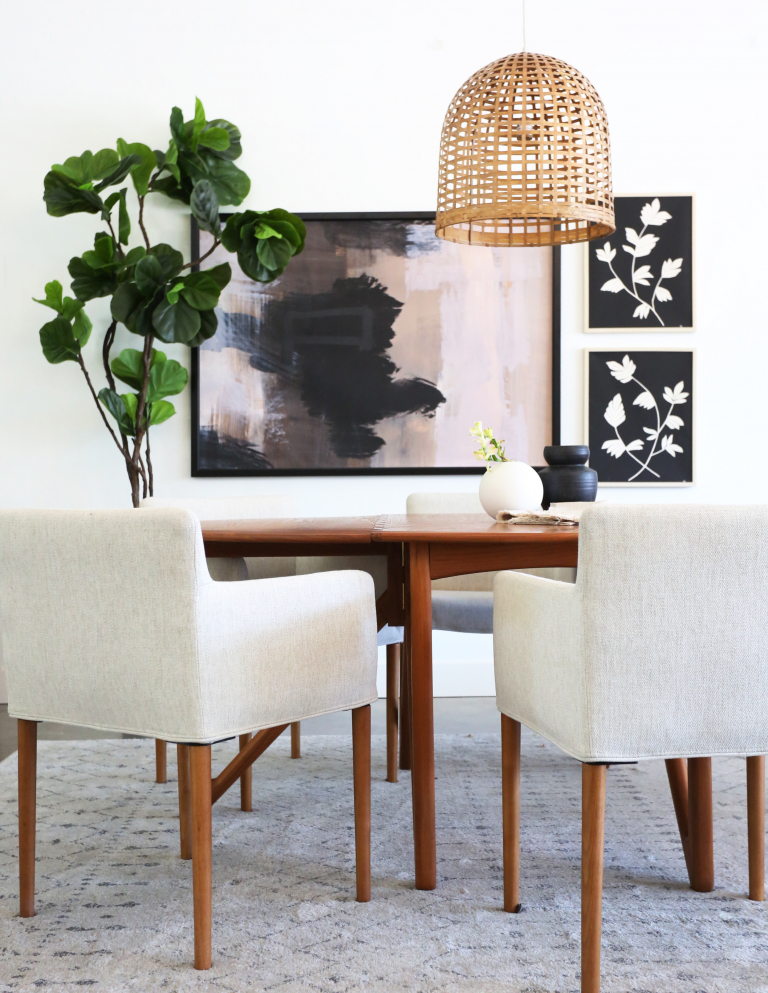
We have done a few faux tree roundups here at Juniper Home, but it’s an area we are always trying to expand on! While we love some of the classic faux options, we are always trying to source new, unique faux trees for our projects. We picked up a few new options lately and we…
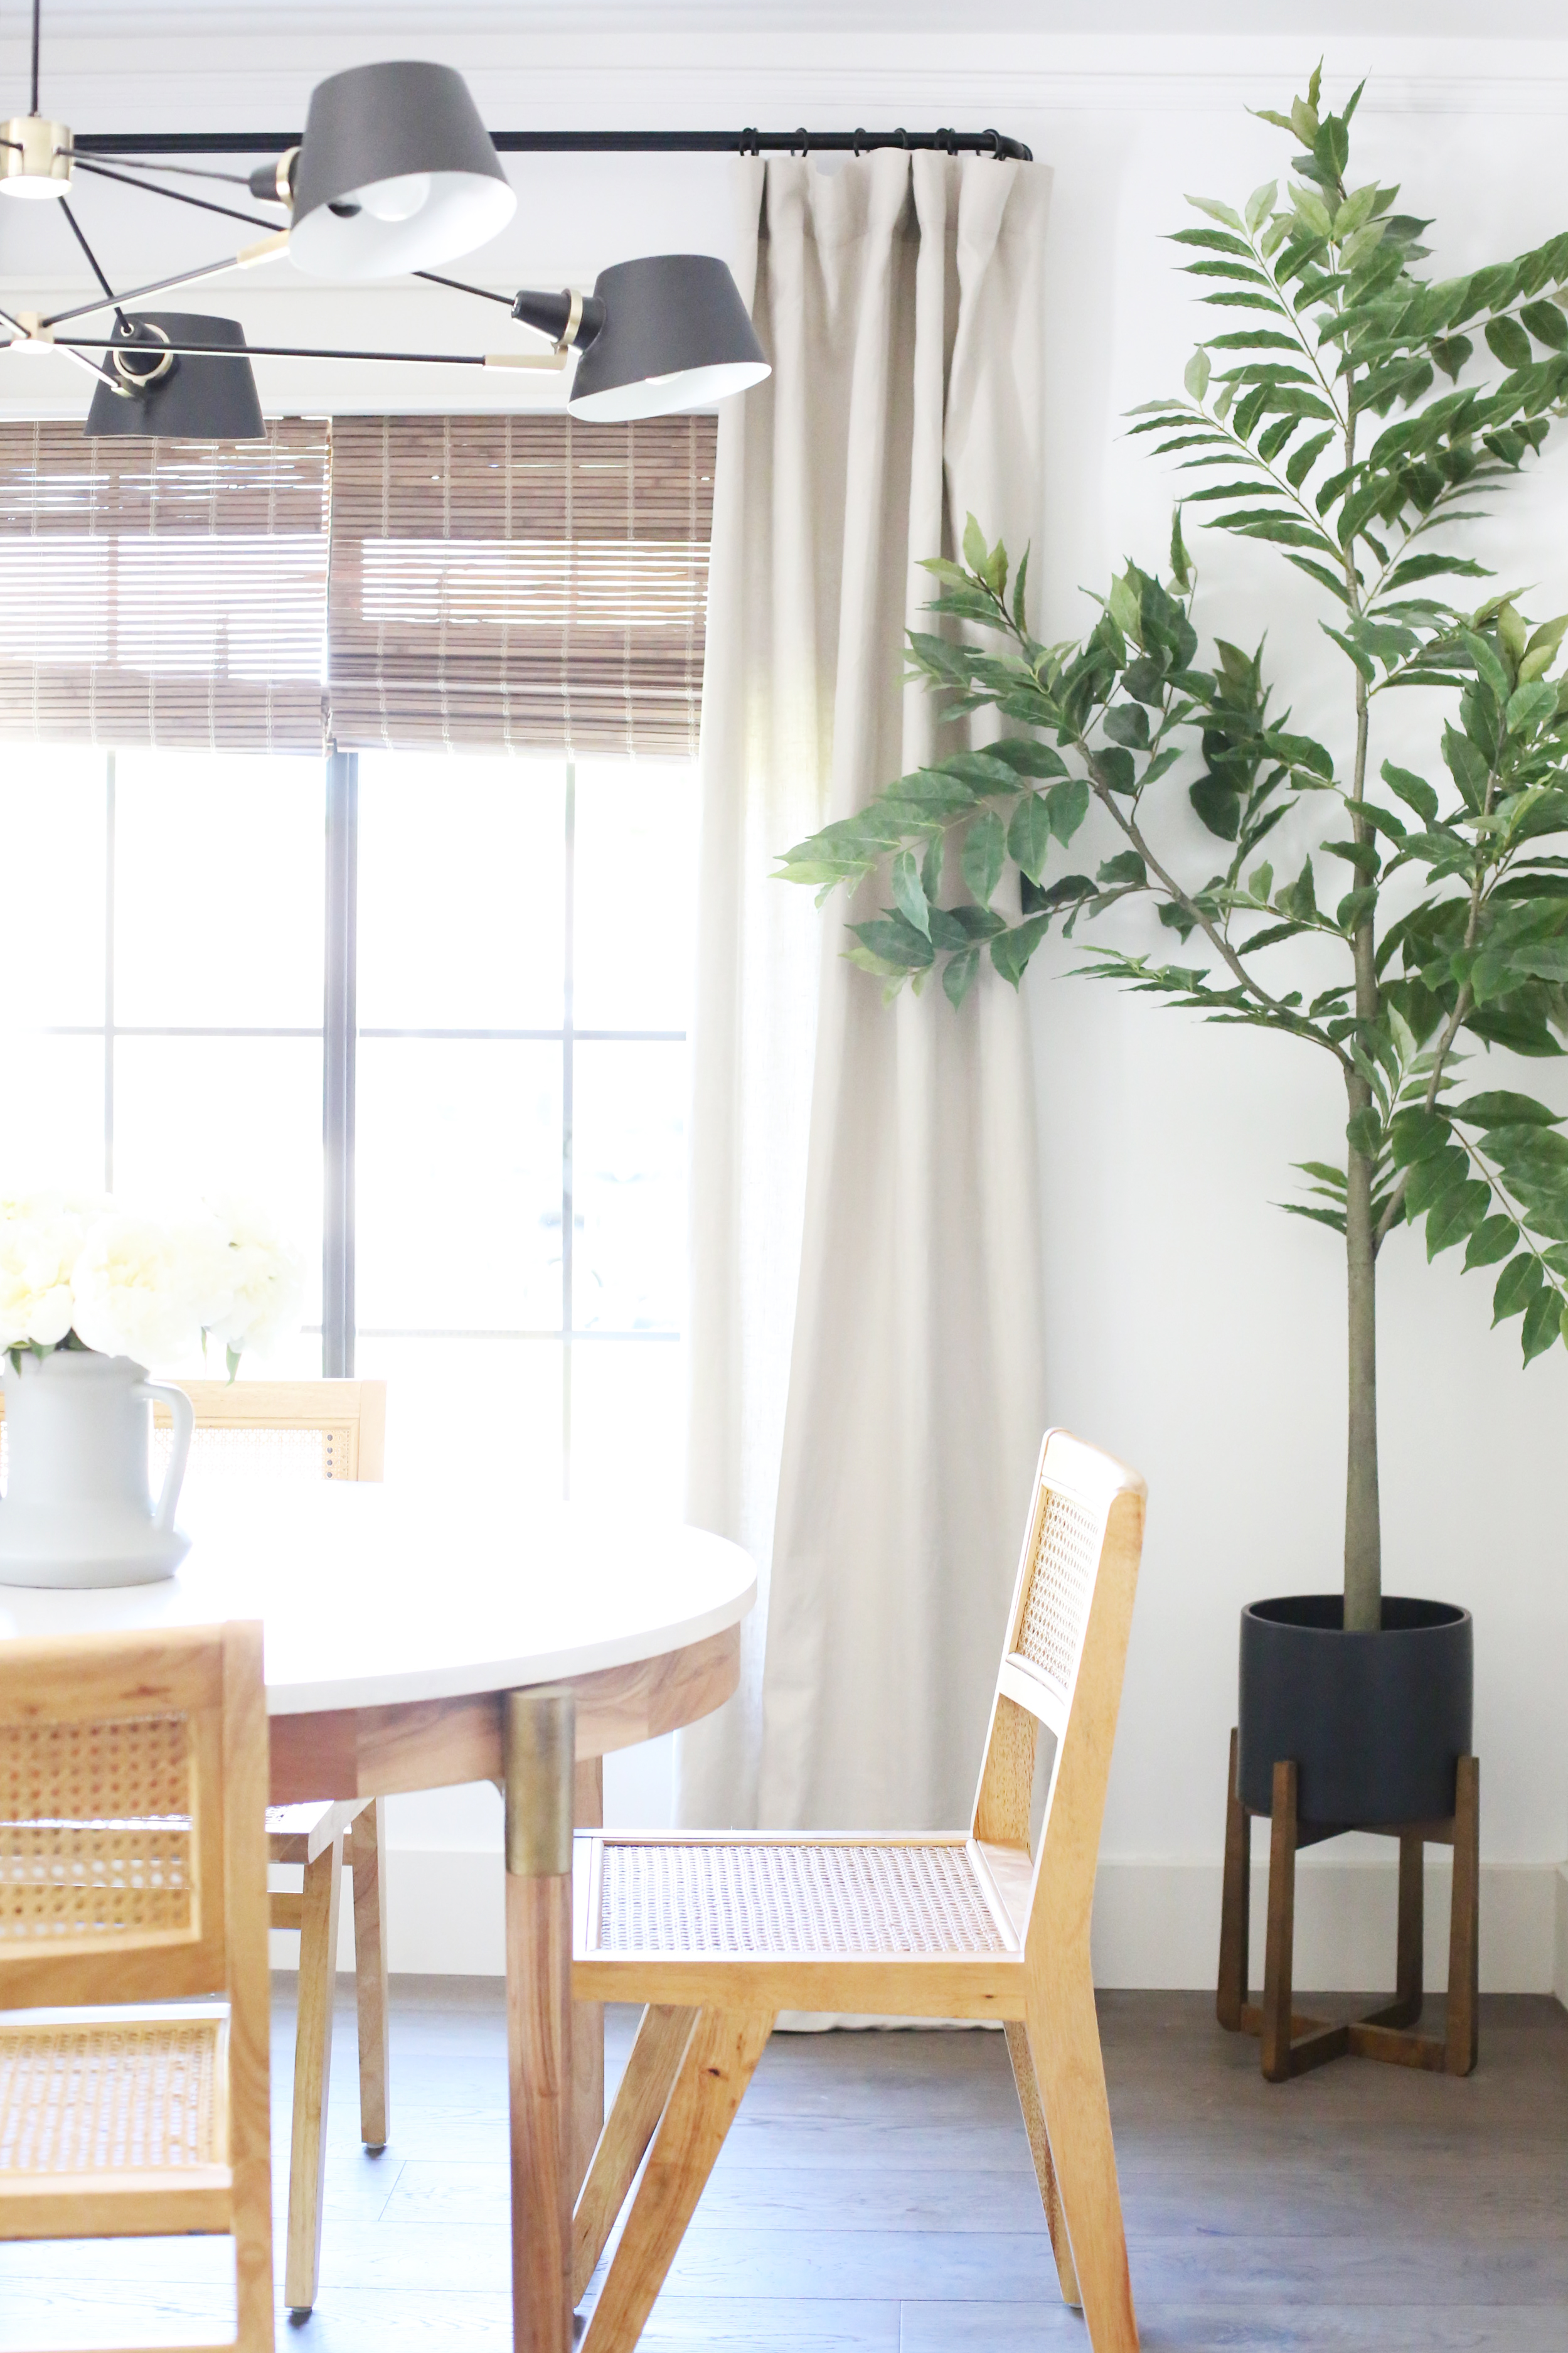
We have done a few faux tree roundups here at Juniper Home, but it’s an area we are always trying to expand on! While we love some of the classic faux options, we are always trying to source new, unique faux trees for our projects. We picked up a few new options lately and we just had to share them with you!
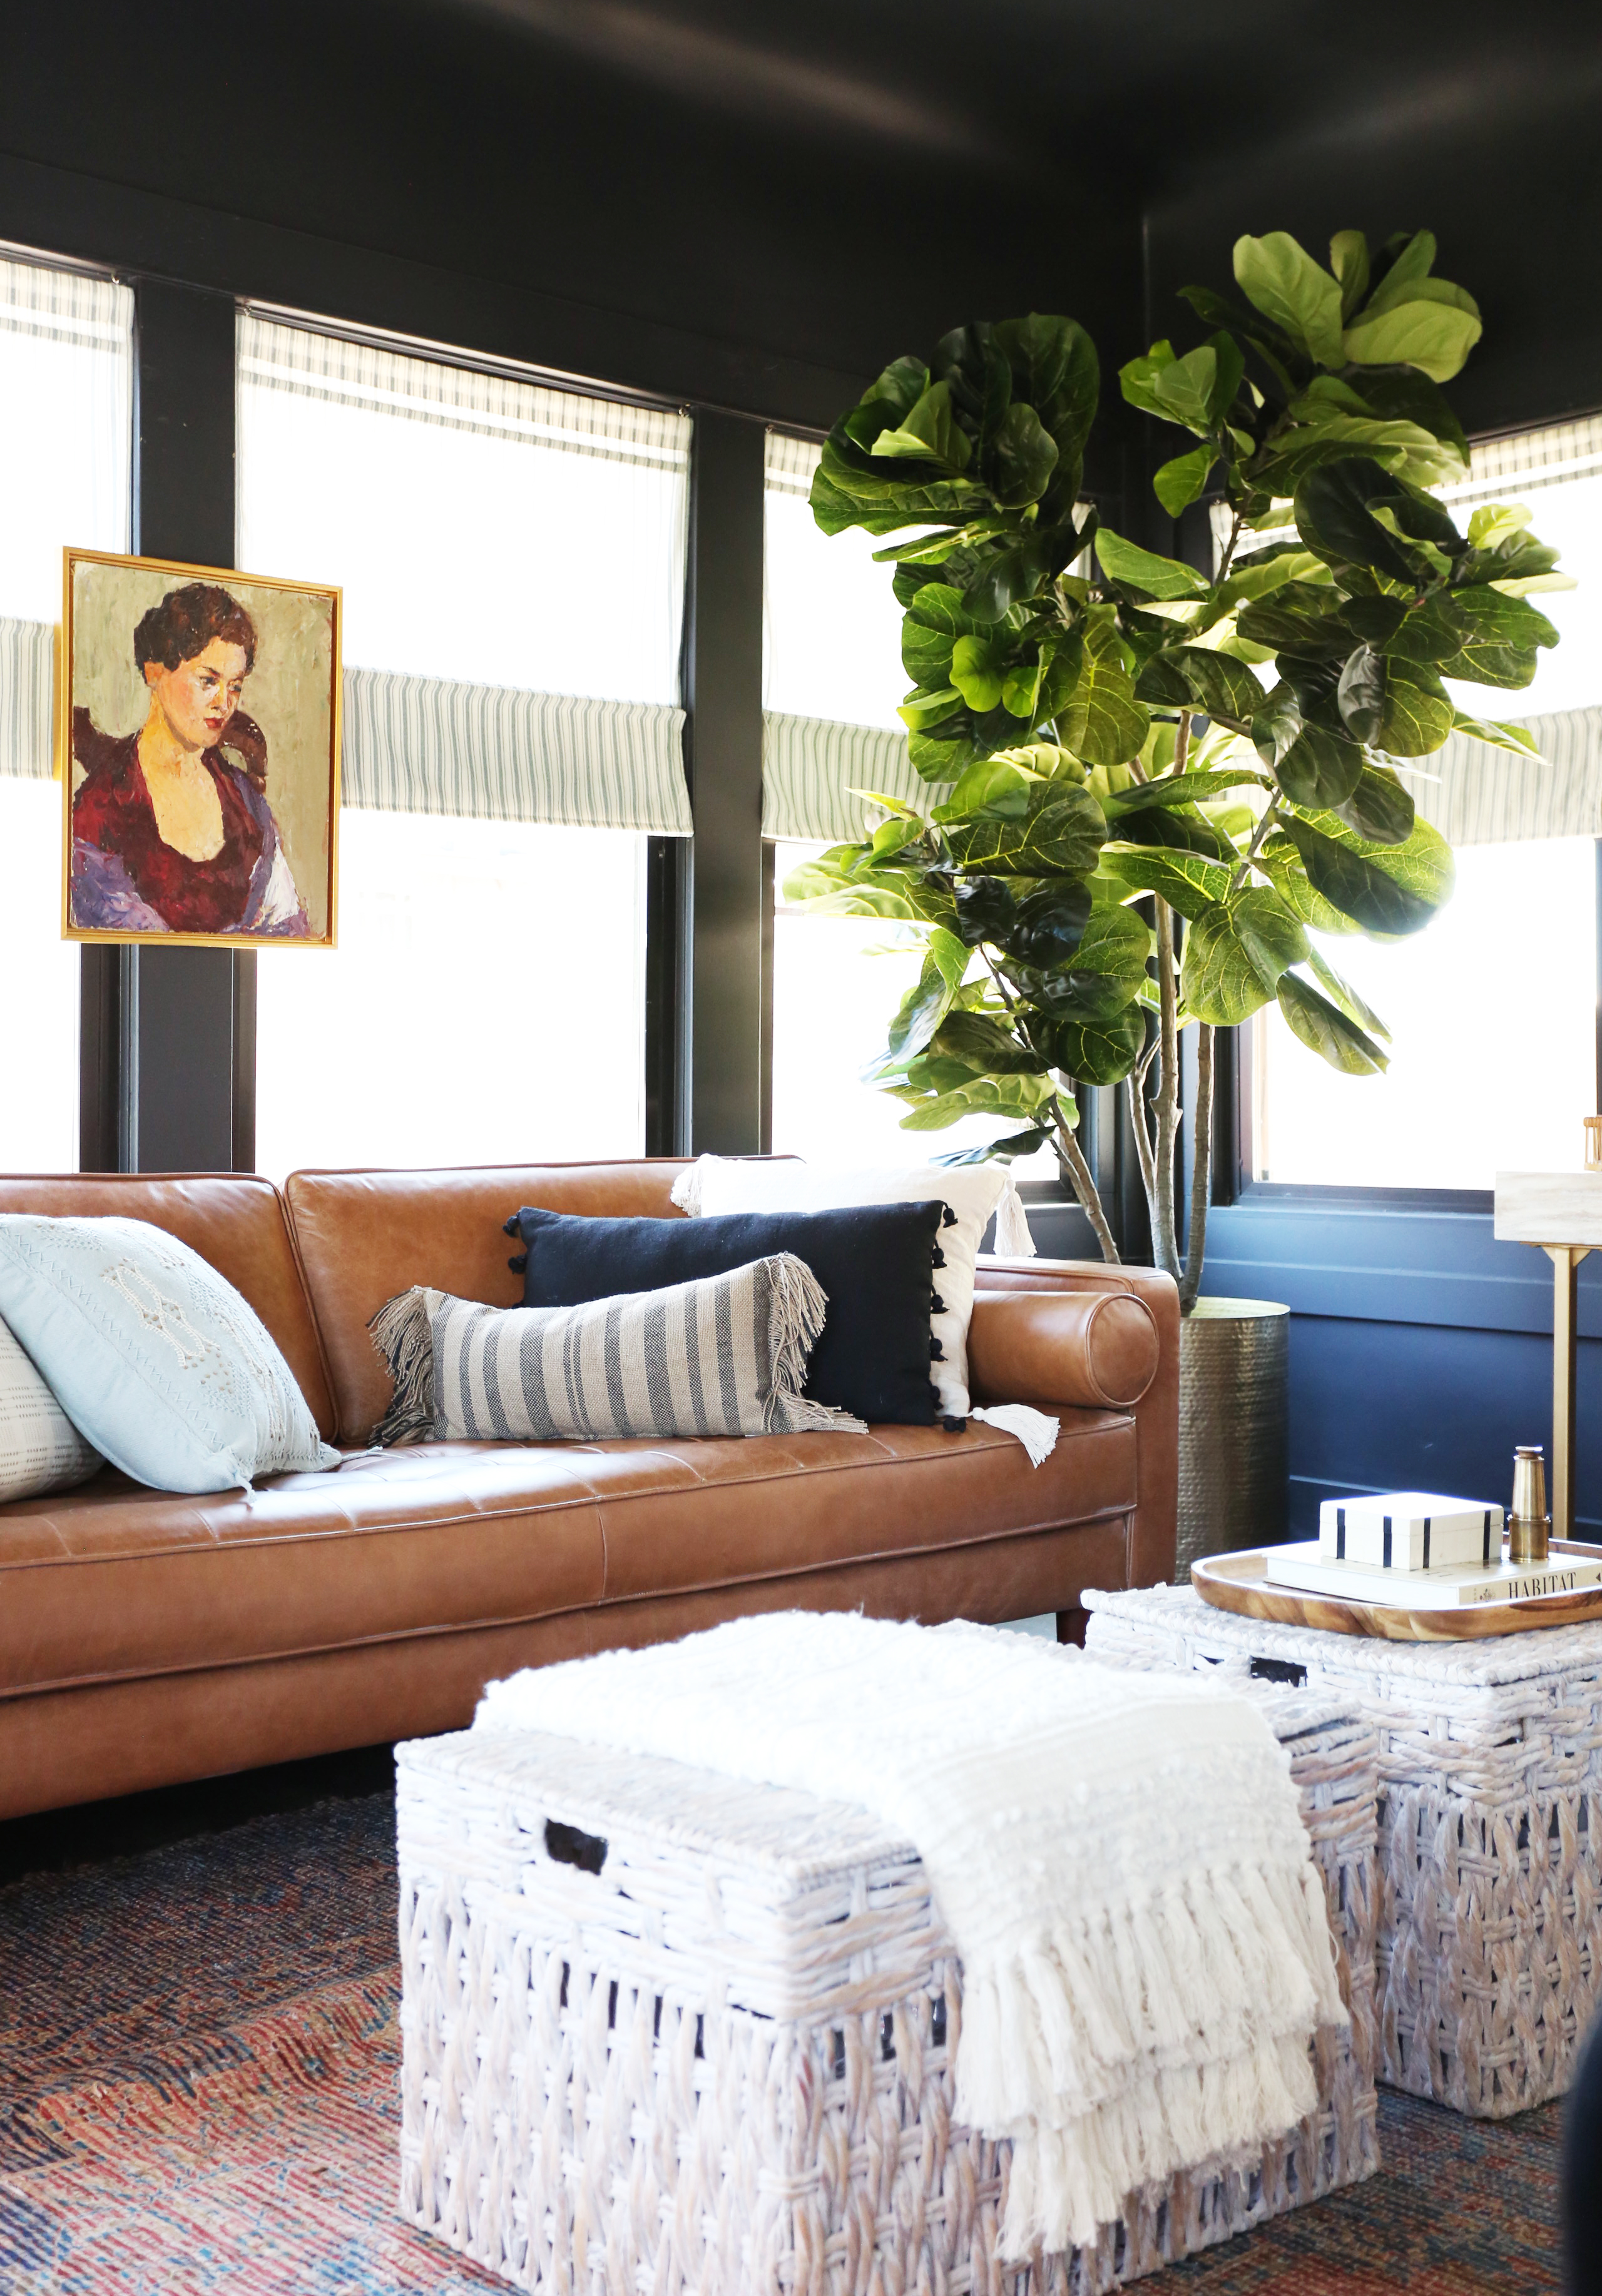
We used this 8′ fiddle leaf fig for the Evergreen sunroom. We wanted something really big, and this is exactly that! When it arrived we were a little skeptical about the leaves, and even considered returning it. While staging the room we decided to give it another try and with about five minutes of leaf fluffing it looks so amazing! It looks very convincing, especially in front of a window. And the height was exactly what we needed to cozy up this big space!
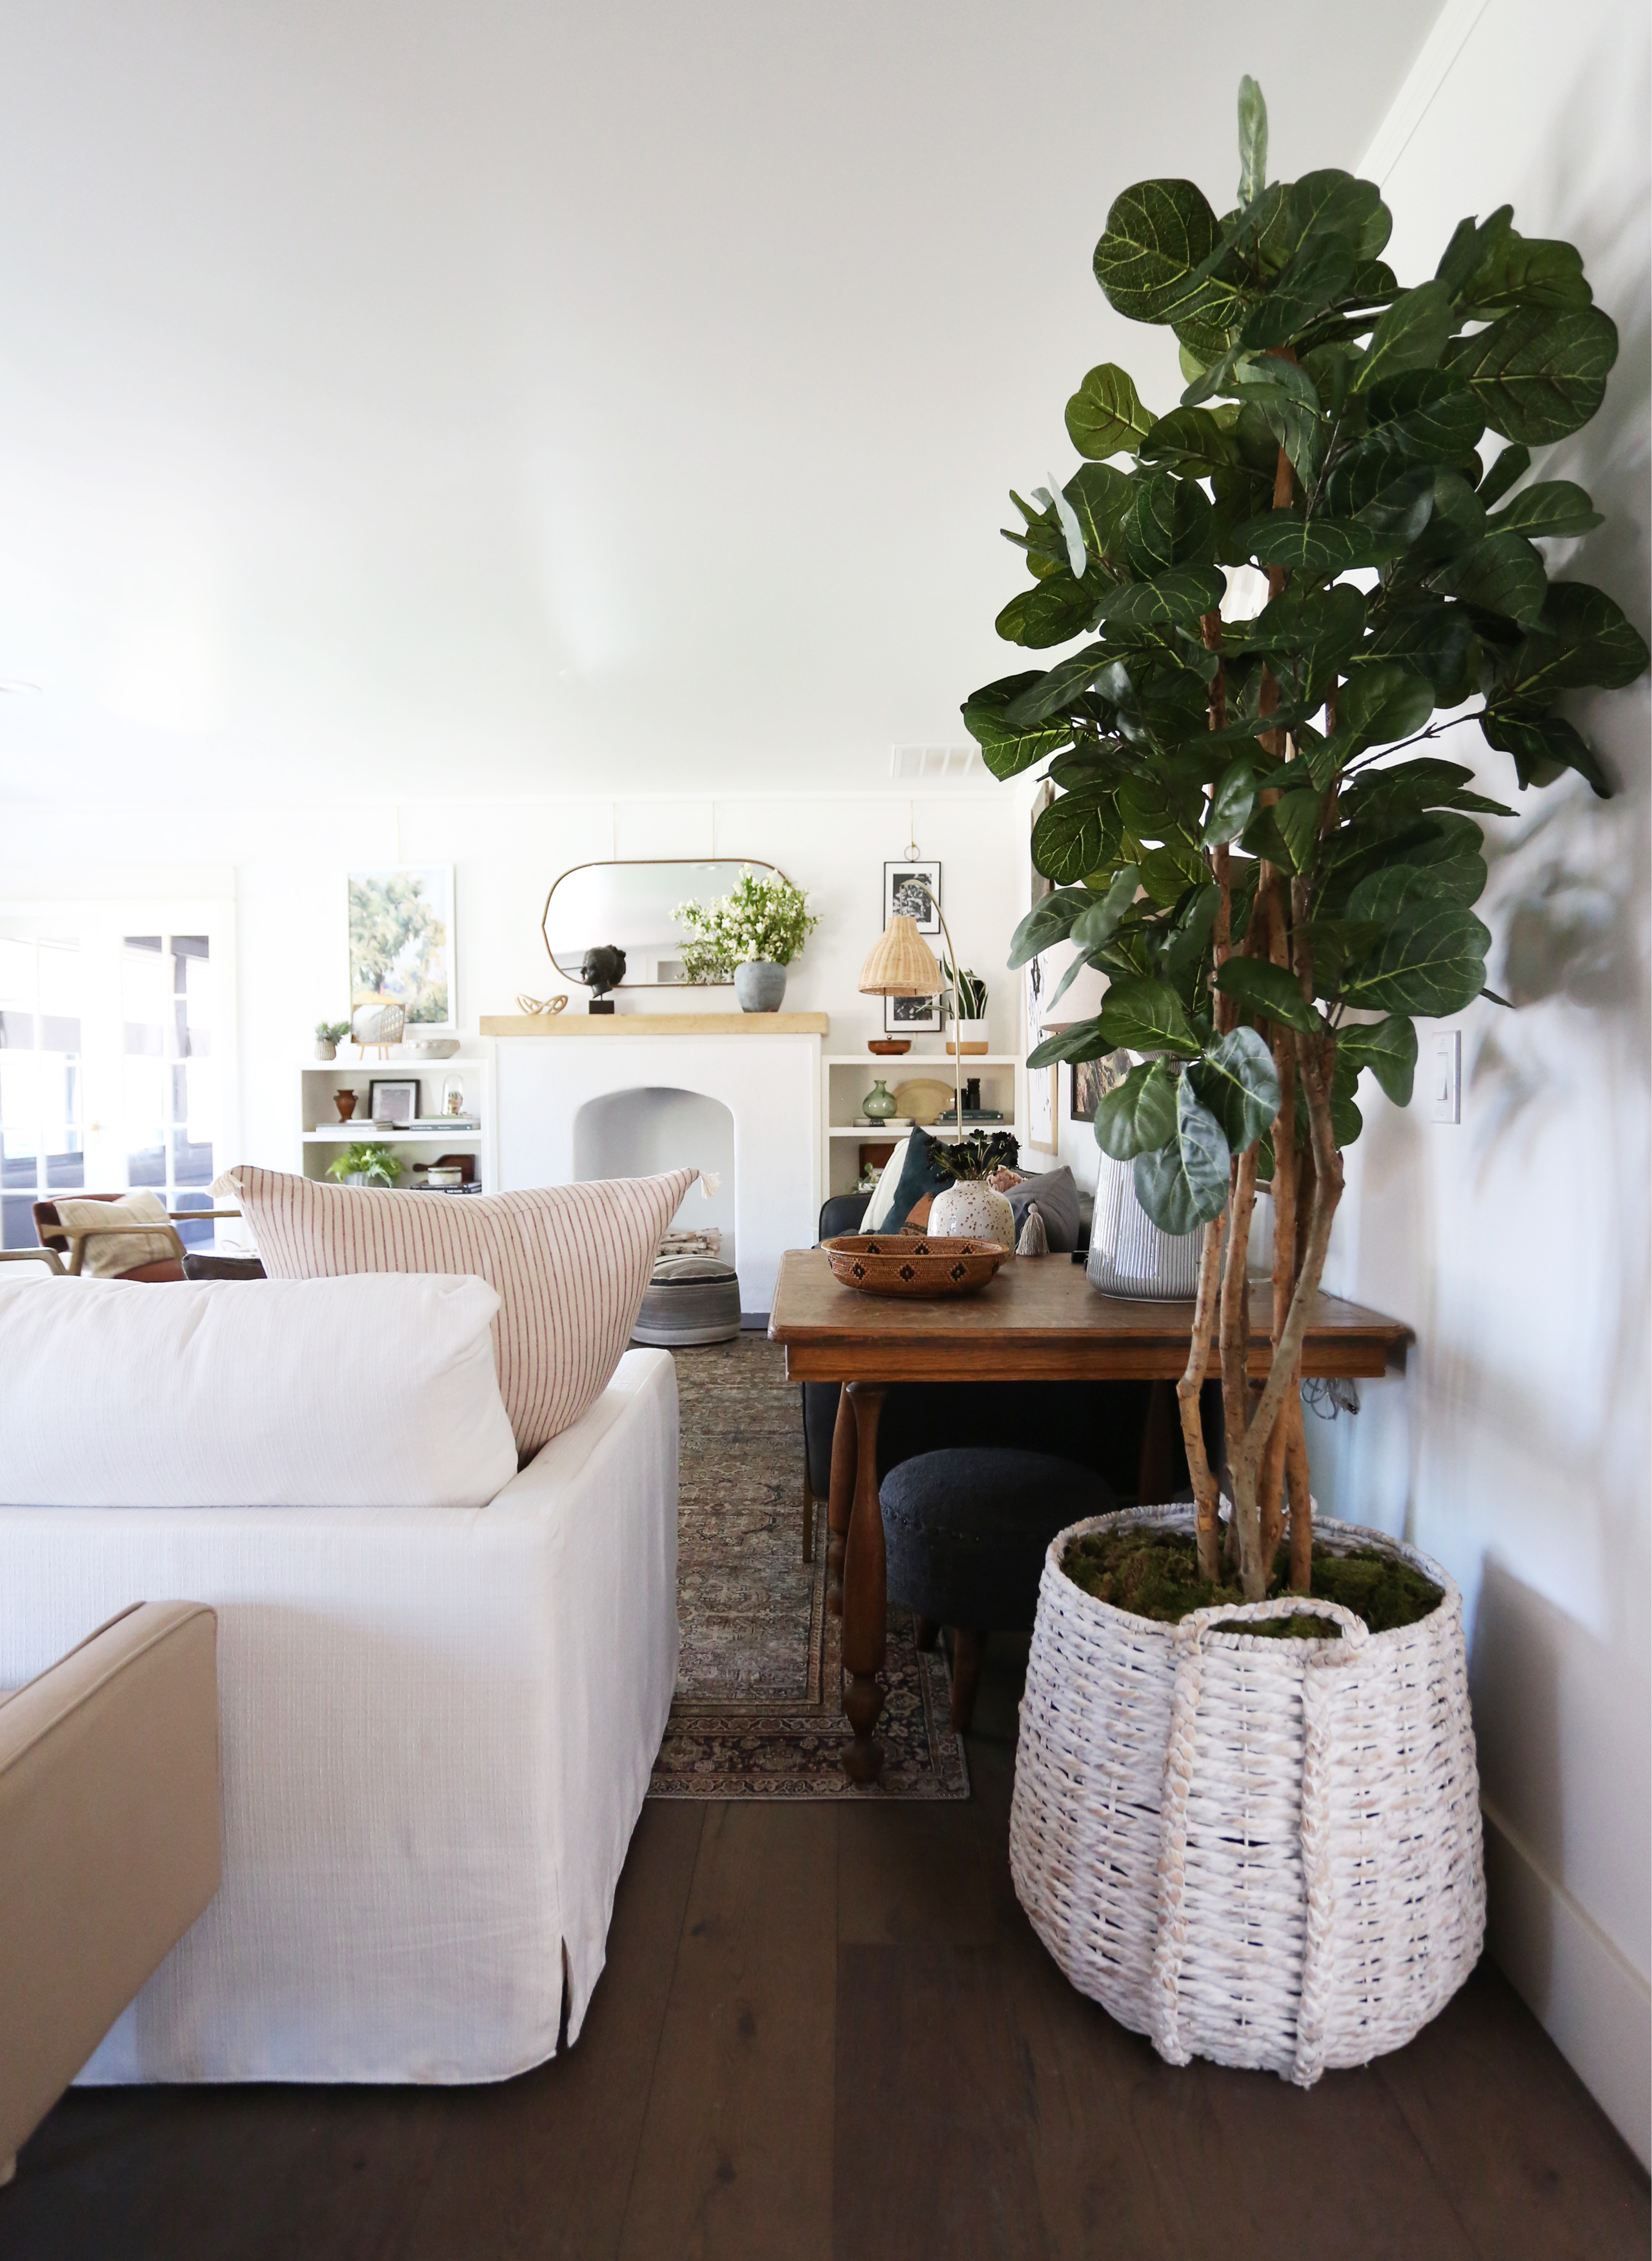
We recently gave my bedroom a refresh, and I knew I wanted to switch out the tree I had in there previously. I love seeing and using faux trees with smaller, more unique leaves. And with faux trees, it is so much easier to make smaller leaves look realistic! This faux Nandina tree is one of the best I’ve seen and it’s right about $100! Here I used the 72″ size.
One of our favorite ways to make a faux tree more realistic is to “plant” it. Find an oversized basket or planter and place your tree in it. I like to prop mine up as high as I can to give the tree as much height as possible. Use leftover cardboard or styrofoam to fill the bottom of the pot until you reach your desired height. At this point I like to use moss to cover it all up. It makes a world of difference!
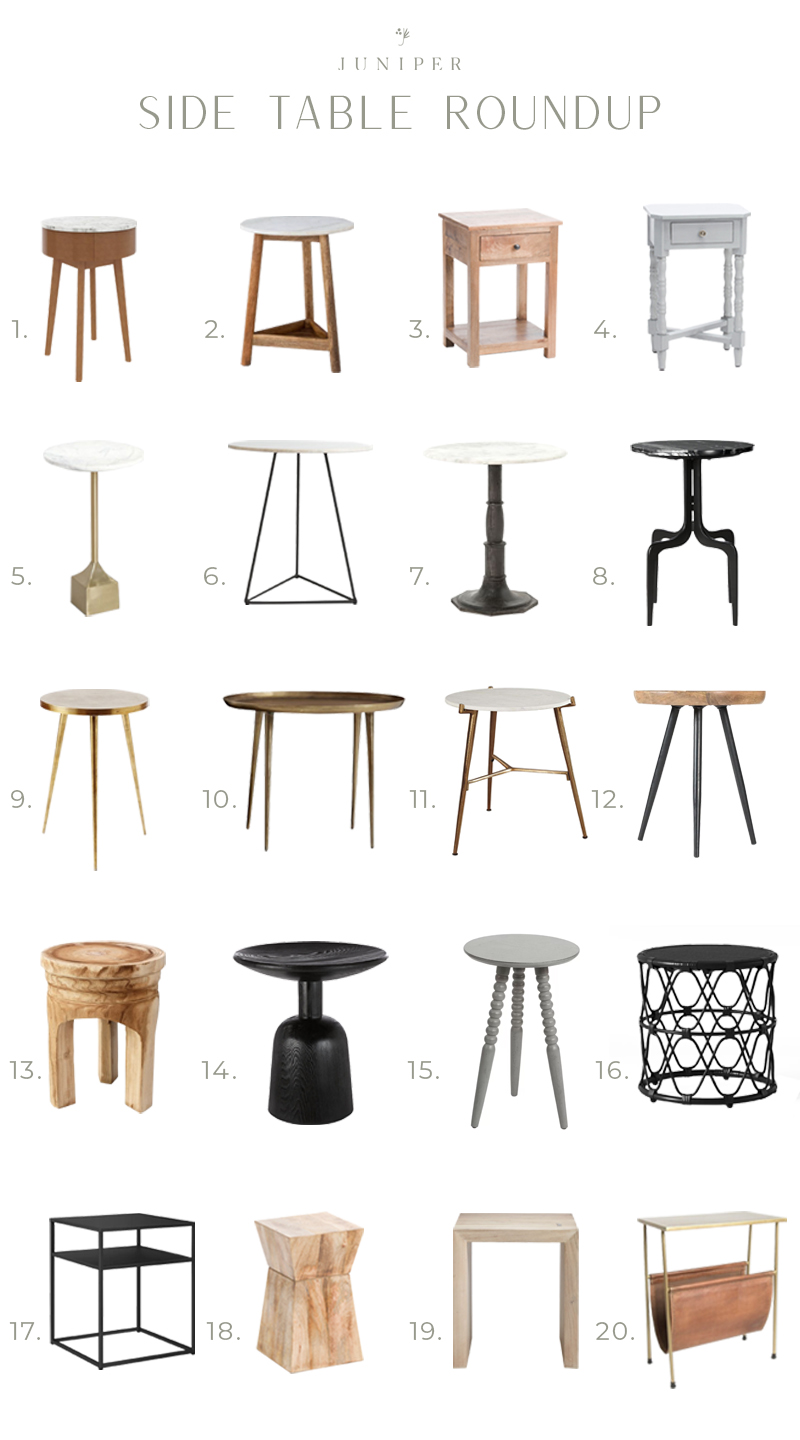
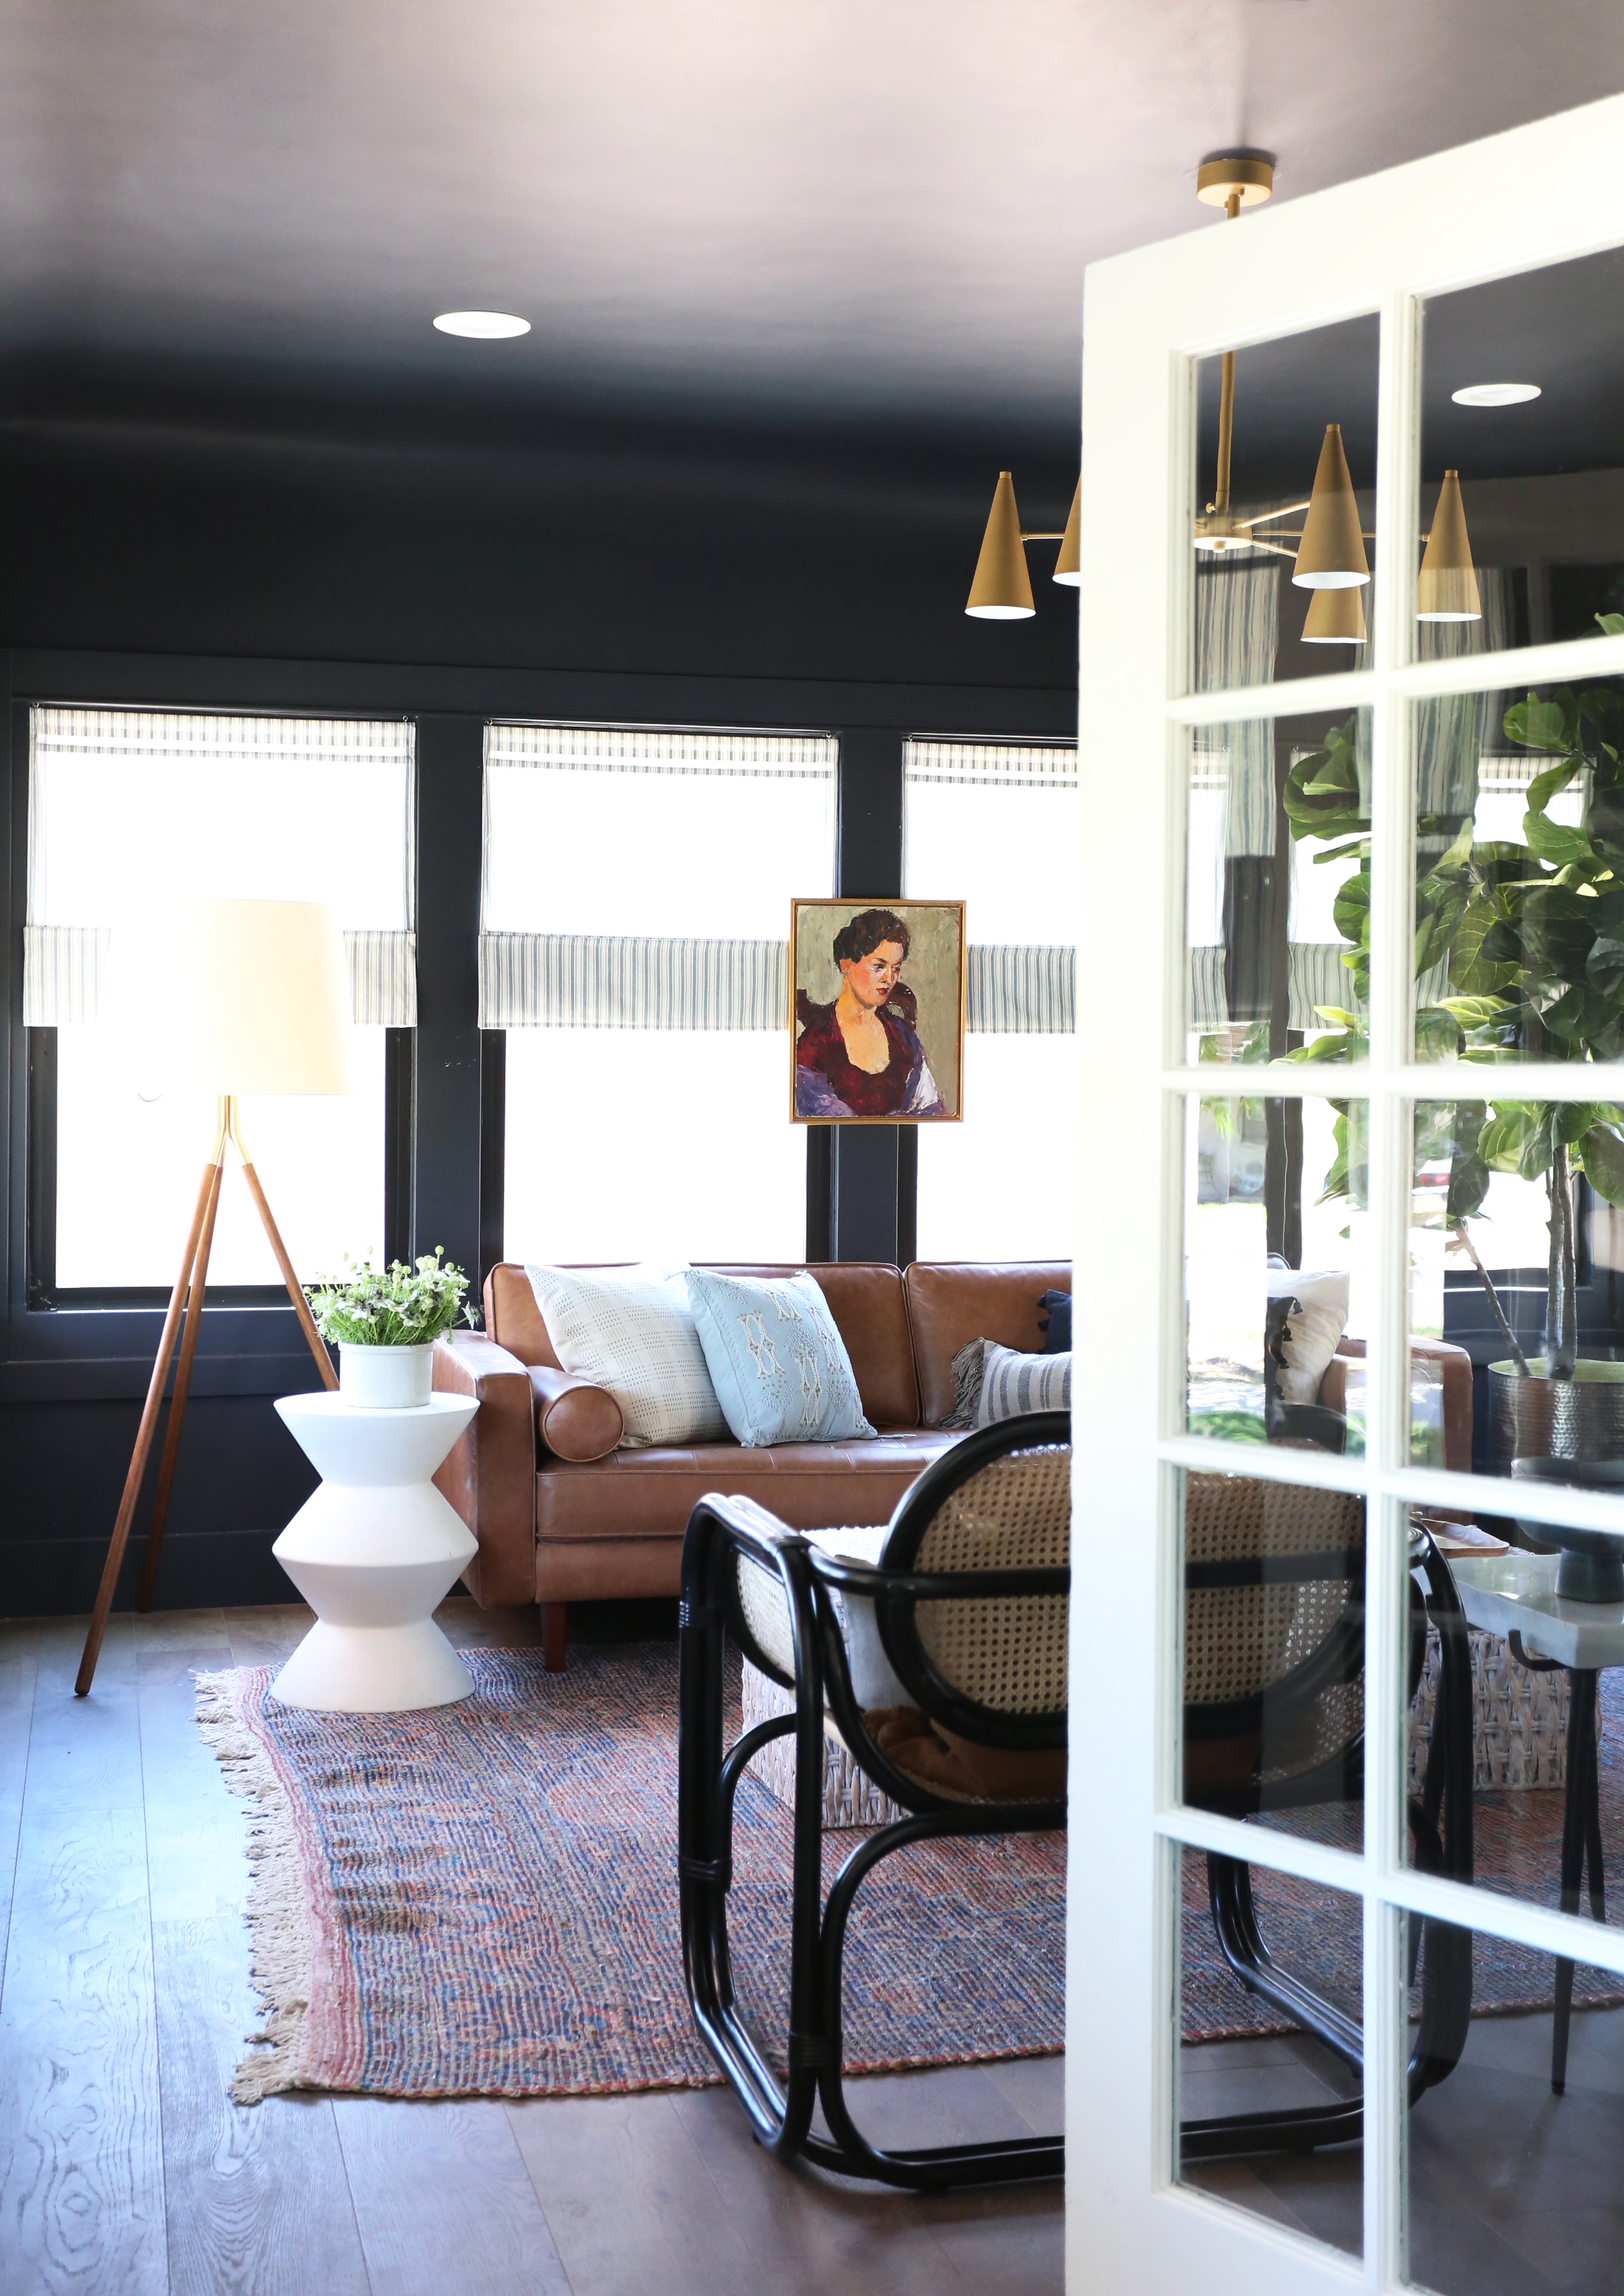
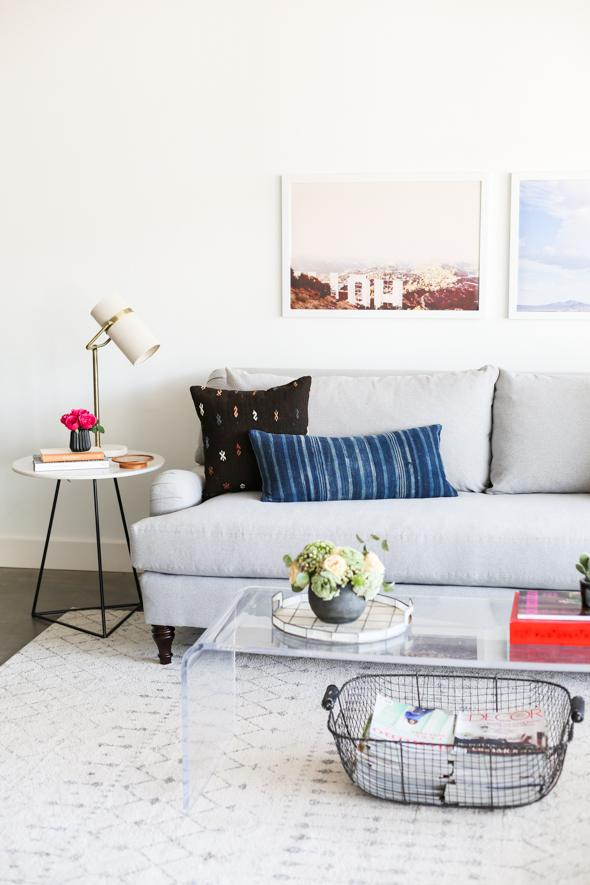
Side tables are such a fun and affordable way to add some personality to your space! They are ideal for small task lighting or to be layered in front of a floor lamp. Style them with books, flowers, candles and other accessories! camel leather sofa // black caned chairs // rug // side table (similar) …
Side tables are such a fun and affordable way to add some personality to your space! They are ideal for small task lighting or to be layered in front of a floor lamp. Style them with books, flowers, candles and other accessories!
Jenny’s Bedroom (The Extended Version!) & Plaster Lamp DIY
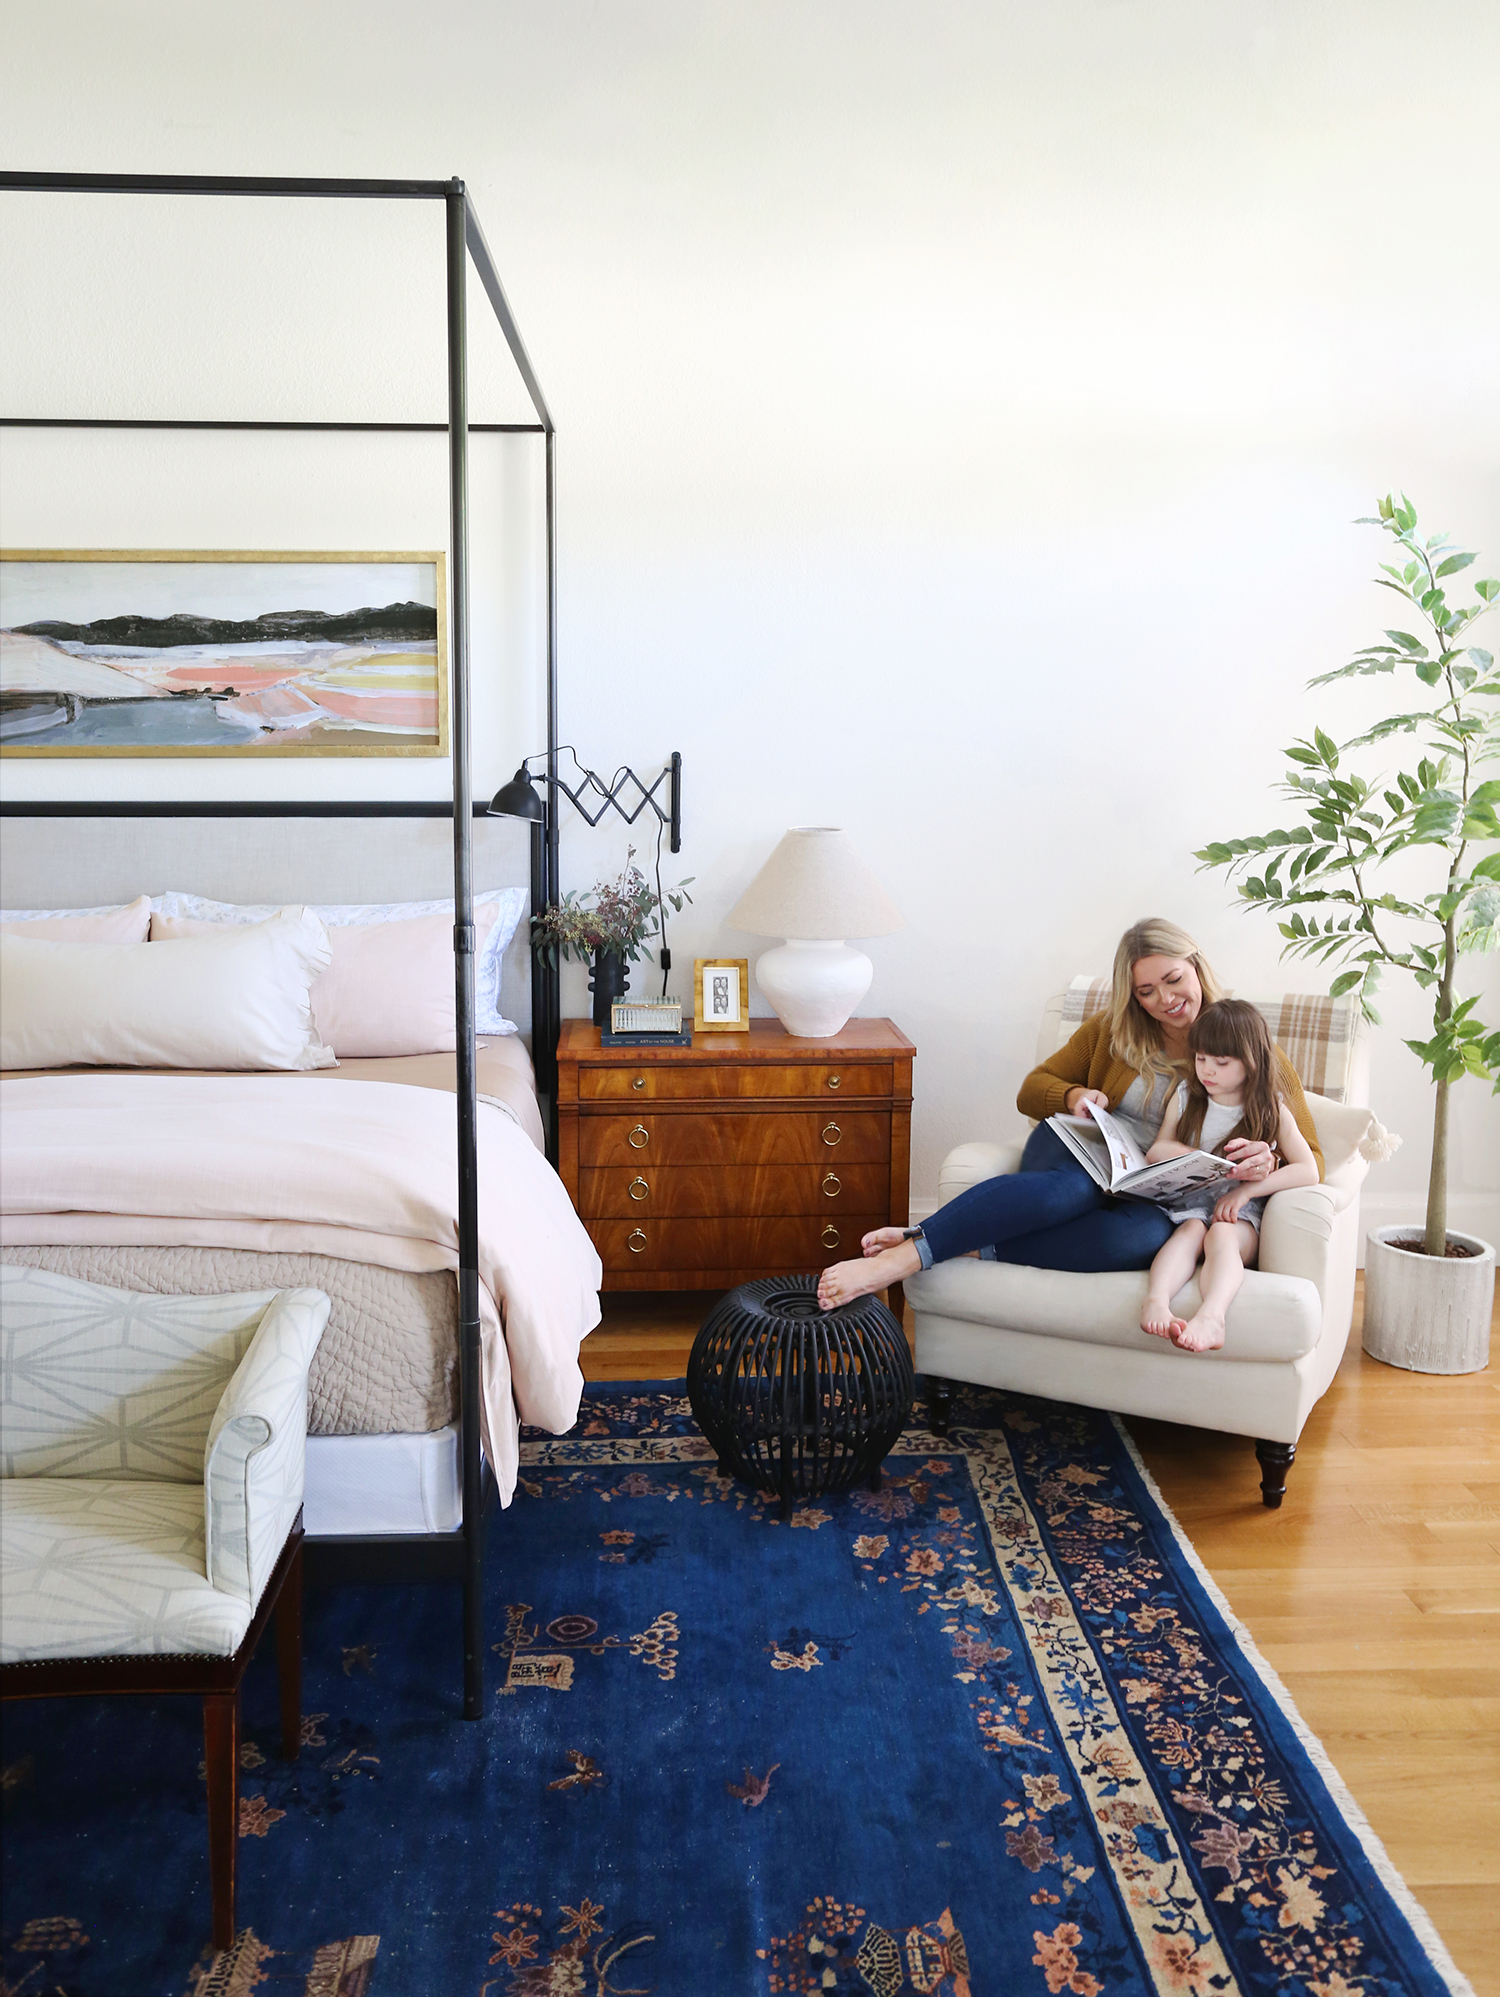
Yesterday we shared some pictures of my bedroom refresh and discussed mostly the bedding. You had so many questions on sourcing around the rest of the room that we decided to do a second post today sharing more of the elements of the room and a quick tutorial for the lamps I plastered! A lot…
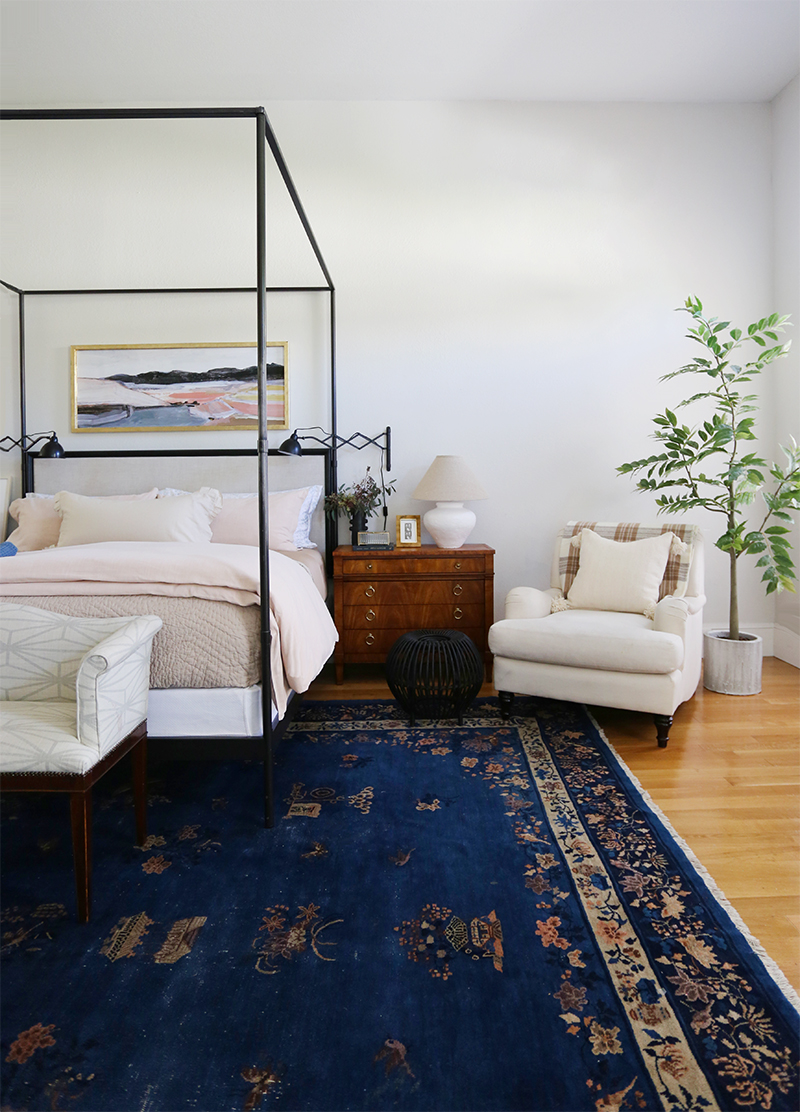
Yesterday we shared some pictures of my bedroom refresh and discussed mostly the bedding. You had so many questions on sourcing around the rest of the room that we decided to do a second post today sharing more of the elements of the room and a quick tutorial for the lamps I plastered! A lot of the items here in my bedroom are vintage, but we did the best we could to find pieces that have a similar scale and look, as well as some budget-friendly versions.
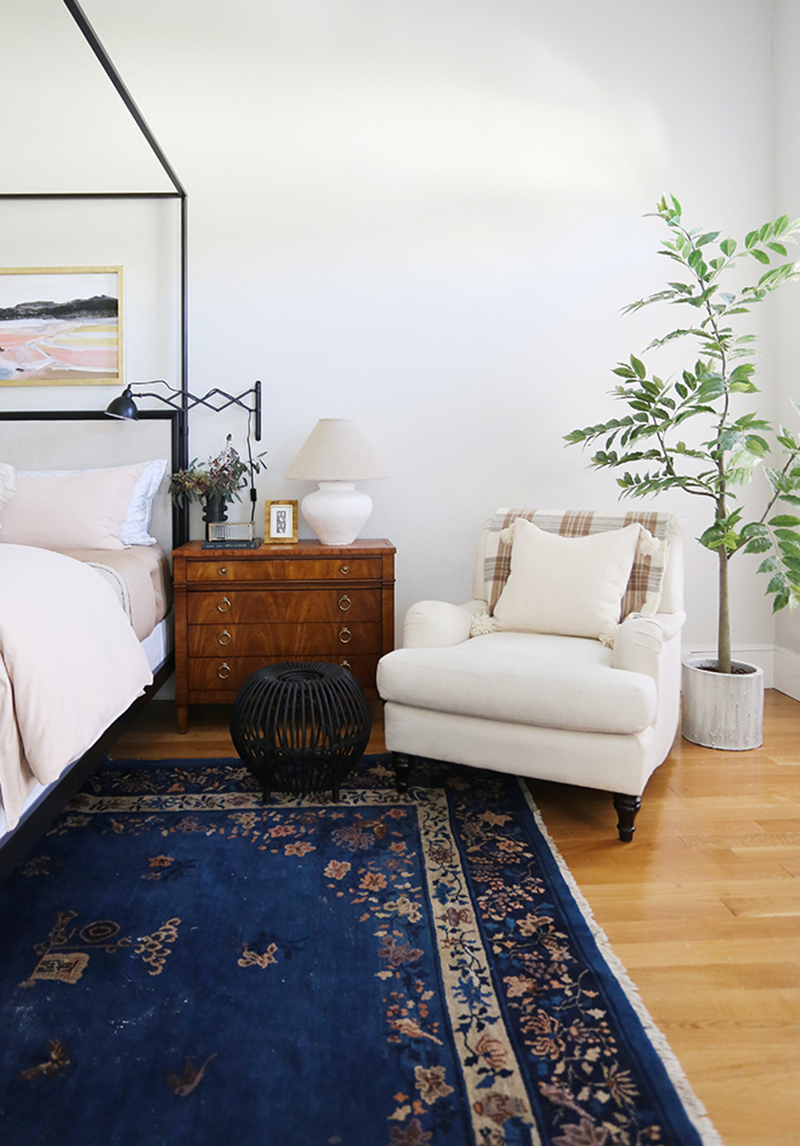
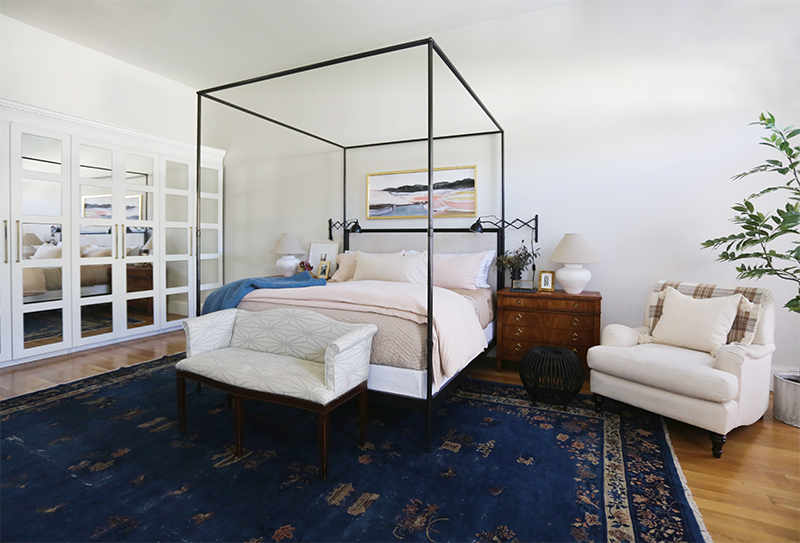
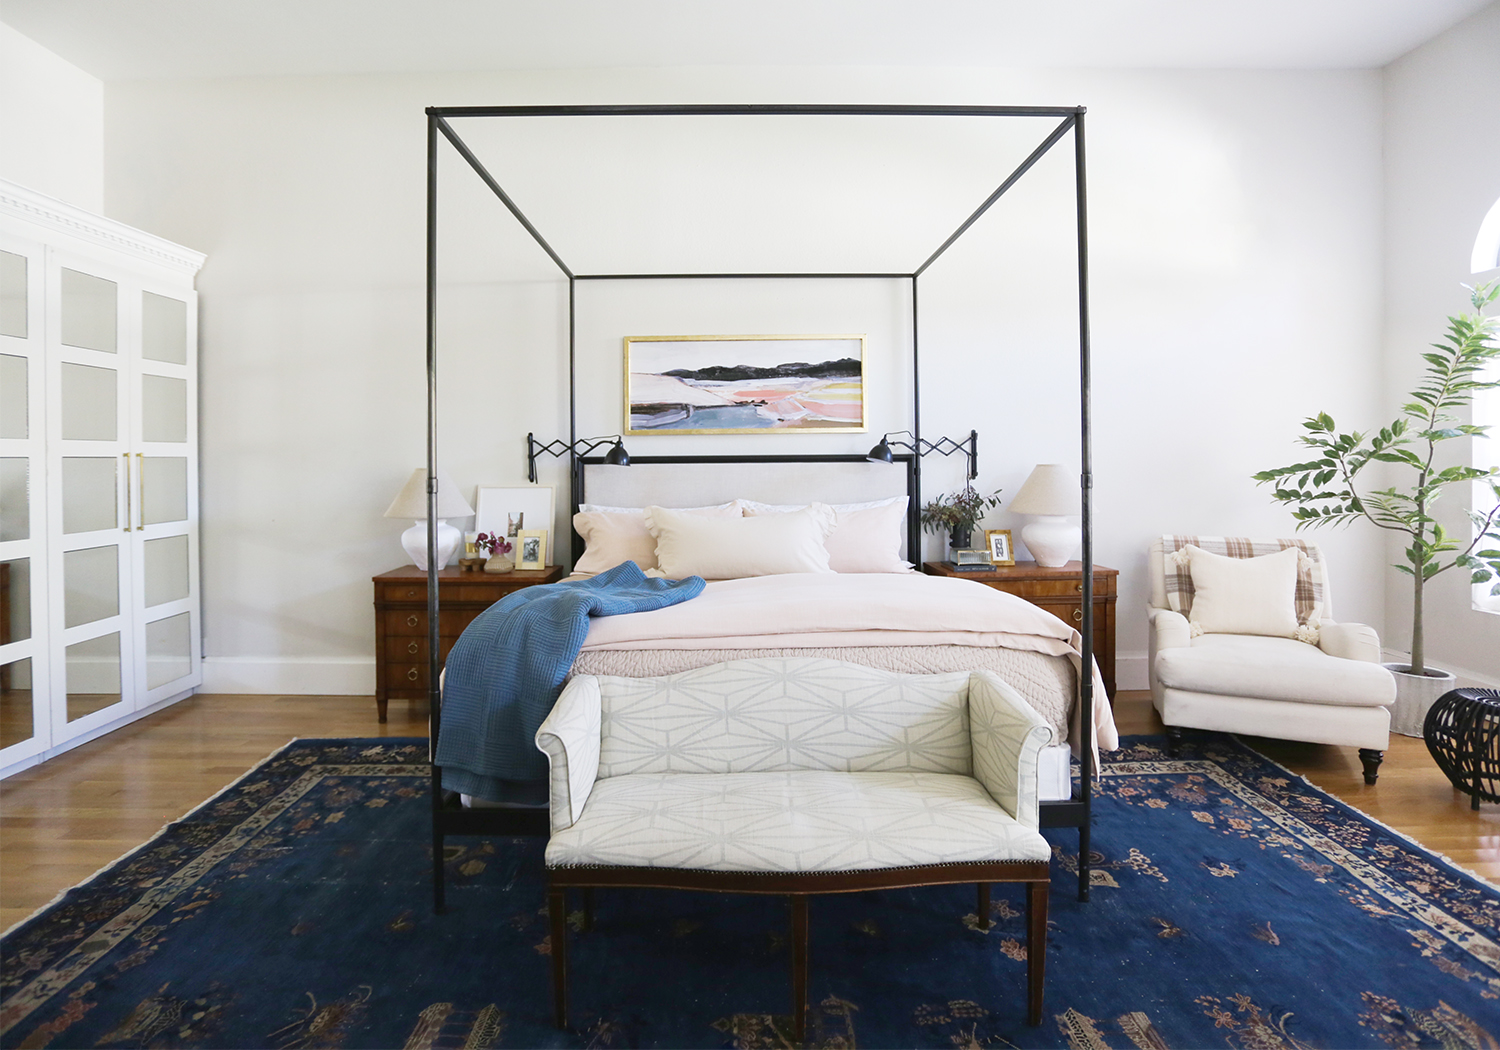
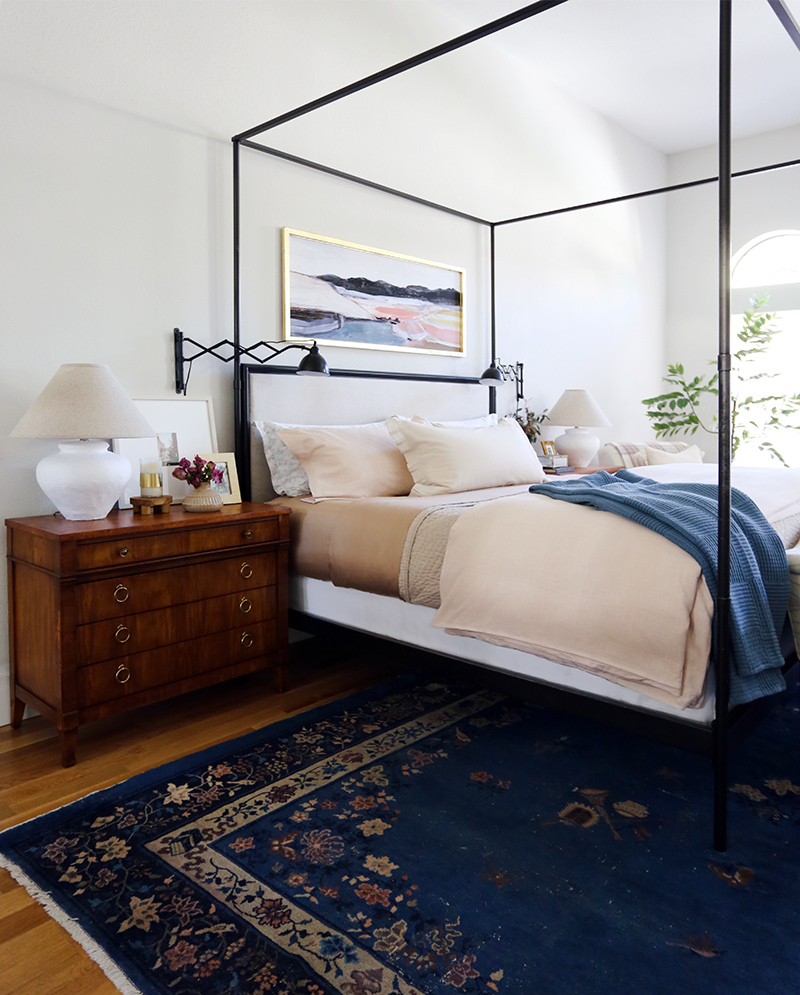
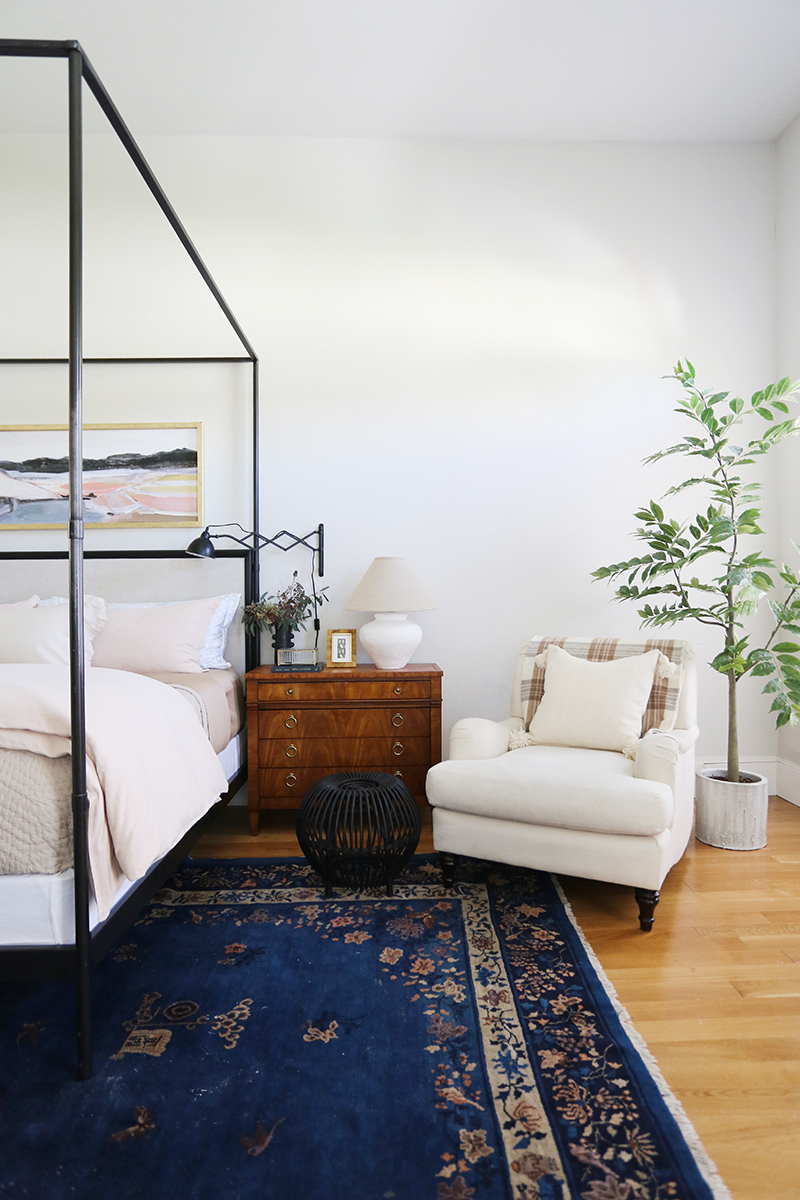
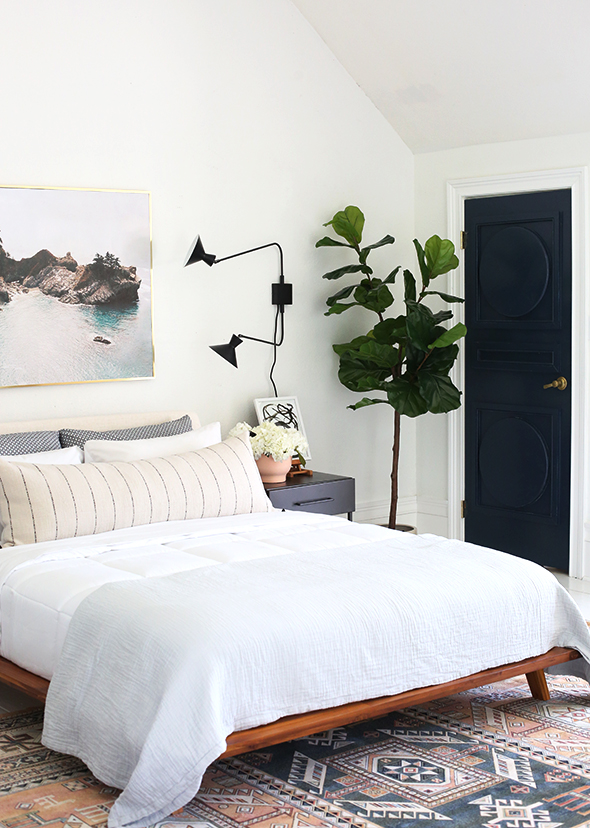
I bought this antique Chinese rug for $250 on eBay years ago, and while it’s seen better days, I still love it and would have a hard time replacing it with another rug. The indigo blue ground color is punchy and vibrant but still livable, especially with the more neutral bedding and wall paint color (which is Benjamin Moore Classic Gray). I love using sources like Ebay and Etsy to find vintage rugs like this one. I linked a few really similar options here below. While they aren’t quite as inexpensive as mine, these are still great prices for vintage rugs of this size! And if you are checking these searches regularly, those special deals will definitely come up! Online vintage shopping is a lot like thrifting – the name of the game is consistency!
We have always had a faux fiddle leaf fig tree in this corner of 0ur room, but I was excited to swap it out for something a little different. I love seeing and using real and faux trees with smaller leaves these days. And with faux trees, it is so much easier to make smaller leaves look realistic! This faux Nandina tree is one of the best I’ve seen and it’s right about $100! Here I used the 72″ size.
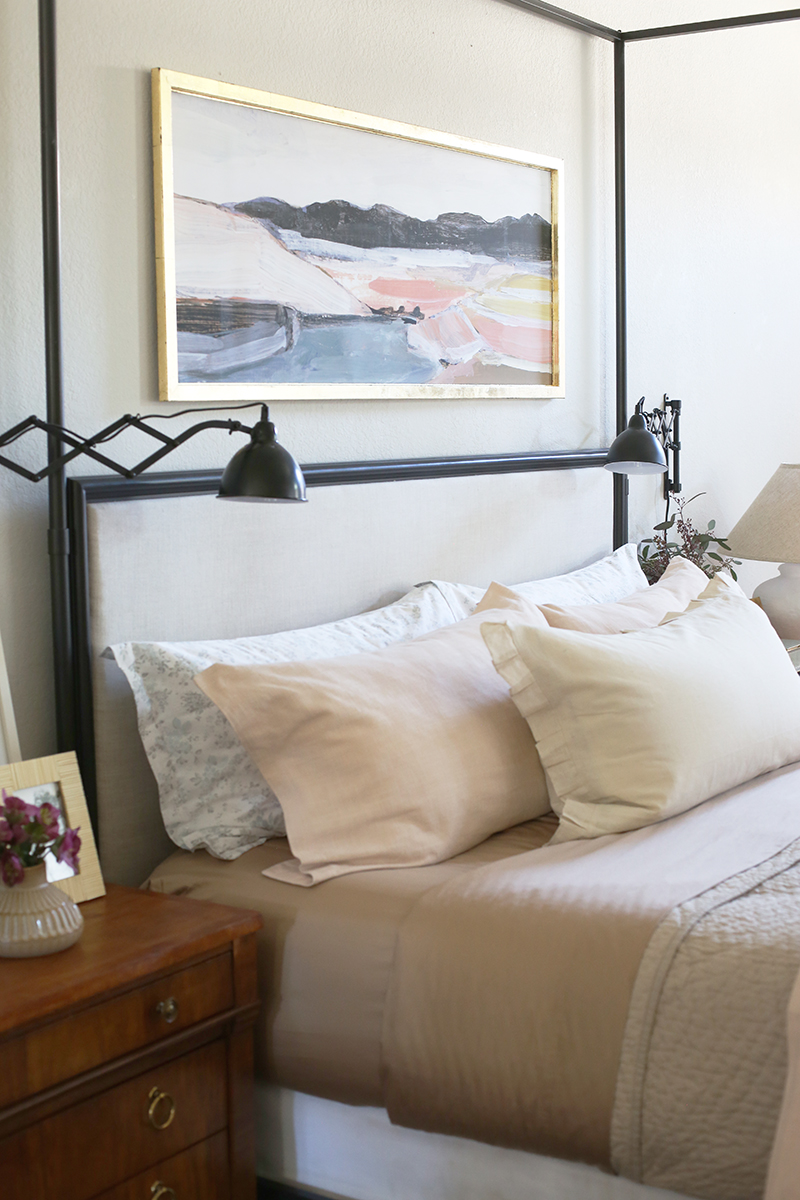
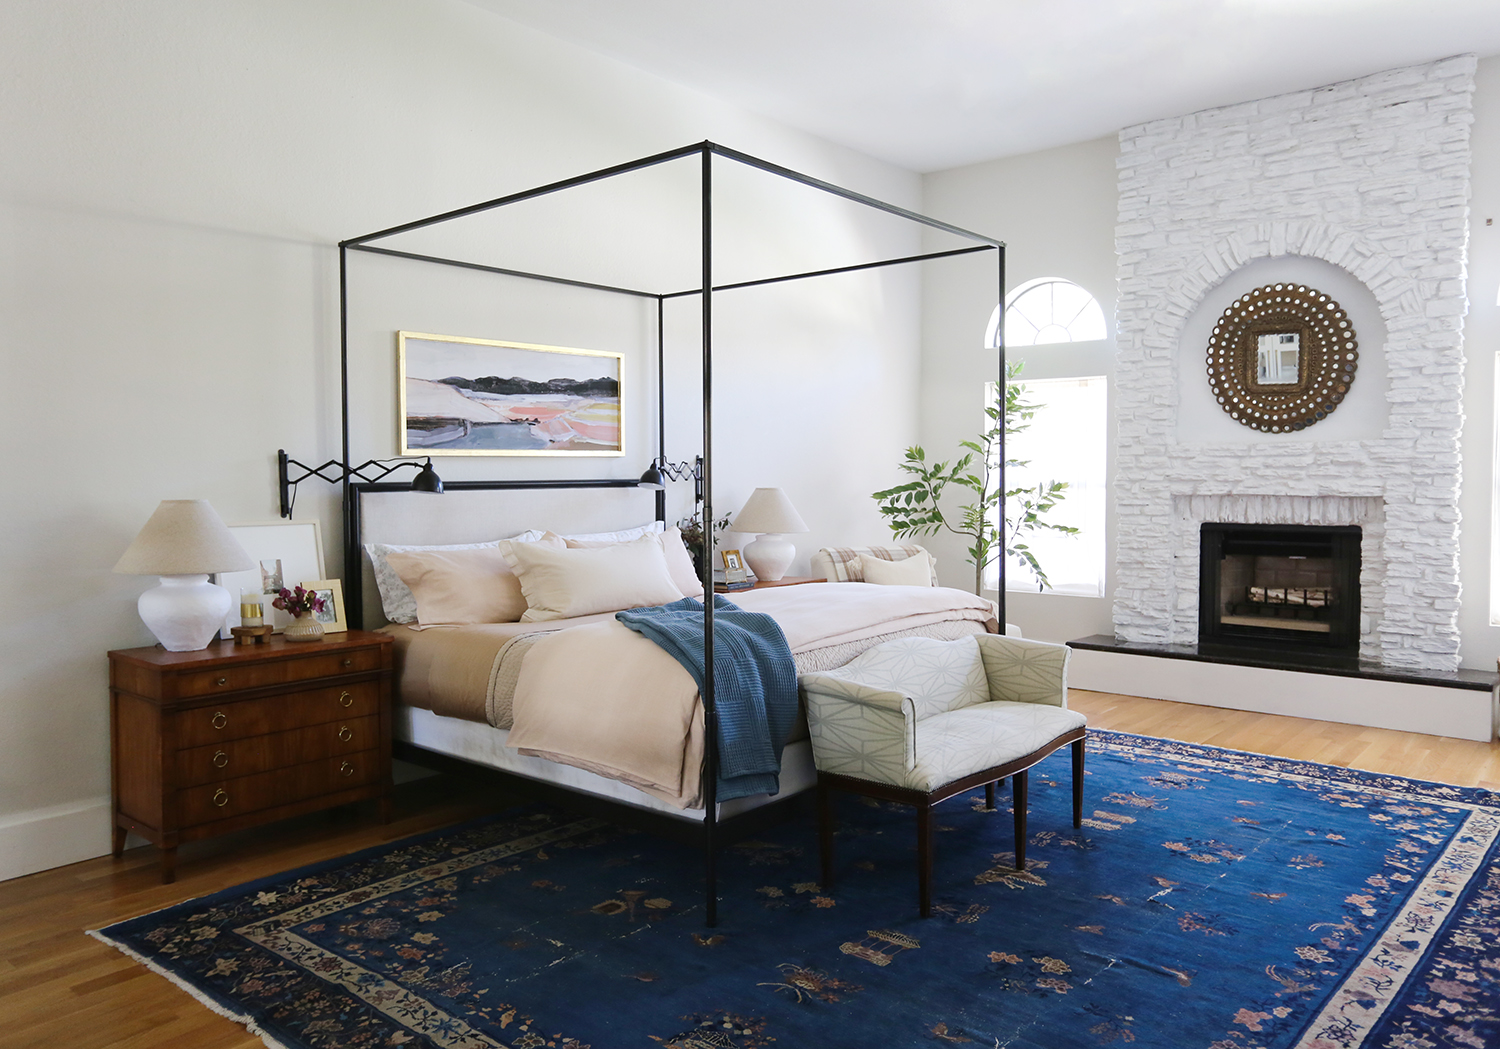
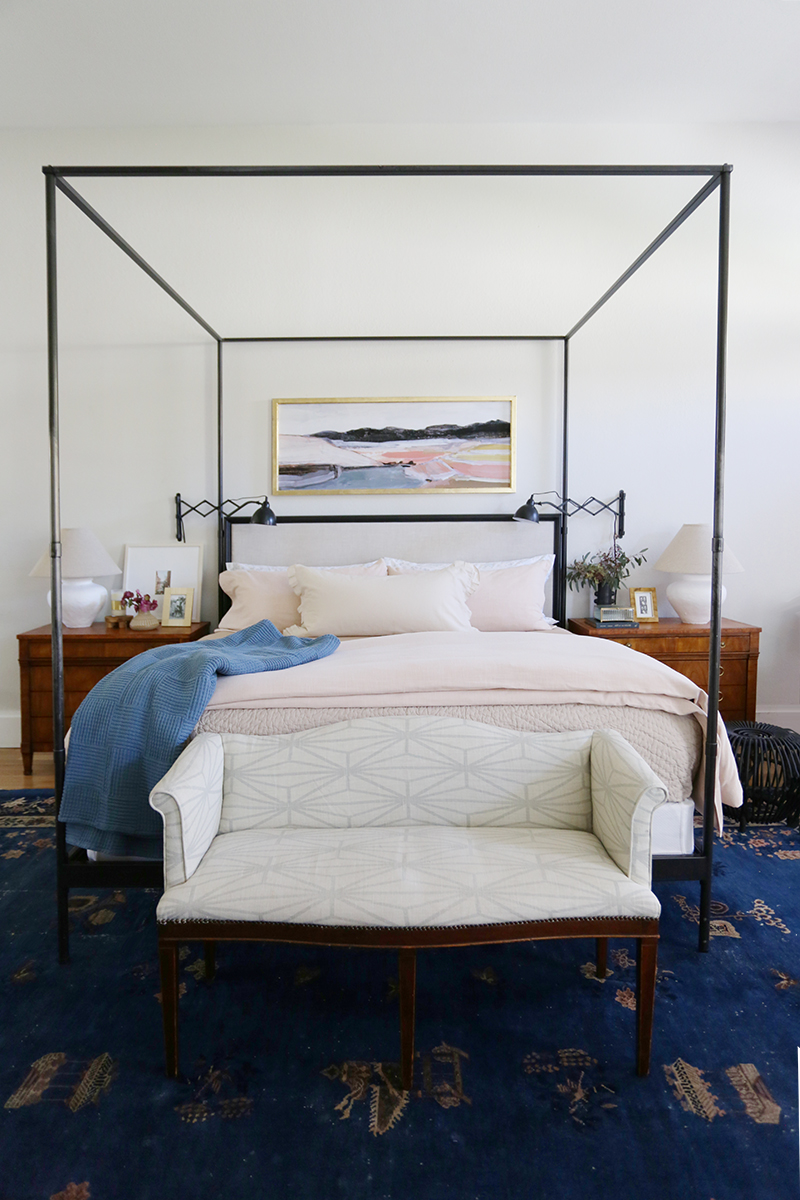
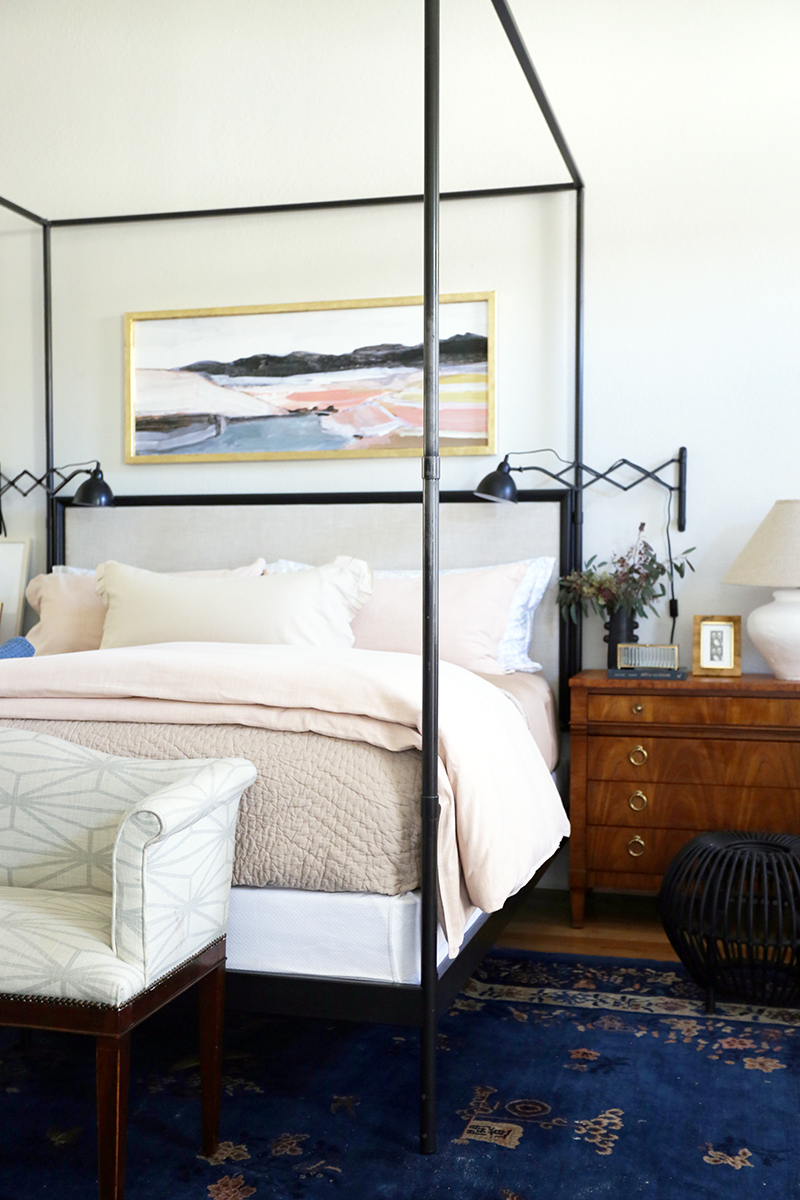
A lot of you asked about the art above the bed! It’s a new print for Juniper Print Shop by artist LaurieAnne Gonzales called French Cove. We are releasing it next week with a whole collection of prints in this 22×55″ size, which is perfect above king and queen beds! We suggest using IKEA’s Bjorksta metal frames for our oversized prints and I gold leafed one for my bedroom refresh. You can check out my Insta story highlights for a quick tutorial!
Speaking of beds, we’ve had this upholstered canopy bed frame from Restoration Hardware for a long time! It was an investment piece, but absolutely worth it. I found a few similar options for those of you trying to recreate this look on a smaller budget. A quick tip about canopy beds – I think these usually work best in rooms with ceilings that are 9′ and taller! Otherwise the canopy can close in the room a lot. We have really tall ceilings in our bedroom and I think the canopy helps make our space feel a little less vast and more cozy.
We have had this classic roll arm chair for years and every six months or so the cream sailcloth upholstery starts to look a little dingy. But it’s nothing a quick session with my absolute favorite upholstery and carpet cleaner can’t handle! We use the same product on our oatmeal linen slip covered sofa and it works wonders! (Just be sure to do a test spot before cleaning your furniture or carpets!) I also use this super handy rechargeable fabric shaver to remove any pilling or snags. These two things keep my upholstery looking great, even with four kids and a giant dog! But a quick warning: Do not use either if you are short on time! It’s almost impossible to stop using these products once you get them out! No sofa cushion or sweater will go untouched when I’m on a roll! ;)
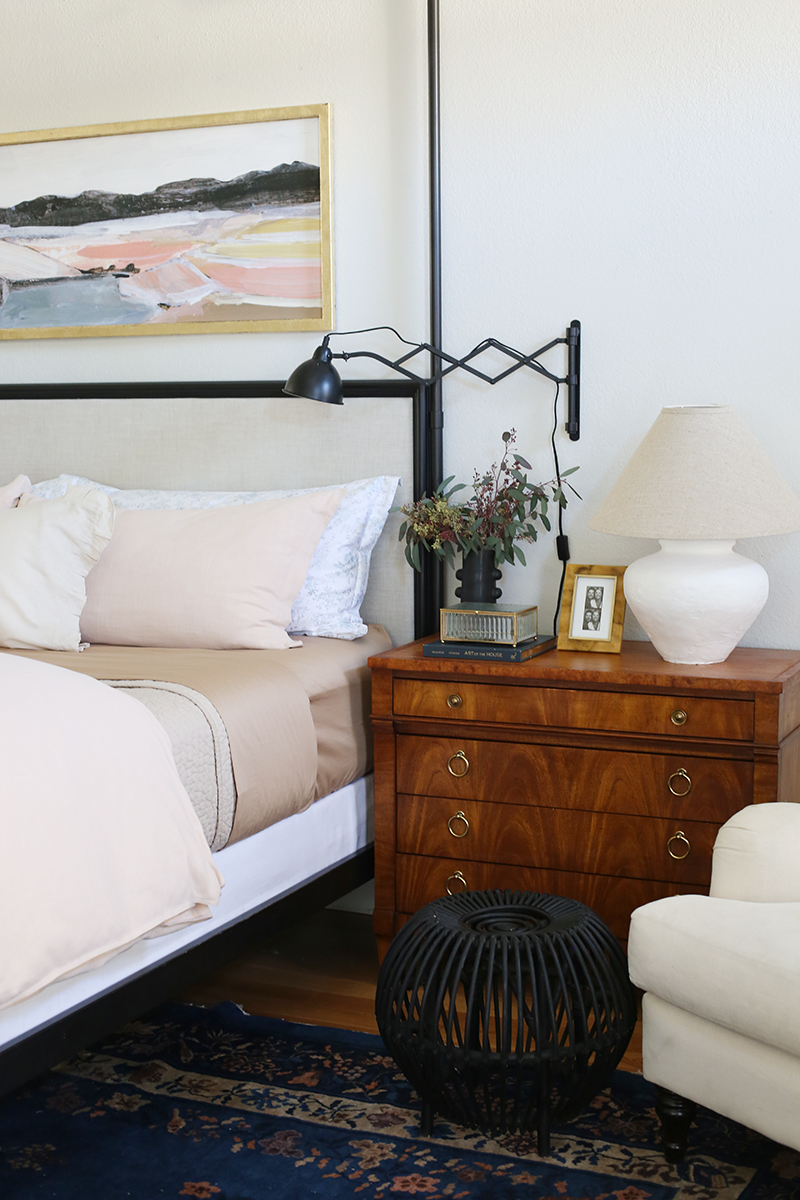
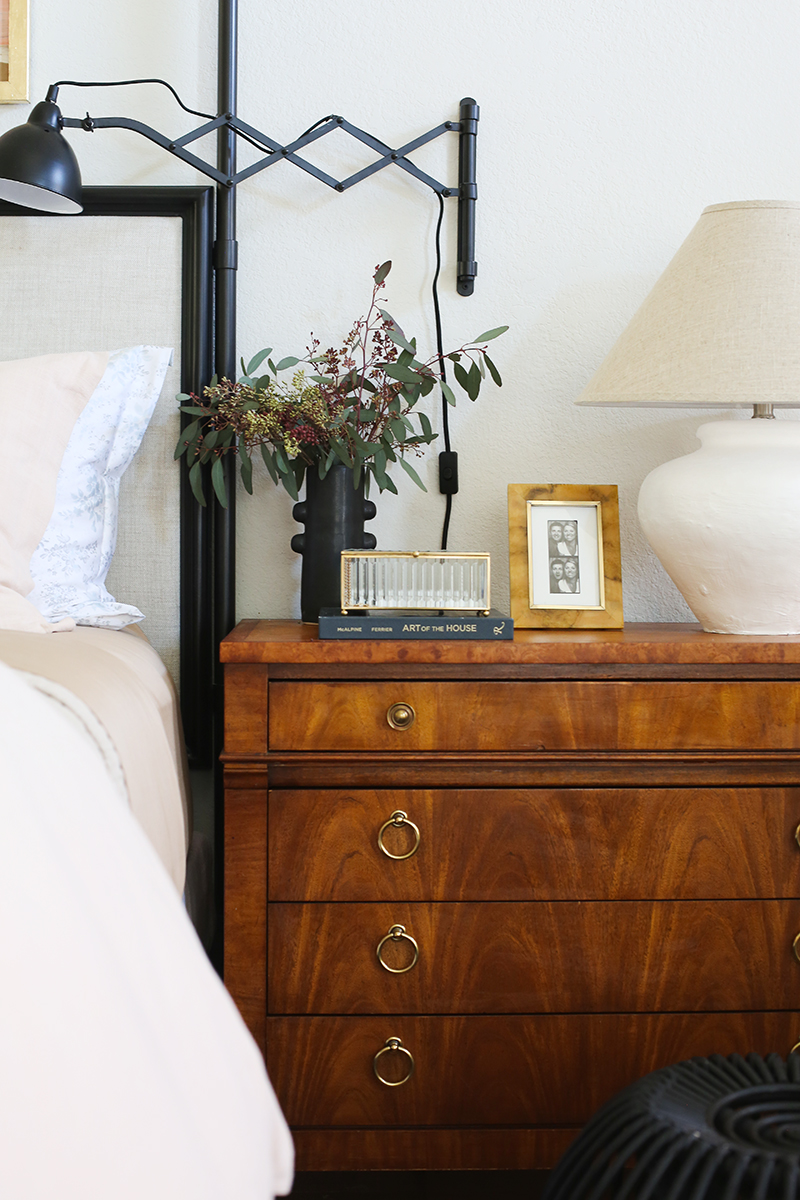
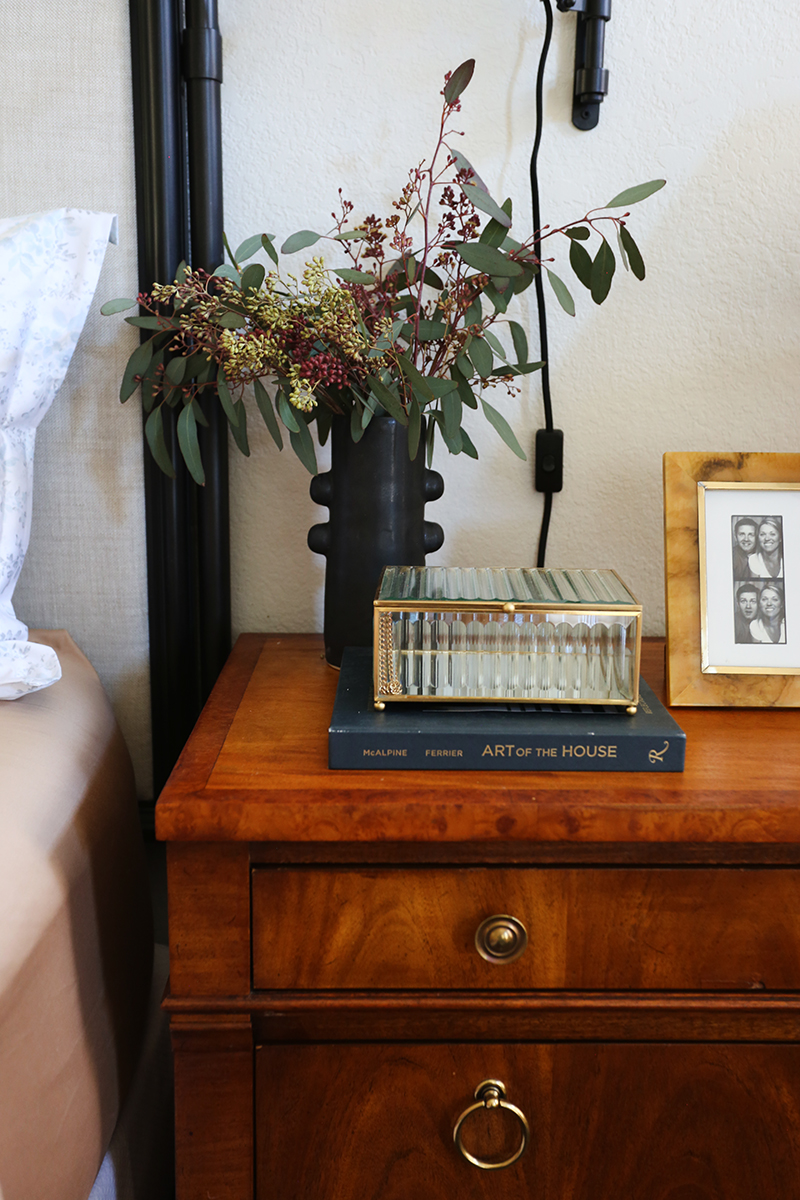
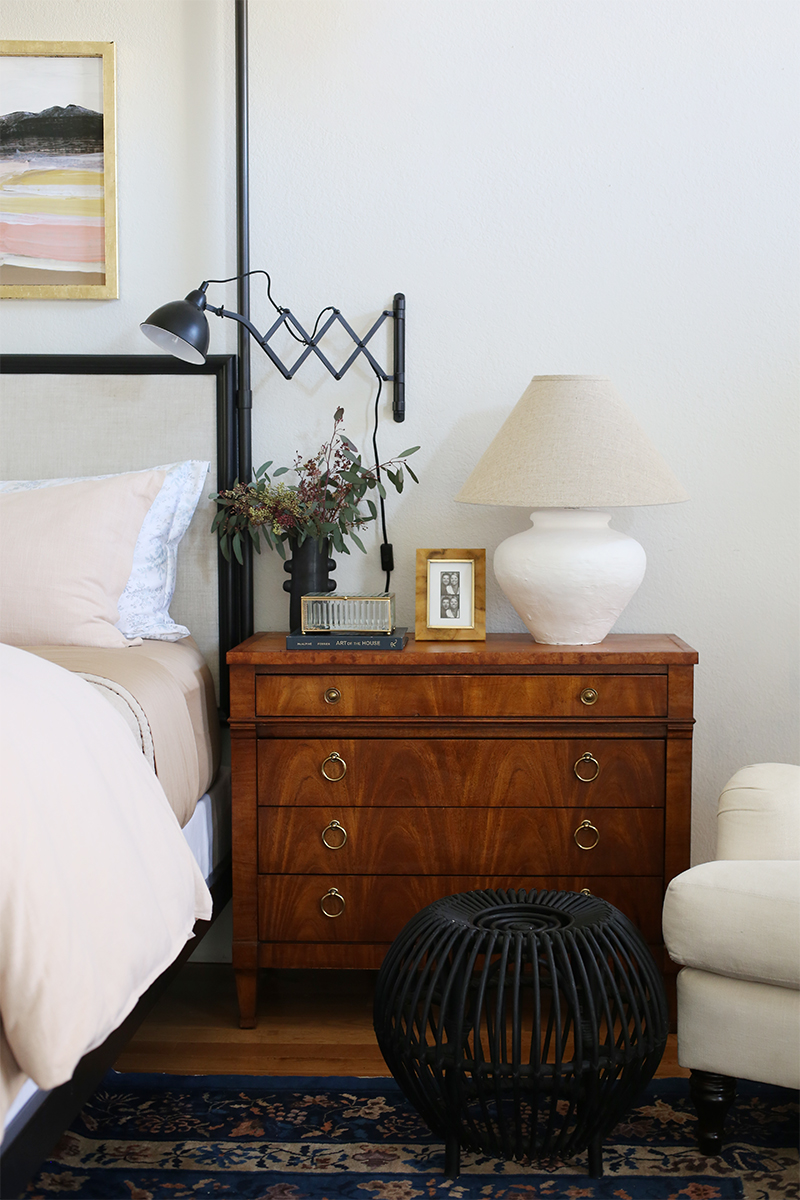
I also had a lot of questions about my nightstands. These are antique mahogany chests and if you’re looking, I’d search Facebook Marketplace or Offer Up for something similar. I love the character and age of these nightstands! They add a lot of warmth to my space.
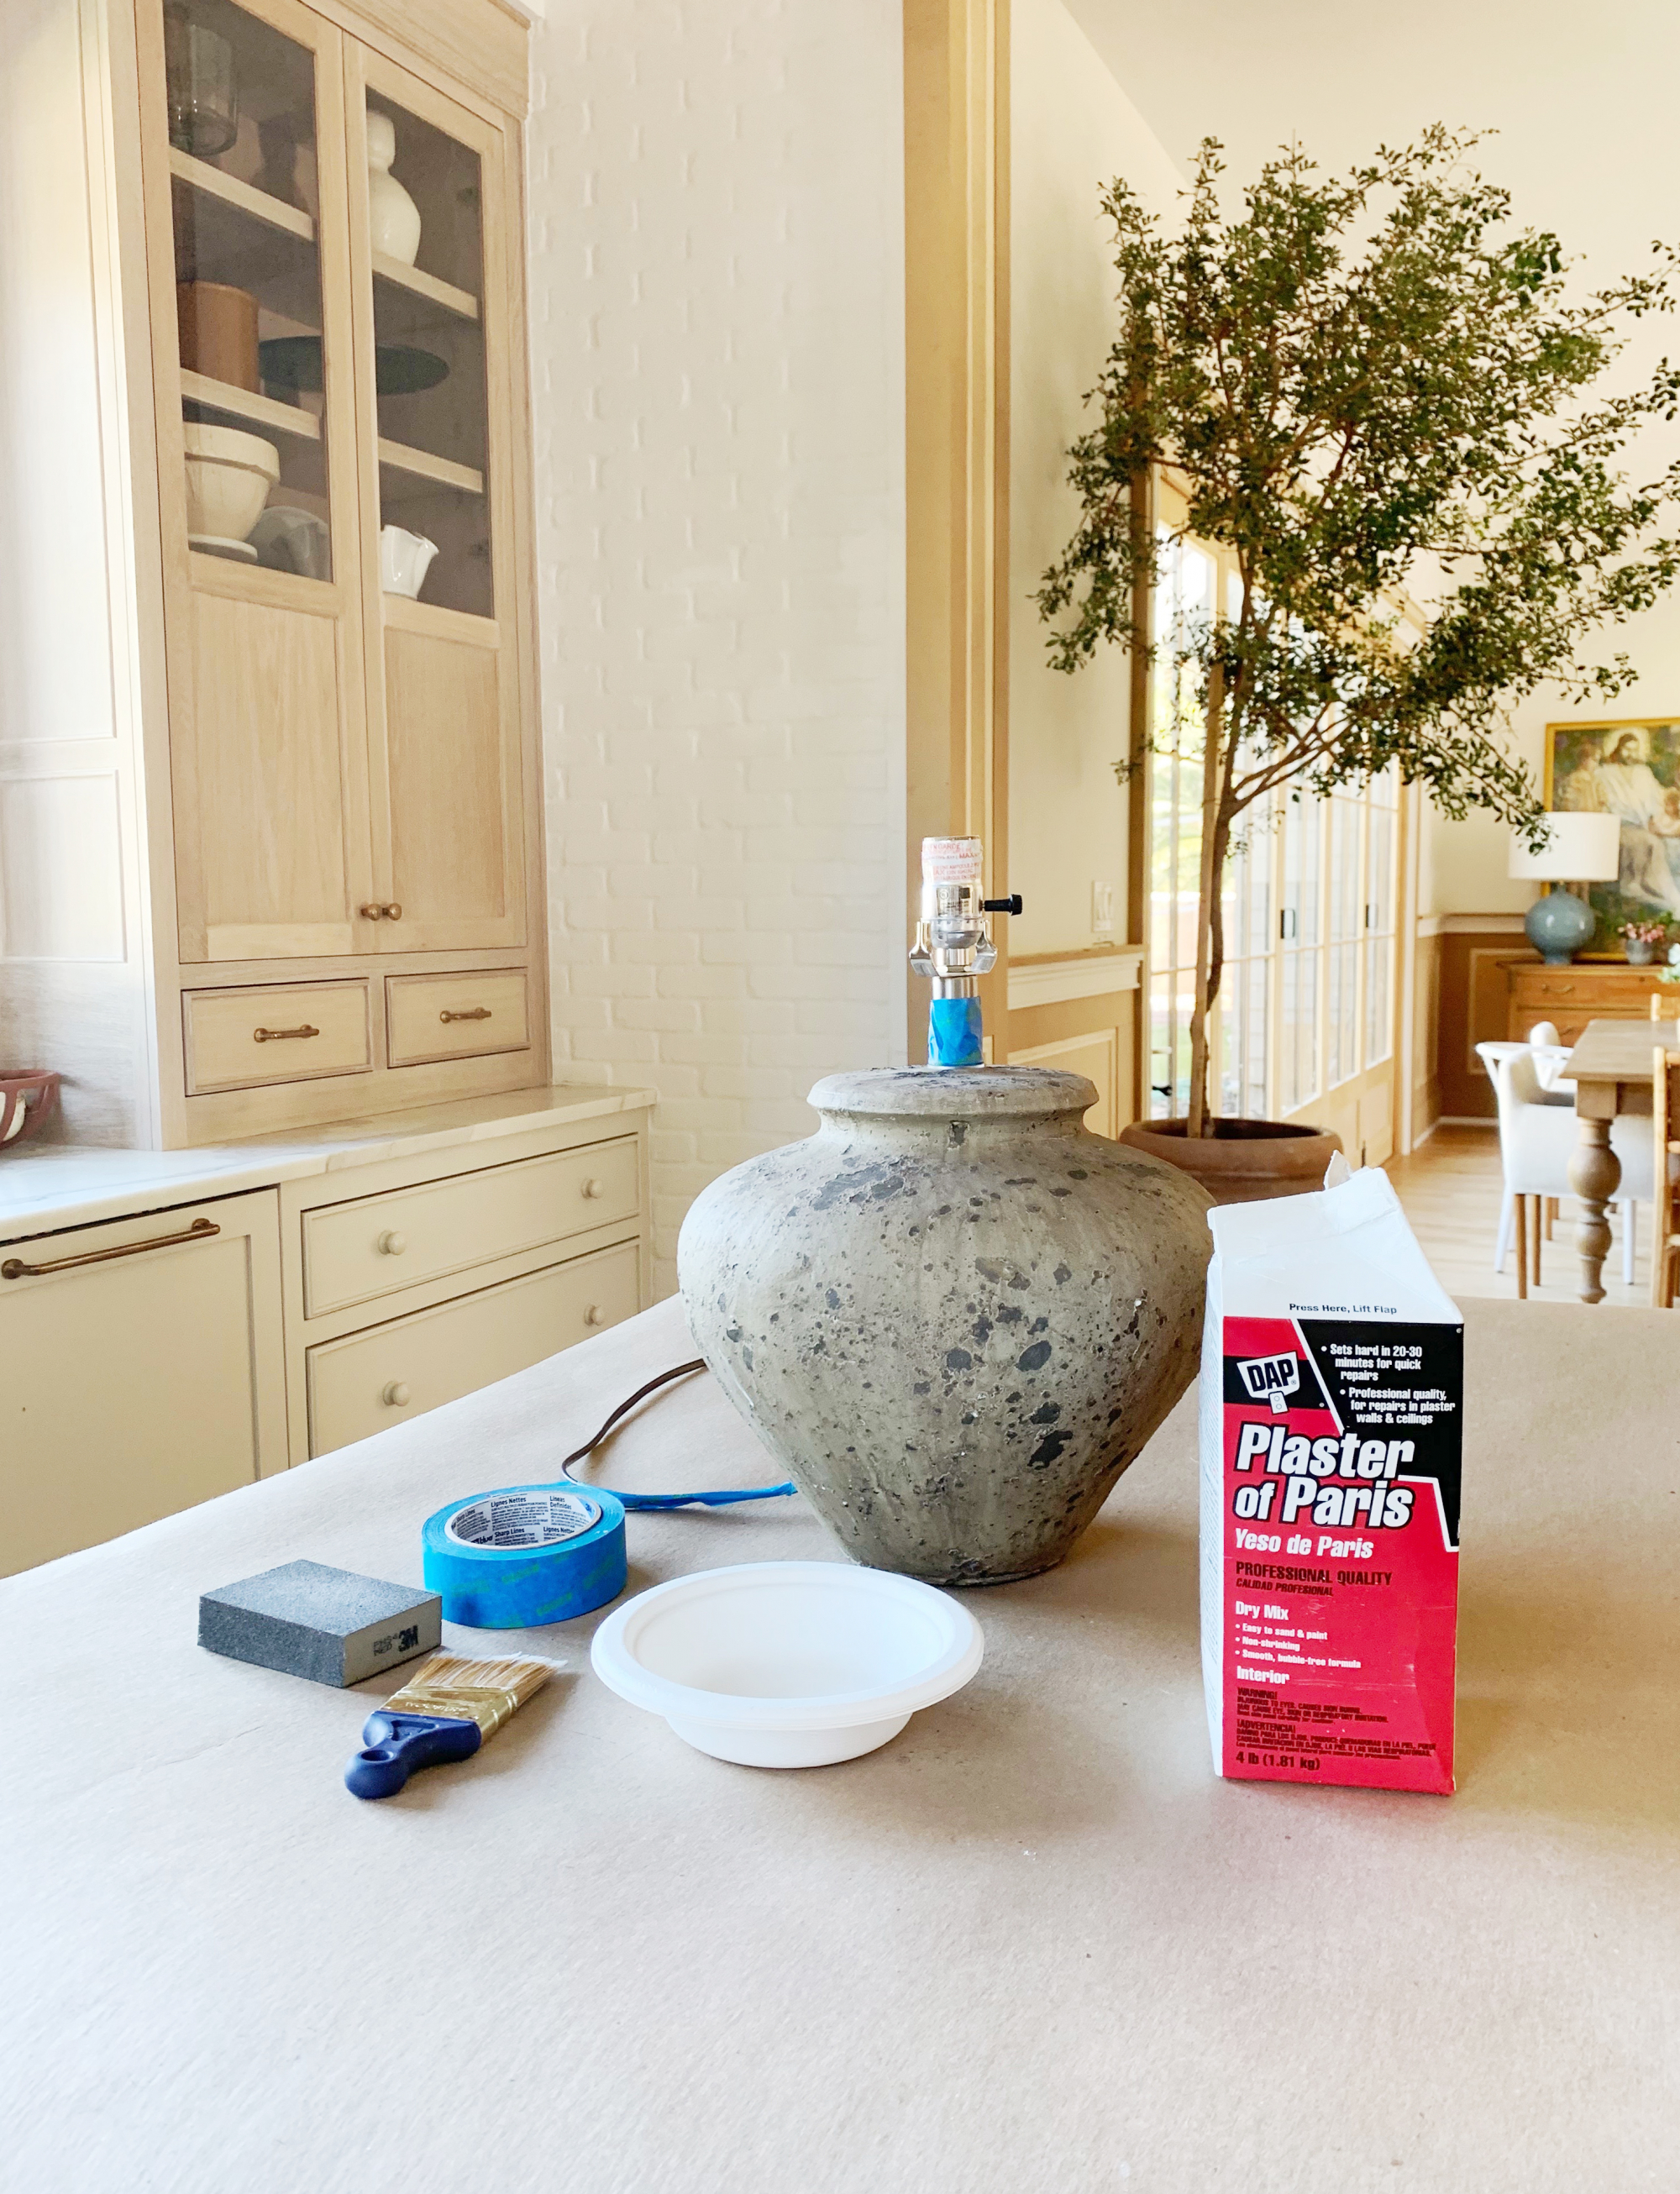
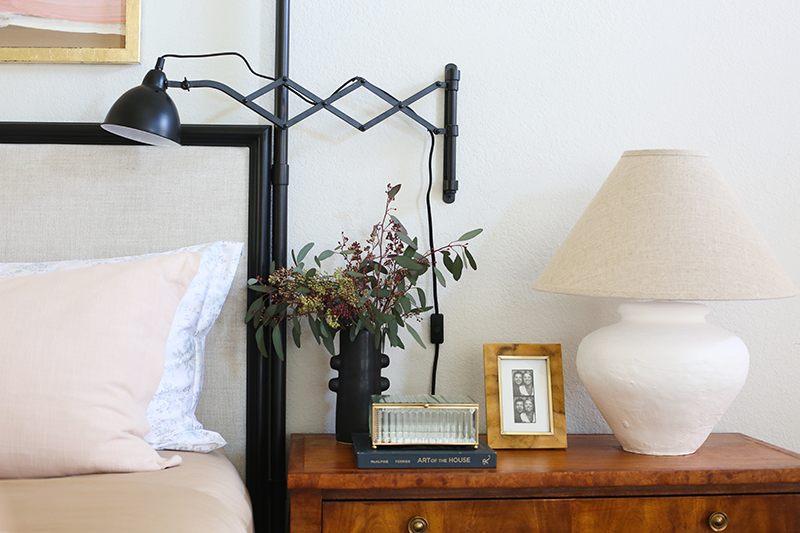
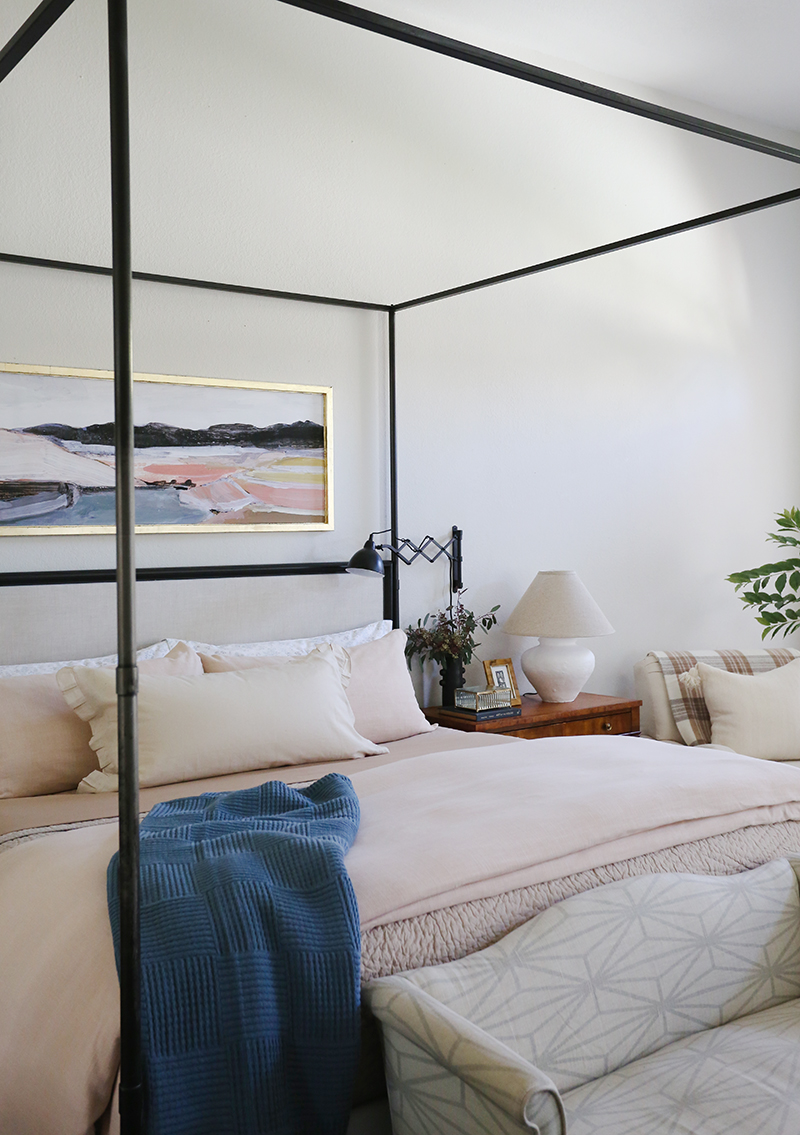
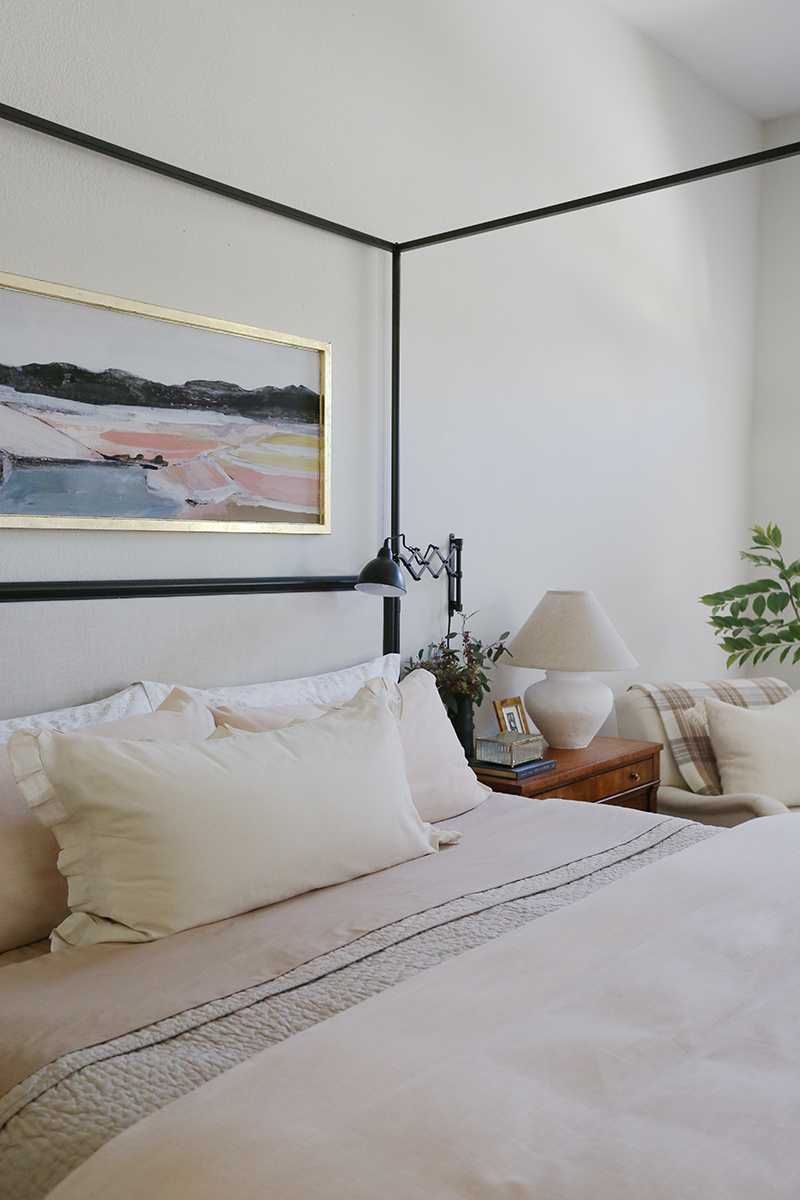
Let’s talk about lighting next! Since I opted for camel color sheets instead of my usual crisp white, I really wanted to add a healthy dose of white in other parts of our room. I also wanted to pair some wall sconces with big beautiful table lamps on our nightstands. I love that combo! I was hoping to use table lamps I already had, and knew I could figure something out with these that we bought for the Evergreen Sunroom. I loved the shape and size for my space, but the finish was not right. But that’s the easy part to change! Plaster to the rescue!
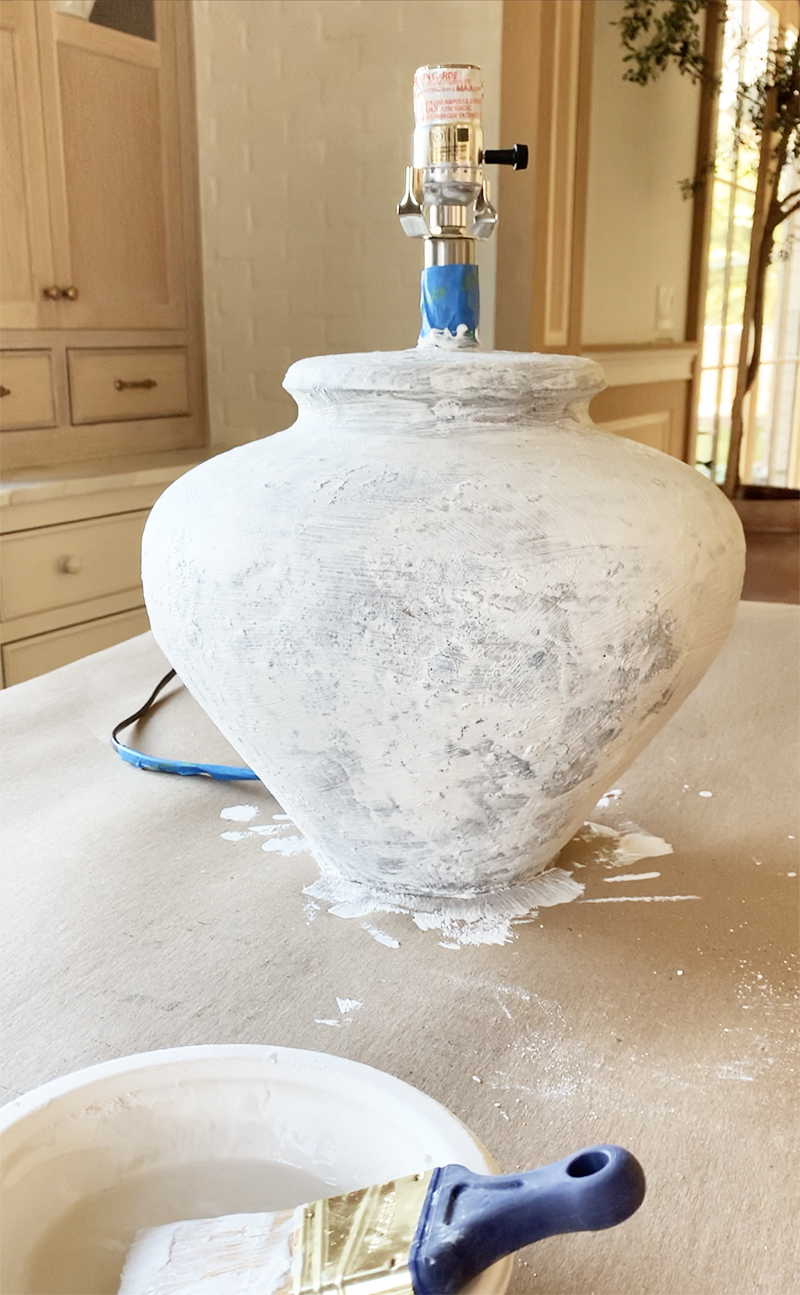
You can use any type of lamp for this project – try checking thrift stores! It’s definitely more about the shape and size than the finish. You can even use this technique on glossy, glazed lamps! Just start with a layer of white spray primer so the plaster has something to grip on to.
Start by taping off your cord and metal pieces on the lamp neck with blue painters tape. When doing this type of DIY it’s a good idea to take a little extra time on this step to ensure a crisp, clean line. A dead giveaway for any DIY project is messy brush marks where paint or plaster should not be!
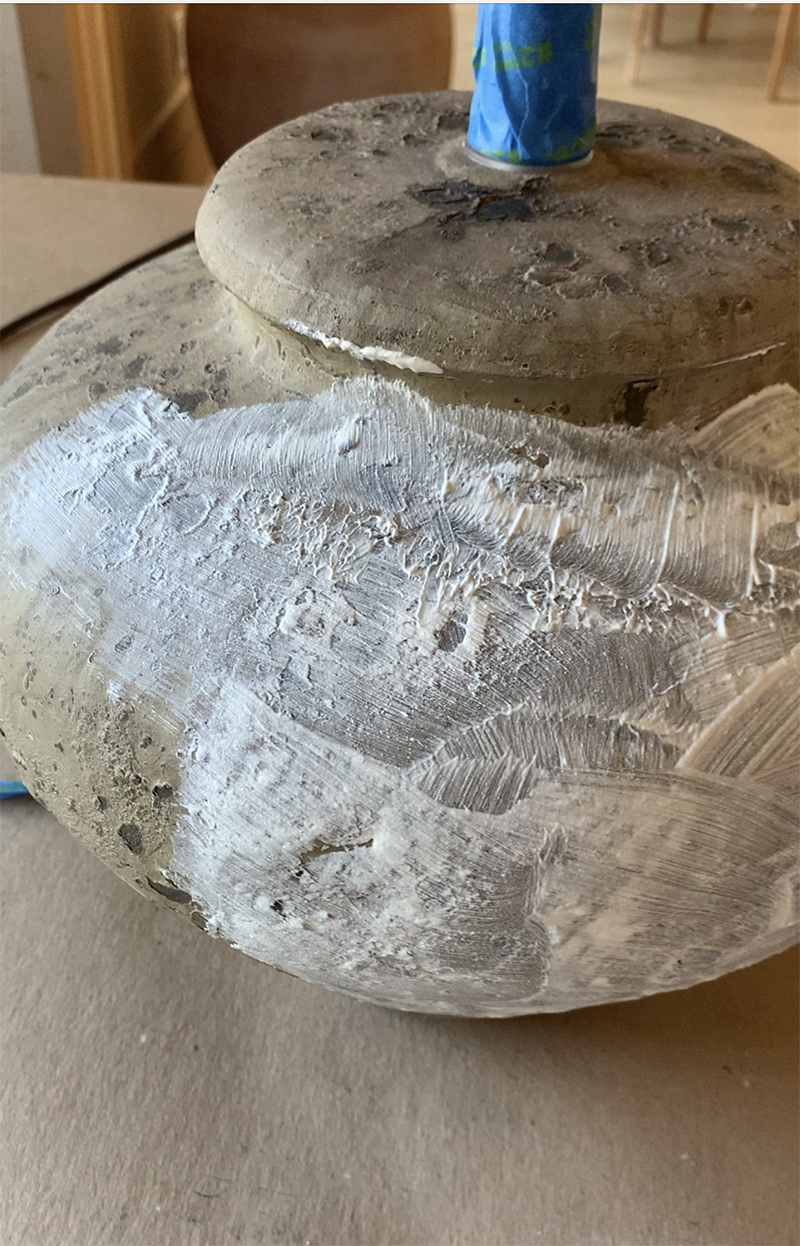
Mix your dry plaster with water and stir until you have a consistency similar to pancake batter. Using a 2″ angled brush, start applying your plaster in a single thin coat. You will need to work relatively quickly. Wet plaster has about a 10 minute window before it starts to harden. As the plaster starts to harder, it’s easy to use your brush to sort of “dab” away any paint lines and add a little bit of texture to the finish.
I like how these lamps looked here, after just one coat and was really tempted to stop here. But I wanted a solid, almost cast plaster look, so I kept going with a second coat and light third coat for full coverage!
On my final coat, before the plaster dried, I used just water on my brush to sort of wet sand the plaster and smooth out any rough parts or brush marks. You can seal with a Polycrylic sealer or a wax to protect your raw plaster after it has completely dried. And if you want to see a video tutorial of this DIY, I posted a step-by-step on my Instagram stories in a saved highlight called “Plaster Lamp.”
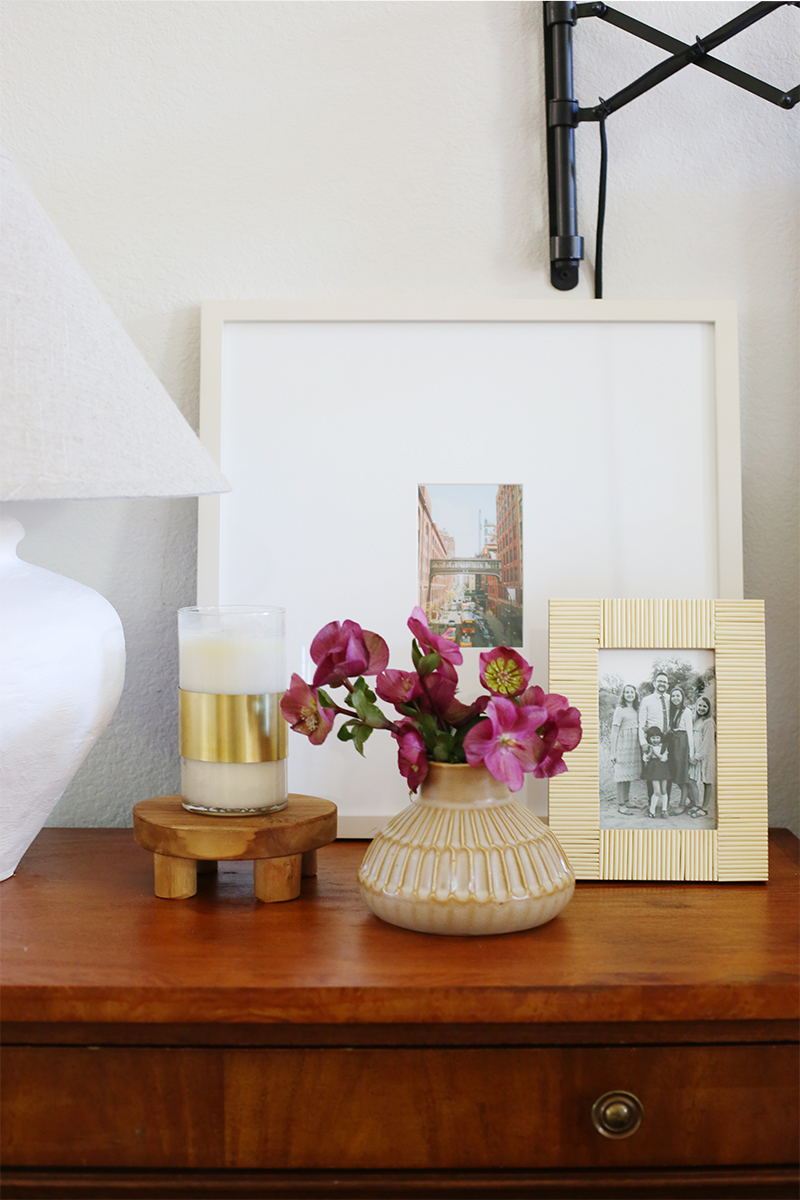
Here’s the finished result! I love to subtle texture and imperfections! I replaced the original lamp shade with this Empire style linen shade, which has a more exaggerated cone shape that I’m really loving again after years of using mostly drum shades!
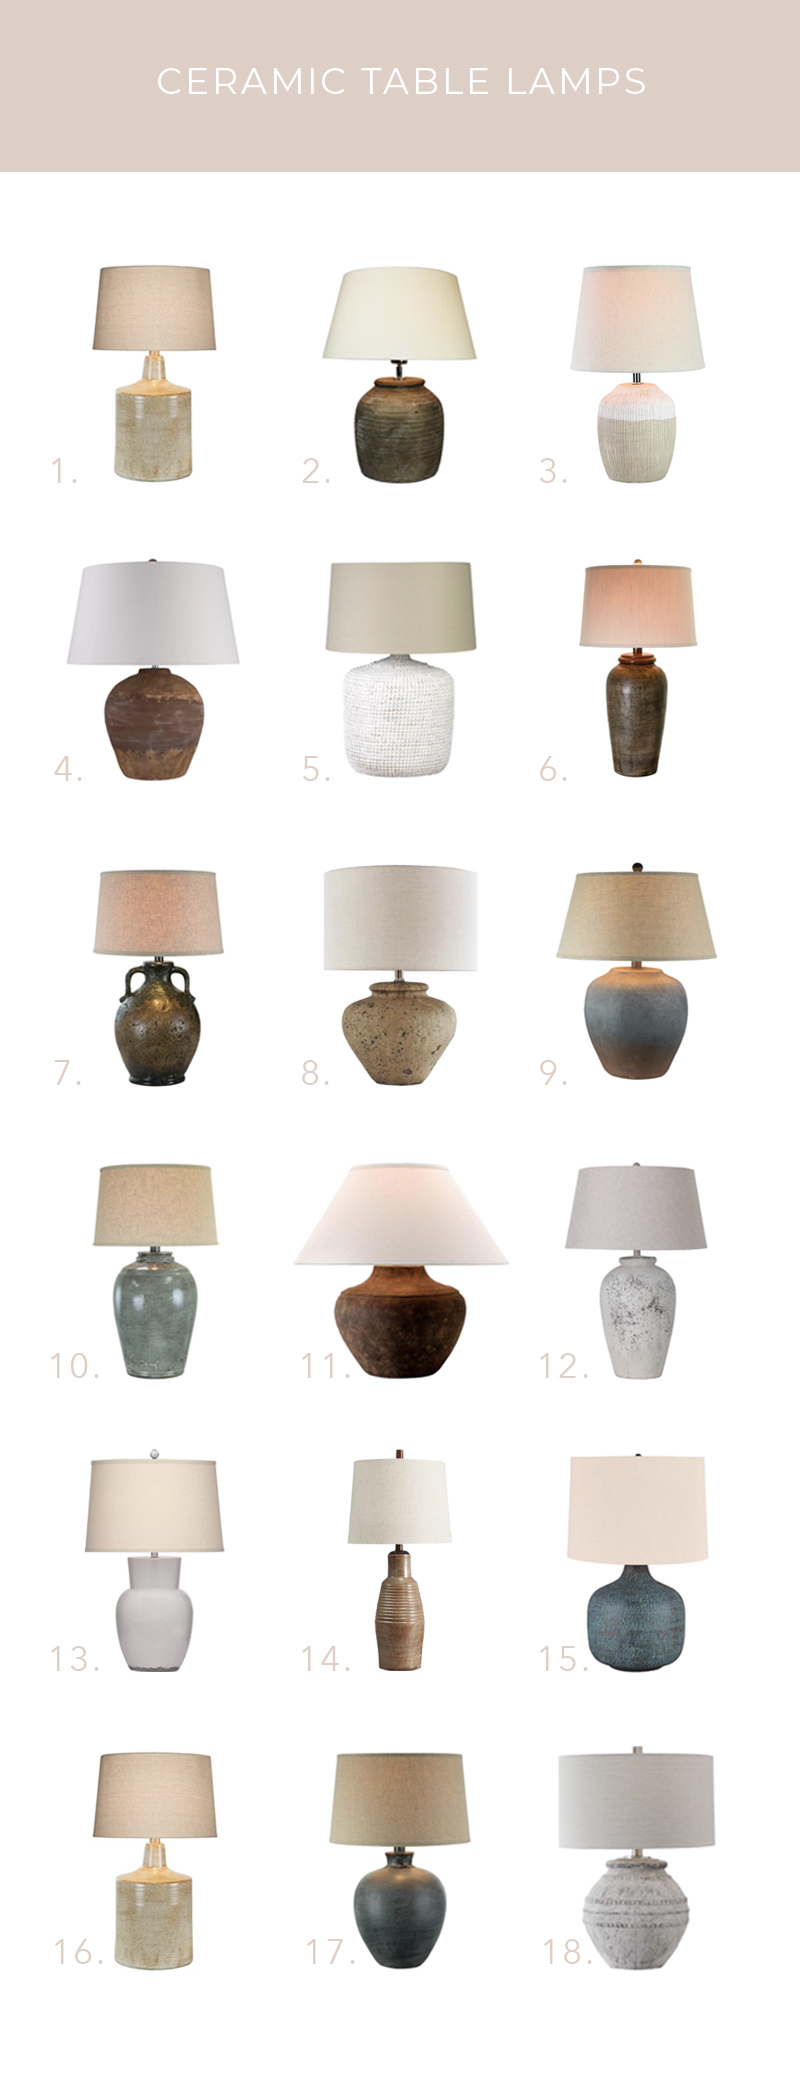
We put together a round up of some ceramic table lamps here that I really love as-is but that I think would also look great with this plaster tutorial. I usually gravitate toward a gourd style lamp, where the base is at least 50% as wide as the shade diameter, ideally even more than that, but absolutely feel free to get creative on the shape!
This post is sponsored by The Company Store. We’re planning on renovating our main bathroom and closet this year, which will likely change the footprint of our bedroom. But we were due for a little bedroom refresh, so I decided to see what I could do with basically just new bedding and art and nightstand…
We’re planning on renovating our main bathroom and closet this year, which will likely change the footprint of our bedroom. But we were due for a little bedroom refresh, so I decided to see what I could do with basically just new bedding and art and nightstand styling – all things that would easily translate after making bigger changes later this year. I worked with The Company Store on this little refresh and I’m absolutely obsessed!
I always suggest starting with your rug as a jumping off point in decorating. I bought this antique Chinese rug for $250 years ago, and while it’s seen better days, I still love it. The indigo blue ground color is punchy but still livable and the beige and mauve tones in the pattern were a great jumping off point for my bedding selection.
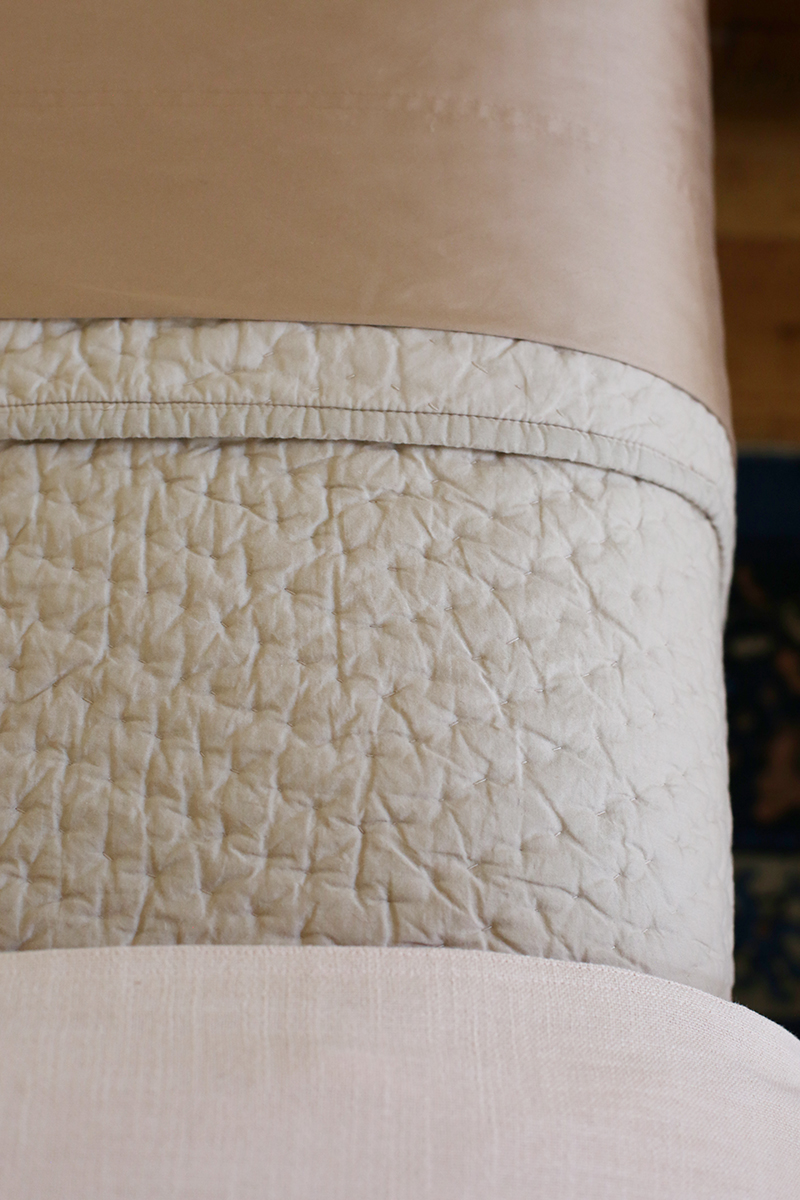
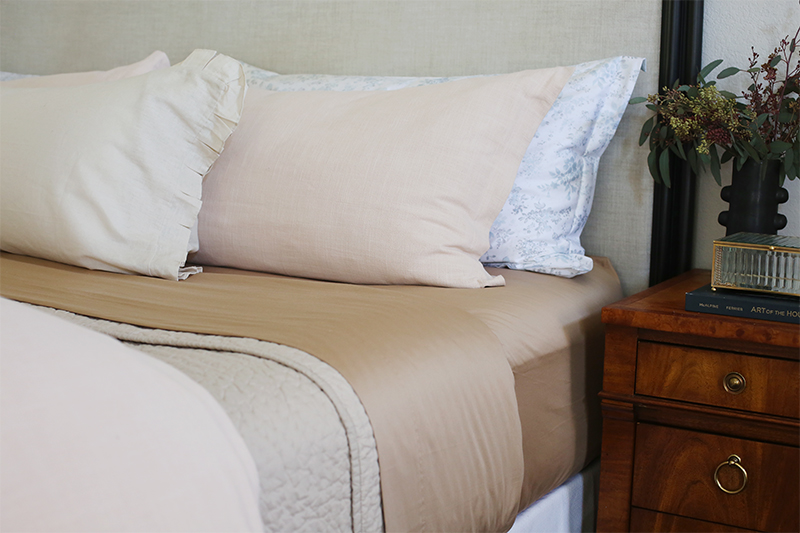
I like to have lots of layers on my bed and love having a duvet folded at the foot on my bed. I found this gorgeous dusty blush linen duvet cover to pair with my amazing down insert from The Company Store. The insert has a loop in each corner and the covers all have ties sewn into the inside so you never have the problem of your insert getting bunched up!
While I love making my bed every morning, I’ve simplified my everyday bed styling here to have no decorative pillows at all. My husband likes to sleep with three pillows and I like two, so I styled our regular bed pillows with one in the front with a different sham, so it sort of looks like a decorative pillow. I really like how this looks and functions!
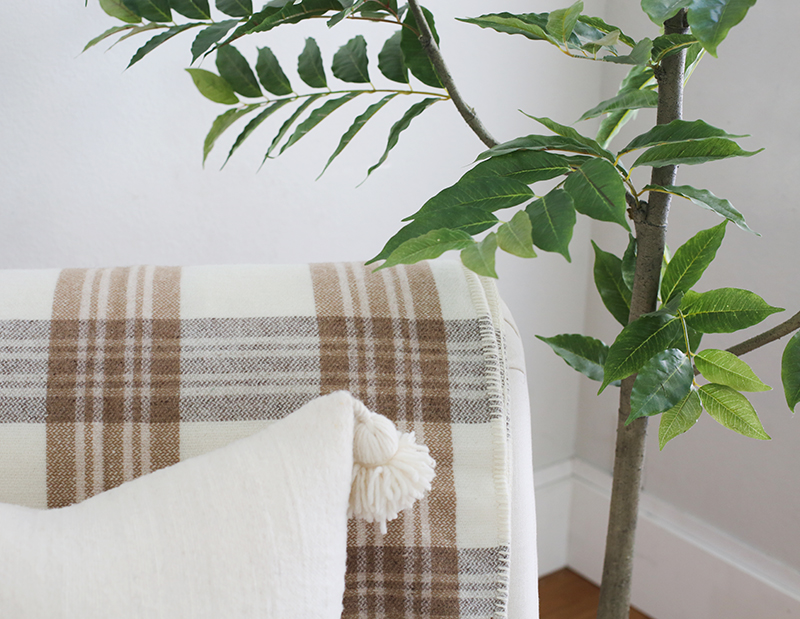
I also added two throws in the room for a little color and texture. I put this cornflower blue waffle blanket on the bed and this GORGEOUS wool plaid throw on our arm chair. I love the combo of floral pattern in the rug and the back shams with the plaid! It’s amazing to me how just changing the bedding makes this space feel completely different and new without having to get any new furniture!
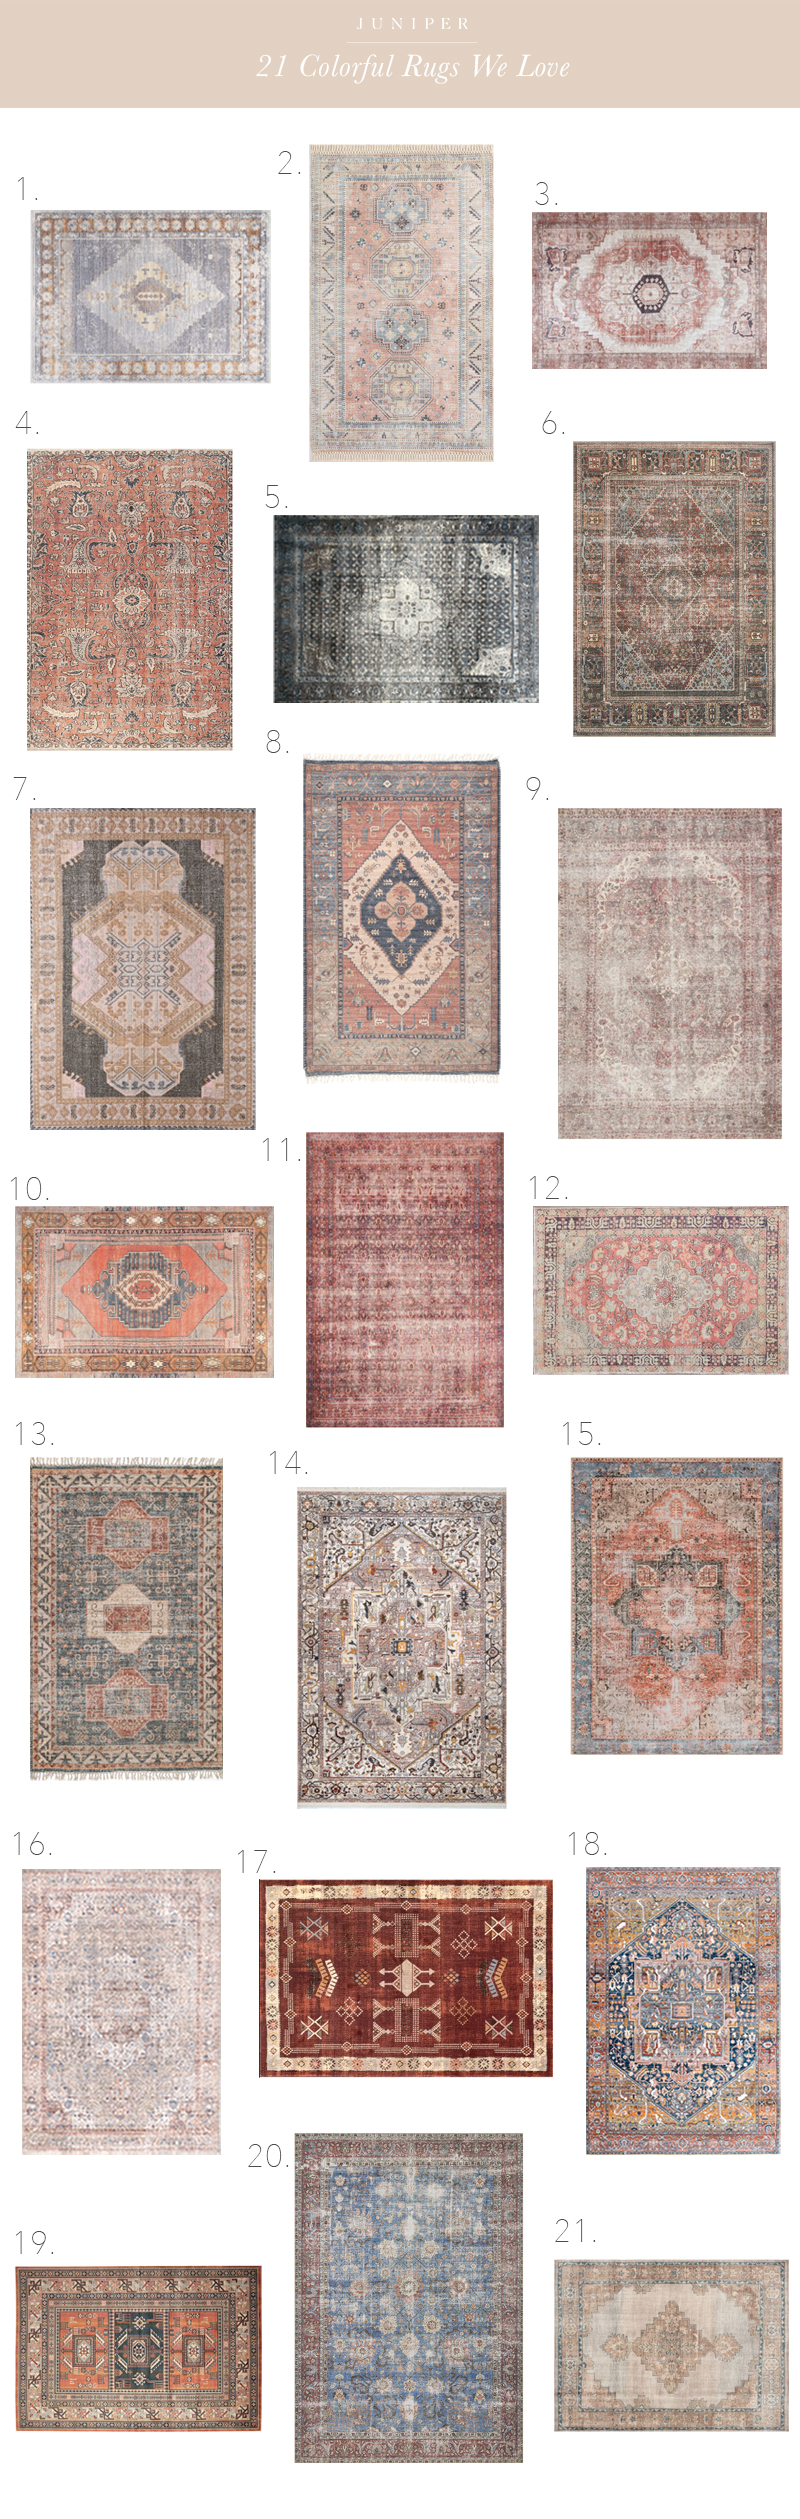
Last week we talked about using neutral rugs in your space. Neutrals are an easy and comfortable choice, but we know that a lot of you prefer a bolder, more colorful look! BIG SUR print // KNOTS print rug // bed // wall sconce Colorful rugs are ideal in homes with kids and pets, because…
Last week we talked about using neutral rugs in your space. Neutrals are an easy and comfortable choice, but we know that a lot of you prefer a bolder, more colorful look!
Colorful rugs are ideal in homes with kids and pets, because they hide just about everything and stay looking new and fresh for much longer than a neutral one! We rounded up some of our favorite colorful options, including a few old favorites!
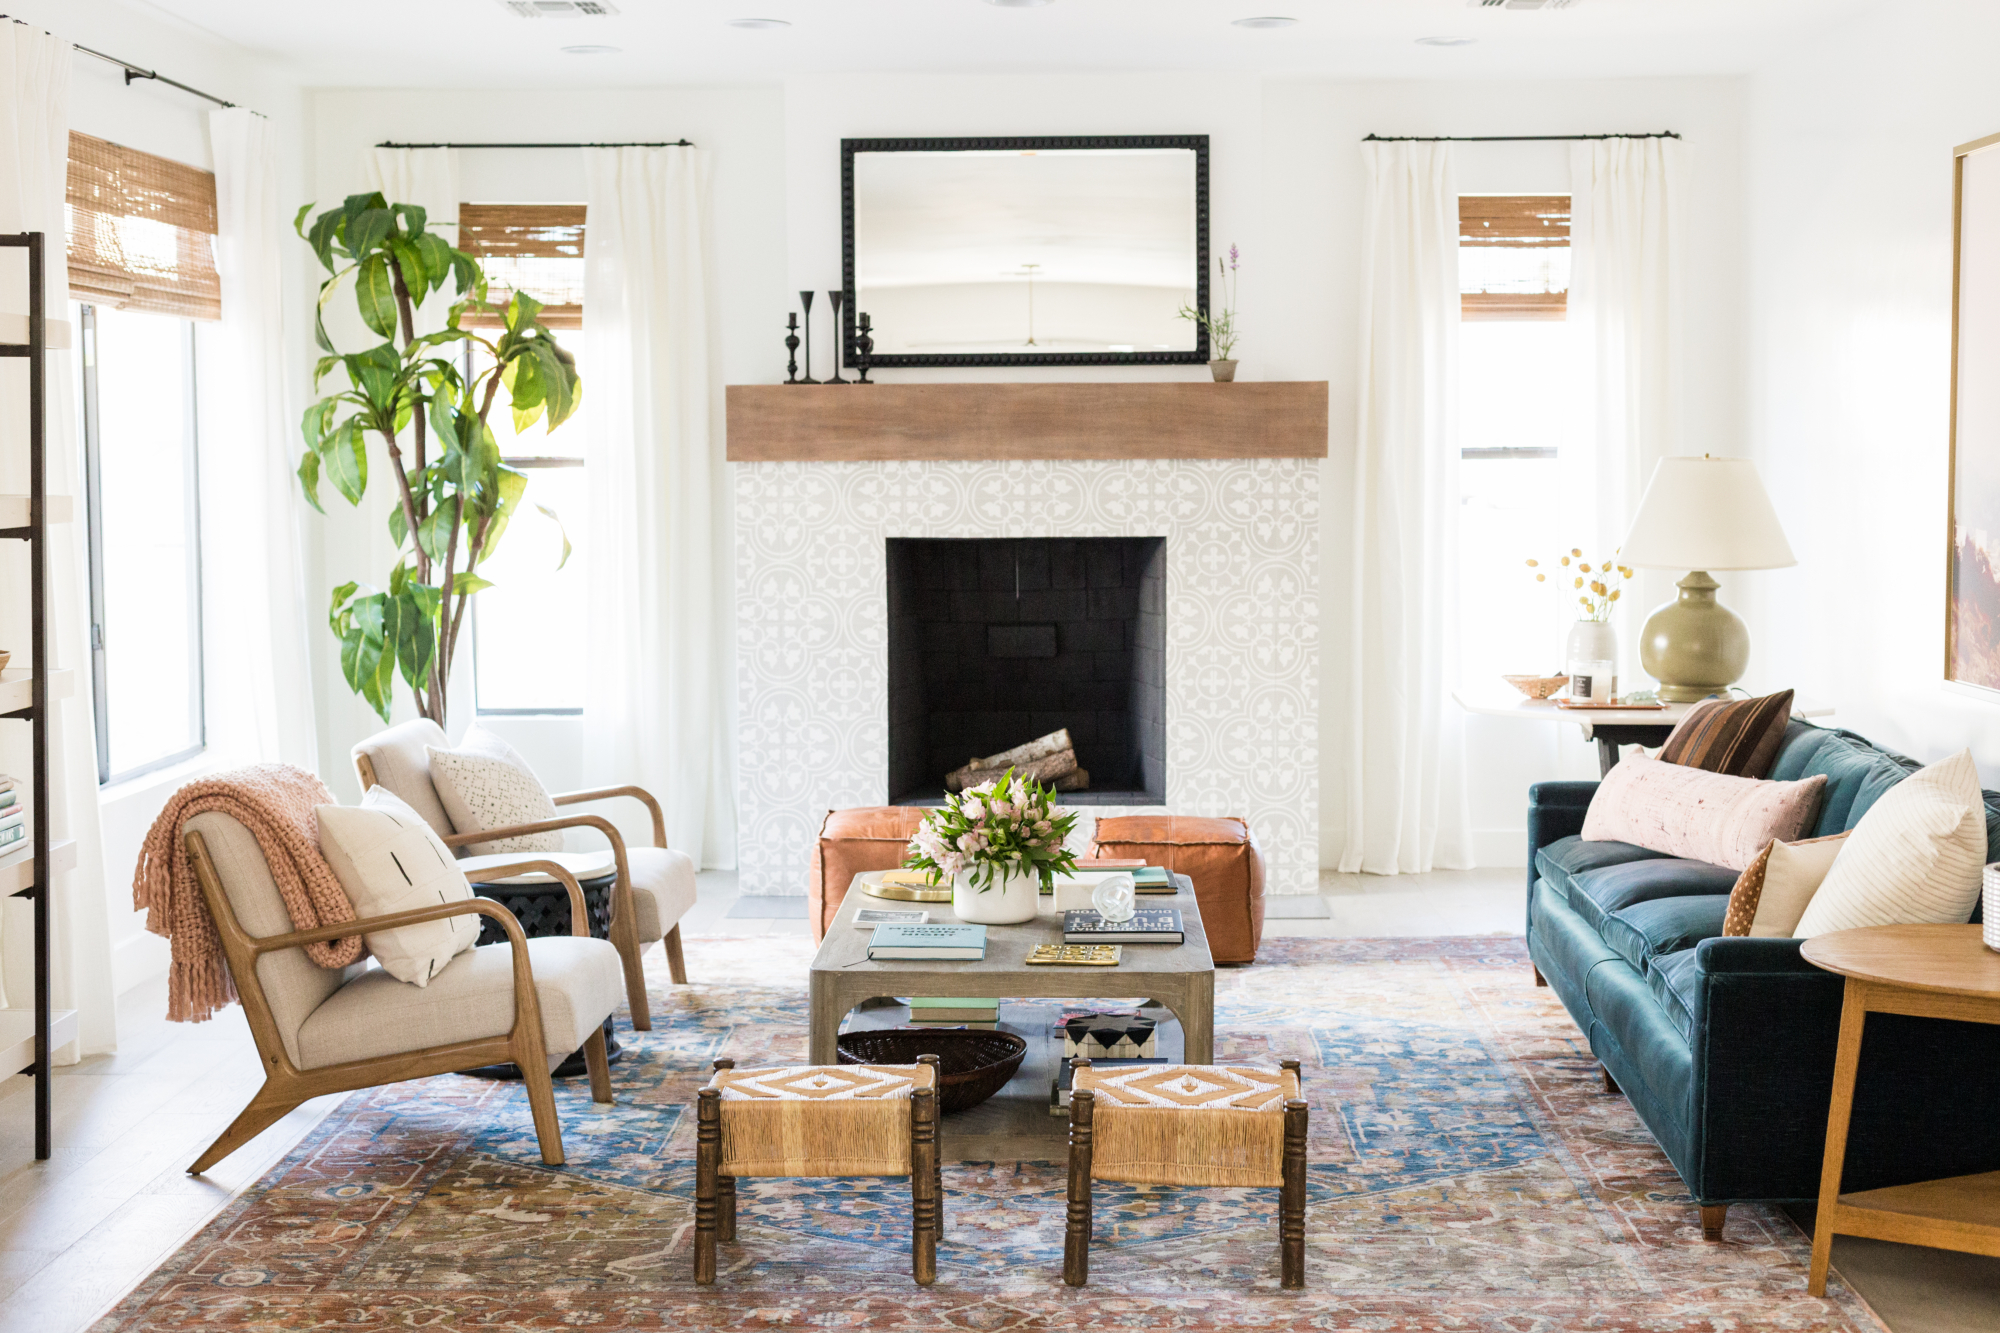
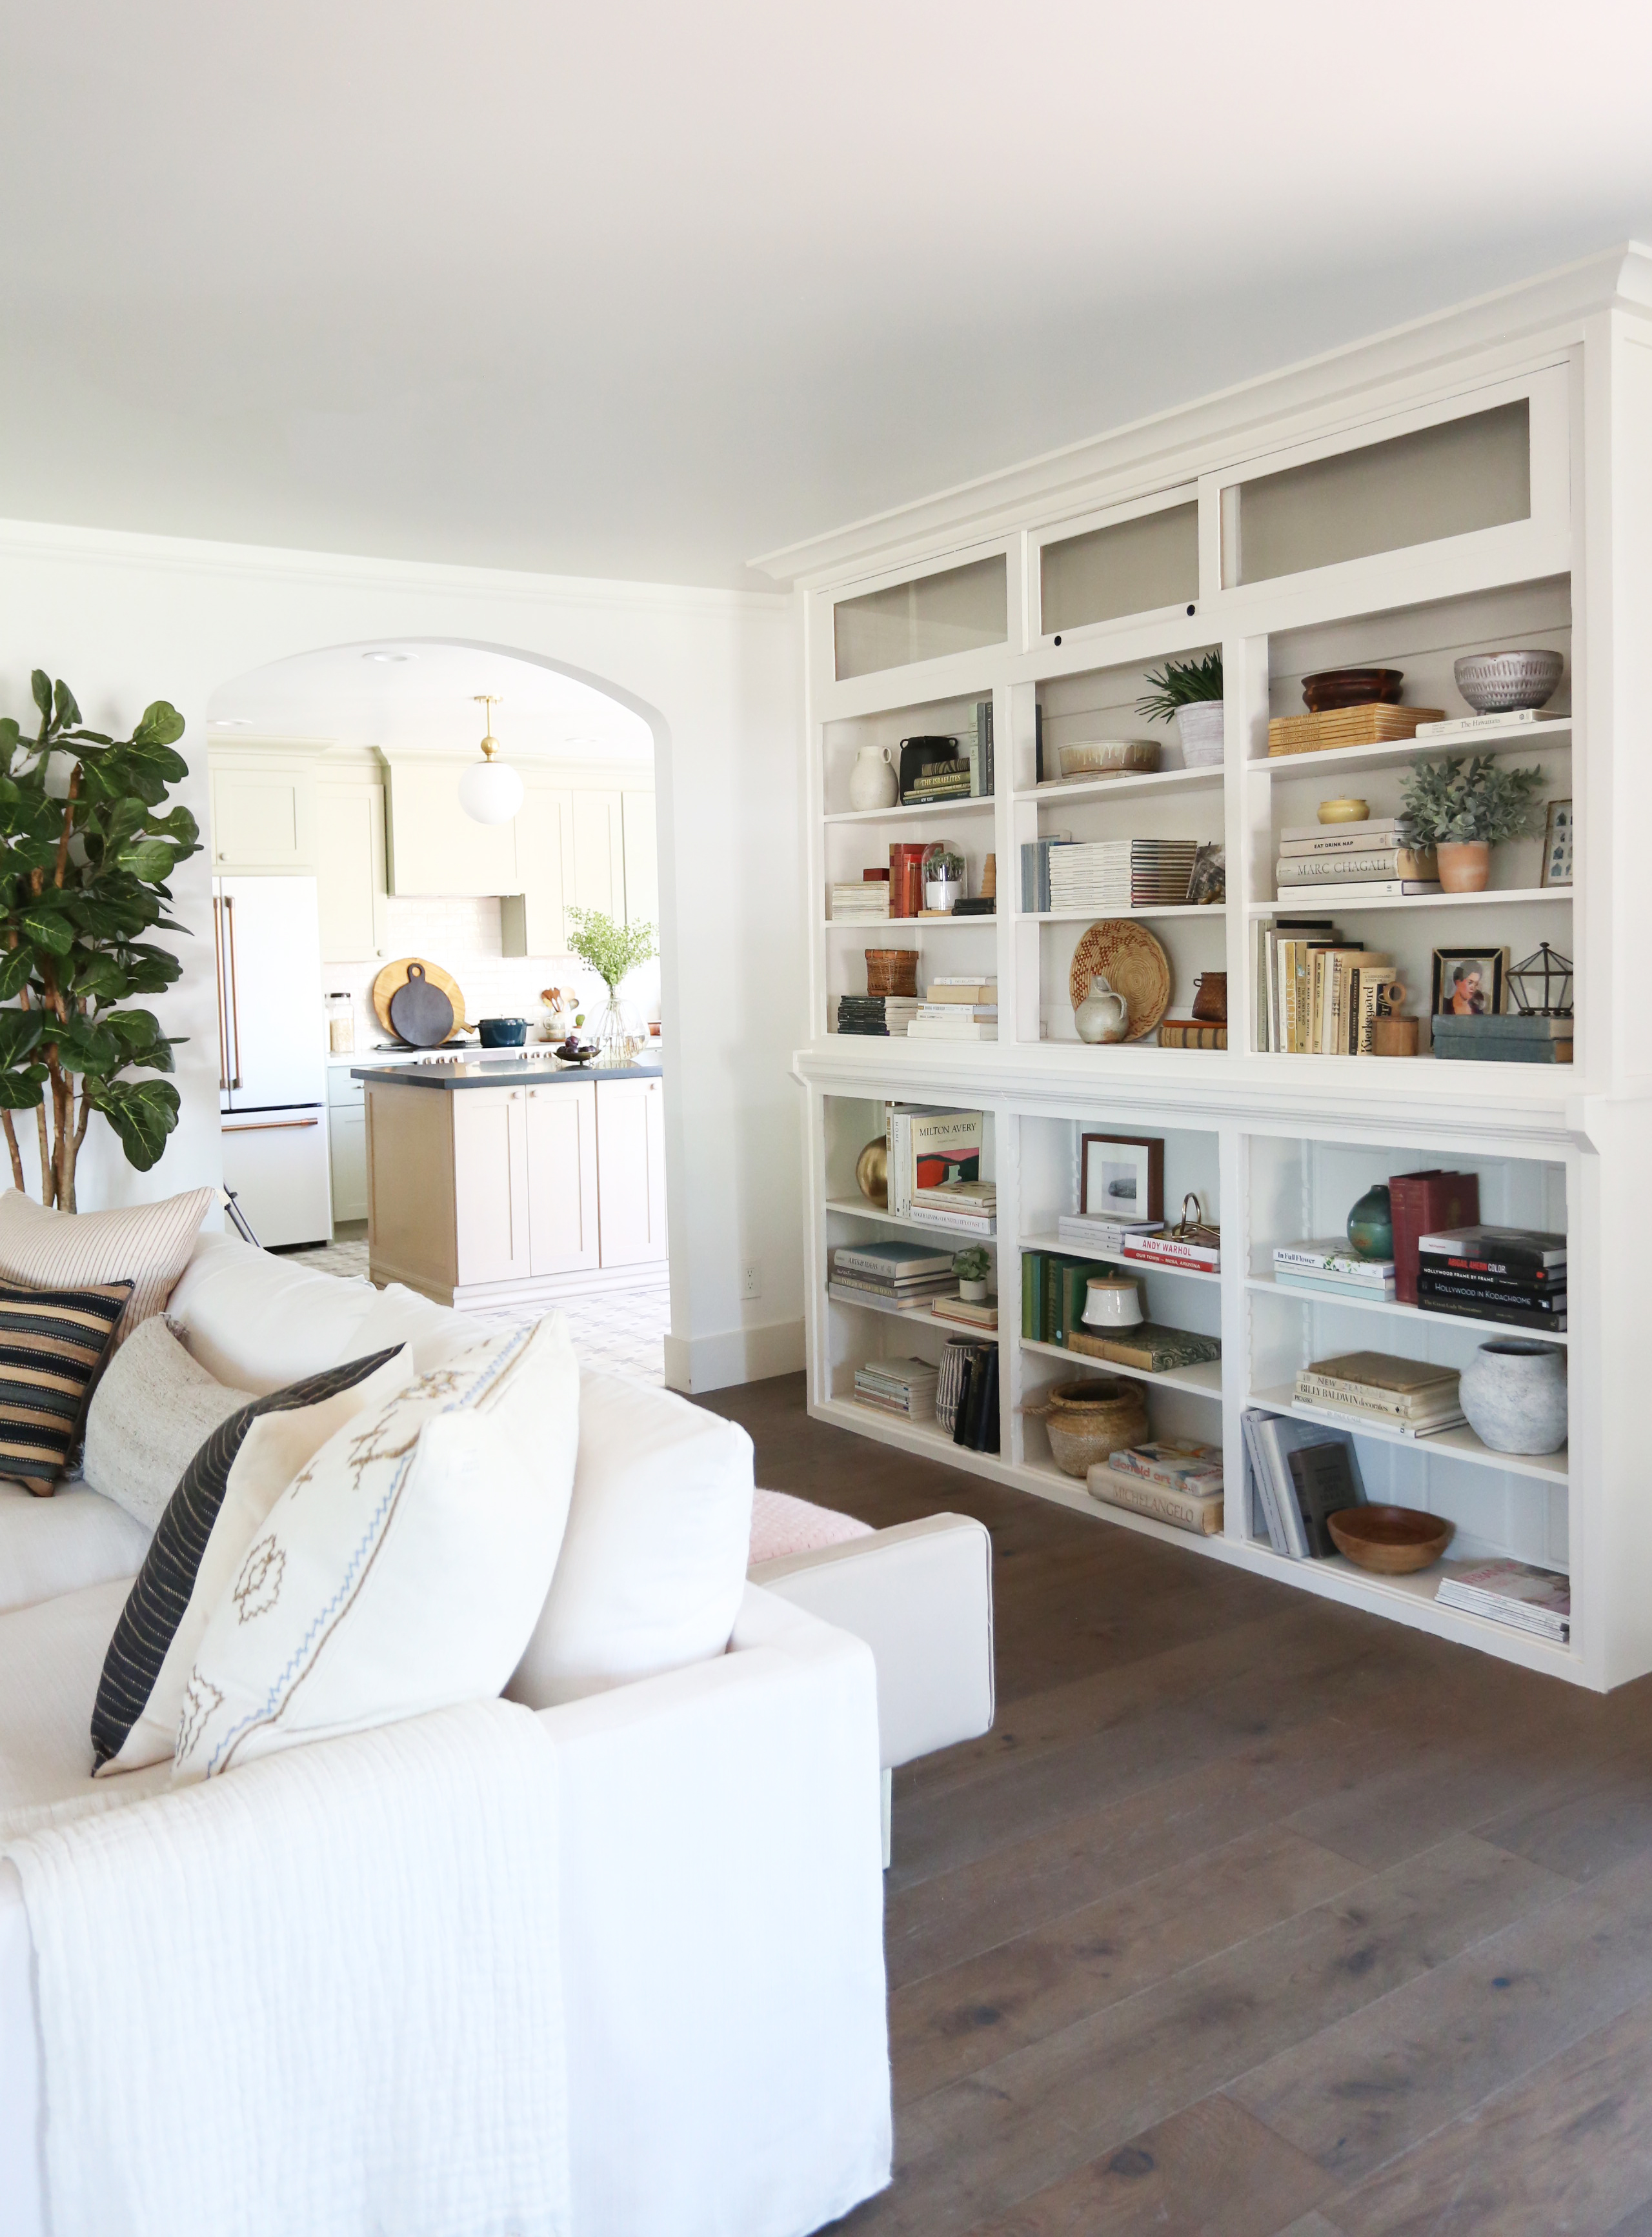
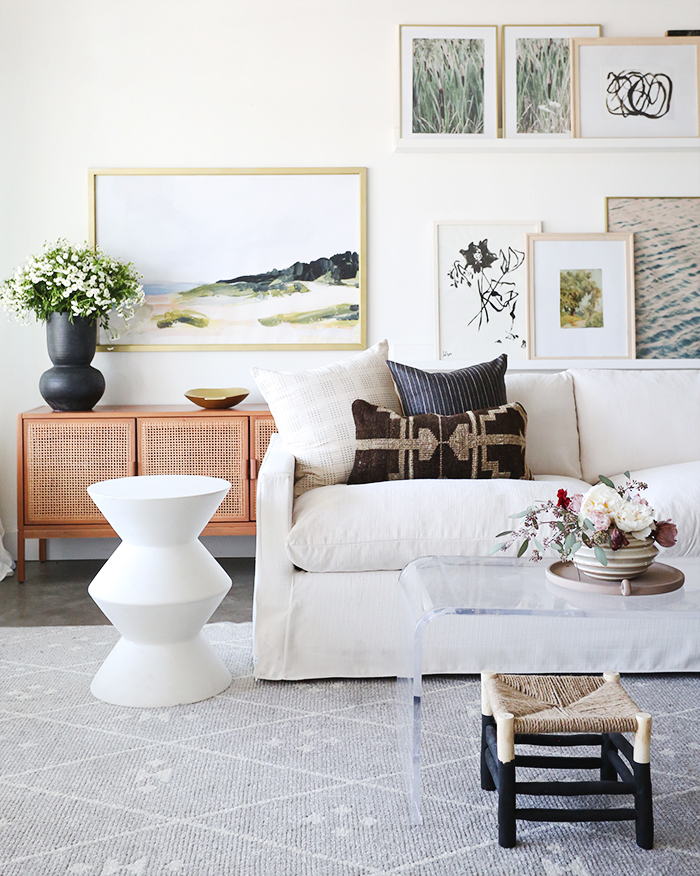
When we first toured the Evergreen House we stumbled on these amazing original built-ins in one of the small, awkward bedrooms. We knew we wanted to try to salvage them and decided that the living room would be the perfect new spot for them. Built-ins of this scale can feel a little overwhelming, so we…
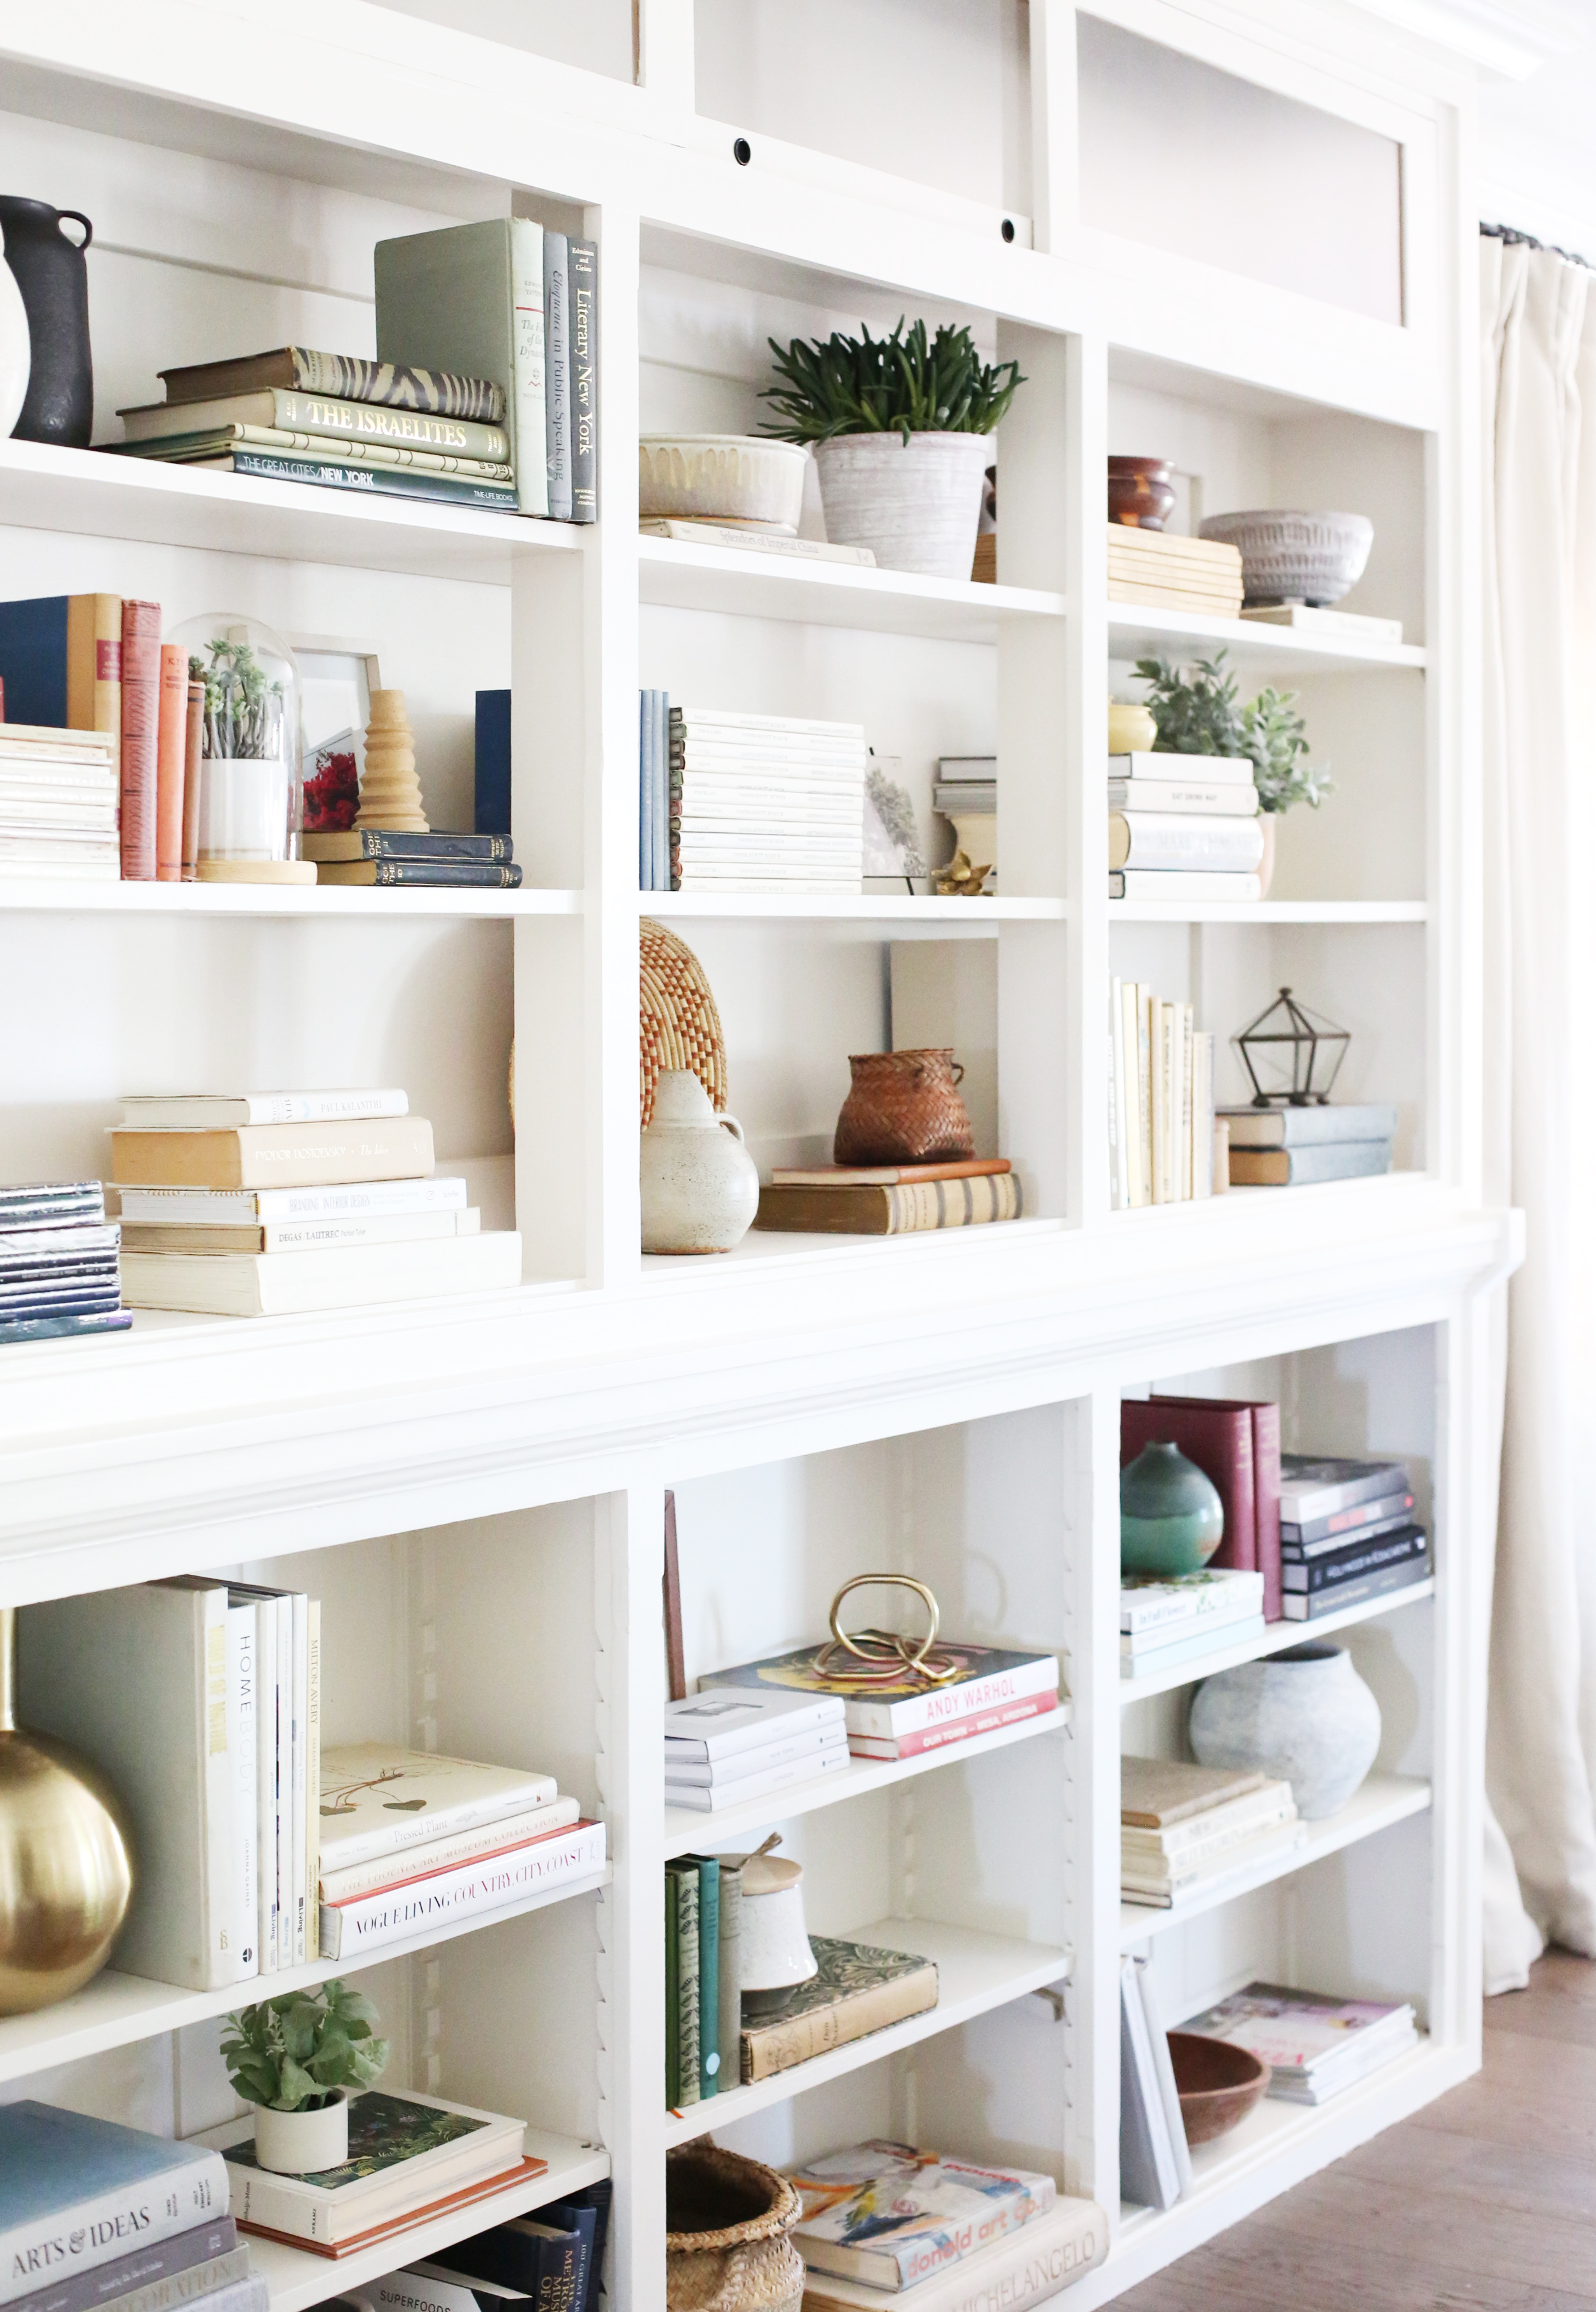
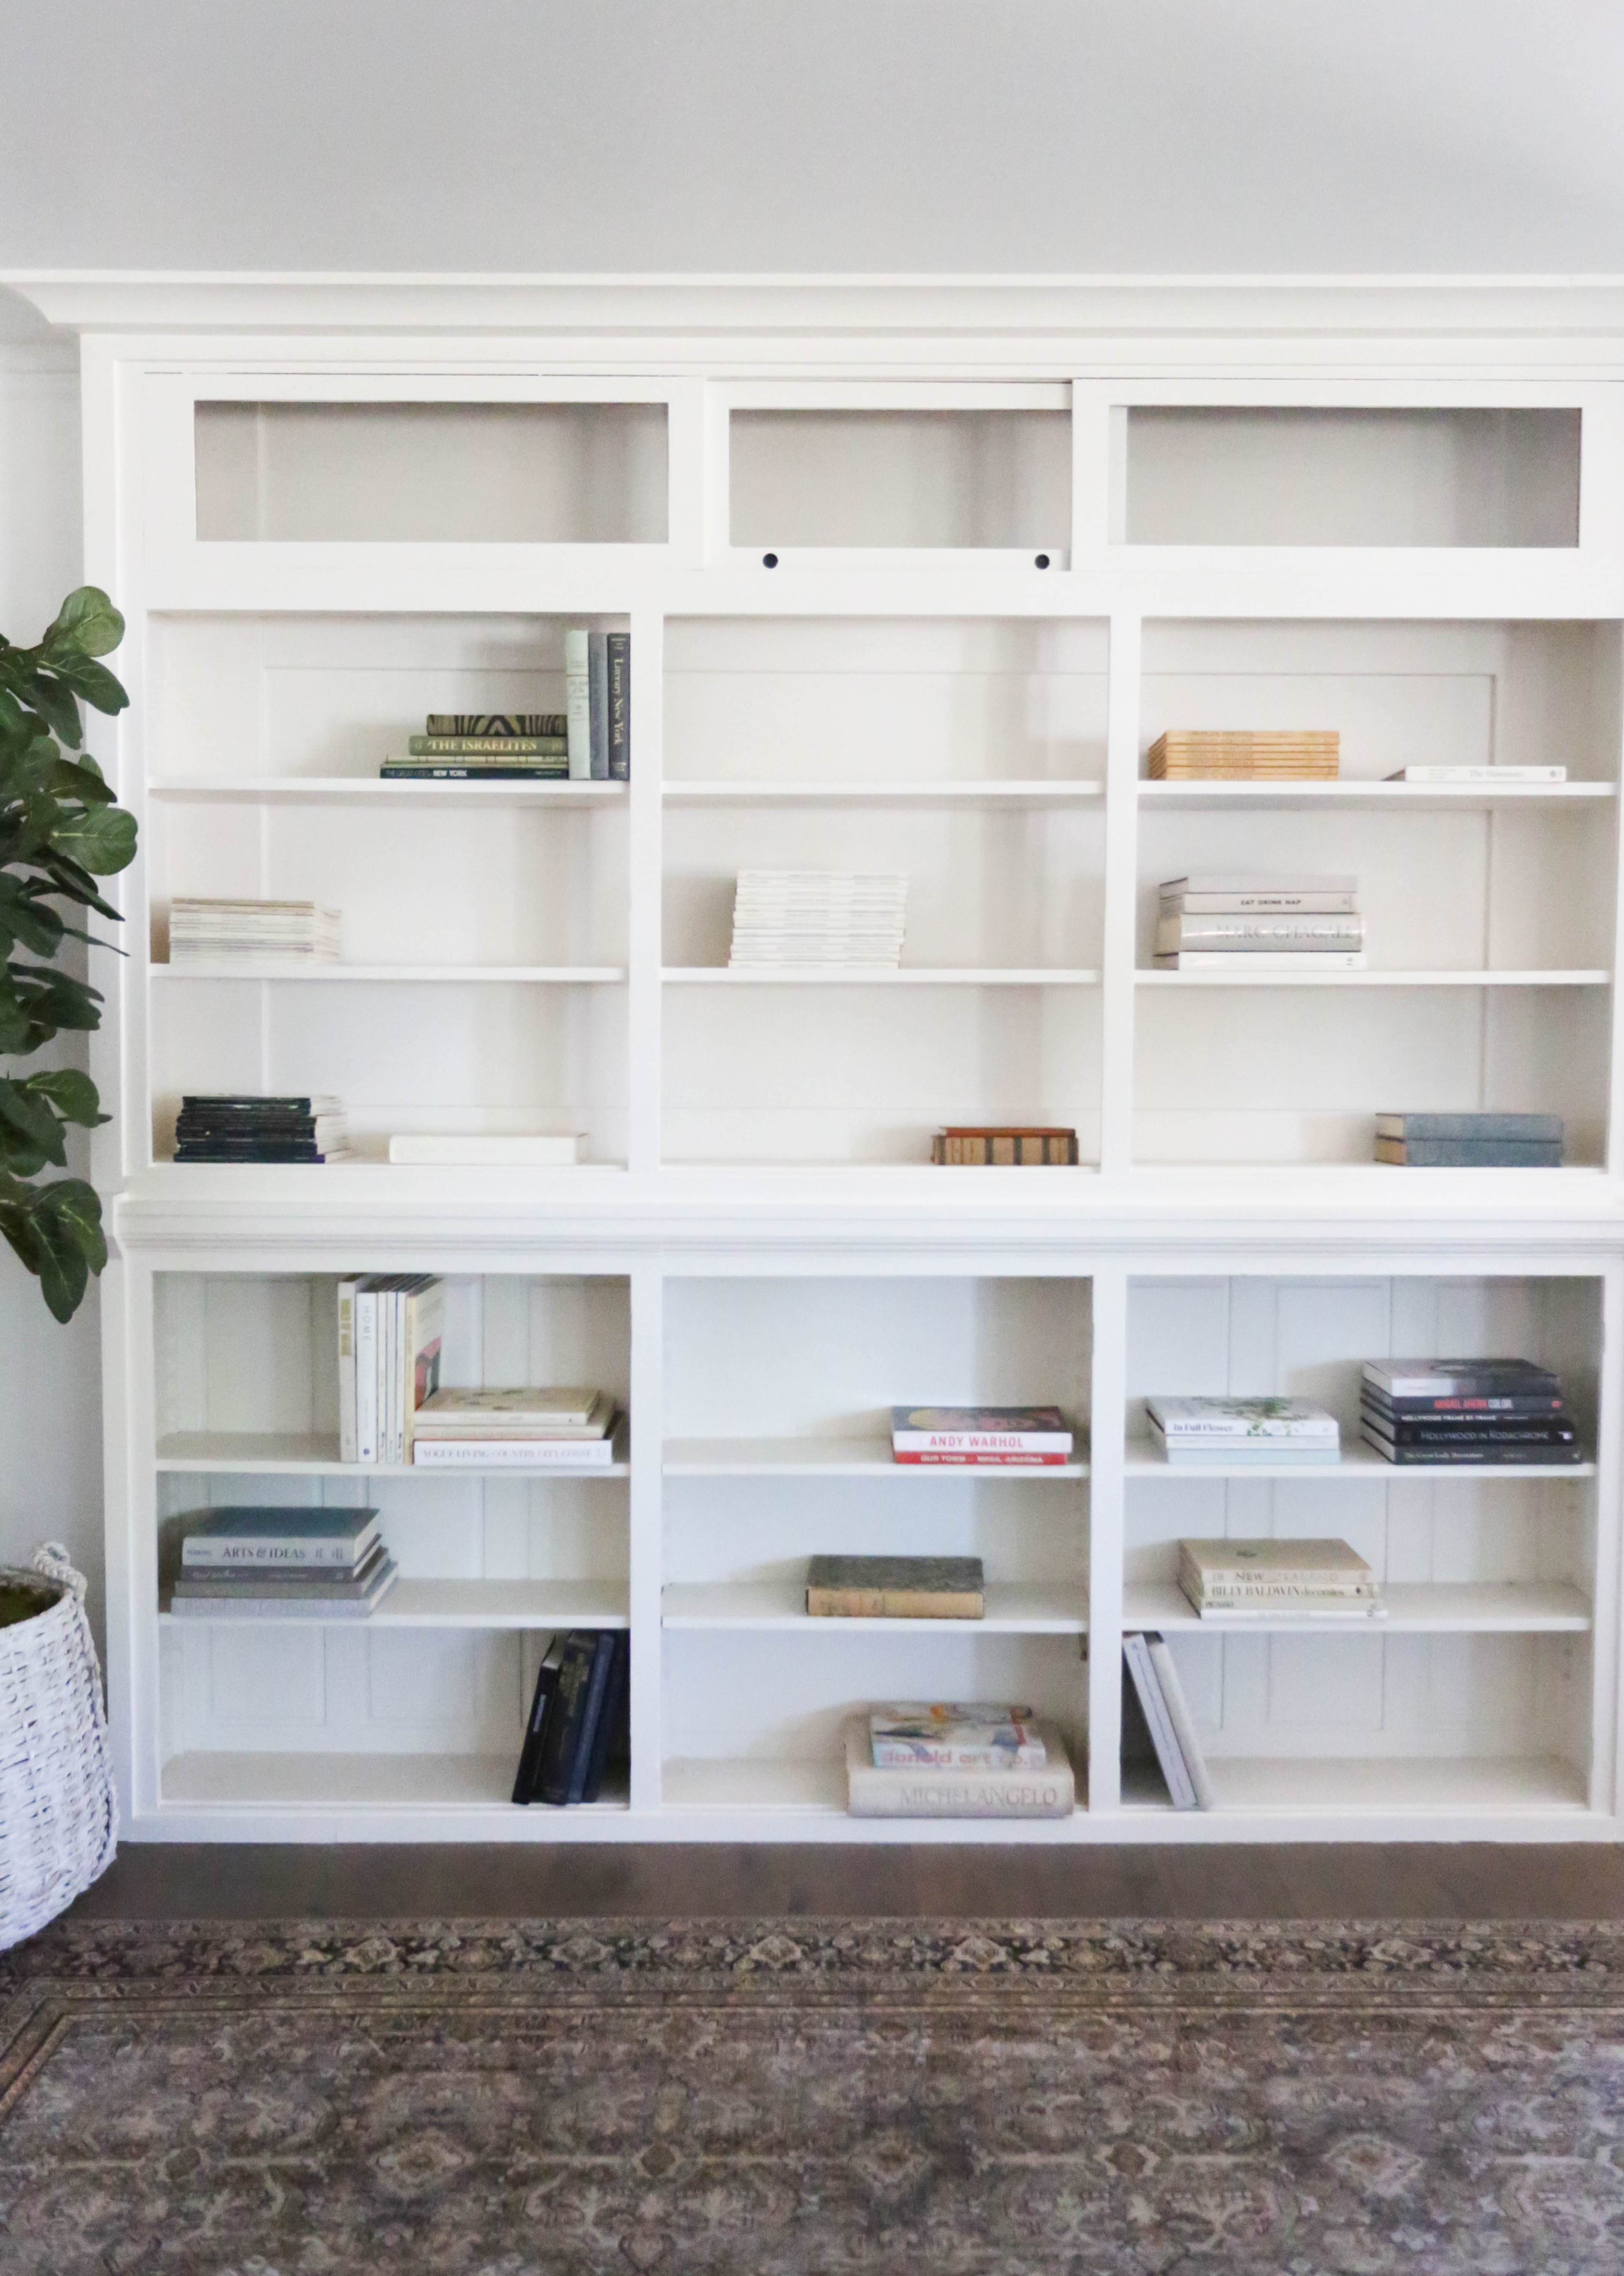
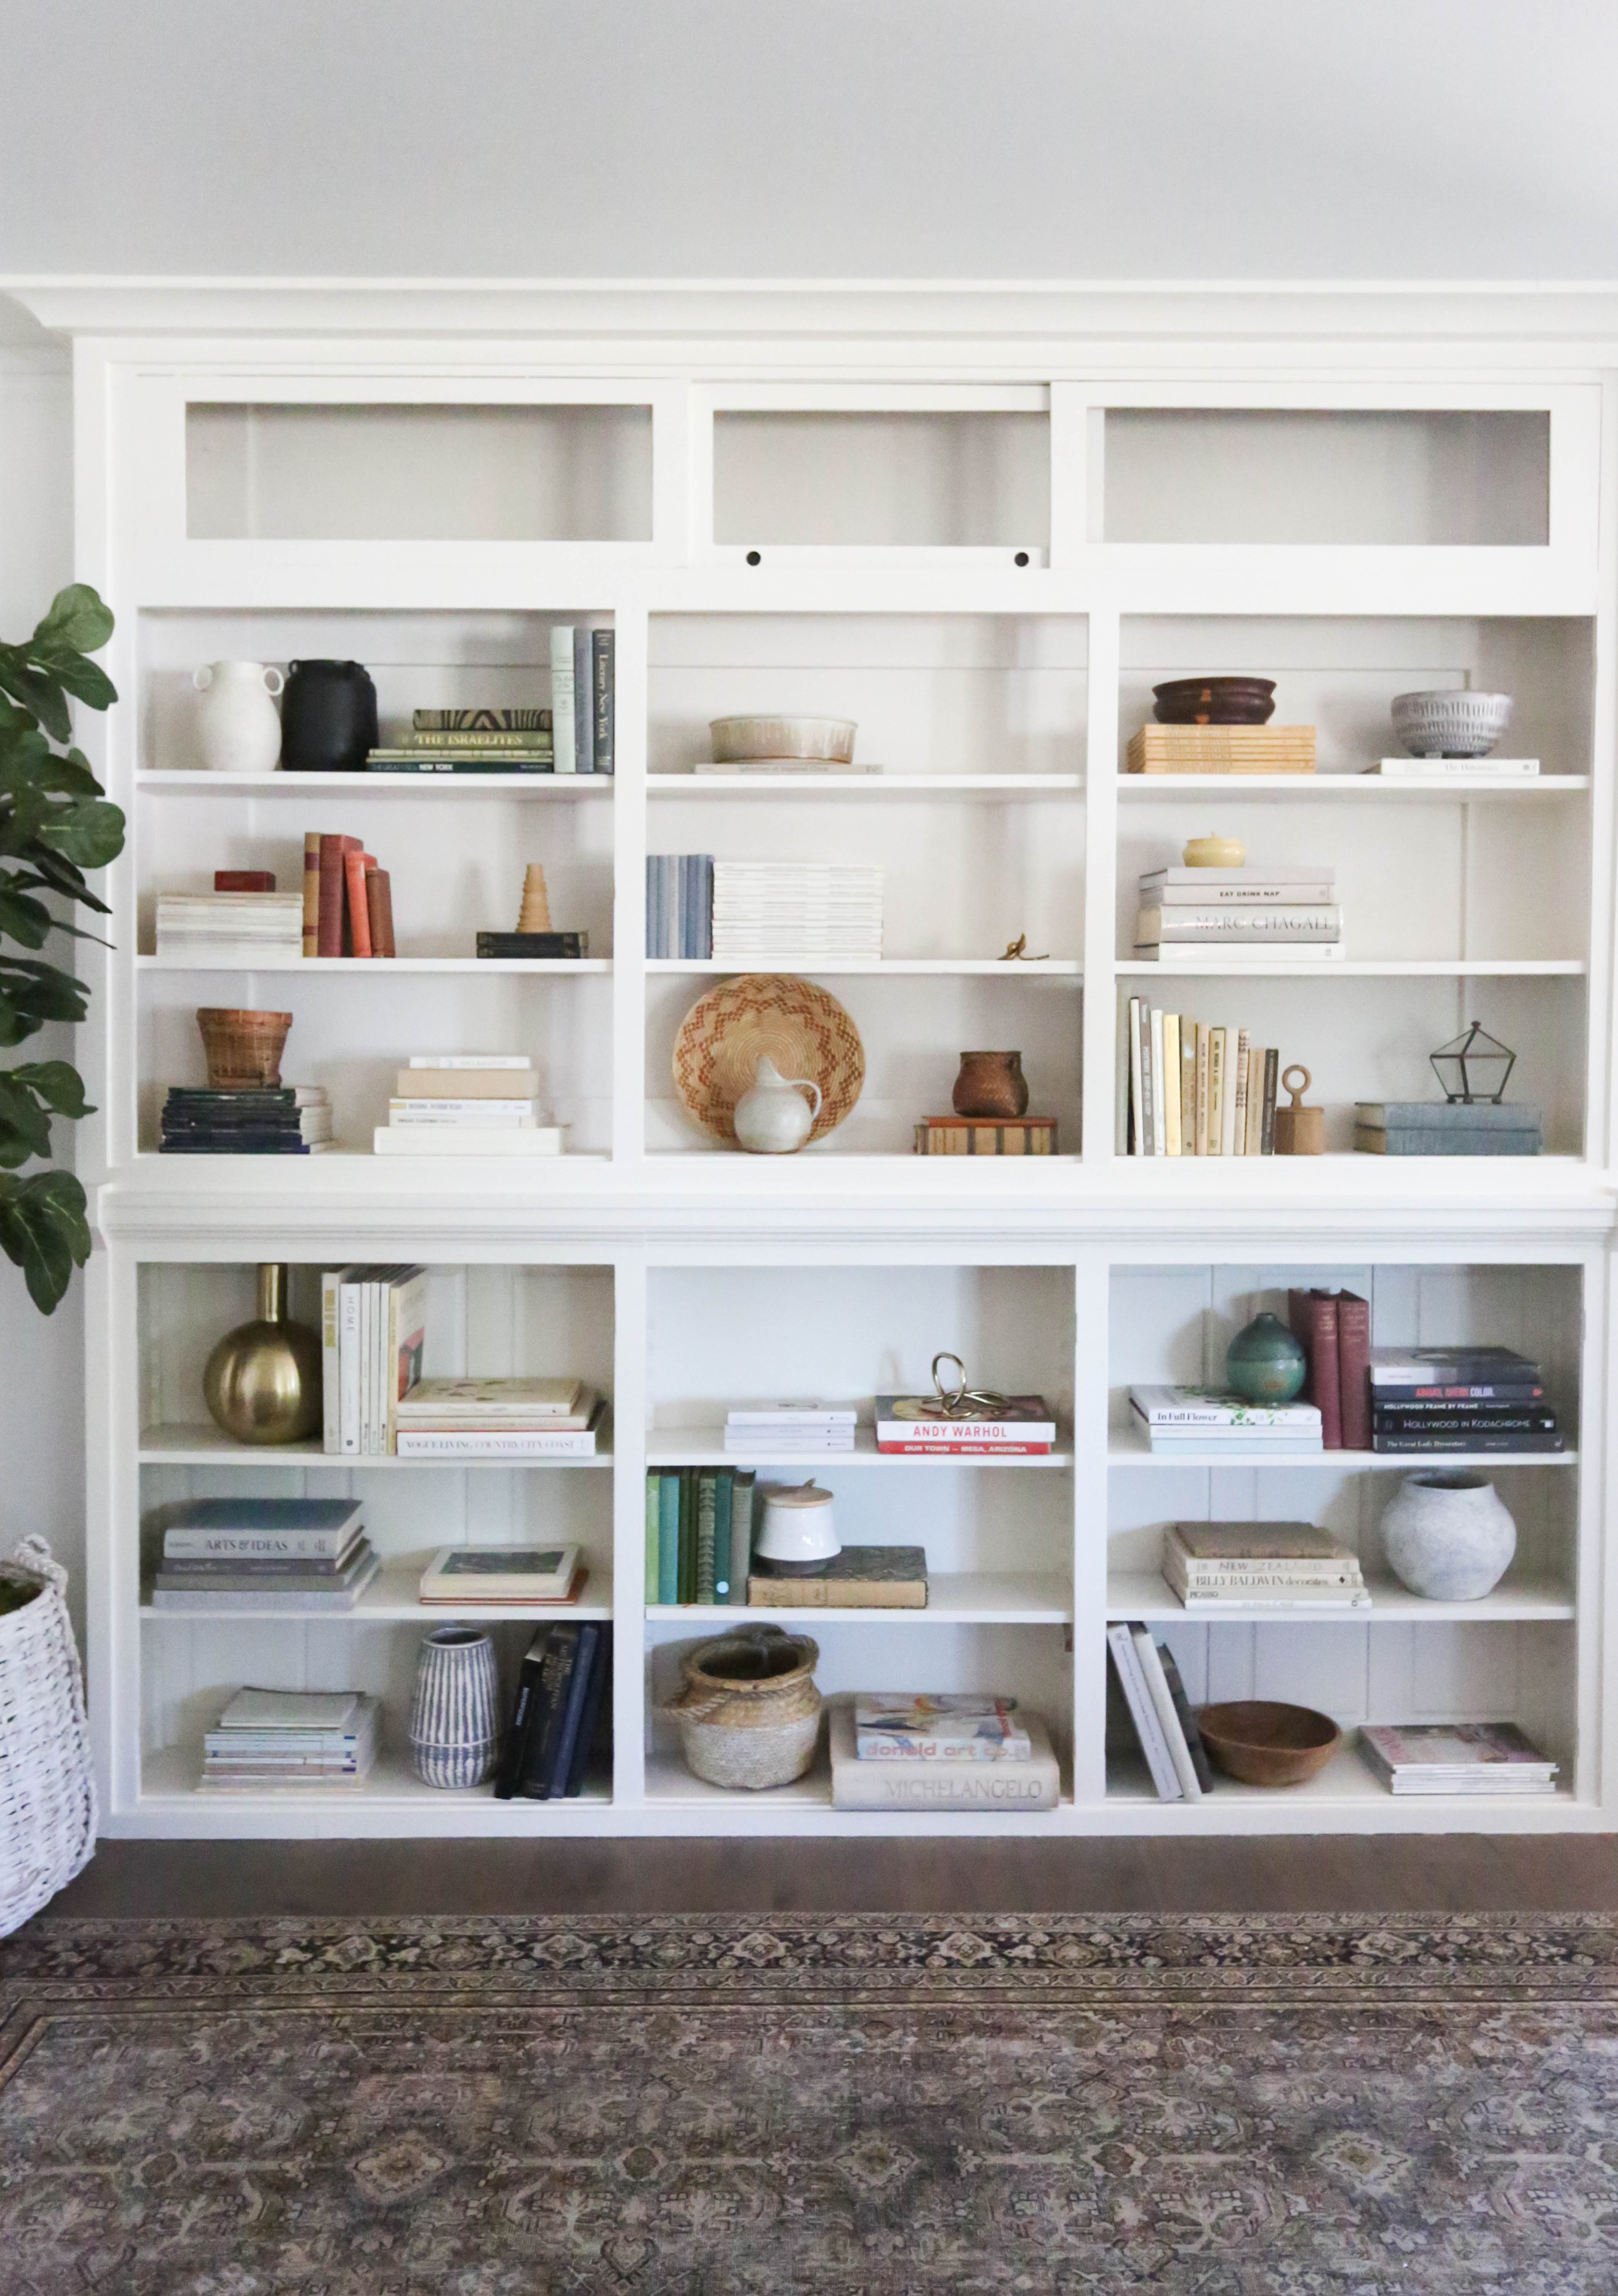
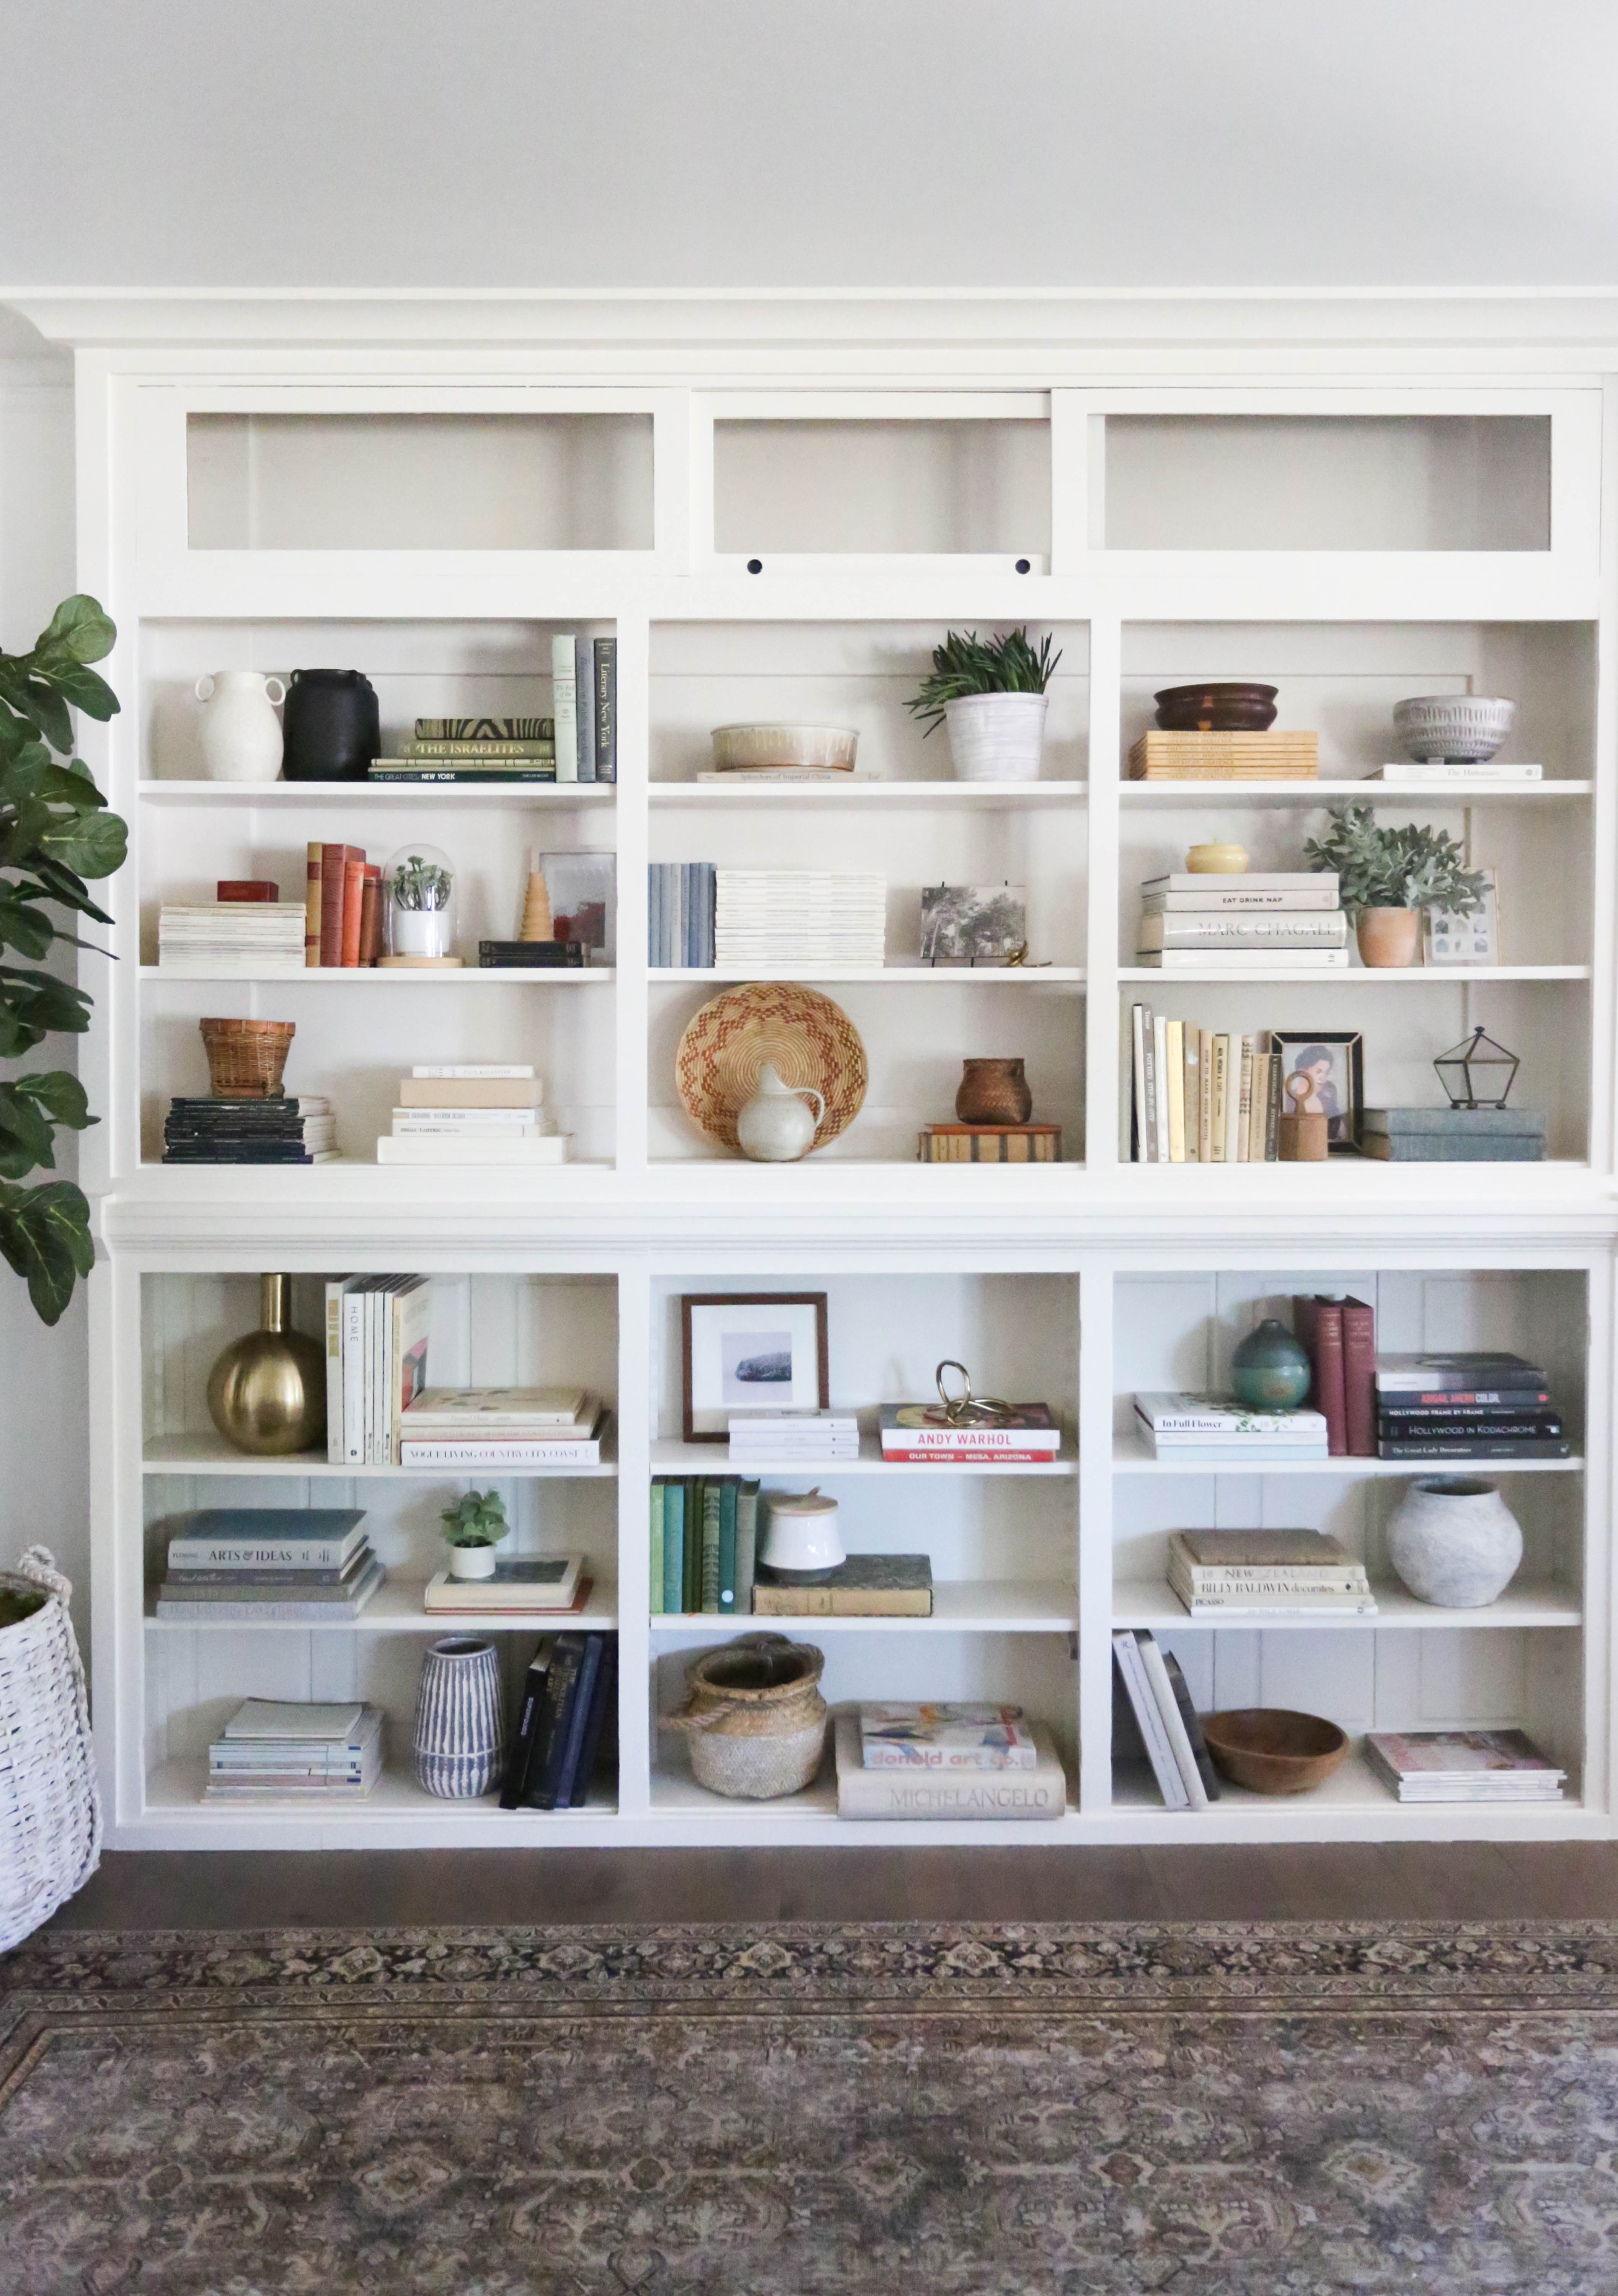
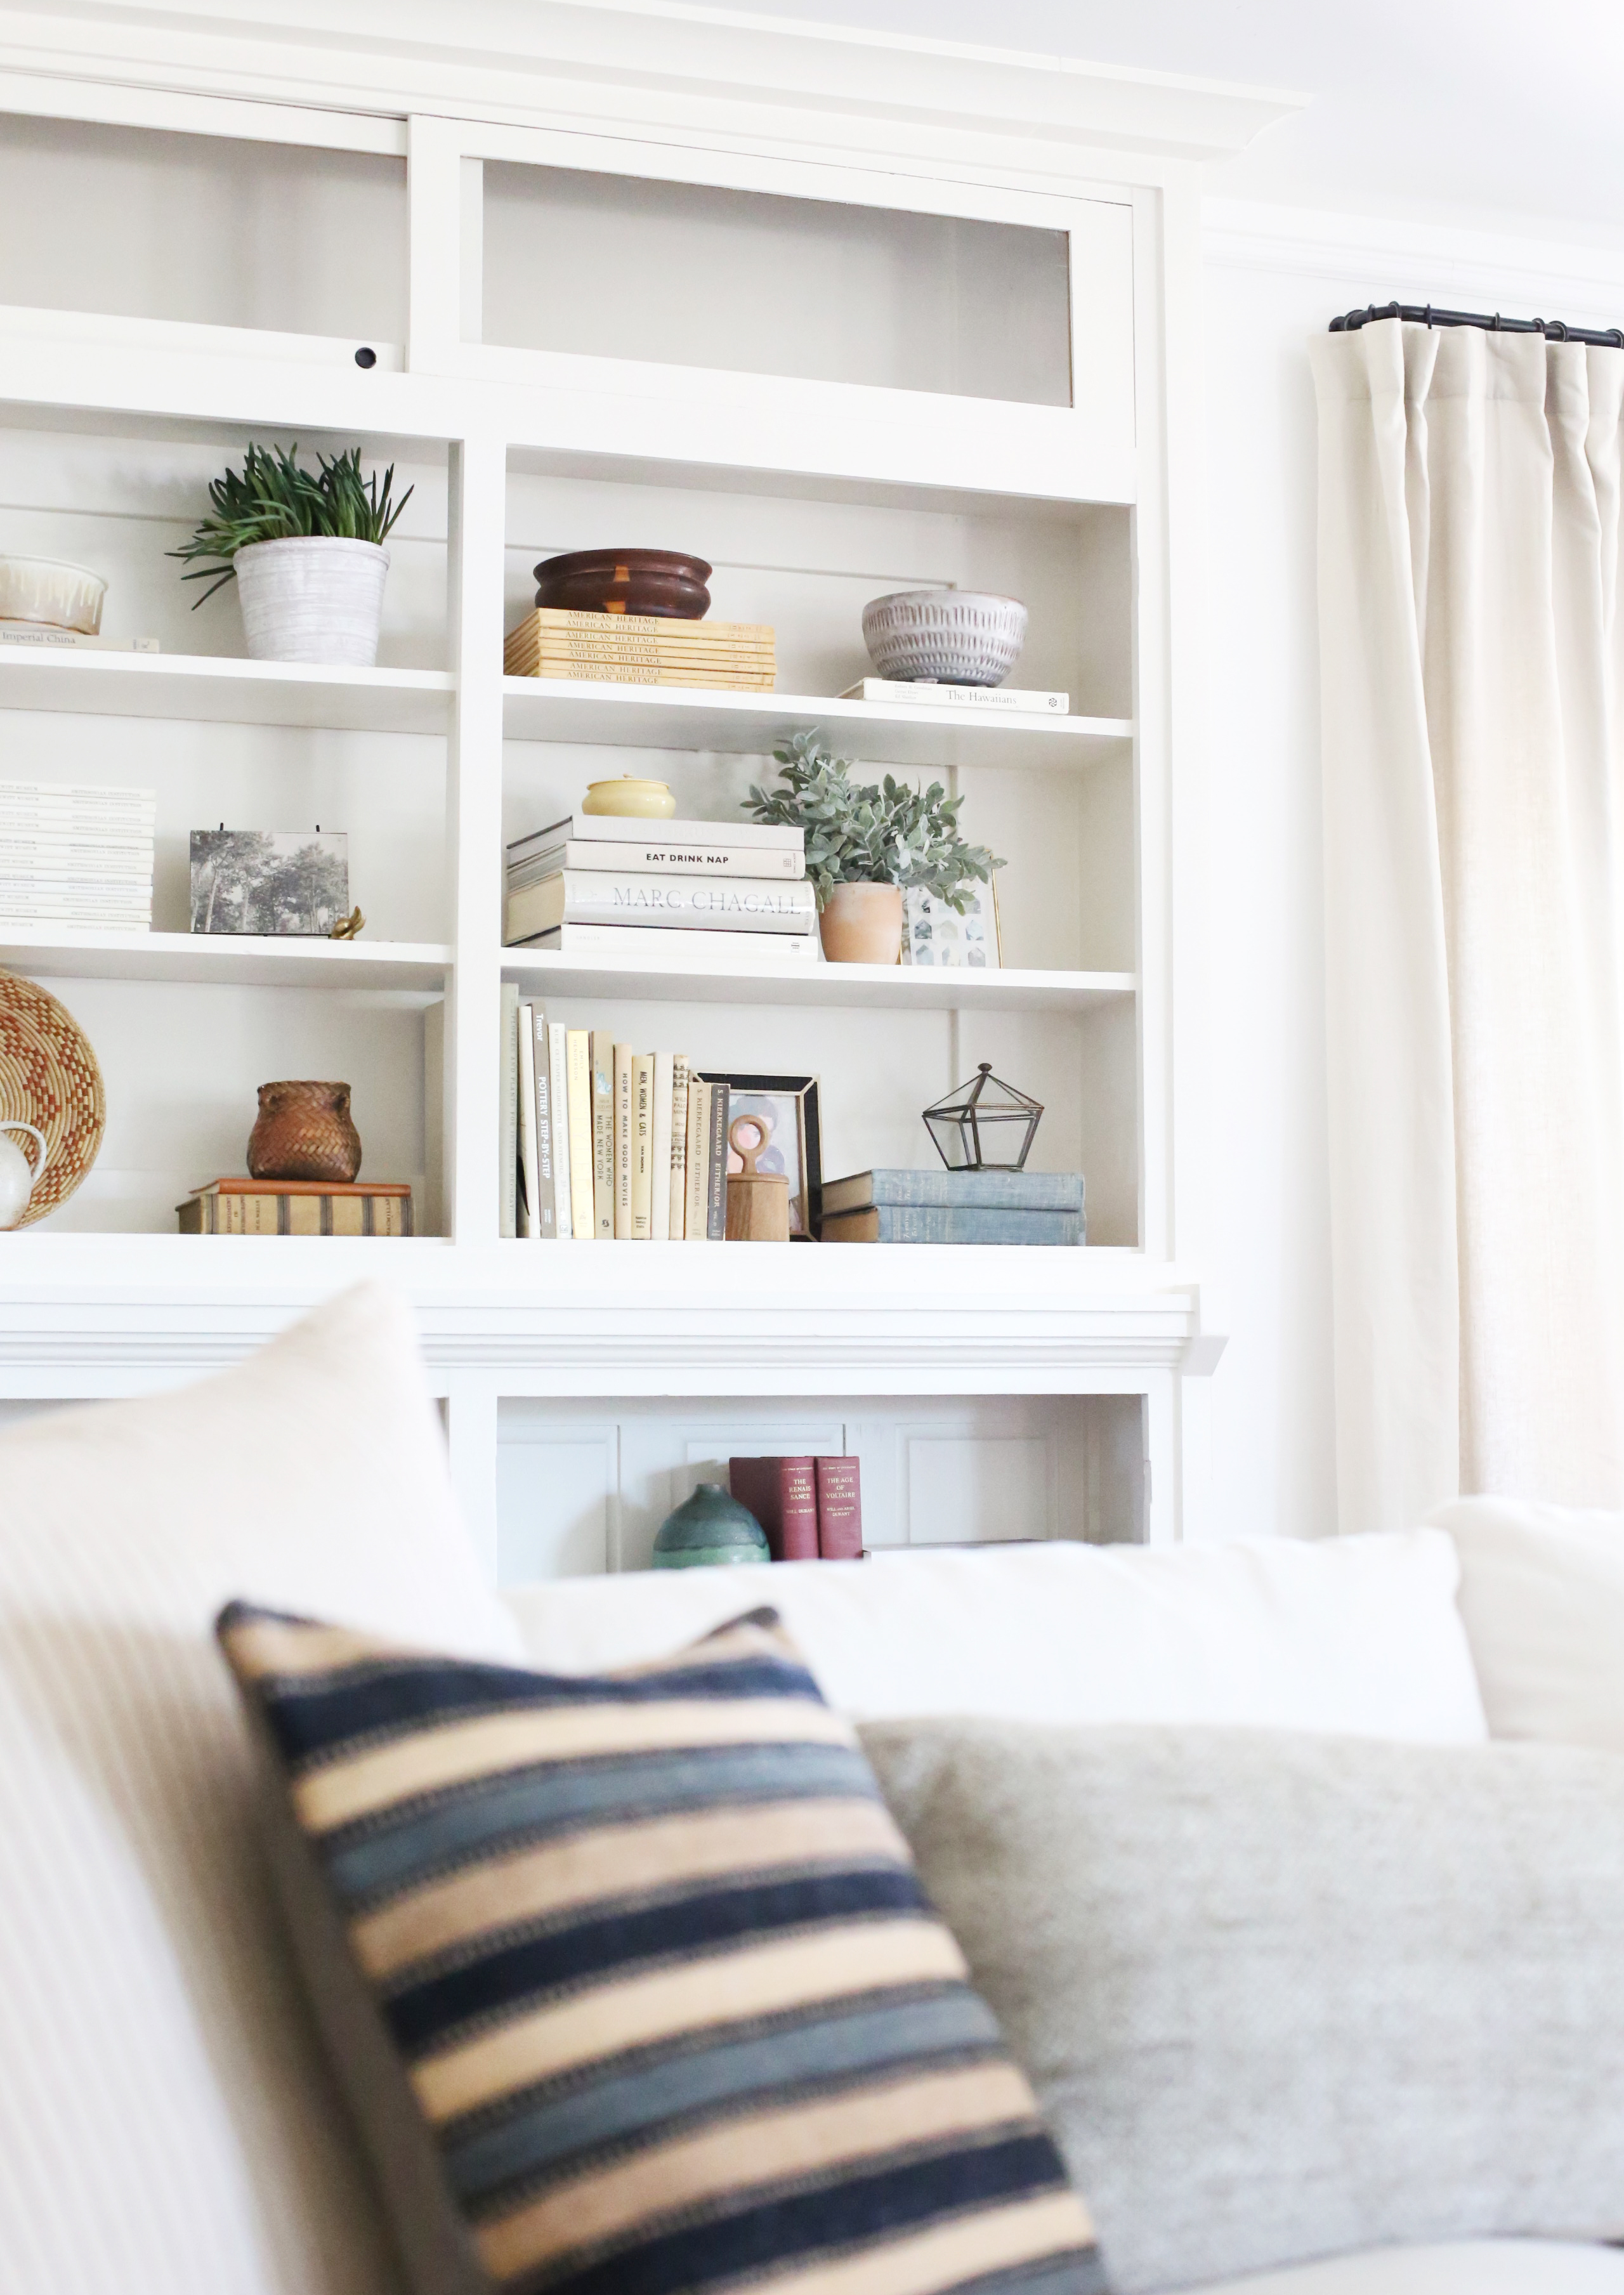
When we first toured the Evergreen House we stumbled on these amazing original built-ins in one of the small, awkward bedrooms. We knew we wanted to try to salvage them and decided that the living room would be the perfect new spot for them. Built-ins of this scale can feel a little overwhelming, so we broke down the process into 5 easy steps to help you tackle the shelves in your own space!
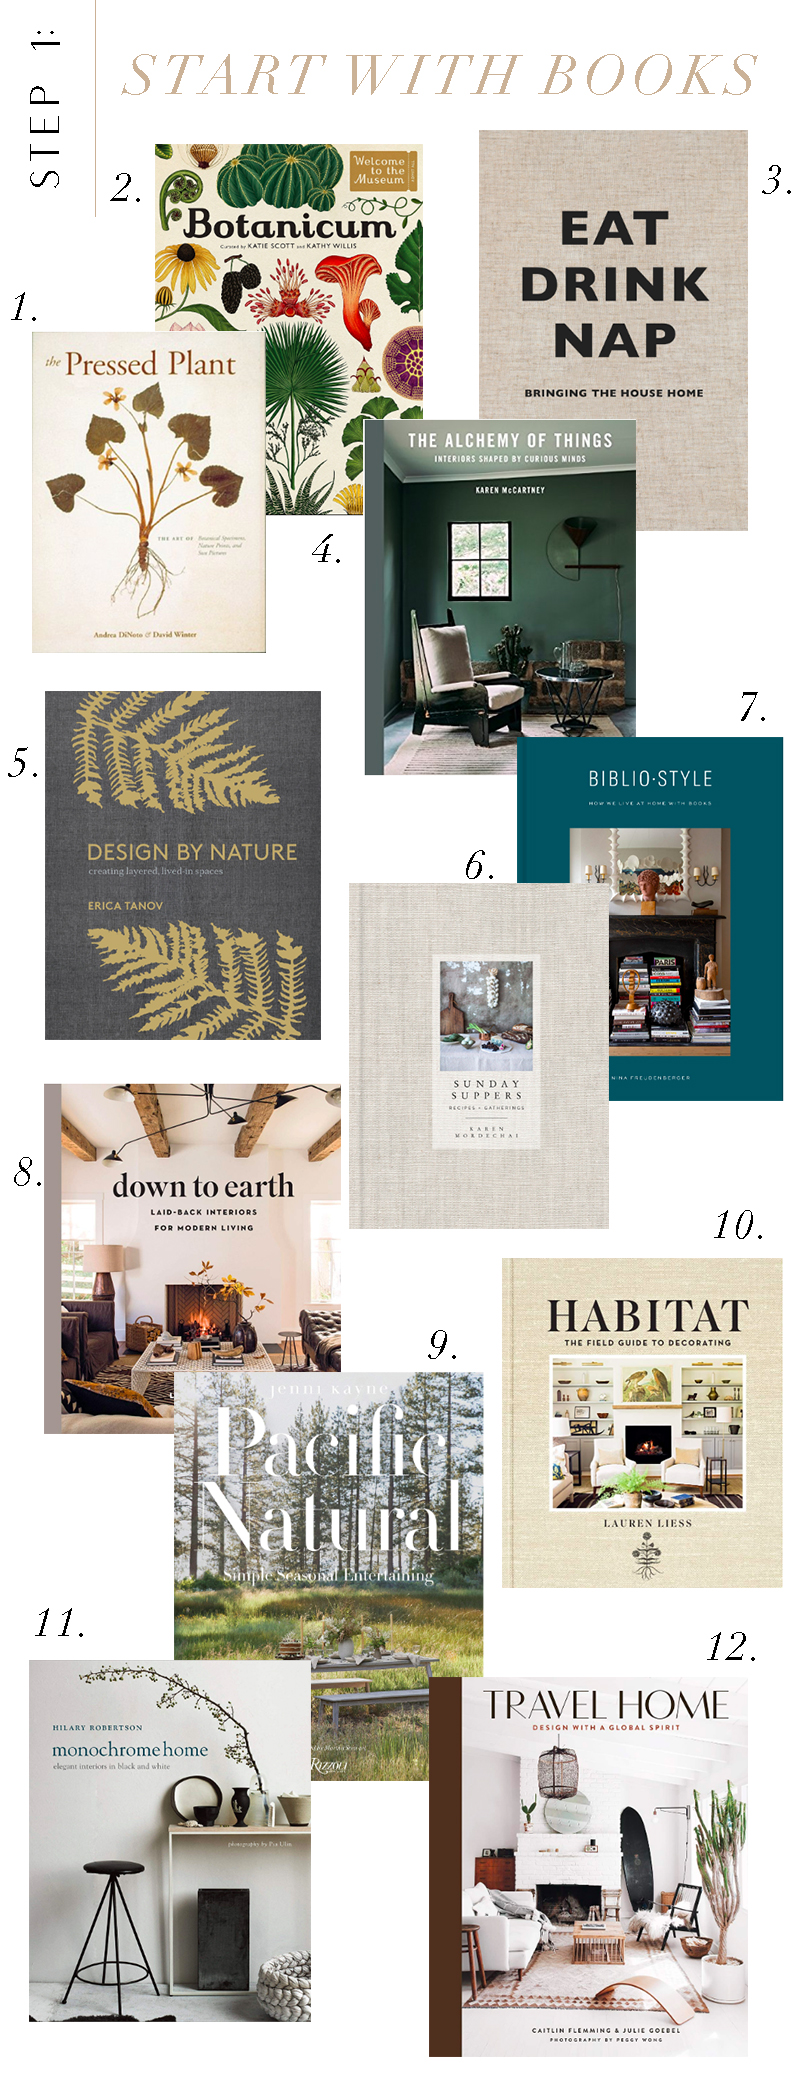
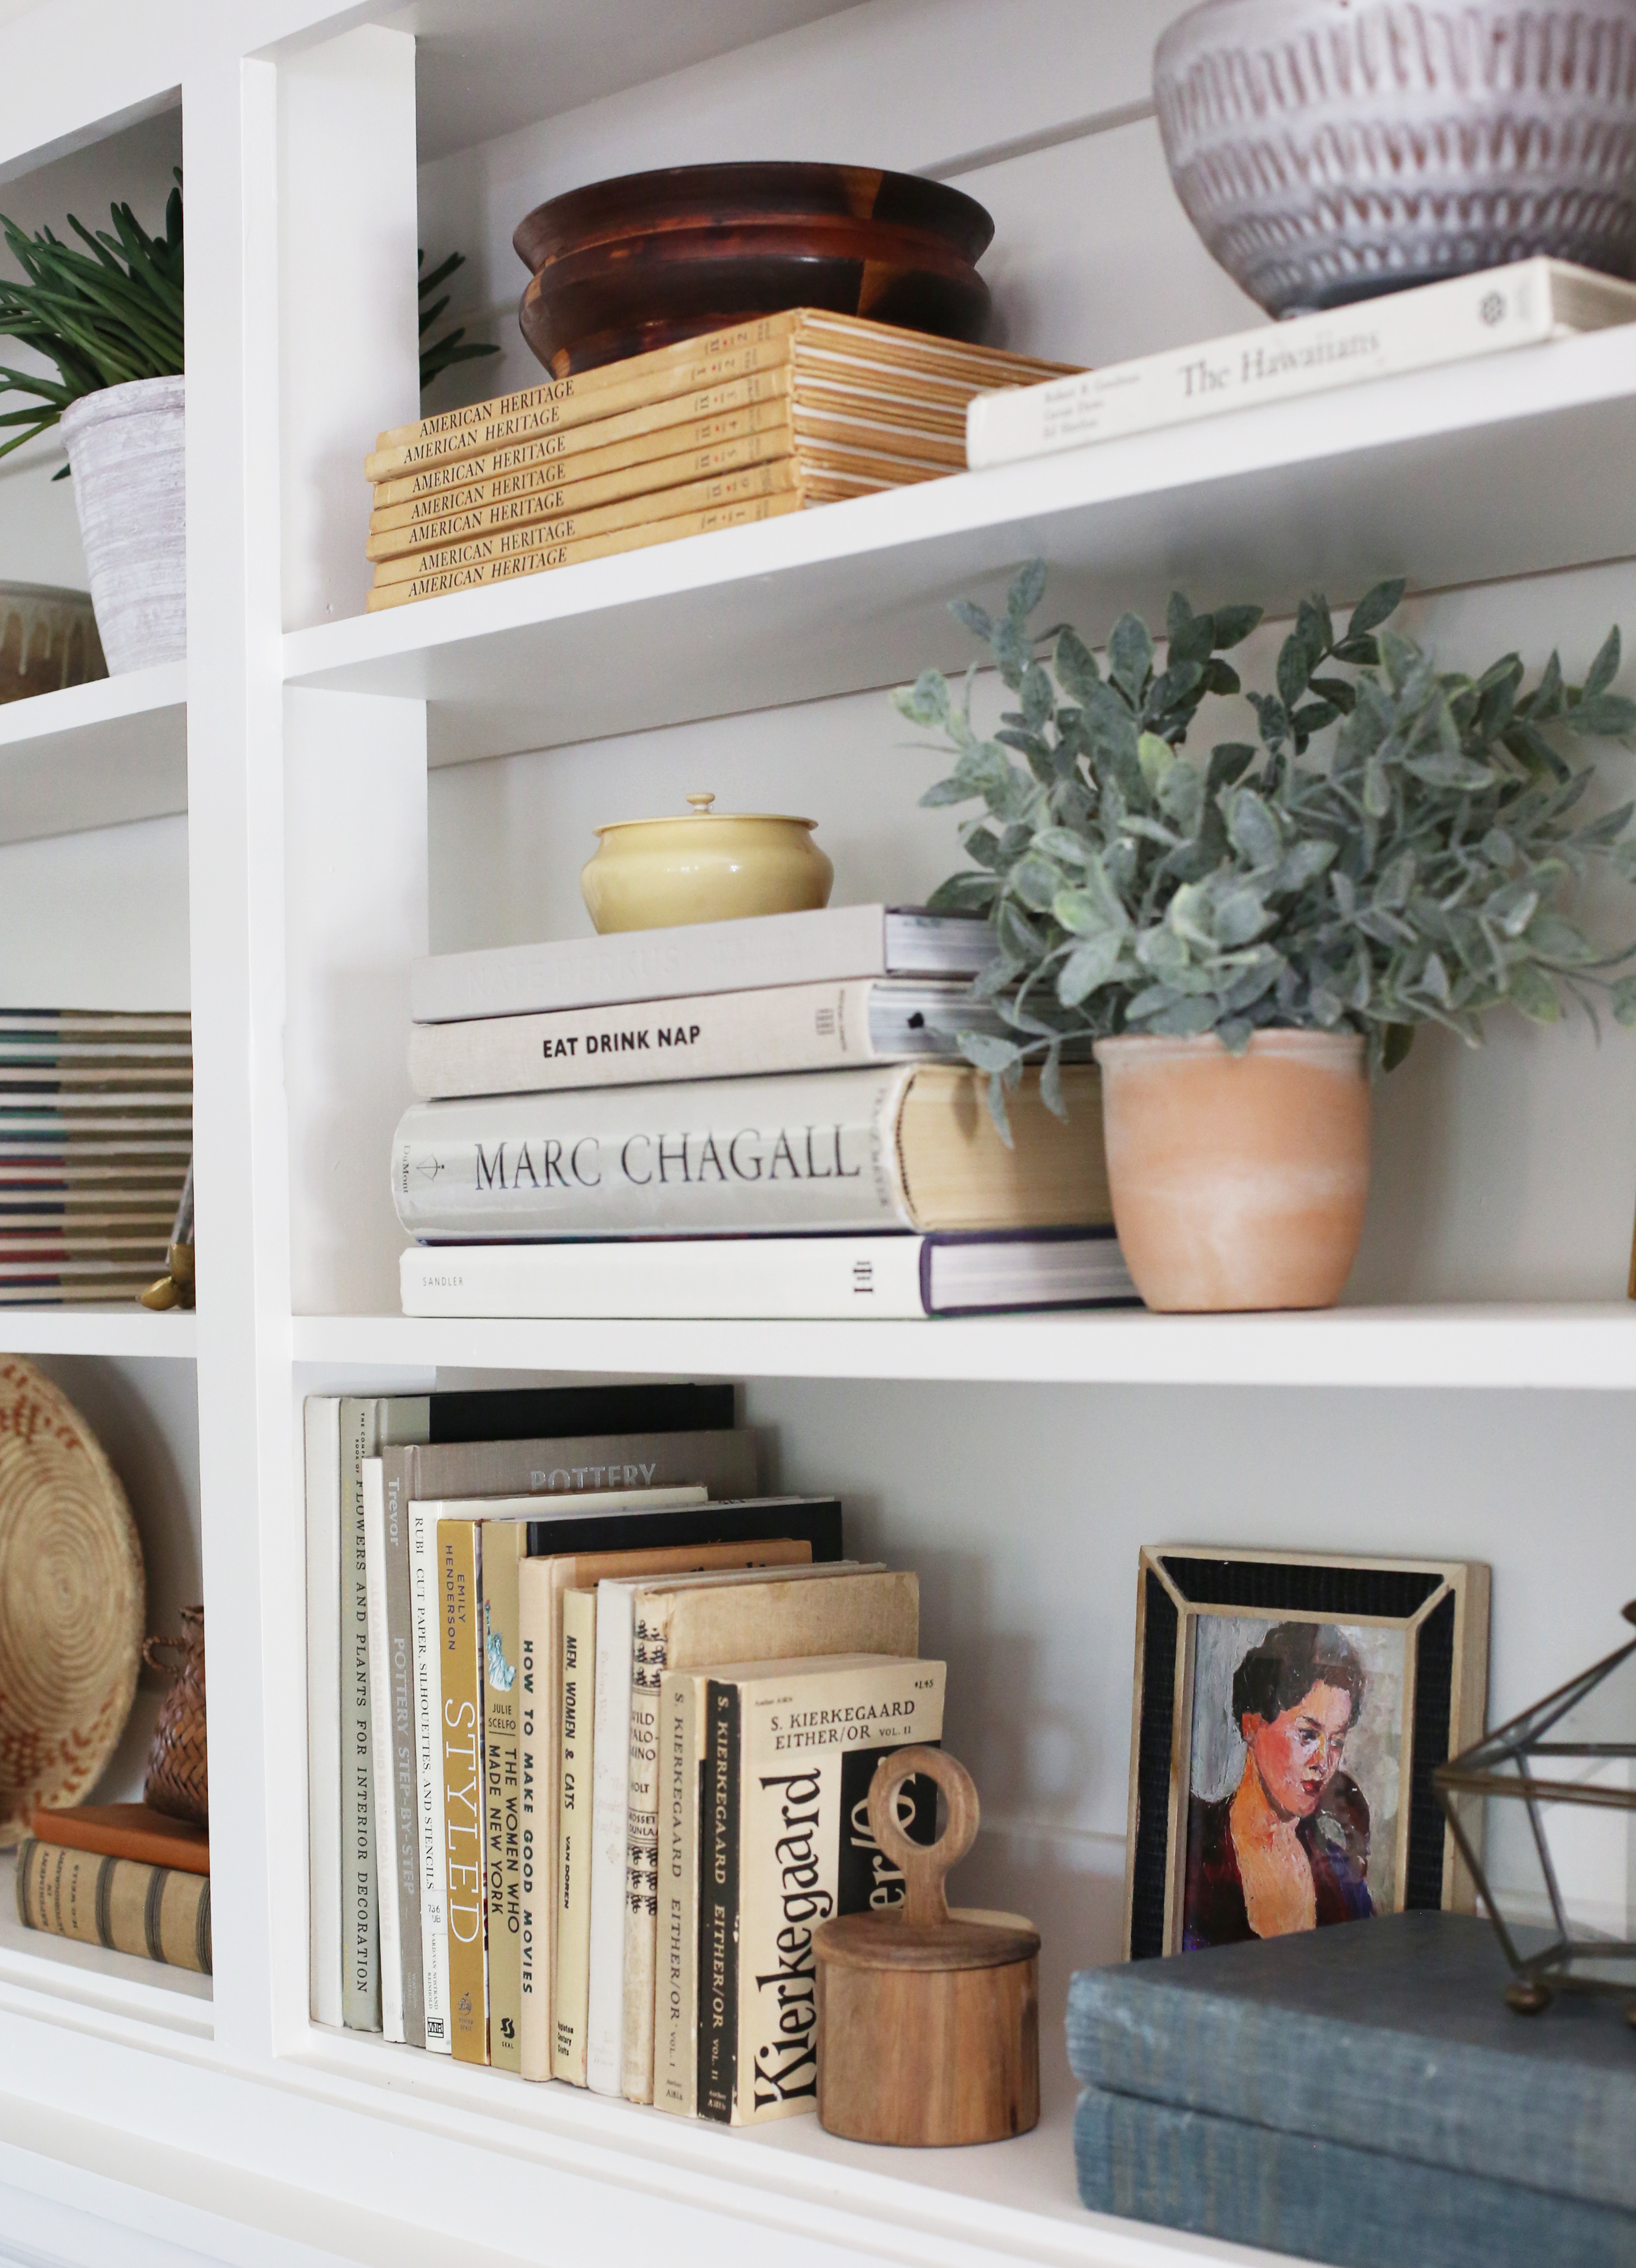
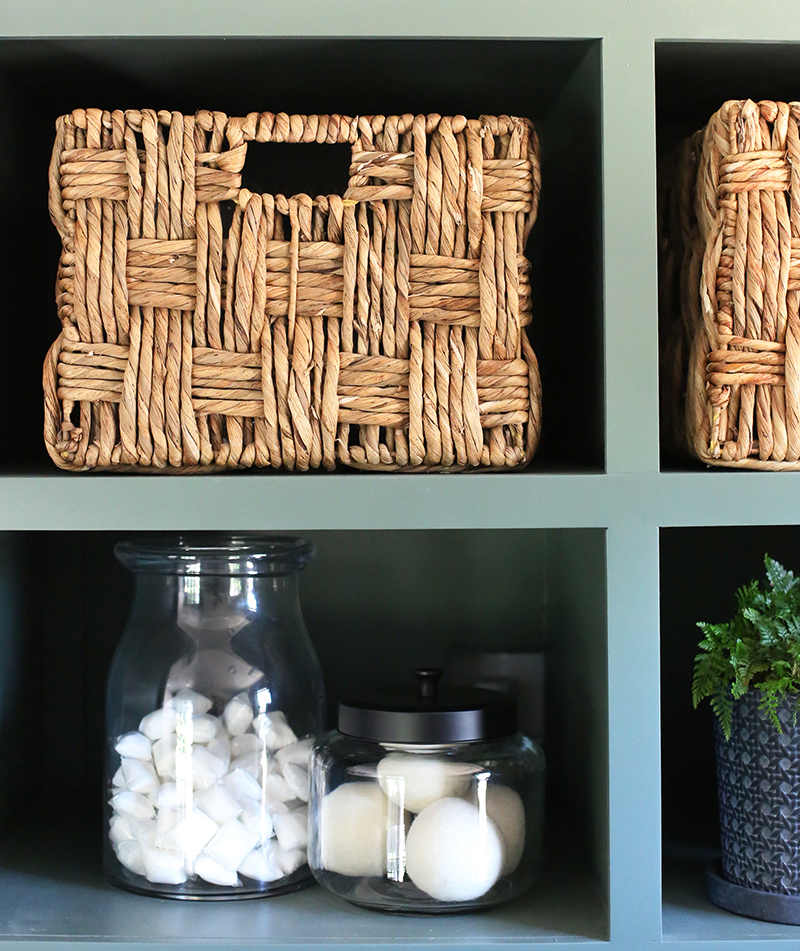
Step 1: Start With Books – We wanted this built-in to act as mainly book storage, so thats where we started. Begin with your largest & heaviest books. This will help give you a nice even base. Stack them both vertically and horizontally to give the shelf some character and movement. Once you have placed your base layer, start stacking your smaller books on top. Group book collections and magazines together for a cohesive look.
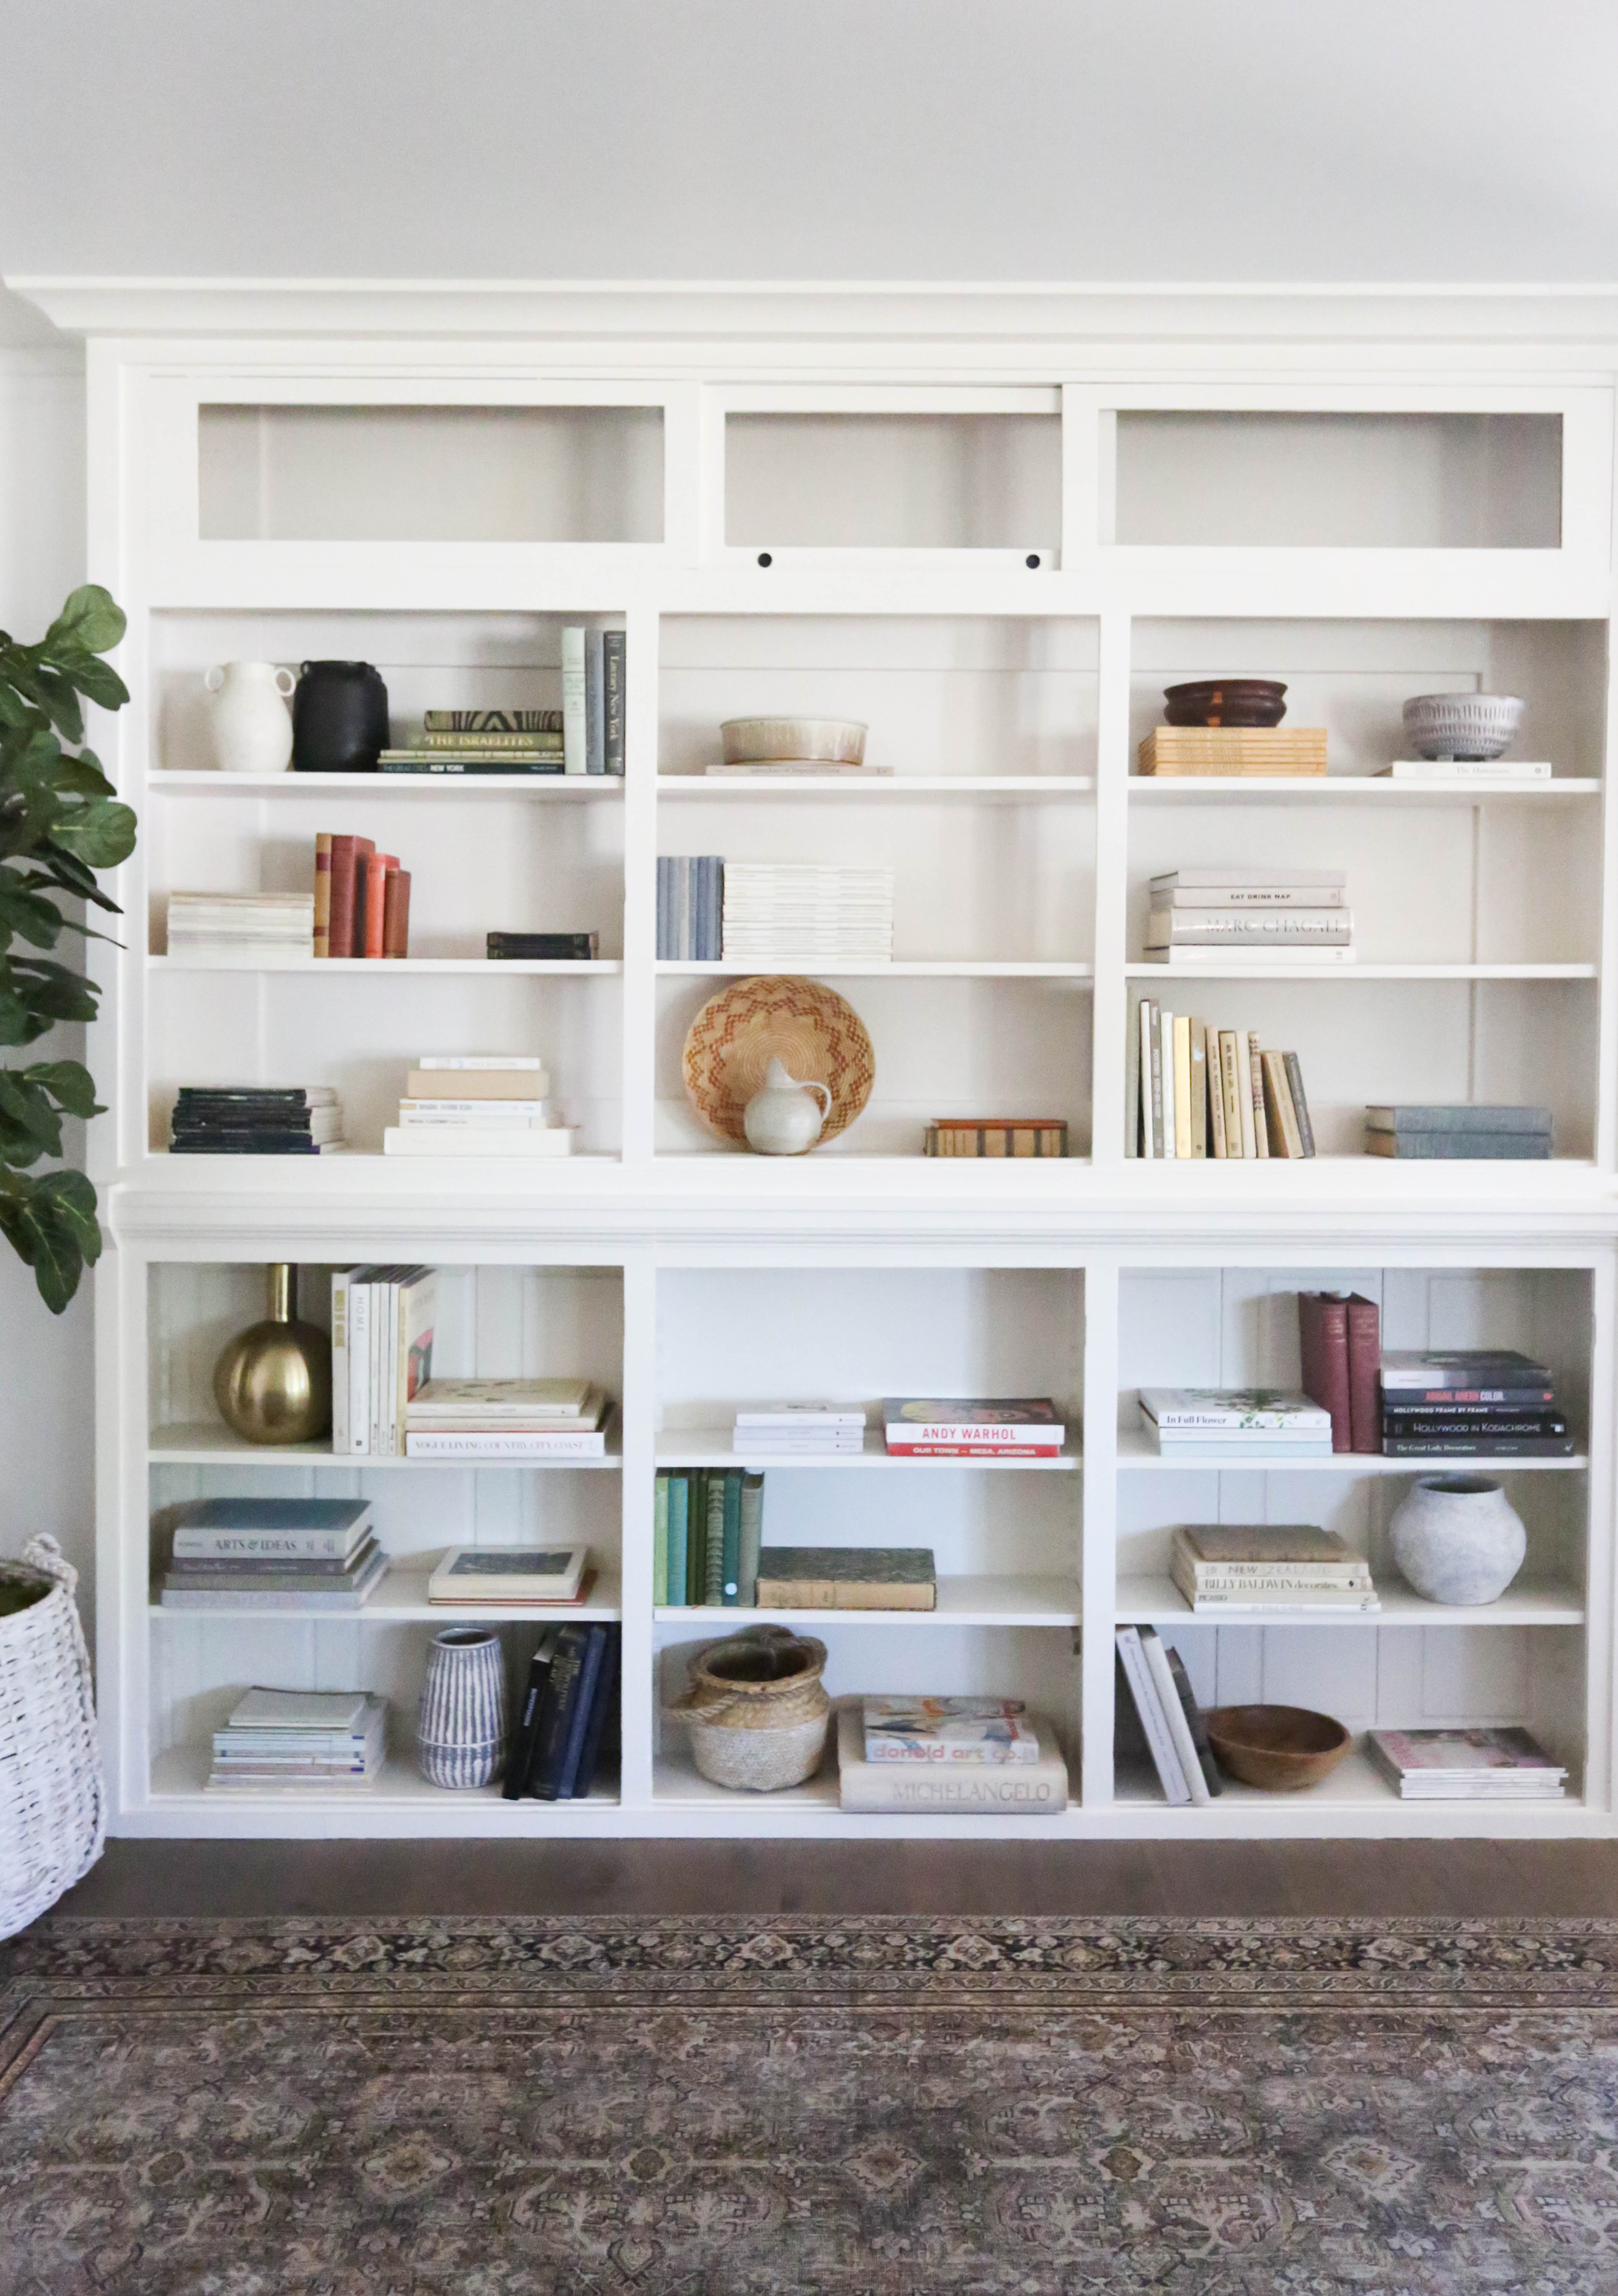
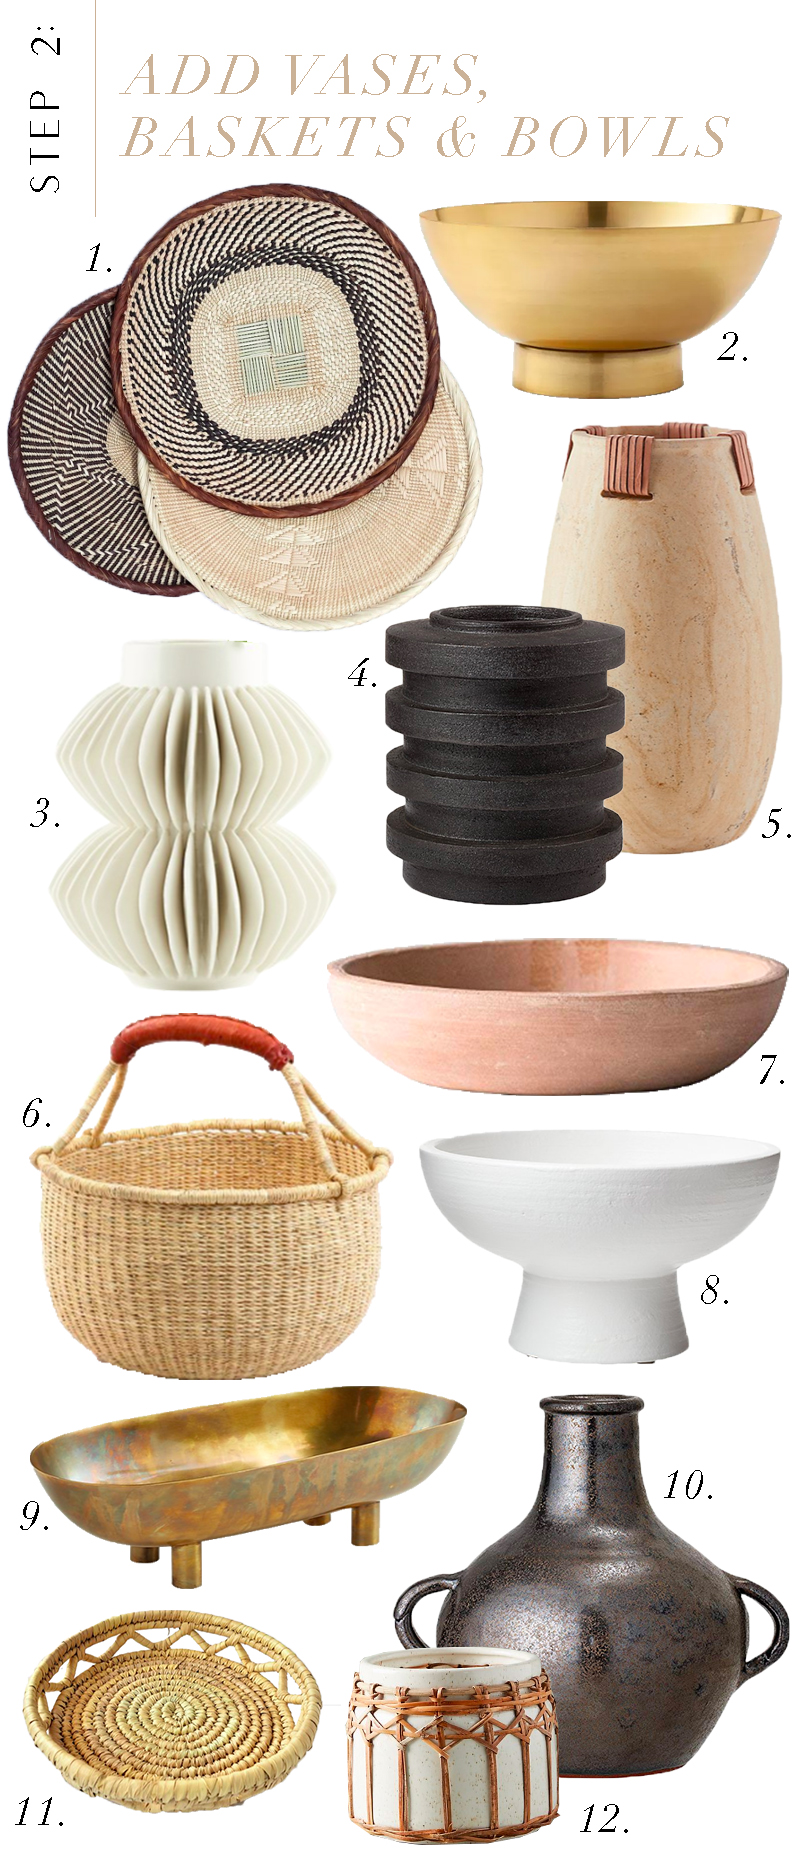
Step 2:Add Vases, Bowls & Baskets – Start with your largest baskets and vessels. Here we propped shallow vintage baskets against the back of our shelves to give them some dimension. Pay close attention to the shape and scale of your pieces. You want to be sure you are evenly distributing the type of item as well as the color and texture. Place larger vessels directly onto the shelf then stack smaller pieces onto your stacked books.
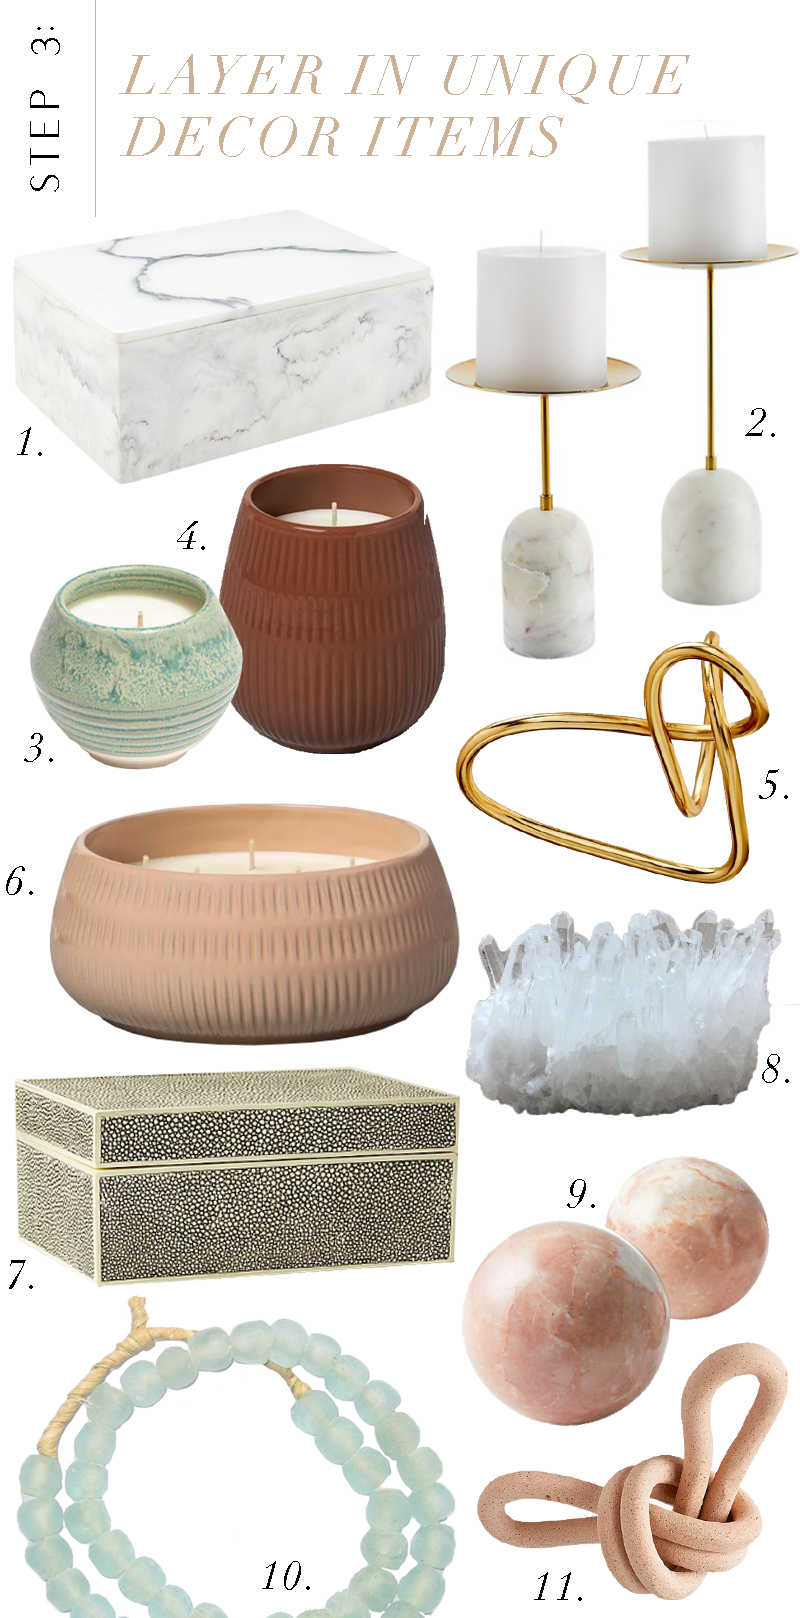
Step 3: Layer in Unique Decor Items – Now is your chance to get creative! Place small, unique items on top of books and layer them in front of larger pieces. I love to buy small, unique pieces while traveling and this is a great opportunity to display those items! You can also add in any family heirlooms, vintage and thrifted pieces you have been collecting!
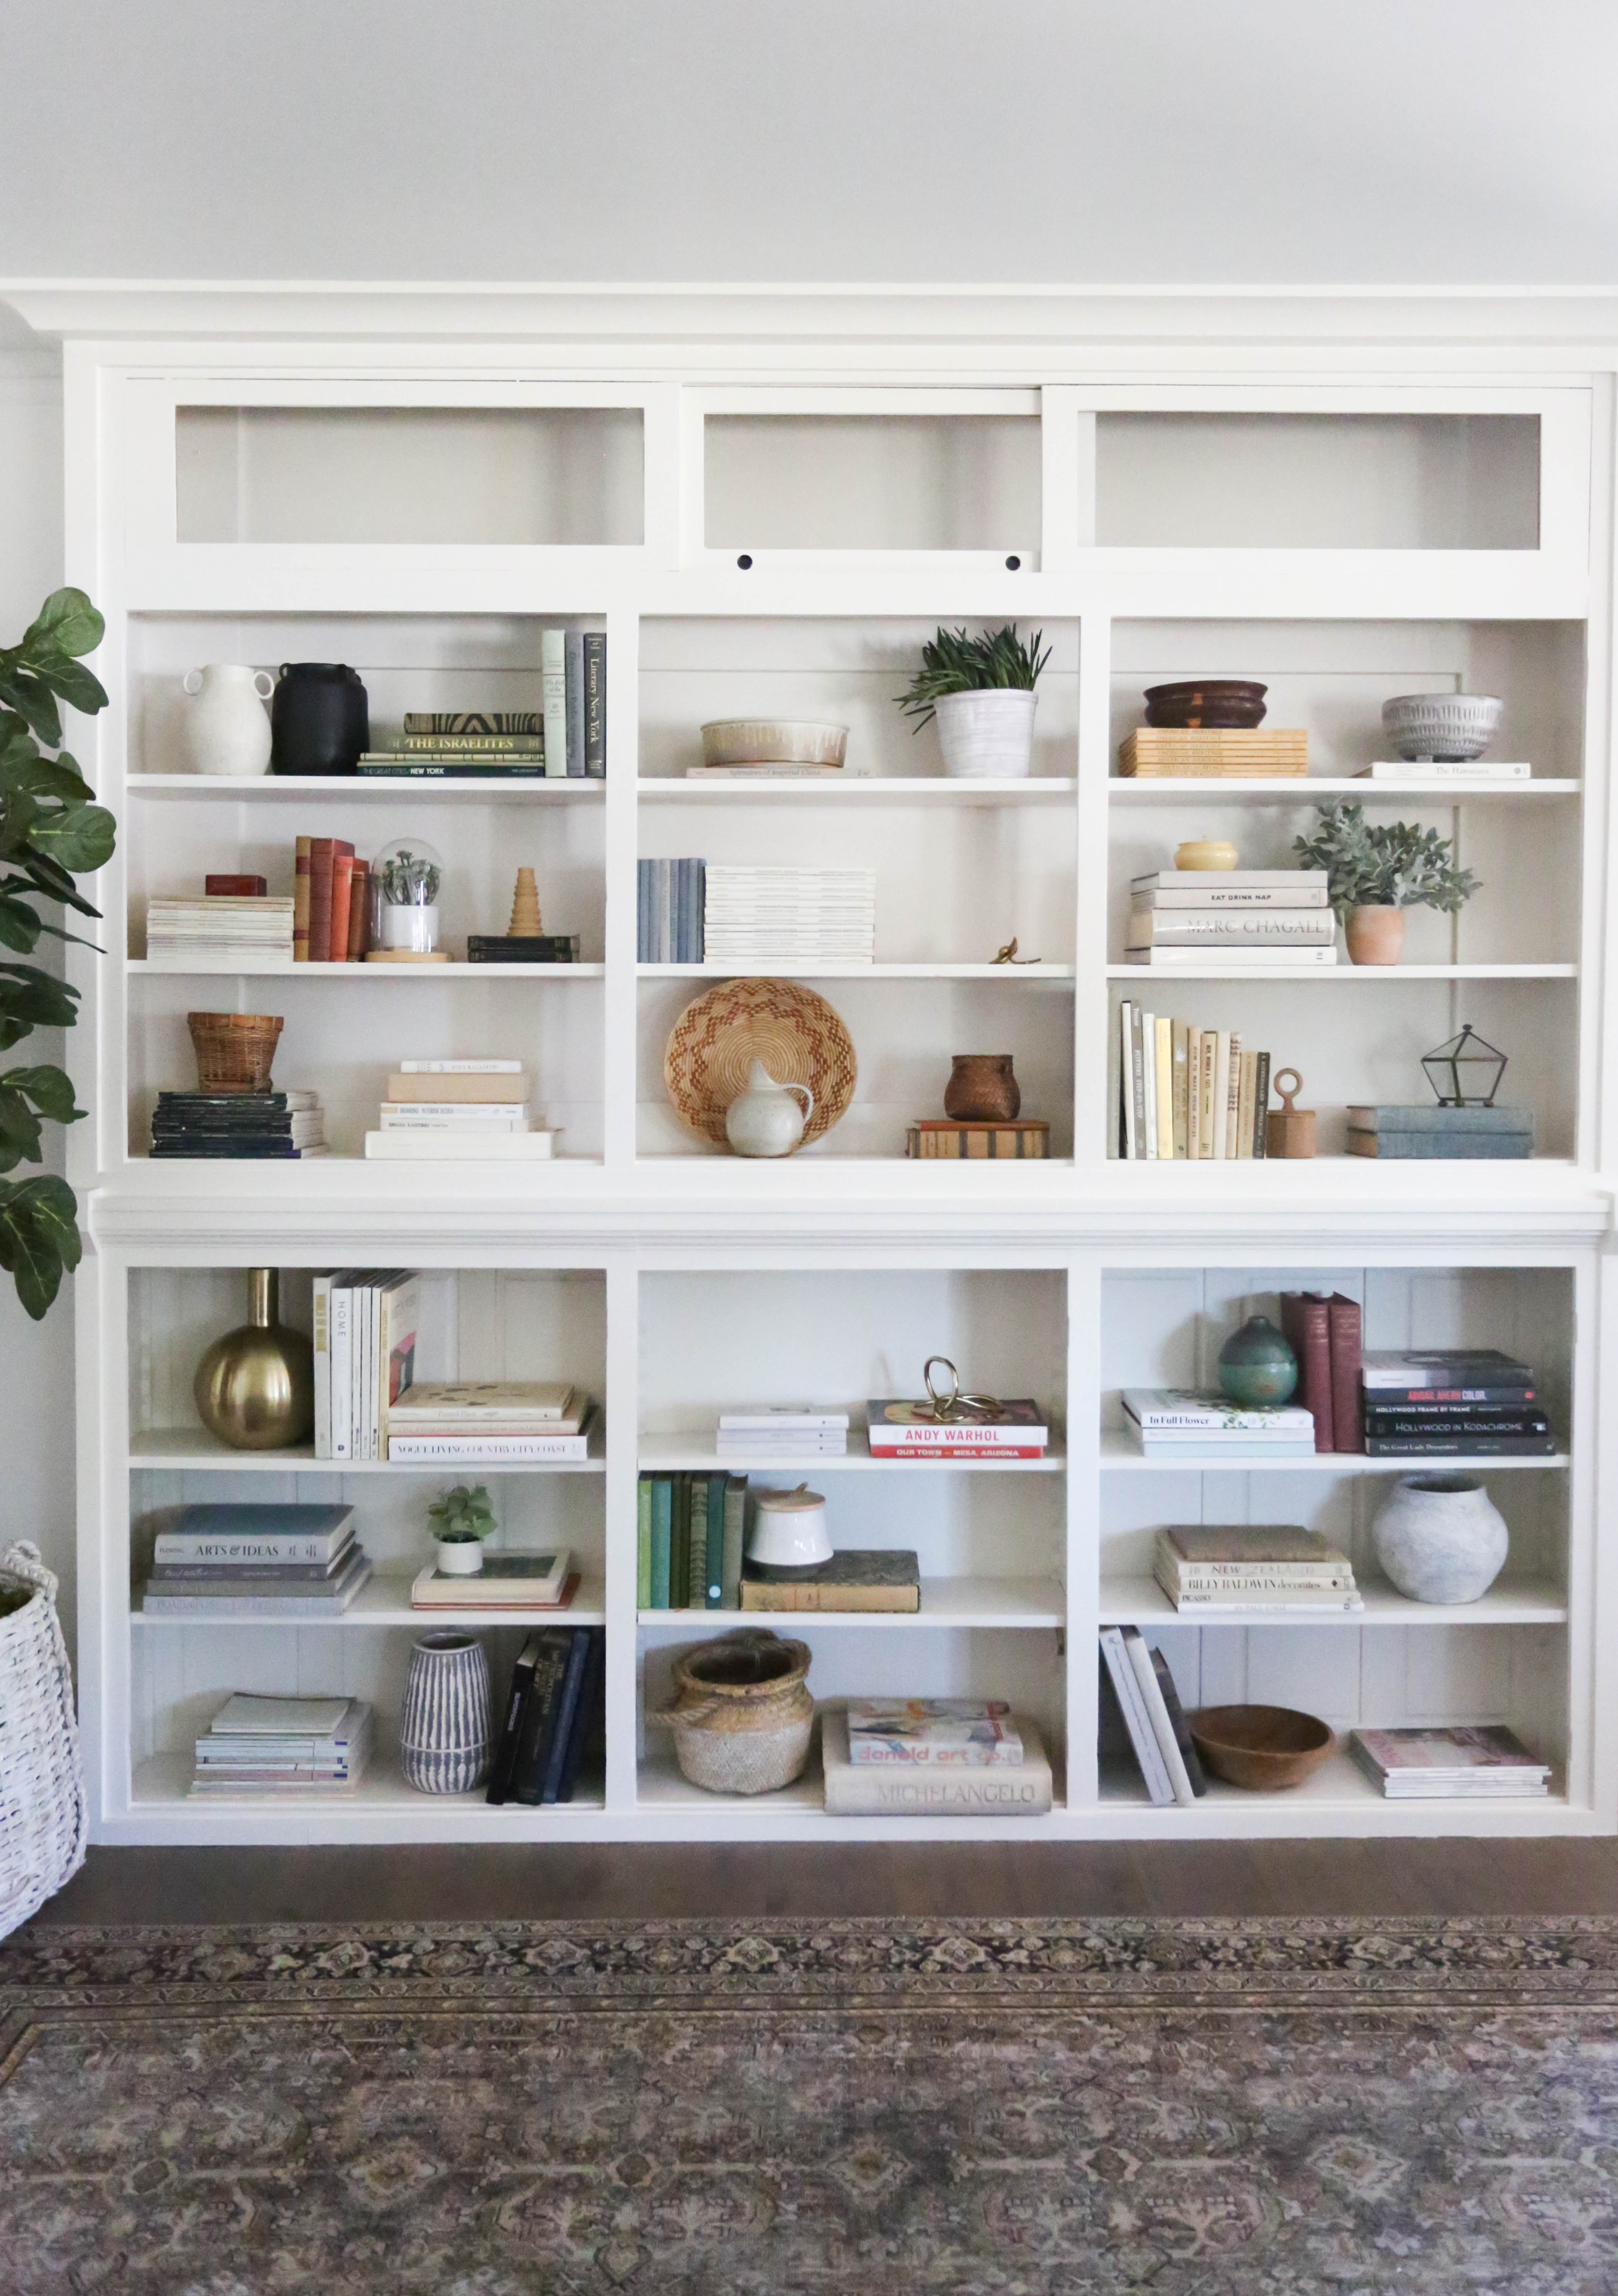
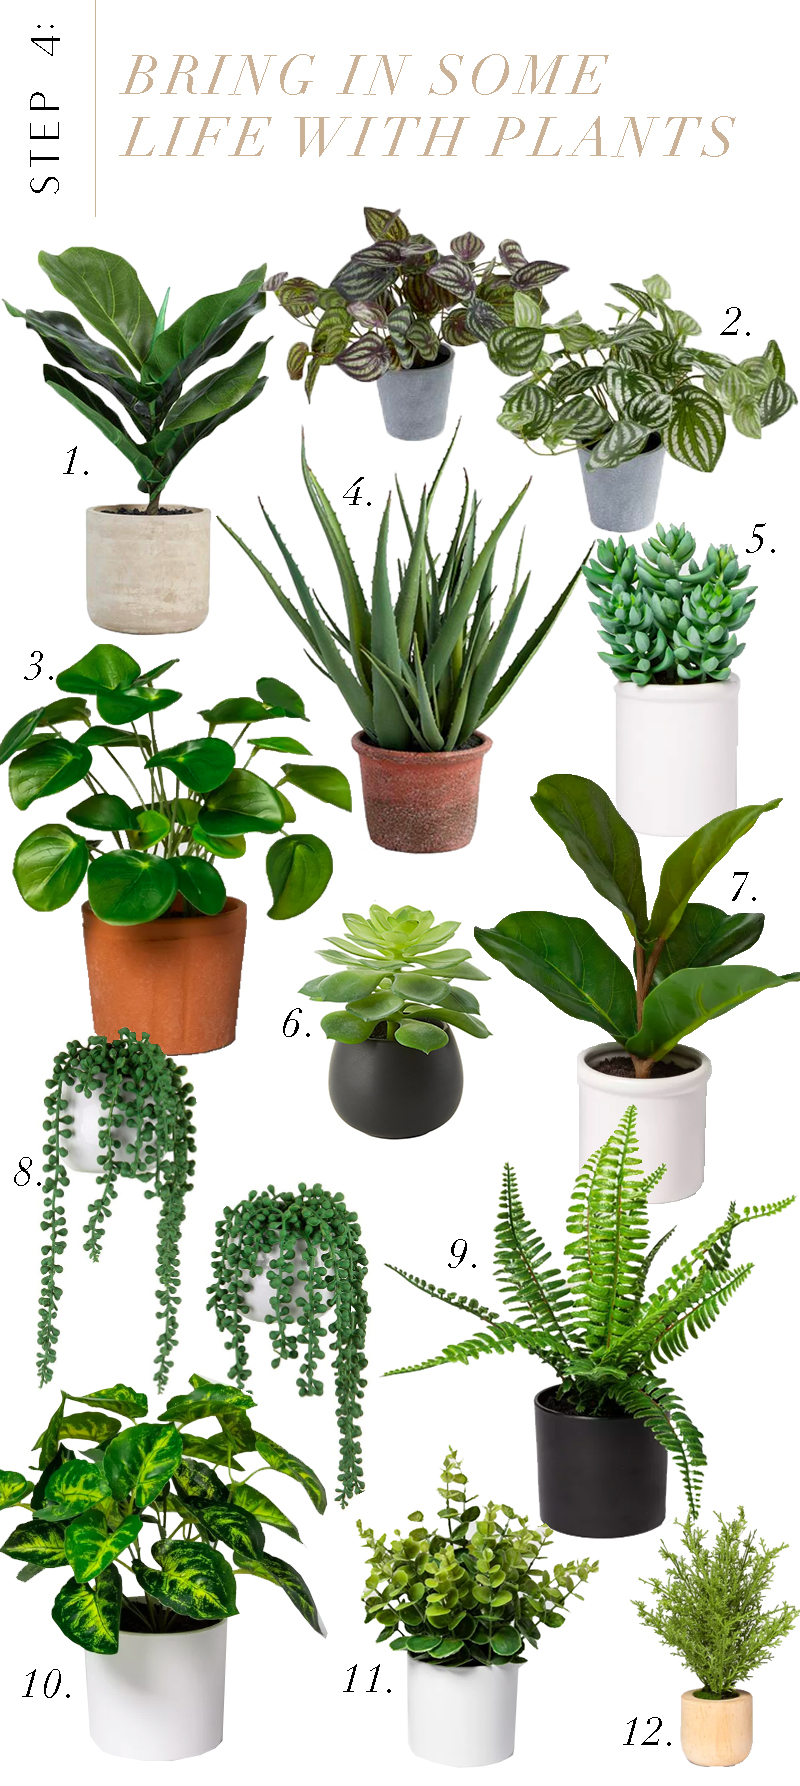
Step 4: Bring in Some Life With Plants – Wether you prefer real or faux, now is the time to add a little greenery to your shelves! Potted plants & succulents will help bring some life to your look.
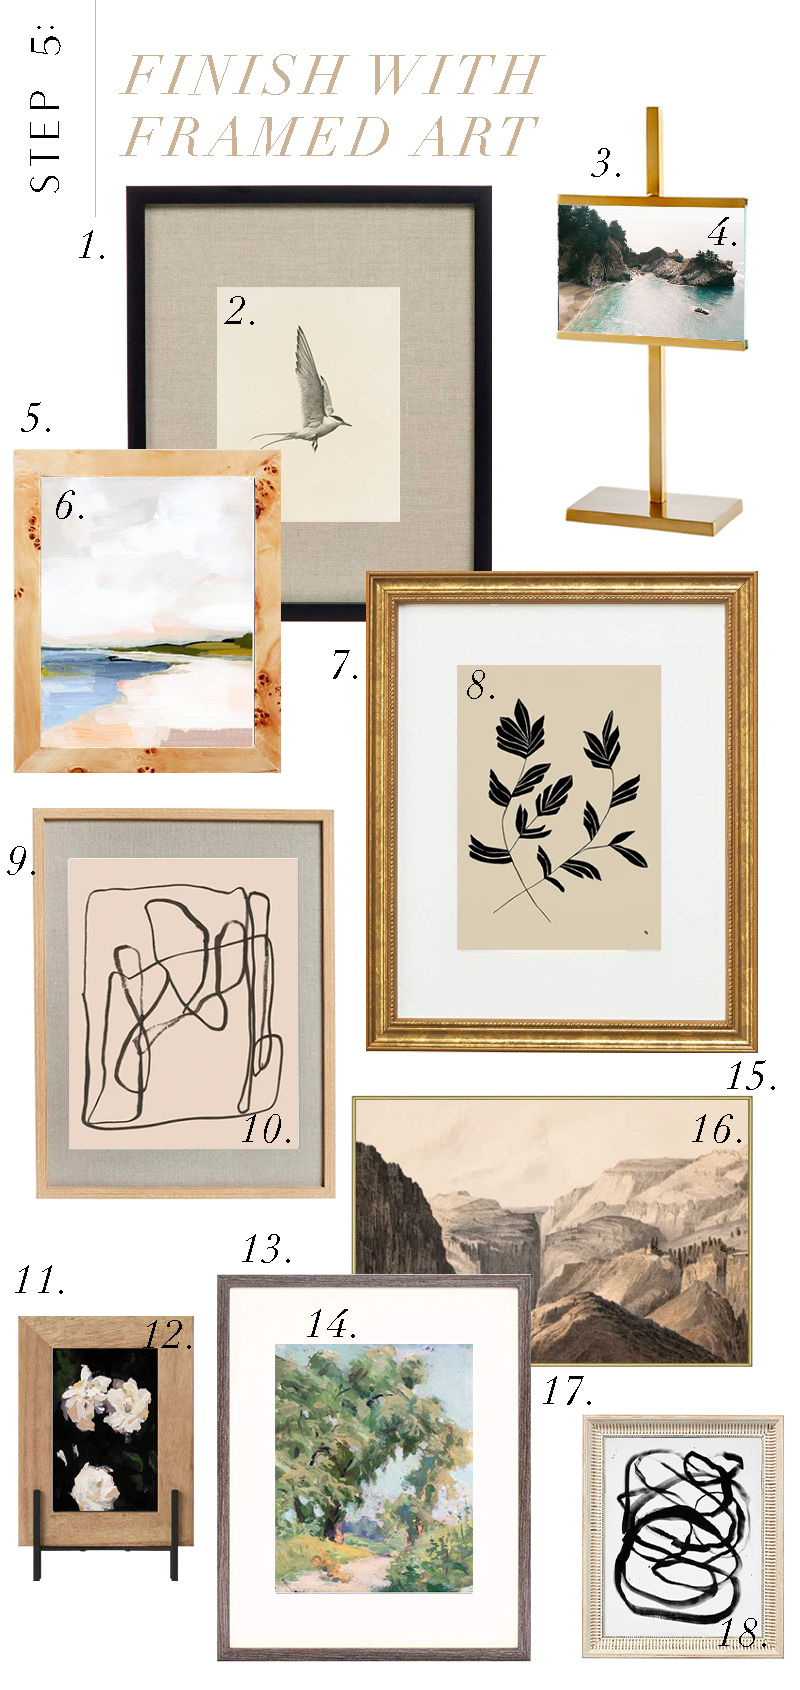
Step 5: Finish with Framed Art – Tilt larger pieces against the back wall and add smaller framed photos. Here we only used art, but this is a great opportunity to incorporate some of your family photos as well!
We hope these tips will help get you achieve the shelf styling you are after! Don’t get hung up on being too literal with the rules though. Your home should always be an expression of your personal taste, so feel free to get creative here!
We want to see your shelfies! Share them with us by using the hashtag #juniperhomespotlight.
Finding the perfect rug can be a daunting task! Rugs are arguably one of the most important pieces in a room and can totally transform the entire feel of your space. We usually recommend picking your rug before your furniture and other textiles, but that isn’t always an option. This is where a neutral rug…
Finding the perfect rug can be a daunting task! Rugs are arguably one of the most important pieces in a room and can totally transform the entire feel of your space. We usually recommend picking your rug before your furniture and other textiles, but that isn’t always an option. This is where a neutral rug can really come in handy! Neutral rugs are a great base for your room and give you the freedom to change out your art, pillows and curtains as often as you’d like, as well as working with your preexisting pieces.
Here are 21 of our favorite neutral rugs right now!! Do you have one of these in your space already?? Share your photos with us by using the #juniperhomespotlight tag in Instagram!
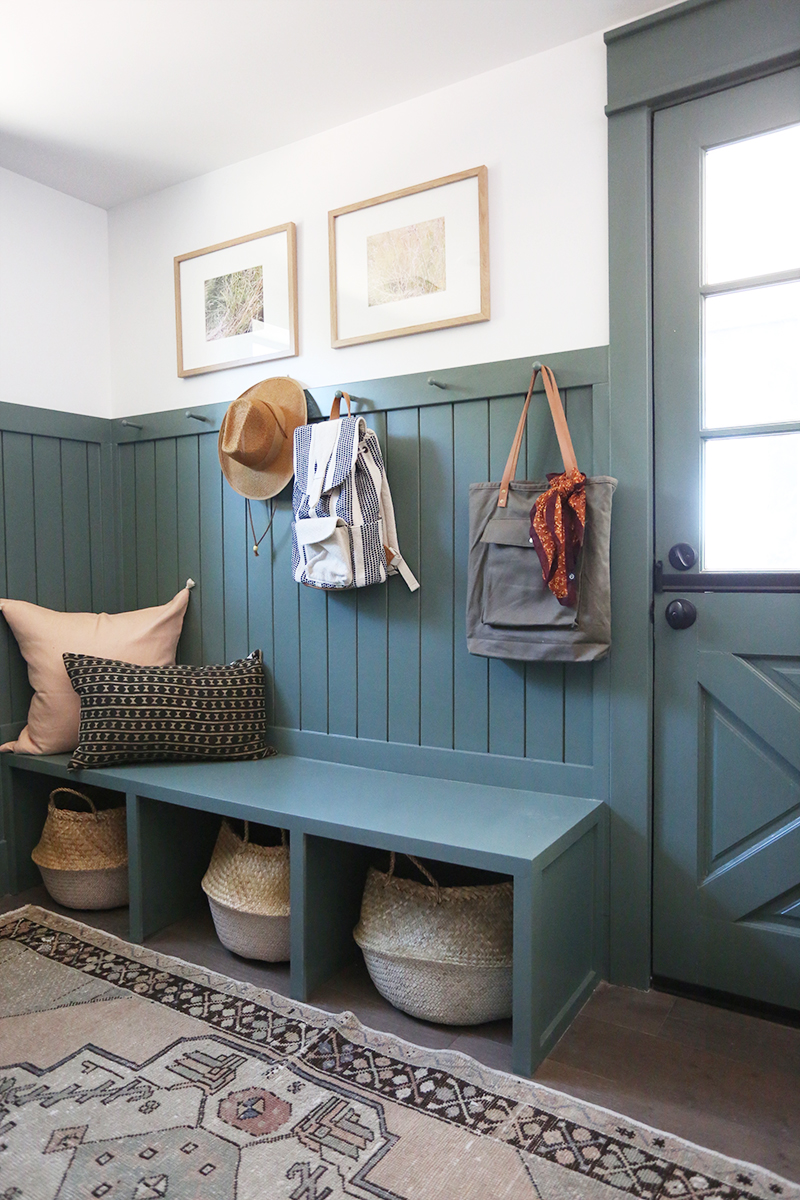
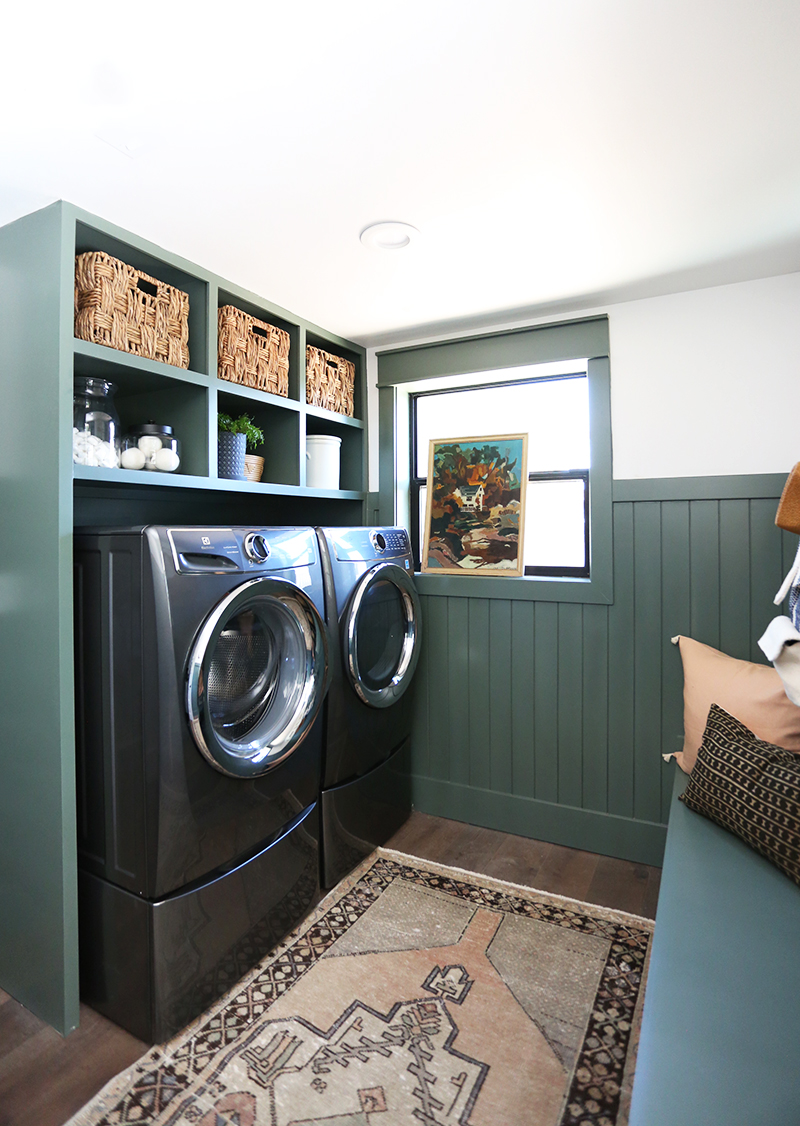
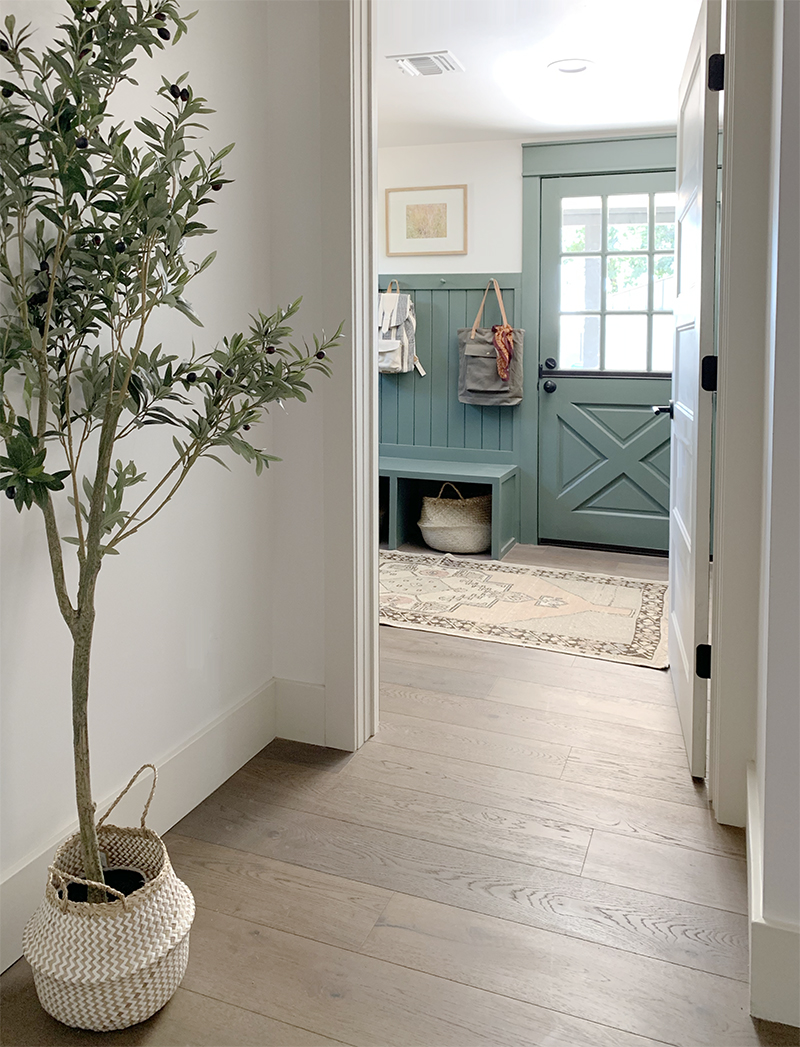
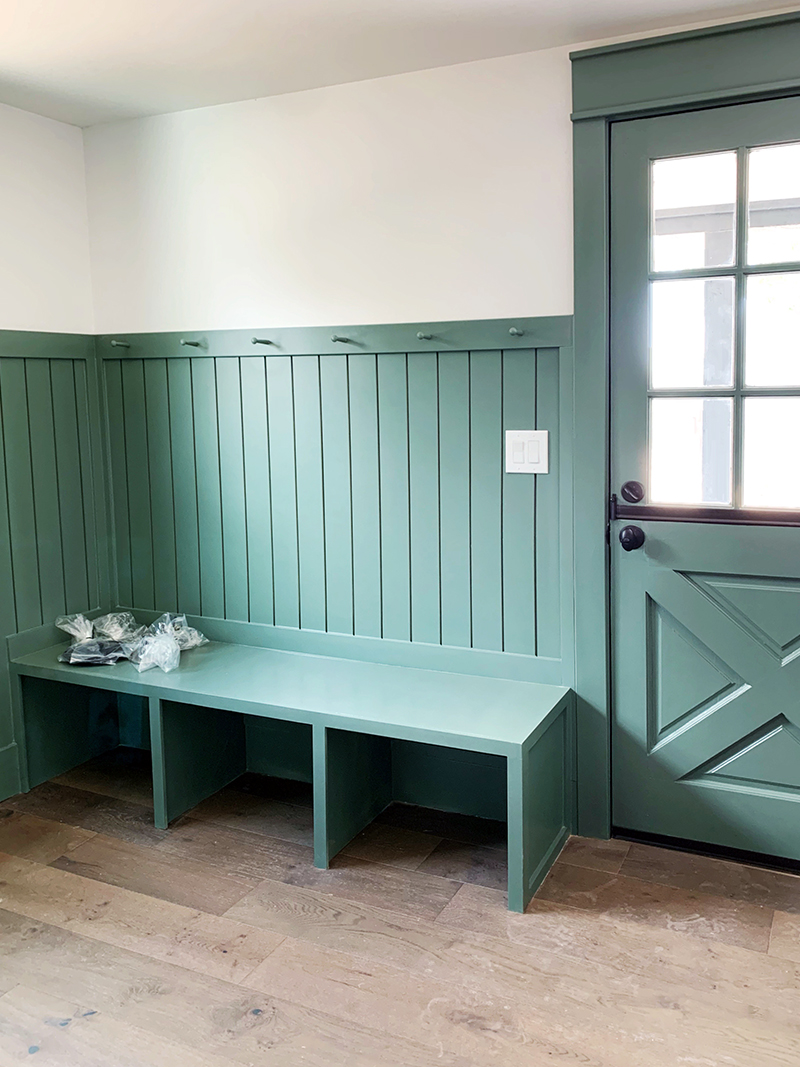
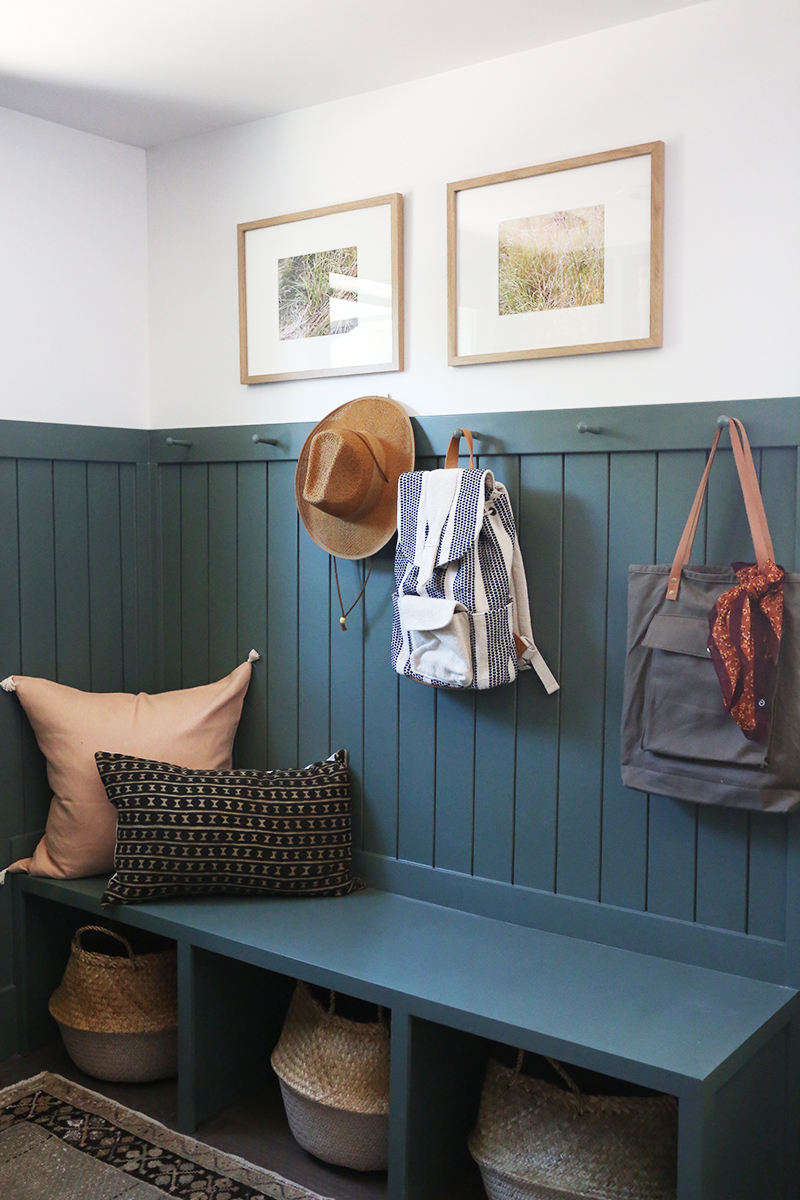
The very last room we have left to reveal from the Evergreen project house is the mudroom! If you remember from other posts about this flip house, we completely changed the floor plan of the back half of the house. When we added this mudroom/laundry room, we also added a back door (and a Dutch…
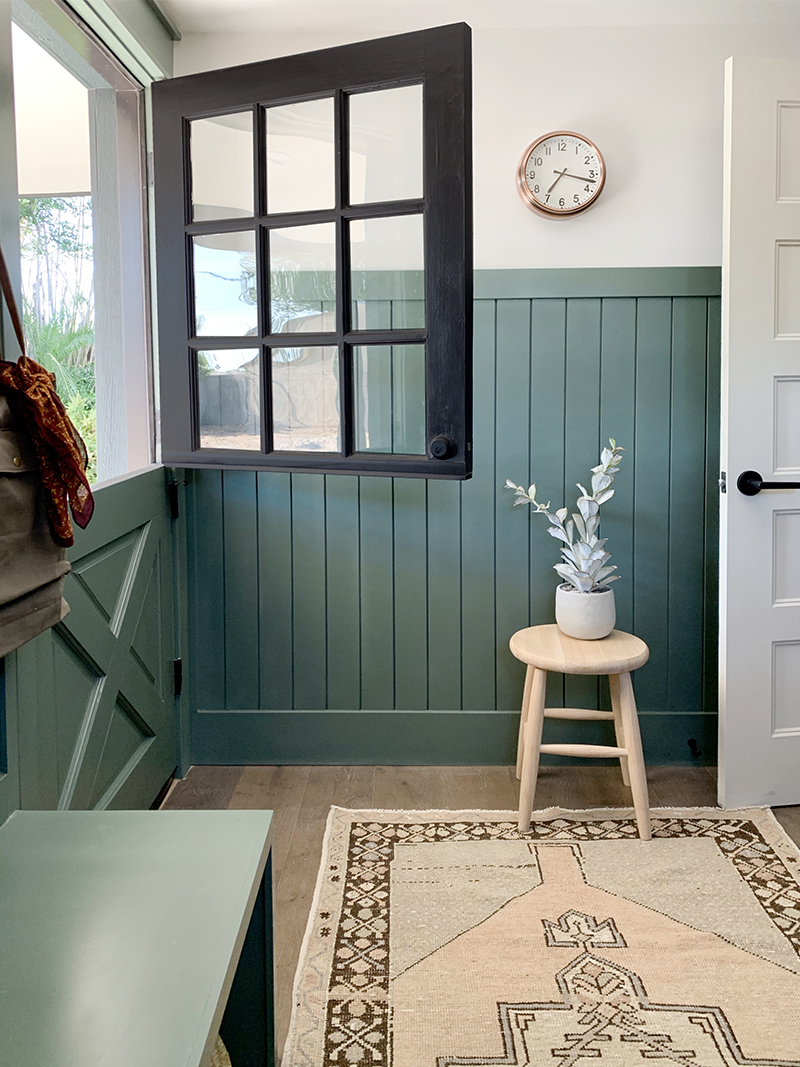
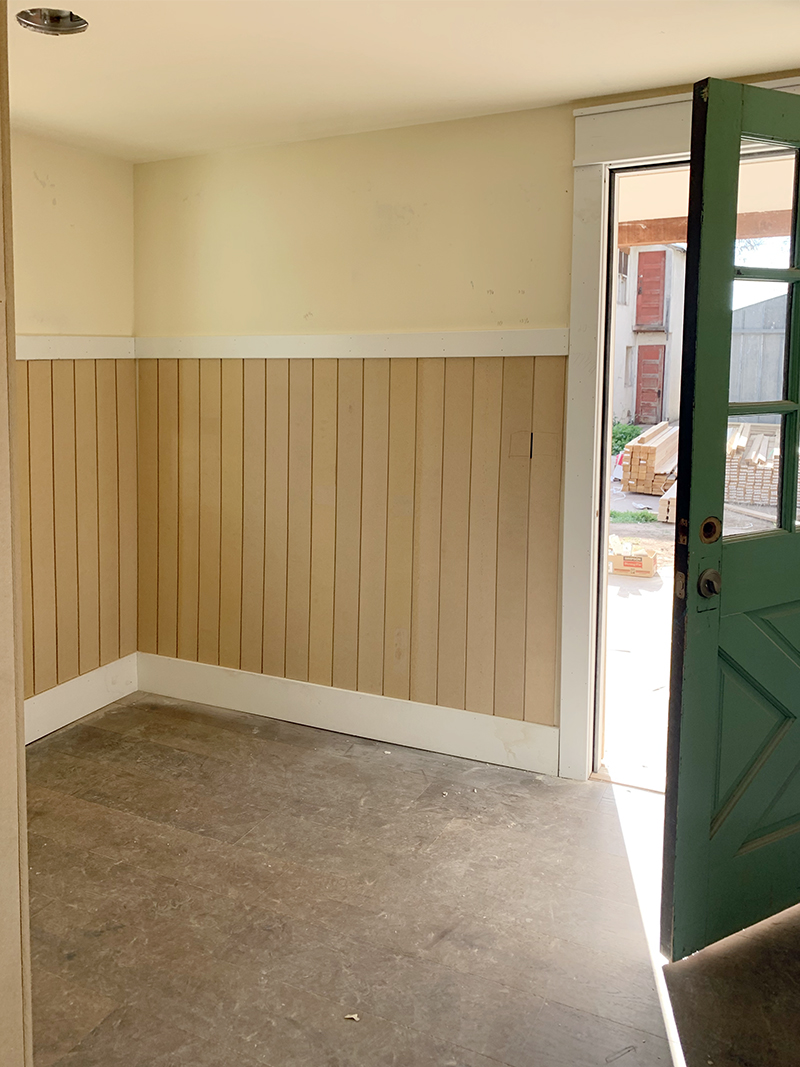
The very last room we have left to reveal from the Evergreen project house is the mudroom! If you remember from other posts about this flip house, we completely changed the floor plan of the back half of the house. When we added this mudroom/laundry room, we also added a back door (and a Dutch door at that!) and a whole porch to the back of the house. You can see the house in it’s very rough before state in a video walkthrough of this house when we first purchased it on my IGTV!
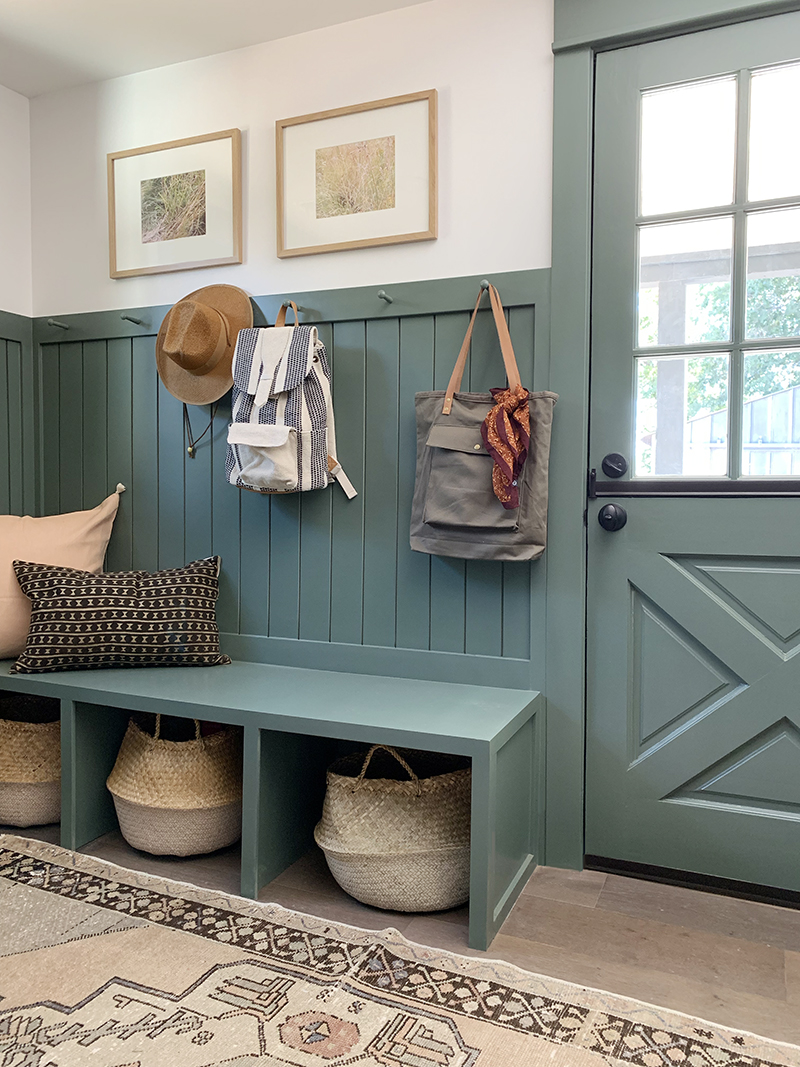
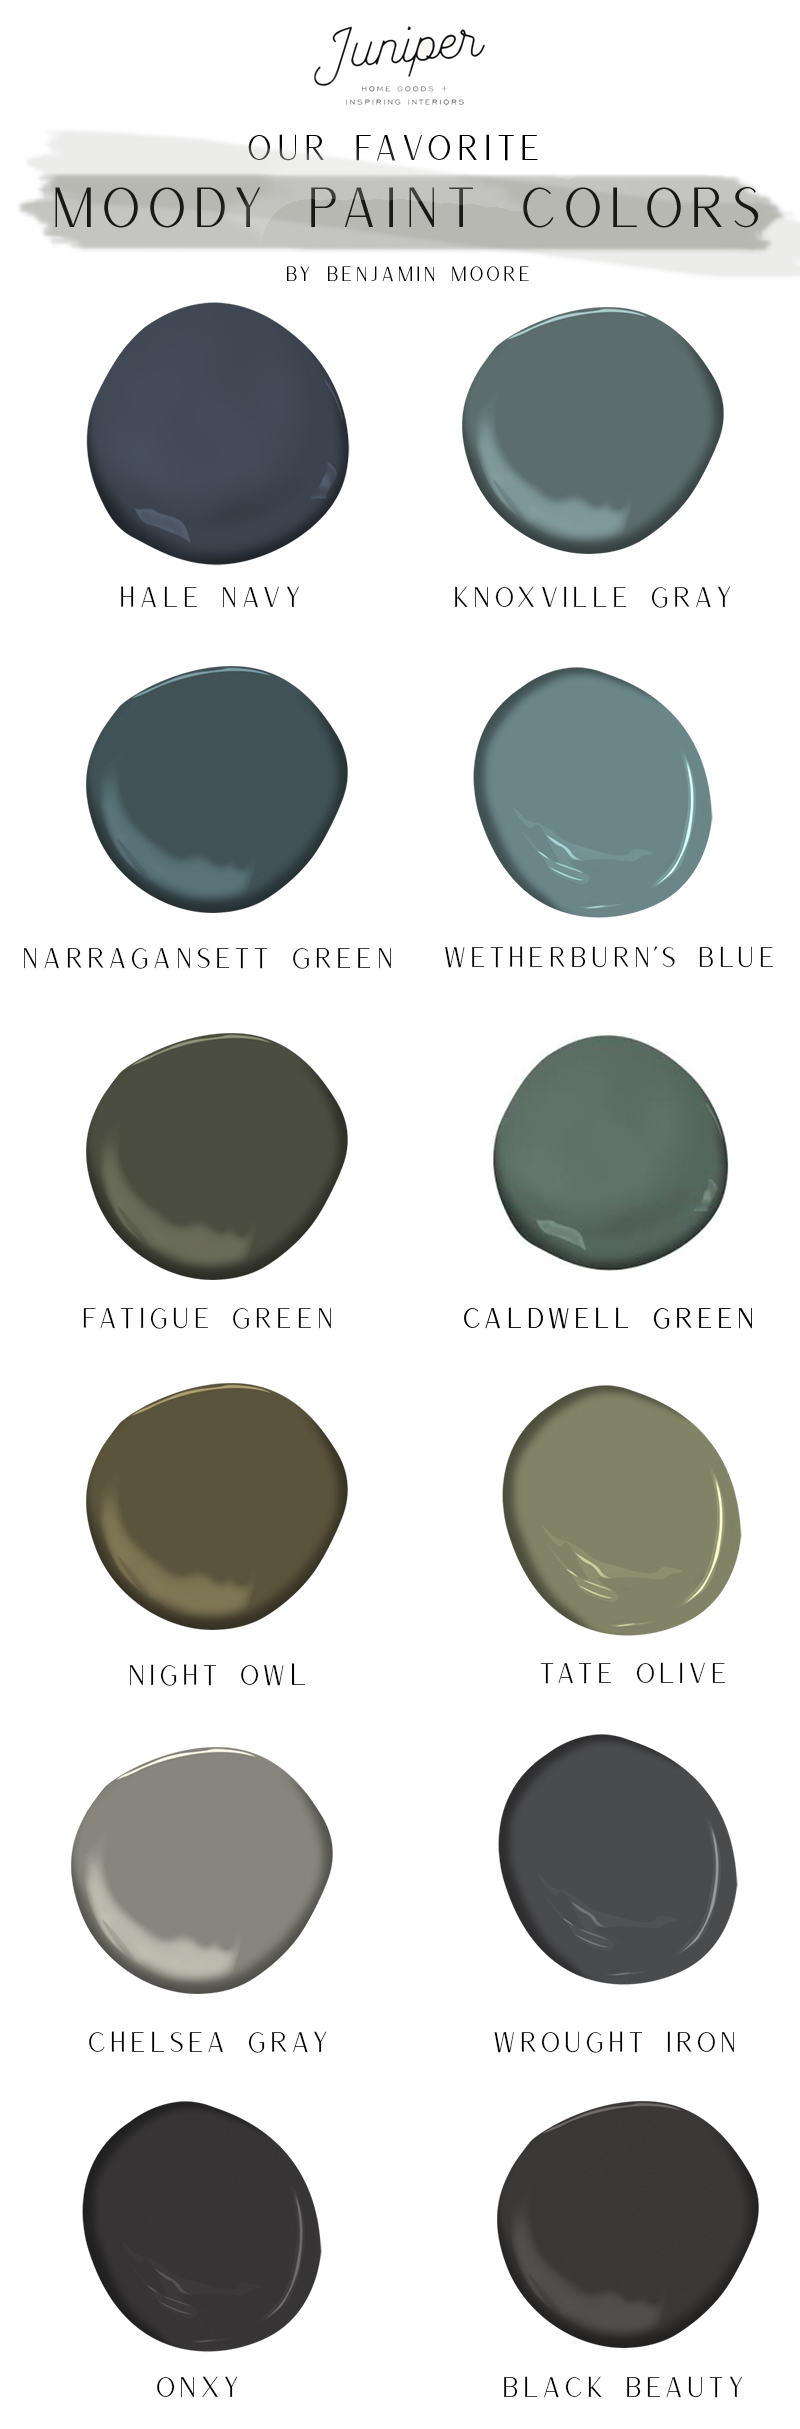
I like to use moody colors in small spaces especially. We used lots of green-gray tones in the house, from the sage green kitchen cabinets, to the taupey-khaki guest bathroom vanity, to the black-green exterior color! Benjamin Moore Caldwell Green felt like the perfect choice for this small but mighty mudroom.
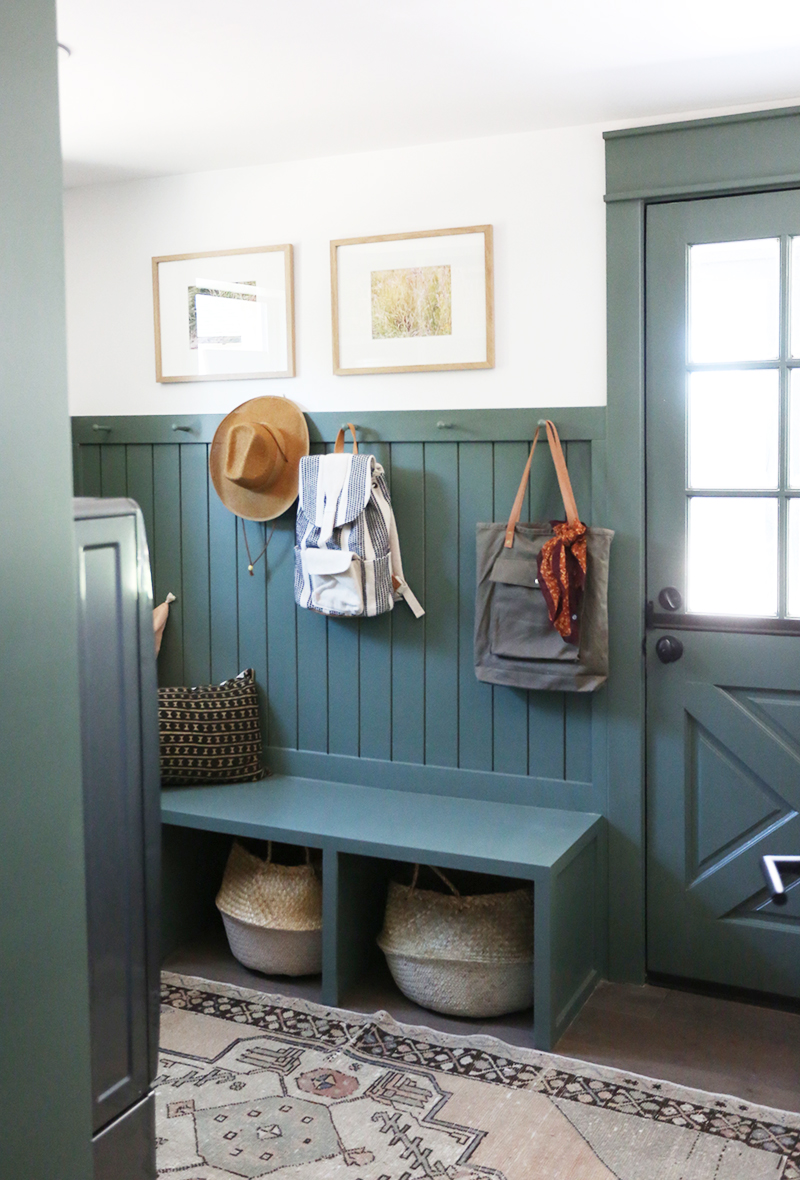
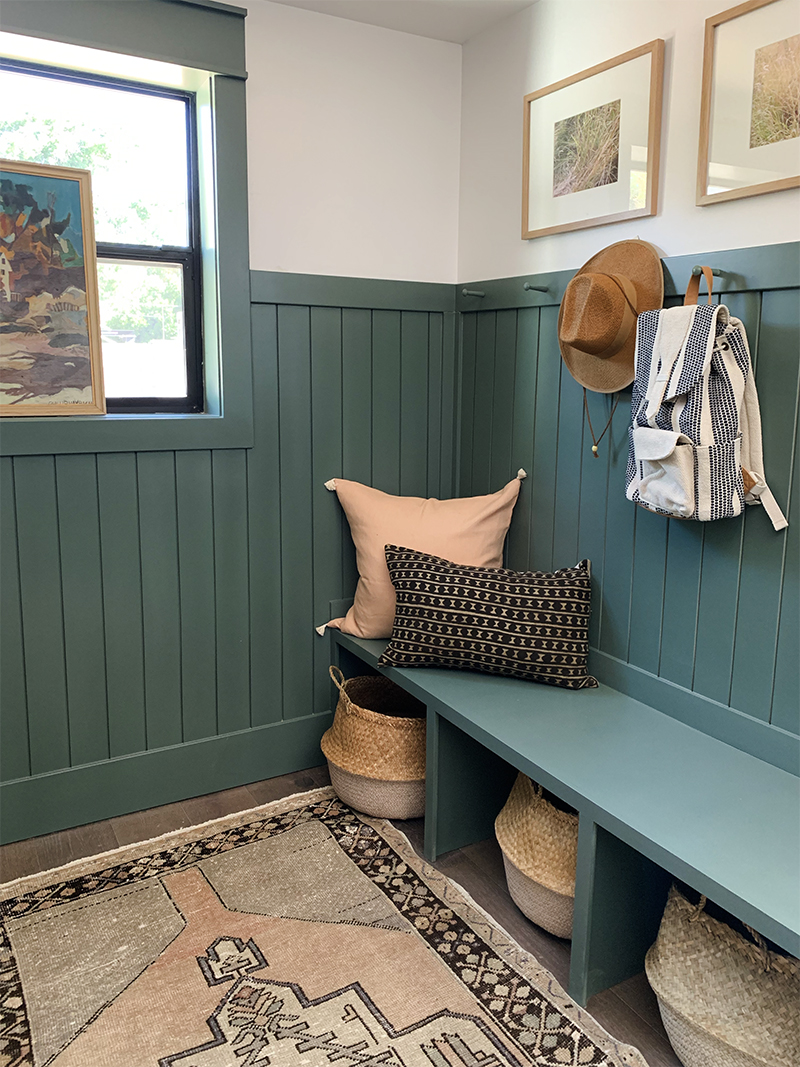
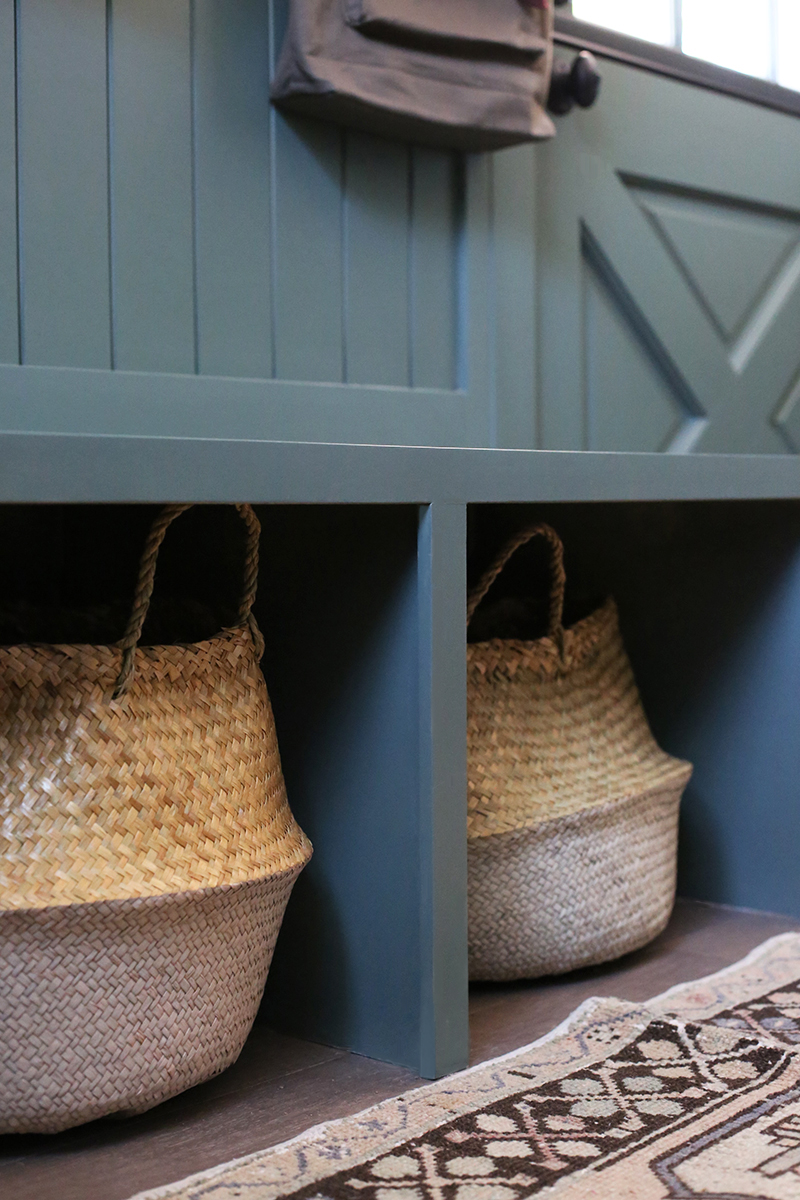
Our goal with this historic home was to maintain as much of the existing charm as possible and to add back in a lot of traditional, cottage-y elements in the renovation, while still keeping a close eye on our budget. This $3/piece MDF vertical paneling called Bender Board is a go-to material for me. It’s really easy to install, is super affordable and looks amazing when painted.
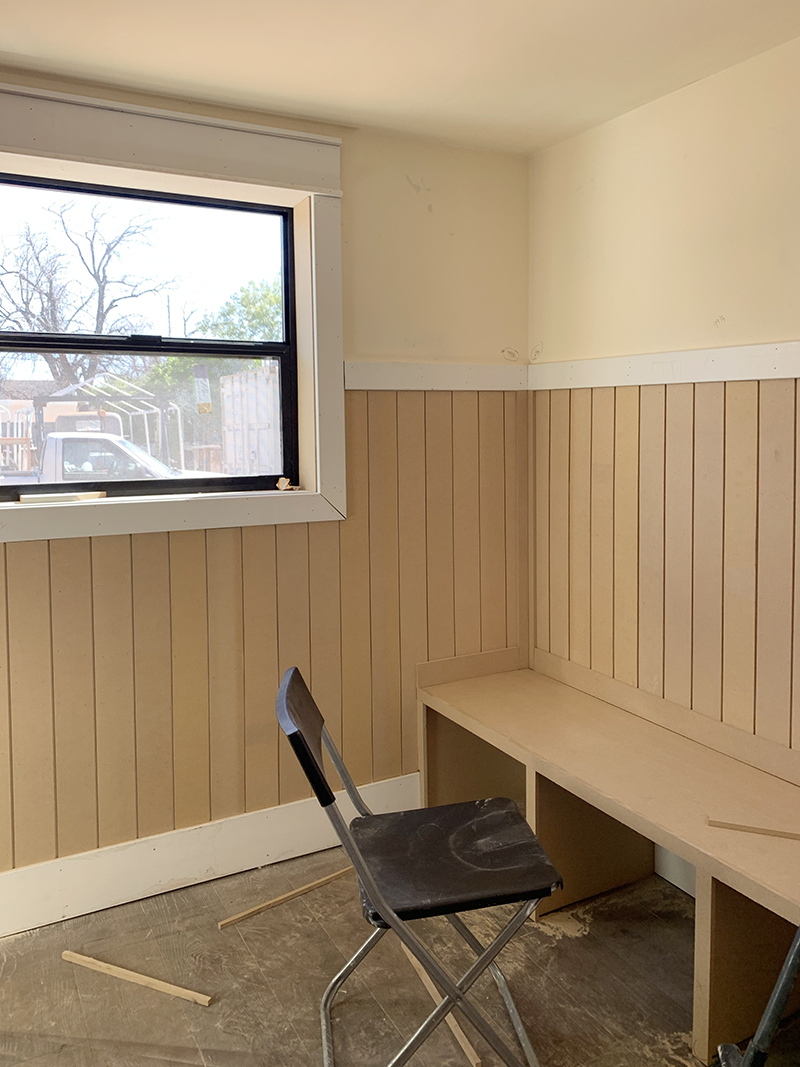
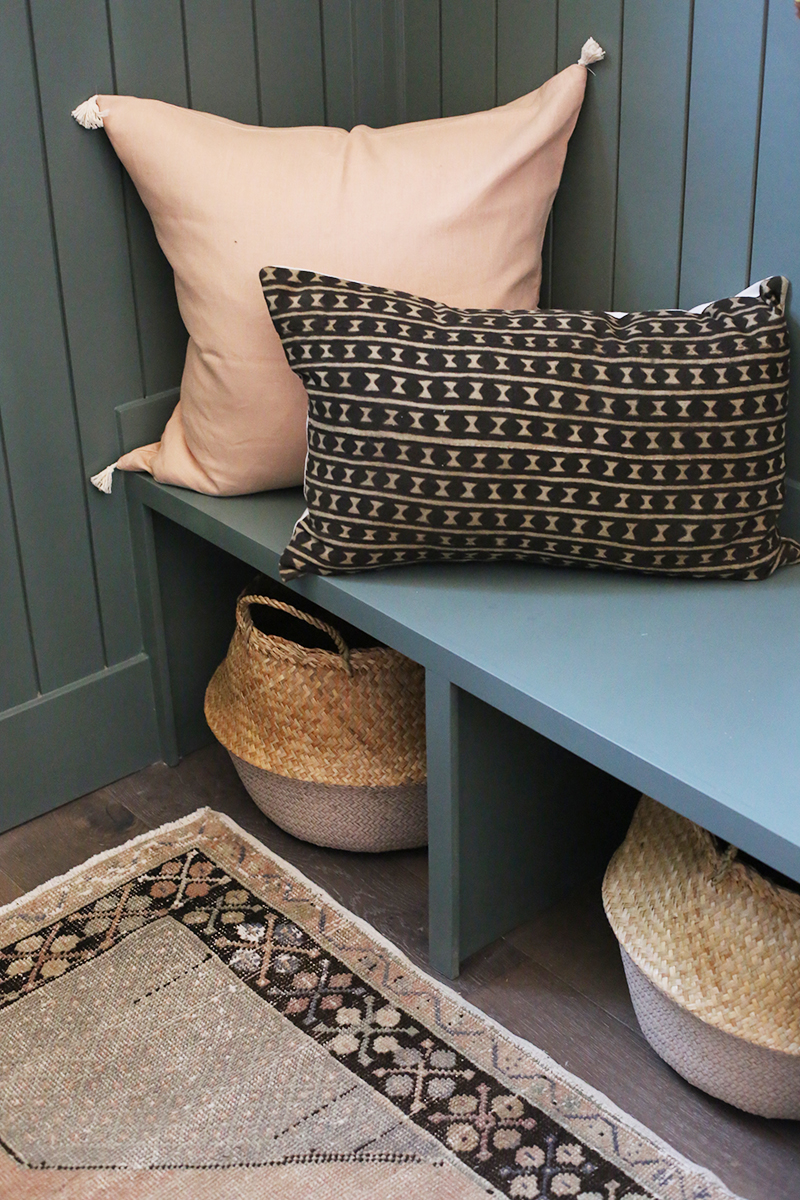
Our trim carpenter first installed the paneling, baseboard and top rail and then he built a simple bench out of MDF on site. After he was finished, all of the seams and joints were caulked and the trim was painted Caldwell Green. The walls were also painted to match most of the rest of the house (Benjamin Moore Chantilly Lace).
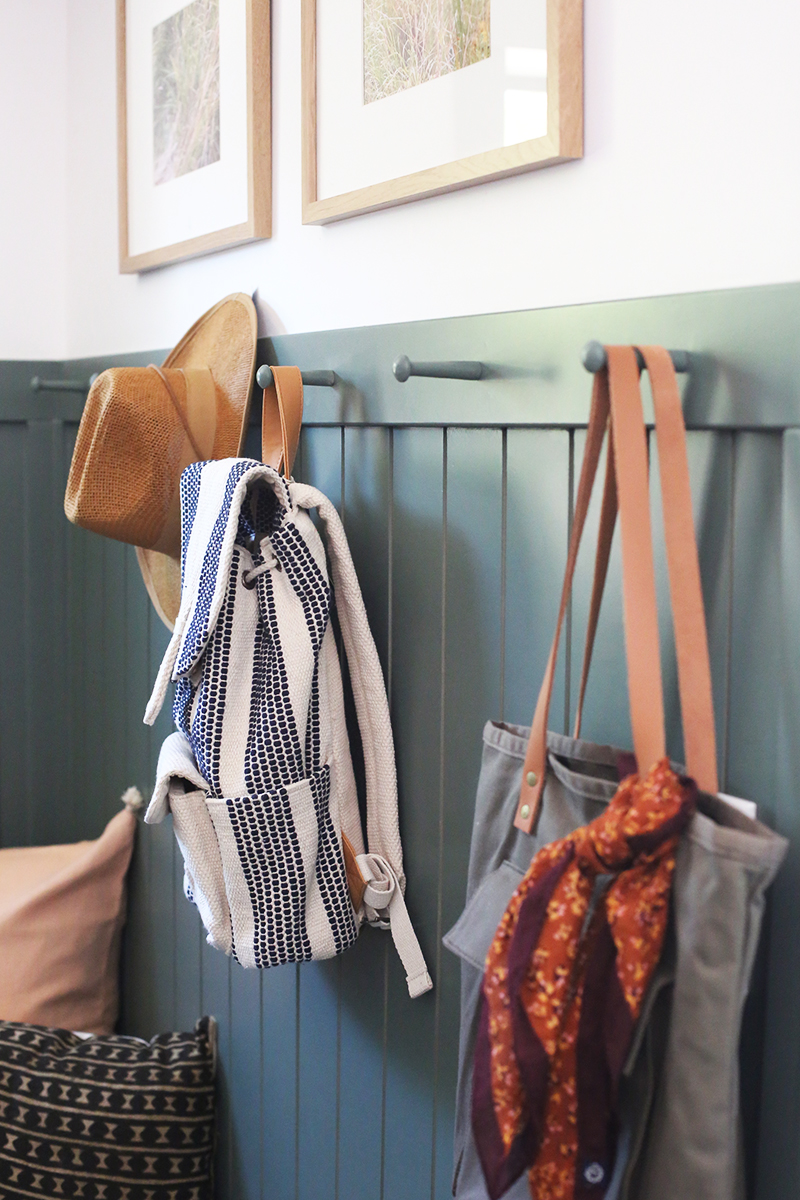
One of my favorite details in this space is these wooden pegs we installed on the top rail trim piece. I’ve always loved English Country style, where wooden knobs and pegs are painted to match cabinets and trim! A 1920s Tudor style house was the perfect place use do this style! (Check out the painted knobs in the kitchen and the upstairs bathroom!)
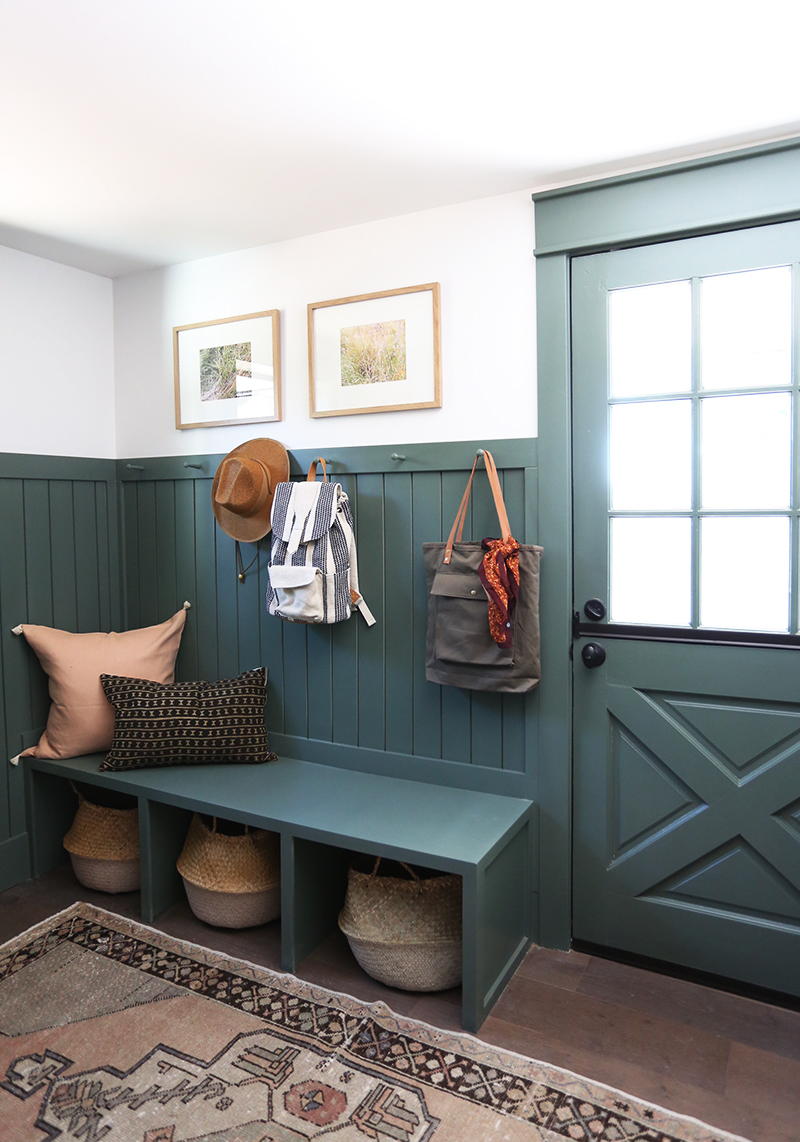
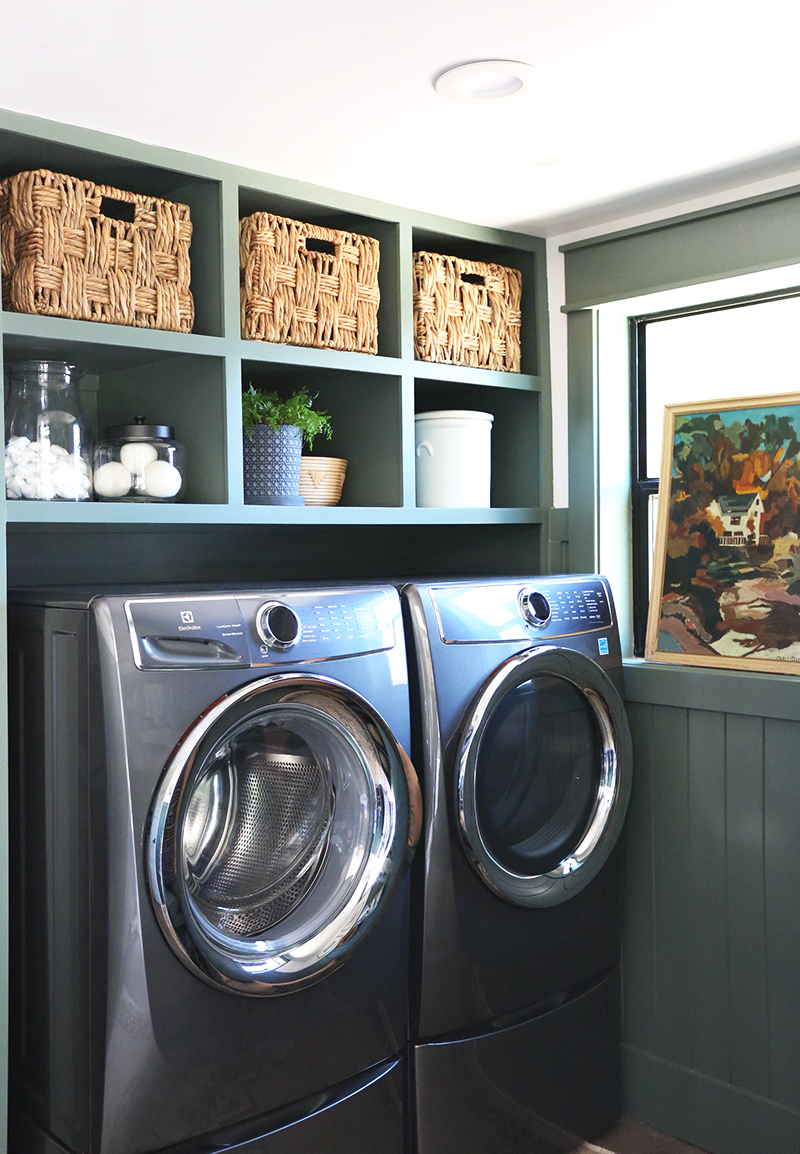
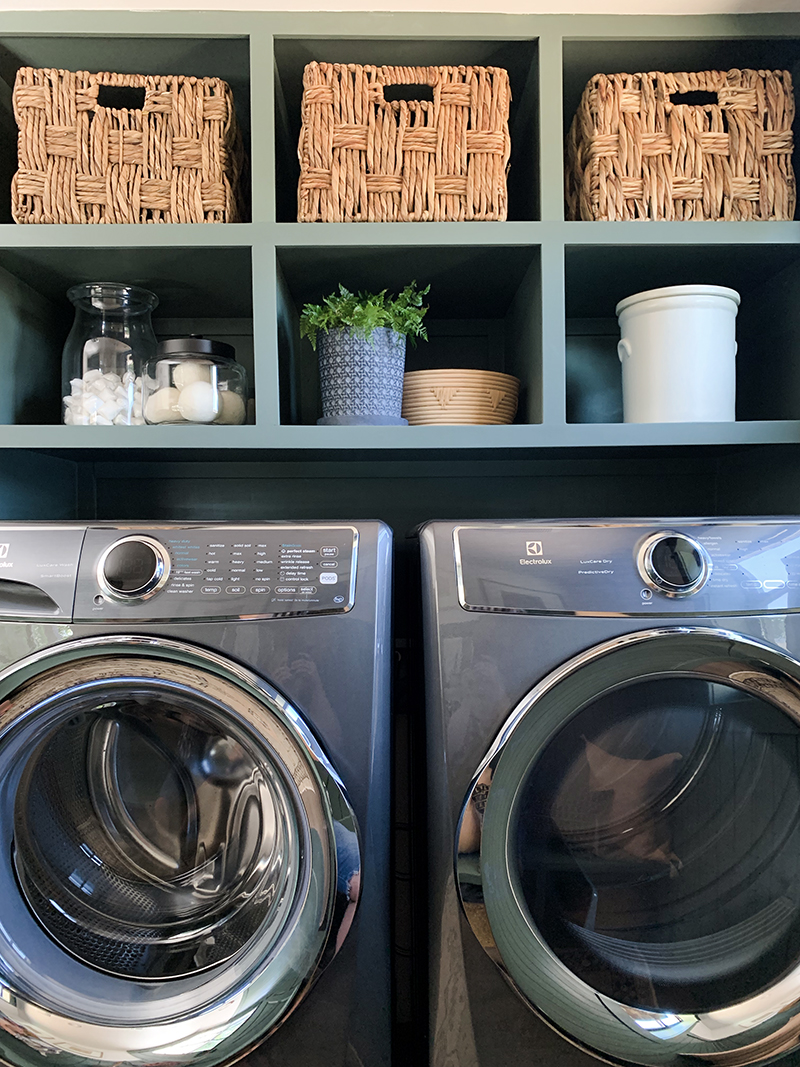
Our trim carpenter also built this simple laundry surround. We didn’t have enough space in here to put the washer/dryer behind closed doors like I would have ideally liked, but the surround helps things look tidy and hides the mechanical parts in the back of the washer/dryer!
We hope you love this space as much as we do! I love how the Caldwell Green walls are saturated enough to pack a big visual punch, but the color is also muddy enough to be easy on the eyes. Here are few of our go-to moody and muddy paint colors that works SO WELL on cabinetry and trim and walls of small spaces! And don’t miss a full list of sources used in this space at the bottom of the post!
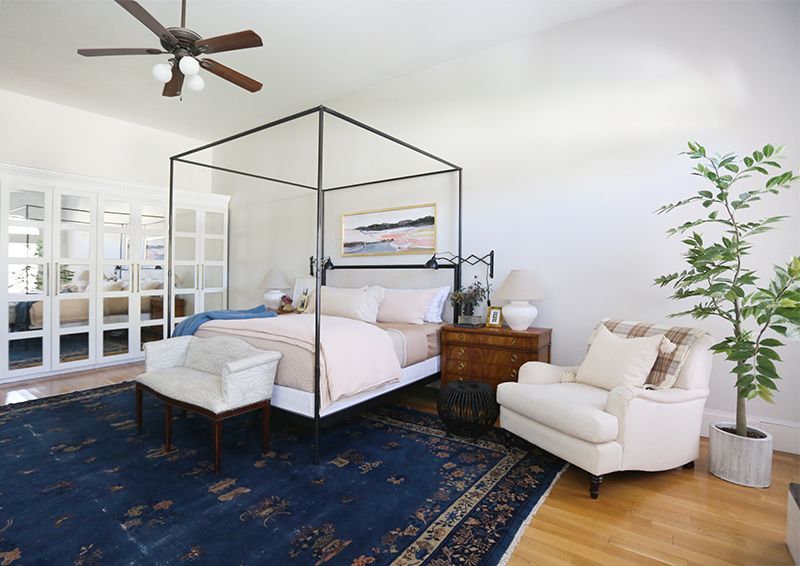
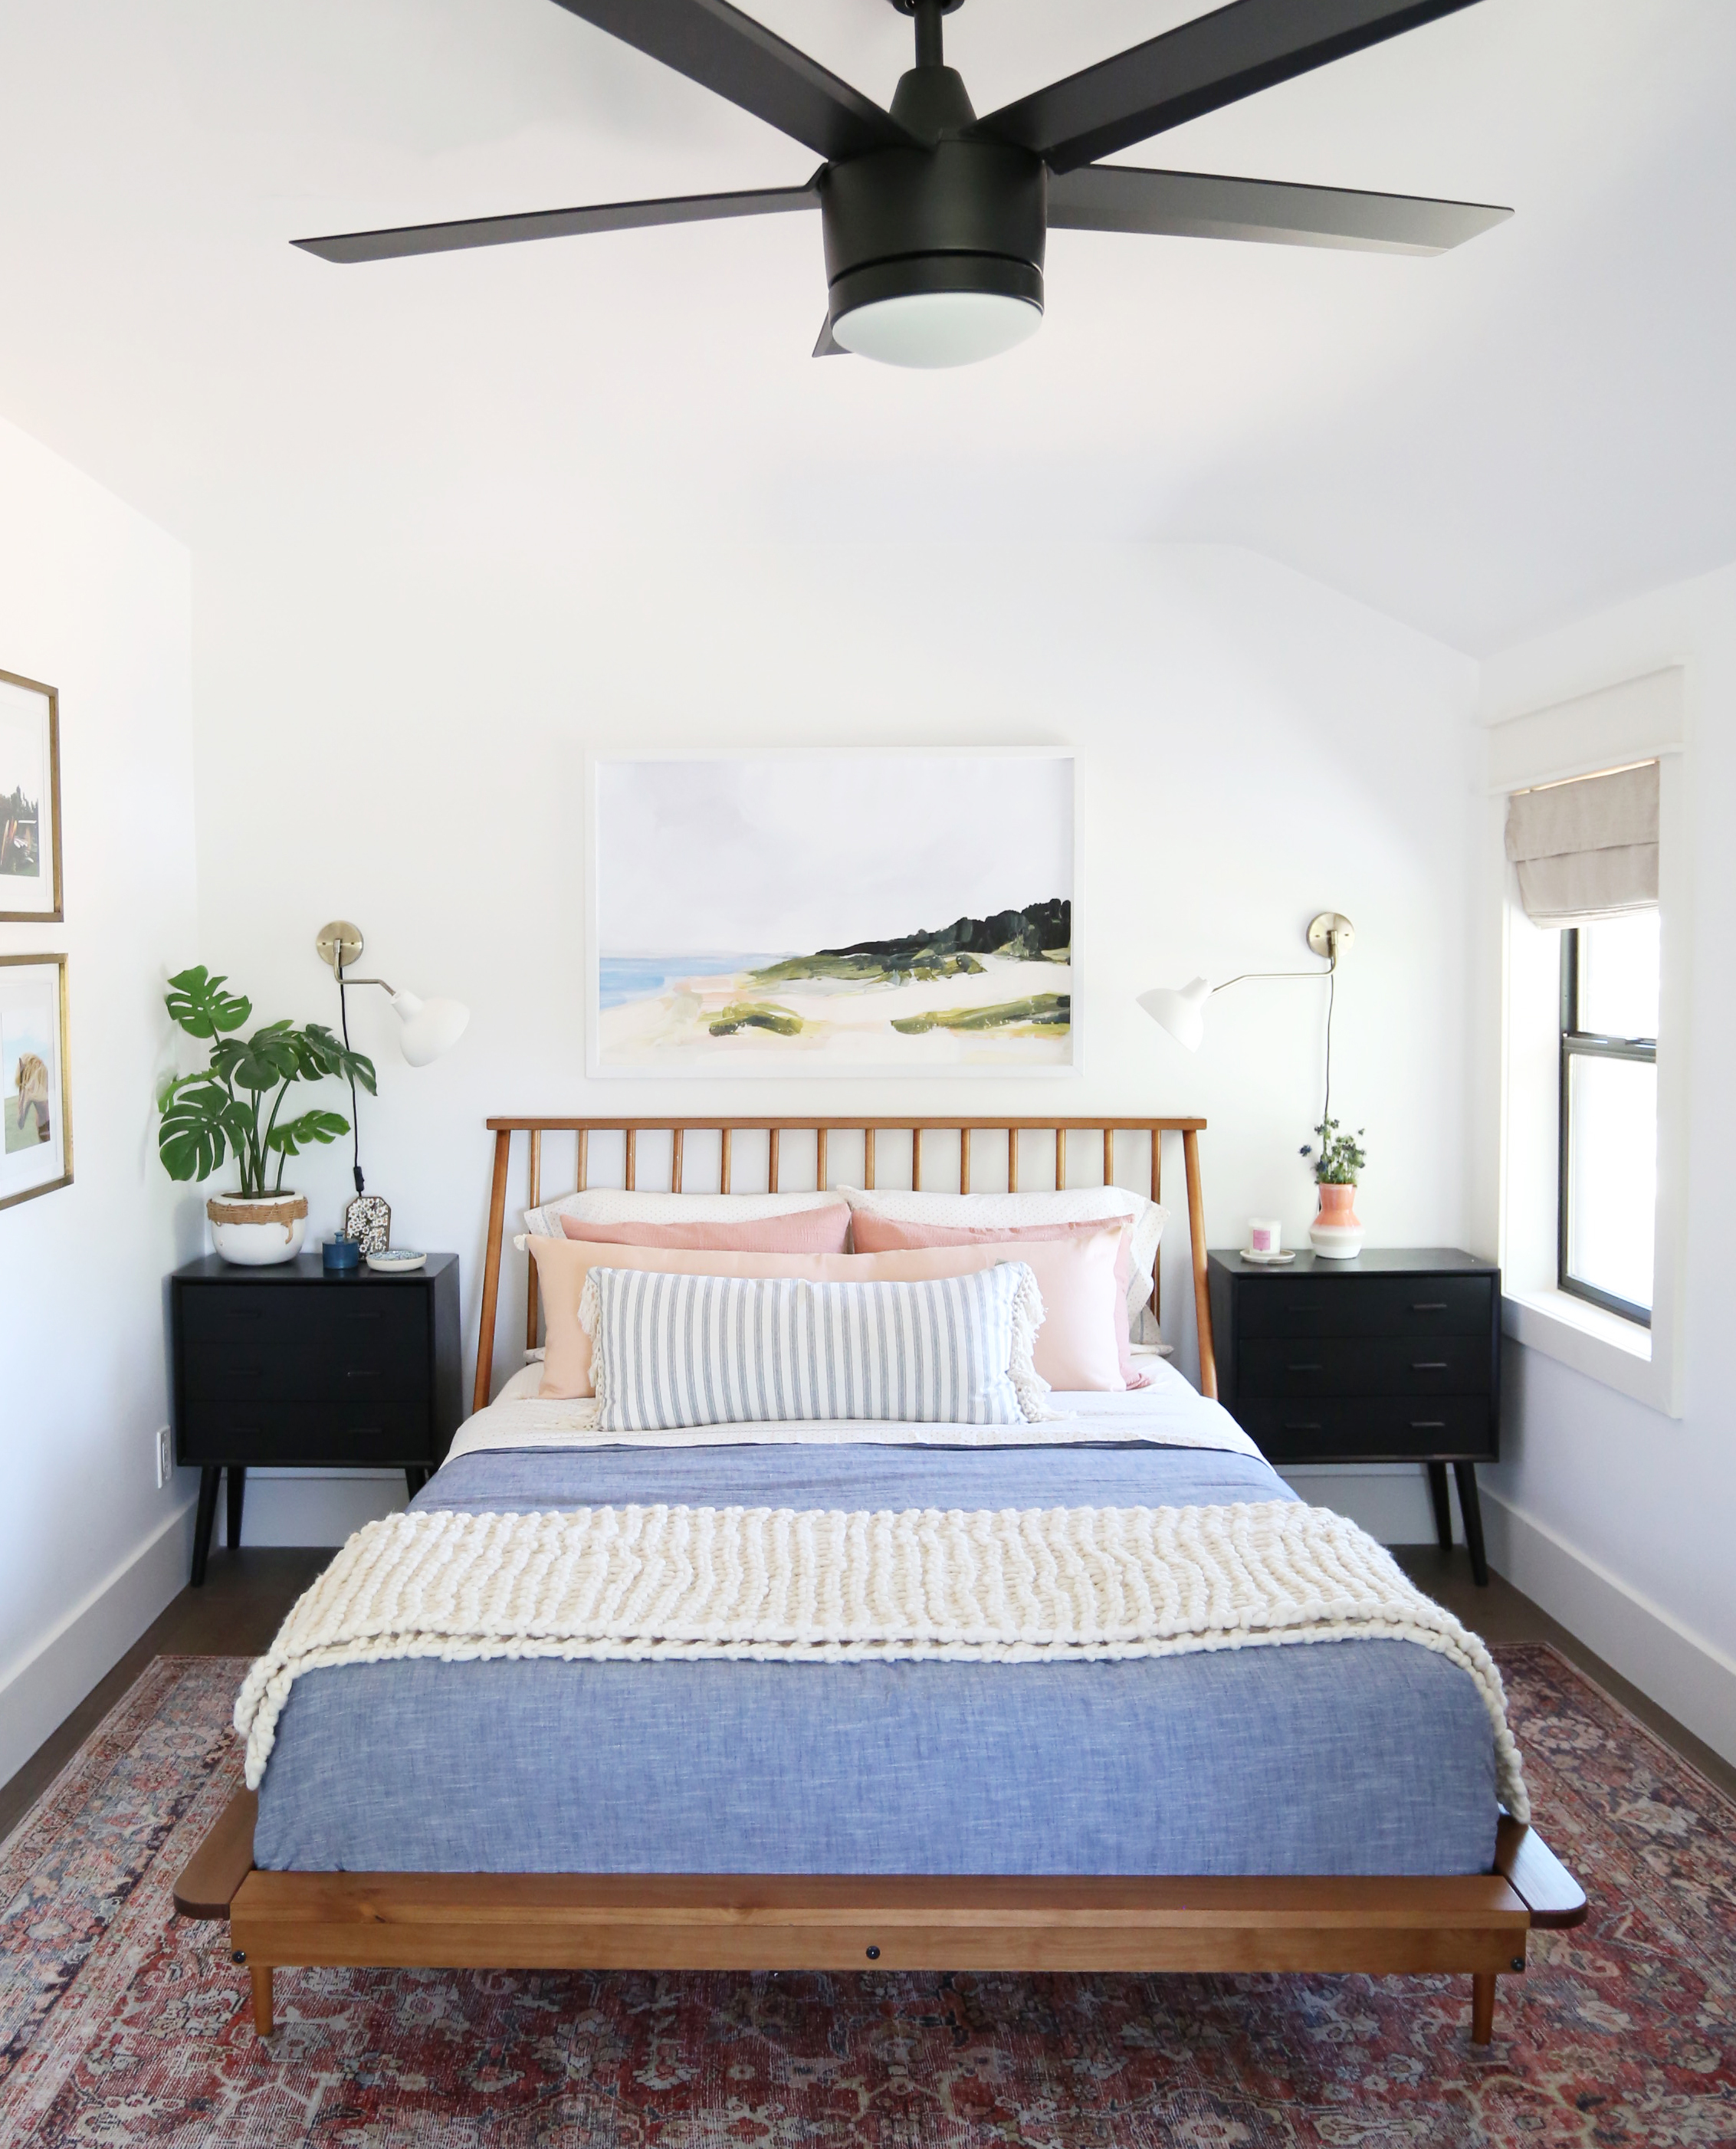
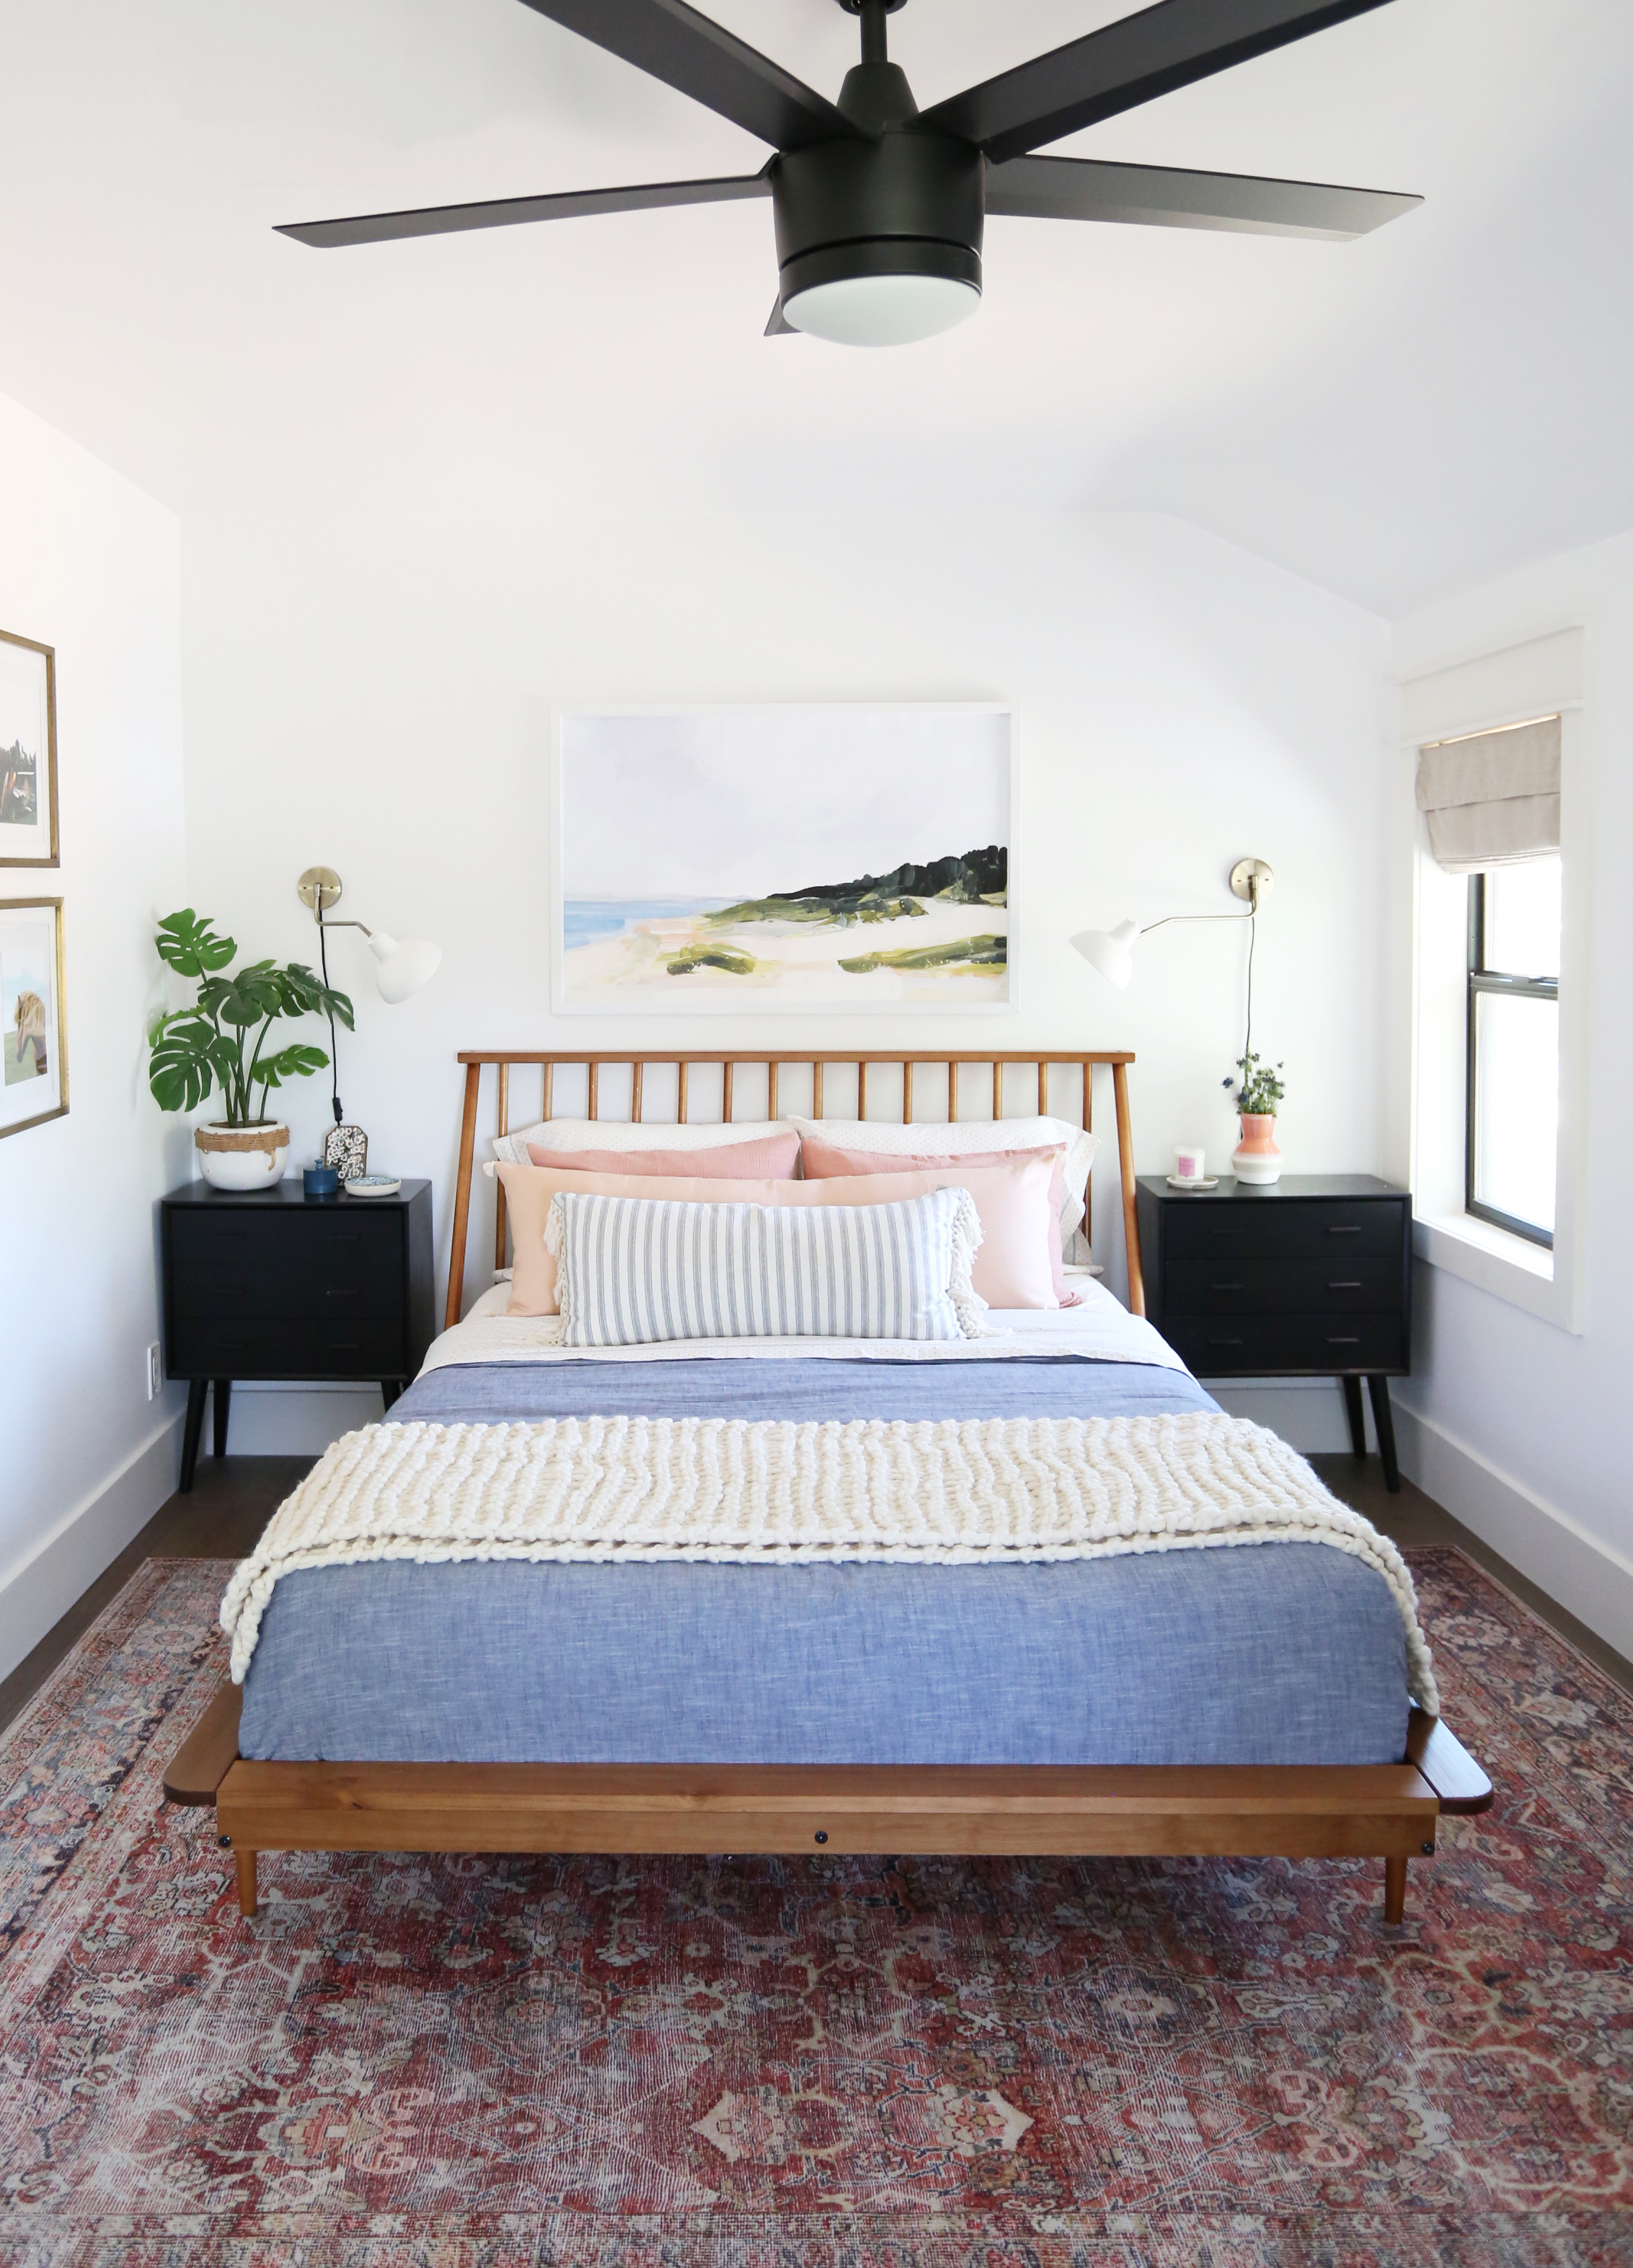
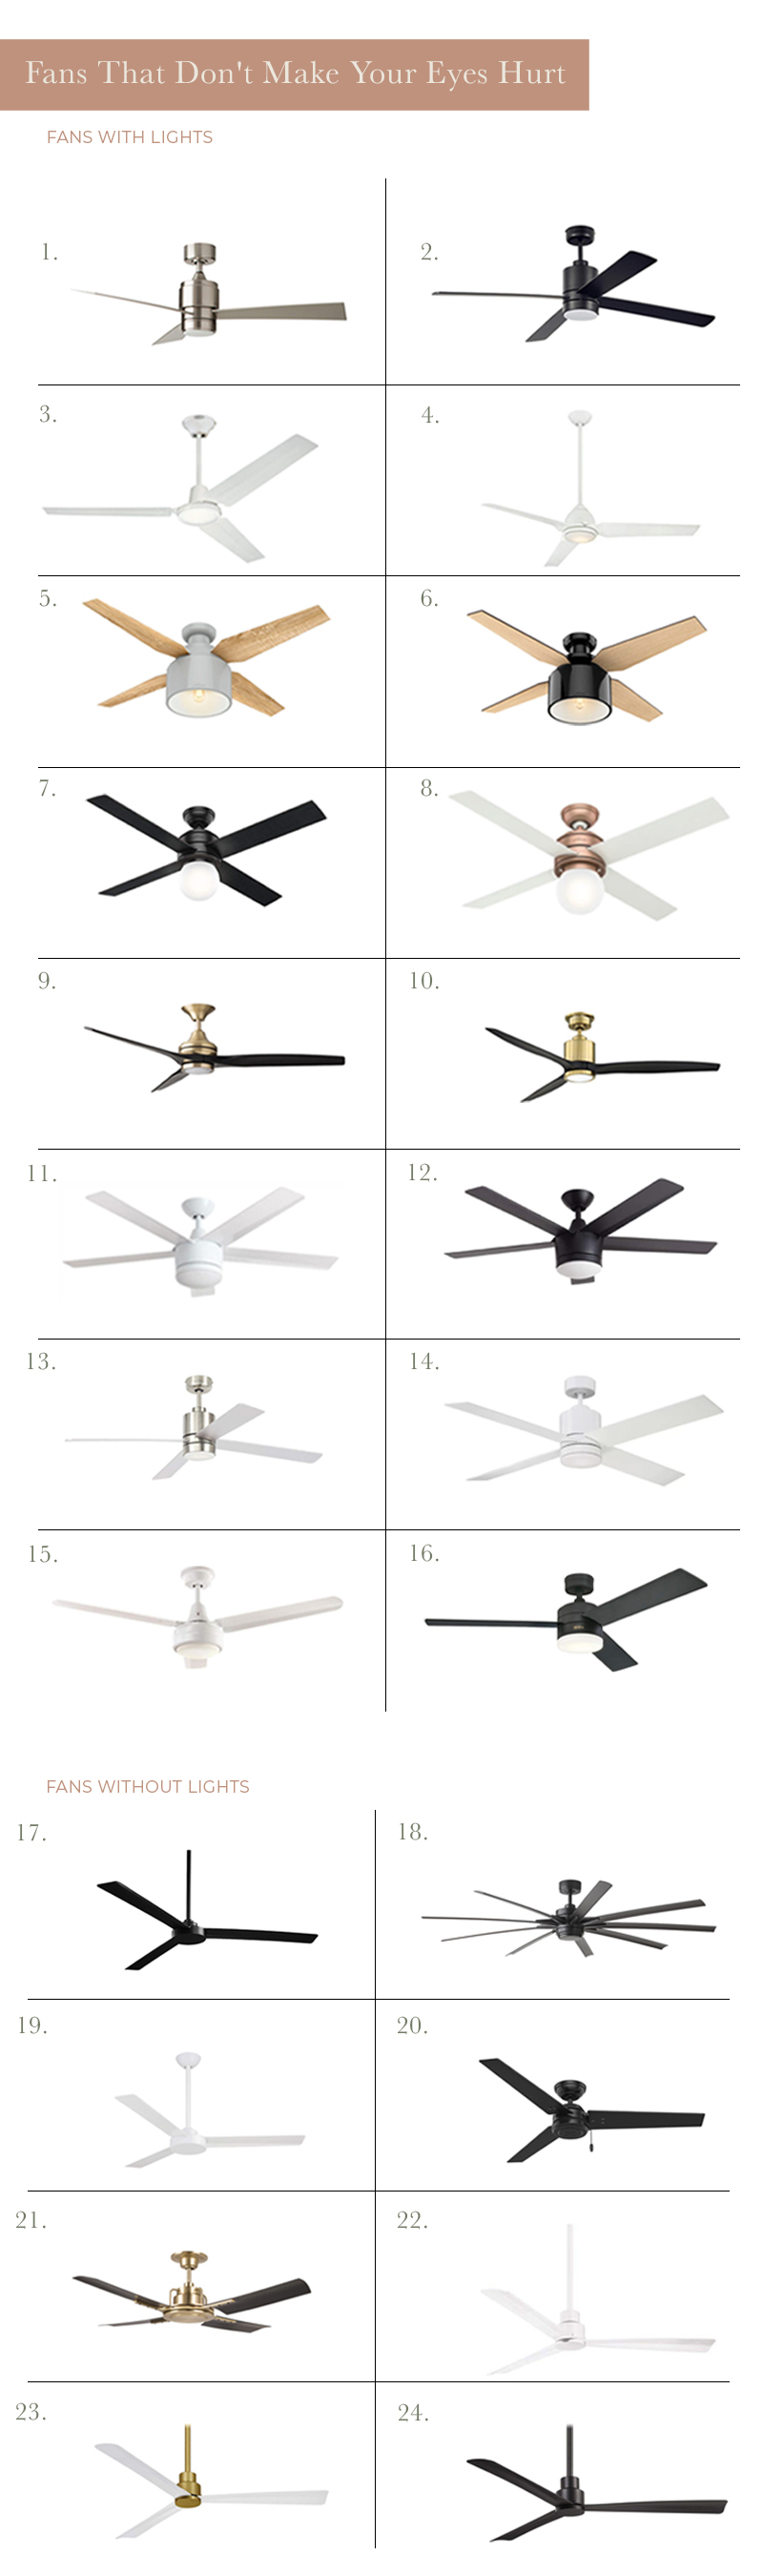
Ceiling fans don’t usually have the best reputation, it’s true. But when you live anywhere with a warmer climate, ceiling fans are a MUST for most of us, especially in bedrooms! I am pretty opinionated about my ceiling fans though and thought I’d share my tips and some of my tried and true favorite fans…
Ceiling fans don’t usually have the best reputation, it’s true. But when you live anywhere with a warmer climate, ceiling fans are a MUST for most of us, especially in bedrooms! I am pretty opinionated about my ceiling fans though and thought I’d share my tips and some of my tried and true favorite fans here today.
My rules for choosing ceiling fans are pretty straight-forward:
Simple is best. I like the style of my fan to swing more modern and sleek and rather than ornate and eye-catching. I also prefer blades that are more linear than curved.
If you have can lights, choose a fan without a light kit.
If your ceilings are shorter than 8′, I would not install a ceiling fan and would just keep a portable fan on a dresser or nightstand (this one is great!). Most ceiling fans have a total drop of at least 14″ and you really don’t want your under-fan clearance to be too far below 7′. In general, you’re going to want to pay very close attention to the measurement of the drop/fan height if your ceilings are not soaring!
If your ceilings are shorter than 8’6″, consider using a white fan to visually blend into the ceiling (assuming your ceilings are white). Otherwise, you might want to choose a finish that matches your door hardware finish and/or window color.
If spaces are open to each other, I think it’s a good idea for fans to match exactly. I usually end up picking one style and finish for an entire house.
Work with an electrician to properly install your fan! No one likes a wobbly fan!
Wether you are short on space or your kids just love being in the same room, shared kids spaces are a really popular choice! Not only does it solve design challenges, it can be such a fun and creative environment for your kids. Click here to see more photos of this kids space! source Matching…
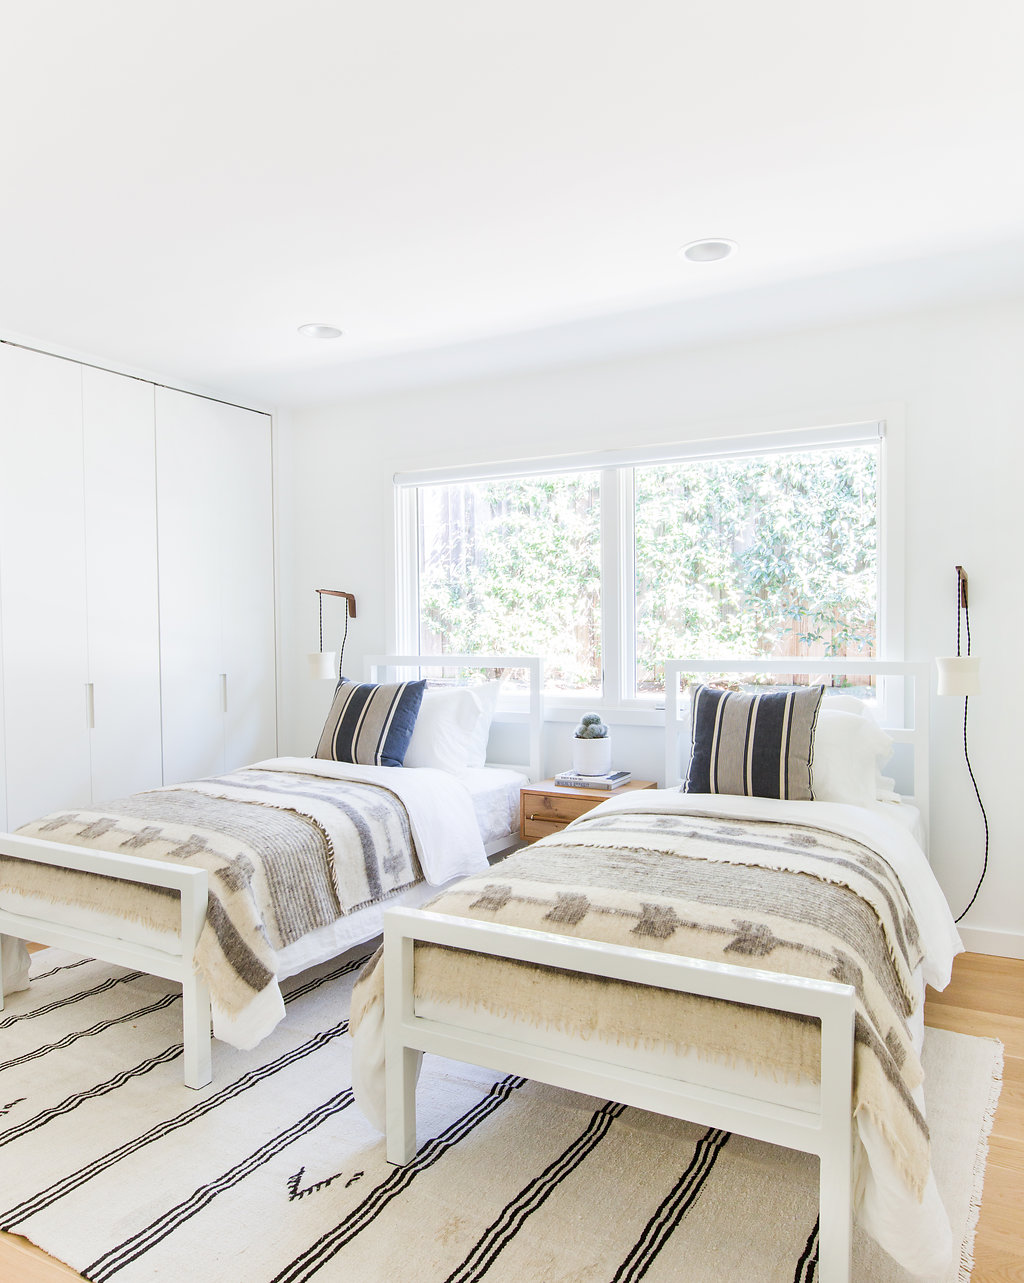
Wether you are short on space or your kids just love being in the same room, shared kids spaces are a really popular choice! Not only does it solve design challenges, it can be such a fun and creative environment for your kids.
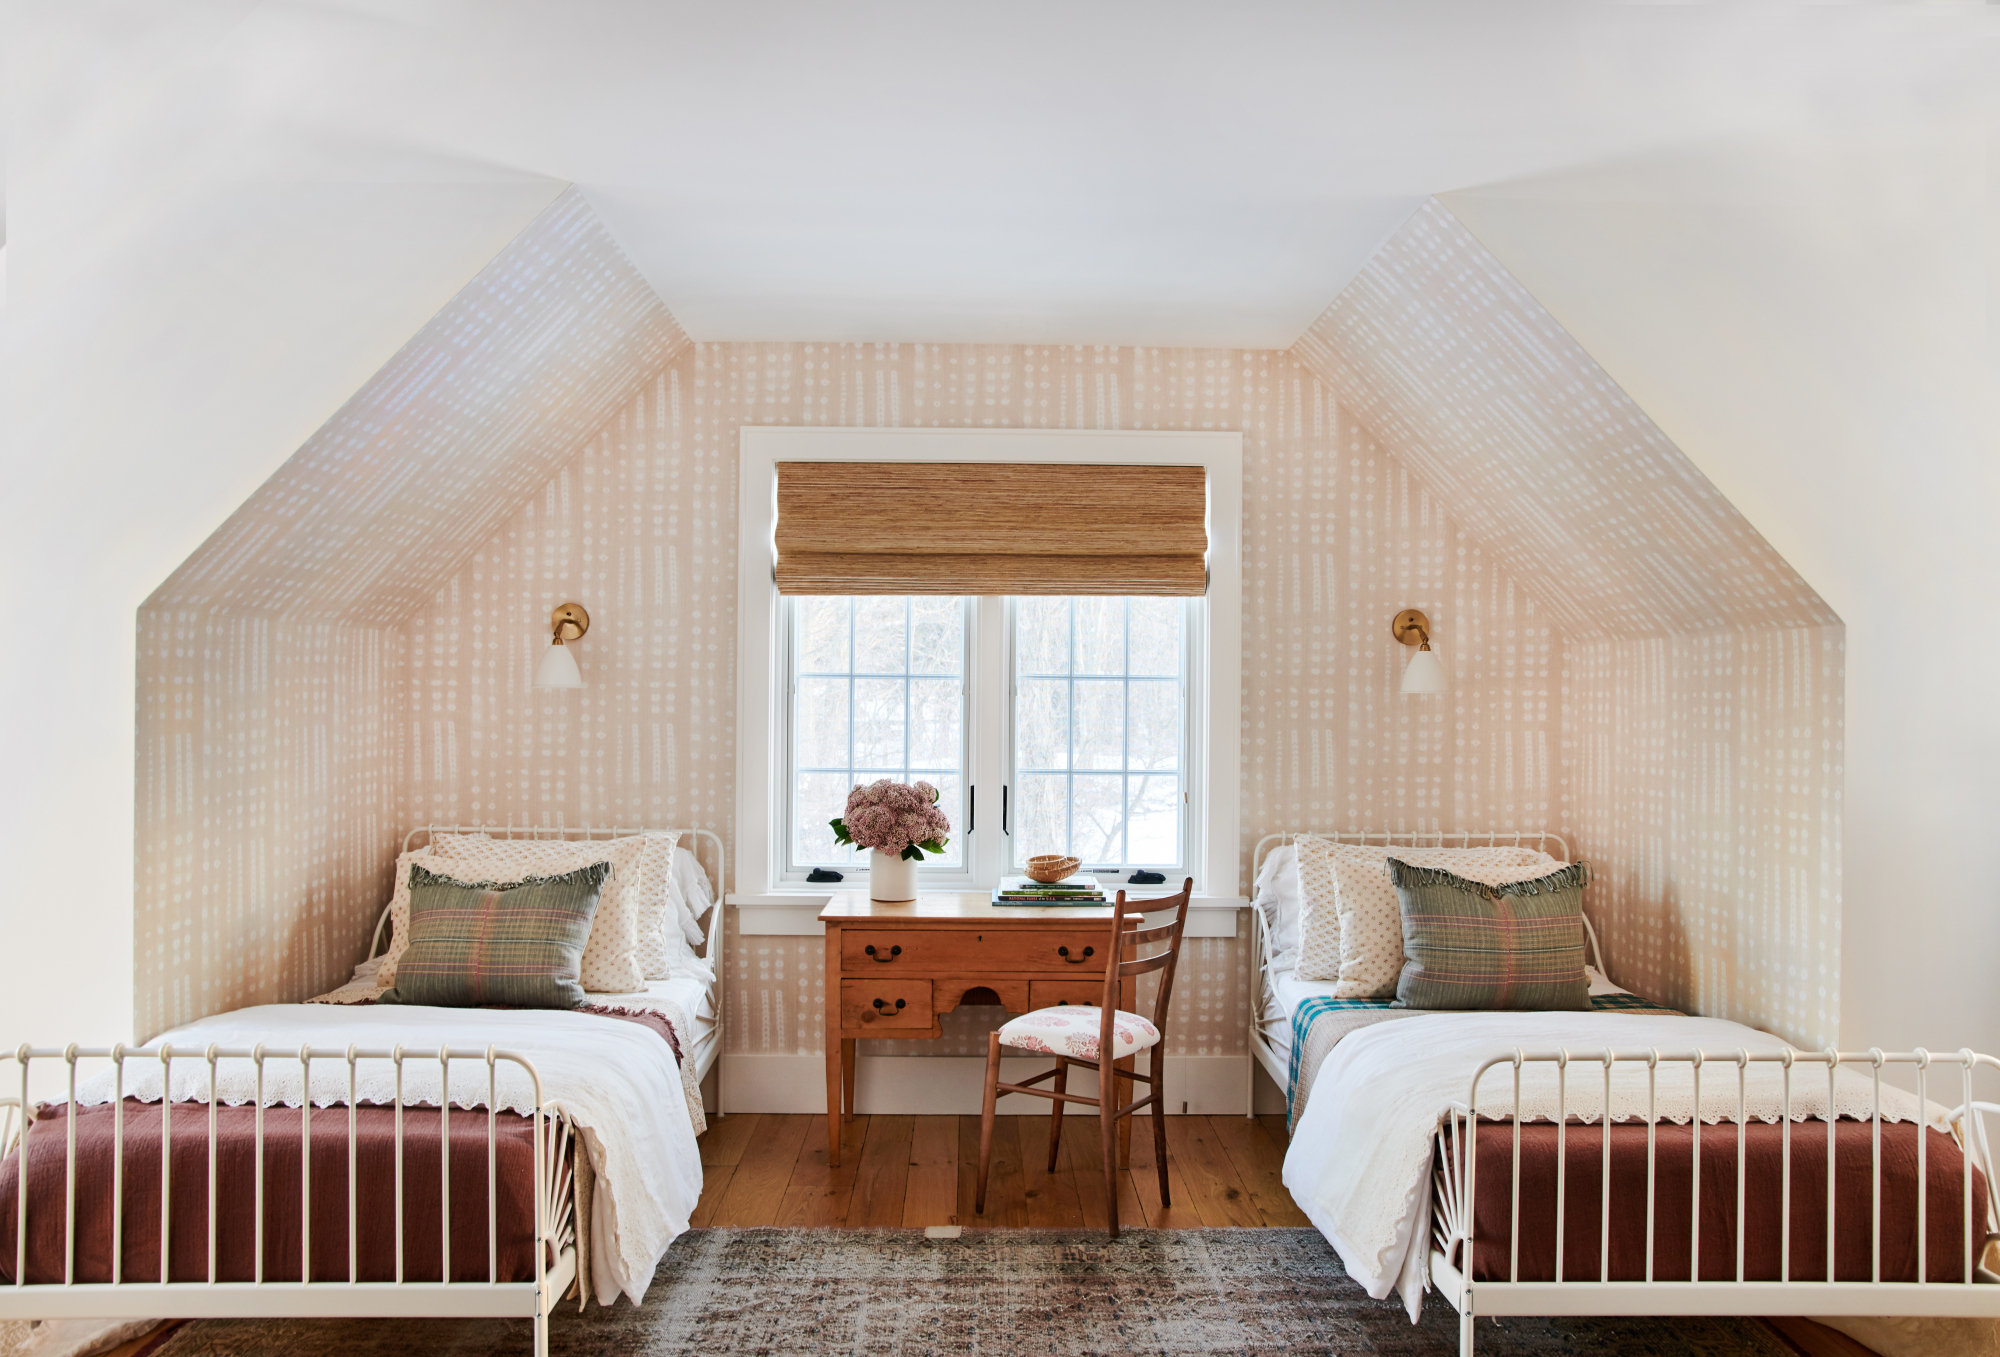
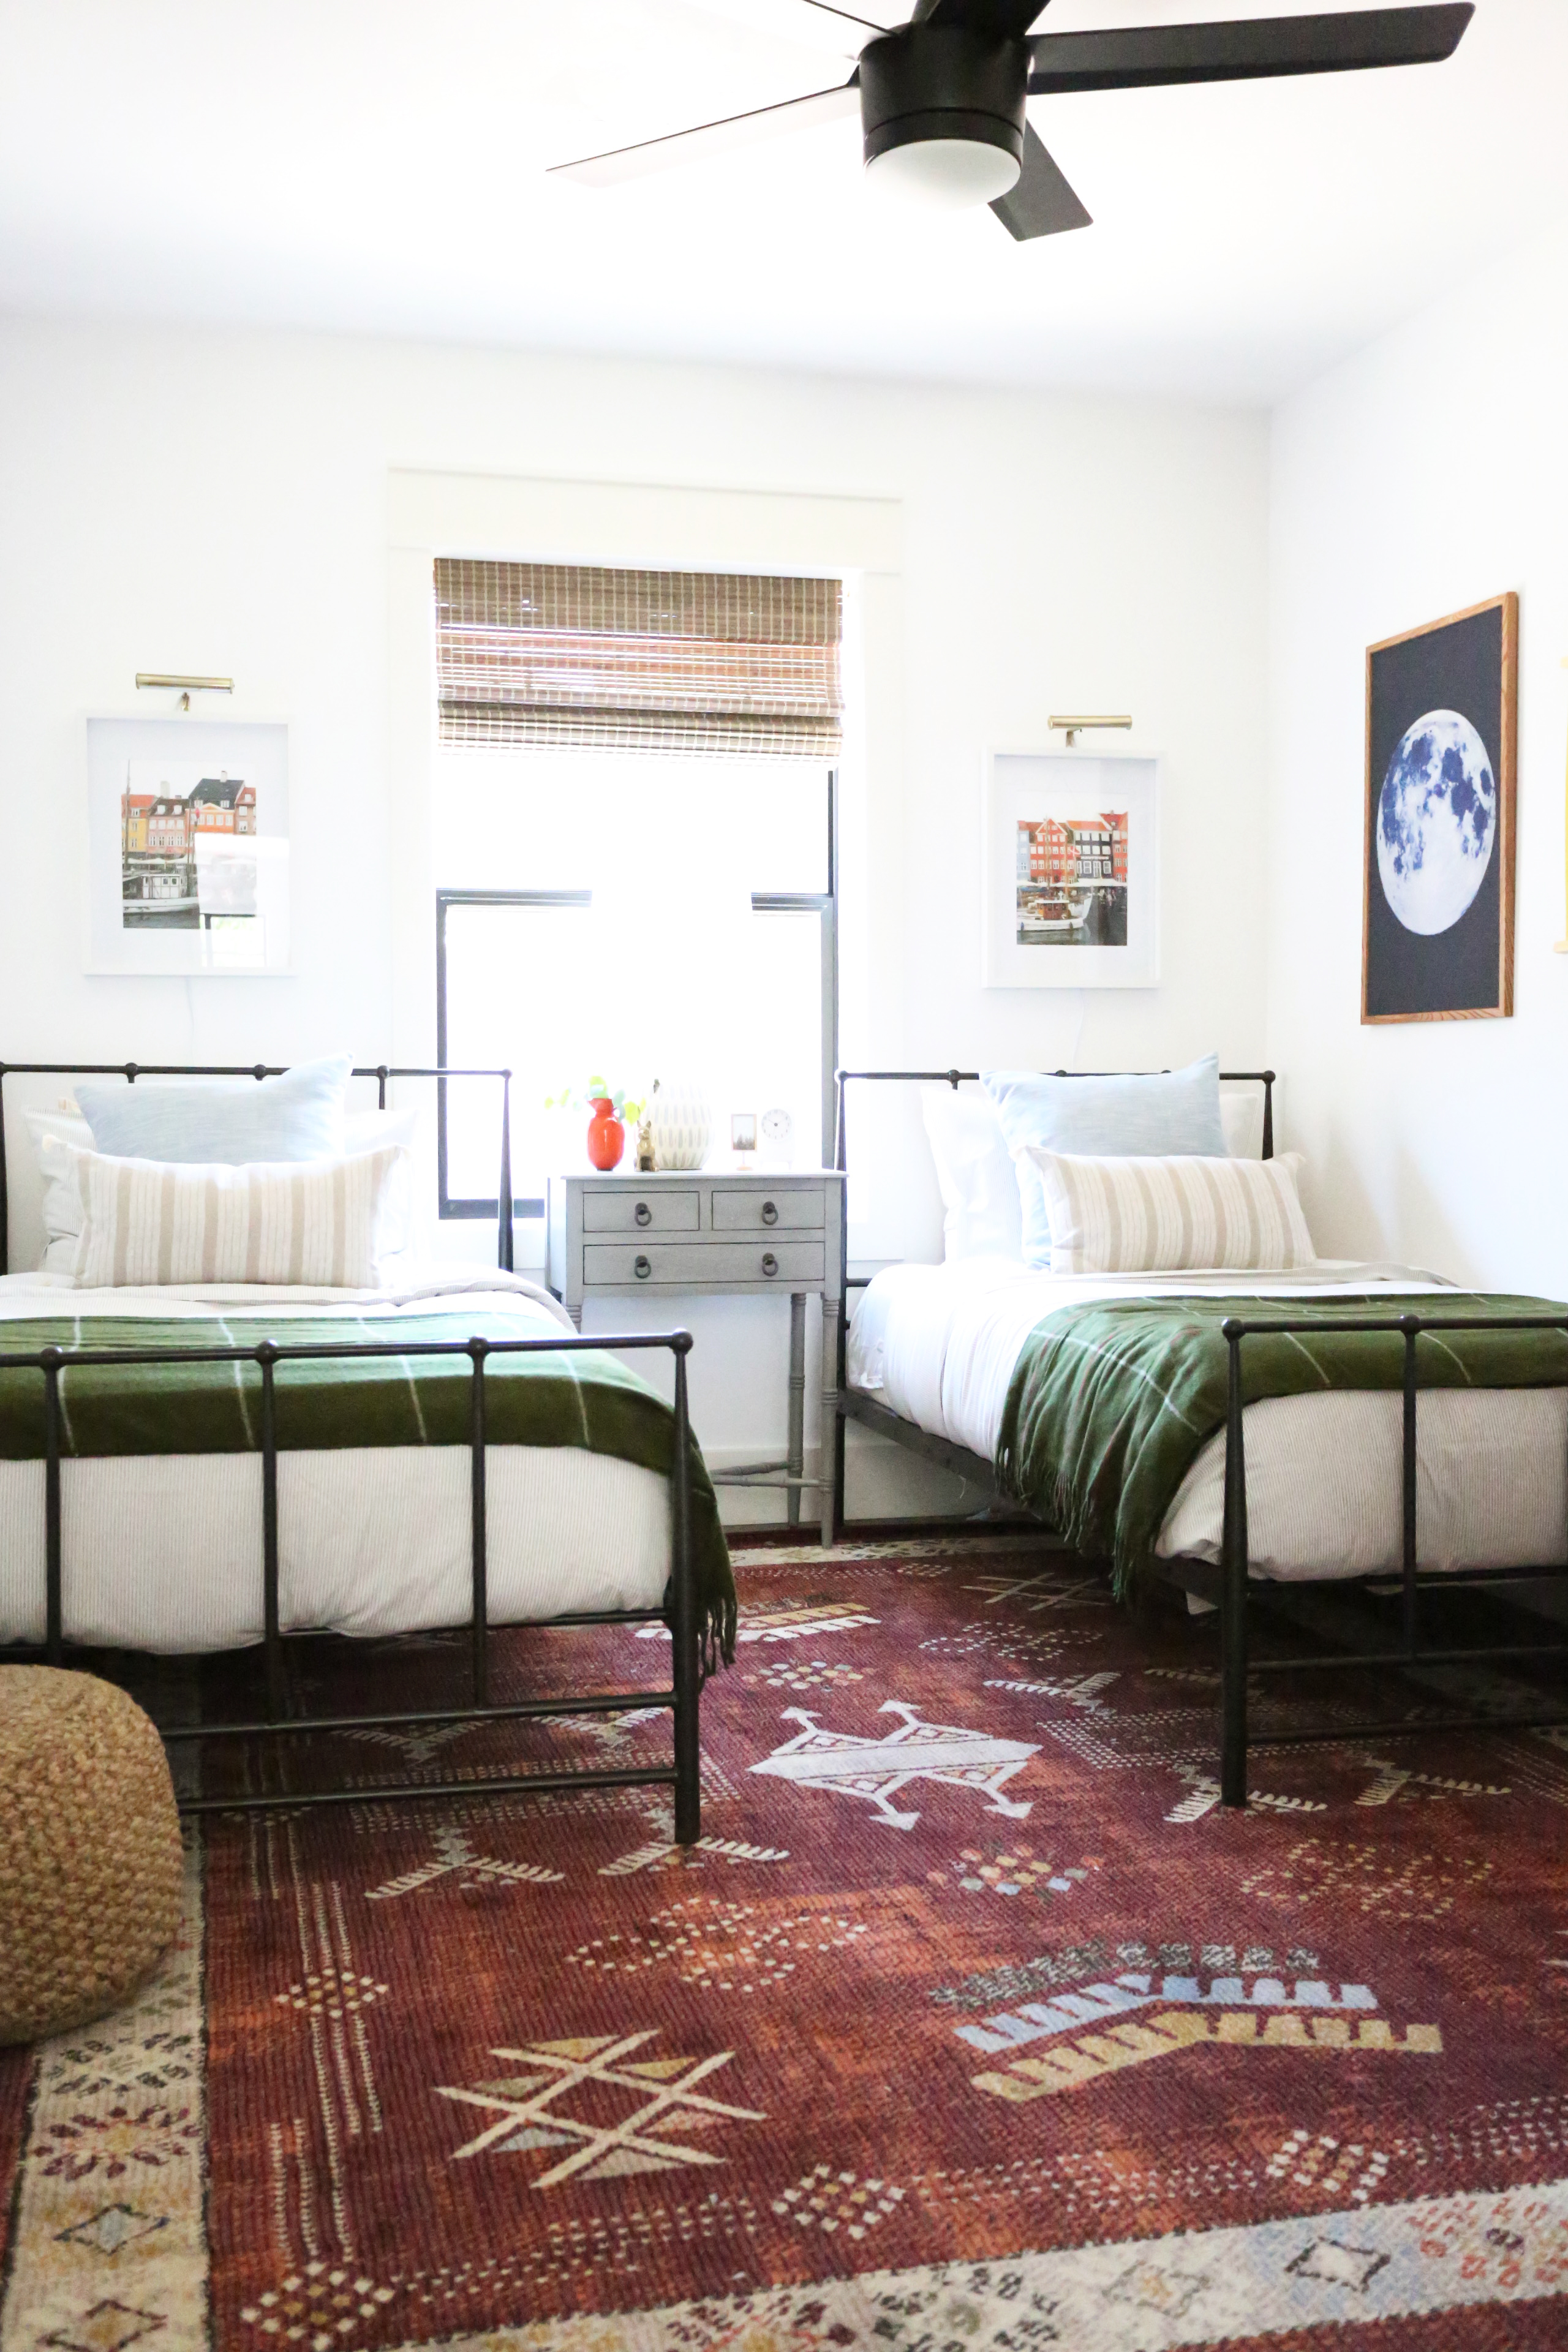
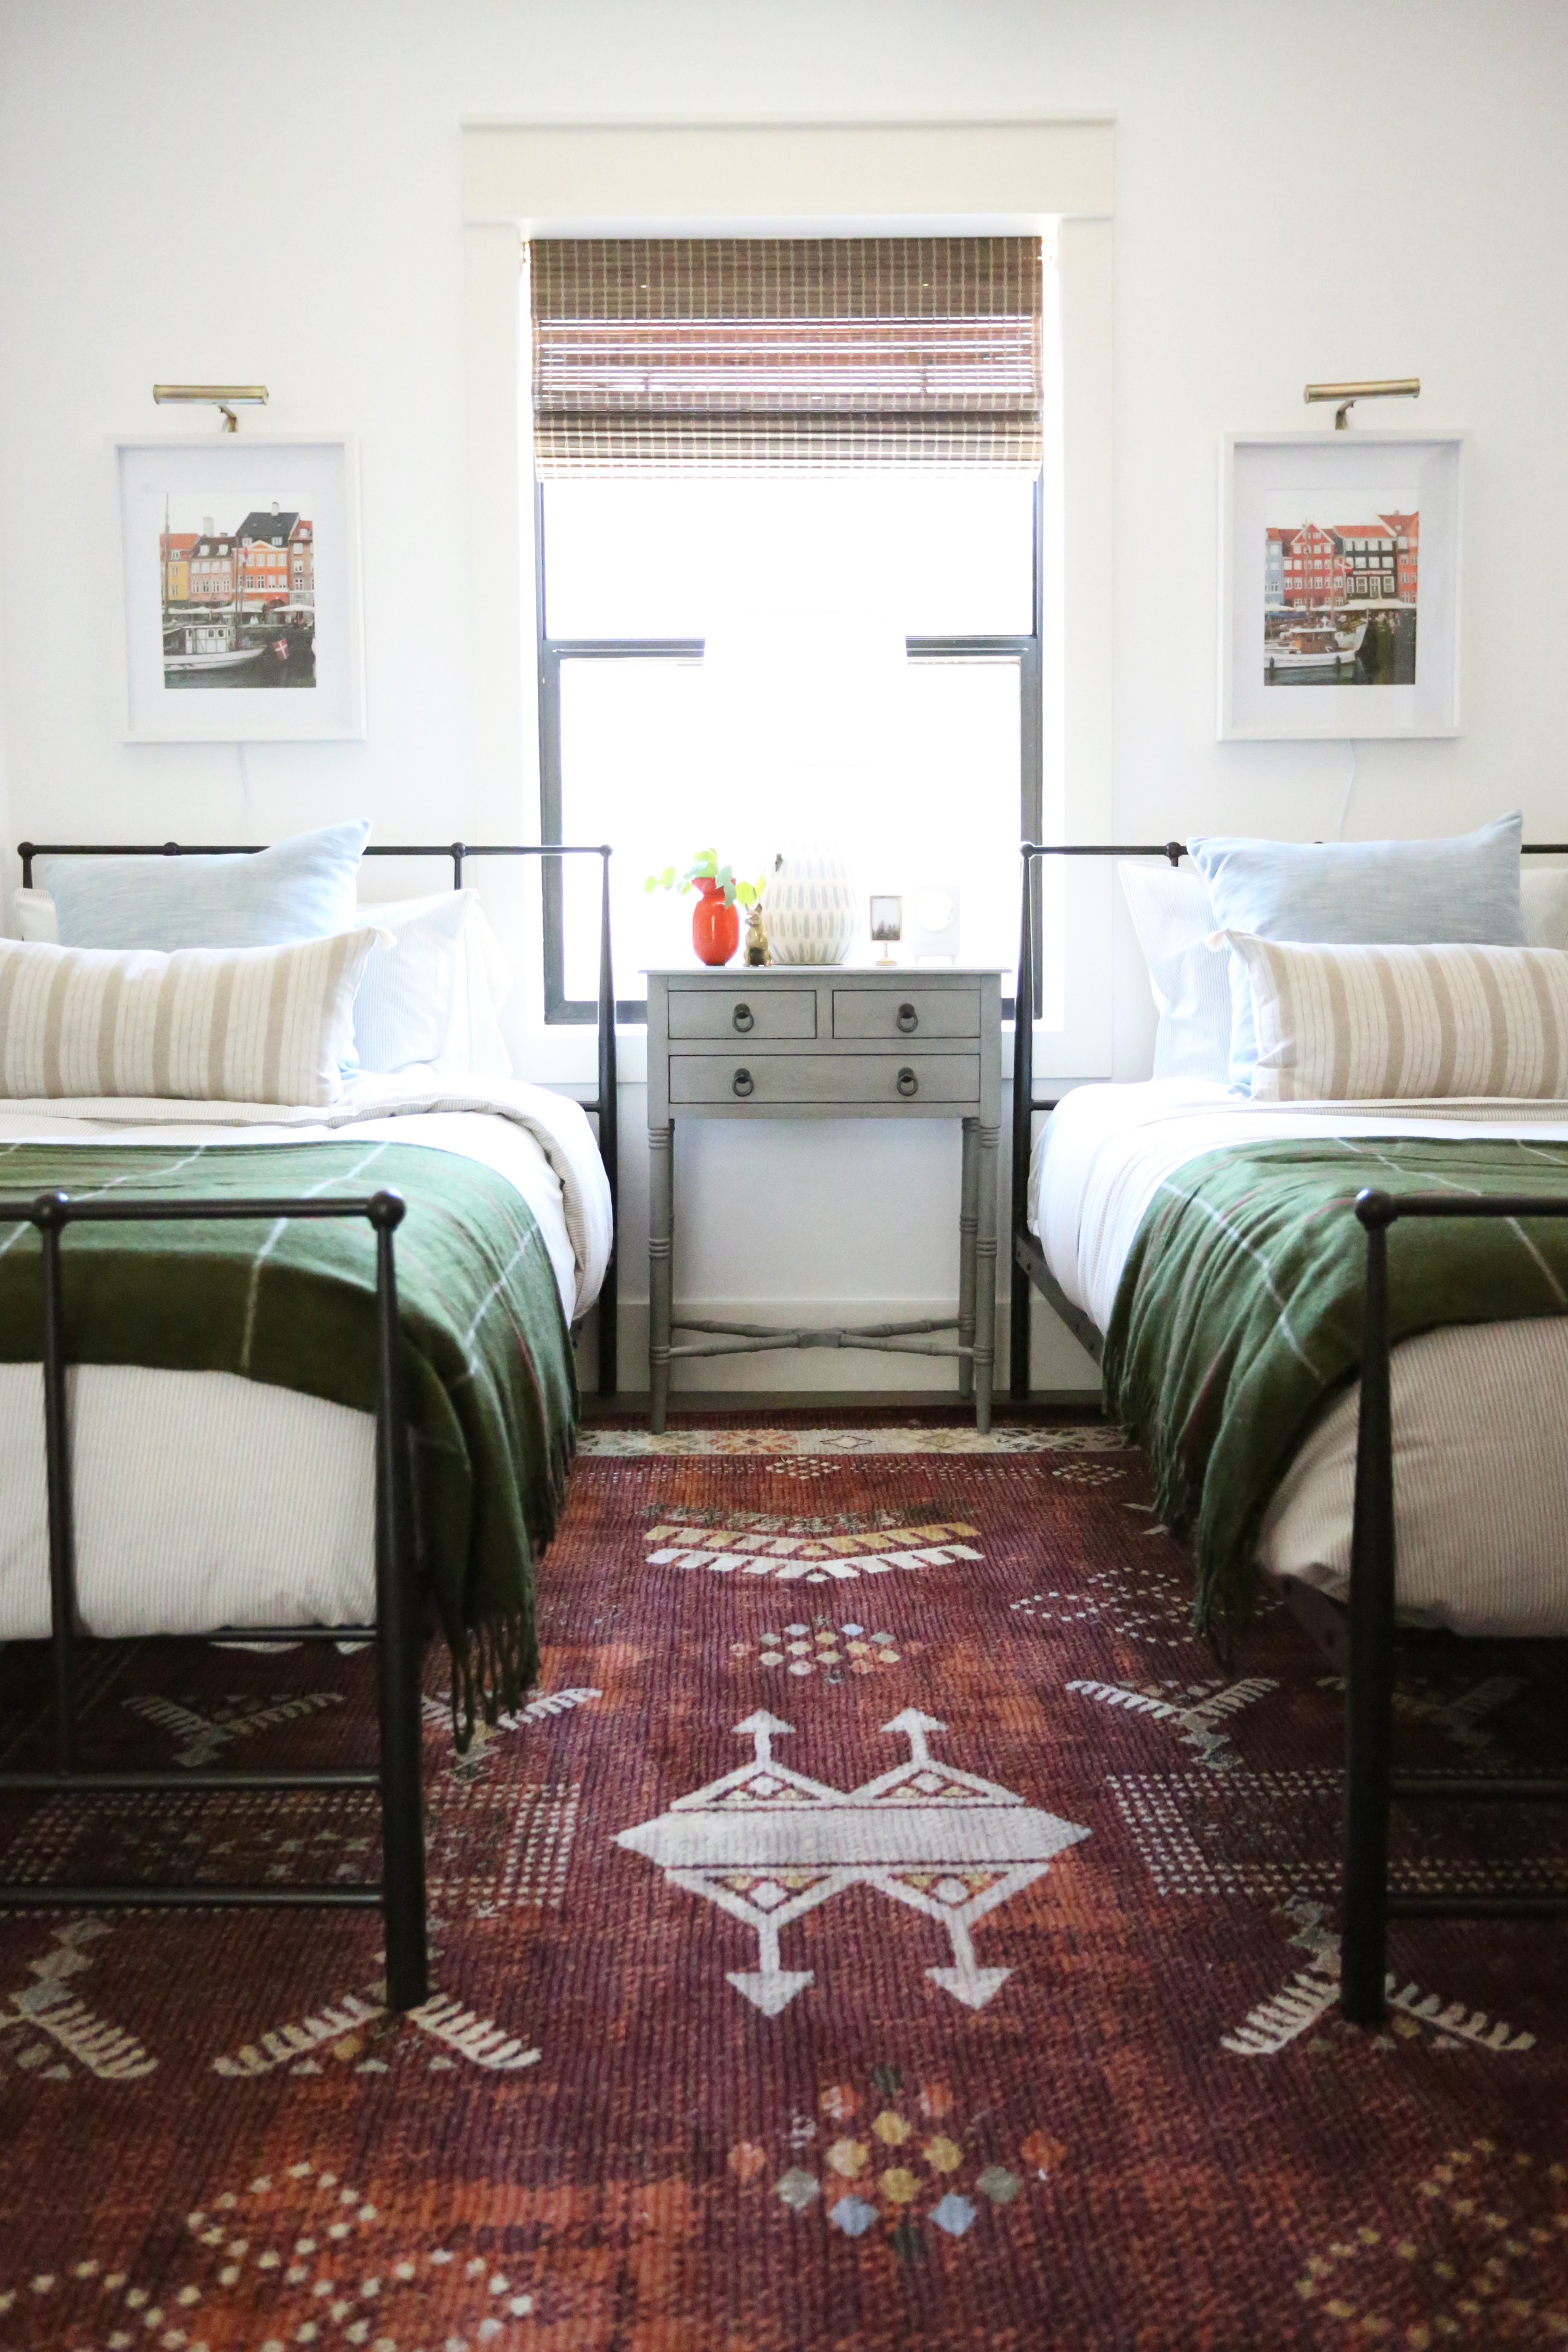
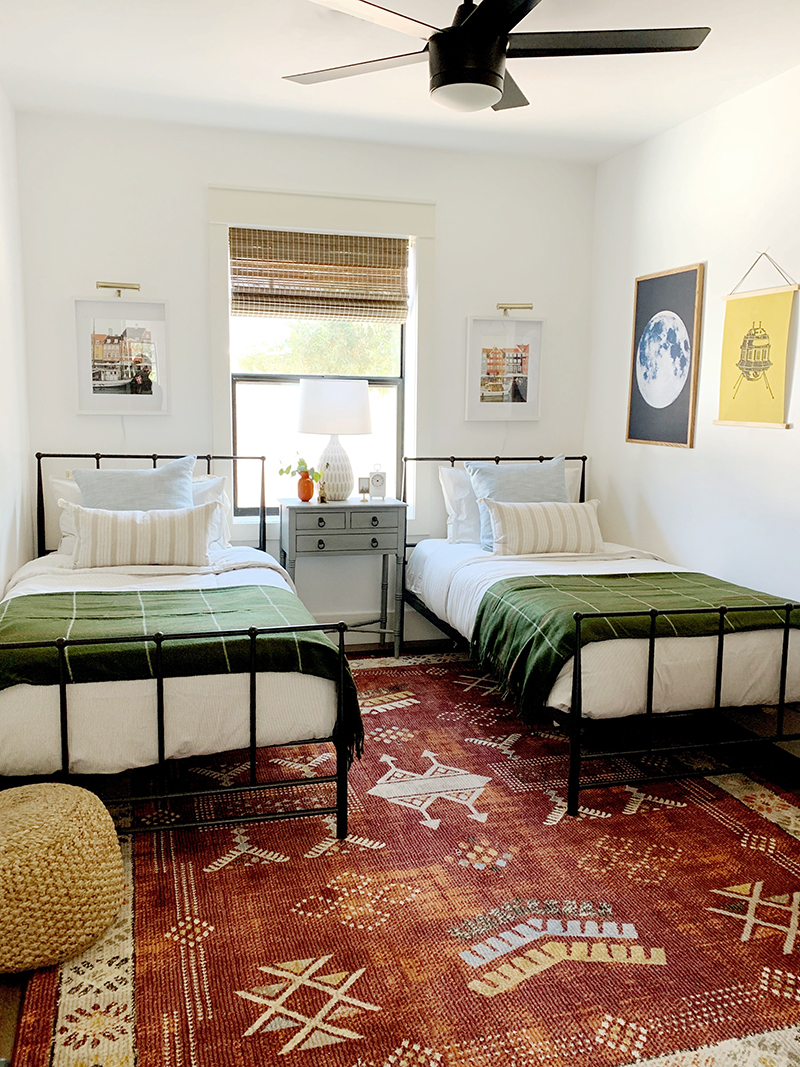
Matching twin beds are a great place to start in a shared space. While matching beds aren’t totally necessary, it can really help give the room some symmetry and a cohesive palette. Always allow for a minimum of 3 feet between the beds. If you have enough space, it helps to have each bed pulled about a foot away from the wall. This really comes in handy when making the bed!
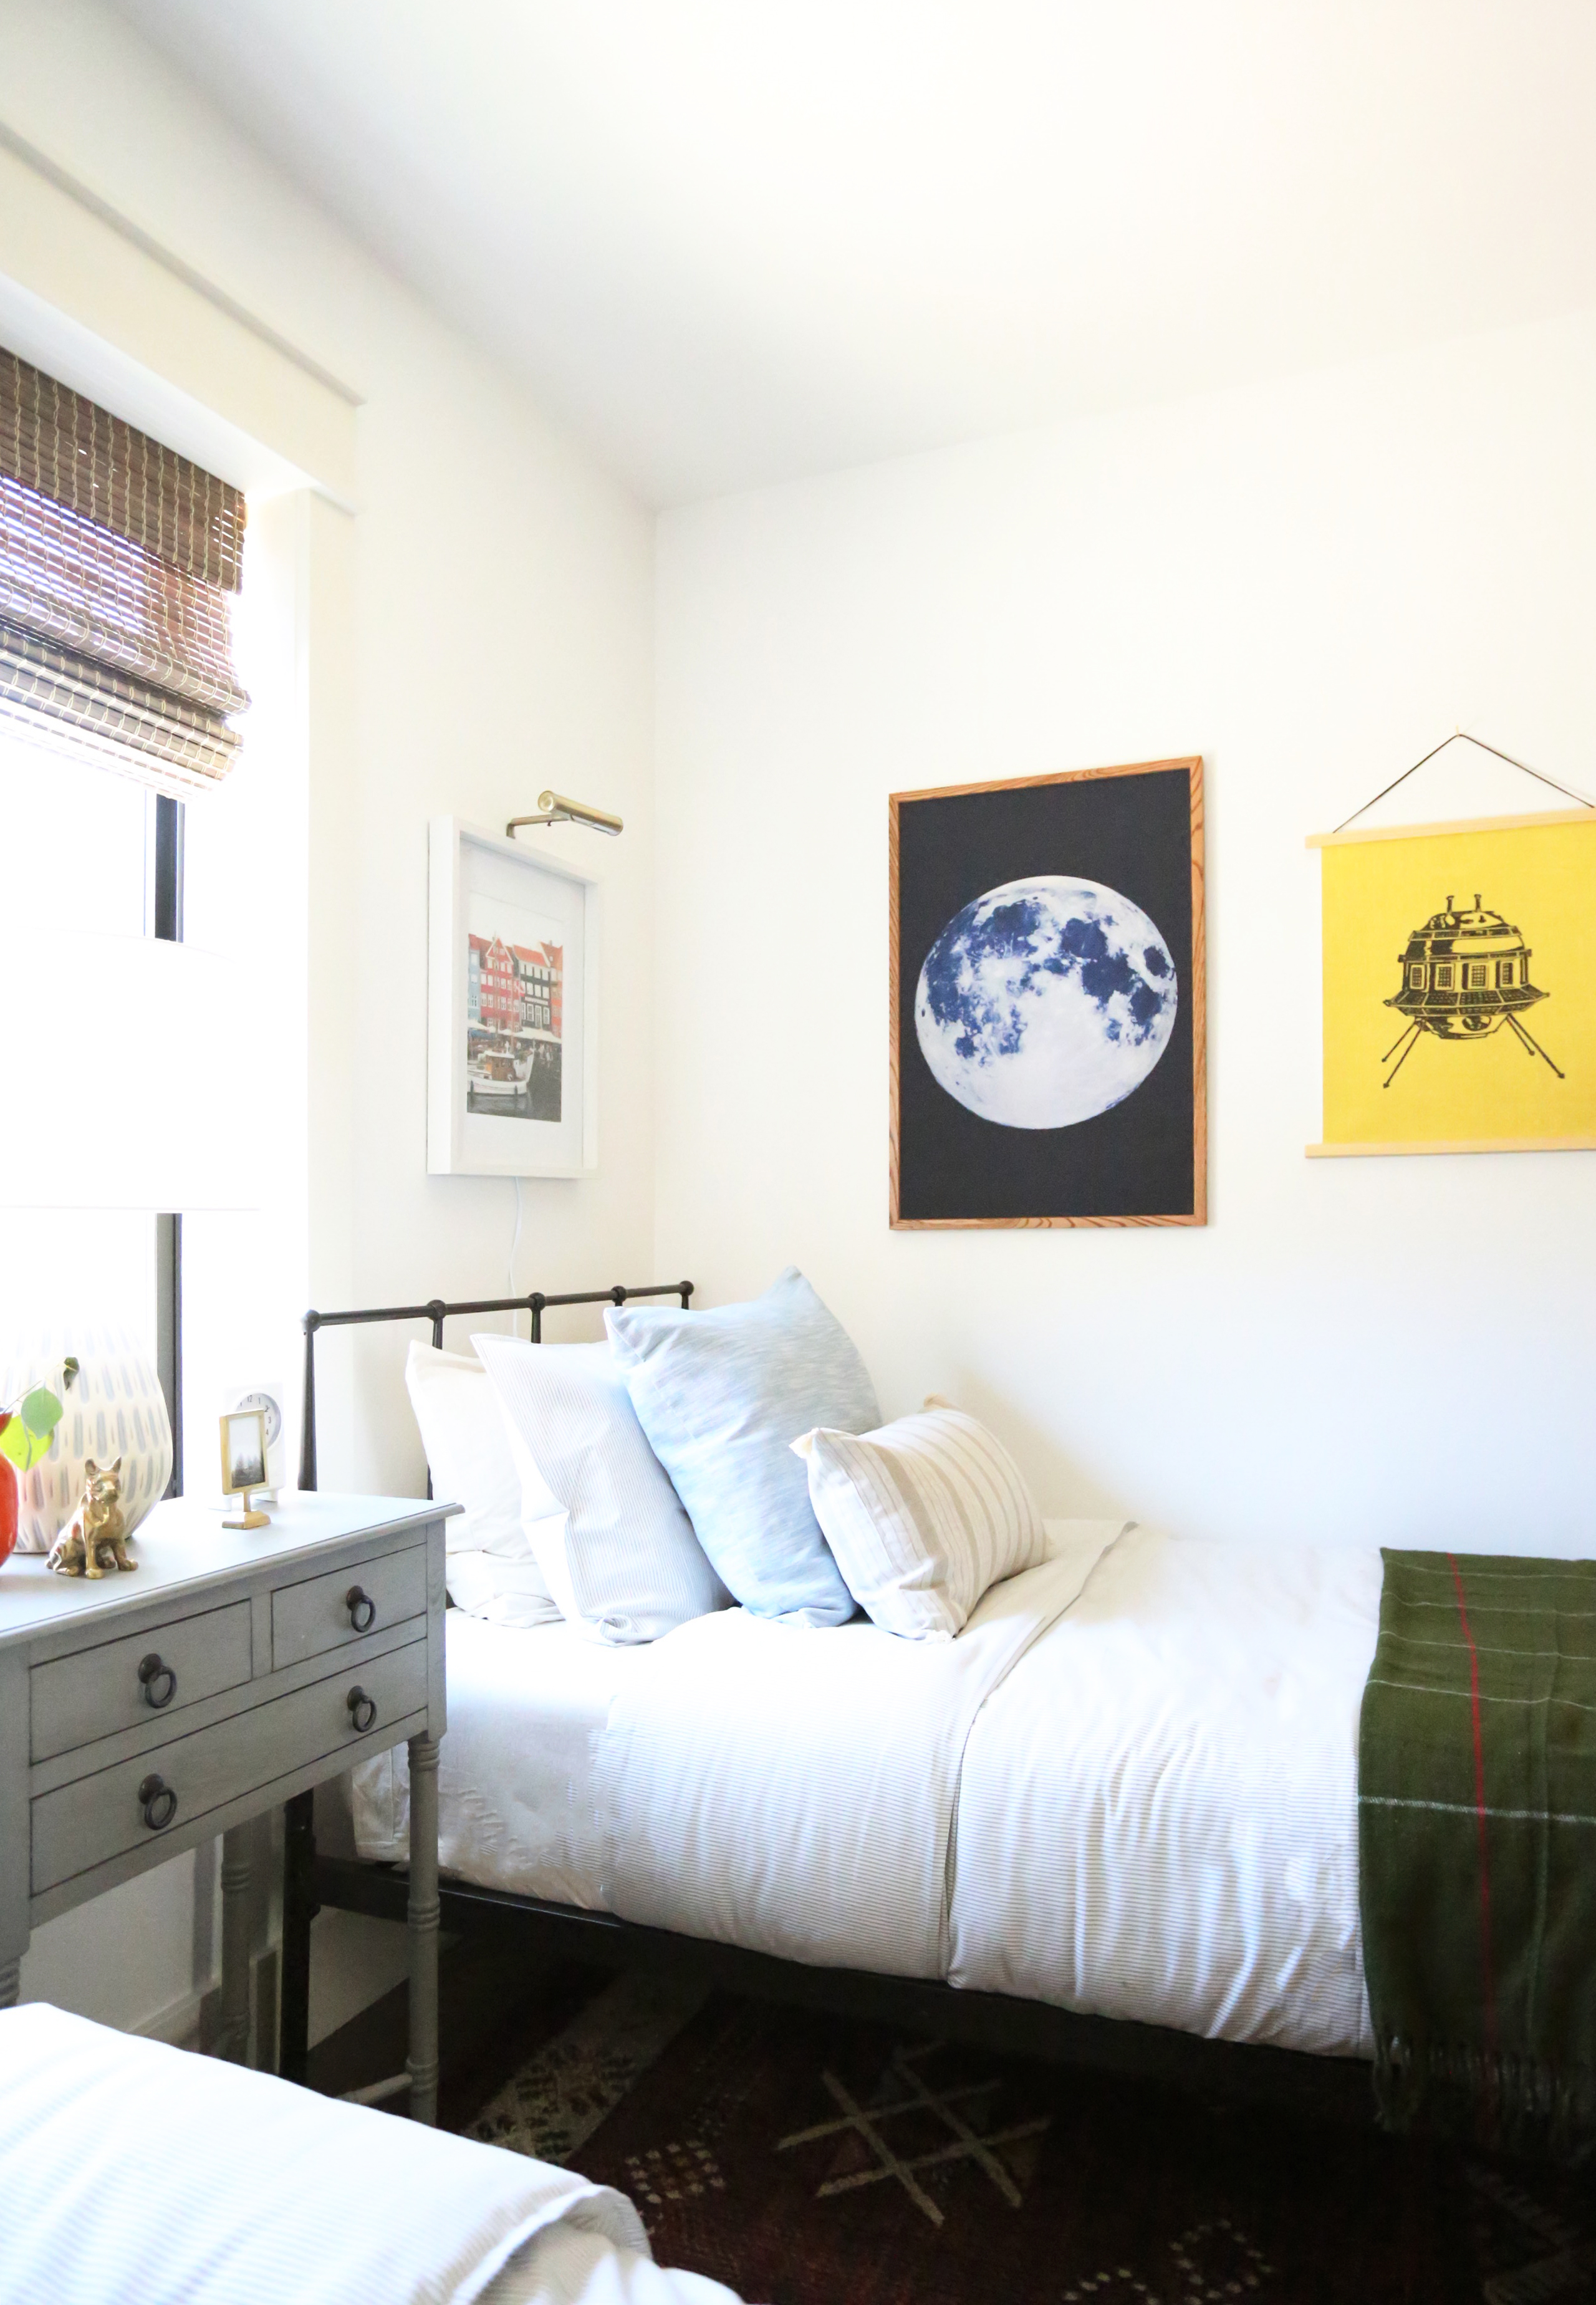
Sticking with symmetrical bedding also helps to keep things cohesive. If you want to mix it up a little to let each kids’ personality shine, try varying the artwork on each side, but try to keep it in the same general color palette. Anything too drastically different will leave the room feeling a little disjointed.
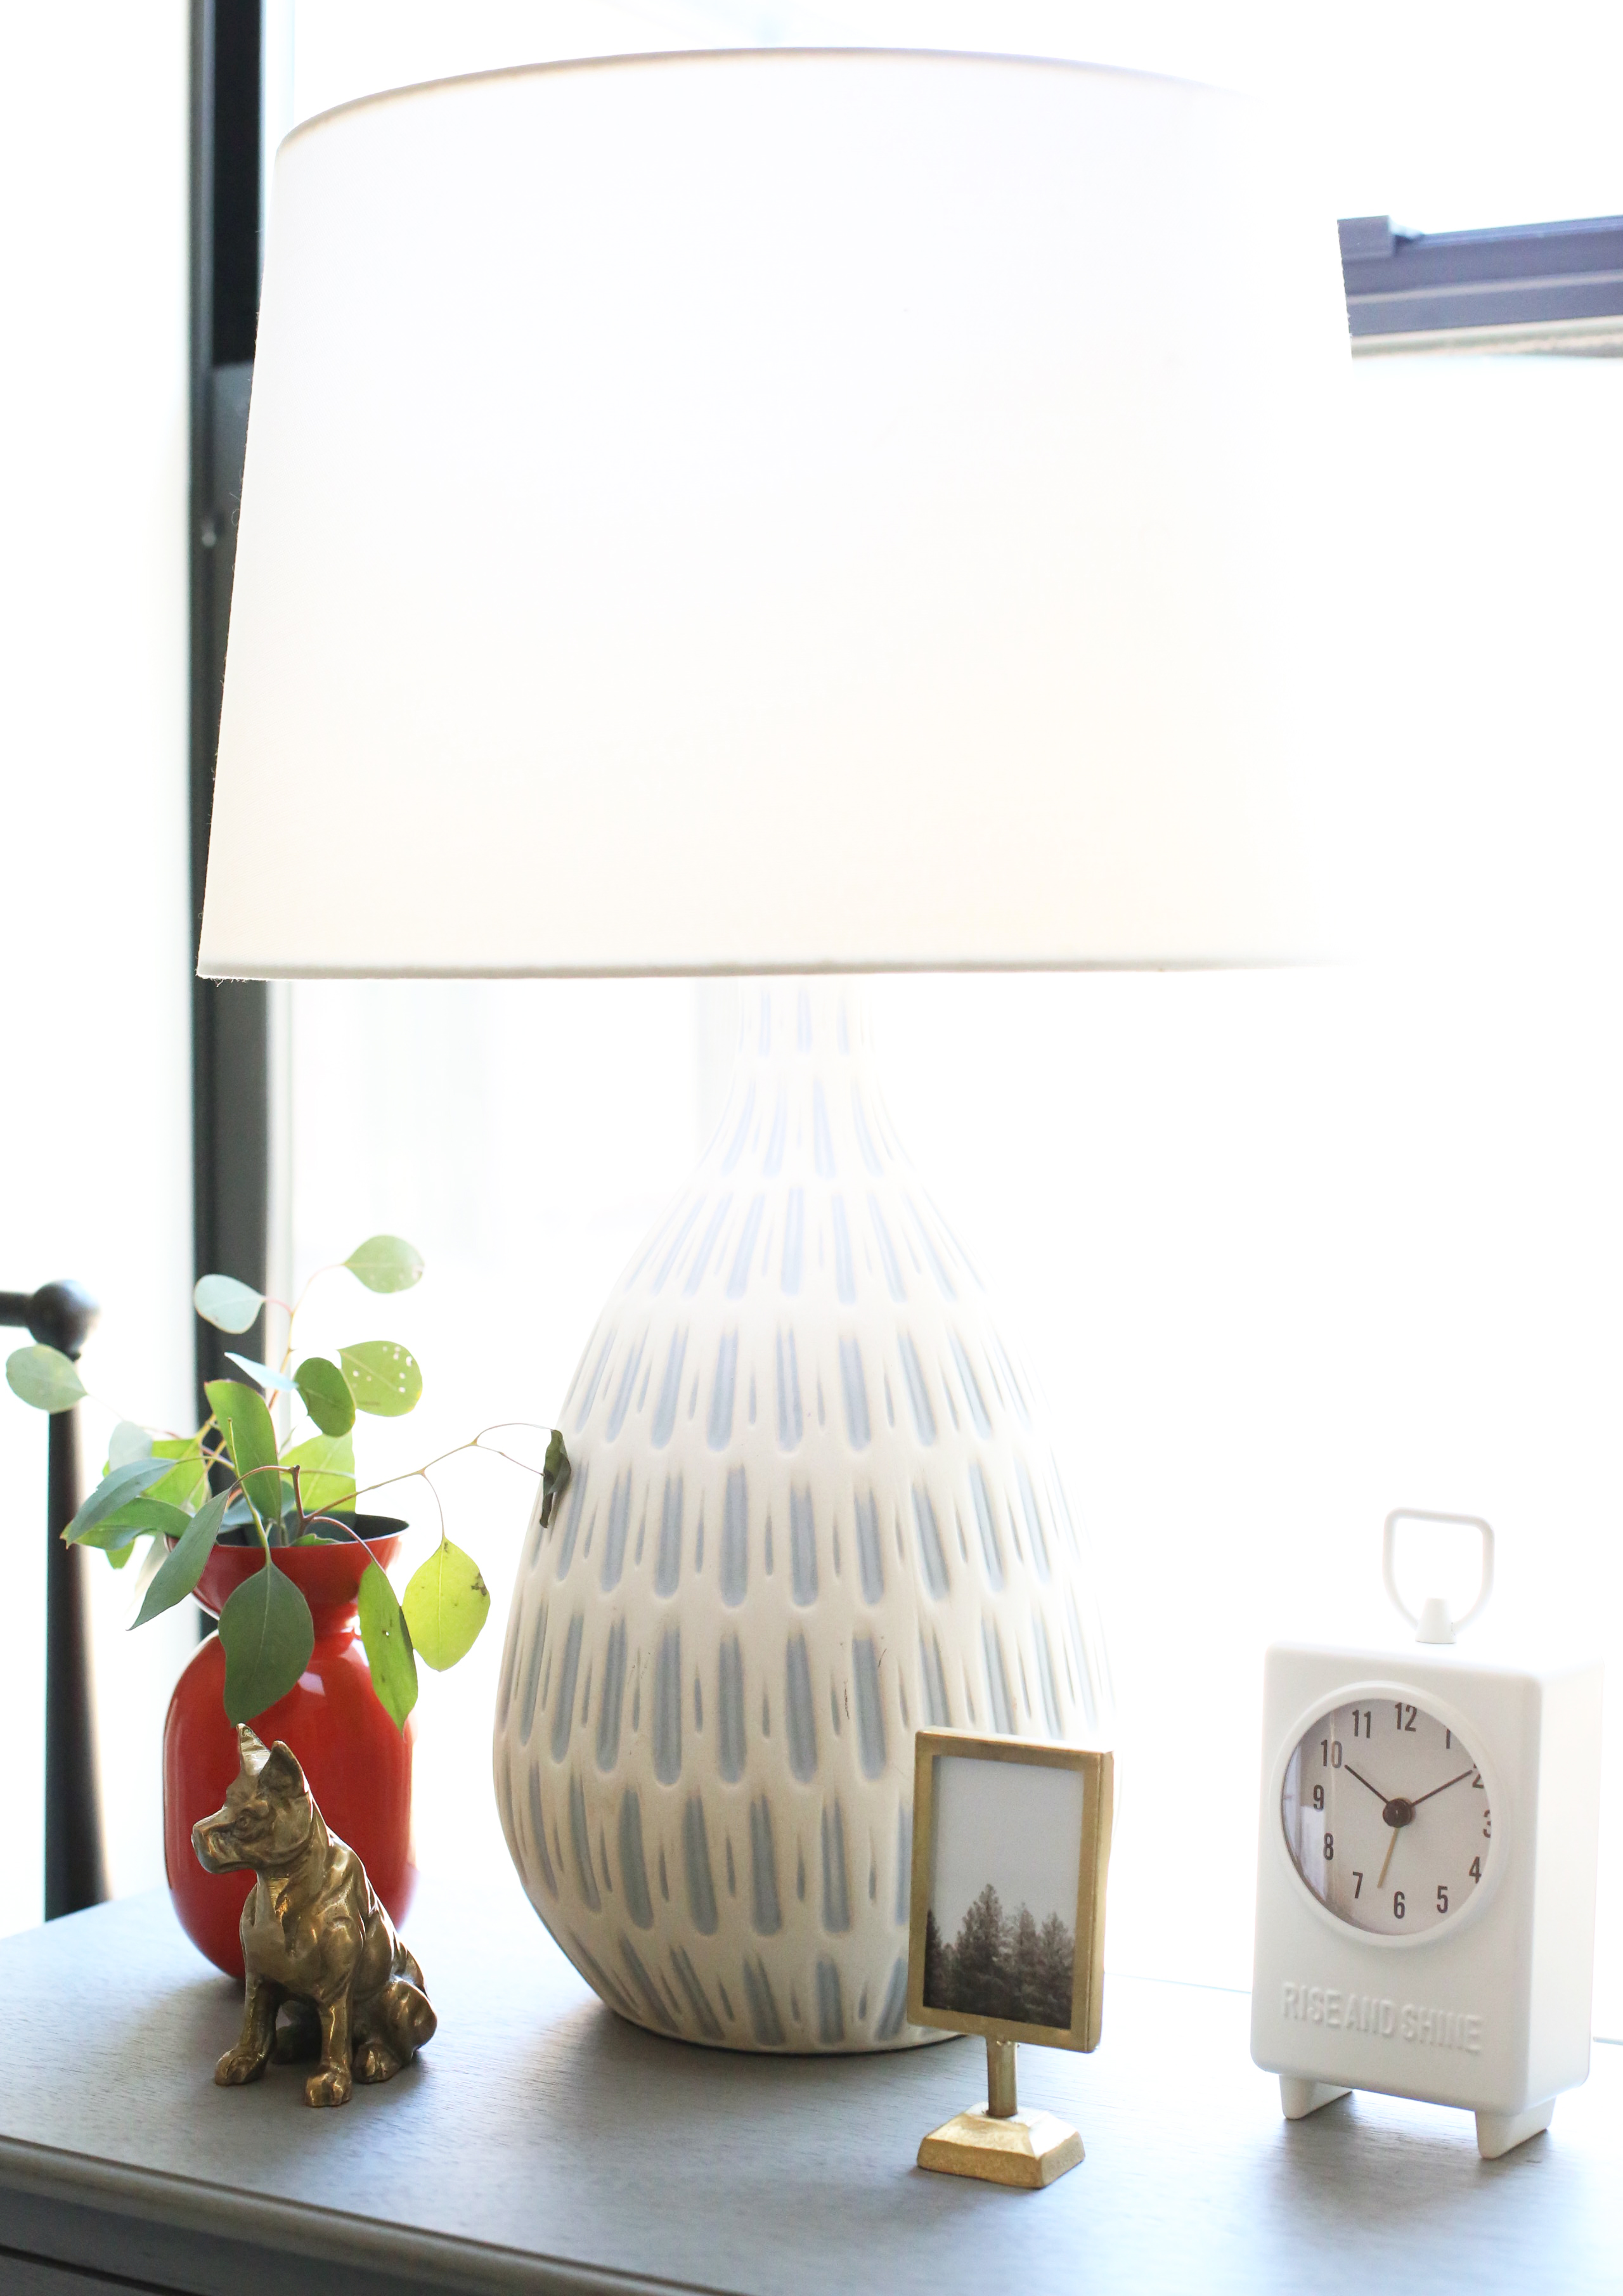
If you have the space, opt for a chest of drawers between the beds rather than a small nightstand. This helps give a little more surface area and storage to each kid! Don’t have room on your nightstand for a lamp? Wall mounted scones are a great way to clear up space!
We are constantly getting asked about our twin bed recommendations on the Juniper Home Instagram. They are surprisingly hard to find! We scoured the internet to find some of the best options out there. From budget-friendly to unique and special, we think there is something for everybody on this list!
The beautiful living room built-ins at the Evergreen house originally started out in this now-kids bedroom. The previous owners must have used this space as a den. Without getting into too much boring detail, I had originally walked the Evergreen house a full year before we bought it to flip. The first time it was…
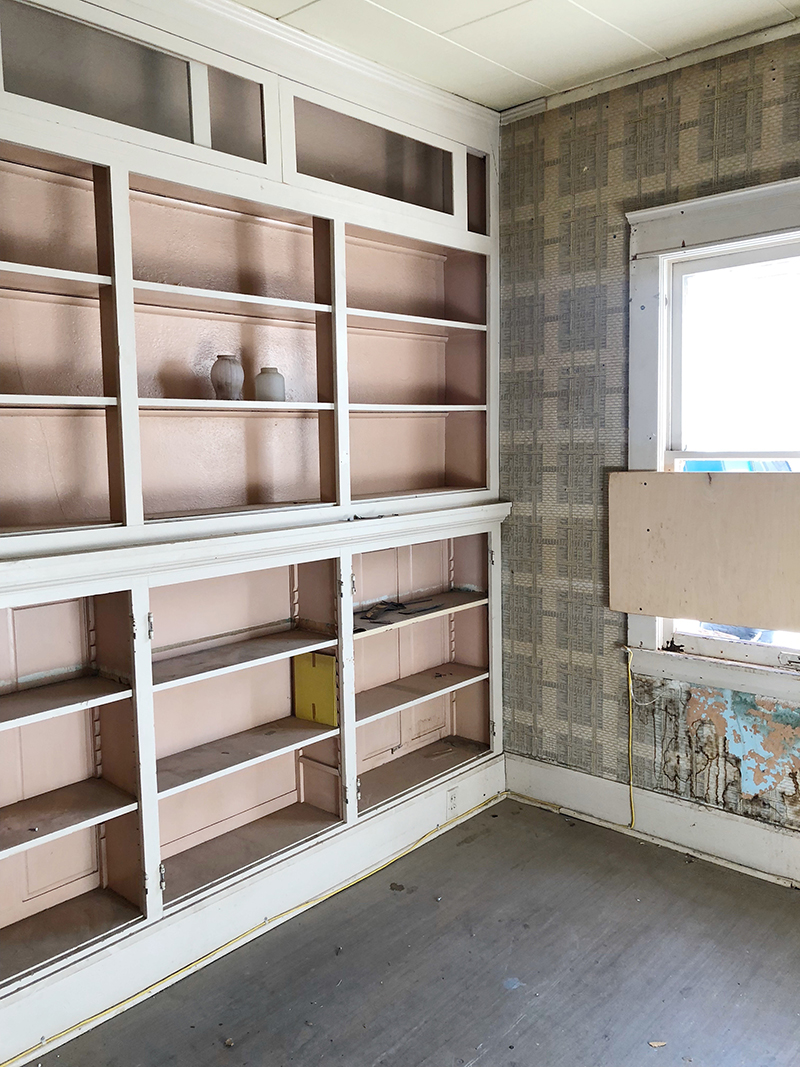
The beautiful living room built-ins at the Evergreen house originally started out in this now-kids bedroom. The previous owners must have used this space as a den. Without getting into too much boring detail, I had originally walked the Evergreen house a full year before we bought it to flip. The first time it was on the market, we were outbid by another flipper. While the flipper did a lot of the haul away work in the year they had it, they weren’t able to do much else before putting the house back on the wholesale market (which is when we bought it).
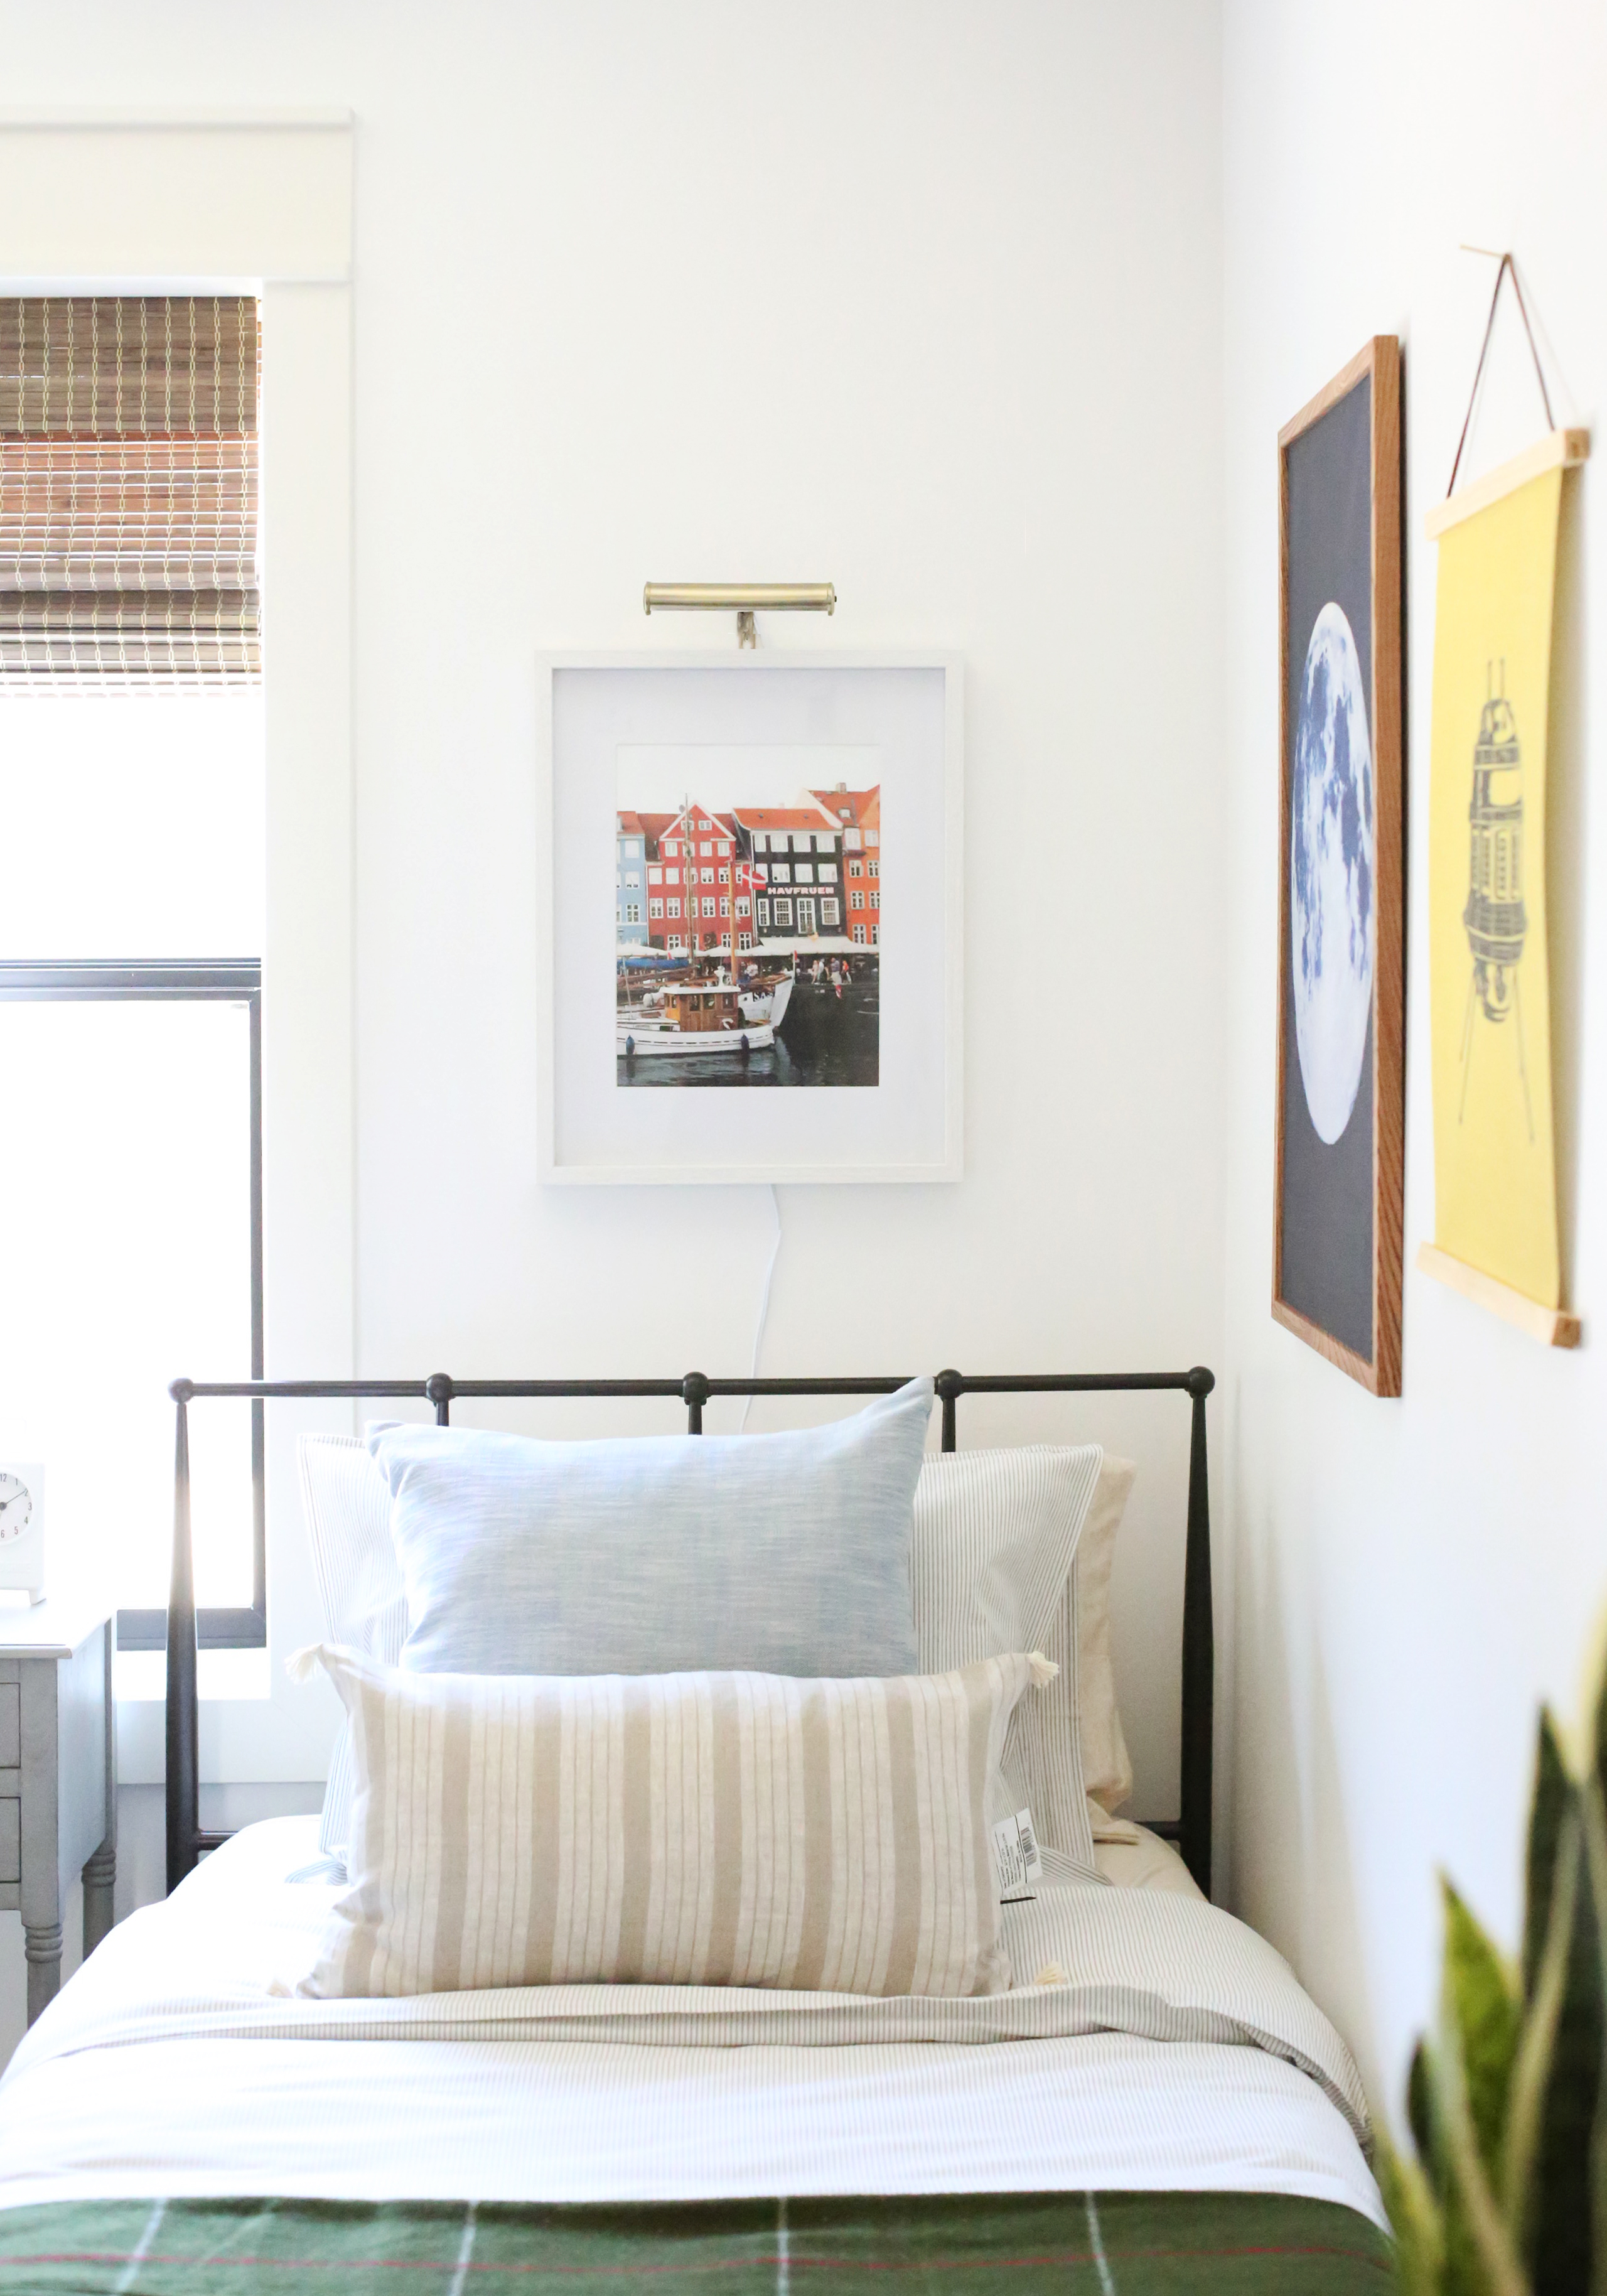
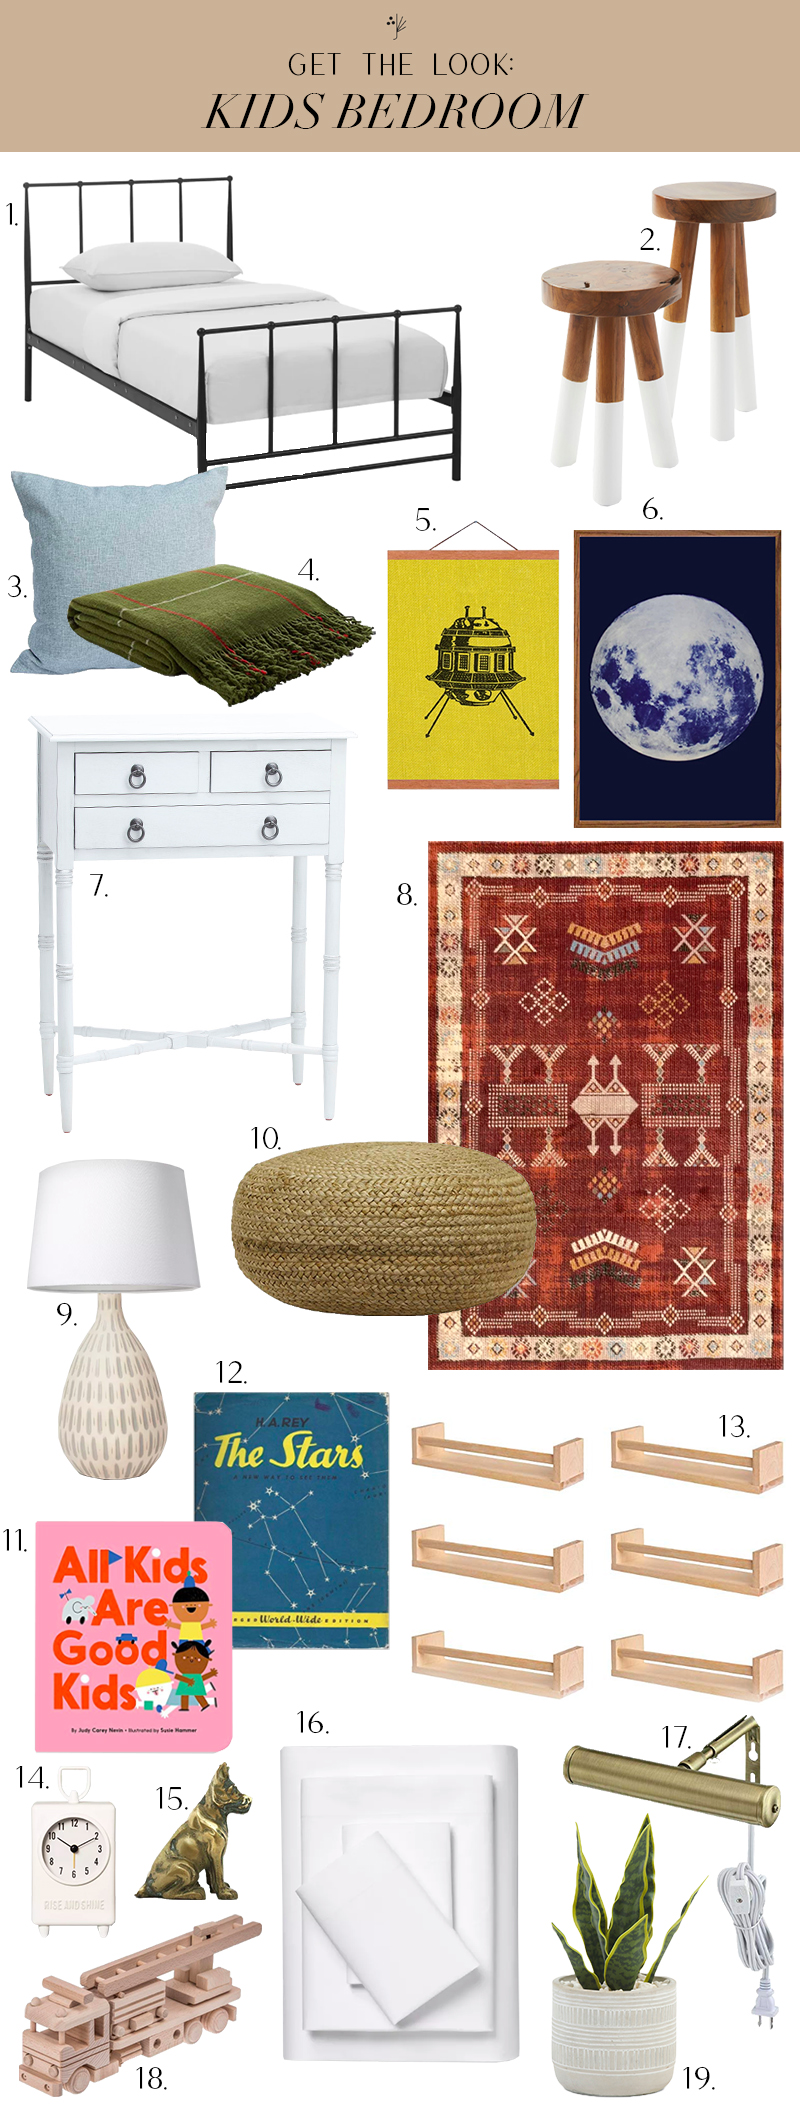
The house was filled with old books and furniture before that the other flipper apparently just took to the landfill. It breaks my heart into a thousand pieces thinking about it! There were some VERY COOL books in here. The original owner had been a librarian for decades and there were books everywhere! The only book the flipper did not toss was a little yellow children’s book. Can you see it on the shelf?
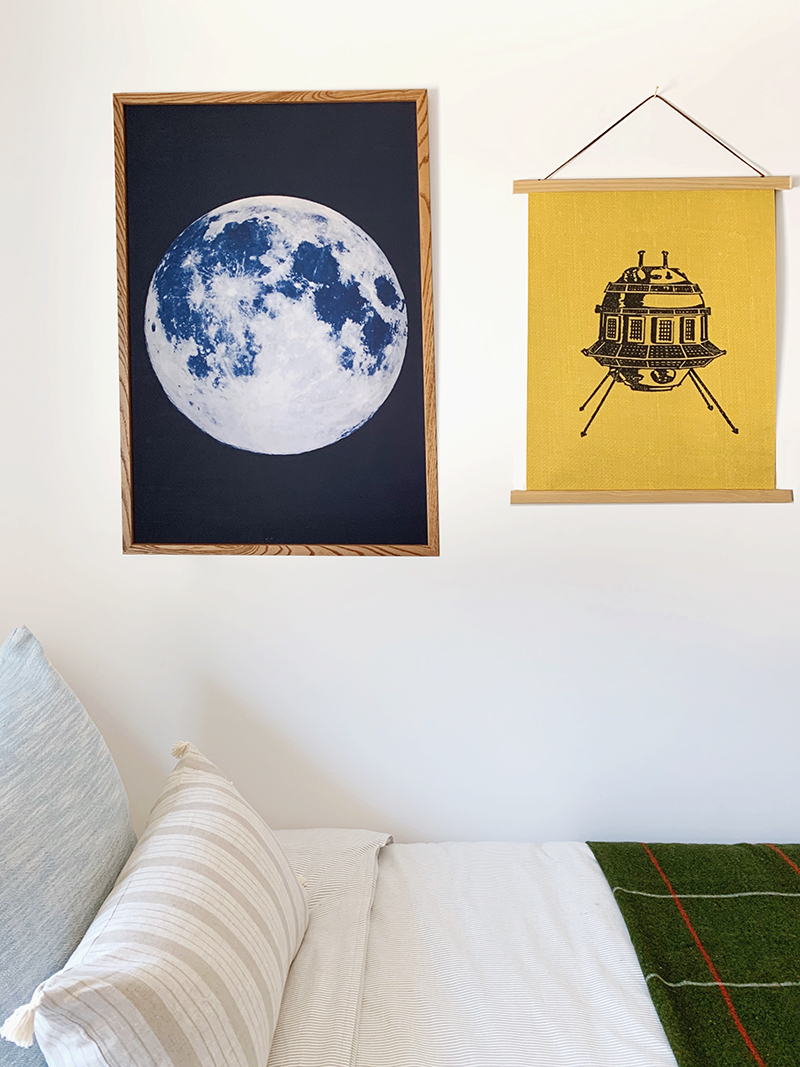
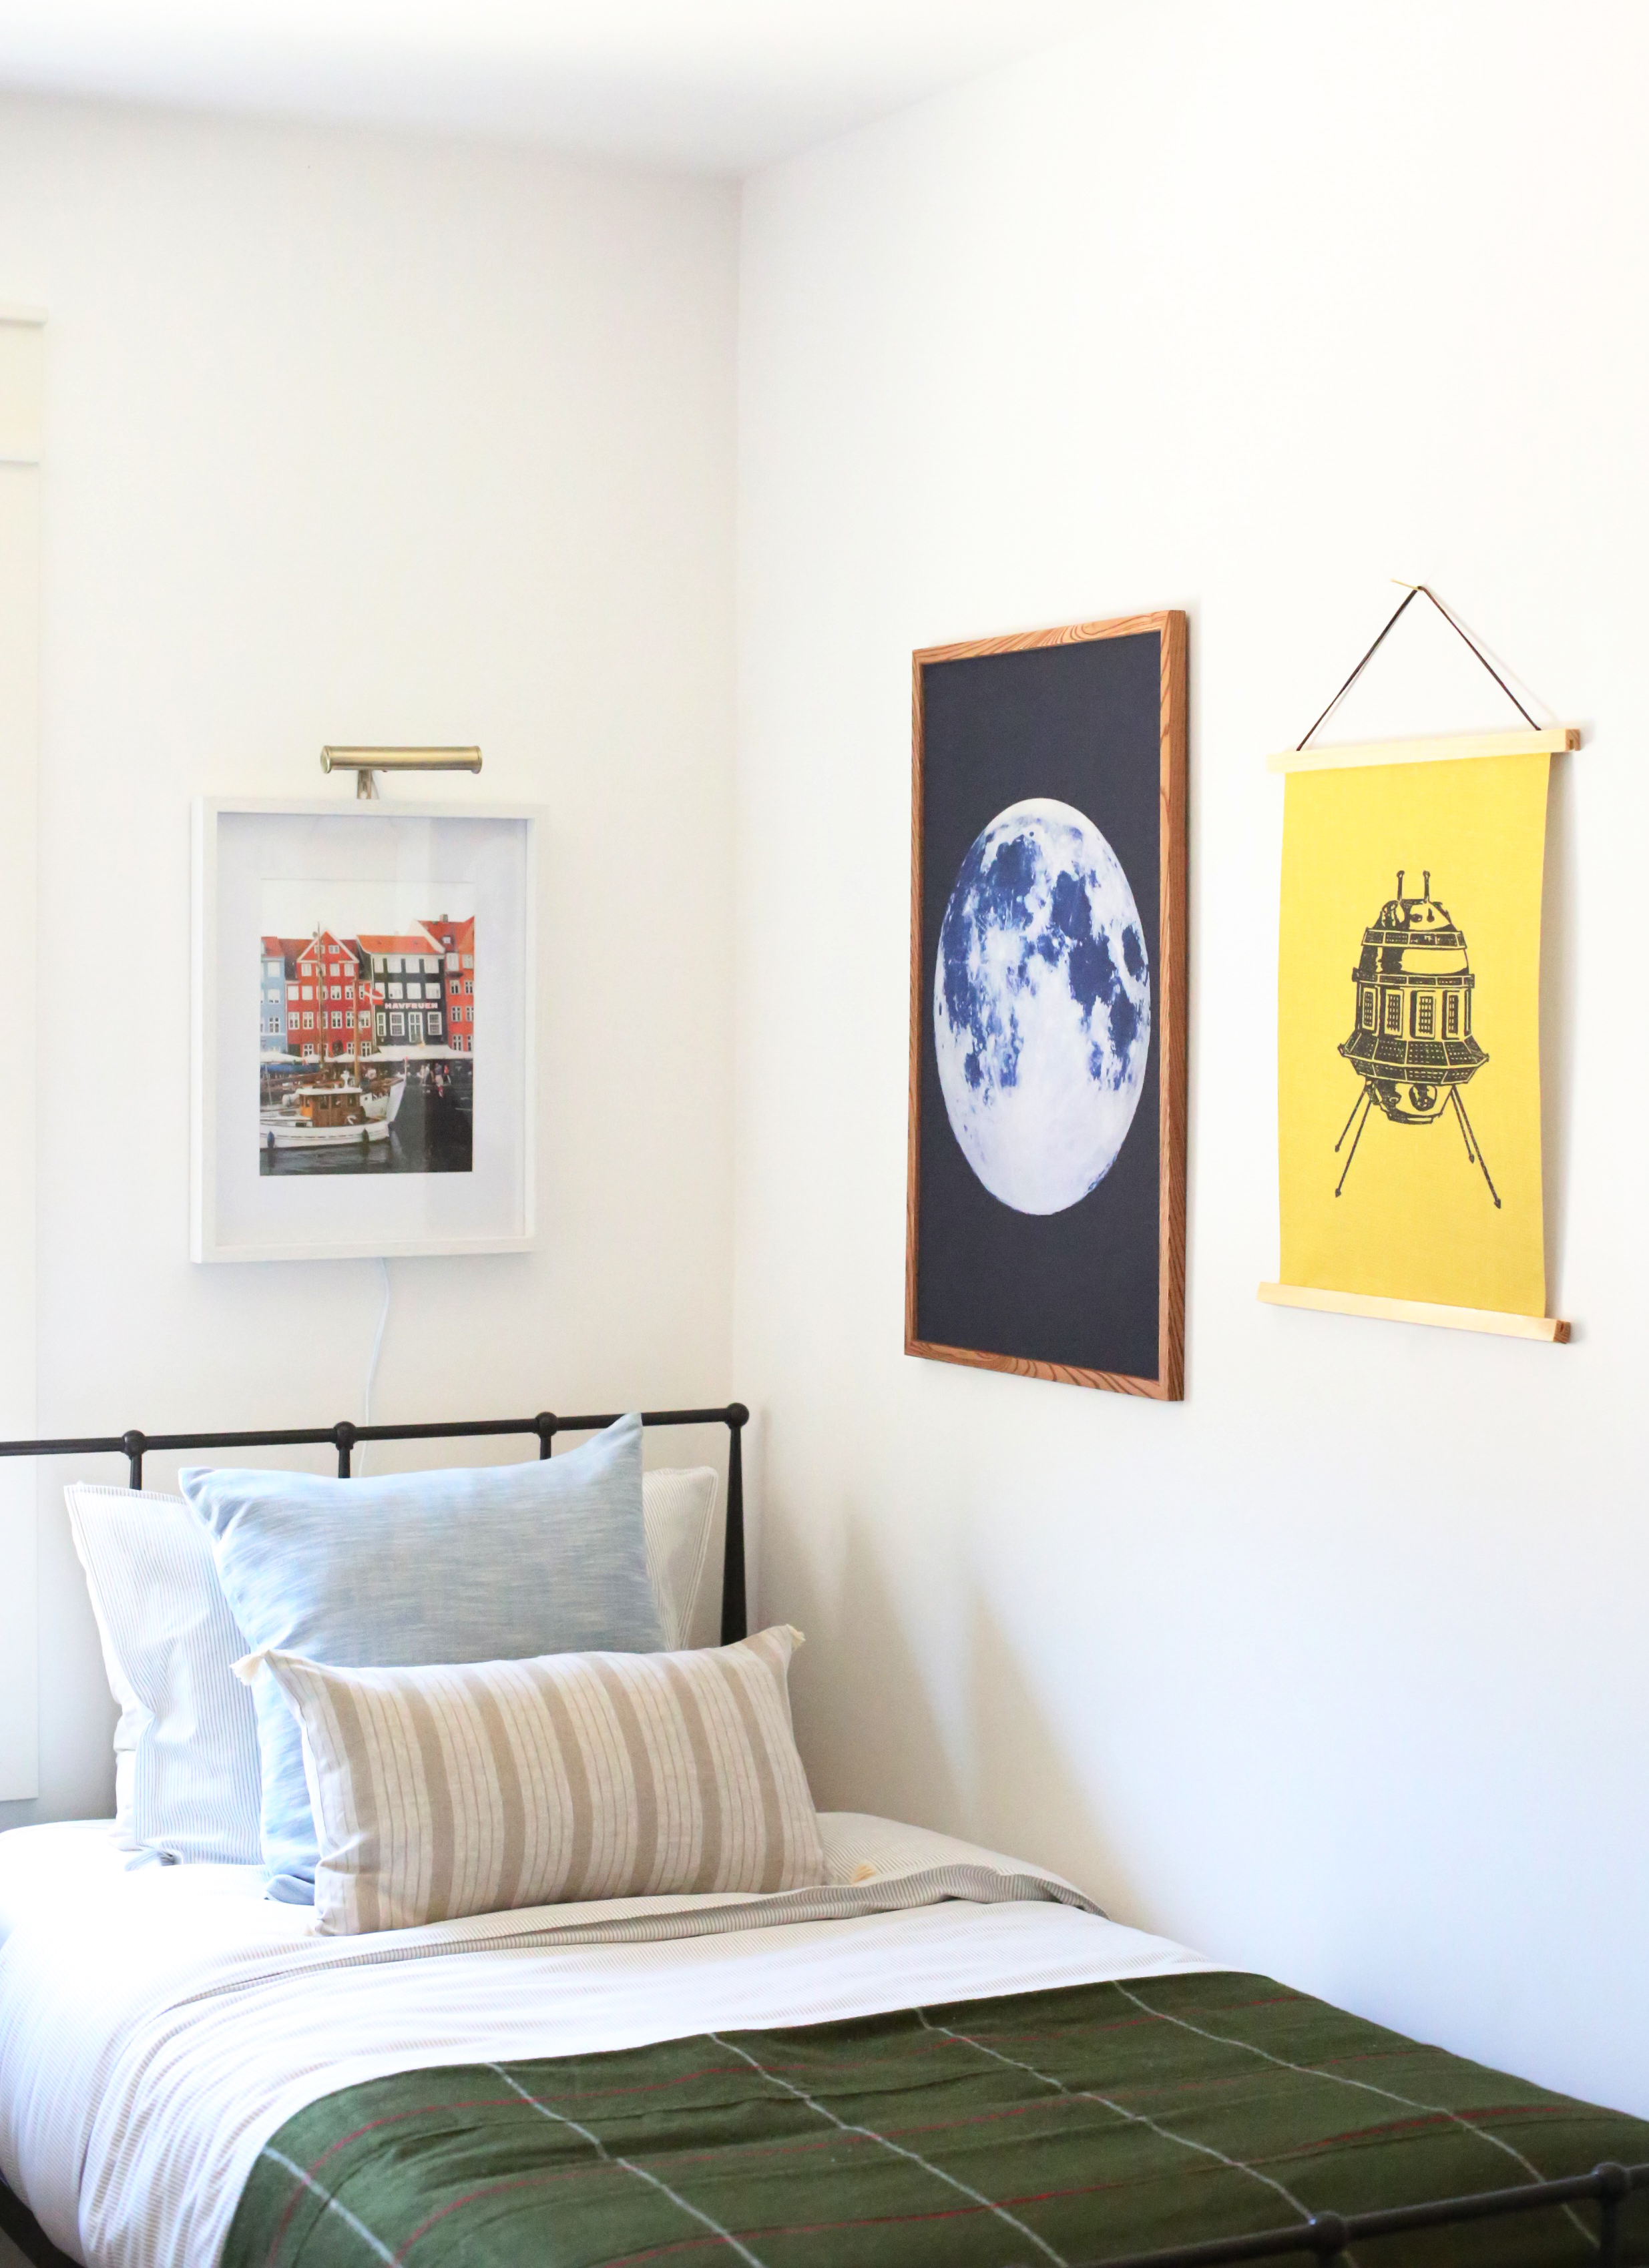
The book was from the 50s and was all about space! On the yellow linen book cover was a little moon rover which we scanned in and made into a print for the room. It’s a fun pop of color and sweet nod to the previous owners.
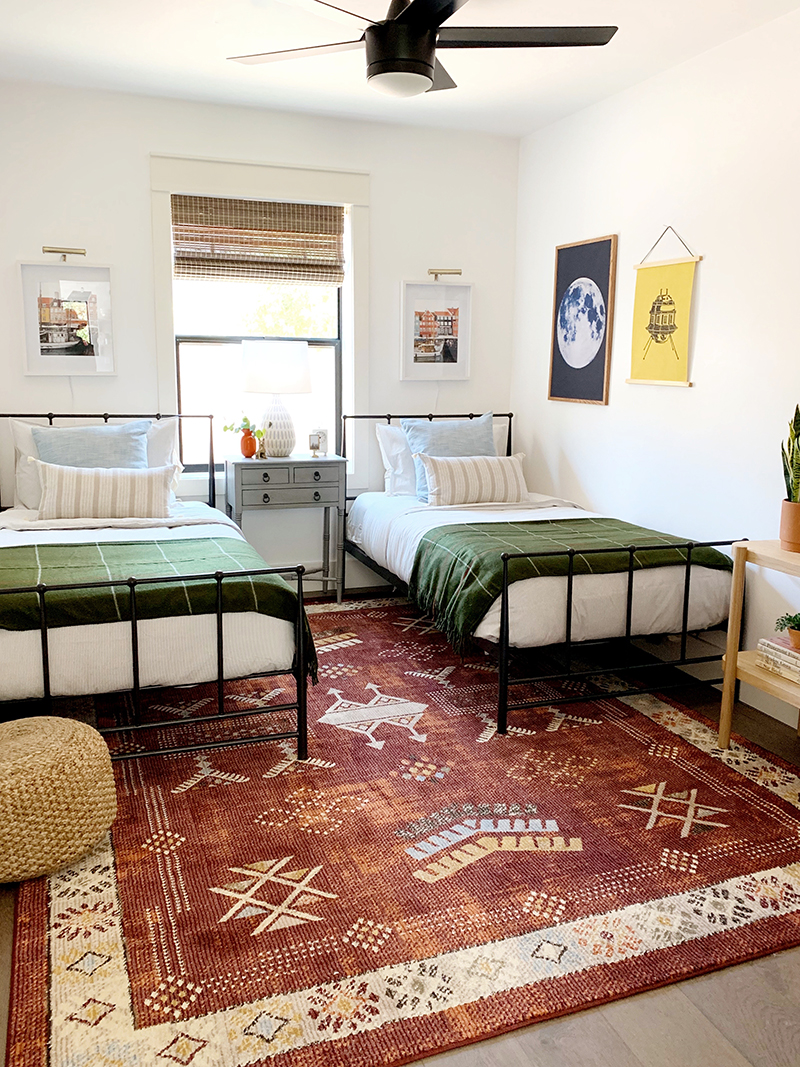
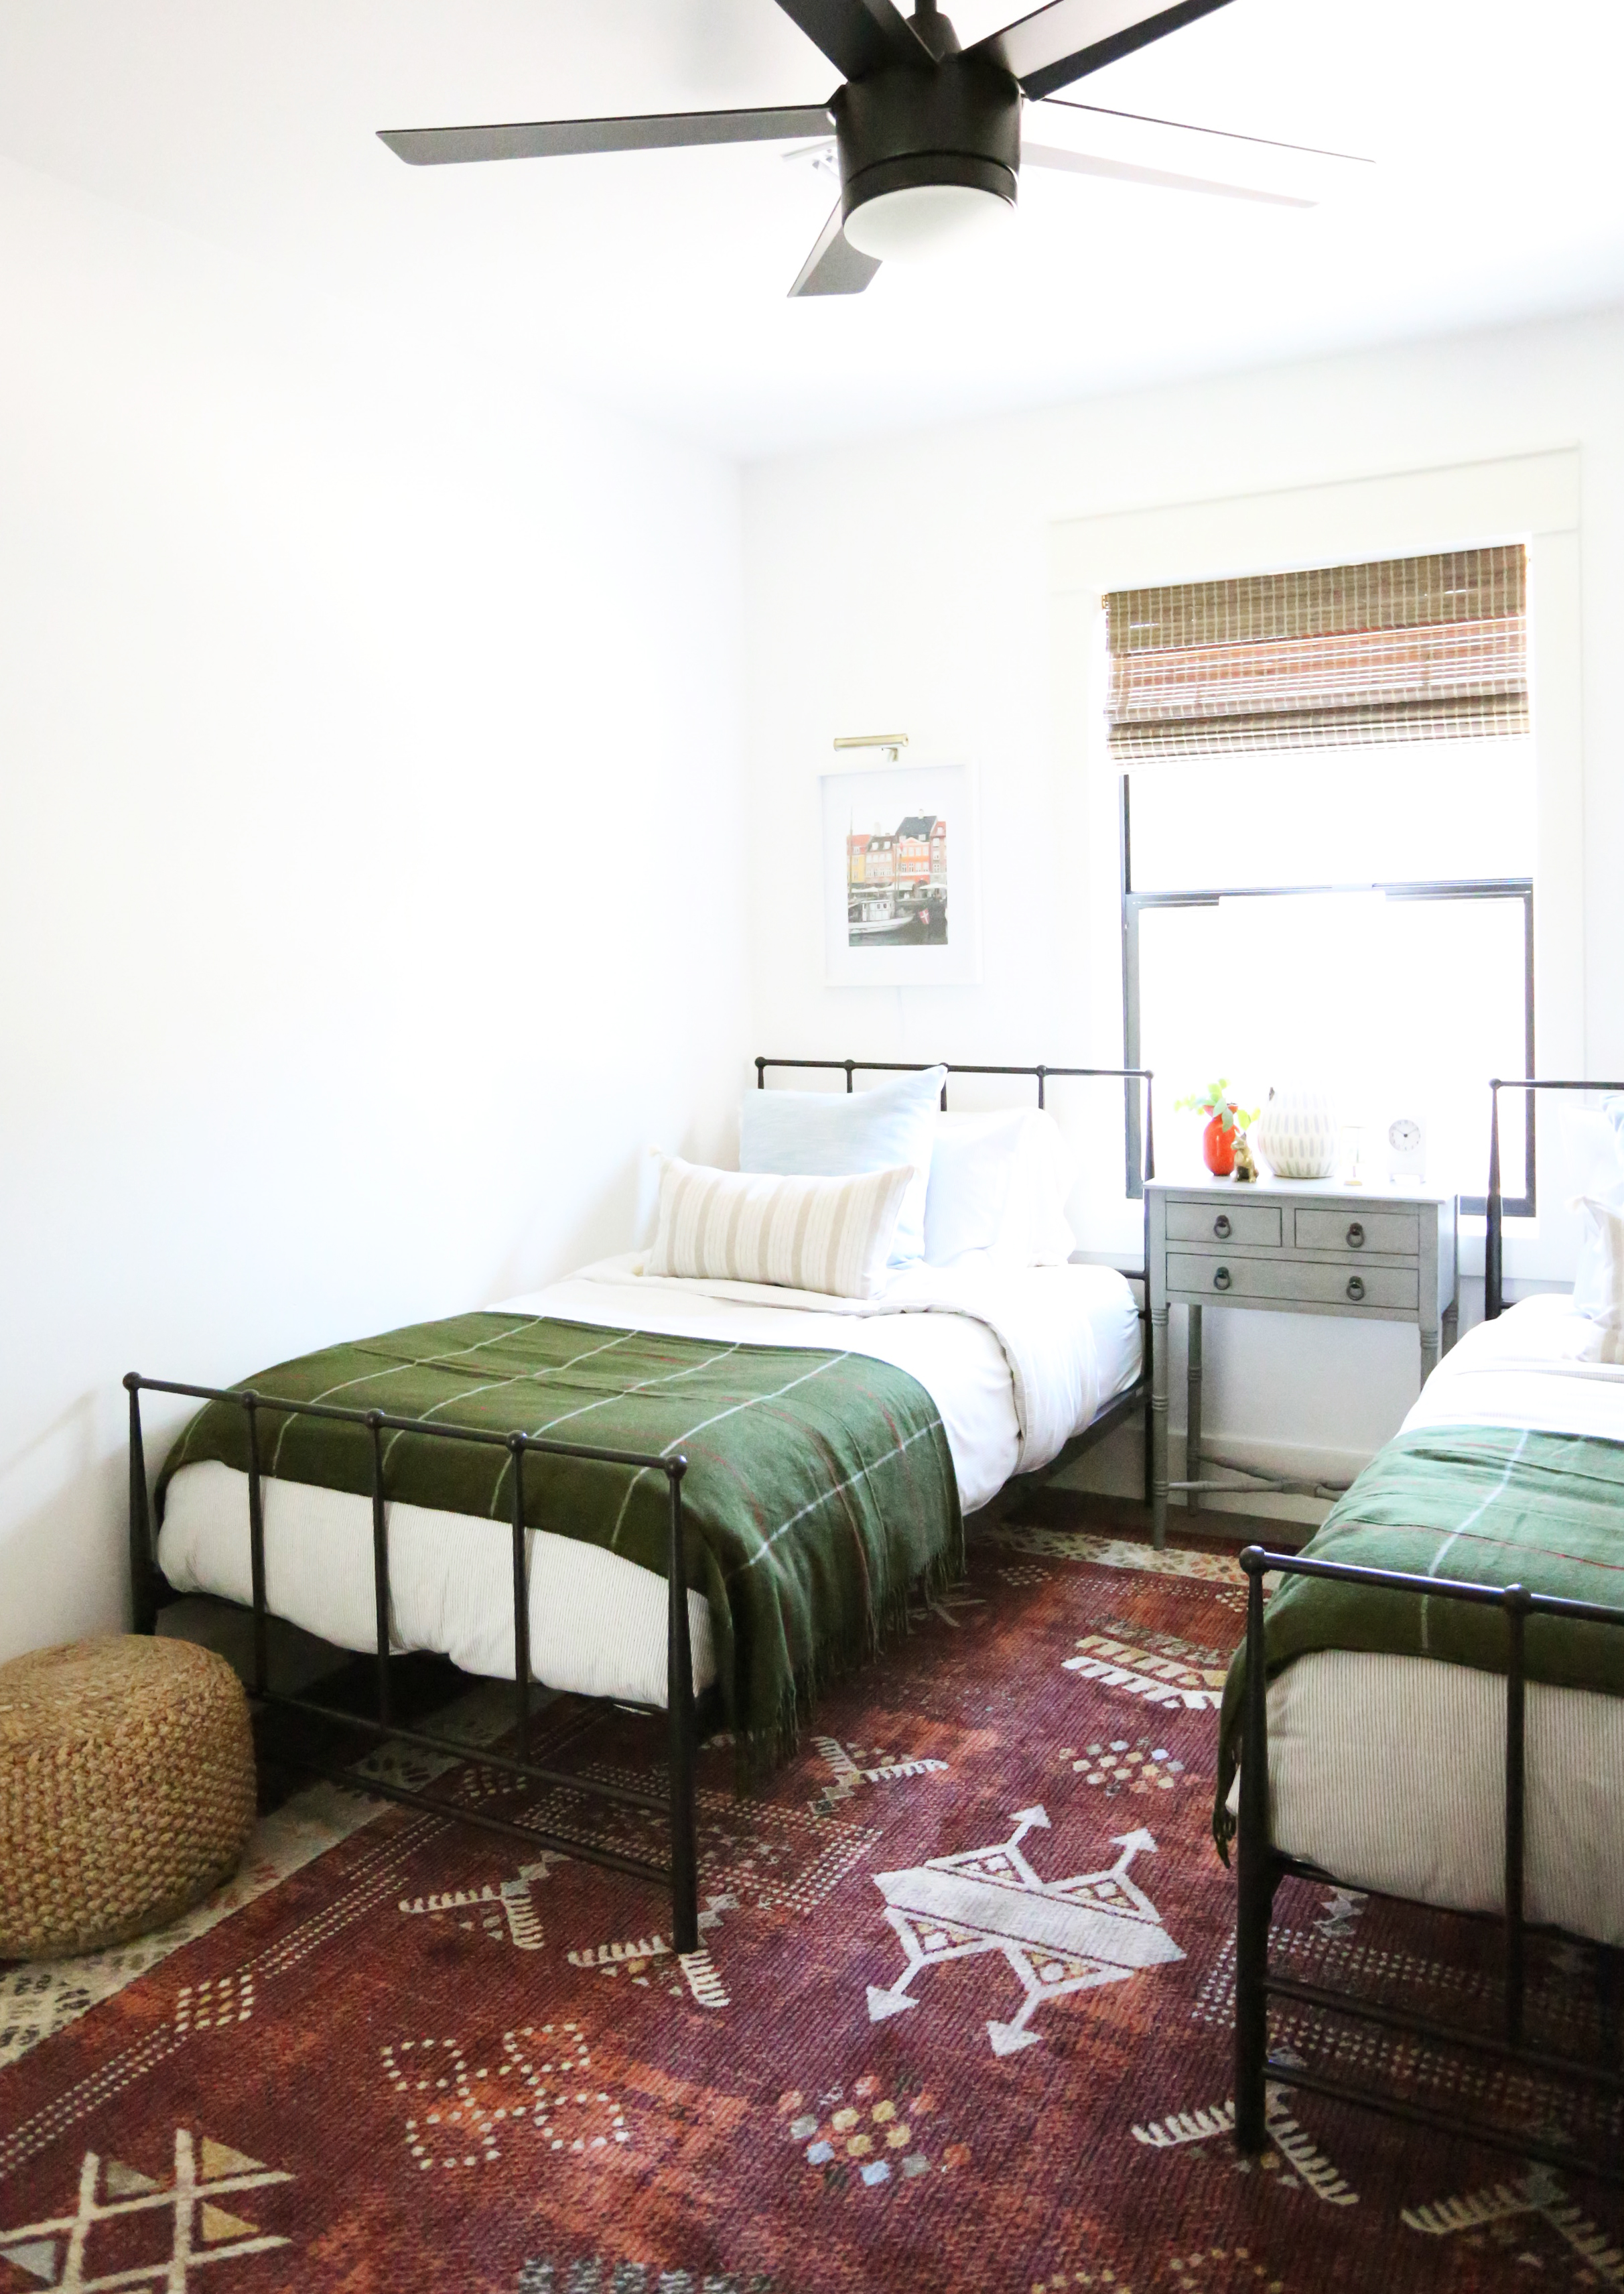
We wanted to use this room as a kids bedroom. The space was long and skinny, but I actually think that footprint works really well for layout purposes! We had just enough room to fit two twin beds on either side of the window, but we also had room in front of the beds for kids to spread out and play! I slept in a room like this growing up with my sisters, but we had three twin beds in a row and it was magical! We lost all sorts of sleep, staying up late every night talking. :)
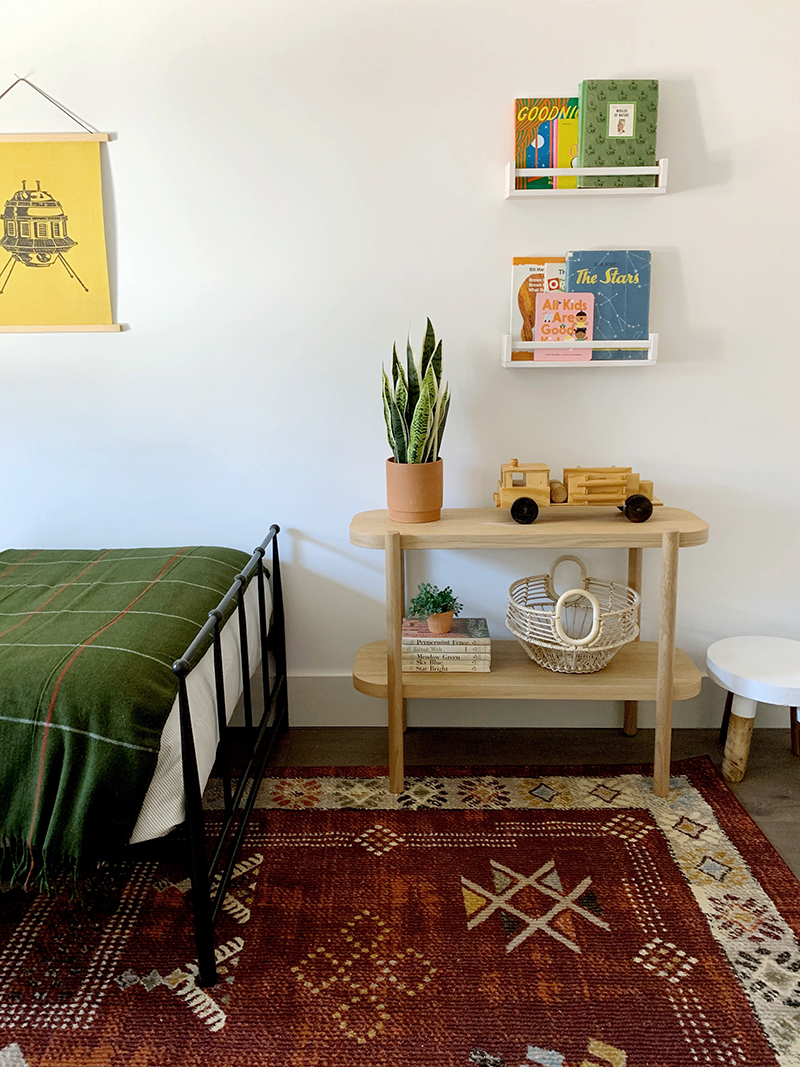
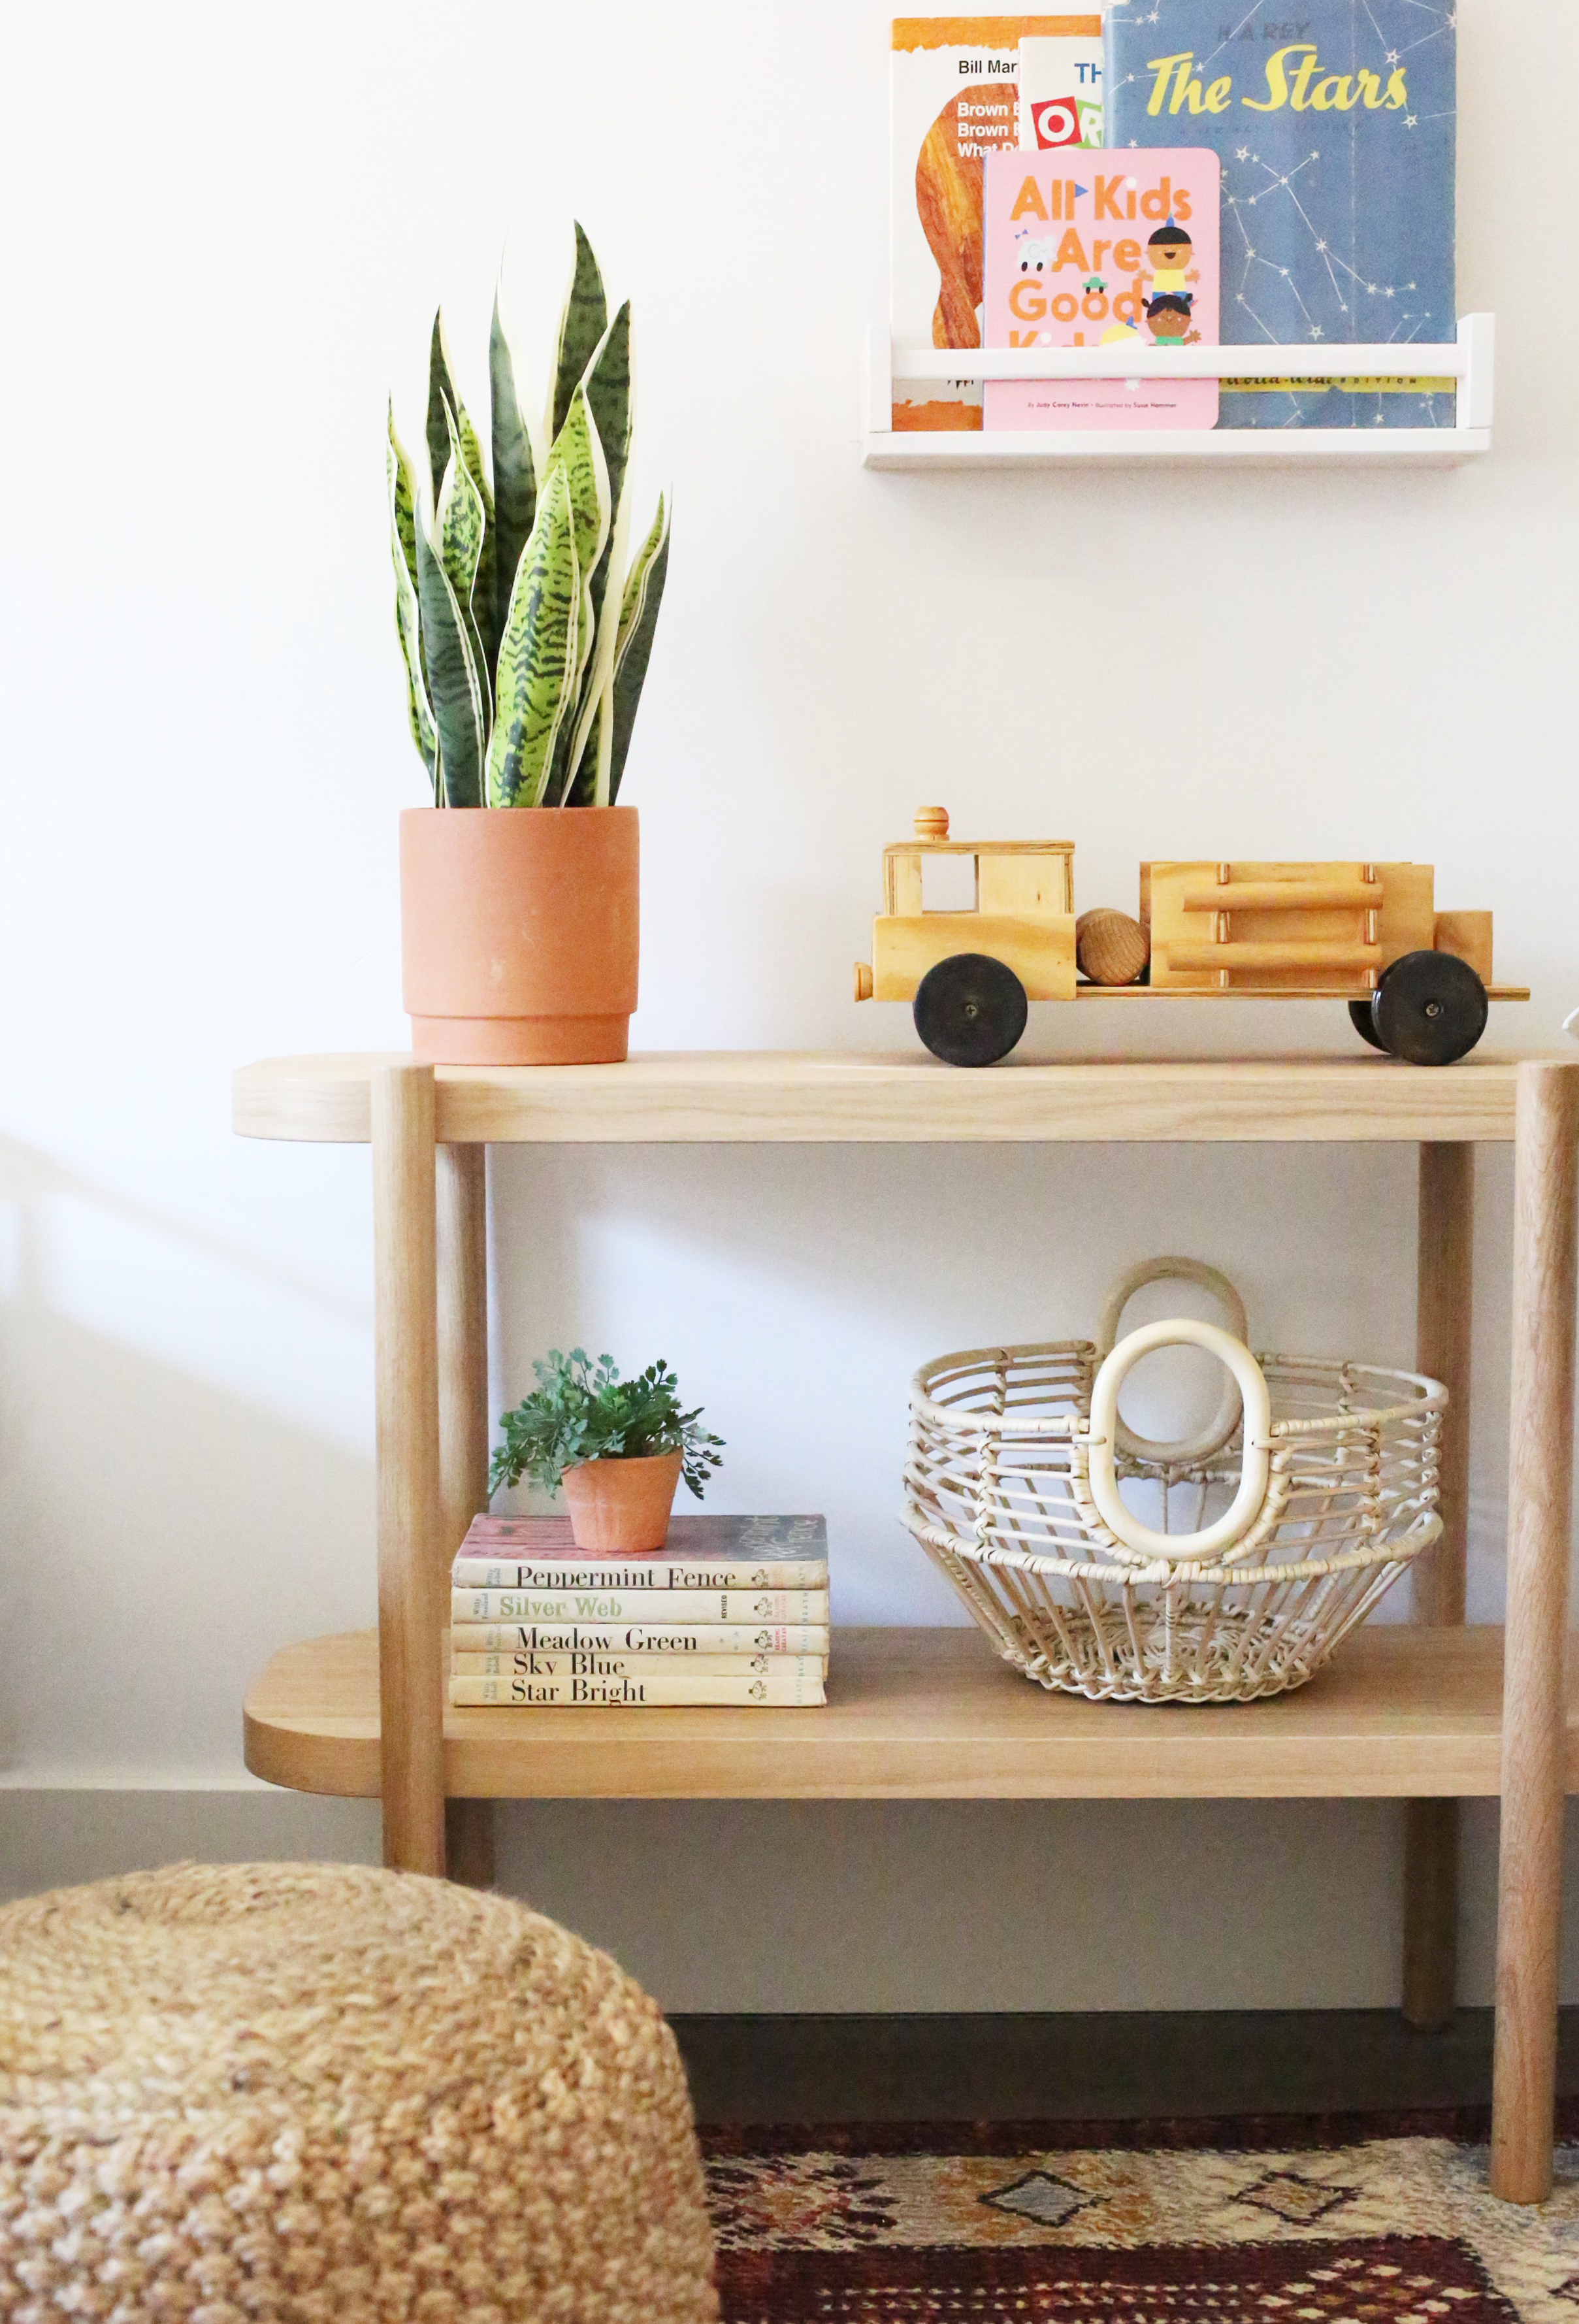
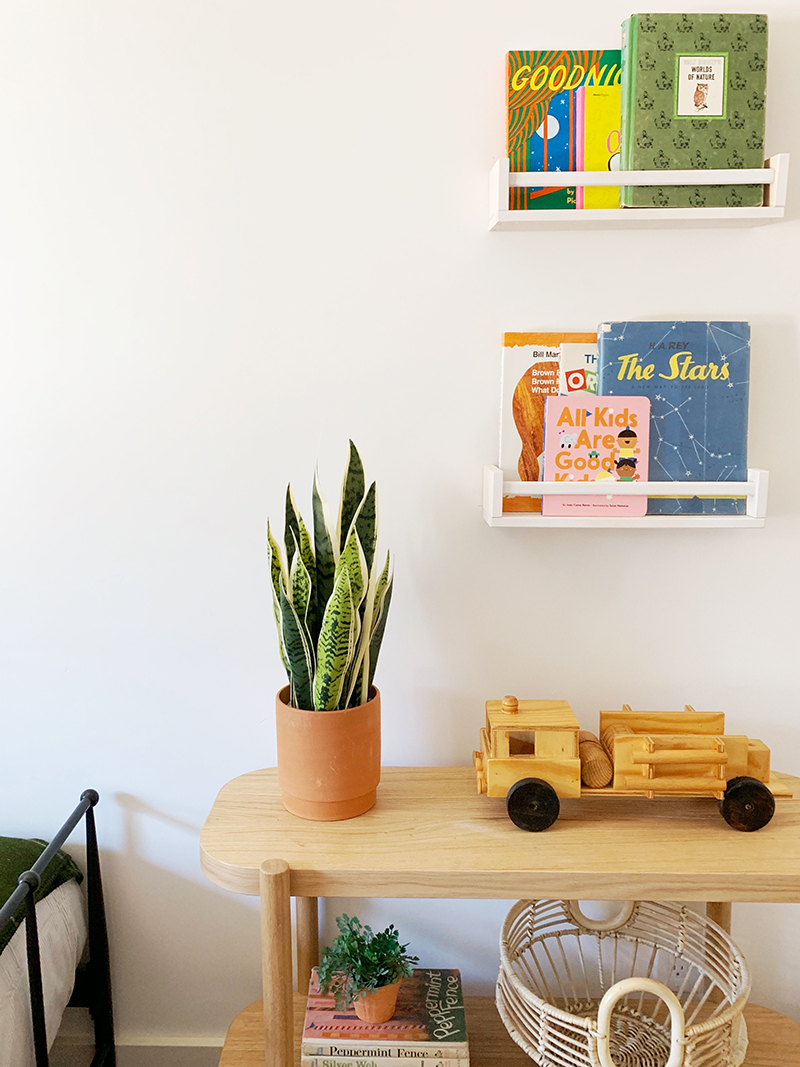
When you’re flipping a house and staging it with furniture in order to sell, it’s hard to know how extreme to go with the styling. You don’t want to overstuff the rooms so they feel cramped. But you also want to give the buyers ideas for living and furniture placement too! I liked the idea of putting a little bookshelf here rather than a dresser (which could easily be placed in the large closet or on the opposing wall).
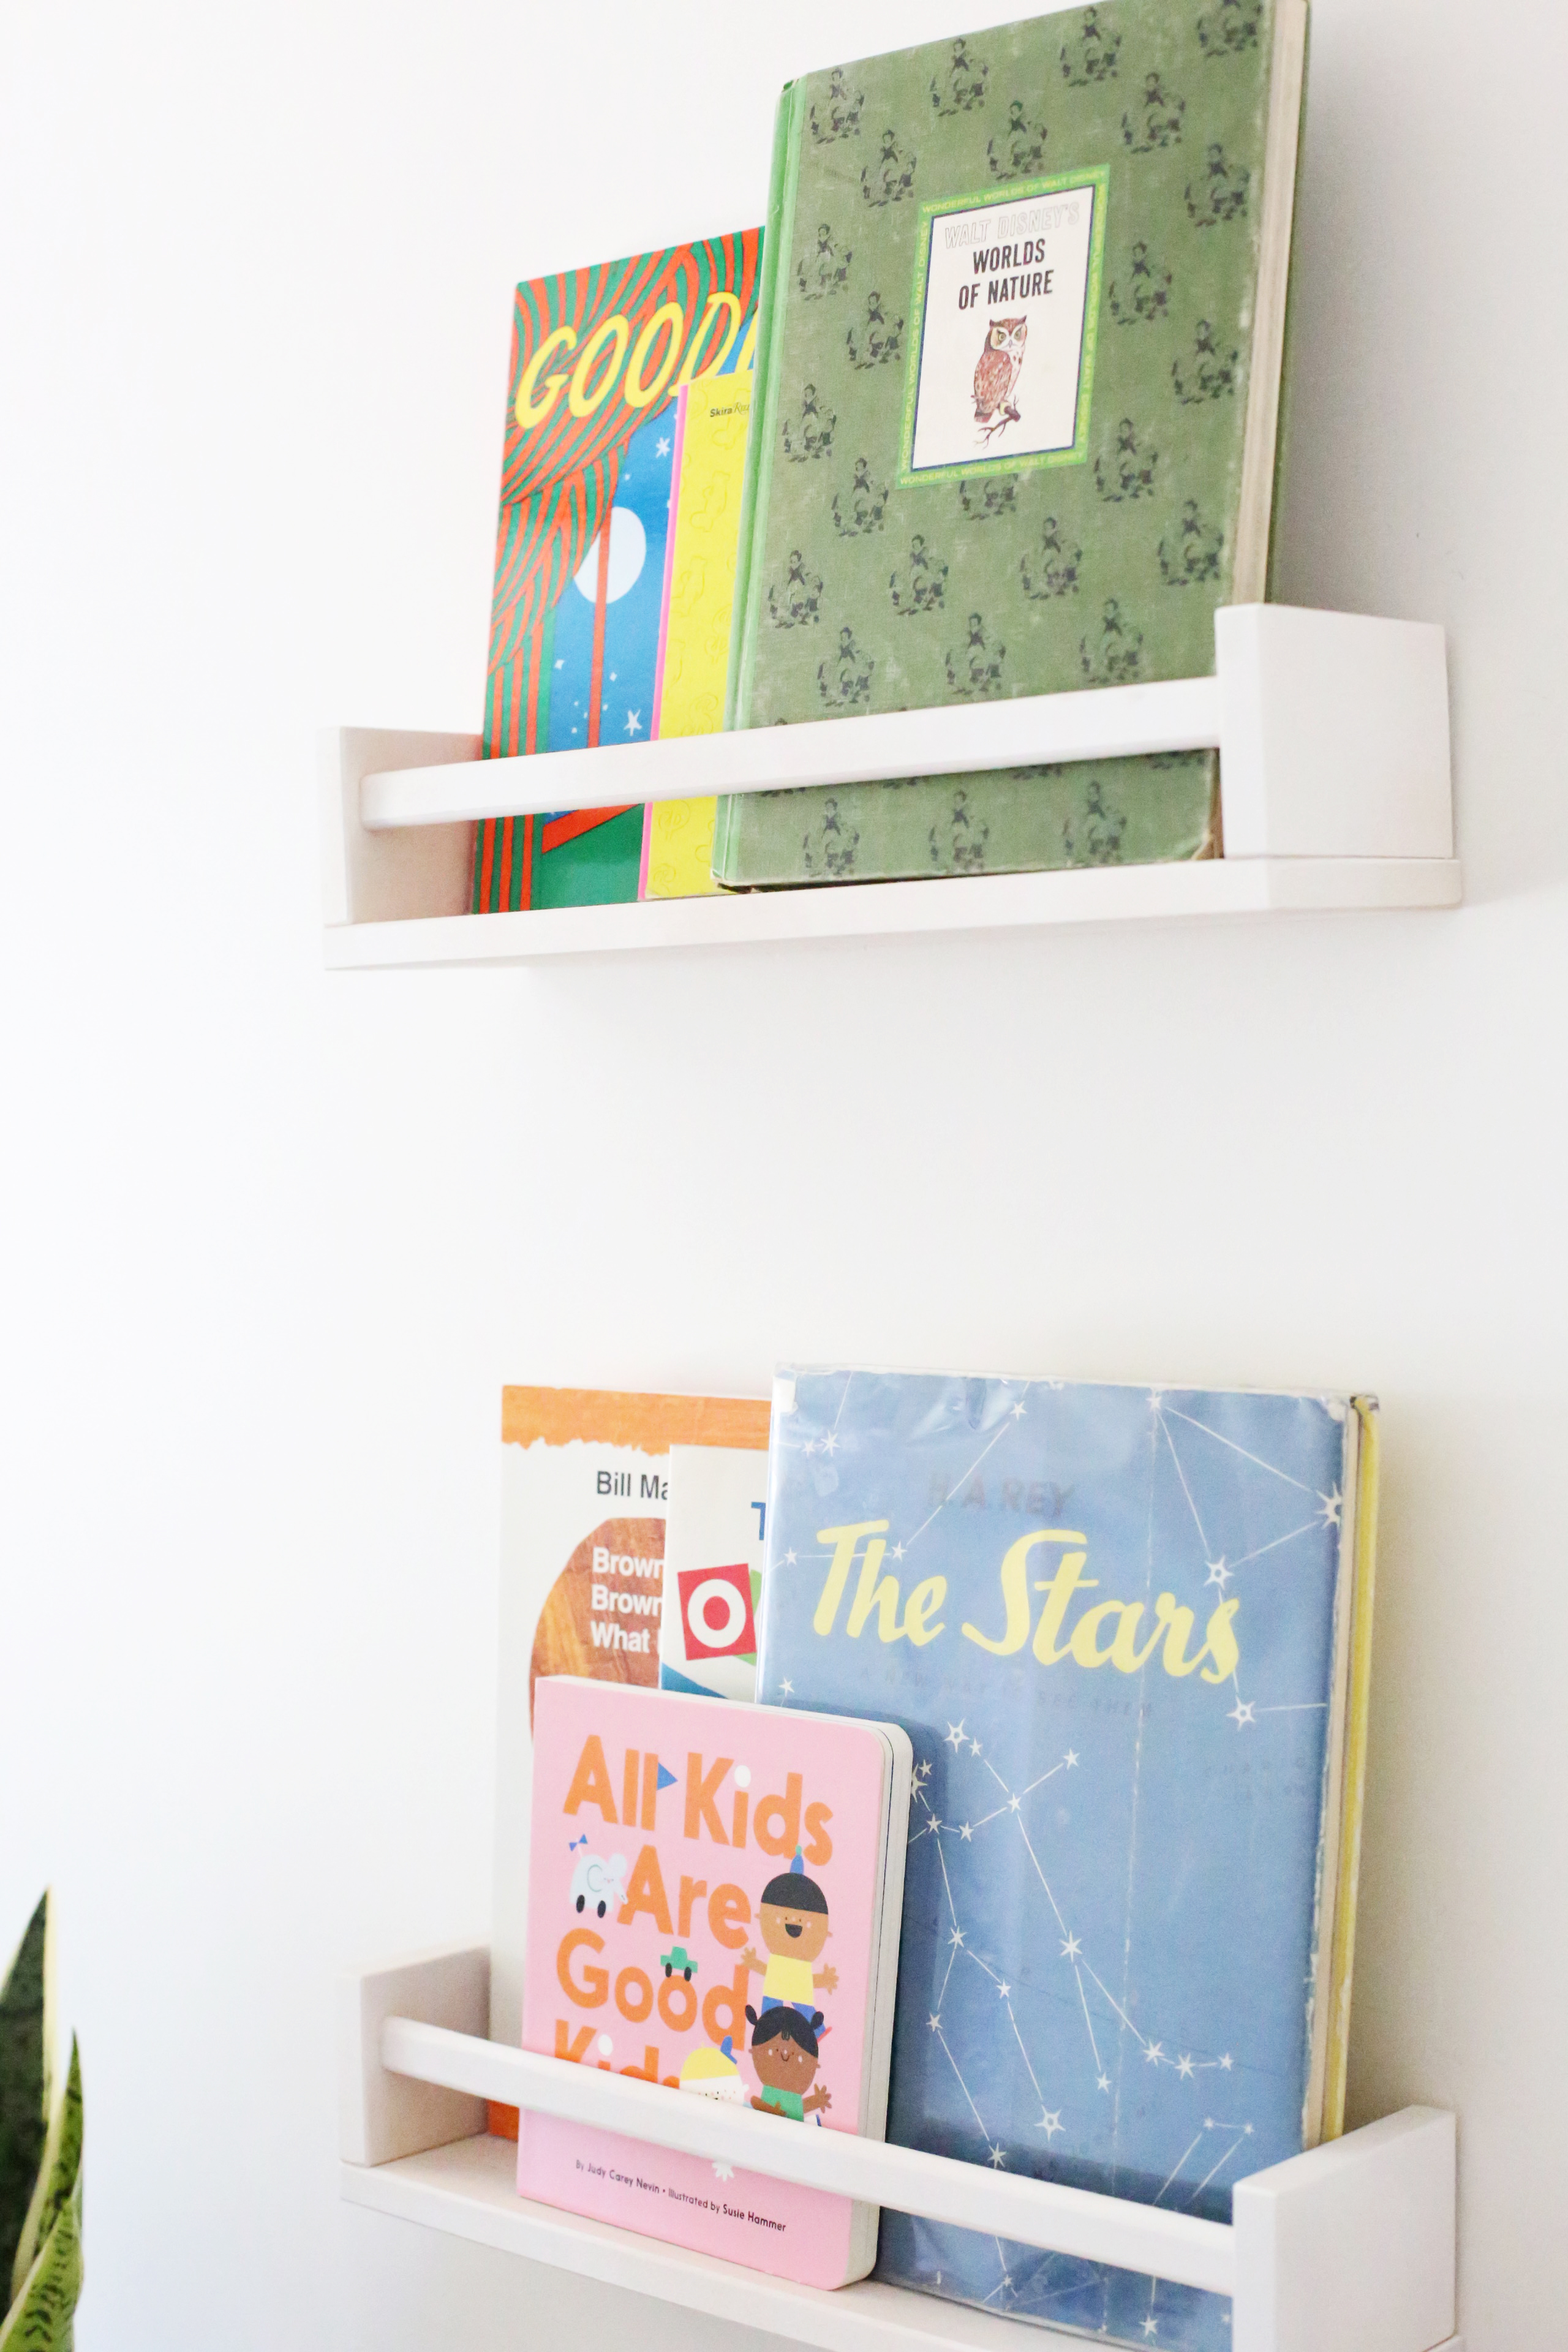
I love using these little spice racks for picture book storage – they are affordable and easy to hang! You could easily fill a whole wall to pack a big visual punch!
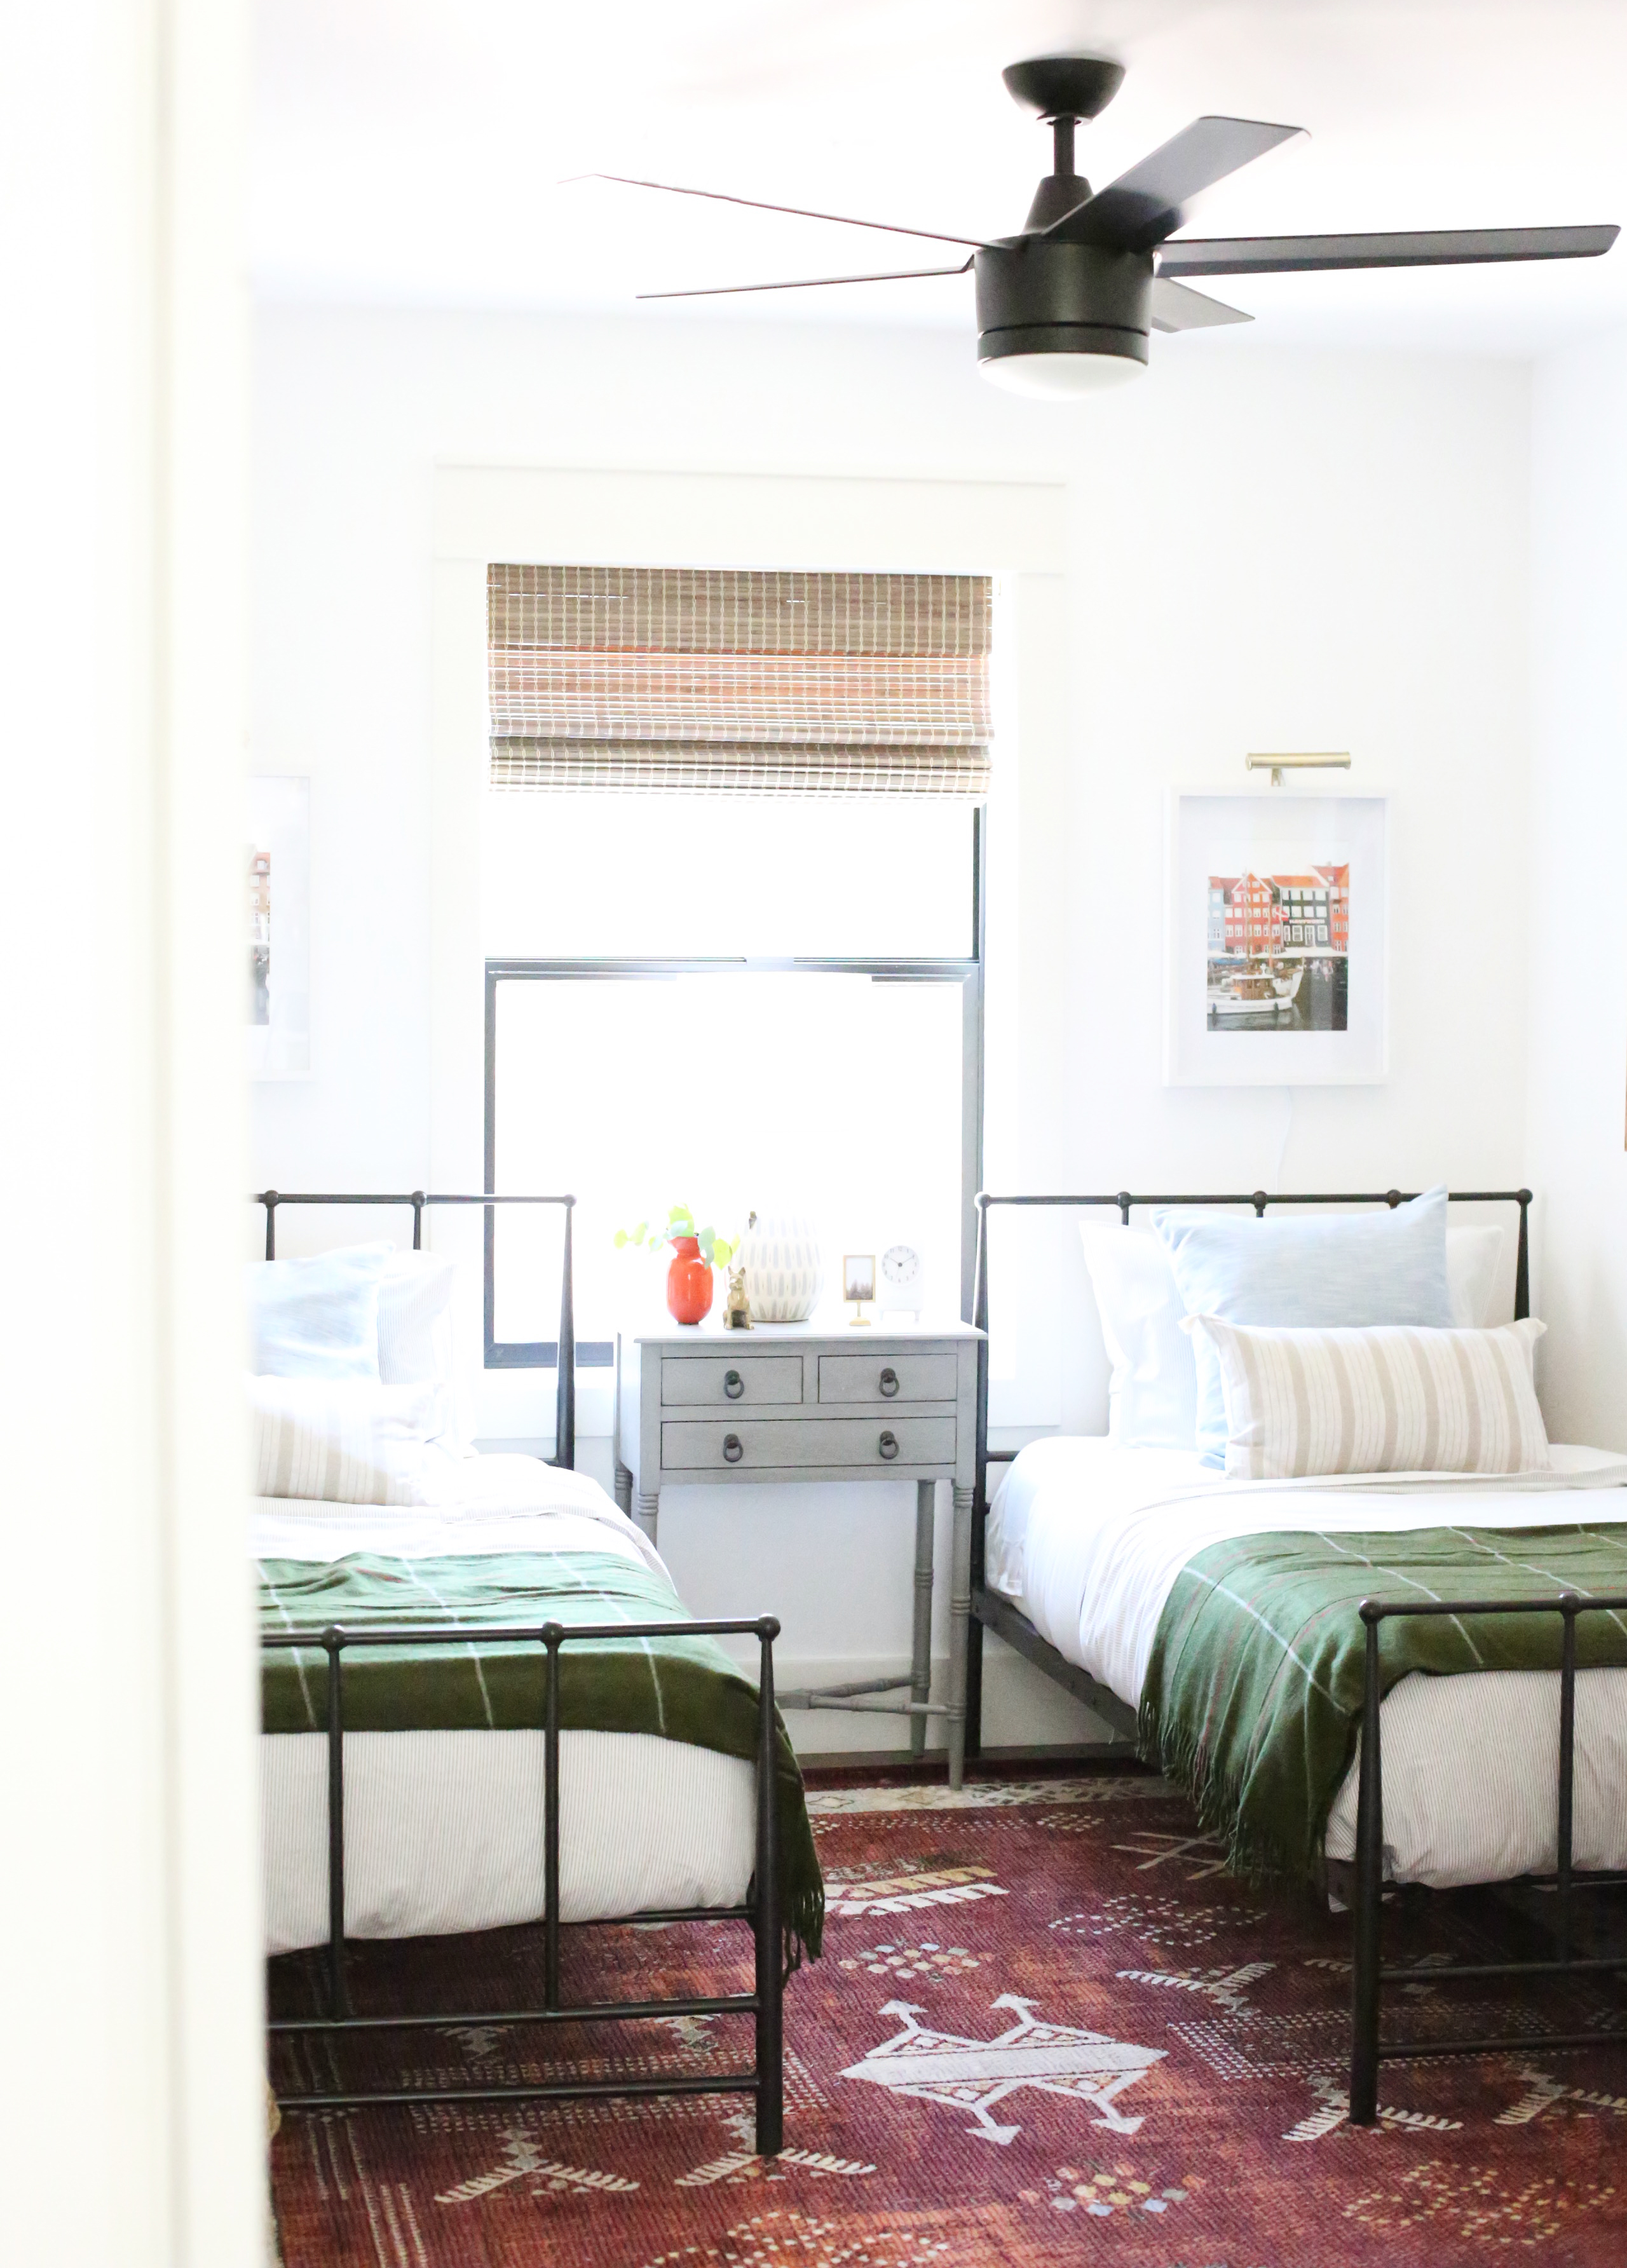
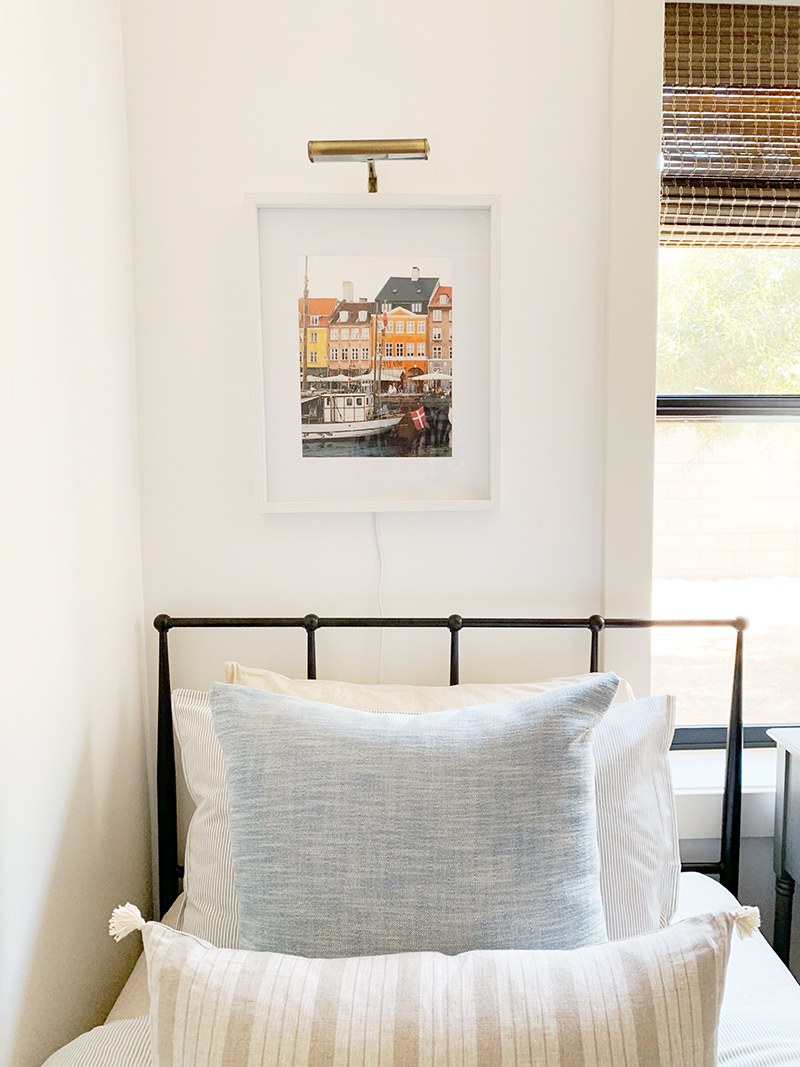
Along the back wall I split a 20×30 print from Juniper Print Shop into two to help connect the two sides of the window! Those little brass art lamps hanging above the prints are my favorite! They double up as reading sconces and really help save space on the nightstand (even though we still put a lamp there – ha!).
We are working on a big ceiling fan round up, but spoiler alert, this one is our very favorite for both the look and the price! Especially when we need a ceiling fan with a light kit (if there are no cans installed in the room). Also this fan comes in both a black and white option!
We were going for sort of a vintage camp vibe in here, inspired by the cute and affordable rug, but the green wool throws at the foot of the beds sealed the deal for us! I love how this sweet little space turned out!


