This post is sponsored by Lowe’s Home Improvement!
Dutch doors, or double hung doors, were originally used to keep the animals out and the children in, while also letting in sunlight and fresh air. (And, yes, you can also open a window, but these doors are just so charming!) We have a stretch in our house between the mudroom and the back stairs, just off the kitchen, that often feels dark and a little stale. Before our reno, I would open the two exterior doors (one at the front of the house and the other at the back) and we would get the most amazing air flow – it was like a giant vacuum when they were both open and the whole house had fresh air in just a few minutes! It was especially helpful on nights I cooked fish or curry! :)
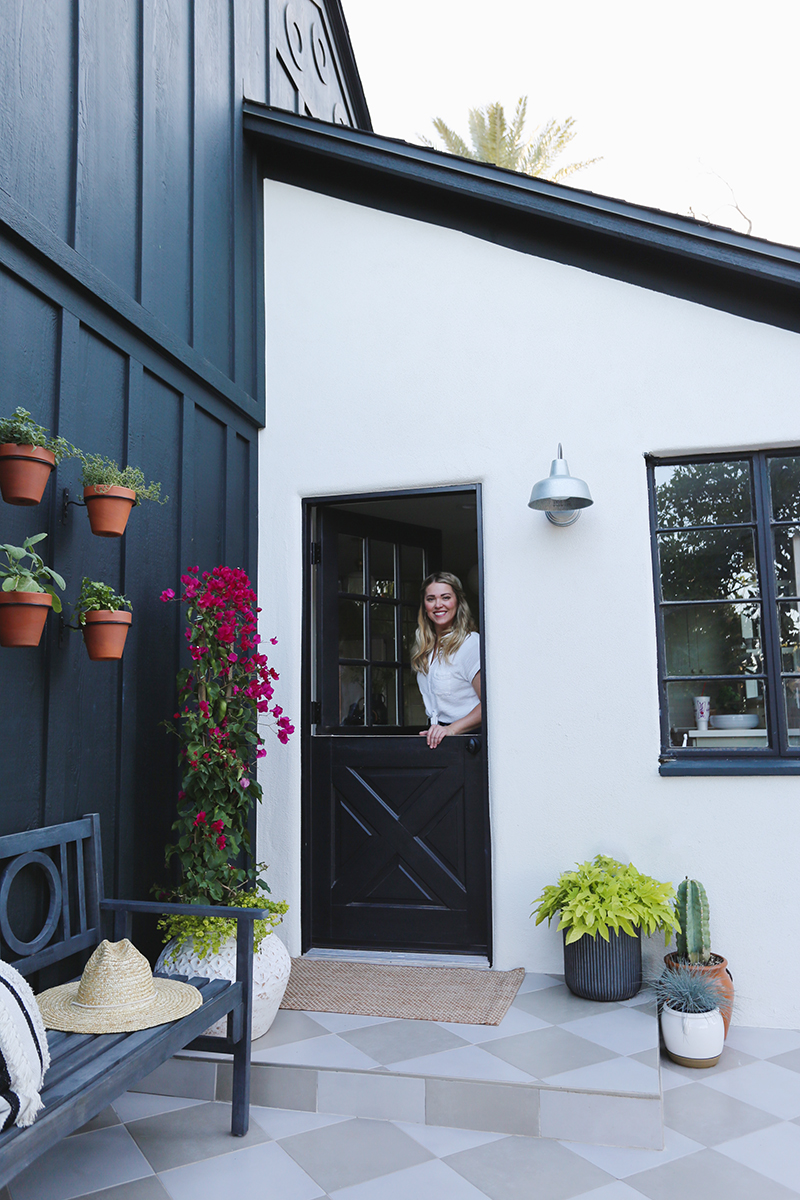
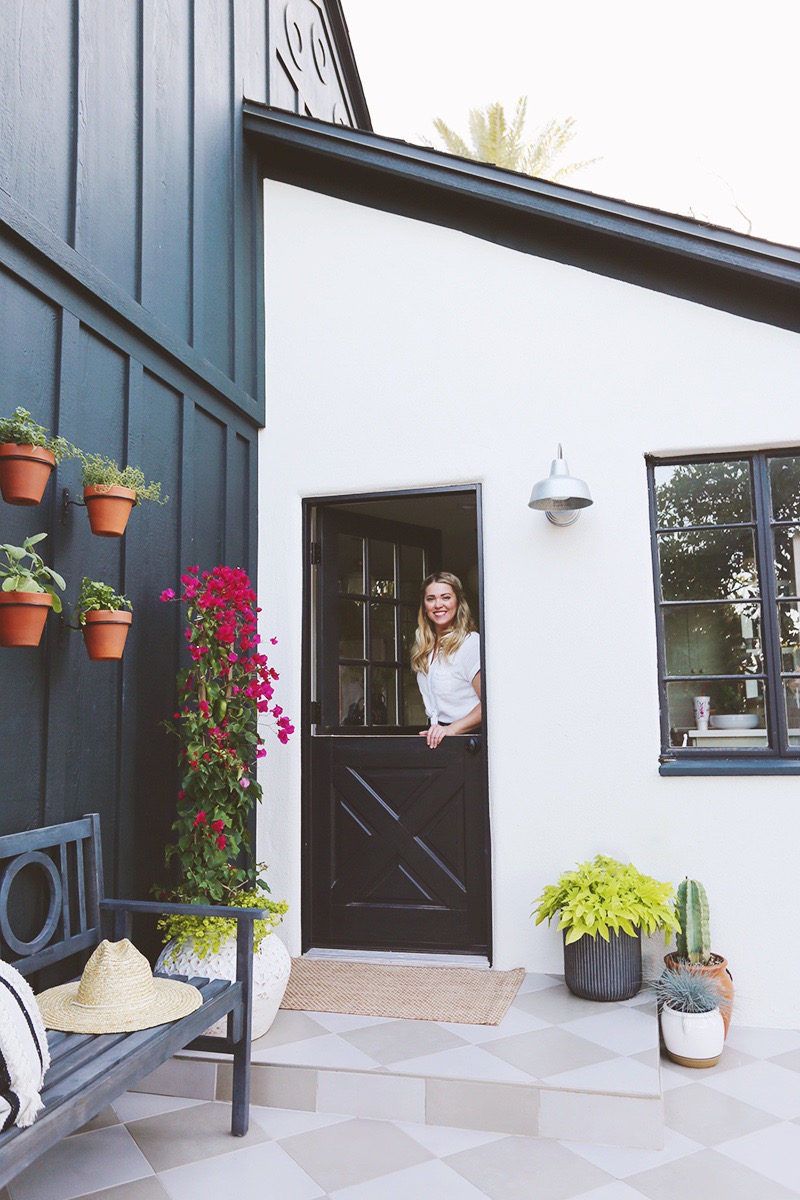
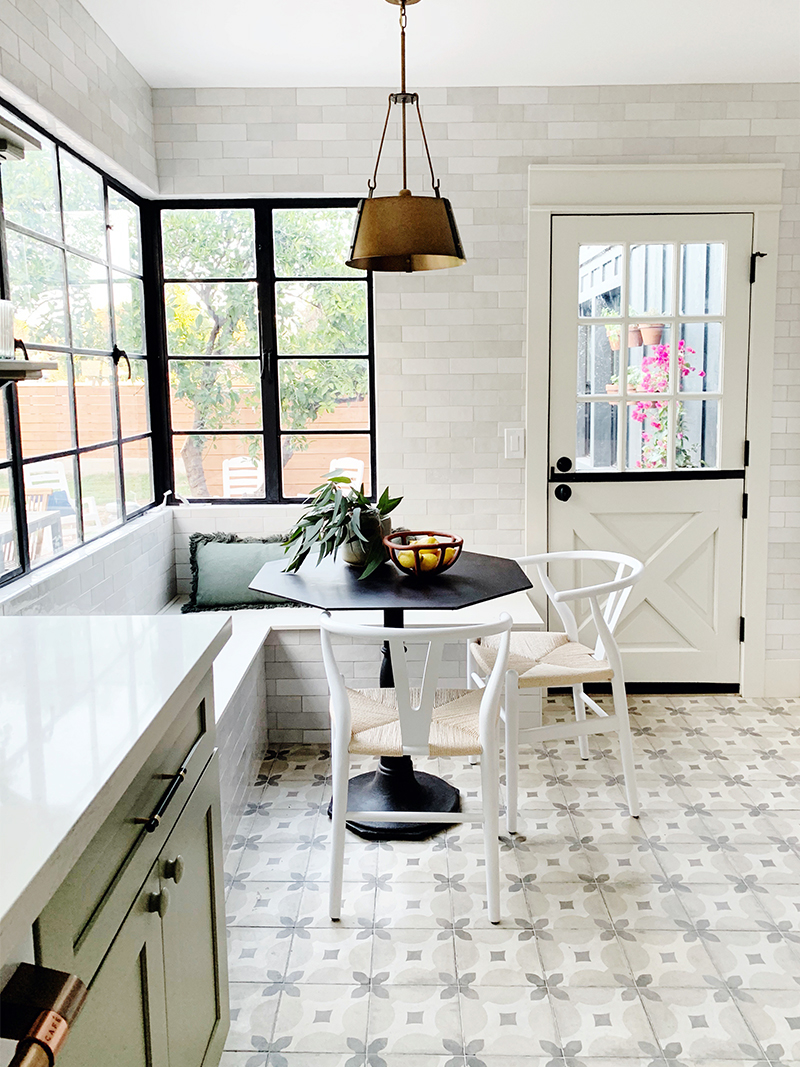
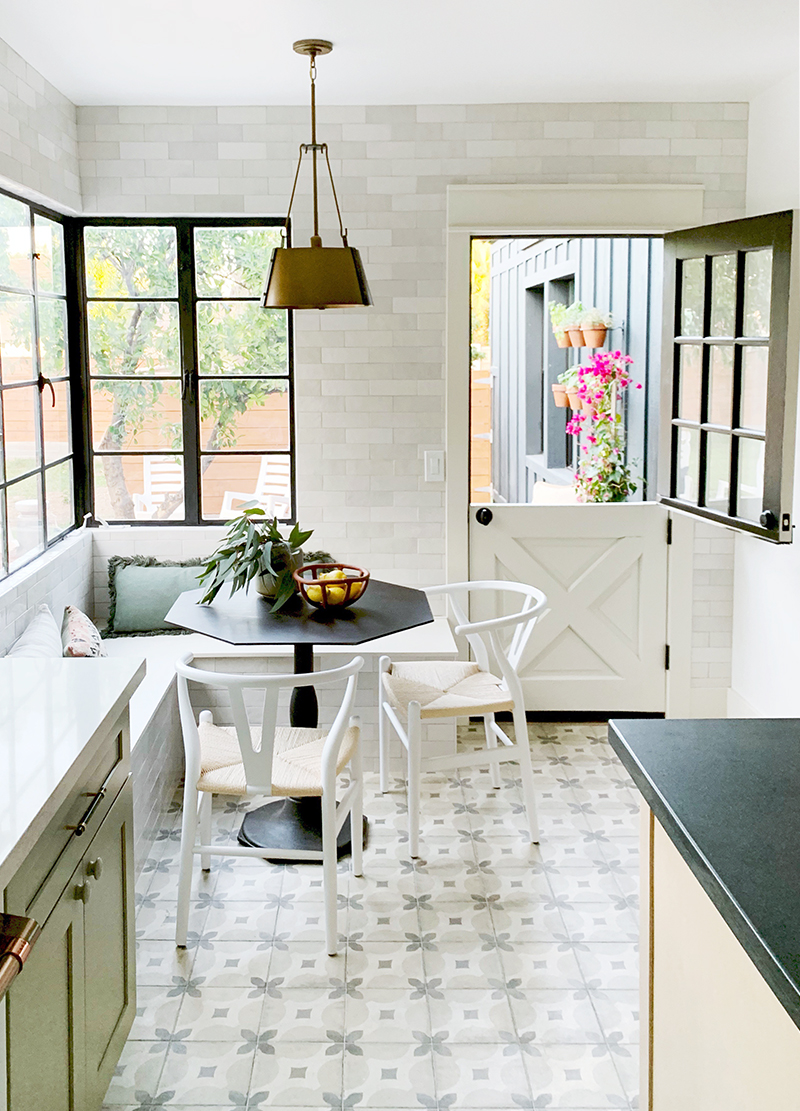
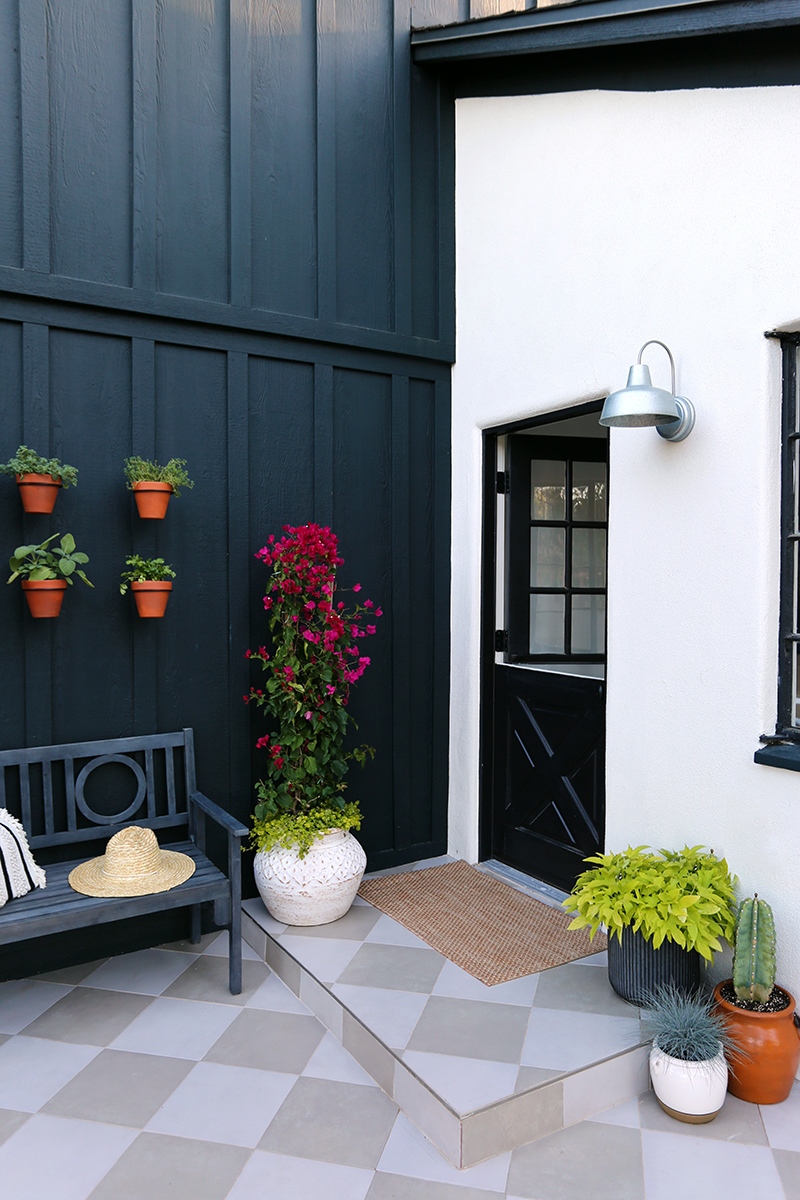
The only trouble is our dog, Linus, would love to escape and take a solo walk around the neighborhood when the doors were open. Not good! So when we were planning for our renovation, I knew I wanted two dutch doors in the house. We bought one new one for the addition section, but we figured out how to turn our old solid wood 9-lite door into a Dutch door and it was actually pretty simple to do! We loved the results so much we did an even more simple version for two of the exterior doors at the Evergreen flip house, which we renovated in partnership with Lowe’s Home Improvement! This is the Evergreen kitchen door closed and open:
Ready to jump in with the tutorial? Here are the supplies you’ll need for this project:
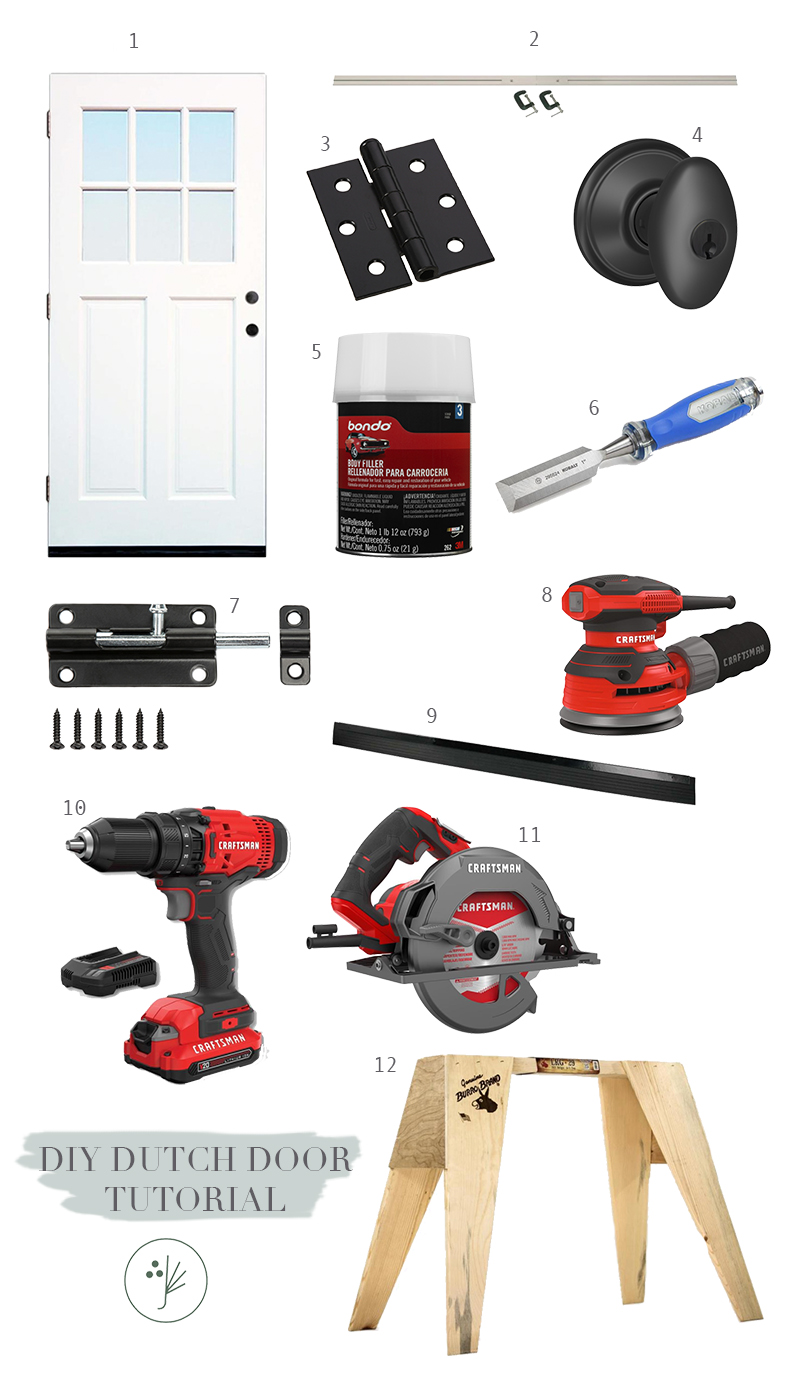
1 – Craftsman Solid core wood door
2 – Swanson Tool Company Straight Edge Cutting Guide
3 – National Hardware Black Barrel Door Hinge
4 – Matte Black Schlage Siena Door Knob
6 – Kobalt 1″ Woodworking Chisel
7 – Gatehouse Black Slide lock barrel bolt
9 – Gatehouse Weather Strip/Door Sweep
10 – Craftsman Cordless Drill (with Charger!)
11 – Craftsman Circular Saw with Laser
12 – Burro Brand Wooden Saw Horses
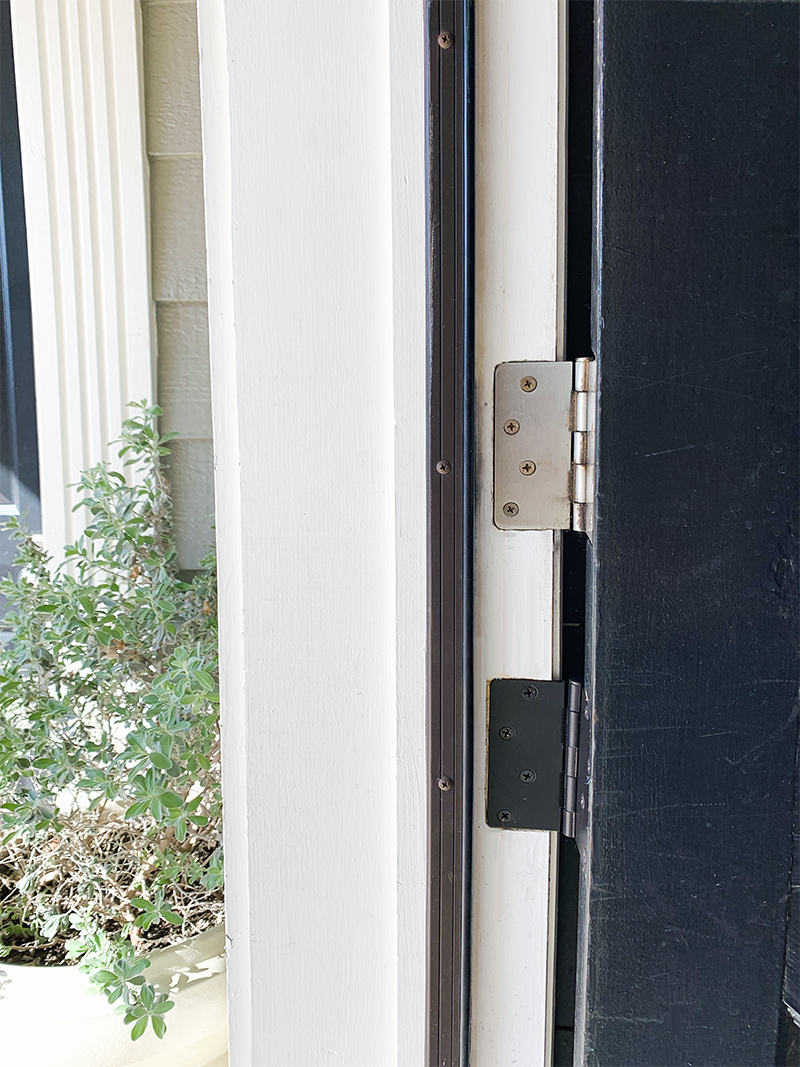
Step 1: ADD A FOURTH HINGE. In order for the Dutch door to work properly, where the doors swing independent of one another, you’ll likely have to add a hinge. That’s as simple as tracing around the hinge and chipping out the wood with a chisel in your door jamb enough so the new hinge sits flush. (Note: we wanted to change all our hardware to matte black, so that is why our new hinge does not match our old ones. Everything got replaced with the black finish hinges at the end of the install though!)
STEP 2: TAKE DOOR OFF ITS HINGES and place on a pair of saw horses. You can see here my door has seen better days, but we’ll fix that right up!
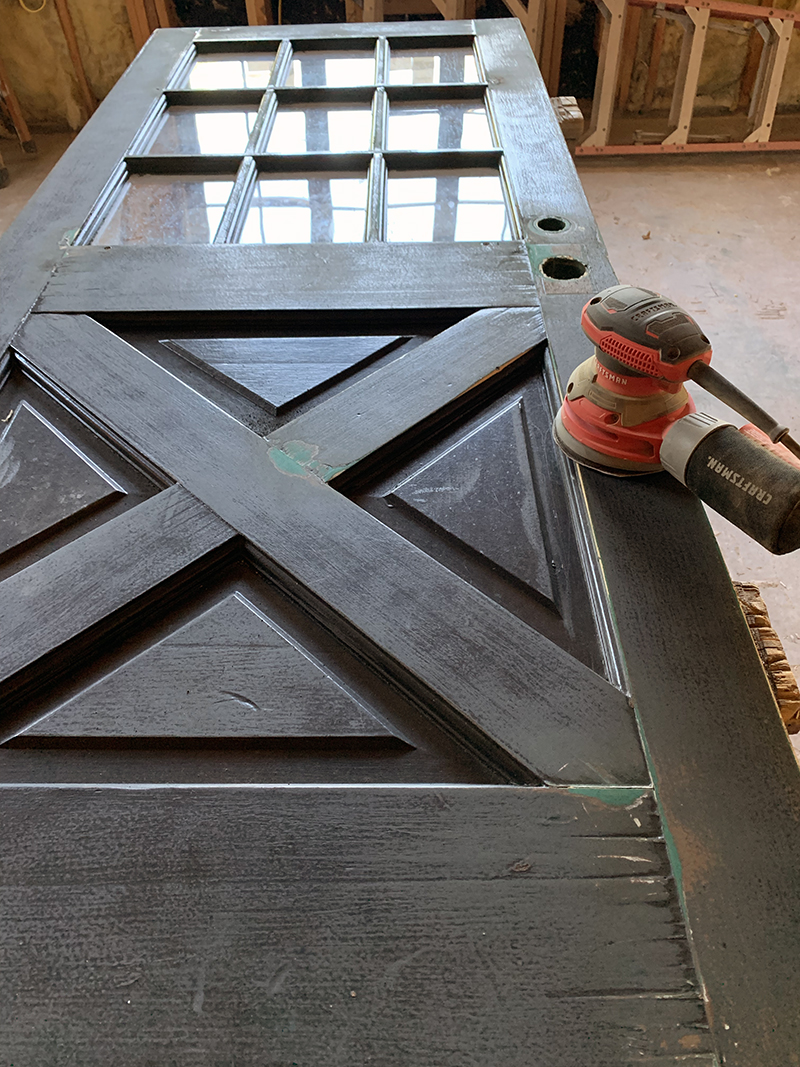
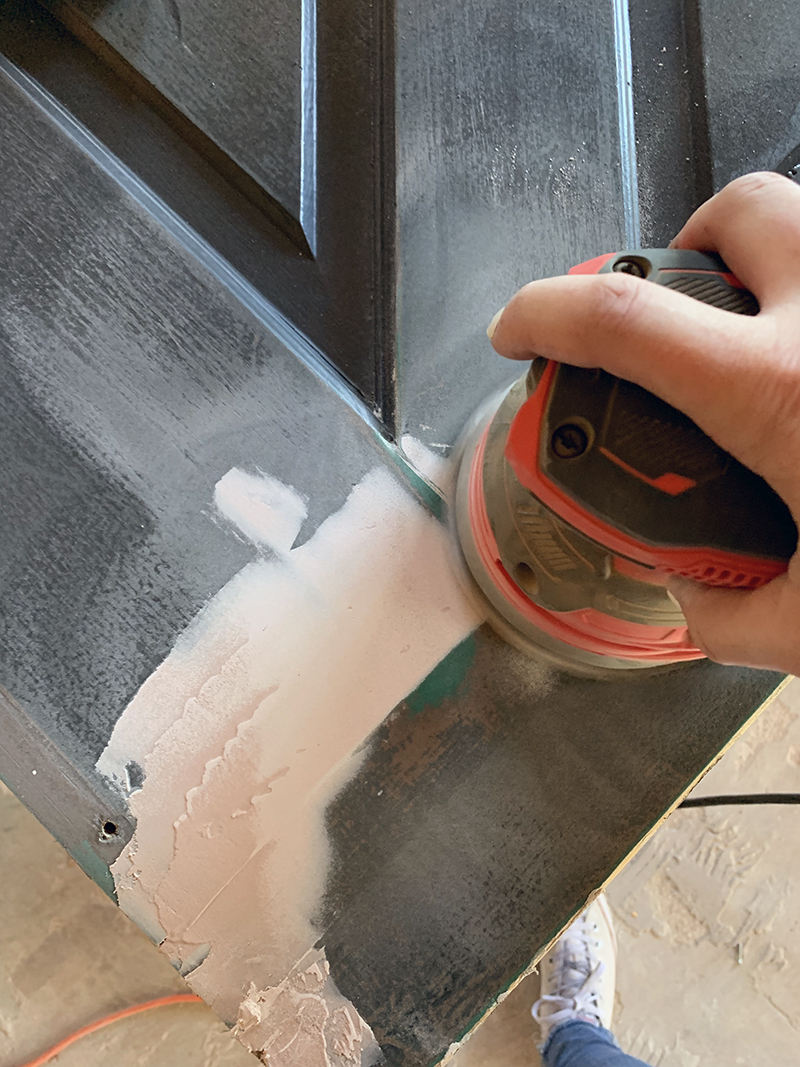
STEP 3: REPAIR AND PATCH DOOR. Depending on the condition of your wood door, you may have some patching and sanding to do, which is much easier to do well with your door on the saw horses! I love Bondo, which is an epoxy product most commonly used for auto body repairs, but it works GREAT on wood or metal furniture that is going to be painted (not stained!).
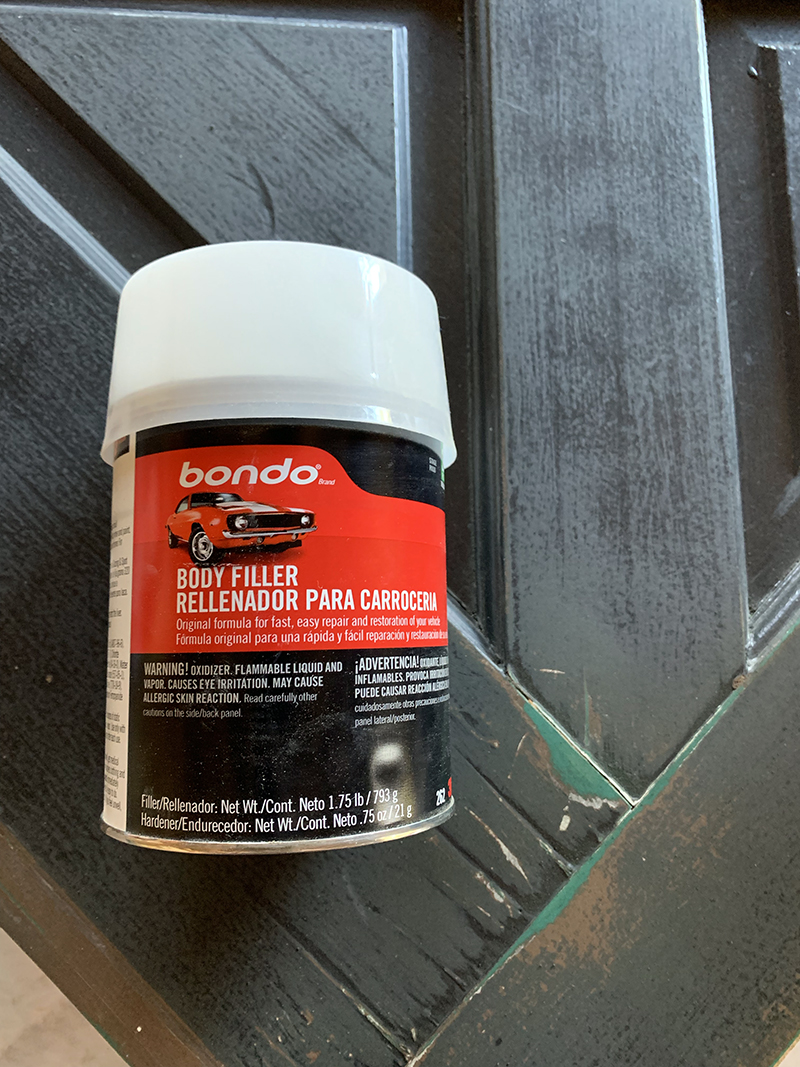
You can follow the simple instructions on the Bondo can for mixing the epoxy. I apply it with a heavy hand – the material is easy to sand down and it’s better to start with a ton of product layered on and then sand down to the perfect finish. It also dries quickly and is ready for paint in only about 30 minutes!
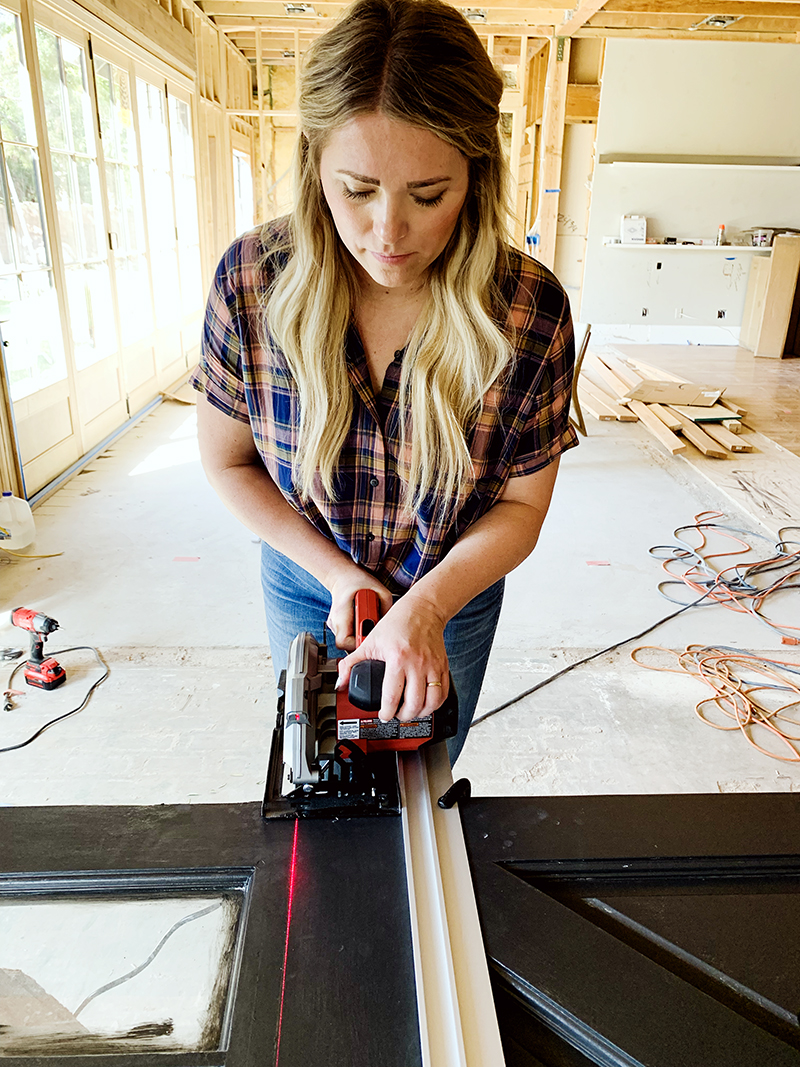
STEP 4: CUT YOUR DOOR! I used this handy straight edge cutting guide from Lowe’s to make a perfect cut (and it does have to be perfect) with my circular saw. My saw has a built in laser guide as well, which is super helpful! You’ll just want to cut between your deadbolt and your door knob.
STEP 6: SEAL THE GAP! When you cut your door in half, you’ll be left with a gap in the two doors the thickness of the blade, and you’ll want the door to be air and water tight. You can address that in two different ways. The simplest way is to add weather stripping (or a rubber door sweep) like we did with the Dutch doors at the Evergreen house. (PS you can definitely paint the weather stripping too to match the door, we just ran out of time before the house sold!)

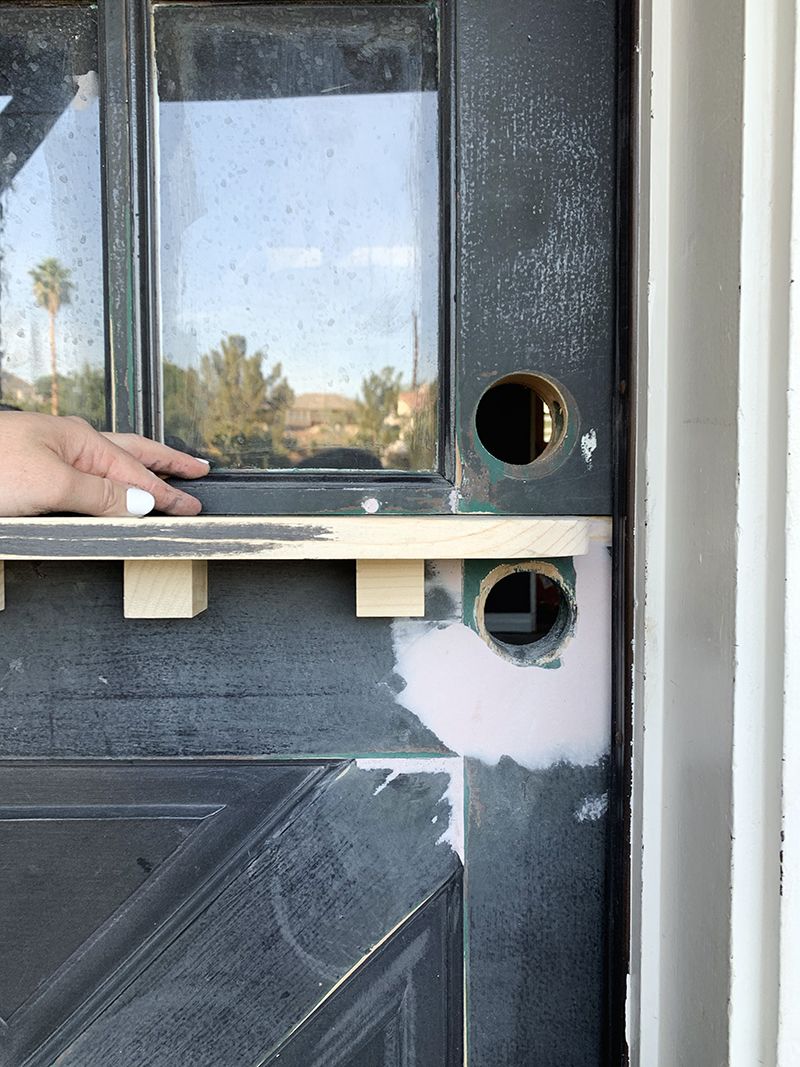
The slightly more complicated way is adding a shelf between the doors, which we did with the door at my house.
I bought a short piece of 1×6 board at Lowe’s. I marked above and below where I wanted the shelf to sit and cut out the approximately 1″ section, careful to keep the blade on the inside of the line with both cuts so that the shelf would fit tightly between the two doors.

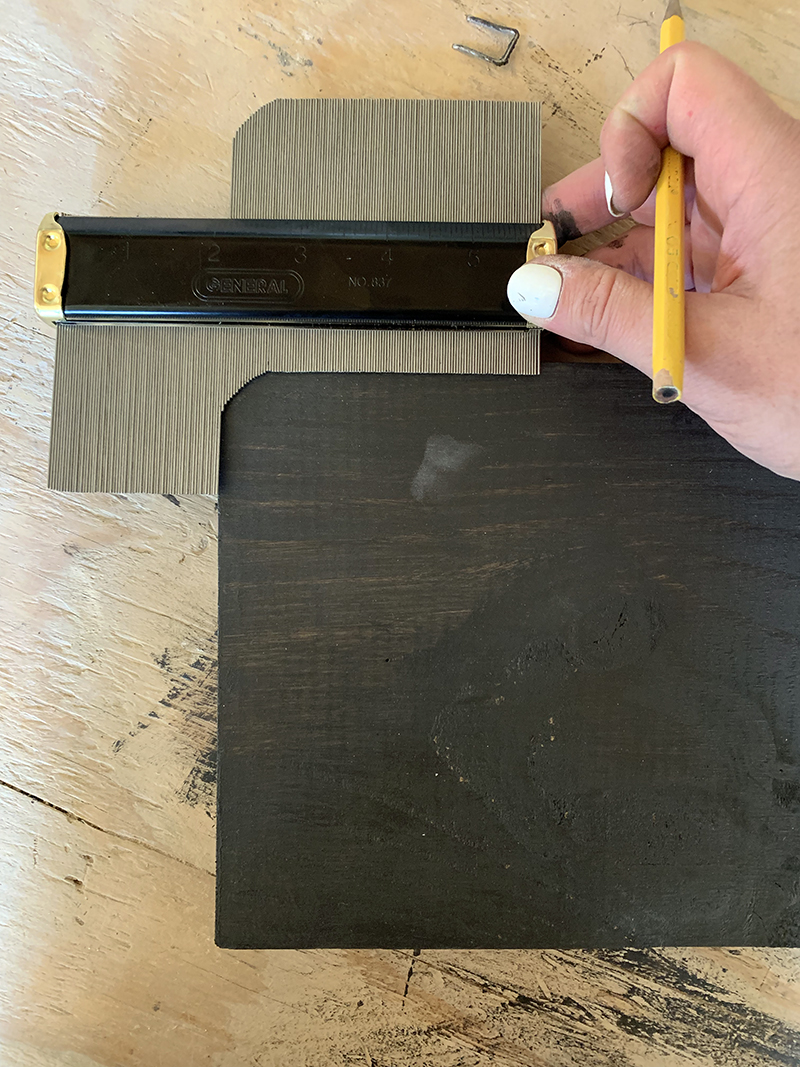
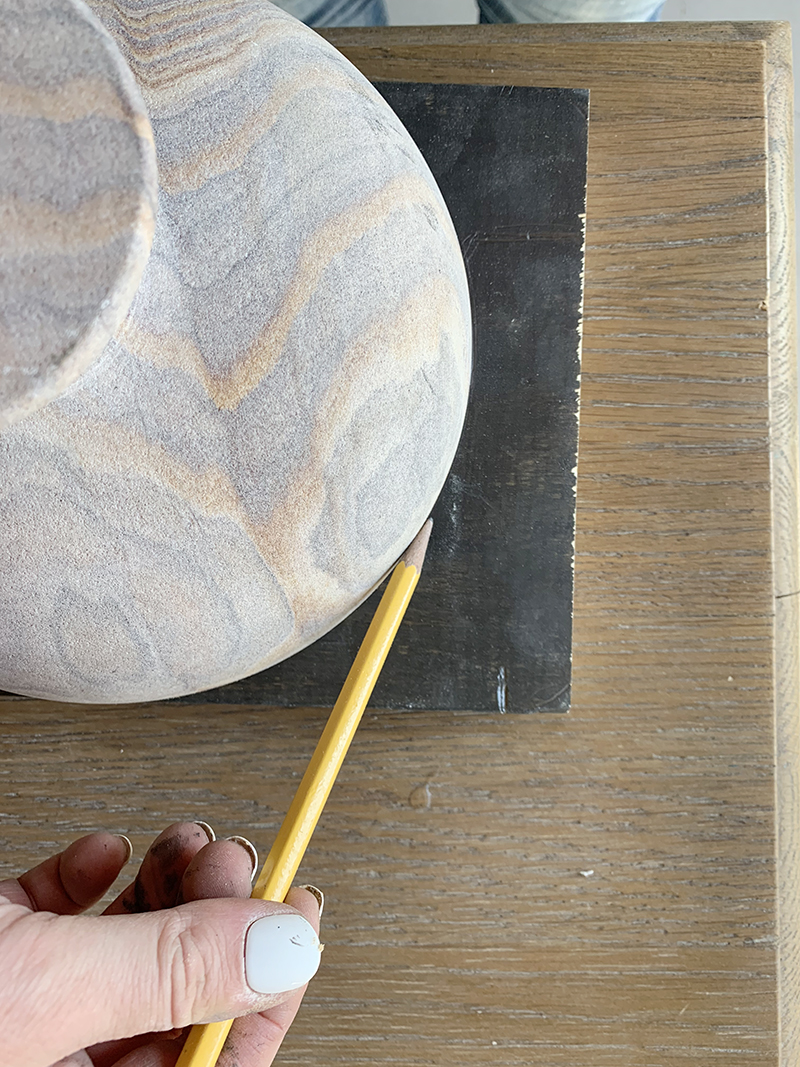
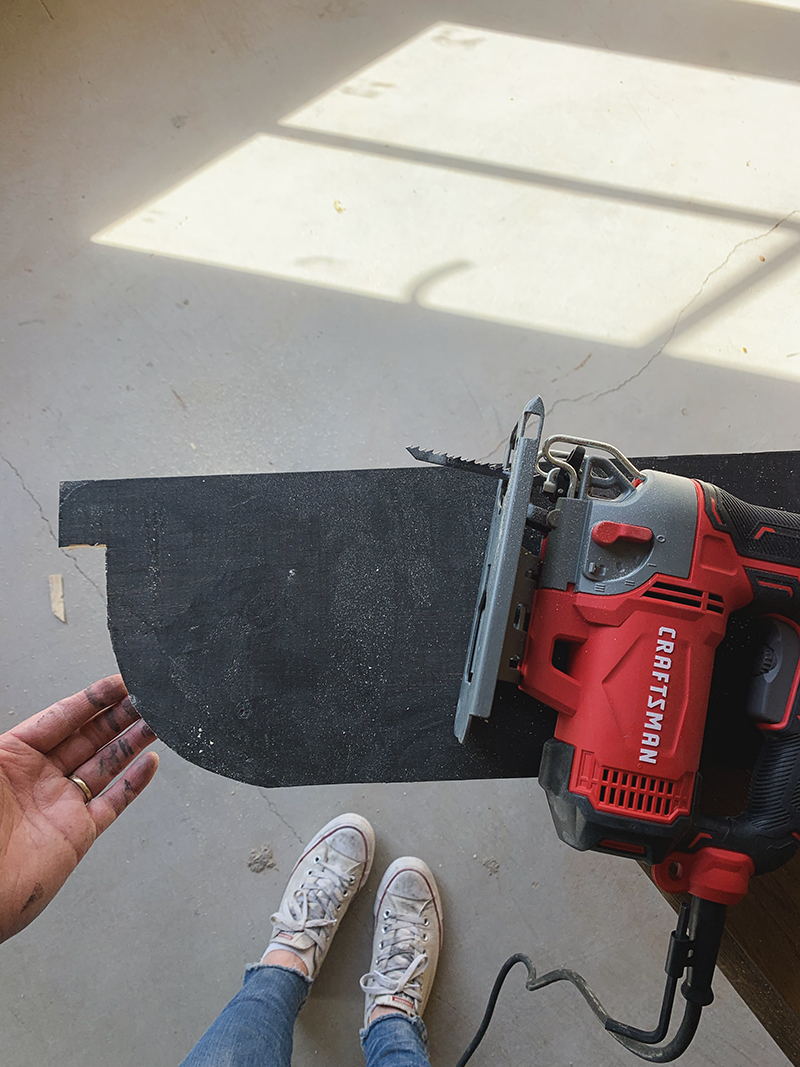
STEP 7: ROUND OUT THE SHELF CORNERS. Depending on your door and hardware placement you might need or want to step in and round out the corners of your shelf. You can do this by using a carpenters guide or if you want a more exaggerated curve like I did, you can use a bowl to mark your curved cut lines. I used a jig saw to quickly cut the shelf board.
You can see here, I wanted the shelf to stick out entirely on the exterior side of our door. The little ears on the shelf sit perfectly on top of the bottom half of the door and then the curved part allows the shelf to clear the door jamb. My cut was a little off, but sanding takes care of any inconsistencies like that!
STEP 5: REPLACE HINGES AND HANG YOUR DOOR AFTER CUTTING. The recommended method is to put the hinge plates on your door and your jamb individually and then tap in the pins to hang.
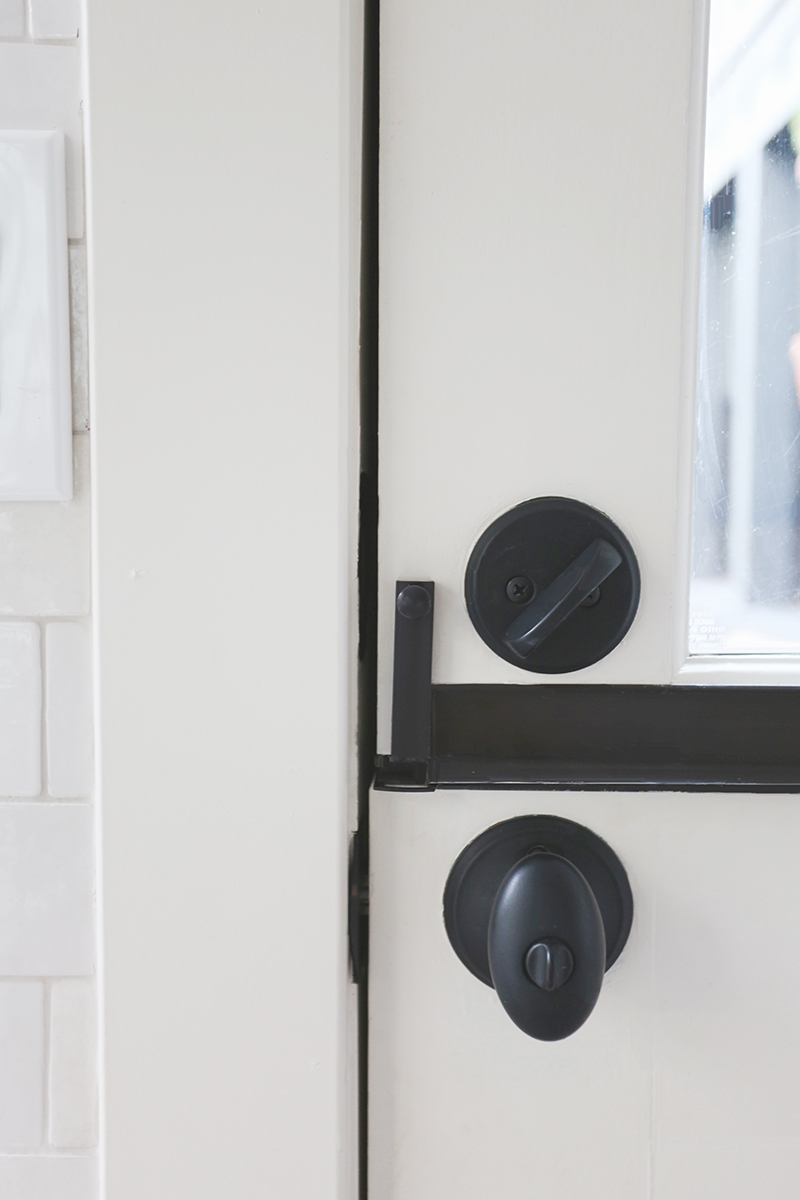
STEP 6: ATTACH YOUR SLIDING LATCH AND SHELF. The sliding latch keeps the two doors tightly together for regular use. It’s easy to screw in next to your handle set on the interior side of the door.
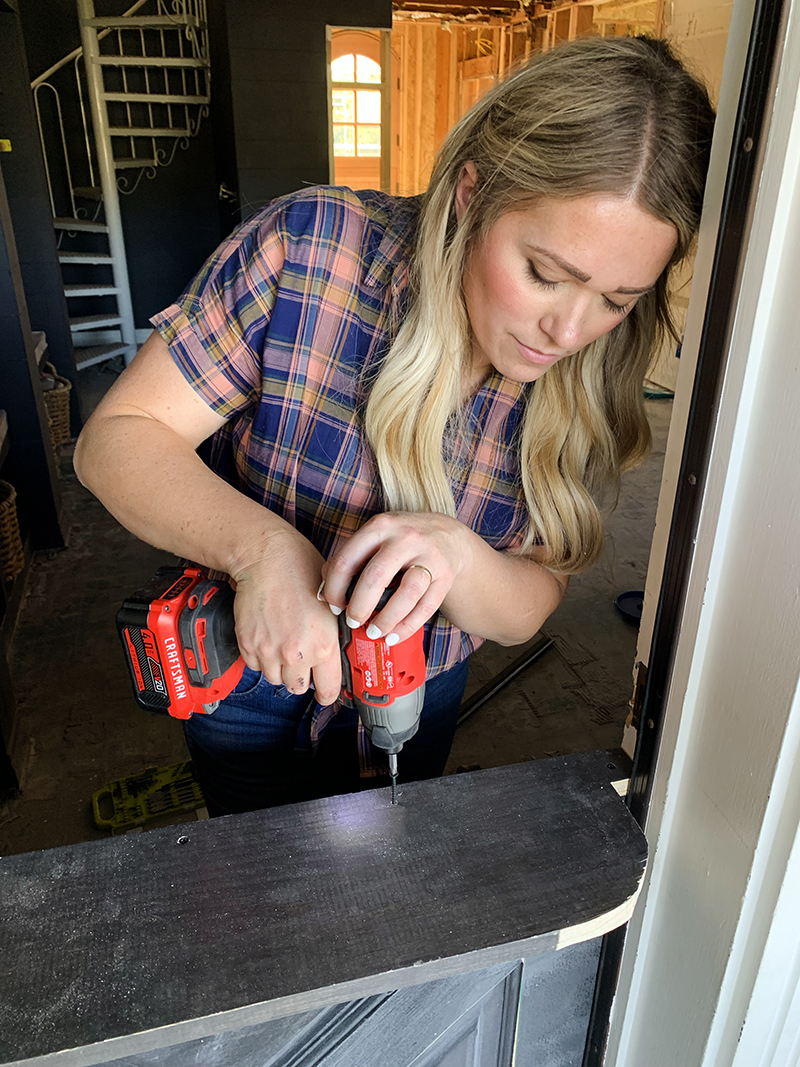
At this point, for my own door, I used six screws and wood glue to attach my shelf to the bottom door. You can do any touch up sanding after the shelf is secure so it looks perfect before painting!
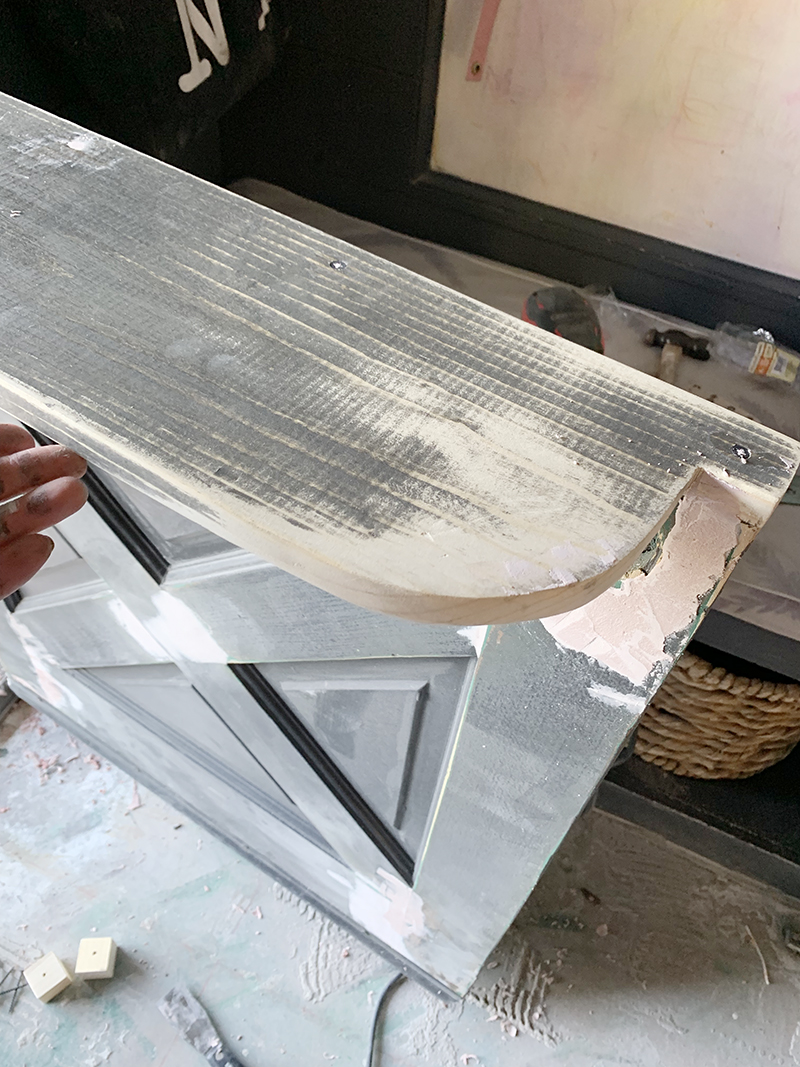
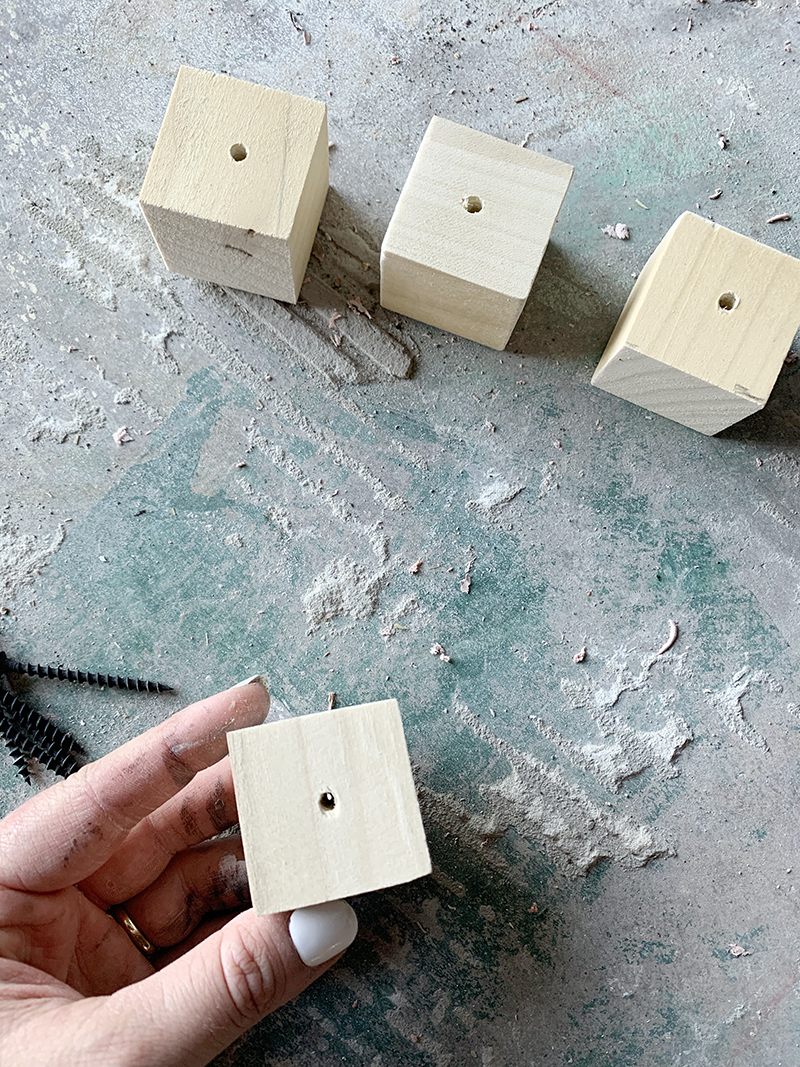
OPTIONAL STEP: I liked the idea of adding some decorative dental pieces under the shelf, so we cut down a piece of square molding from Lowe’s into little cubes, drilled pilot holes and secured them to the underside of the shelf with wood screws and a little glue.
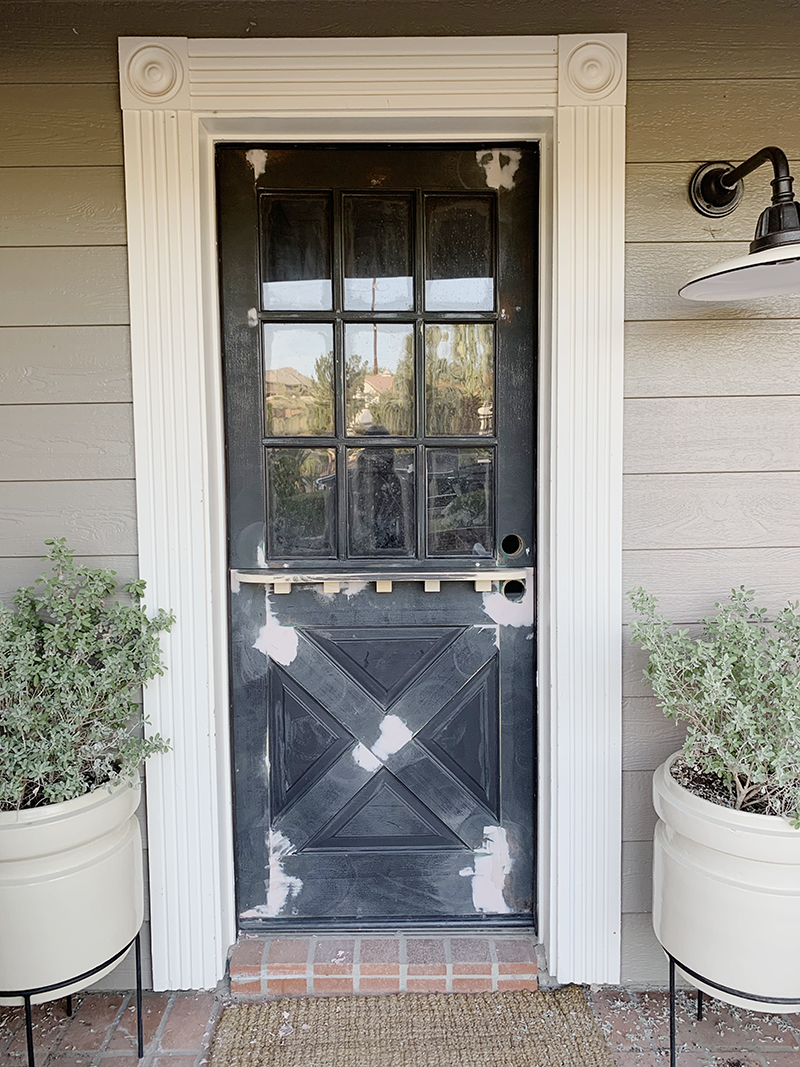
The door at our house is not much to look at yet, but it’s all ready for the house painters to come! :) I love it and I’ll be sure to post an after-after photo on social media as soon as this one is perfect!
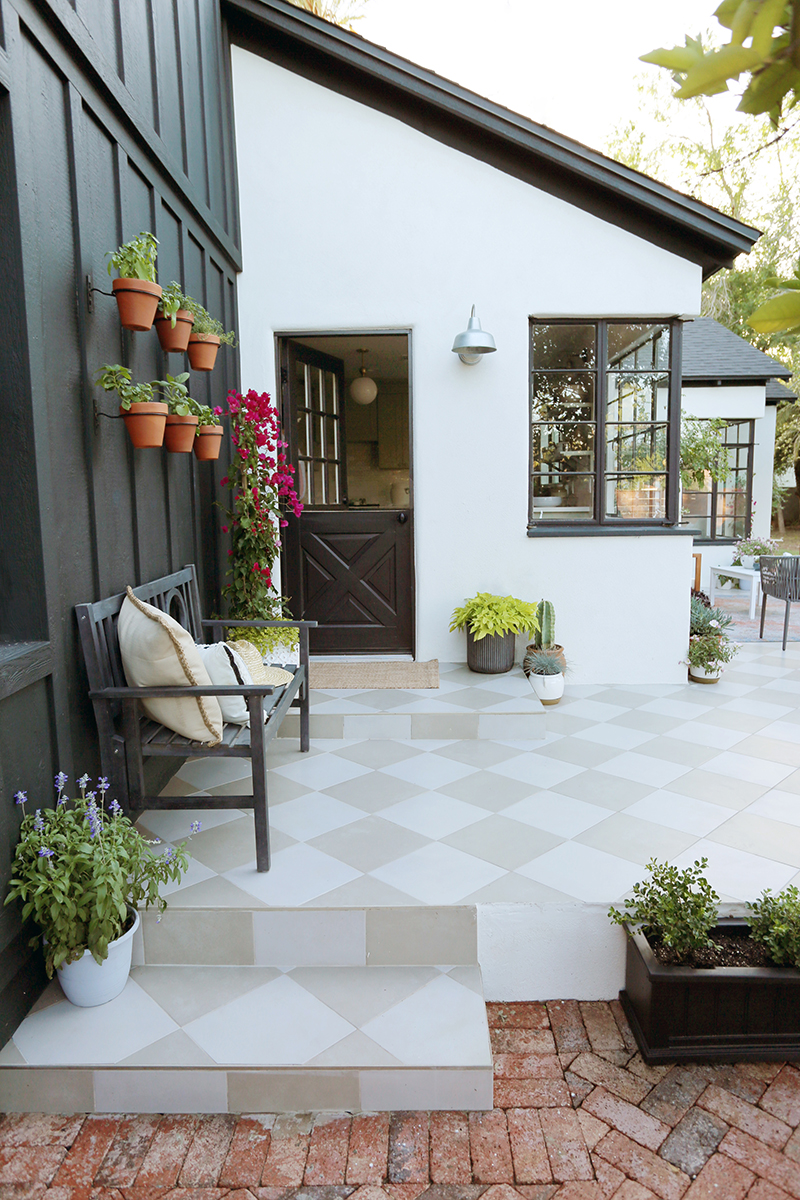
In the meantime, here are a couple more shots of the simpler, no-shelf version of this same project at the Evergreen house! Dutch doors are not for everyone or for every house but if you’re a fresh air junky like I am and you love adding some character to your house, this project might be a good one for you! We have amazing weather in desert for about eight months of the year and I can’t wait to get even more of that beautiful desert breeze that often smells like orange blossoms or creosote by our house!


Love this! Where did you get the door at the Evergreen House?
The doors were all from my house originally! :) We didn’t need them after demo for our renovation so we repurposed them at the flip house! You can find solid wood doors like these at Lowes or you can get salvaged ones at shops like Habitat for Humanity’s ReStore!
Love this tutorial! Your DIYs are always the best!
Thank you Melissa! xo
Fantastic. I know what you did is just right because I just did something similar. Bought 2 old doors and refinished them – the hard way. But boy do they look great now. Worth the effort. However, it isn’t cheap when you add in the cost of tools and supplies. What price glory I say! Thanks for the great tutorial. Ann
Great layout in planning and tutorial on how to build our very own. I’m going to build two of them using some of your great ideas. Although mine will have to be completely built from scratch. I believe your tips are going to make to adventure something great to the front of my camper and the back of my camper.
Thank you for such wonderful and easy steps.
Love your home and your Dutch doors. I recently came to own a vintage Dutch door that I want to use as an exterior door from inside our home into the garage area. My question is how do you keep air leaks from the area where the two pieces of door meet?
You can use some very slim weather stripping!
Love it. Now I have to find someone to do it for me.
I love your Dutch door and your How-to instructions. I can’t find an external door that has those cross pieces of wood on the bottom half like yours has. Do you have a source that you can share for finding that door style?
The door of Evergreen House is so beautiful. I love it and bloxorz
Simply gorgeous, loved that you did it all yourself. You a badass.
It’s clear that there is a lot to learn about this. I think you made some good points about features age of war game
This Dutch door tutorial is fantastic—clear, detailed, and so inspiring! Jenny’s step-by-step guidance makes the DIY process feel totally achievable. Can’t wait to try this in my own home flappy dunk!
Challenge yourself in Hardcore mode or relax in Creative mode—minecraft legends lets you play your way.