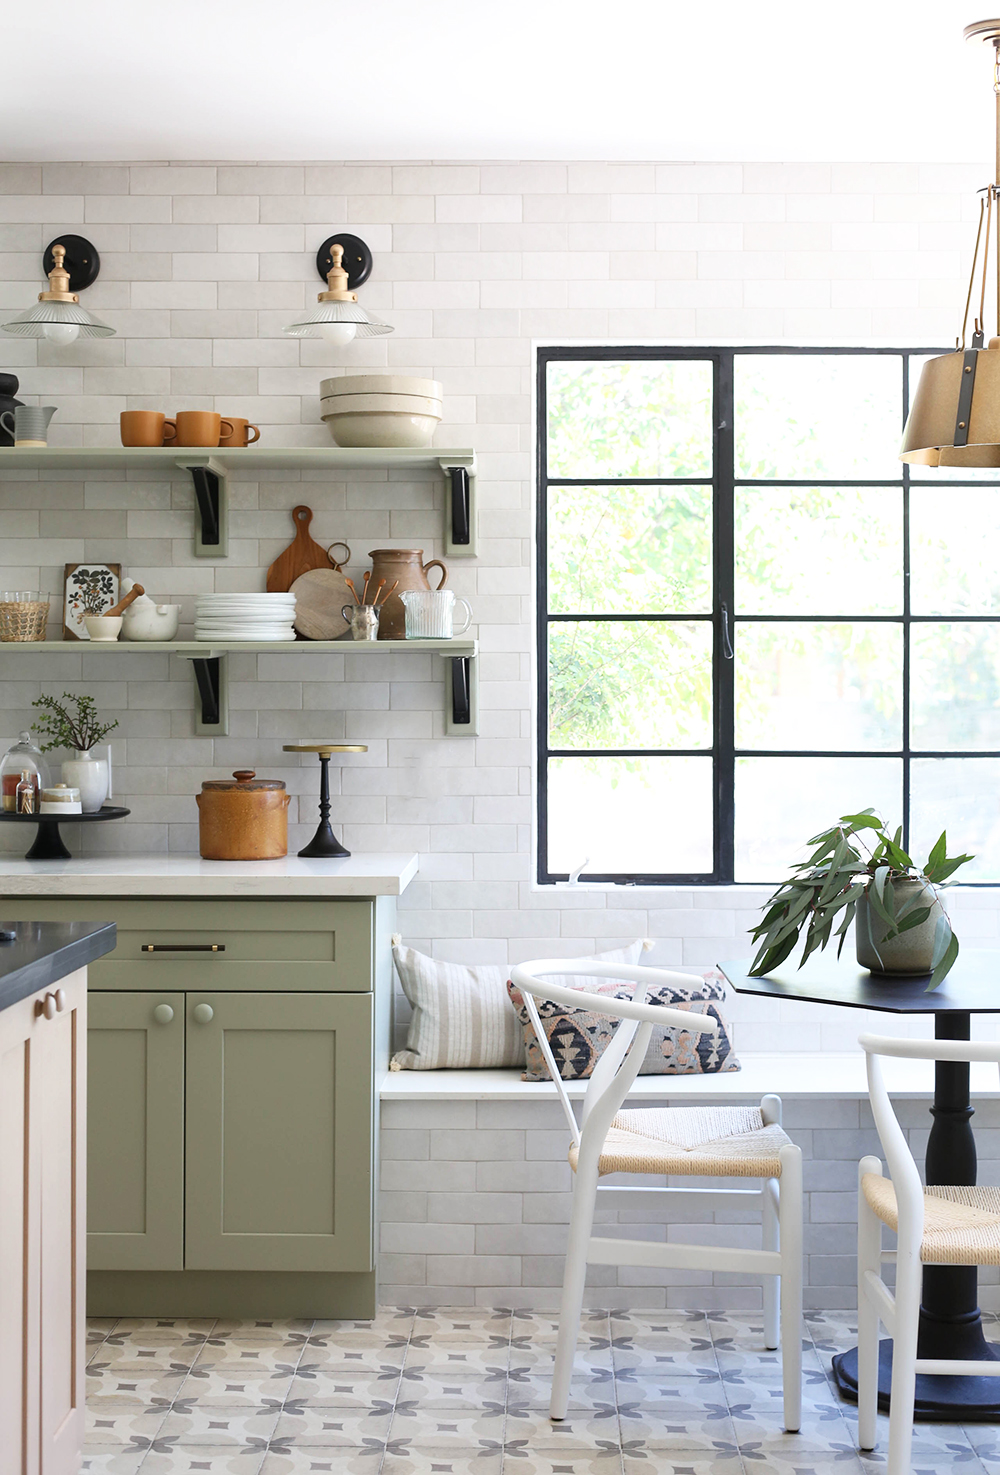
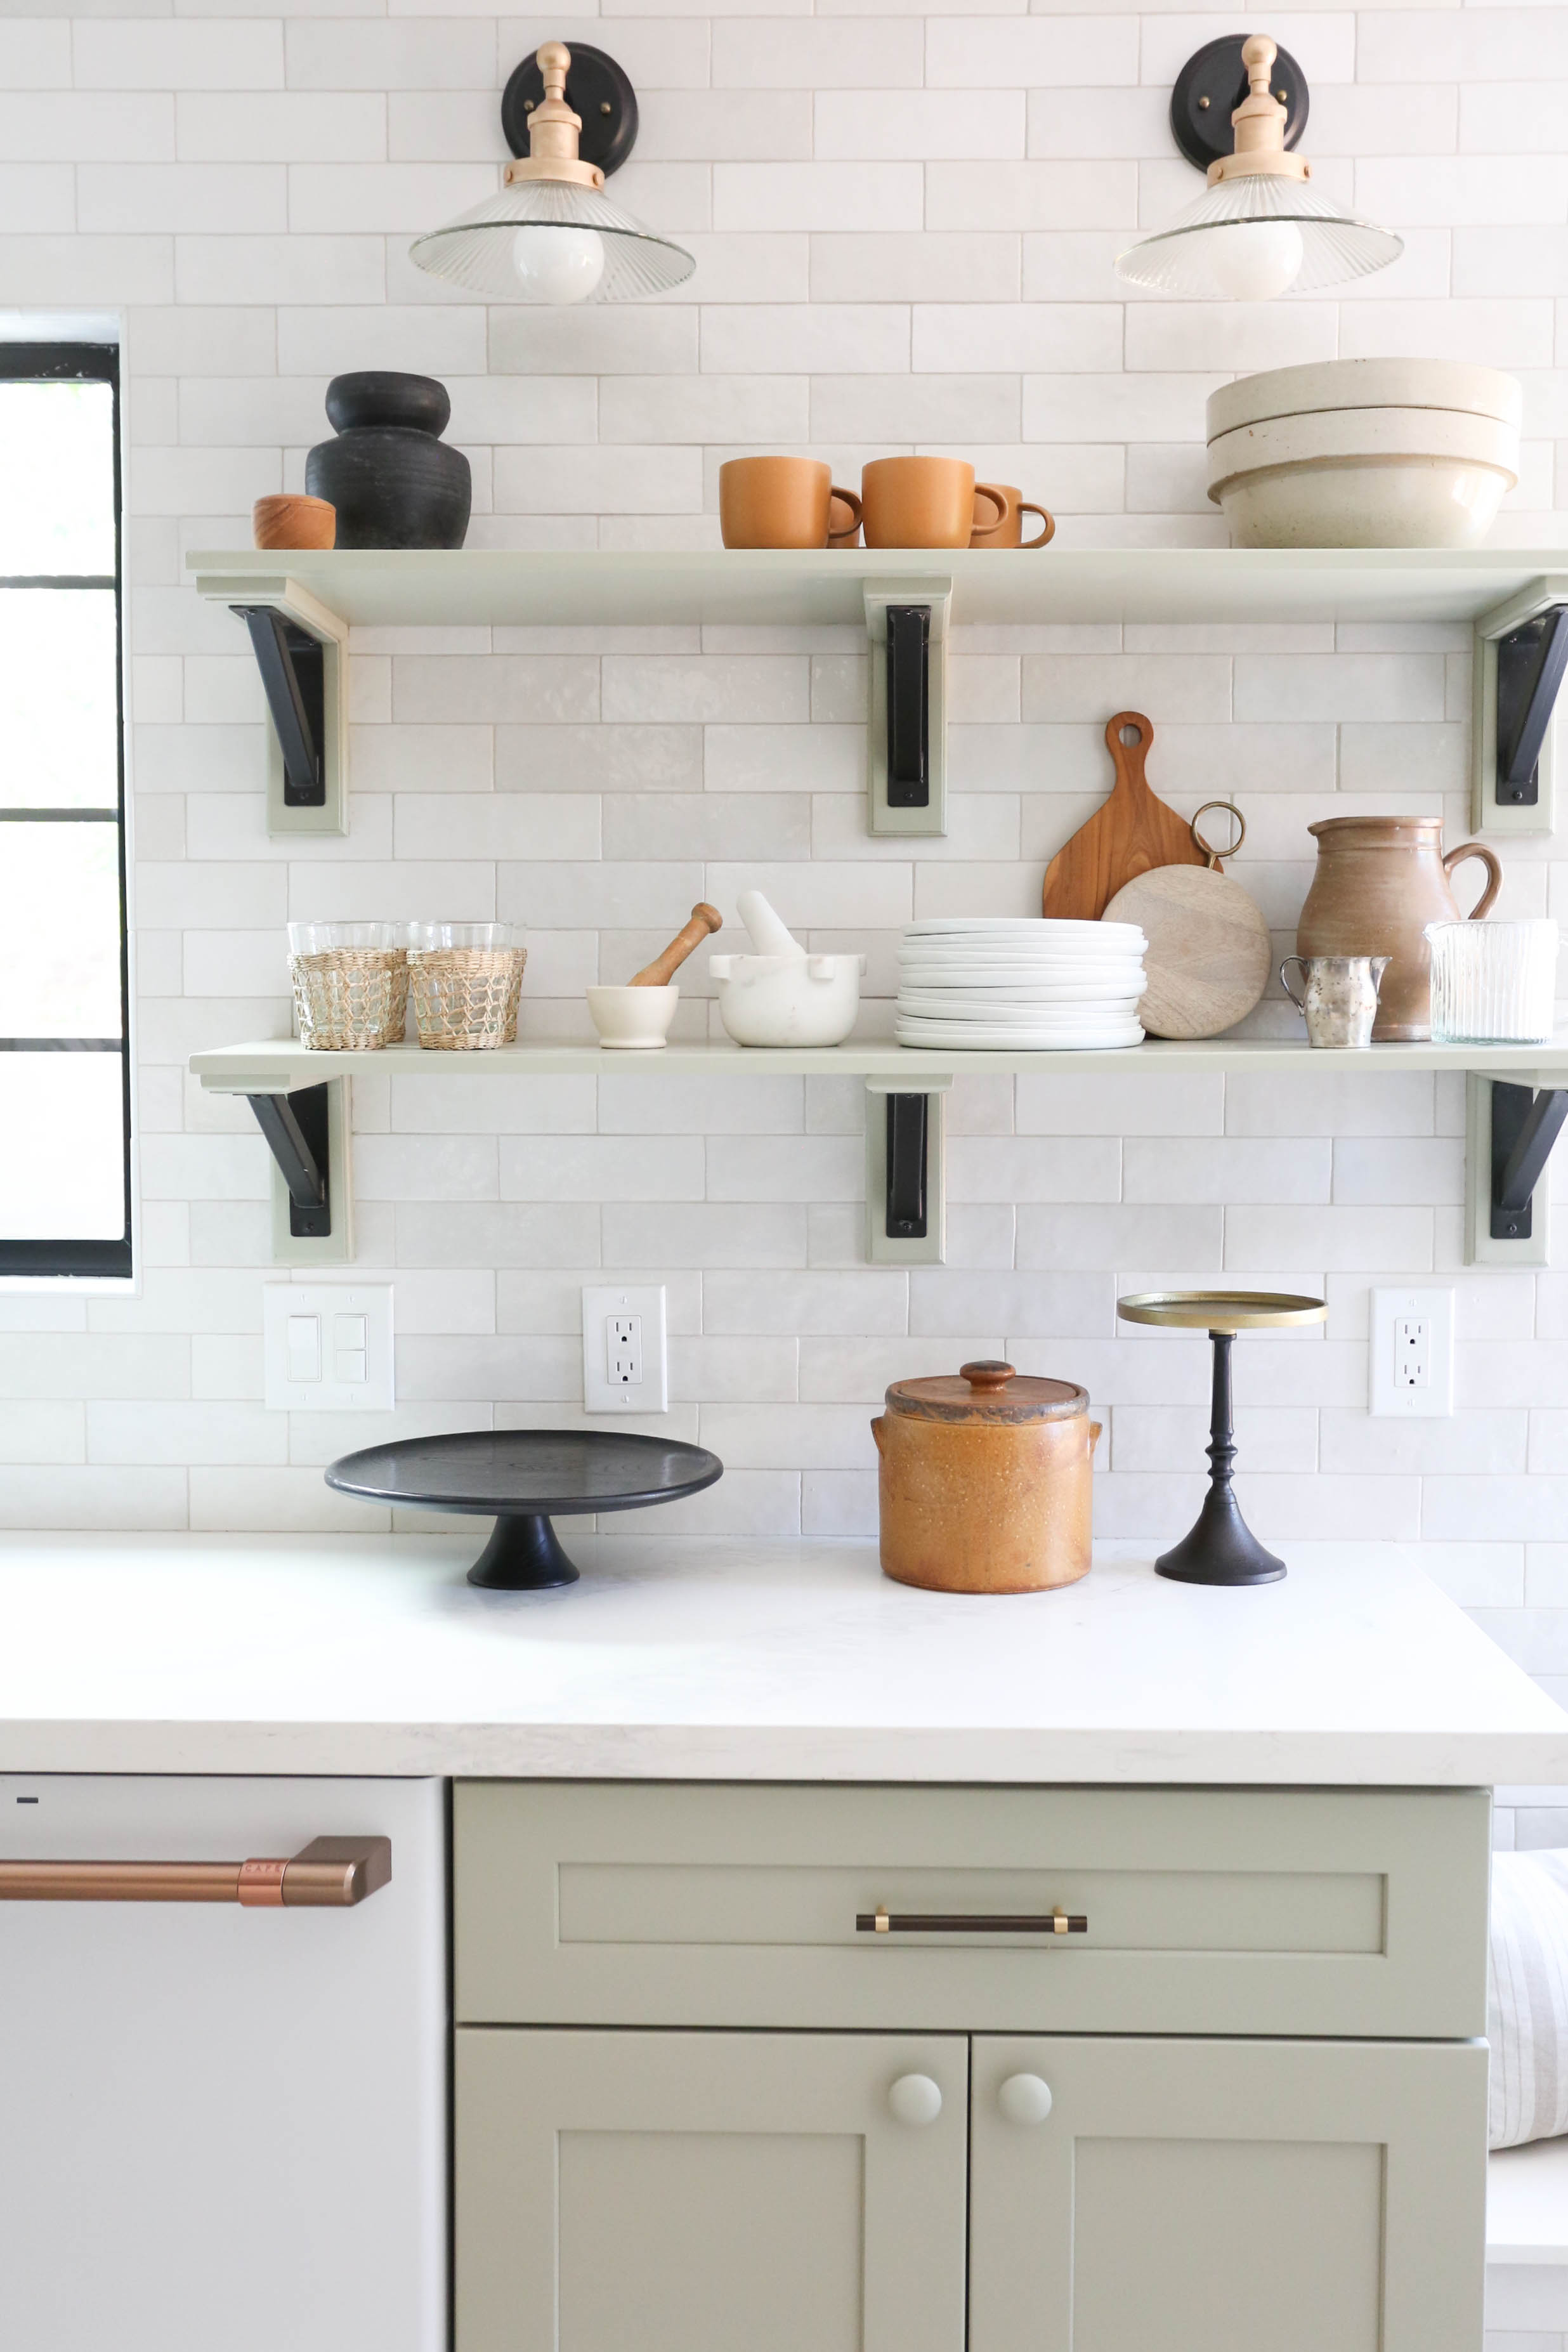
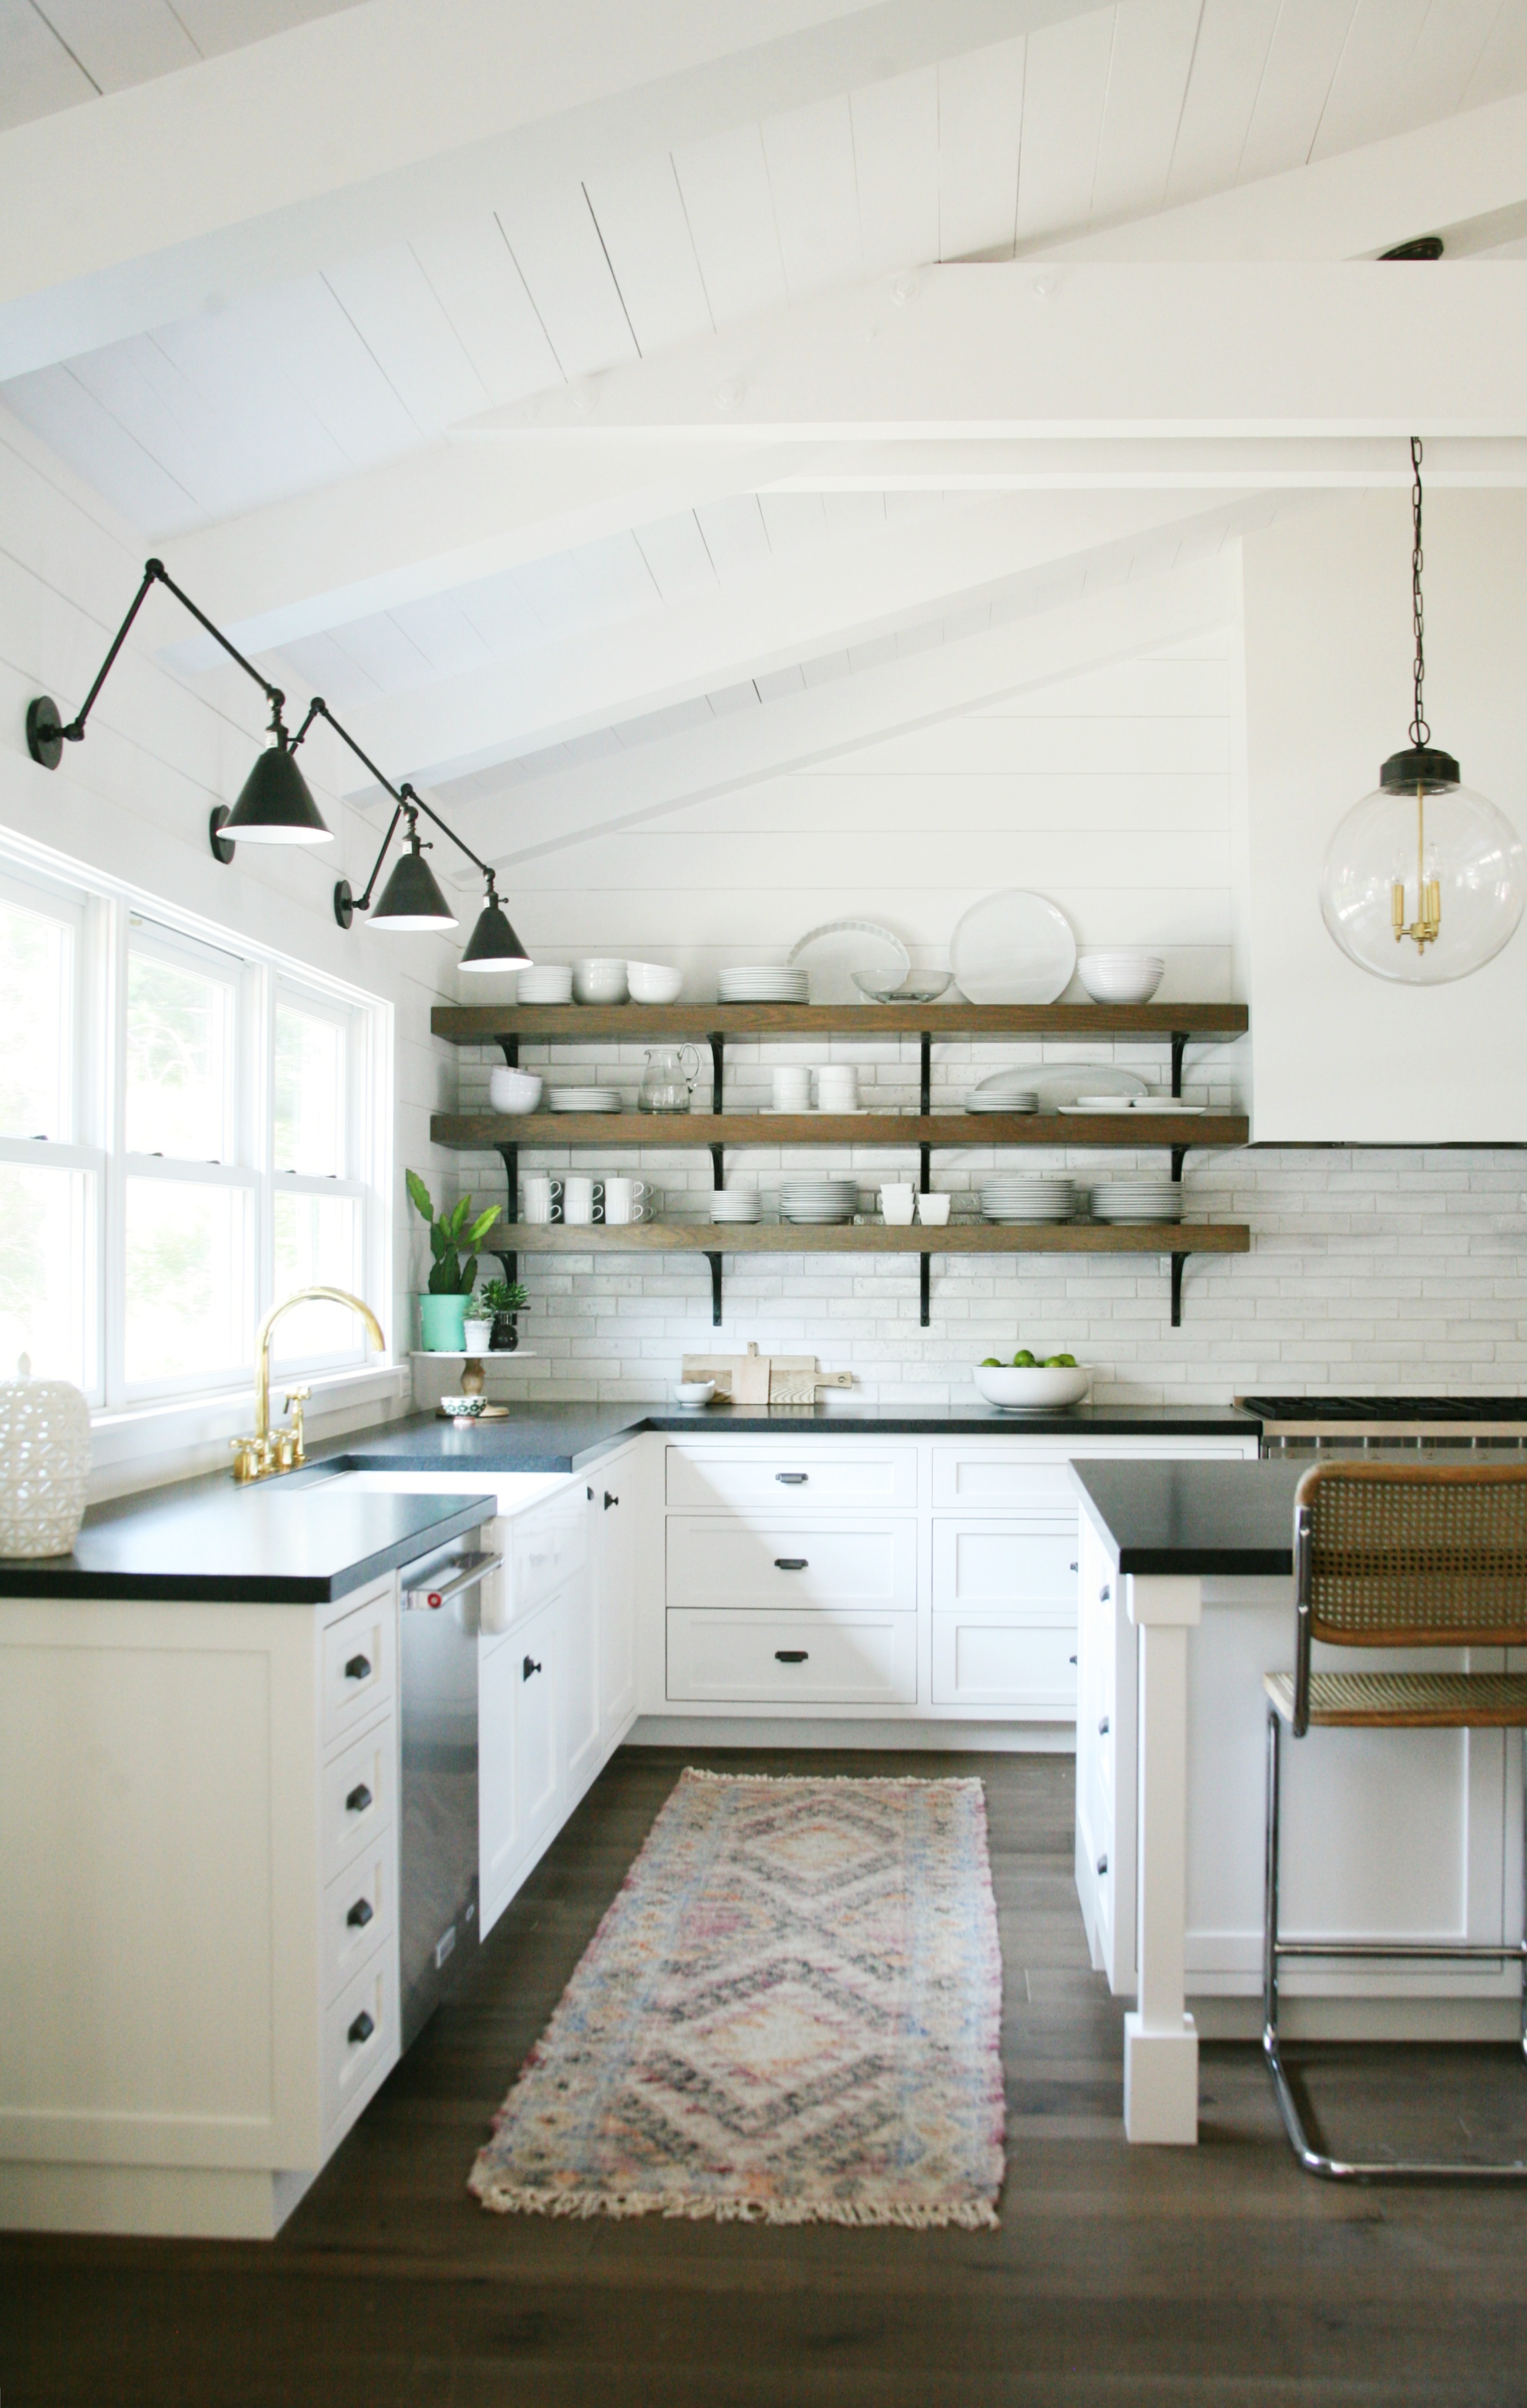
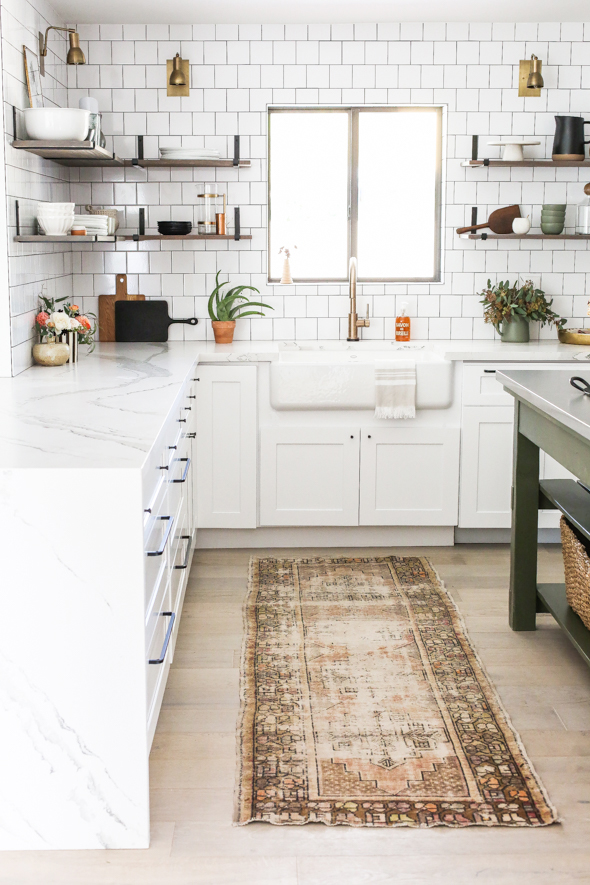
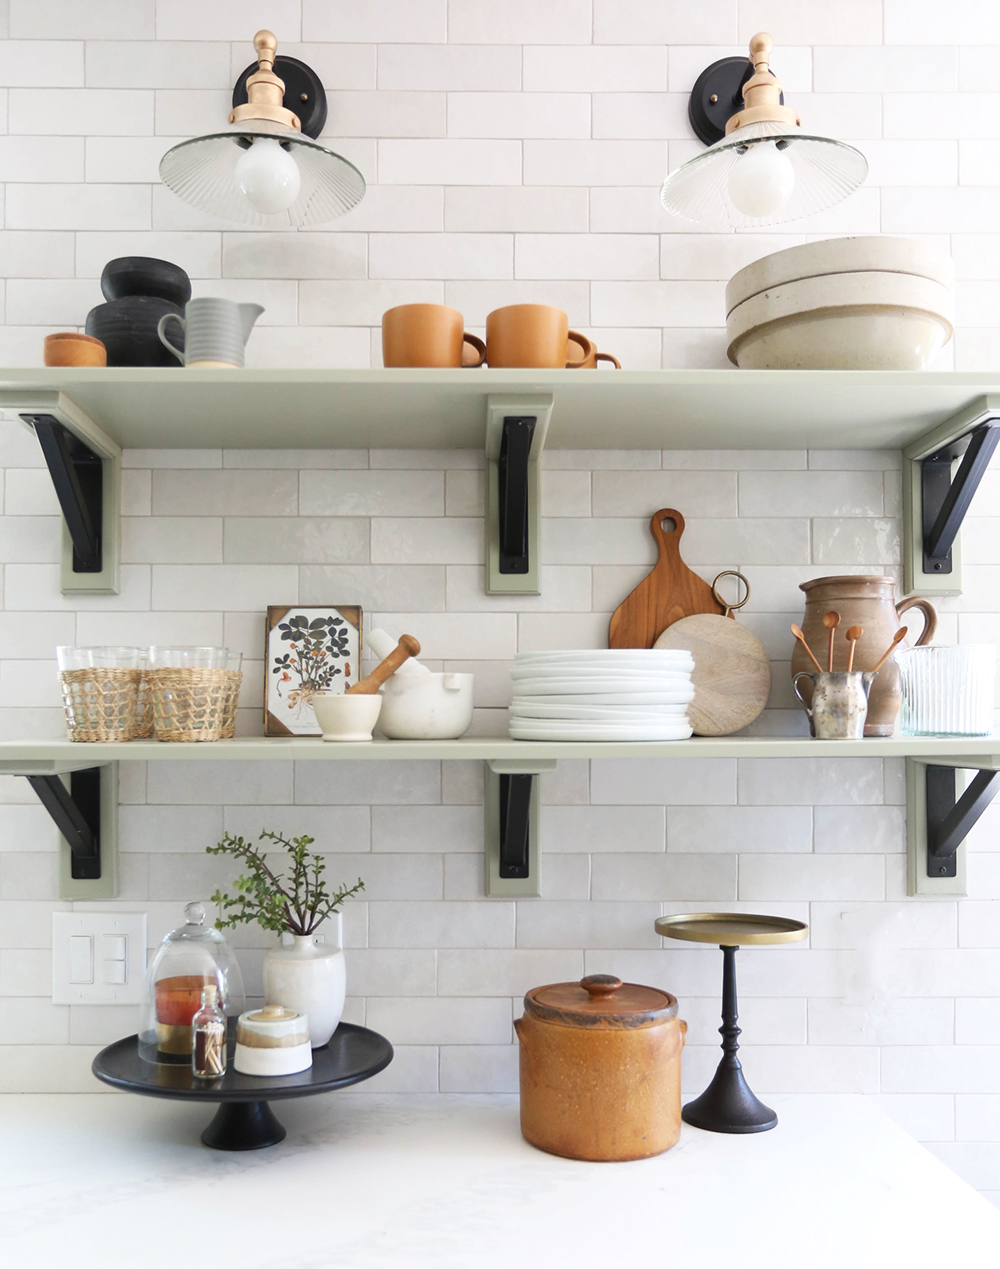
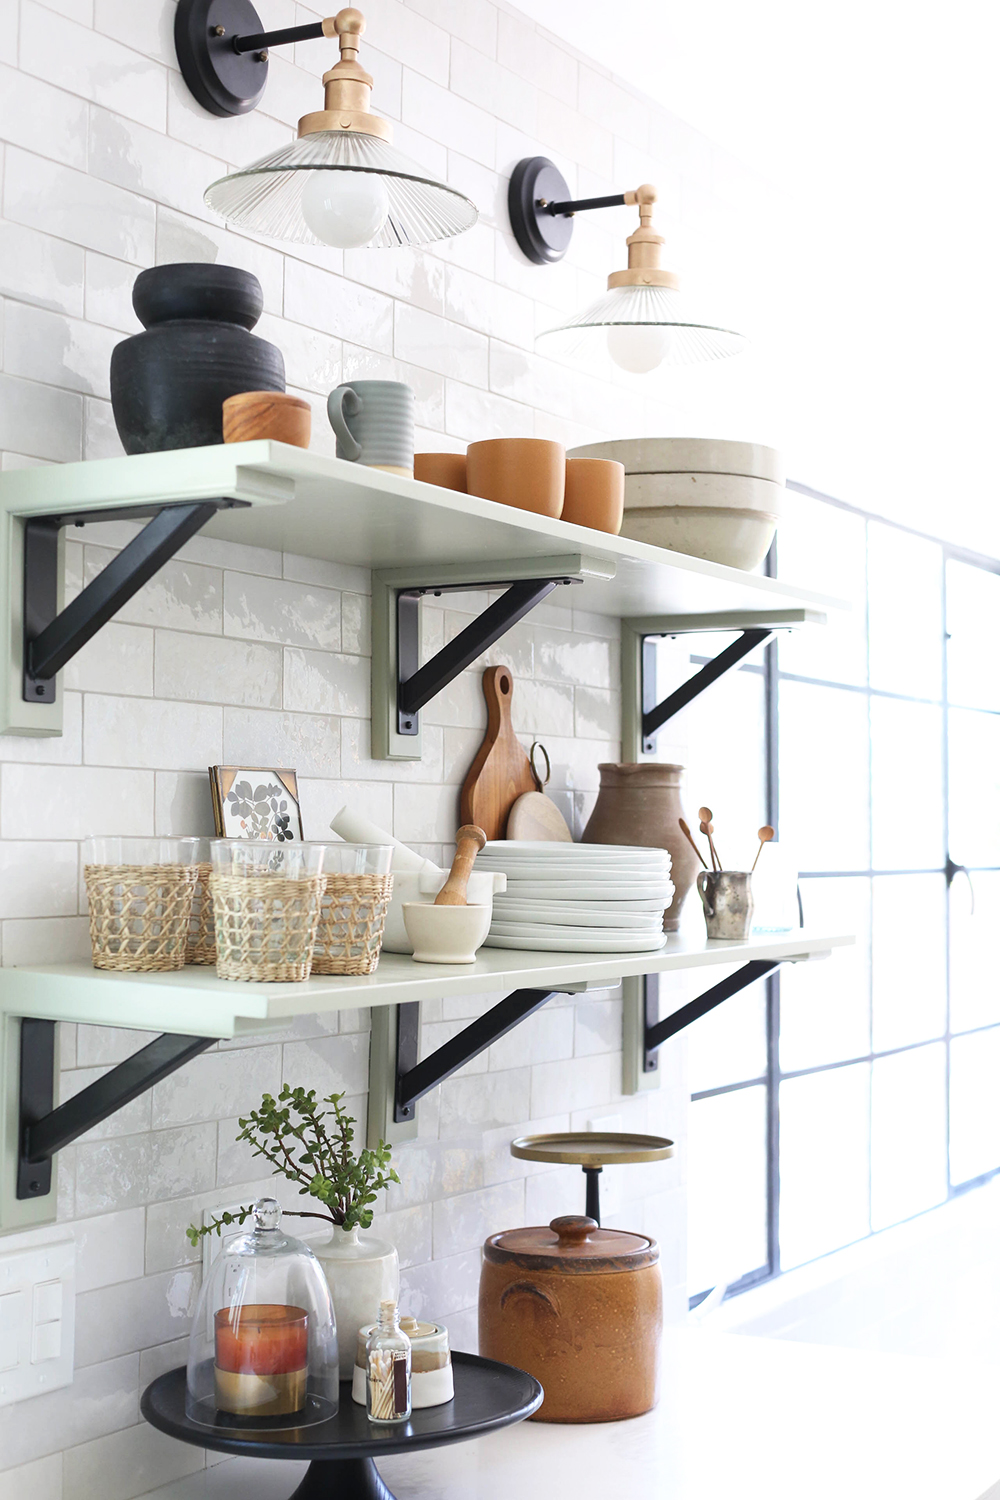
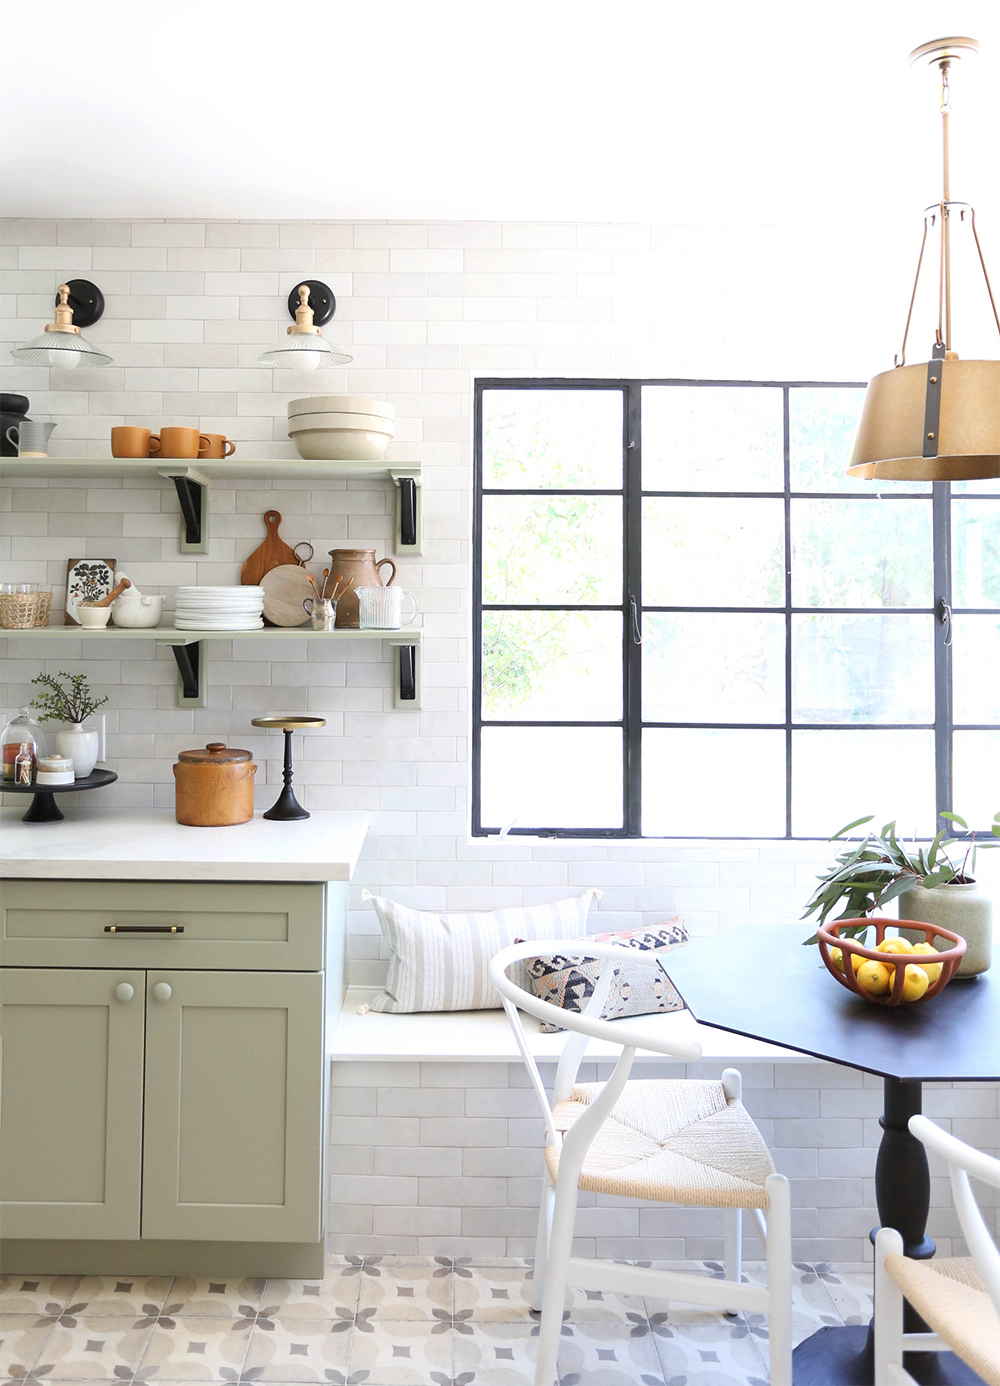
Open shelving in a kitchen is a great way to display both beautiful and functional kitchen items. Overwhelmed on how to start styling yours? Follow the easy steps below to get this effortless look! seagrass cups // mortar & pestle // white plates // mini wood spoons candle // cloche // black & brass cake…
Open shelving in a kitchen is a great way to display both beautiful and functional kitchen items. Overwhelmed on how to start styling yours? Follow the easy steps below to get this effortless look!
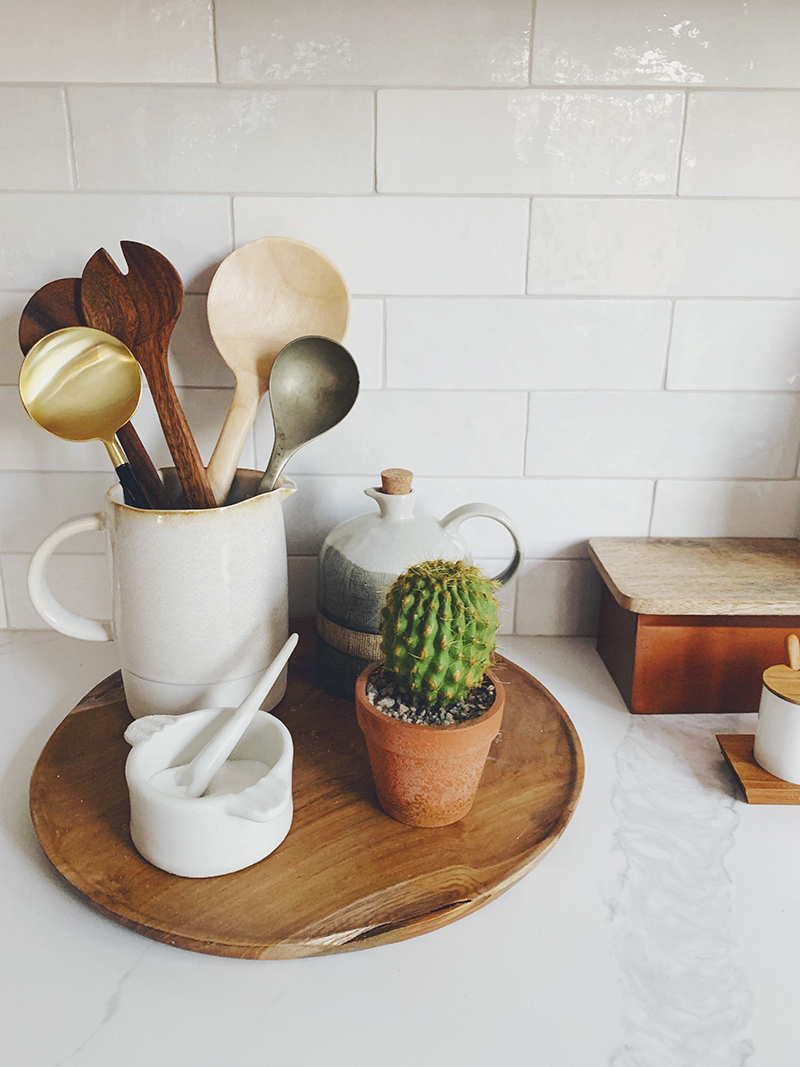
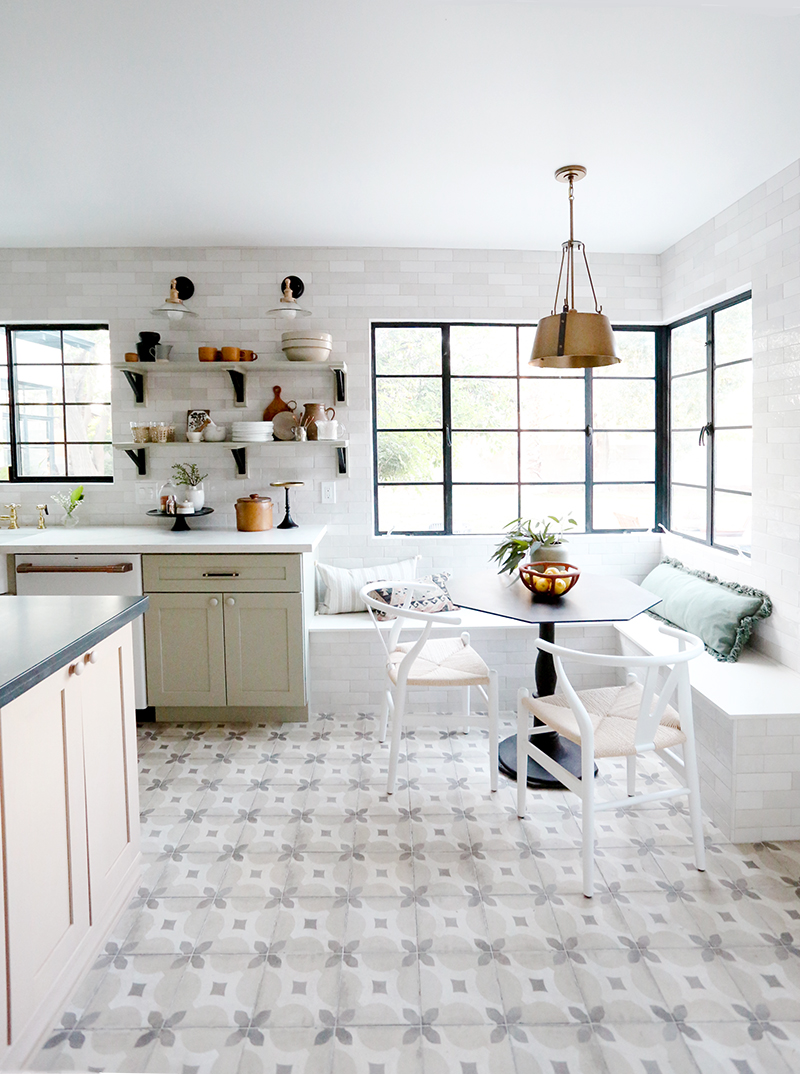
The first step to styling open shelves in your kitchen is assessing how much storage you have. The Evergreen Kitchen had plenty of uppers to store our everyday items, so we used these shelves to display special pieces and decorative items. If you are using your open shelving as your primary source of storage, you can scale back on some of the lesser used items and add in higher functioning pieces!
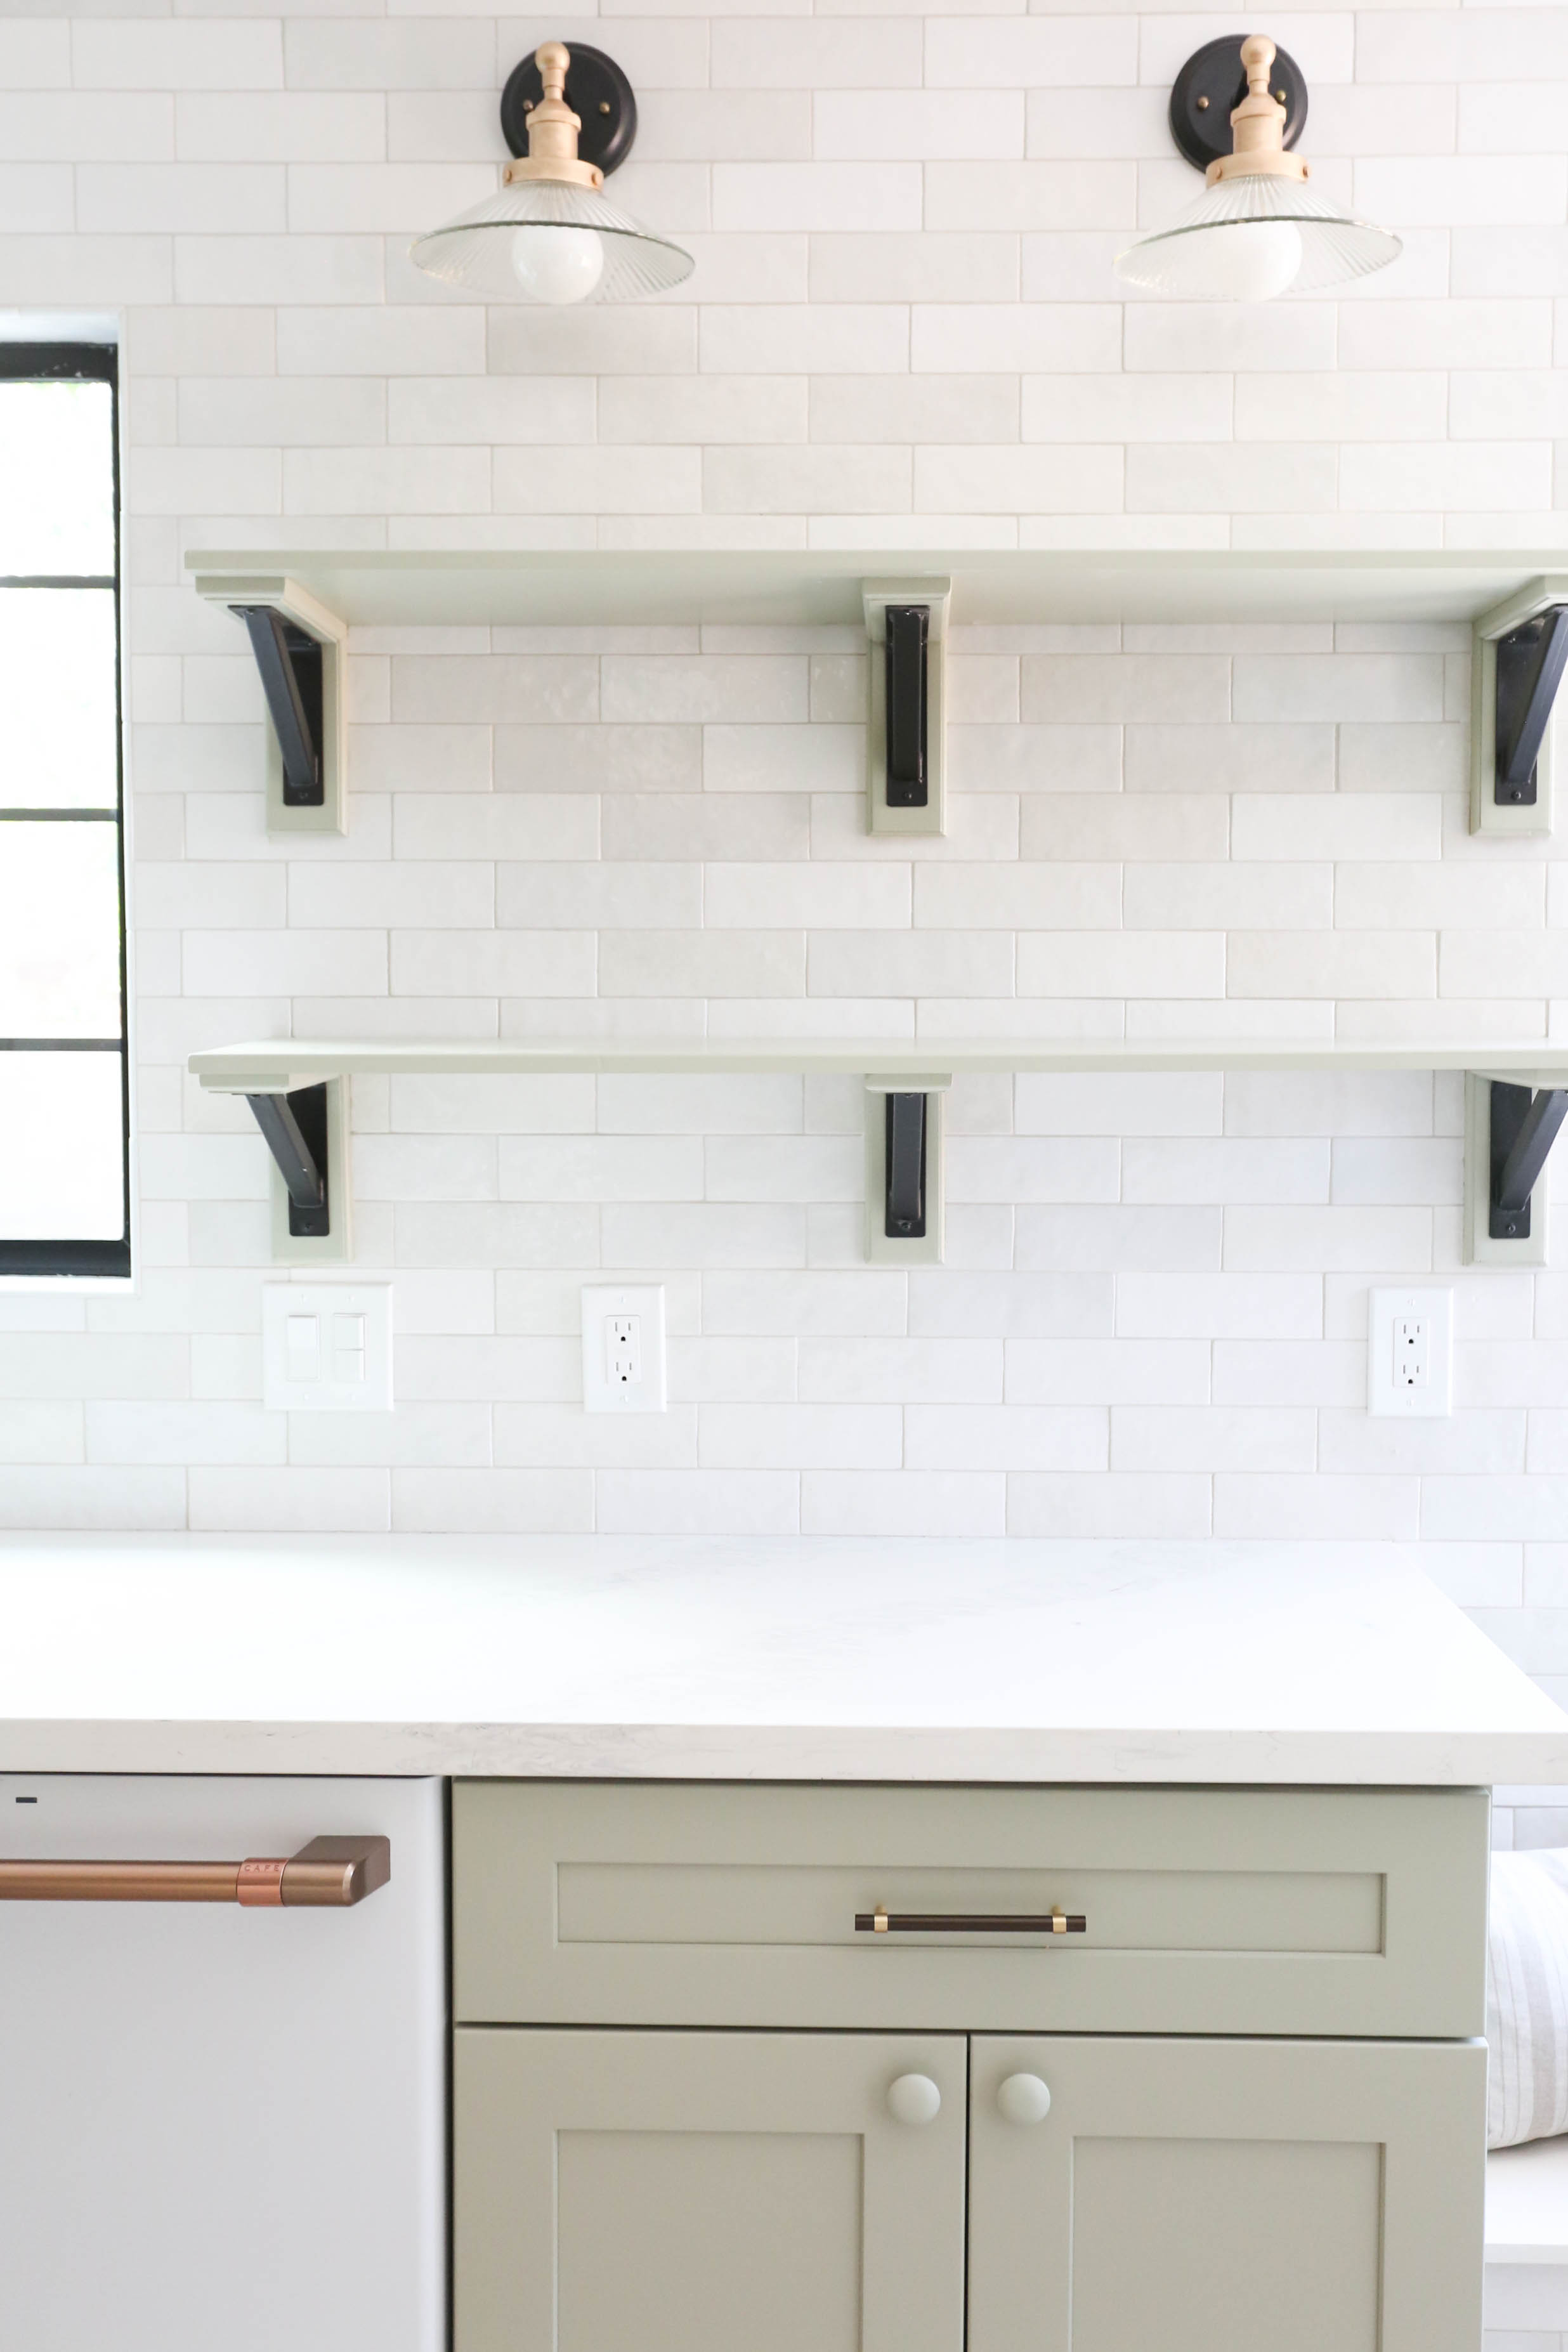
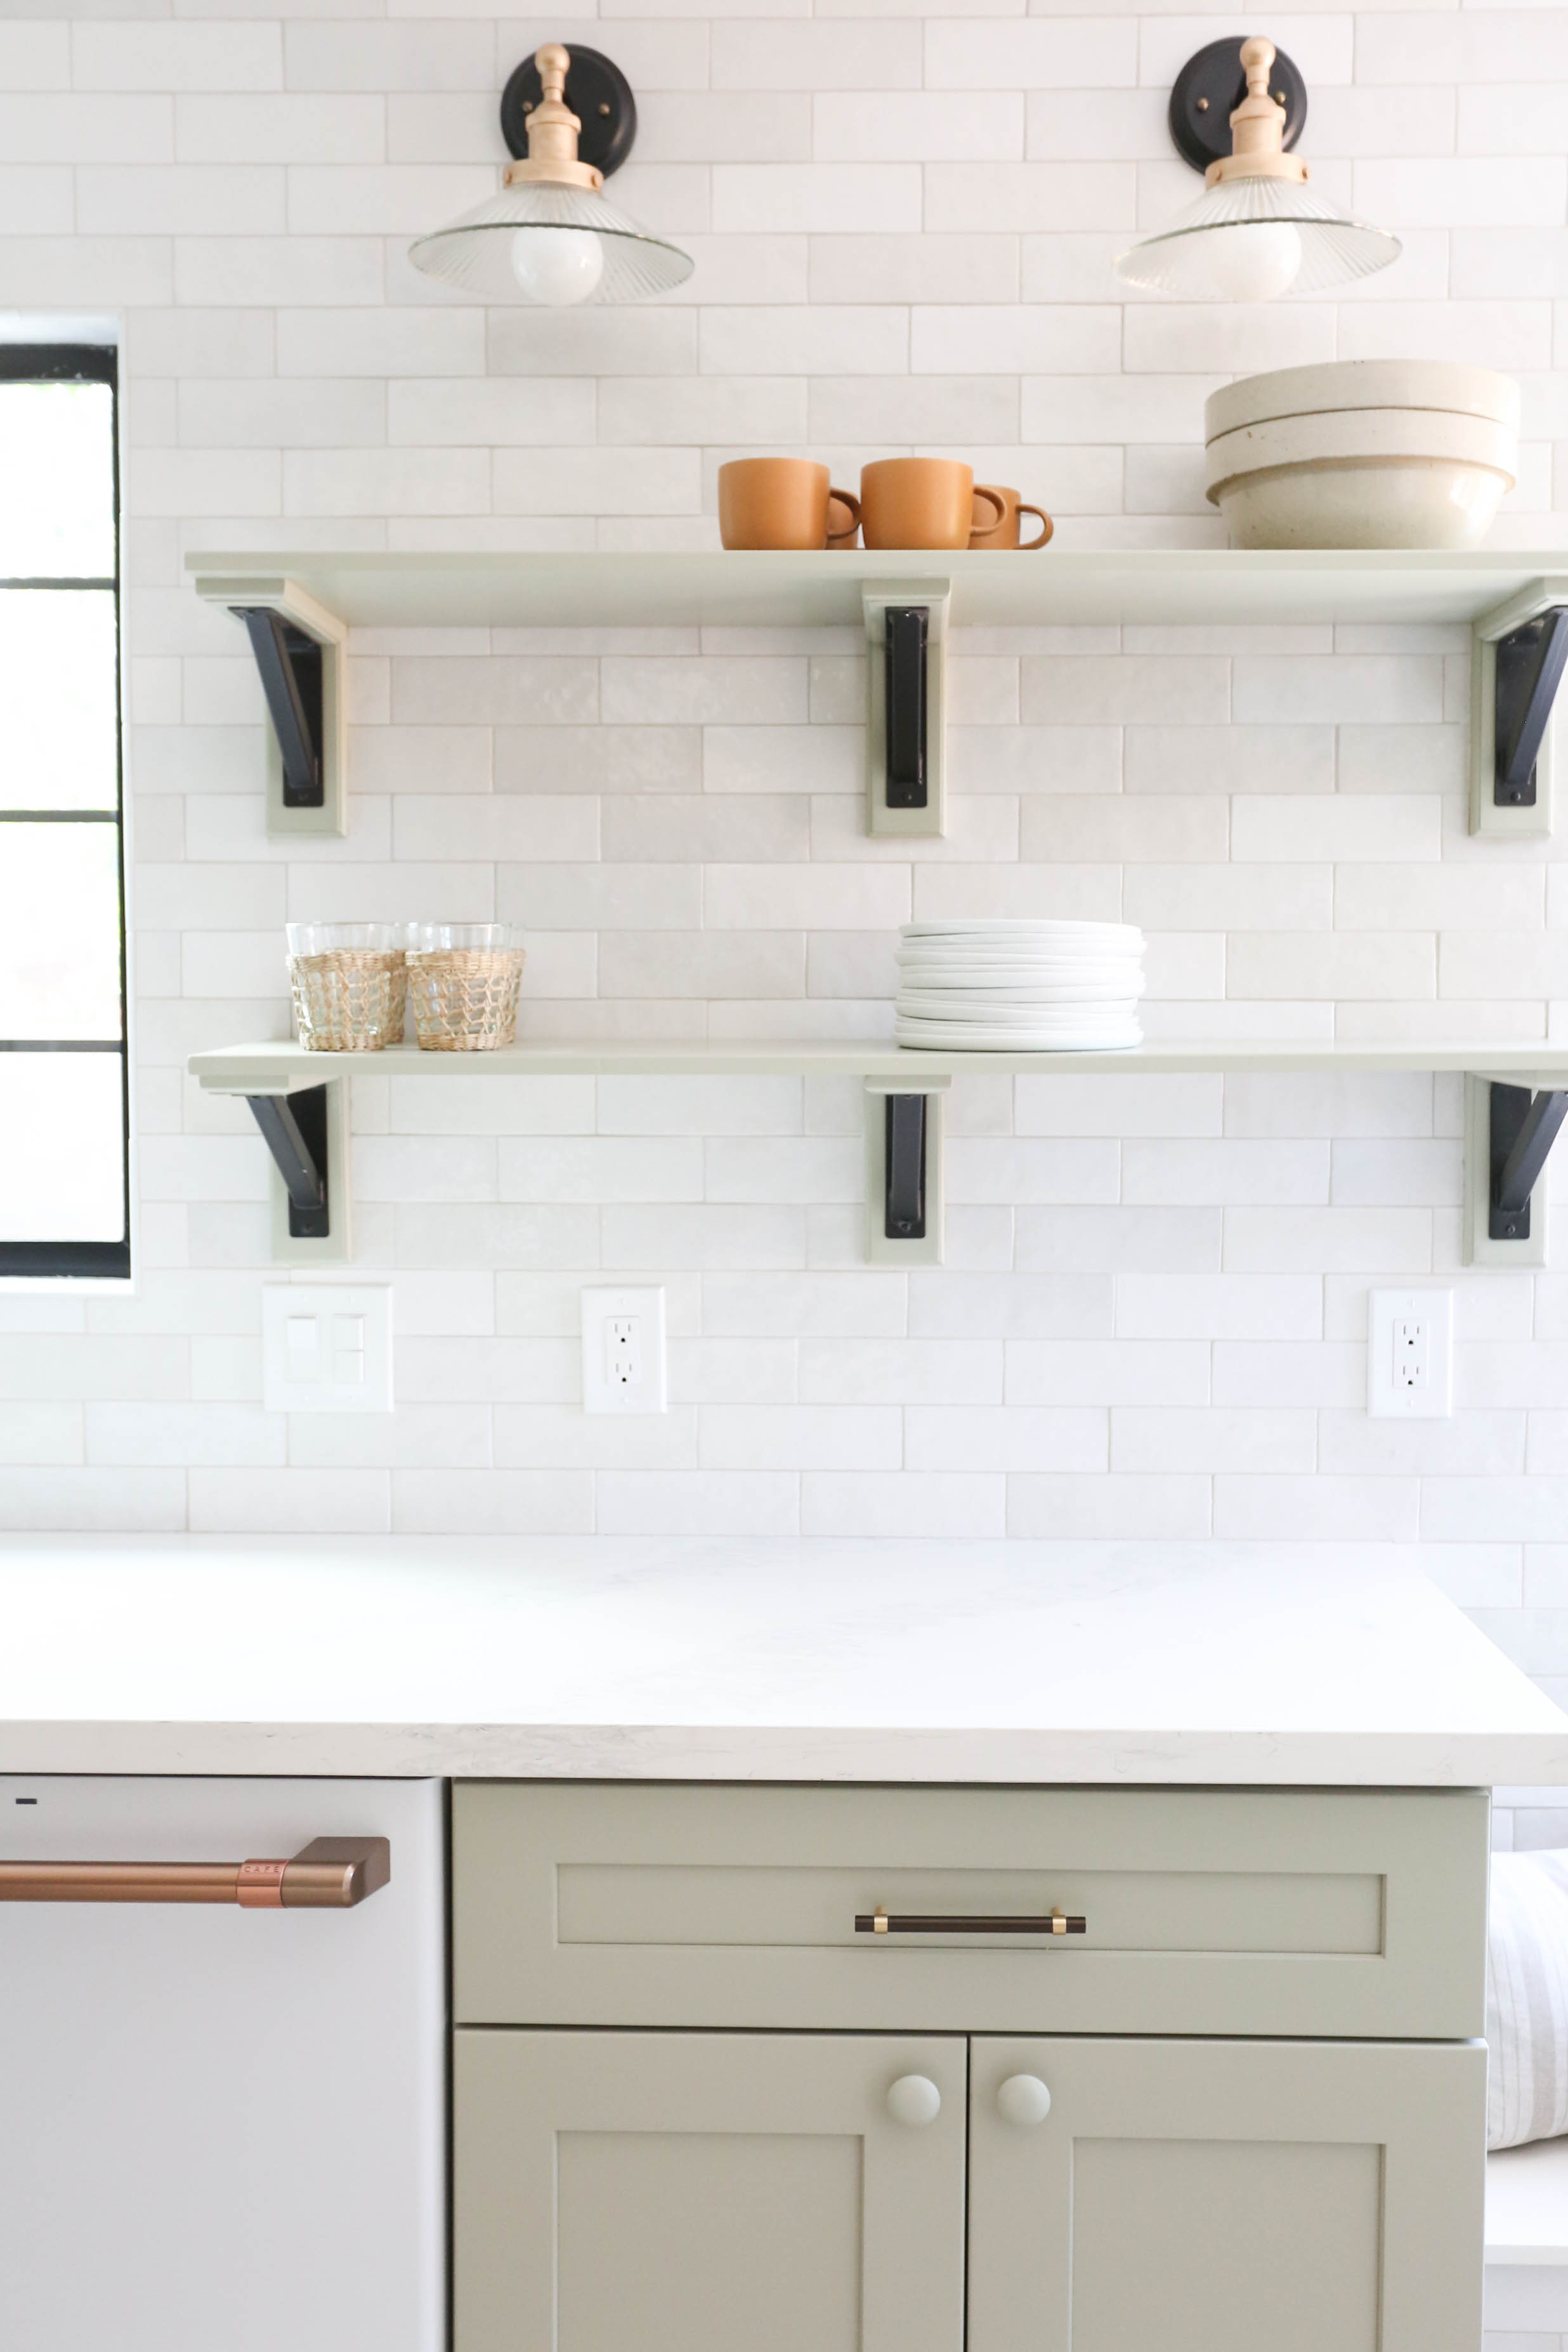
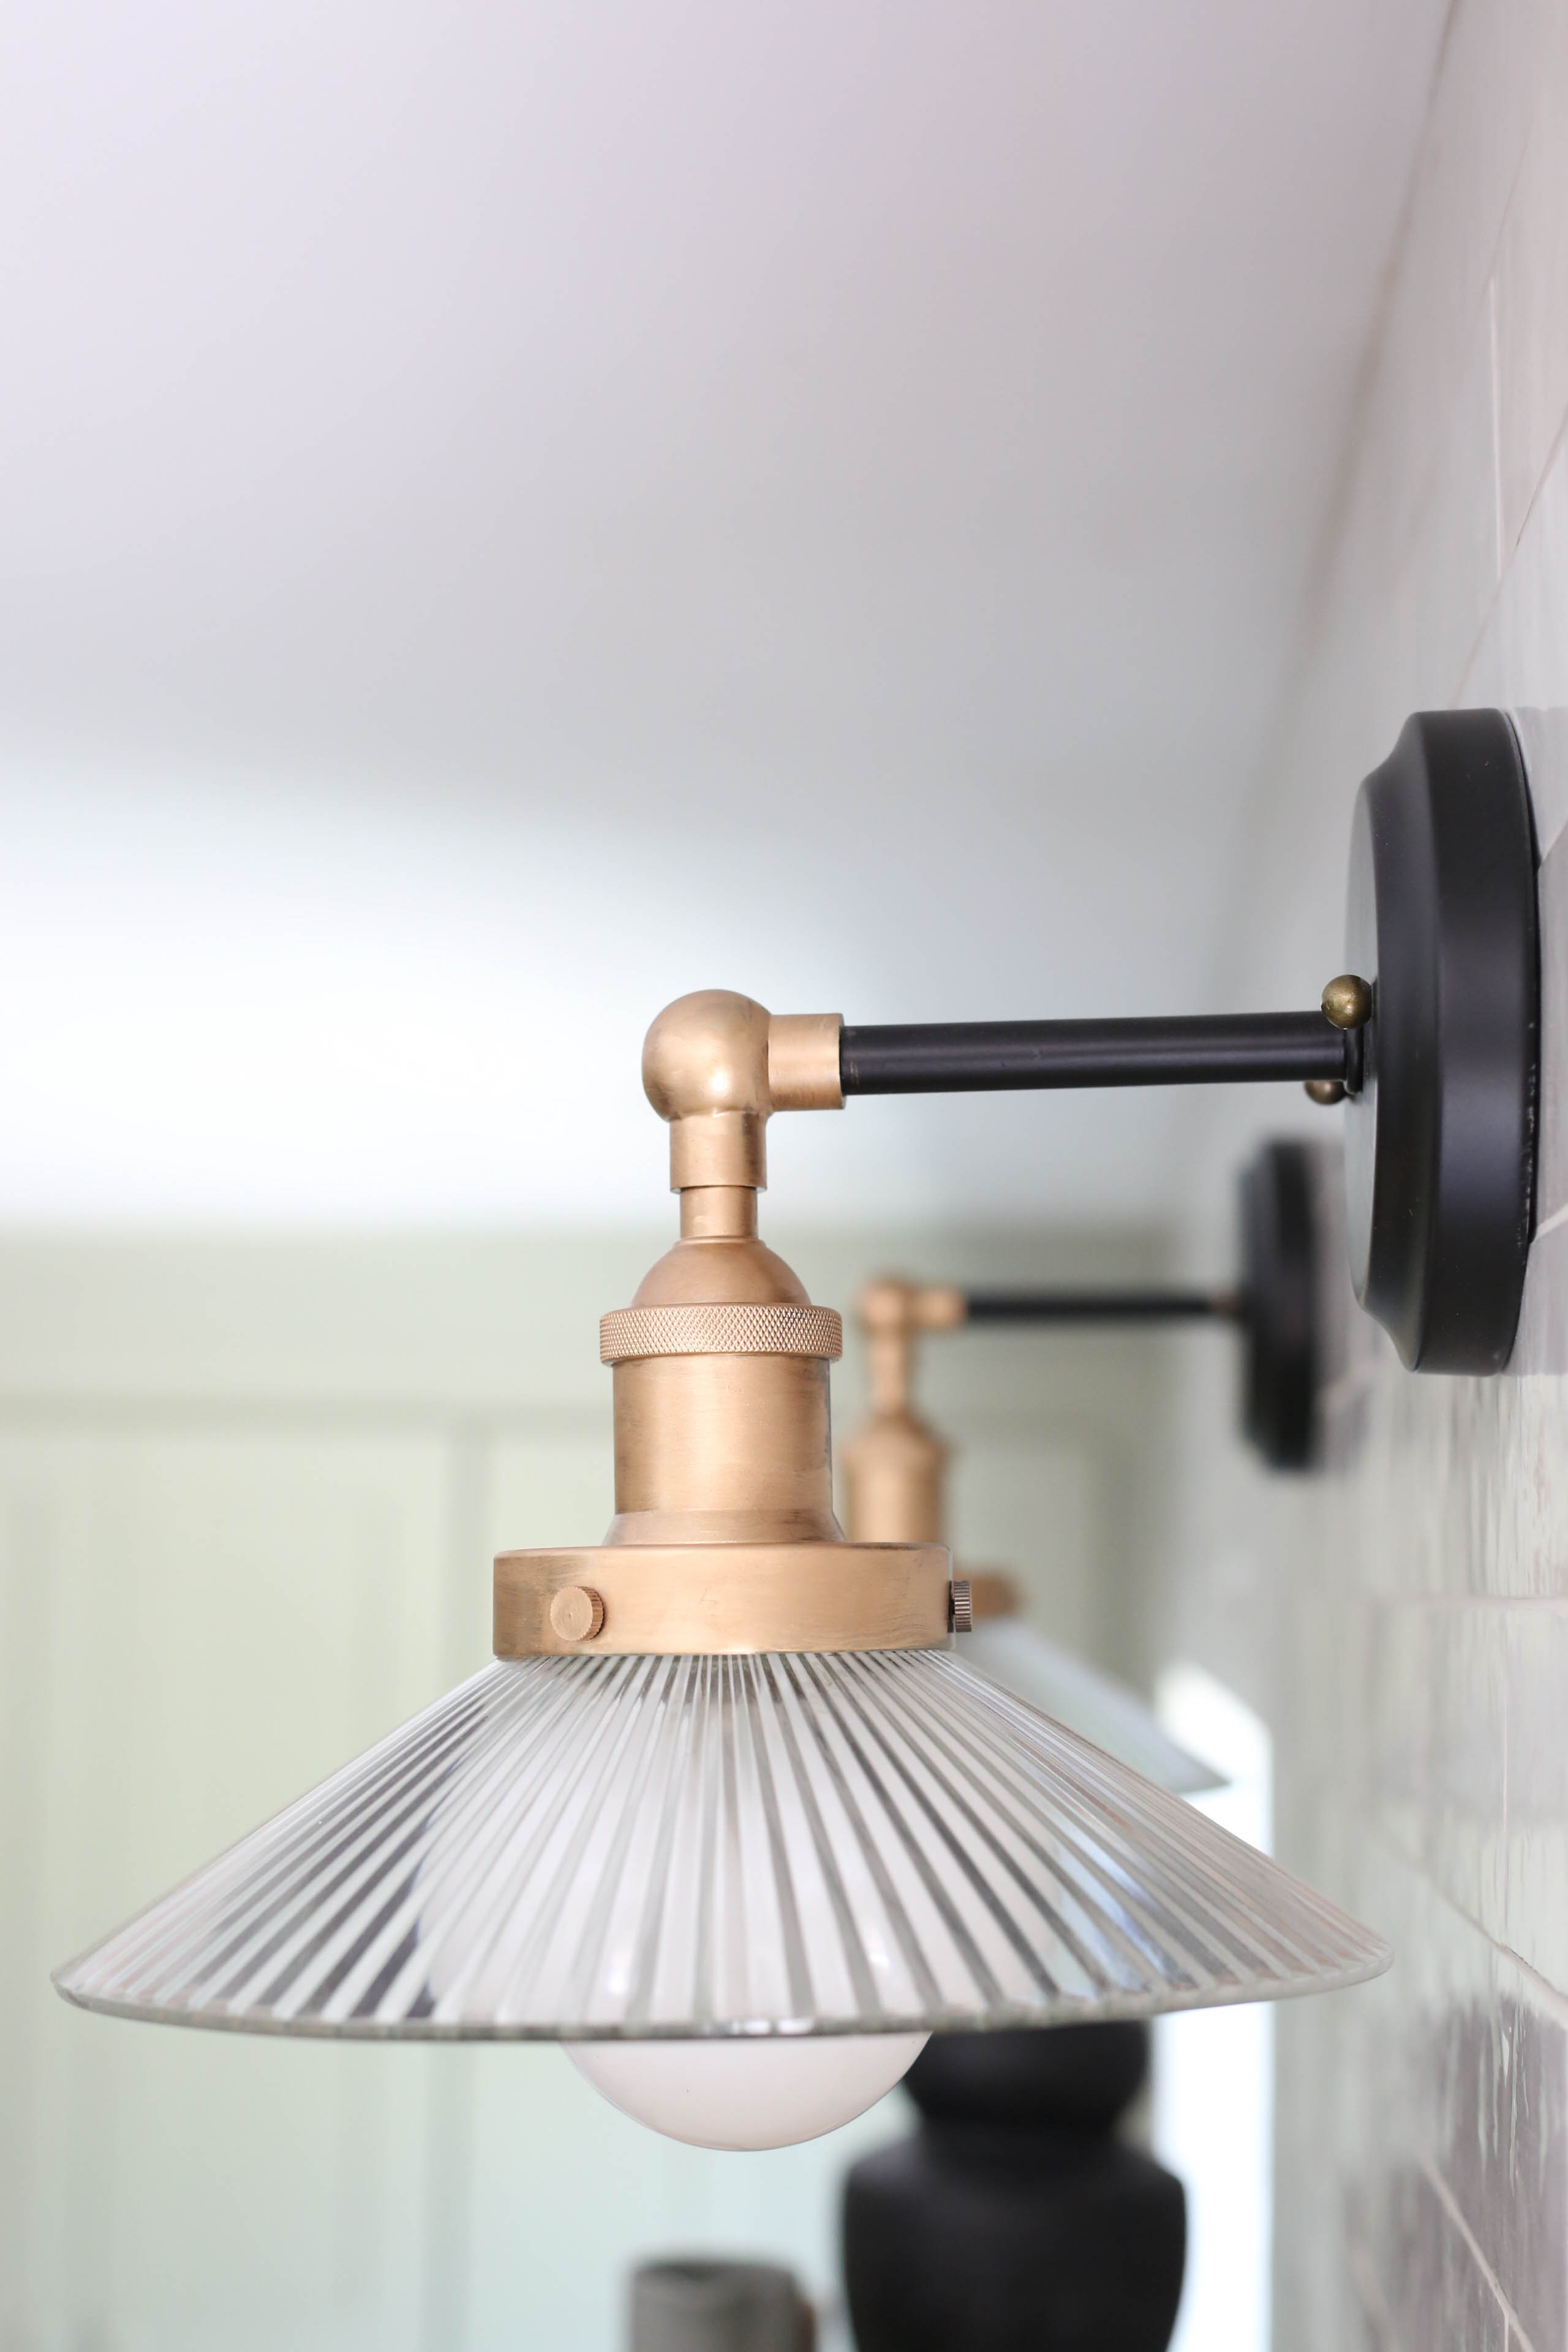
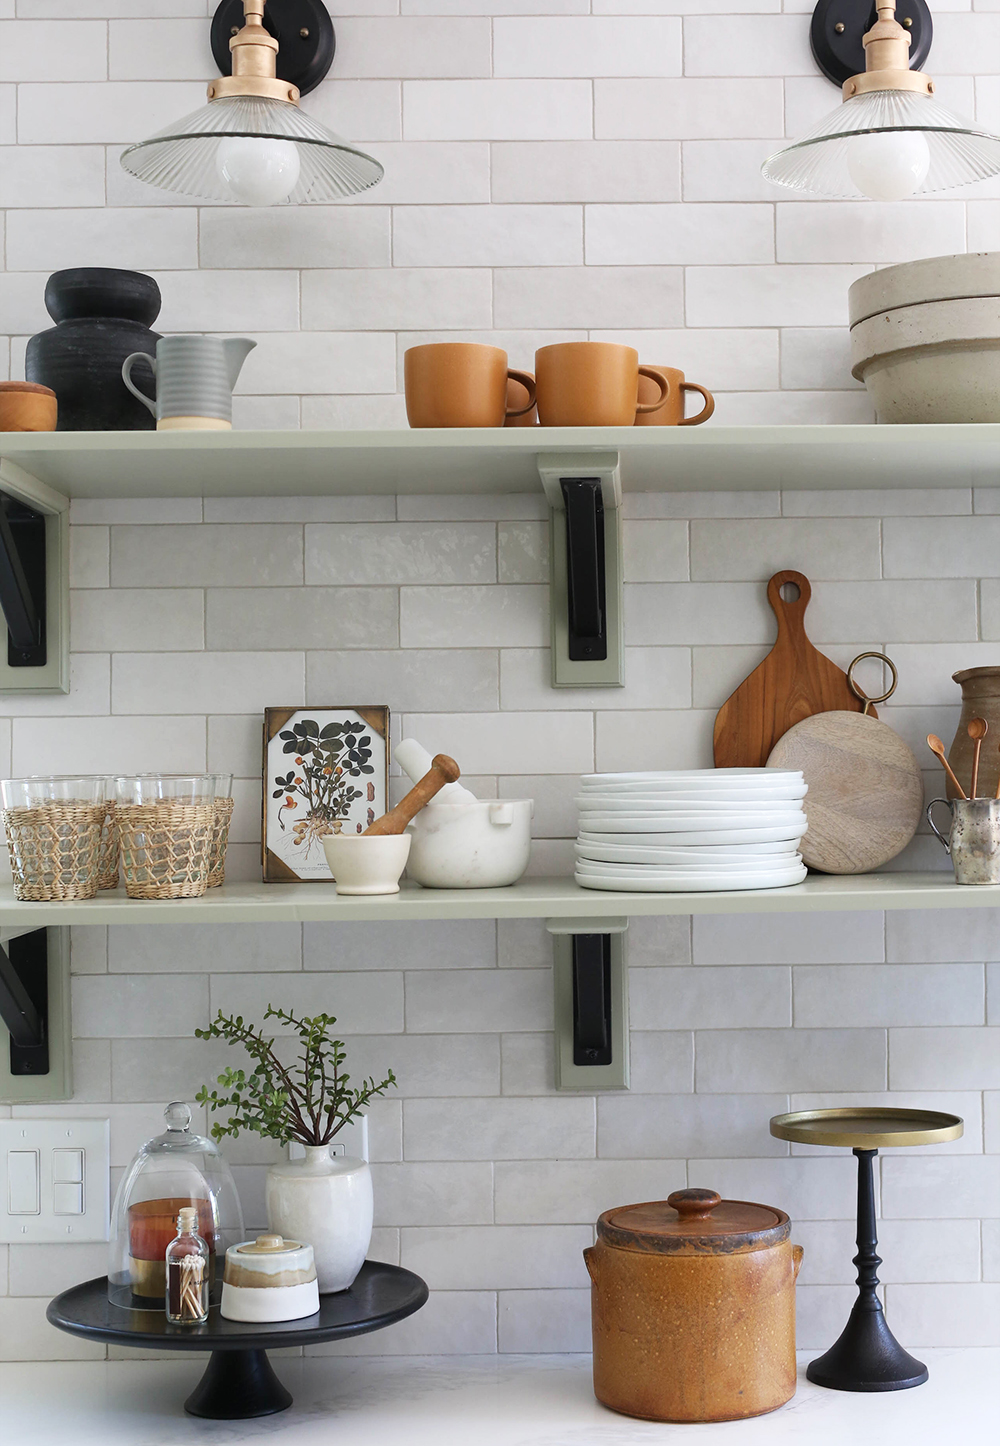
Step 1: Start with a blank slate! Decorative sconces add height and light.
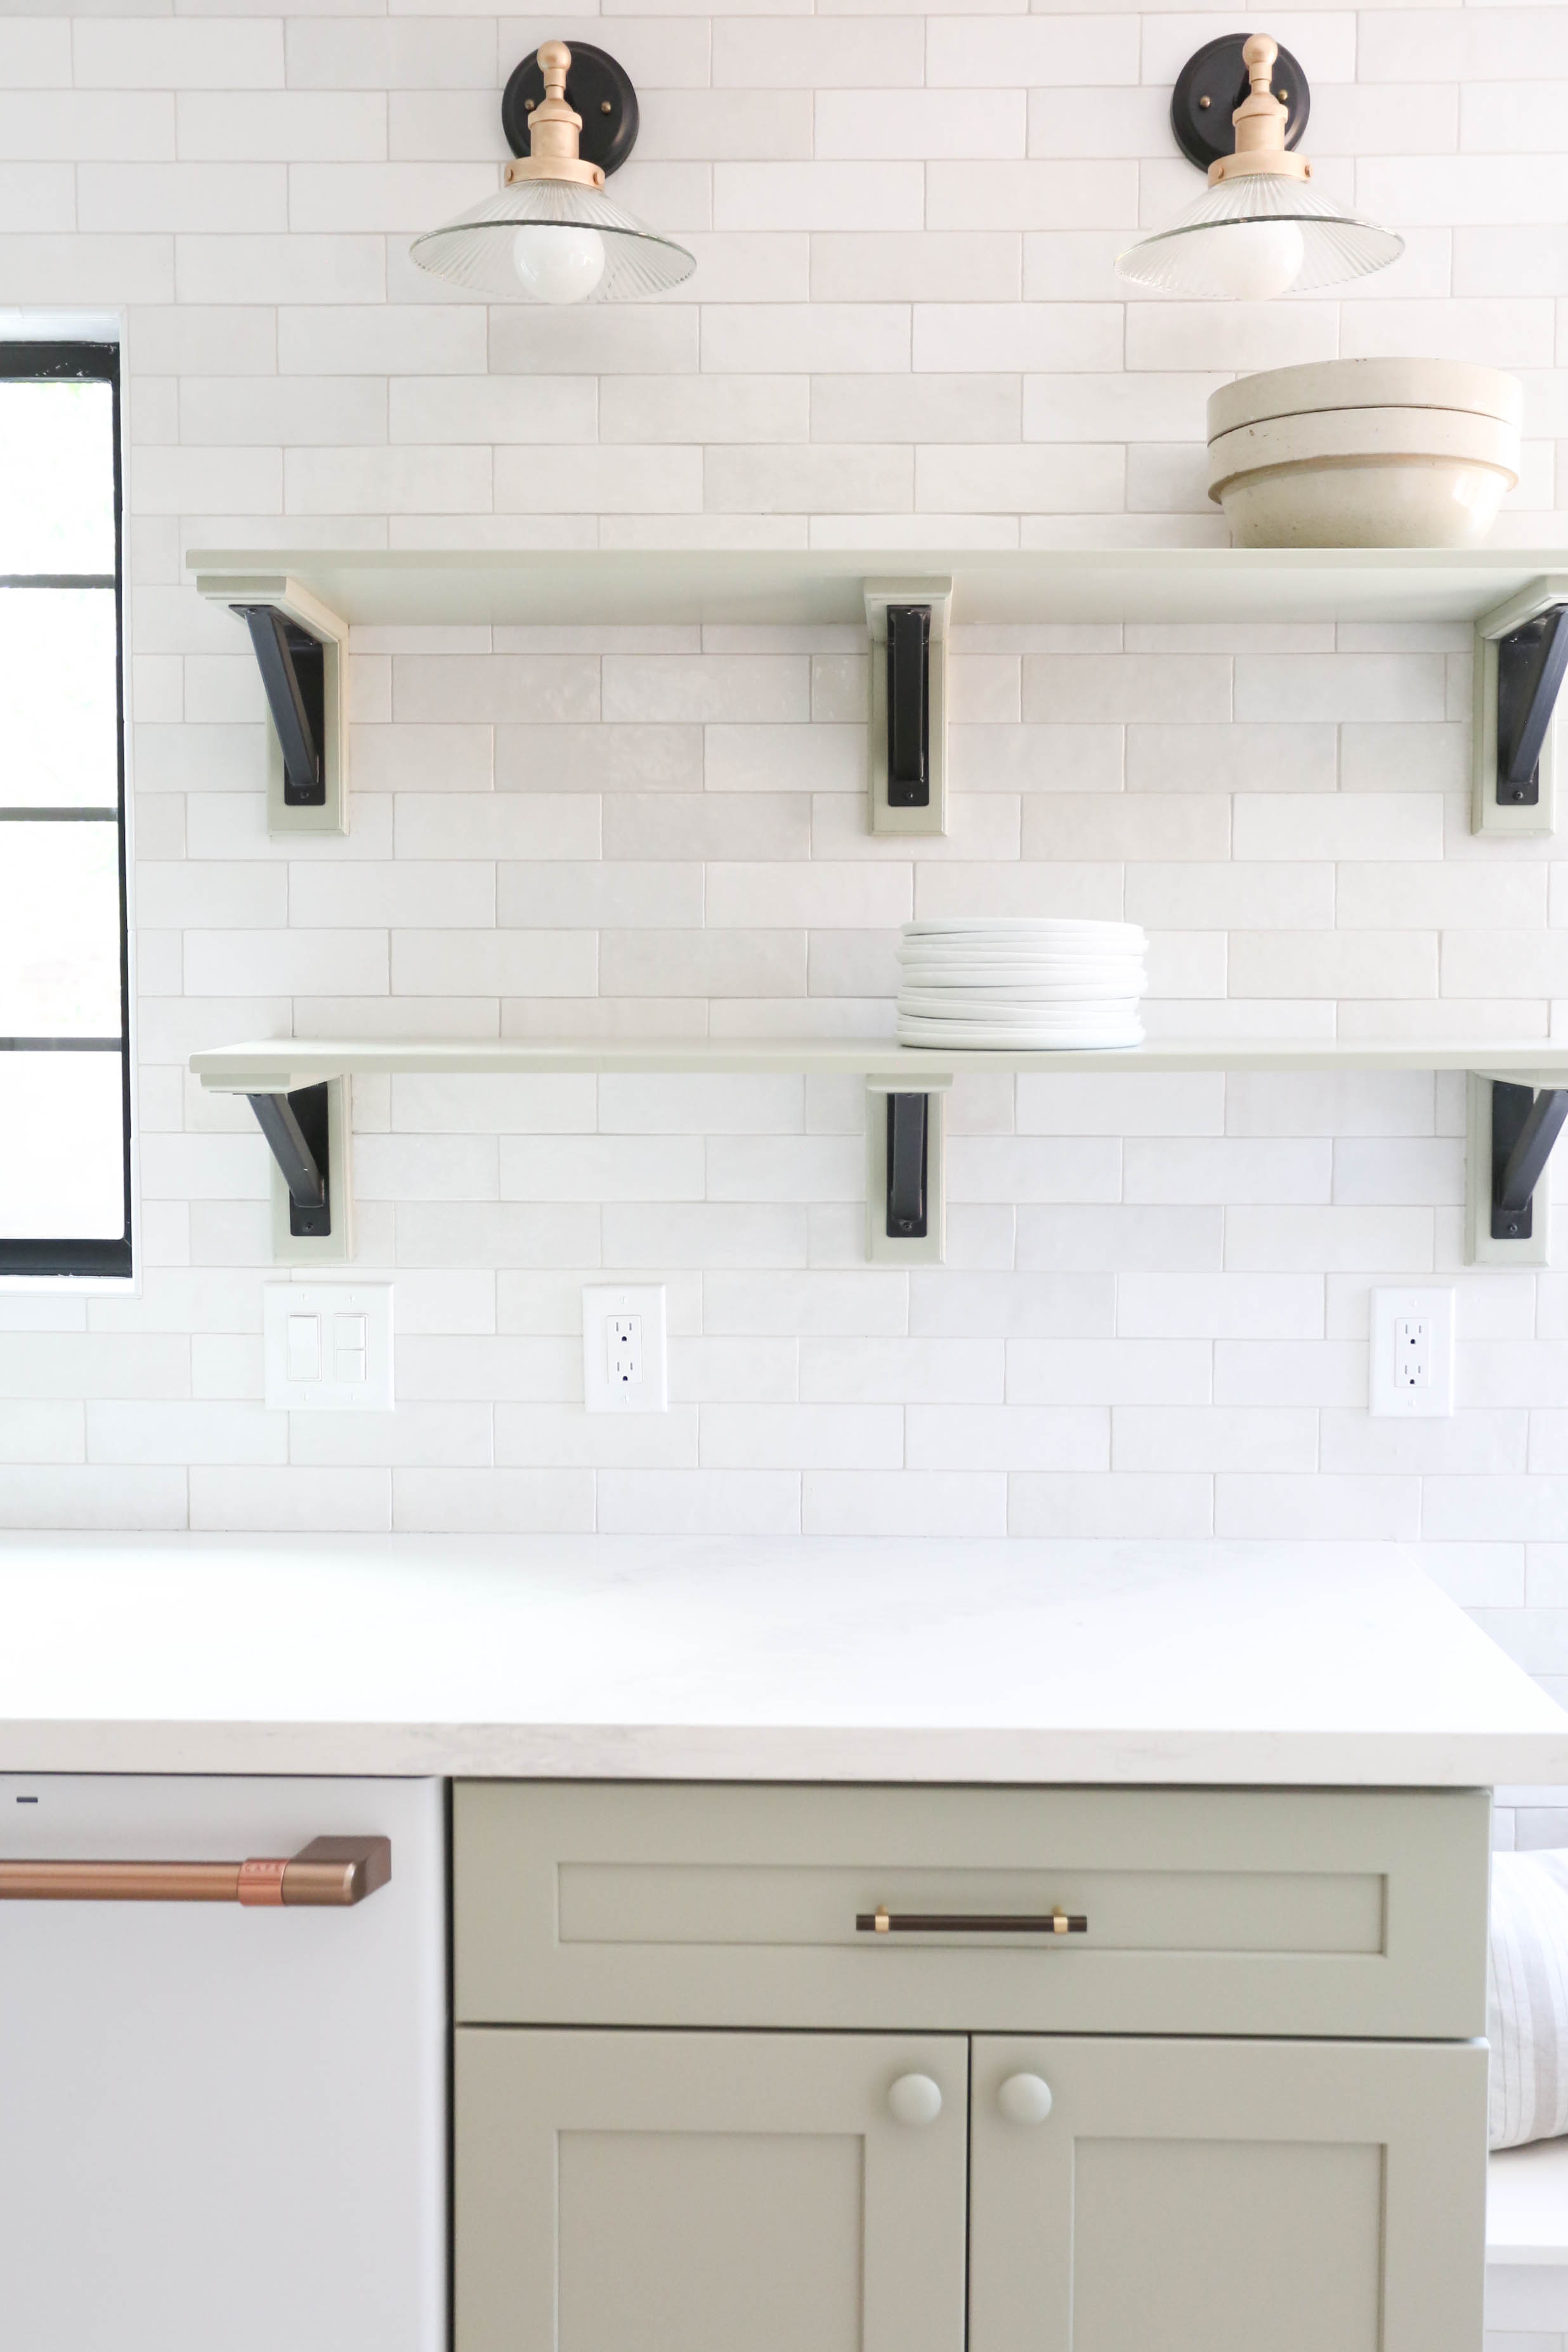
Step 2: Start with your larger pieces like neutral plates & bowls. Add balance by distributing the weight on opposite ends of your shelves!
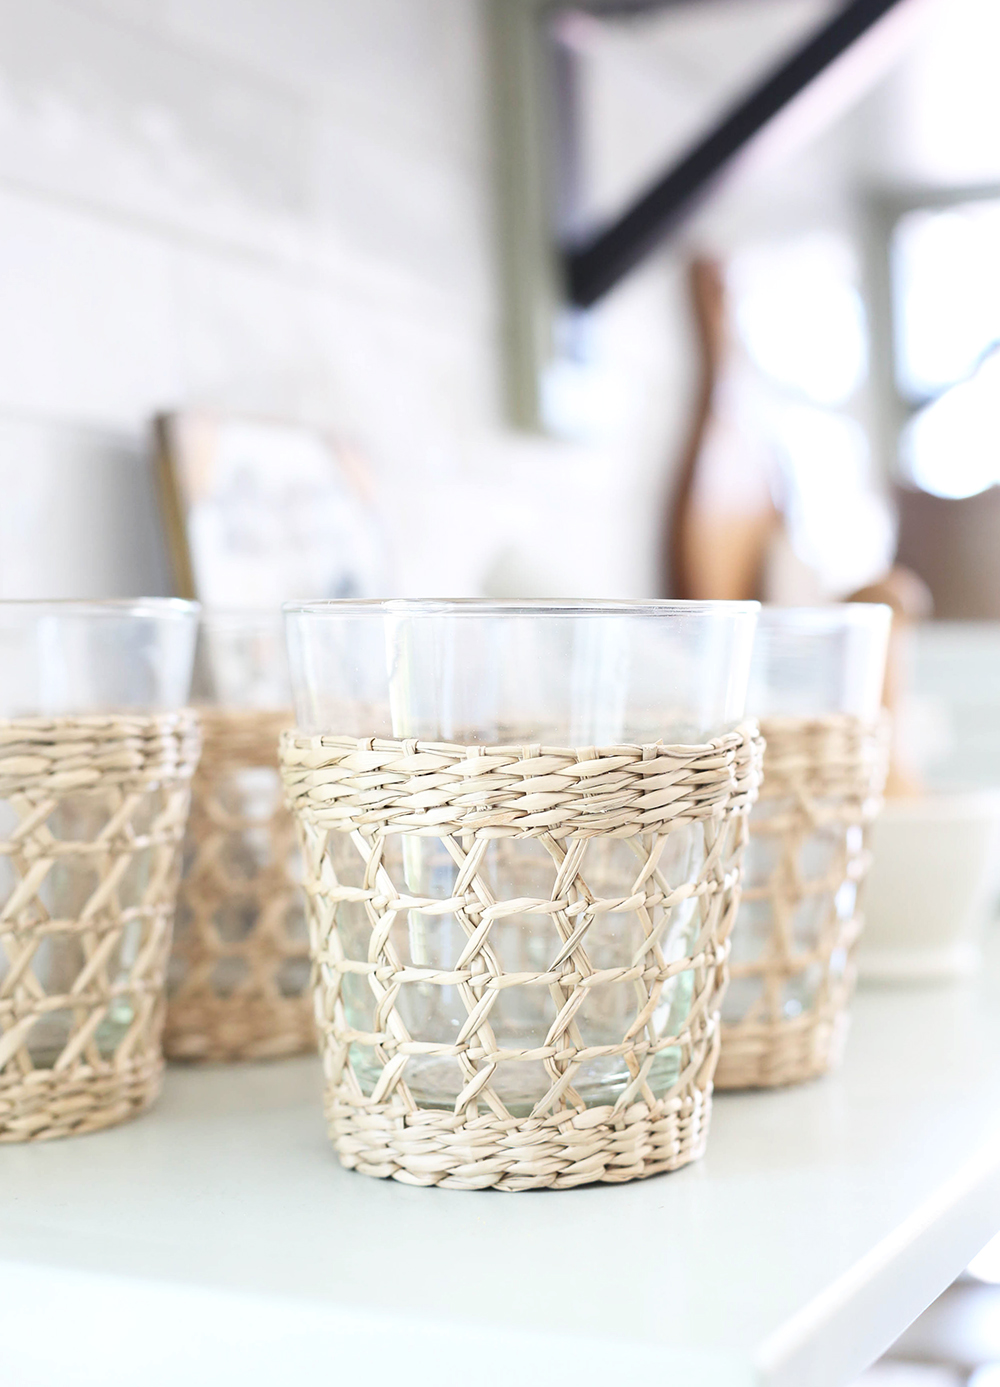
Step 3: Group cups by style and color
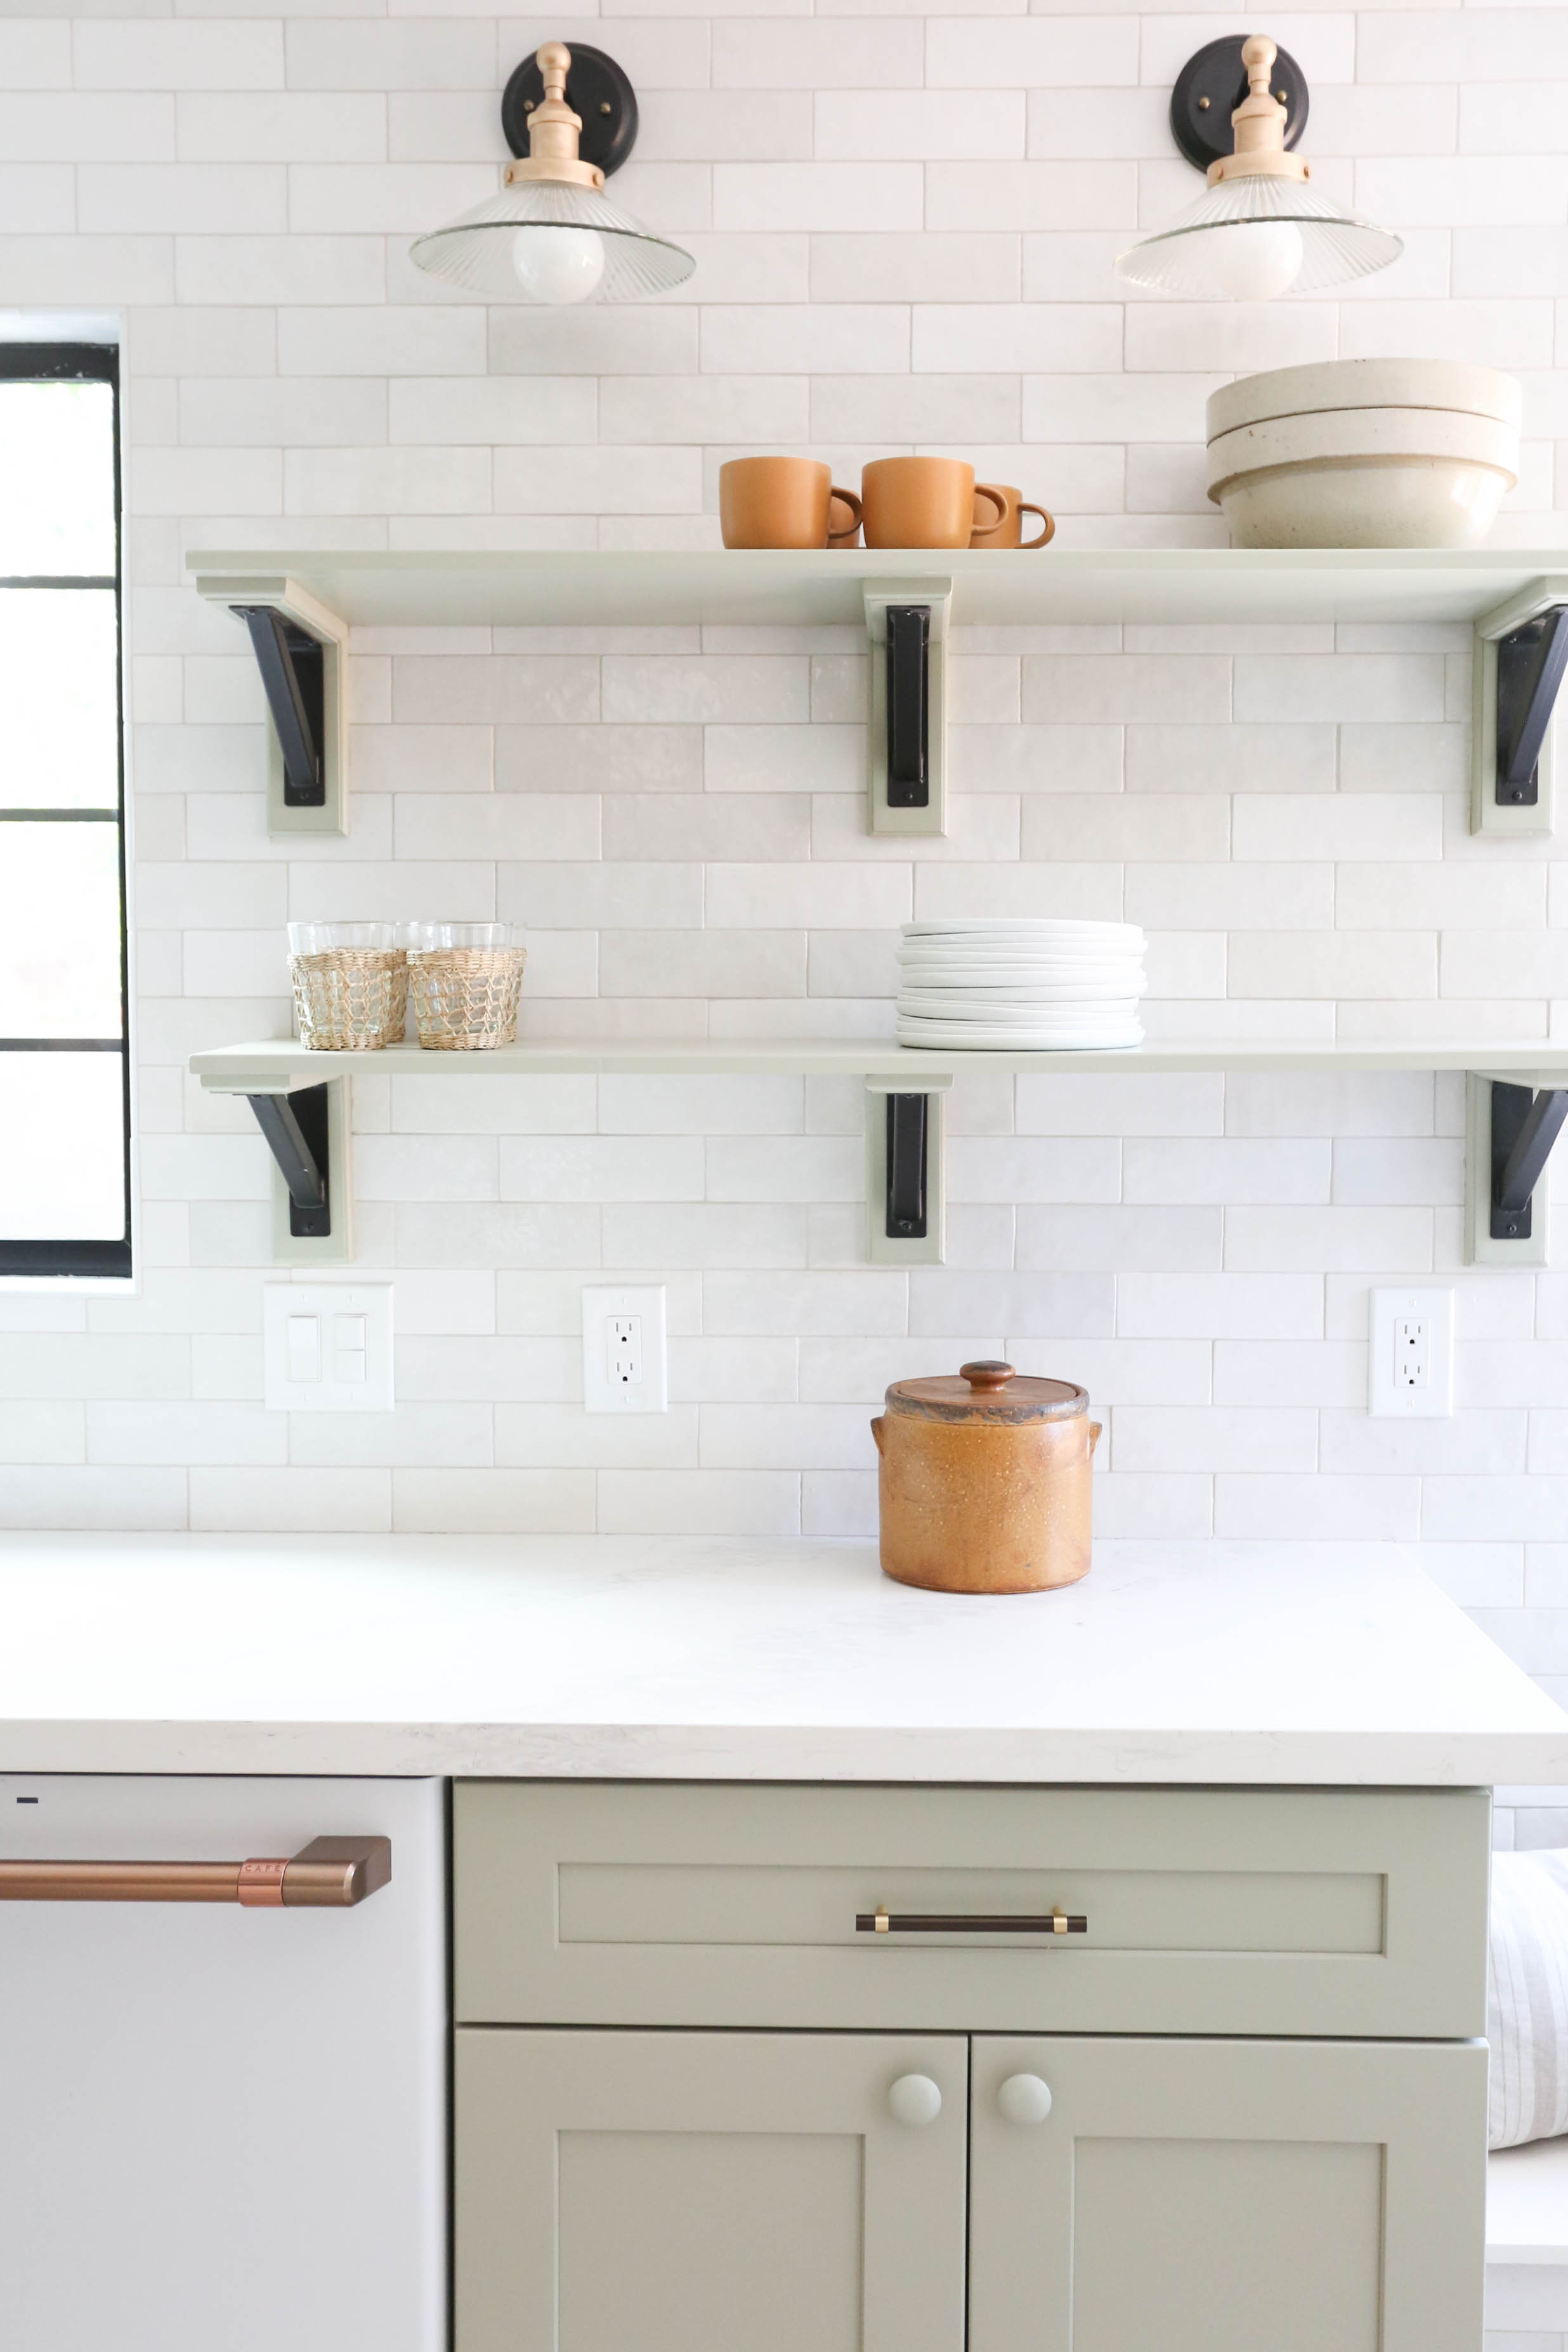
Step 4: Incorporate beautiful storage pieces for rice, pasta & flour
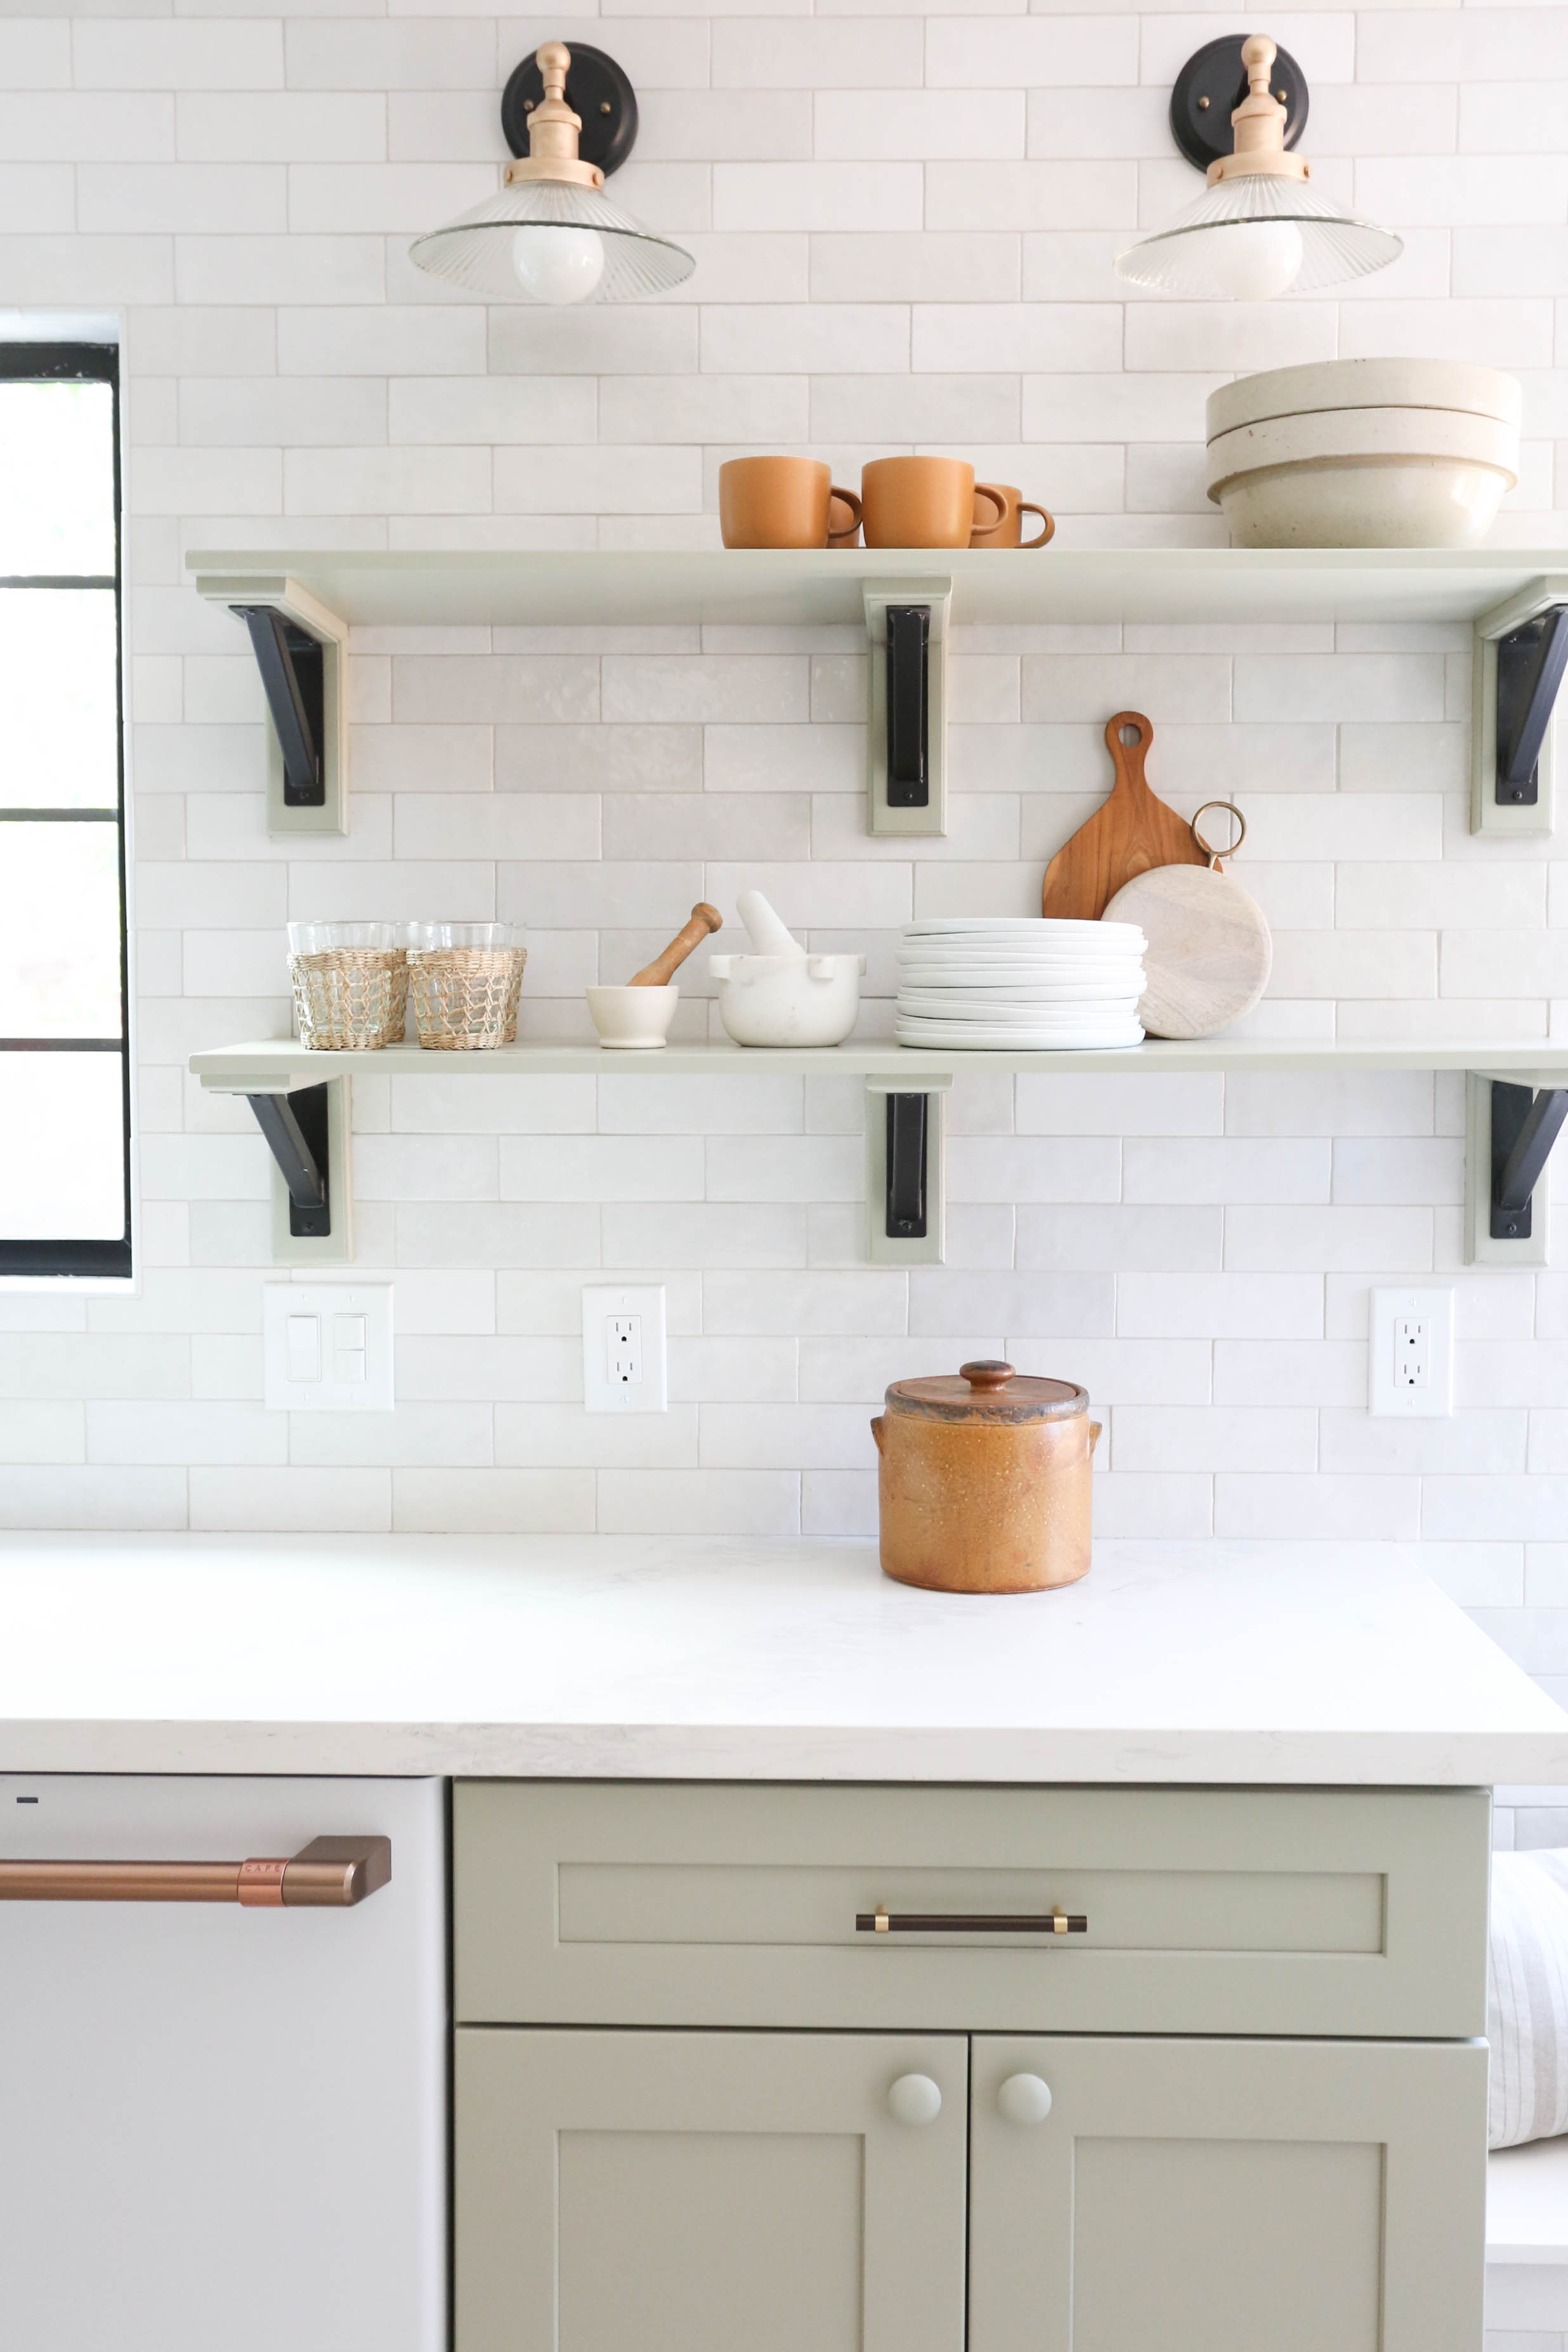
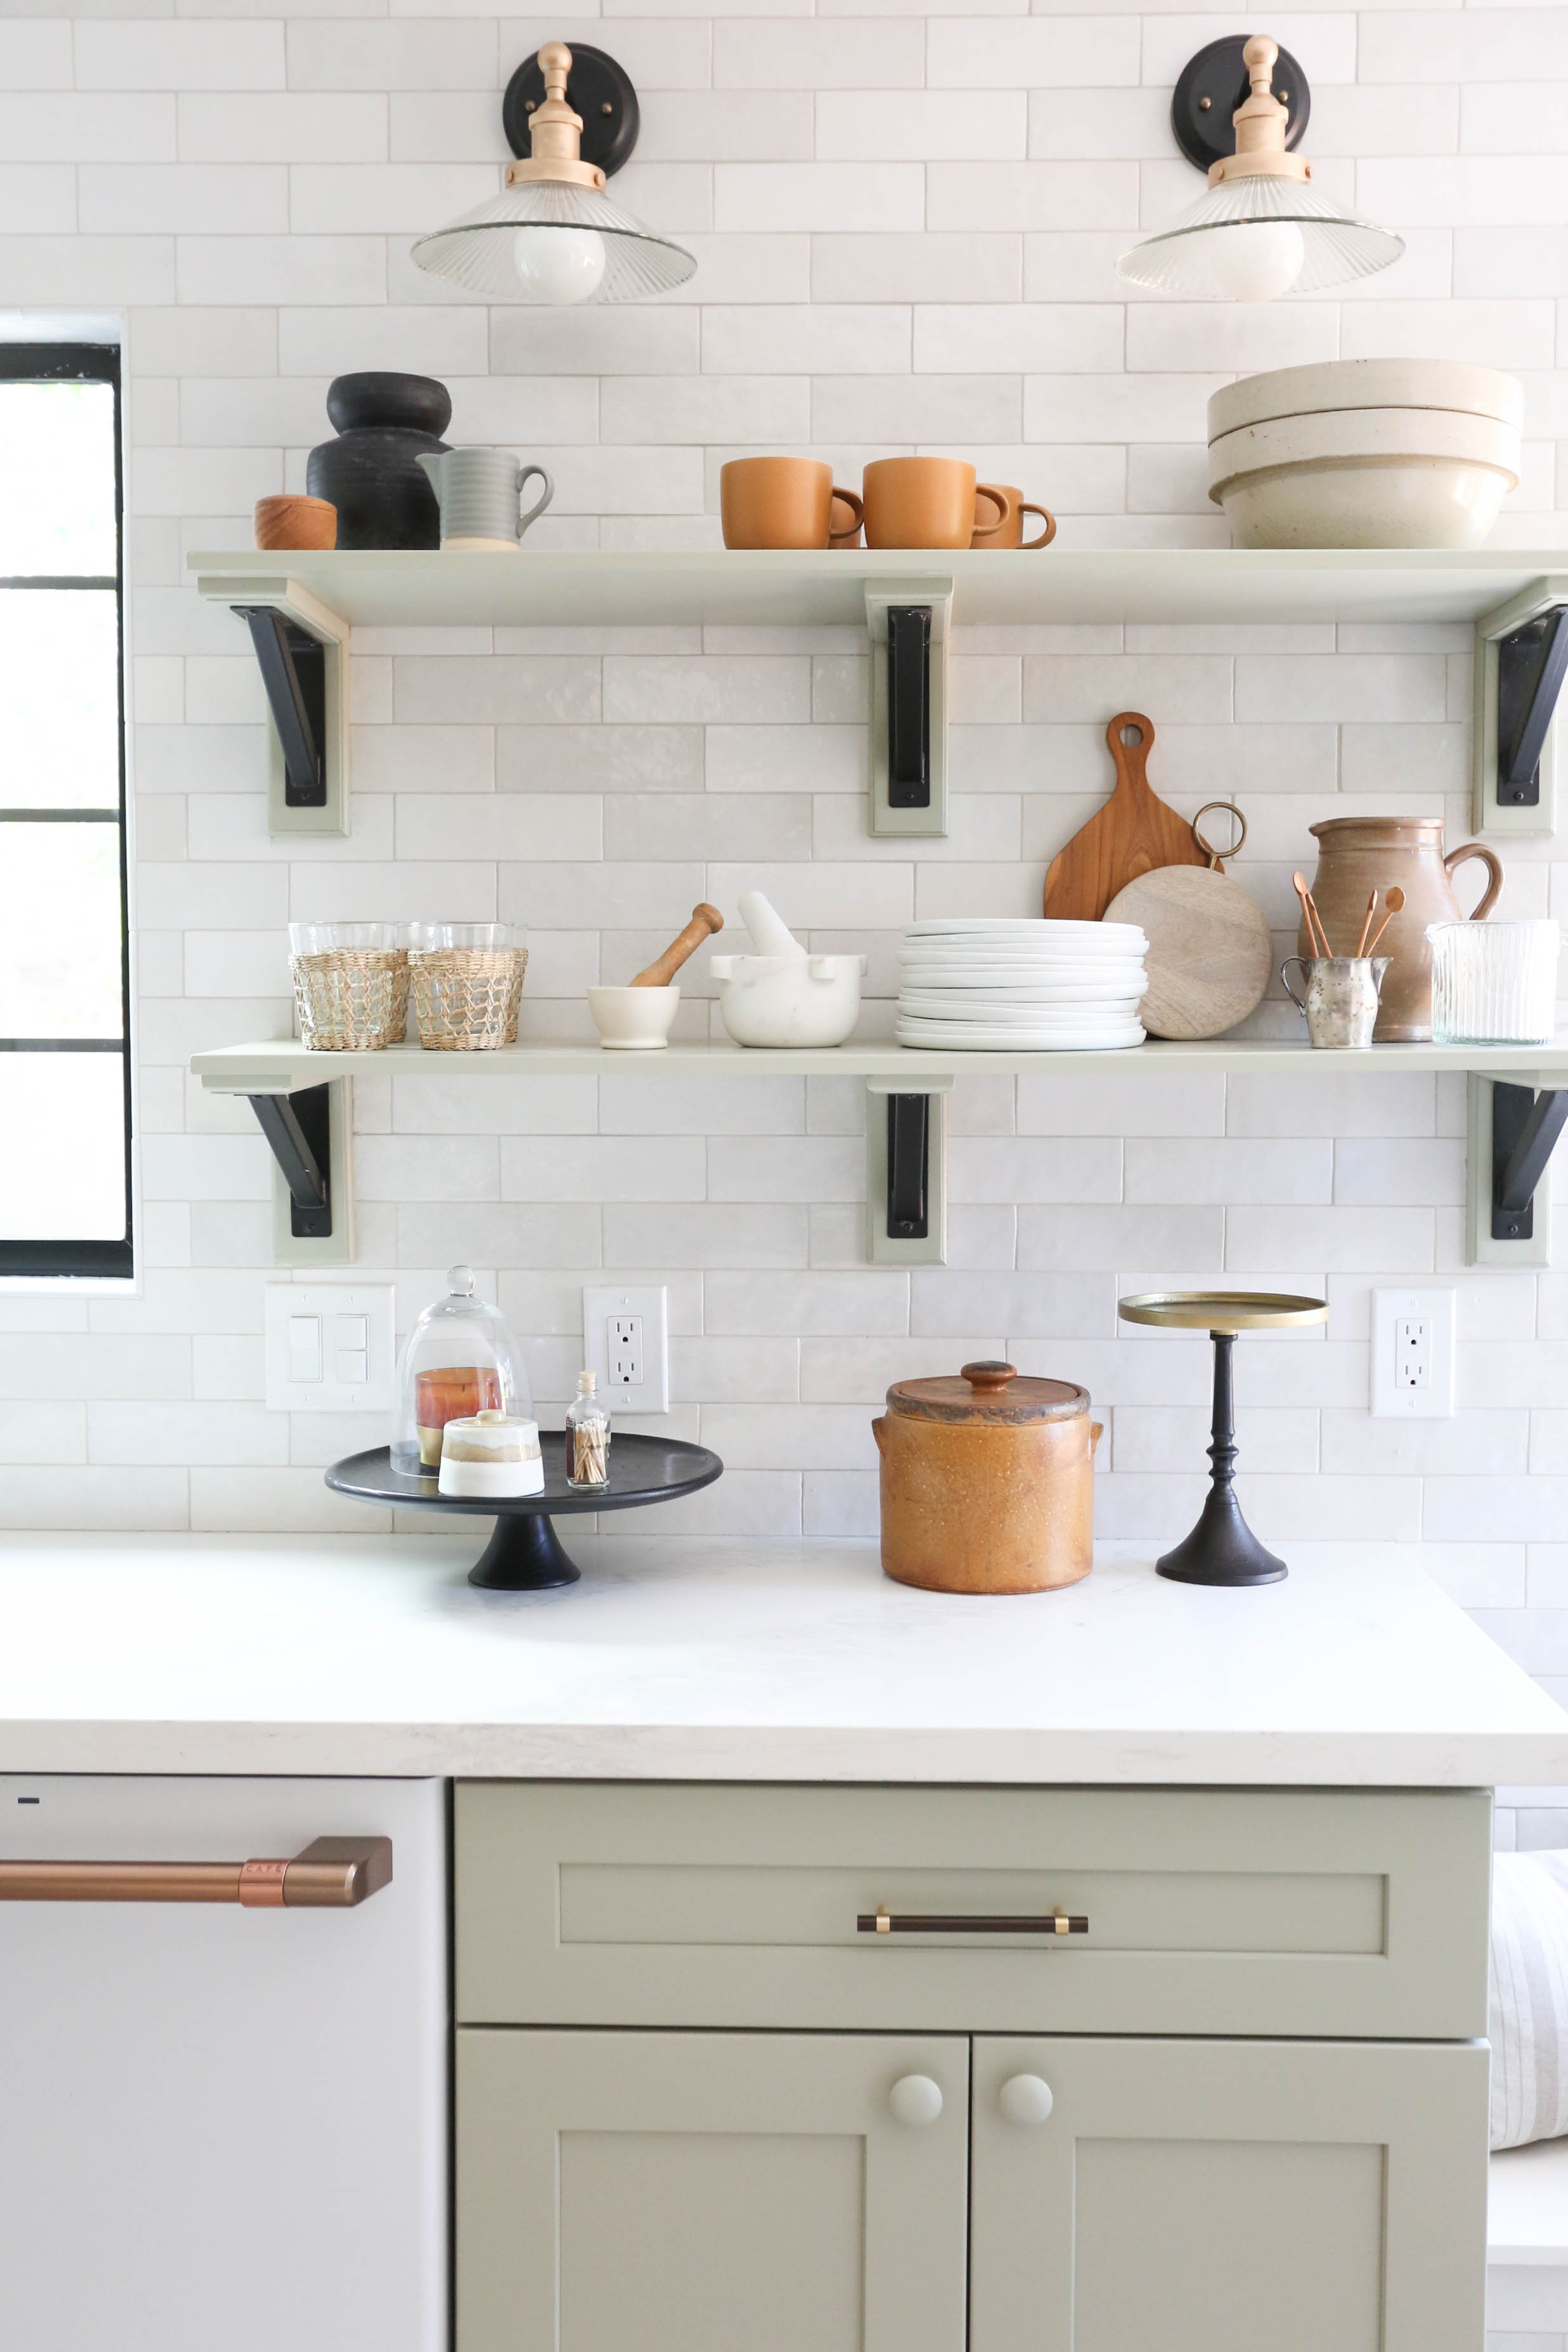
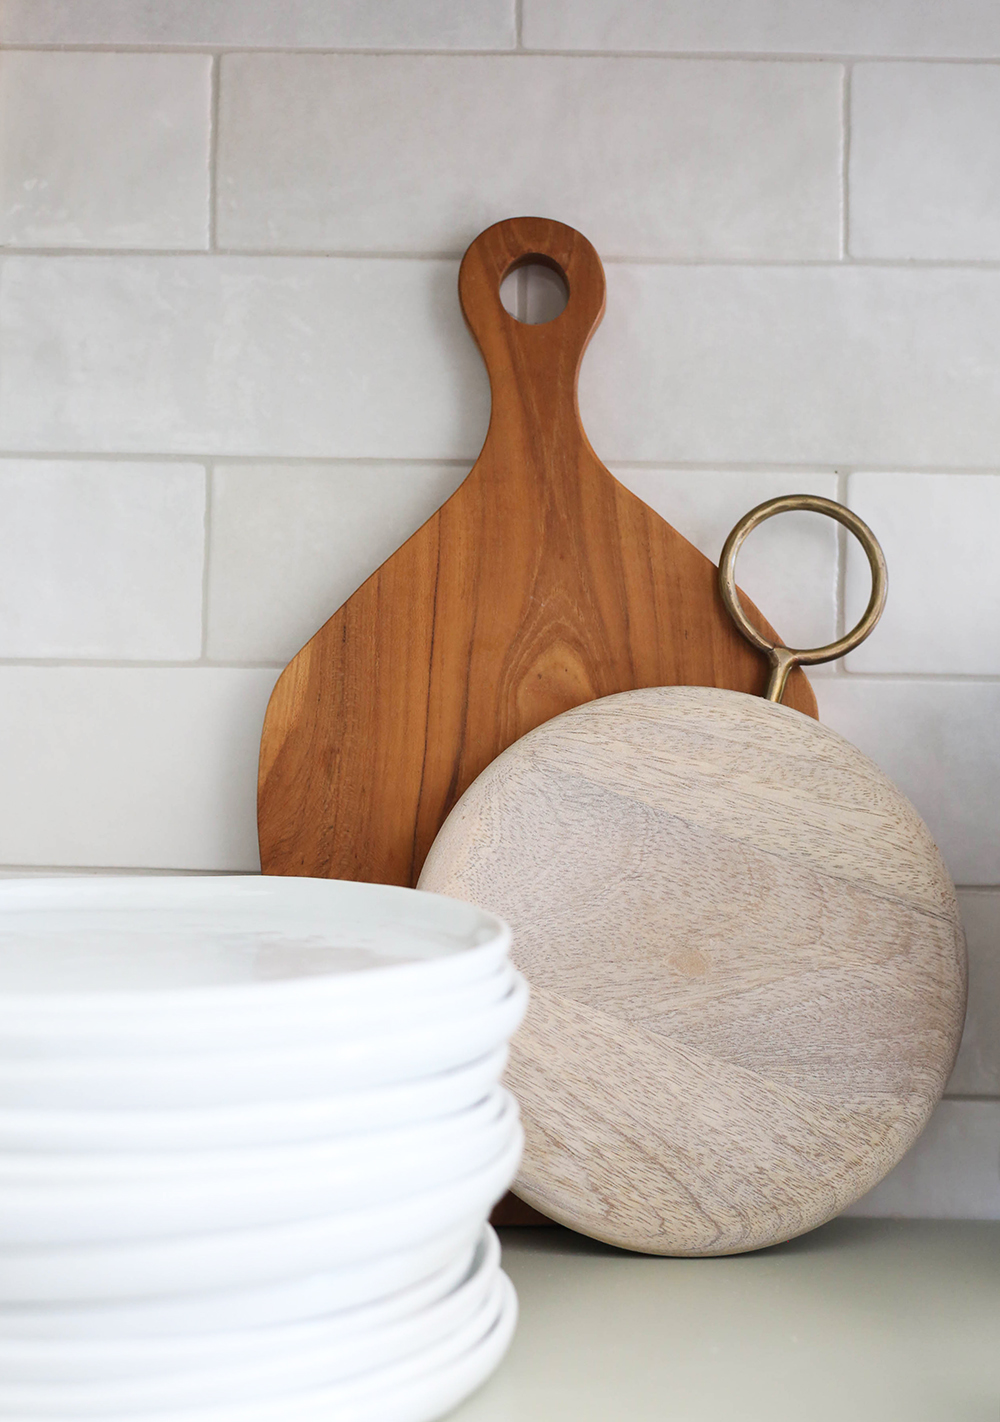
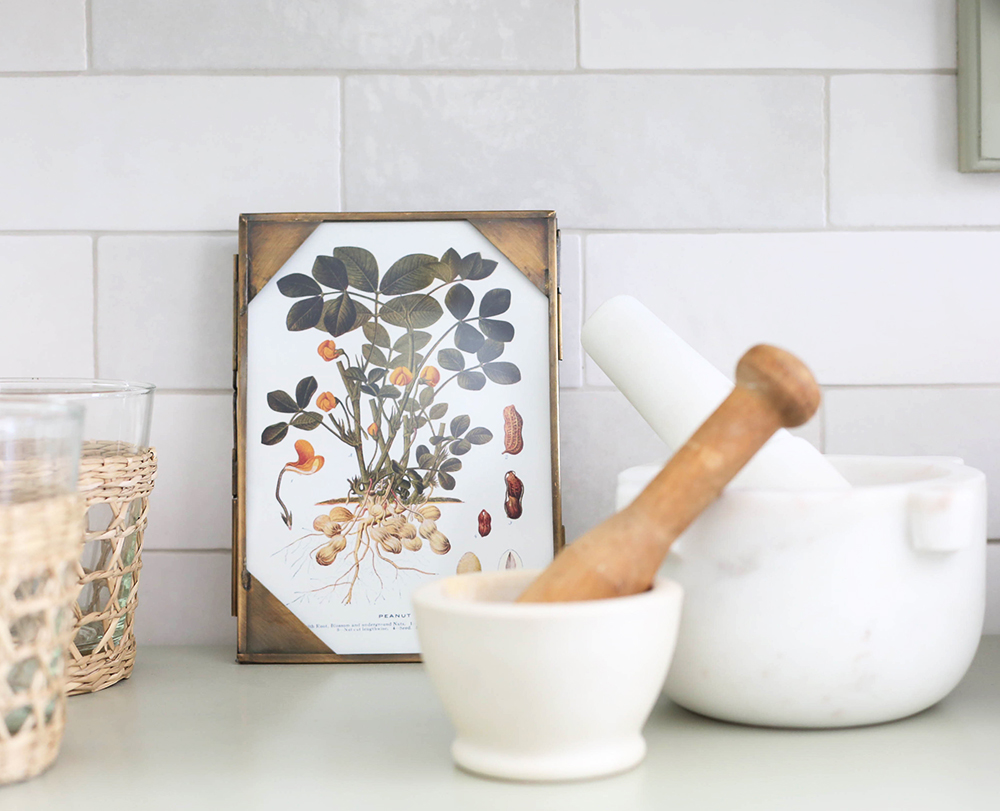
Step 5: Display beautiful cooking tools like cutting boards and mortar & pestles. *Pro Tip* – It can be tempting to start with leaning pieces, but it is actually easier to add them in at this step once you have your foundation in place!
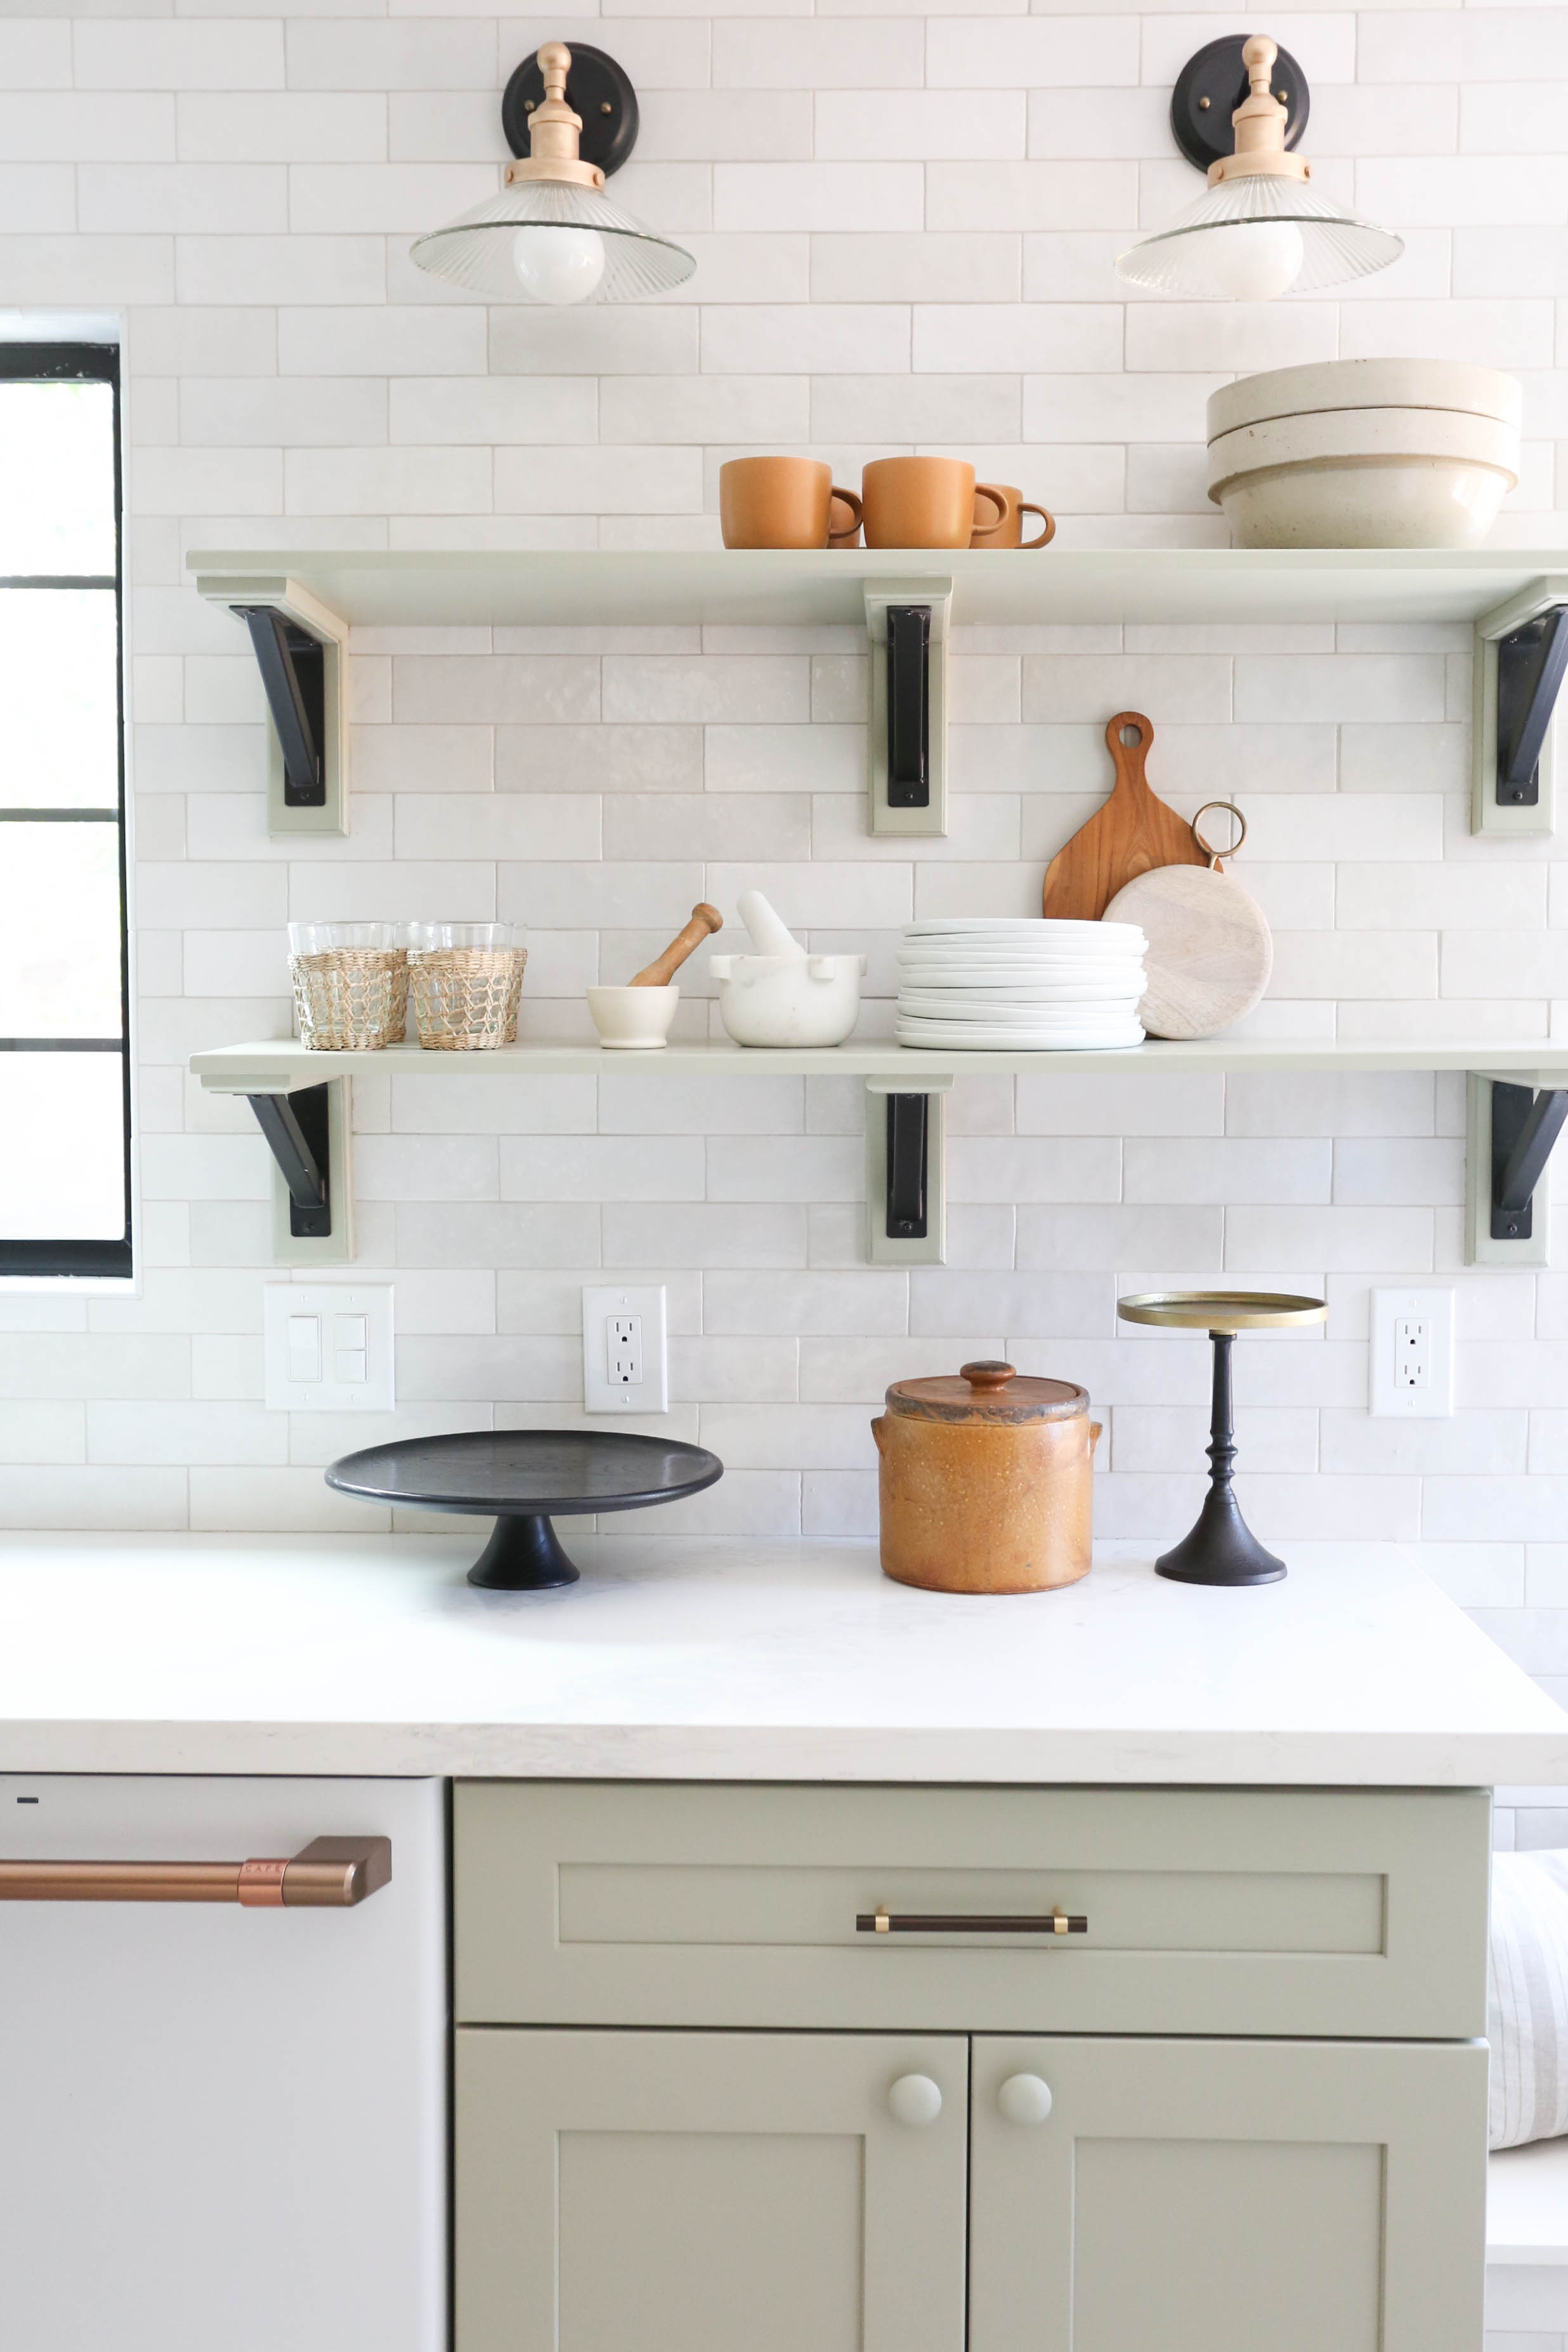
Step 6: Cake stands add height
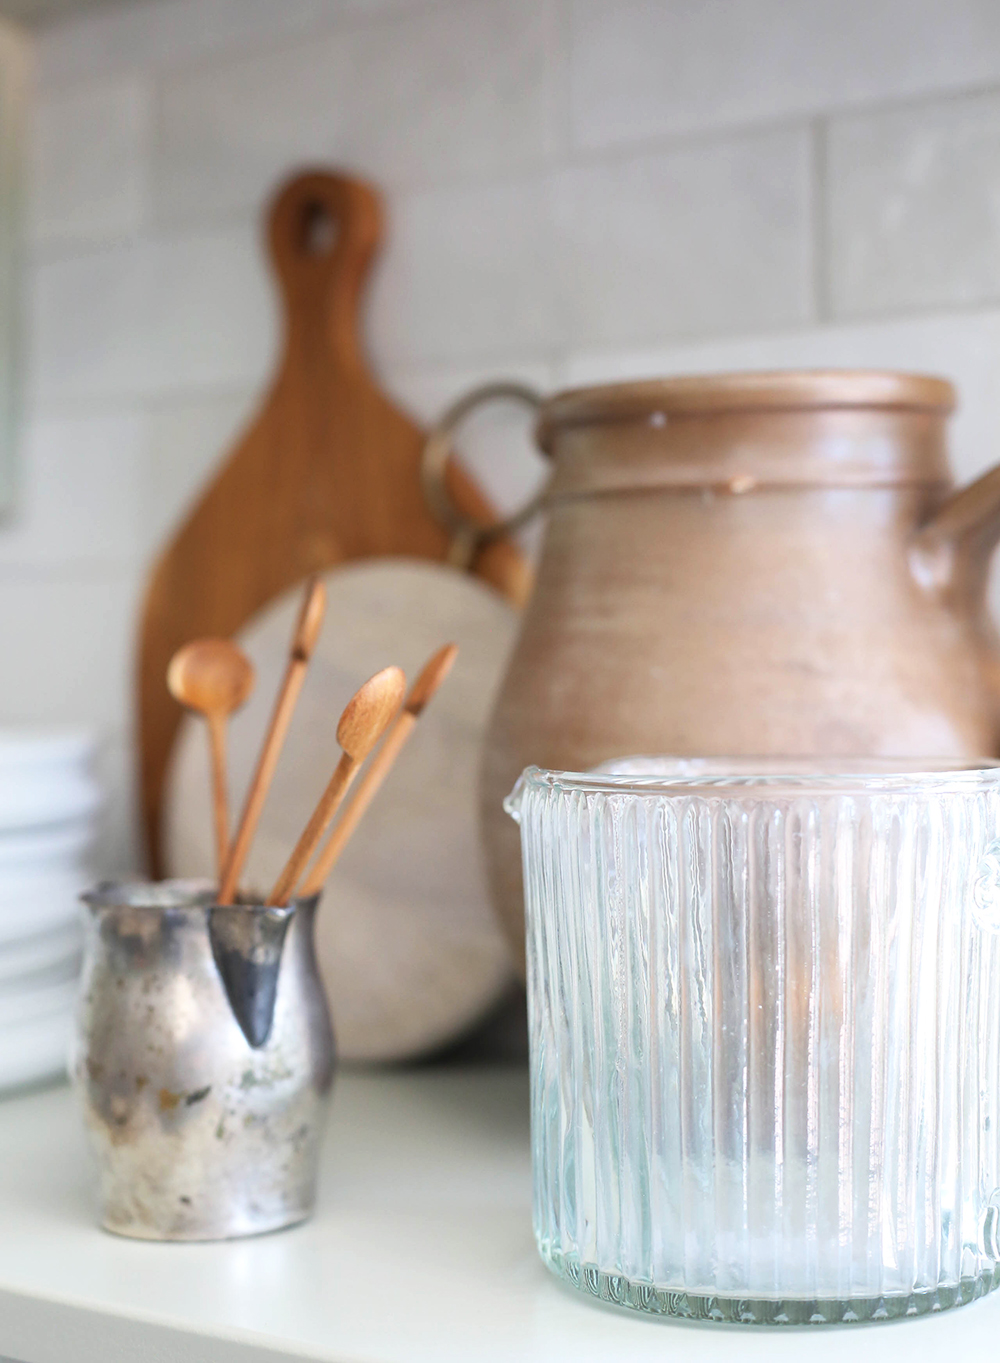
Step 7: Layer vases, decorative pottery and pitchers
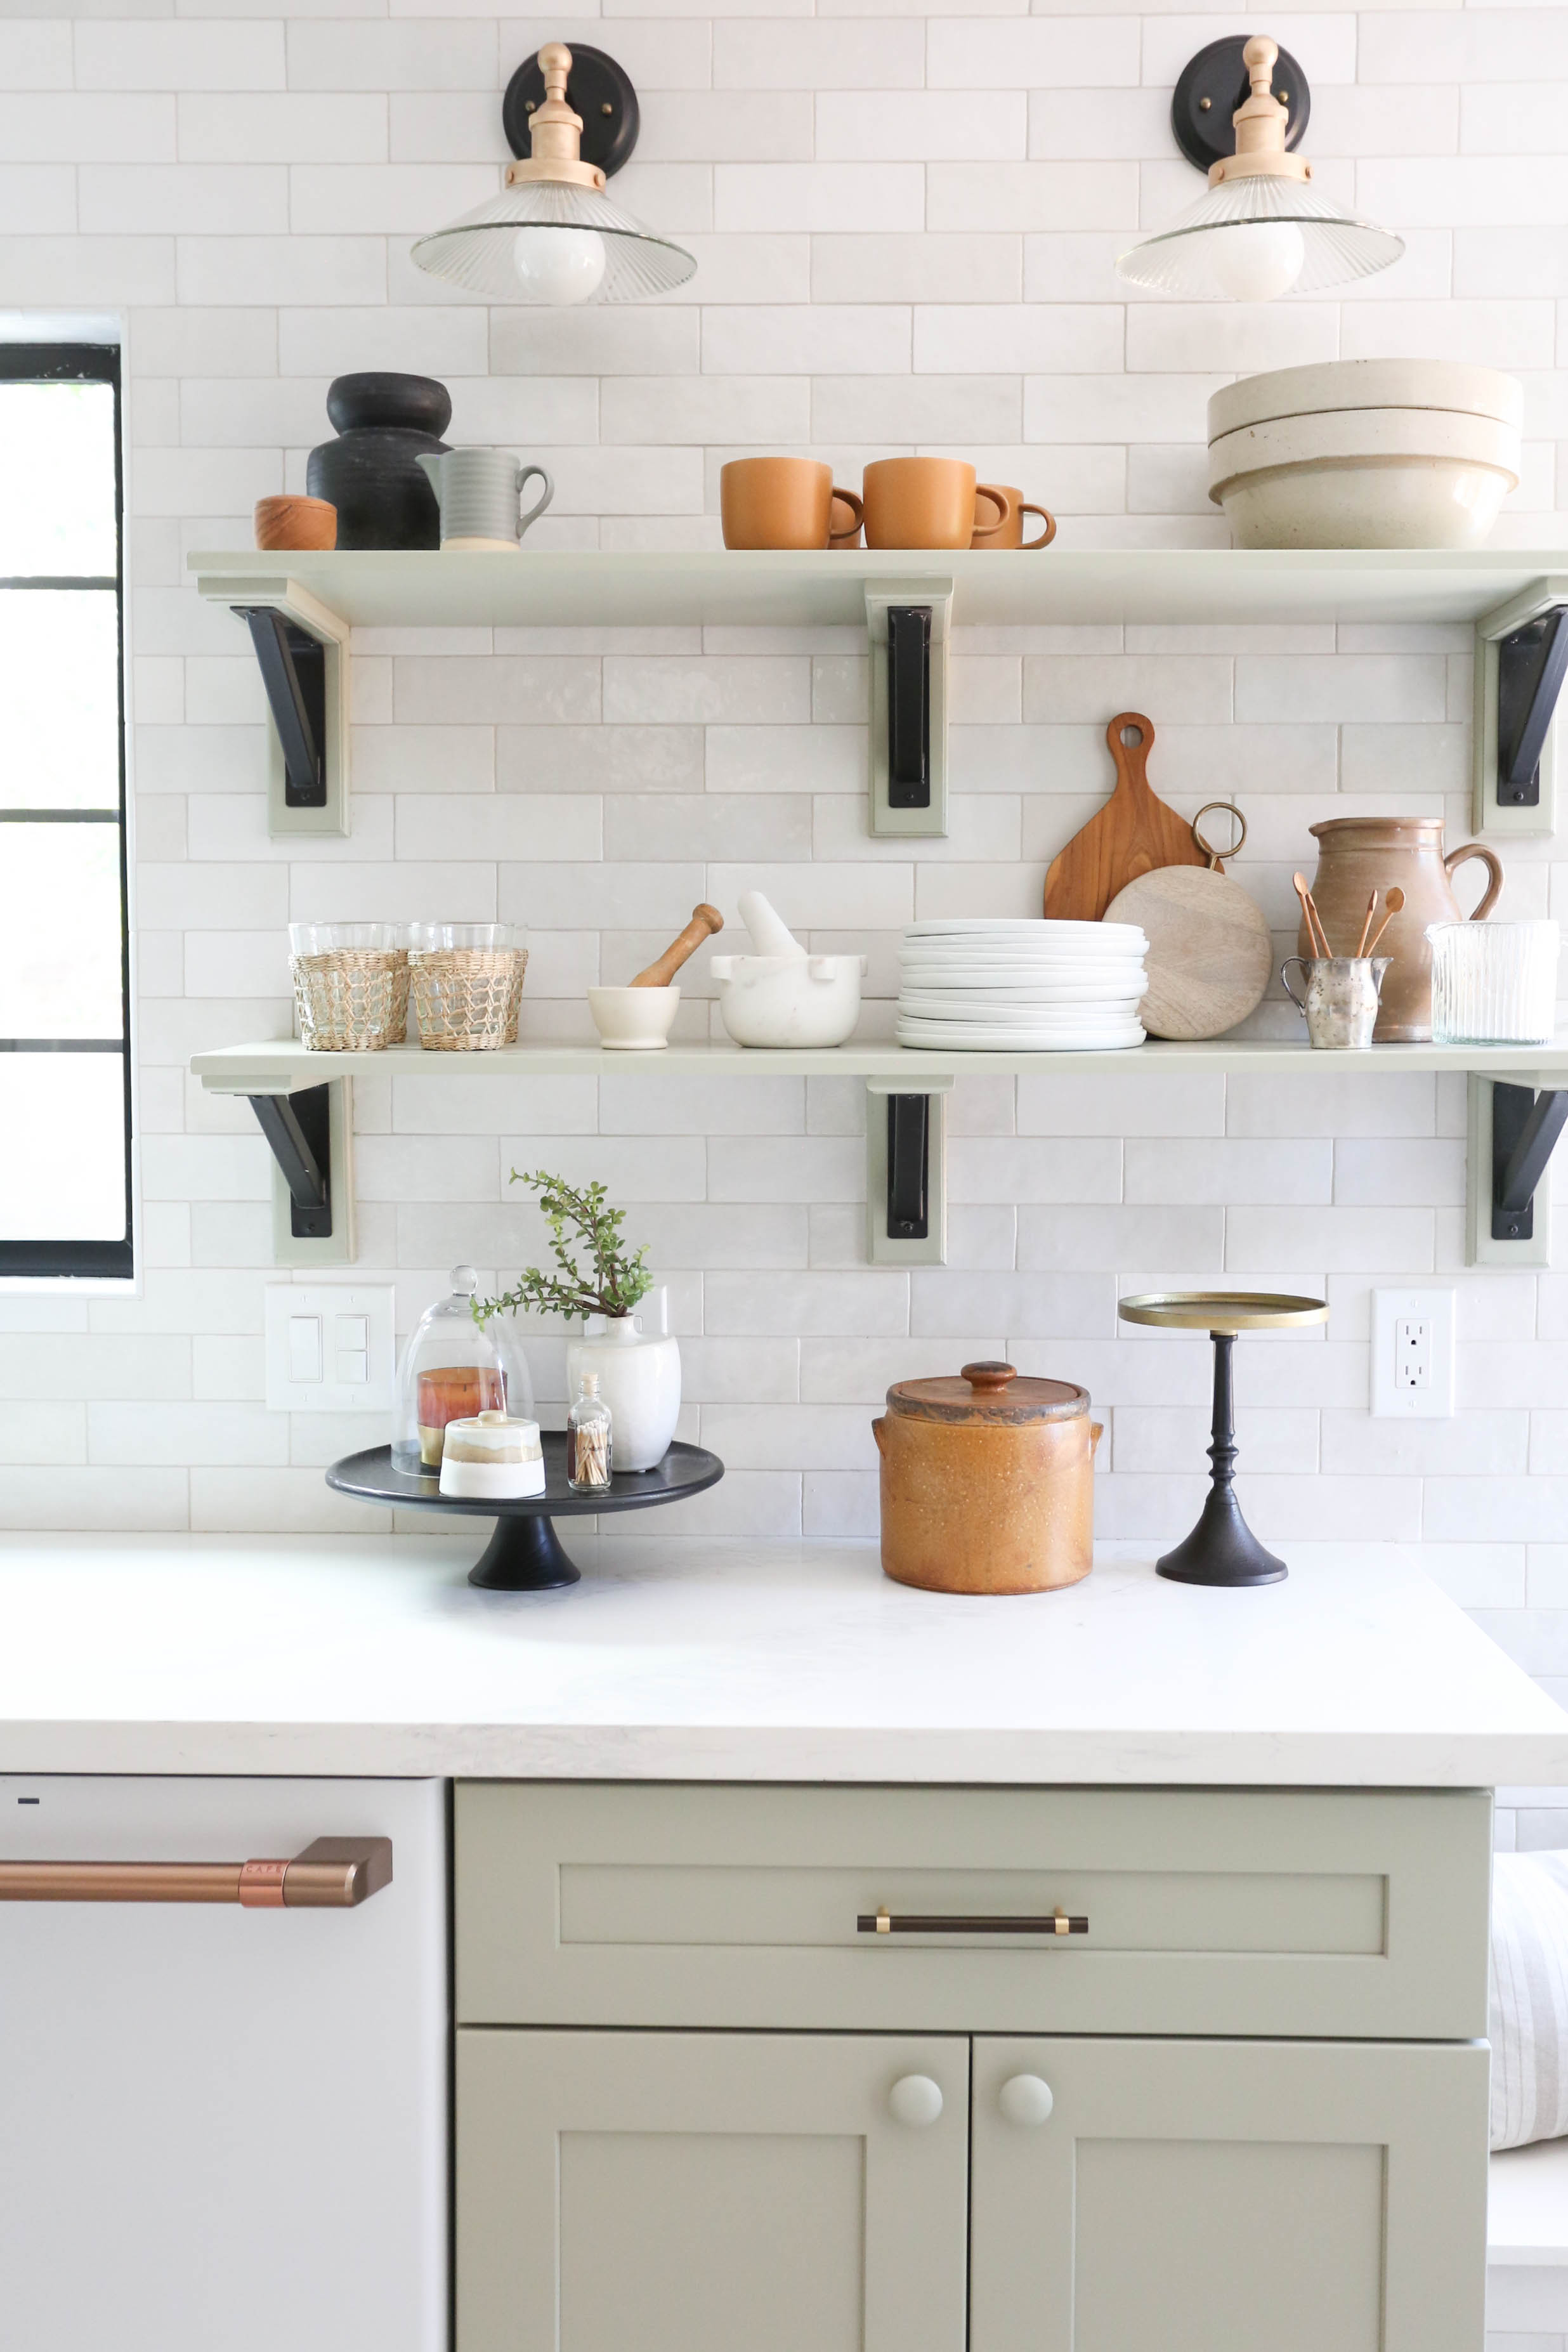
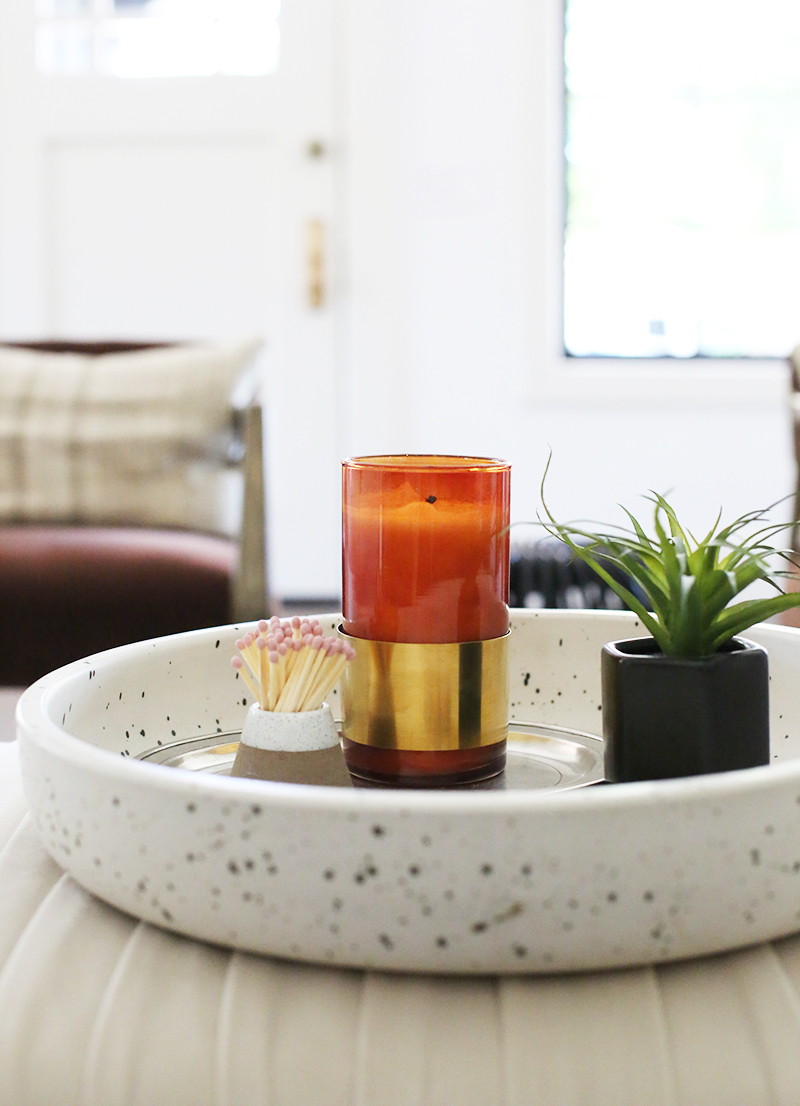
Step 8: Add candles and small accessories like cloches and matchstick holders
Step 9: Greenery brings the whole space to life
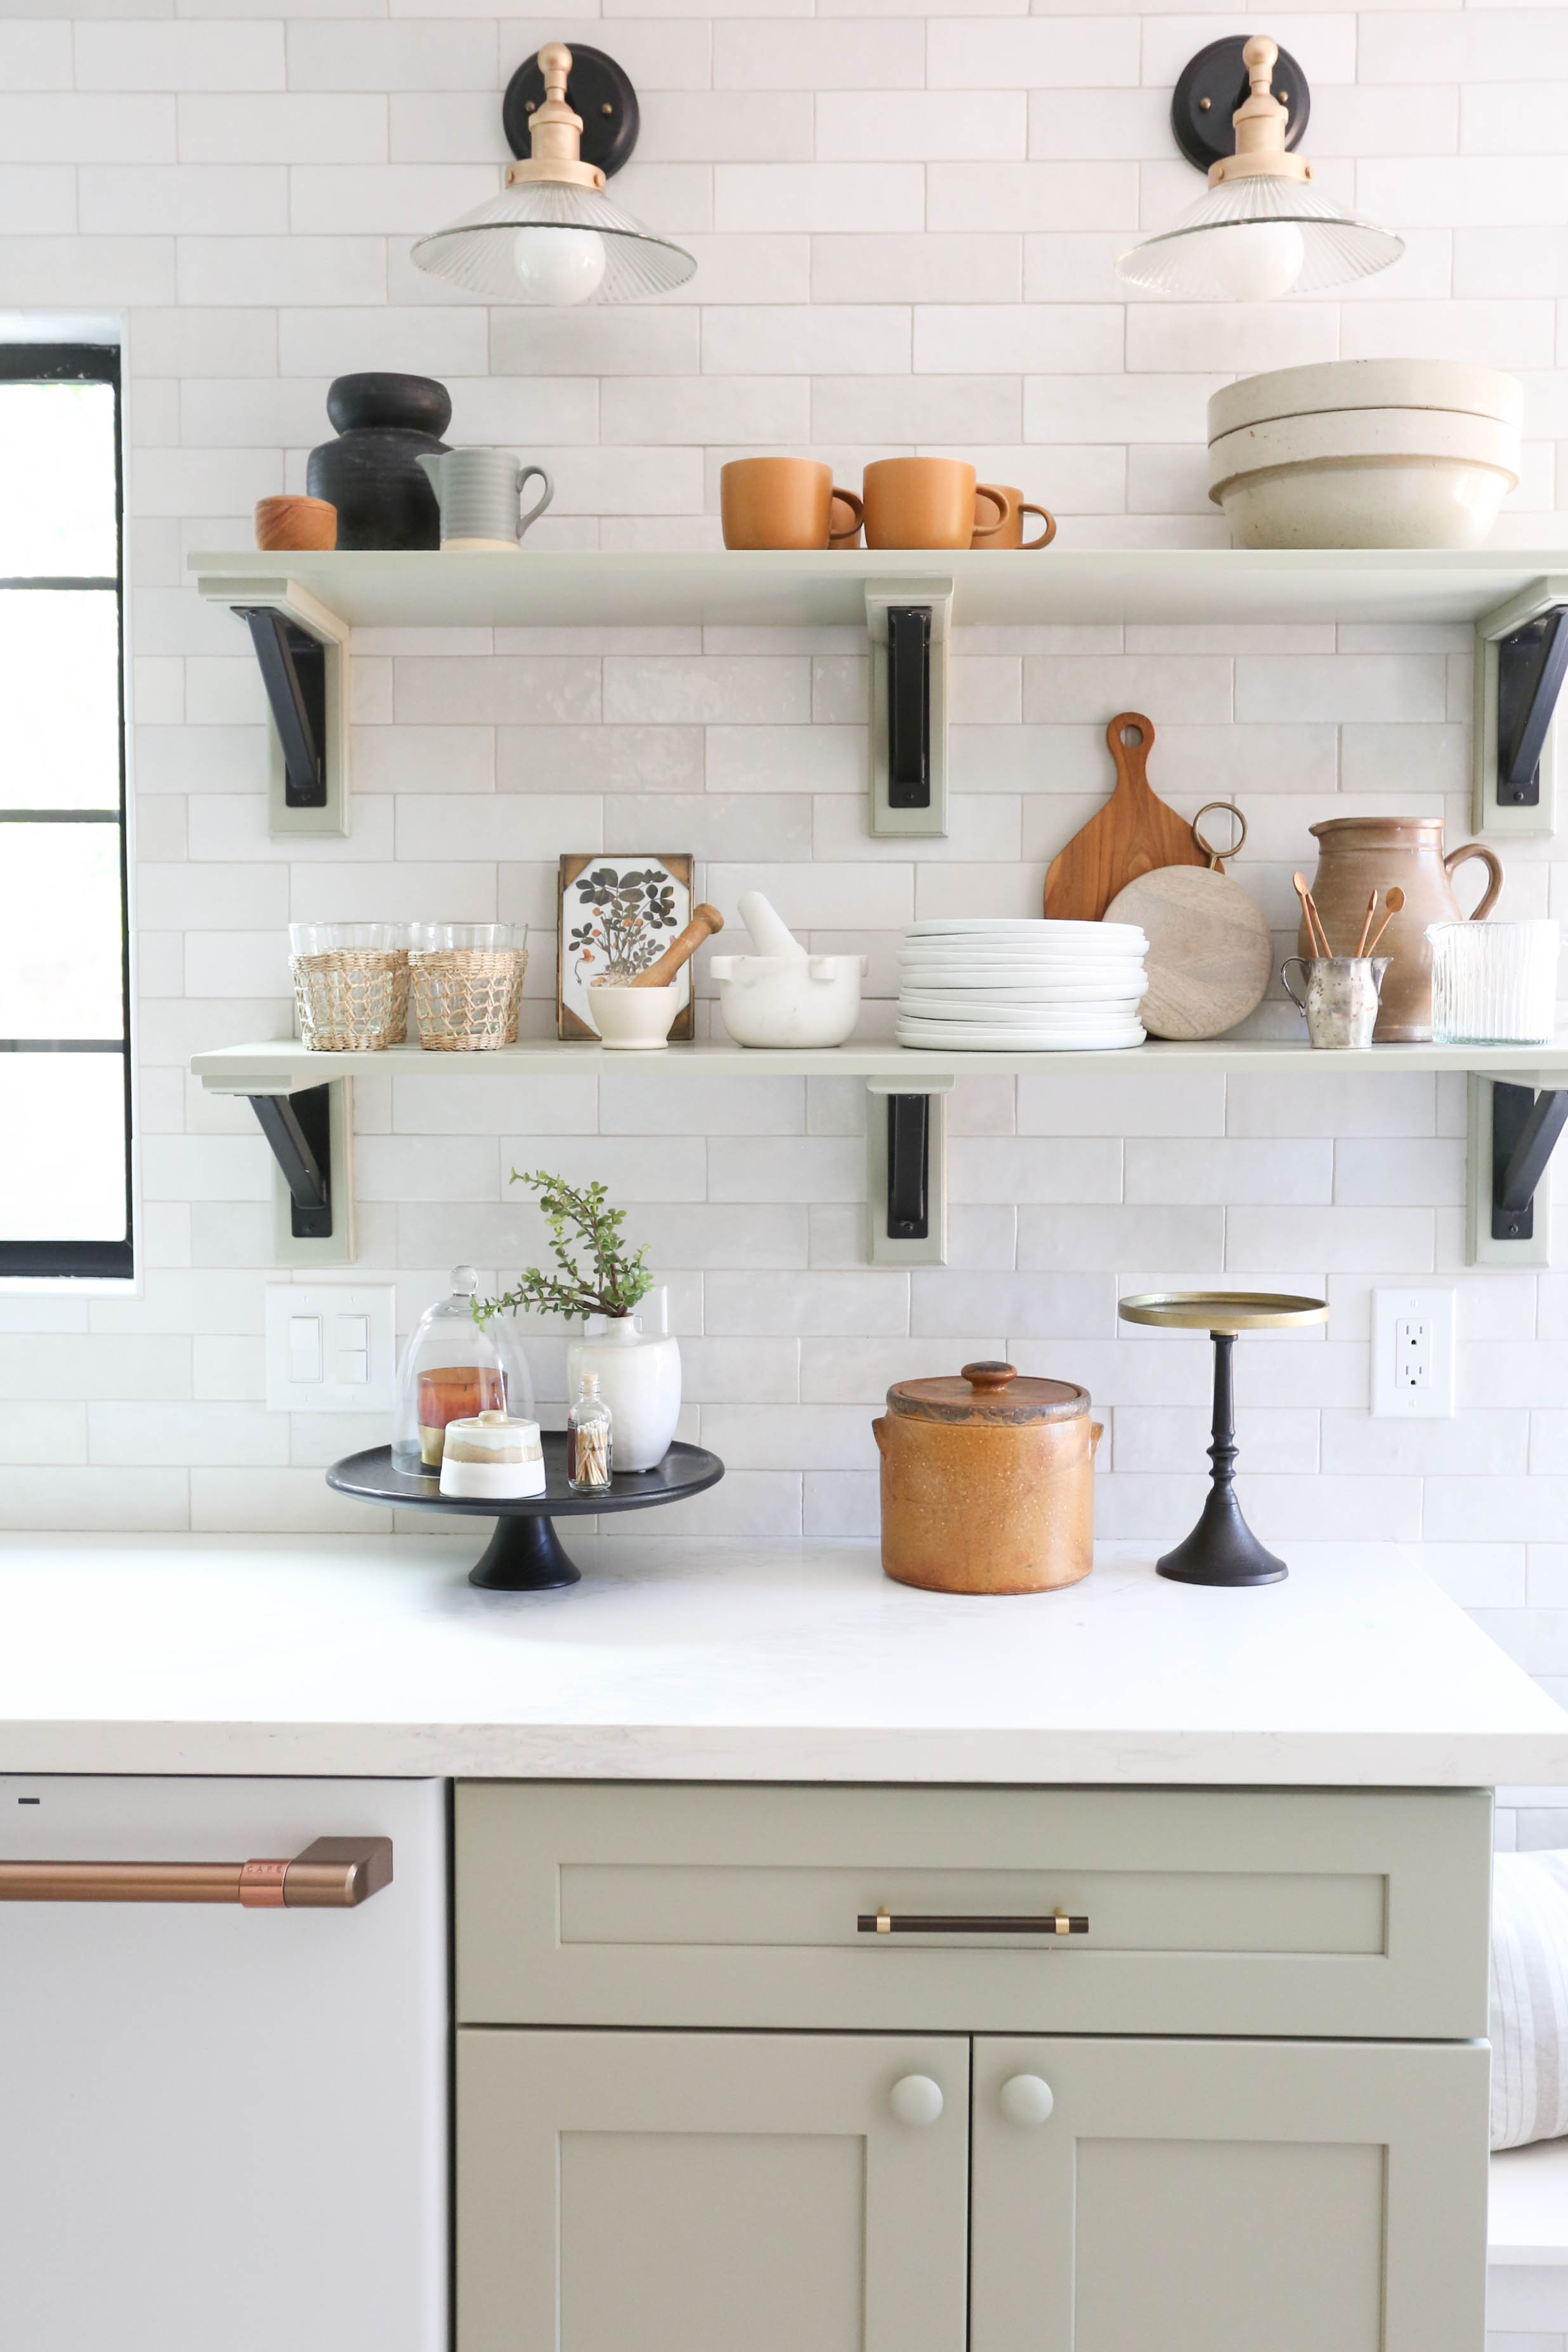
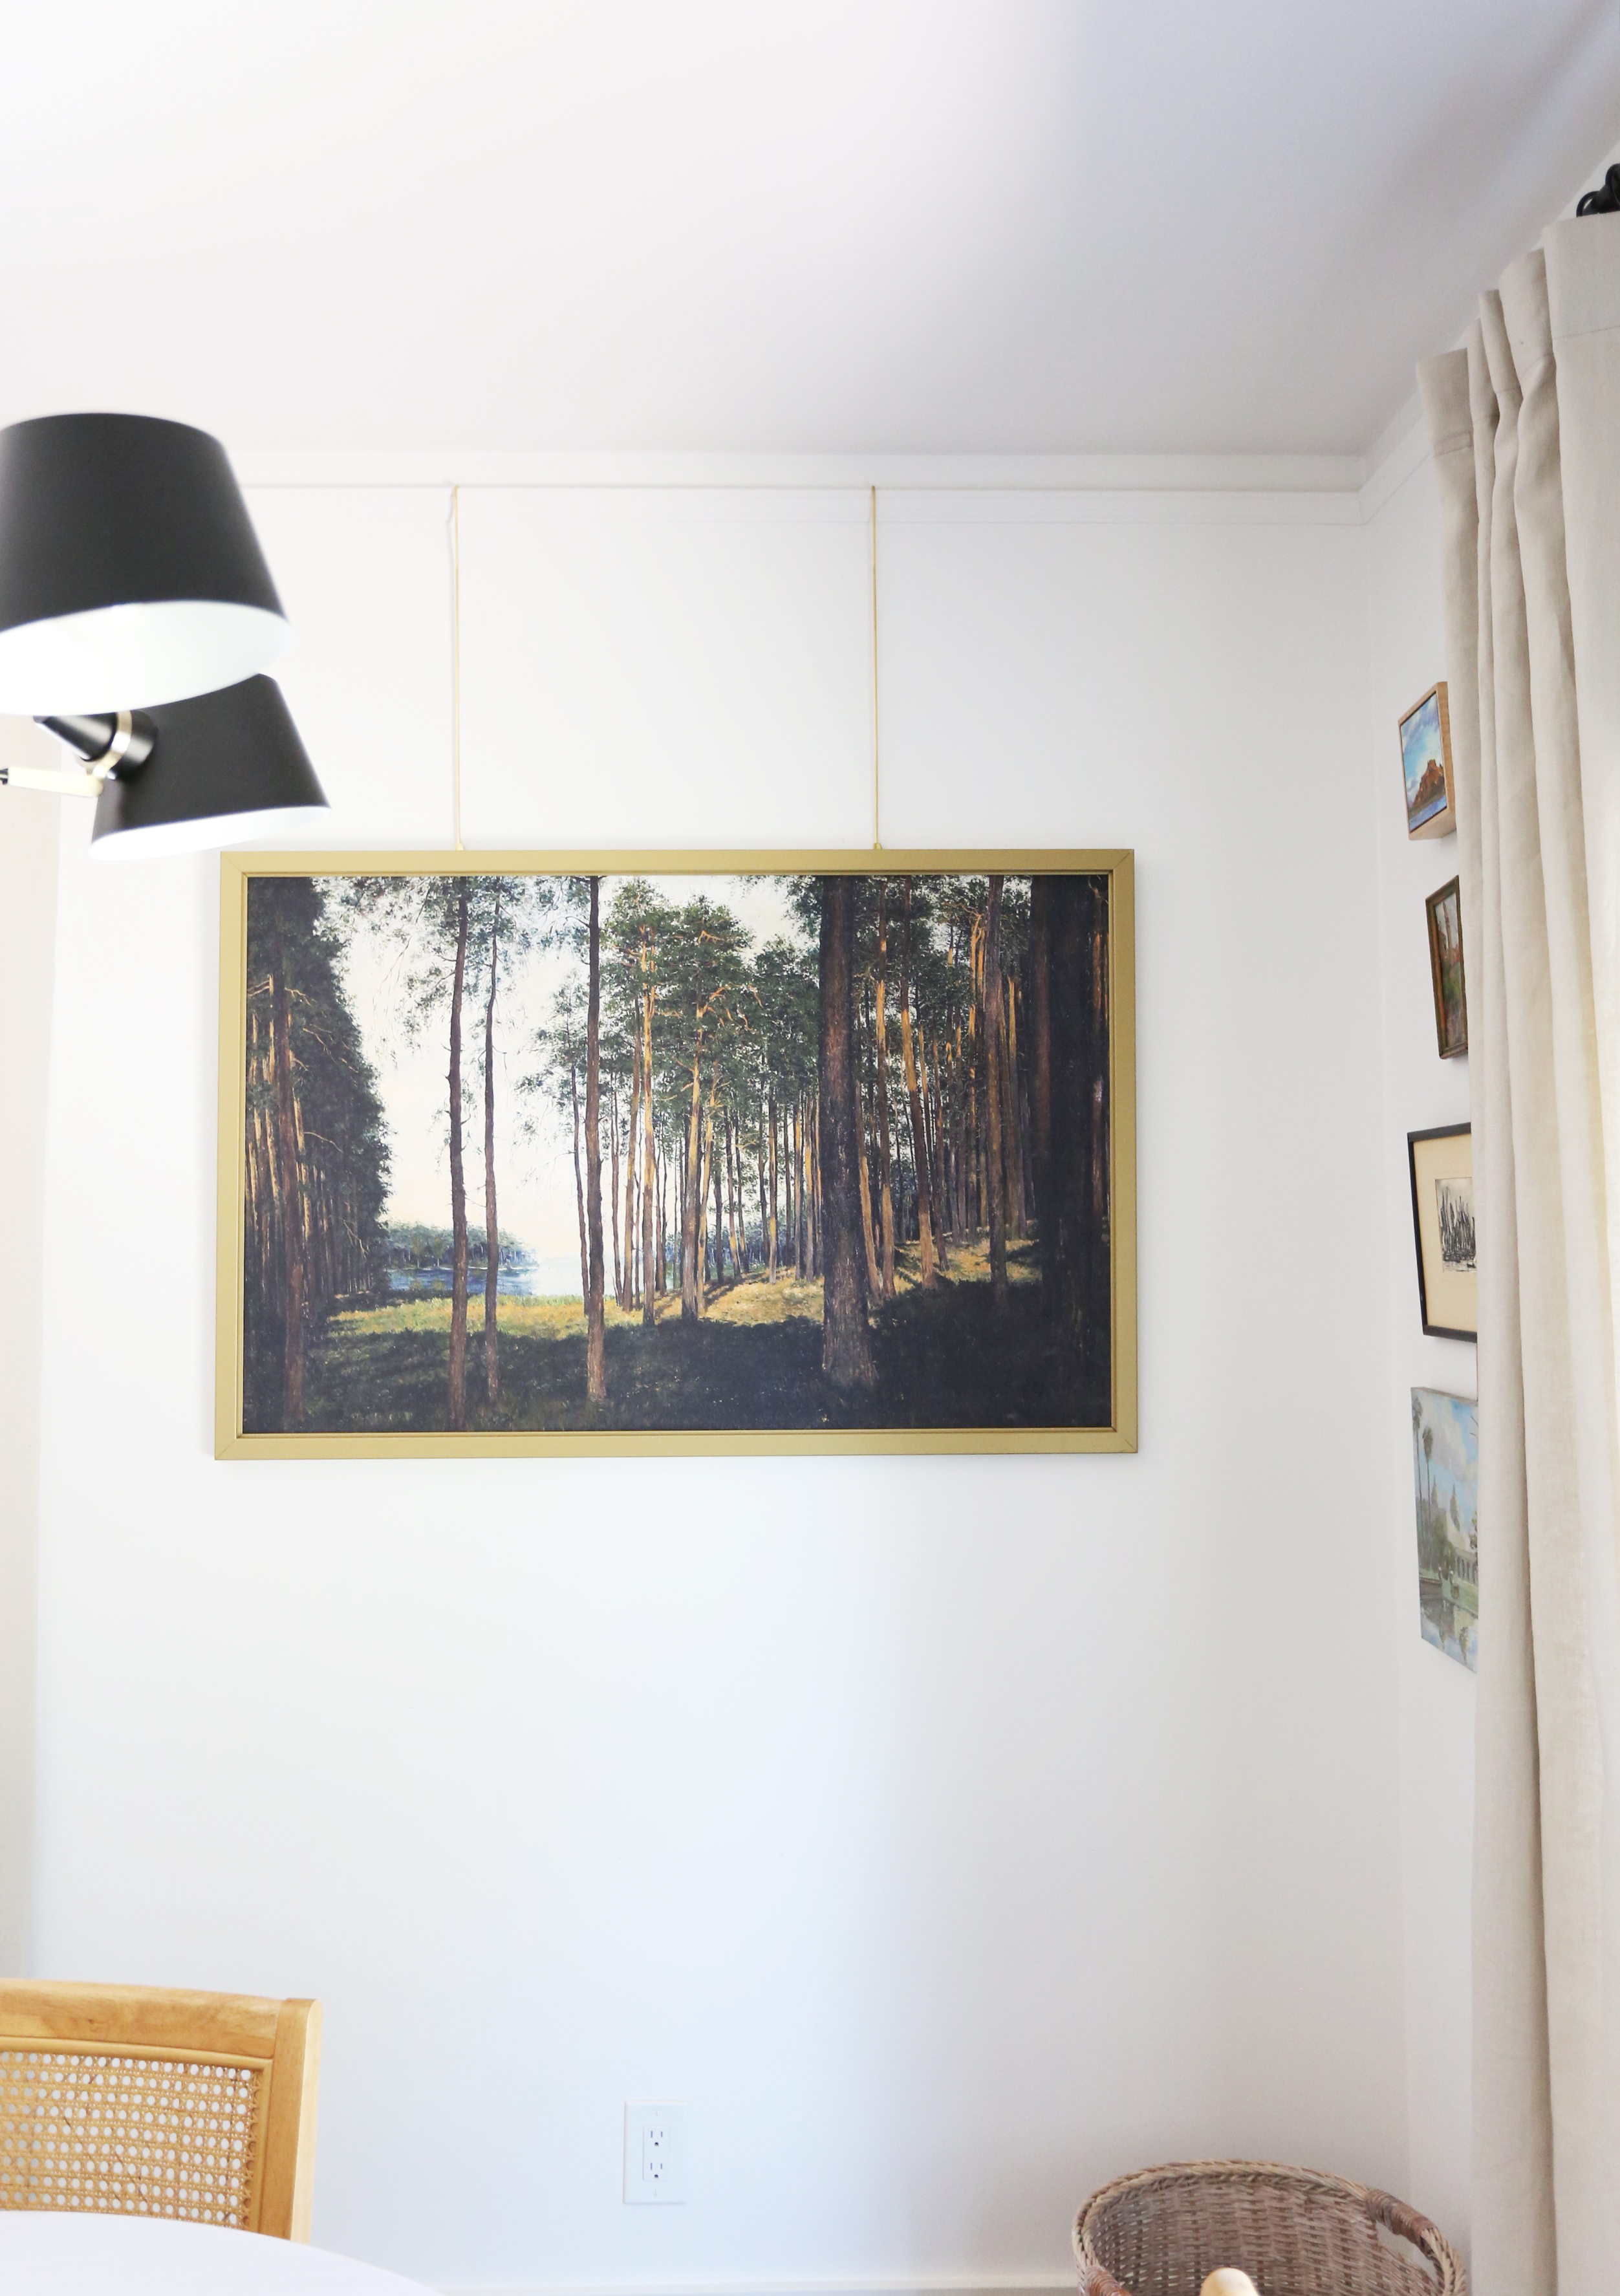
Step 10: Lean Art to complete the look. Here we used our “PEANUT” print!
We want to see your kitchen shelving! Share your space with the hashtag #juniperhomespotlight!
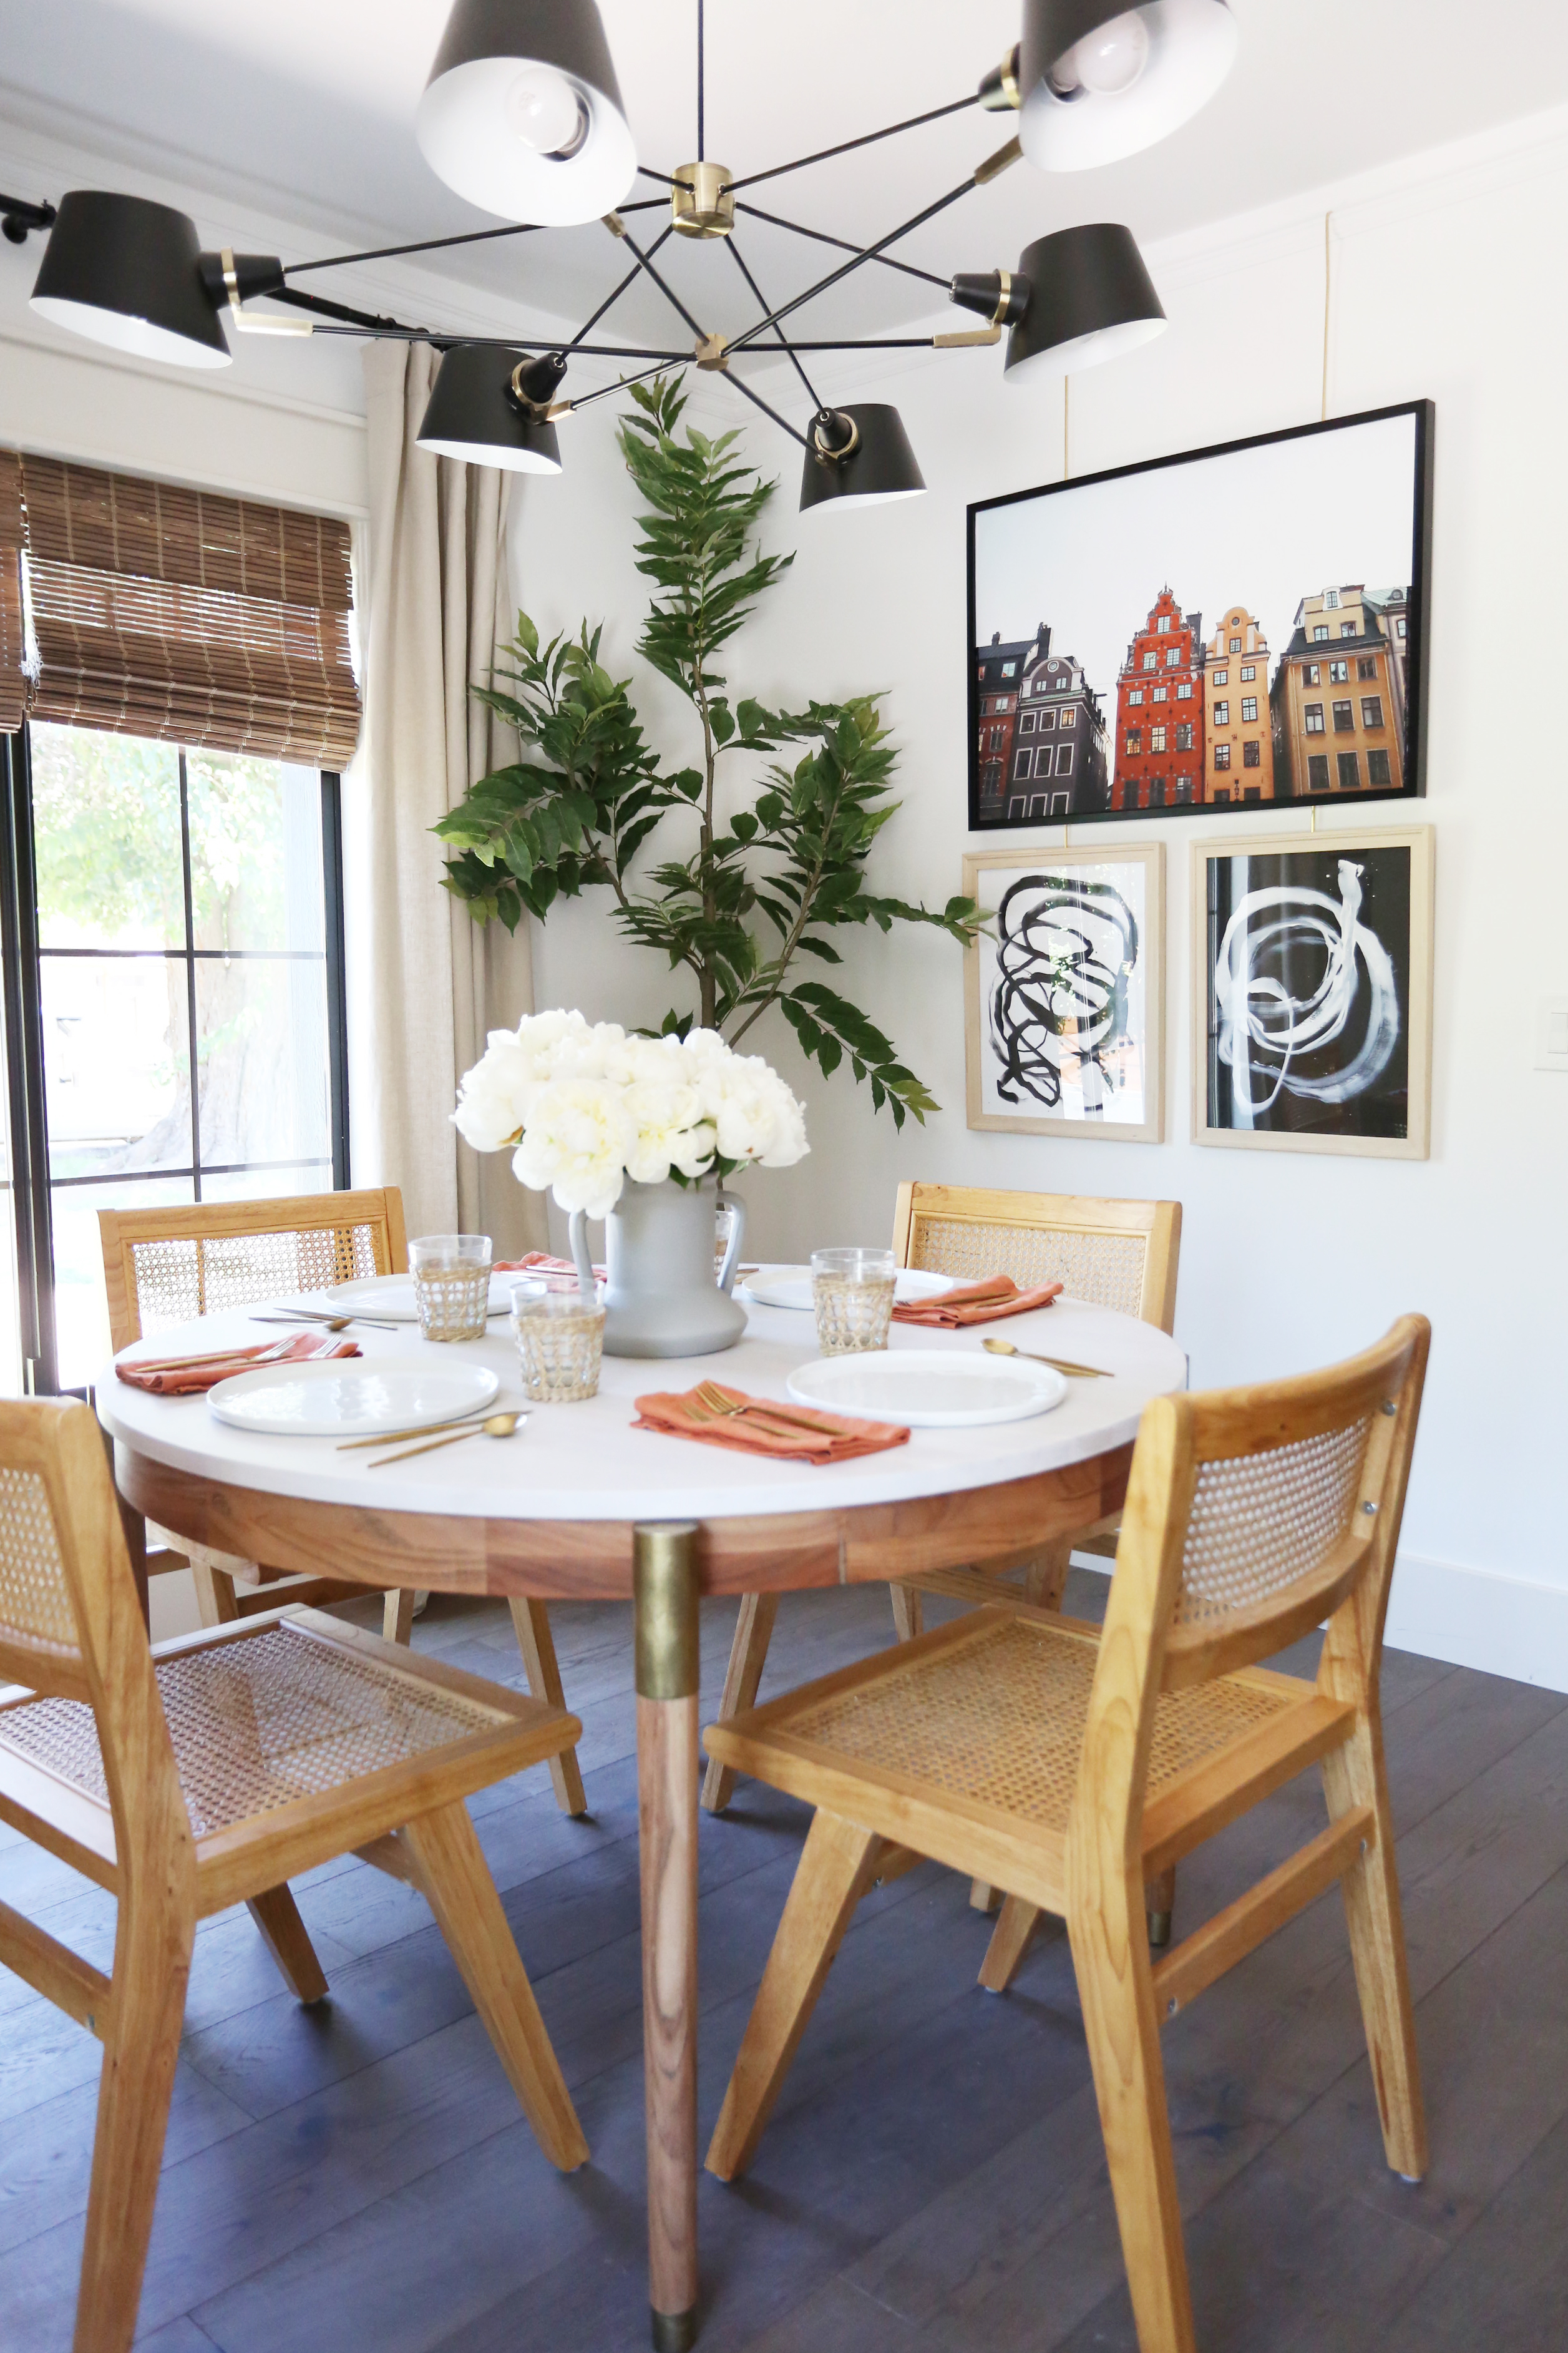
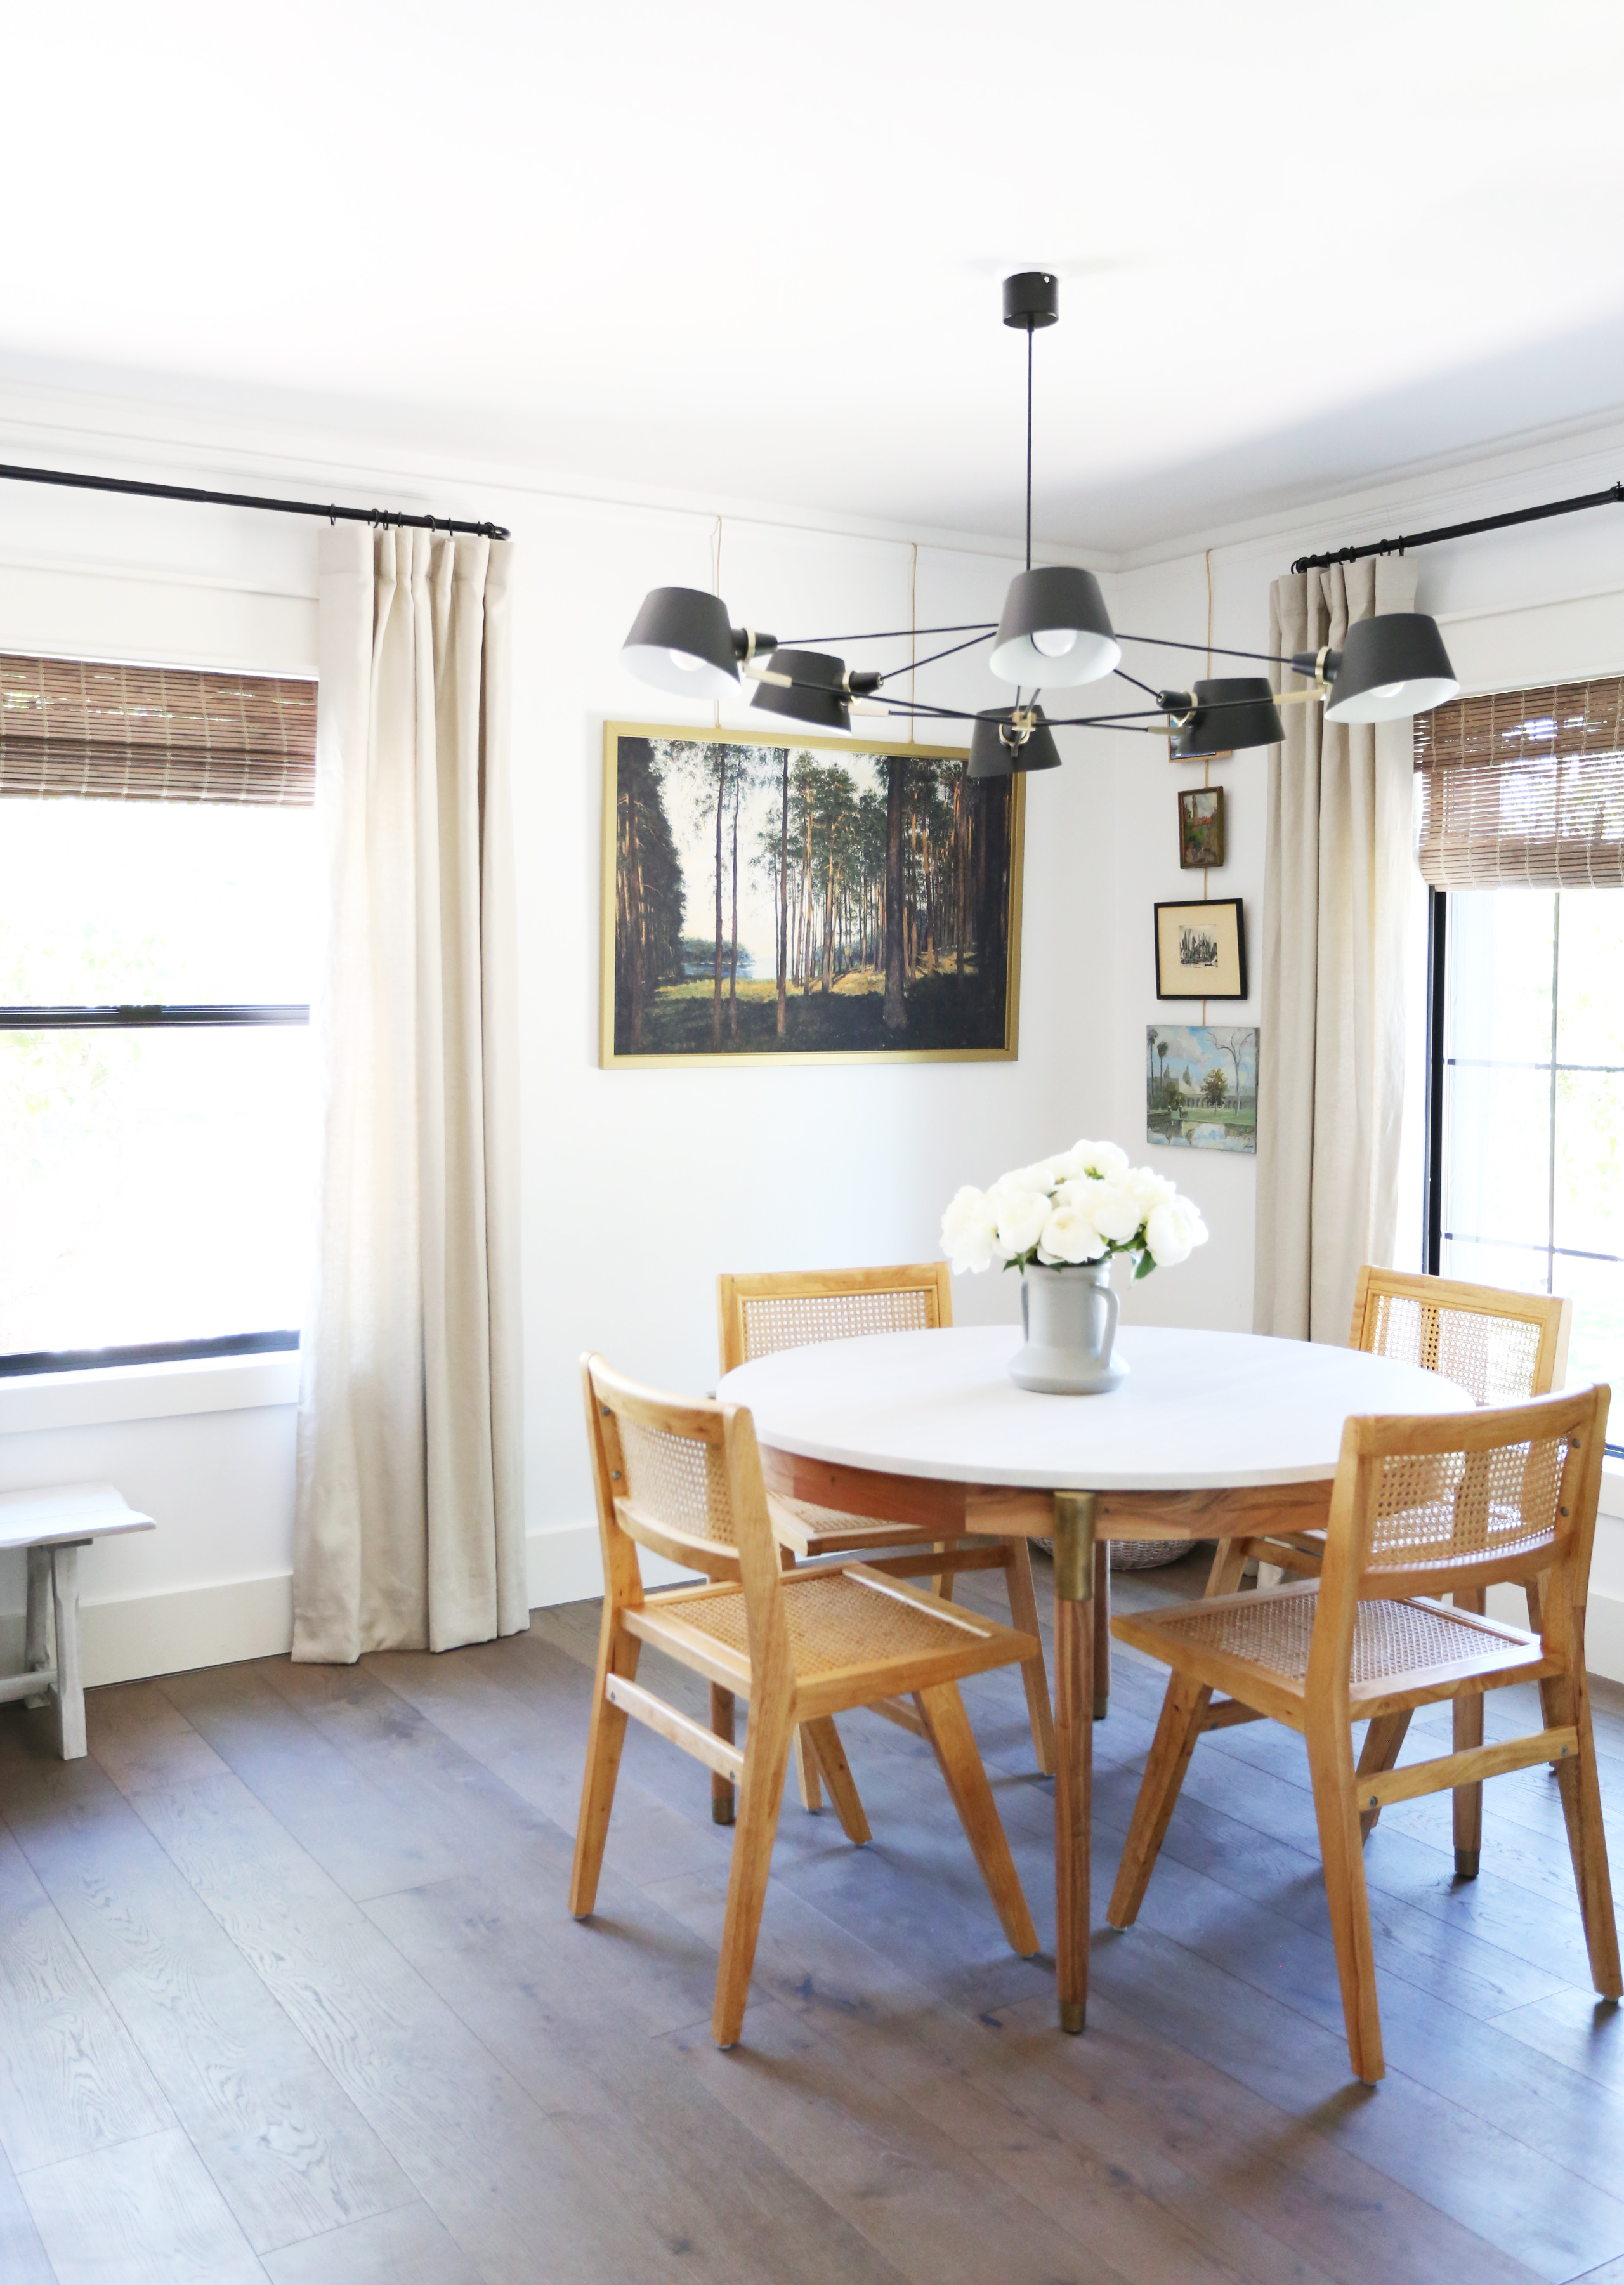
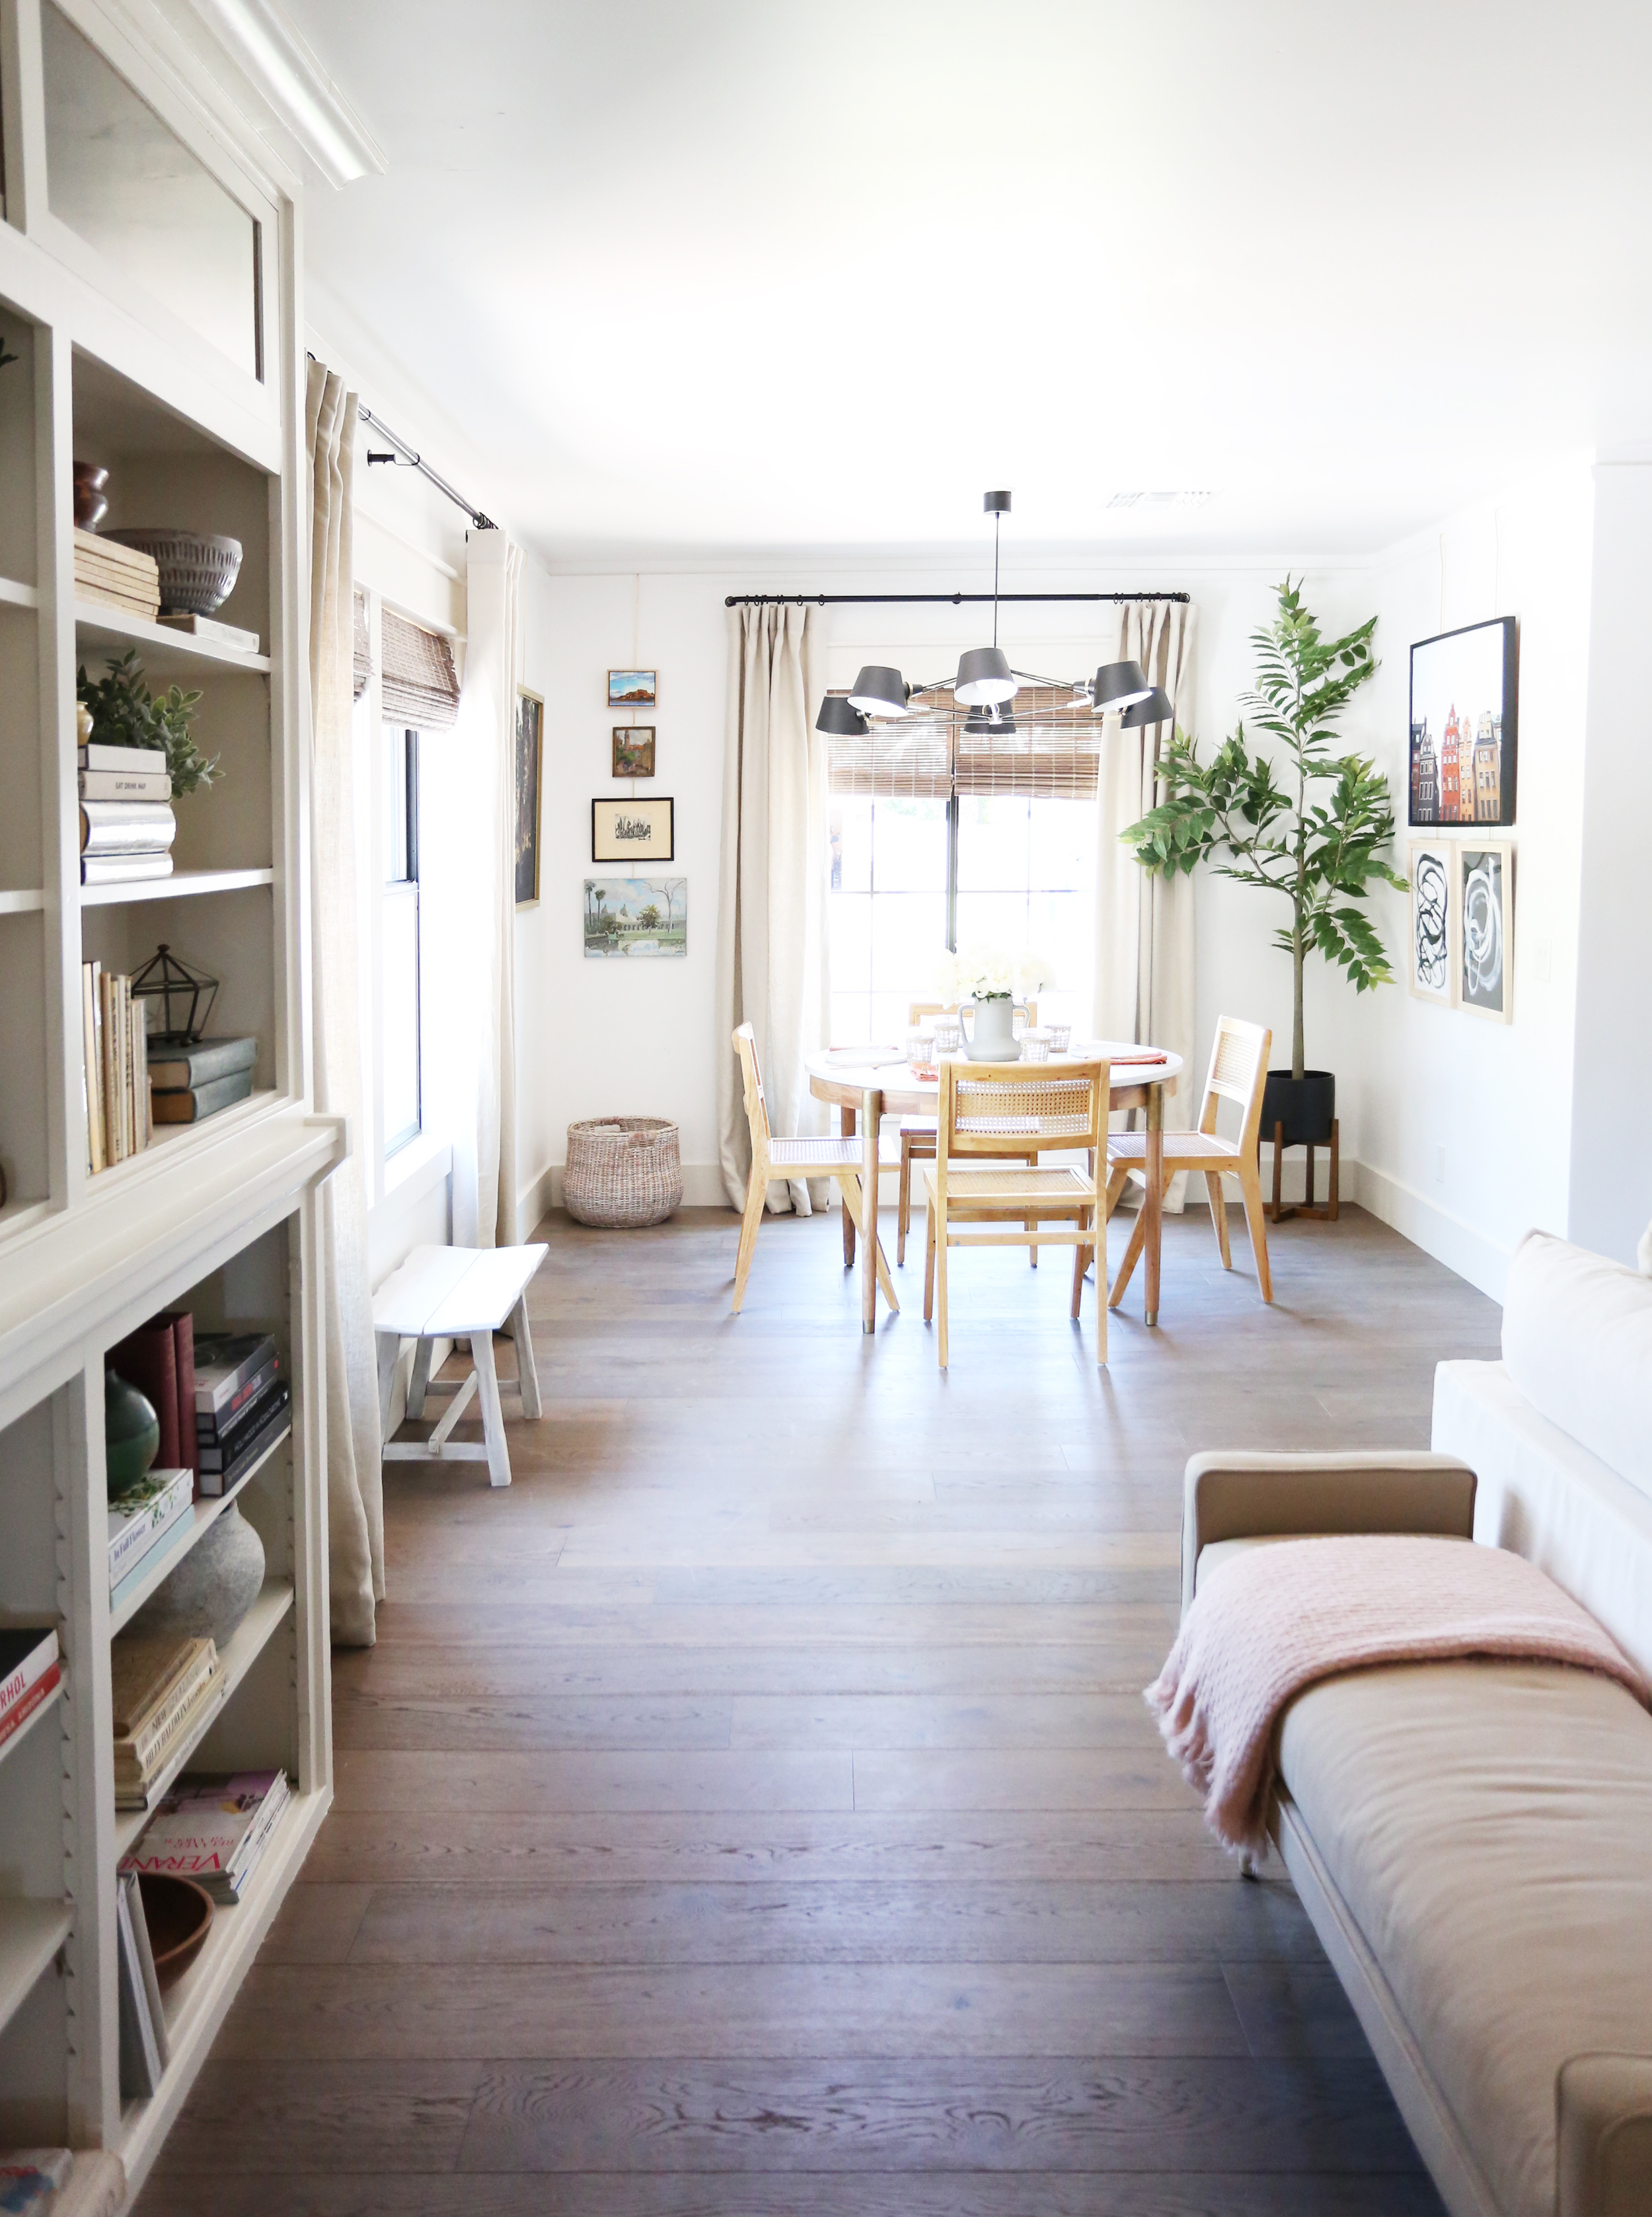
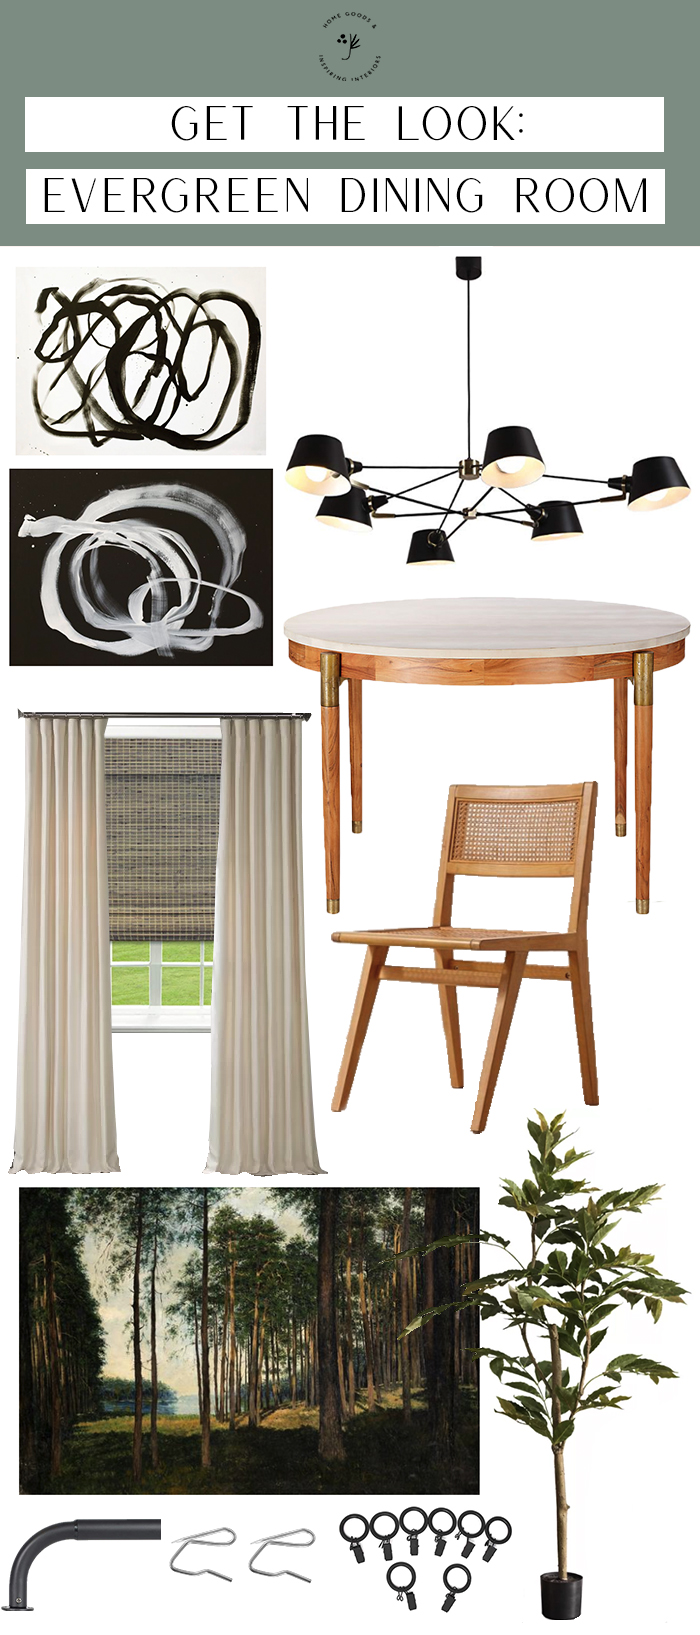
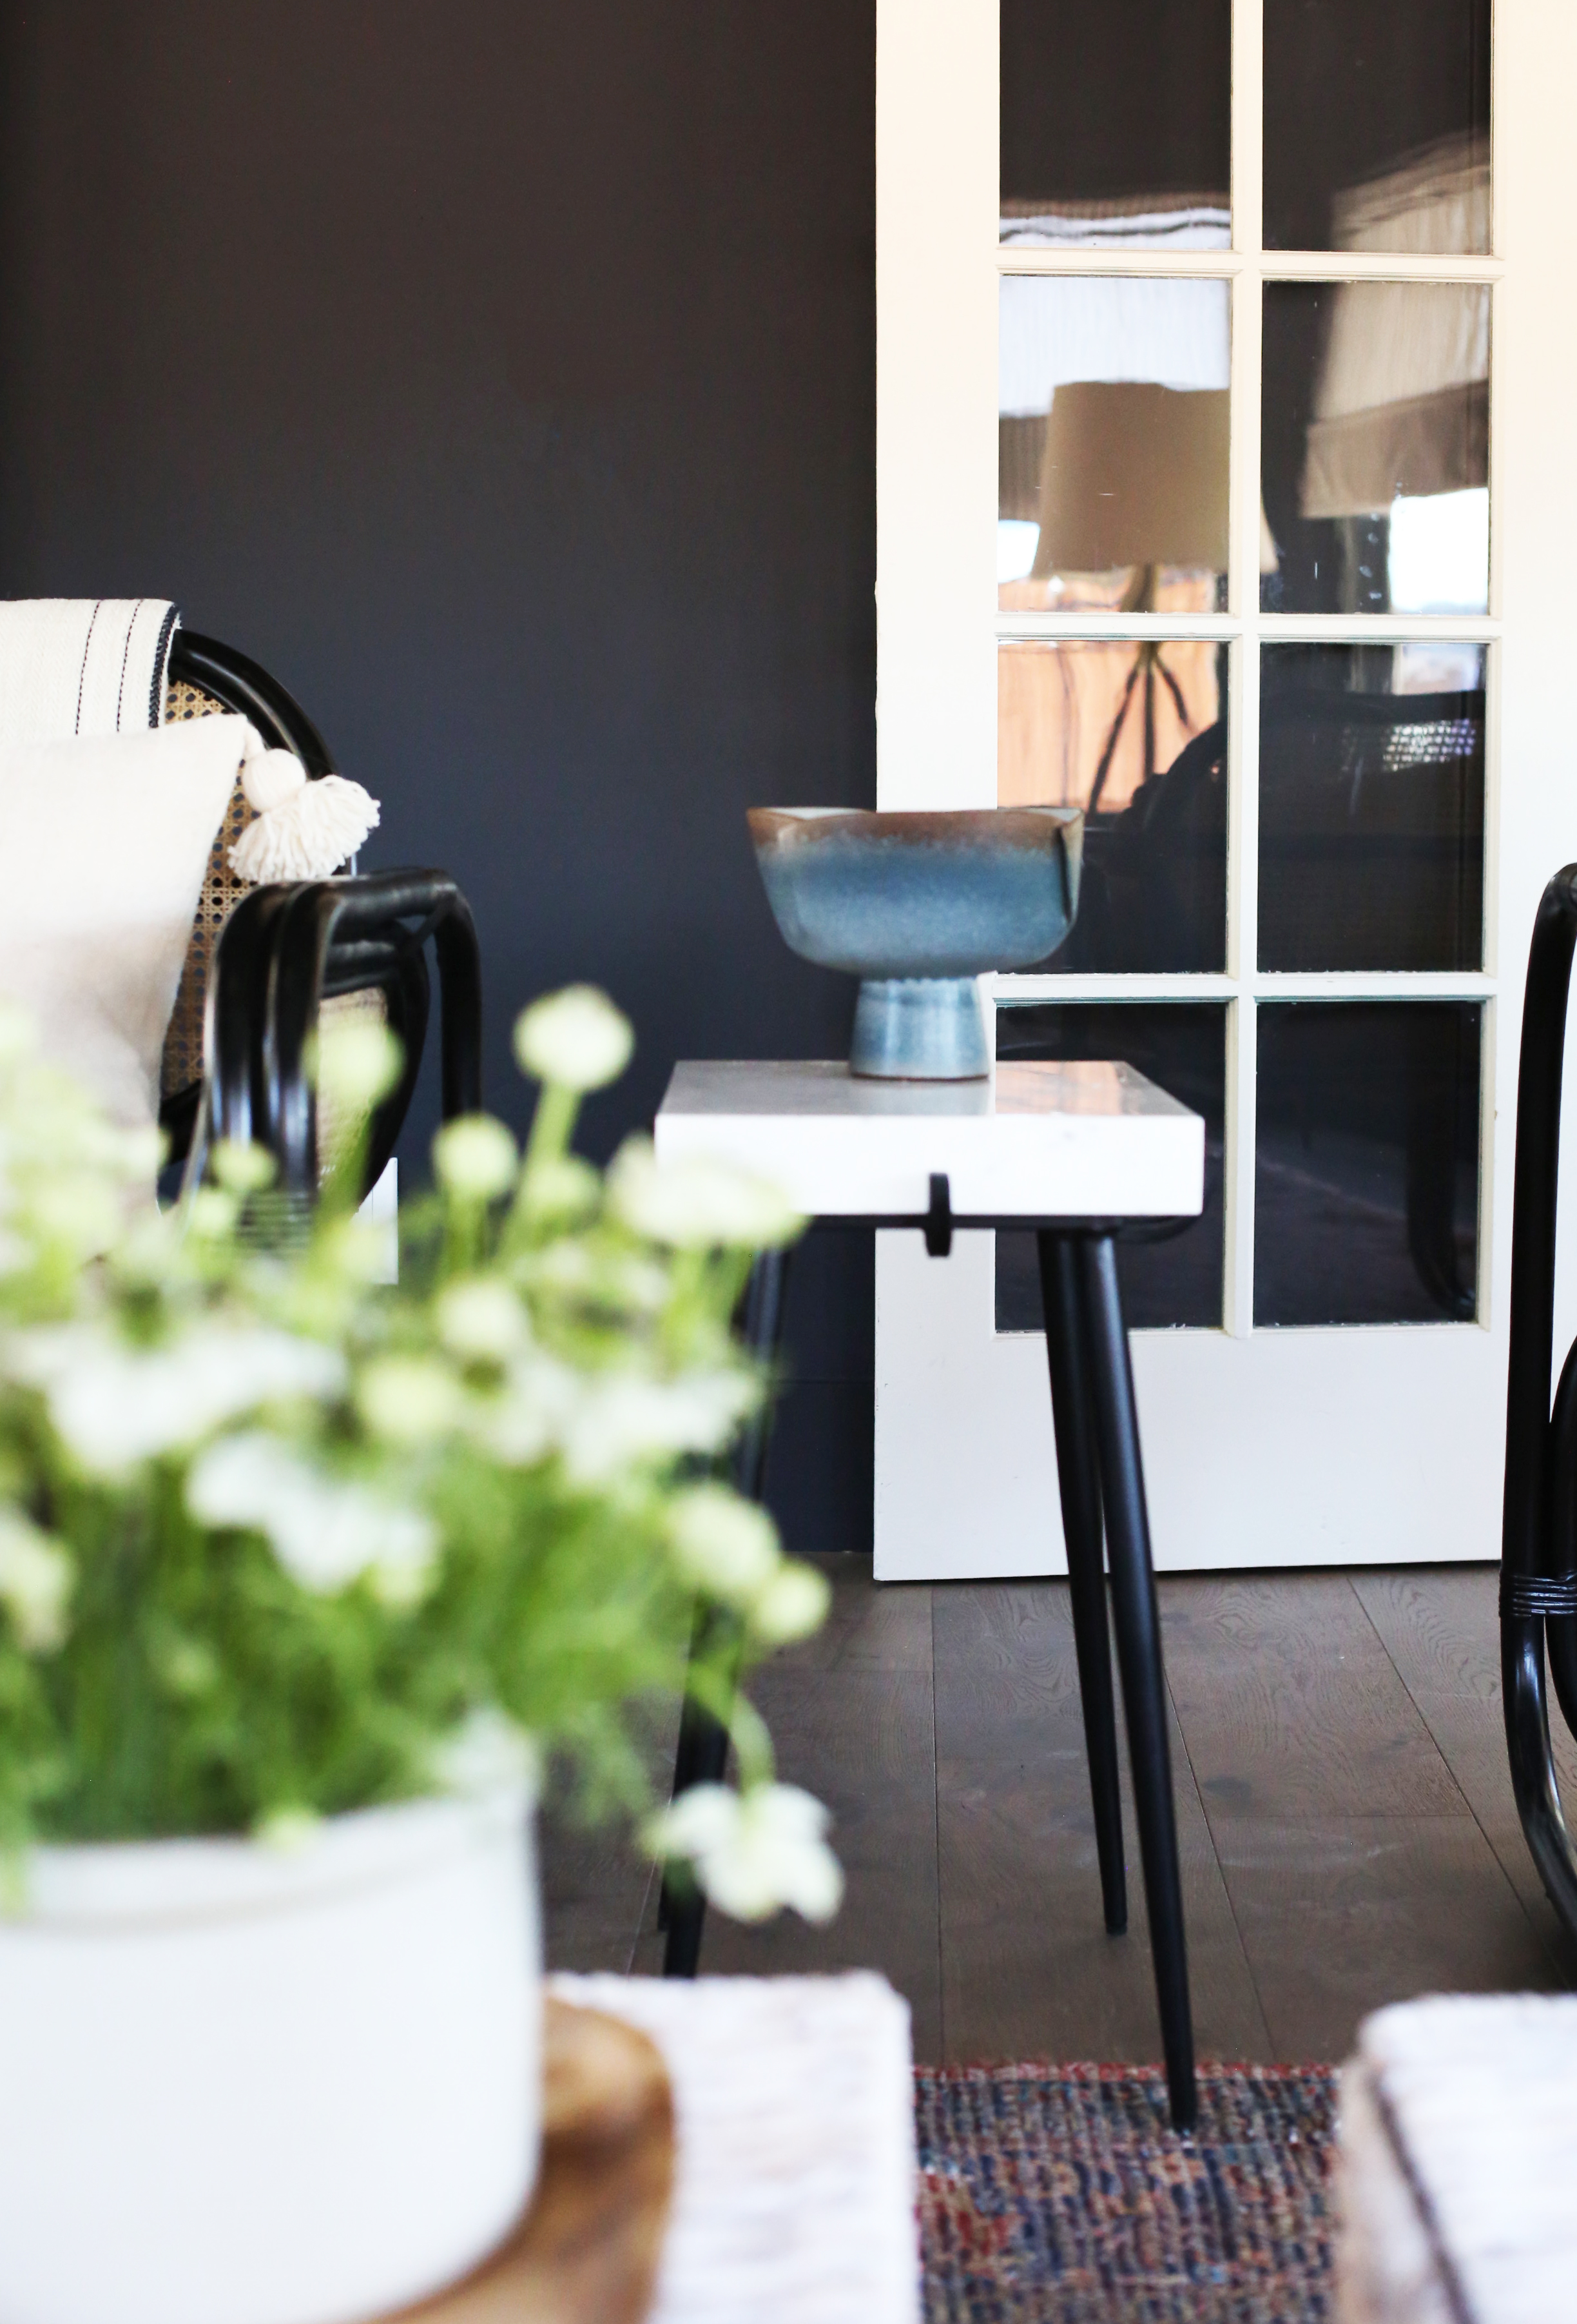
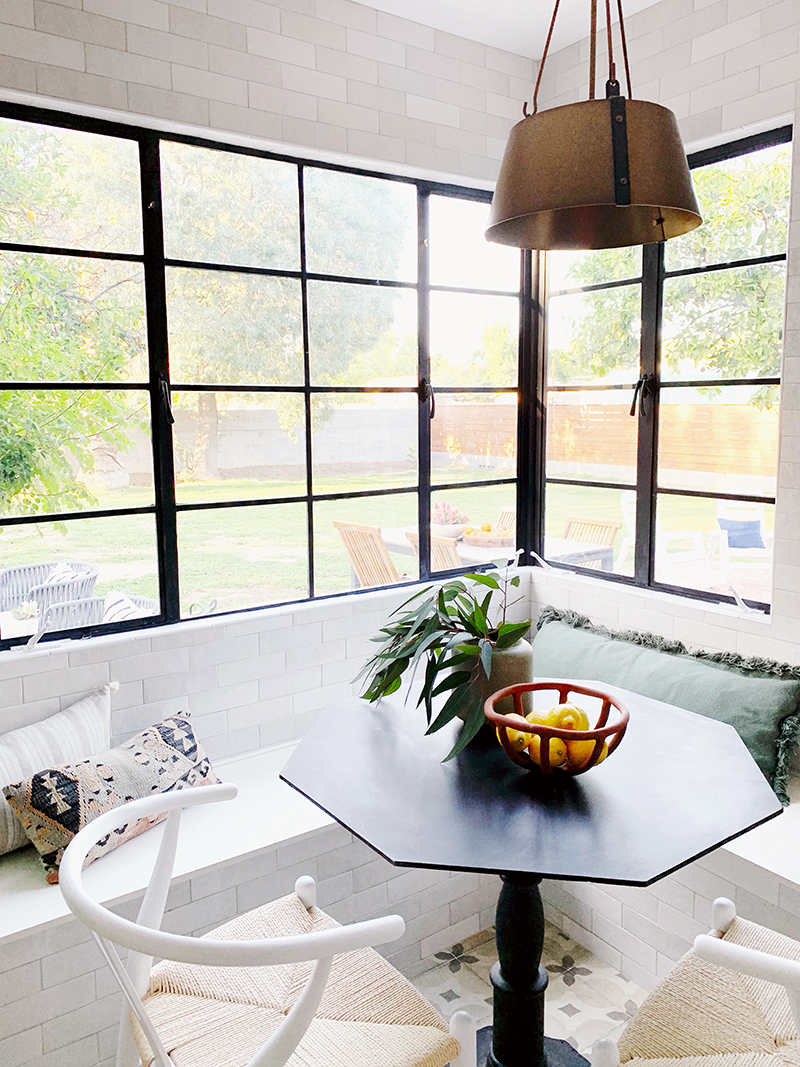
Just off the living room in the Evergreen house, we created a little dining nook that was the perfect size for a small dining table! I love having dining spaces that are separate from the kitchen but connected to the living spaces. It creates such a casual, livable flow that I really like! chandelier(similar) // …
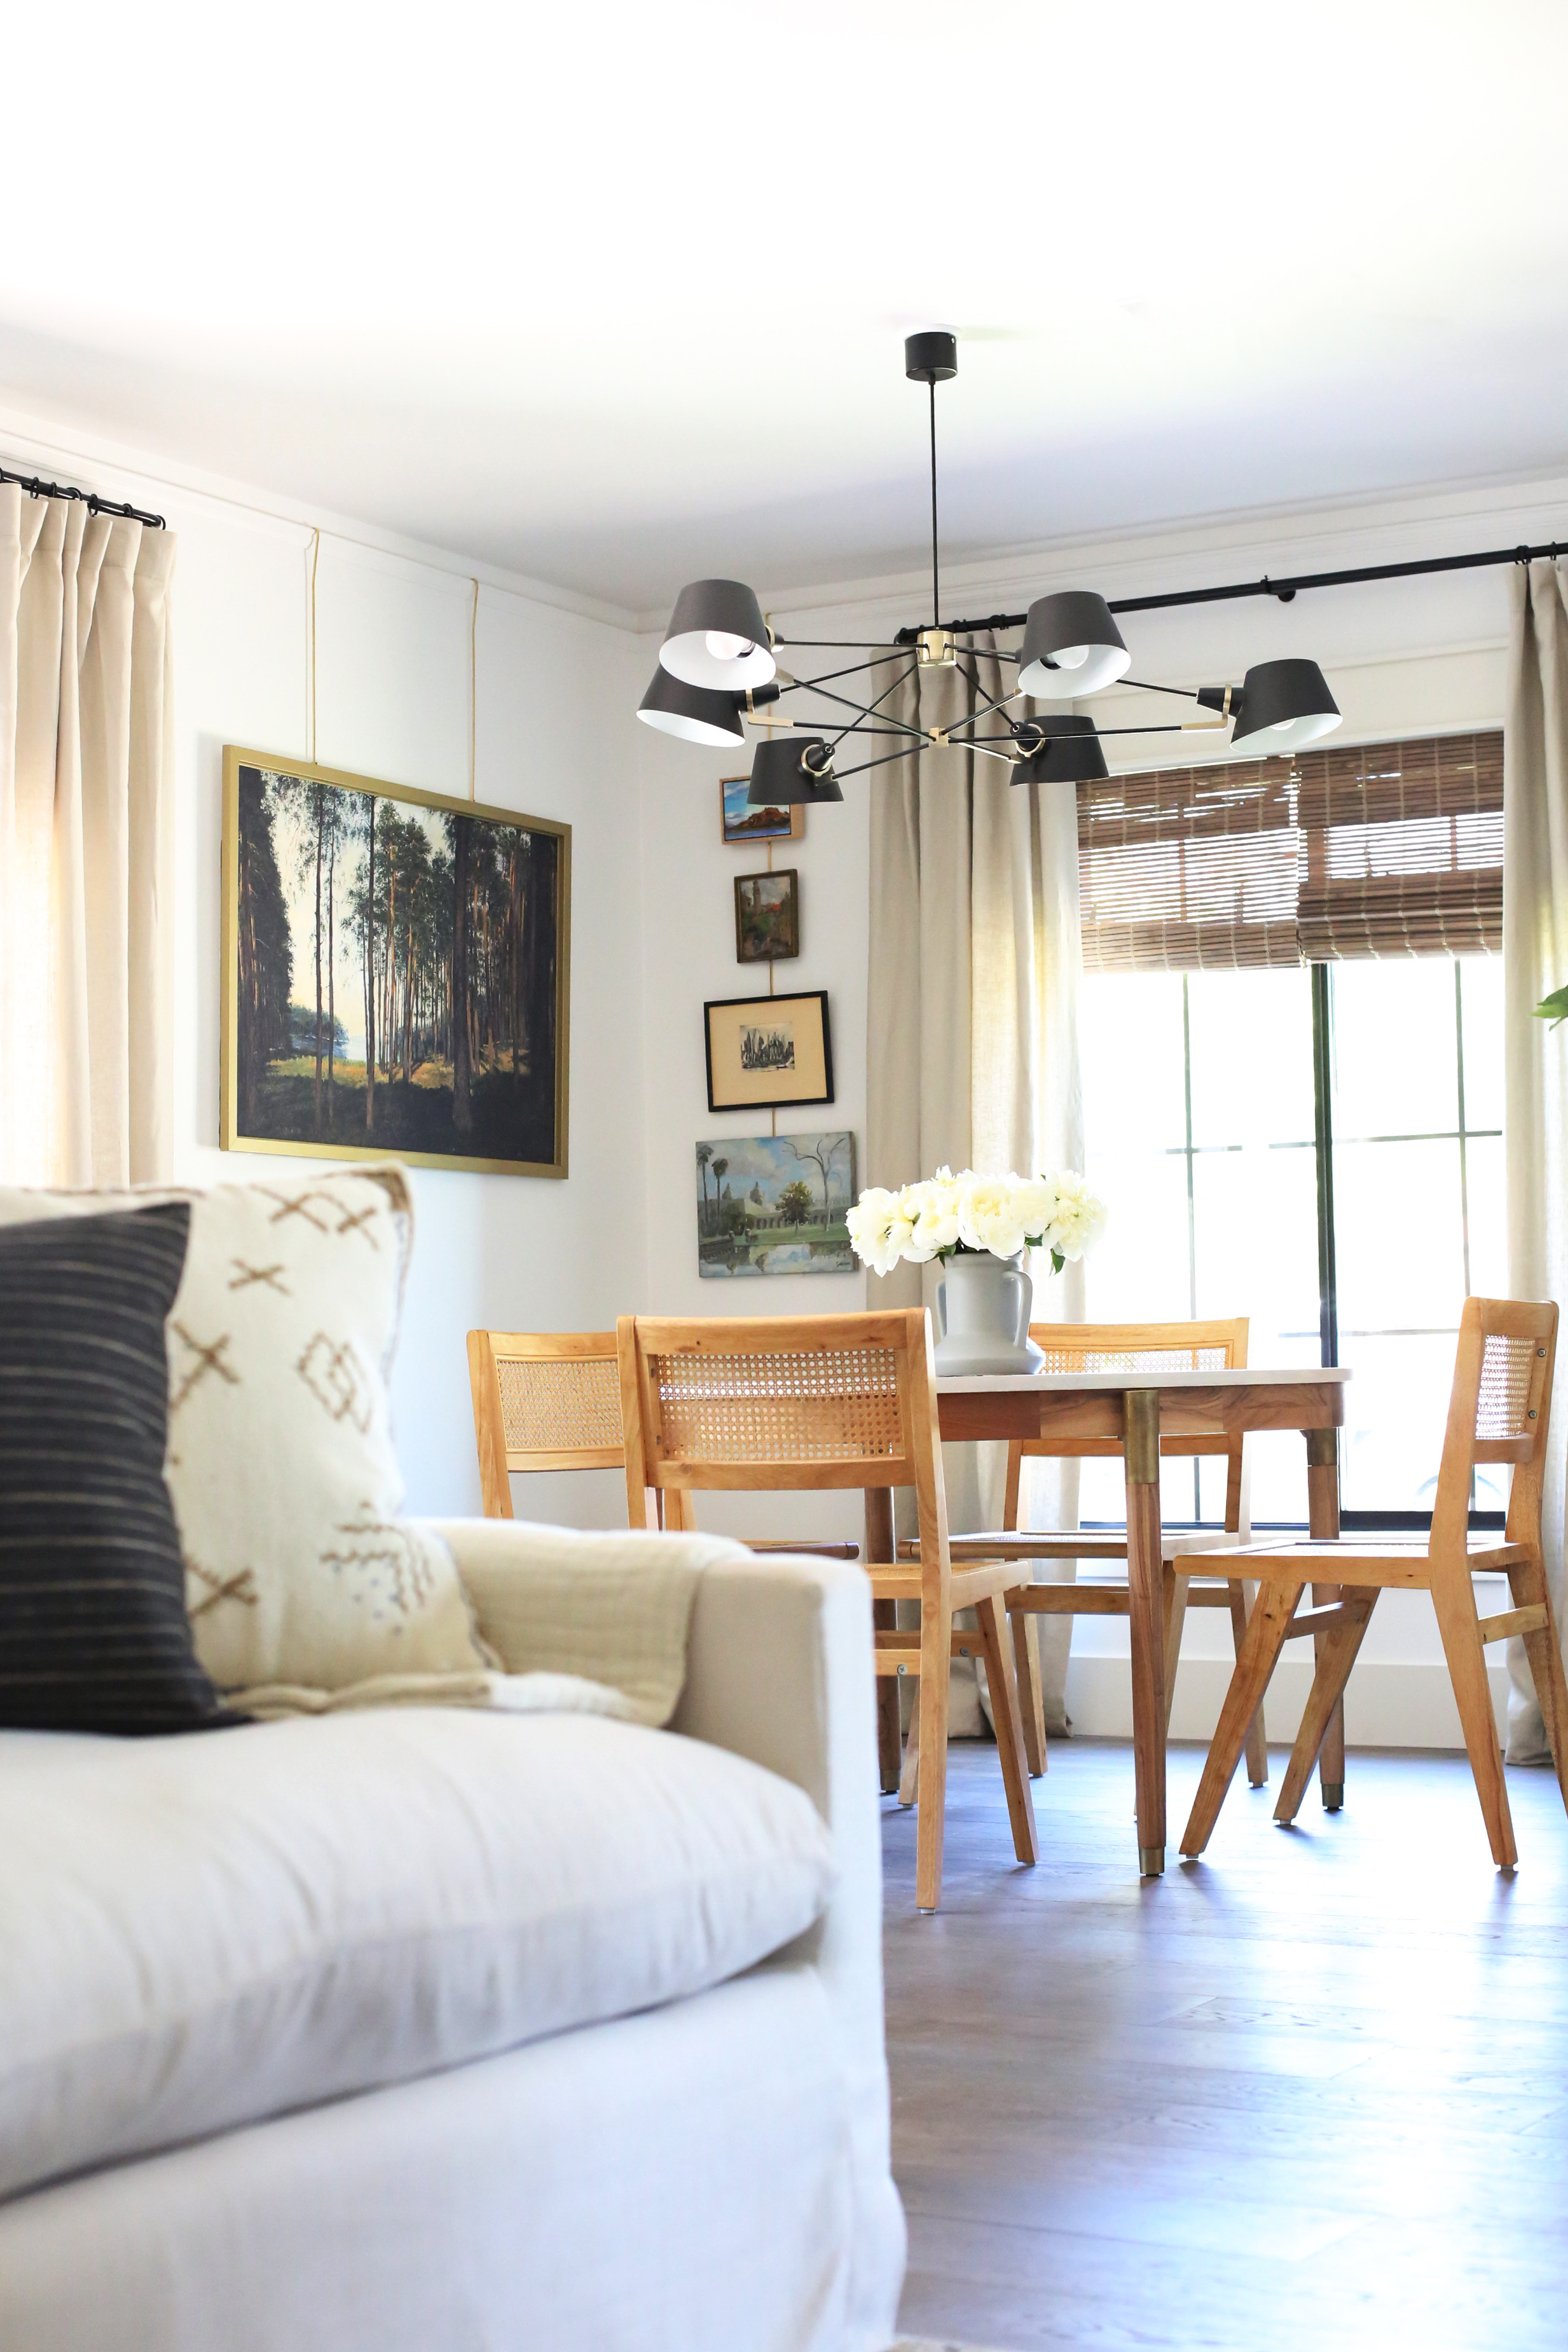
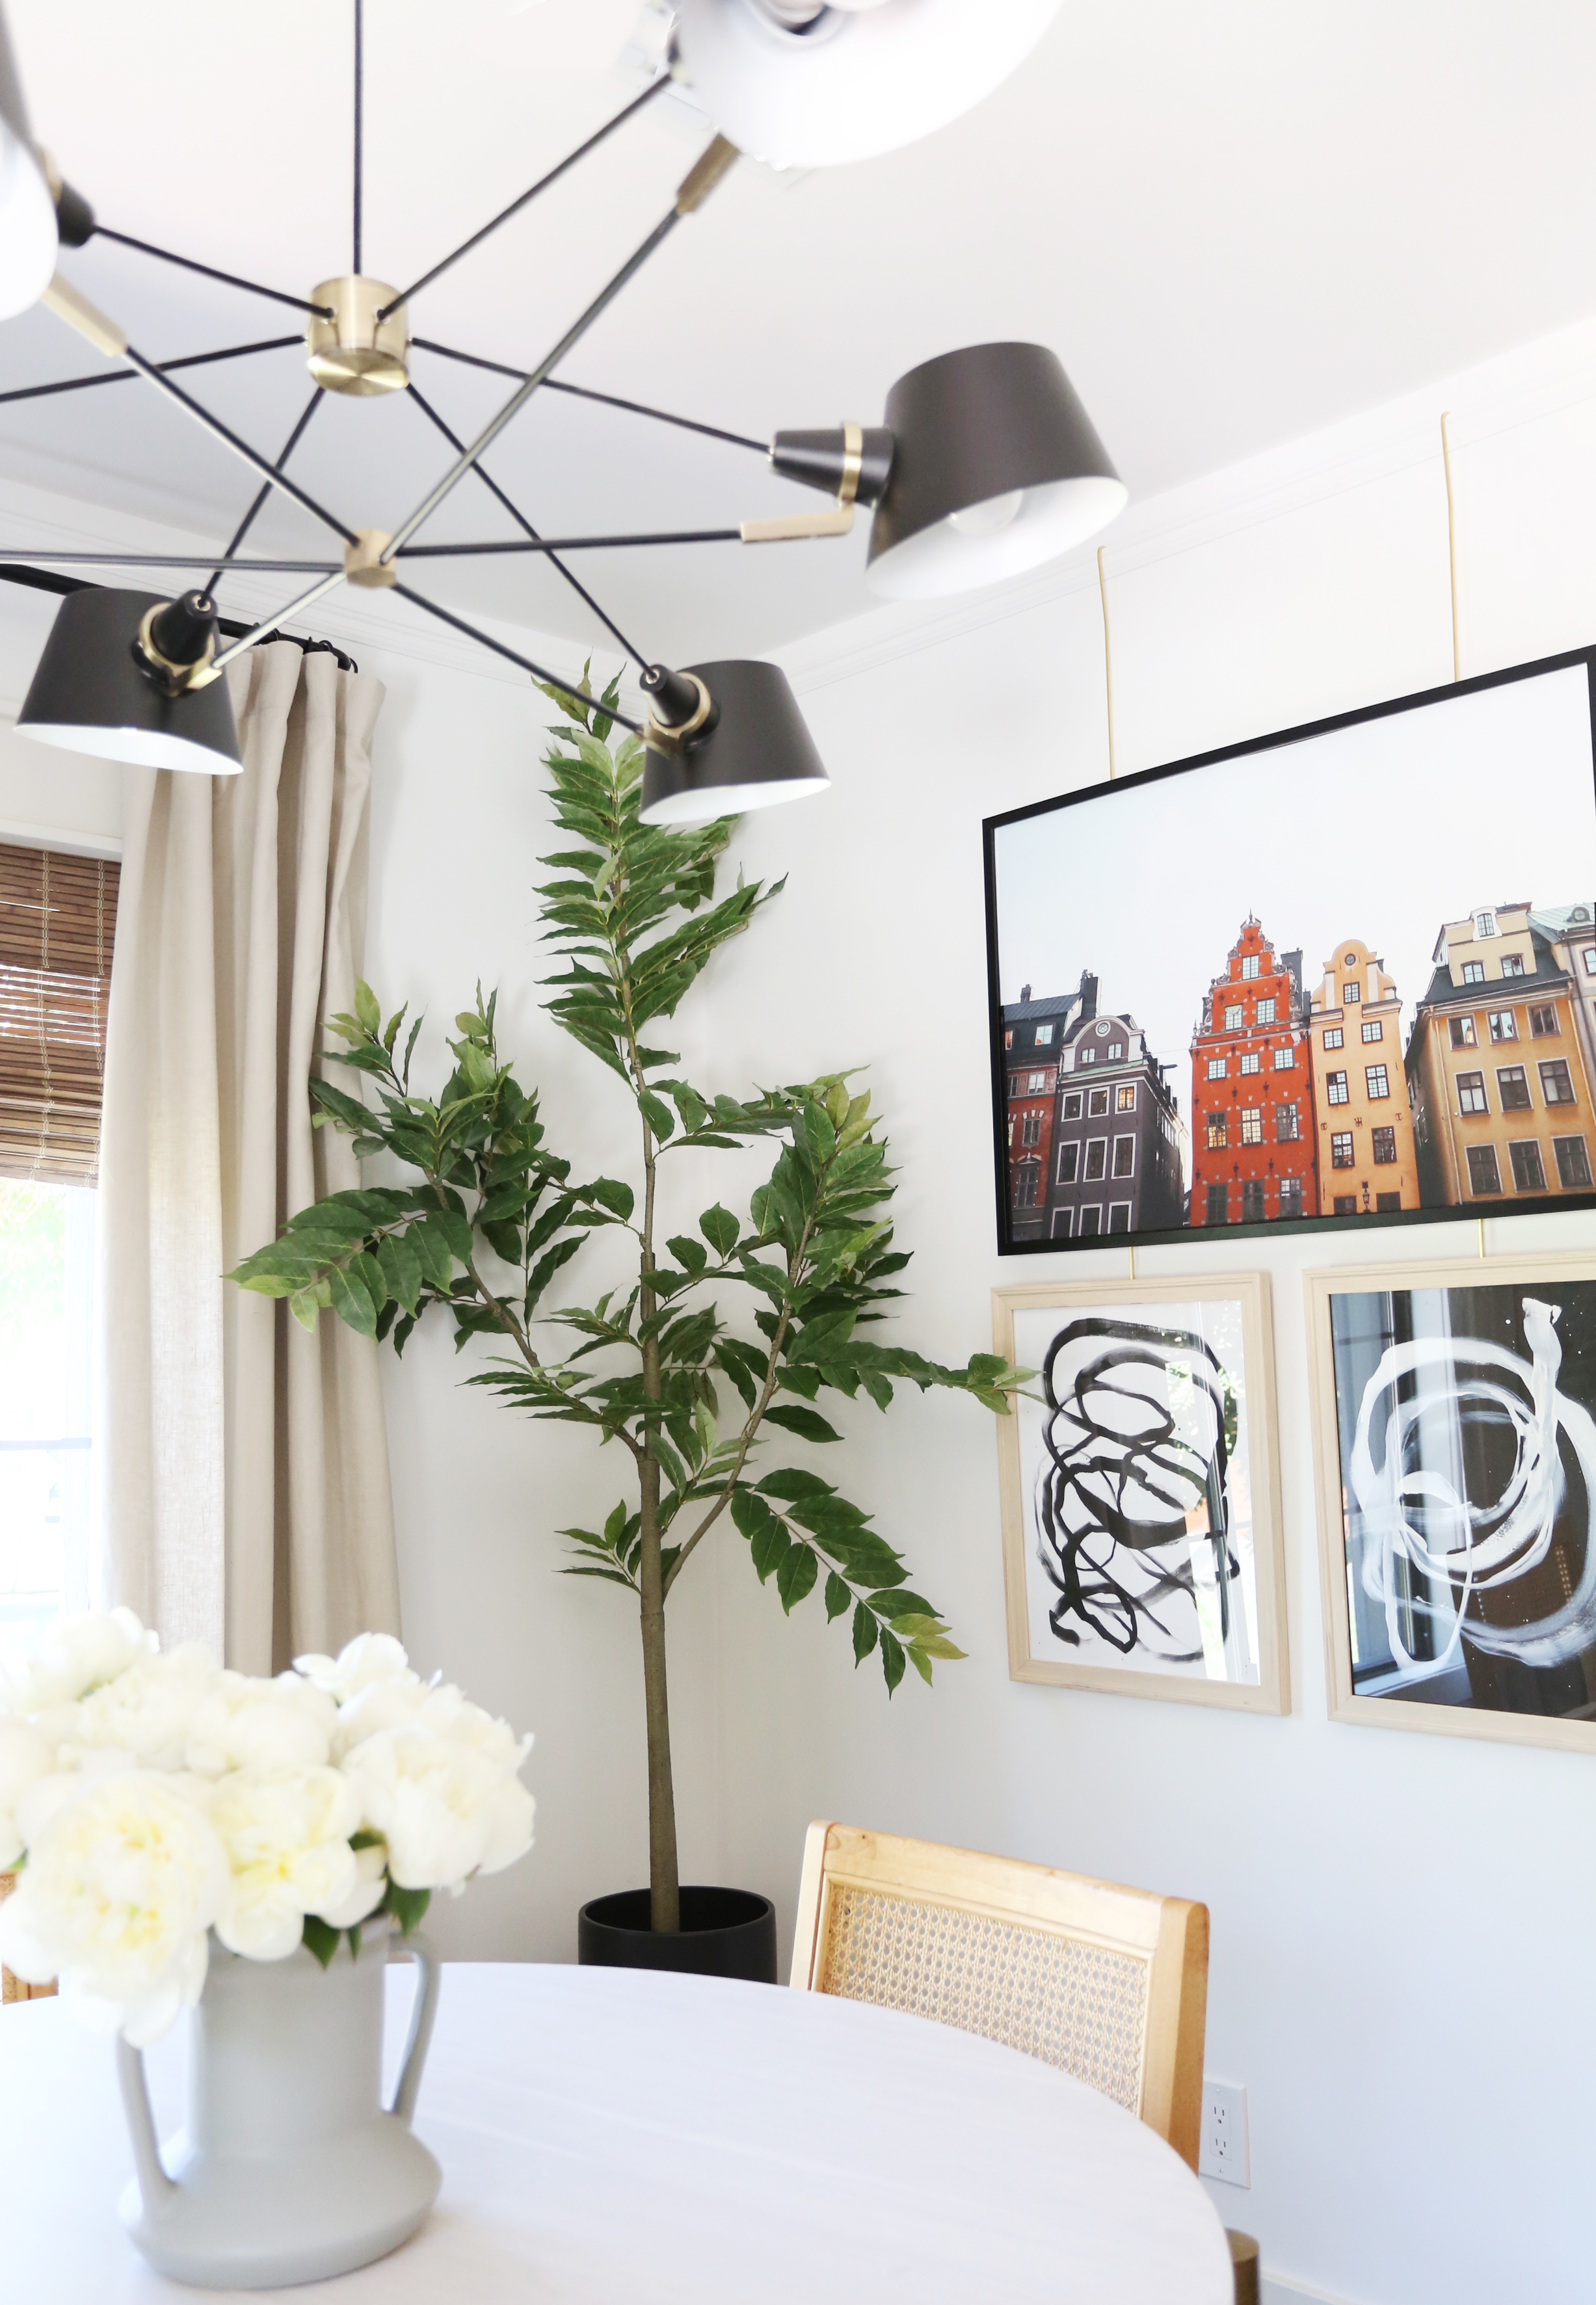
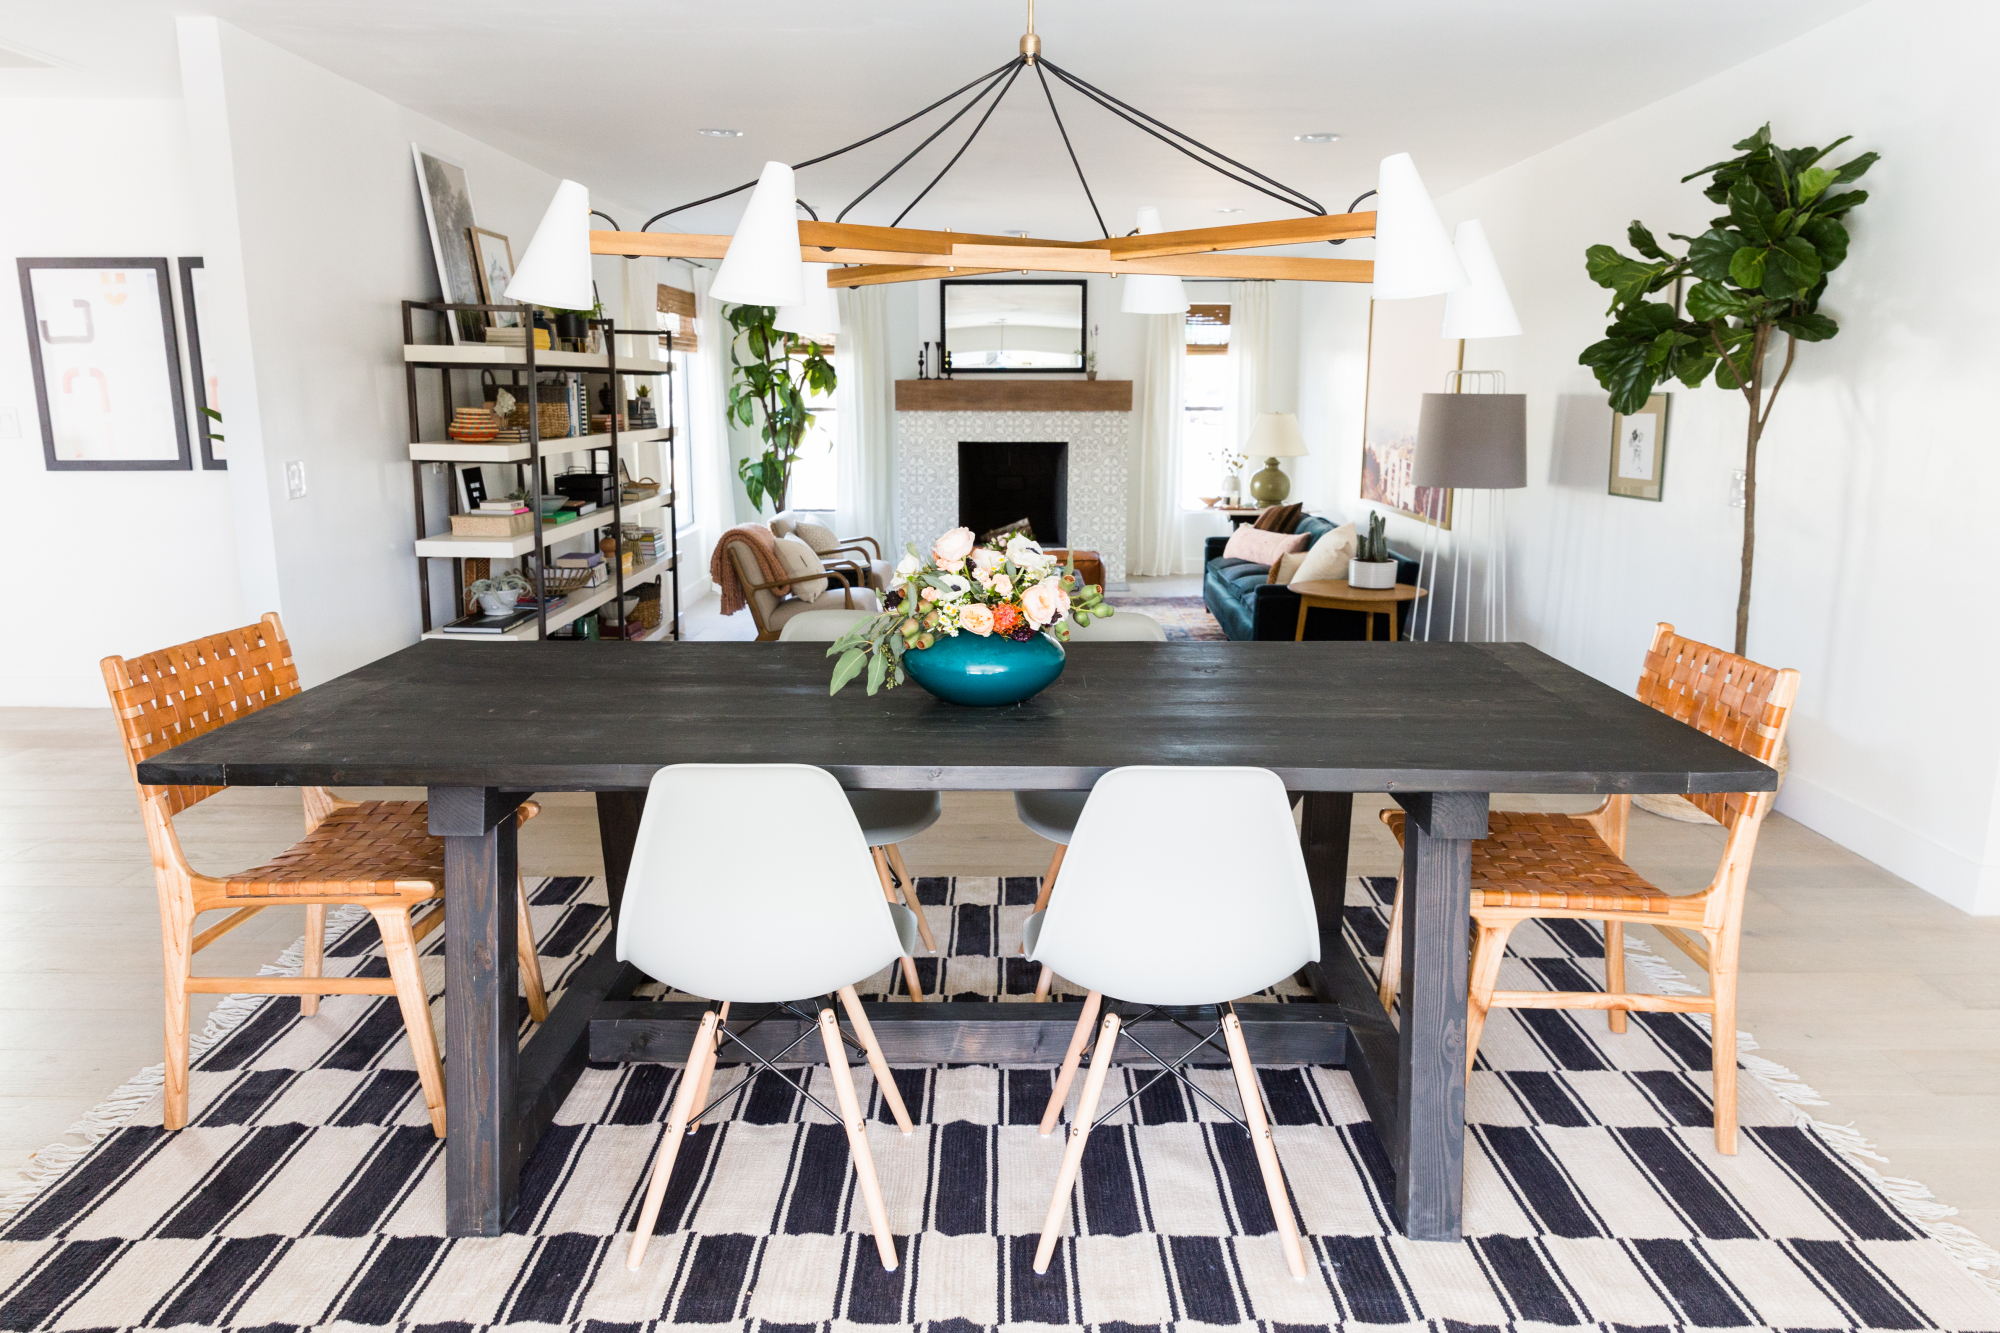
Just off the living room in the Evergreen house, we created a little dining nook that was the perfect size for a small dining table! I love having dining spaces that are separate from the kitchen but connected to the living spaces. It creates such a casual, livable flow that I really like!
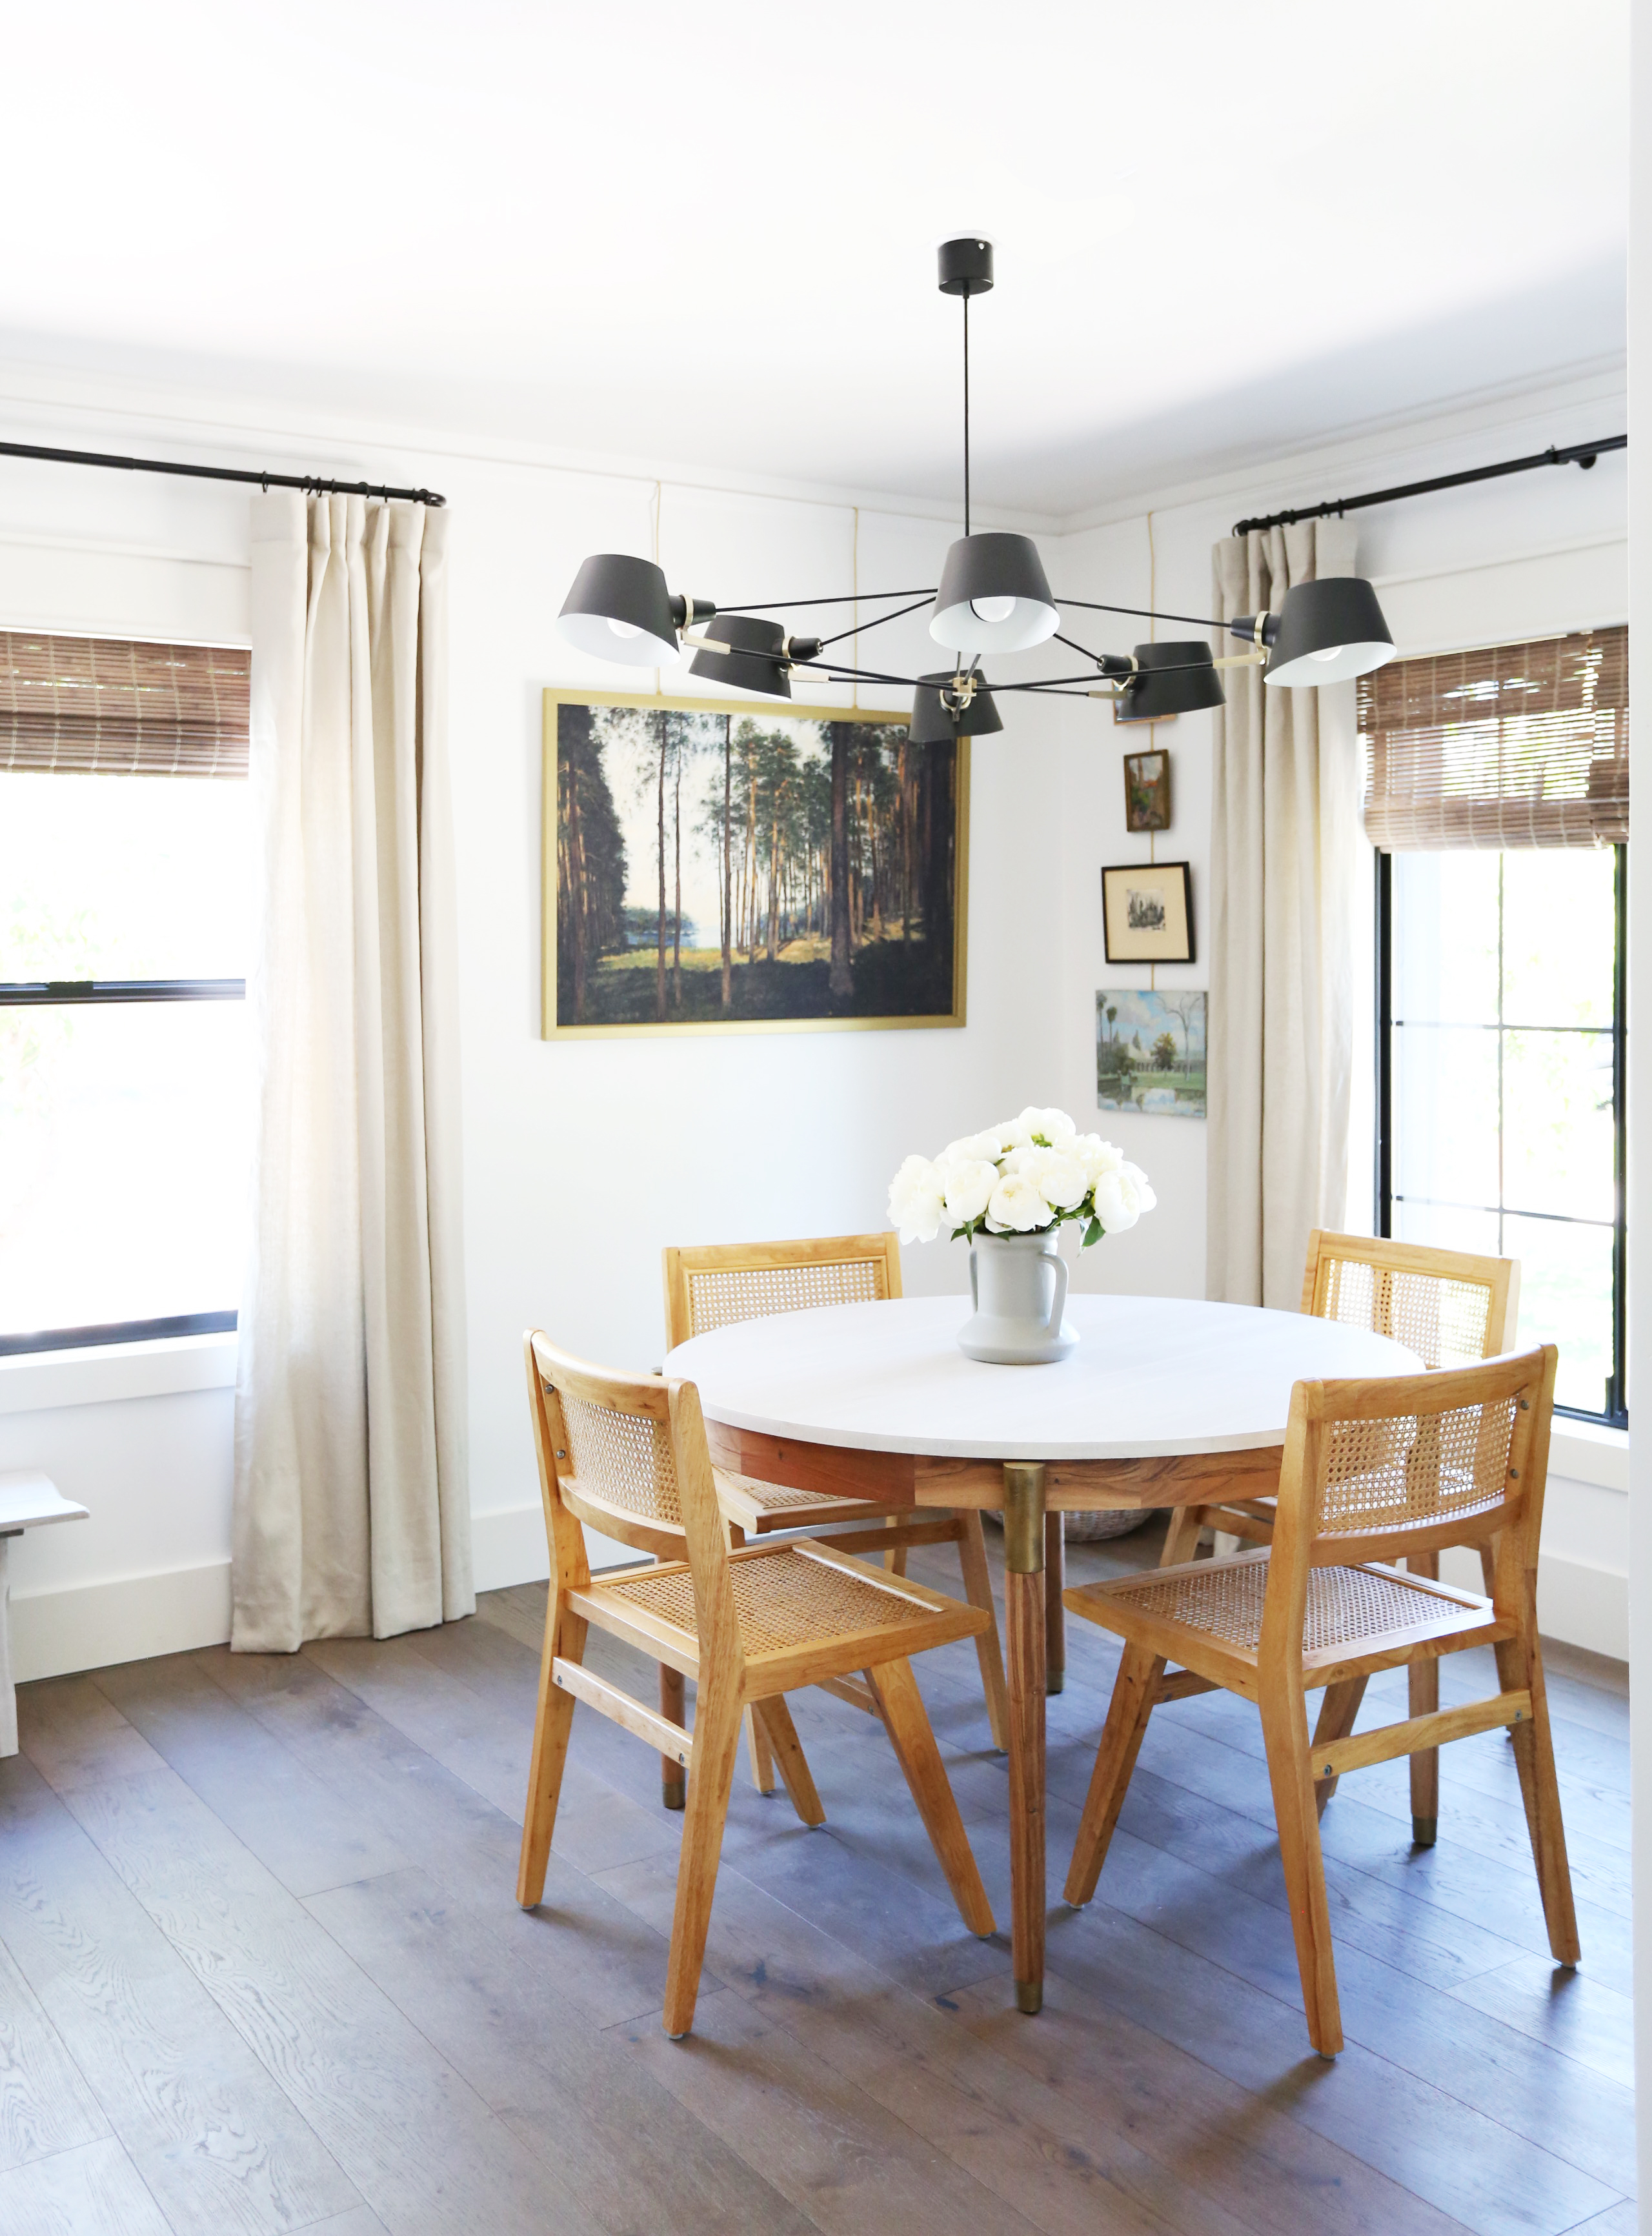
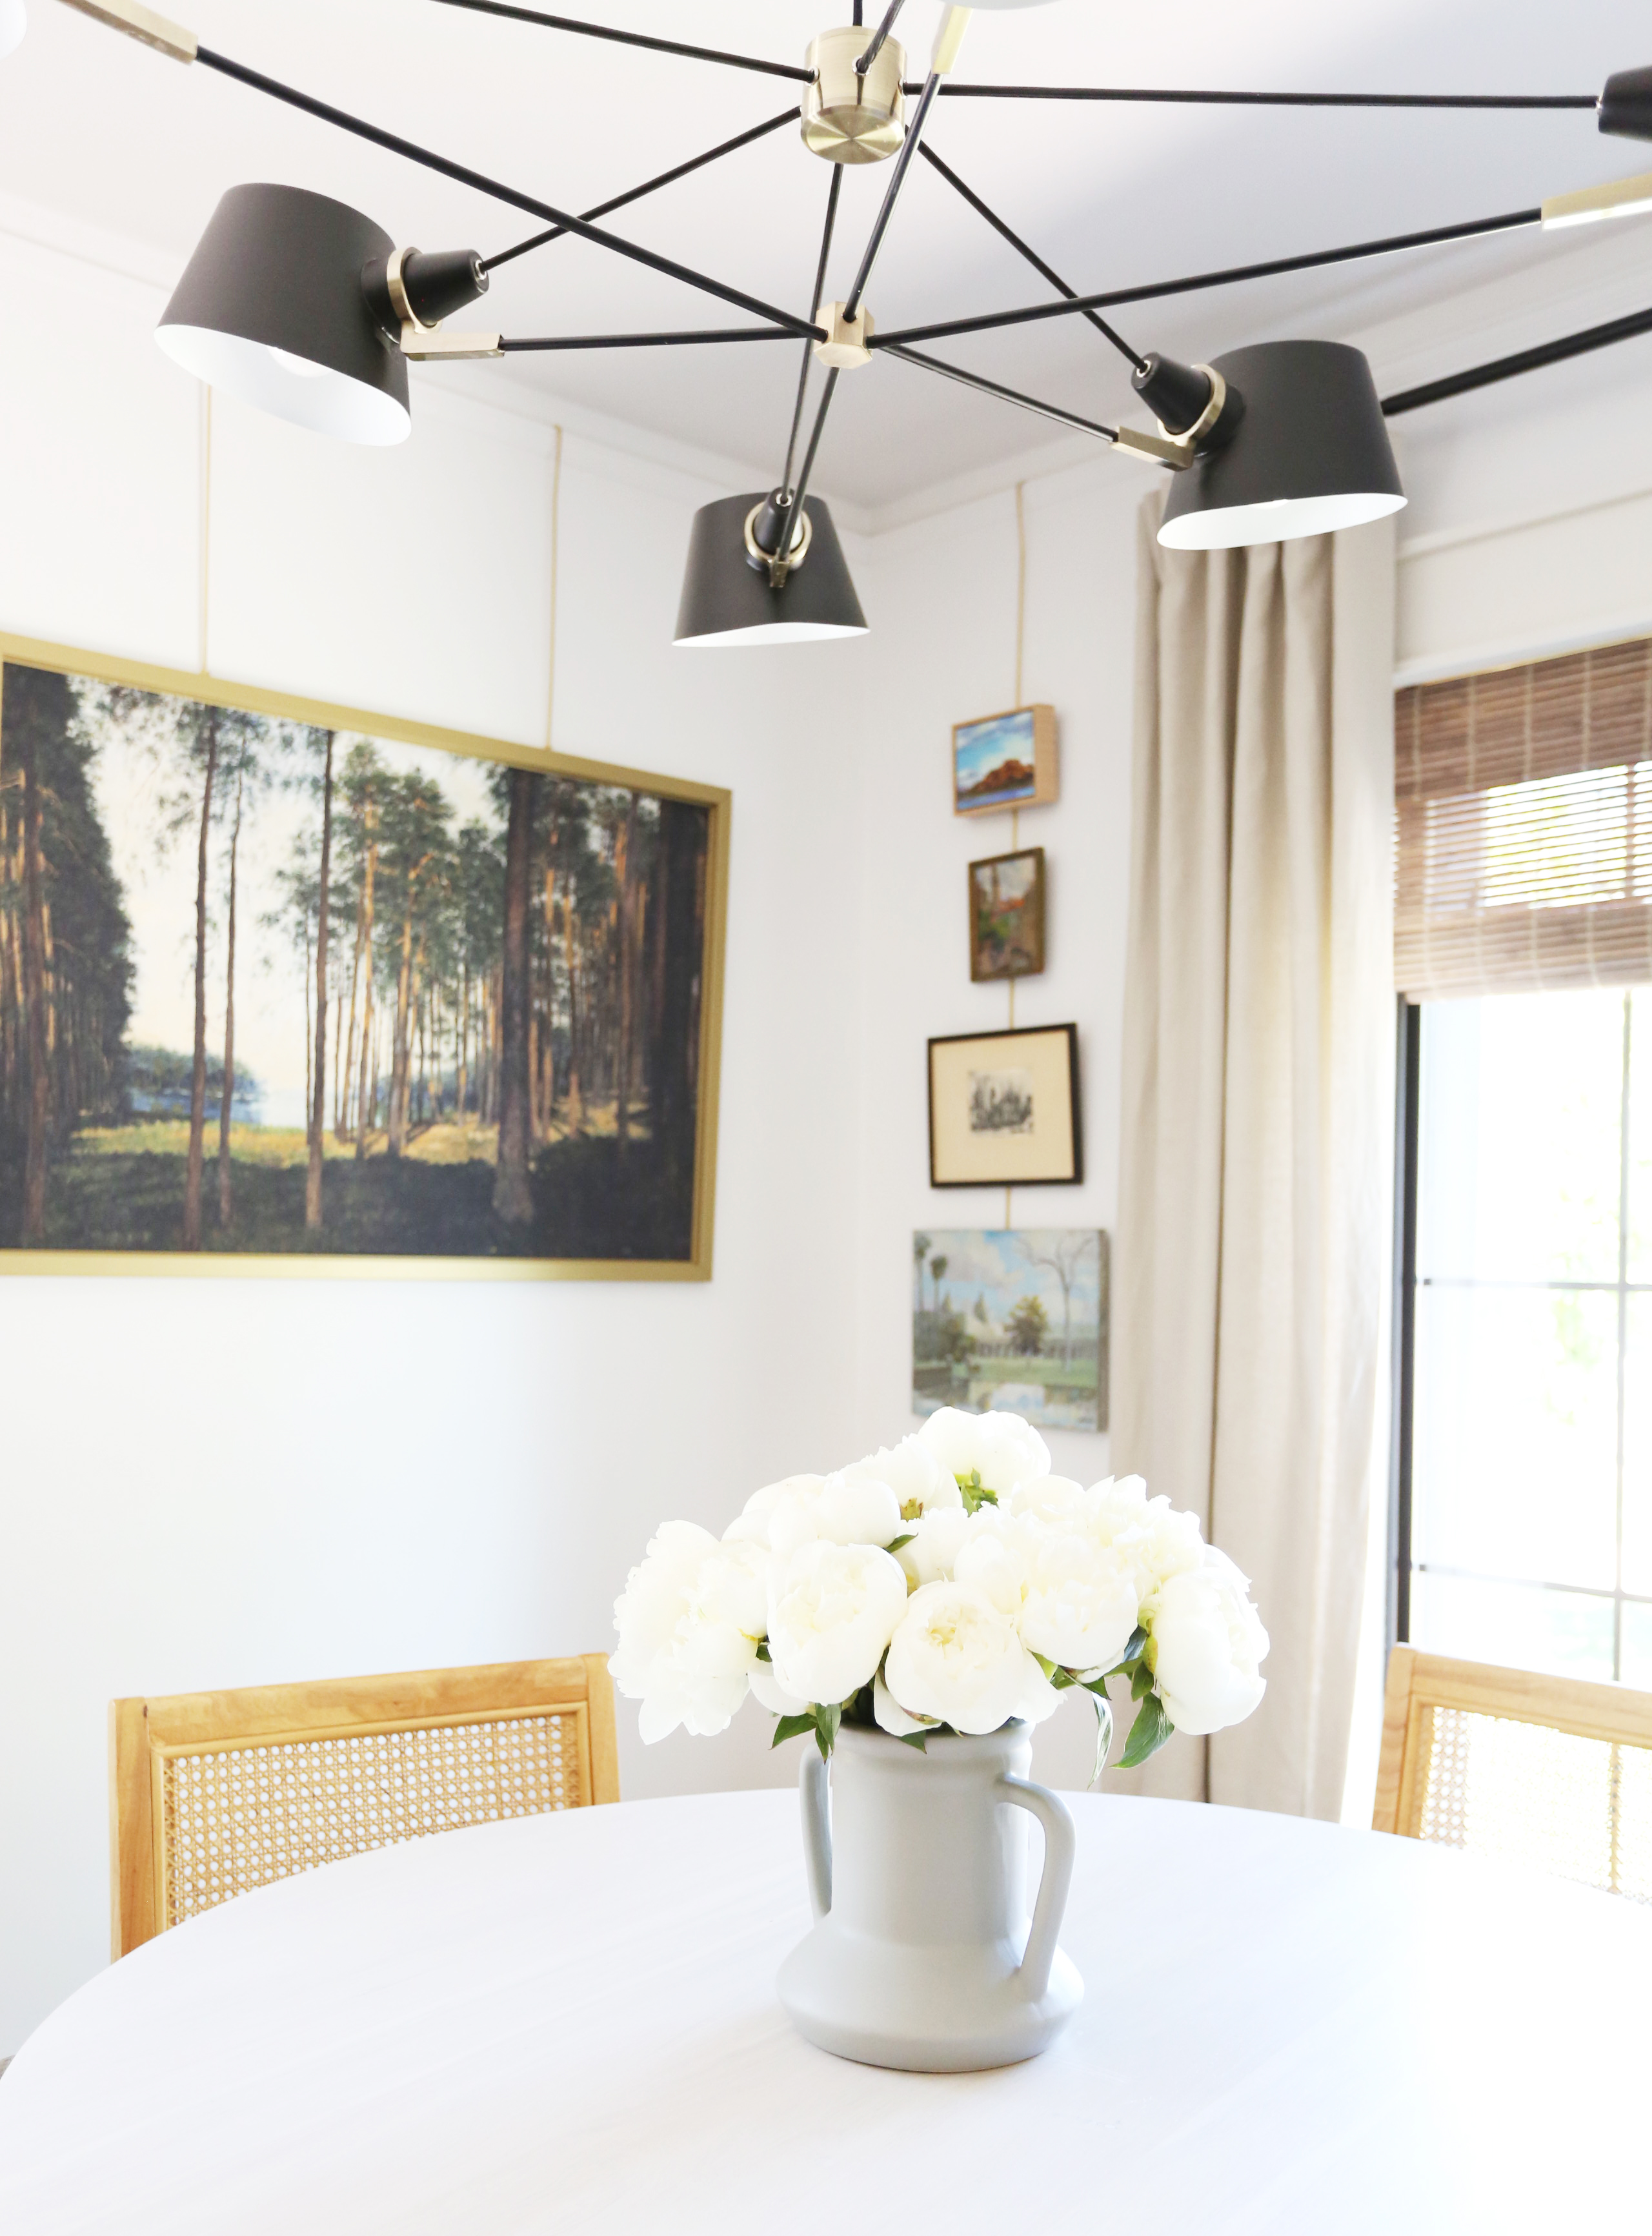
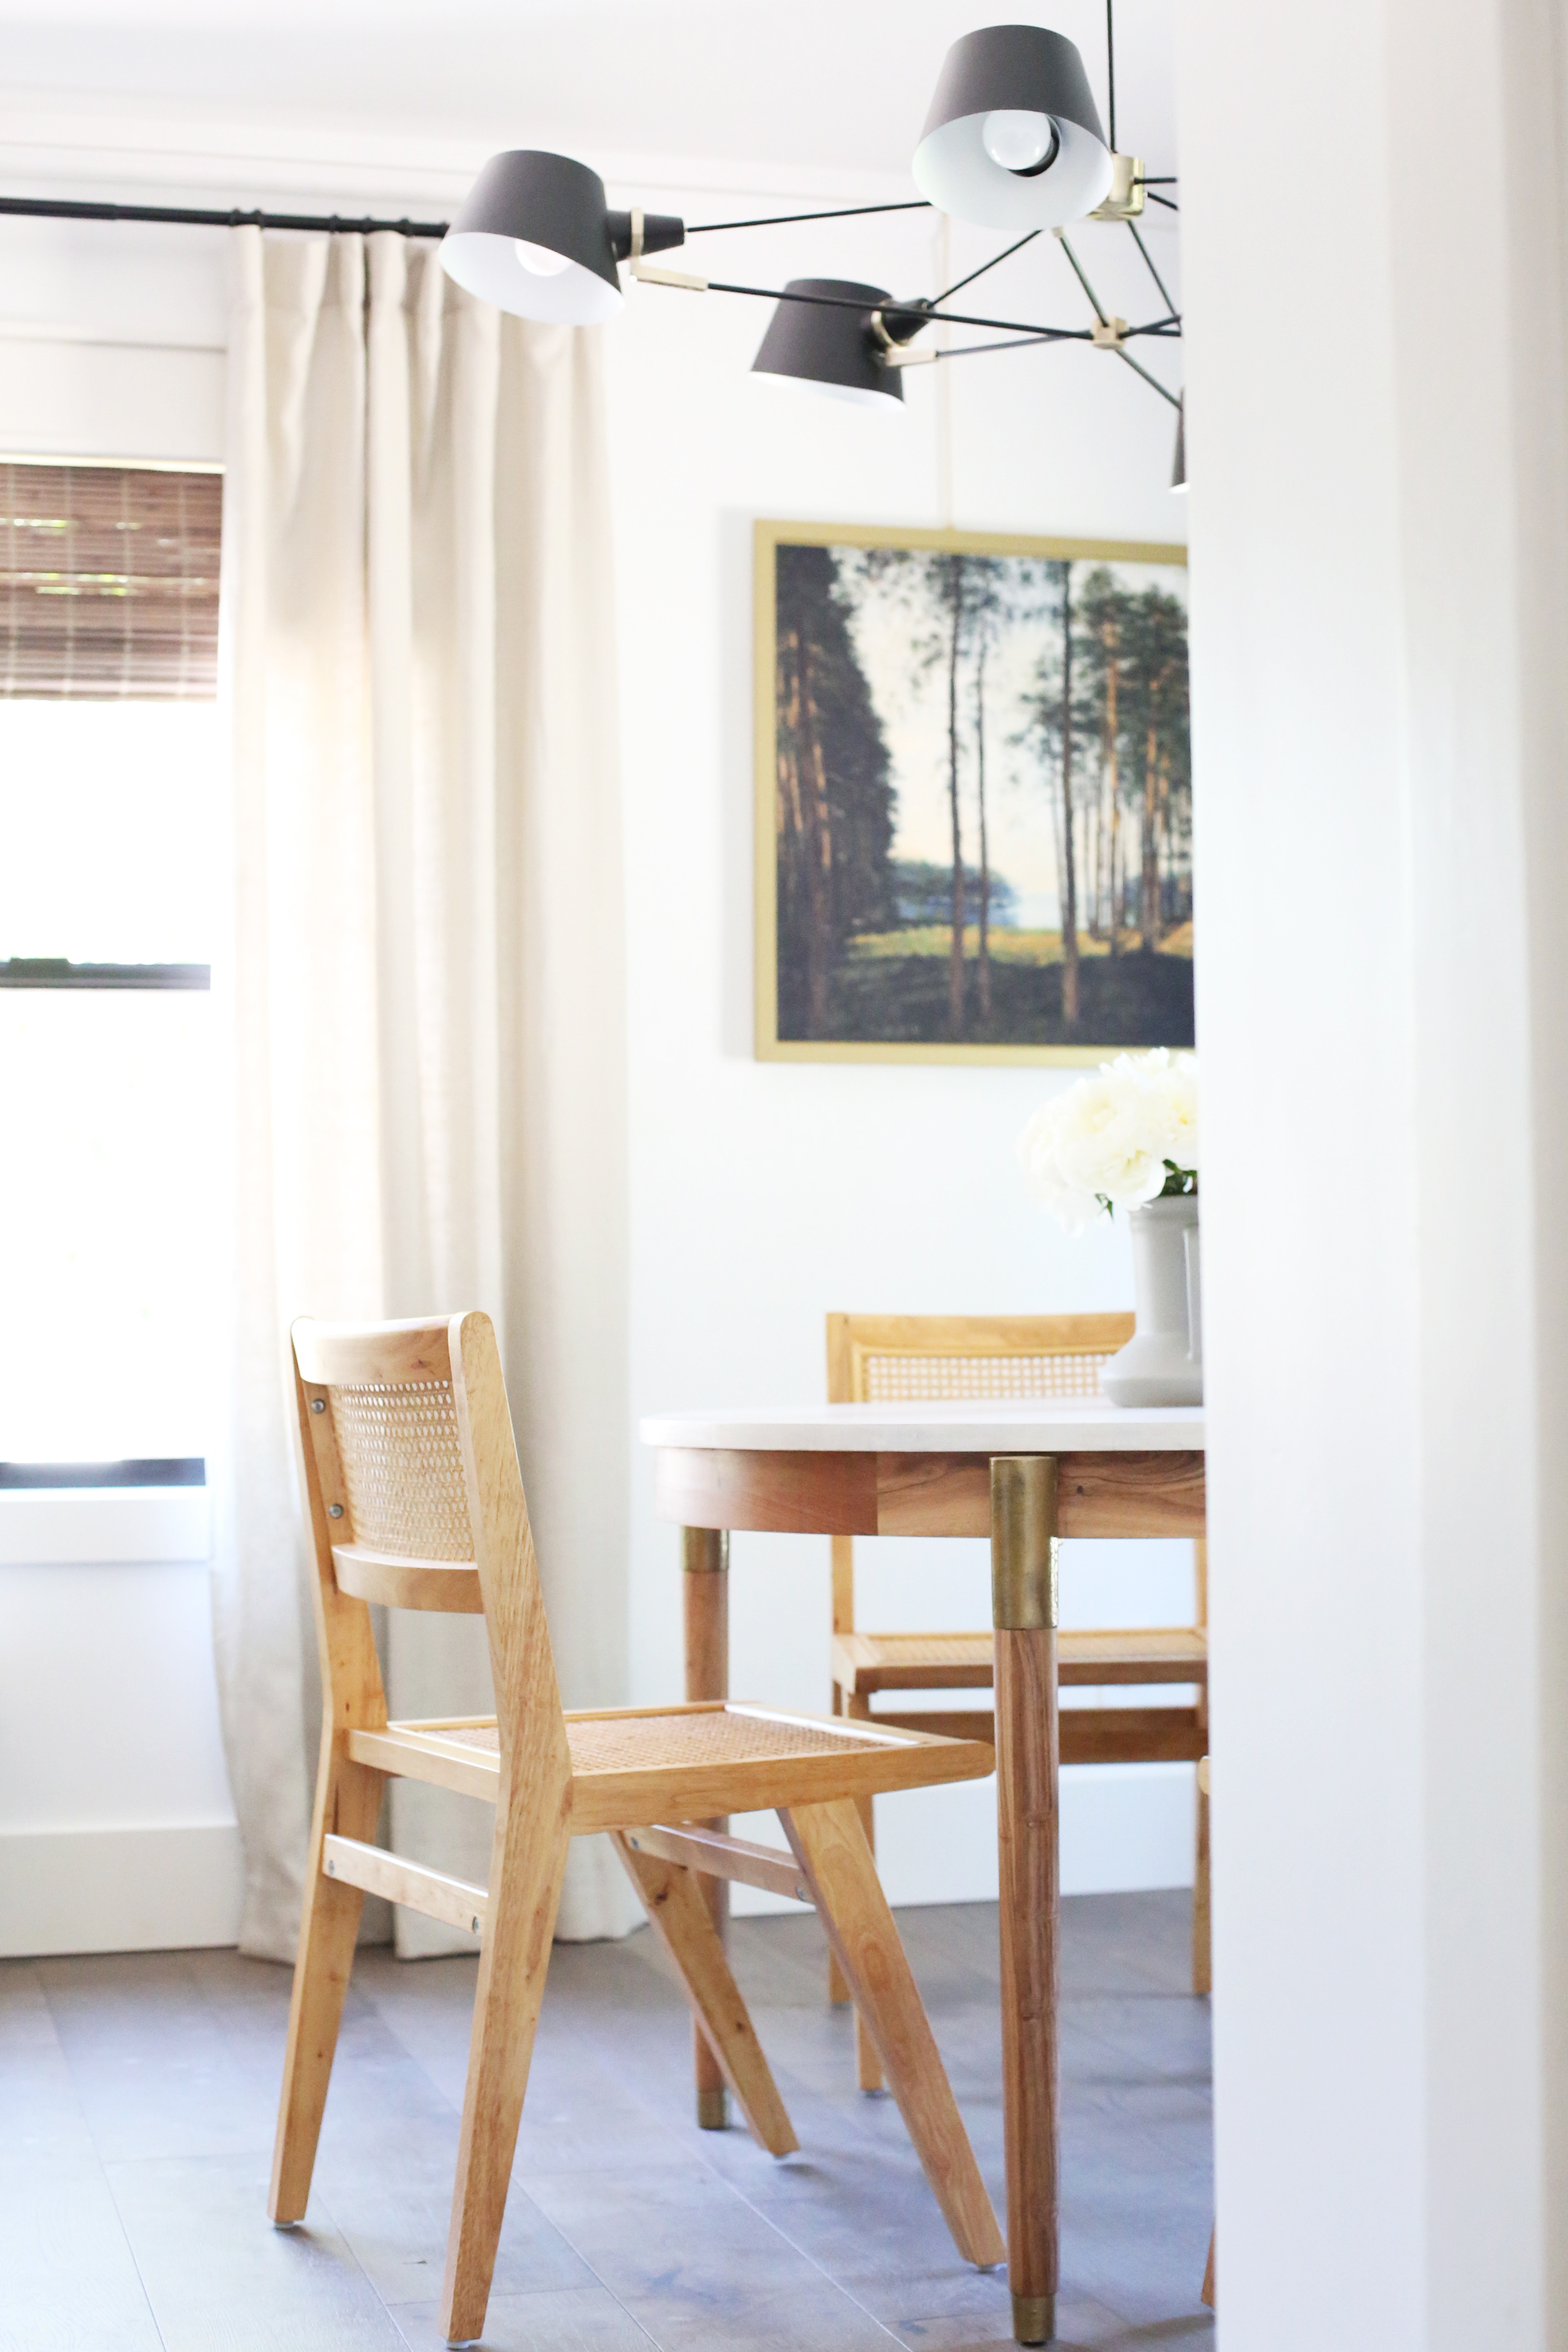
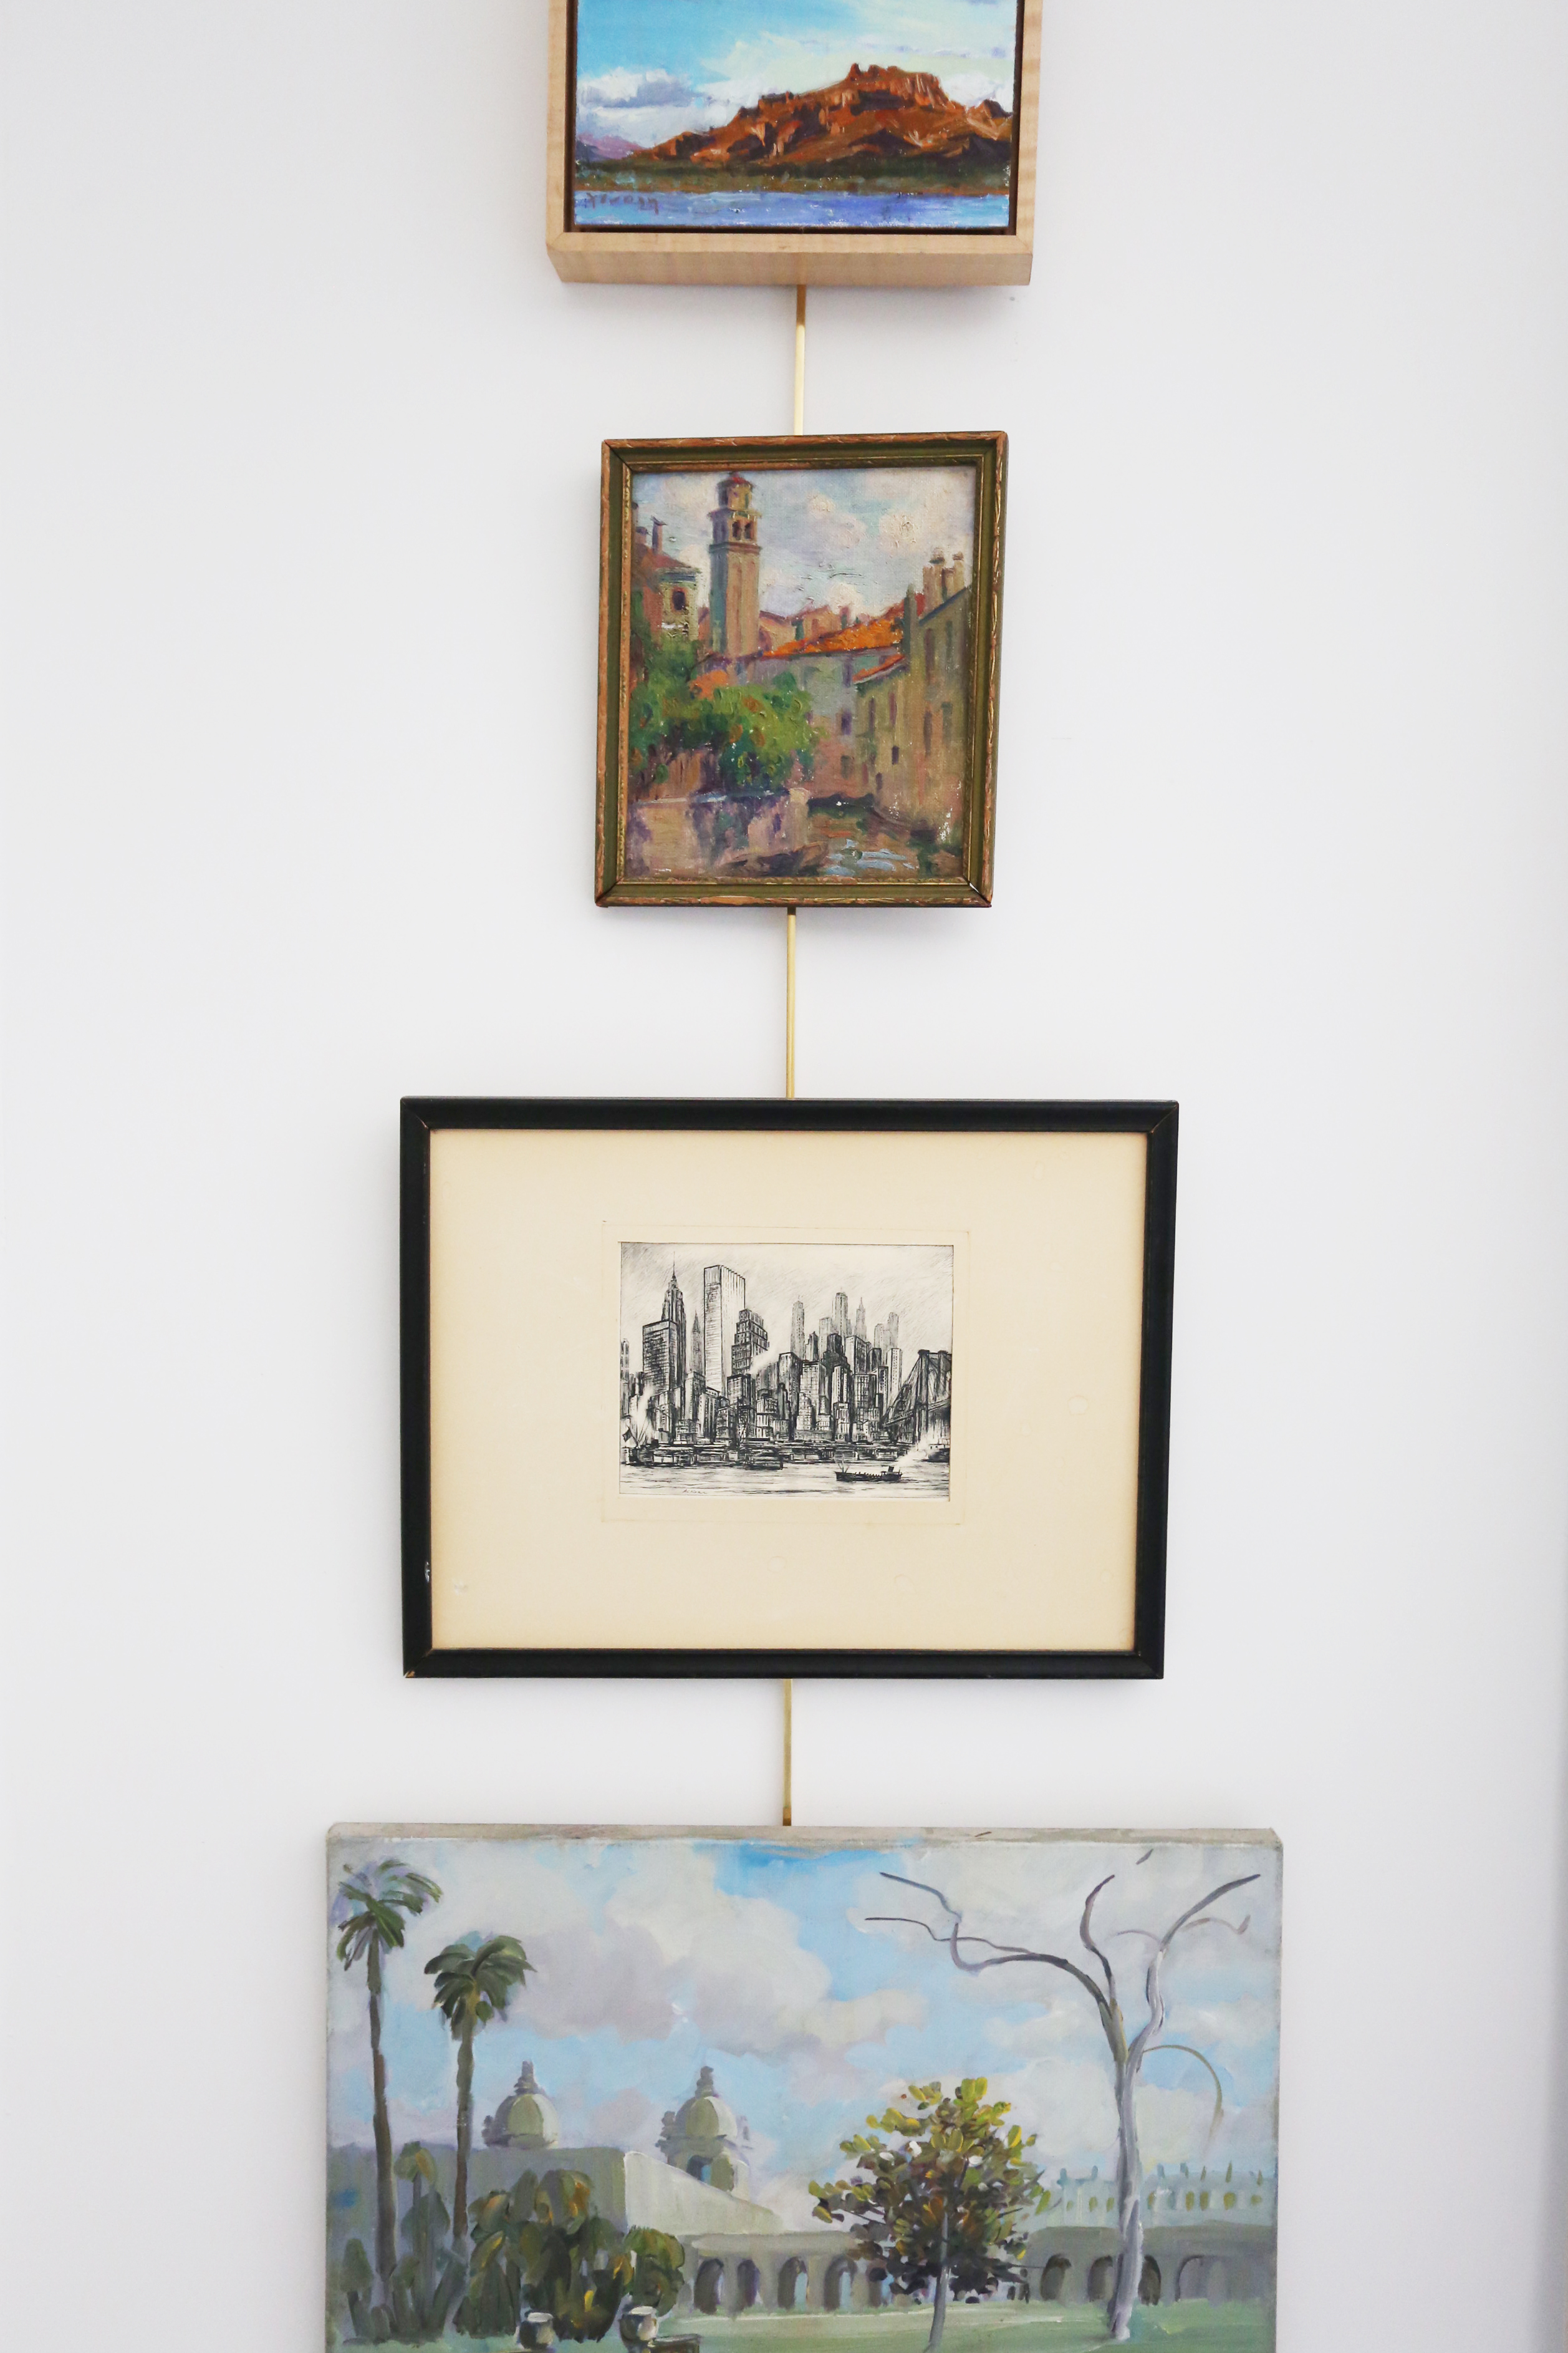
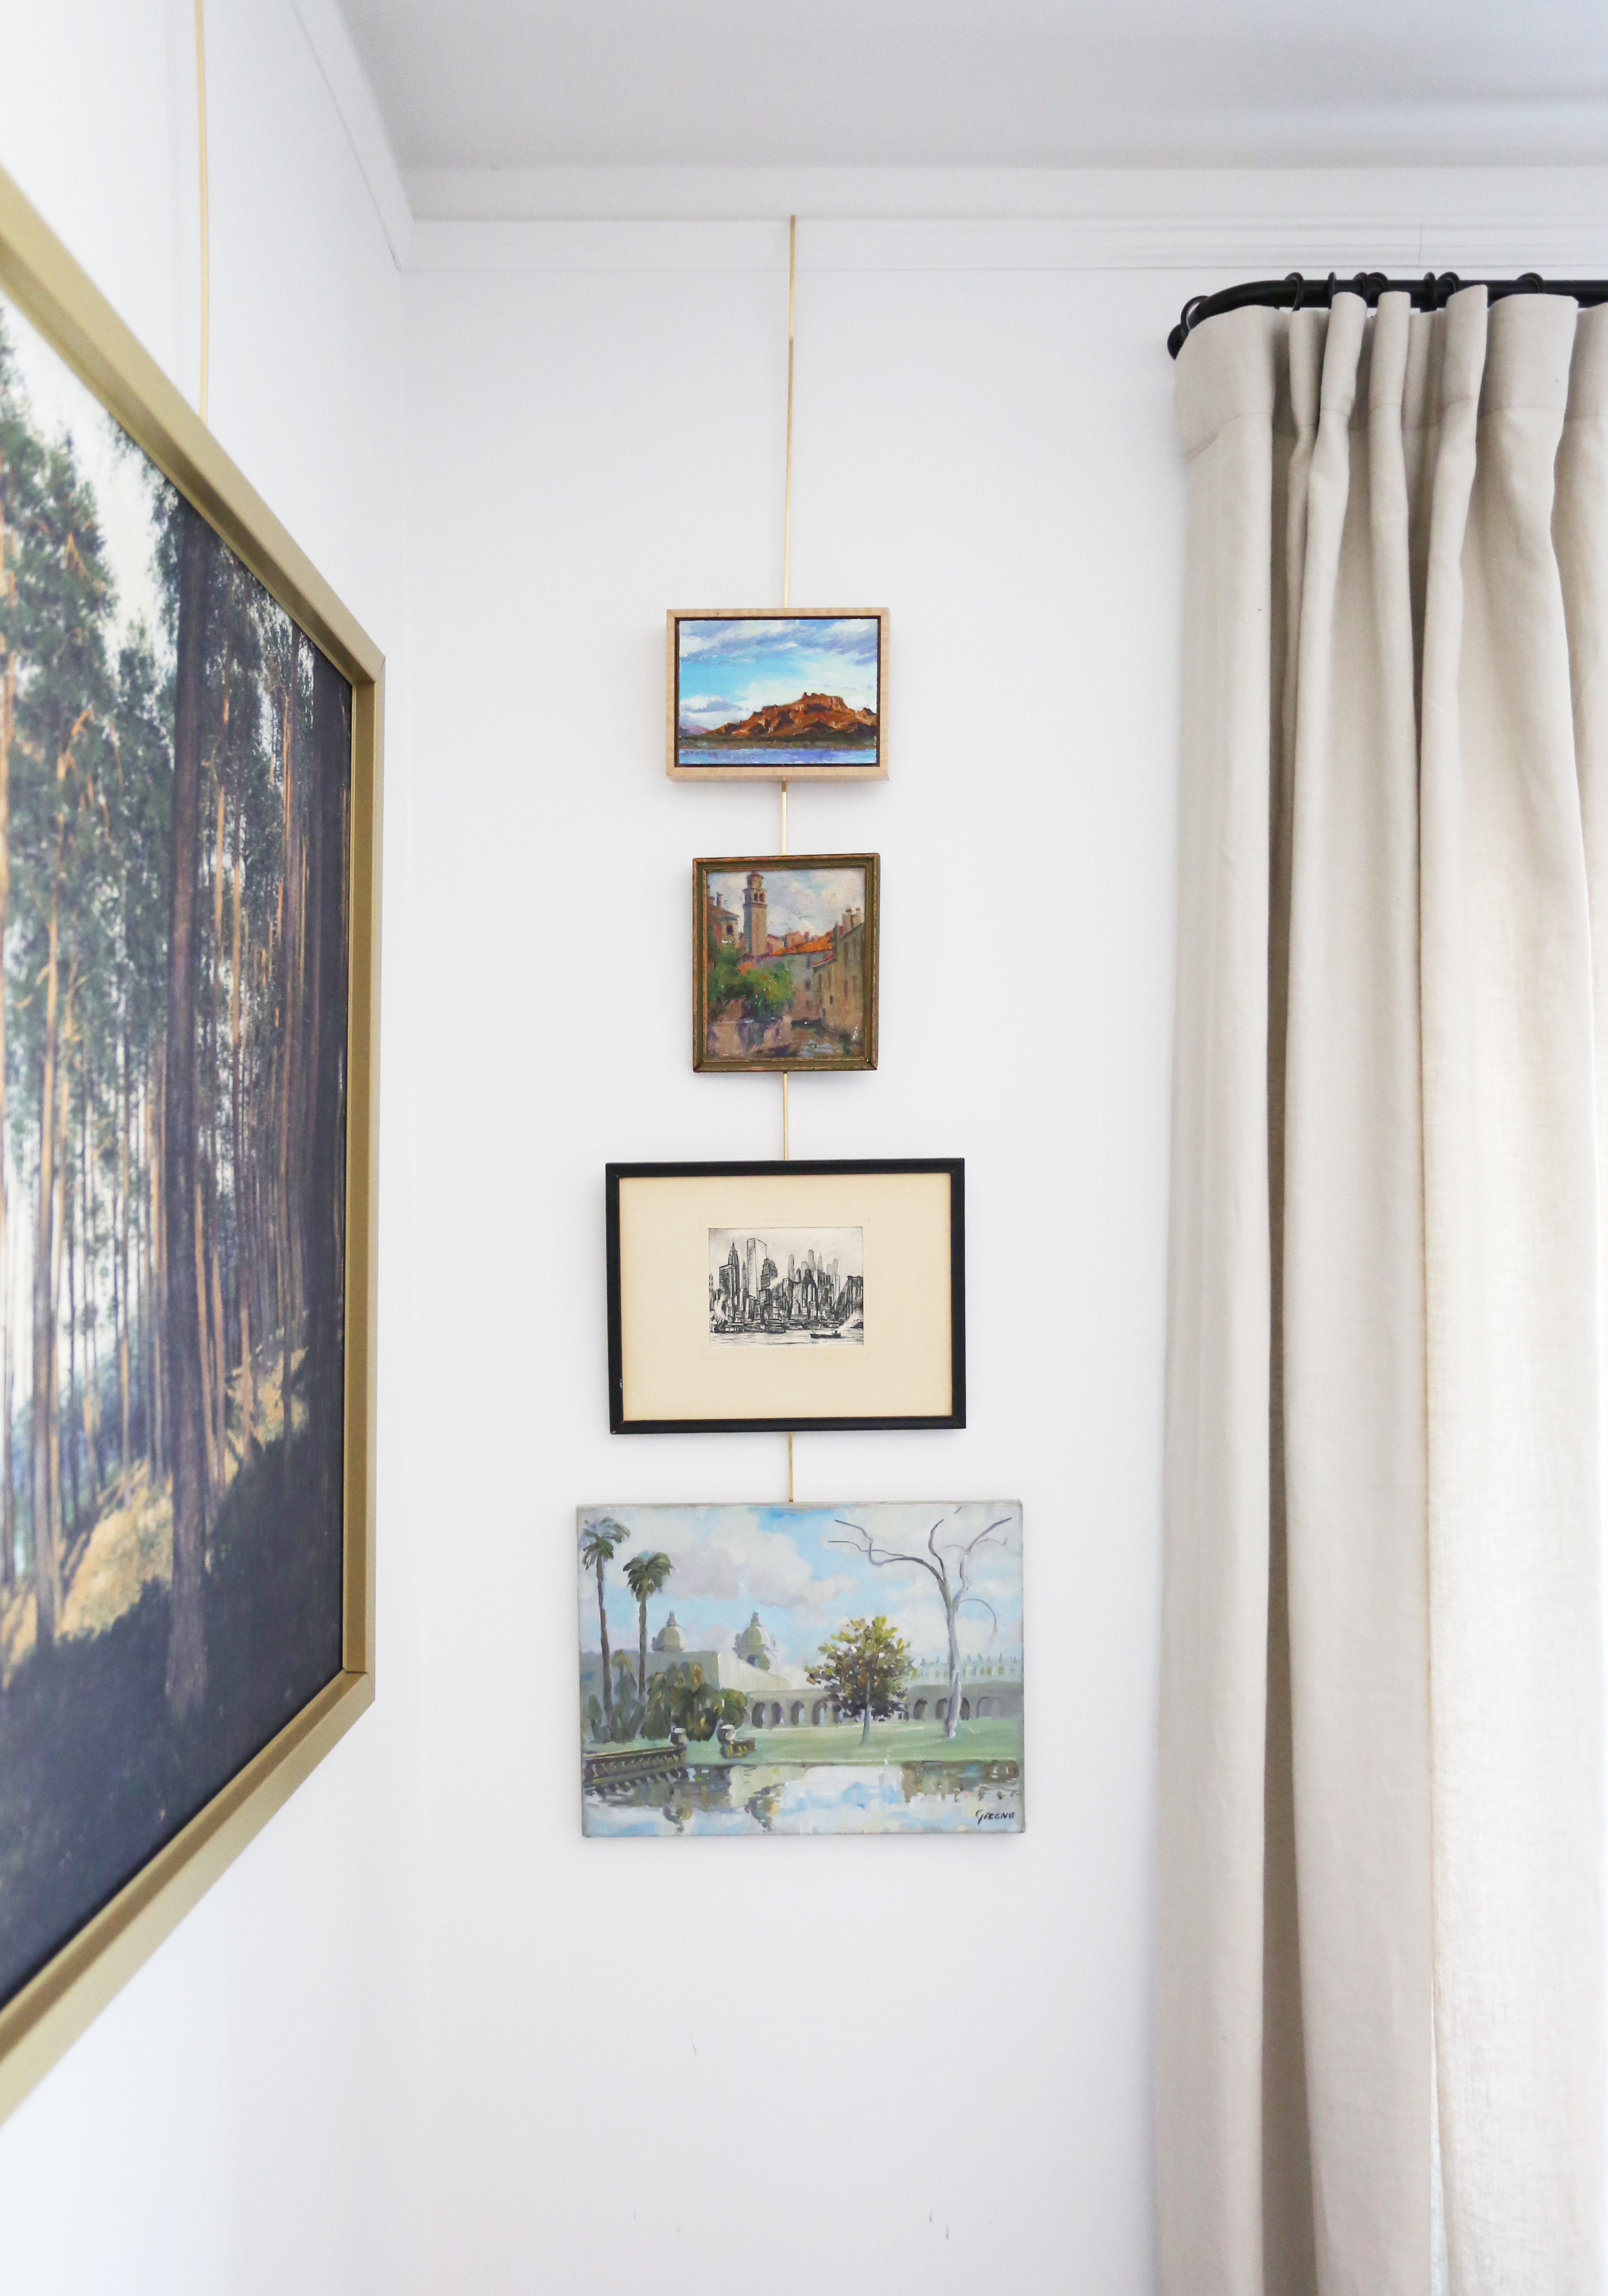
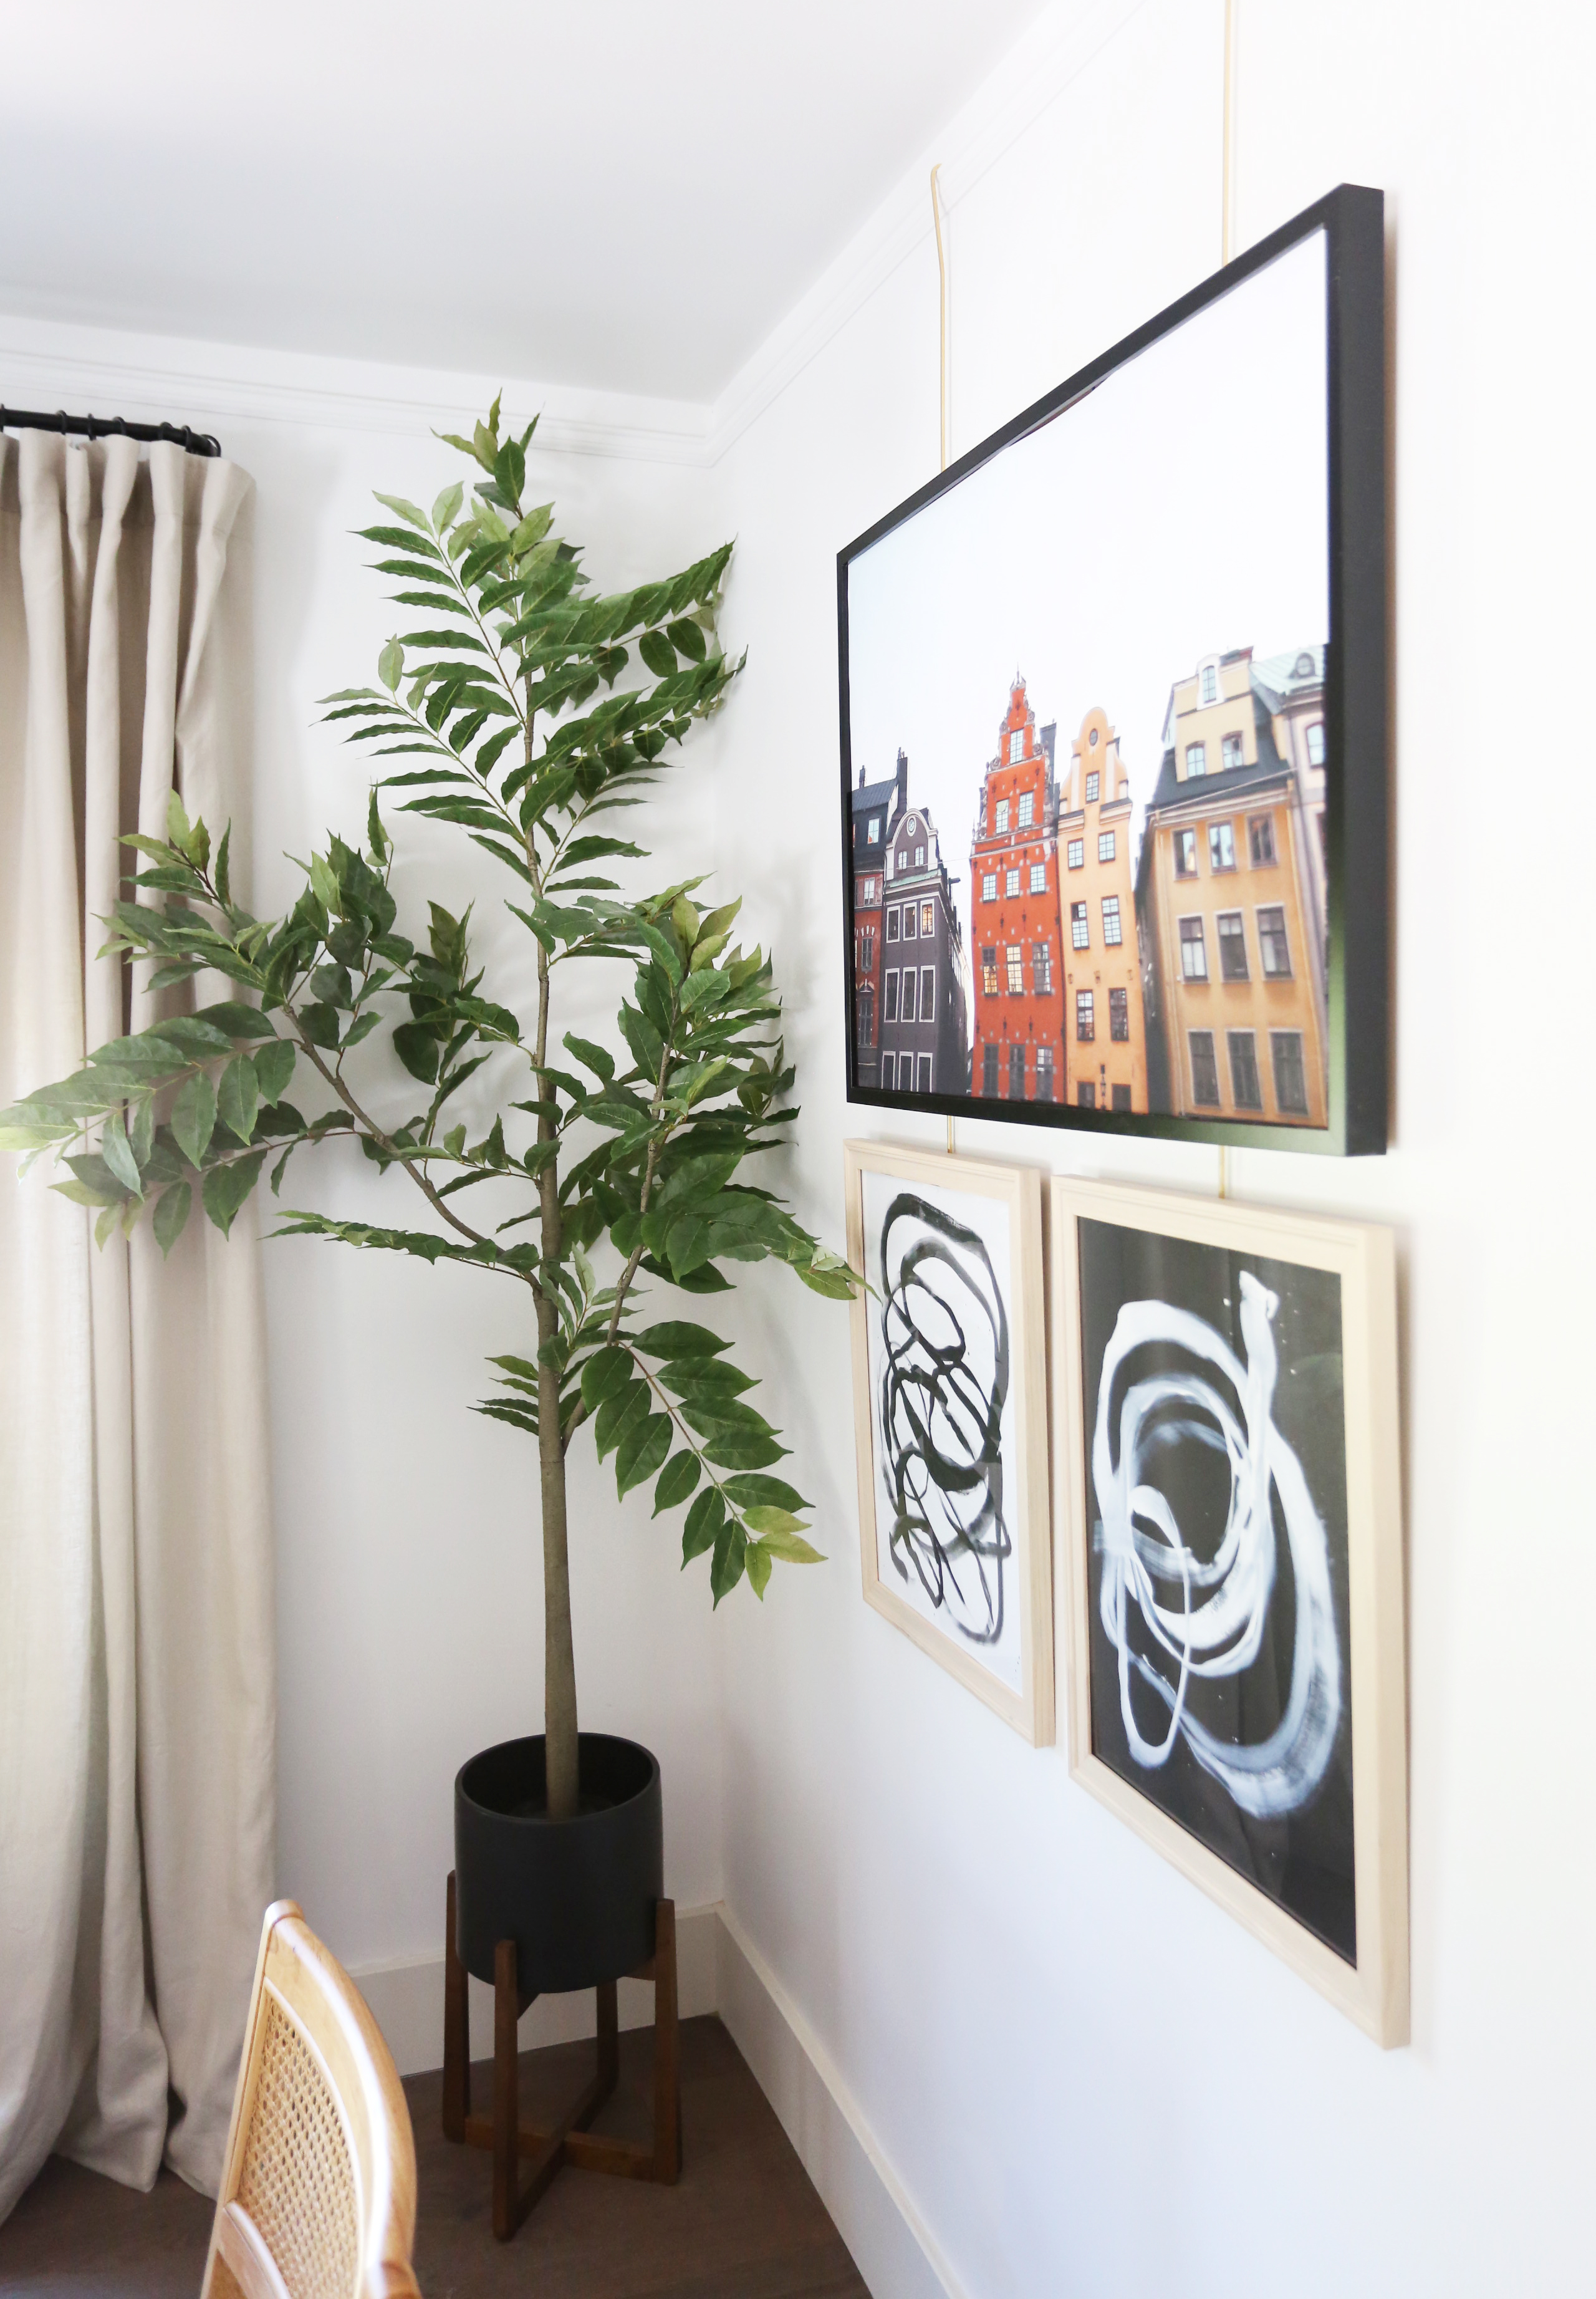
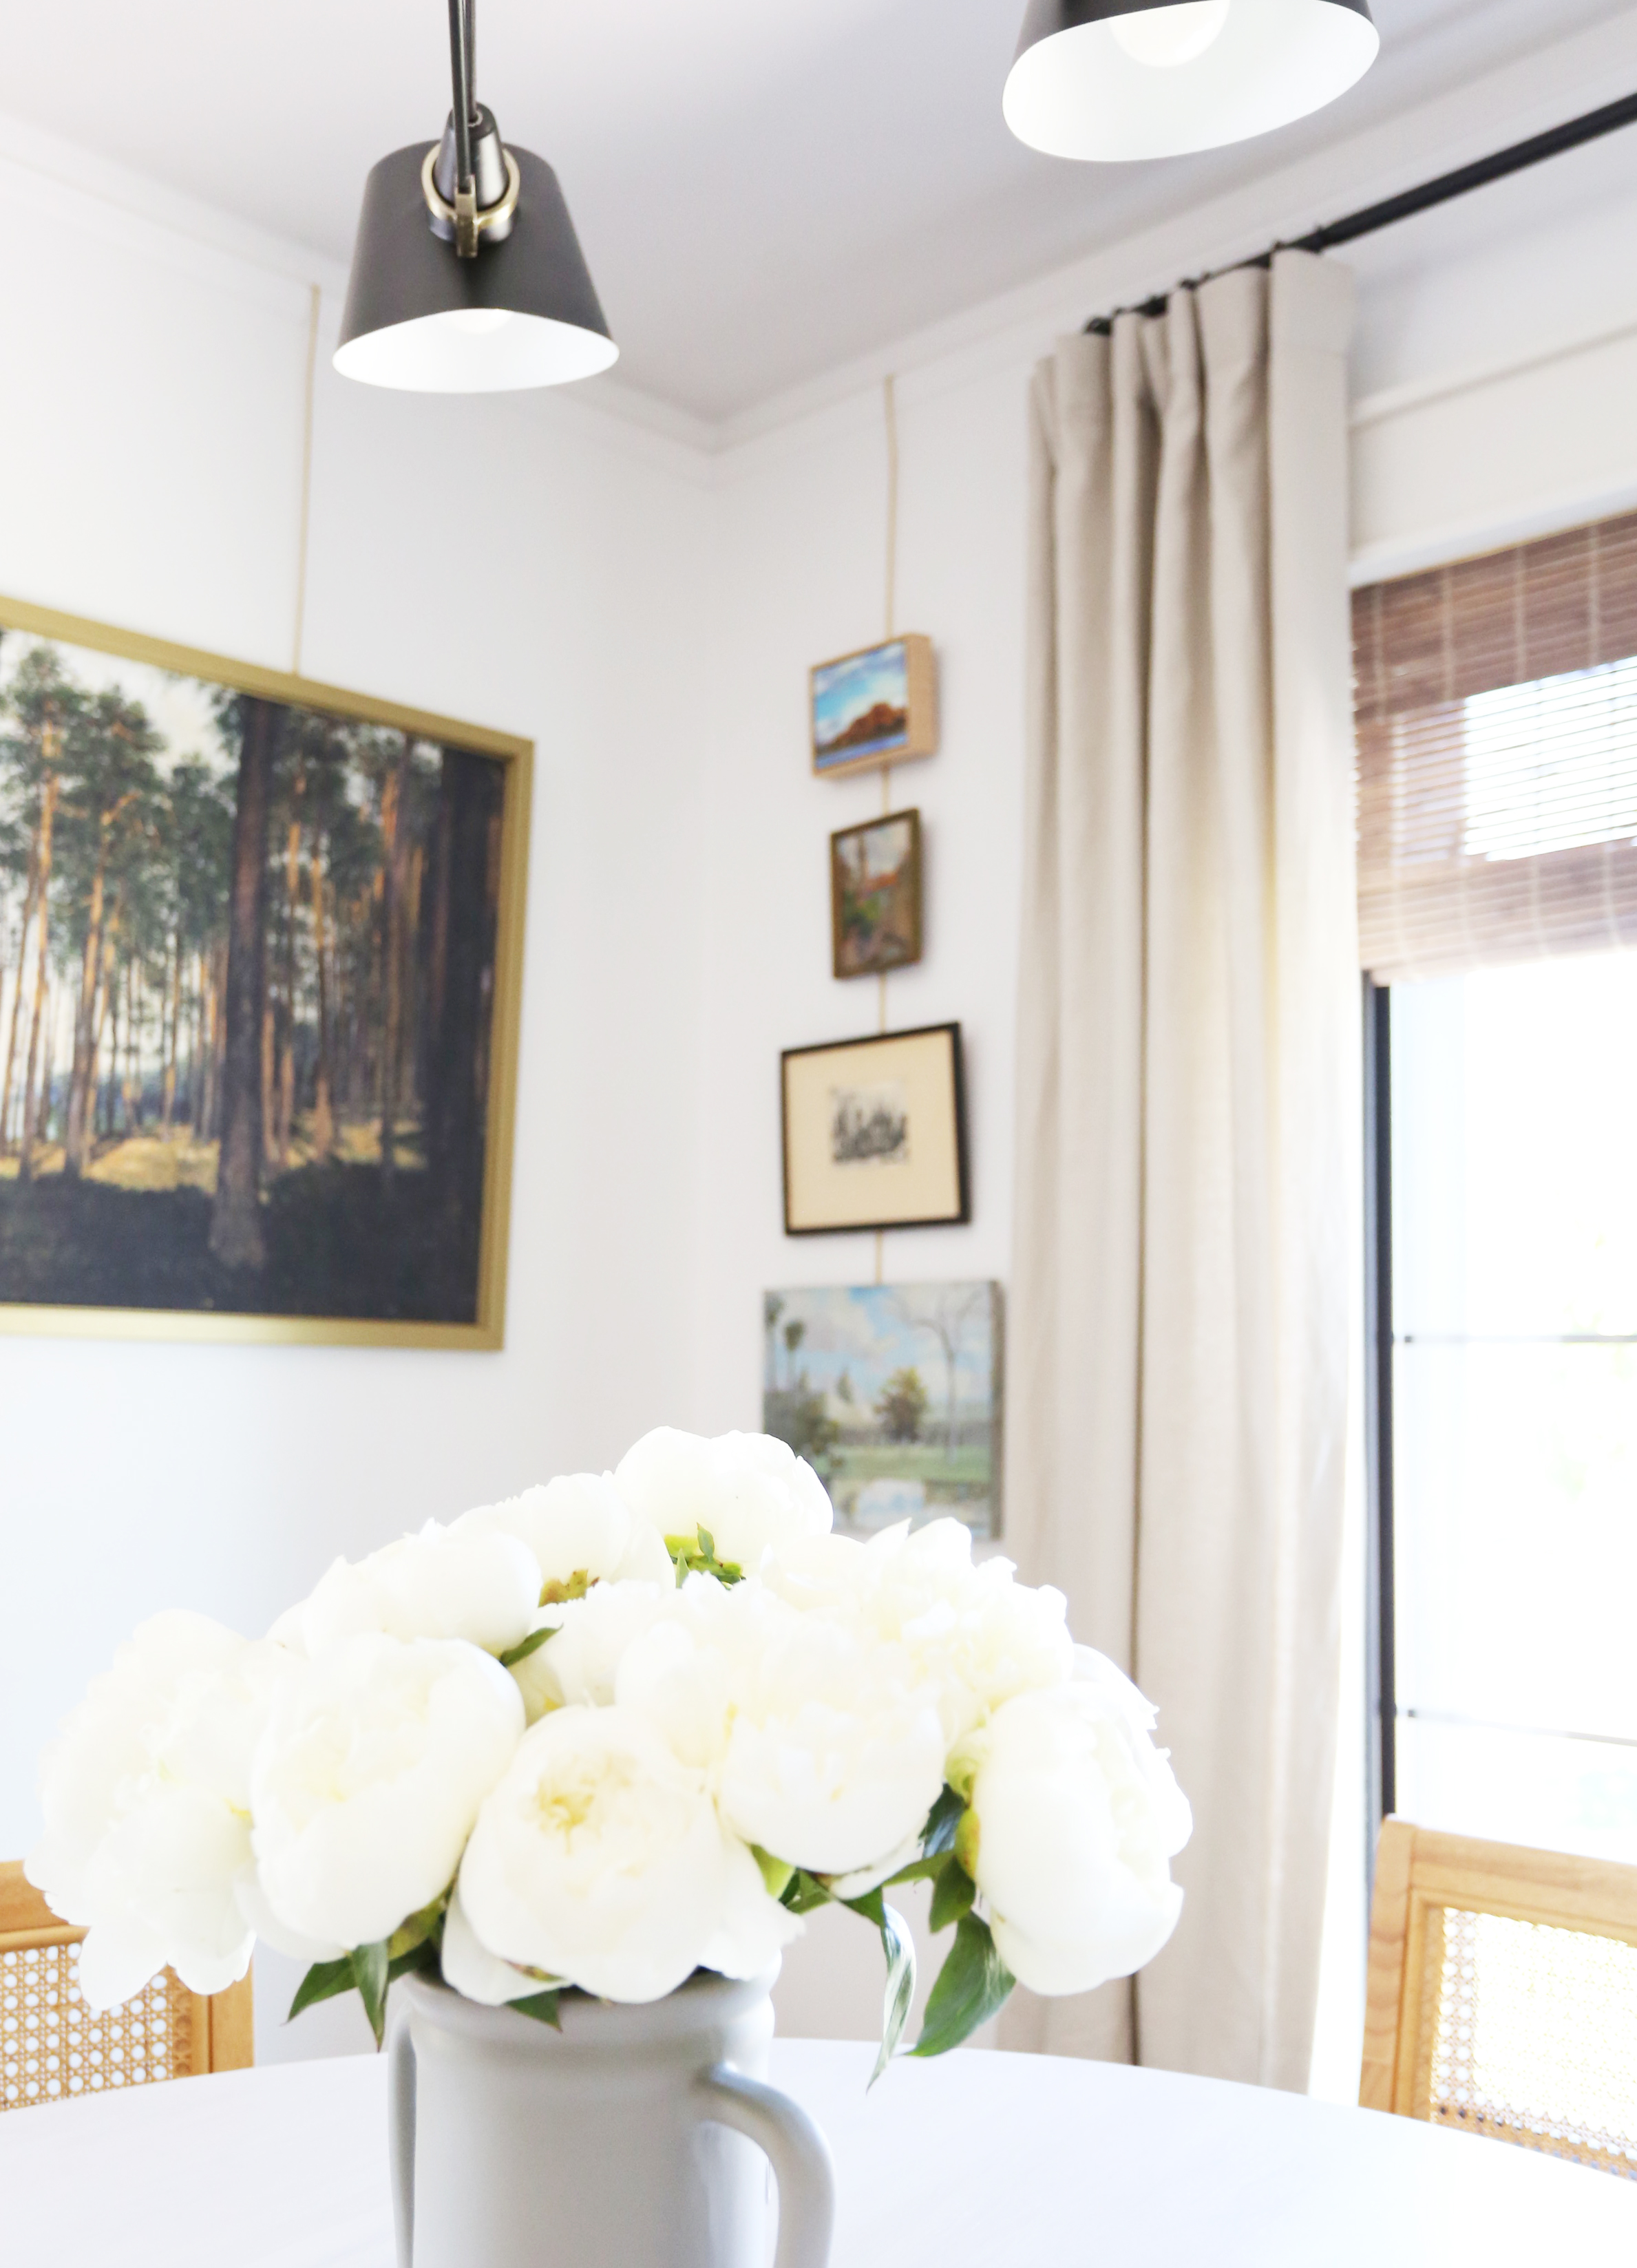
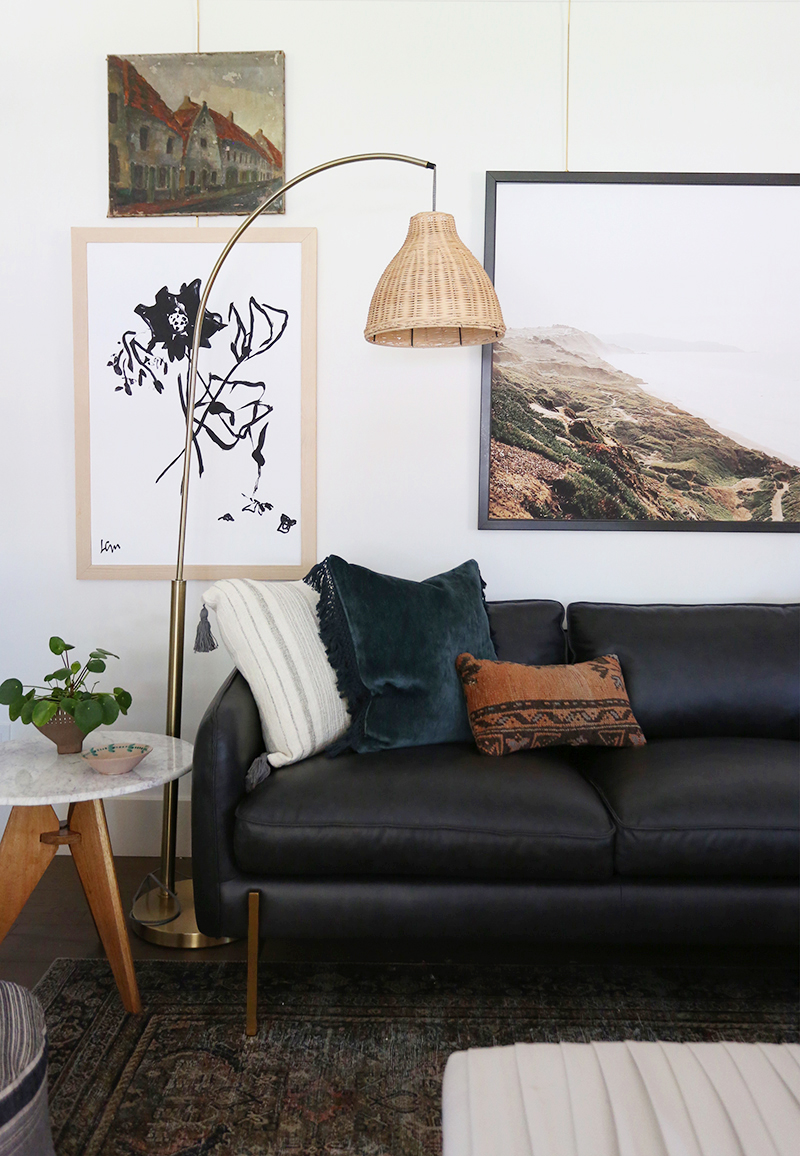
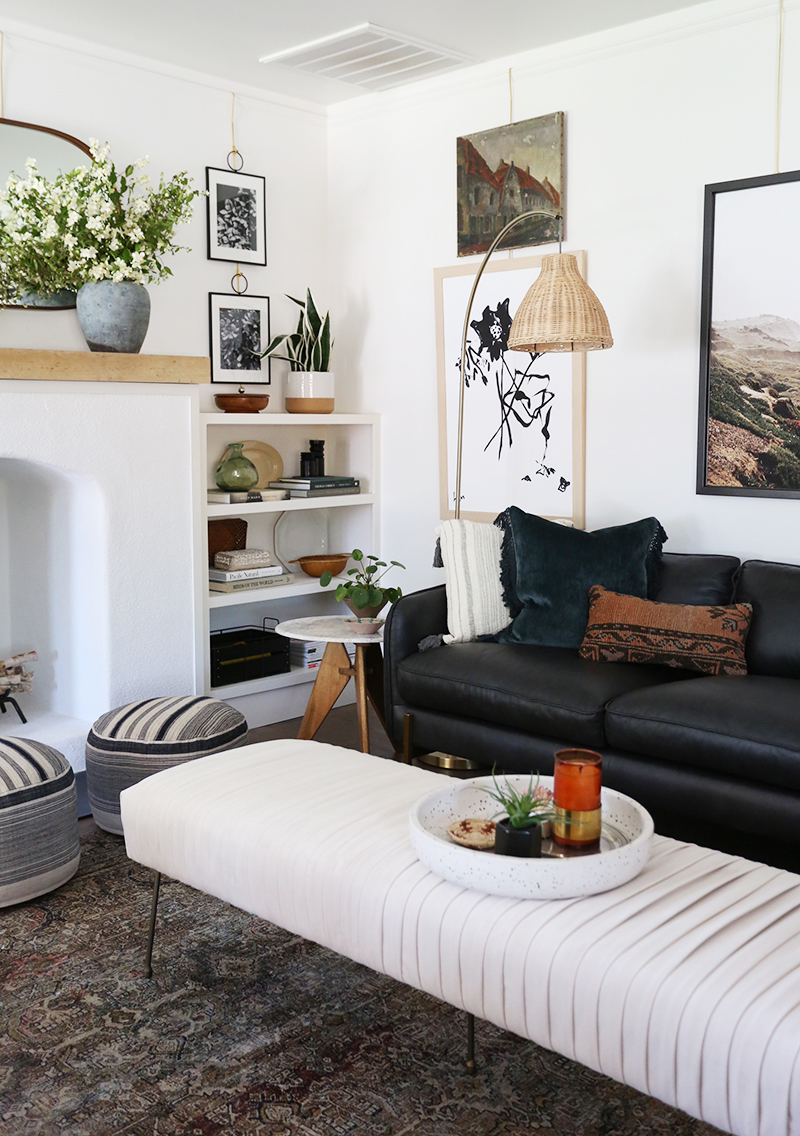
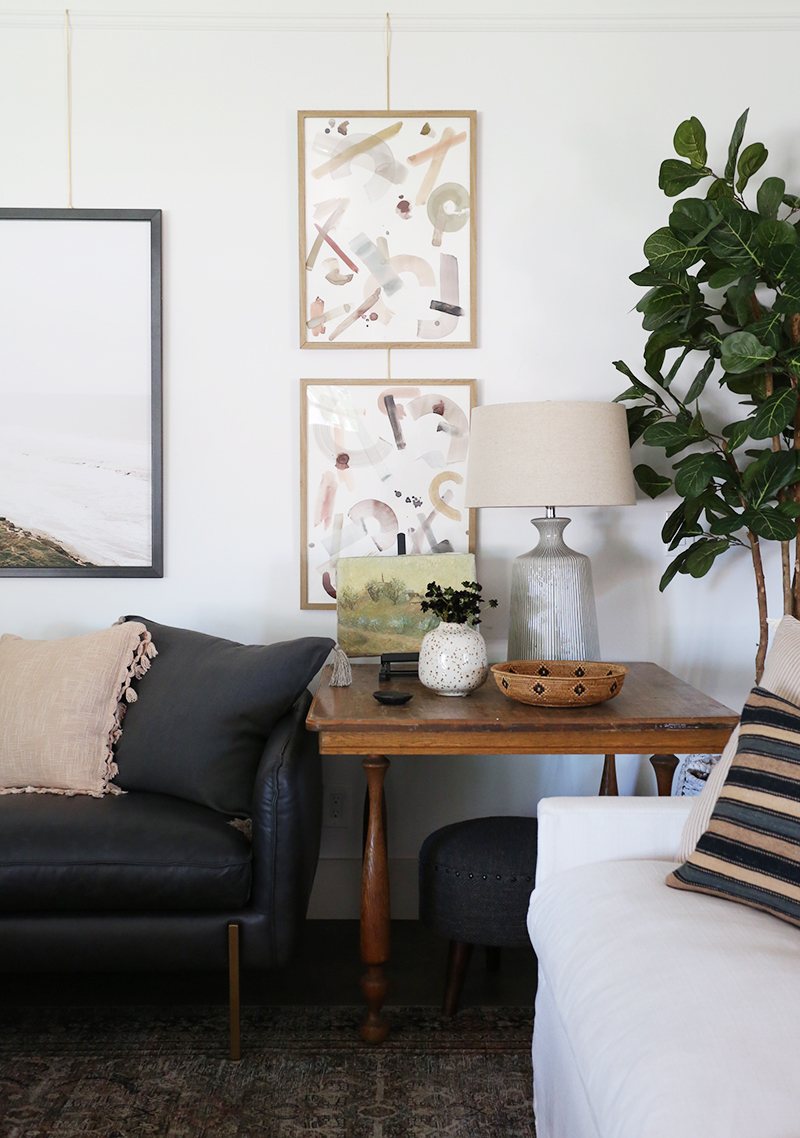
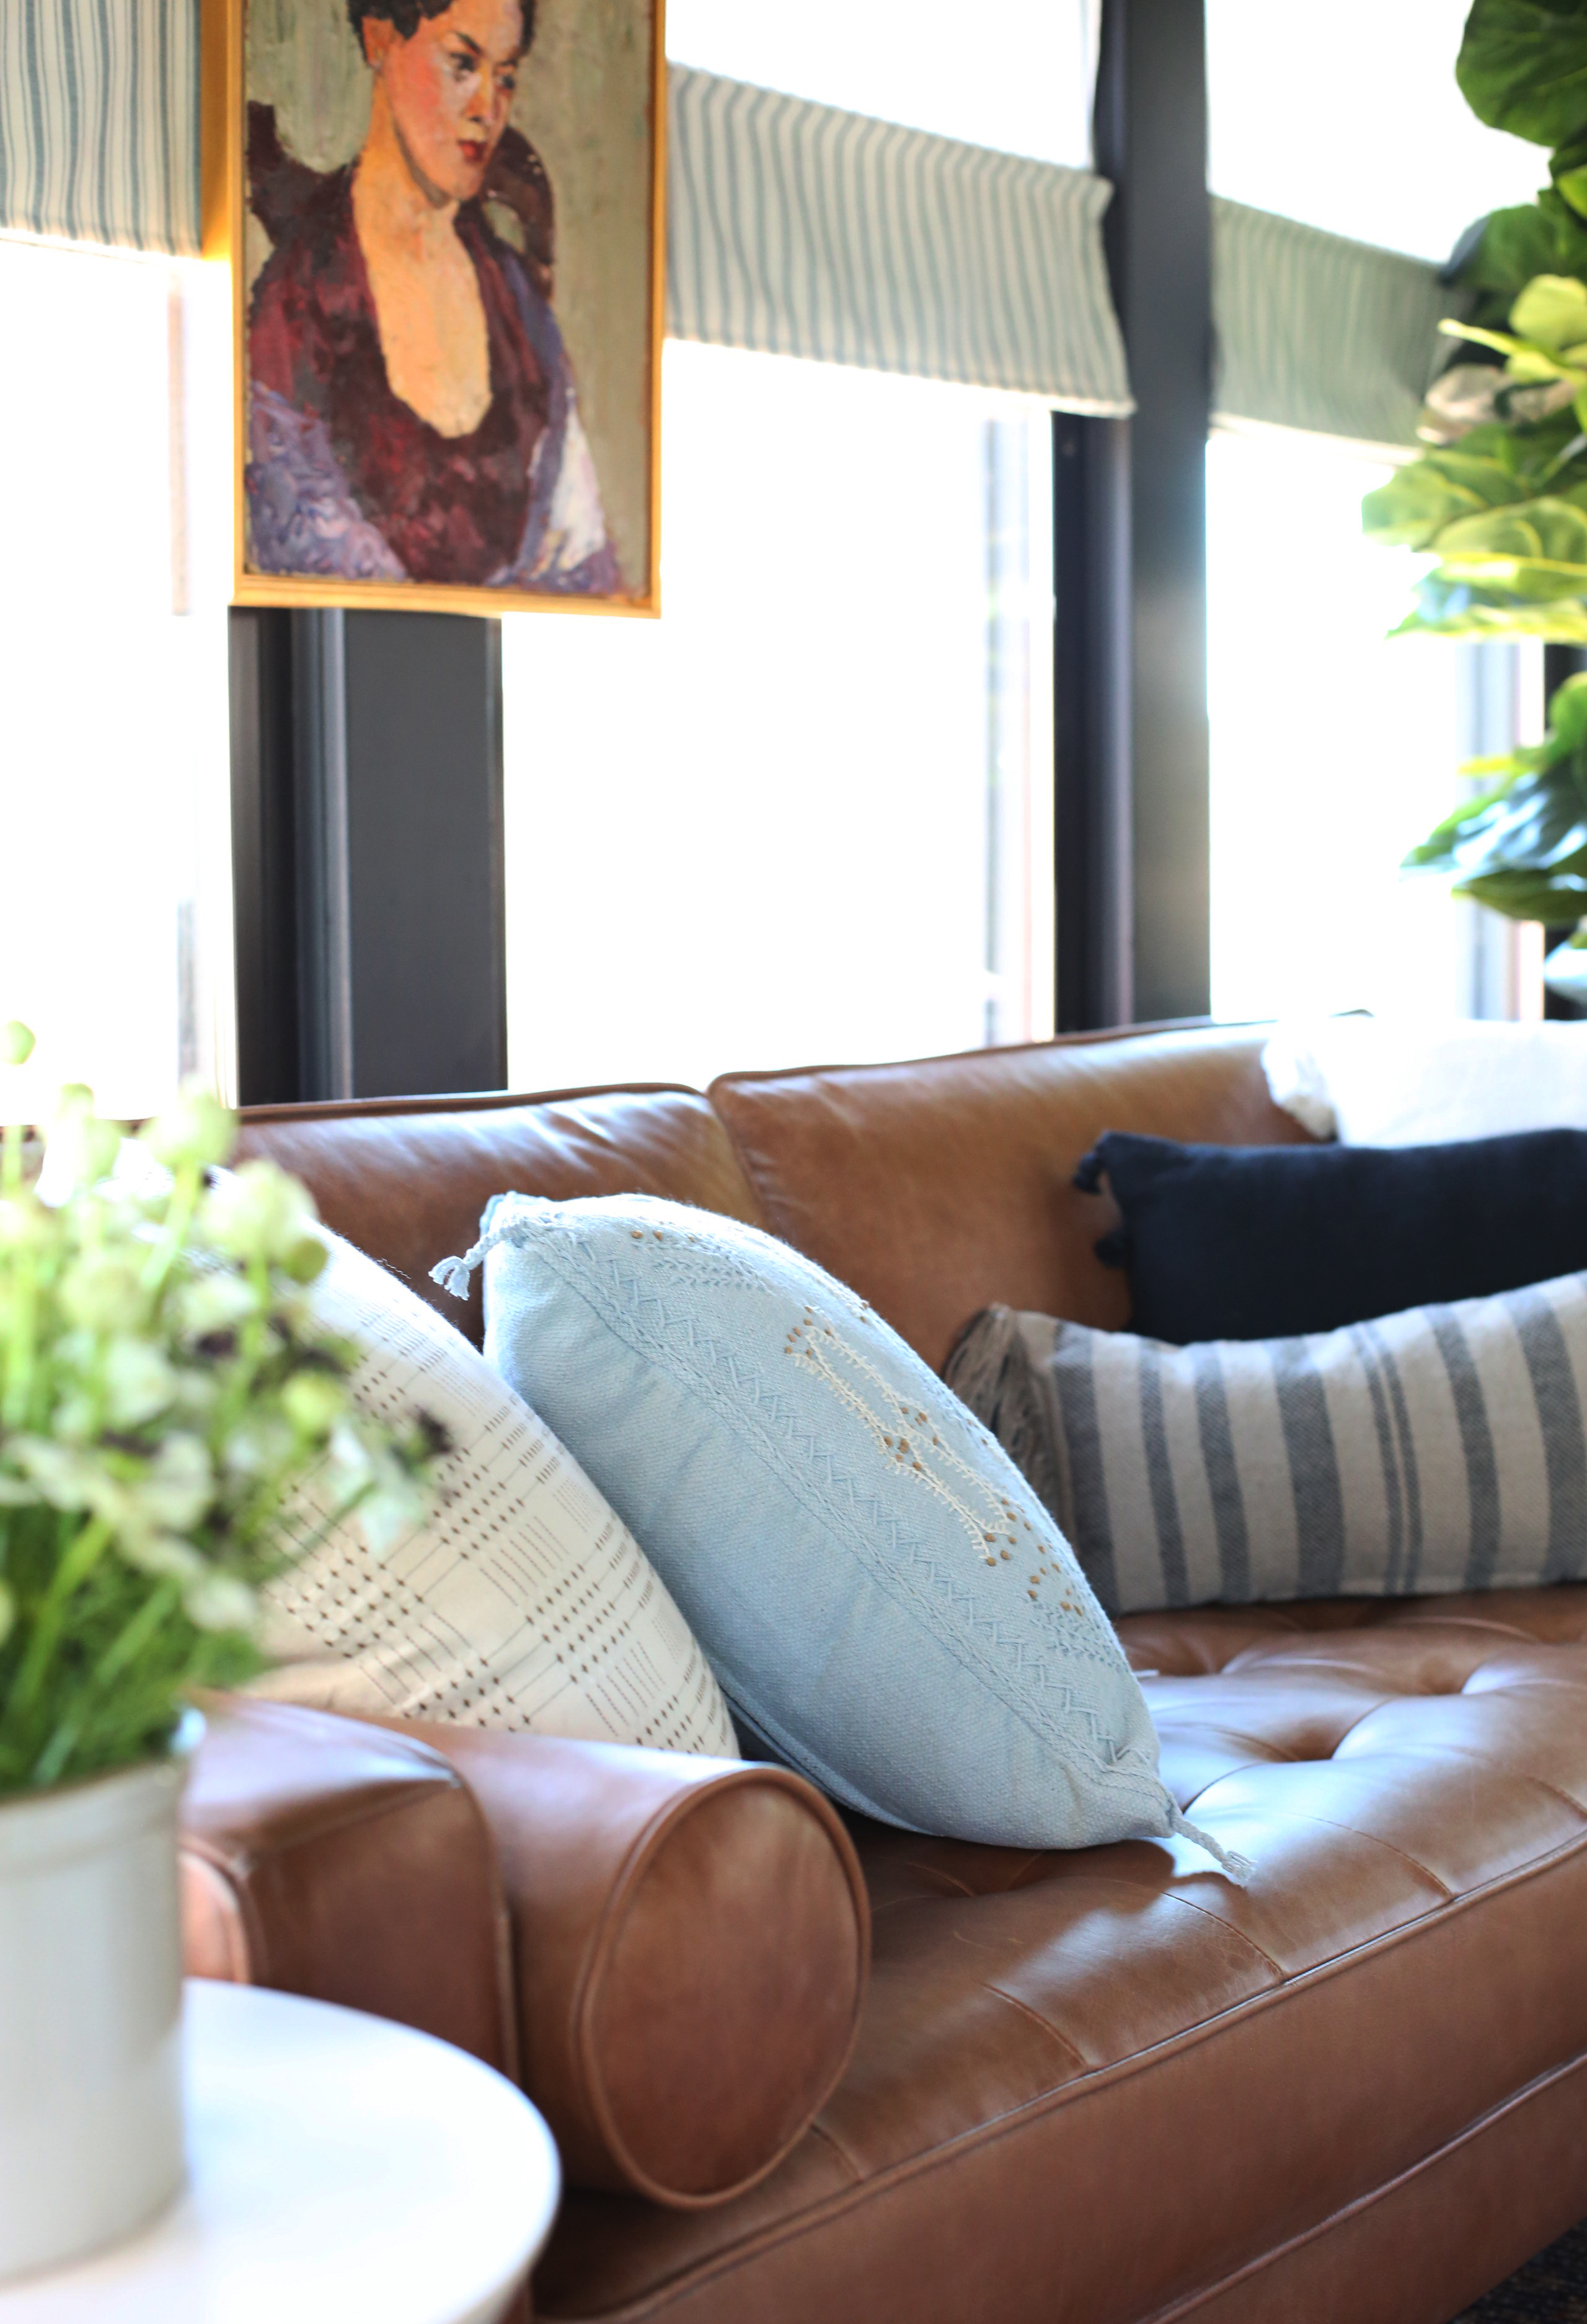
There’s quite a bit going on in the living room and with the adjacent built-ins, so we tried to keep this space low key. I do like how the layered art steals the show. Most of these pieces are available in Juniper Print Shop, but a few are vintage finds. In case you missed the link in the living room reveal, we used Swan Picture Hangers to source these French brass gallery rods to hang our art and mirrors on the plaster walls without putting a million holes in the walls.
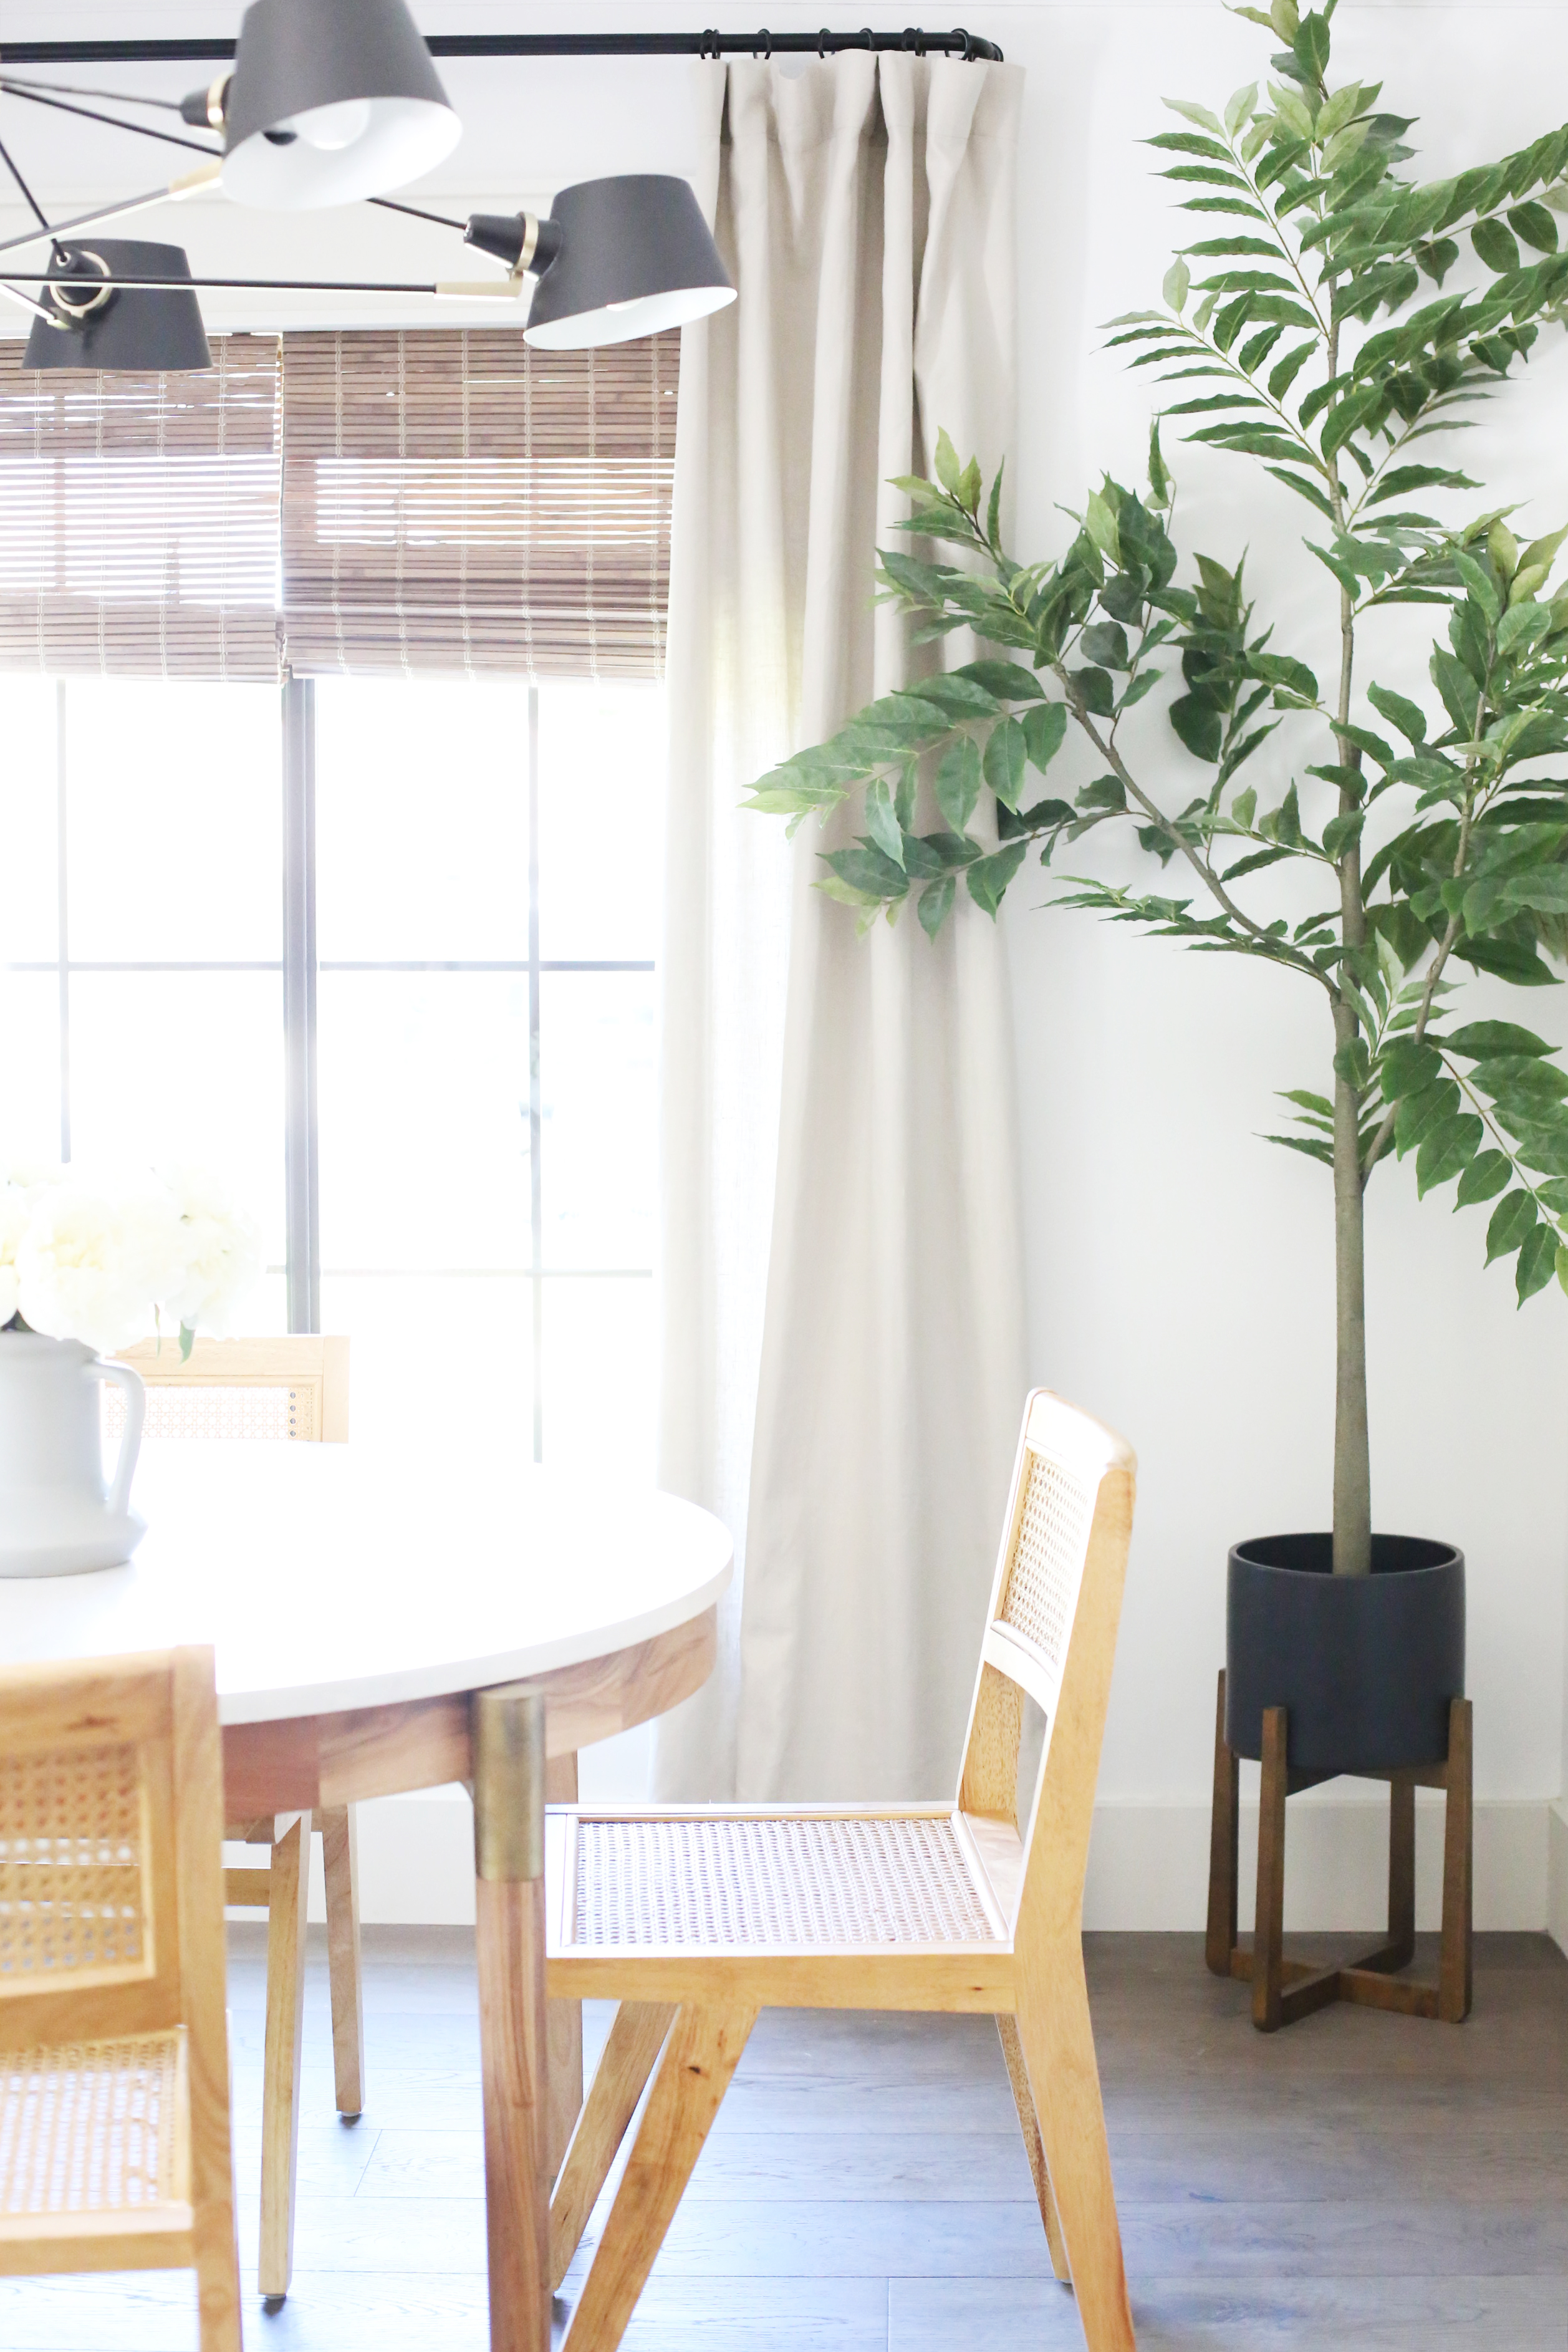
This faux maple tree was an awesome and inexpensive find! I like that it’s not a fiddle leaf fig! It’s fun to mix up the tree species from room to room. This one with the small leaves felt perfect for our little dining room! And this short but substantial plant stand(similar) was the perfect base for our tree. It added a little height so that the tree felt grounded but the pot itself wasn’t so big that the tree base was swimming, you know?
The linen curtain panels(similar) were such a lucky find! They are thick and lined and come with drapery hook tape, which makes them easy to hang in just a few minutes. I’ll be sharing stories in my highlights about how I like to hang curtains, but in general I like to use French rods that return back into the wall instead of finials (these are my very favorite and the ones here are a less expensive version). I prefer to hang my panels with 1″ of extra fabric so the panels just kiss the ground. Instead of grommets or rod pockets, I like to hang my panels using drapery hooks and curtain rings (I skip the clips in favor of hooks!).
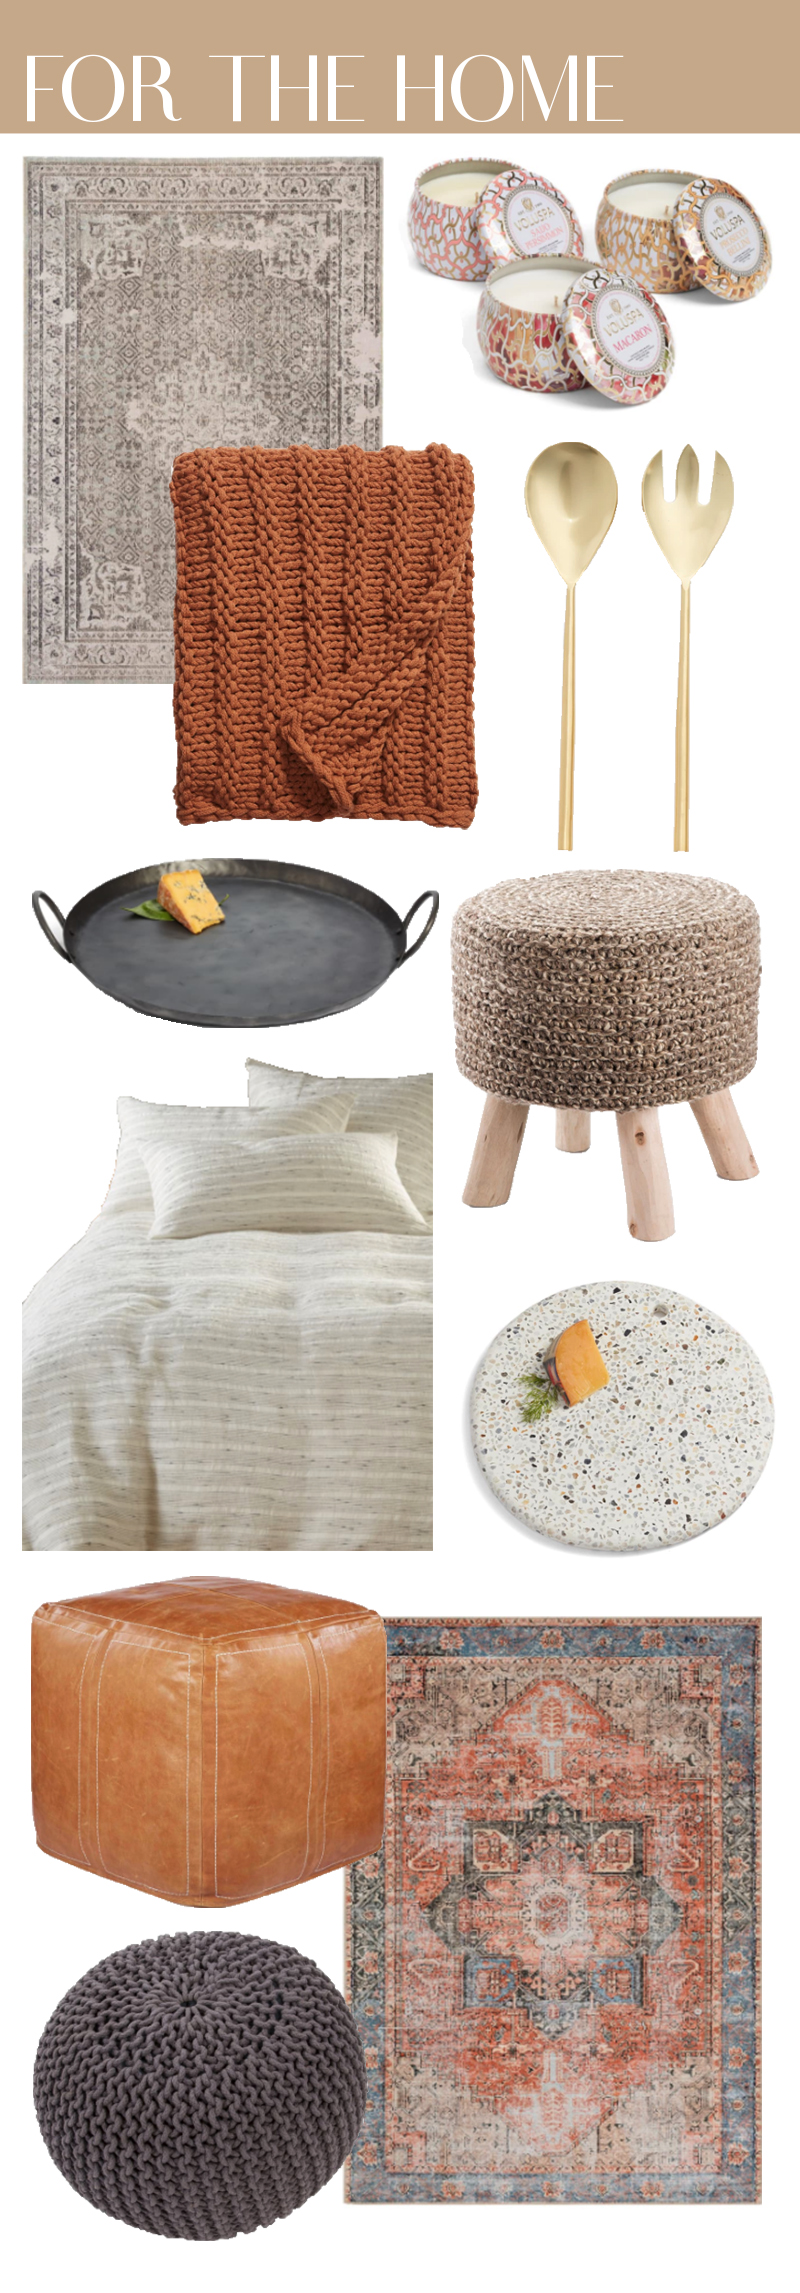
It’s that time of year again! The Nordstrom Anniversary Sale is on and we’ve rounded up some of our favorites! Here are some of our top picks in the Home category. We are loving that forged iron serve wear and that chunky rust throw! Gray & Cream Rug // Set of 3 Candles // Rust Knit Throw …
It’s that time of year again! The Nordstrom Anniversary Sale is on and we’ve rounded up some of our favorites!
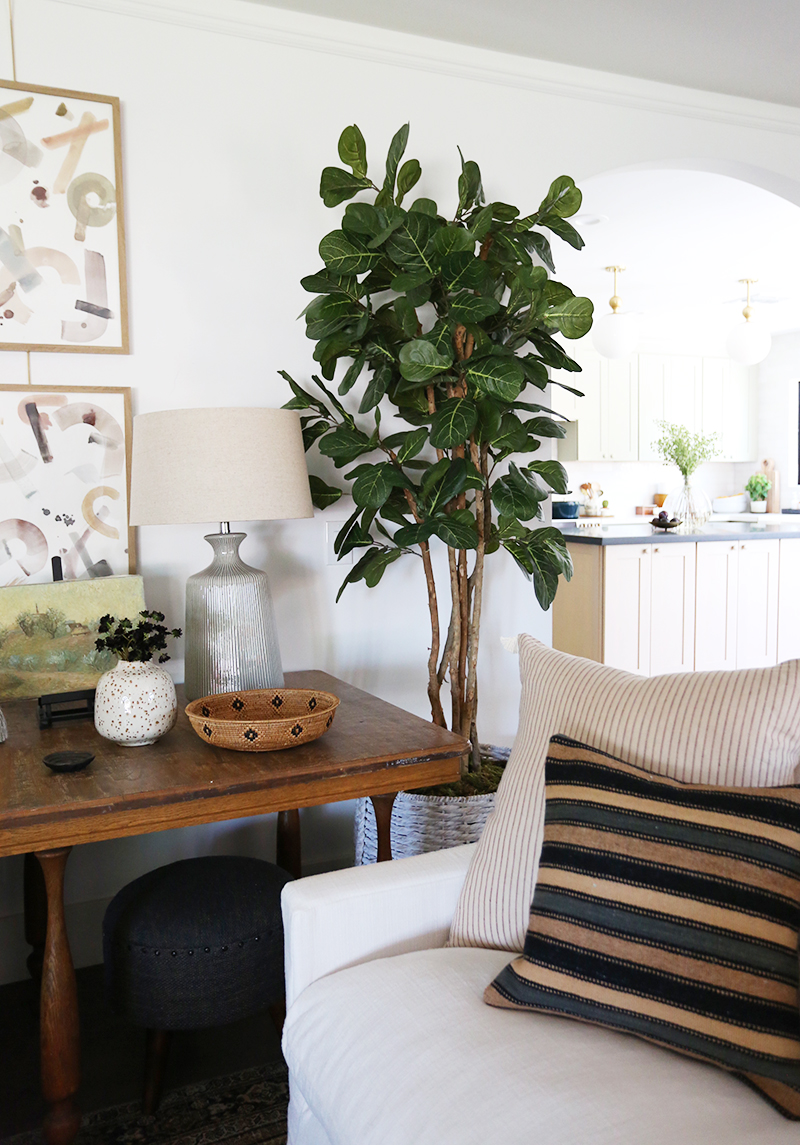
One of our most asked questions we get is “Where did you get that tree!?” Every time we work on a new project we scour the internet to try and find the latest and greatest faux tree options and give them an honest review to pass on to you! CONFETTI I print // CONFETTI II print …
One of our most asked questions we get is “Where did you get that tree!?” Every time we work on a new project we scour the internet to try and find the latest and greatest faux tree options and give them an honest review to pass on to you!
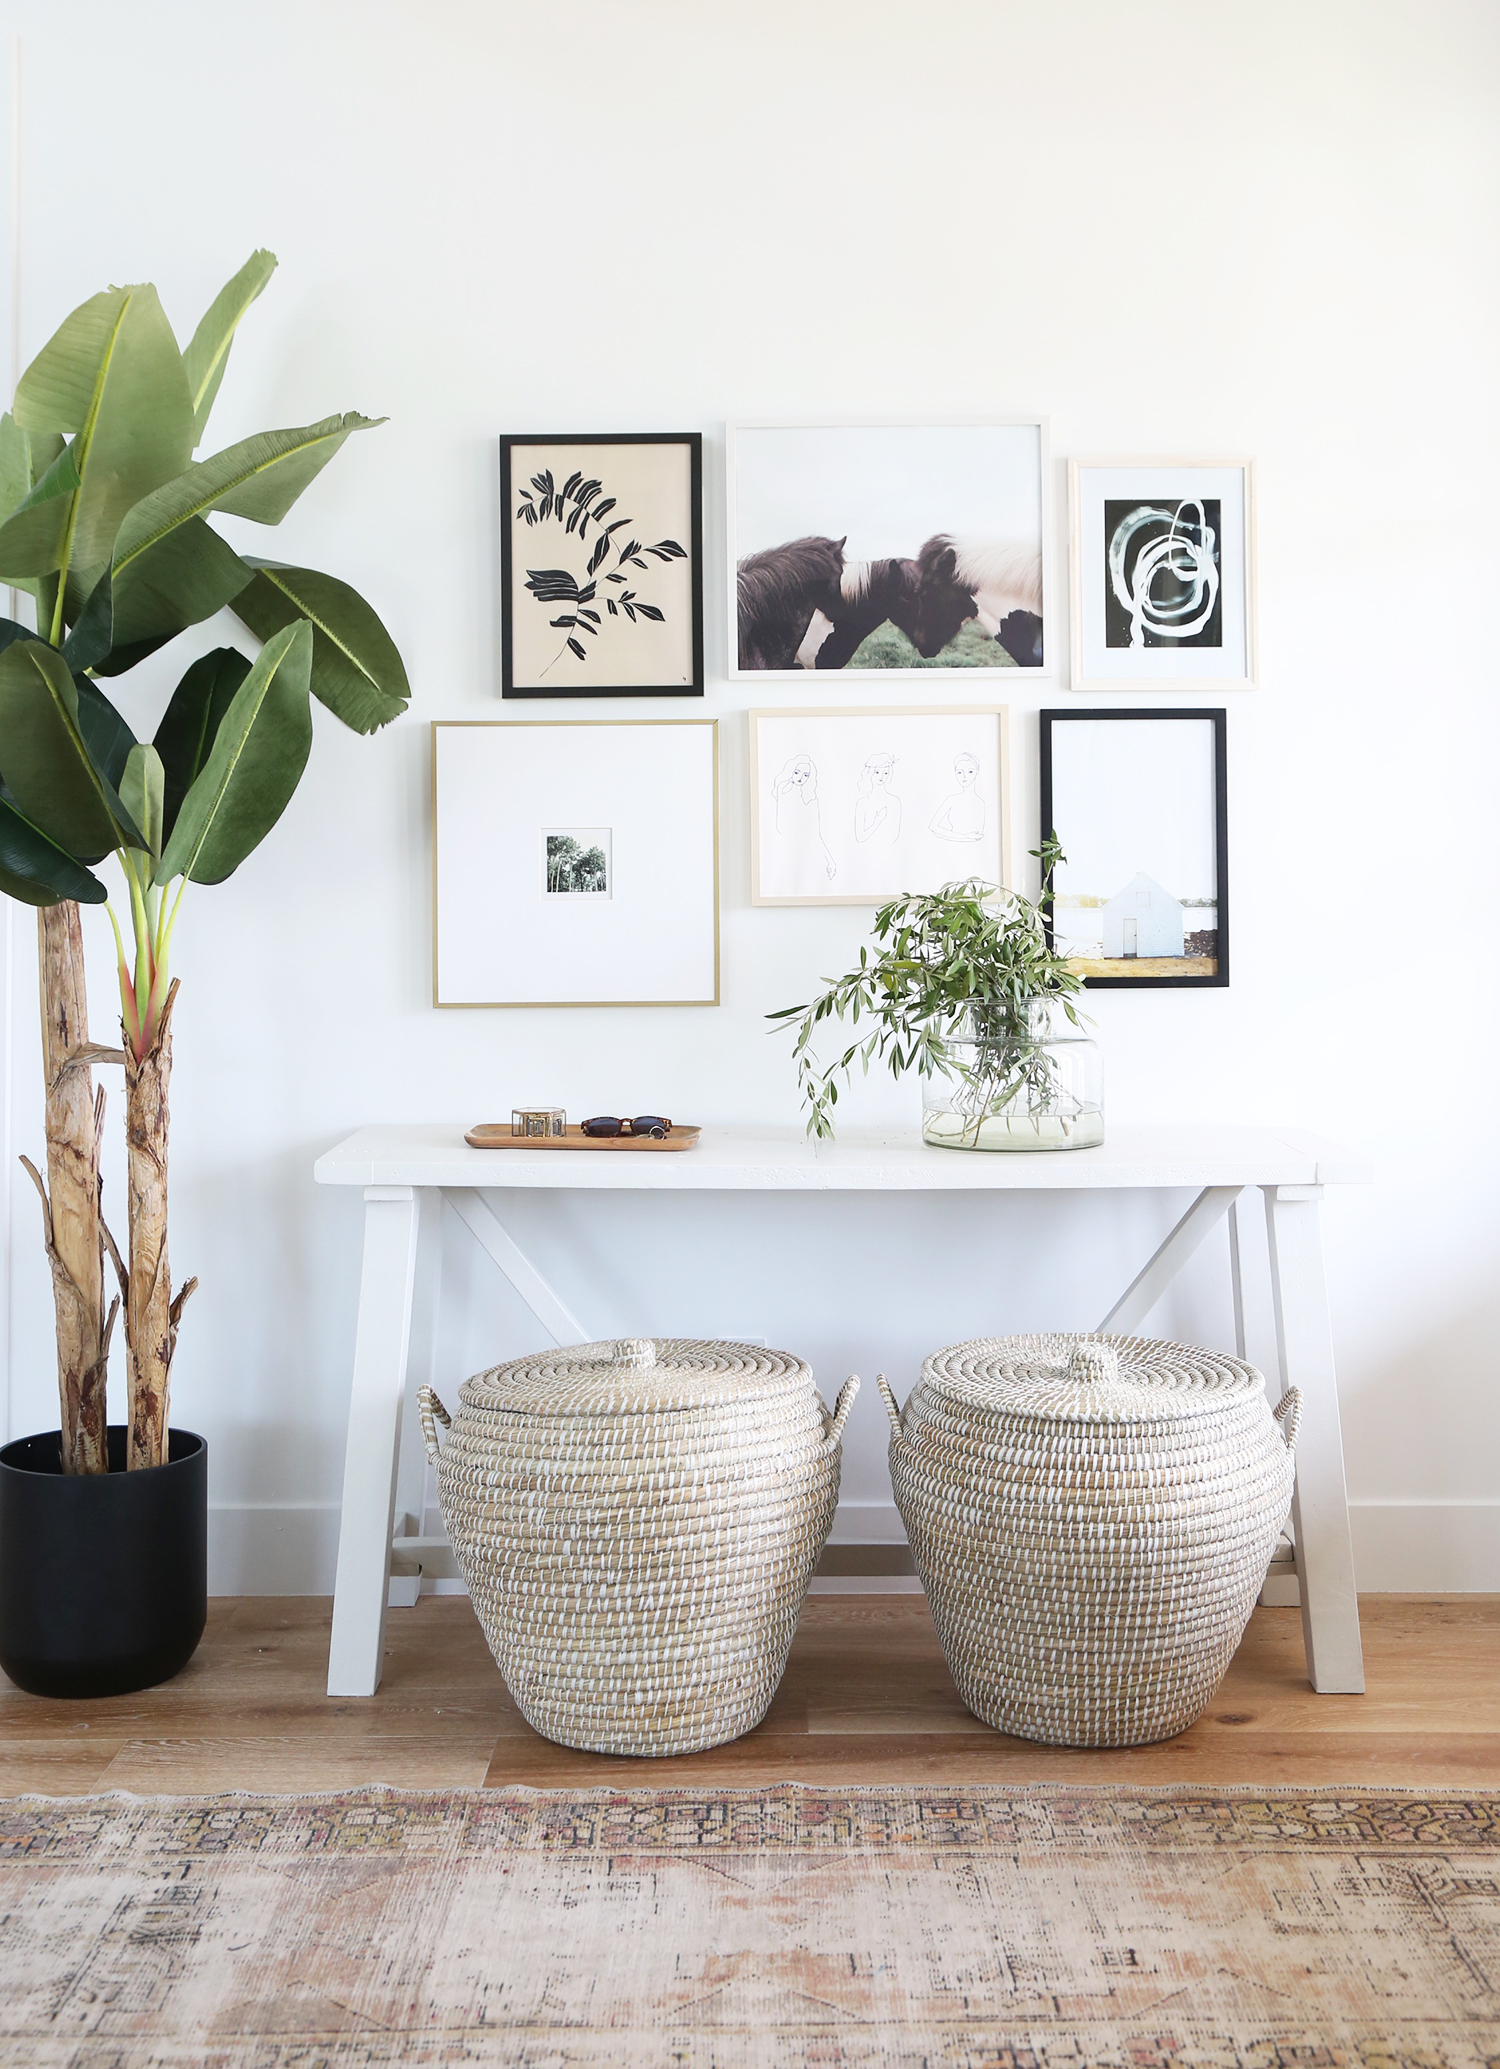
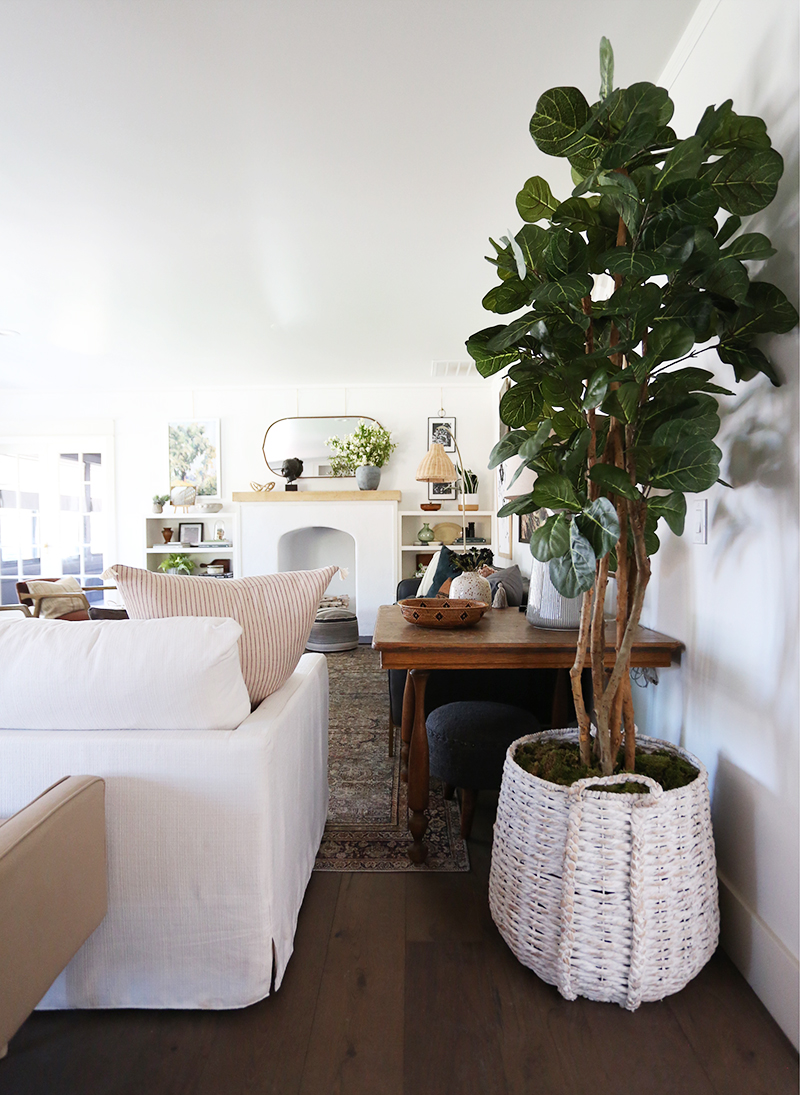
The faux fiddle leaf fig tree we used in the Evergreen living room was a great affordable find! I love that it has many individual trunks rather than a single skinny one. I did end up removing about half of the leaves to thin out the top a lot before manipulating and fluffing the leaves. I think this helps the tree look more realistic! I “planted” the tree in an oversized white basket, propping up the tree with a few boxes underneath and supporting the sides with recycled packaging materials before covering the top in moss.
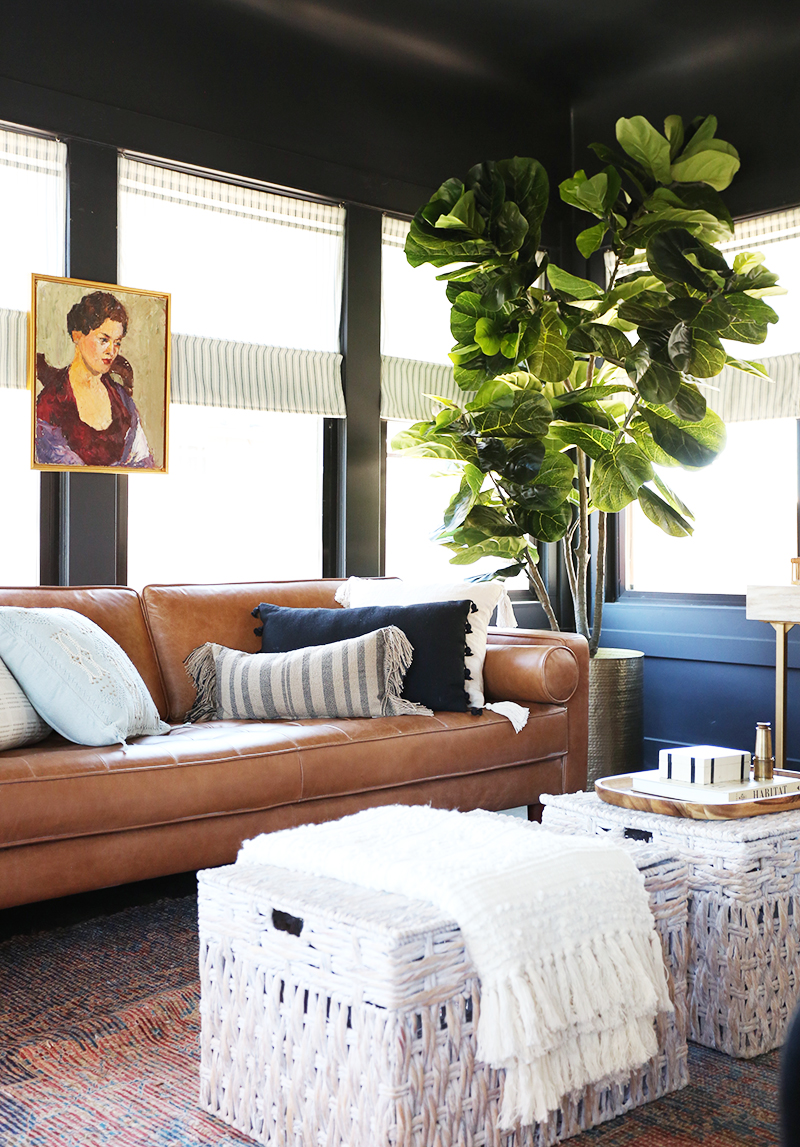
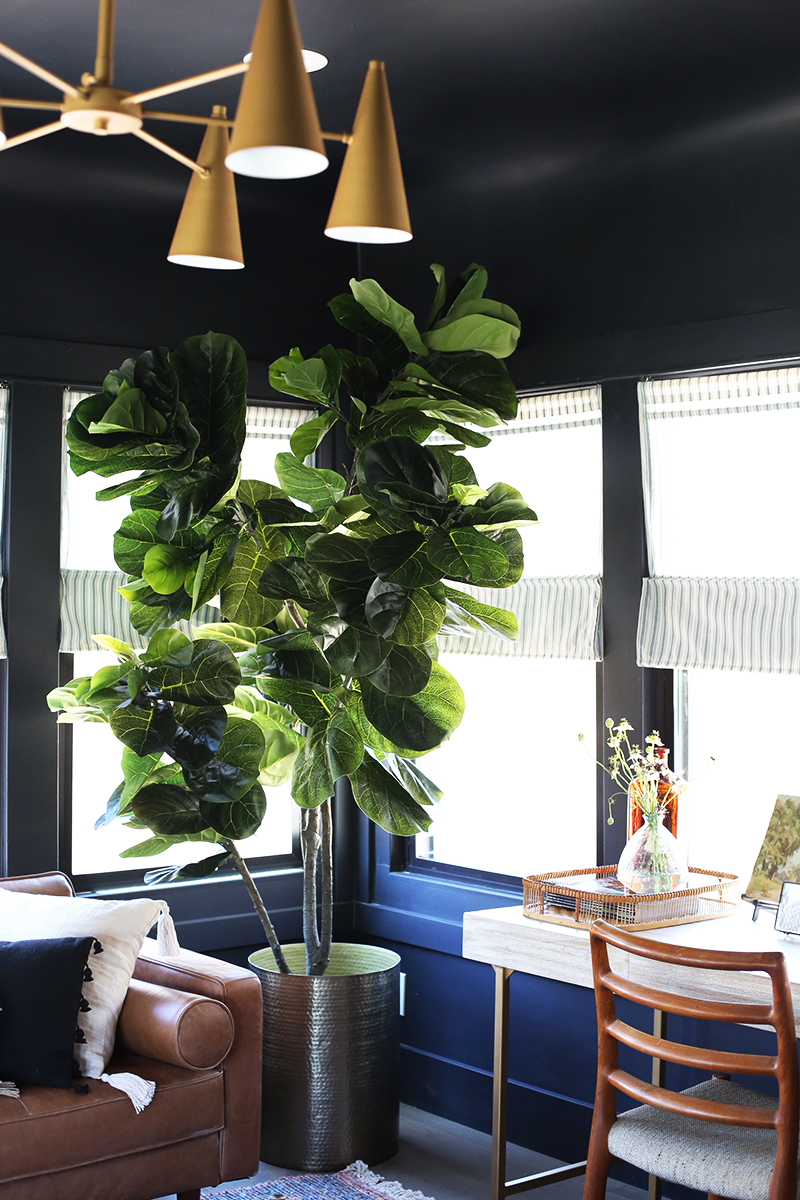
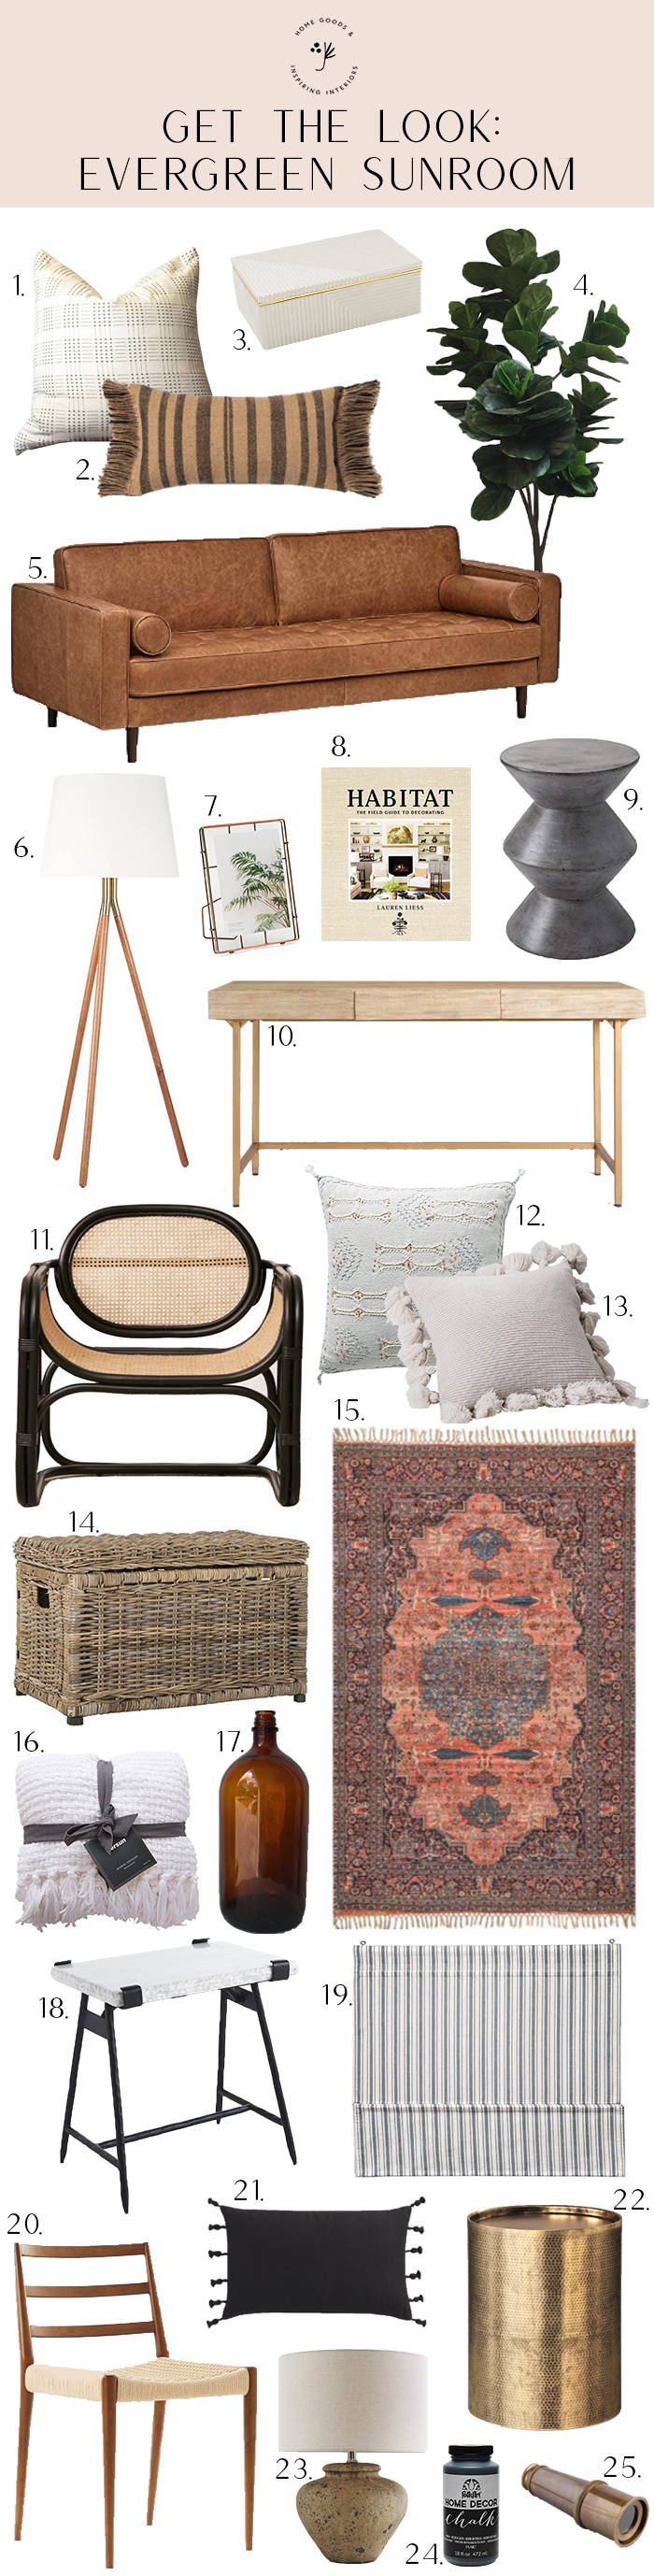
We used this 8′ fiddle leaf fig for the Evergreen sunroom. When it arrived I was SO disappointed with the way it looked, I packaged it back up and planned to return it. While staging the room we reluctantly decided to give it another try and with about five minutes of leaf fluffing, I AM OBSESSED!!!! It looks very convincing, especially in front of a window. And the height was exactly what we needed to cozy up this big space!
I really wanted to find a brass planter, but were having difficulty finding something large enough to accommodate this huge tree! We got creative and purchased a brass side table and turned it upside down! I wouldn’t recommend doing this with live plants, due to poor drainage, but when you are dealing with faux anything goes!!
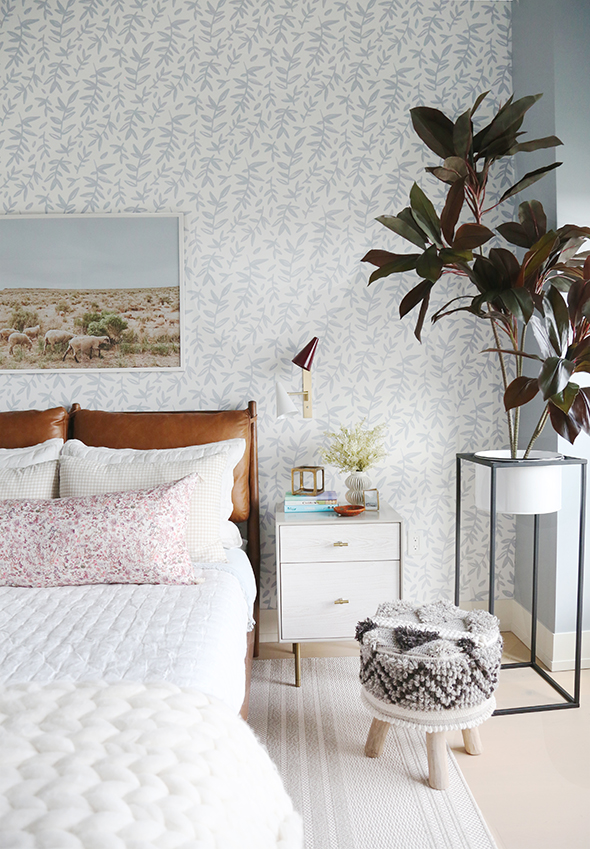
I was in a fiddle leaf fig rut when I purchased this faux tree for the Real Simple bedroom we worked on last year. I was craving something different, and this tree fit the bill perfectly. Make sure you take some time to gently bend and separate the trunks and leaves on this one. It will give it a much more realistic look!
Here is one of our favorite fiddle leaf fig options. This one never fails and looks good in just about every space. You really dan’t go wrong with this one!
Below are some of the trees we have either already ordered to try out, or have our eyes on! What is your go-to source for faux trees?
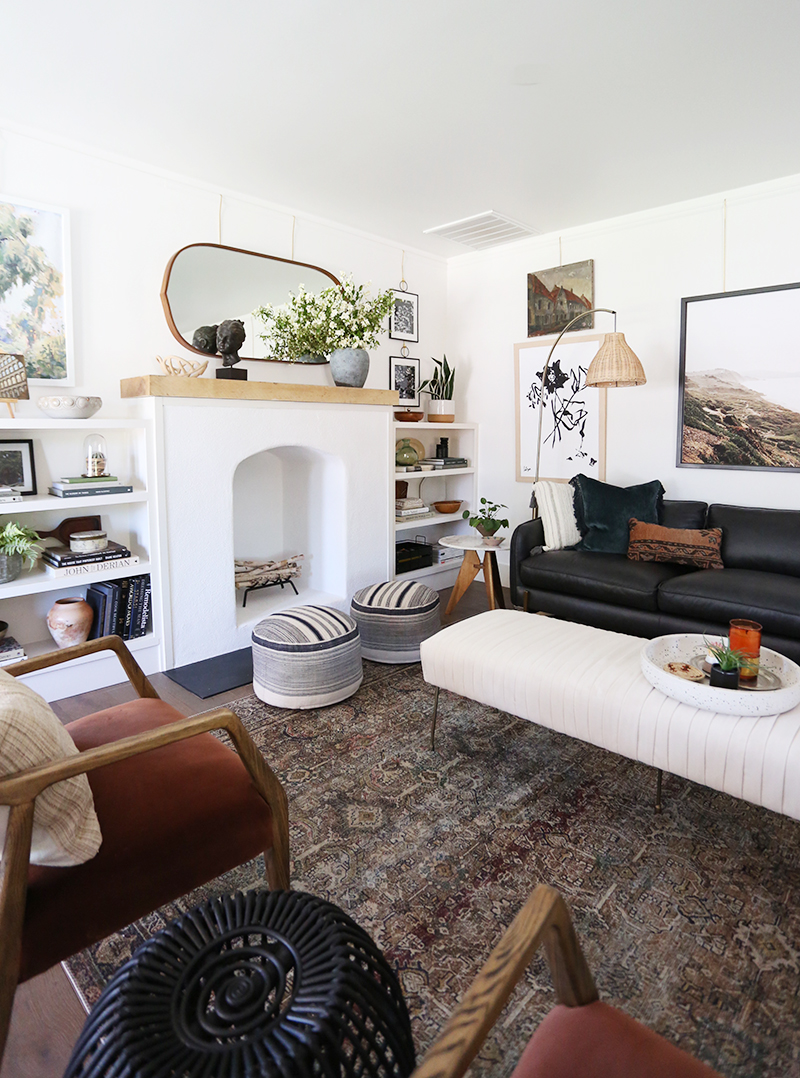
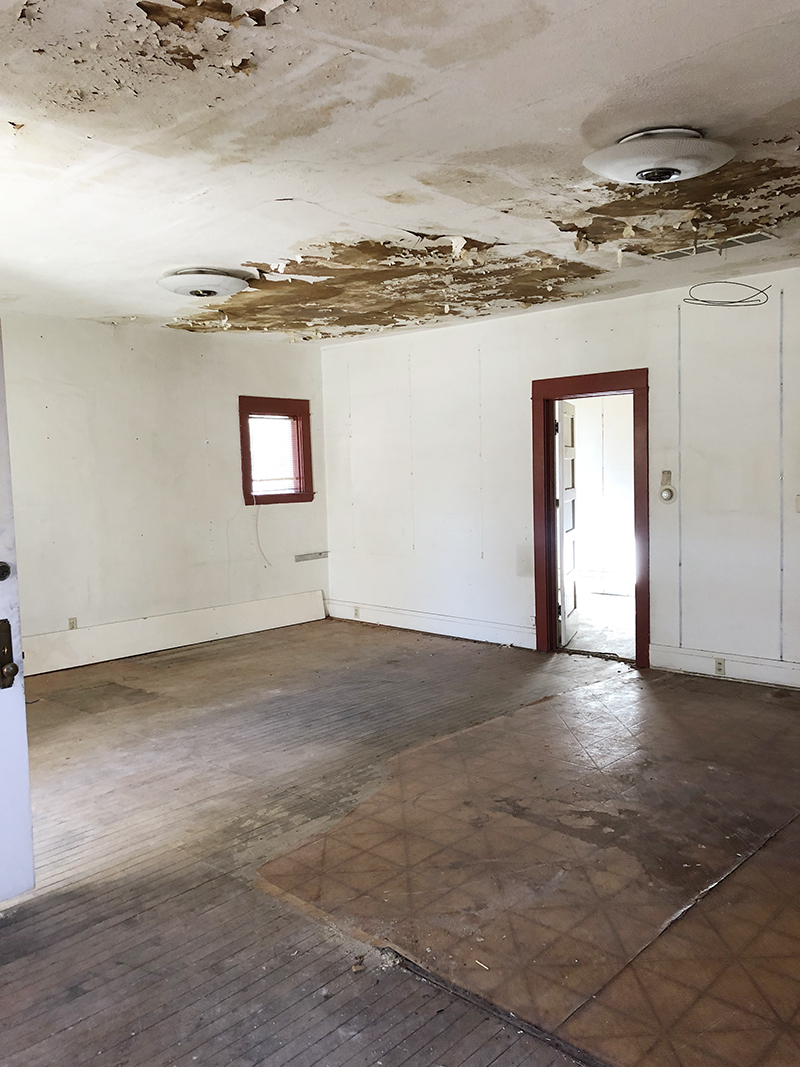
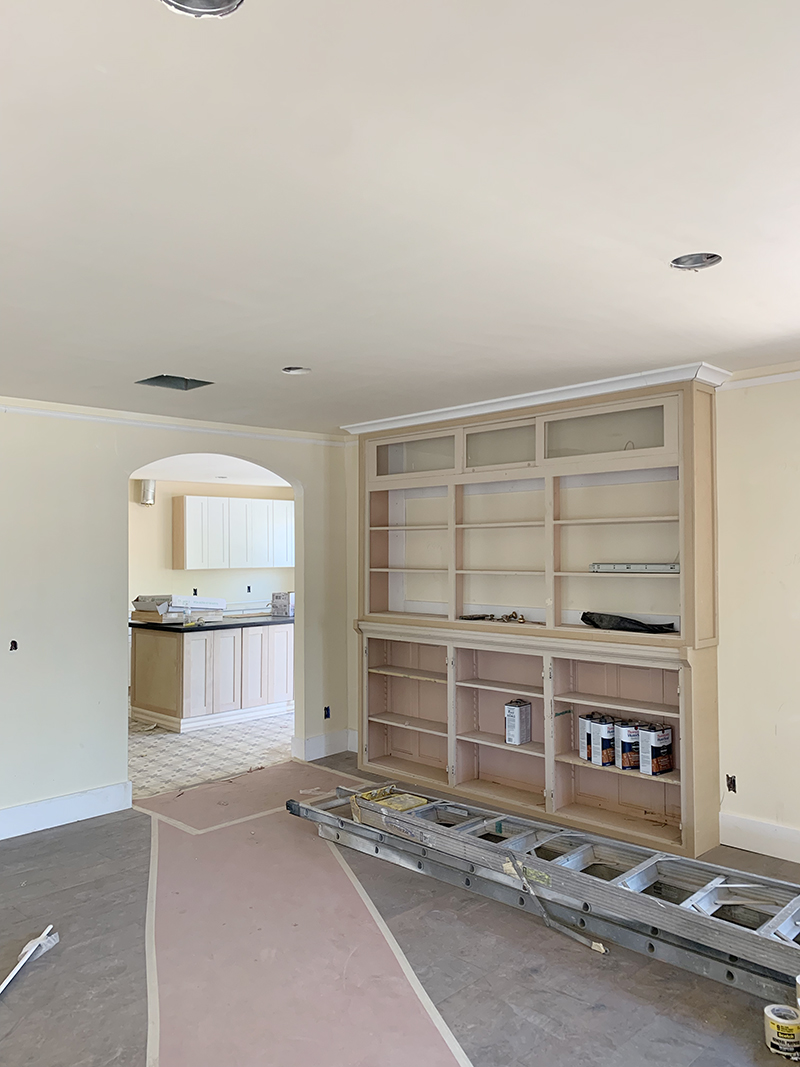
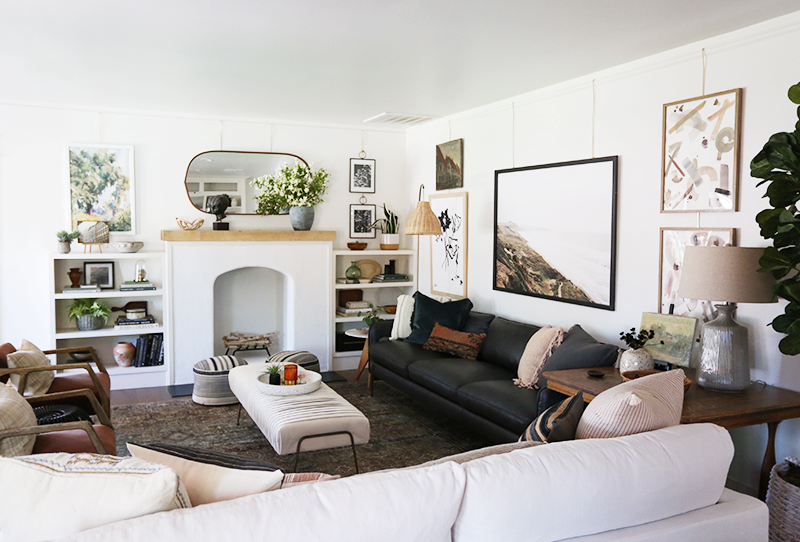
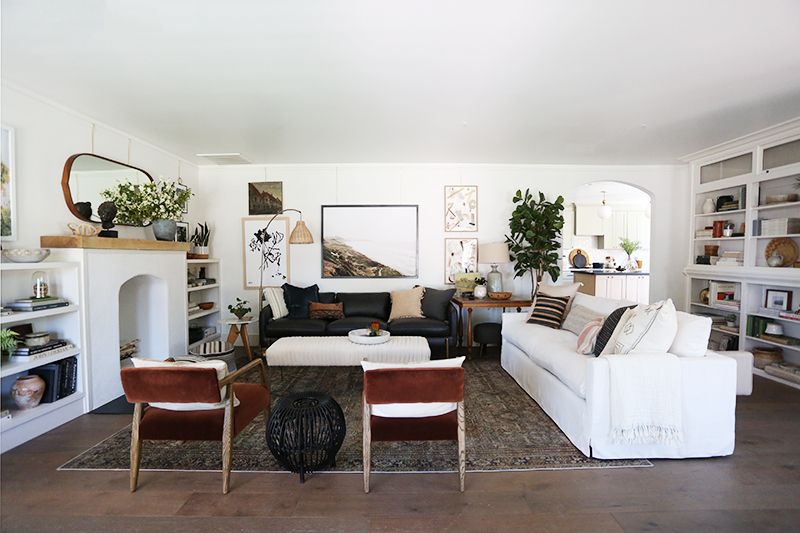
The living room at the Evergreen house has come such a long way! When we first bought this flip house, the fireplace had been demoed and the flu was buried in the wall. There was an awkward small window in the corner and a strange door to a bedroom right smack dab in the middle…
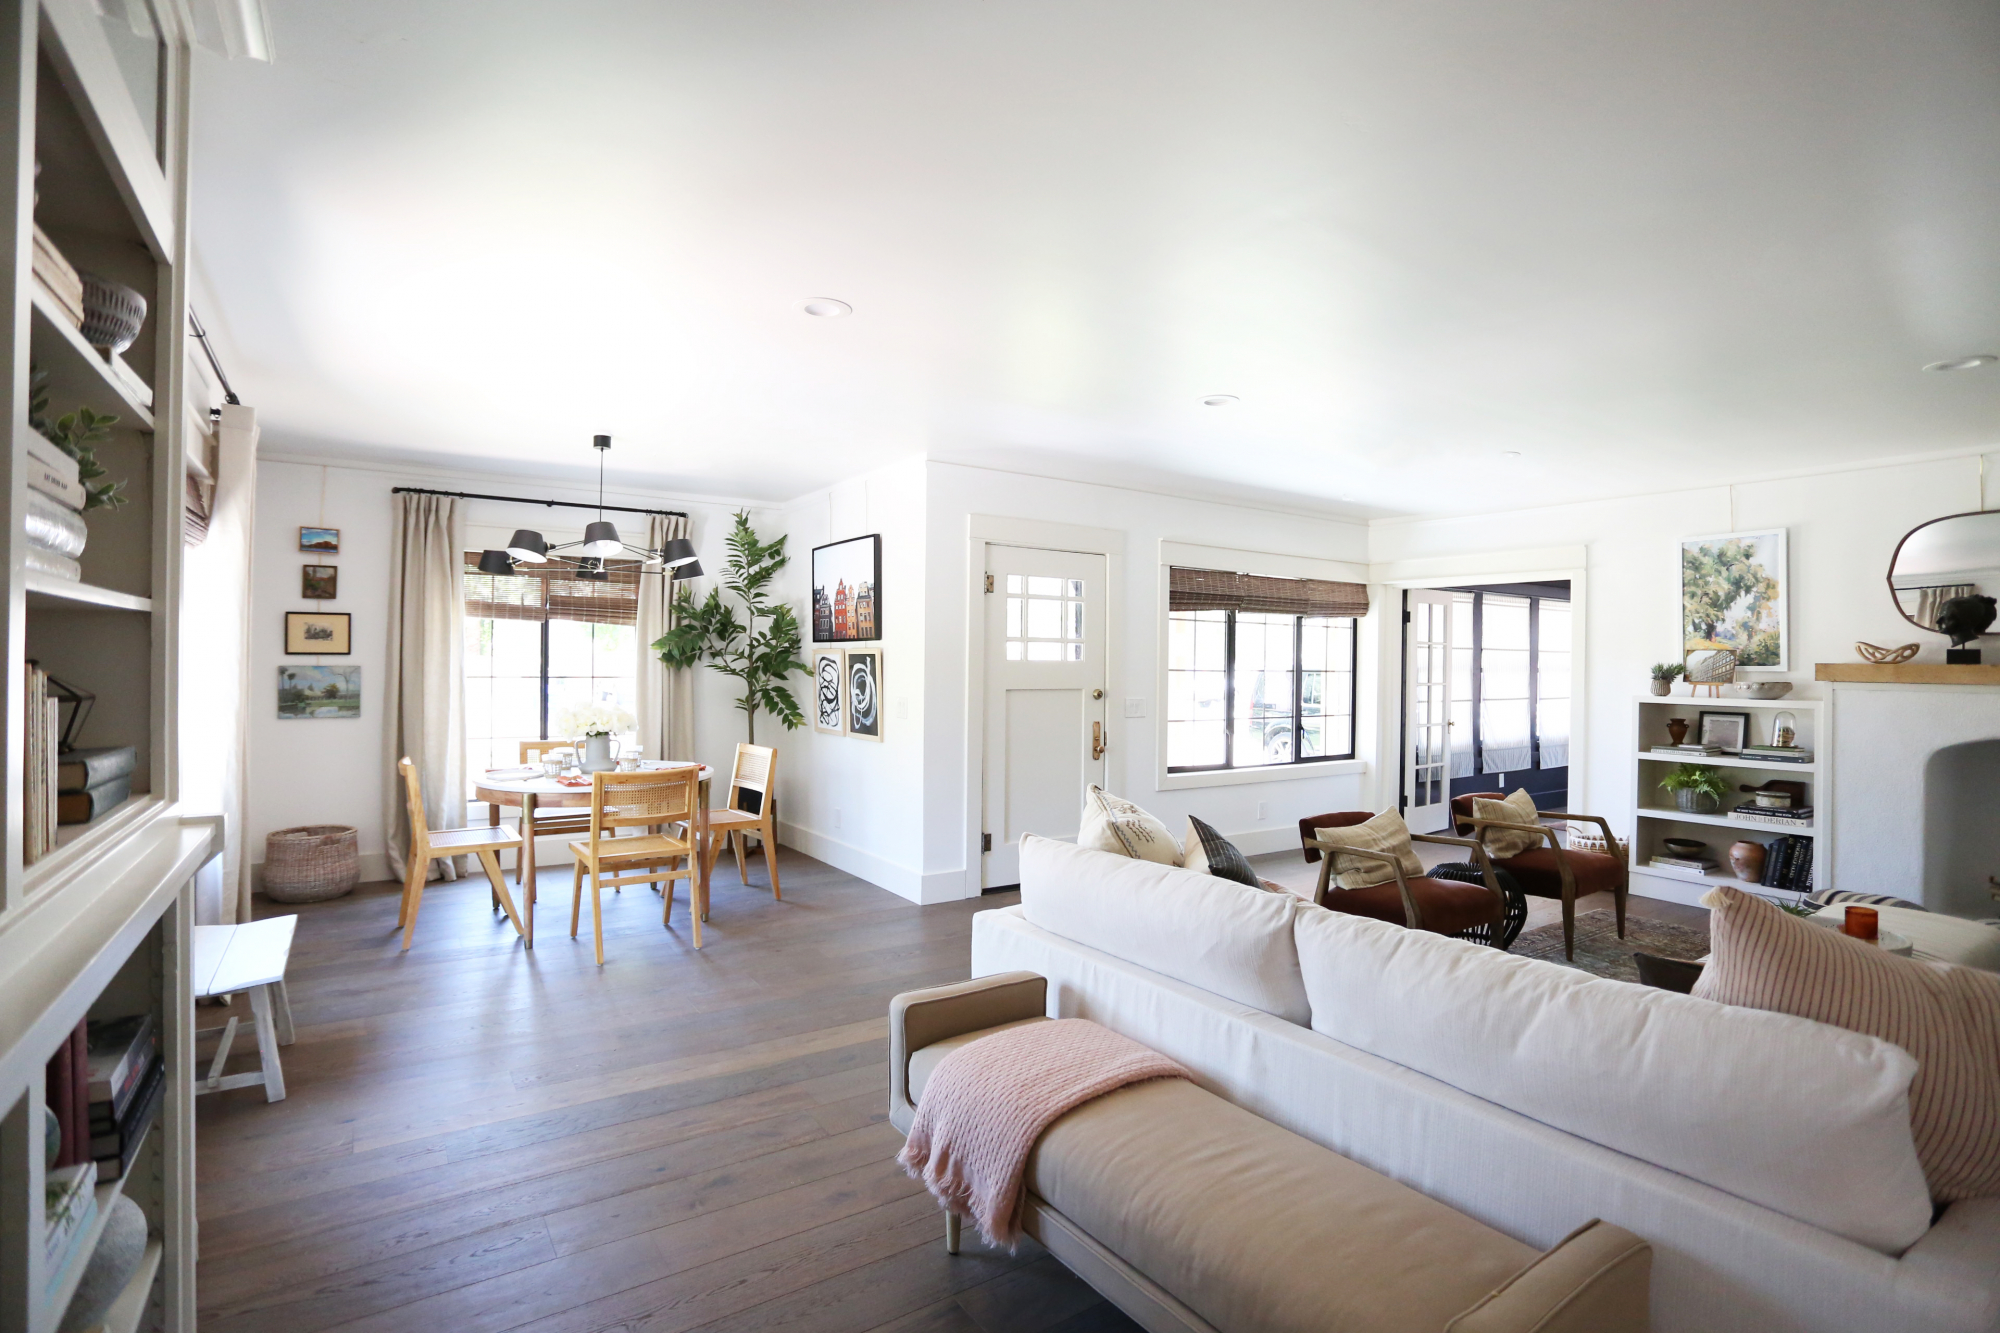
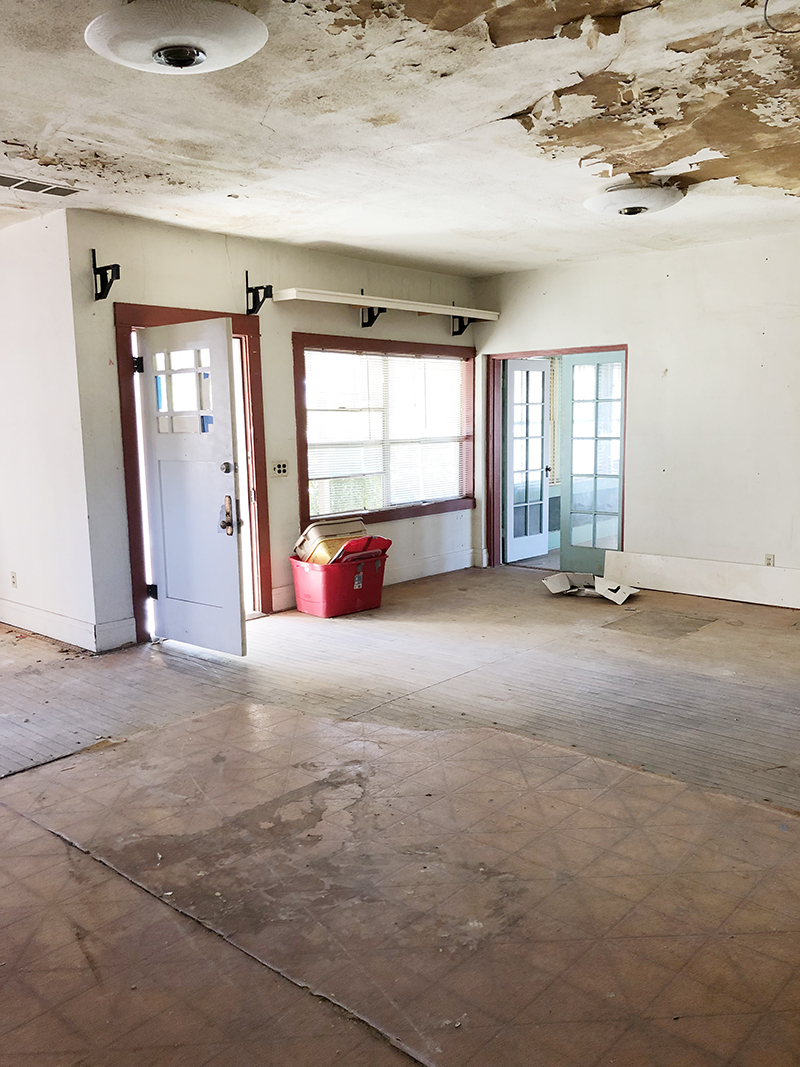
The living room at the Evergreen house has come such a long way! When we first bought this flip house, the fireplace had been demoed and the flu was buried in the wall. There was an awkward small window in the corner and a strange door to a bedroom right smack dab in the middle of the main wall, a straight shot from the front door. The pass through to the kitchen was short and narrow. There were THREE types of flooring in one room. And the ceiling was basically falling down. NBD, right?
The first thing we did was frame in the doorways and windows we wanted to delete. We replaced the ceiling drywall and laid new floors since there was no wood to even salvage in half of the room. Everything under the linoleum was plywood, so there must have been some serious water damage at some point or something! I was bummed we couldn’t use original wood floors in this house, but I love the tones of the new flooring (Grand Pacific in the color Sea Lion).
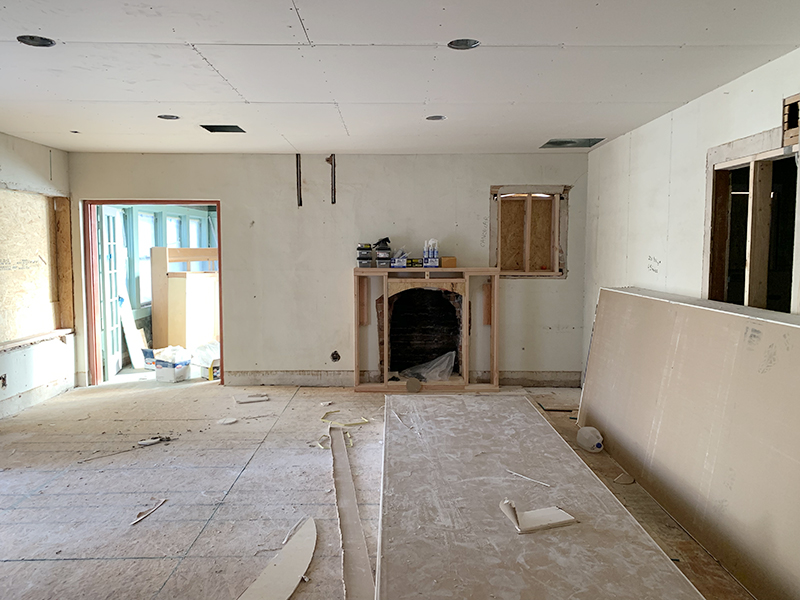
We built out a new firebox and framed out shelves on either side.
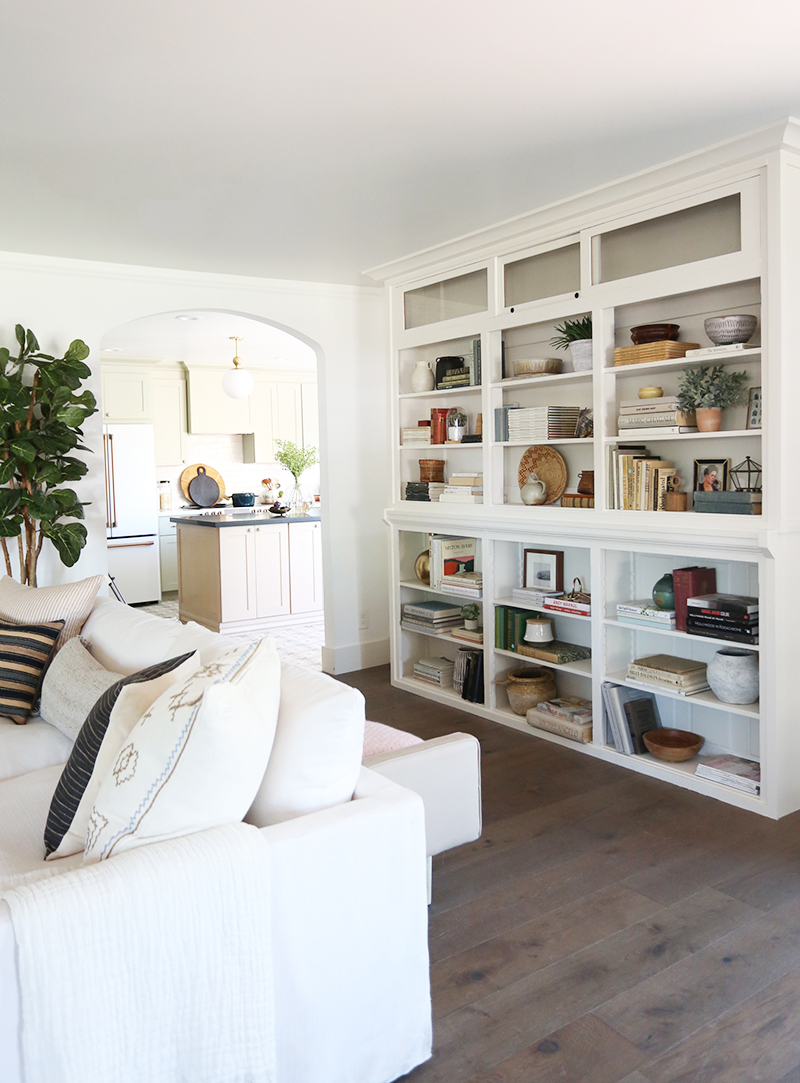
On the other side of the room, we opened the pass through to the kitchen and added an arch detail that mimics the arch we designed for the fireplace surround. We installed some original built-ins we had salvaged from one of the bedrooms. It fits perfectly on this wall!
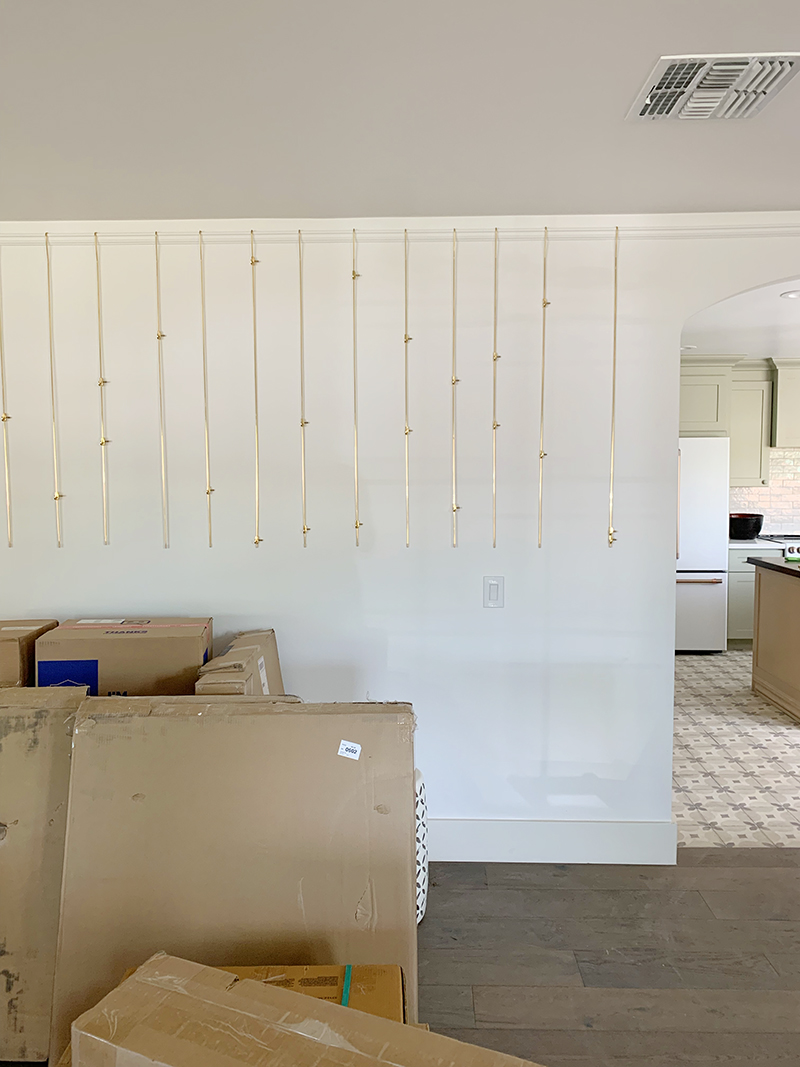
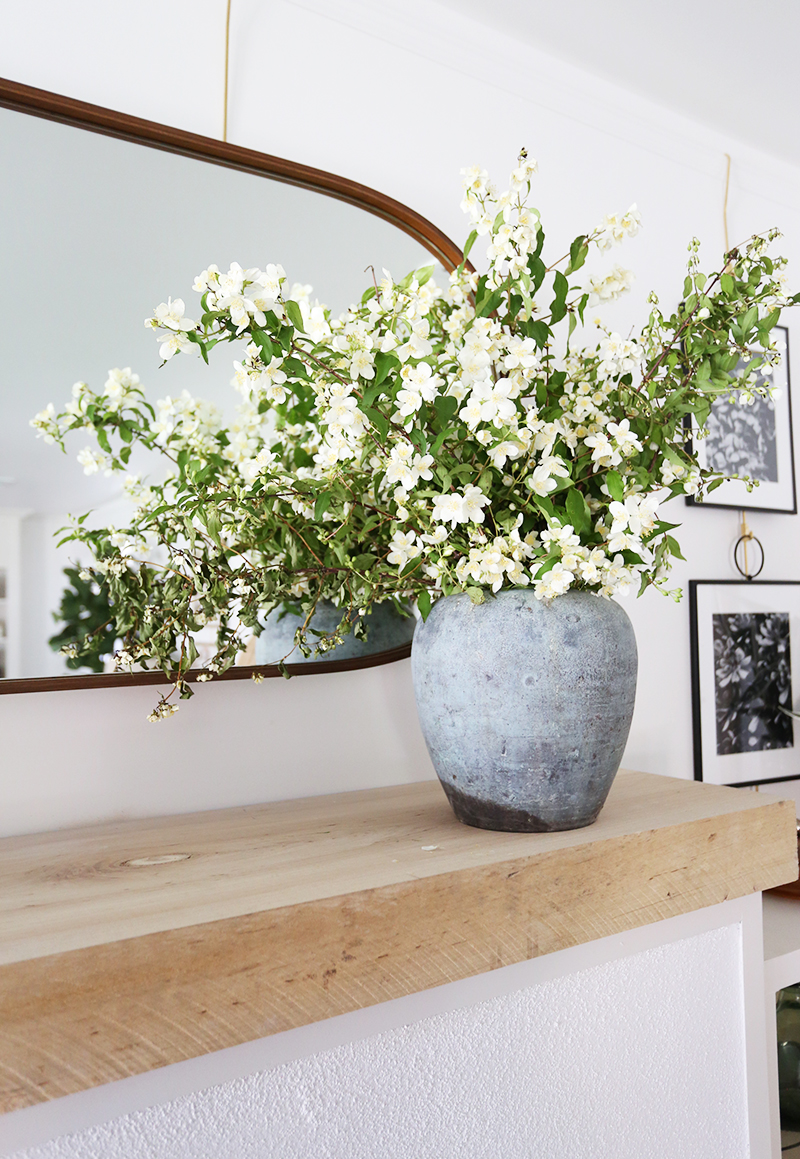
From day one, I had a vision of using a picture rail system in the front room for hanging art easily on the original plaster walls (which can be a BEAST to nail into!). I think the picture rail installed a few inches from the ceiling also compliments the coved ceiling detail in the sunroom! The french brass gallery rods were purchased from Swan Picture Hangers and I was super impressed with the look and quality.
The walls were painted Chantilly Lace by Benjamin Moore and the trim and builtins are Seapearl. I love the tonal warmth in the colors of this room and I think the brass accents from the gallery rods are the perfect final touch! (And they match the original door hardware too!)
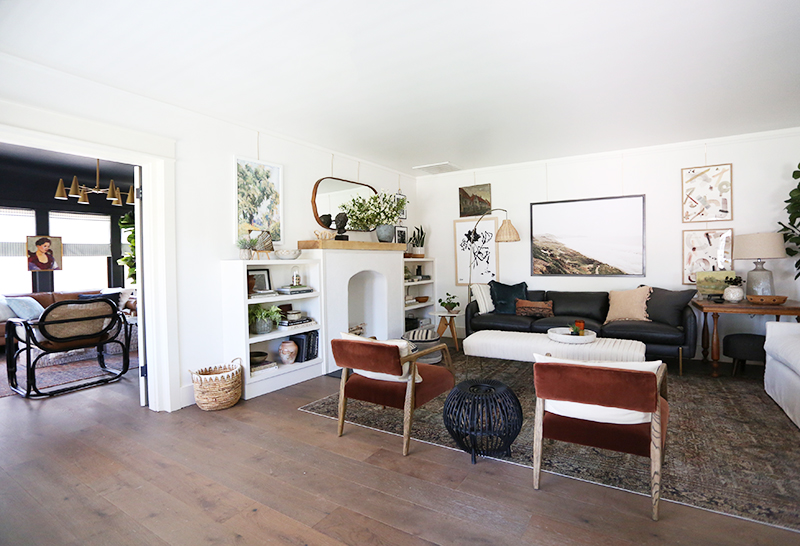
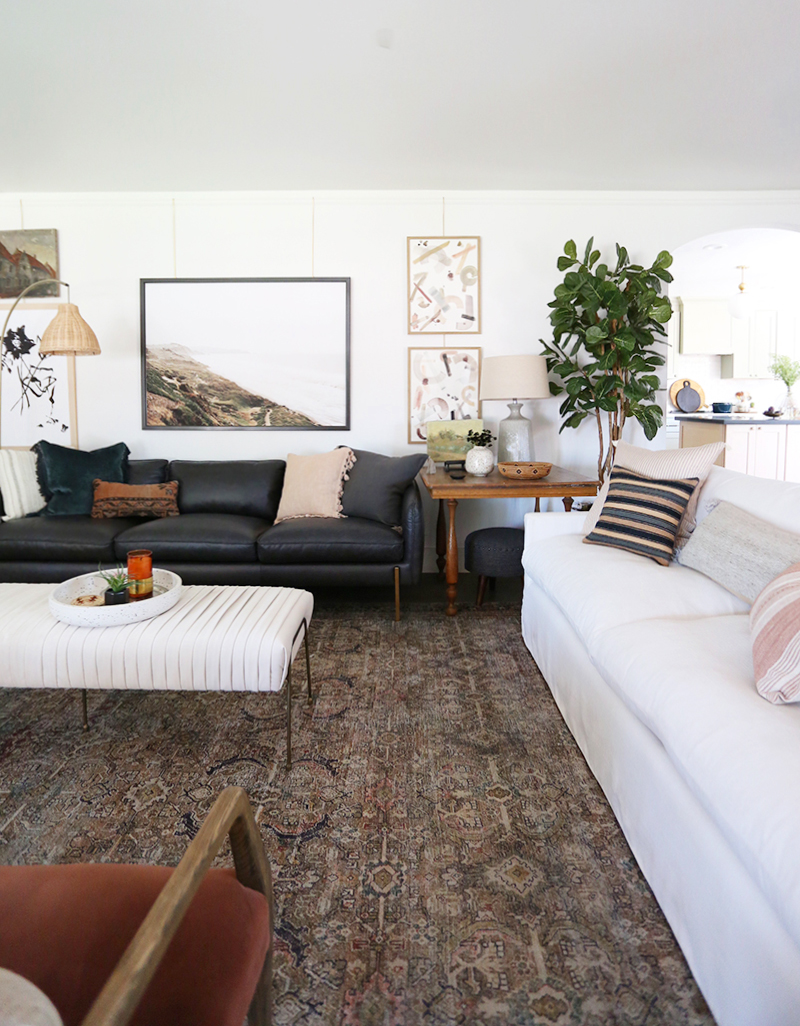
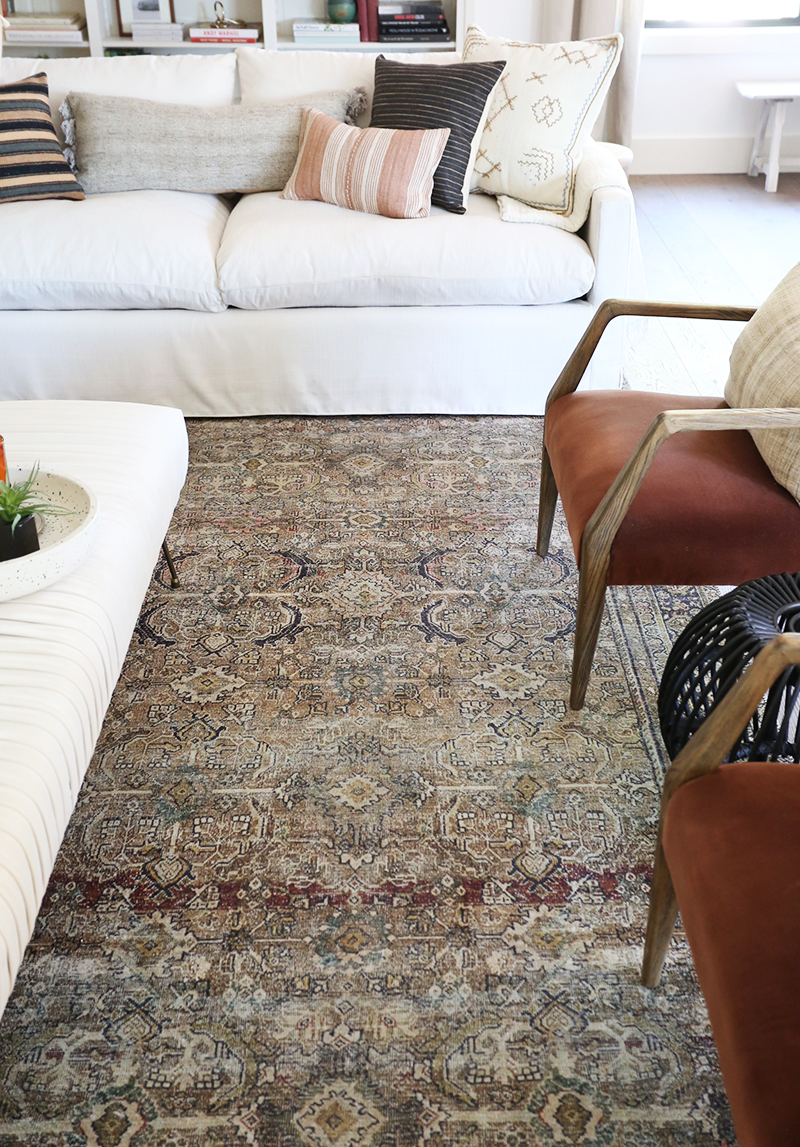
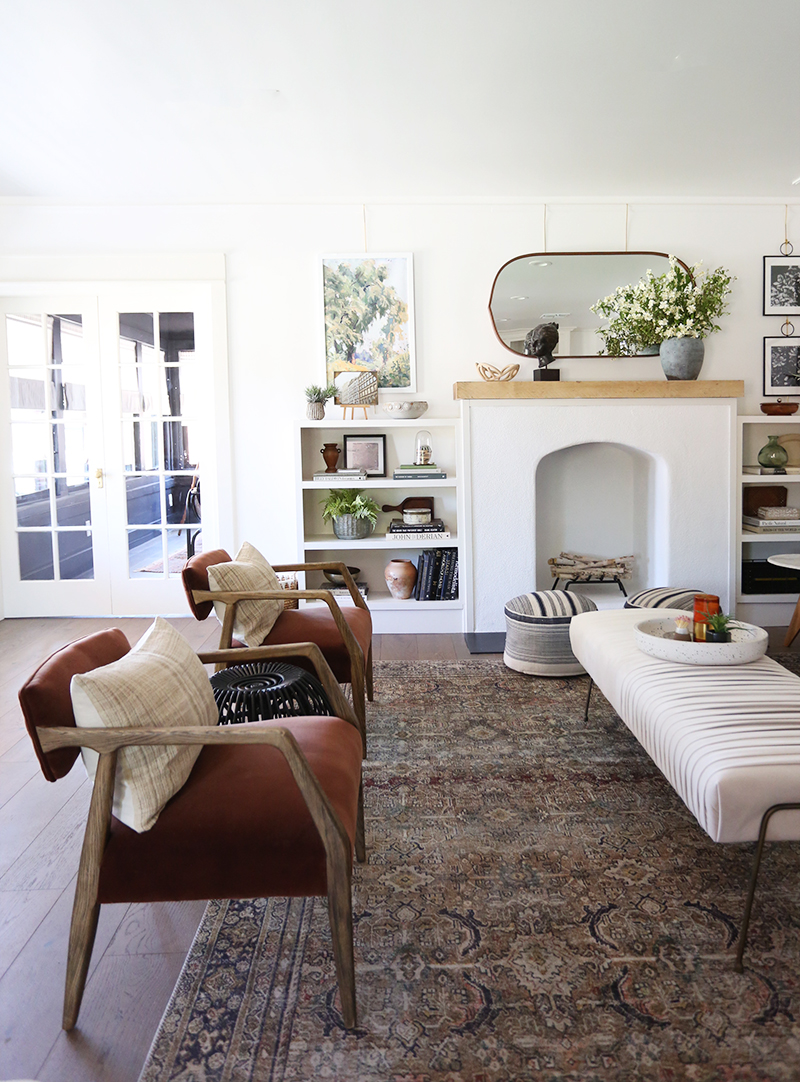
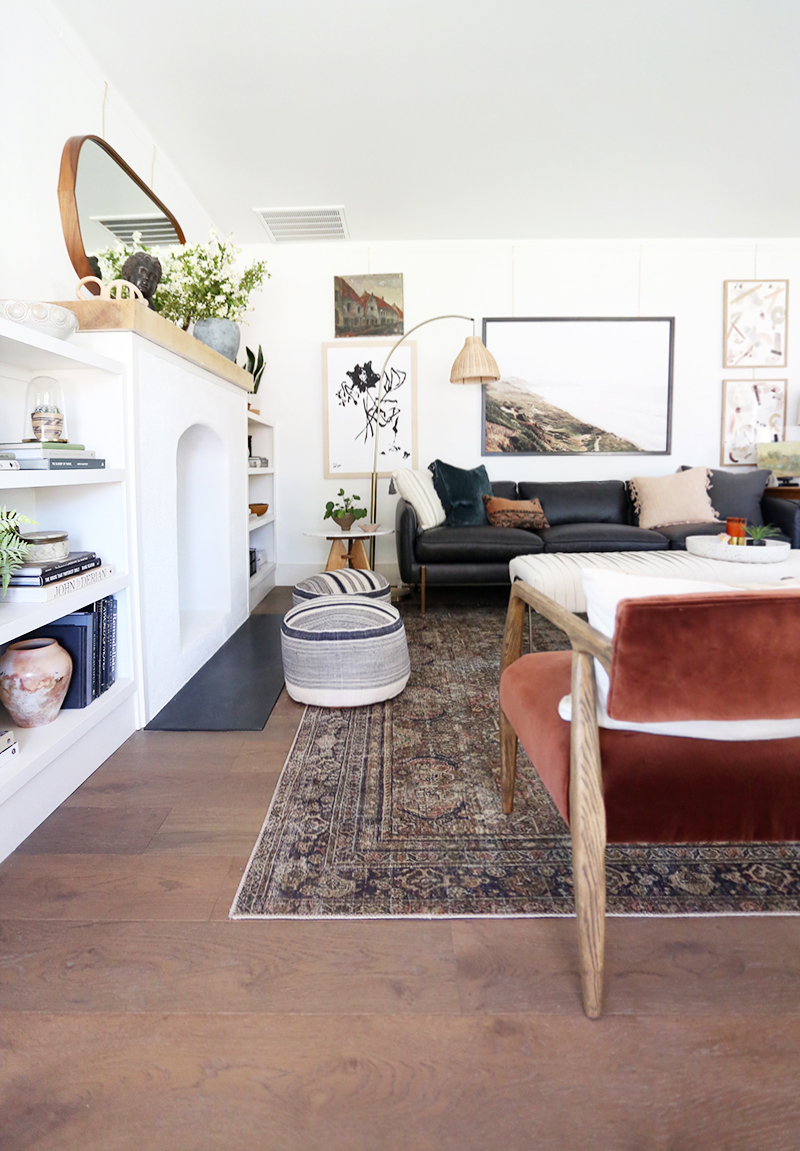
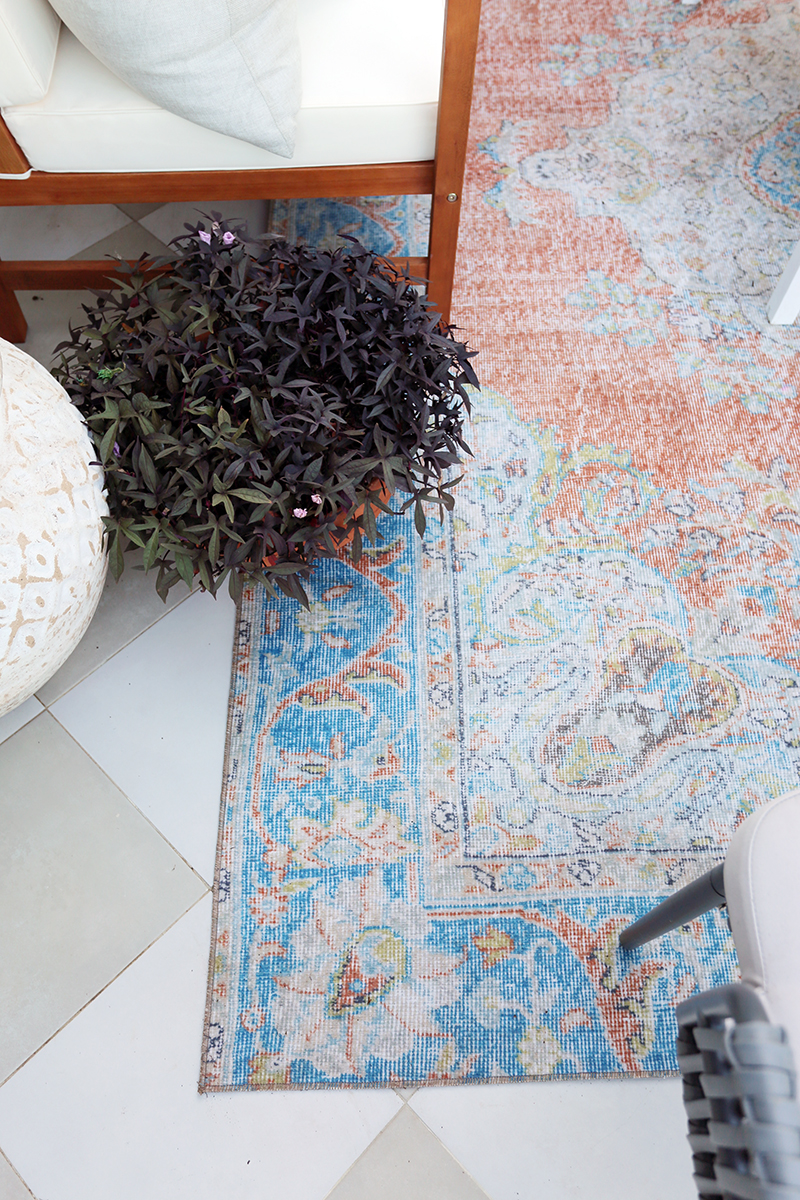
If I’m starting from scratch with decorating a space, I almost always pick the rug first, because rugs are the hardest thing to find for me, and they are so, so important for a room! In fact, if you are stumped with your room, make sure you have the right rug for your room. It needs to be the first puzzle piece!
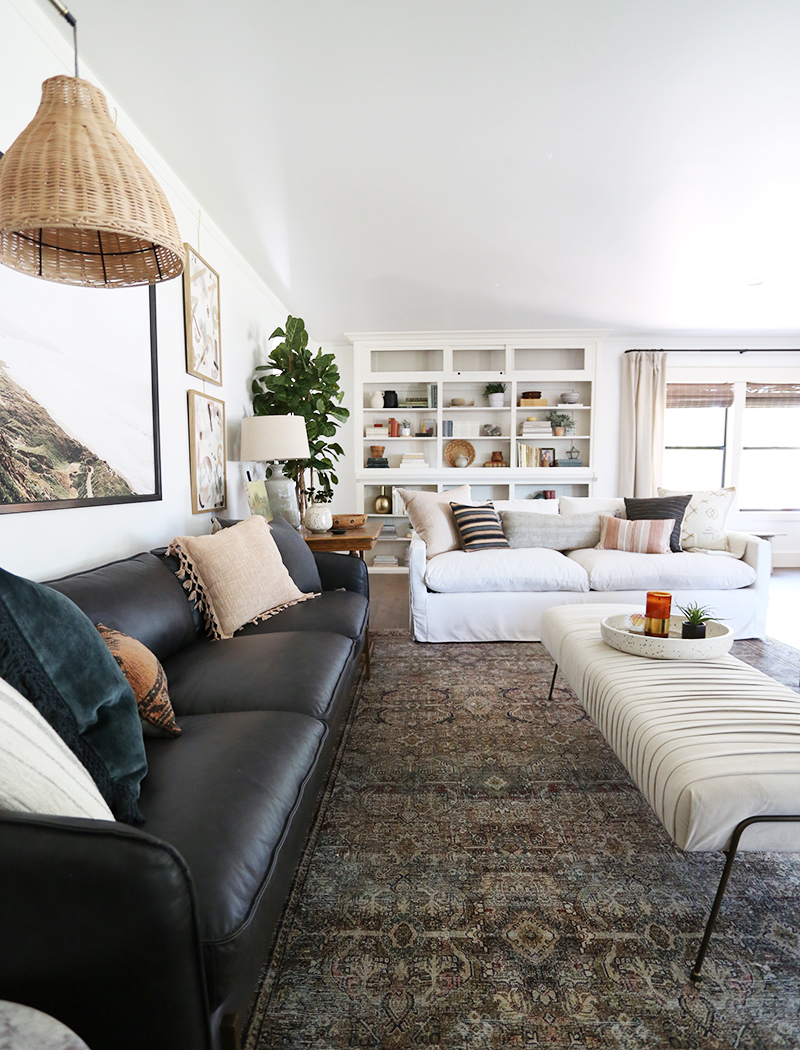
The size needs to be right for the space and for your furniture (our rug here is 9×12 – perfect for a larger layout and all the front legs are comfortably sitting on the rug). Beyond size though, the pattern and color tones of your rug will completely change the feel of your space! I love this particular rug for this room because it was tonal with the floors. I love all the warms colors and the movement. (Also it was super affordable and GORGEOUS!) BUT the pattern is definitely on the busy side, so that dictated the direction of my furniture upholstery and throw pillow choices. Even my art needed to go in a different direction to compliment the busier rug pattern.
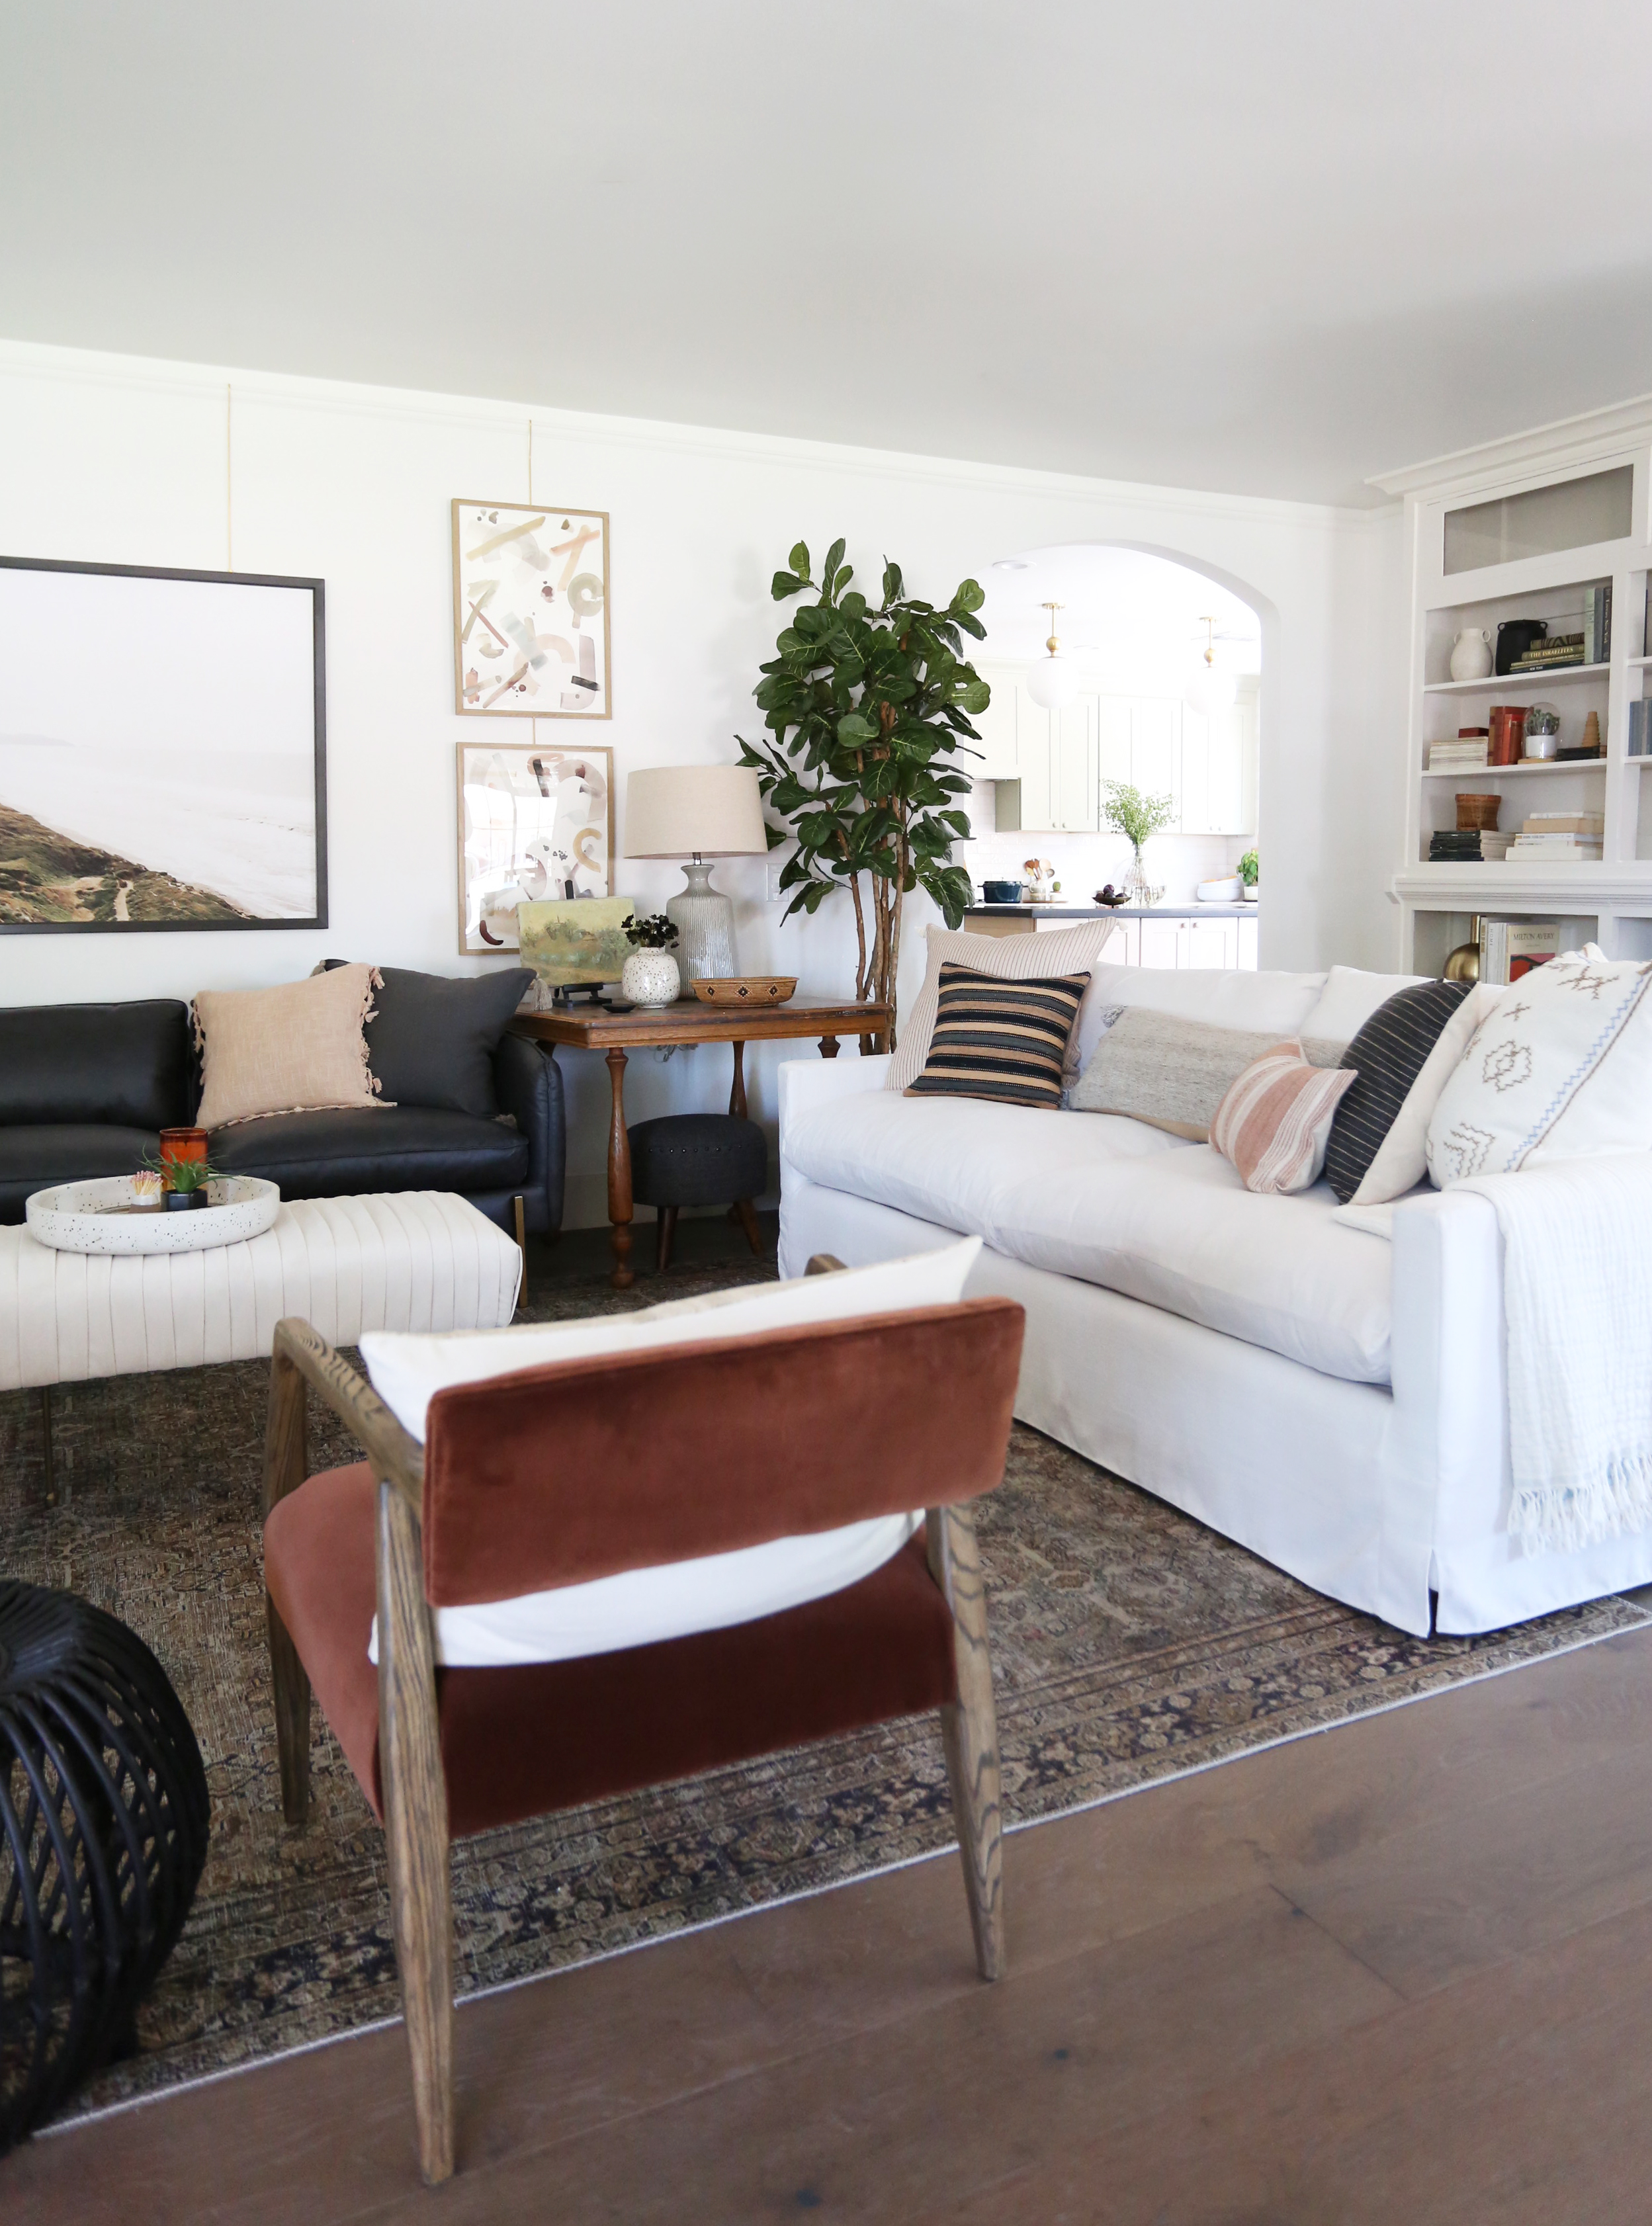
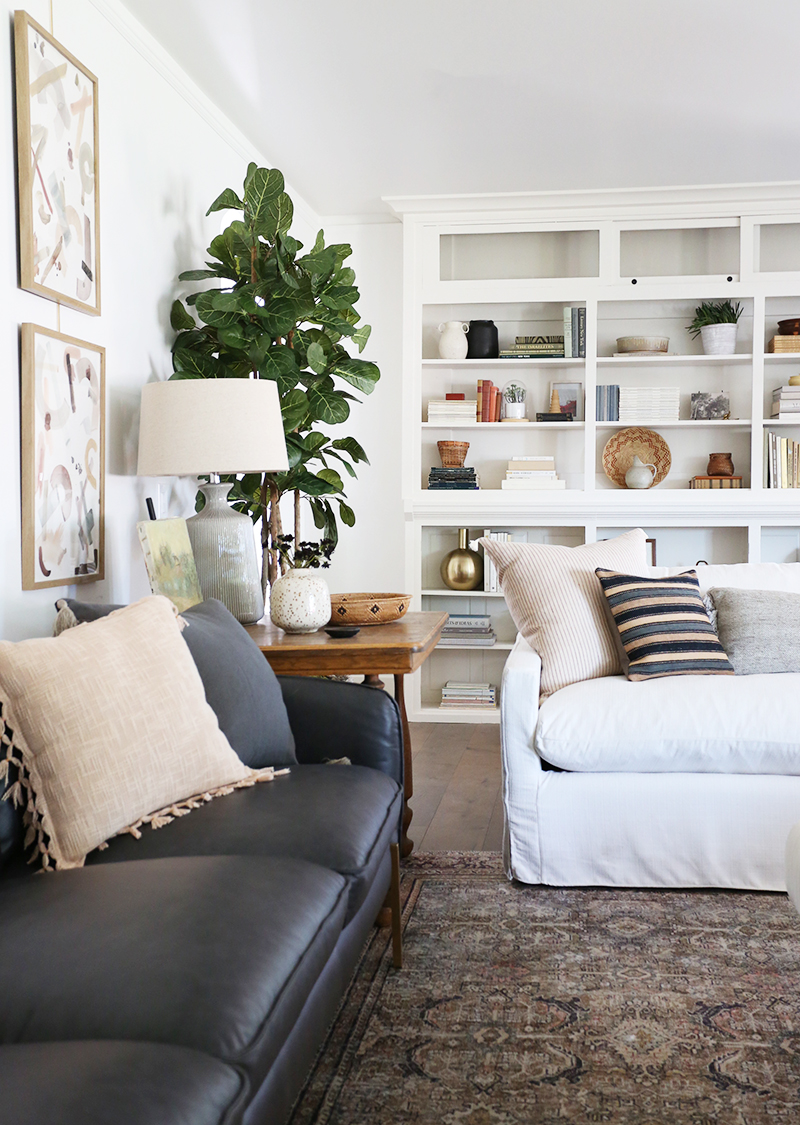
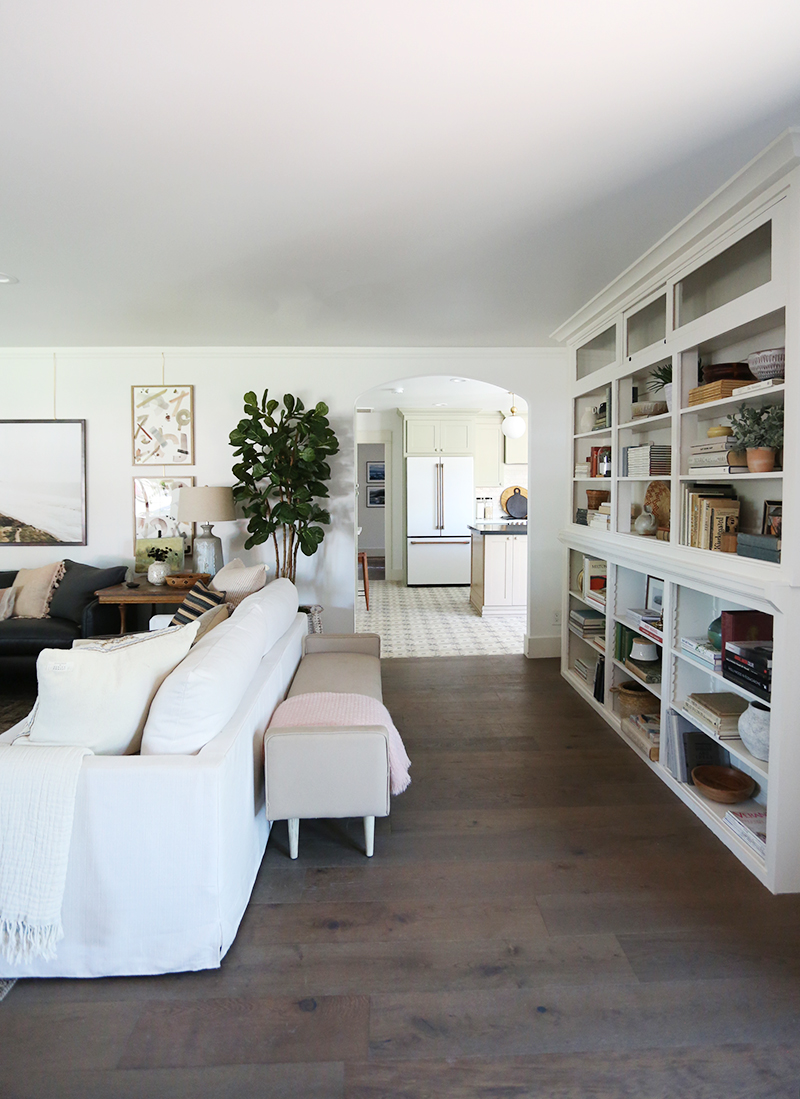
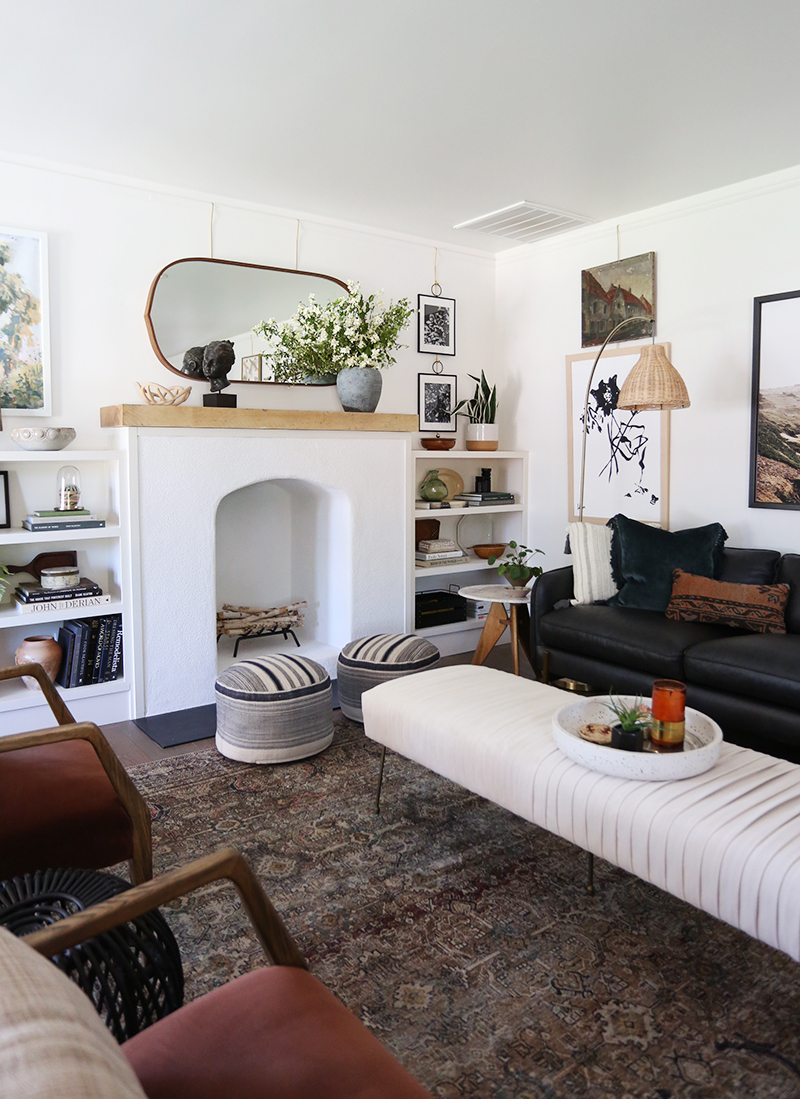
We chose rust velvet arm chairs, a white slipcovered sofa and a black leather sofa to all fit together in the living room. It’s a big space and it could handle a lot of seating. I love how these pieces work together to create a balanced look in both tone and style!
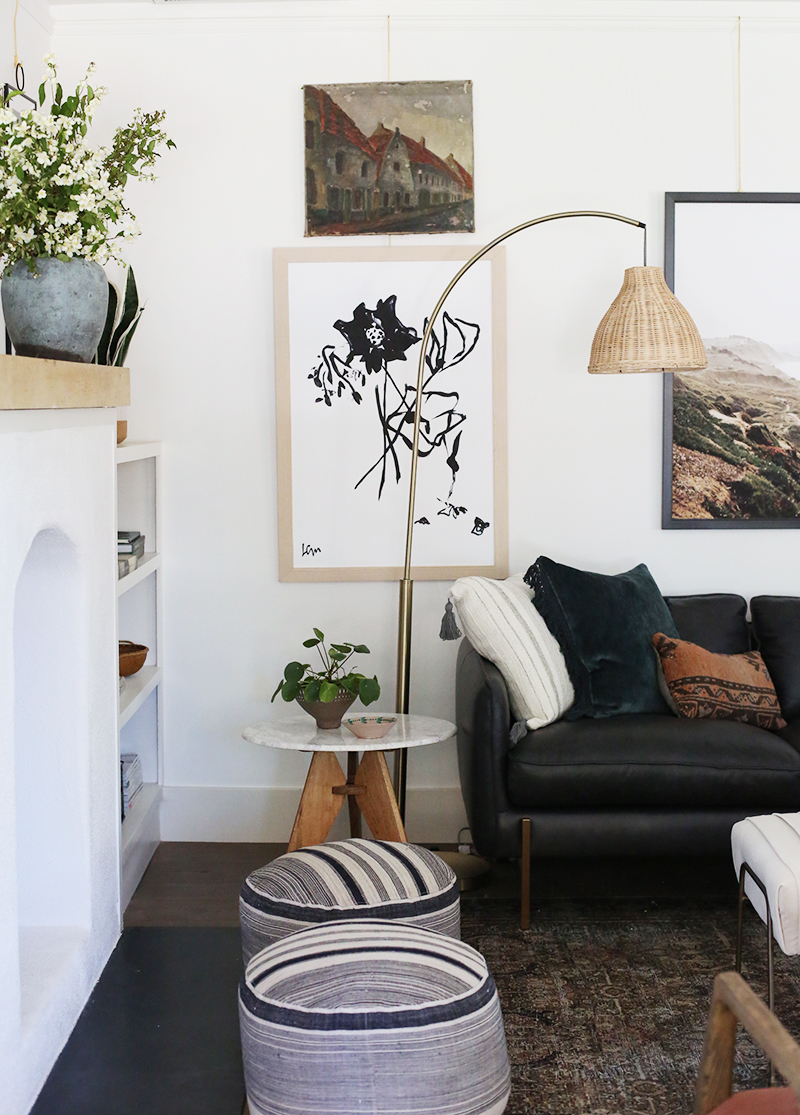
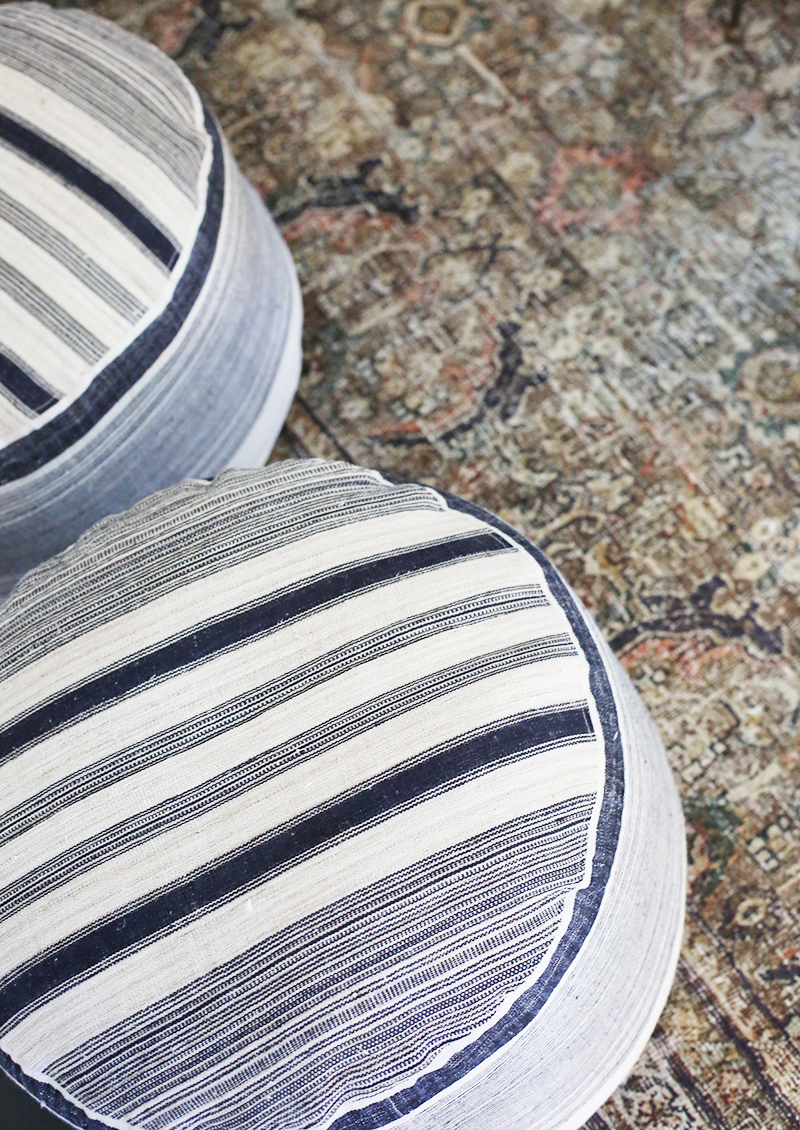
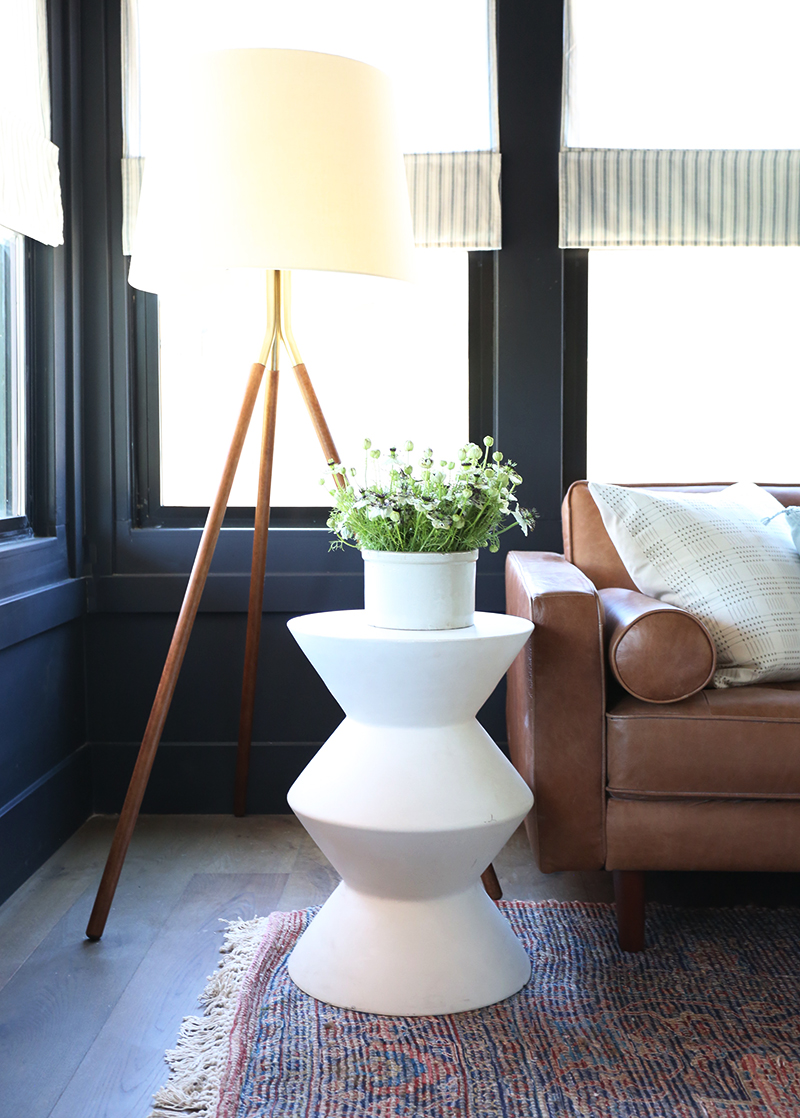
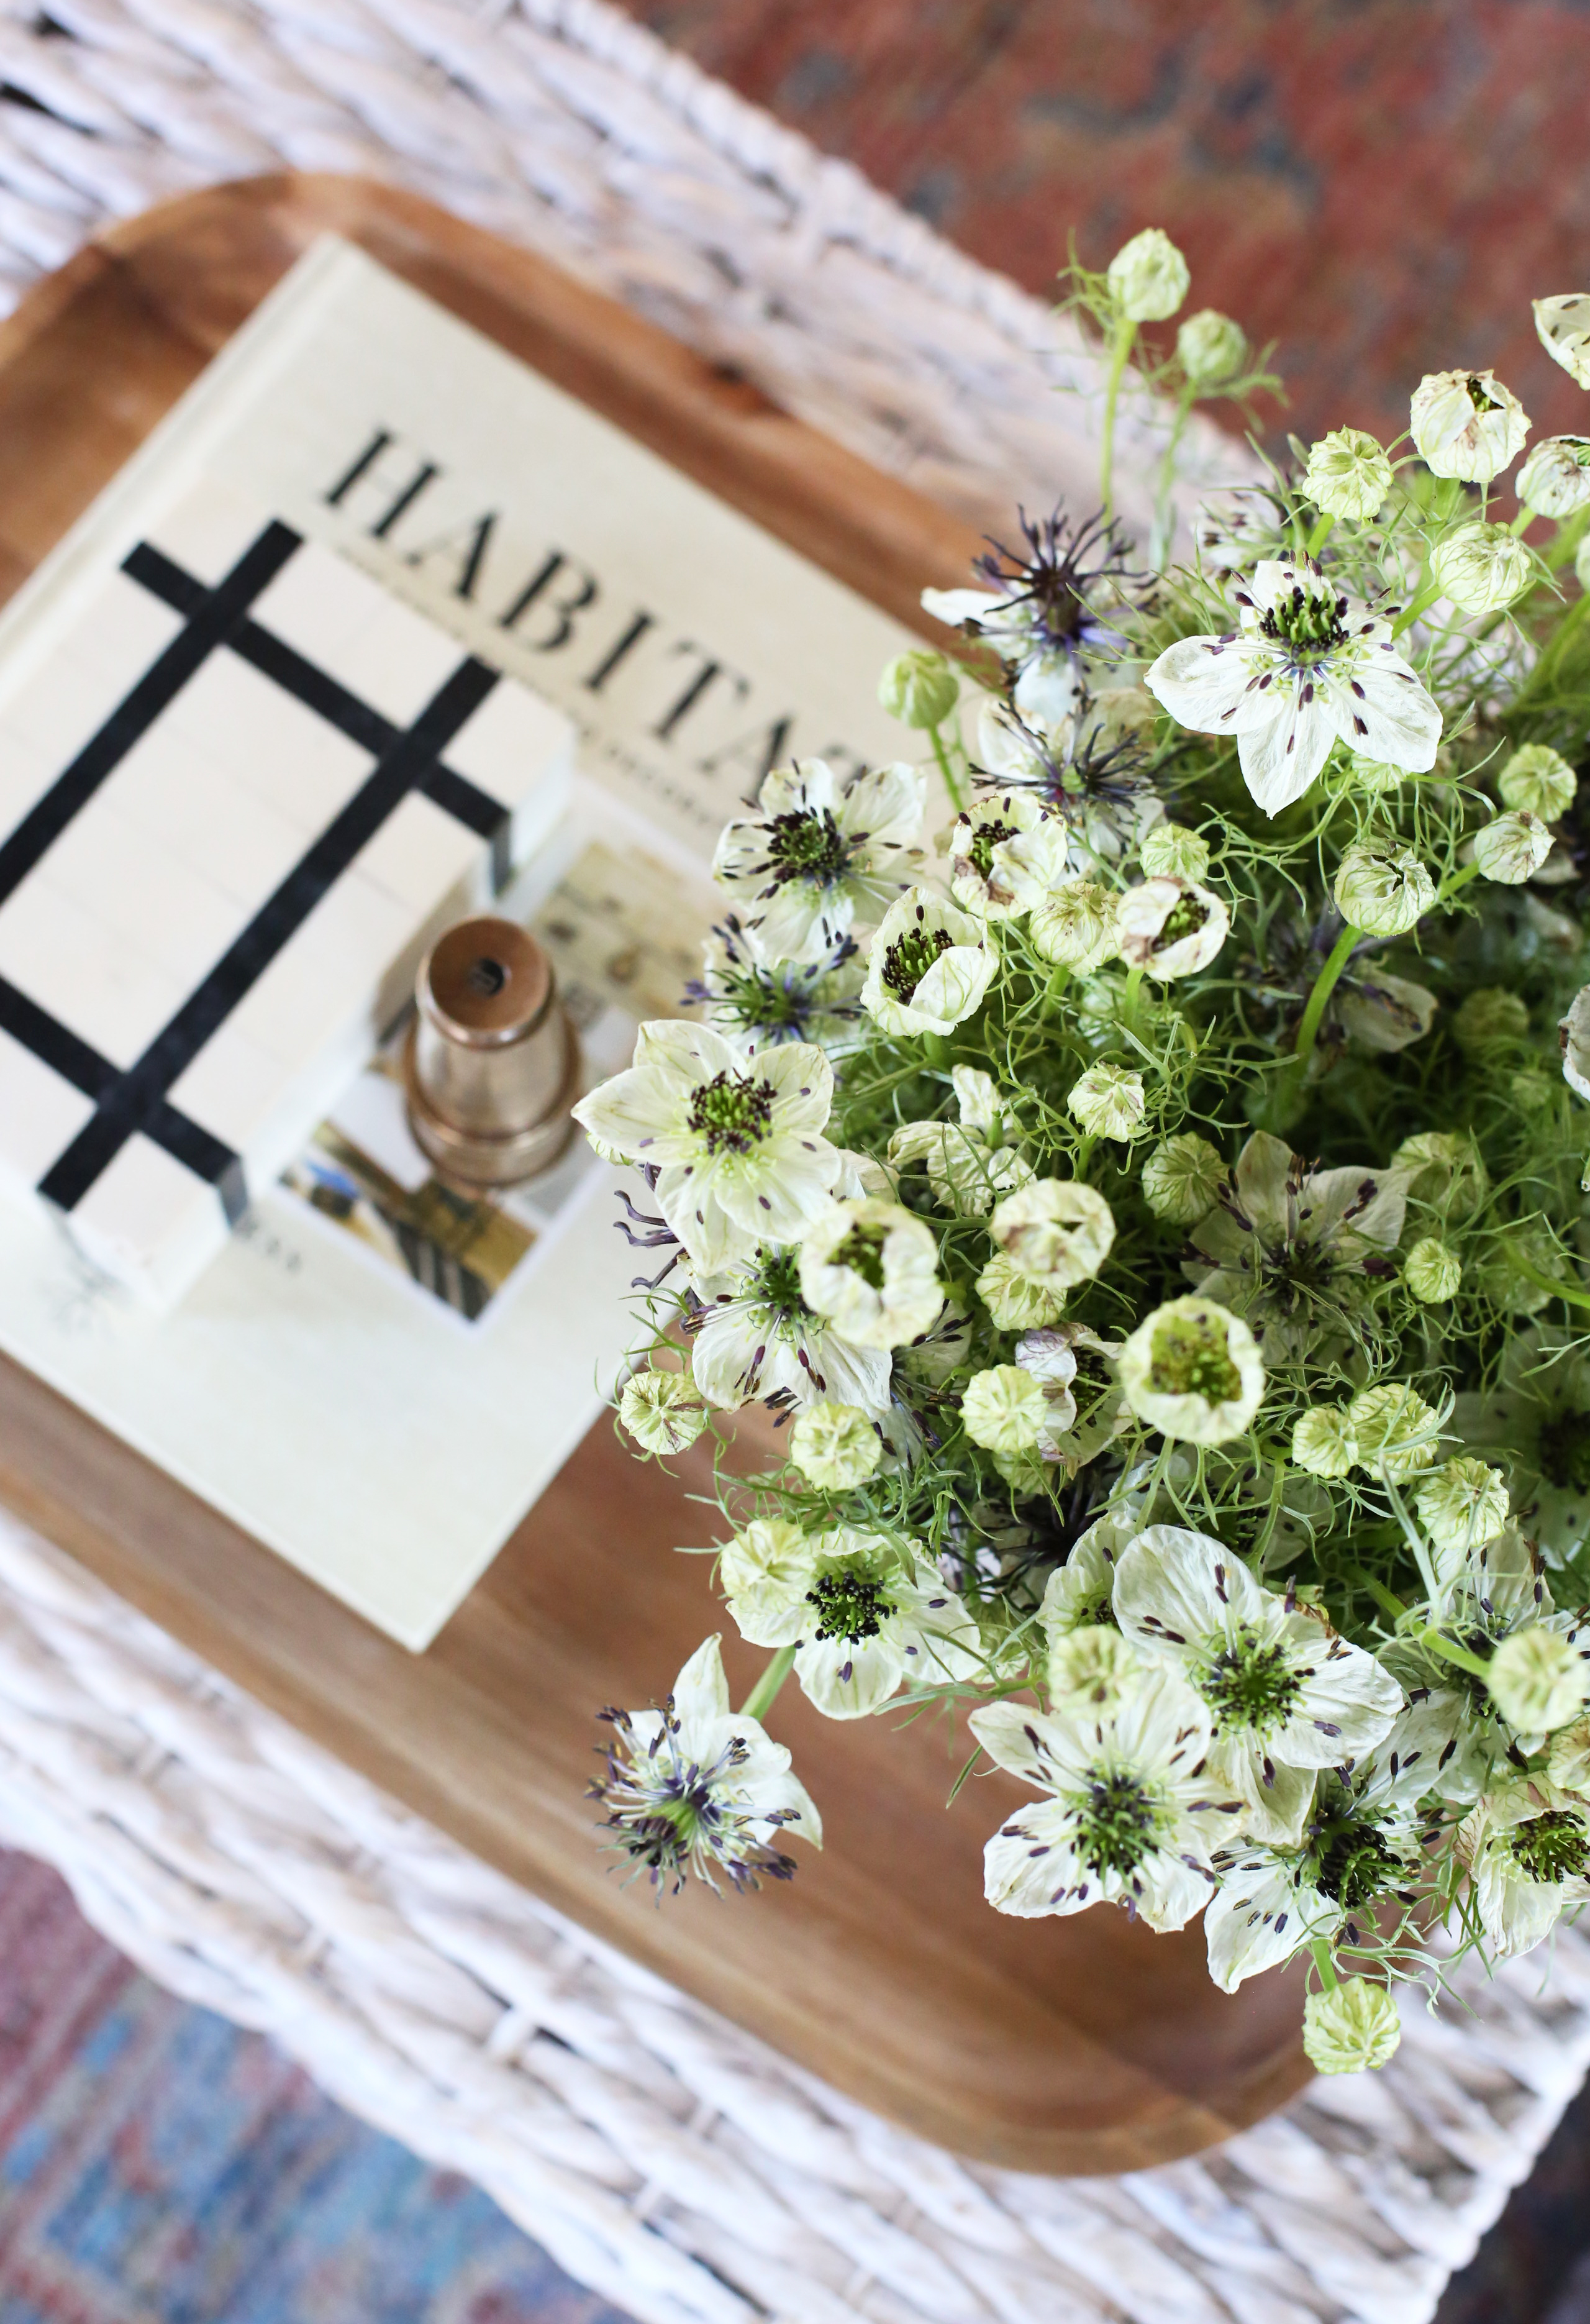
I originally tried a wood coffee table in here, but the pleated ottoman(similar) won over in the end! I love using a small dining table as a side table in a living room and it felt like we had too much wood in here with both tables. The soft, textural ottoman with trays works perfectly. And the large side table (which was a vintage find) allows us to display art and other pretty objects with still plenty of room for an oversized table lamp.
The faux fiddle leaf fig tree was a great affordable find. I love that it has many individual trunks rather than a single skinny one. I did end up removing about half of the leaves to thin out the top a lot before manipulating and fluffing the leaves. I think this helps the tree look more realistic! I “planted” the tree in an oversized white basket, propping up the tree with a few boxes underneath and supporting the sides with recycled packaging materials before covering the top in moss.
We placed a small bench (similar) behind the sofa to help fill in a little space and to add some layering and dimension.
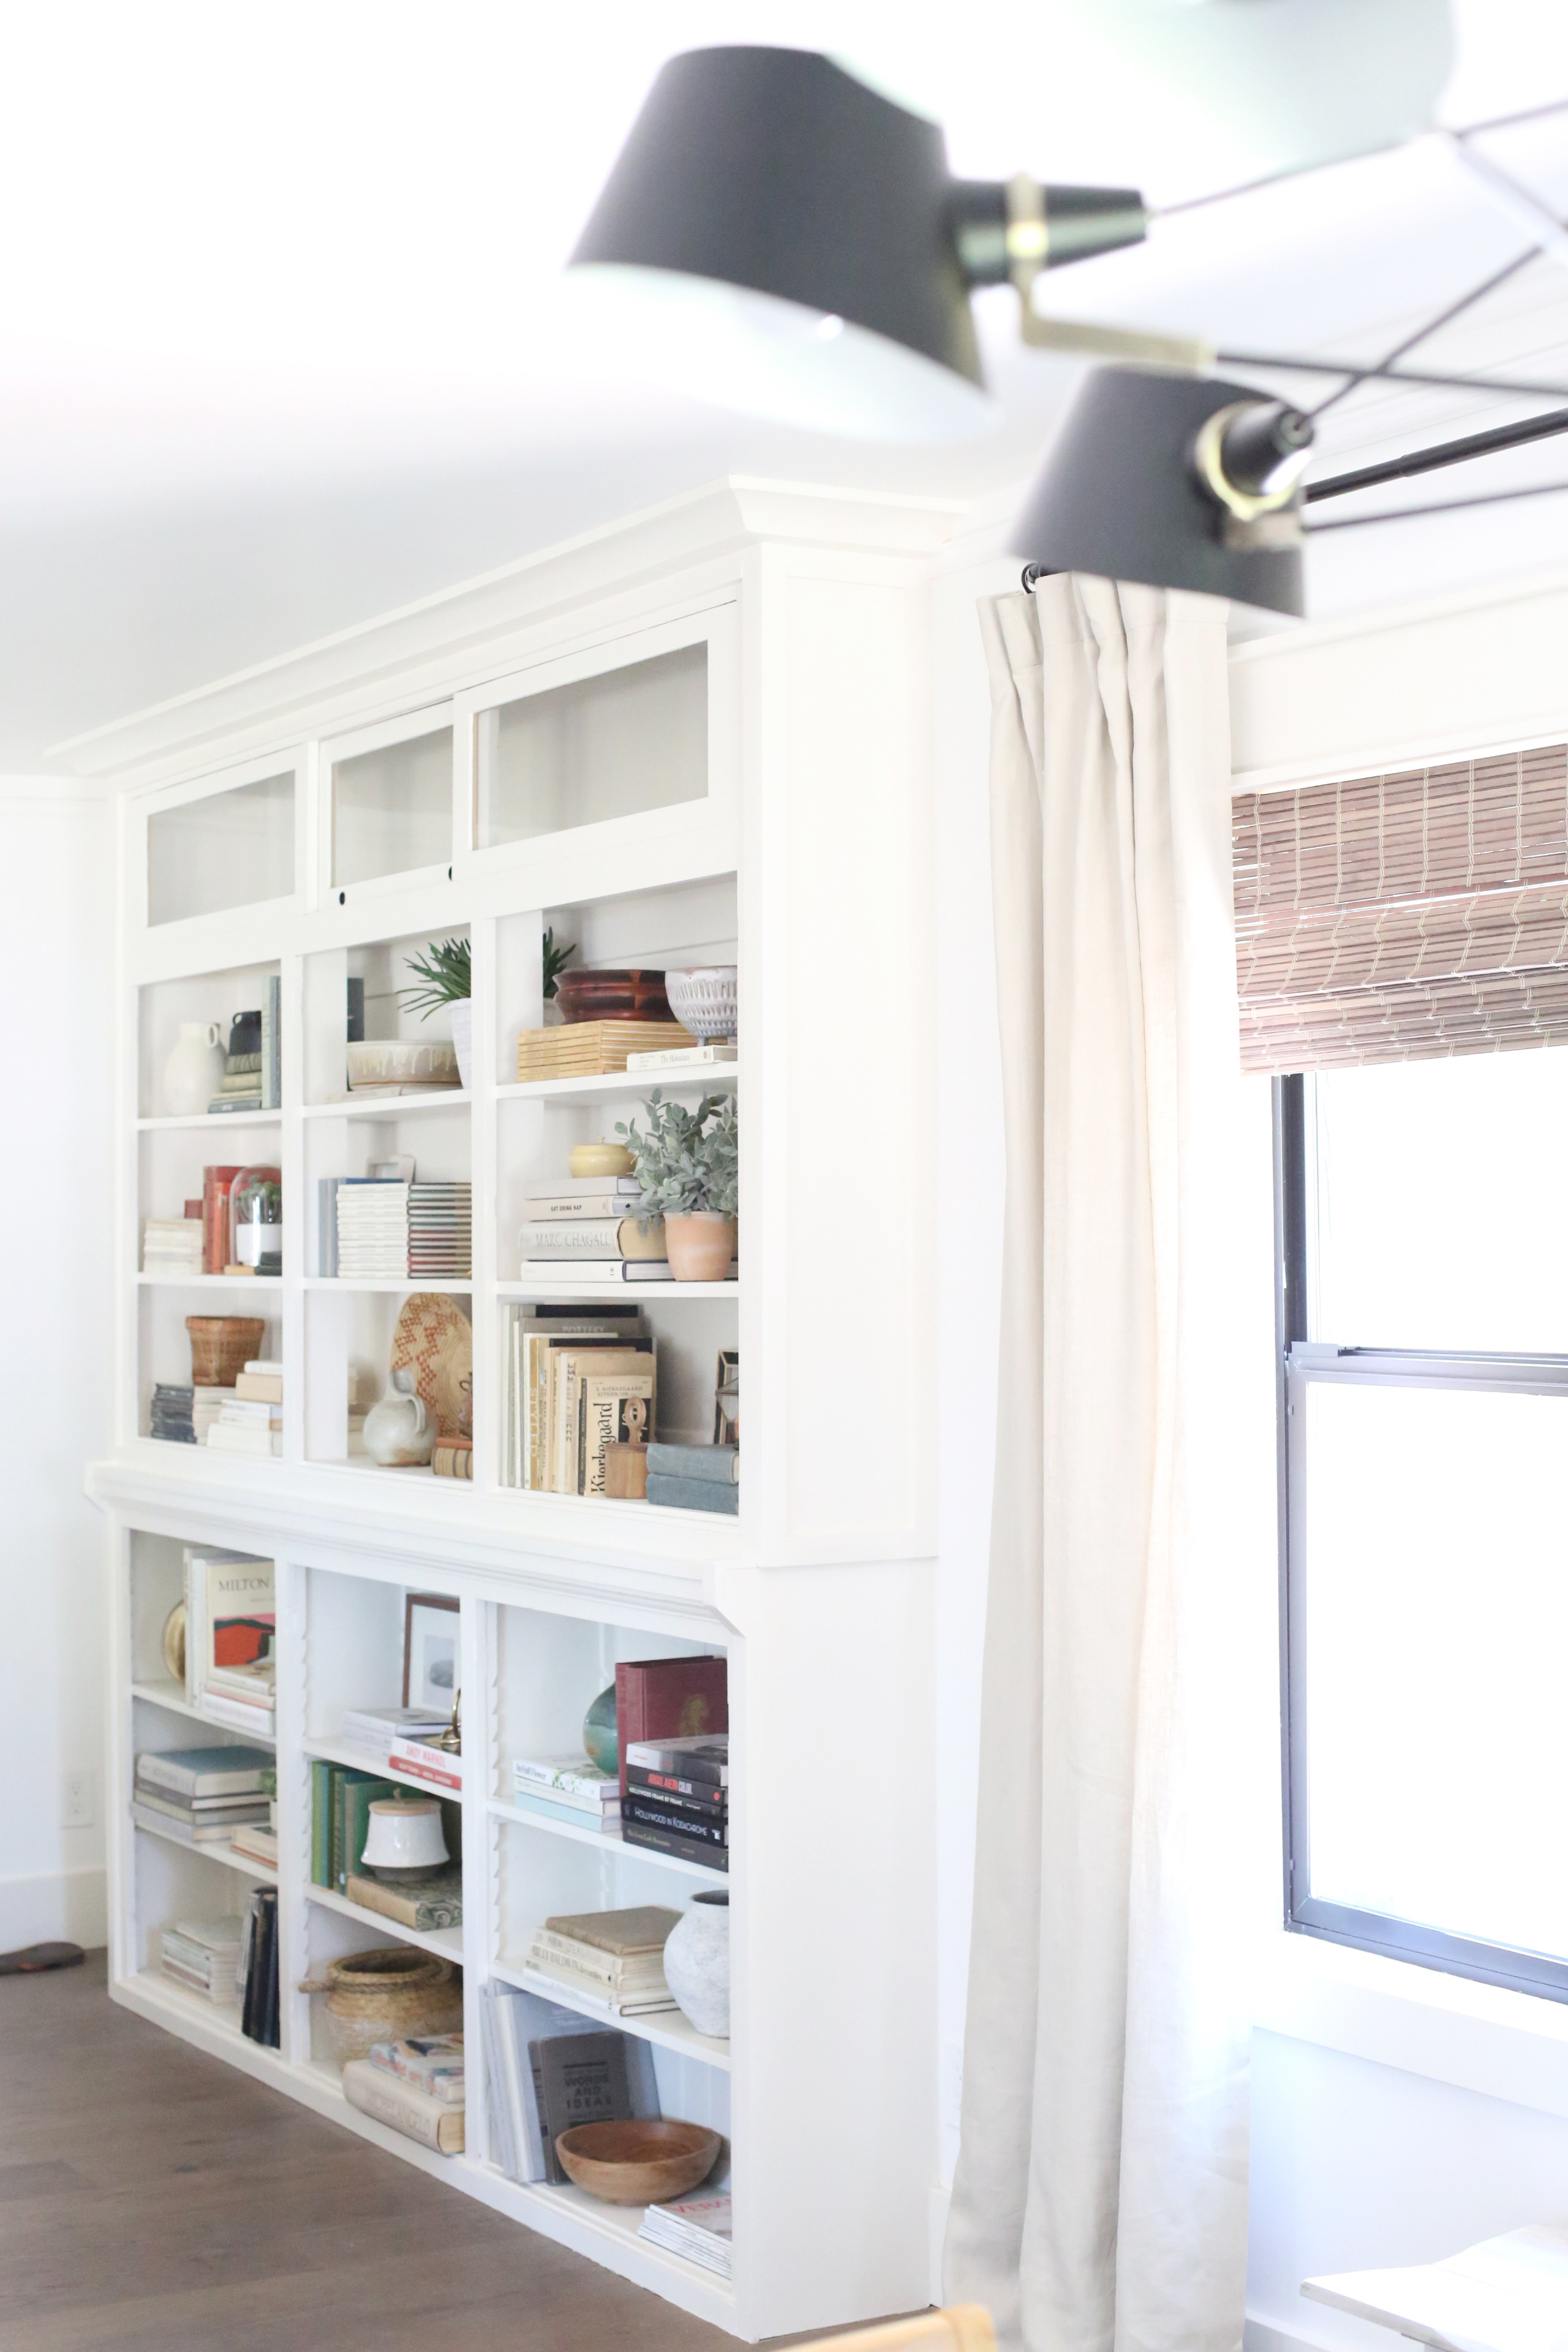
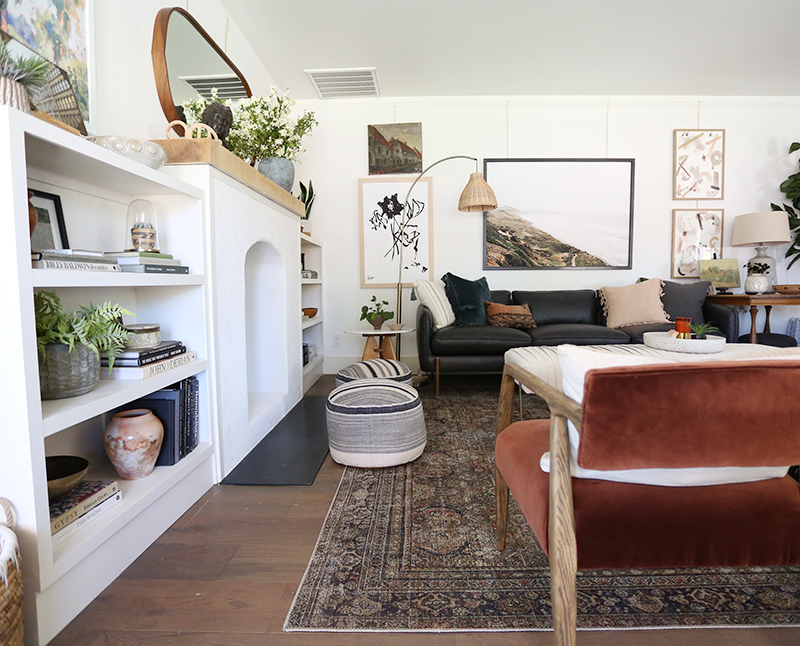
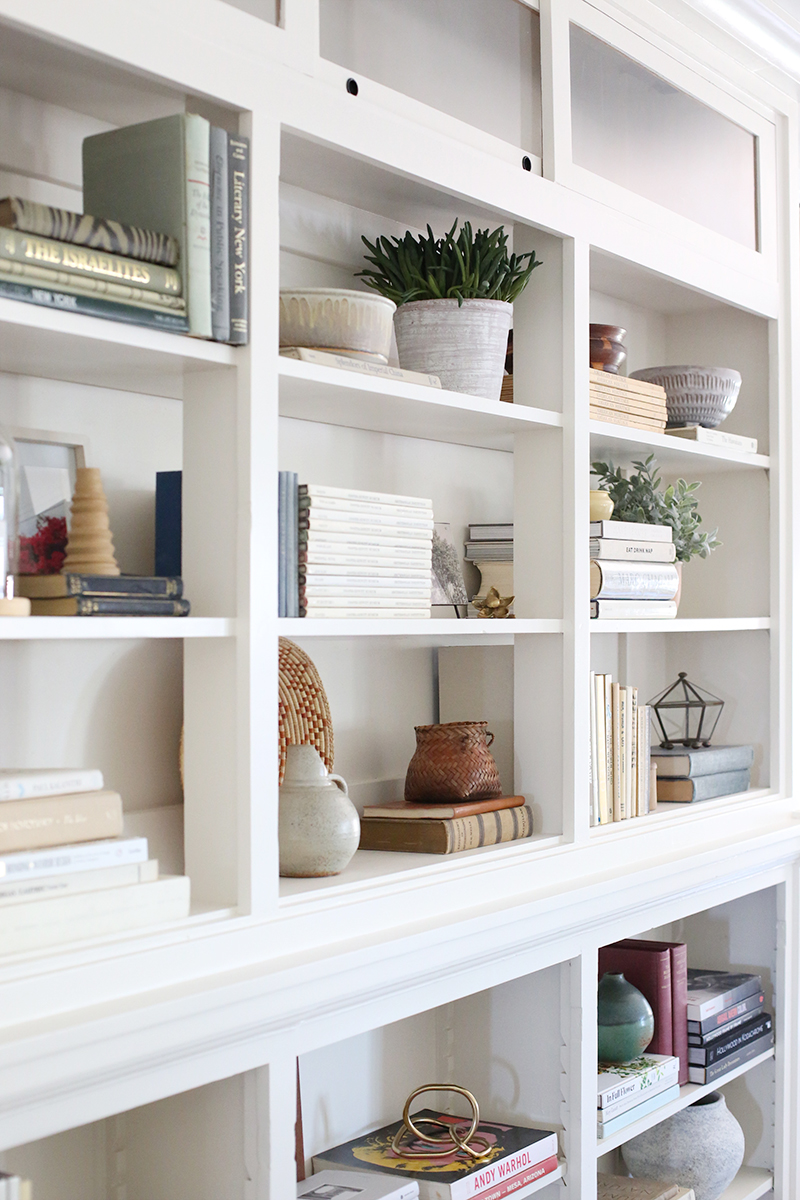
Check out the sawtooth shelf supports! They just don’t make things like they used to! I’m so happy we were able to reuse these built ins with only a few minor adjustments!
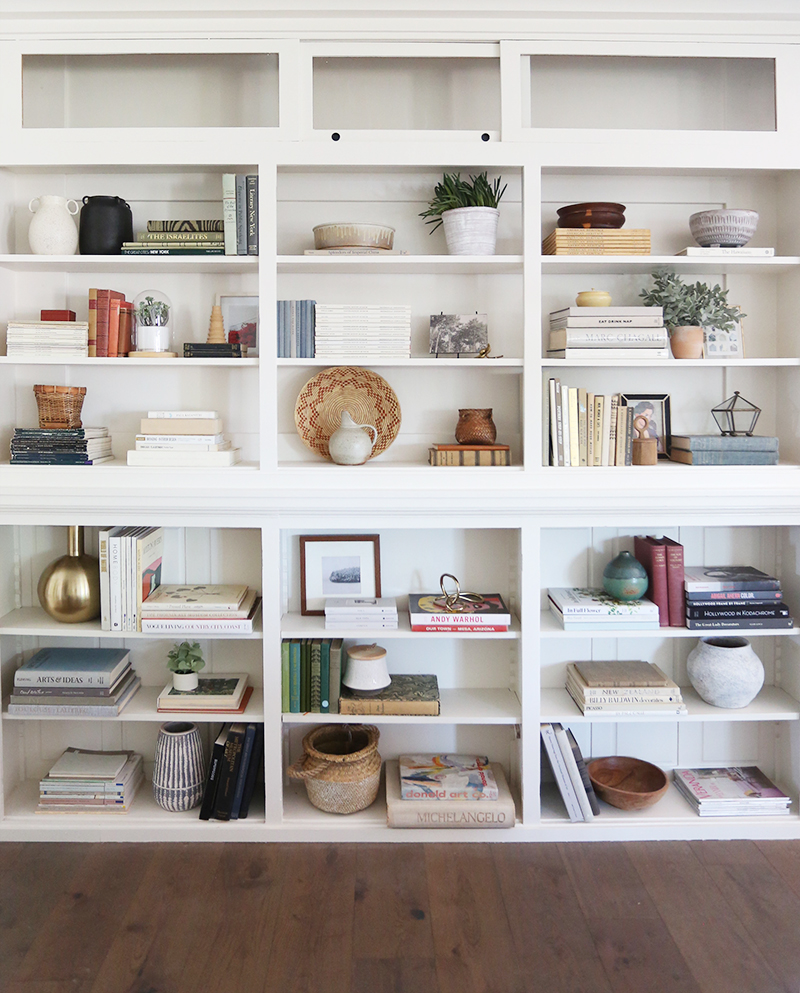
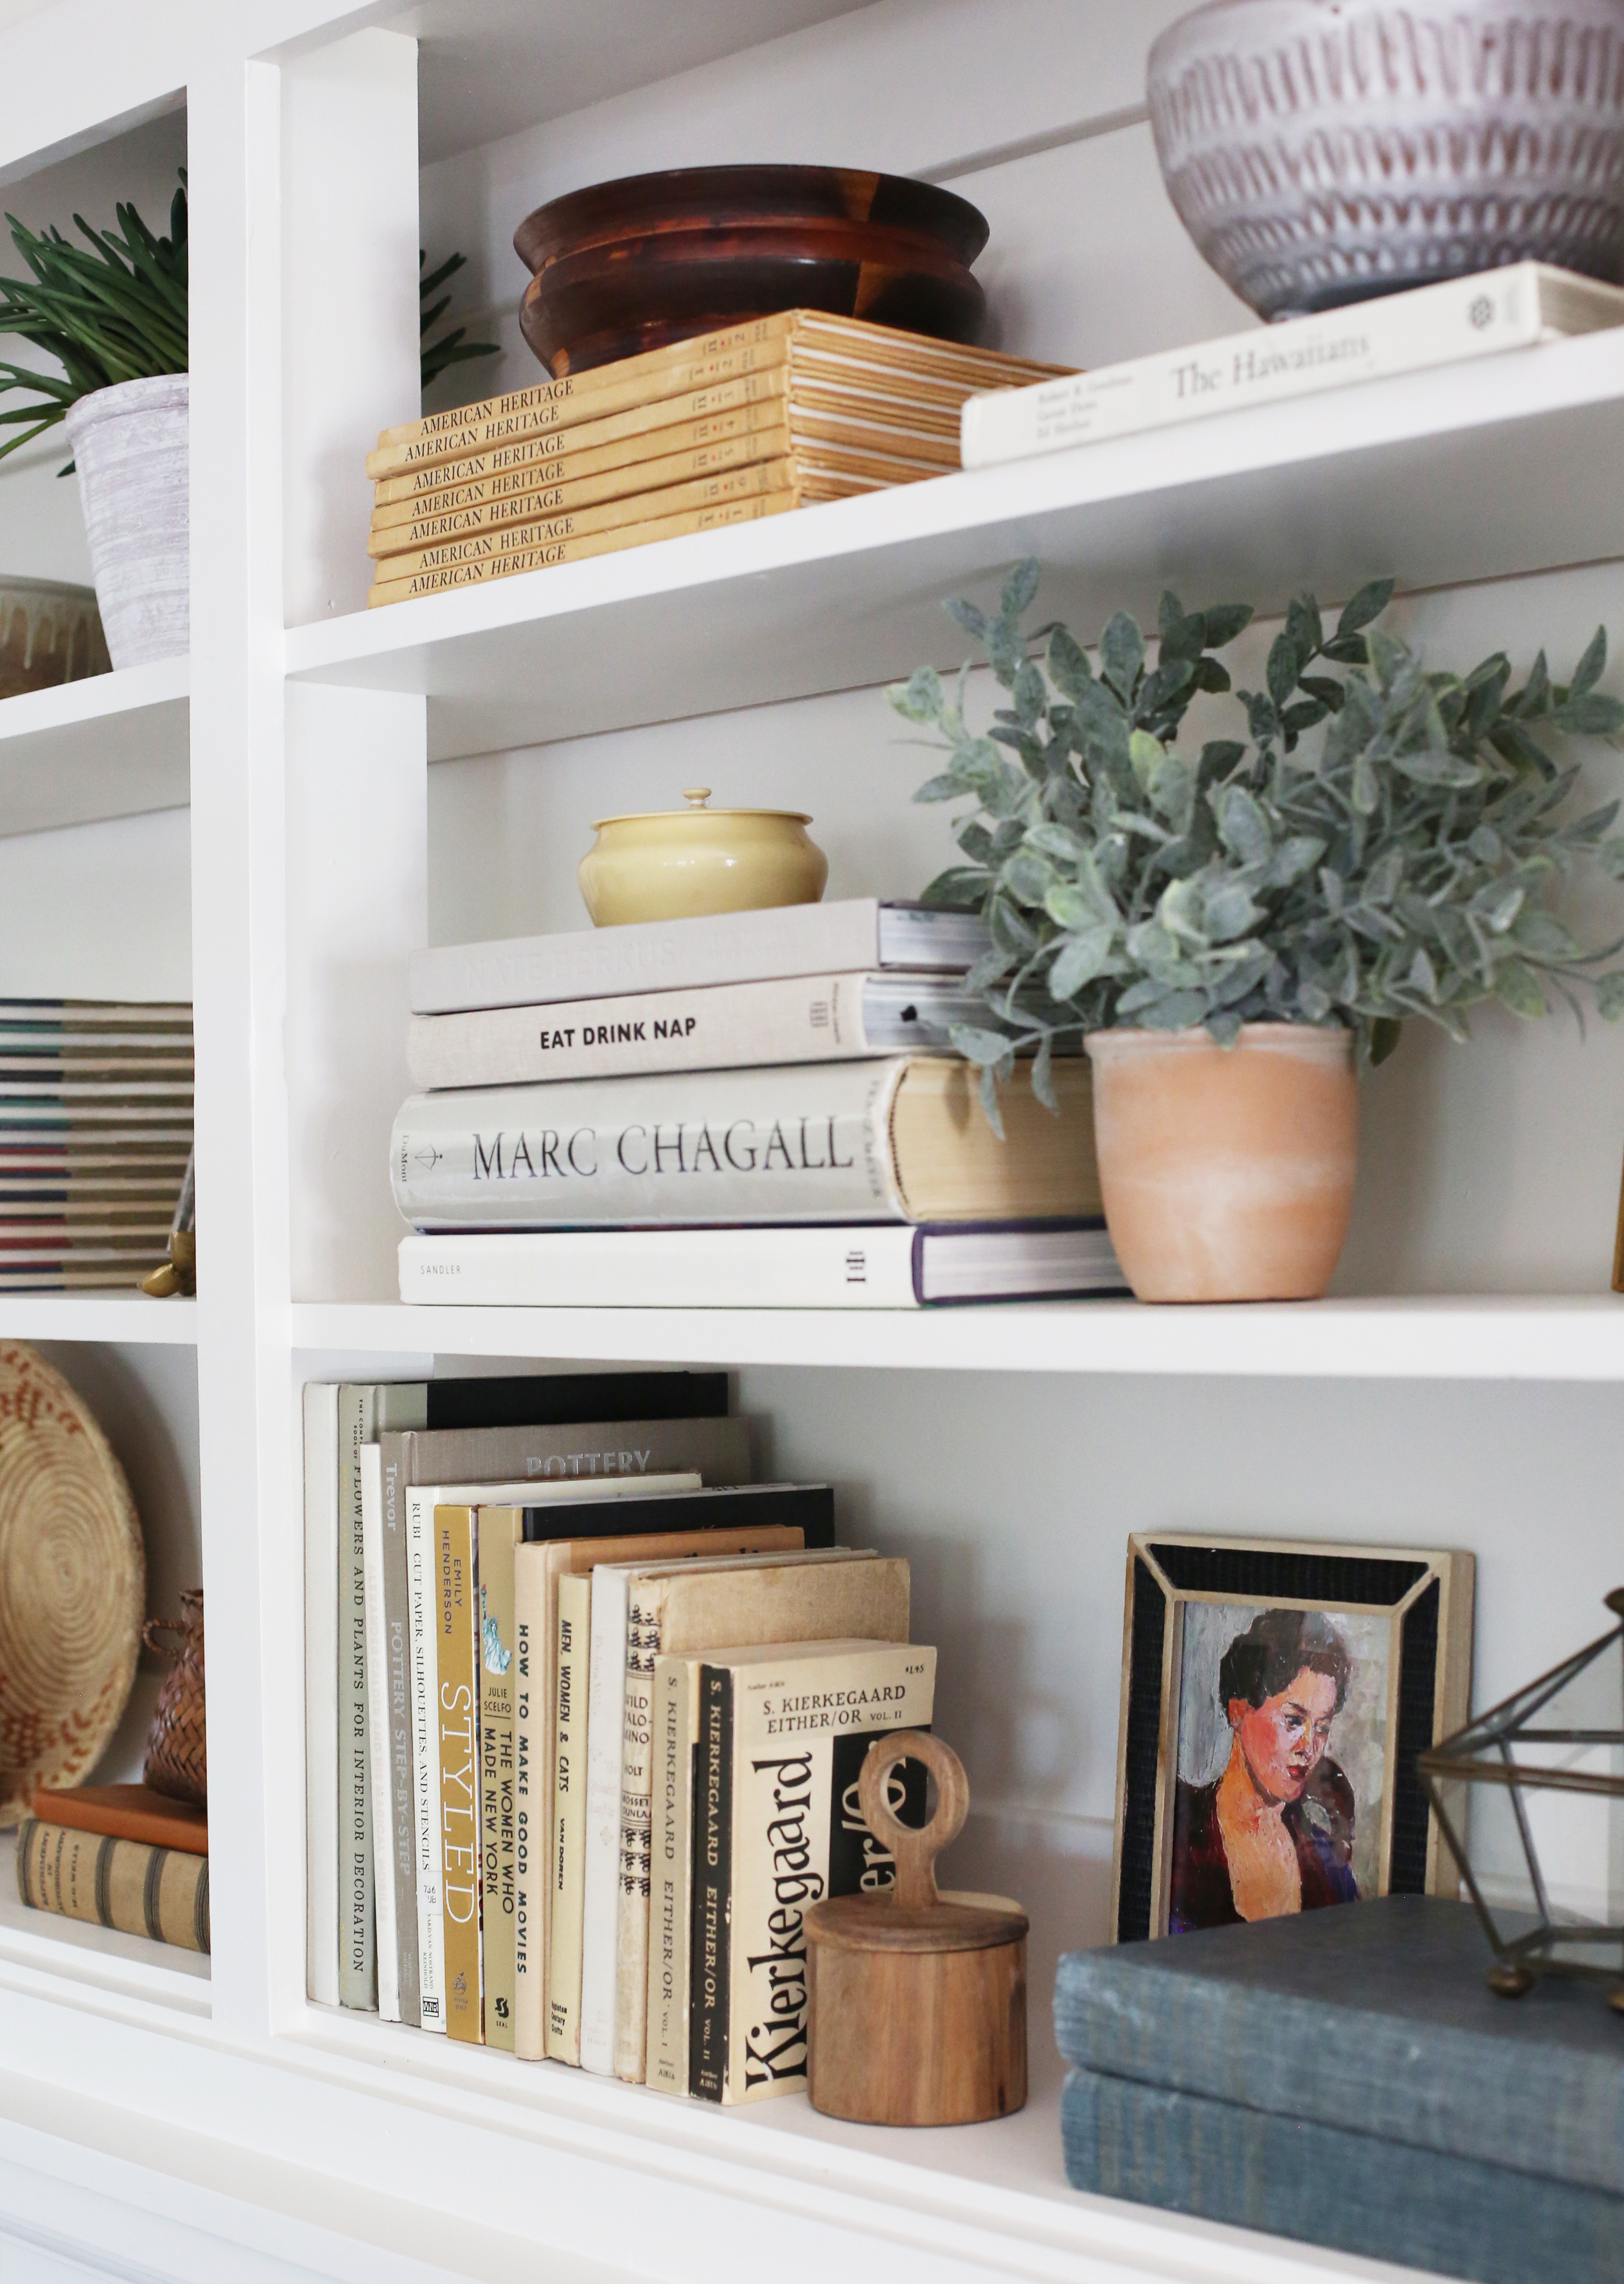
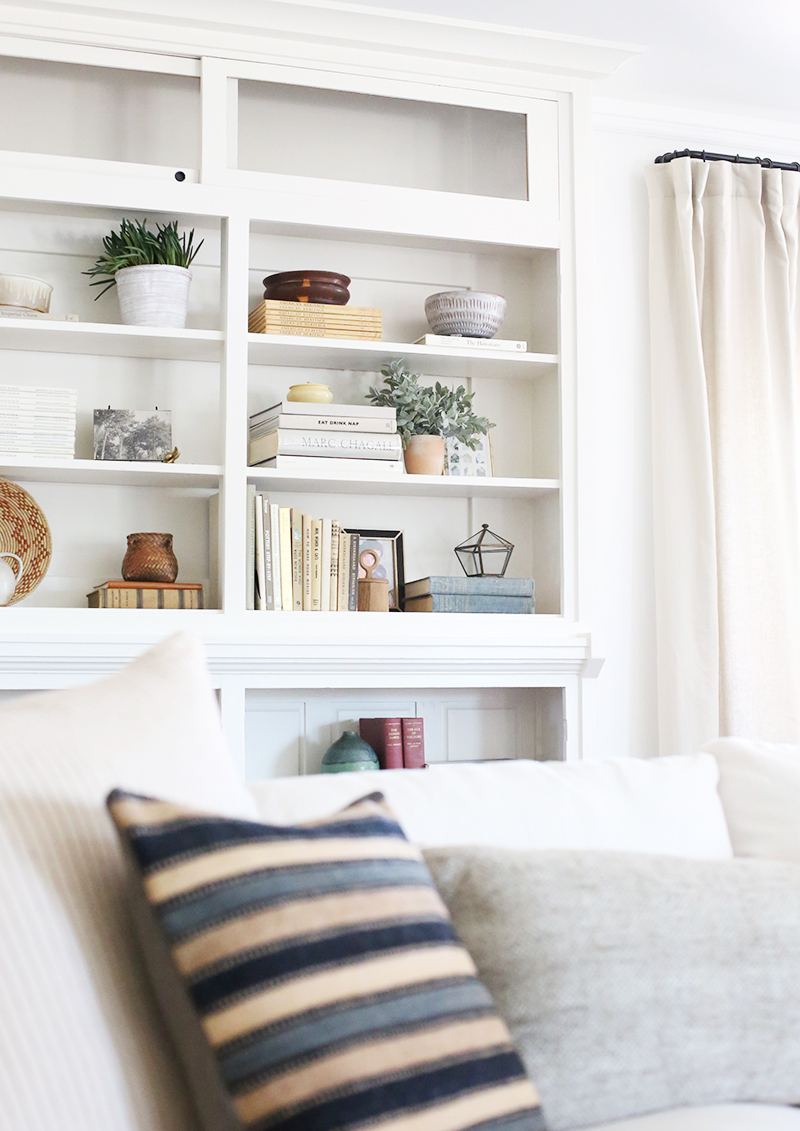
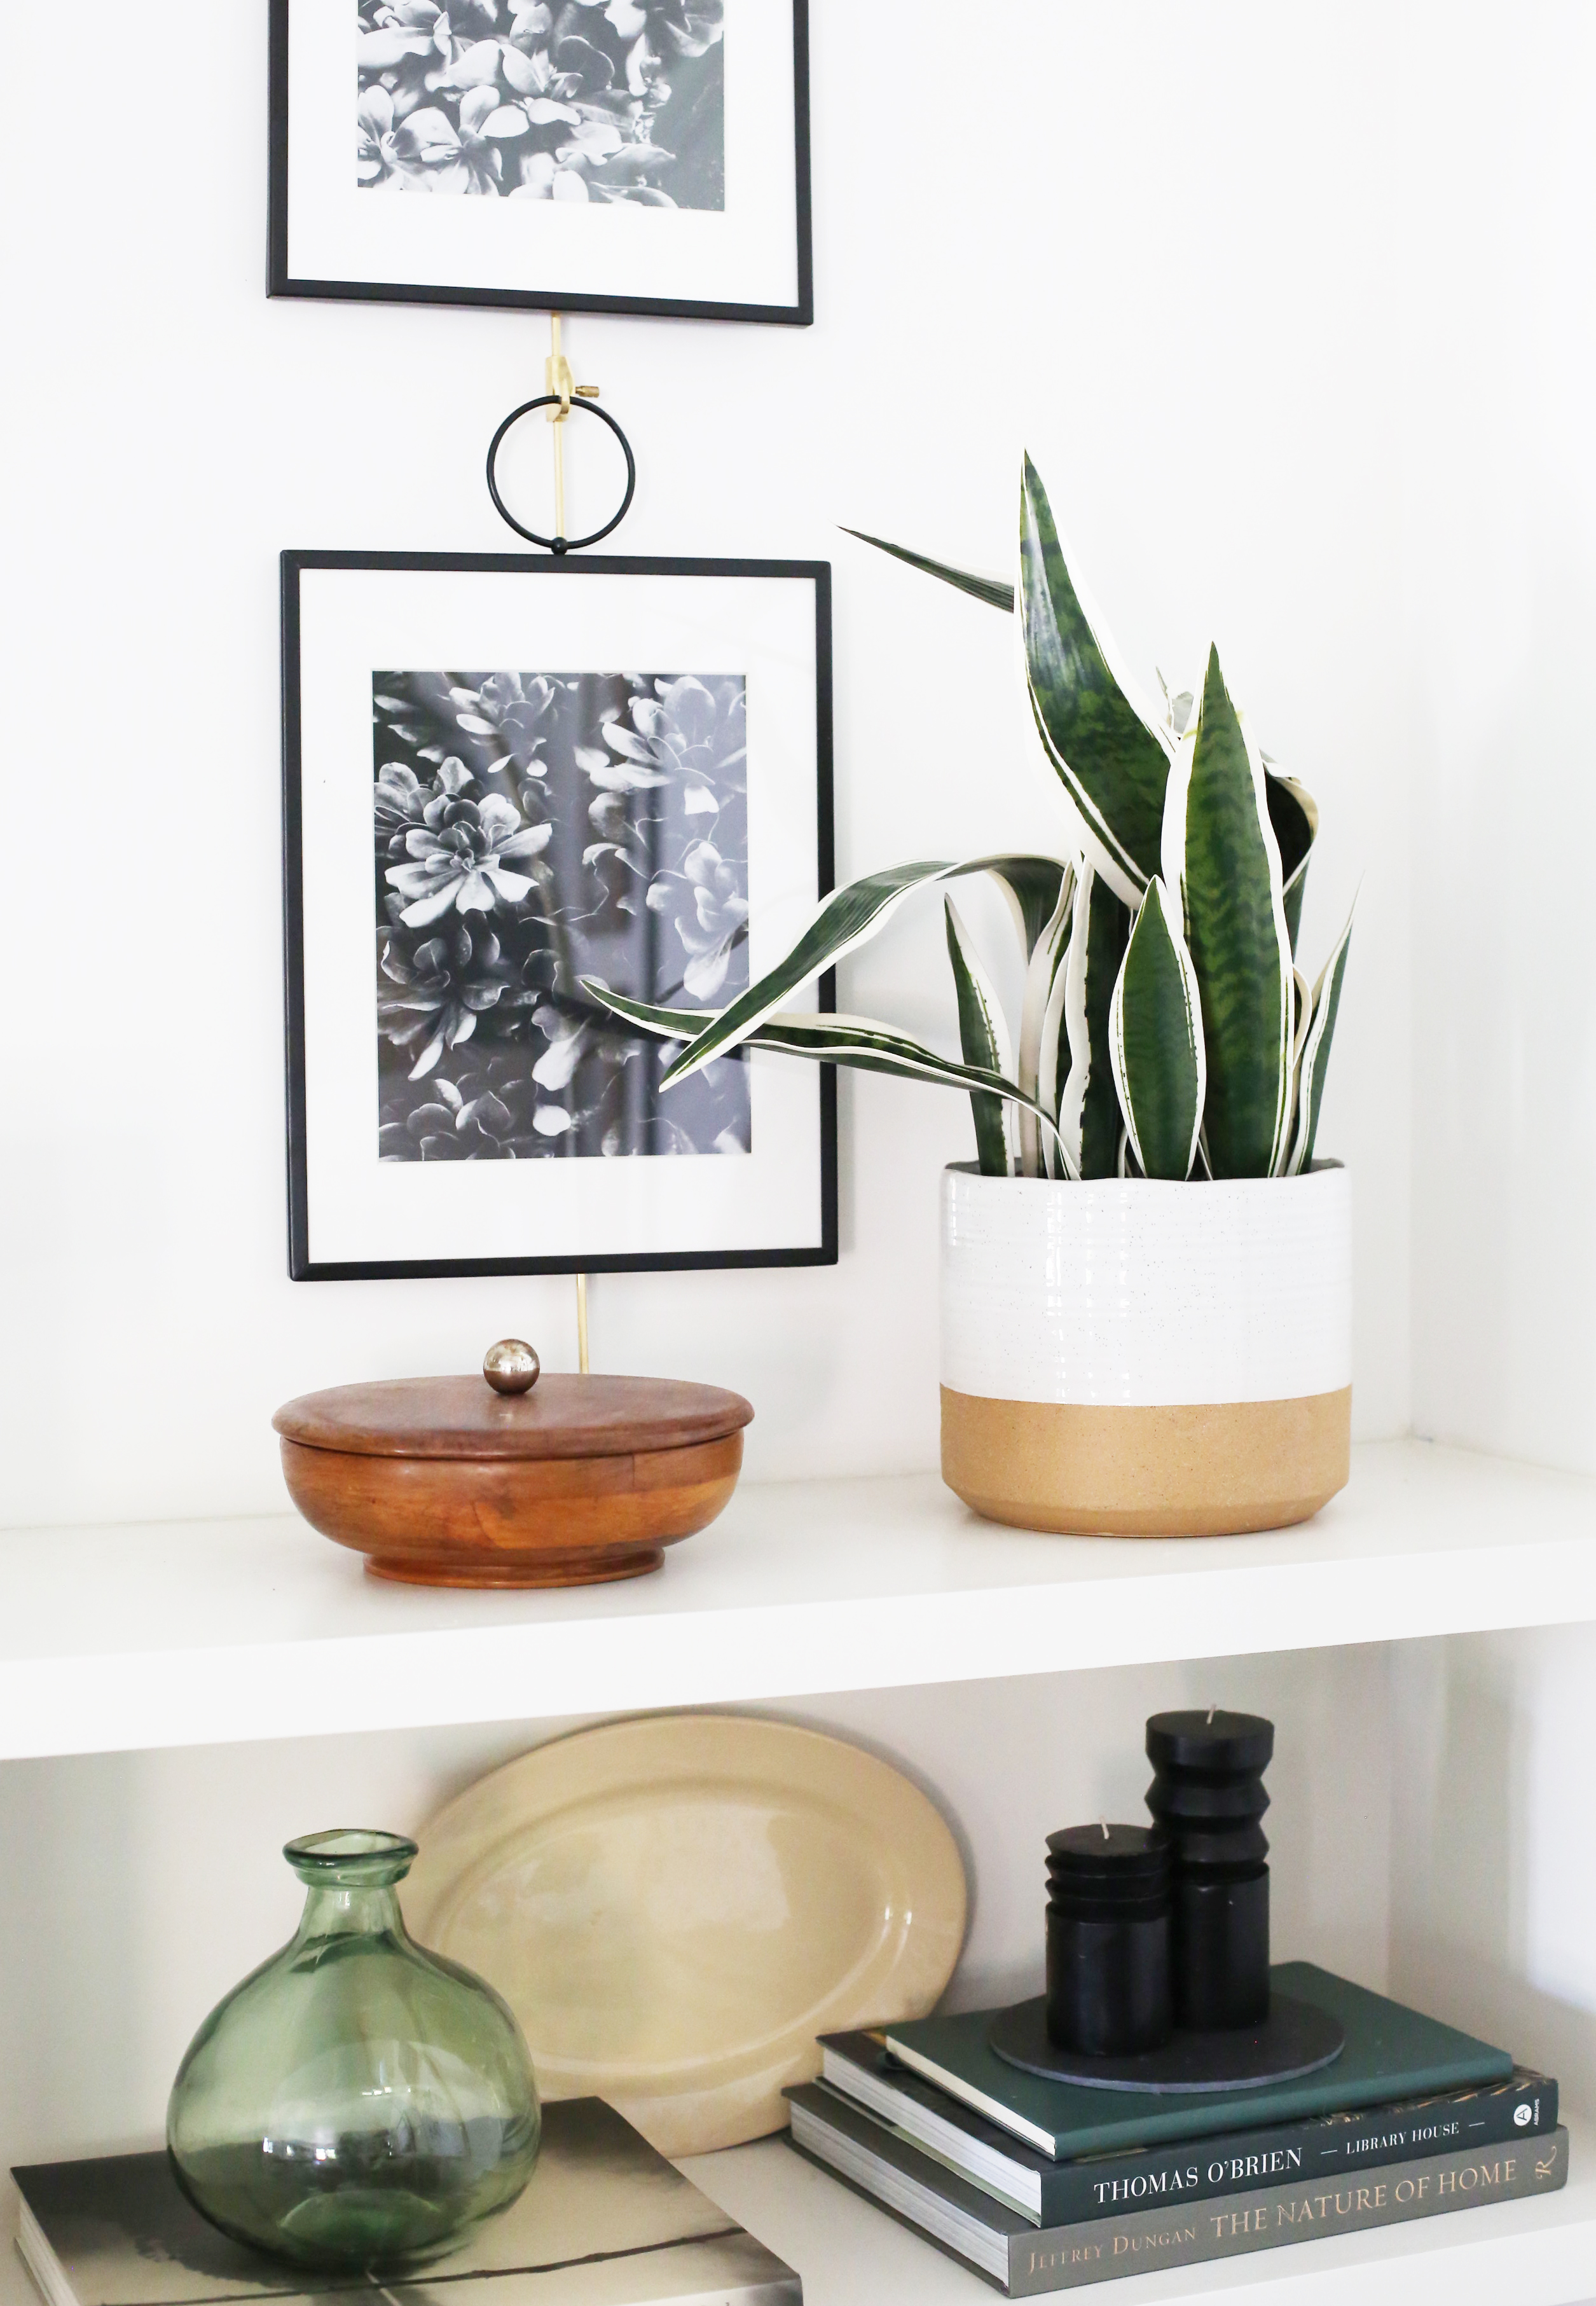
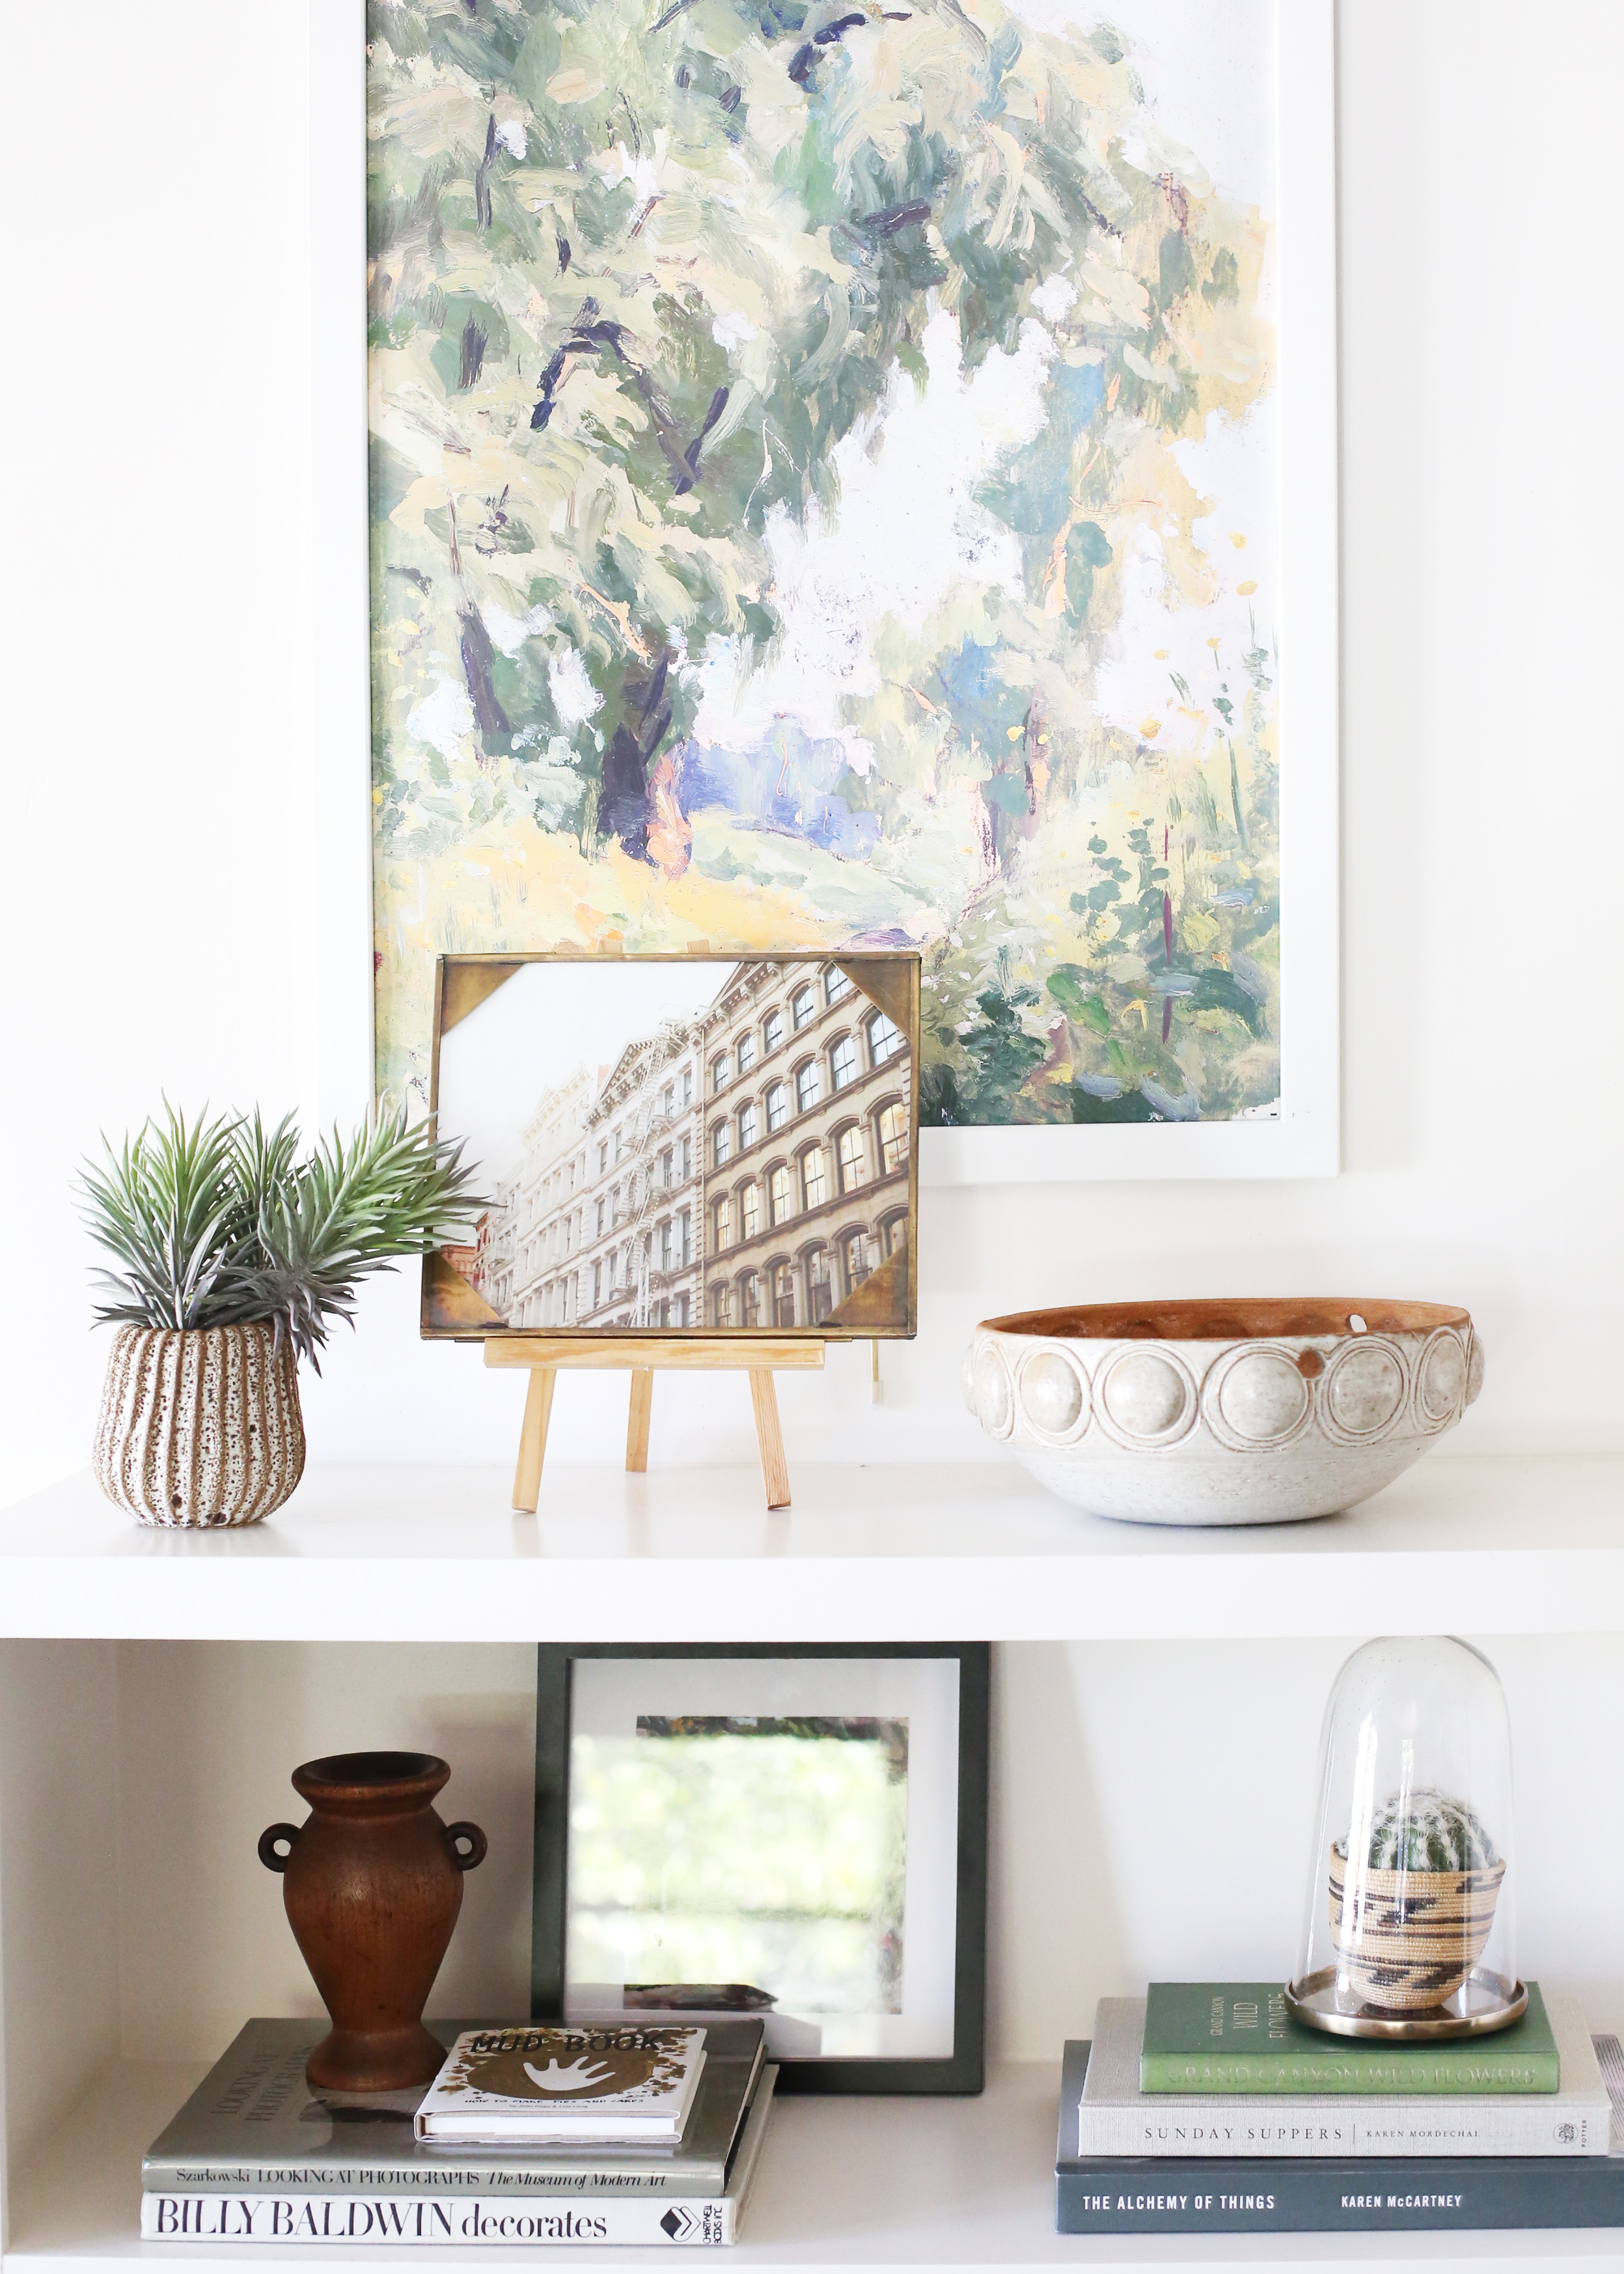
We’ll be doing a separate post on our shelf styling tips (since this post is already monster sized!), but usually I like to start with larger storage pieces, art and art books, and then I fill in with smaller books and finally plants and small accessories. As a general rule, I tend to prefer more books on bookshelves. Too many accessories starts to feel like a store instead a home! Books are so homey and inviting to me. I think very, very loosely making small groupings of books by cover color looks a little more organized and helps give the eye a place to rest as it moves around your shelving. Each little grouping becomes its own object of sorts. Don’t get too literal about it though, or else it will feel stiff.
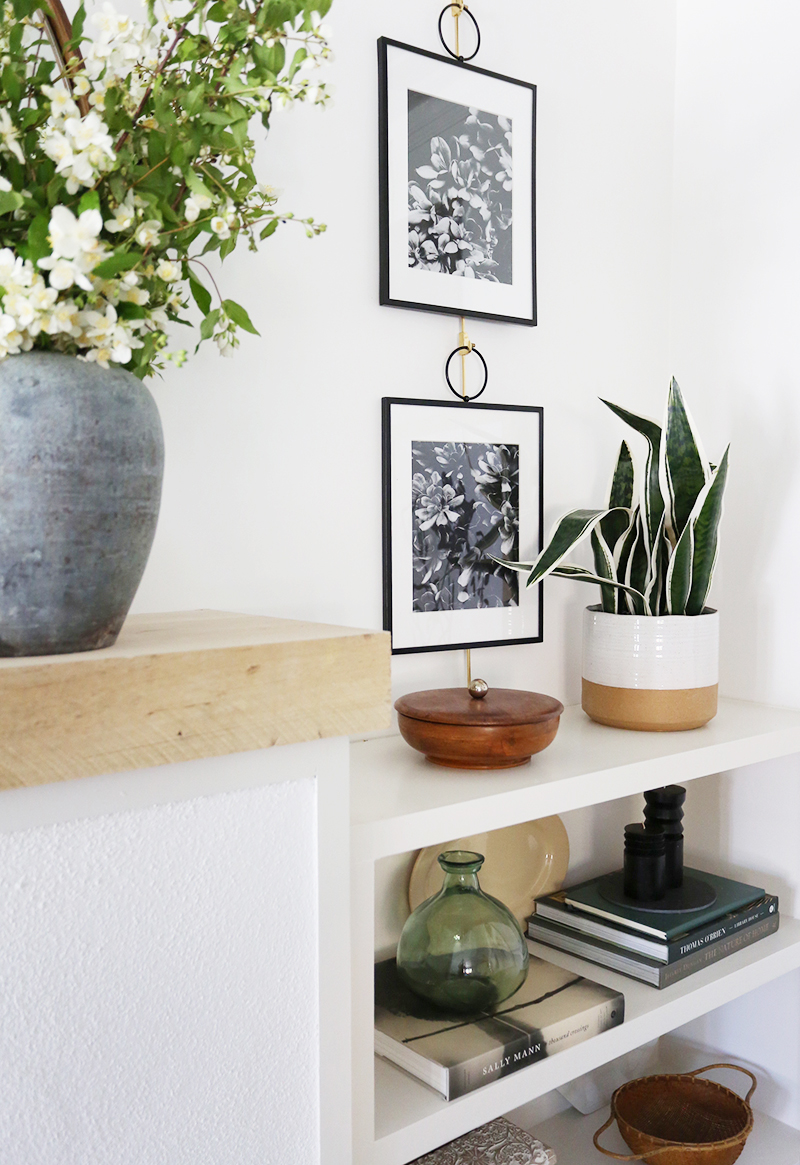
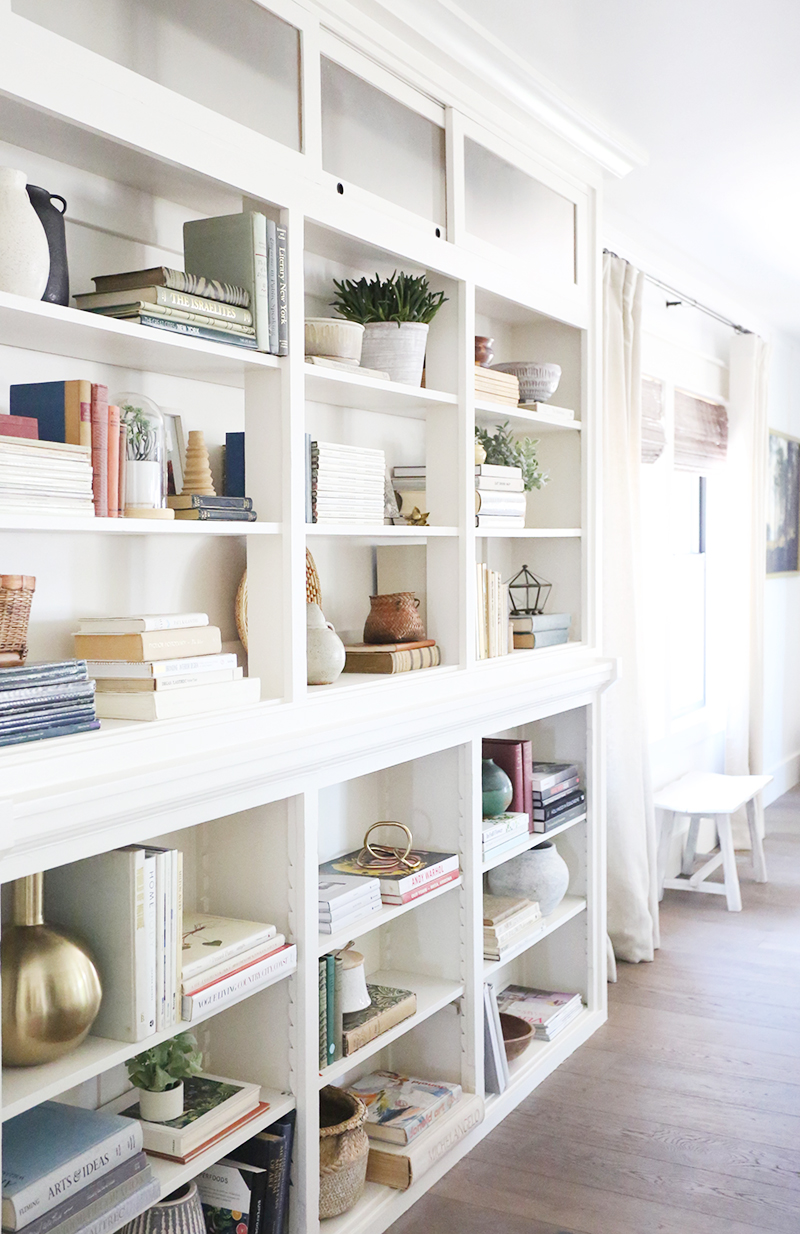
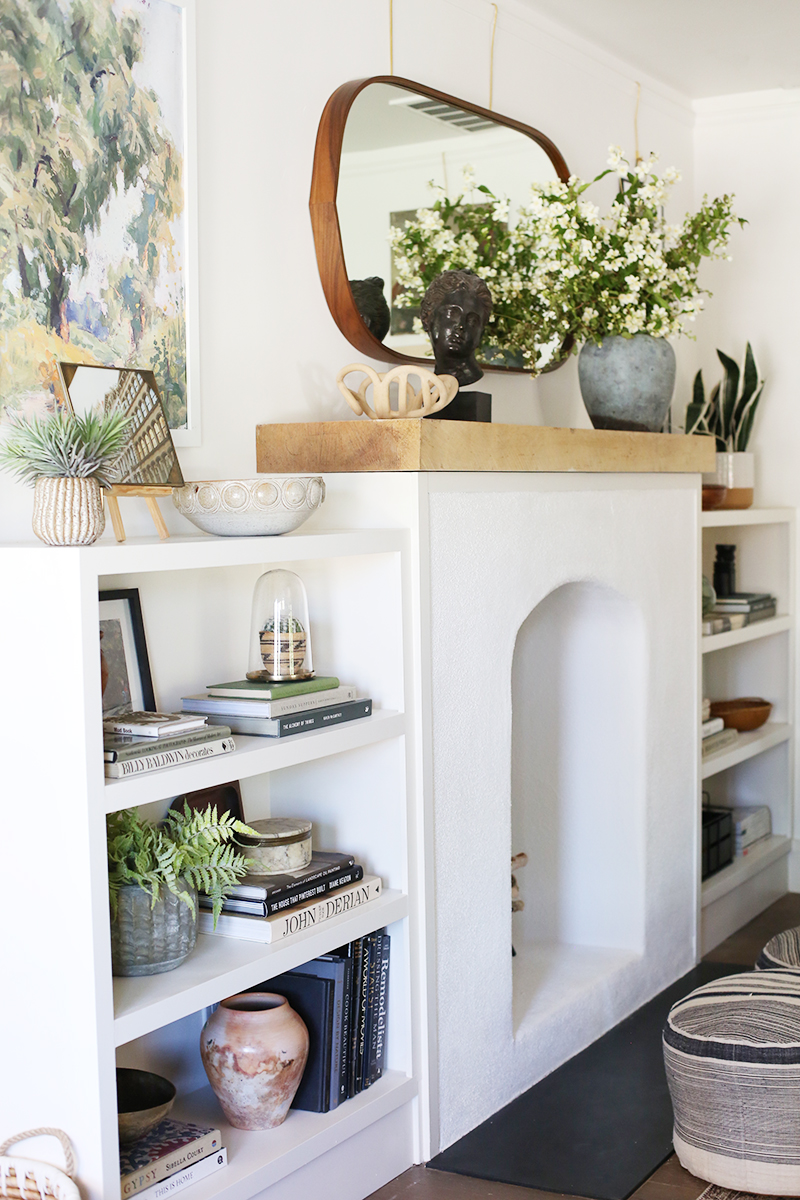
I followed the same styling rules for the shelving that flanks the fireplace. I tried to really focus on the books, but then fill in with pretty objects that feel collected and help the eye move around. And don’t forget the greenery! It’s SO important to have a lot of plants in a room in order for it to feel alive!
This antique copper urn is one of my most prized possessions – I love it. It was only $2 at an antique mall. I have kind of given up on most thrift stores and have doubled down on antique malls. In my area at least, the finds are still very reasonably priced and are infinitely better curated!
I’m so happy with this pretty space and wish it were my own living room! What questions can we answer for you? As always, the sources are all listed together here at the bottom of the post and I’d be happy to go over anything in the comments or on Insta! xo
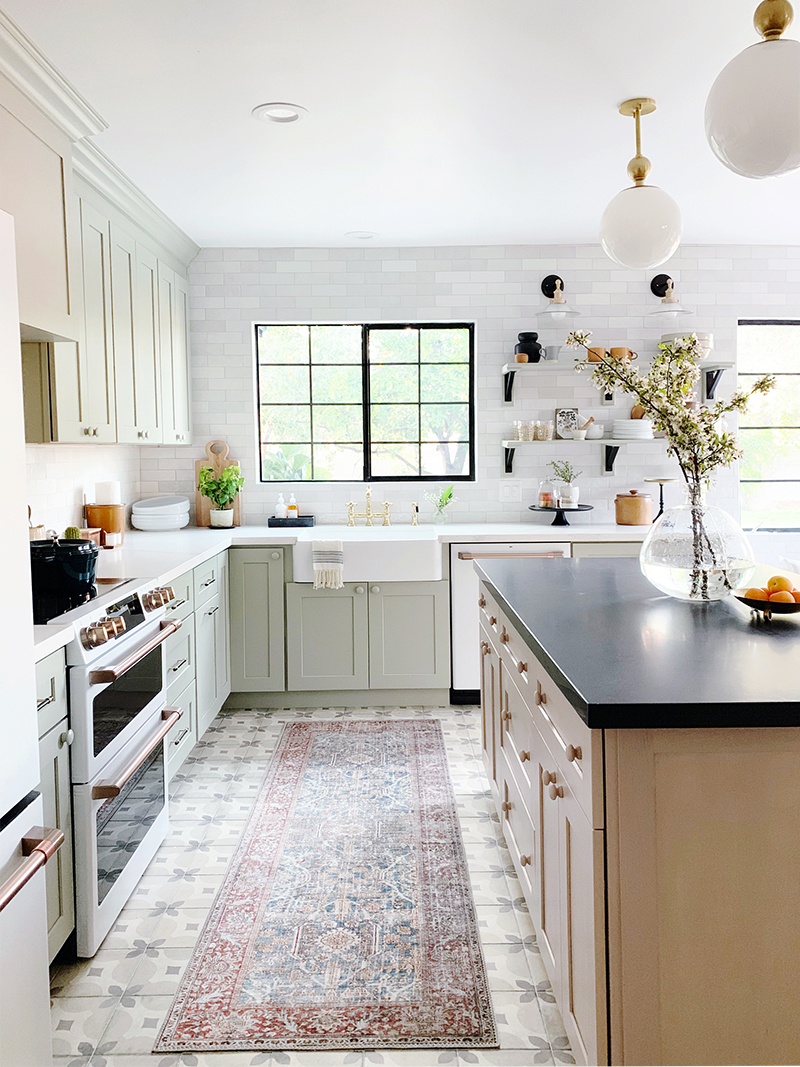
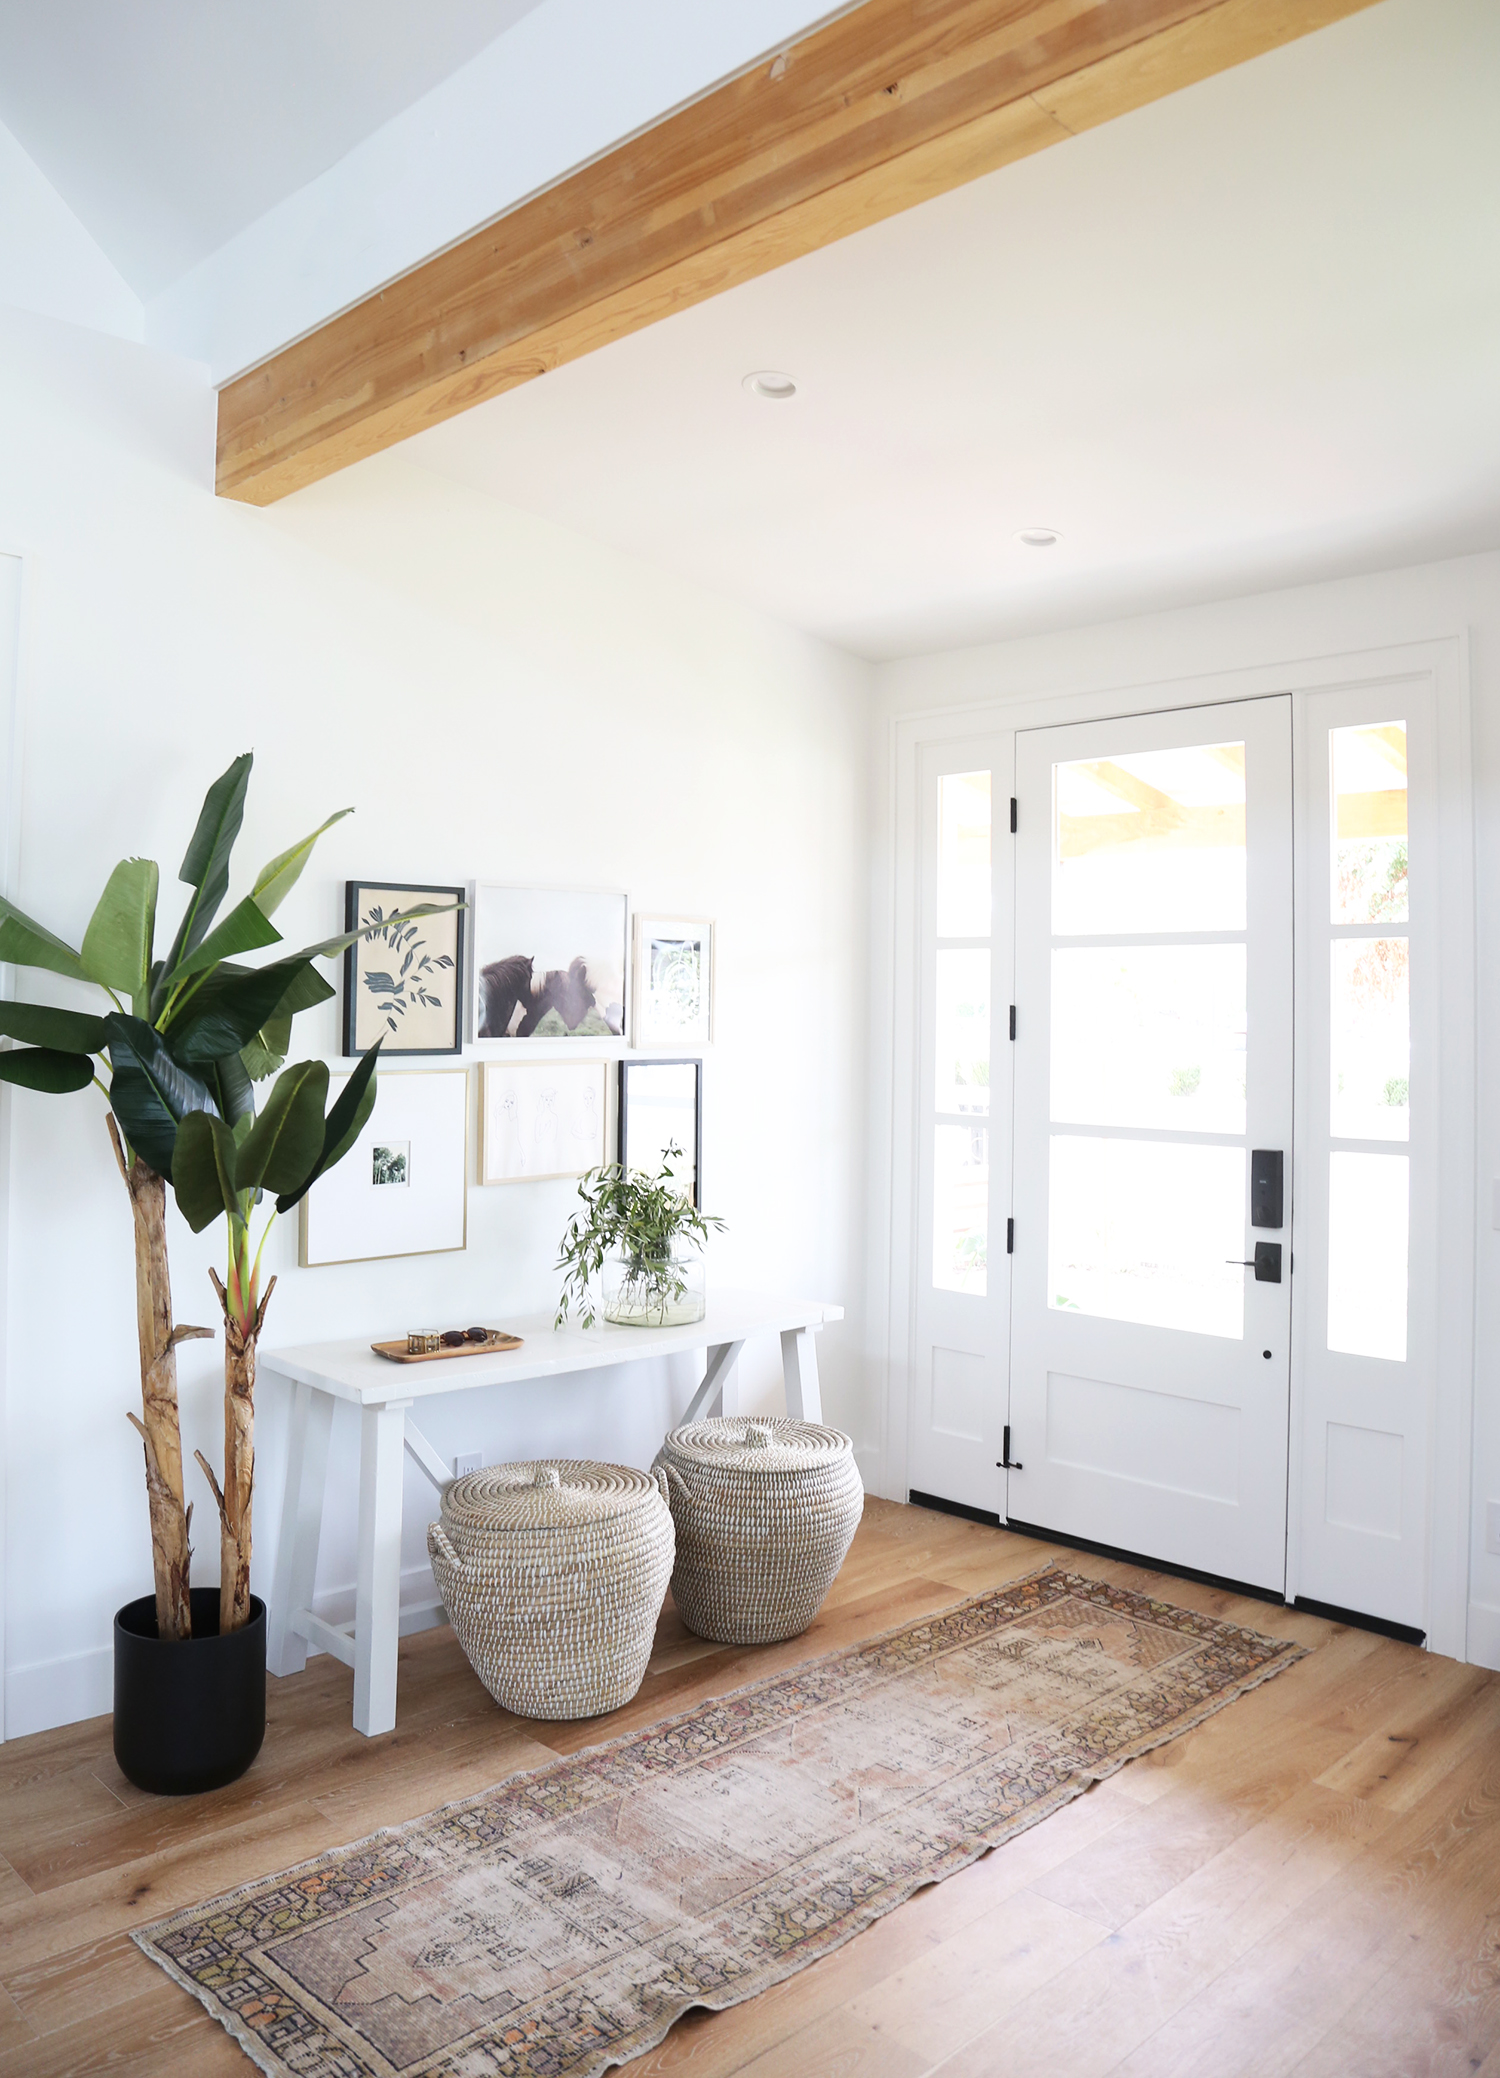
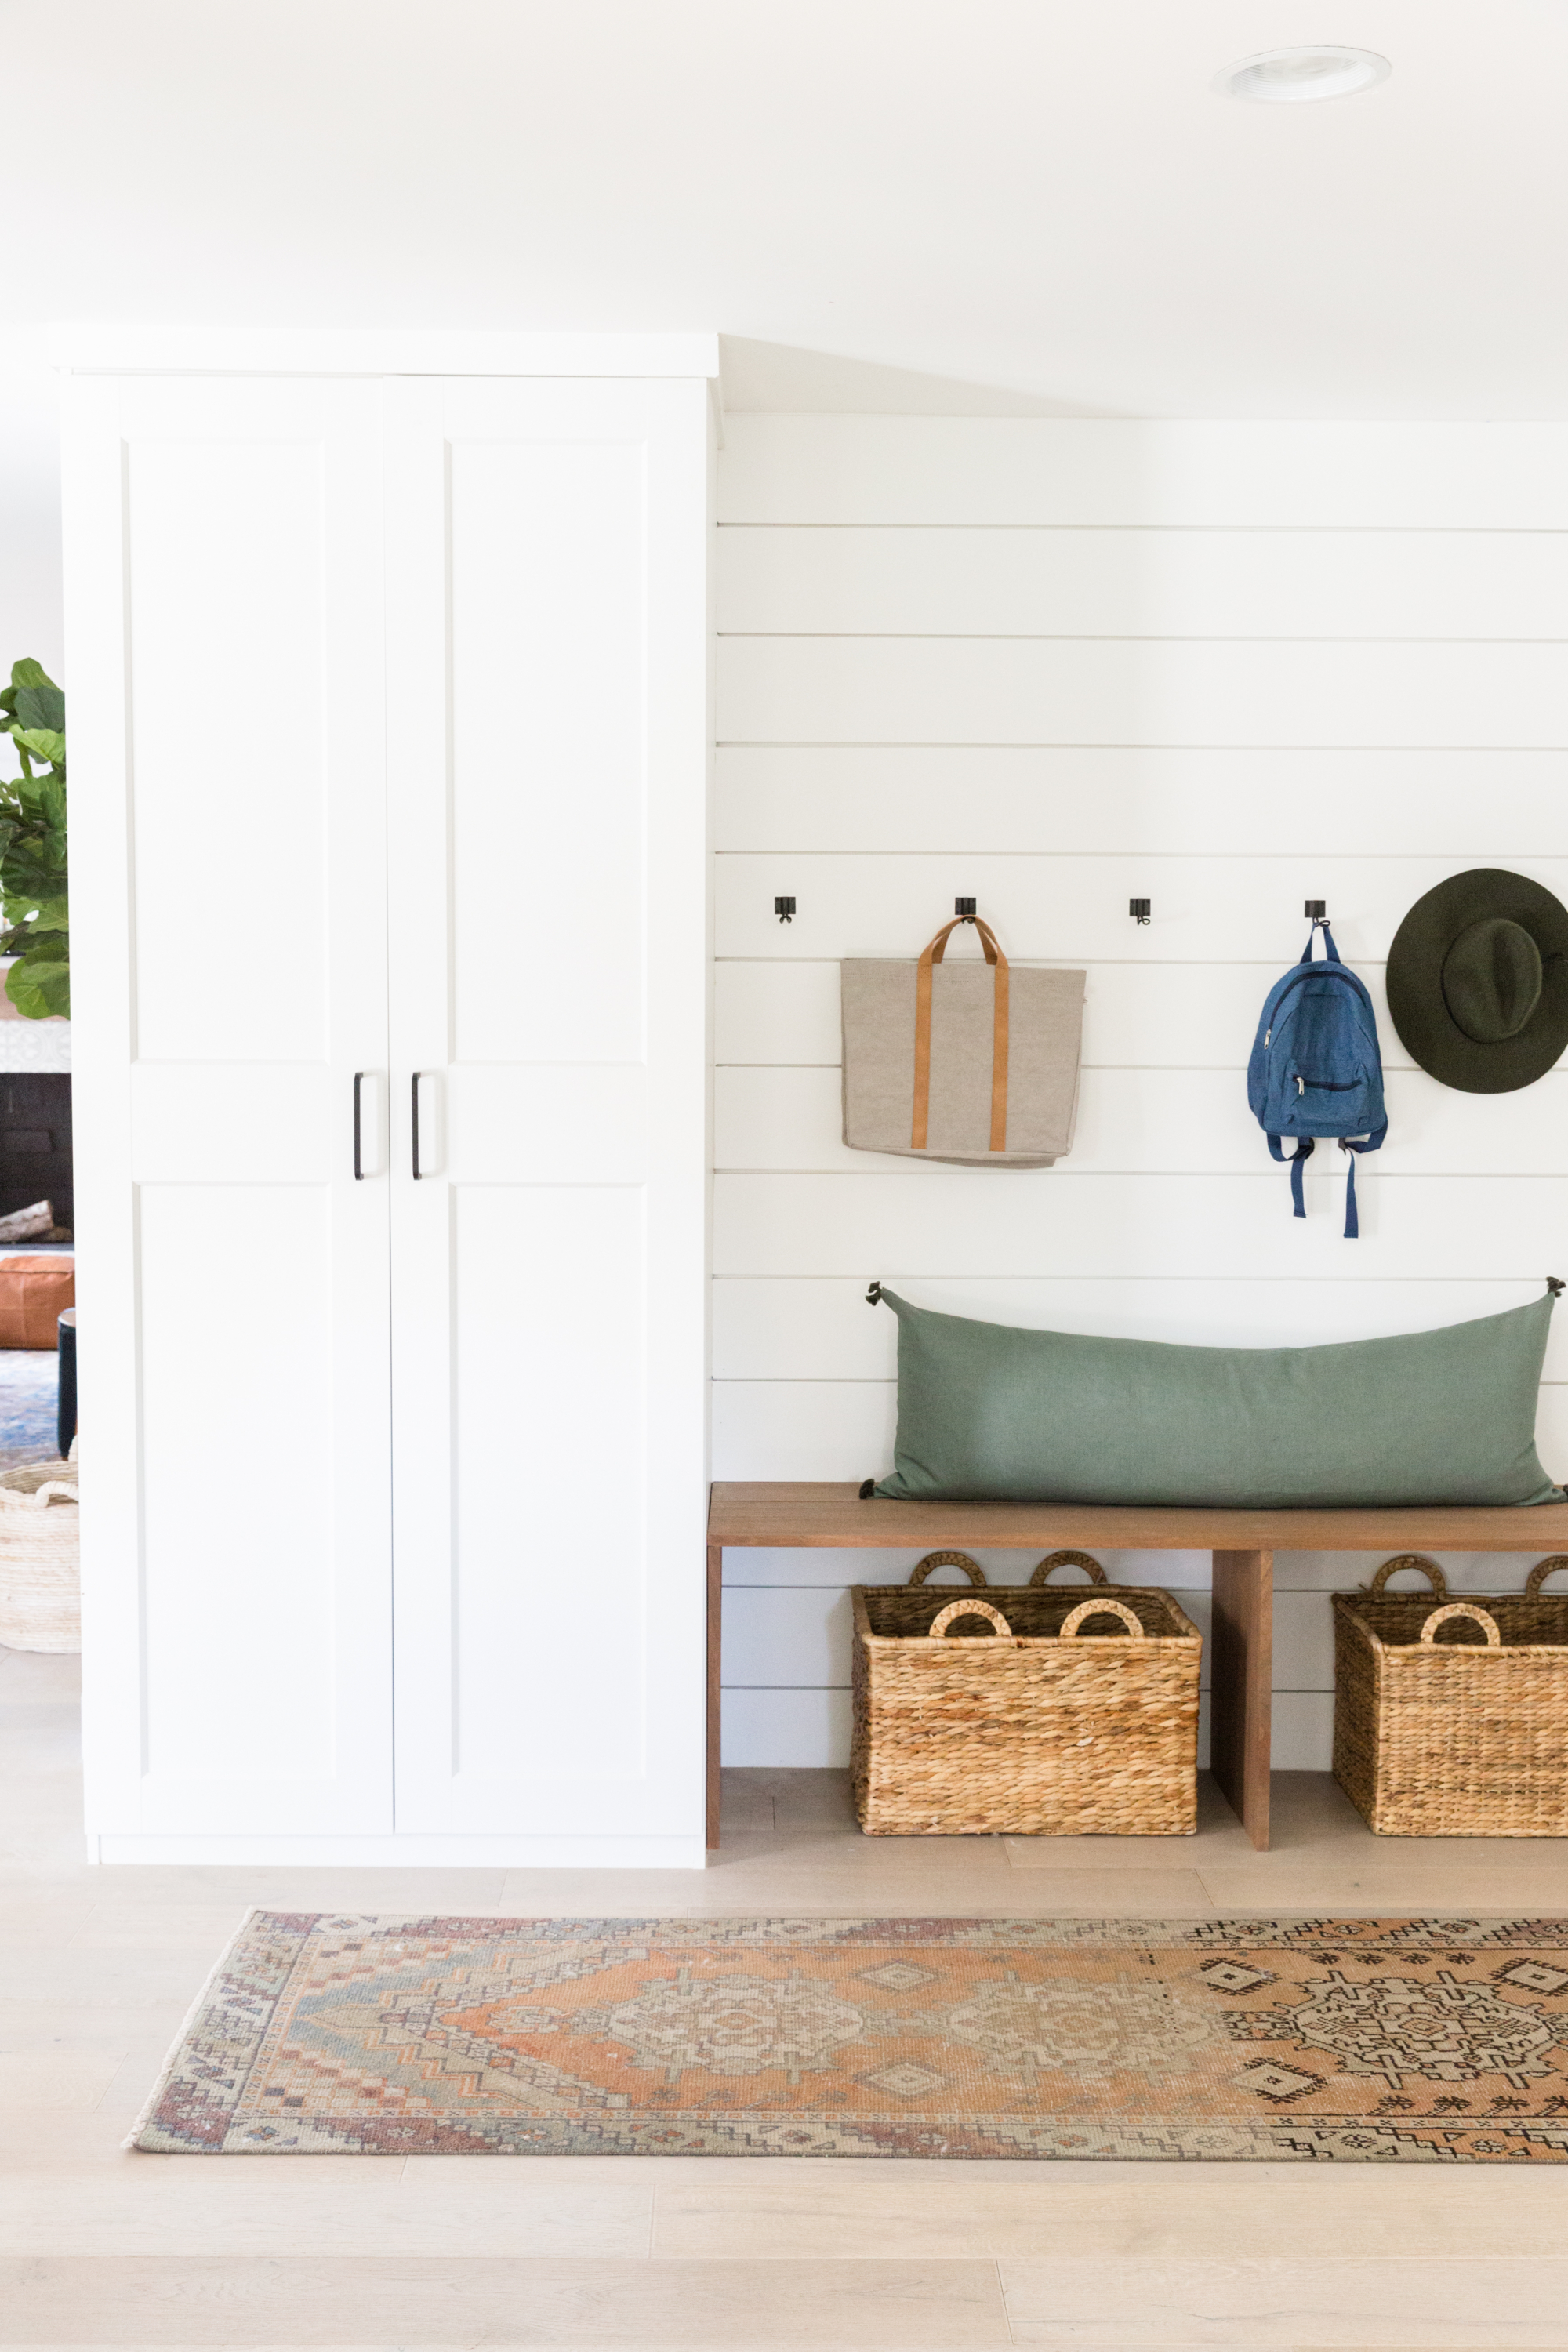
Runners are one of our favorite ways to add instant charm and character to any space! From kitchens to entryways to hallways, a beautiful runner can totally transform the look of your home. runner // kitchen tile // wall sconces Click here to see the Evergreen Kitchen Reveal! faux tree // oushak runner We are…
Runners are one of our favorite ways to add instant charm and character to any space! From kitchens to entryways to hallways, a beautiful runner can totally transform the look of your home.
Did you know we have an area on our site just for runners?! Head over to our “Shop Our Finds” page and click on the “Rugs + Windows” tab. We are constantly updating this page with our latest and greatest rug finds! We even have a vintage section!
If you’re not feeling the idea of a vintage rug in your home, thats okay! There are so many beautiful, “made to look vintage” options out there! Here are our favorite options, most of which are super budget friendly.
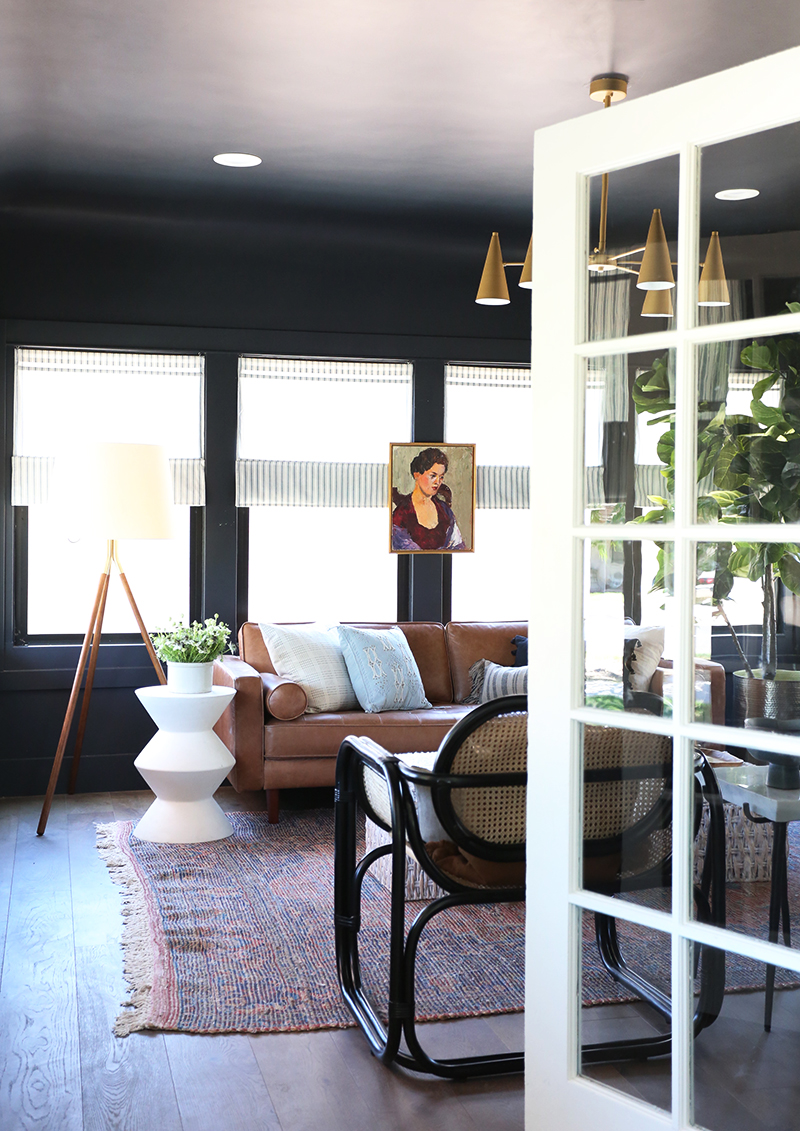
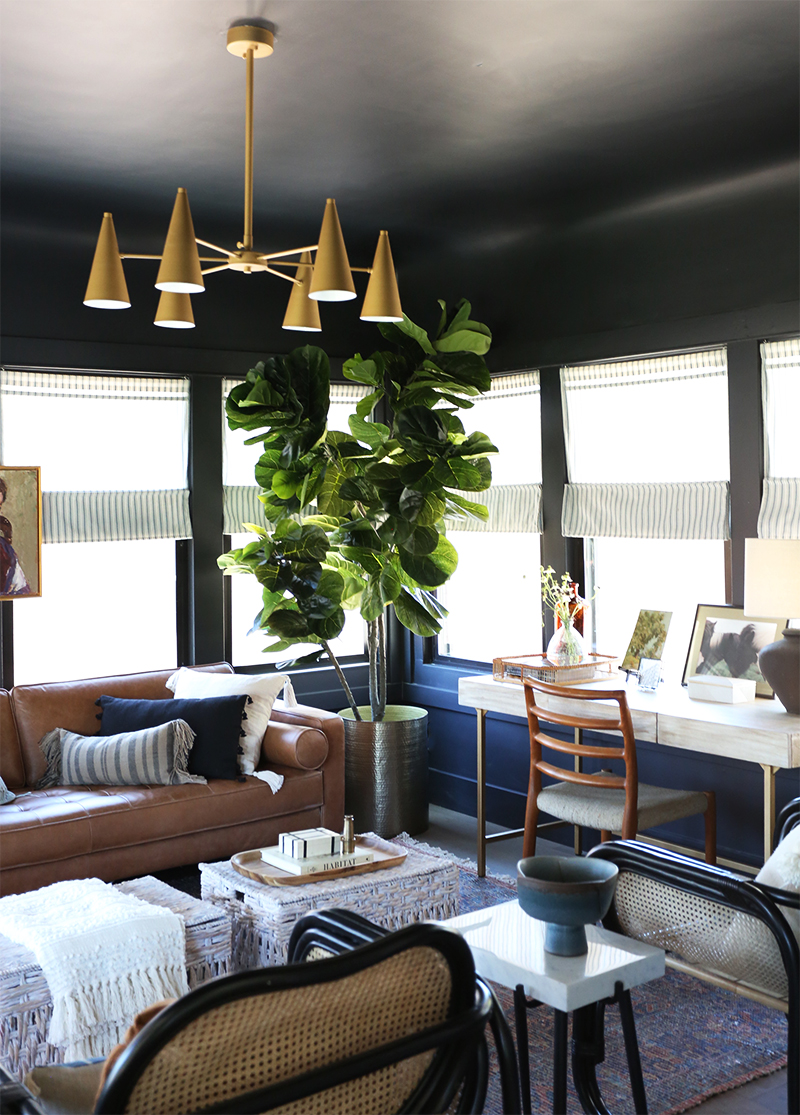
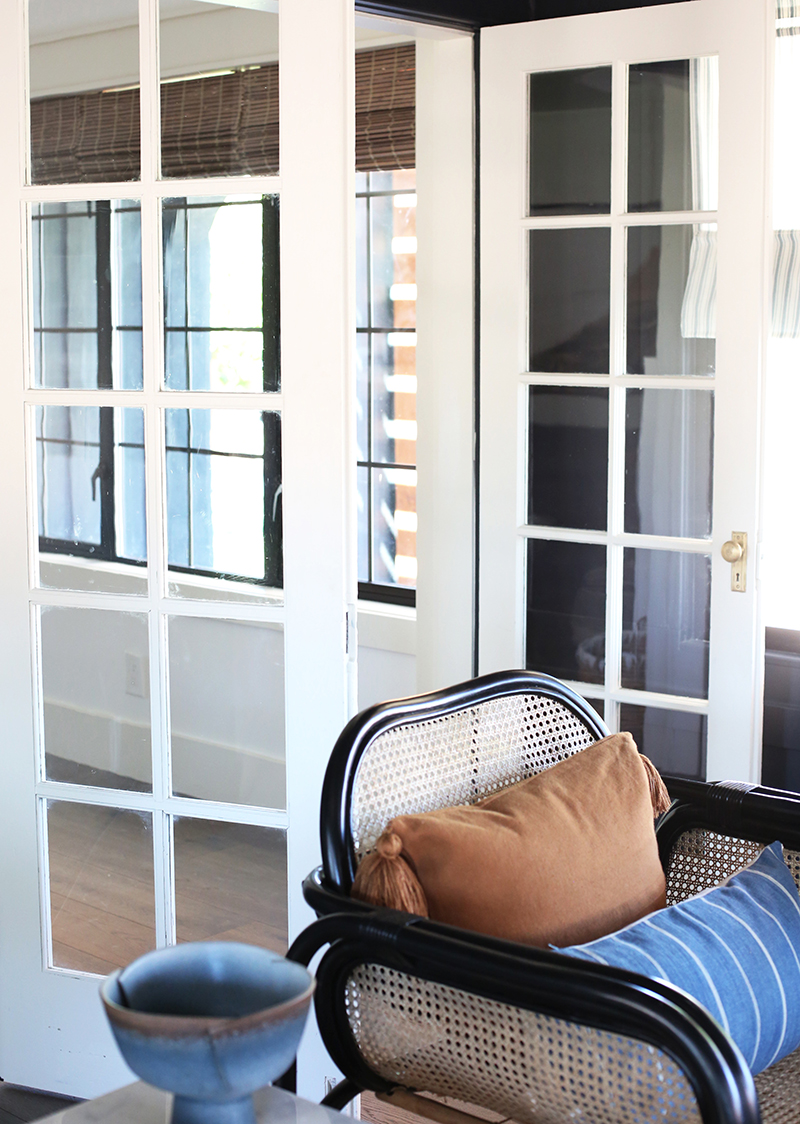
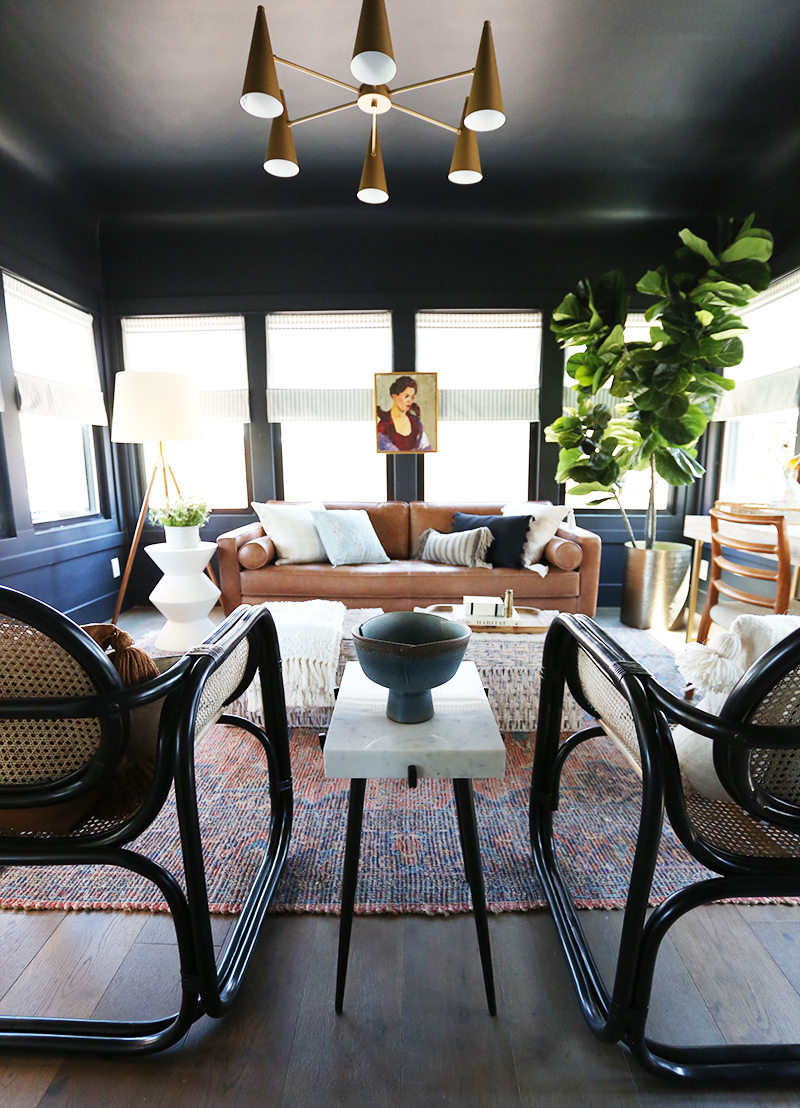
One of the very first additions to the Evergreen house that was made in the 30s was this beautiful little sunroom off the living room. With windows on three sides and the gorgeous coved ceiling, this space was alway my favorite room in the house. As it turns out, it was also the hardest for…
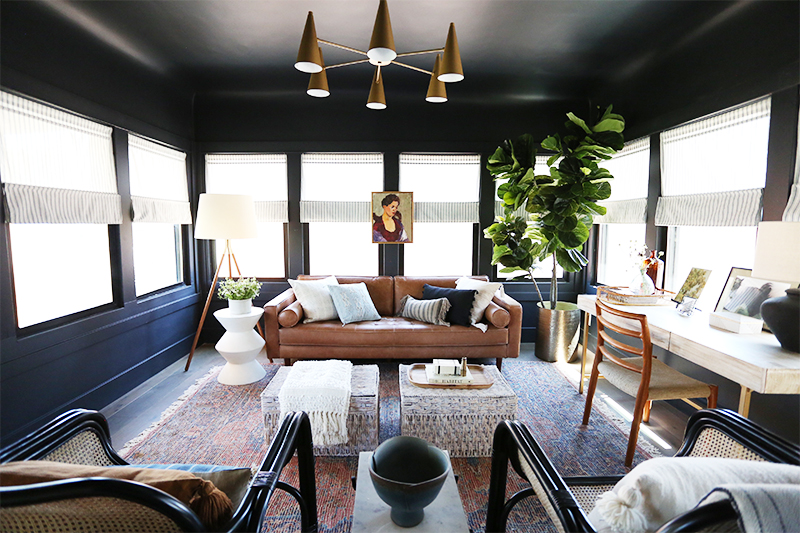
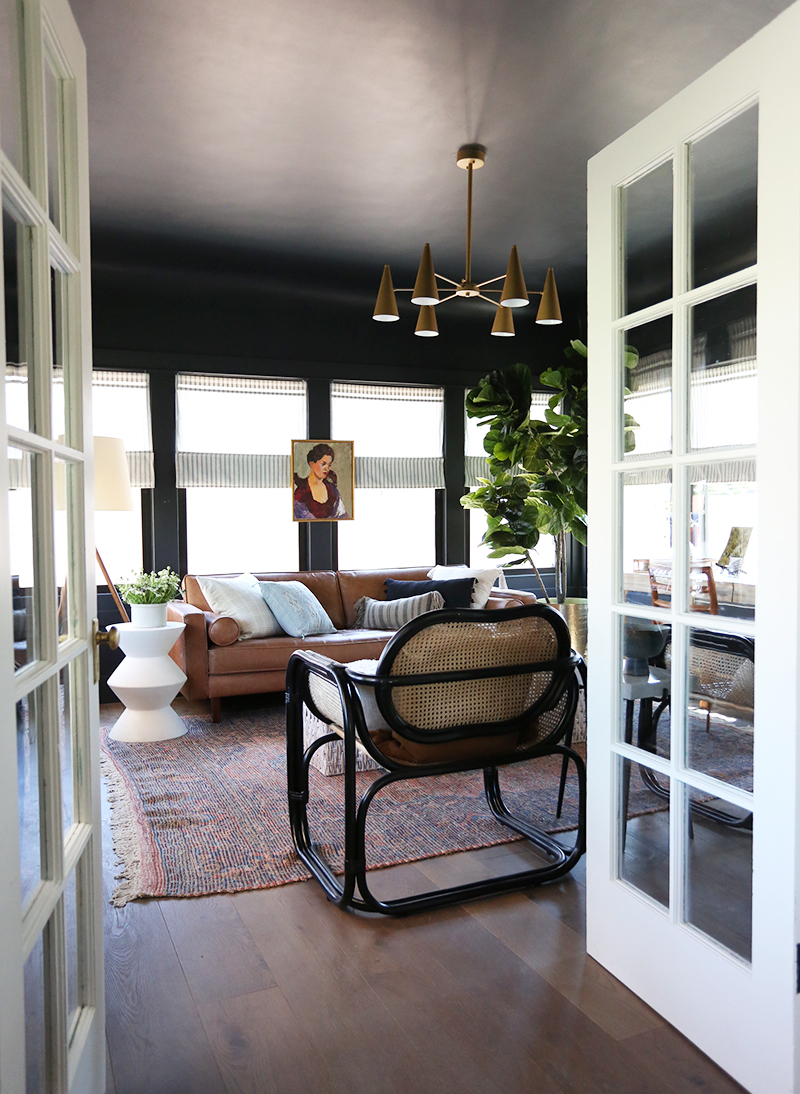
One of the very first additions to the Evergreen house that was made in the 30s was this beautiful little sunroom off the living room. With windows on three sides and the gorgeous coved ceiling, this space was alway my favorite room in the house. As it turns out, it was also the hardest for me to stage! What’s that about?!
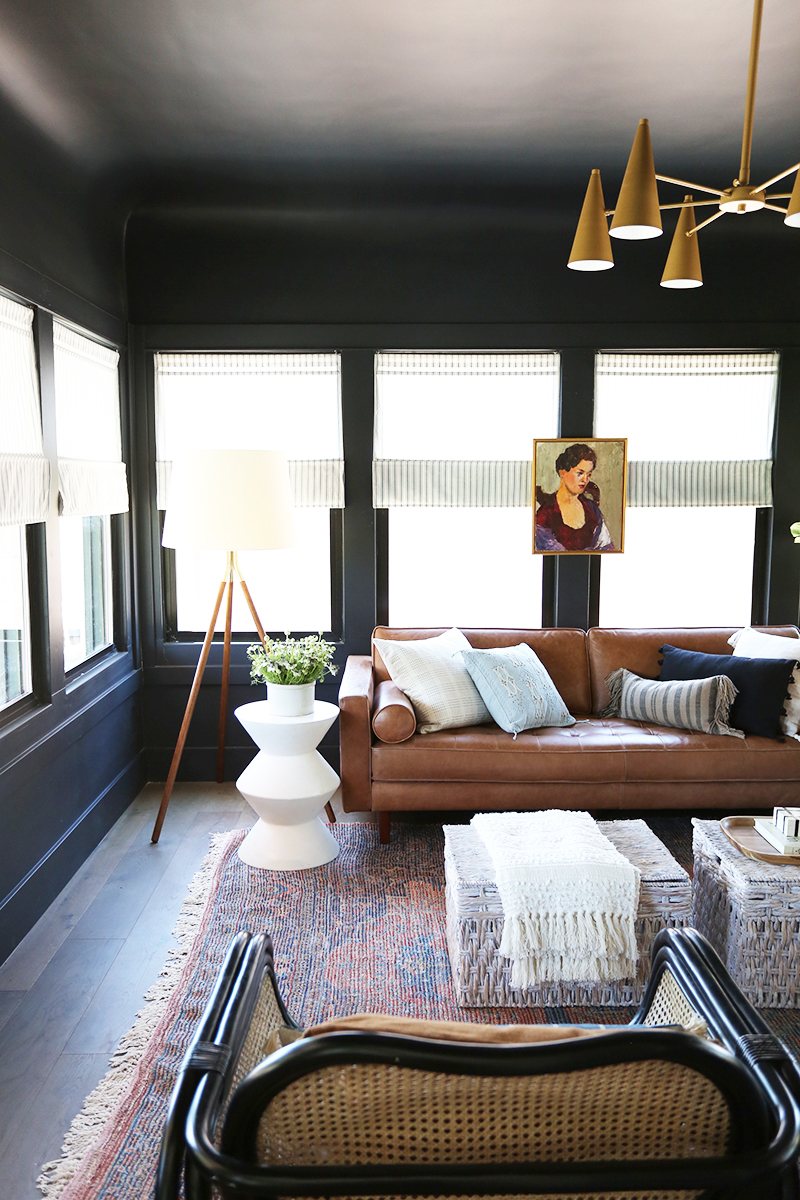
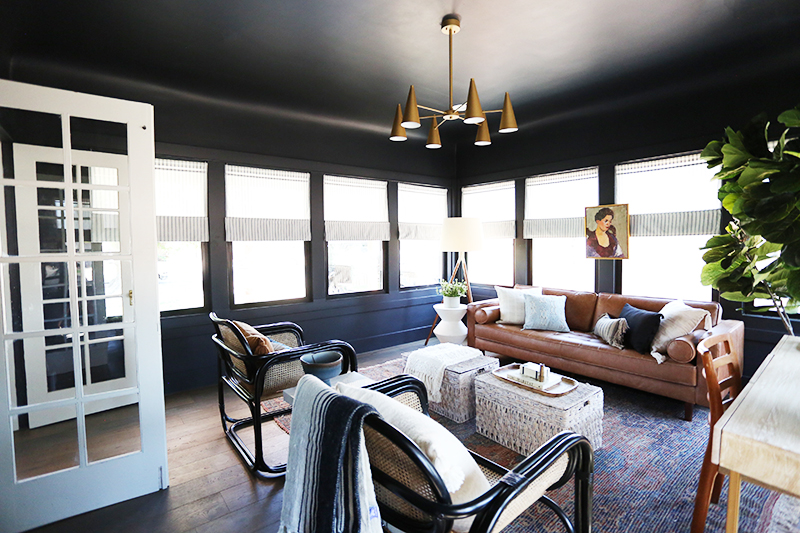
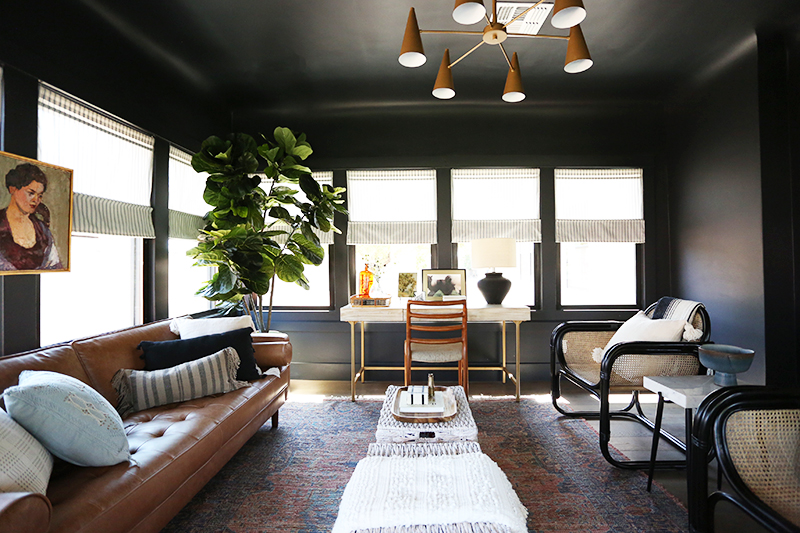
We decided to go bold and dramatic with the bluey-black paint color (Benjamin Moore’s Black Ink). I think it does a great job highlighting the cove and making the room feel like its own thing and separate from the living room.
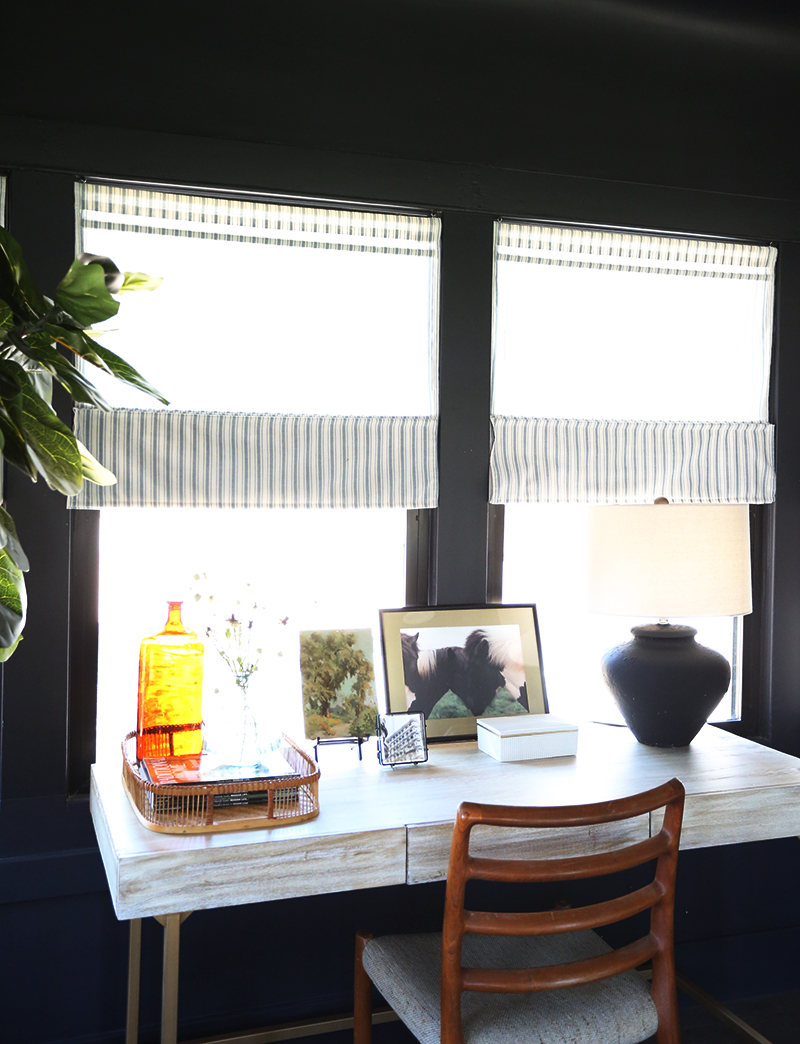
The shades(similar) were a super lucky find! When you sell a house, most of the time the items that are more permanently installed (like hard-wired lighting and window treatments) convey with the closing of the house. We wanted to install window treatments in every room both for privacy and security of our staging pieces, but also to make the homeowners feel more settled and welcome when moving in. I know buying a house full of window treatments all at once can feel overwhelming! We found some great deals though that helped soften the investment for us, like these striped roman shades(similar).
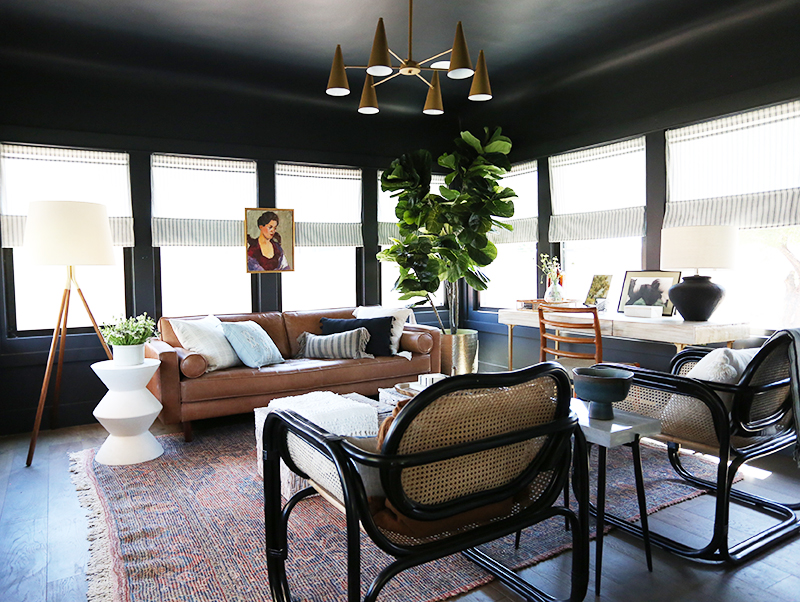
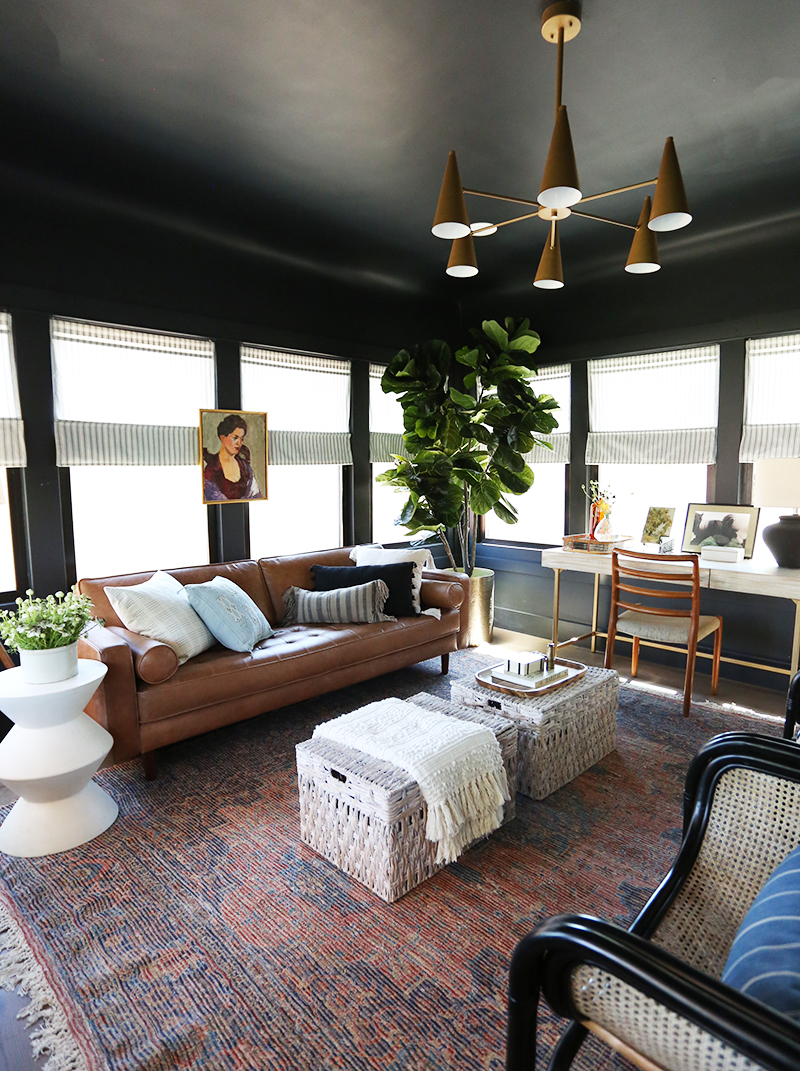
From the beginning, we had planned to set this room up like an office, but it was just too big. The room felt empty and misused when we had only a desk (albeit a large one) and a pair of chairs. We were brainstorming one day and I had the feeling that if this were my house, I would set up the space as a TV room, or a more casual family room.
I bought this 8′ fiddle leaf fig on a whim a month or so ago. When it arrived I was SO disappointed with the way it looked, I packaged it back up and planned to return it. We started to get a little desperate for trees though by the end of the staging. If you follow me on Instagram, you saw the house sold off market VERY quickly and we barely had time to finish the staging for our photos, which we use for marketing for Juniper Print Shop and to work with our sponsorships. There was no way we weren’t going to finish staging this home, even though it had already sold! But that meant we had to get creative with some of the pieces we already owned. I pulled out this 8′ fig to give it another try and with about five minutes of leaf fluffing, I AM OBSESSED!!!! It looks very convincing, especially in front of a window. And the height was exactly what we needed to cozy up this big space!
This room was not coming together for us during the two weeks we were non-stop down at the house finishing the staging. But in the end, I really love this room and think it came together. It feels eclectic and layered and cozy and functional. All my favorite adjectives for a space. Here are some additional shots and all the sources listed at the end!
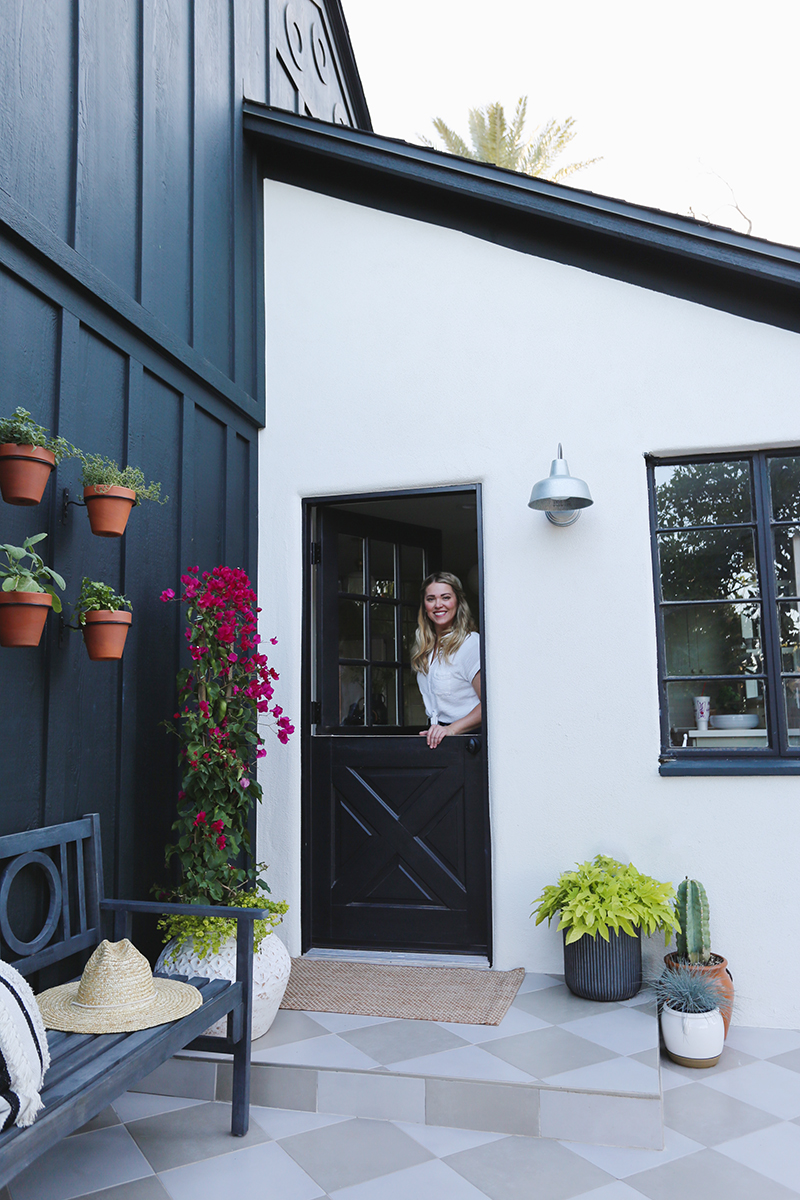
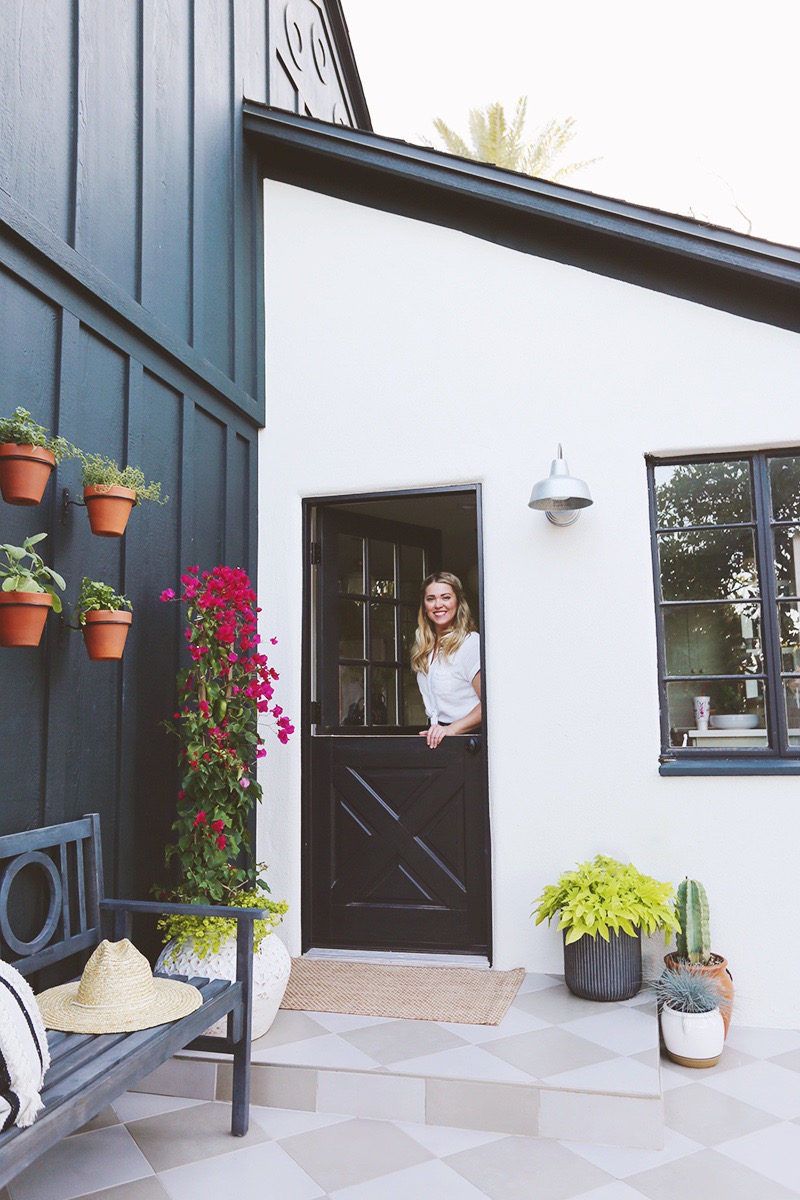
This post is sponsored by Lowe’s Home Improvement! Dutch doors, or double hung doors, were originally used to keep the animals out and the children in, while also letting in sunlight and fresh air. (And, yes, you can also open a window, but these doors are just so charming!) We have a stretch in our…
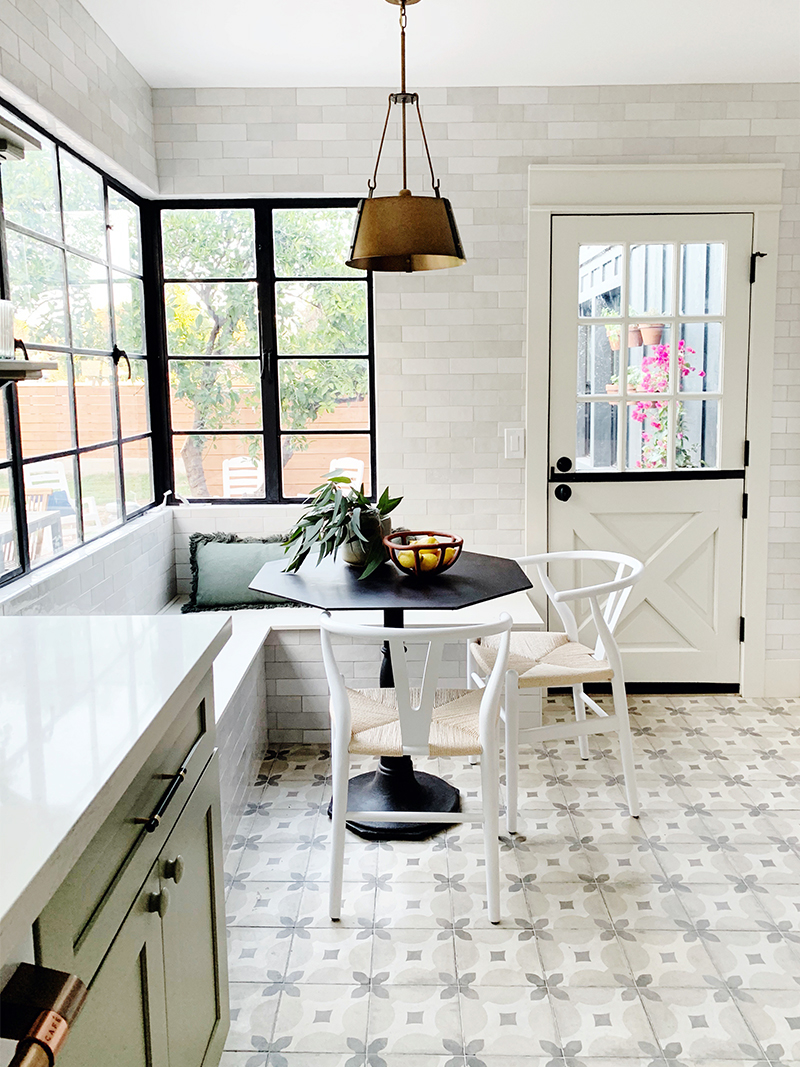
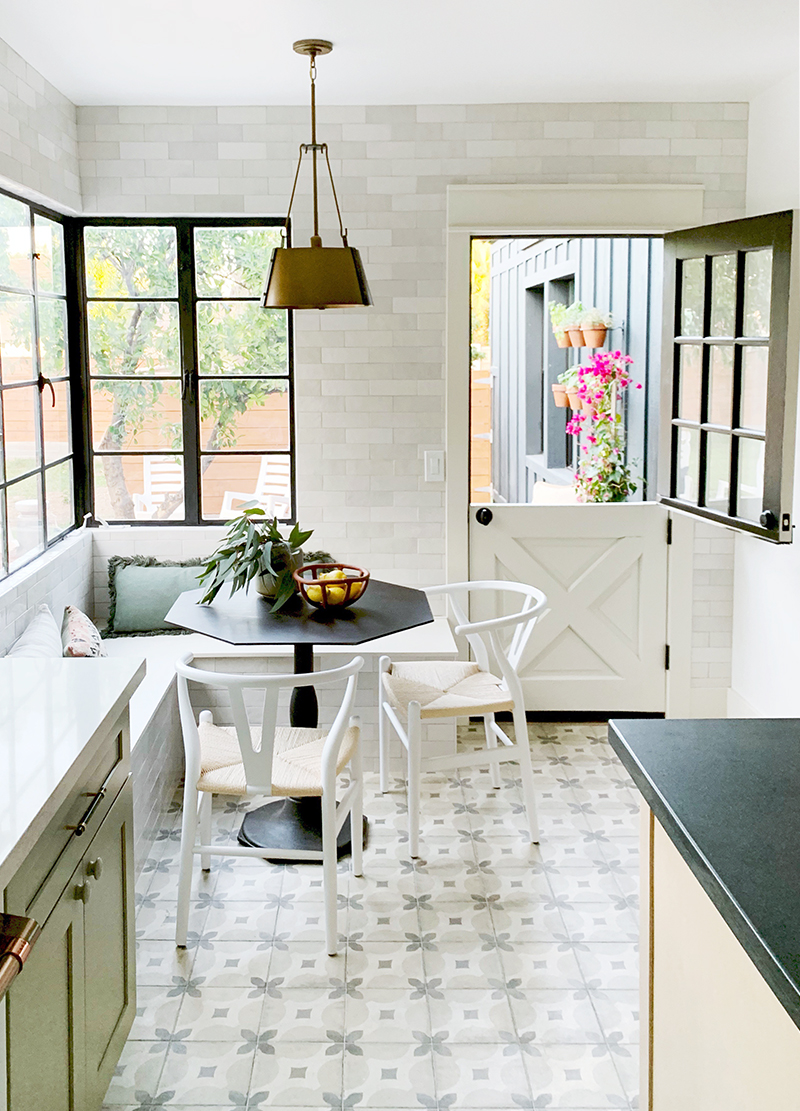
Dutch doors, or double hung doors, were originally used to keep the animals out and the children in, while also letting in sunlight and fresh air. (And, yes, you can also open a window, but these doors are just so charming!) We have a stretch in our house between the mudroom and the back stairs, just off the kitchen, that often feels dark and a little stale. Before our reno, I would open the two exterior doors (one at the front of the house and the other at the back) and we would get the most amazing air flow – it was like a giant vacuum when they were both open and the whole house had fresh air in just a few minutes! It was especially helpful on nights I cooked fish or curry! :)
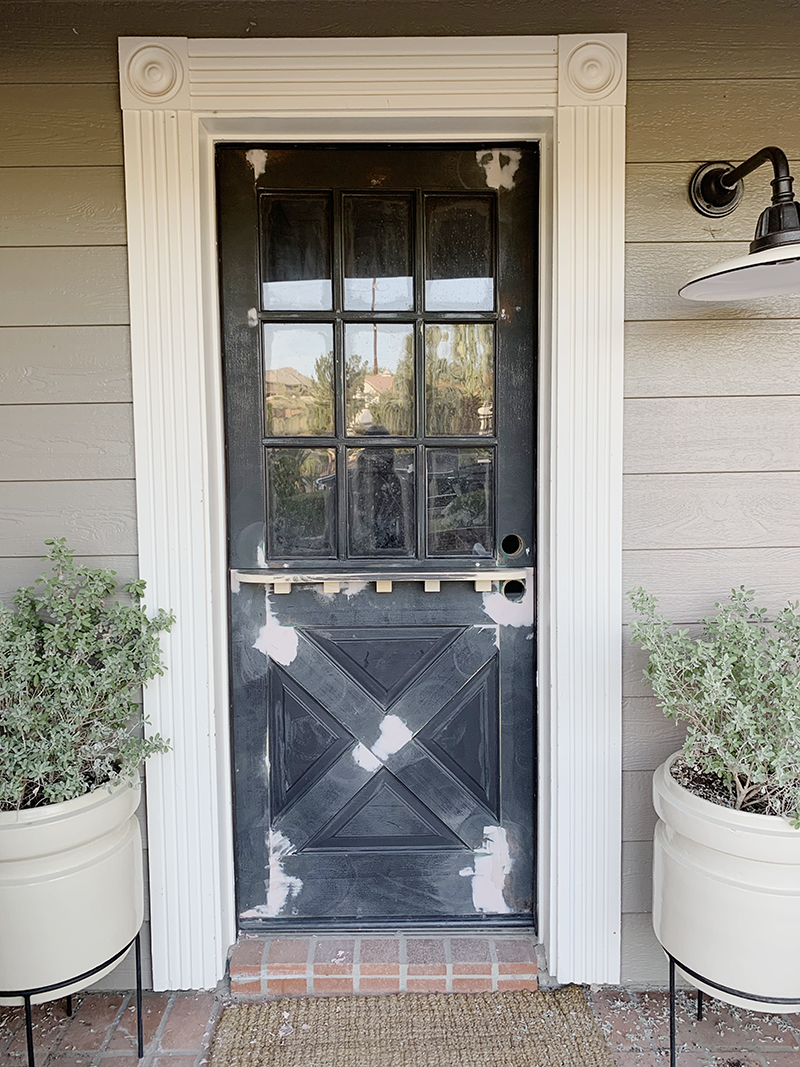
The only trouble is our dog, Linus, would love to escape and take a solo walk around the neighborhood when the doors were open. Not good! So when we were planning for our renovation, I knew I wanted two dutch doors in the house. We bought one new one for the addition section, but we figured out how to turn our old solid wood 9-lite door into a Dutch door and it was actually pretty simple to do! We loved the results so much we did an even more simple version for two of the exterior doors at the Evergreen flip house, which we renovated in partnership with Lowe’s Home Improvement! This is the Evergreen kitchen door closed and open:
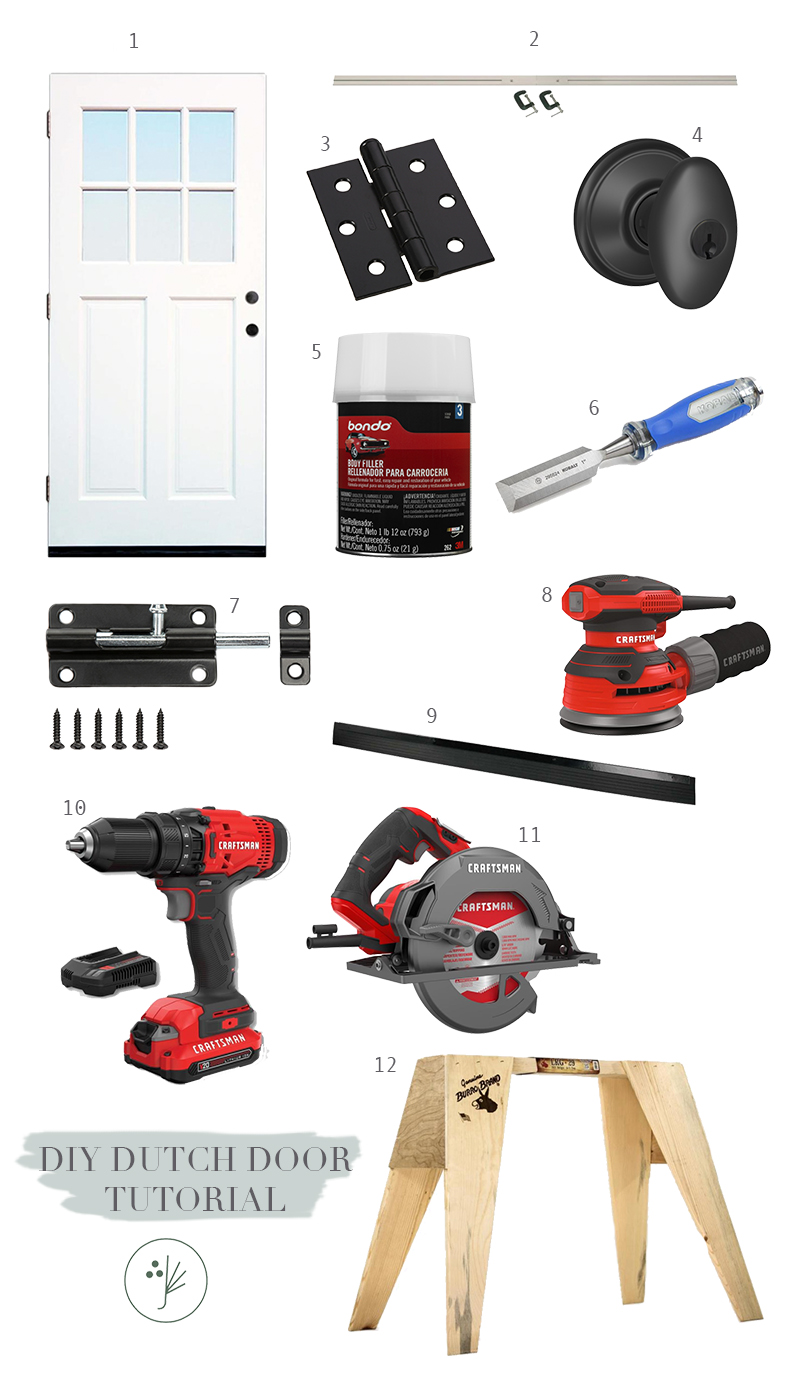
Ready to jump in with the tutorial? Here are the supplies you’ll need for this project:
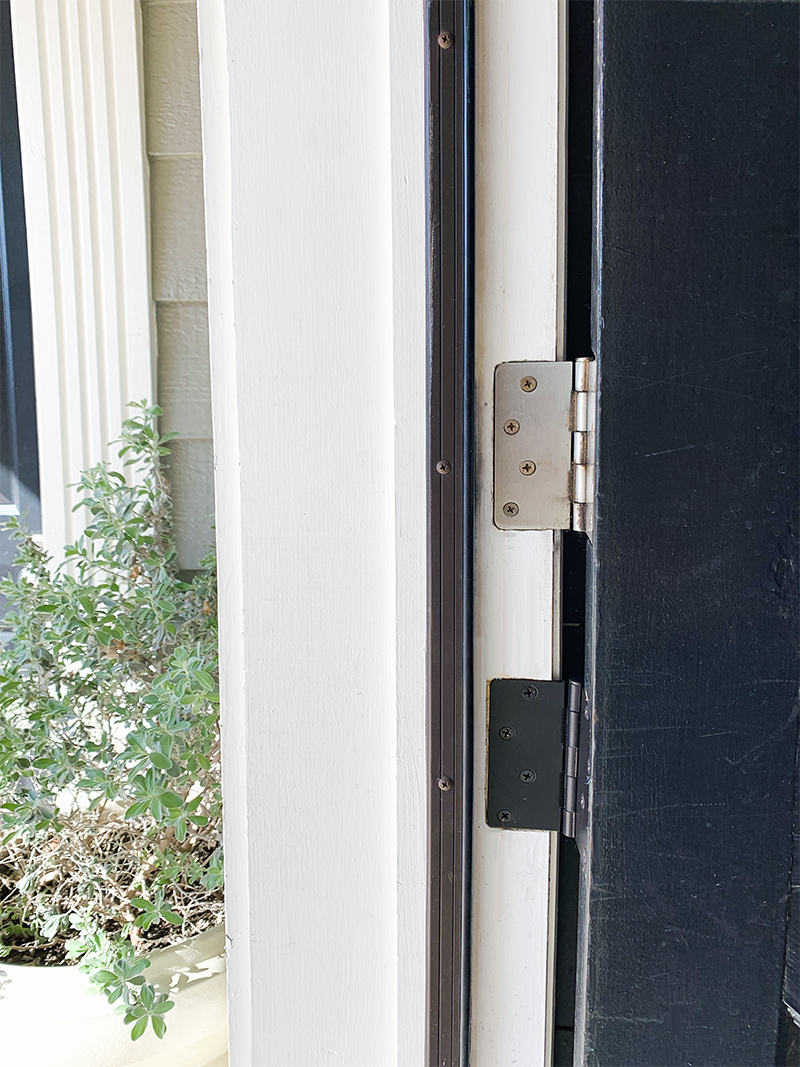
Step 1: ADD A FOURTH HINGE. In order for the Dutch door to work properly, where the doors swing independent of one another, you’ll likely have to add a hinge. That’s as simple as tracing around the hinge and chipping out the wood with a chisel in your door jamb enough so the new hinge sits flush. (Note: we wanted to change all our hardware to matte black, so that is why our new hinge does not match our old ones. Everything got replaced with the black finish hinges at the end of the install though!)
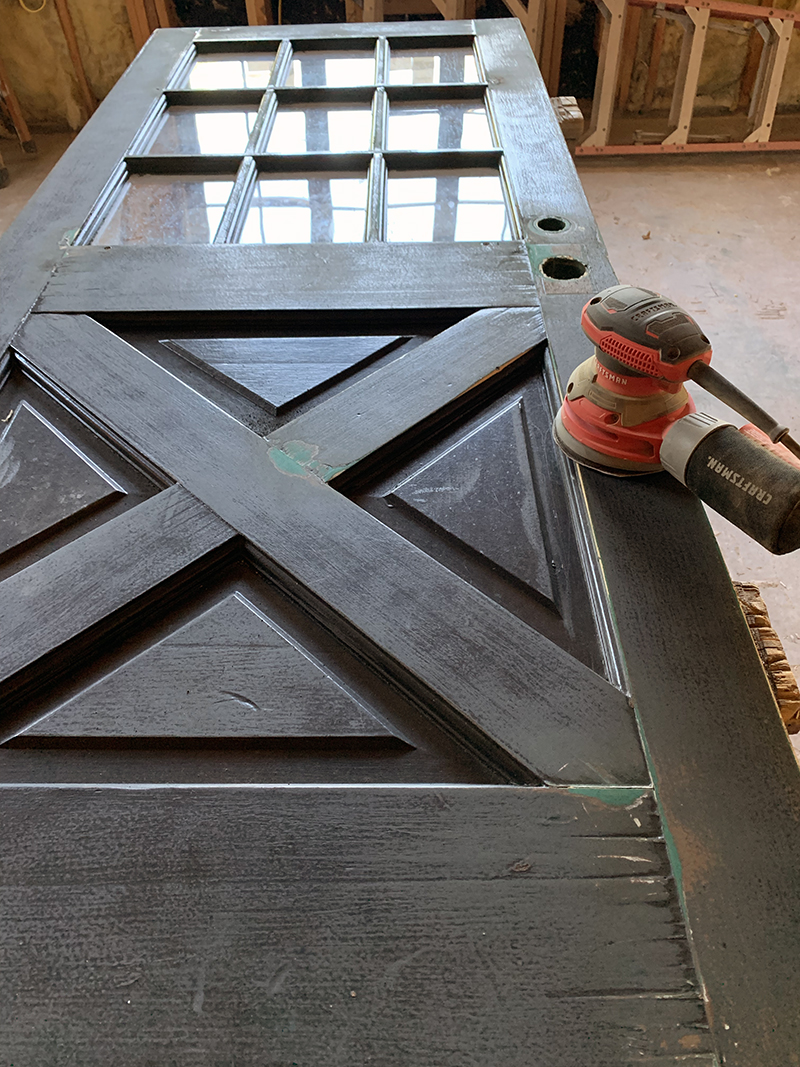
STEP 2: TAKE DOOR OFF ITS HINGES and place on a pair of saw horses. You can see here my door has seen better days, but we’ll fix that right up!
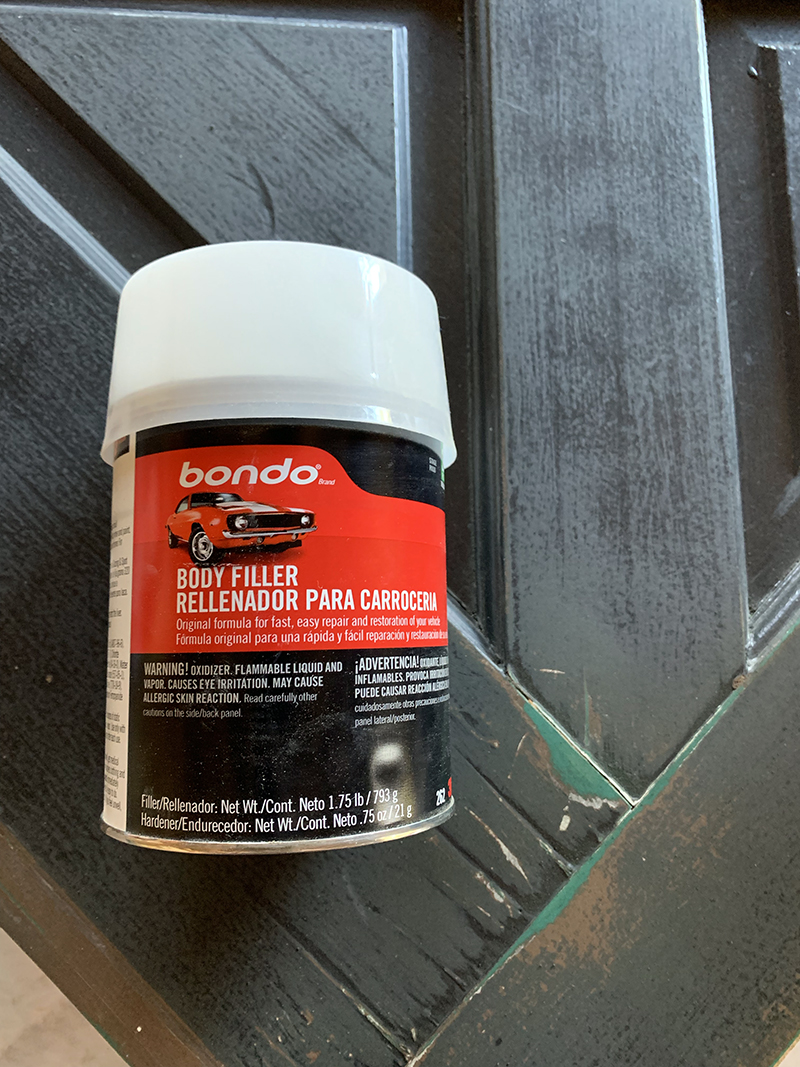
STEP 3: REPAIR AND PATCH DOOR. Depending on the condition of your wood door, you may have some patching and sanding to do, which is much easier to do well with your door on the saw horses! I love Bondo, which is an epoxy product most commonly used for auto body repairs, but it works GREAT on wood or metal furniture that is going to be painted (not stained!).
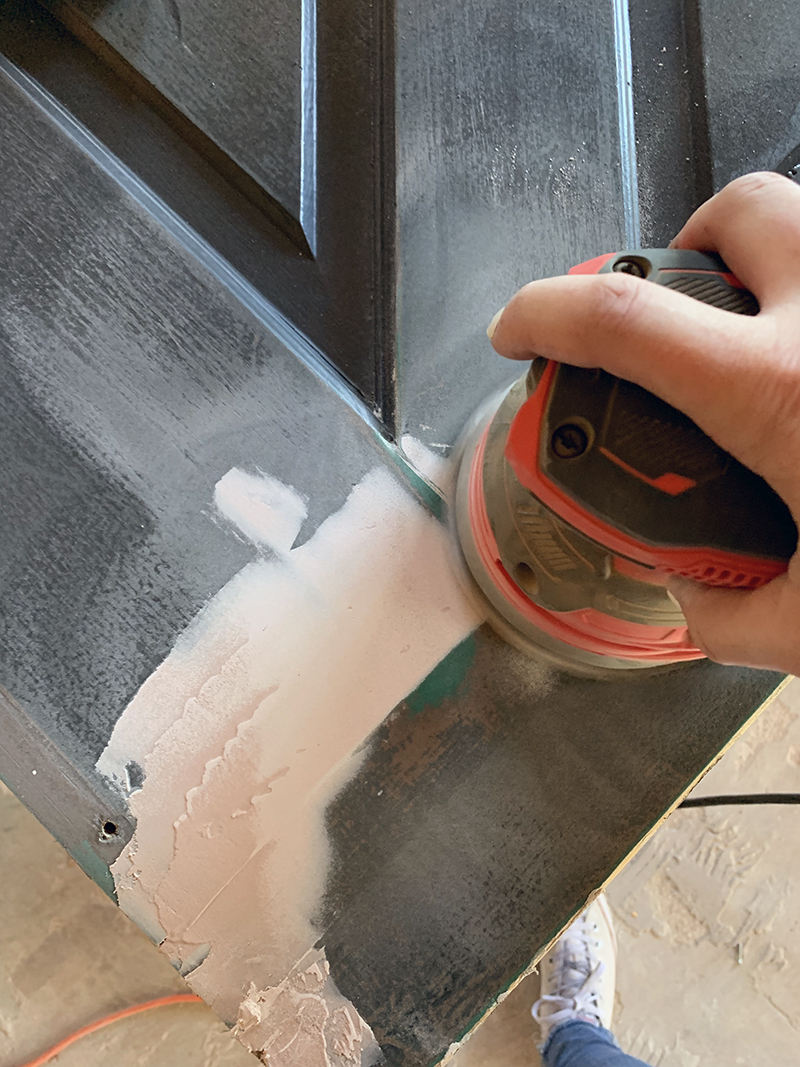
You can follow the simple instructions on the Bondo can for mixing the epoxy. I apply it with a heavy hand – the material is easy to sand down and it’s better to start with a ton of product layered on and then sand down to the perfect finish. It also dries quickly and is ready for paint in only about 30 minutes!
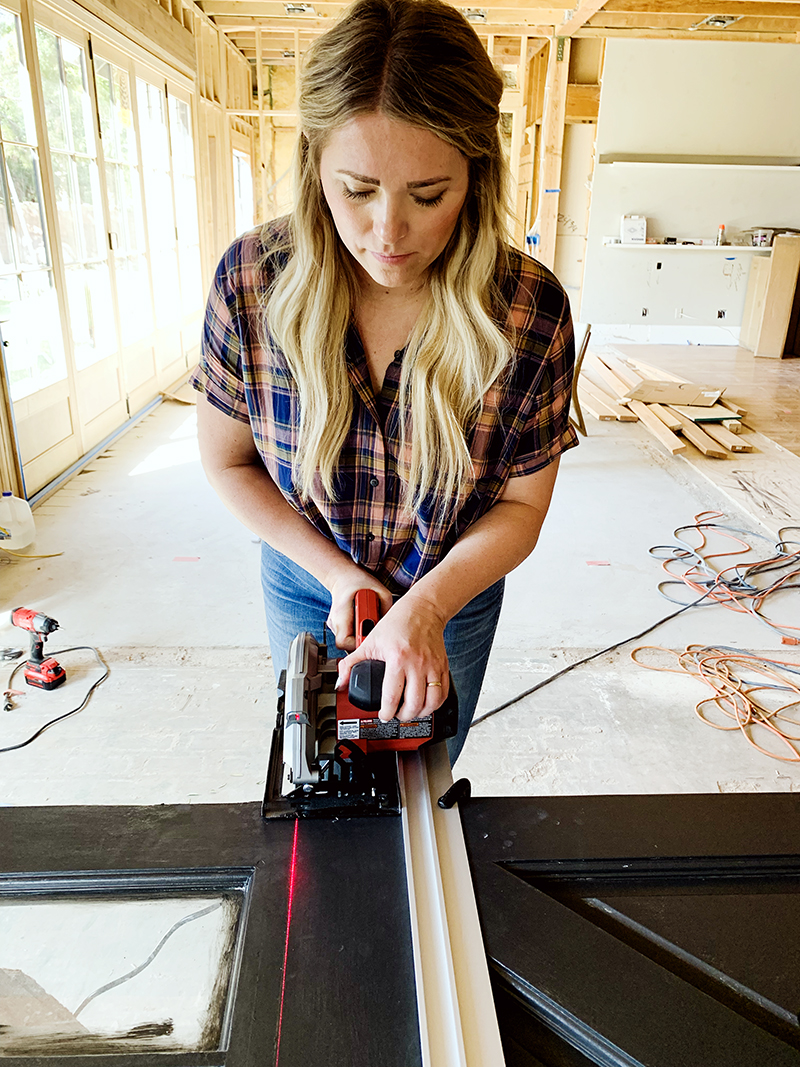
STEP 4: CUT YOUR DOOR! I used this handy straight edge cutting guide from Lowe’s to make a perfect cut (and it does have to be perfect) with my circular saw. My saw has a built in laser guide as well, which is super helpful! You’ll just want to cut between your deadbolt and your door knob.
STEP 6: SEAL THE GAP! When you cut your door in half, you’ll be left with a gap in the two doors the thickness of the blade, and you’ll want the door to be air and water tight. You can address that in two different ways. The simplest way is to add weather stripping (or a rubber door sweep) like we did with the Dutch doors at the Evergreen house. (PS you can definitely paint the weather stripping too to match the door, we just ran out of time before the house sold!)
The slightly more complicated way is adding a shelf between the doors, which we did with the door at my house.
I bought a short piece of 1×6 board at Lowe’s. I marked above and below where I wanted the shelf to sit and cut out the approximately 1″ section, careful to keep the blade on the inside of the line with both cuts so that the shelf would fit tightly between the two doors.
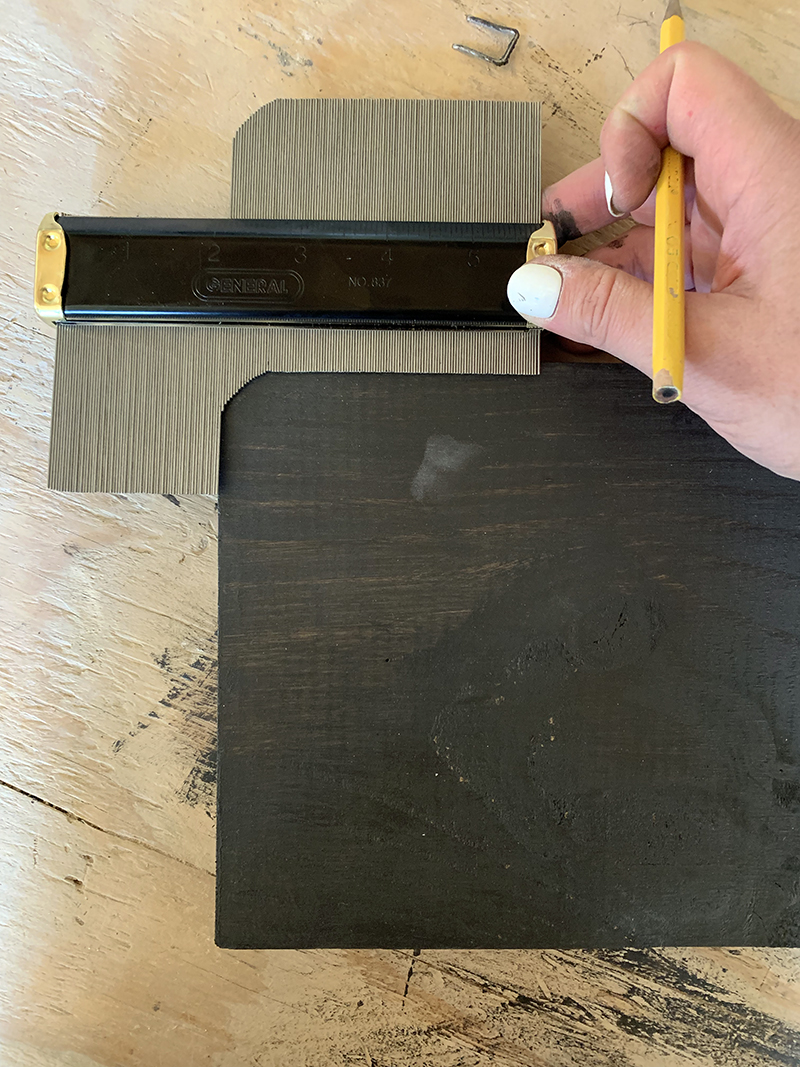
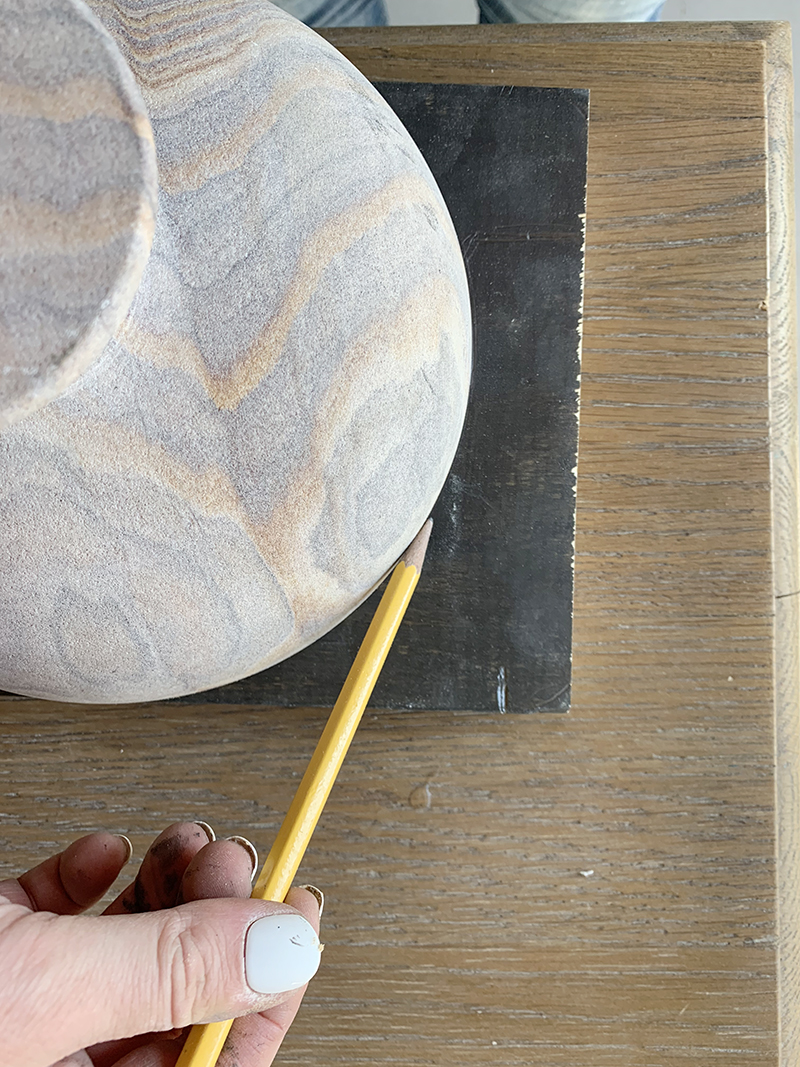
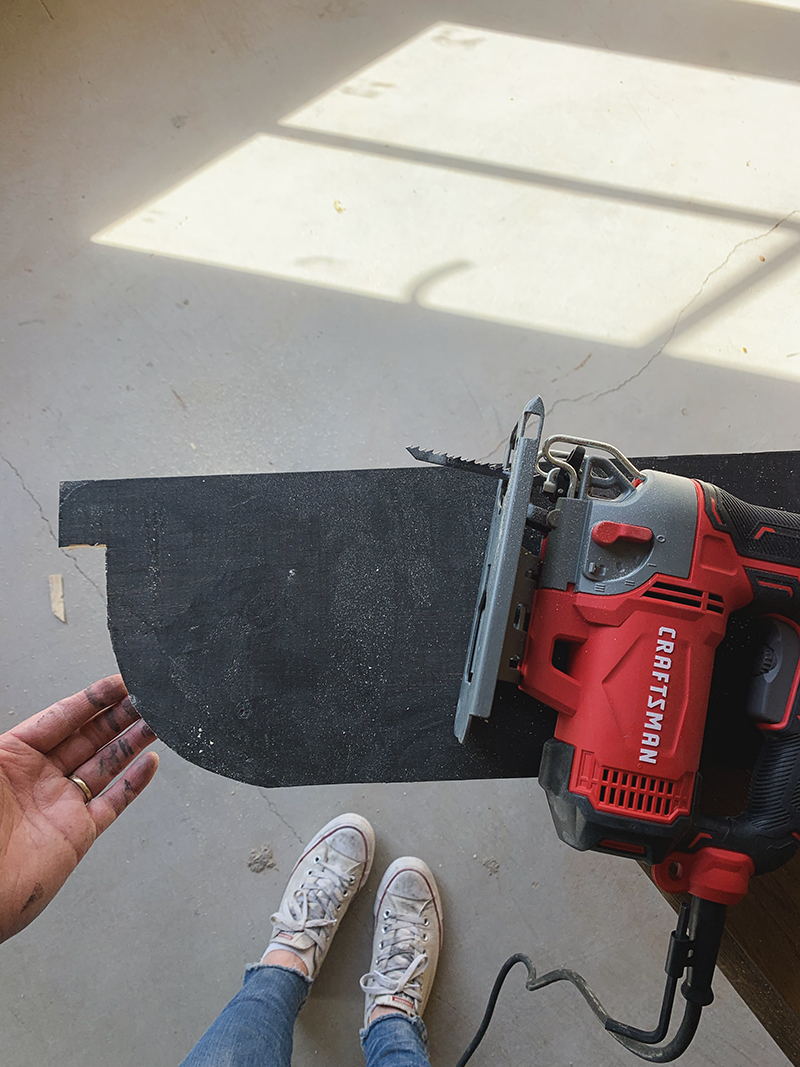
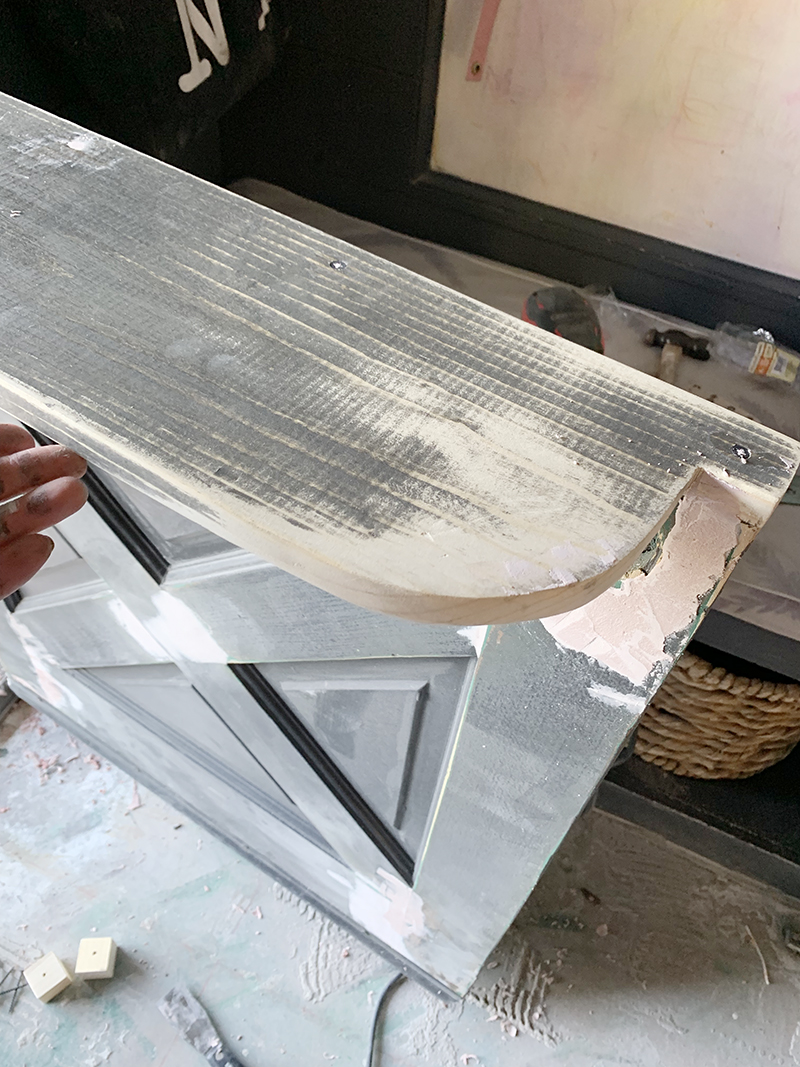
STEP 7: ROUND OUT THE SHELF CORNERS. Depending on your door and hardware placement you might need or want to step in and round out the corners of your shelf. You can do this by using a carpenters guide or if you want a more exaggerated curve like I did, you can use a bowl to mark your curved cut lines. I used a jig saw to quickly cut the shelf board.
You can see here, I wanted the shelf to stick out entirely on the exterior side of our door. The little ears on the shelf sit perfectly on top of the bottom half of the door and then the curved part allows the shelf to clear the door jamb. My cut was a little off, but sanding takes care of any inconsistencies like that!
STEP 5: REPLACE HINGES AND HANG YOUR DOOR AFTER CUTTING. The recommended method is to put the hinge plates on your door and your jamb individually and then tap in the pins to hang.
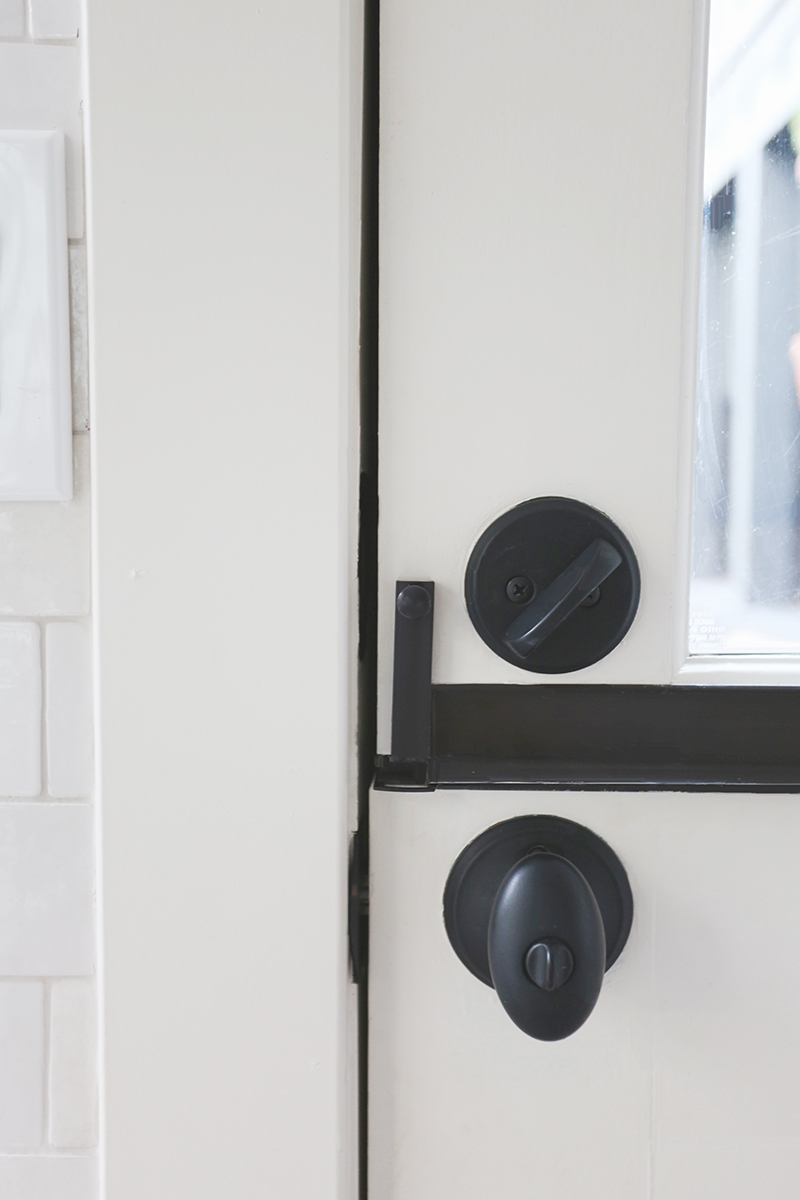
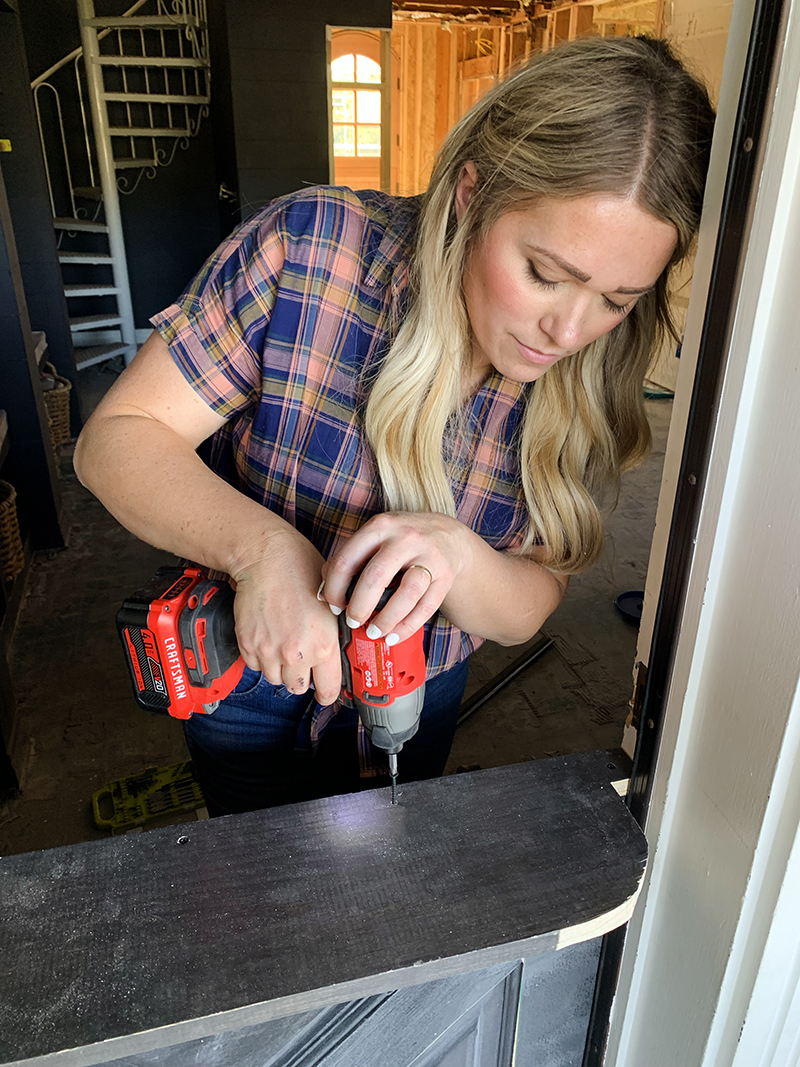
STEP 6: ATTACH YOUR SLIDING LATCH AND SHELF. The sliding latch keeps the two doors tightly together for regular use. It’s easy to screw in next to your handle set on the interior side of the door.
At this point, for my own door, I used six screws and wood glue to attach my shelf to the bottom door. You can do any touch up sanding after the shelf is secure so it looks perfect before painting!
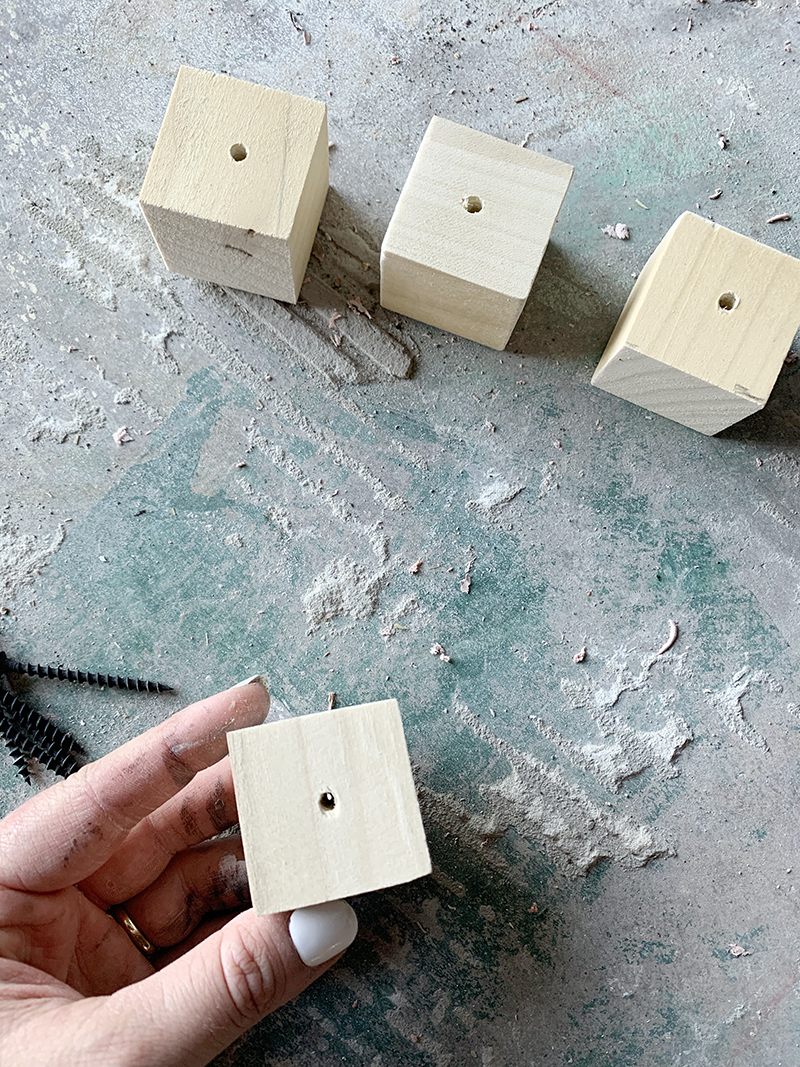
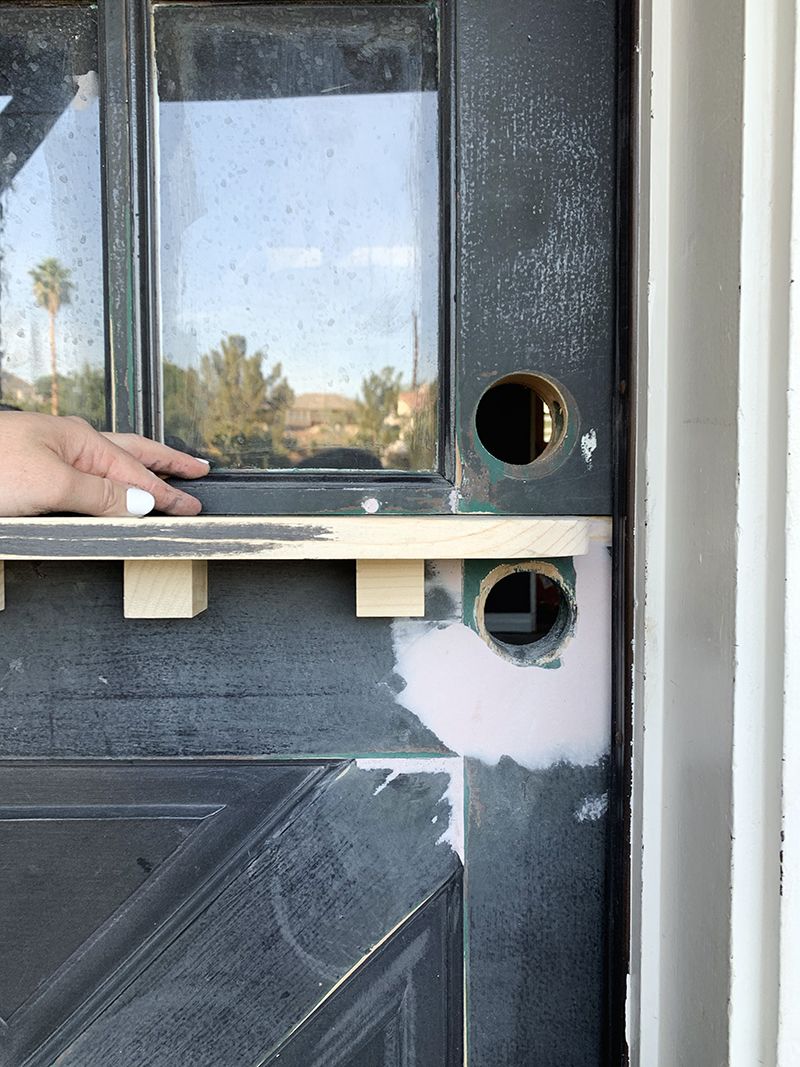
OPTIONAL STEP: I liked the idea of adding some decorative dental pieces under the shelf, so we cut down a piece of square molding from Lowe’s into little cubes, drilled pilot holes and secured them to the underside of the shelf with wood screws and a little glue.
The door at our house is not much to look at yet, but it’s all ready for the house painters to come! :) I love it and I’ll be sure to post an after-after photo on social media as soon as this one is perfect!
In the meantime, here are a couple more shots of the simpler, no-shelf version of this same project at the Evergreen house! Dutch doors are not for everyone or for every house but if you’re a fresh air junky like I am and you love adding some character to your house, this project might be a good one for you! We have amazing weather in desert for about eight months of the year and I can’t wait to get even more of that beautiful desert breeze that often smells like orange blossoms or creosote by our house!
The Evergreen house was built in 1920 as a 800 square foot Sears Kit house. Over the decades, there were several additions and now it is 2500 square feet! Most of those additions (like the beautiful sunroom at the front of the house) are great, but the southwest corner of the house was strange….
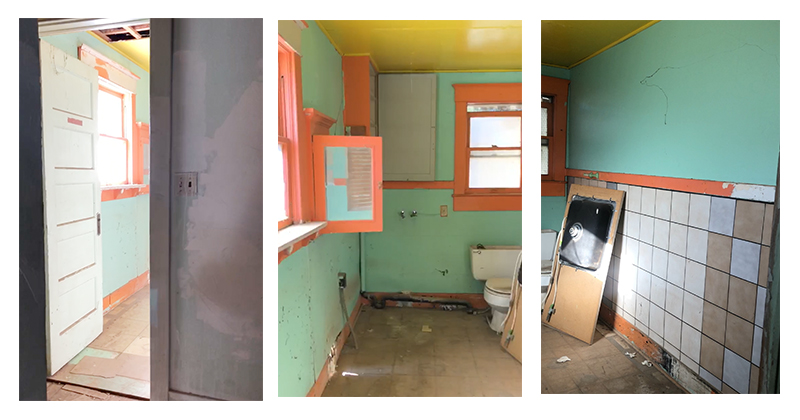
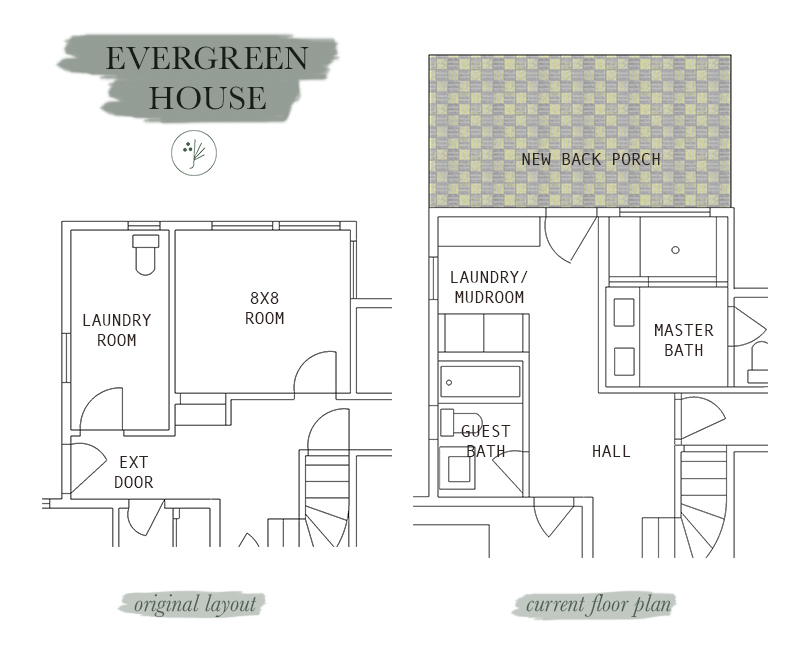
The Evergreen house was built in 1920 as a 800 square foot Sears Kit house. Over the decades, there were several additions and now it is 2500 square feet! Most of those additions (like the beautiful sunroom at the front of the house) are great, but the southwest corner of the house was strange. We had a dark, tight hallway and two rooms that were both at the same time way too big and also too small, so we ended up completely reworking this space and adding a back porch while we were at it!
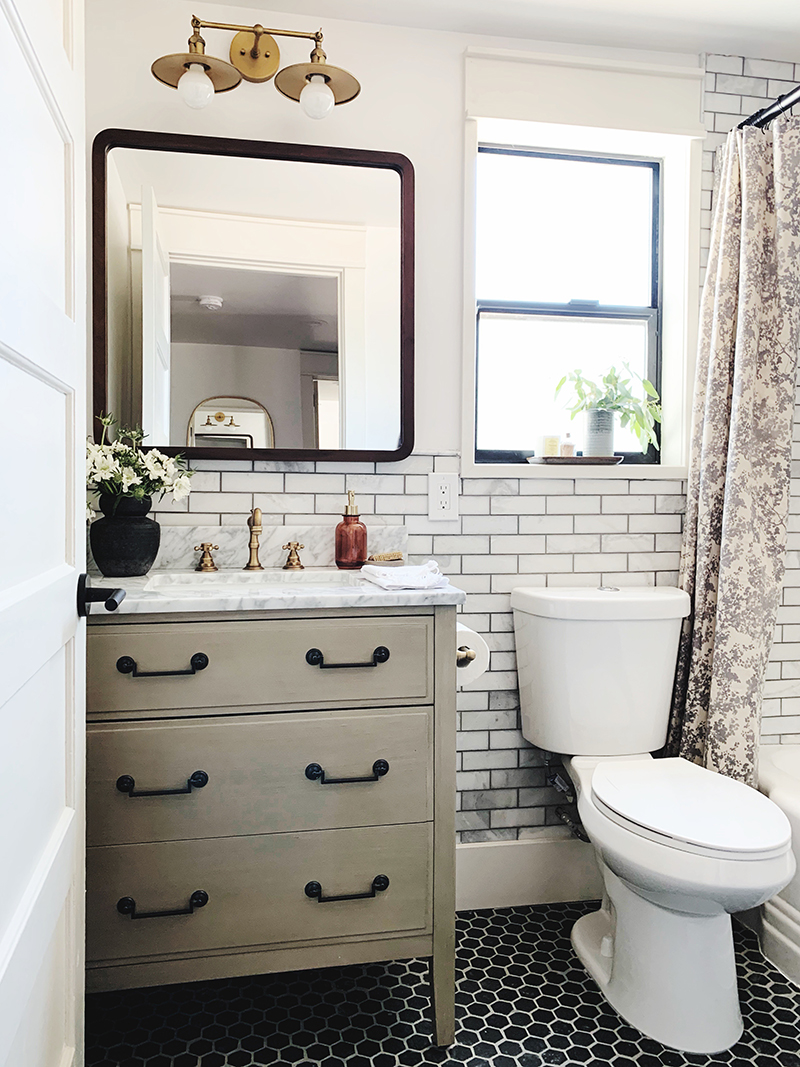
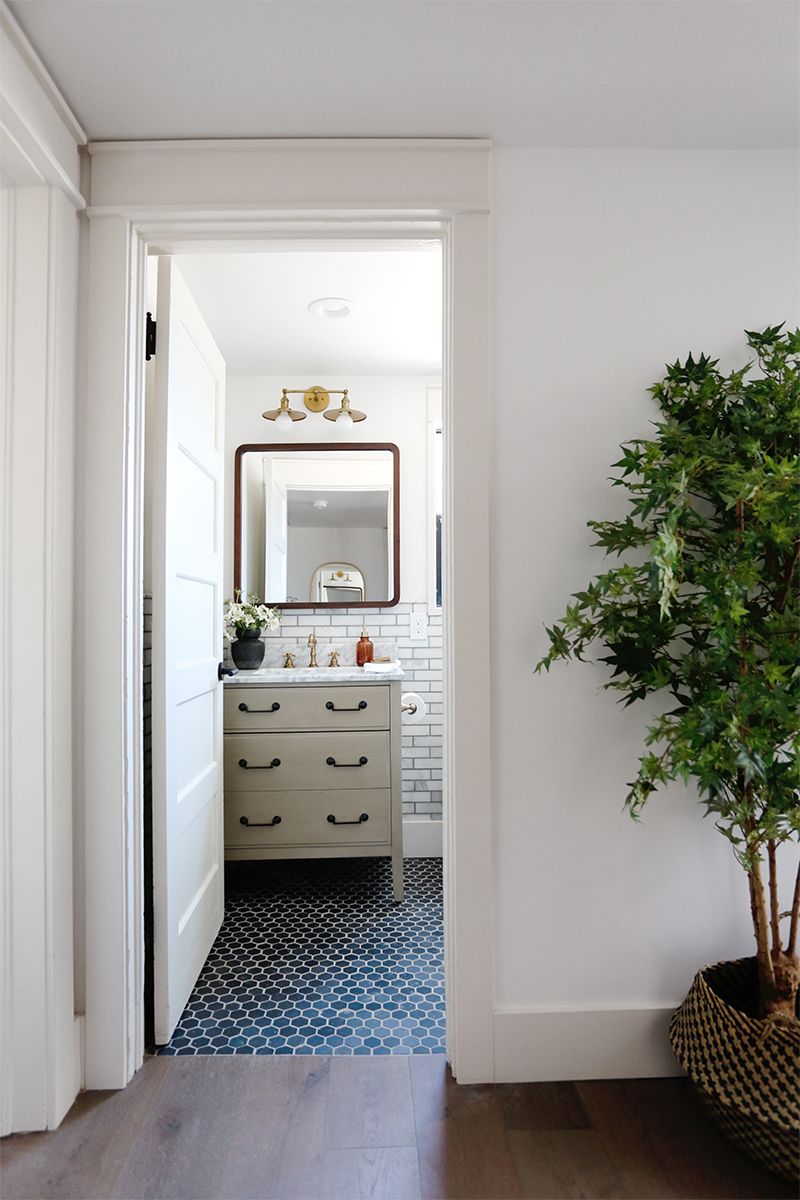
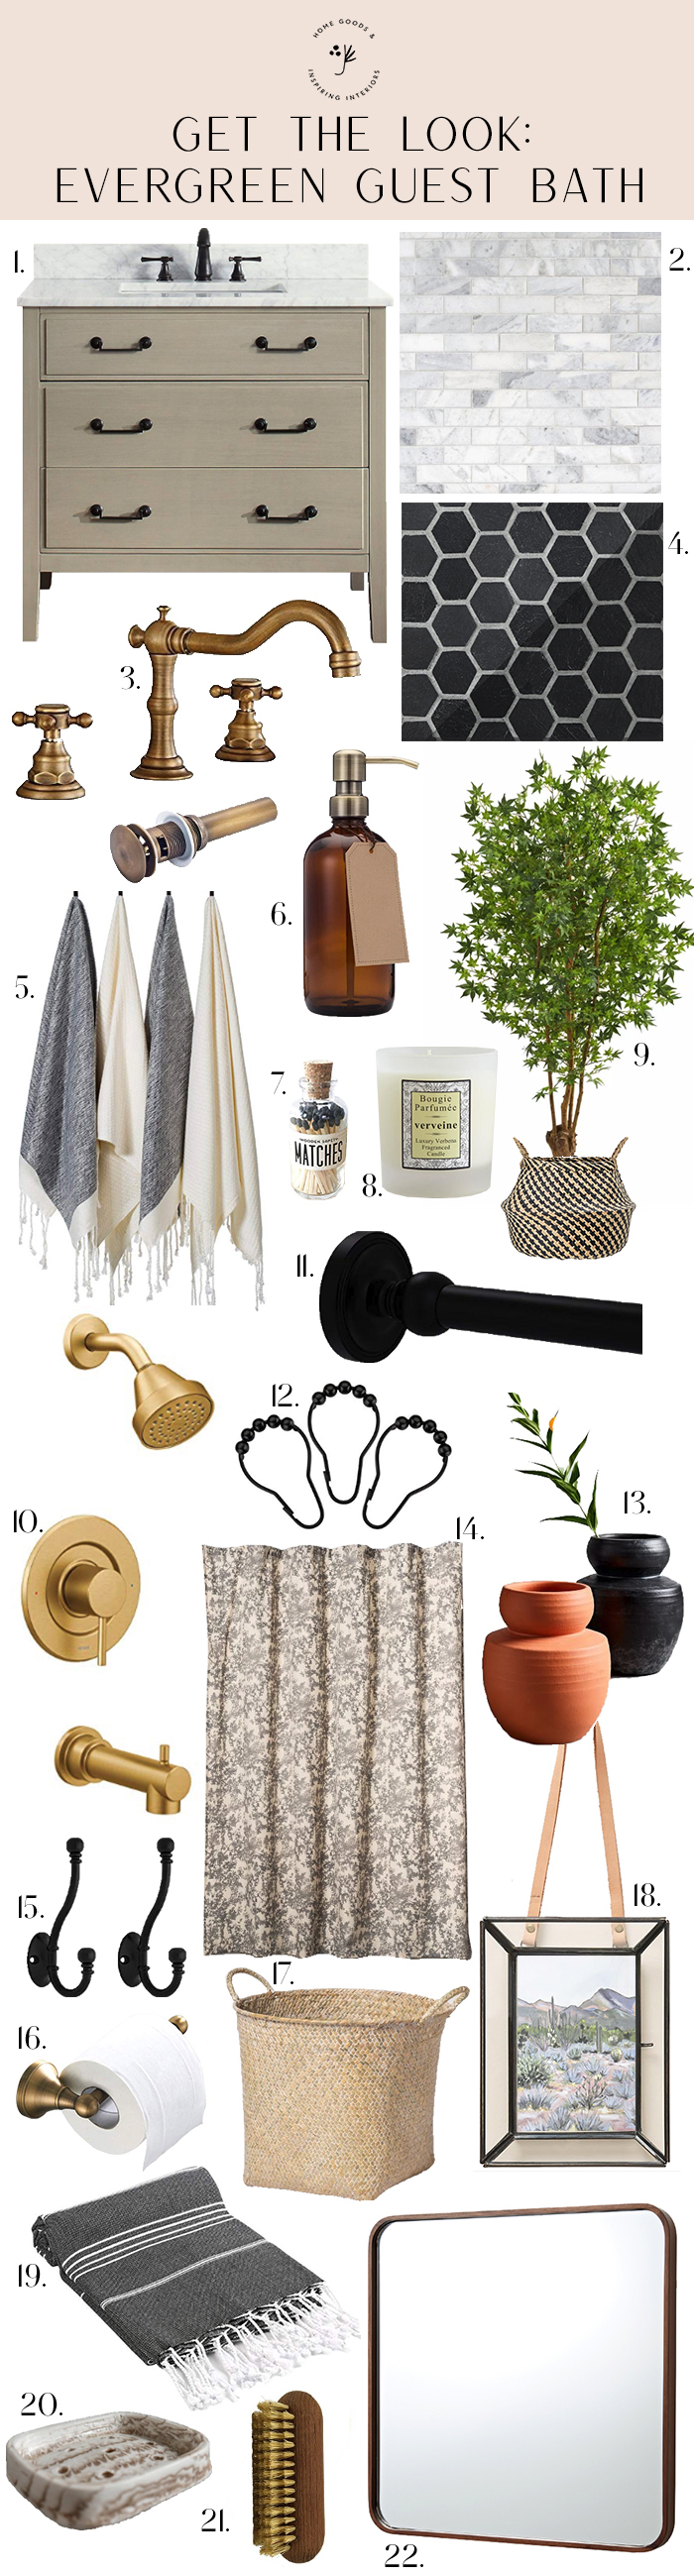
We gave up that tiny 8×8 bedroom (which really couldn’t have been used as a bedroom anyway) to get a full master bathroom and it also gave us some real breathing room in the hallway (which is now light and bright!). The new layout also allowed us to add a full bathroom. Can you believe there was no bathroom on this floor except for in the master? There was a toilet just sitting in the laundry room, but still! This new layout works a million times better for this house!
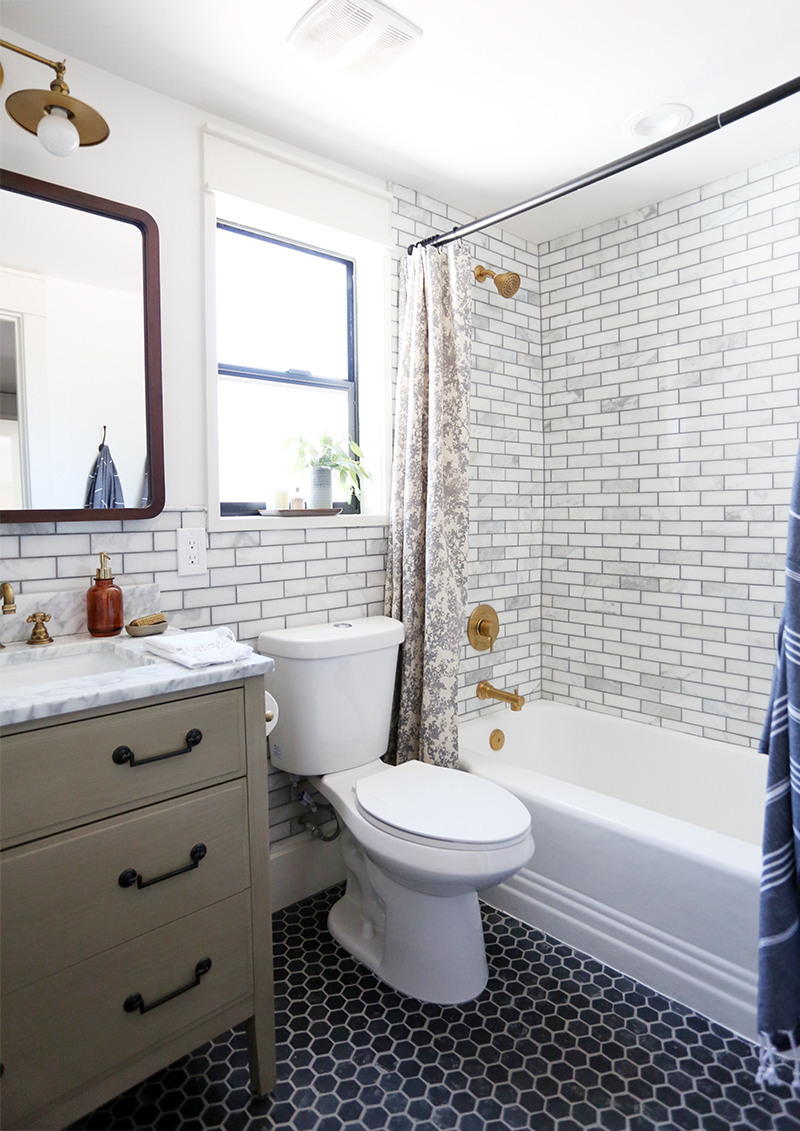
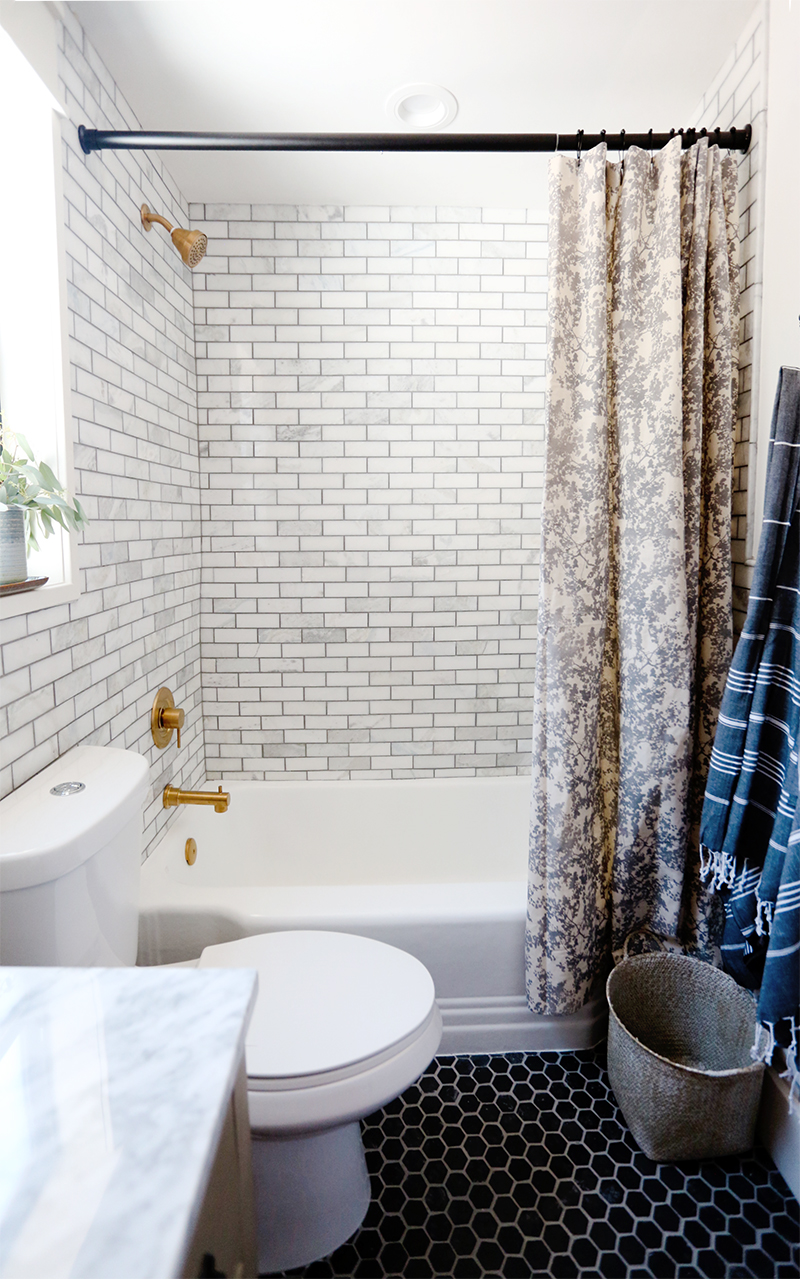
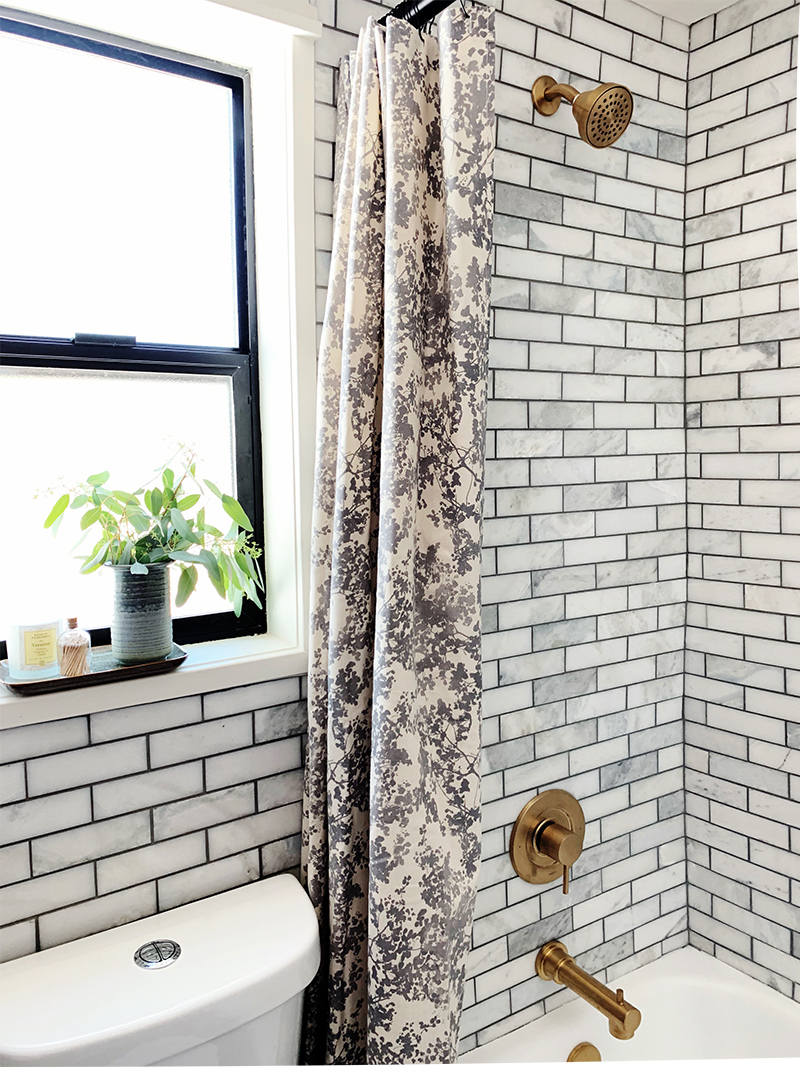
We were still working with a pretty tight foot print, but as a rule of thumb, if you can squeeze out 5×8′ of space, you have enough room to add a full bathroom. I’ve always found that the best layout is sink, toilet, tub/shower in a row for these tiny bathrooms. You could get away with slightly smaller too if you don’t add a tub, but since we didn’t have a tub in the master anymore, I liked the idea of having one in the guest bathroom for bathing littles. We actually salvaged this cast iron tub from the old master bathroom and had it resurfaced. I love the old shape!
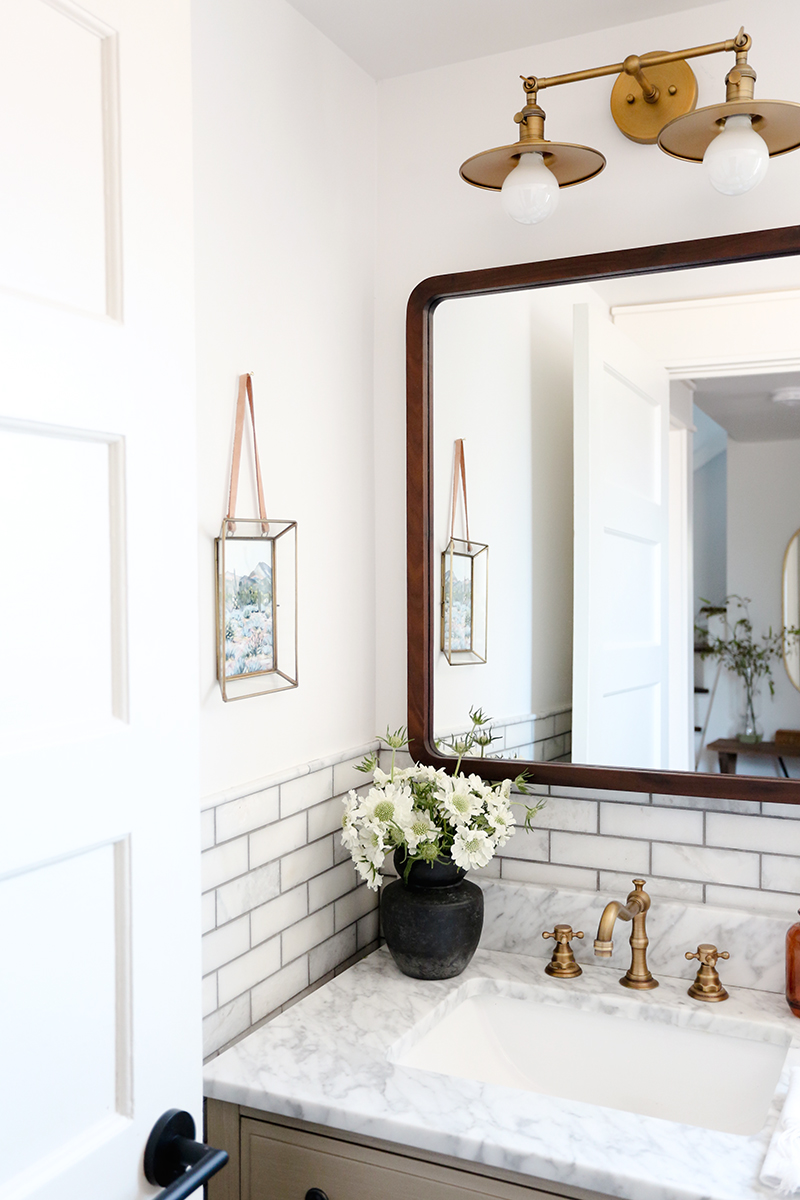
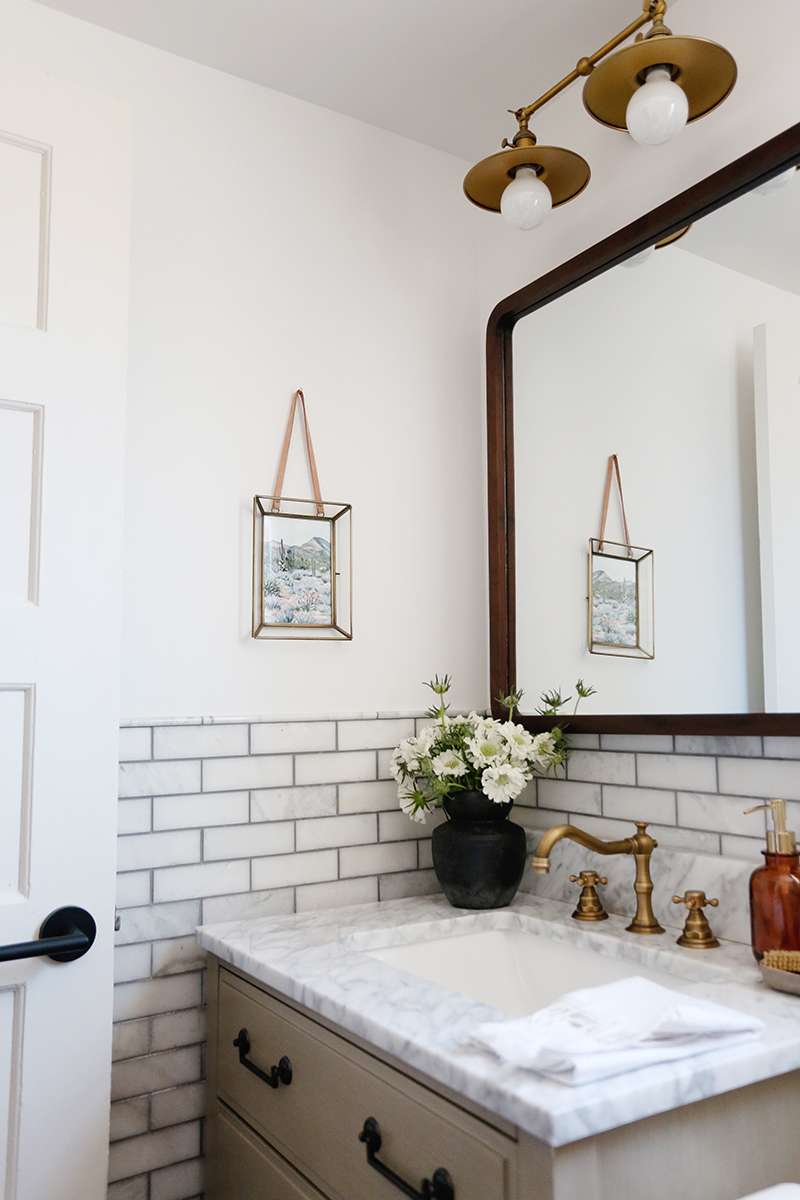
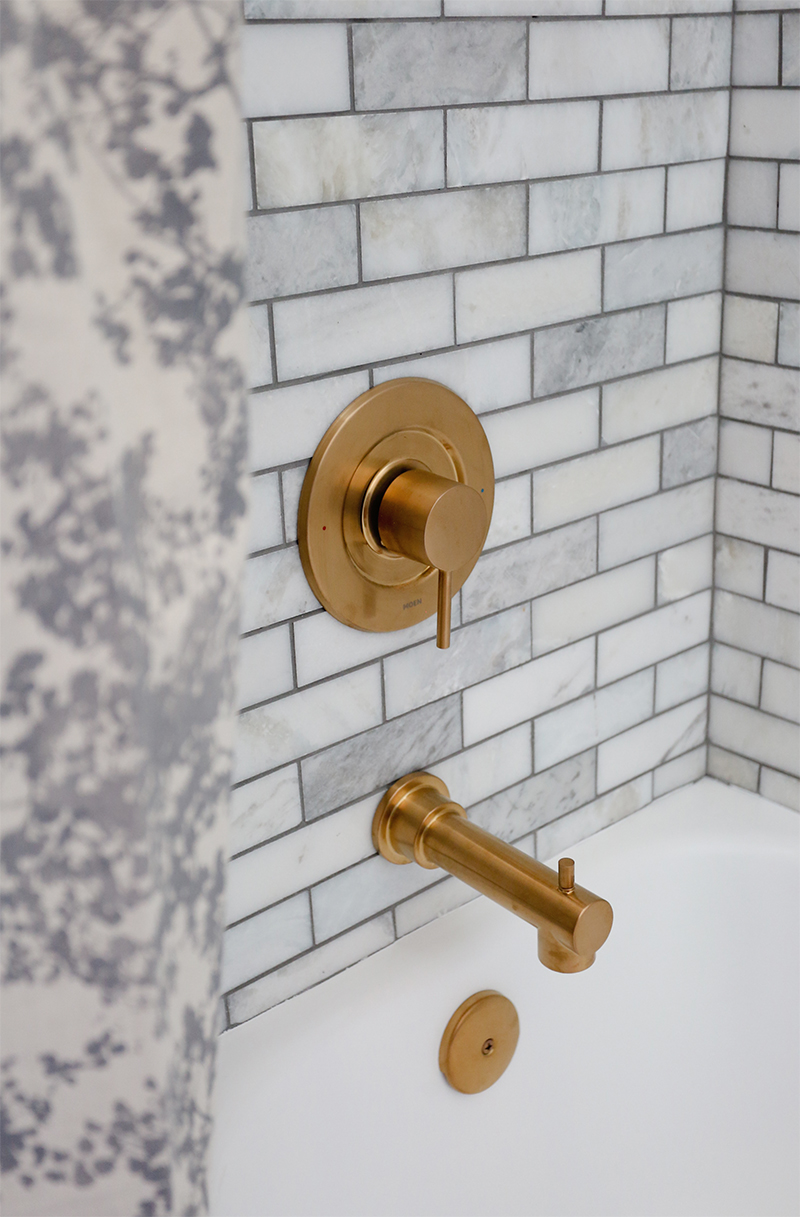
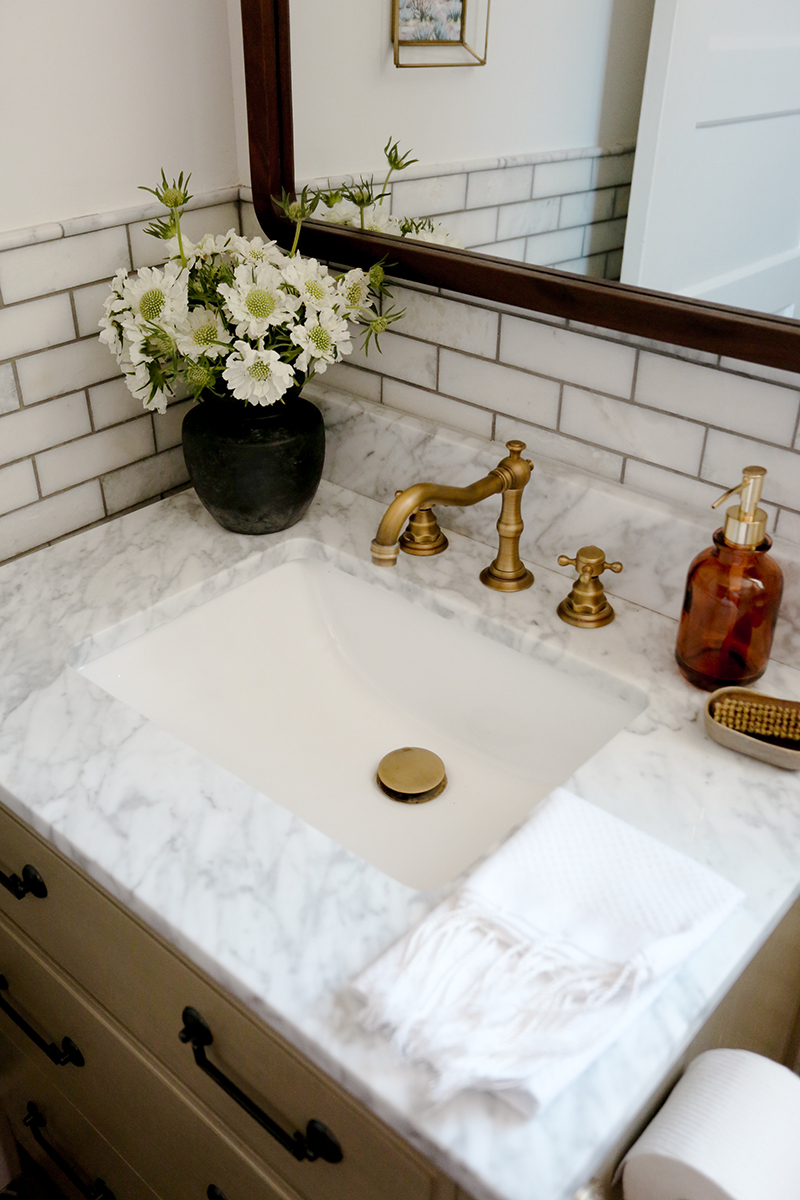
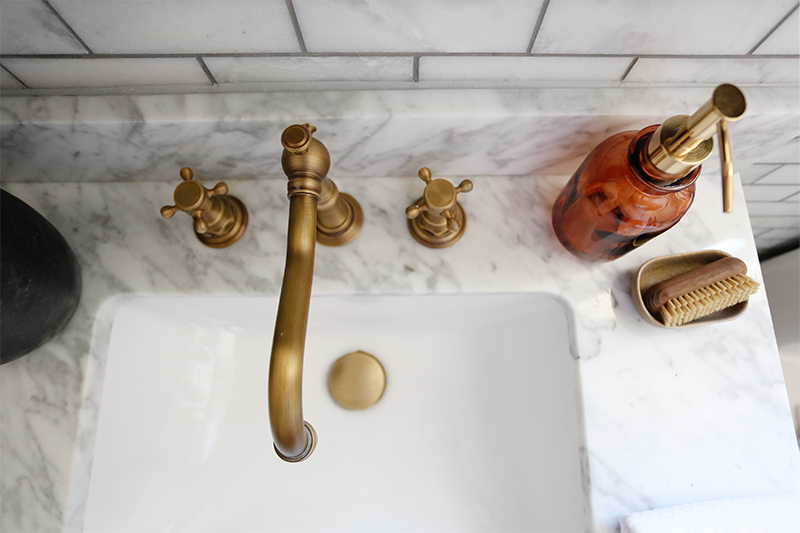
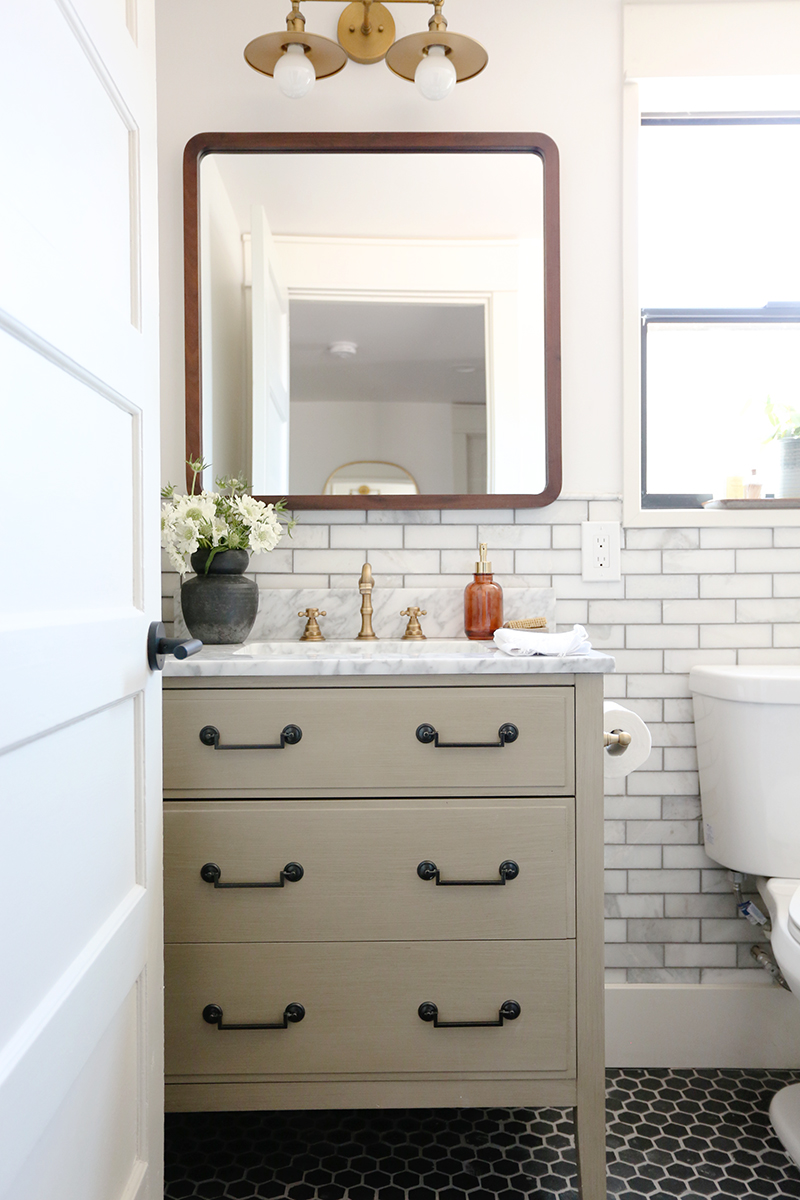
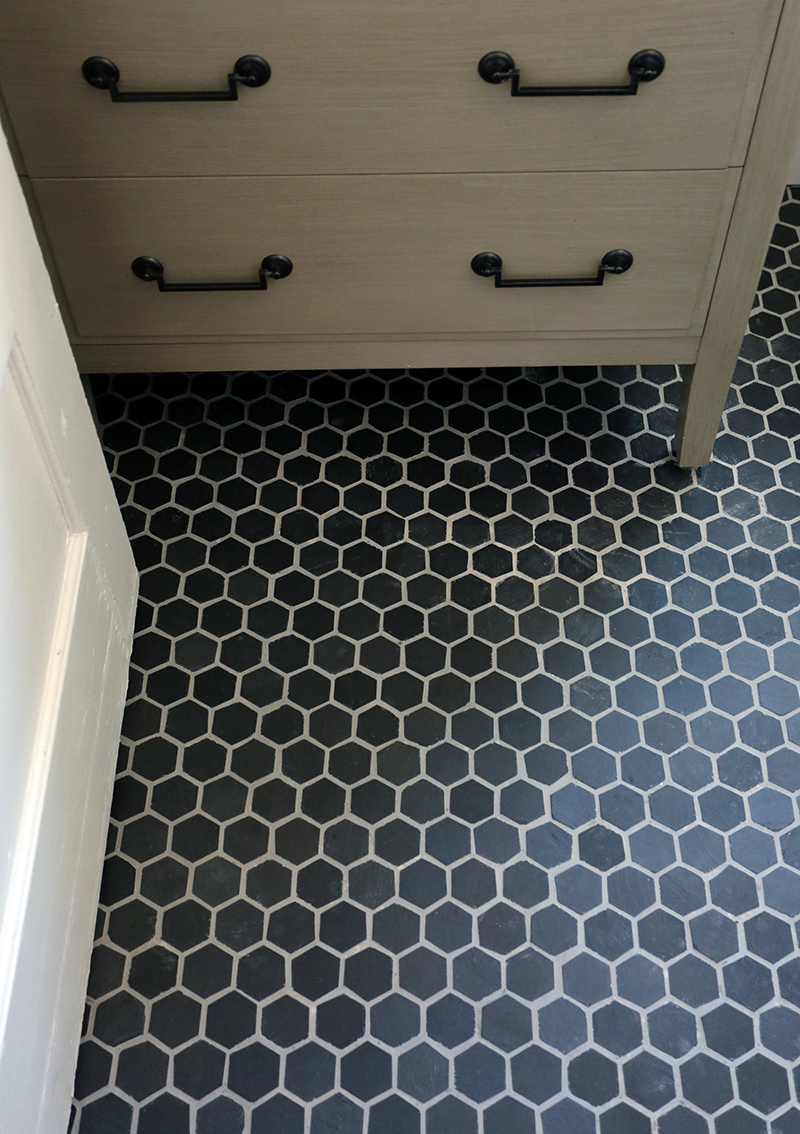
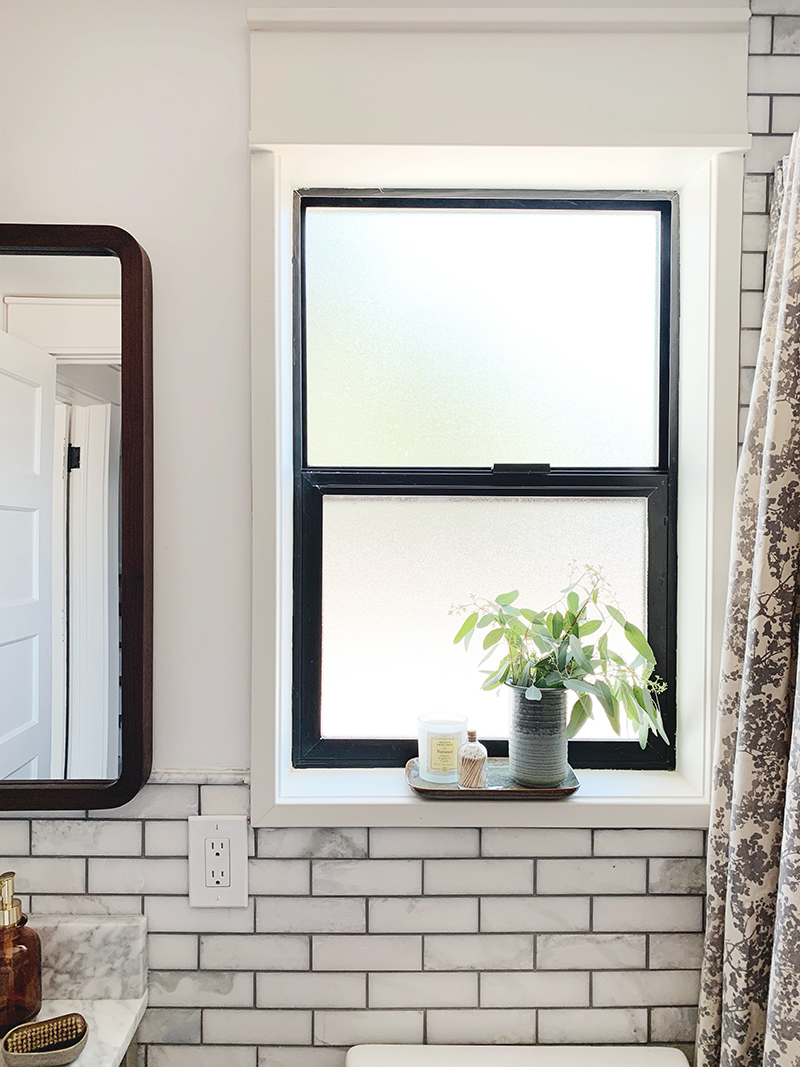
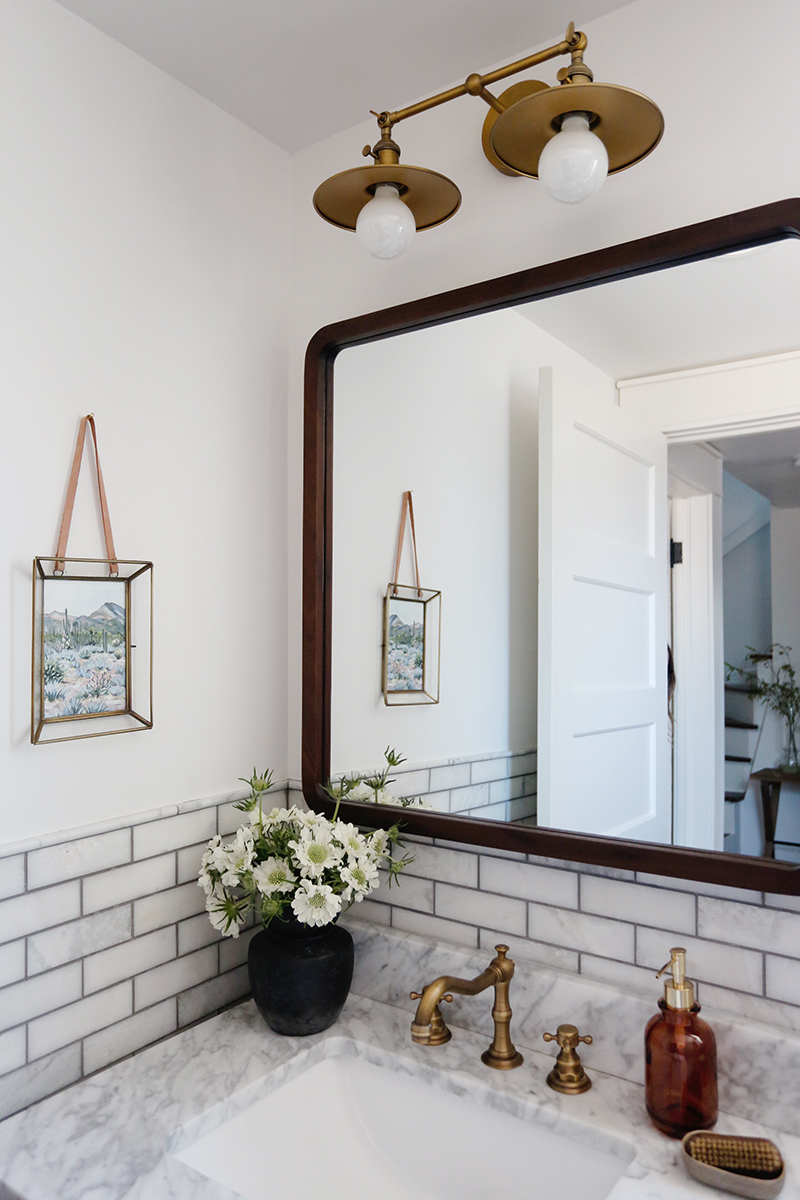
I also love the brass fixtures we used in this space! The shower/tub trim is a bright, warm brass and looks great with this SUPER affordable sink faucet on Amazon! The vanity is completely the star of the show for me though! The finish looks so expensive and it comes with that pretty Carrara marble top, the black drawer hardware and the sink! It ends up being a HUGE cost savings over custom cabinetry and stone fabrication!
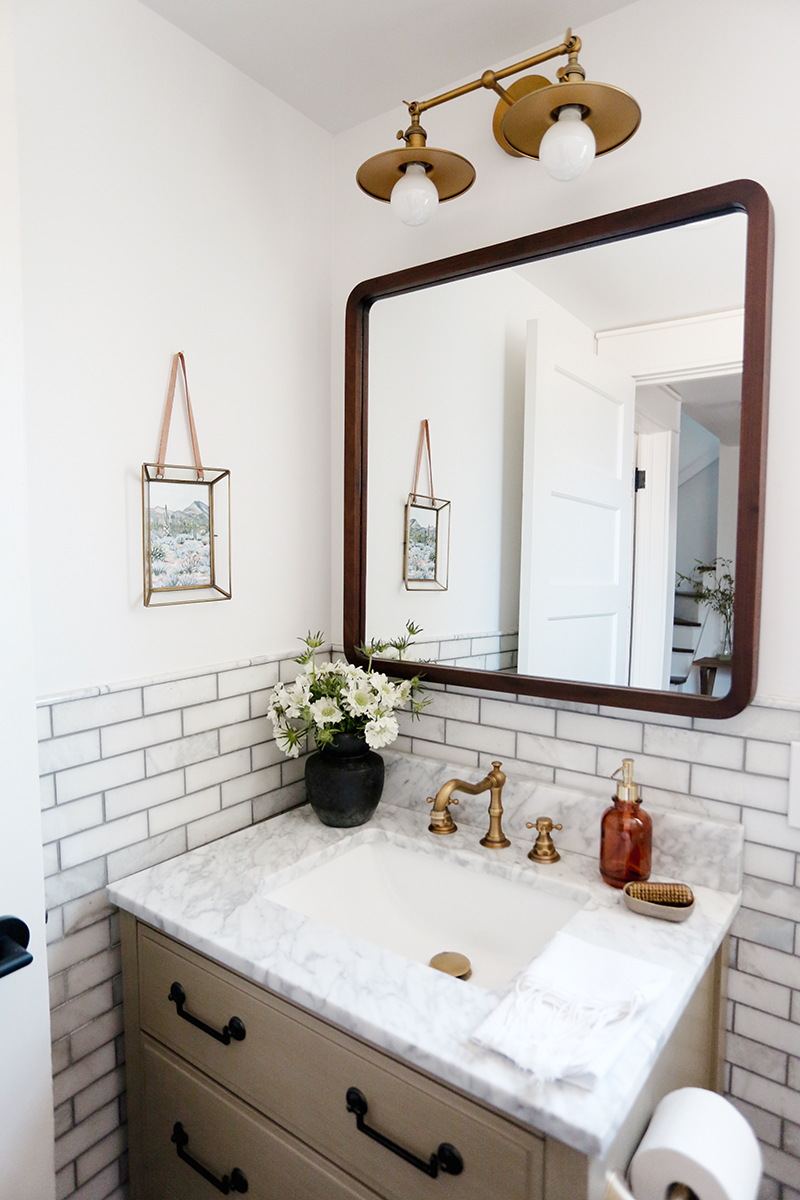
The brass sconce was also from Amazon and was only $60 (brass out of stock – similar option here). It is gorgeous and also comes in black. I like to use these white globe bulbs for sconces this size. These are the same bulbs we used in the kitchen sconces.
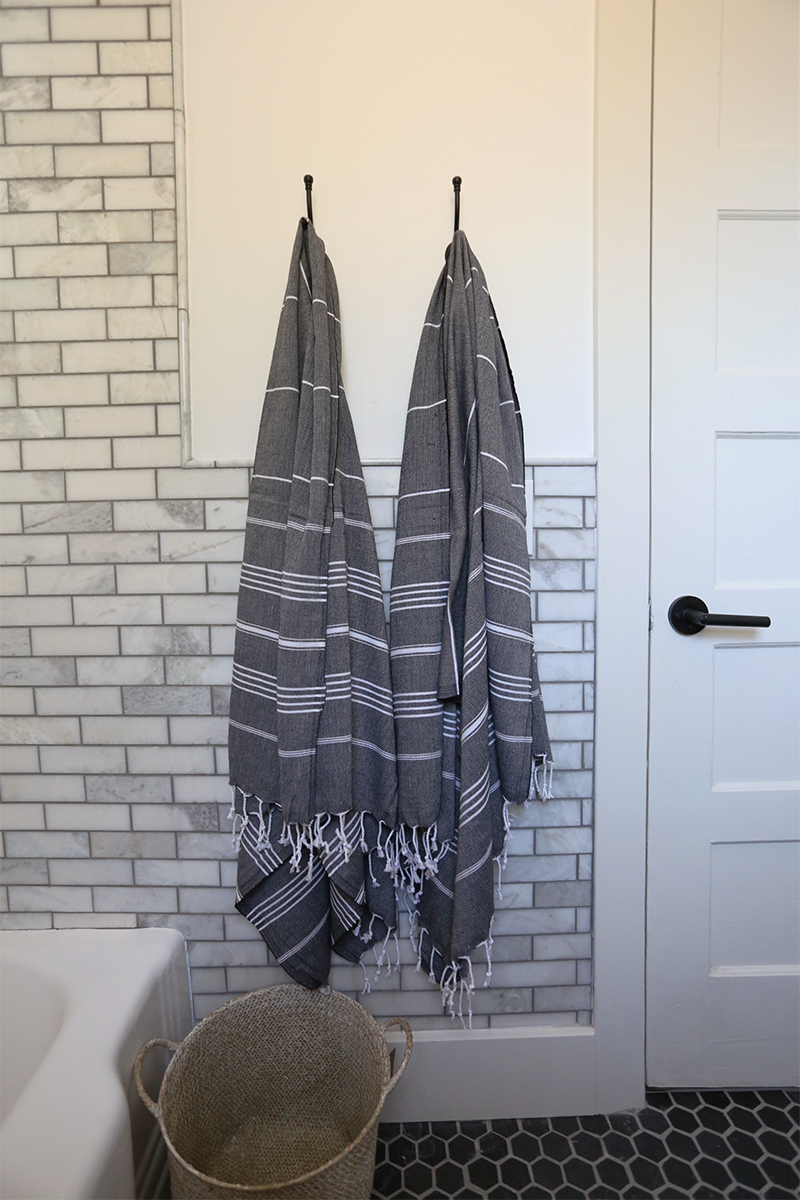
To make this space as kid-friendly as possible, we tiled around the whole room at 48″ above the floor and then all around the tub surround. We used tiny pencil trim pieces to finish the tile edge off, which feels more traditional than a mitered edge or schluter trim. I love it.
For the floors, we picked this 2″ black slate hex. We used the same grout color for the walls and the floors, which is always what I recommend! (This color is Mapei Cobblestone)
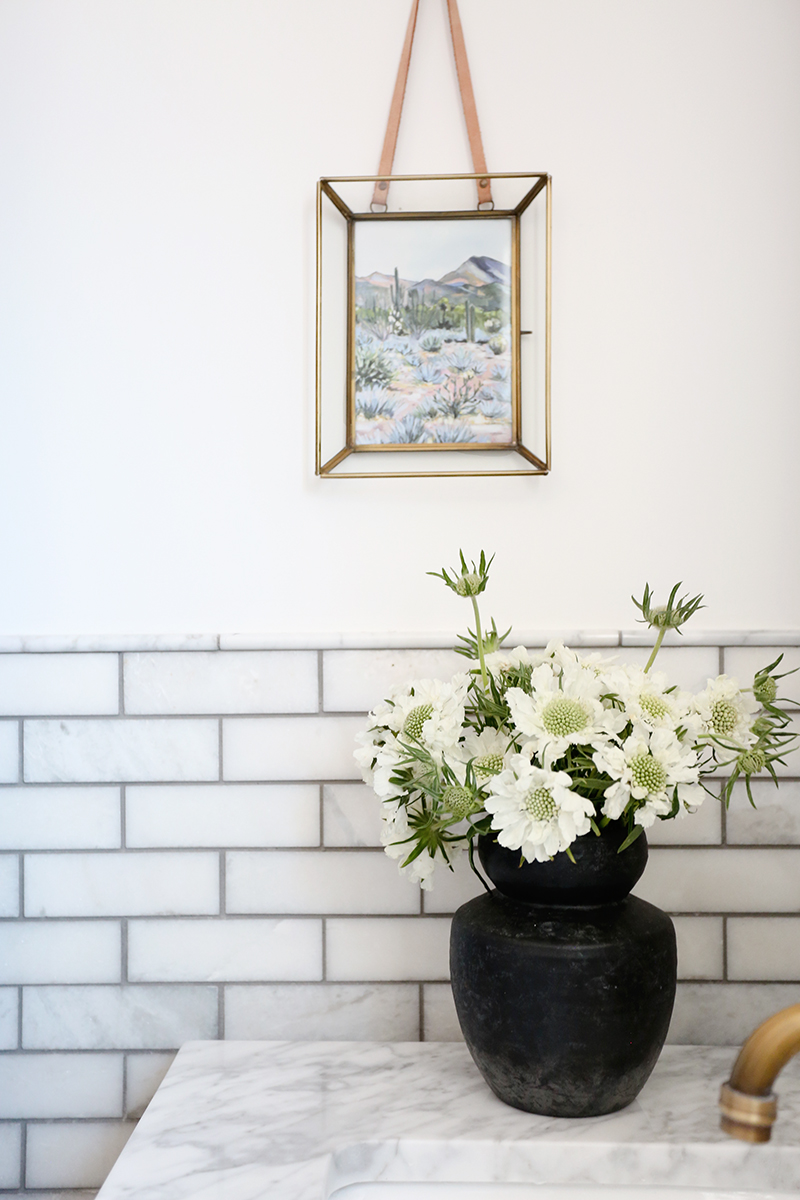
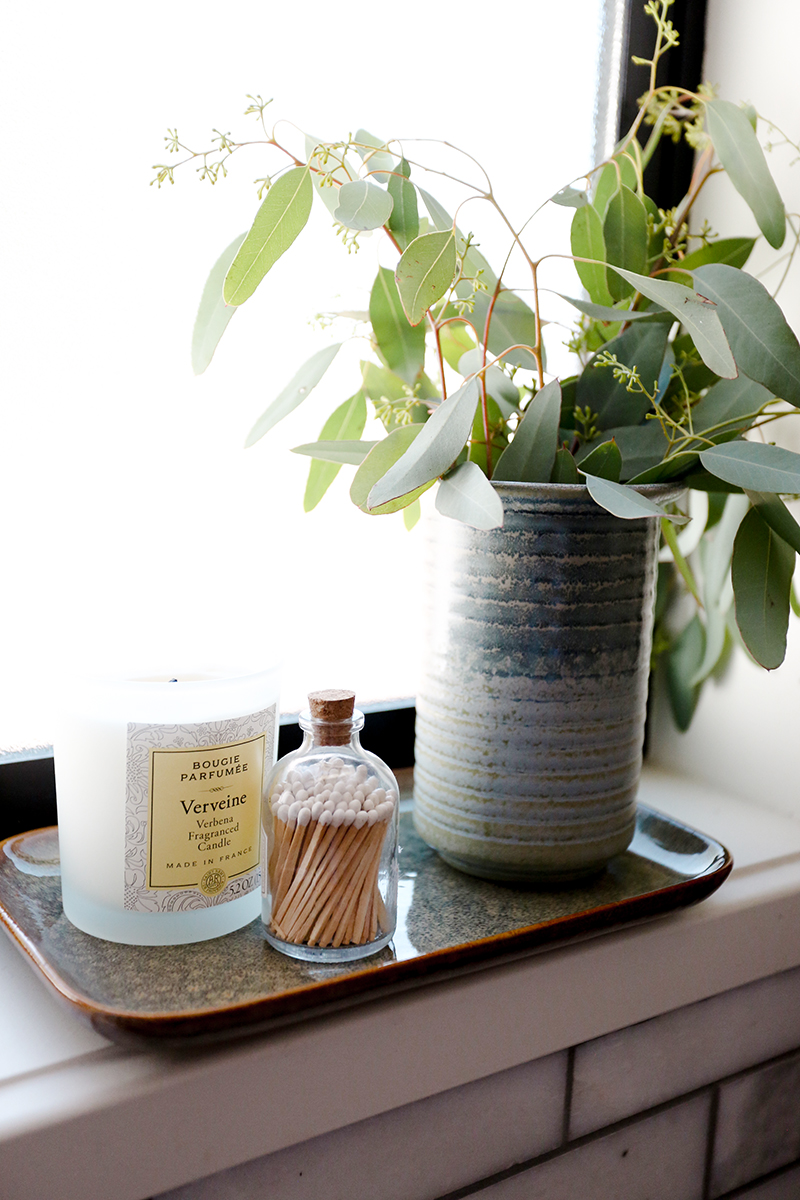
And finally, adding a layer of pretty and useful accessories always helps to cozy up a bathroom space! I like to keep things pretty simple in a bathroom though. I think some greenery, special towels and color/pattern in the art and textiles really help too.
I hope you love this little bathroom as much as we do! As always, if you have any questions, let us know in the comments and we’ll put all the sources here below!
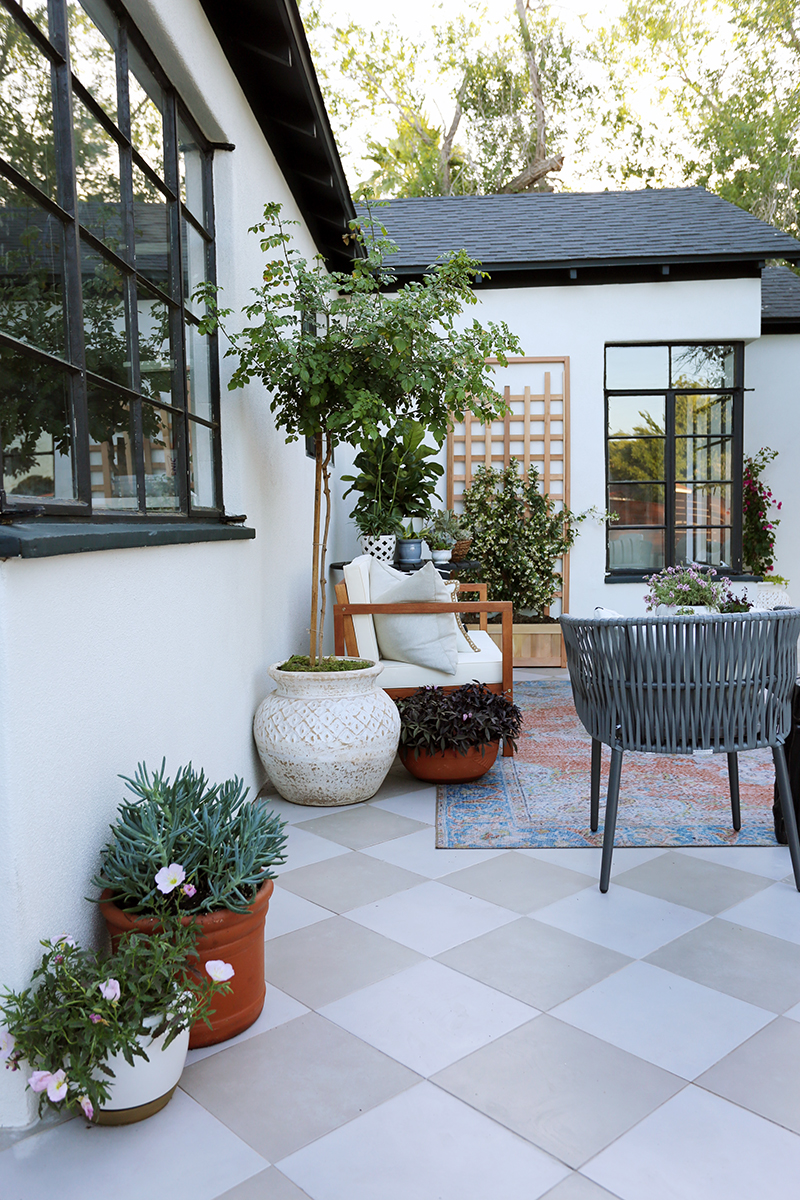
Sponsored by Lowe’s While I still love a good fiddle leaf fig tree, lately I’m noticing a shift away from using one in every single room in the house! :) It’s fun to see people start to use softer, more feathery trees in planters both inside and on porches and balconies. I’m obsessed with this…
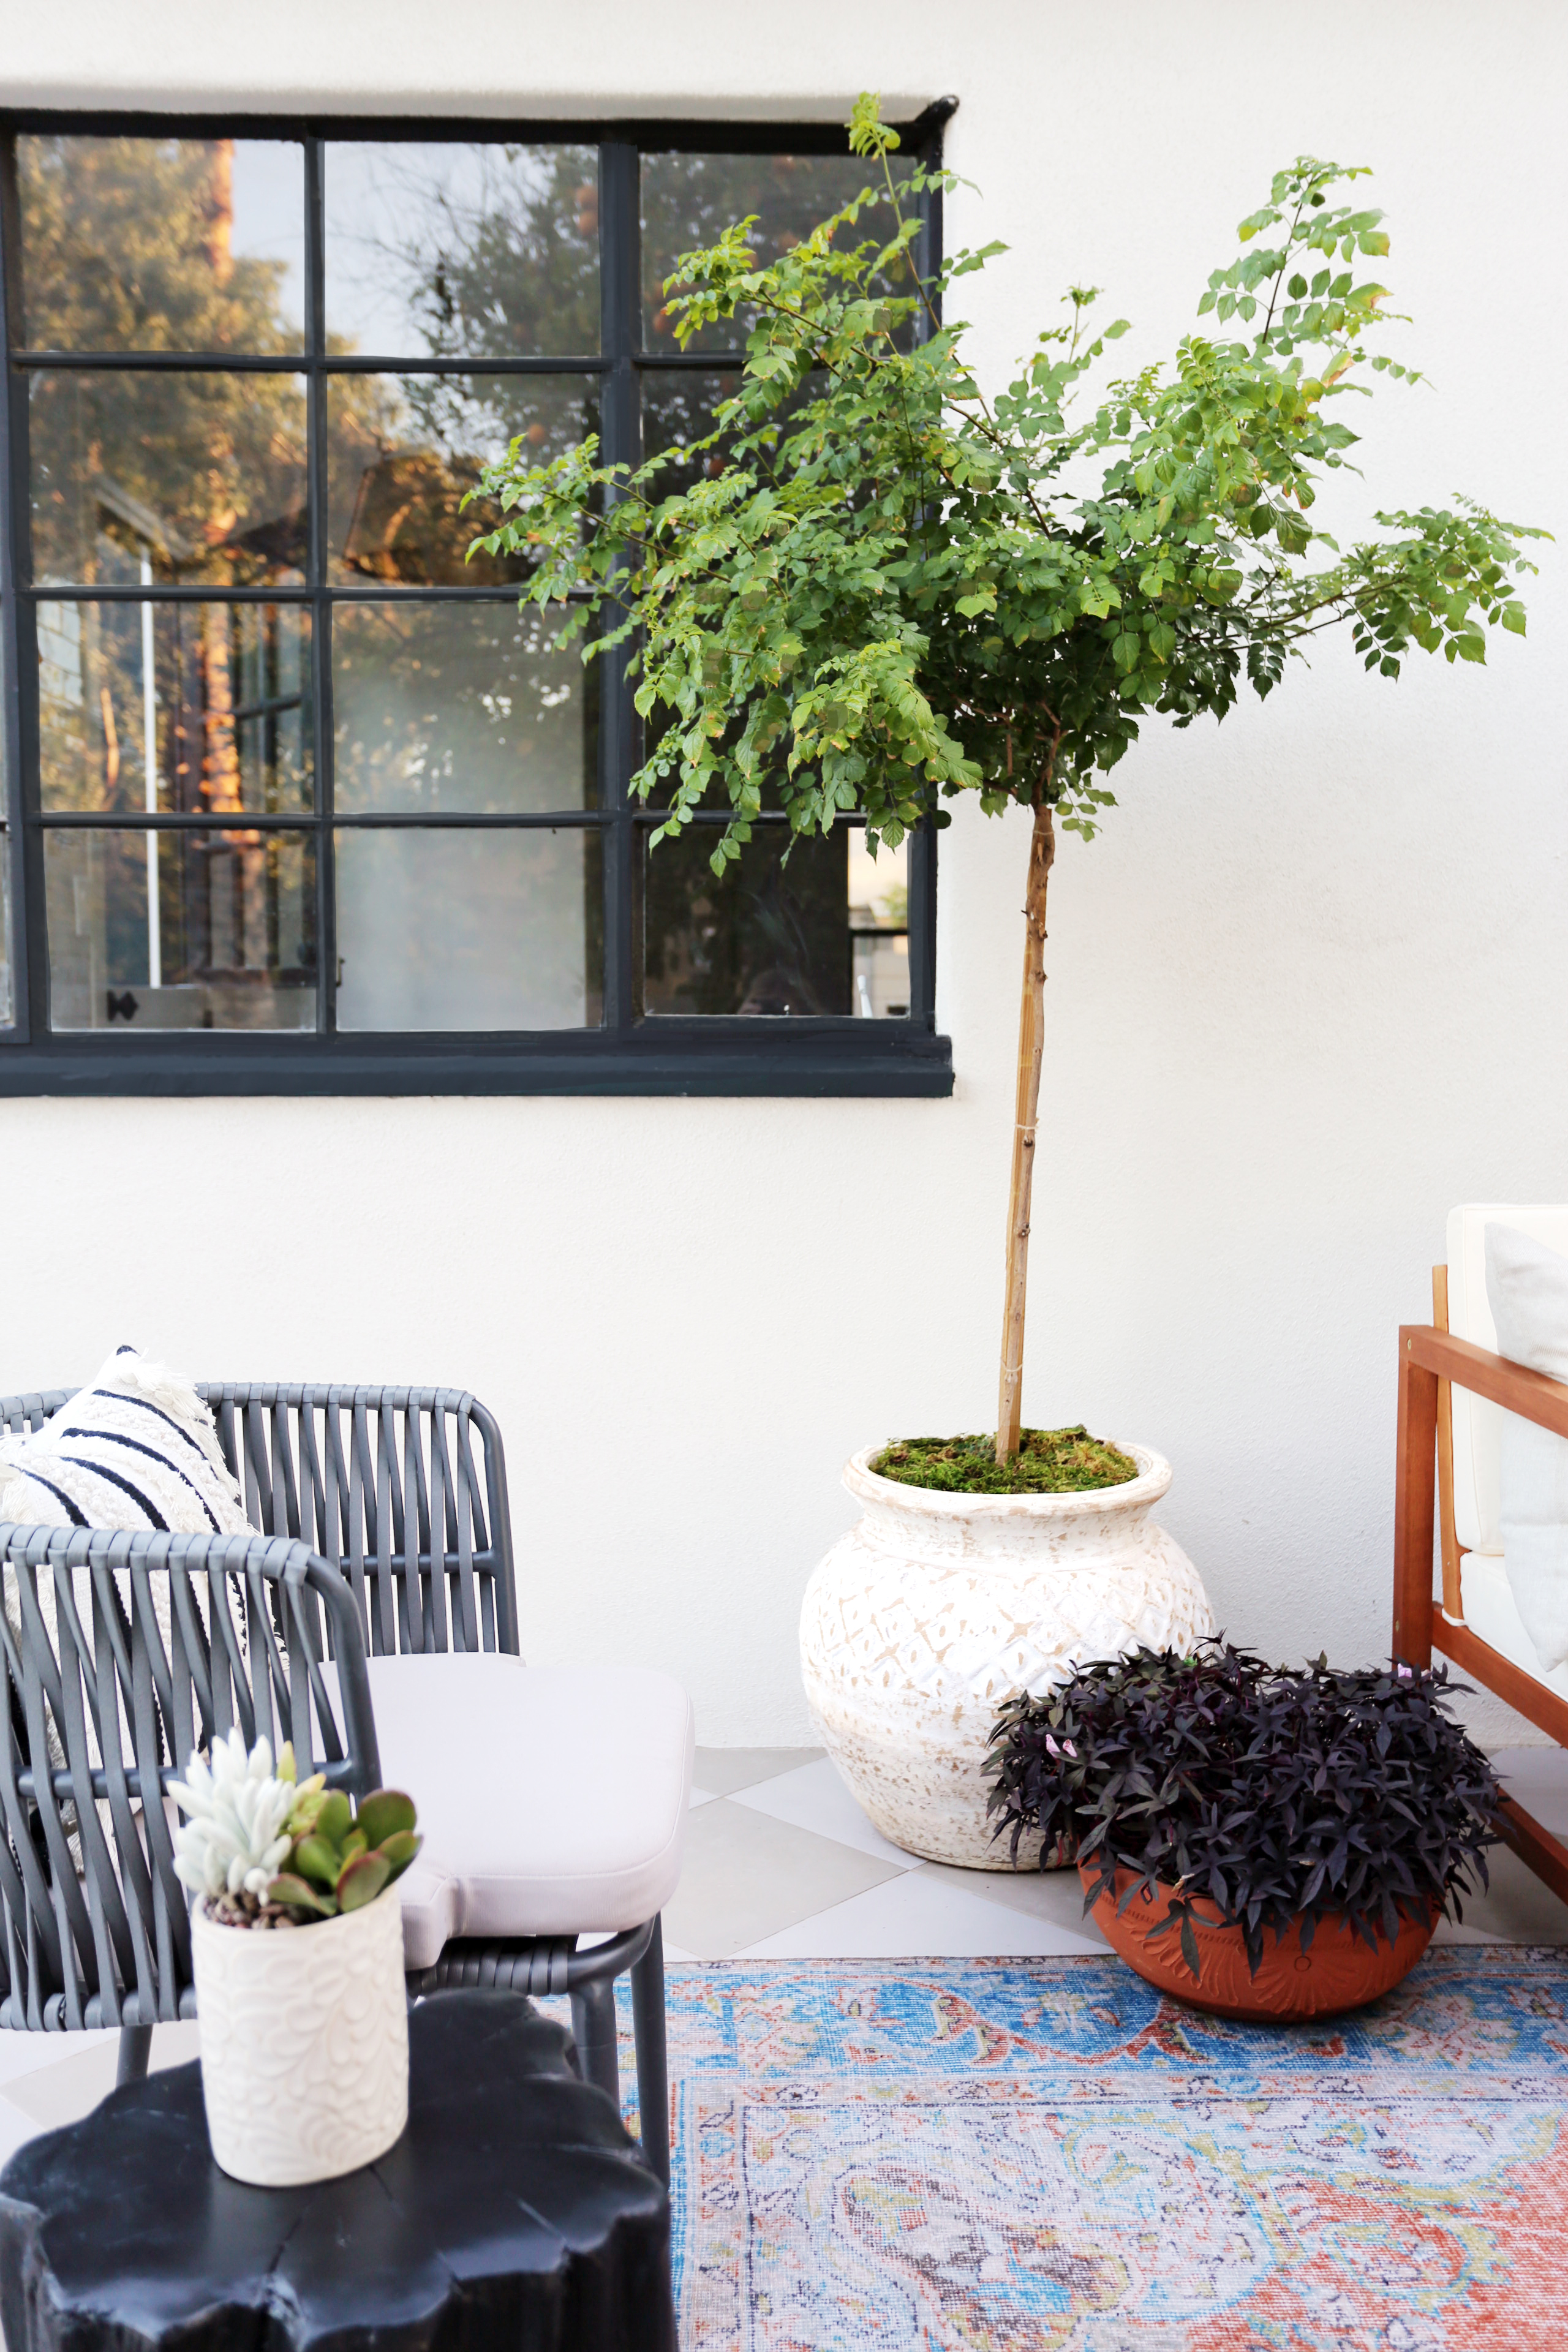
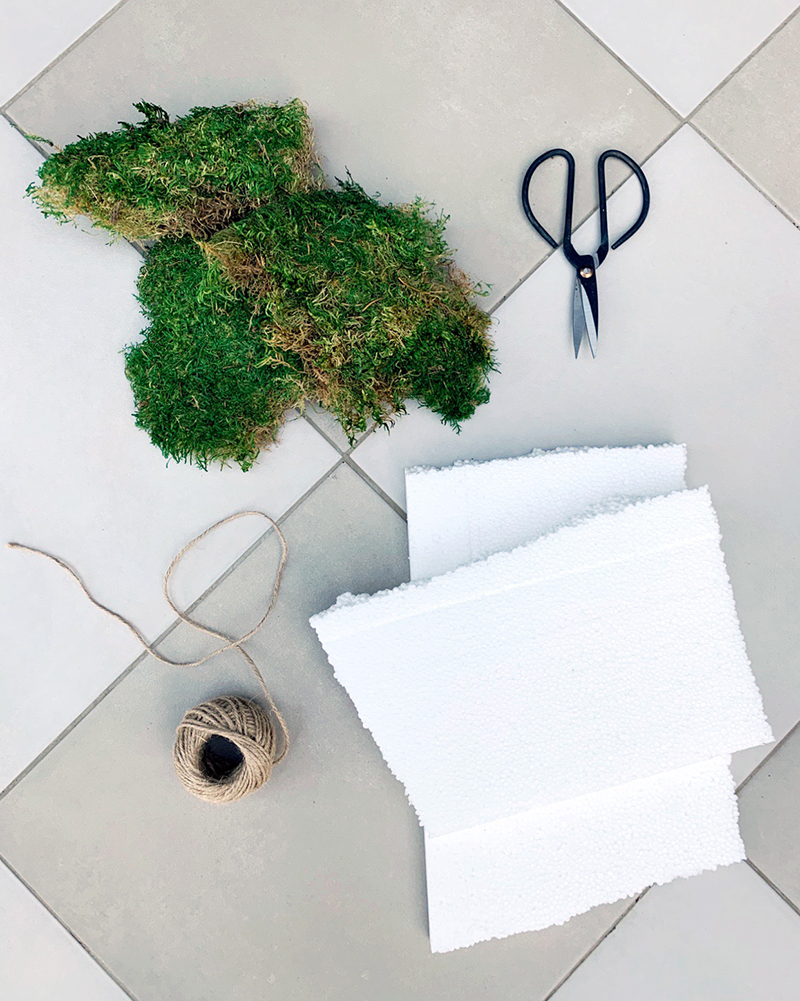
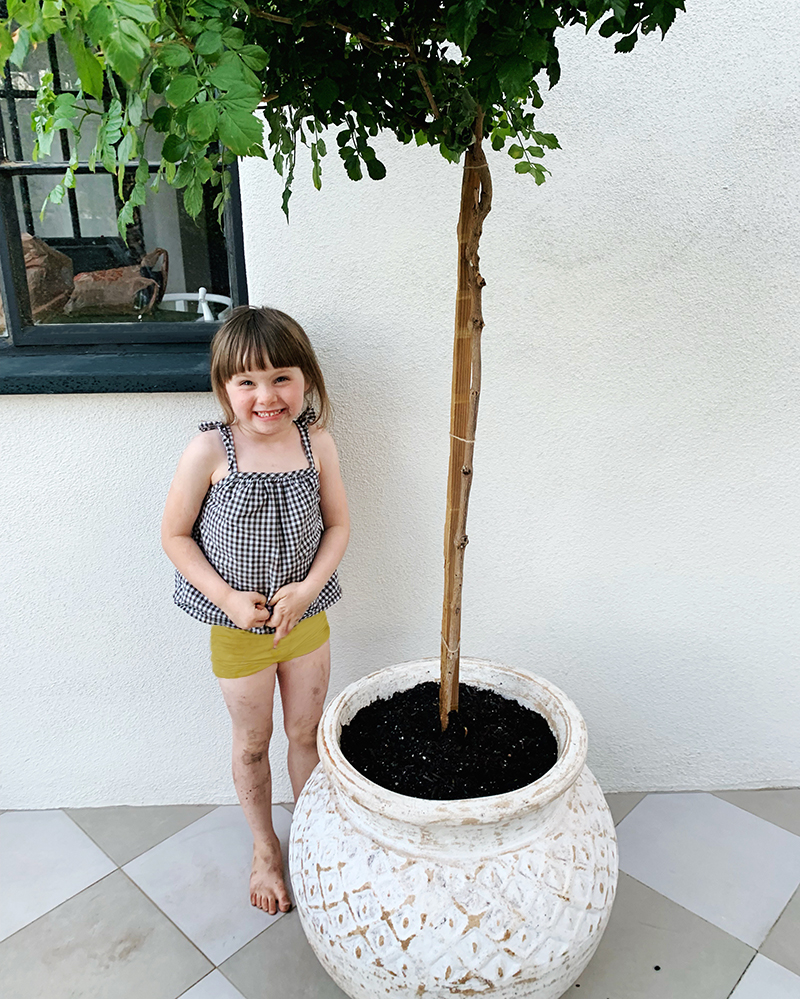
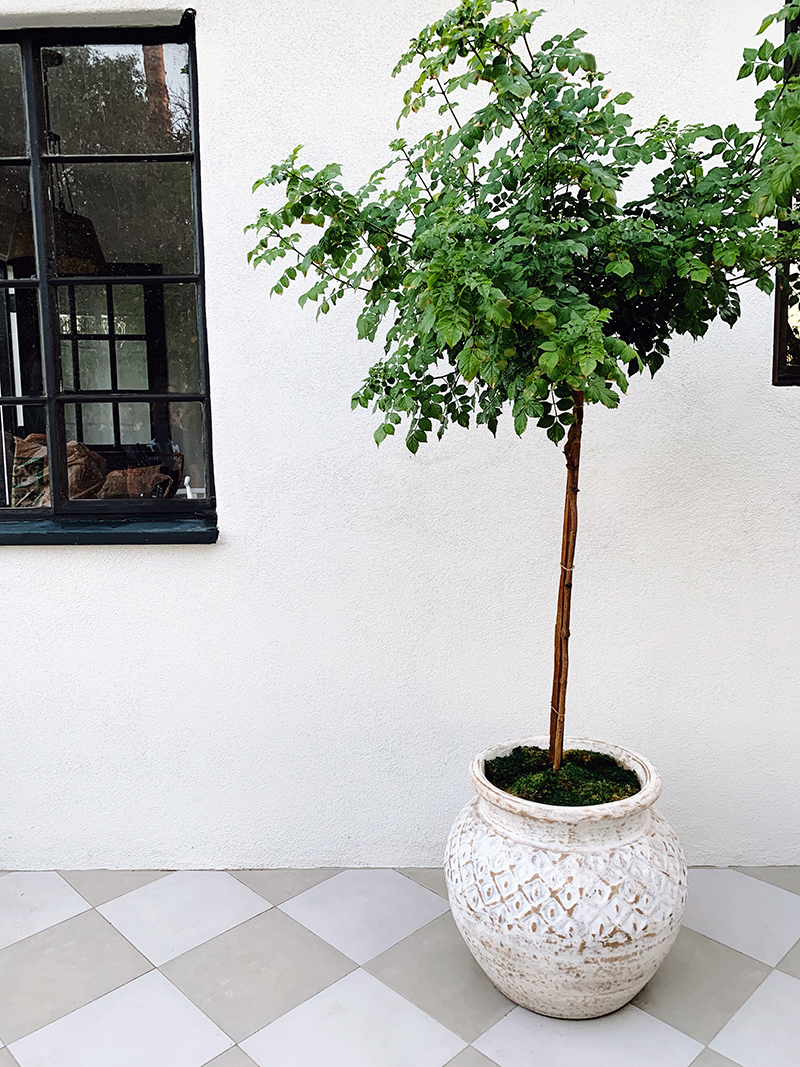
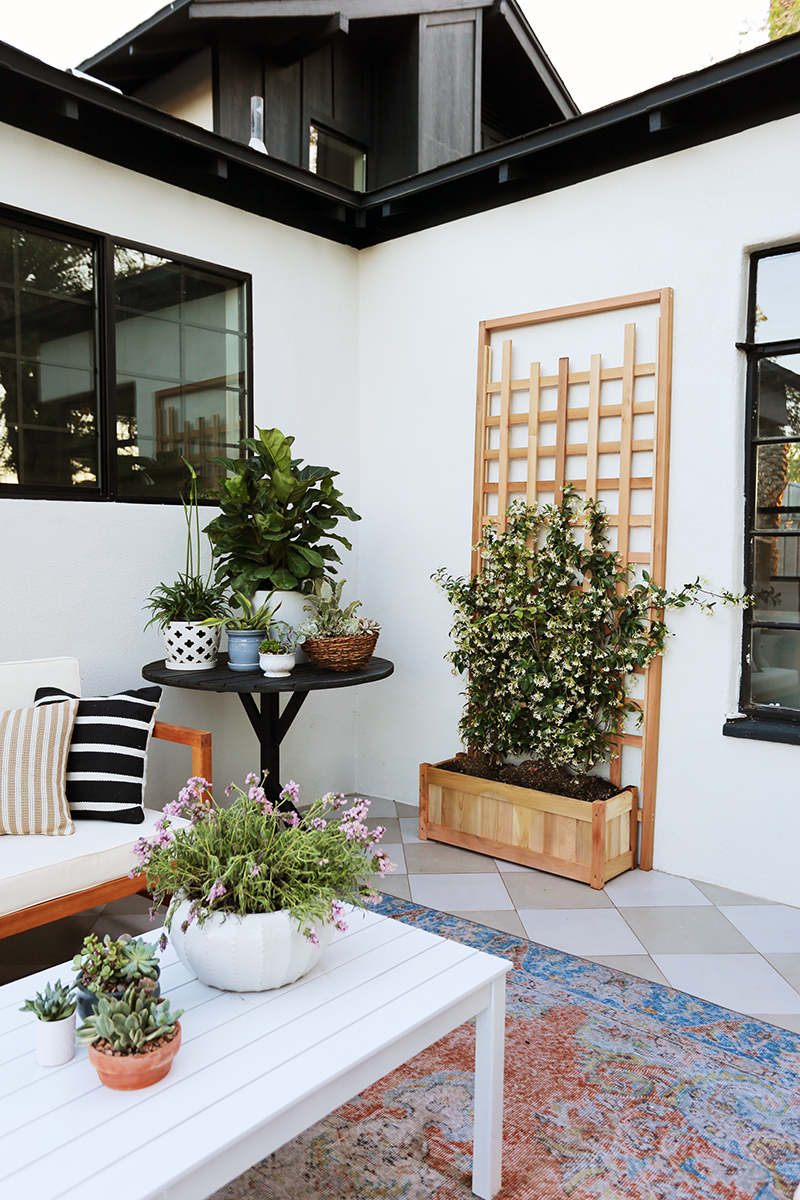
While I still love a good fiddle leaf fig tree, lately I’m noticing a shift away from using one in every single room in the house! :) It’s fun to see people start to use softer, more feathery trees in planters both inside and on porches and balconies. I’m obsessed with this 5′ tall honeysuckle tree we planted in this white stone planter from Lowe’s on the side porch of the Evergreen house and I thought I’d share here my approach to planting trees in large containers.
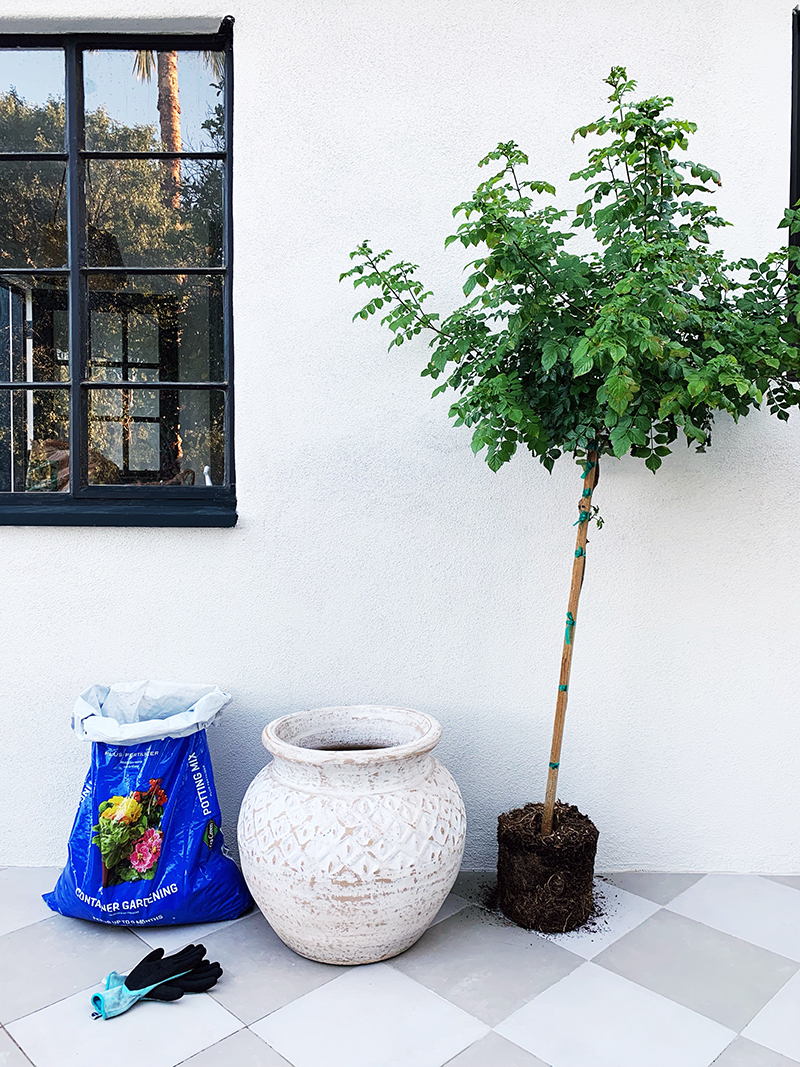
Start with selecting the right size planter. Something that is a few inches bigger than the plastic planter your plant was purchased in a good rule of thumb. Make sure your planter has a good sized drainage hole in the bottom (you can add these with a drill if needed!) and a saucer pan if your planter is coming inside.
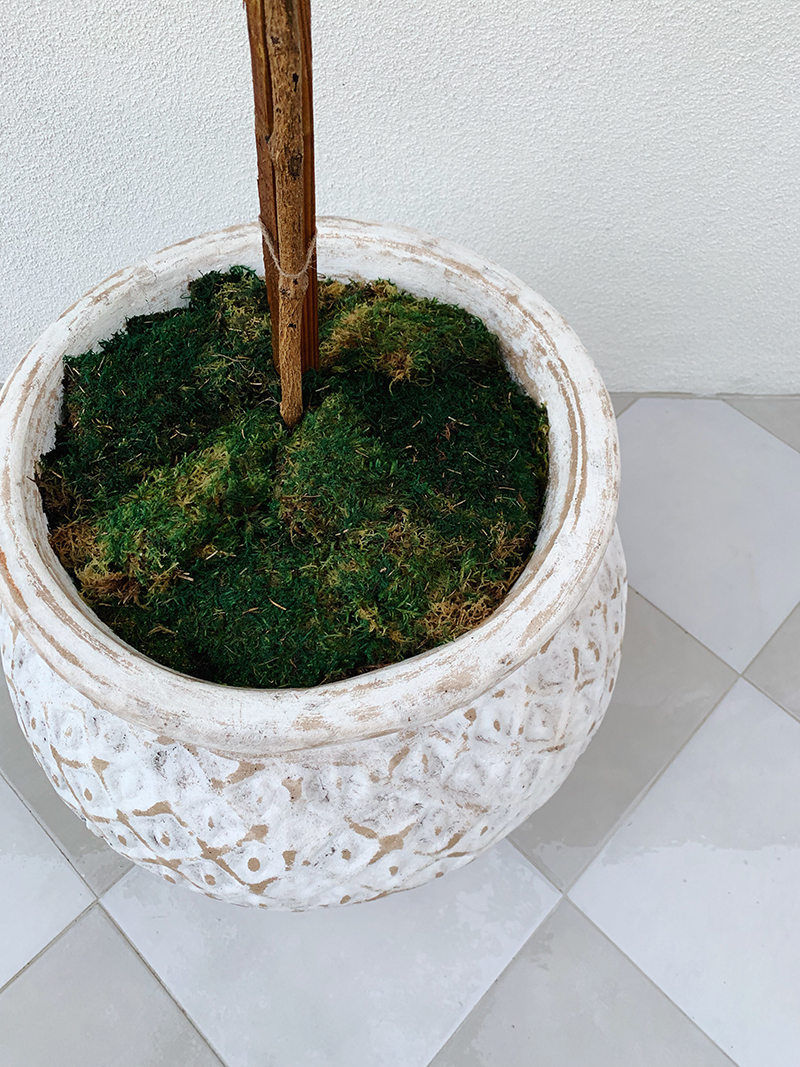
I chose this gorgeous ceramic planter that is big and pretty heavy. To lighten the weight a little and to make it moveable, I like to add about 4″ of either packing peanuts or broken up styrofoam. I’ve found this helps with drainage too, which is so important to prevent root rot.
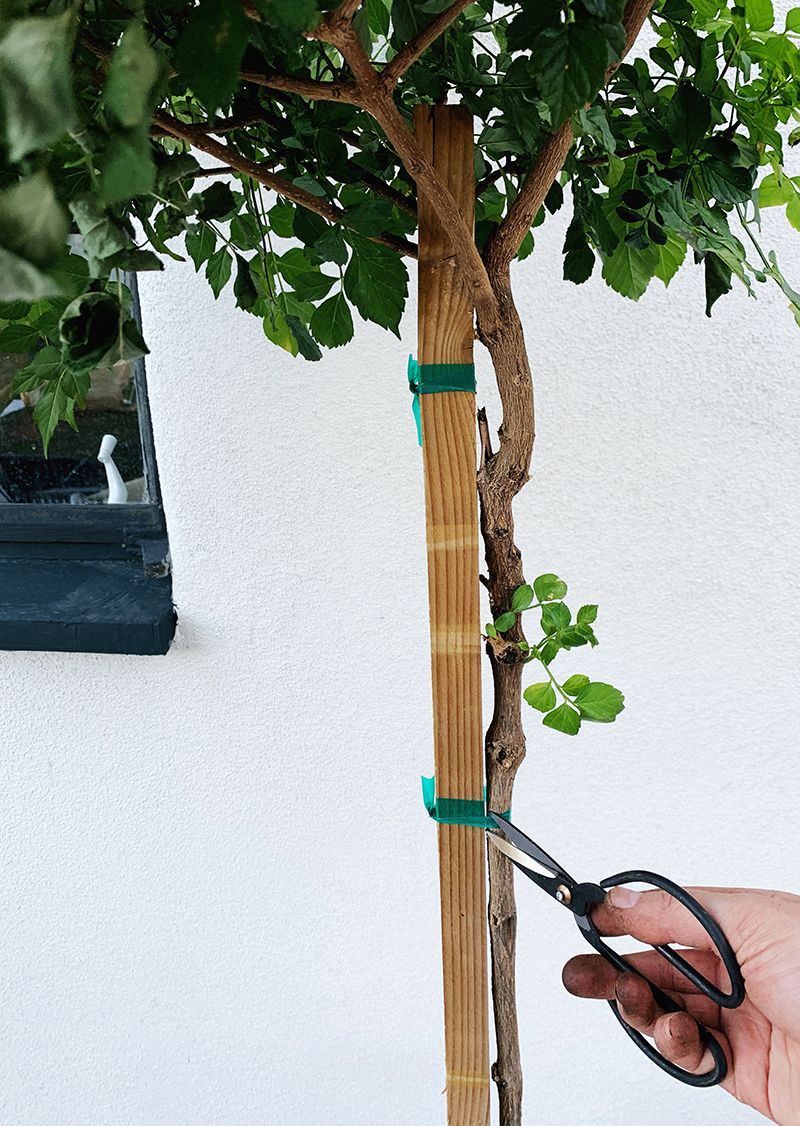
After filling the planter with good soil about half way, I like to clean up the trunk of my tree, remove any dead leaves and break up the roots a bit before planting. I also like to remove the bright green plastic ties. I use loosely tied jute twine to tether my tree to the wooden stake – you just have to keep an eye on the twine and replace it once a year or so as the tree continues to grow. Also, I usually like to pull out the stake from the root ball, find the prettiest angle of the tree and then replace the stake behind the trunk from the new front view before tying the twine. A hammer or mallet can help tap the stake down into place and will ensure your tree grows straight!
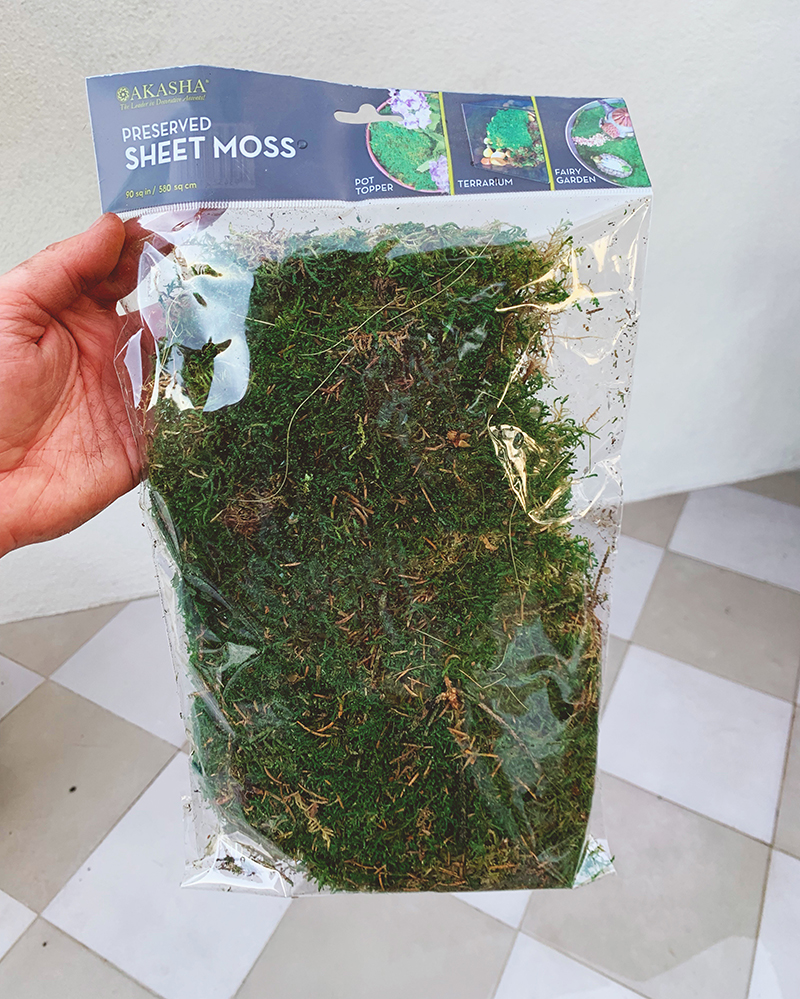
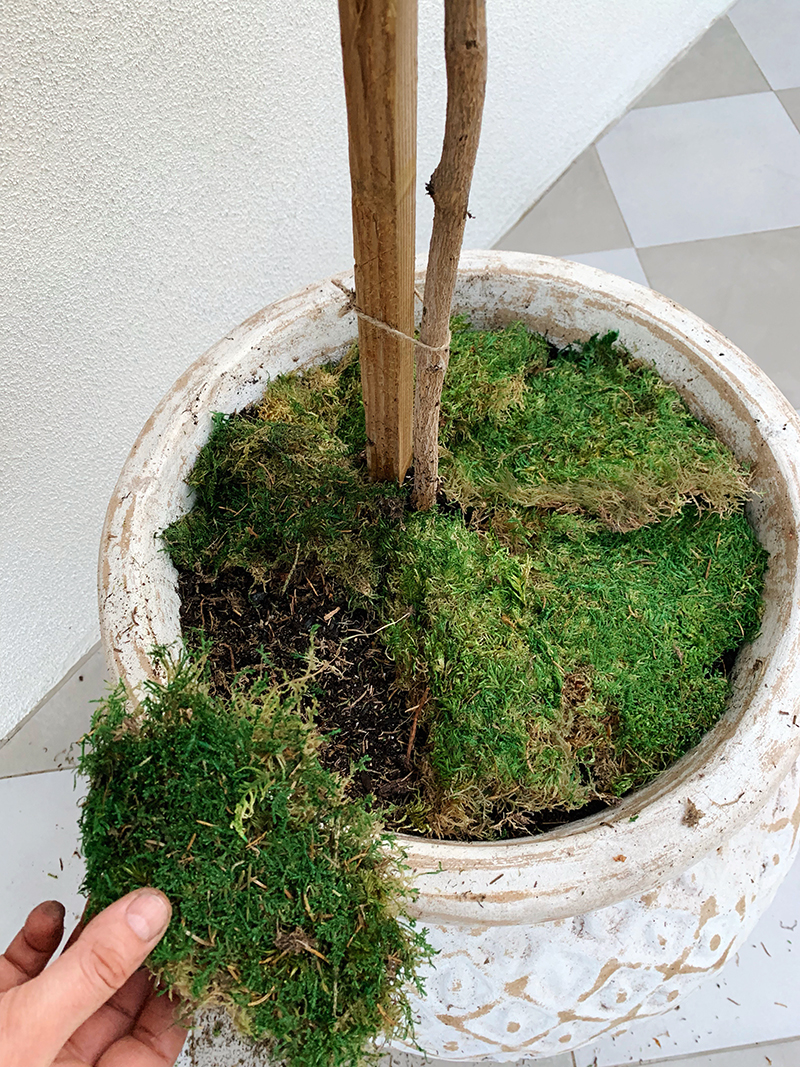
I always like to finish my planters by covering up the soil with either moss, gravel or ground cover plants. This final step is SO pretty and it also helps your tree retain moisture (which is so helpful here in Arizona!). I love using pea gravel or crushed white marble, but for this honeysuckle tree I opted for some preserved sheet moss from Lowe’s (you can get it in the nursery near the garden herbs).
I like to tear the moss into 4″ sections with my hands before layering them on the top of the soil. The finished result is so pretty!! Just make sure to lift off one of the moss sections if you’re watering with the hose so the water goes directly to the soil, not through the moss. The moss can lose it’s coloring a bit if it gets too directly soaked, but it’s not a big deal just to lift a piece up before giving your tree a good soak.
Every tree has different water, soil, food and light needs in order to help it thrive for years to come, so be sure to do your research! My local Lowe’s nursery manager, Matt, is a wealth of knowledge and really helps me figure out what to plant and where! And worst case scenario, did you know they will accept returns with a receipt if your plants dies within a year? Amazing, right?!
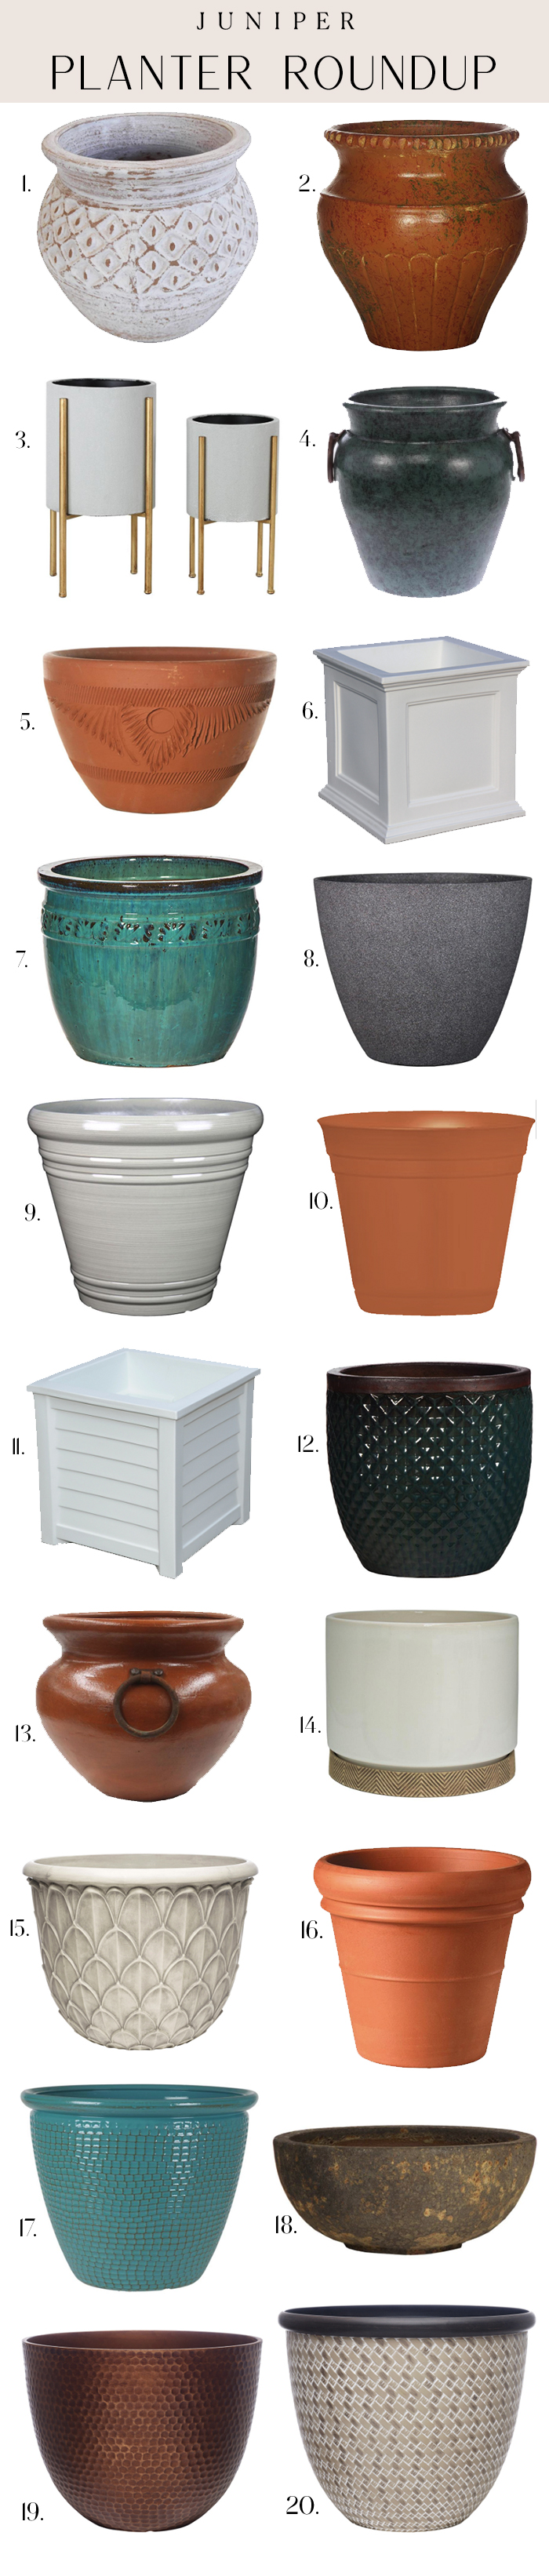
Here are some of my favorite planters at Lowe’s right now. And I’d love to hear if you have any additional tips for me in the comments section!
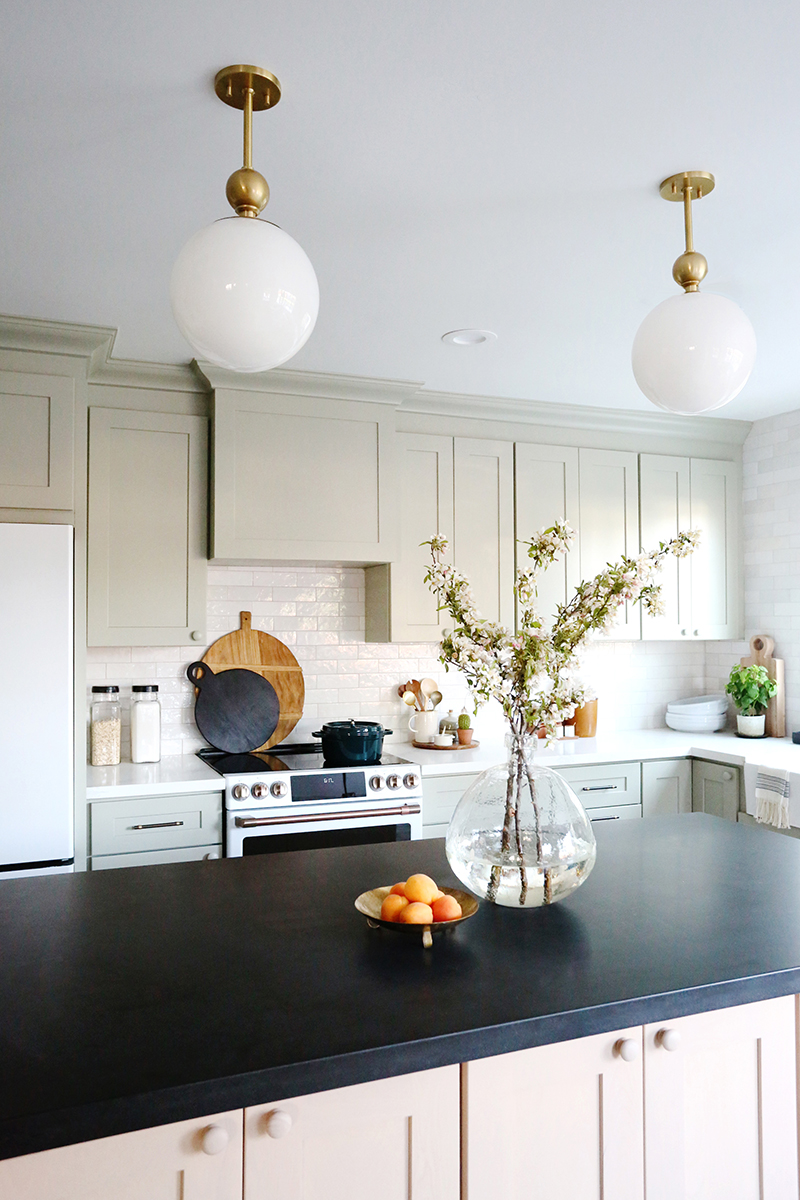
We are SO excited to reveal the kitchen today from our Evergreen flip project! We really wanted this space to feel more traditional and cottage-y with modern touches. I’m so happy with how it turned out! I love this sweet and functional space! sconces // wall tile (similar) // black and brass handles BOTANICAL…
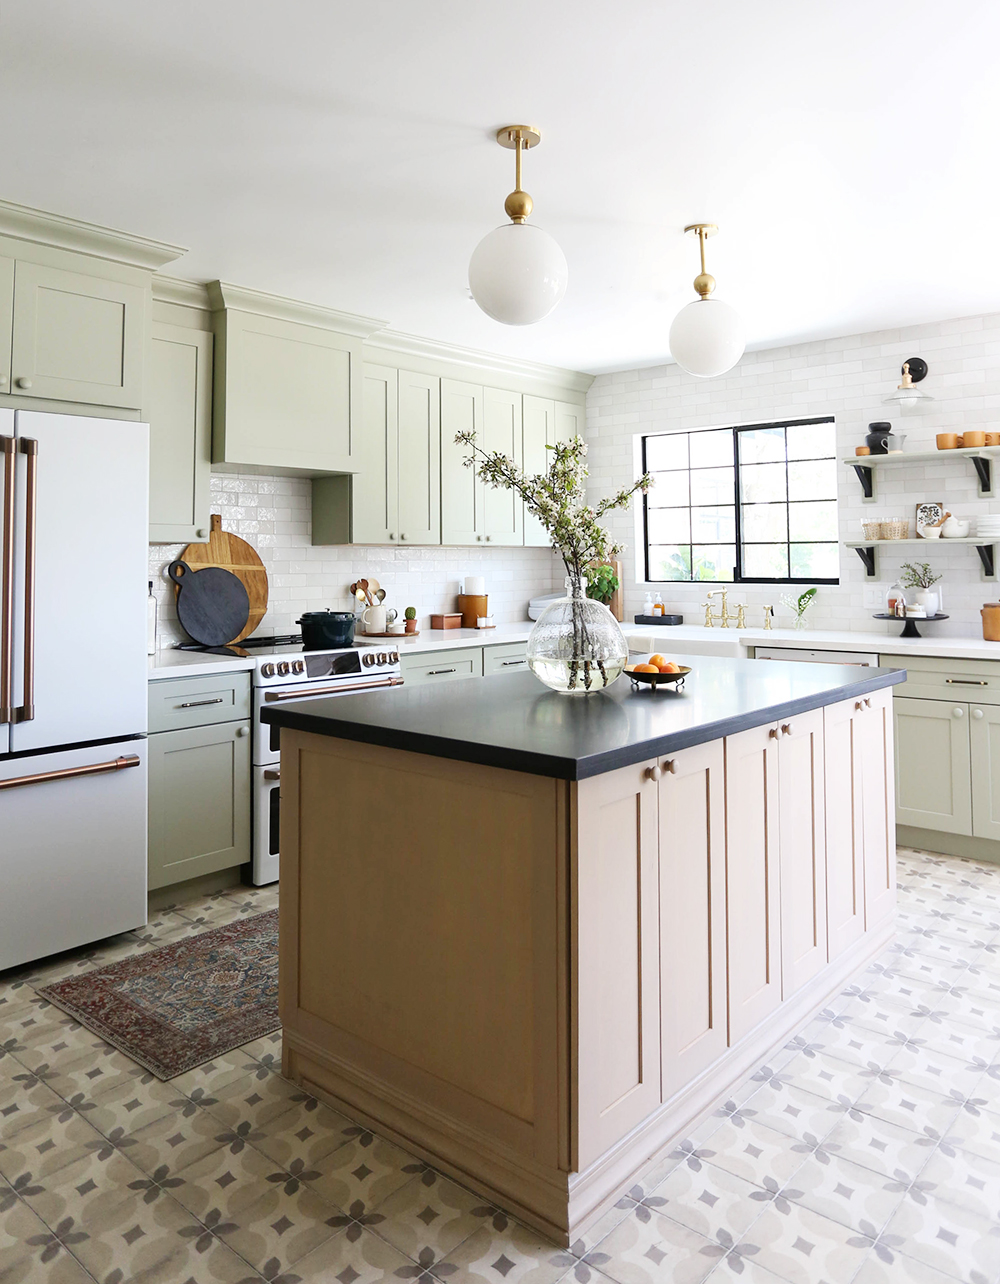
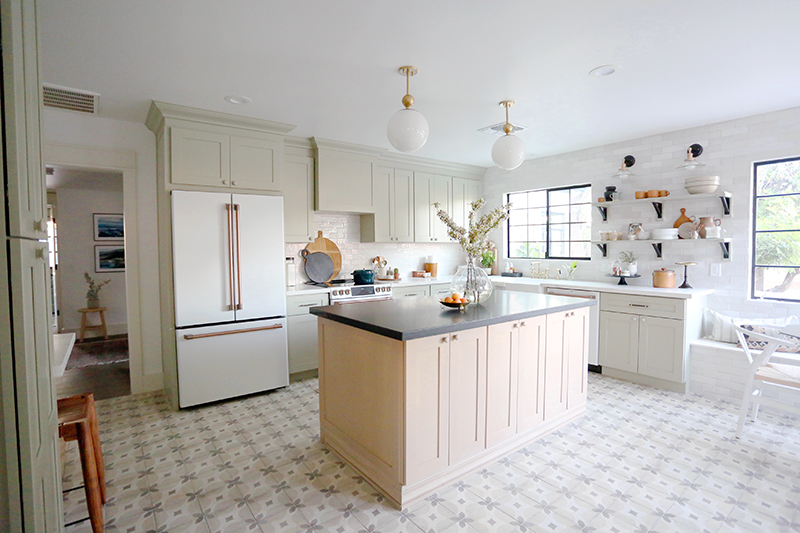
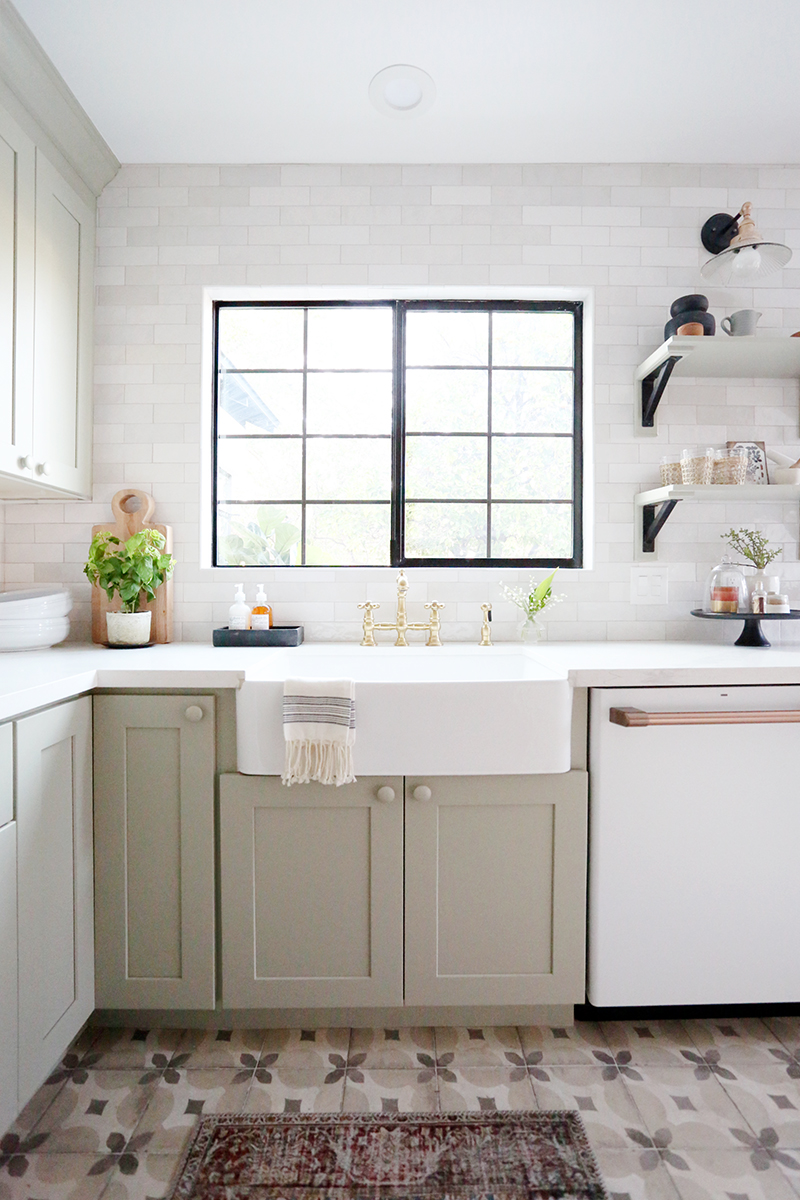
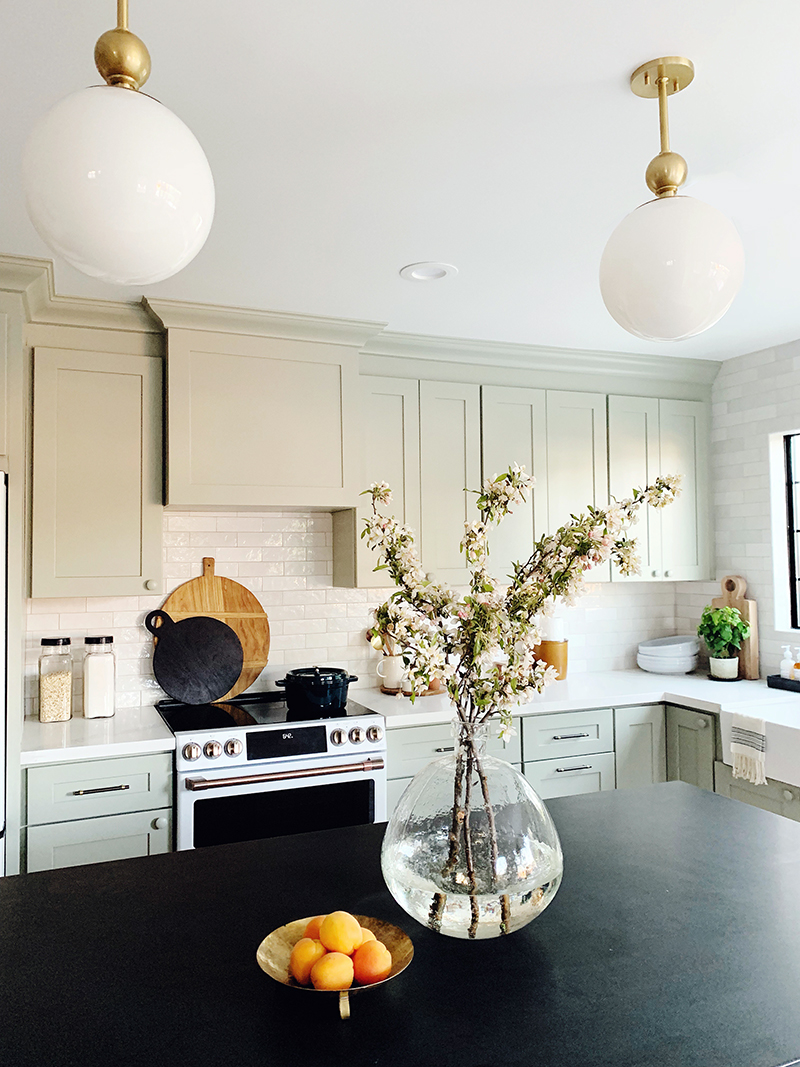
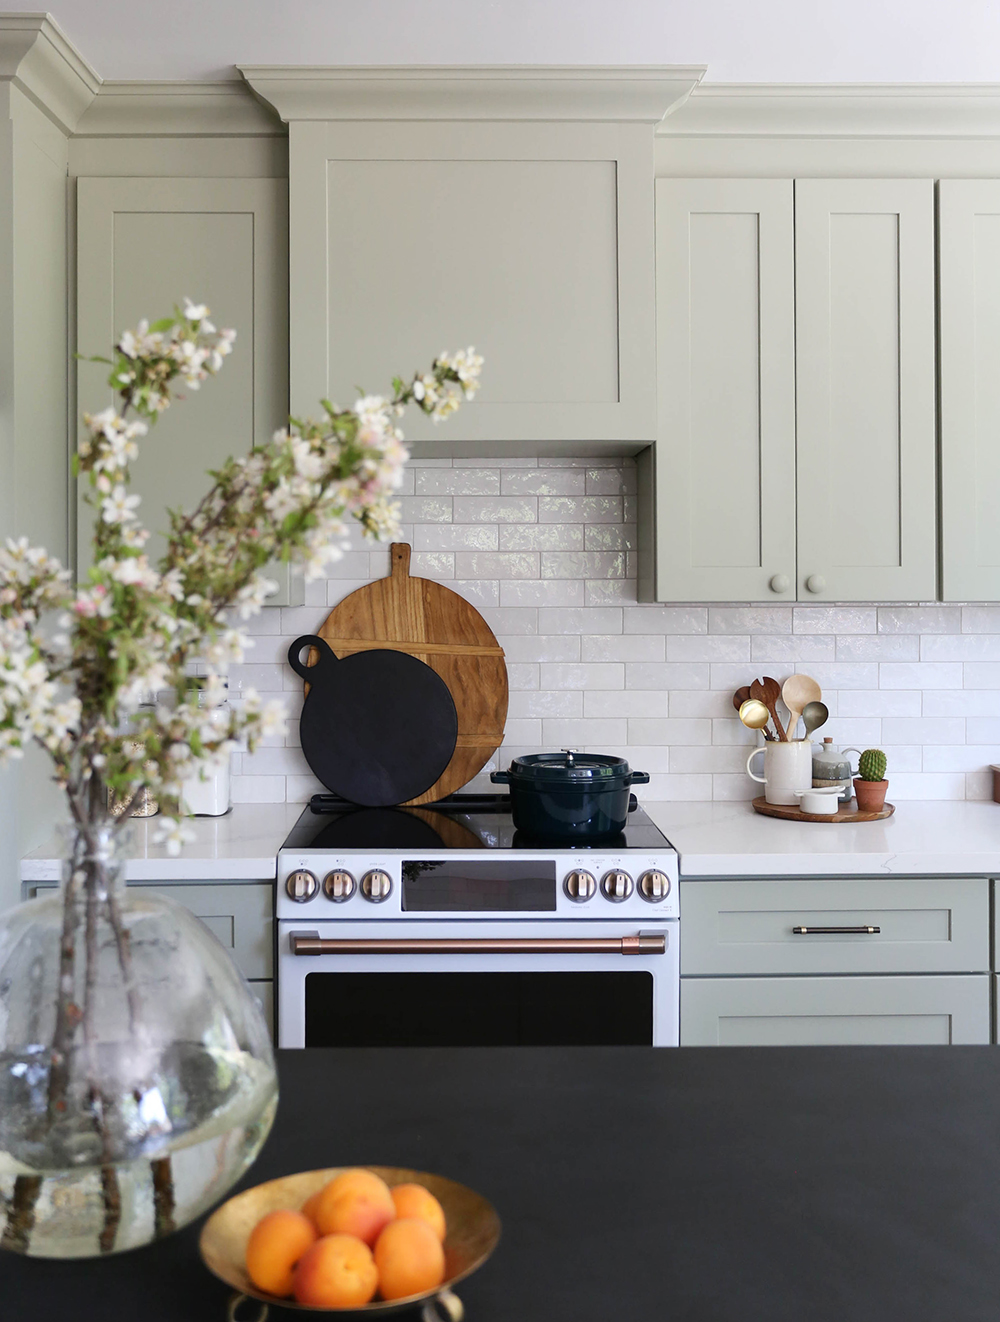
We are SO excited to reveal the kitchen today from our Evergreen flip project! We really wanted this space to feel more traditional and cottage-y with modern touches. I’m so happy with how it turned out! I love this sweet and functional space!
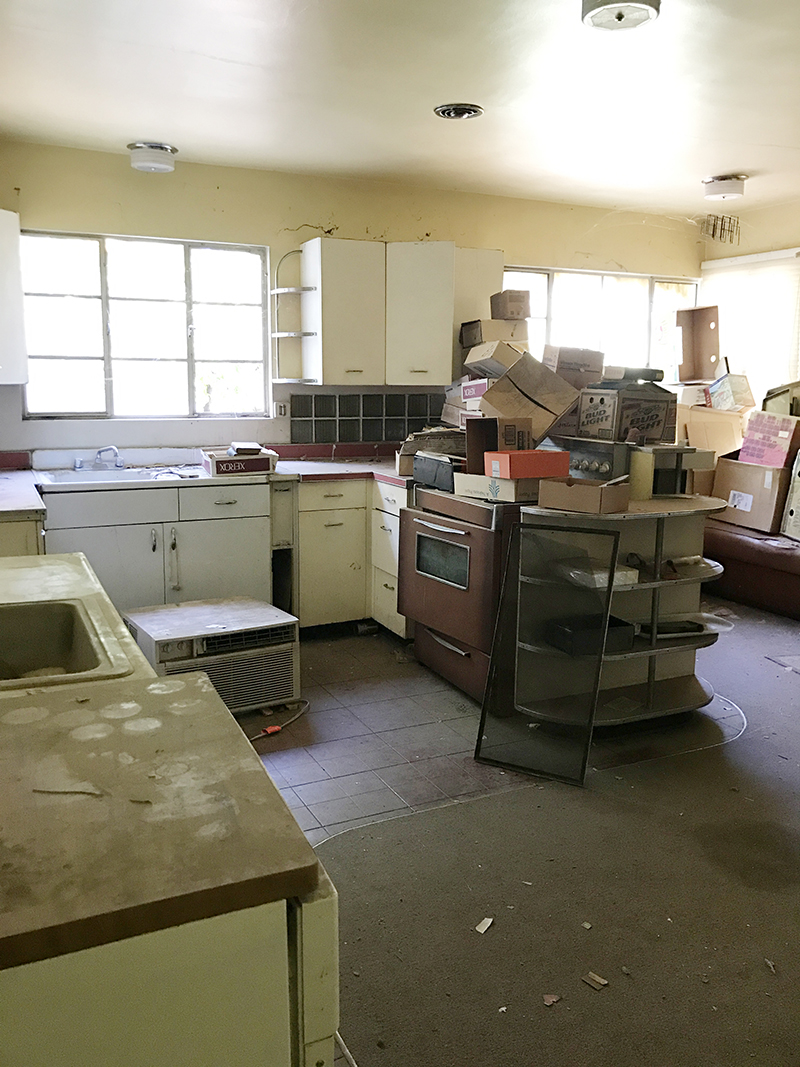
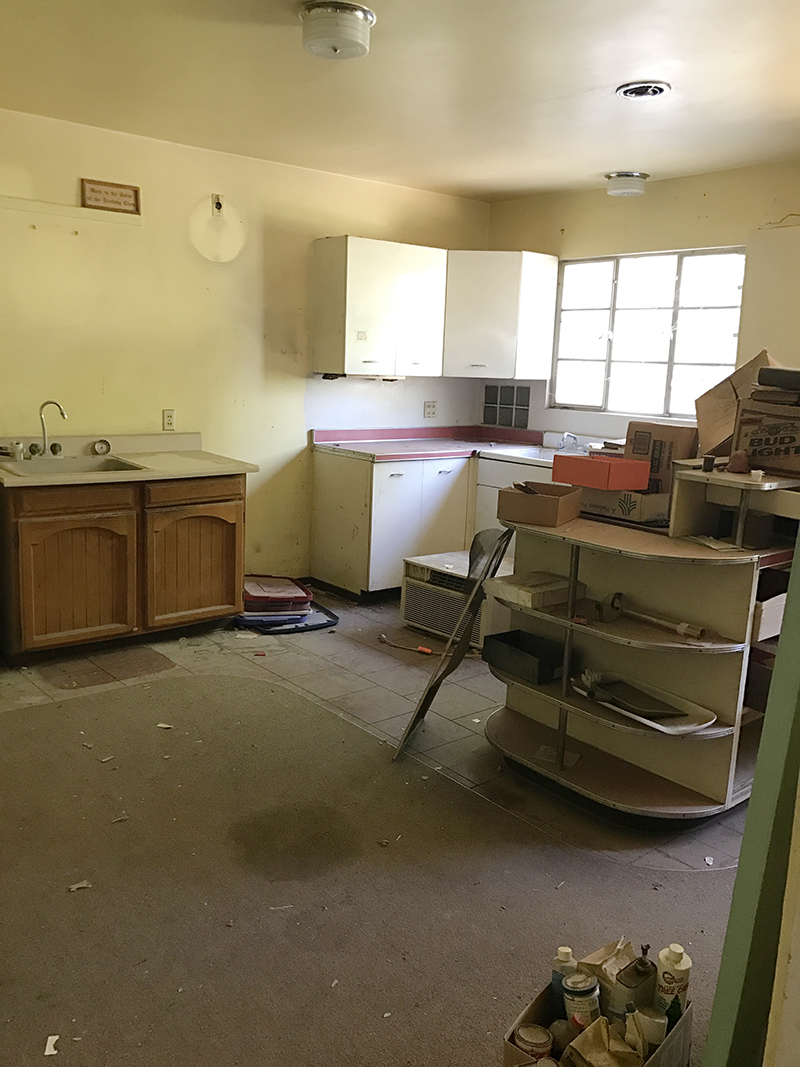
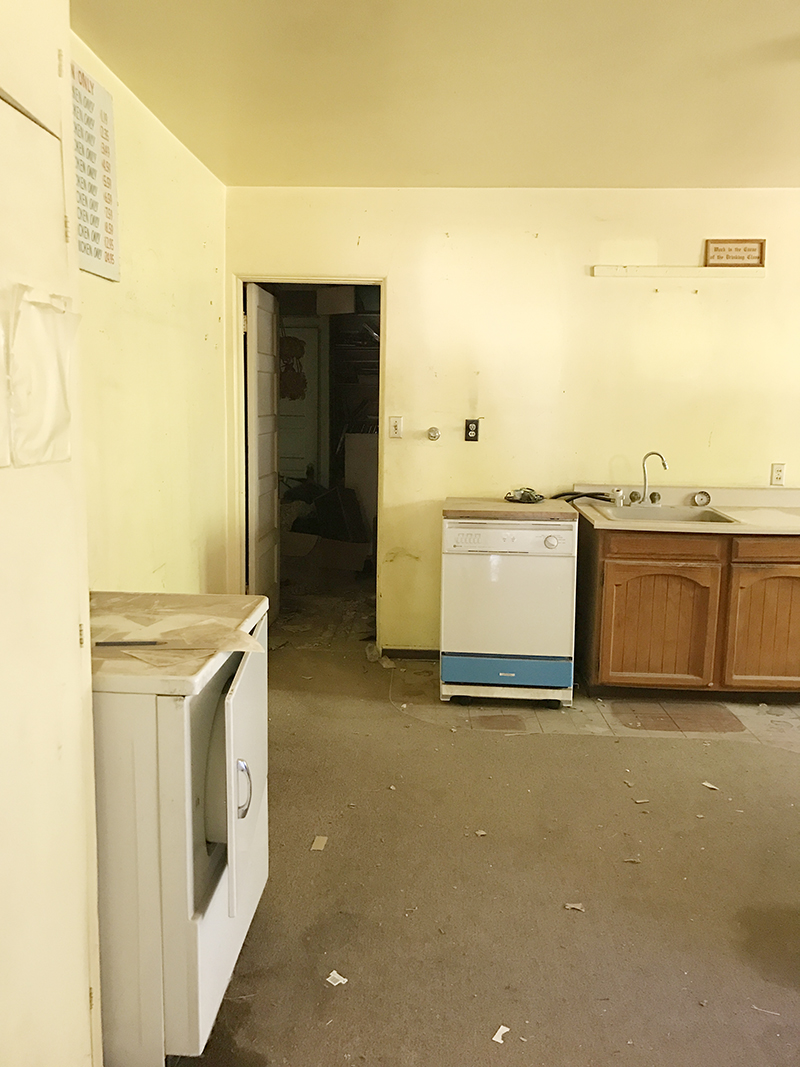
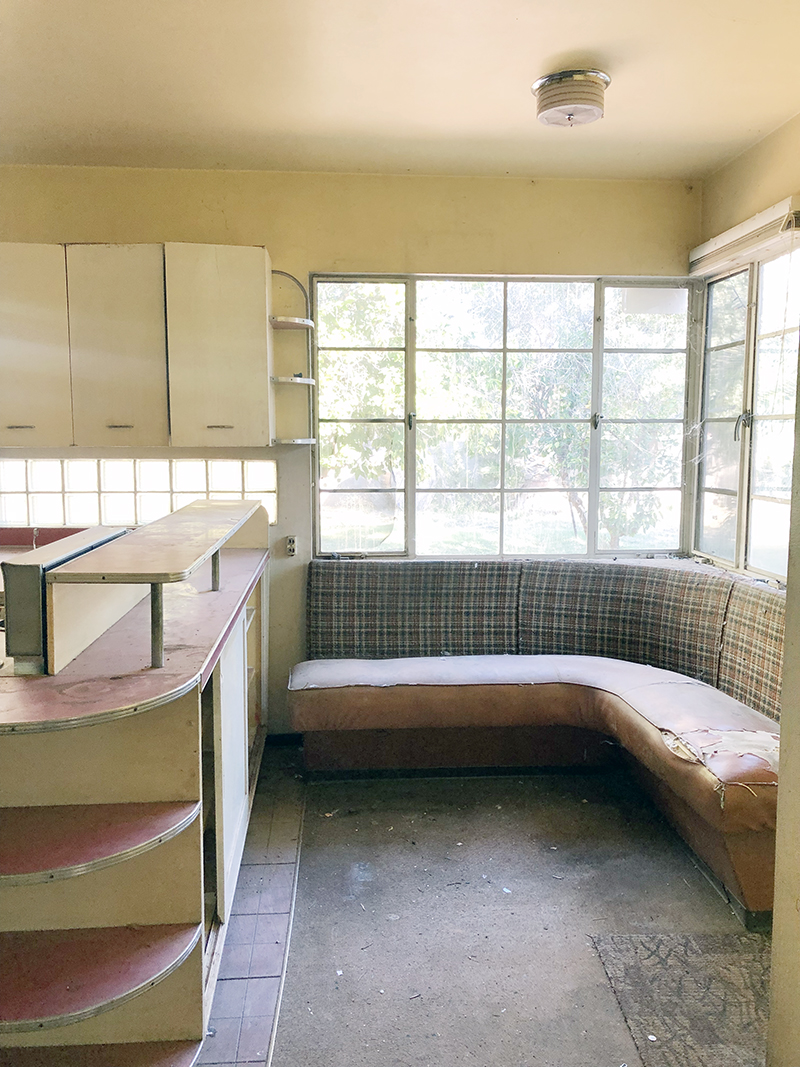
Ready for some crazy before photos? There were two sinks in here, some serious water damage and how about that carpet?!
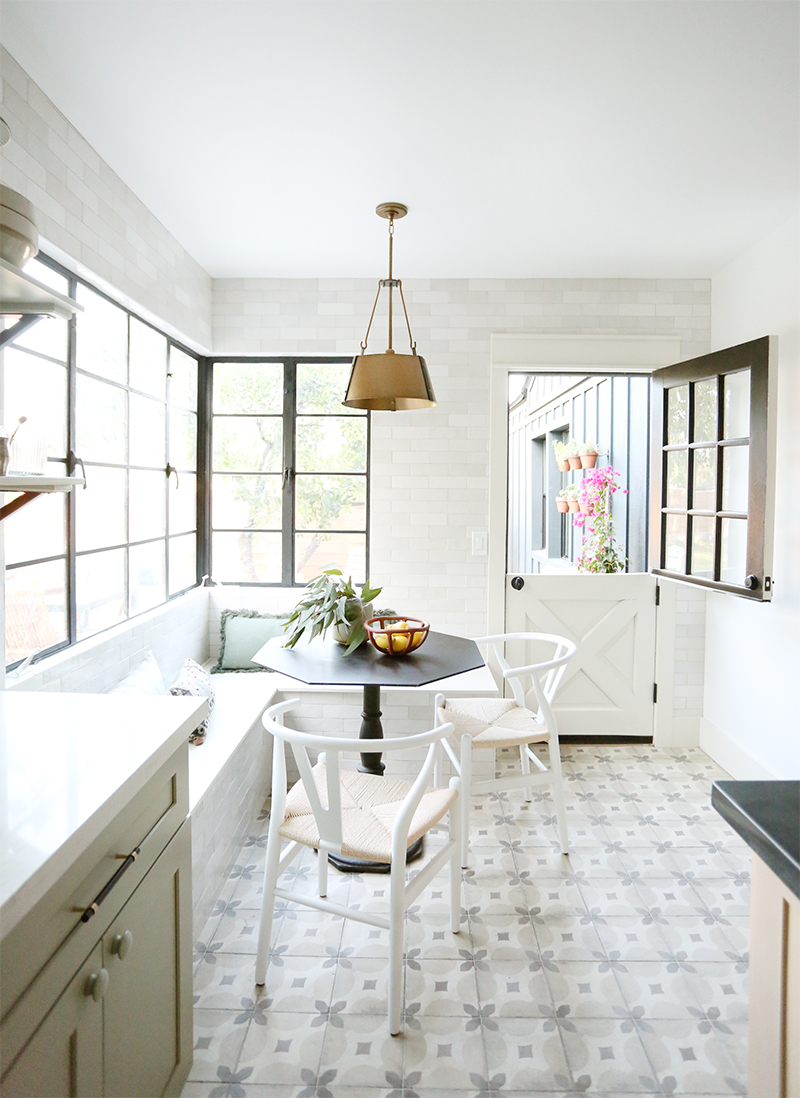
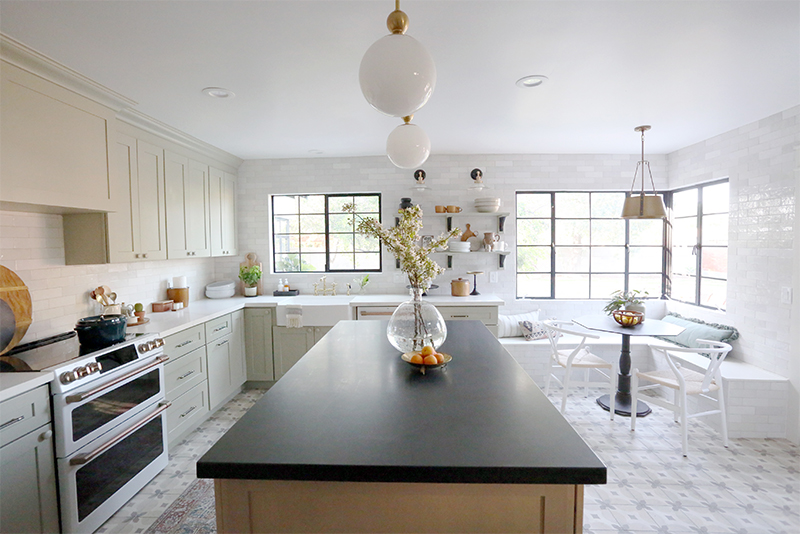
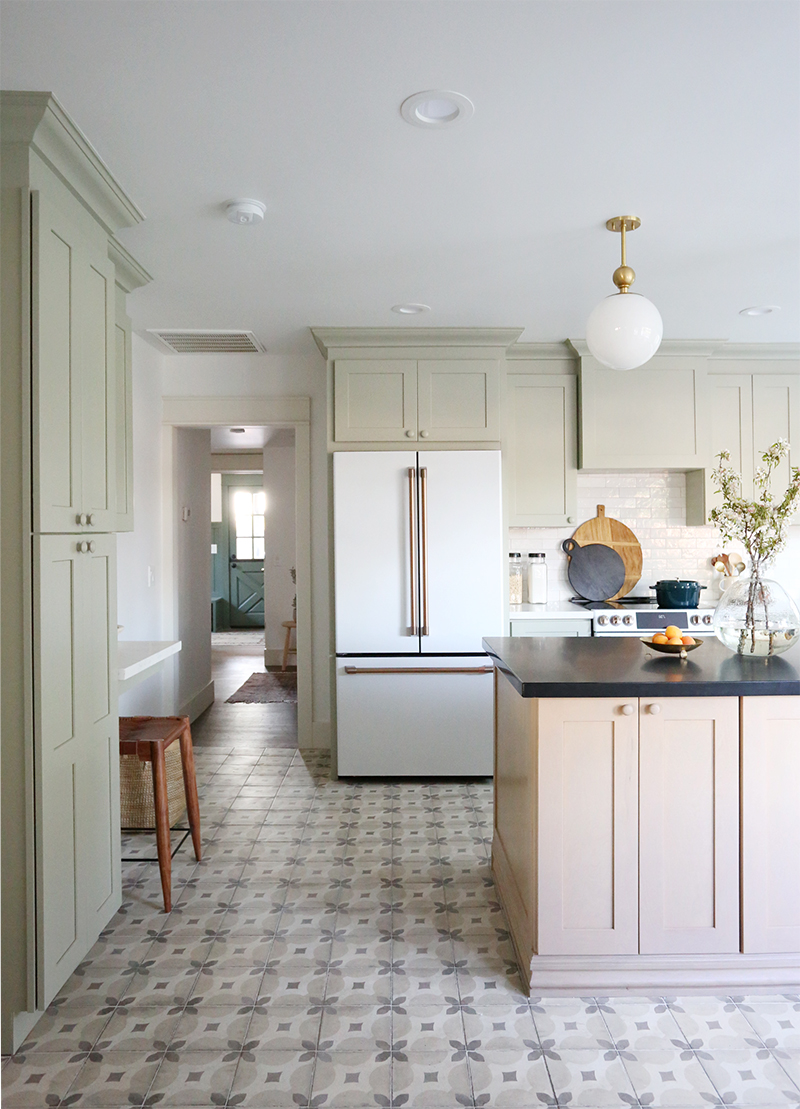
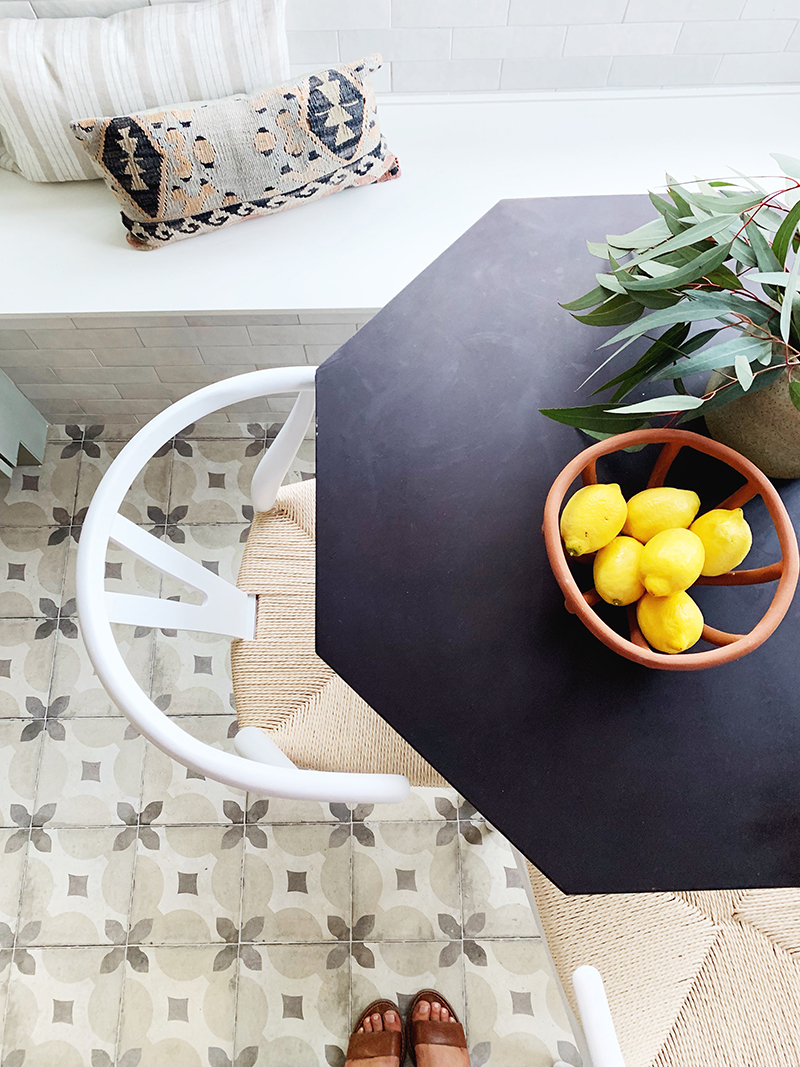
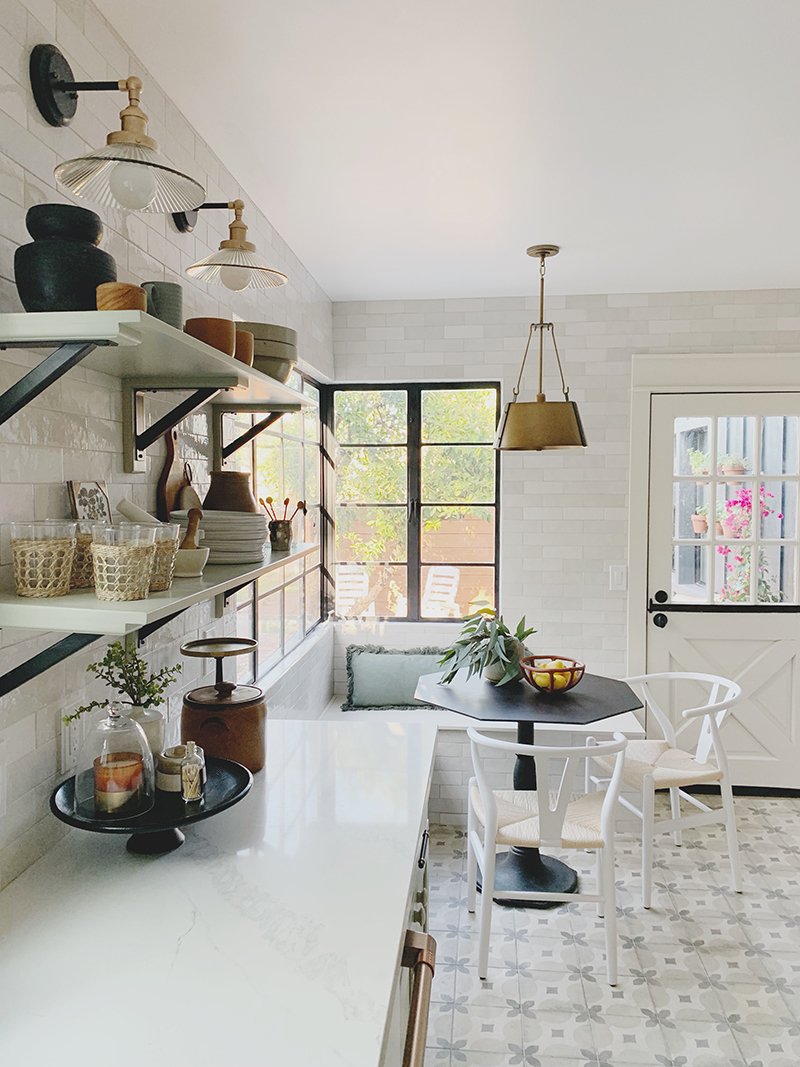
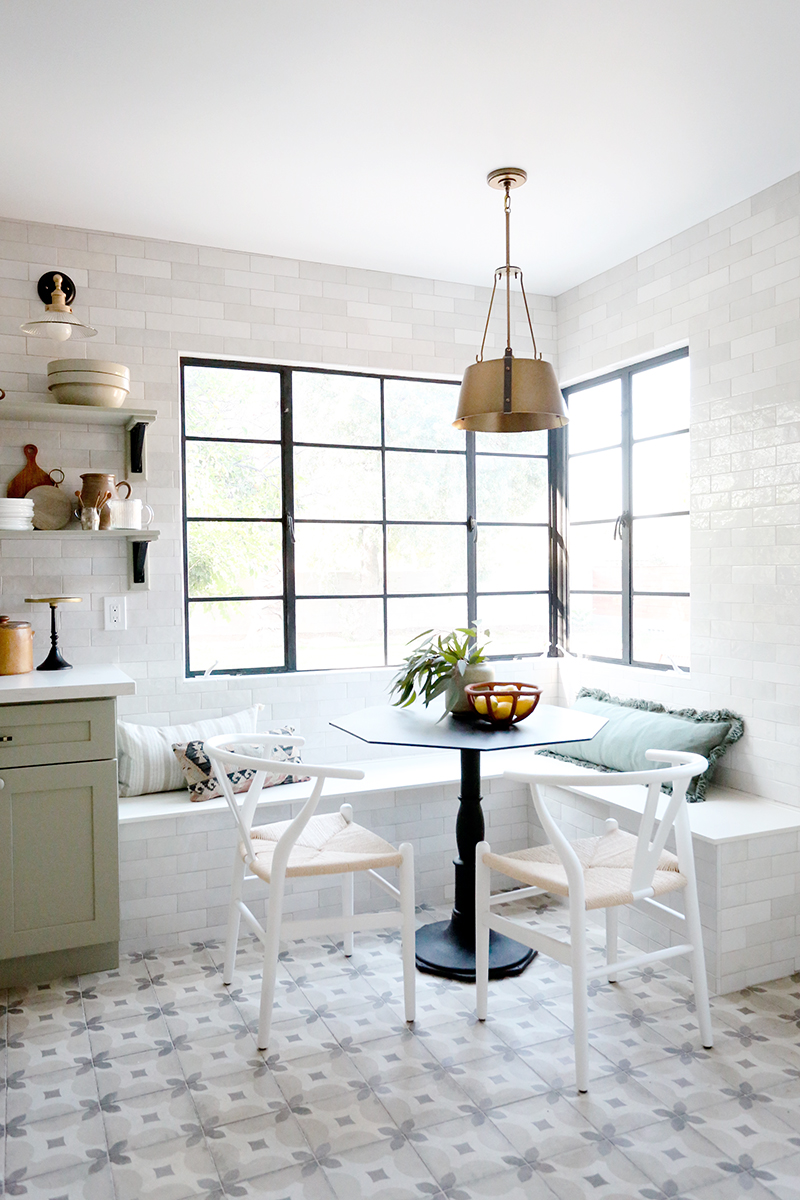
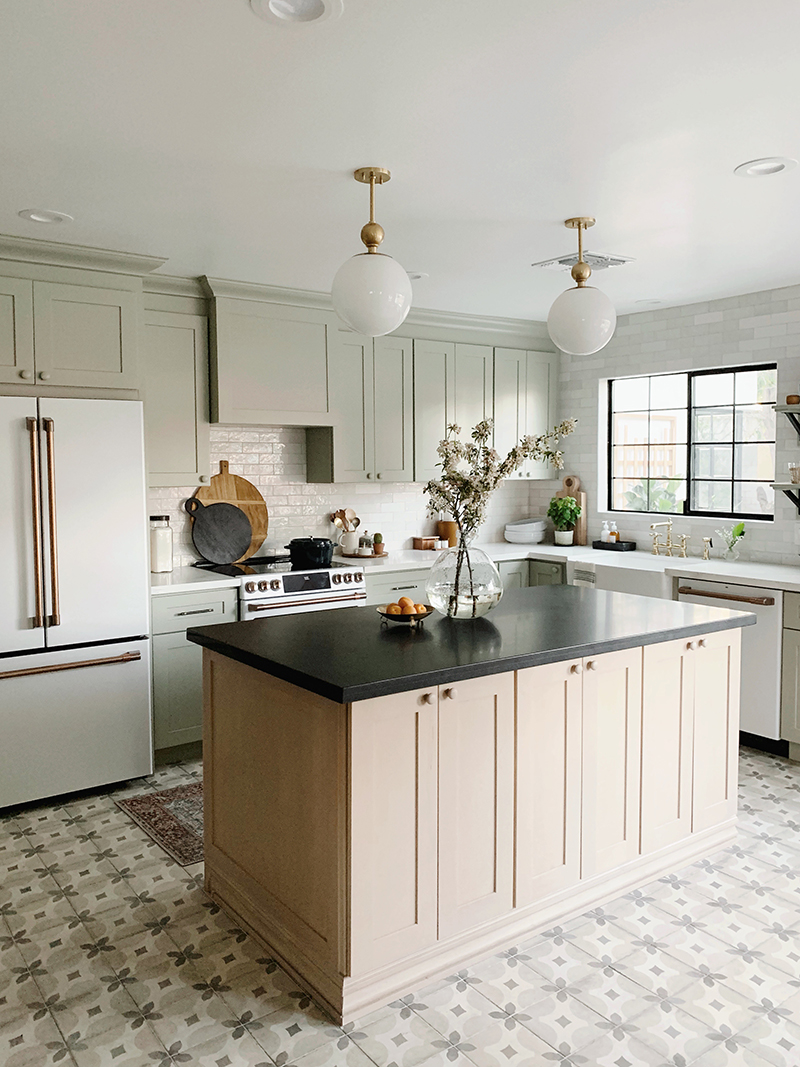
We were really lucky though that we didn’t have to change the footprint in here. I was actually pretty shocked when we first walked through that a 100 year-old house had such a large kitchen! We just needed to move a window a few inches and we opened up a few of the doorways, but that’s it for structural changes! I loved the original corner banquette concept and opted to recreate that space, which also allowed us to skip barstools at the island in favor of more storage (and a prettier view of the kitchen from the front rooms – it’s not fun to be a slave to straightening up barstools!).
Here are some wide shots to give you a sense of how the space flows:
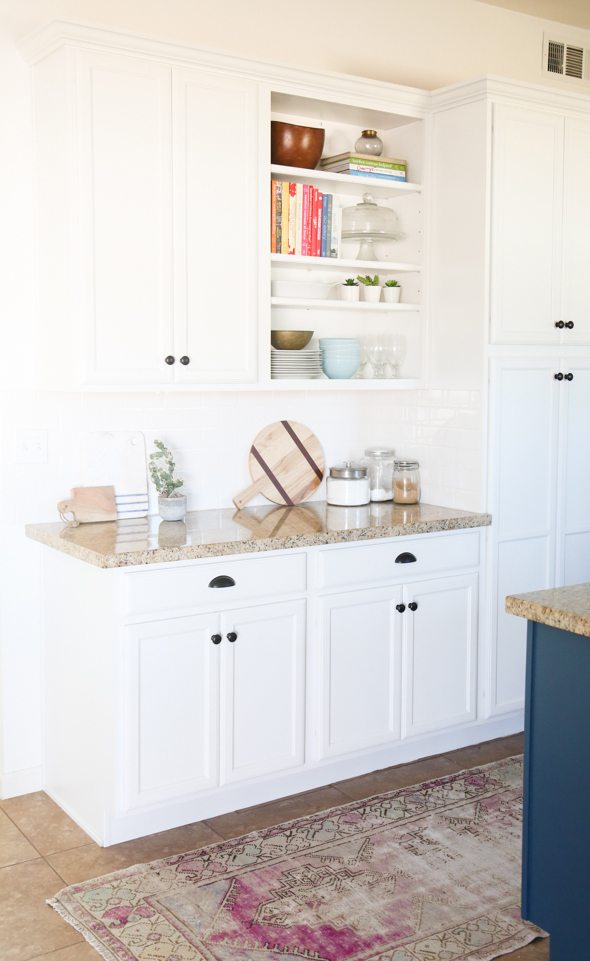
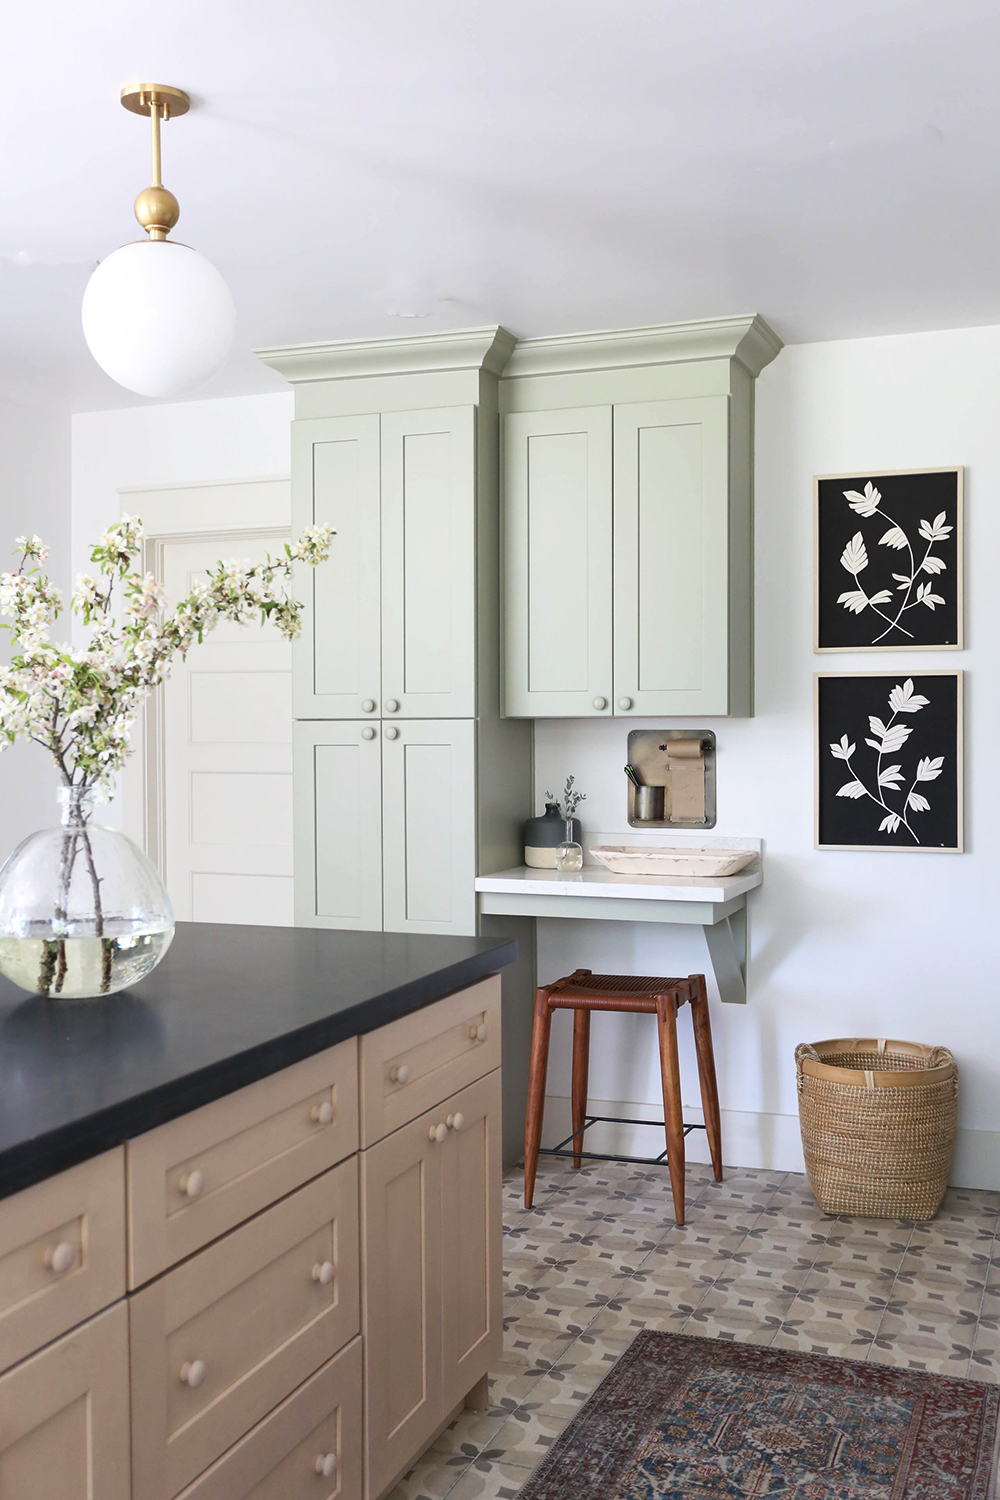
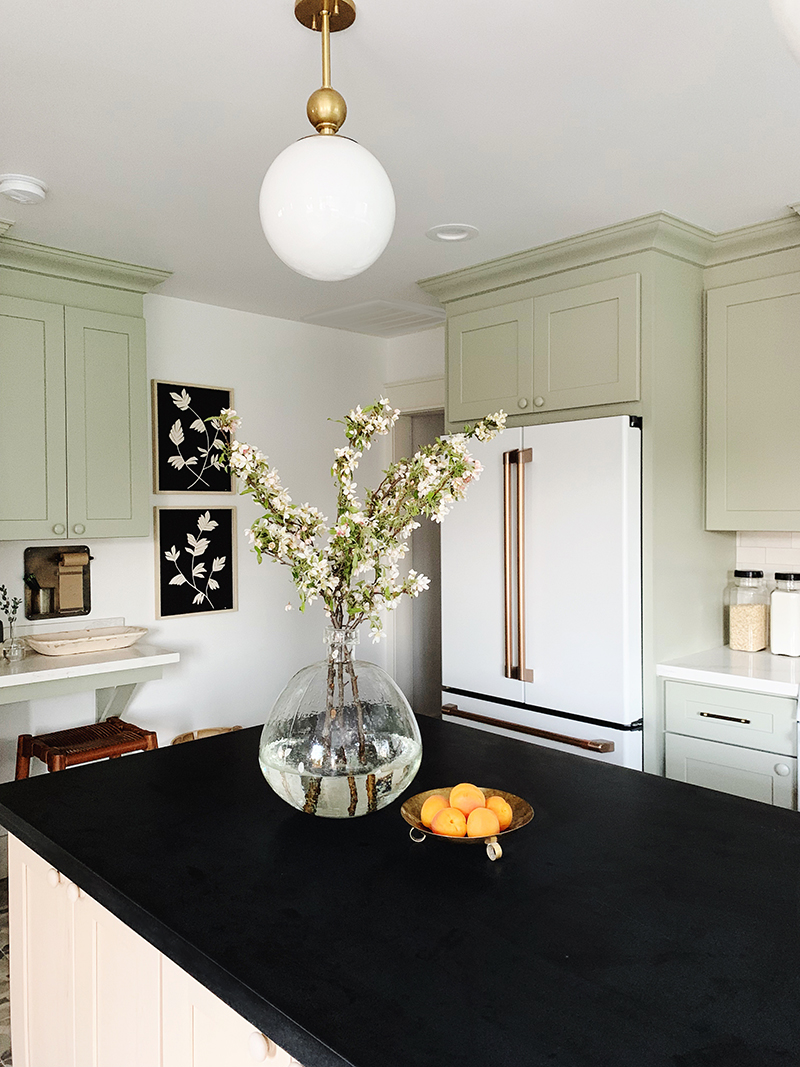
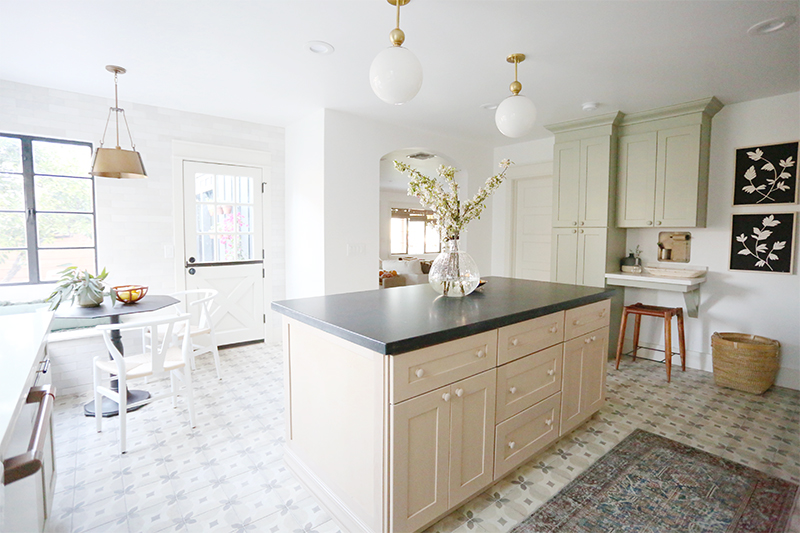
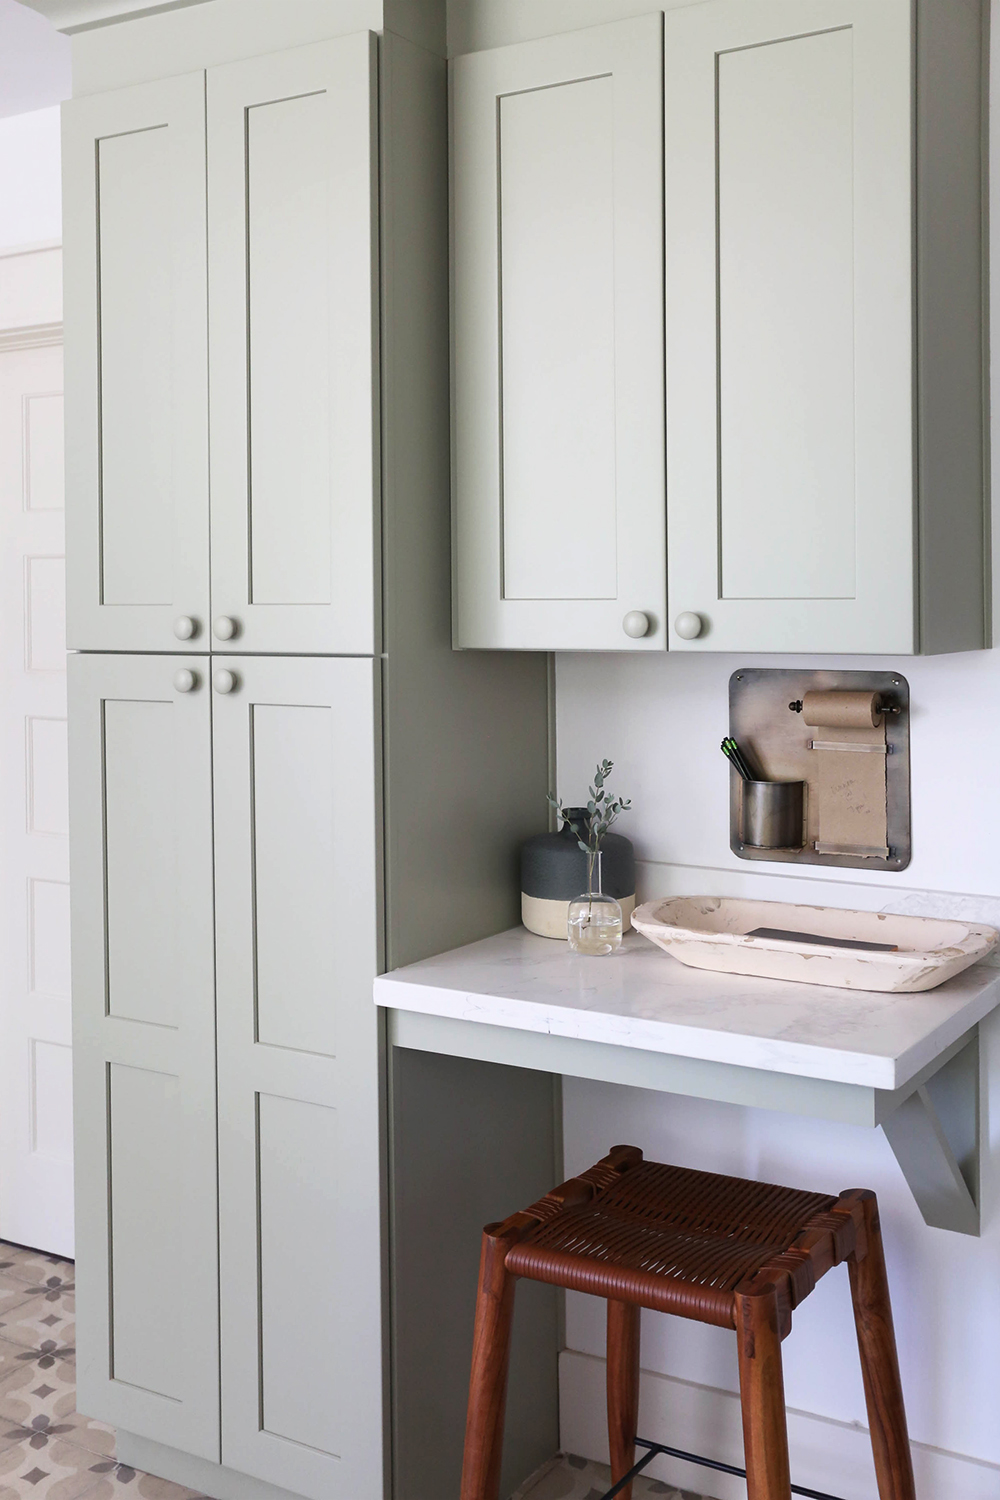
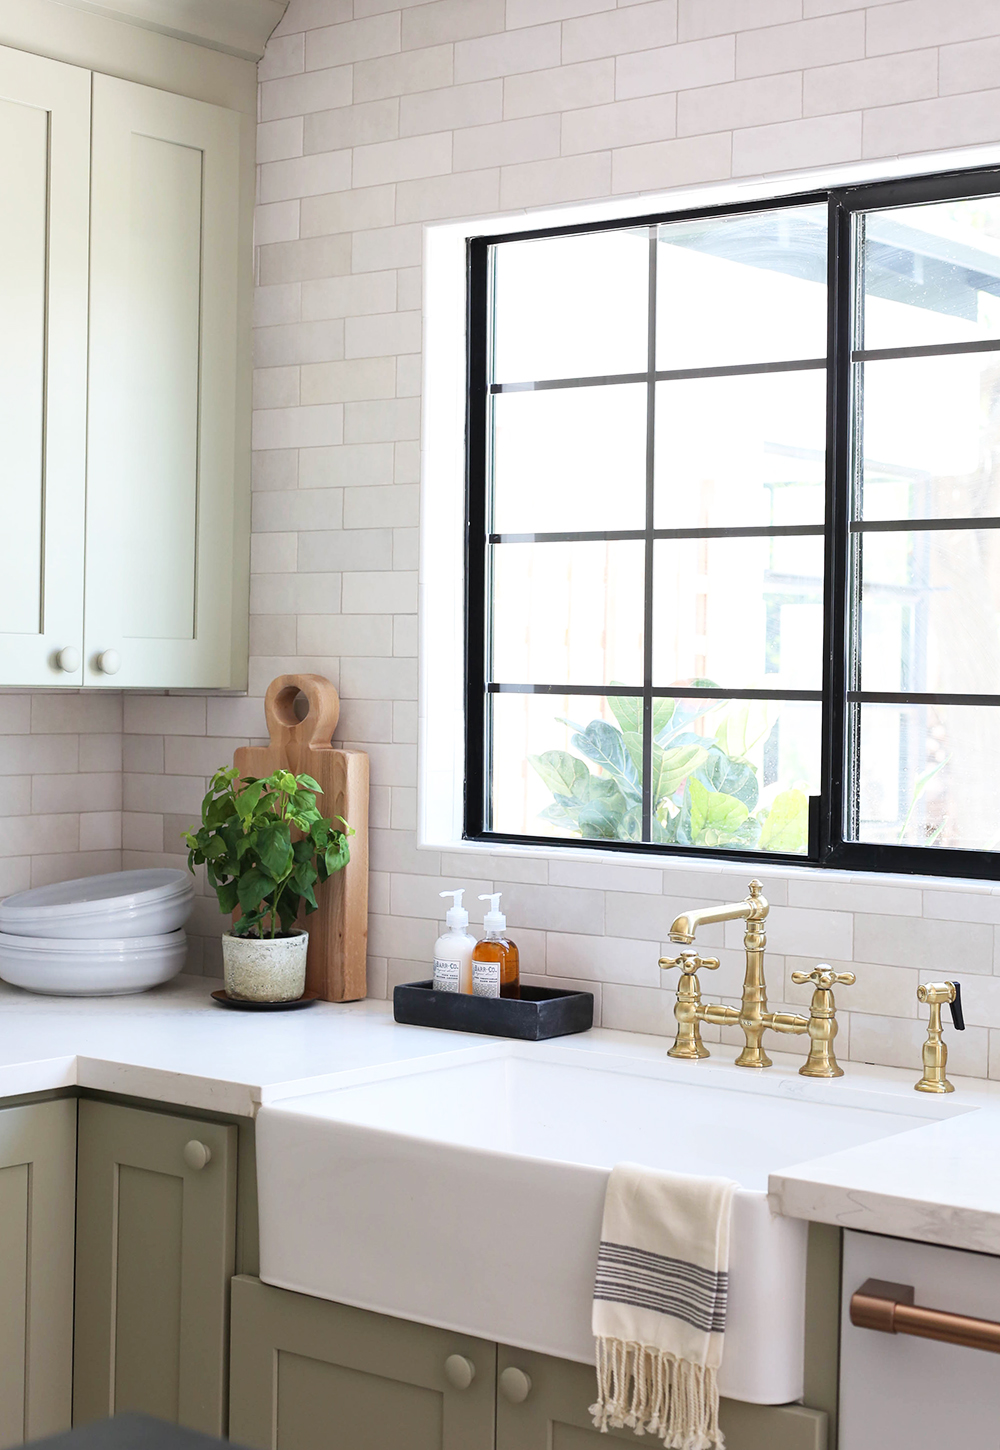
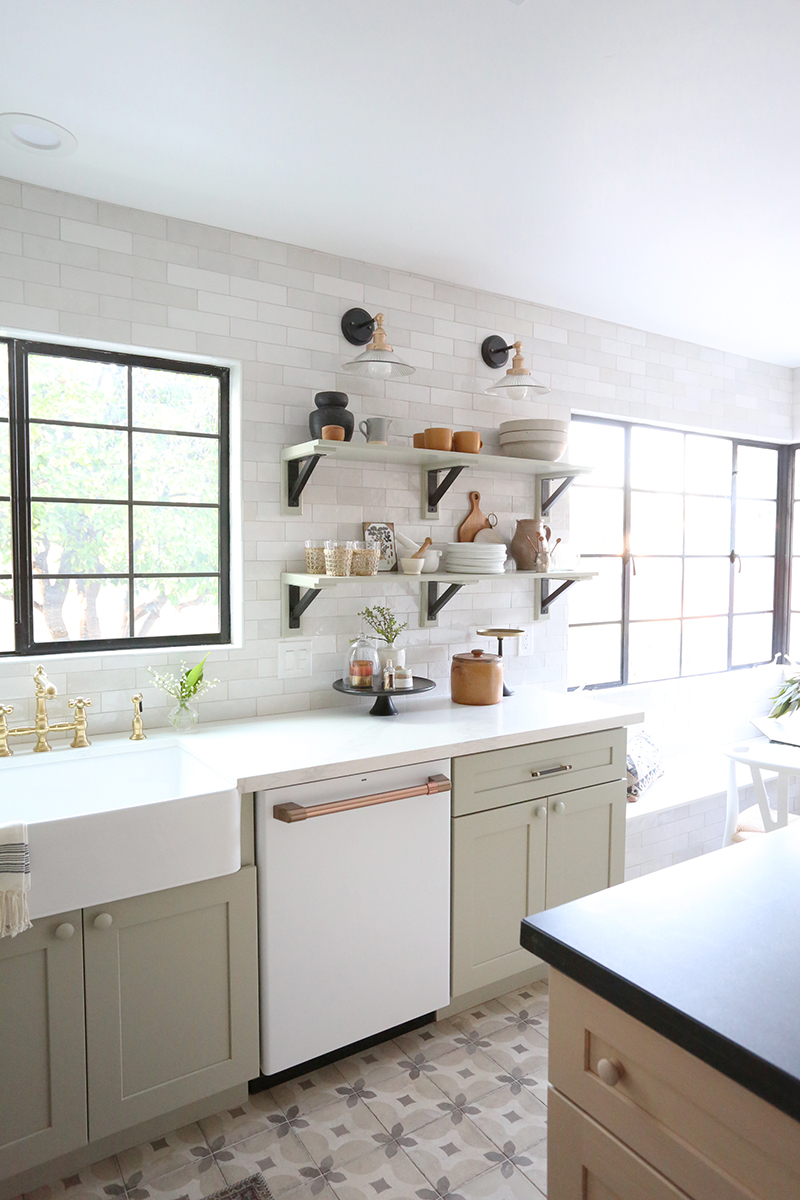
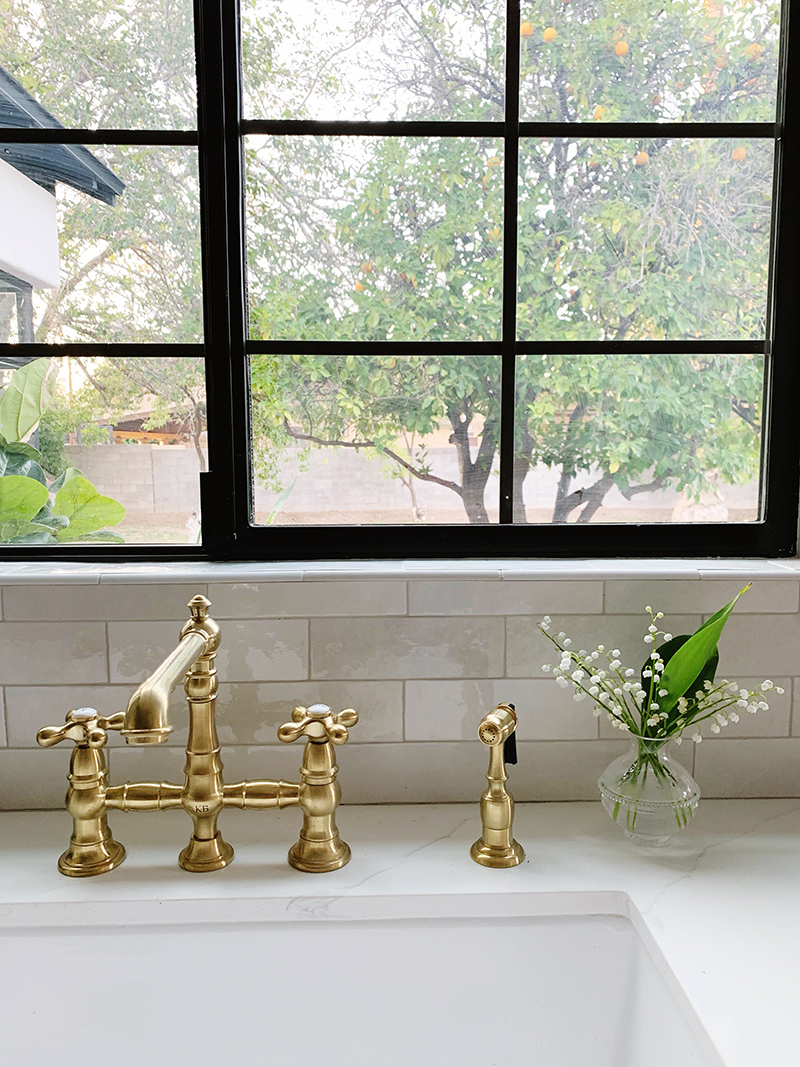
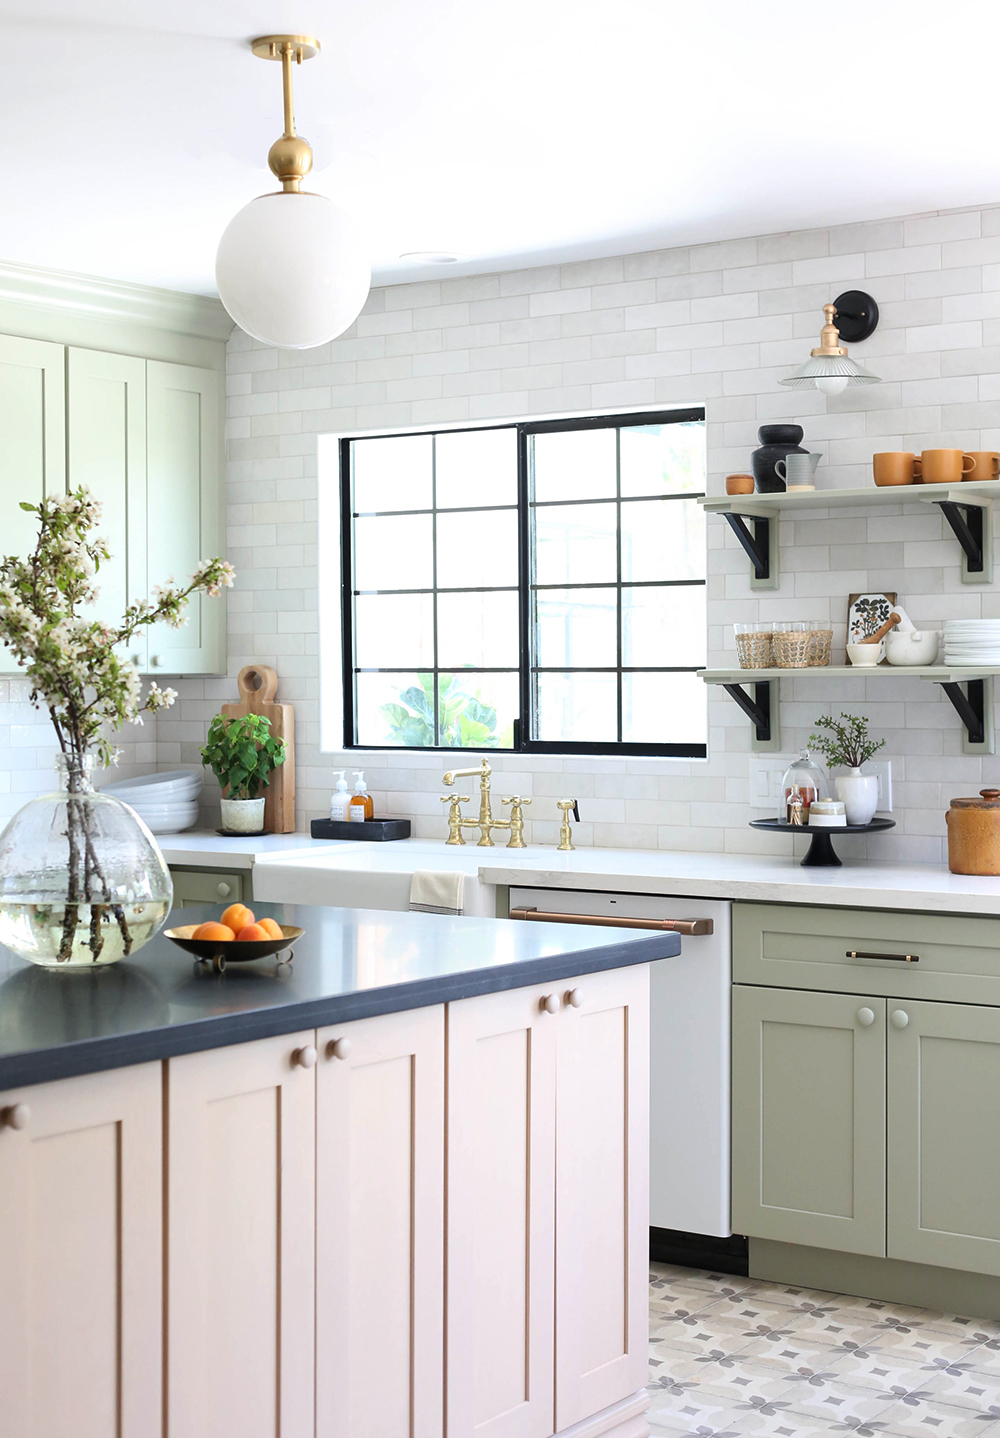
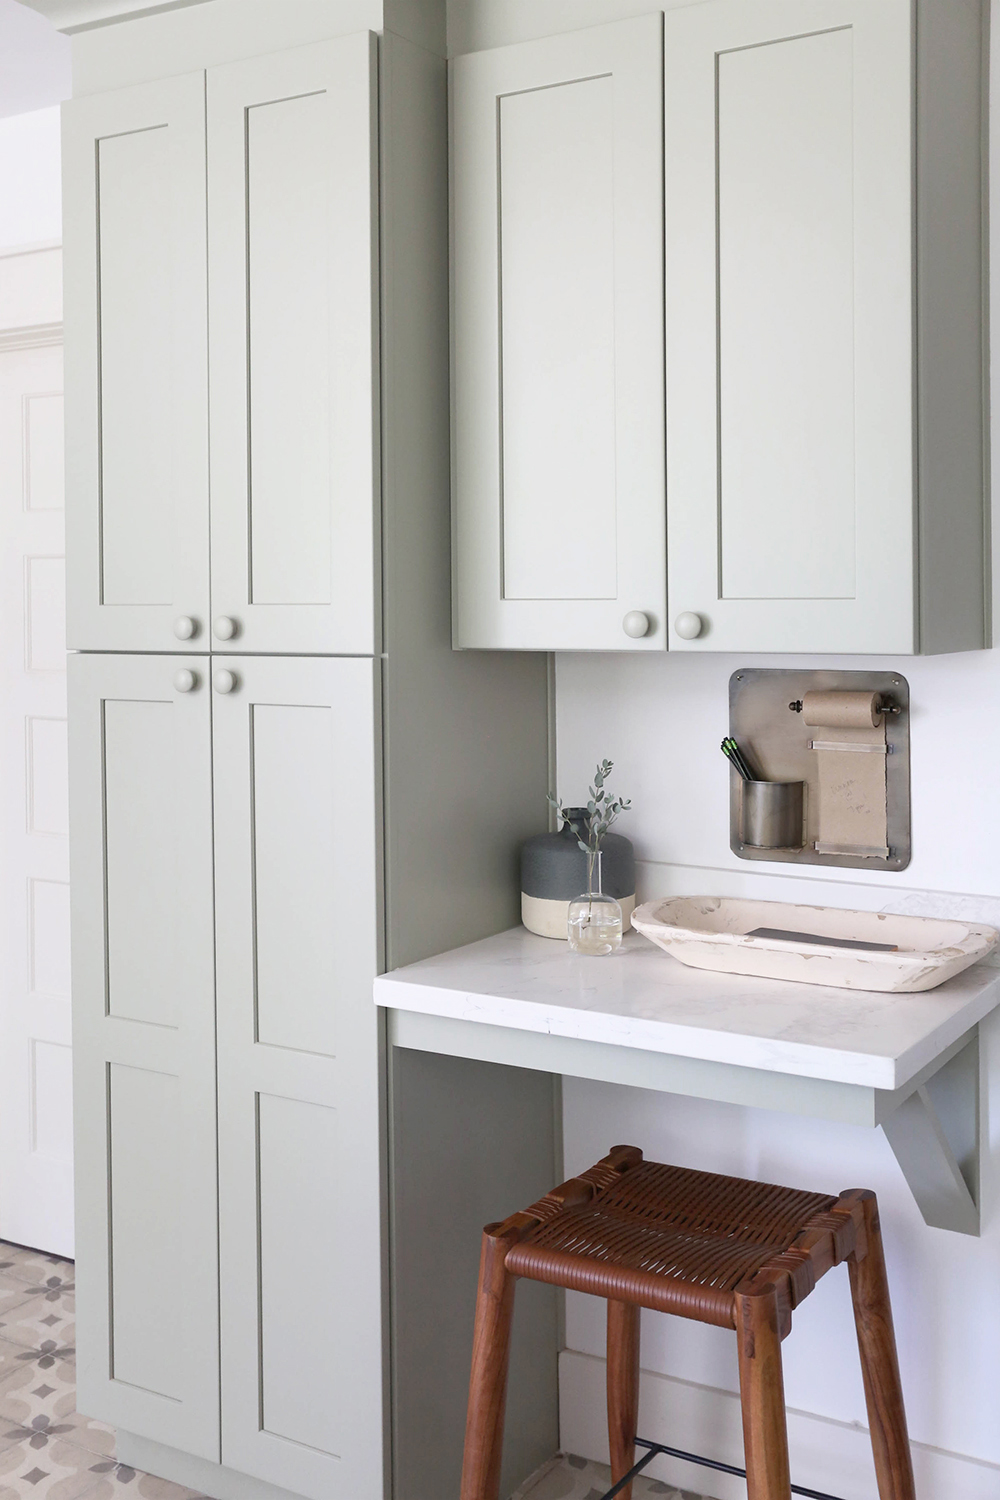
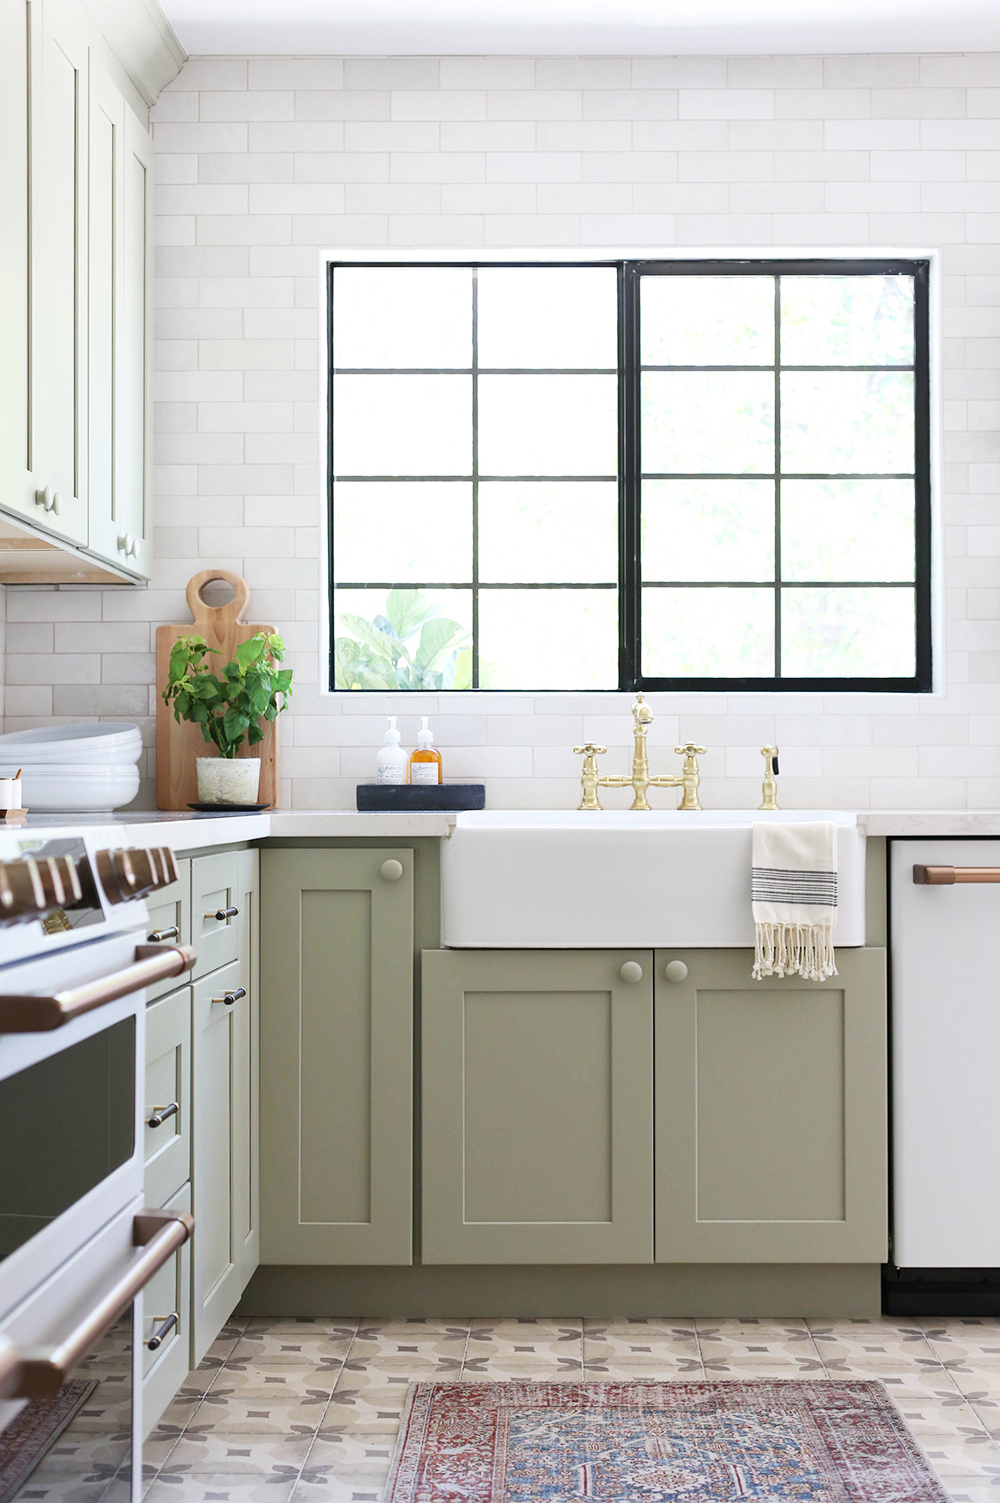
When designing a kitchen layout, I always like to have the sink in front of the window if at all possible and the range as the center focal point. I fill in the fridge wherever makes the most sense after that. In this space we also had room for a pantry hutch and little desk area to keep mail and cook books.
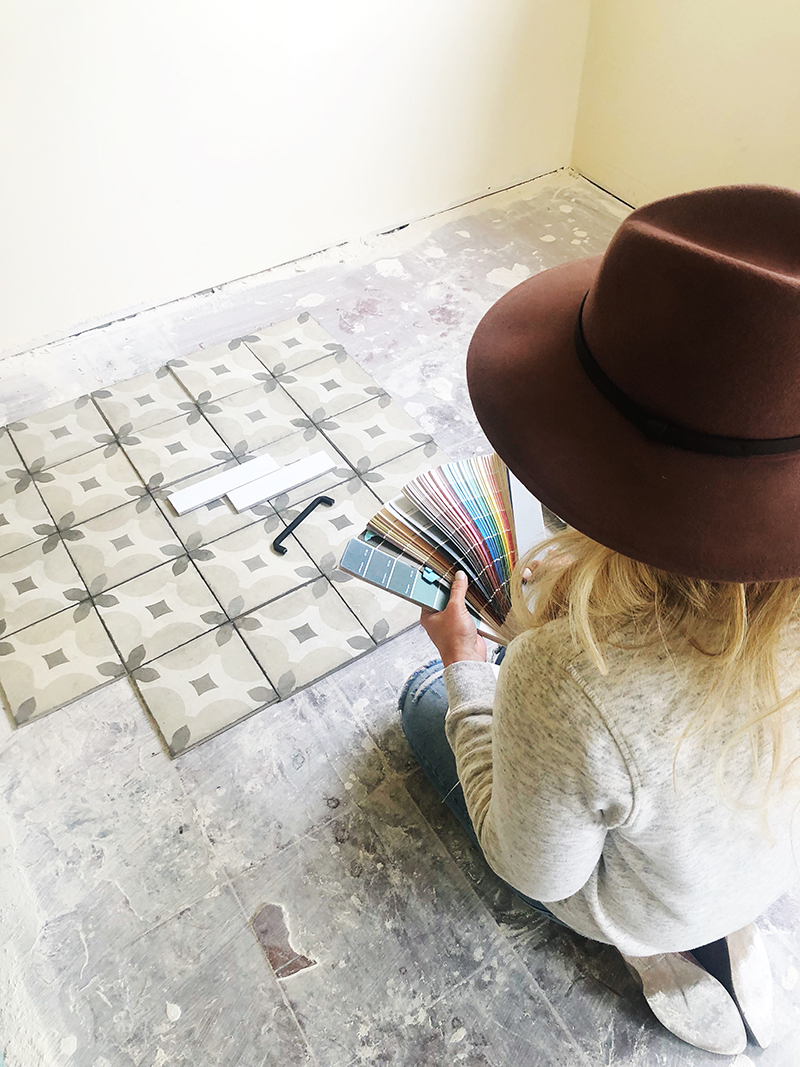
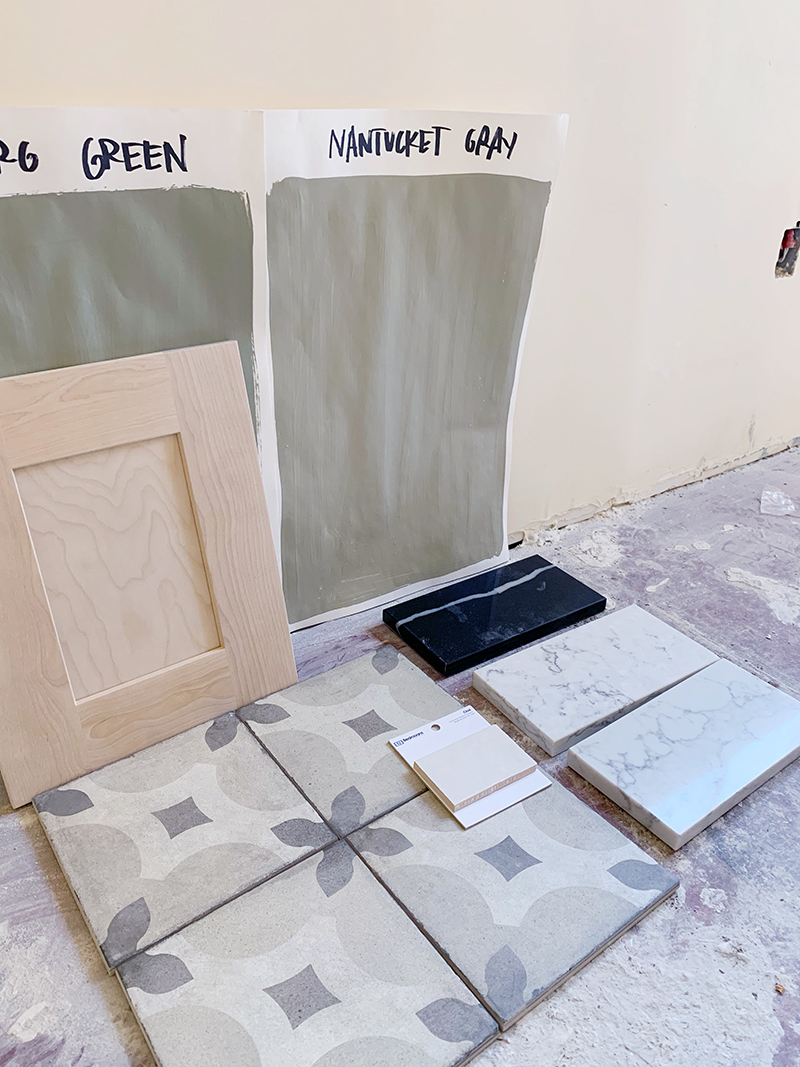
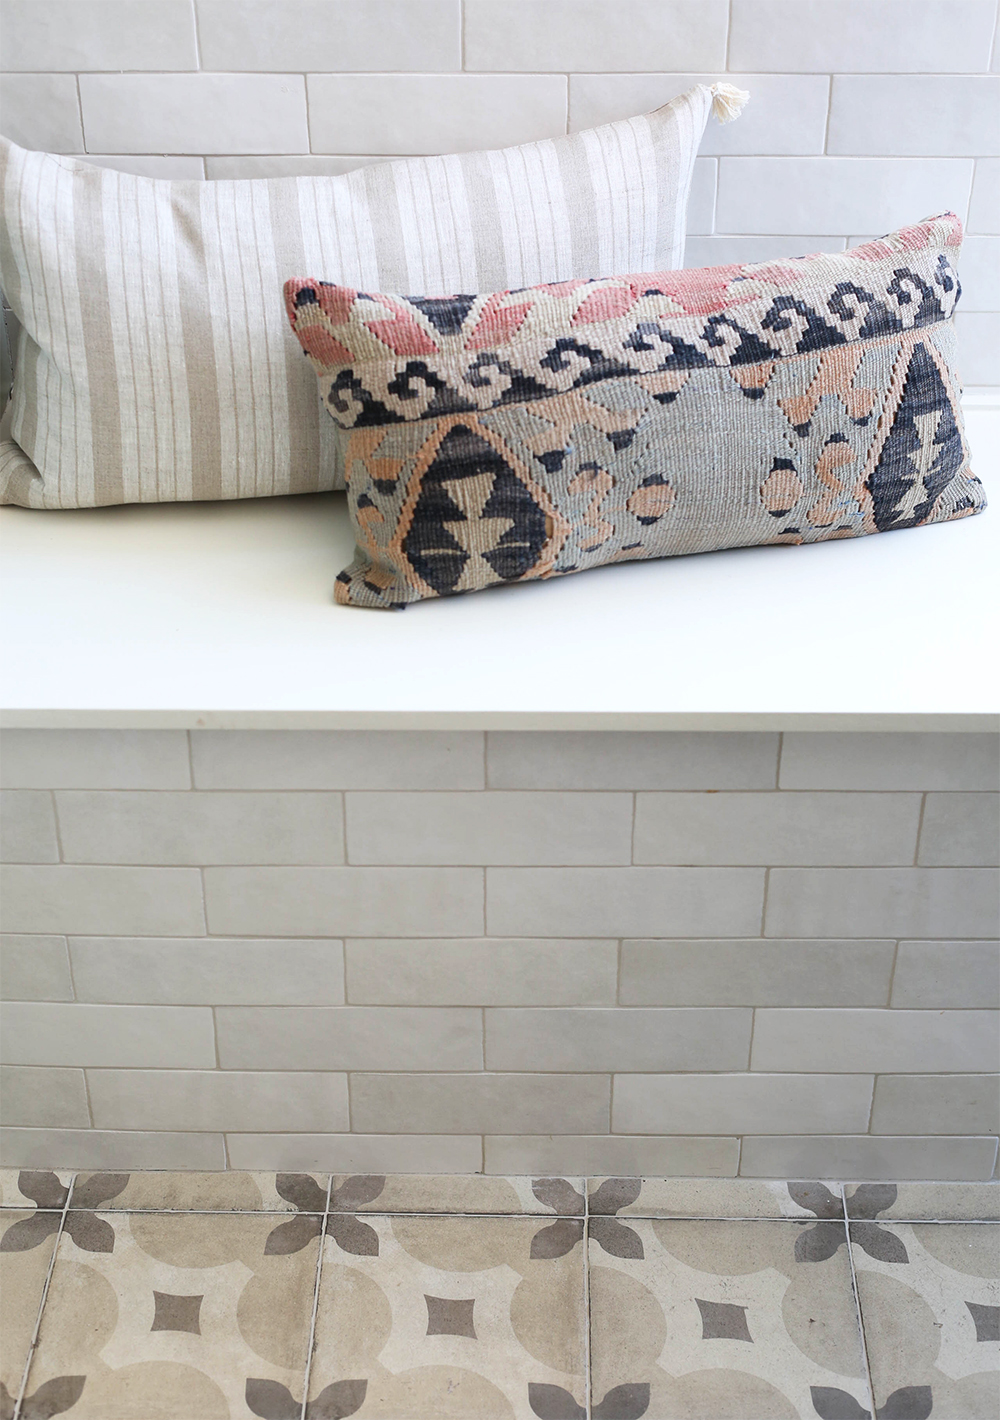
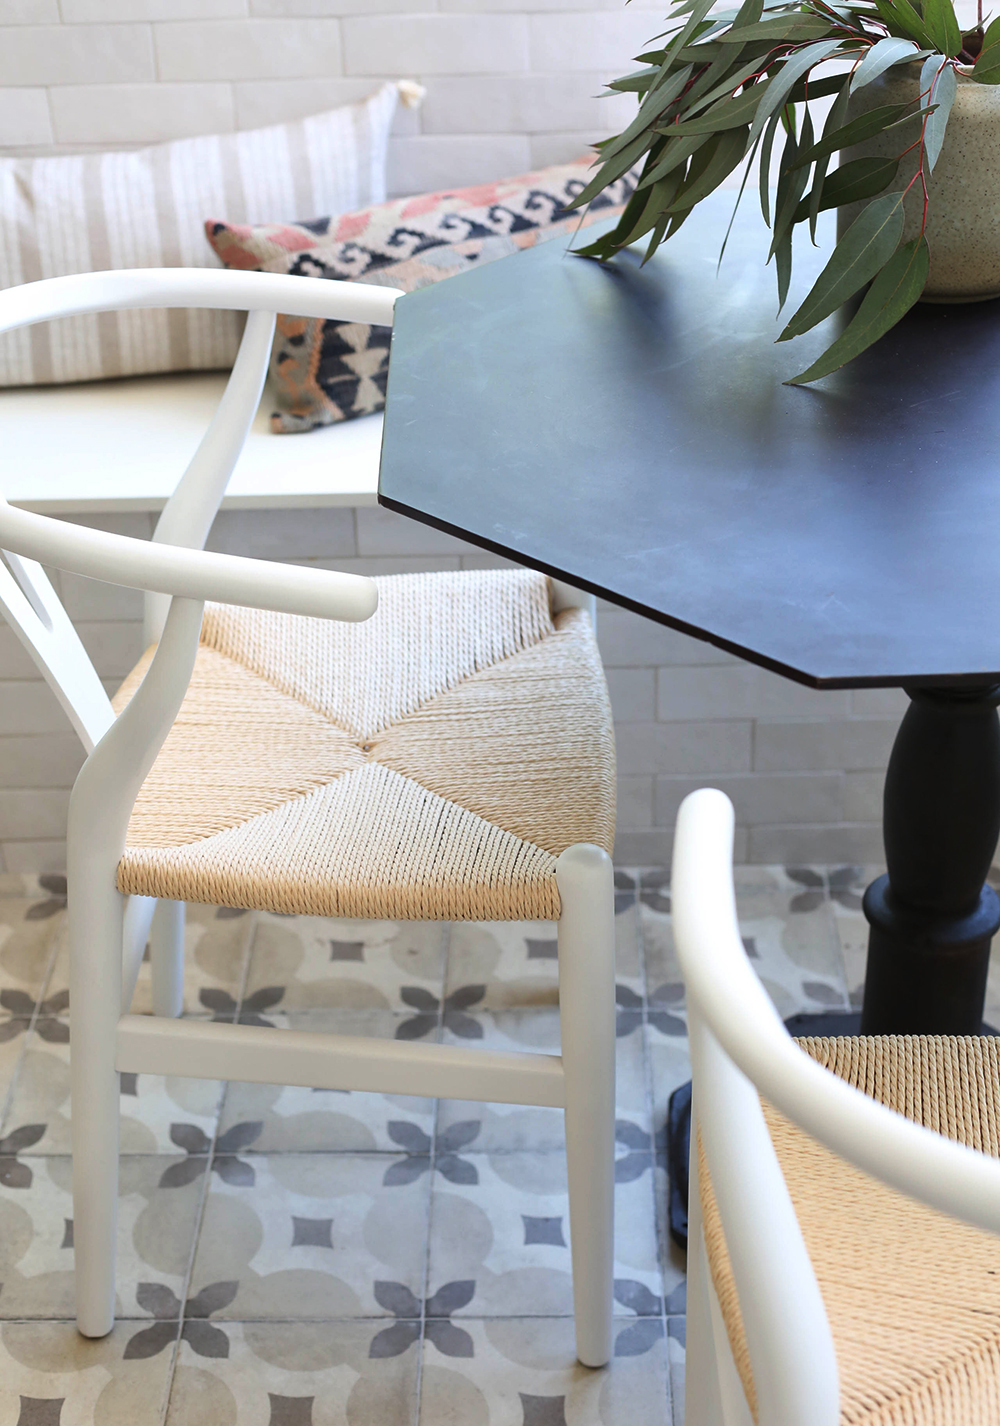
My biggest tip for selecting kitchen colors and finishes is to let your starting point be whatever is the hardest thing to source (or the hardest thing to change in the space if you’re not starting from scratch). For us, the trickiest selection was the floor tile, for sure. I wanted a patterned tile, but I wanted something more affordable and durable than cement tile. We totally scored with this neutral patterned porcelain tile (similar) that was only $5/ft! Once we figured out the tile, it was easy to pick cabinet colors, wall tile and and counter material from there. When you start with the tricky part, the rest of the design will fit together like puzzle pieces. Because we all see so many amazing kitchen designs on Pinterest all the time, it can be hard to narrow down a favorite color or material when it feels like there are infinite wonderful options! But this approach makes it easier to eliminate good options in favor of the right-for-the-house option.
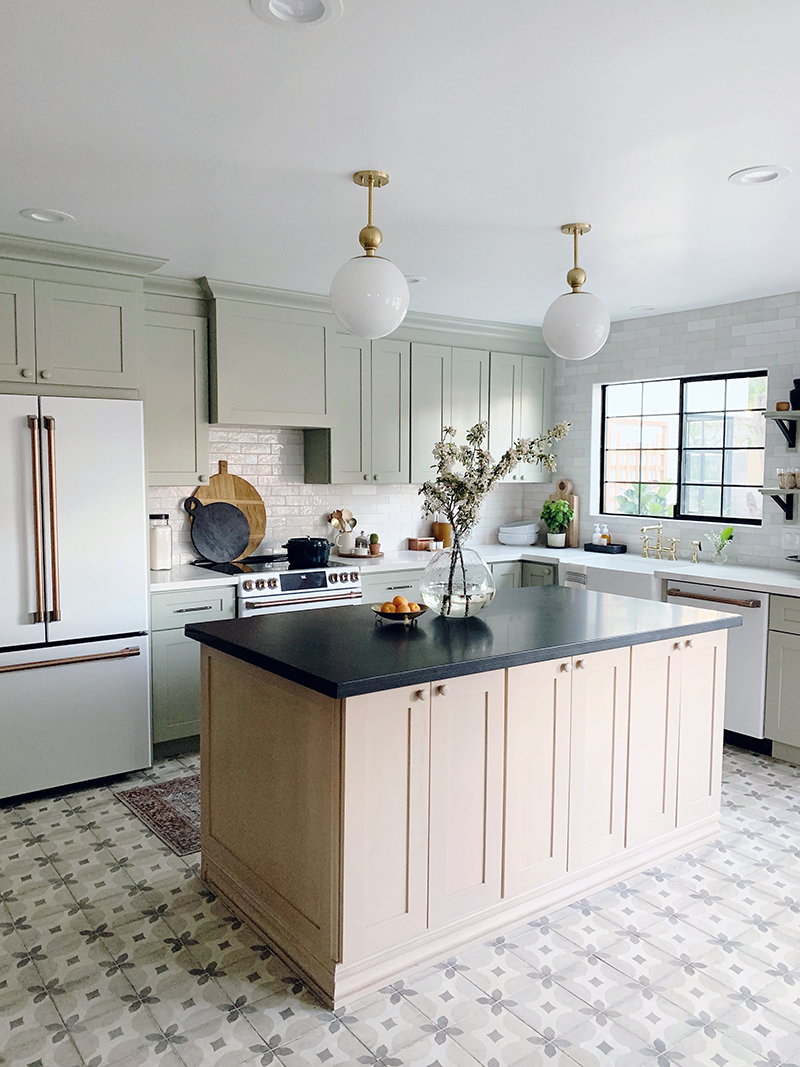
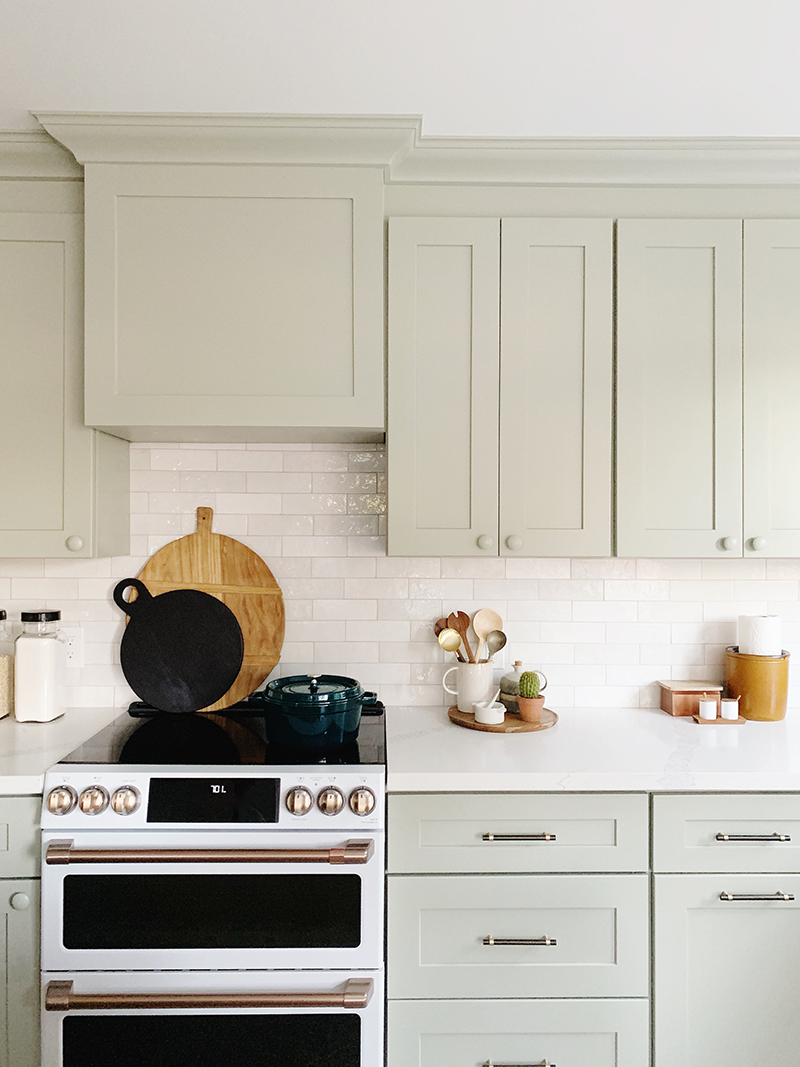
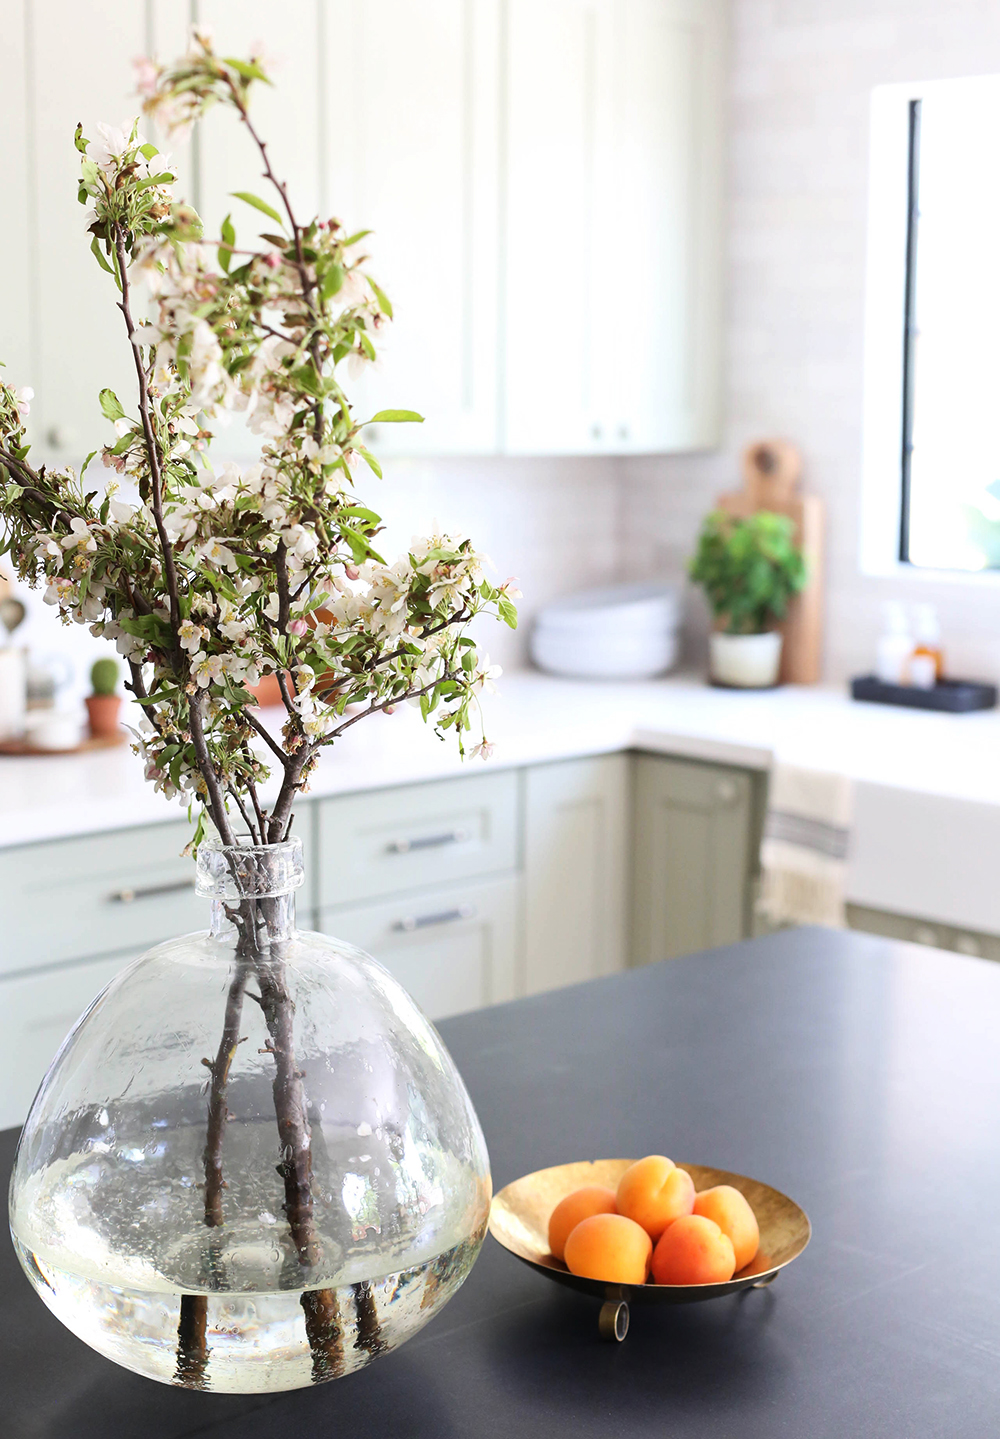
Once we got the floor tile samples in, we saw there were some green undertones in the tile and that gave me the idea of doing a sage green perimeter cabinet color. (See what I mean about how once you make the hardest decision first, it’s easier to narrow down options?!) Our cabinet company, CabCo Cabinets, offers unfinished maple cabinet options, so we went with a gray-blonde island to mix things up a little. We actually had our painter brush on a gray-beige acrylic paint wash on the raw wood cabinets and I really like how it turned out! It adds a lot of warmth to the room without darkening the space. And to add to the cottage/traditional look, I chose painted and stained wood knobs for the cupboard doors and all of the drawers on the island. I love, love, love this look!
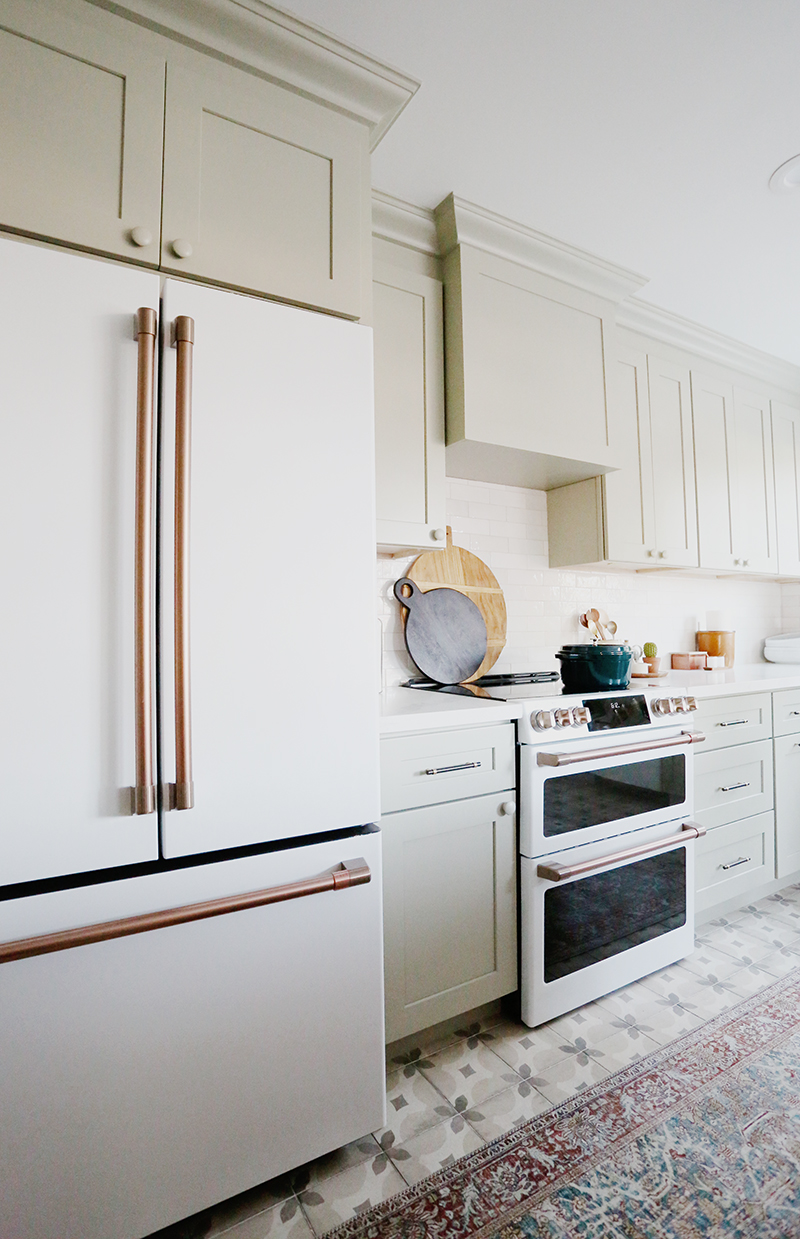
Another way we worked to keep the space light was with the matte white Cafe Appliances. They are GORGEOUS and every single person who comes through the house has asked about these appliances! They come in a few different smudge-resistant matte finishes and the handles are customizable as well – I selected the Brushed Bronze option. I only wish this house had a gas line because I LOVE their gas burner range, but the double convection/induction ovens on our electric range are pretty amazing. The fridge is my absolute favorite – the proportions are perfect – and I love that it has a water dispenser on the inside for a solid front door! I couldn’t recommend the Cafe line more if you want a high end look at a more affordable price point.
I love to mix metals and finishes in a kitchen – I think when it’s done right, it makes a kitchen look more custom and less cookie cutter. I used a lot of brass finishes in the lighting and on the appliances, and a little black/bronze in there too with the drawer pulls and shelf brackets. I think little hits of black keep the eye moving around a space and provides some good balance.
Speaking of black and high contrast, we went with white quartz from MSI called Calacatta Venice for the perimeter countertops. It’s affordable and much easier to maintain than marble but gives a similar look. I like the subtle veining in this one! For the island we found a black honed granite remnant and I love the mix of materials! Granite is a total workhorse in a kitchen, and I love honed jet black granite the most because it doesn’t have any speckles and can pass for soapstone or honed black marble, which are much more expensive materials.
The backsplash is another favorite moment in the design for me. We opted for floor to ceiling handmade subway tiles from Bedrosians Tile. We even installed the tile on the front of the banquette bench! The tile is from Bedrosian’s Cloe line in White and we used Mapei Alabaster grout. The subtle color variation in the tiles is my absolute favorite. It adds such a beautiful, textural layer to this space. And the price is so, so reasonable at under $7/ft. I’m obsessed and can’t wait to use these tiles again in another project. Maybe the square size? And maybe the pink or the blue next time?!
My final tip is to save some room in your kitchen reno budget for pretty organizational items and accessories for styling, which absolutely put the finishing touch on any kitchen! Even just a little bit of styling for your surfaces will help to cozy up your kitchen. We’ll be sharing more how-to’s for kitchen styling soon and on the @juniper.home instagram account, because heaven knows this post is loooooong enough already! :) We’ve tried to round up all of the sources for you here, but for sure let us know if we missed anything in the comments!
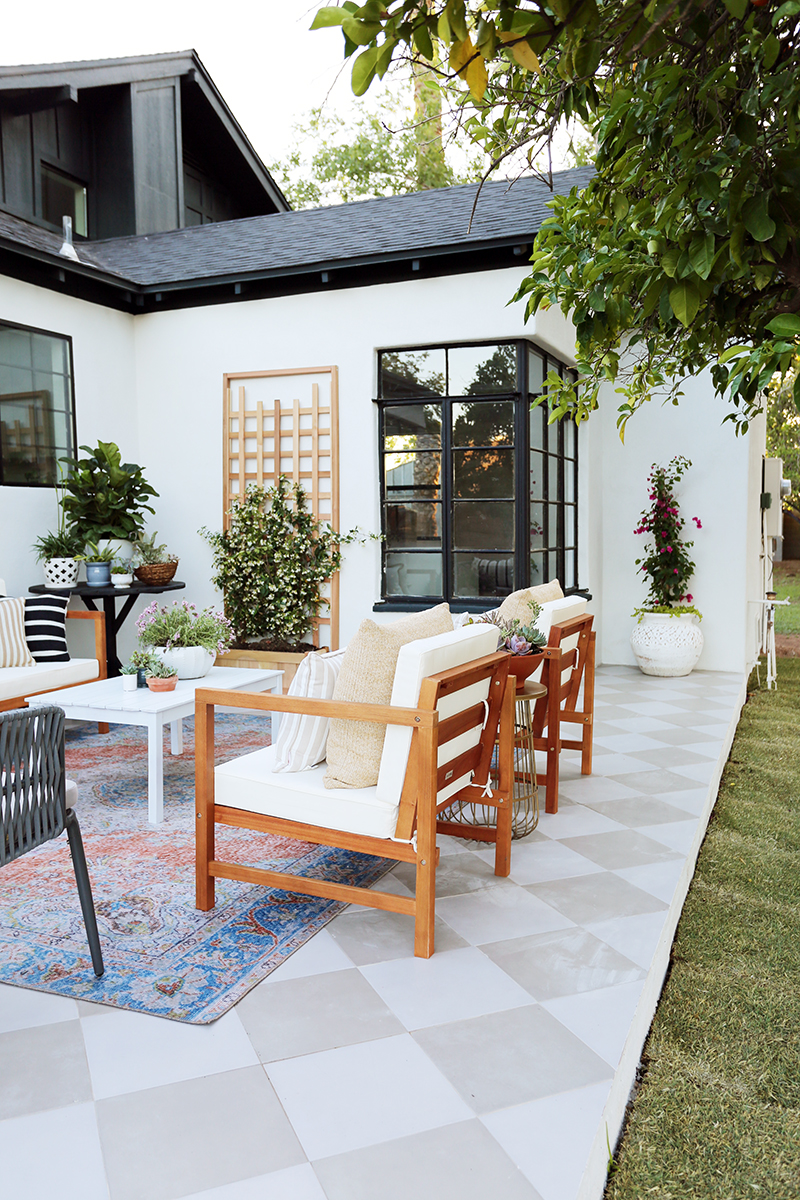
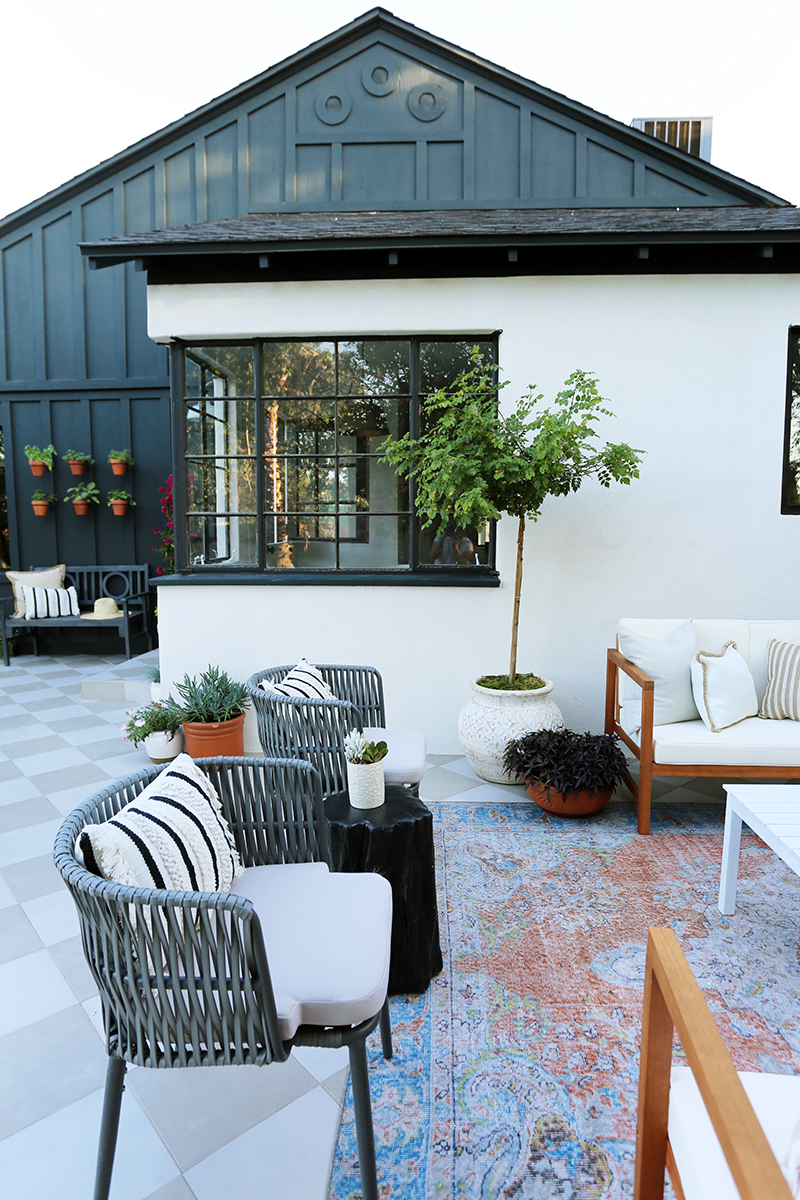
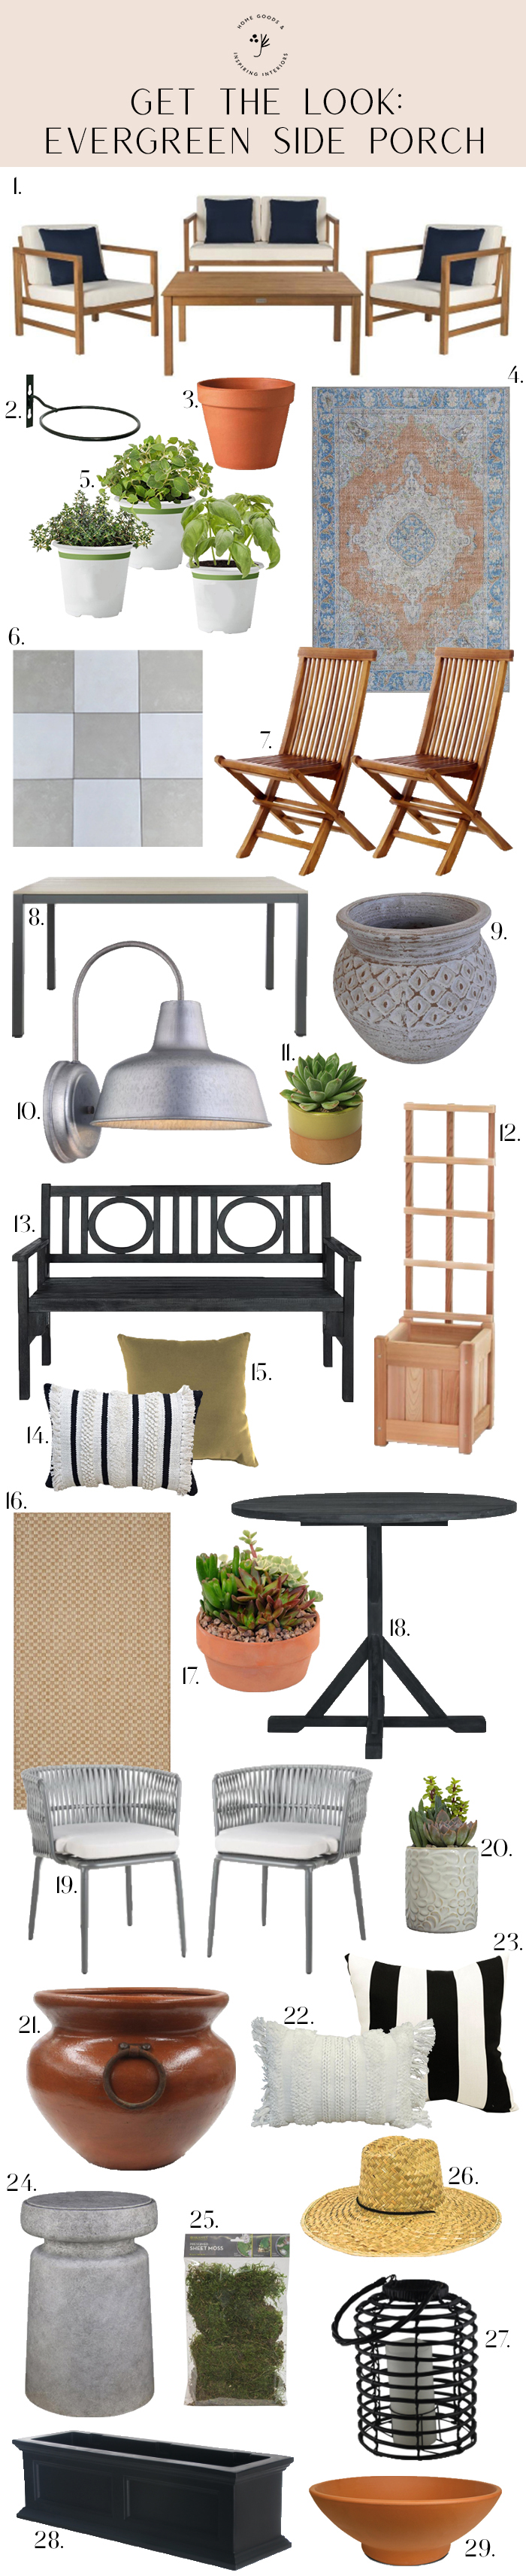
This post series is sponsored by Lowe’s. The first time we walked the Evergreen house, when we were considering whether or not to take on the house as a rehab/flip project, I knew that the side porch had major potential to be one of my favorite spots in the house, even though it needed a…
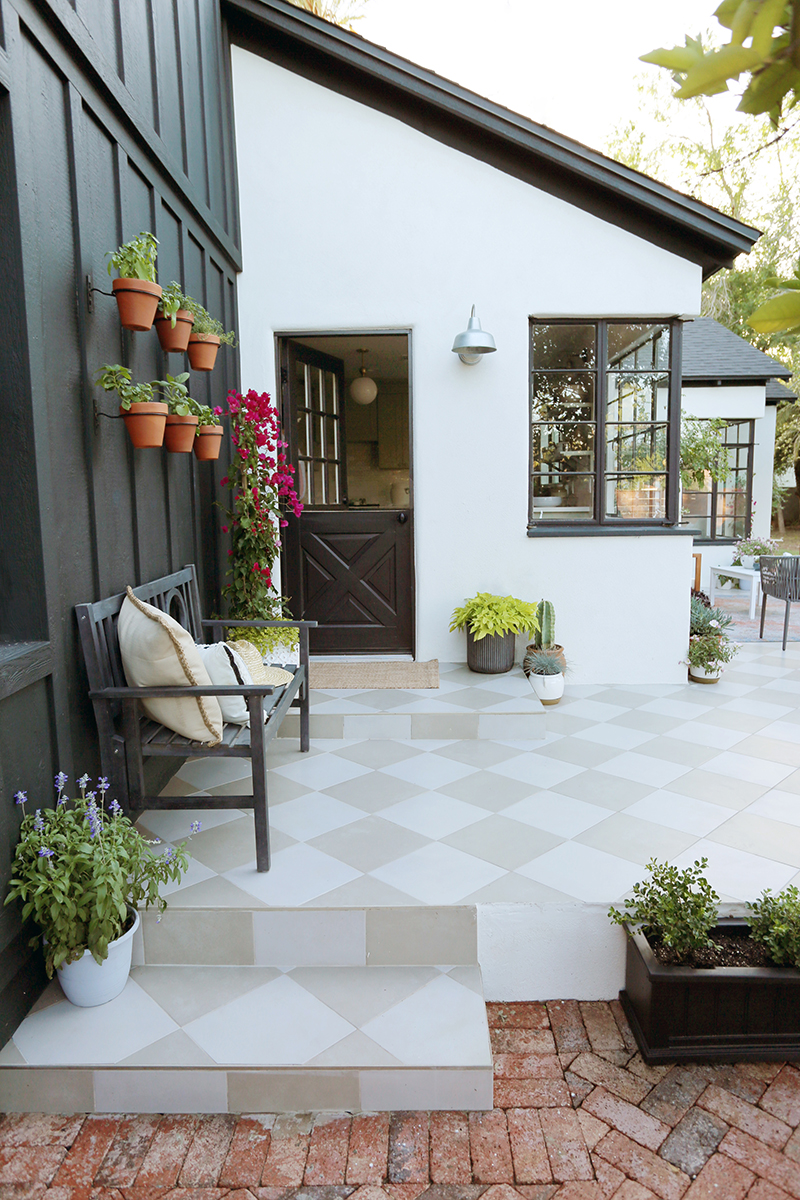
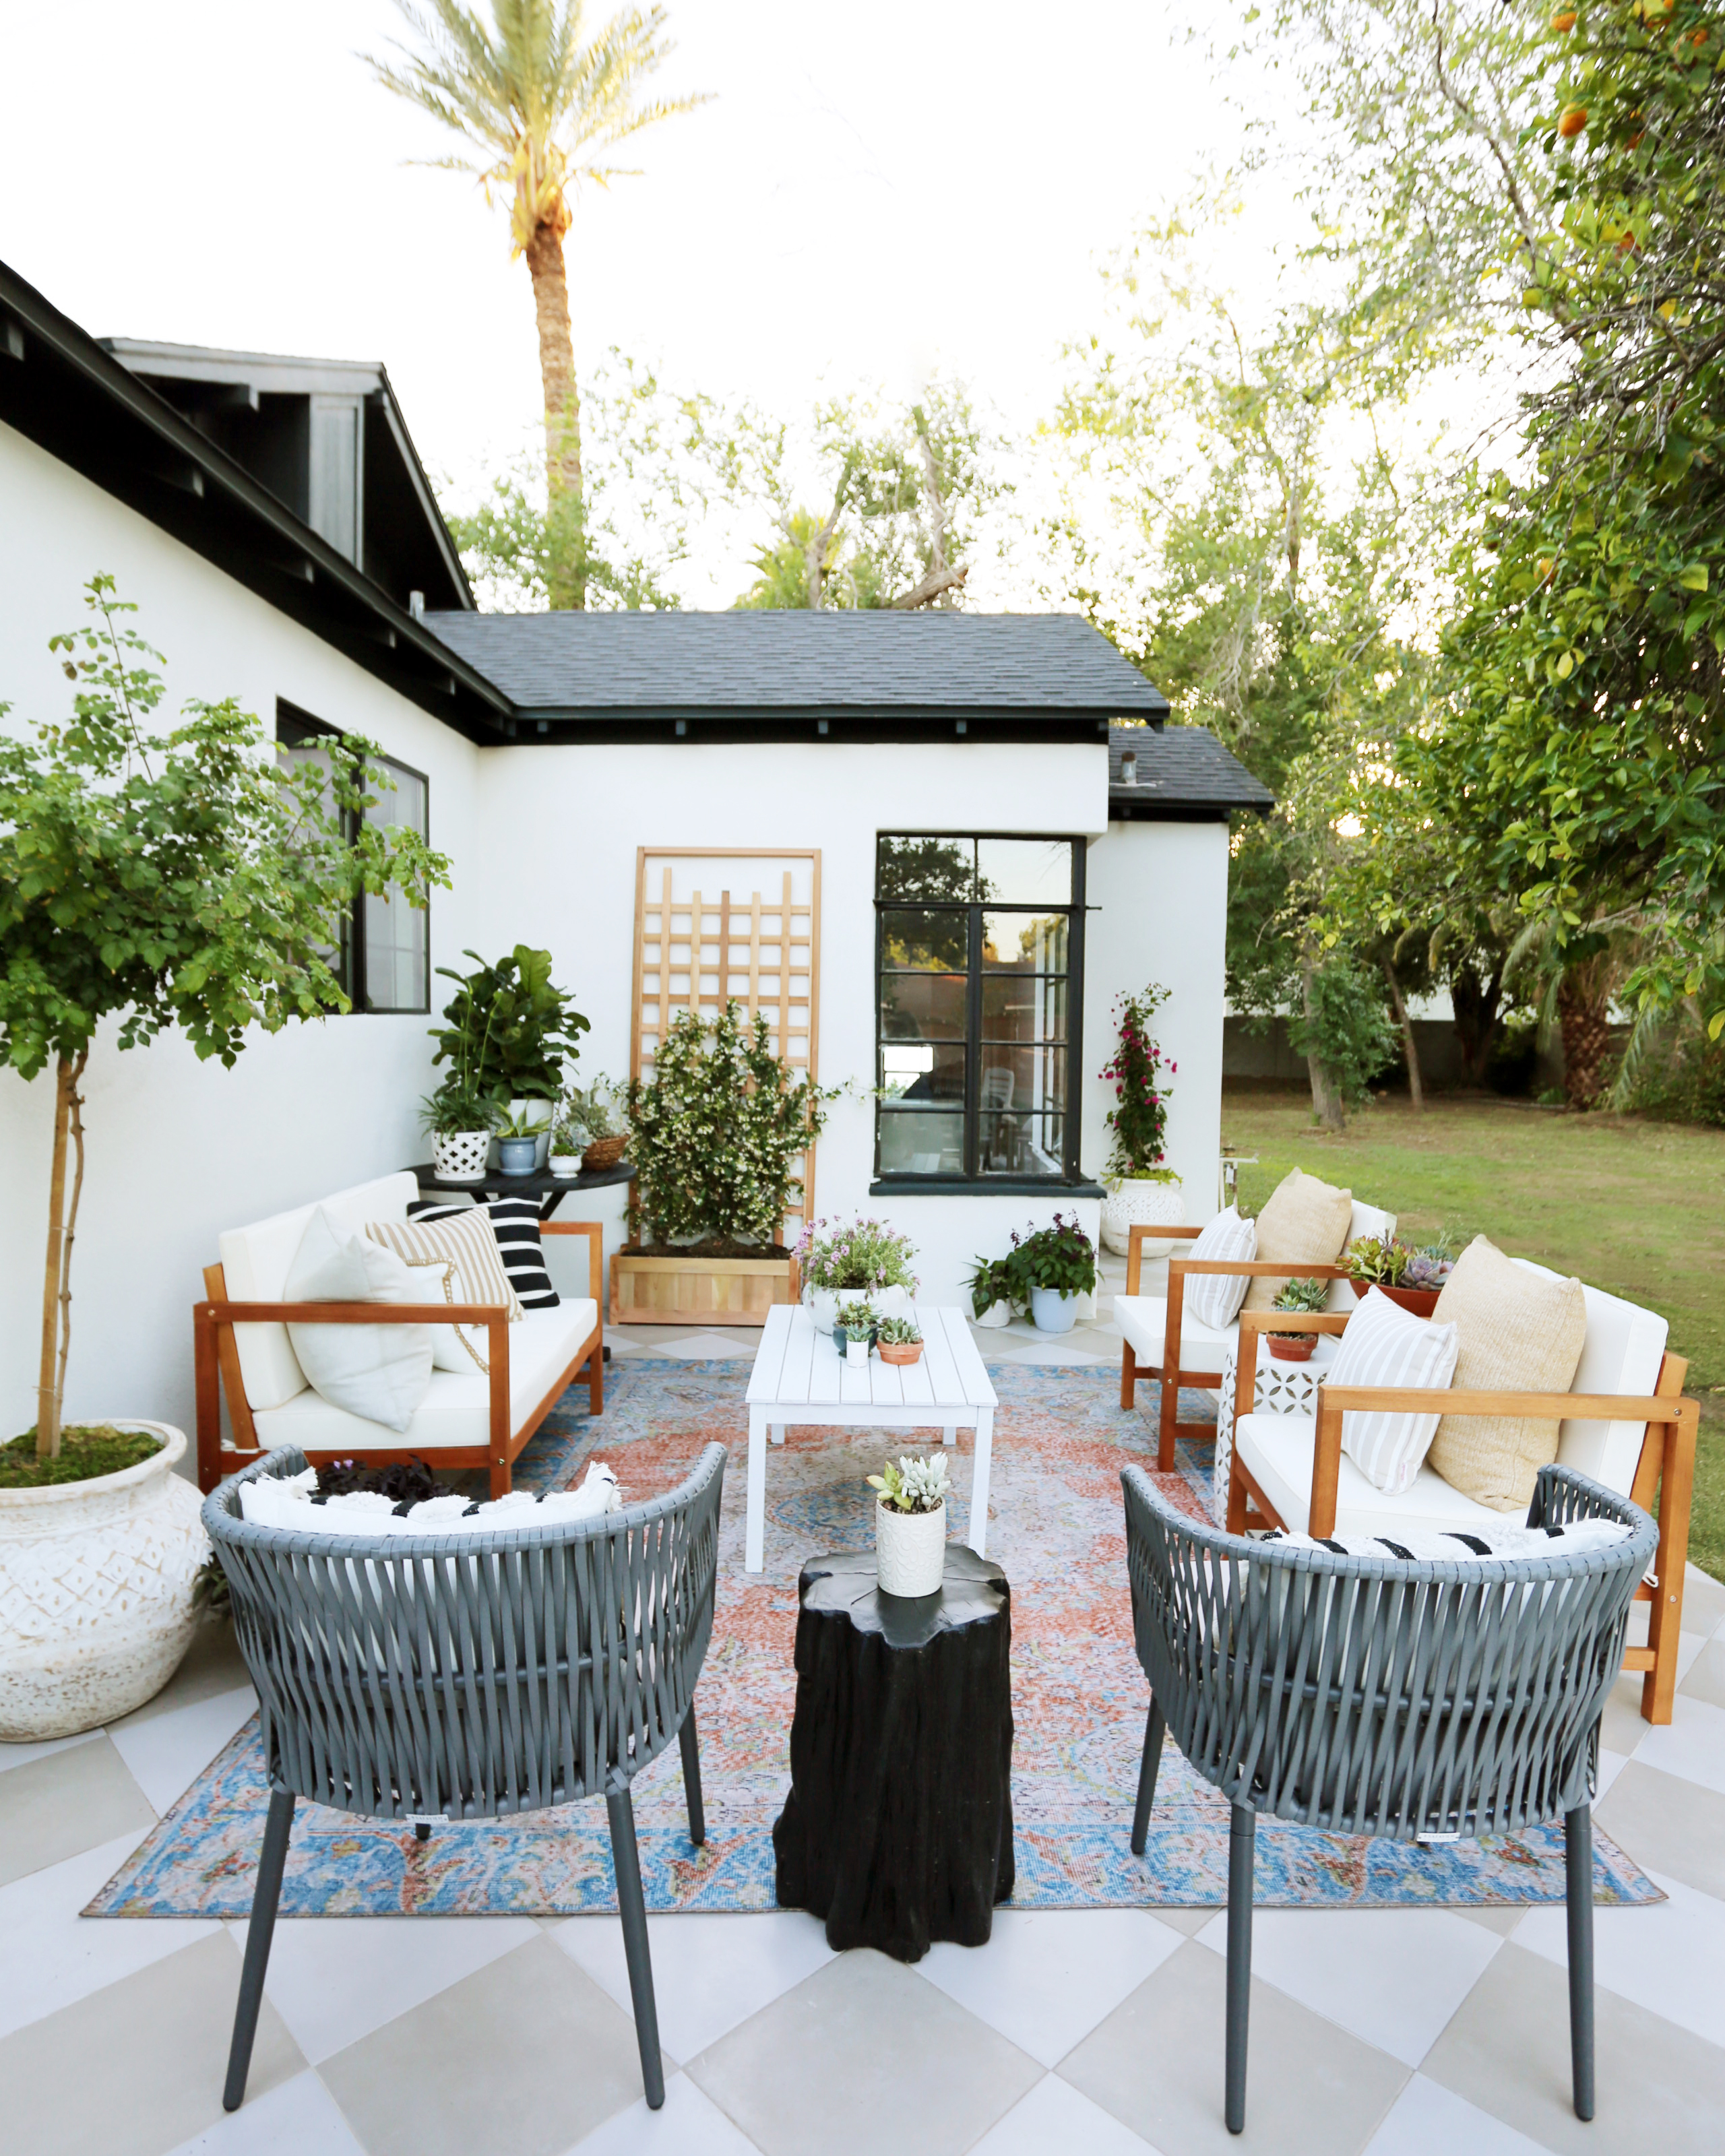
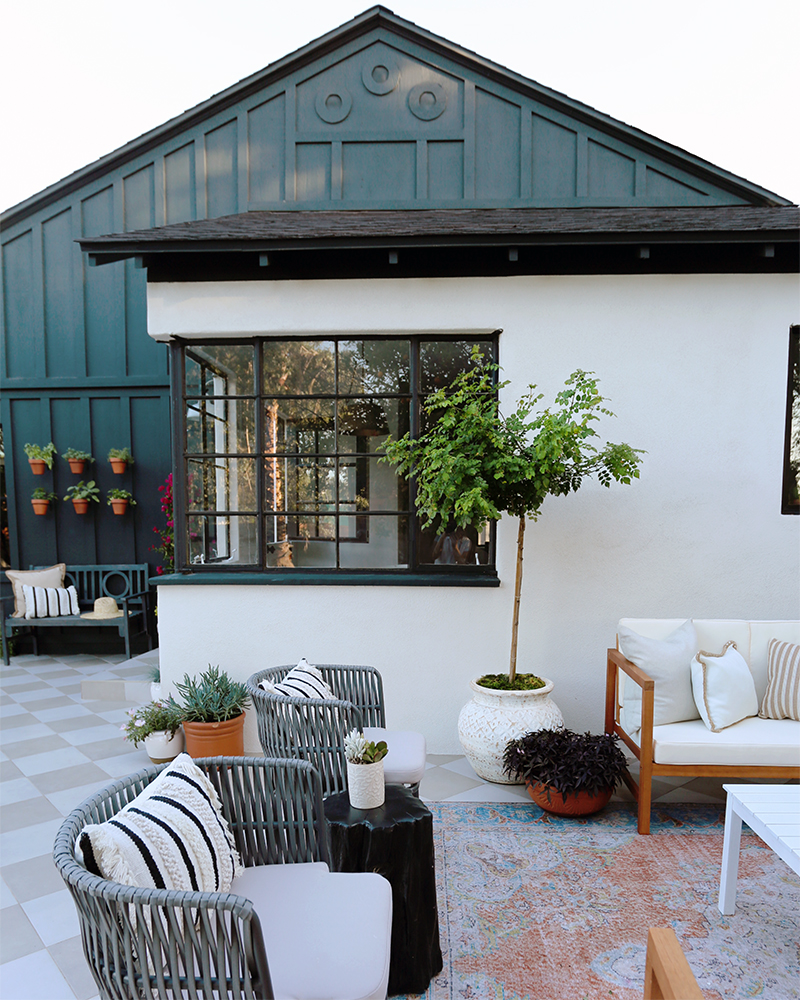
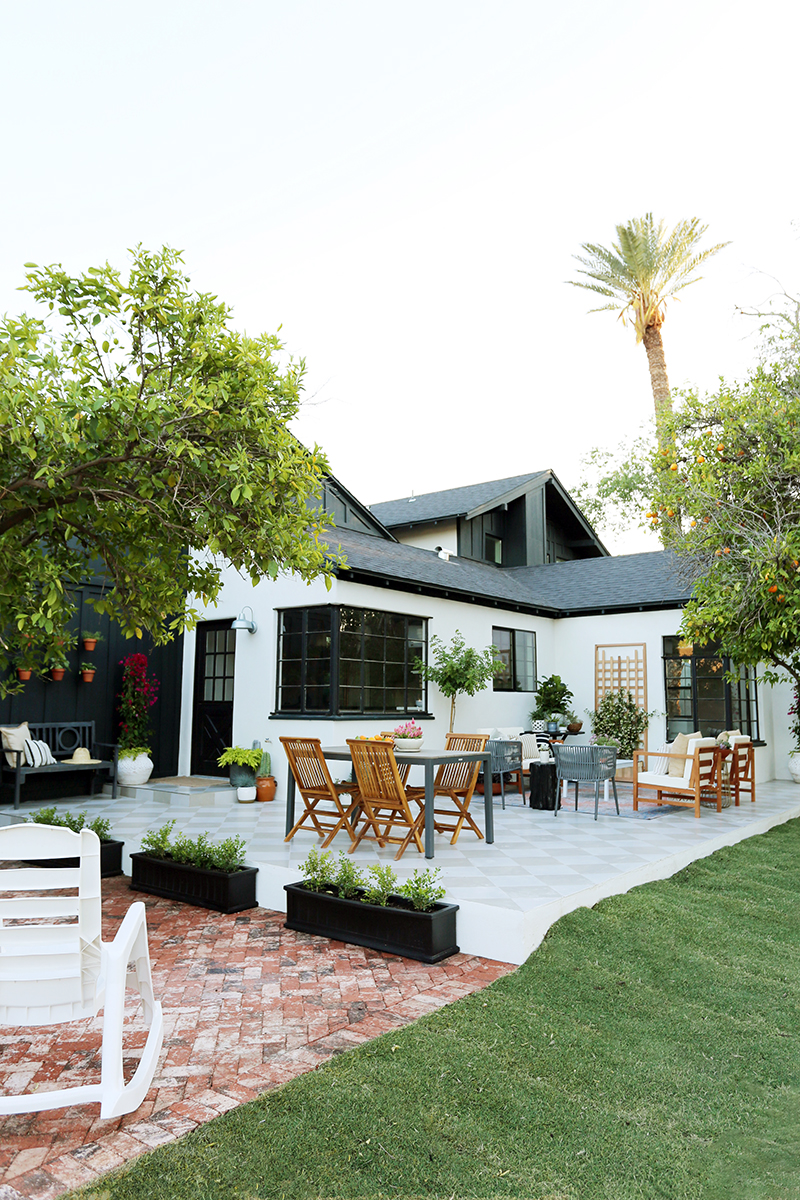
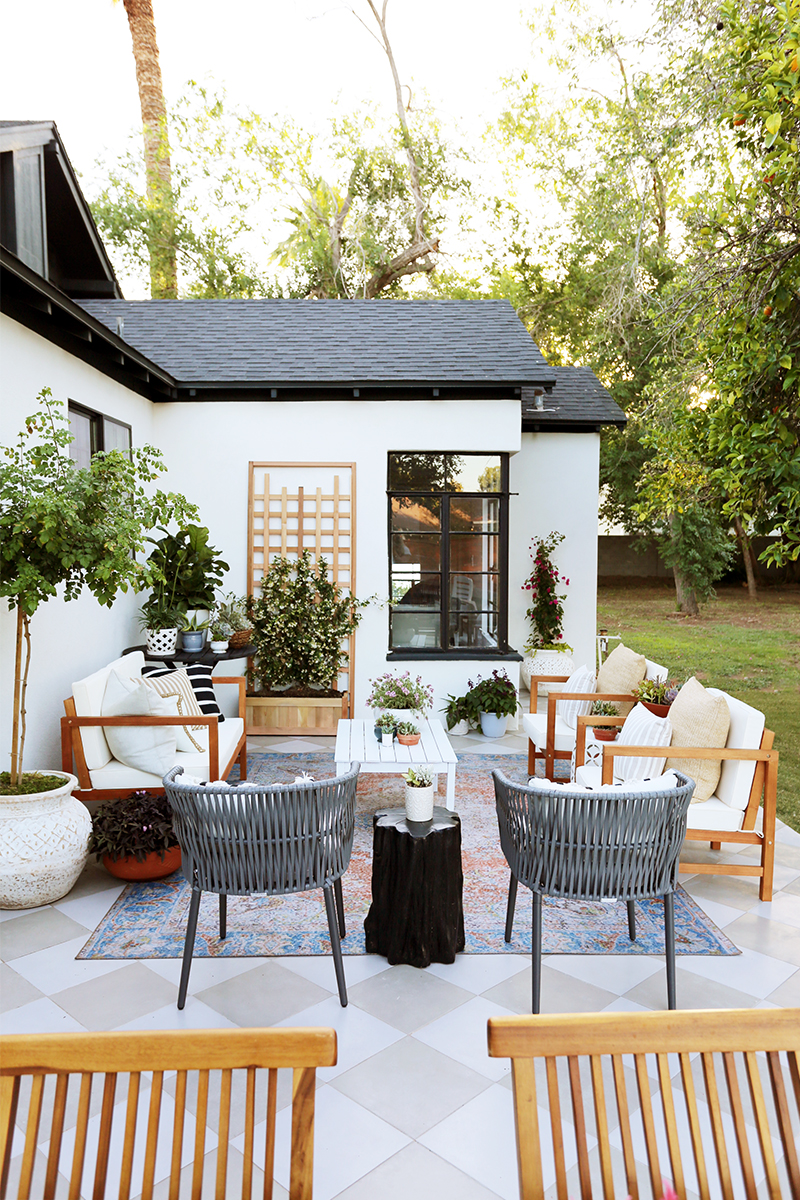
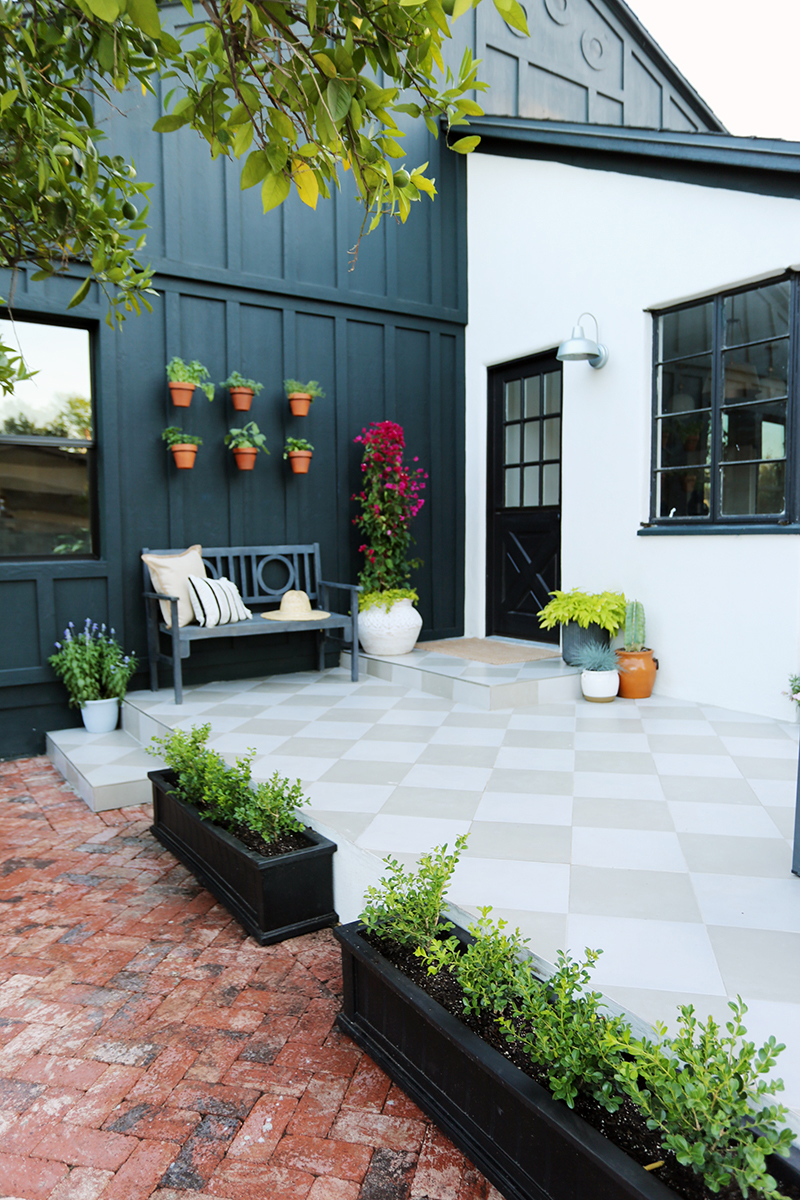
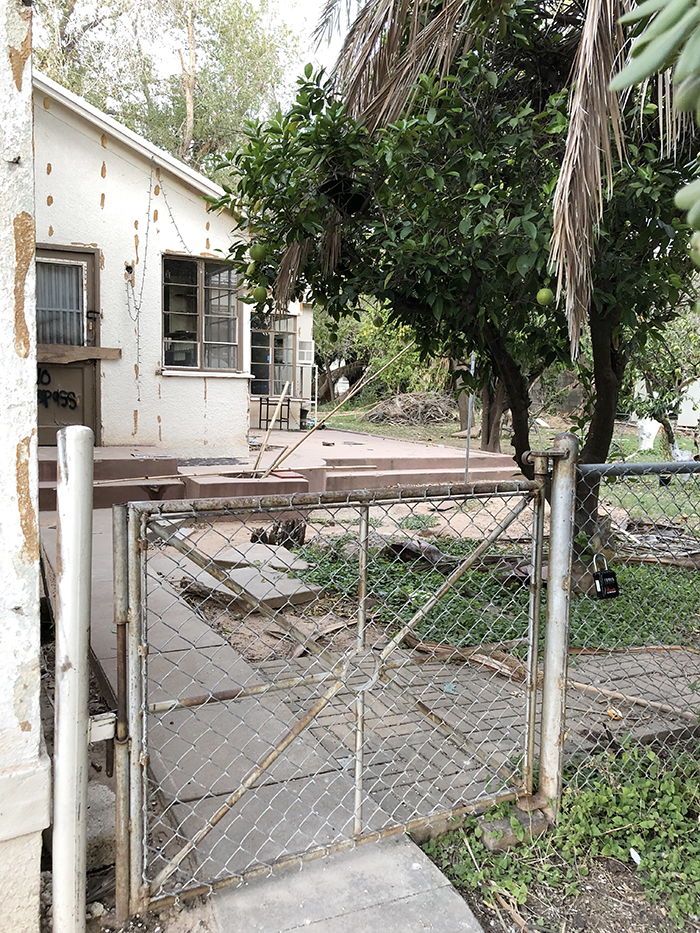
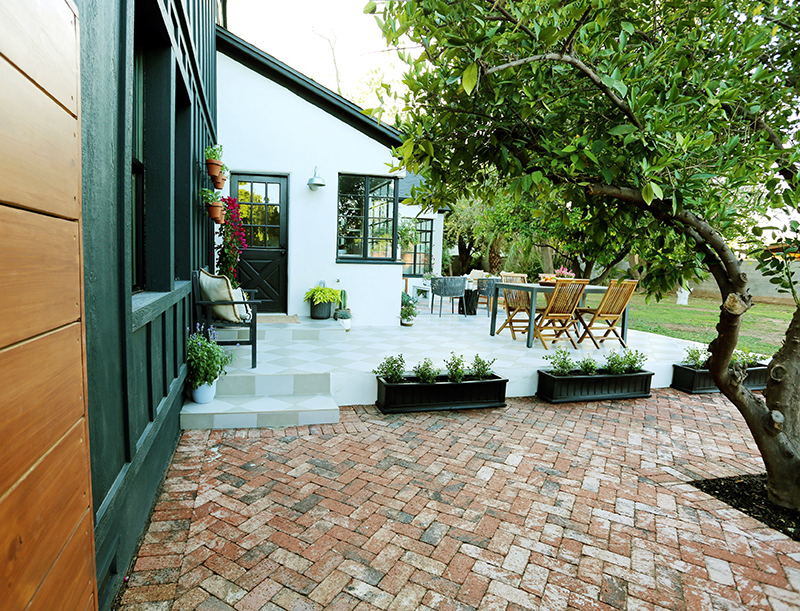
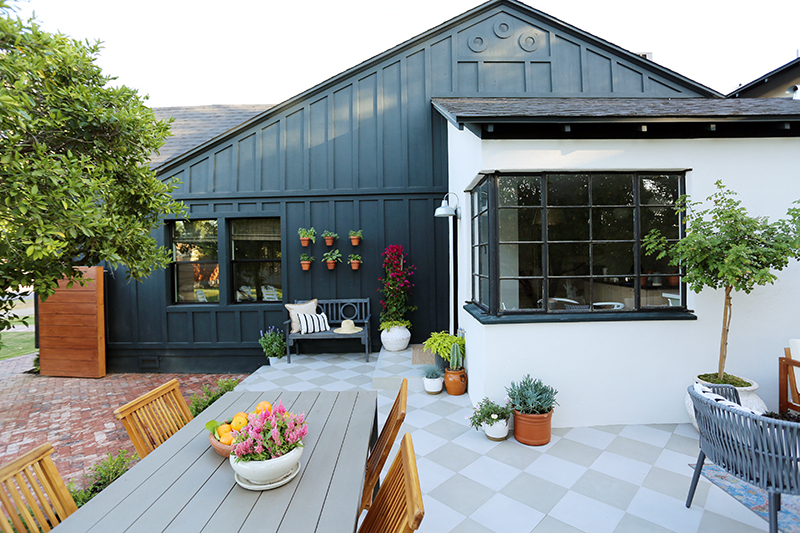
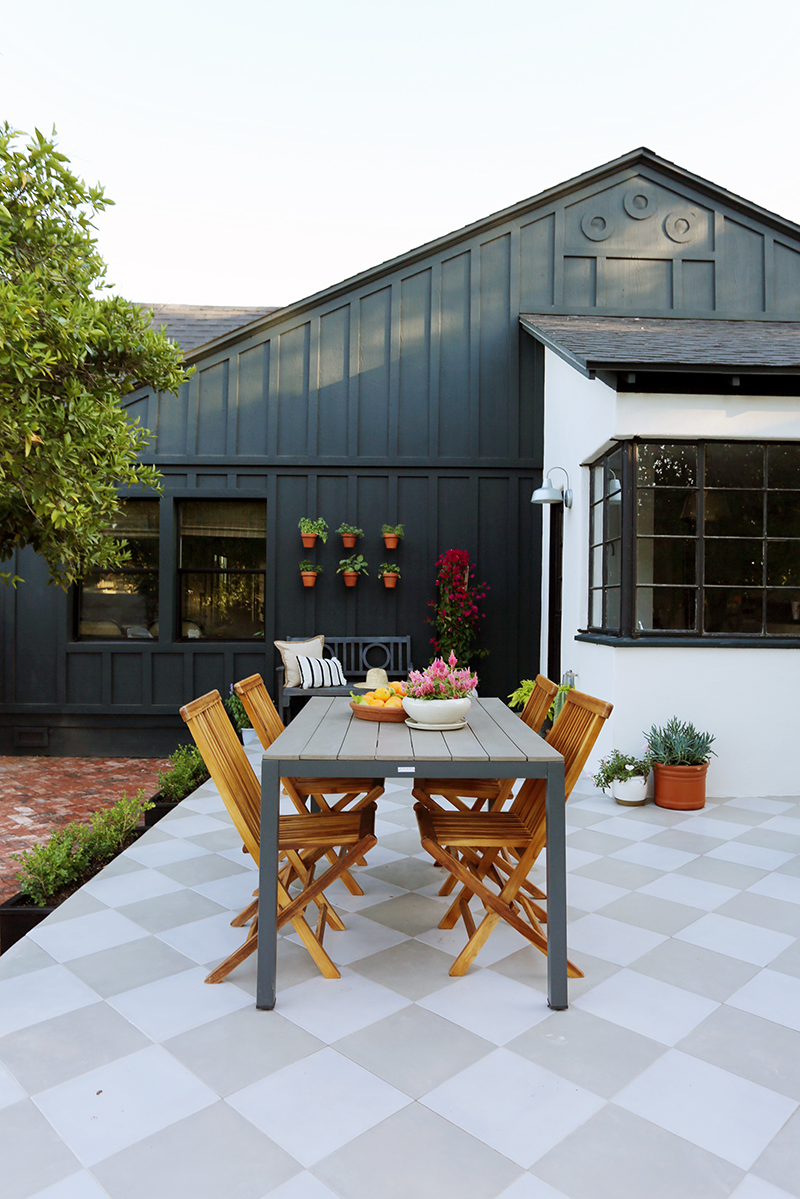
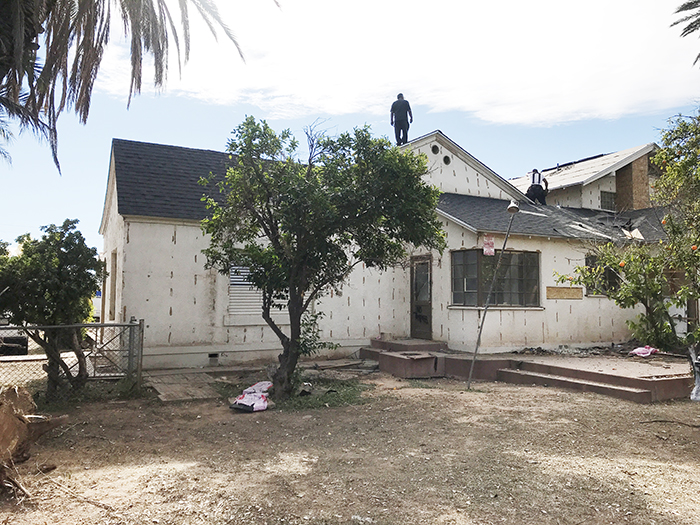
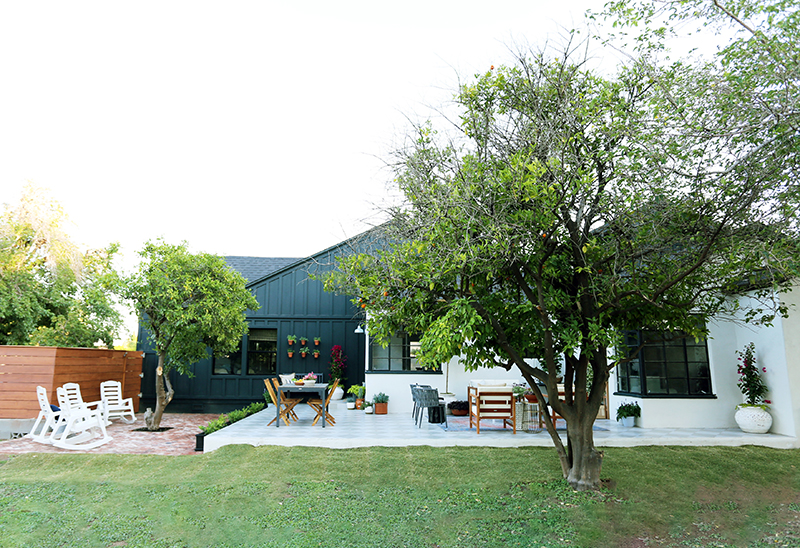
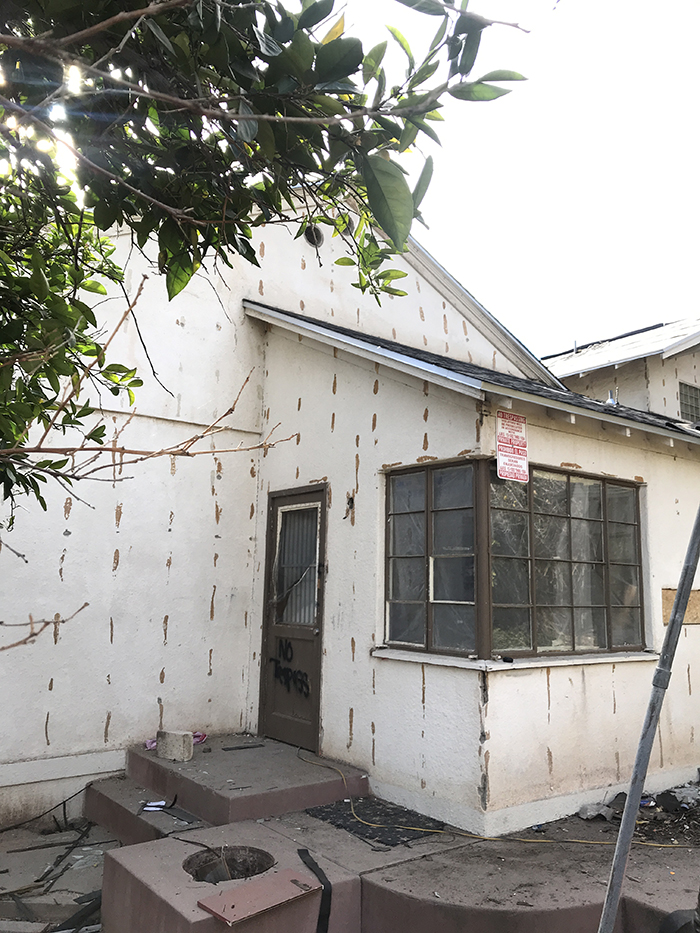
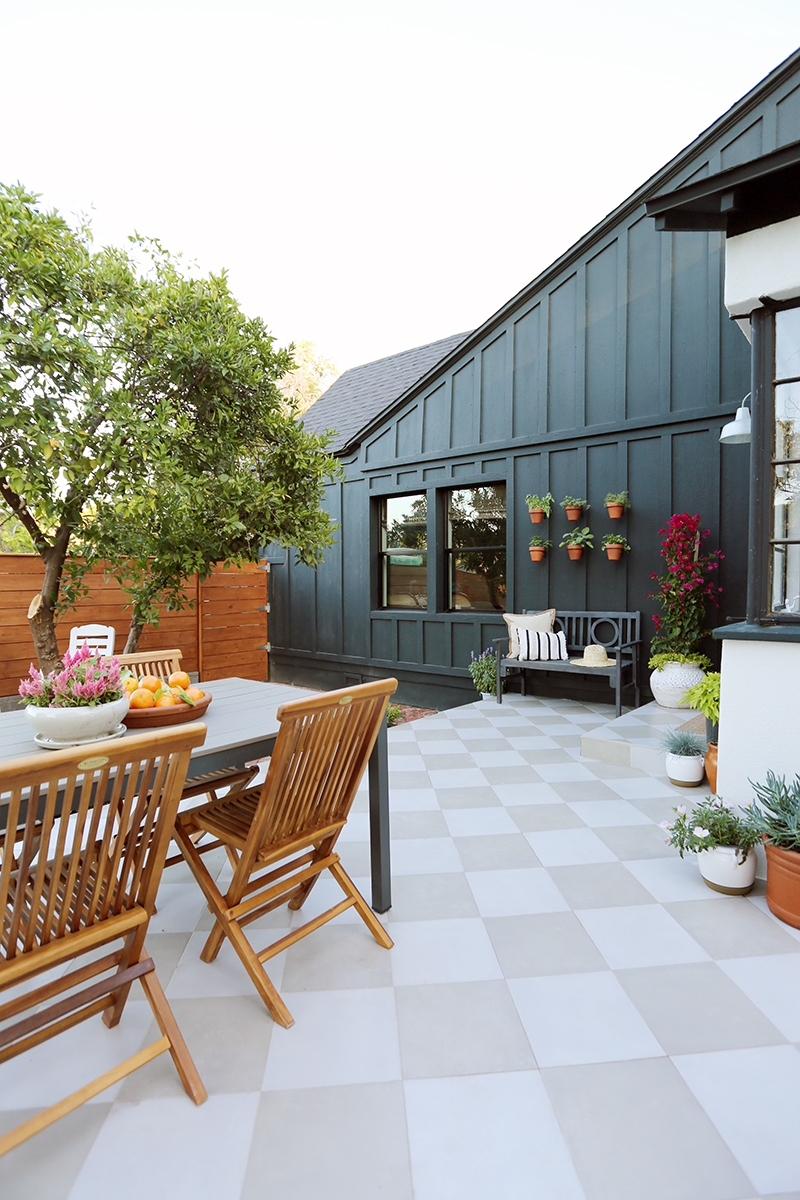
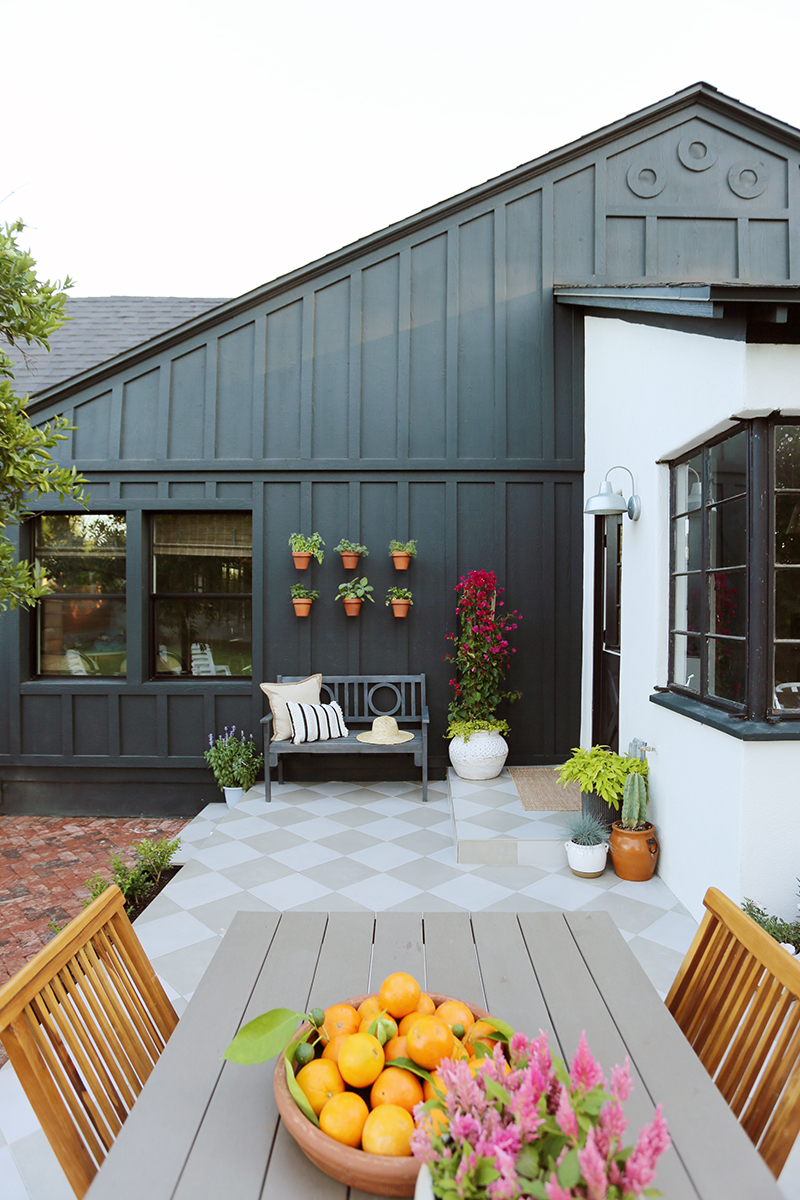
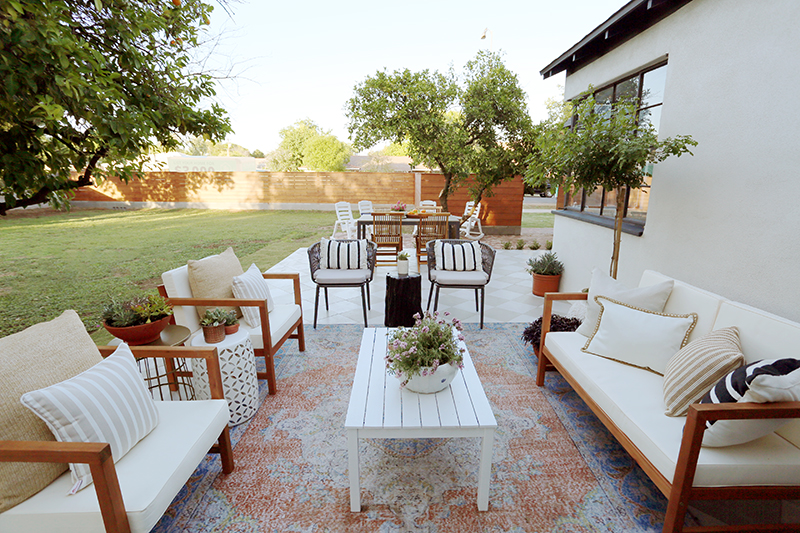
The first time we walked the Evergreen house, when we were considering whether or not to take on the house as a rehab/flip project, I knew that the side porch had major potential to be one of my favorite spots in the house, even though it needed a TON of work. Like, I’m not saying “it wasn’t much to look at” – it was downright SCARY looking (scroll down for the befores!). So when we partnered with Lowe’s on the exterior of the house, and I started finding amazing and affordable materials like the $2/ft checkerboard tile and the gorgeous brick pavers we laid in a herringbone pattern, I breathed a big sigh of relief and started to get REALLY excited about the potential of this space.
It’s truly amazing what can happen in just a few months time! Look how far we’ve come!
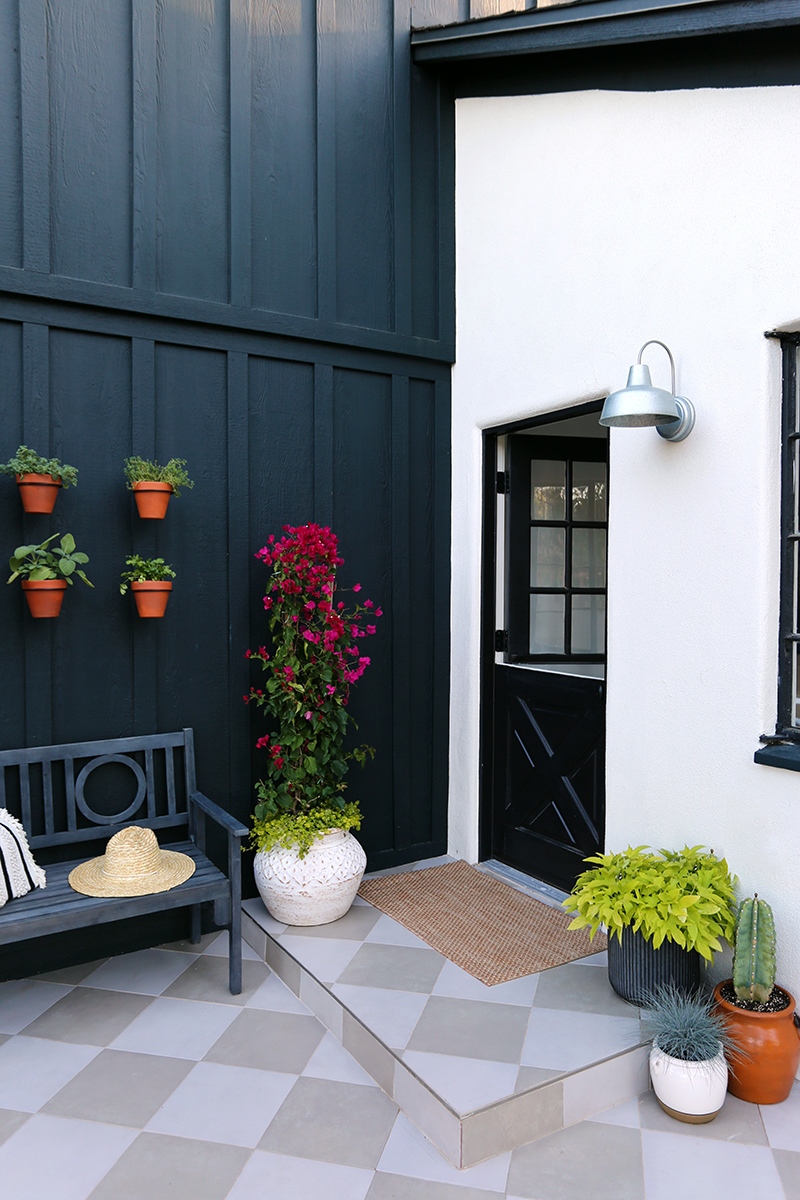
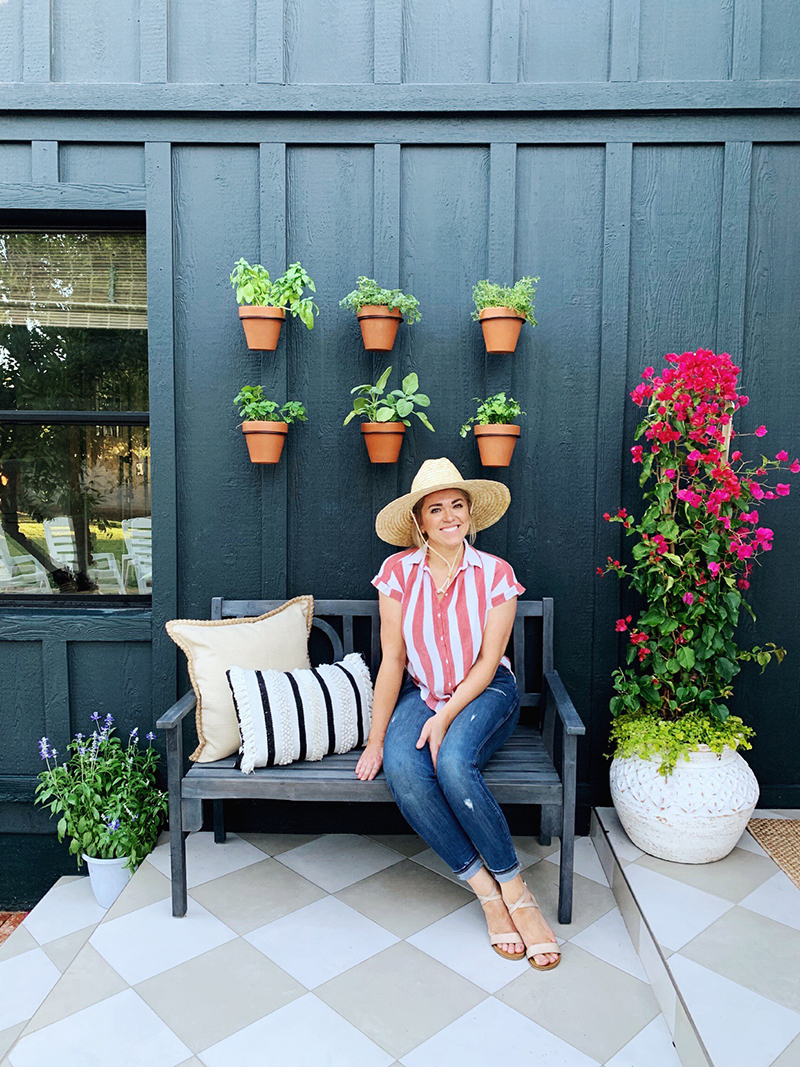
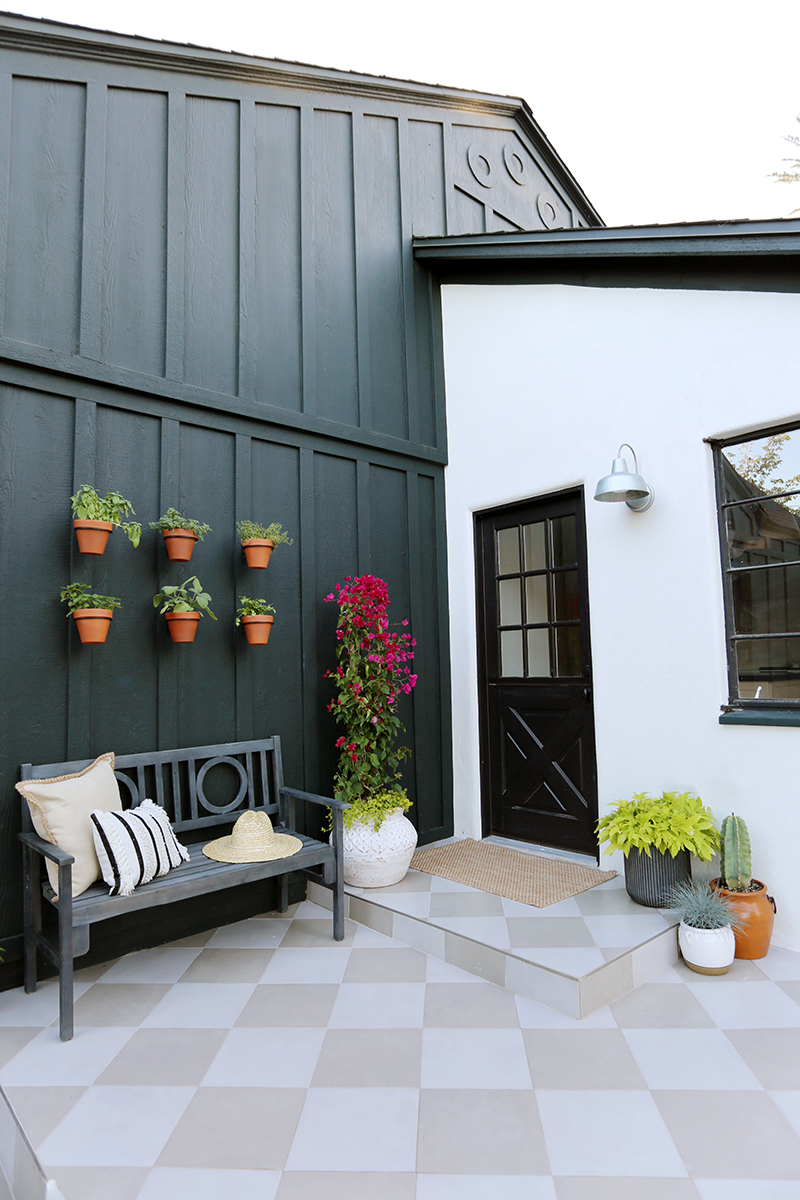
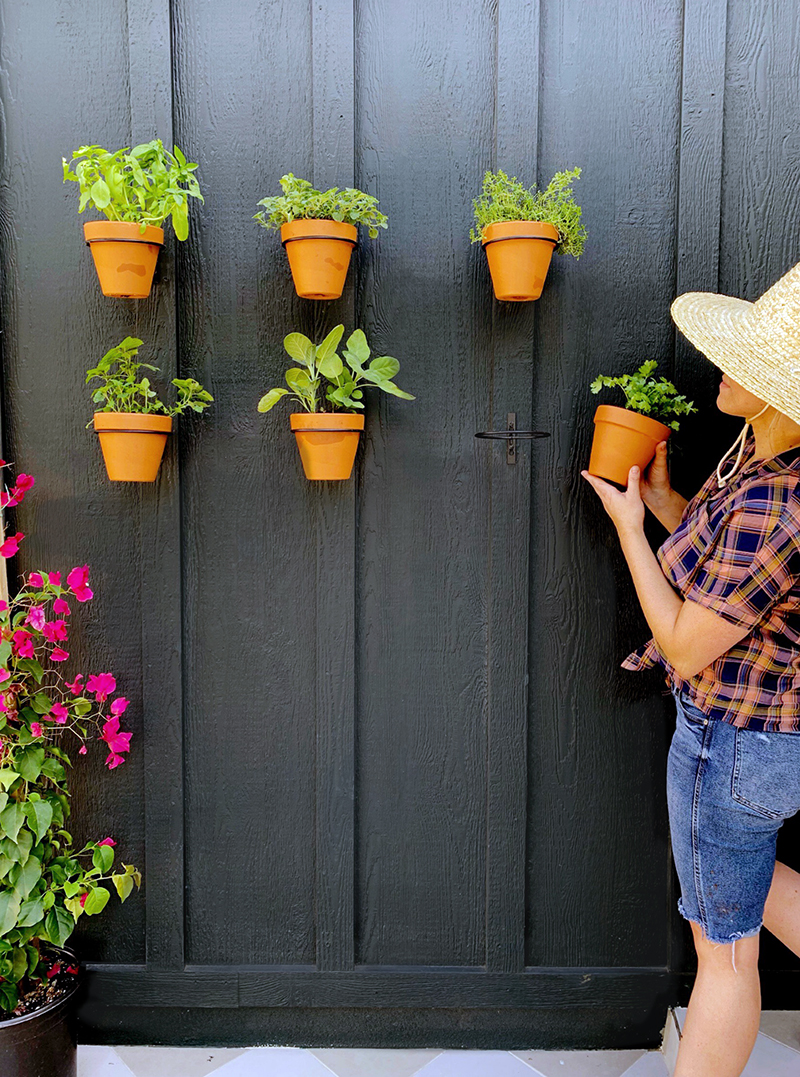
One of my favorite moments in this space is the wall herb garden we hung right by the door to the kitchen using these black metal rings and 6″ terracotta pots! It took about five minutes to hang and every visitor has been commenting on this simple addition! I love easy, affordable and impactful projects.
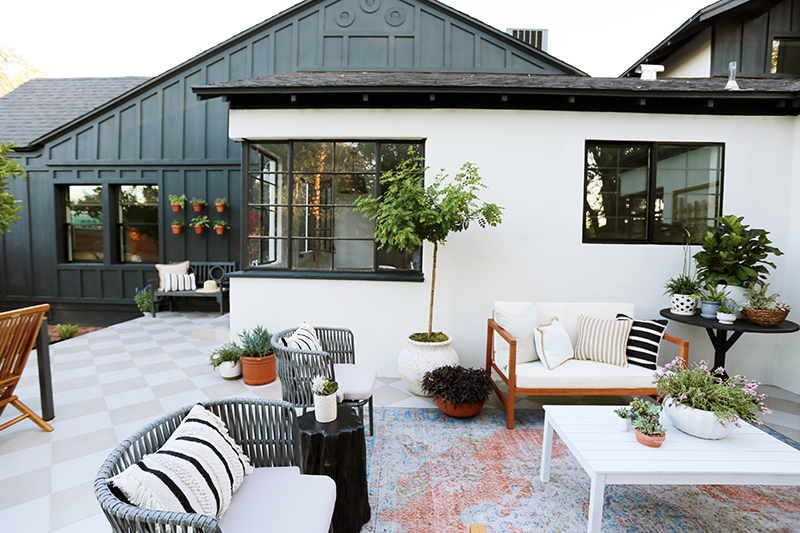
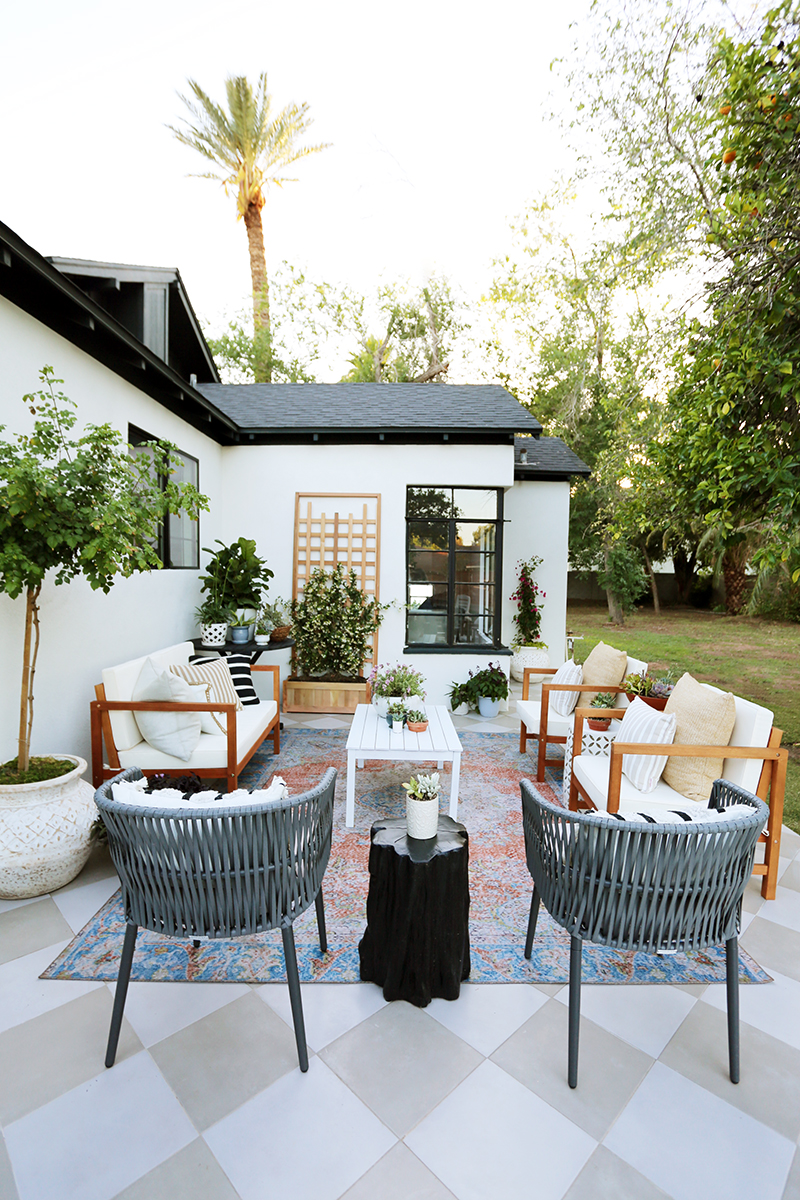
I honestly couldn’t be happier with this side porch! I love the mix of materials, the flow of color and pattern, and just how many areas we created for gathering together! If you’re looking for our sources on the Lowe’s site, look no further! We’ve got you covered here and would be happy to answer any more questions in the comments!


