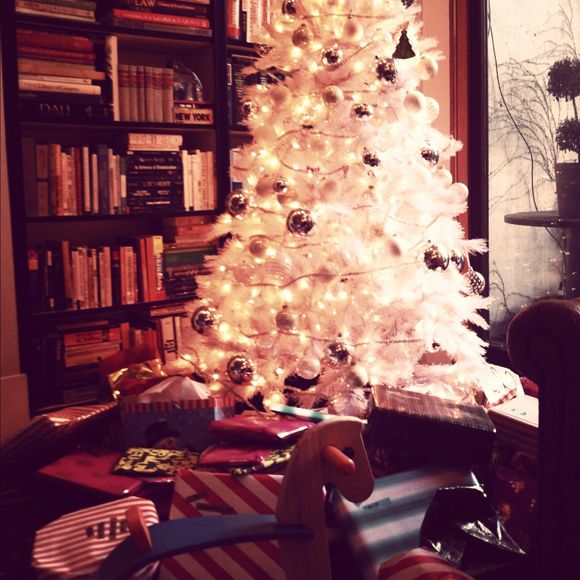
We’re in full Christmas mode today! If you celebrate Christmas too, I hope it’s a lovely day for you and your family!
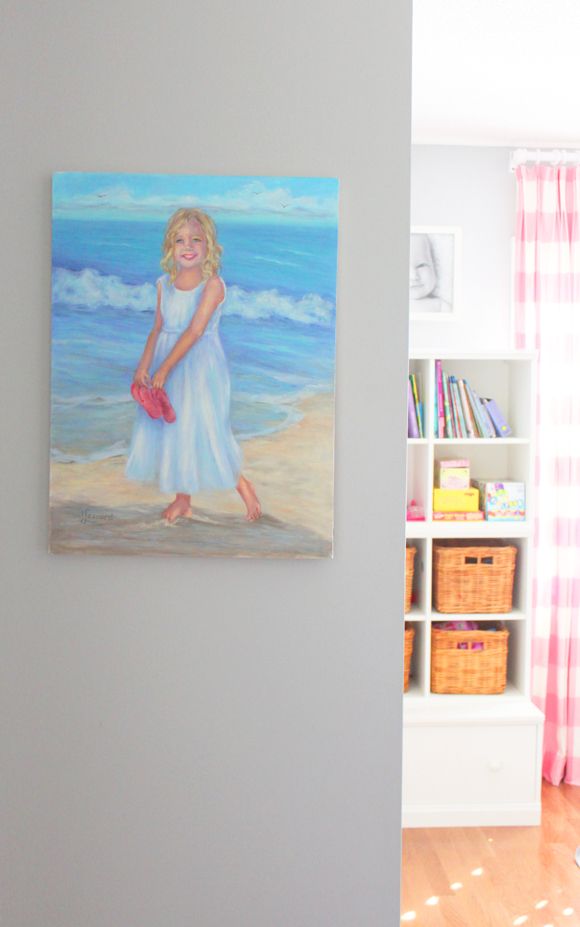
My friend Kristen Dowd from Gypsy Soul Interiors in Dallas (who shared projects with us here, here and here) has decorated her home so beautifully for the holidays and I thought you’d like to see it too before the big day has come and gone. So much inspiration everywhere! Also, in addition to doing online interior design consultations, Kristen is a talented artist. She is offering 15% off custom paintings for LGN readers (just email her for details). This is one of her paintings below.
Your home is lovely! What a transformation! Will you tell me about how much of the work was DIY and how much was contracted out?
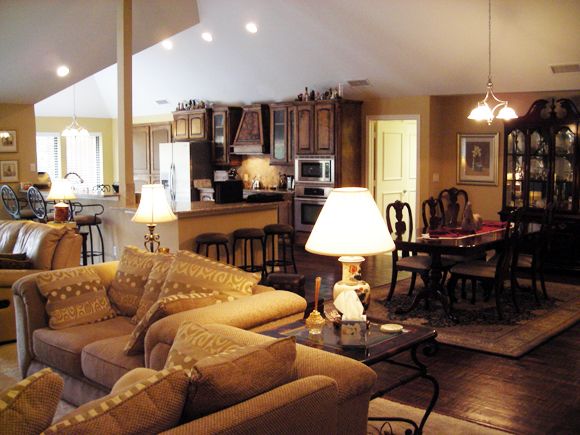
We bought the home in 2009 and absolutely loved the layout. The area of town we live in is filled with amazing sprawling ranches that were built in the early seventies. Lucky for us, a builder had recently completely renovated the home and had taken out nearly every wall in the living area. Our kitchen is open to the dining room, entry, living area, breakfast area and bar. At the time we had a 1 year old, and open living is so easy with little ones. We now have a 5 year old and a 7 month old and I am still loving the floor plan.
Here’s the before-we-moved-in shot:
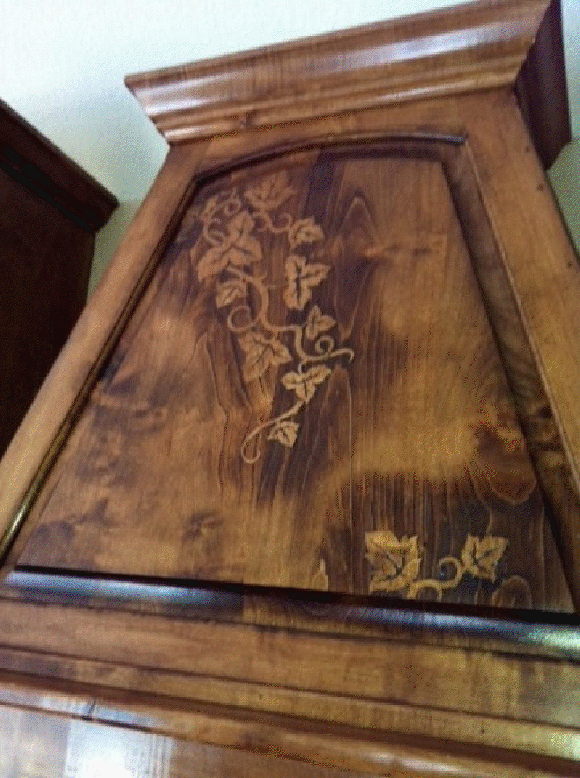
The flip side of the coin was that said builder had a completely opposite aesthetic taste than I did. I’ve always said that I think the theme before we started putting our mark on the home was “Cracker Barrel meets Olive Garden” (no offense to either restaurant). So it was rustic and Tuscan at the same time, two of my least favorite design styles.
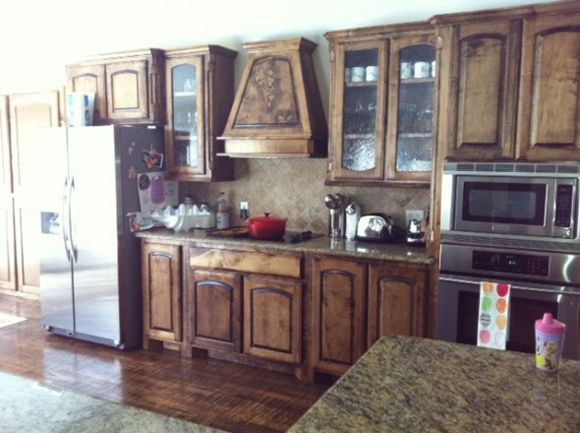
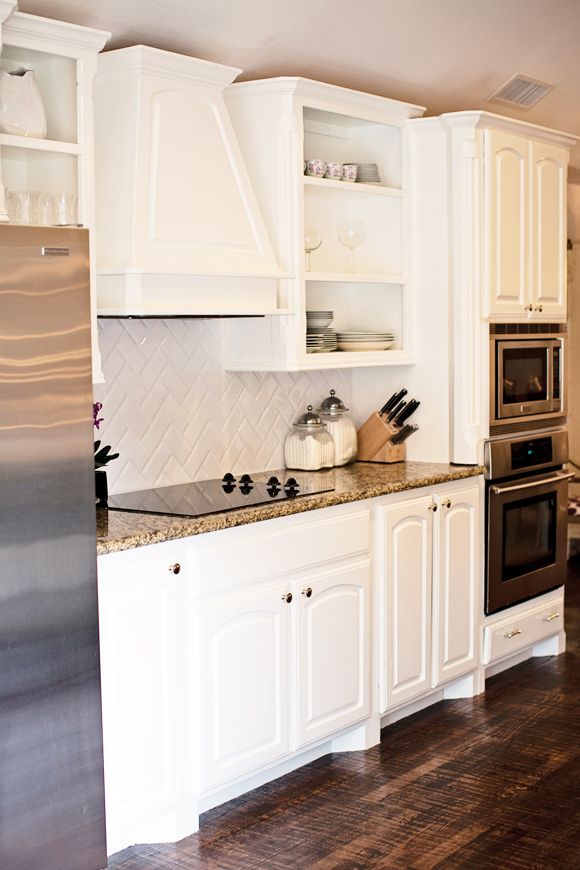
Check out the vine on the hood. Nice!
The changes weve made really look extensive, but the beauty is, they really were not extensive at all. Literally, all we did was paint, change out tile and take some doors off the kitchen cabinets! It is really amazing what paint can do. I’d love to say that we did the work, but alas, I know my strengths and weaknesses and painting falls in the “weakness” category. I also know that you have to be patient when painting kitchen cabinets, and anyone who knows me knows patience is not one of my virtues.
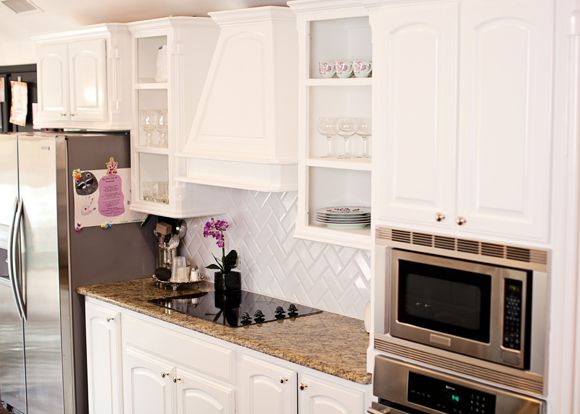
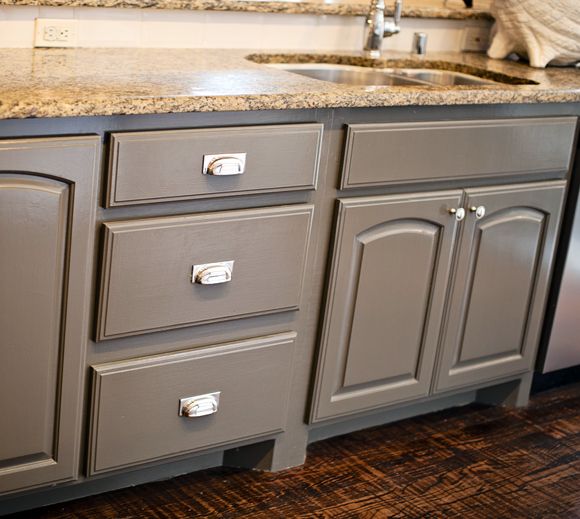
As far as the paint colors, I literally painted every square inch of the living area, including trim and kitchen cabinets, “Simply White” by Benjamin Moore. I love the way white modernizes a room. I narrowed the initial choices of white down to 3 colors, White Dove (too grey), Mascarpone (too yellow) and Simply White. Simply White worked best for us, but I love White Dove and Mascarpone too, it all depends on the lighting in your home. The center island and center island cabinets are “Porpoise” from Sherwin Williams. The hardware is from Horton Brasses.
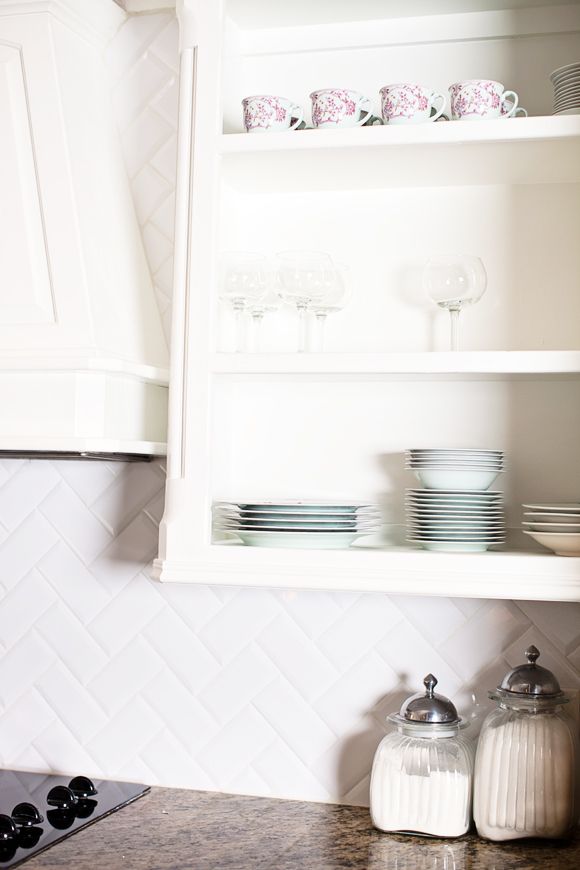
The tile is bevelled subway tile from Floor and Decor laid in a herringbone pattern. The tile is so so so reasonable! My total for tile was less than $60. The herringbone pattern is what really gives it impact. We kept the granite because frankly, it was not in the budget to replace. Check out the vent hood. Hooray! No more carved vine.
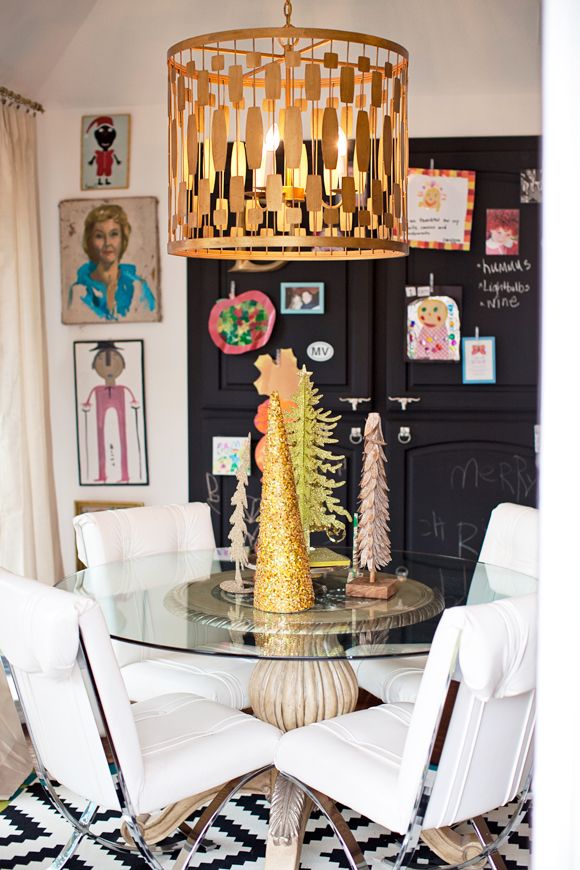
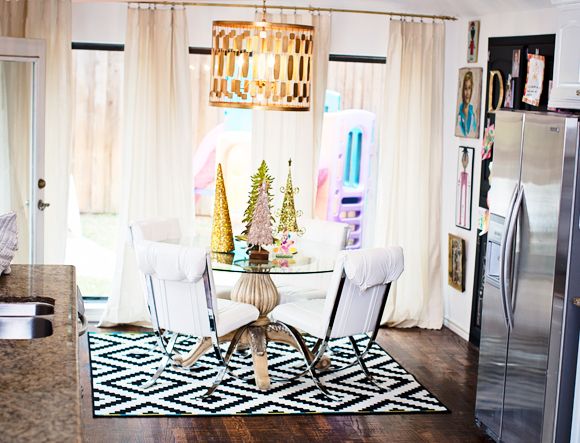
I am crazy about the breakfast nook right off your kitchen. Tell me a little bit about the pieces you have in here and the projects you’ve done.
Sure! The chandelier is Horchow, the table was found on Craigslist, the chairs are also from Craigslist, the rug is Ikea and the Christmas trees are Homegoods. A huge score in this room and actually throughout the back of my house are the curtain panels. They are lined faux dupioni silk panels from JCPenneys, found on clearance for $8 a panel!
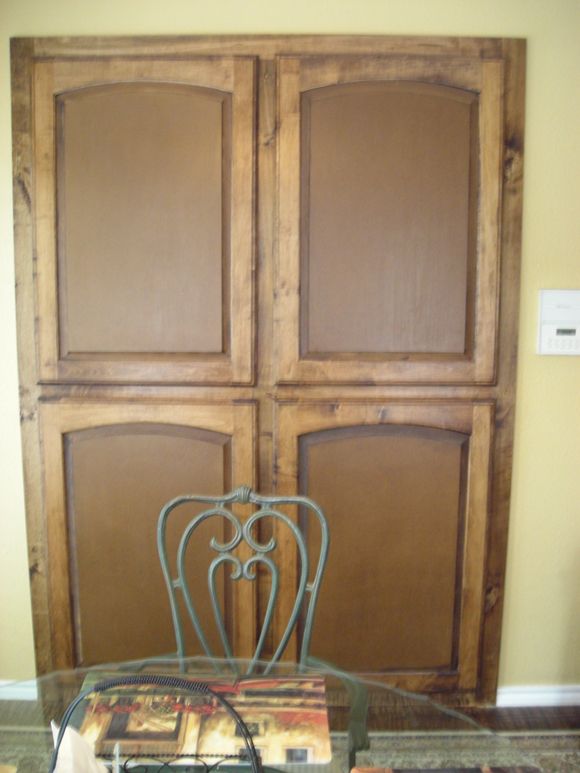
The pantry in the breakfast room is an situated awkwardly on the wall. I could have painted it Simply White, like the walls, but when I saw
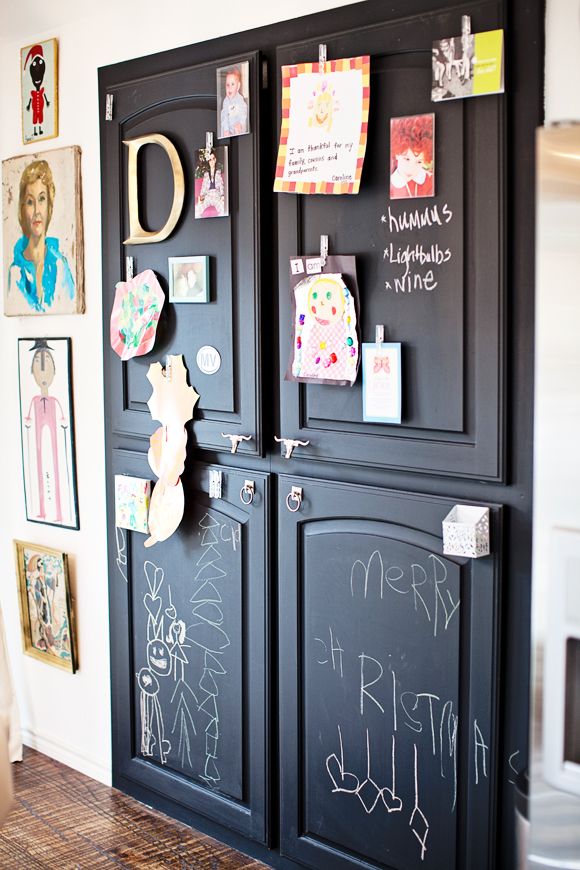
Caitlin Wilsons chalkboard wall I knew I was going to copy her! And I love how it turned out!
If you look closely, you will notice the hardware pulls are actually pewter longhorns! A playful ode to the great state of Texas :)
I am using the pantry wall as a gallery wall of sorts. I am a folk art collector, and being from Montgomery, Alabama, love Mose T’s work. The pink man is by Mose T and the Santa is by his daughter Annie T. The lady in turquoise is just a fabulous portrait I picked up at the White Elephant in Dallas.
I love that your Christmas decorations are colorful and modern. Where do you shop for holiday decor?
I joke that many of our Christmas decorations are actually stolen goods. I probably shouldn’t joke, because it may be true. When we were first married and lived in Atlanta, we lived in a “transitional” neighborhood. One day, I was heading to the thrift store in a sort of sketchy shopping center and there was a large unmarked 18 wheeler with a handwritten sign “Christmas Decorations” on the side. Naturally, I was curious, and ended up spending maybe $75 on enough decorations to fill two car loads. Something was odd, but I was still thrilled at my haul. I brought my husband back later that evening, and Ben was hysterically laughing and explained that this “pop up shop” was actually a stolen shipping crate. Oh well, lesson learned, but I did score some great decorations. Everything else in our home is from Homegoods or Target.
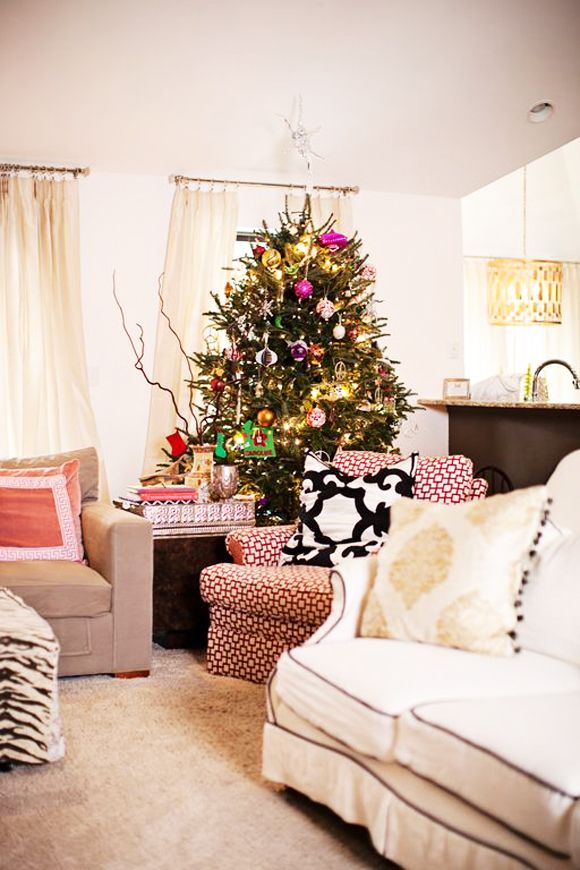
We do not stick to a certain color scheme for holiday decorating but stick to a high “sparkle” factor which makes the decor look more cohesive. I am also a fan of grouping like items for more of an impact, like out nutcrackers, metallic Christmas trees and reindeer. I started a collection of snow globes as a child, and Cici, my daughter is also collecting them. We display all of the globes together each Christmas.
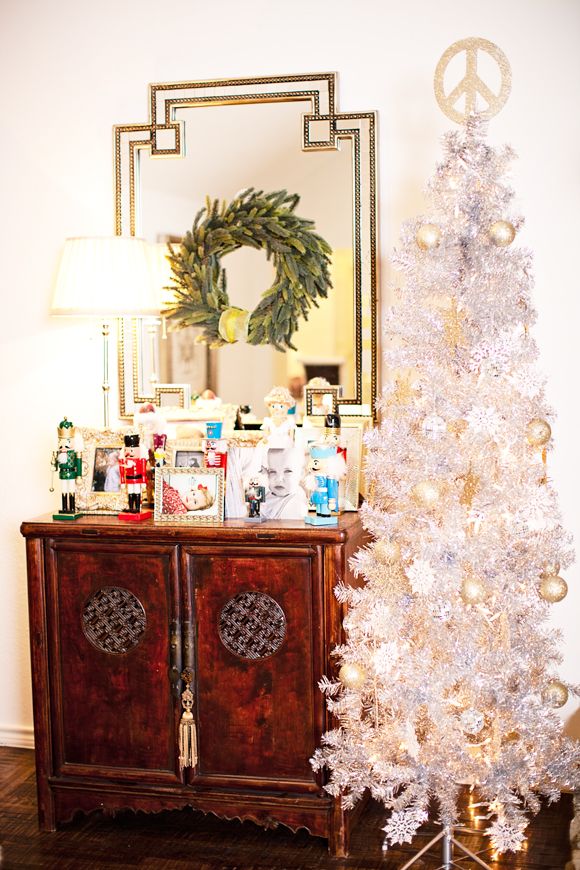
I adore the tree above. See what I mean, we love “Sparkly!”Tree is from Dillards, Peace Sign on top is from Homegoods, Cabinet is from Montgomery Antiques in Montgomery, Alabama , Mirror is from Horchow Finale, wreath is part of my “Stolen Goods” Christmas decor.
Where are you favorite places to shop? What’s been your favorite find so far?
My favorite place to shop is Scout Design Studio, at 155 Howell Street in the Dallas’ Design District. Scout is a 15,000 square foot warehouse of affordable vintage finds. My business partner Grace and I also sell our pieces from Scouts warehouse. Other faves include Salvation Army, Horchow Finale and Antiques Moderne in Dallas. My best find ever has to be the giant faux bois armoire that hides my husbands monstrosity of a television. You can see the armoire in this picture (this was before we painted).
Tell me a little bit about your floors.
That is a loaded question. I love these floors so much. They are a beautiful 2 inch handscraped oak with a tiger finish. I had no idea what a “tiger” finish was until we had a contractor come quote laying these floors in the bedroom area of the home. It is a fantastic look, as the stain almost resembles a tigers stripes. We currently have carpet (yuck) in the bedrooms and wanted the wood to continue in each room. Well apparently, handscraped wood floors with a tiger finish are $16/square foot at minimum! Gulp… Big Gulp… cant afford that :( We are brainstorming plan B. Plan B may just be to wait until we can afford so the home will be cohesive. The thought of a mismatched floor tortures me to no end.
Let’s walk through the rest of your living spaces. Your home is such a fun mix of vintage and new. I love hearing about where you source your finds.
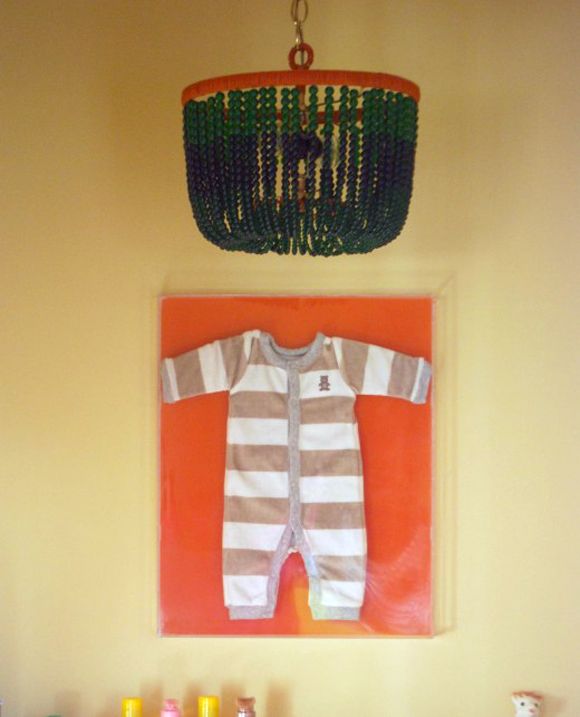
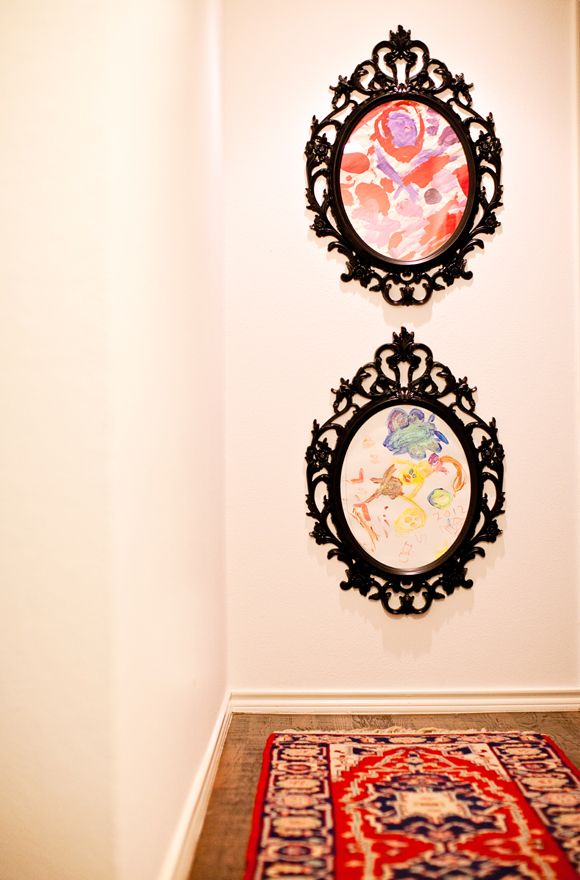
Here above, I framed Cici’s artwork in a couple IKEA frames. The rug is from Montgomery Antiques in Montgomery, Alabama.
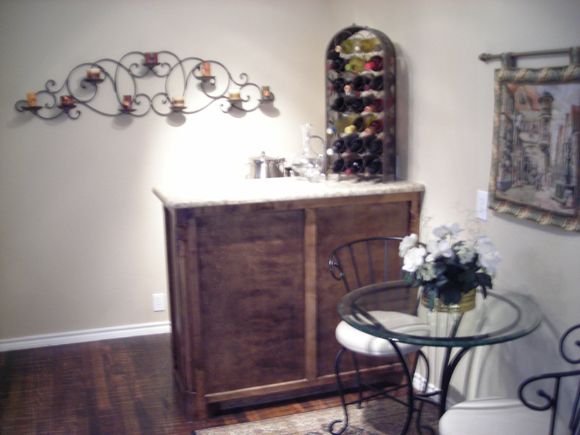
Here’s a before shot of our bar area.
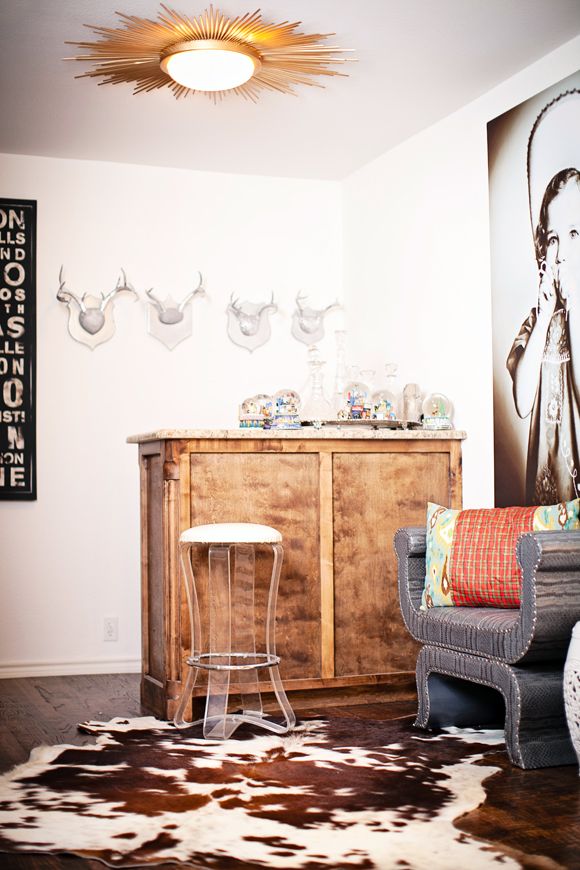
I think the white paint really helps to hightlight the bar. To decorate the bar area for Christmas, I displayed our snow globes in with our decanter collection and wrapped a table runner from Walmart around the ikat pillow. The “Texas” print is from Homegoods, the lucite stool is from White Elephant, the blue bench is from Homegoods and so is the pillow. The large canvas of my daughter Cici was printed at Canvas on Demand and the light fixture was purchased at Shopten25.com.
Here are more of those JC Penney faux silk curtains hanging in our living room.
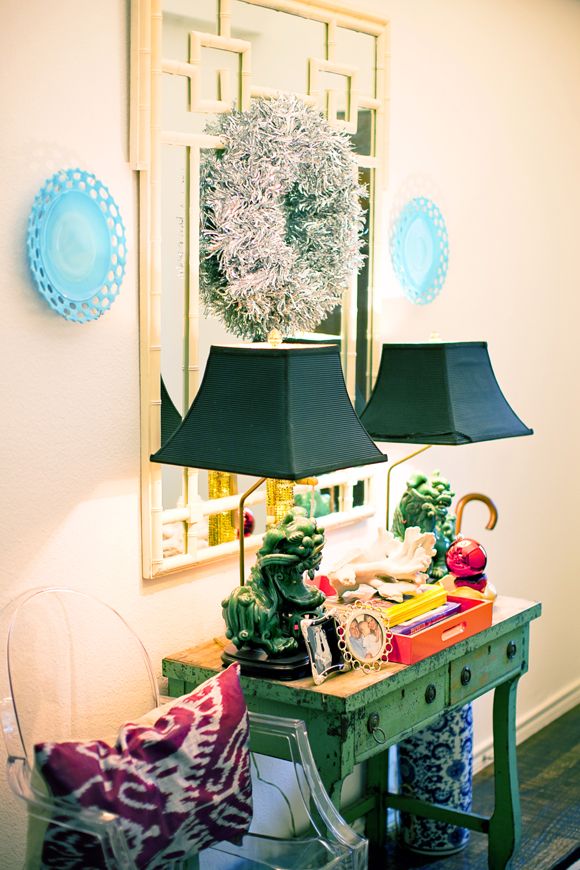
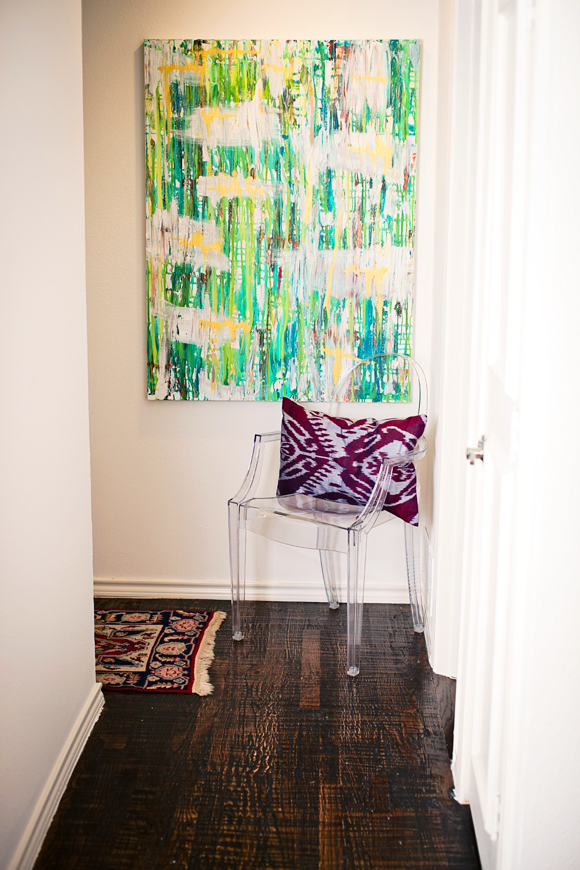
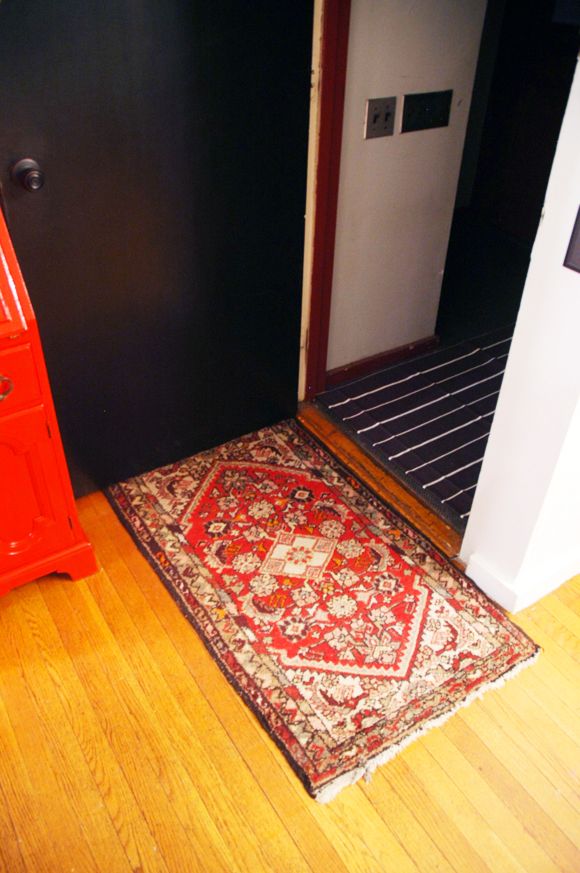
And in our entry I hung a mirror from Craigslist over my Great grandfather’s painting desk (how awesome, right?!) The lamps were also found on Craigslist. The lucite chair is from Amazon and the pillow is from Fabricadabra. The silver wreath is Target.
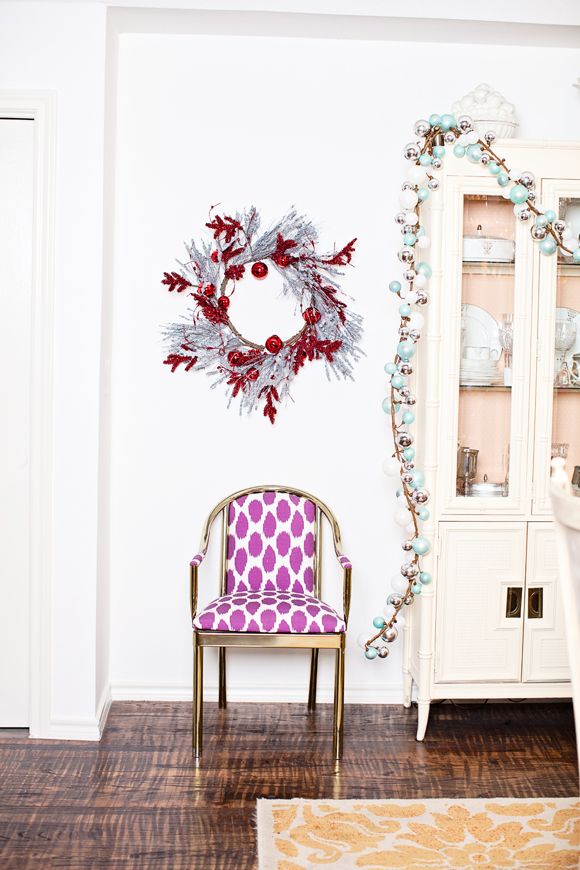
Kristen, I’m loving your dining room, especially the interior color of the hutch. It’s a vintage piece, right?
I found the vintage hutch at Salvation Army and painted it! The dining and two accent chairs are from Again and Again. The table is from Rooms To Go (yes, you read that correctly!).
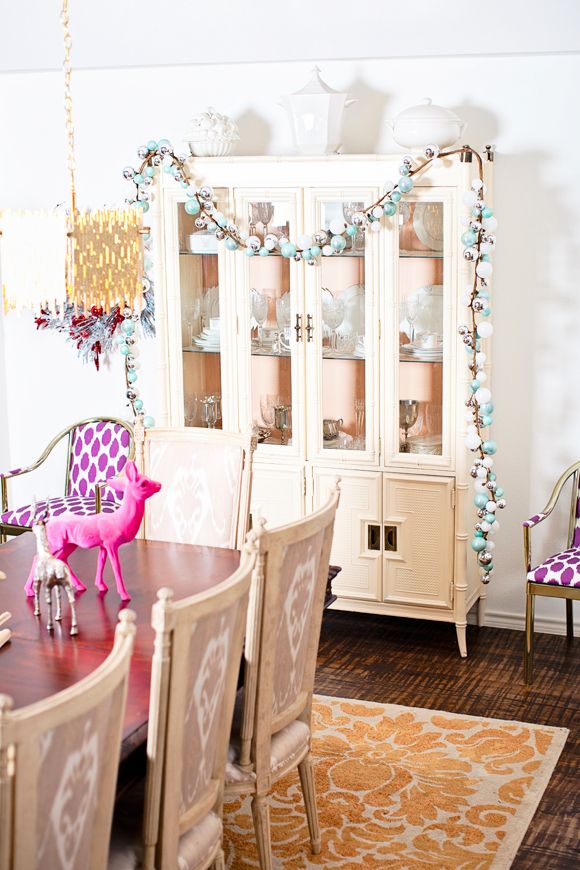
The brass chandelier is from Bienvenue Antiques in Miramar Beach, FL. And pretty much all the holiday decorations in here are from Homegoods (can you tell I like HG?)
A HUGE thanks to Carrie Smith for the pretty photos and to Kristen. of course, for the lovely home tour! What a gorgeous home, right?


