This DIY project was sponsored by Home Depot and their great campaign to be more eco-friendly.
Putting a little chair and a vanity in our bathroom has been on my to do list for a while. I love having furniture in bathrooms. If you have a big enough bathroom to pull it off, I think it looks really great and helps tone down the sterility bathrooms usually have. Plus, I don’t know about you, but I’m getting too old to sit on my knees in front of the tub while my kids are taking a bath. :)
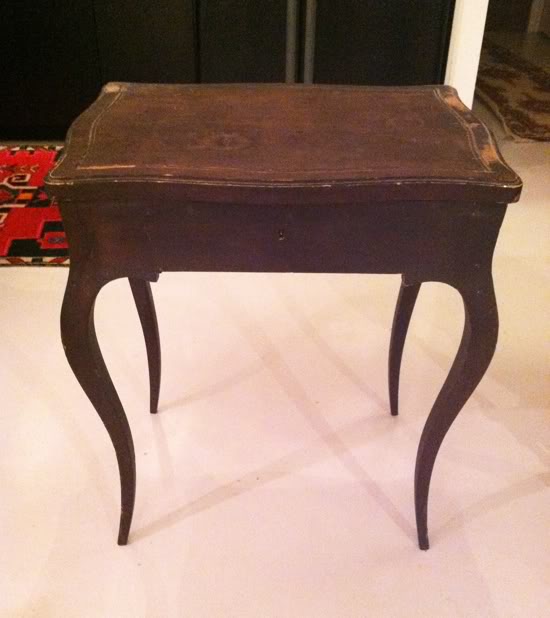
I found this little French vanity desk at Dixon’s Auction in Crumpton MD. It had been passed over buy the other buyers, so I gladly snatched it up for free before the auction house workers had a chance to toss it in the dumpster with the other passed-over items.
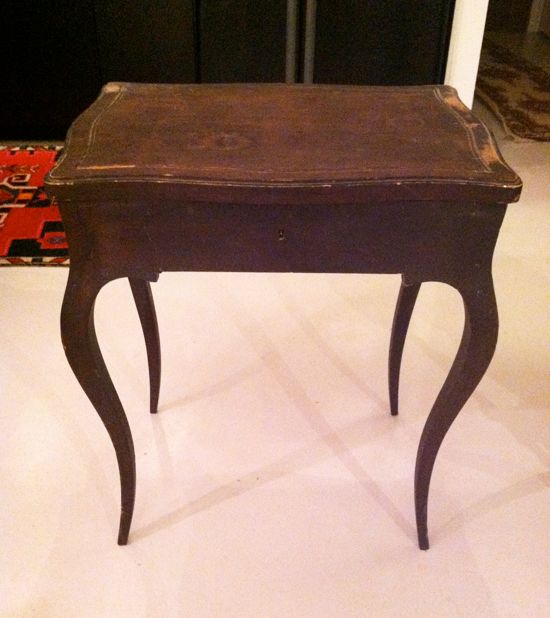
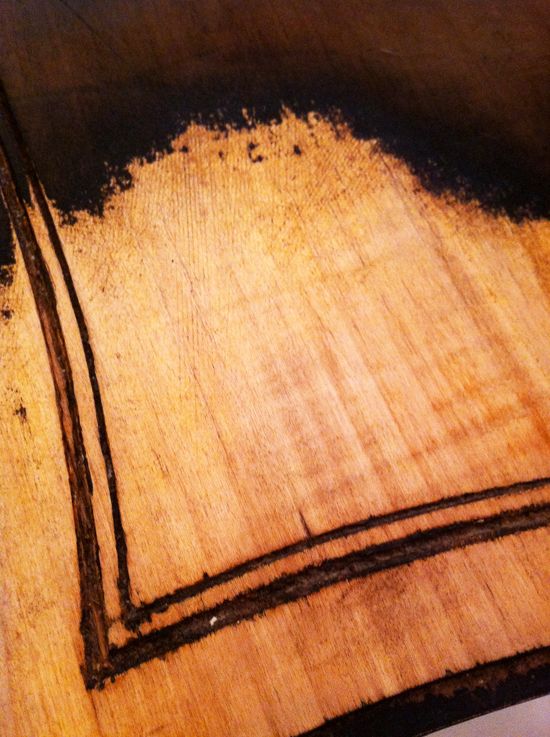
You can see why maybe no one would want it. There was a lot of surface damage to this old little piece. But I loved the shape and thought it had potential. My original plan was to sand off the old finish and stain the wood.
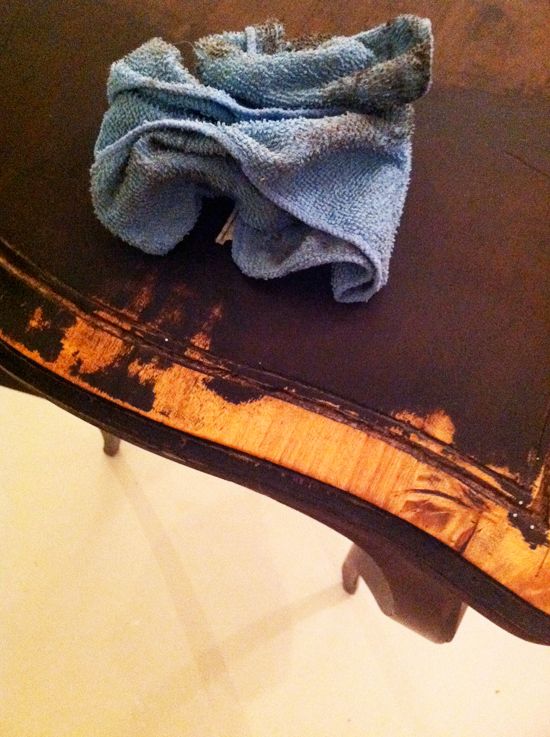
At first it looked like it was going to work, but after sanding more toward the center, the top started to look a little fishy and I bailed. I think the wood was just too old and too beat up.
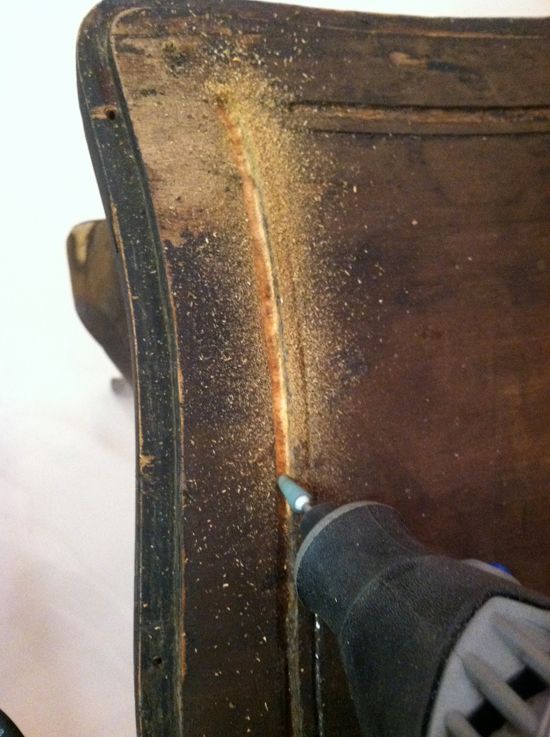
Plan B was to paint the piece. So first I used my new Dremel (which I love!) to sand out the detail work. A lot of this area had filled in over time, but it was easy to zip through with the conical bit and clean all the build up.
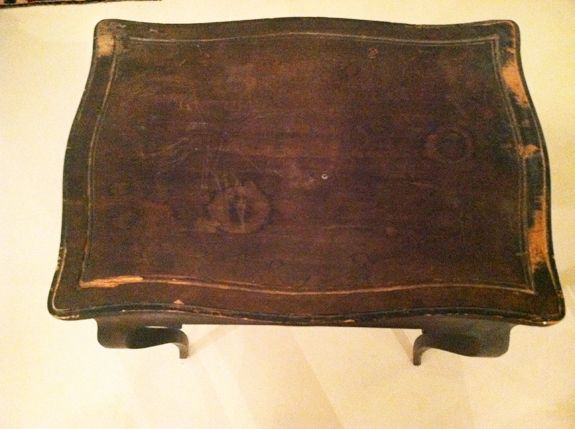
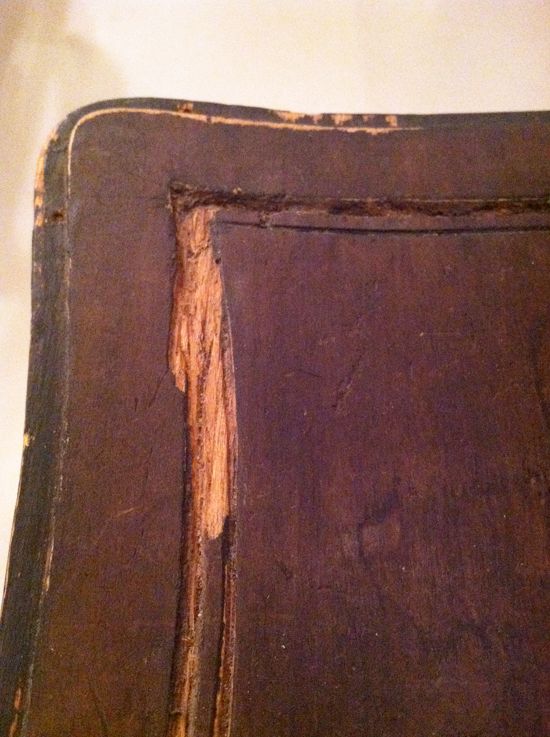
One section of the top detail was completely gone, so I had to rebuild it.
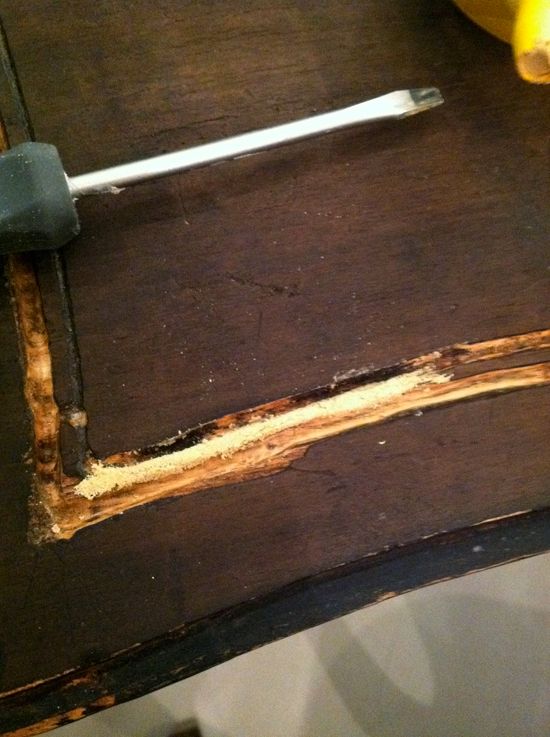
I shaped some wood filler with a flat head screw driver. It’s not completely perfect, but you couldn’t really tell where the repair was after everything was painted over.
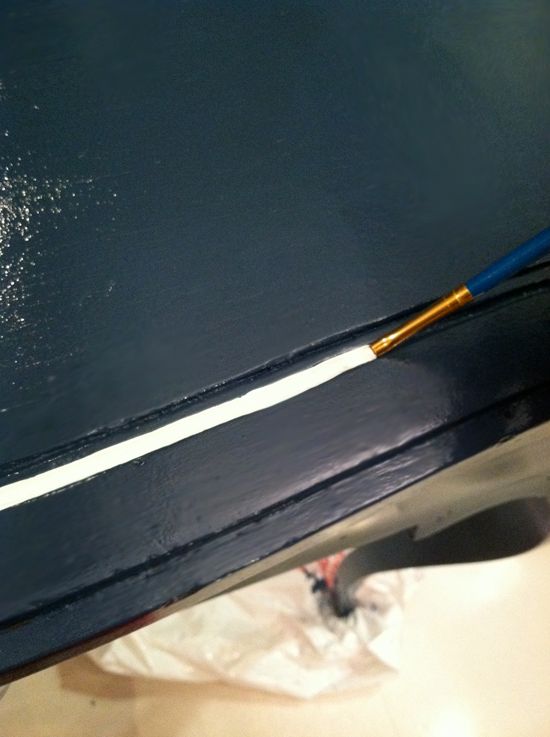
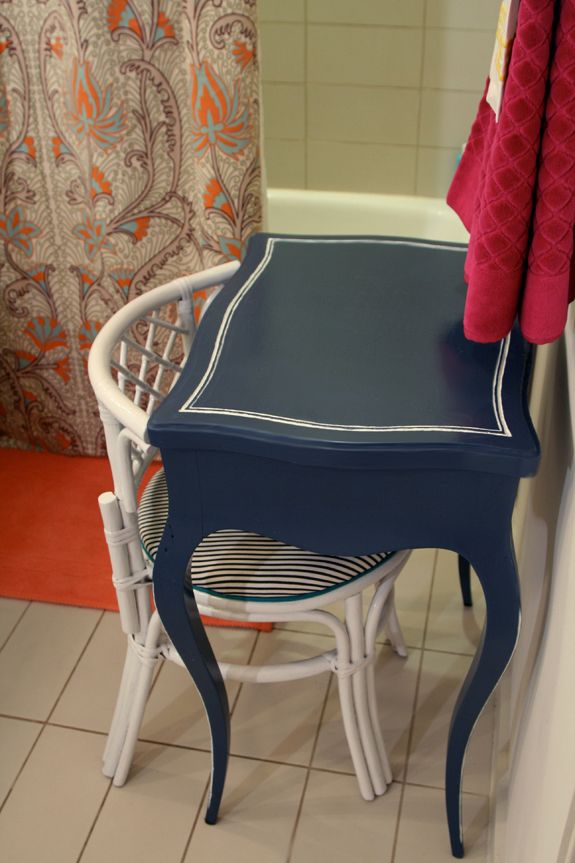
I gave the desk a coat of Zinsser primer and then 1-2 coats of BM ‘Gentlemen’s Gray’ in the Advance paint line I’m loving so much. After the base coat was dry, I went back with a small brush to paint out the detail lines with white. There were too many curves here to make painter’s tape worth the hassle, so I free-handed it. The trick to getting a smooth line easily was to first lay down the white as evenly as possibly and then to come back and cut in with the Gentlemen’s Gray to touch up the white mess ups.
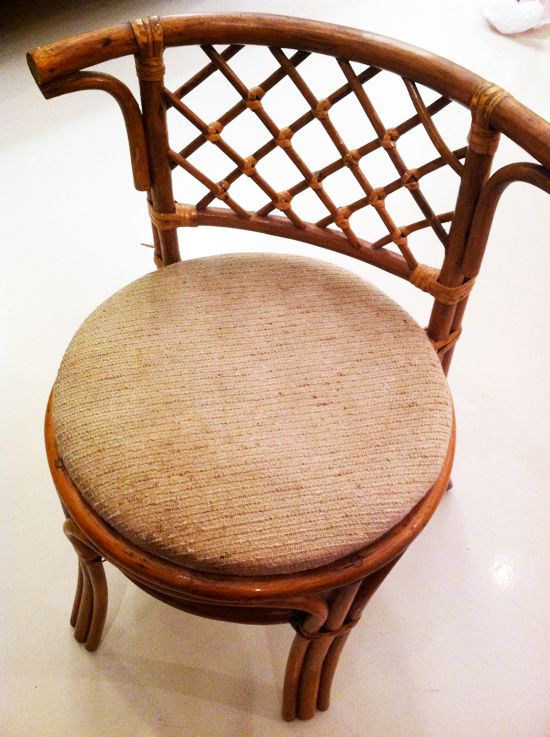
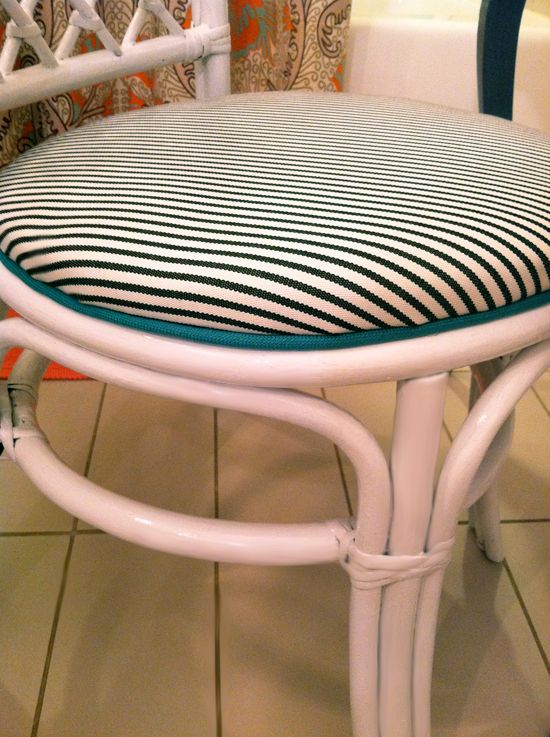
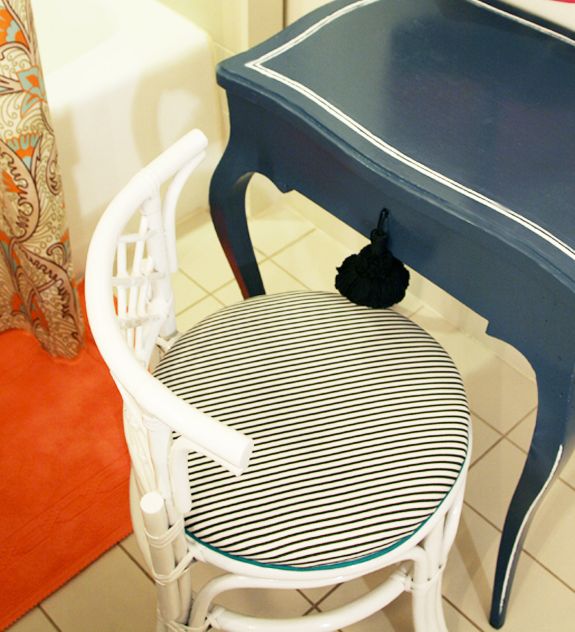
For the chair portion of the vanity set up, I found this little vintage bamboo stool at a thrift store here for $4.50. It was grimy and needed new paint and new upholstery, but I liked the shape and it fit perfectly in the little vanity.
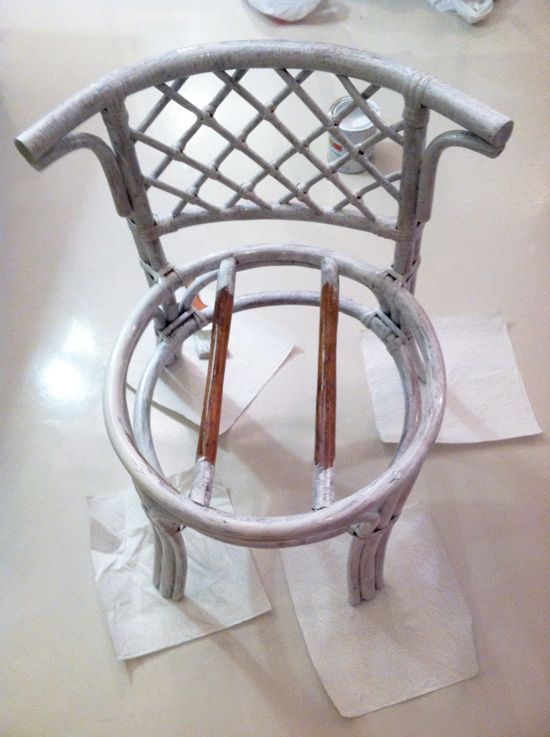
You’re going to think I’m crazy, but I ended up brushing on the paint for this little chair. I really wish I could have spray painted it, but it’s been cold and rainy here lately, so I was forced to brush on a coat of zinsser and 1-2 coats of BM White Dove in the Advance line. It actually didn’t take as long as I worried it would. It probably took 15 or 20 minutes to do the primer, below.
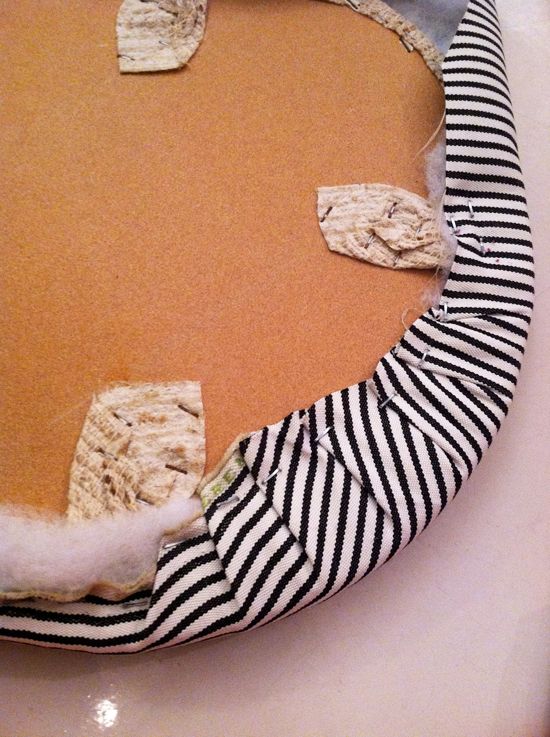
For the seat upholstery, I wanted to used some indoor/outdoor fabric since this thing will get inevitably doused during bath time. I had some woven black and white stripe from Perennials, which is a very nice all-weather line. It doesn’t look or feel like outdoor fabric at all. They also make a great outdoor velvet.

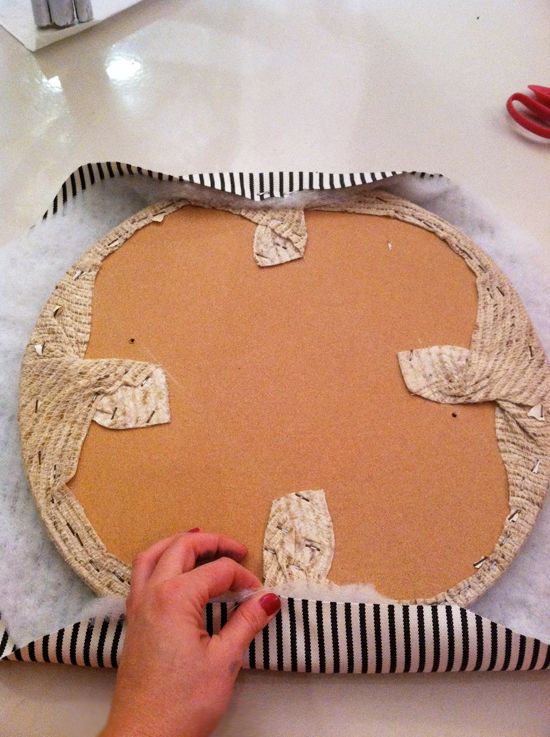
For the fabric between all the staples, you’re just going to create neat little folds like these below and staple them into place as well. The goal is for the fabric at bottom of the seat to be as flat as possible. The fastest way for an upholstery job to look ‘DIY’ is for the edges to be bumpy. Don’t give yourself away like that! :) Make those edges flat and smooth and straight by folding carefully.
I will never tire of black and white stripes!
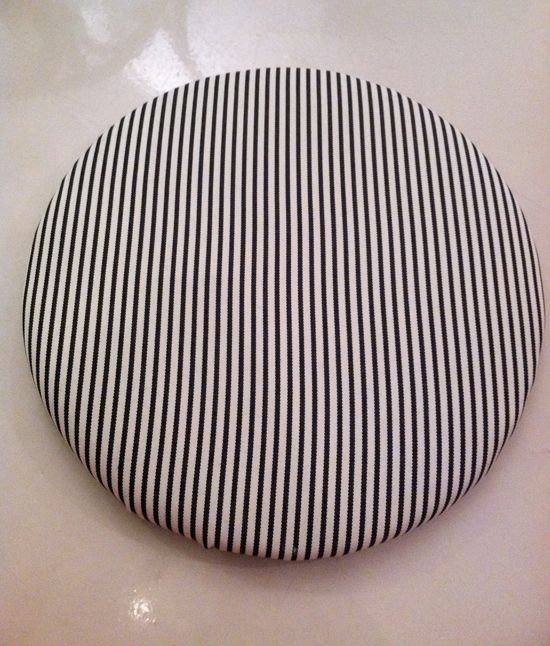
I decided I wanted a little shot of color, so I pulled out some cording and some teal outdoor fabric that I used in this project. I’ve been a piping-making fiend lately! I love the difference a contrasting welt can make. It’s such an easy sewing project too, there’s no reason not to make your own. Since I’ve been making so much of this lately I’m fast and about five minutes after deciding to add the welt, I was gluing it on to the seat.

Isn’t it funny how we talk ourselves out of doing something because it feels like too much work or too much time? My new motto is ‘Less thinking, more doing.’ It’s crazy how productive I can be when I stop fretting about how much I have to get done and just start moving. I feel like I should have turned my brain off years ago! :)
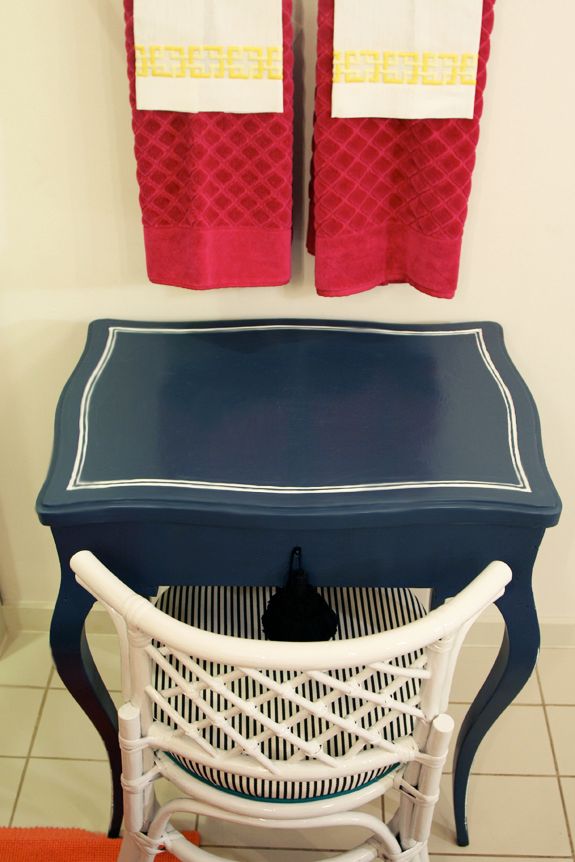
Anyway, here’s the little vanity in our bathroom. I couldn’t get the lighting right, so the colors are off a little. I’m so happy to have a little place to sit down in our bathroom now!
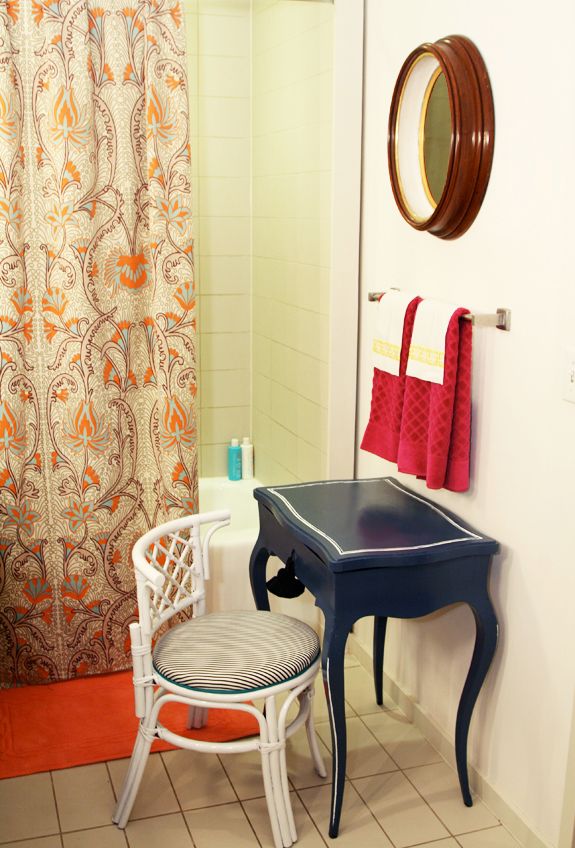
The shower curtain was made from Quadrille’s Contessa (tutorial coming up!) and the hand and guest towels are from Gracious Home.
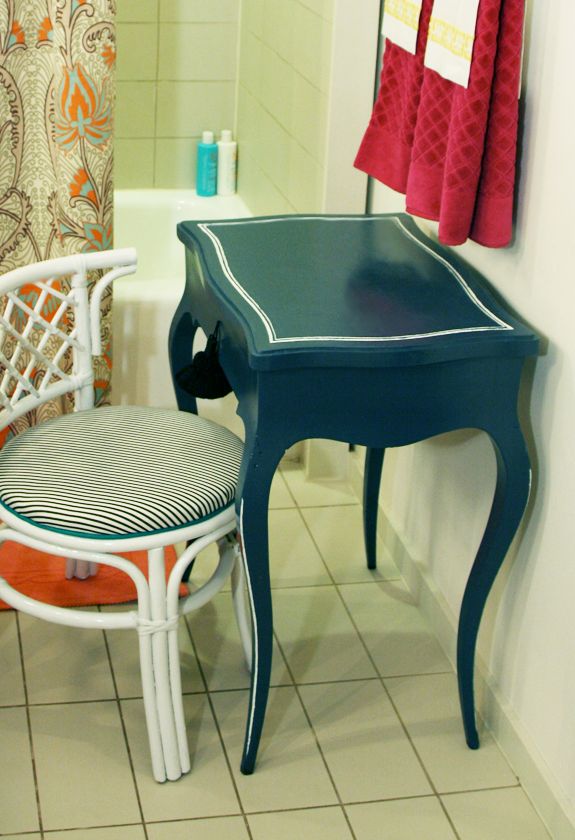
The coral bath mat is from the Williams Sonoma Home Outlet in Riverhead (I think it was less than $10! They always have the craziest sales).
So what do you think? Do you like have furniture in your bathroom?


Great idea! I agree that bathrooms can be so utilitarian. The furniture gives it some lived-in appeal. Love the shower curtain too.
So flippin cute! Great idea on the turq cording for the striped fabric!
-Bethany
http://powellbrower.blogspot.com/2011/11/gettin-styled.html
Love it – I would like something just like that for my laptop rather than my bathroom!
Jenny, I never leave comments but just had to. You are so good at what you do! Every time you post your work, whether it be a DIY or a room you've put together, I am so inspired and impressed. Thank you for continuing with your blog when I am sure you are very busy.
The shower curtain is SO gorgeous! Can't wait for the tutorial!
Jenny,
You are killin' it with these great projects!
Once again you amaze with your creative vision and talent!
I'd love some furniture in there, but we would just never use it.
We do have a really big bookcase, though, to hold everything since we have no linen closet (or any closet for that matter).
But your redo and bathroom is fantastic!
oh my!!! what a great transformation!!!
Such a cute addition to the space. And the welting makes all the difference for that little chair!
Loving the shower curtain fabric as well.
Live Inspired,
Heidi
athousandlaughingstarfish.blogspot.com
WOW!
LOL – Our bathroom is so tiny we can barely fit in there! I lived in an apartment with a big bath and yes, I had furniture in it and I LOVED it.
Your blog is quite wonderful and your bathroom project looks splendid – well done.
Mary Beth
great project, turned out super cute too. i wish our bathroom was big enough for furniture, that being said, i still want a vanity for primping. even though my "routine" is very minimal.
You are incredible.
I totally would! But our bathroom has about as much floor space as a bathTUB. Tiny. Love the floor-length shower curtain!
Another great project and what a beautiful bathroom! Love the white accents on the vanity piece, and the chair is just perfect!
I recently moved to Brooklyn and We're renting and won't be here that long, but your blog still is inspirational and I love all of your great ideas for small spaces.
This is darling! My bathroom isn't big enough to fit furniture but if it was, I'd have something in there.
love the big tassel! Also, I'm with you on the new motto. For some reason, I dread projects for ages, and when I finally do them, I LIKE doing them! All that energy wasted stressing about it.
You get so much done, you are totally an inspiration!
Beautiful. Can I fly you out to CA for a week to work with me :)
I just love your ideas and tutorials:)) Thanks for always sharing! Have a wonderful day.
Thanks for the lovely tutorial – it turned out great! I agree with you, less thinking, more doing!
i have wanted to try painting an old desk myself for some time but i didn't know where to start – thanks for the help! it looks so awesome!
Smoking Crayolas Blogspot
What an adorable little table! I love the simple French pieces that show off the curves rather than elaborate carving.
How can I get some fabric from Quadrille?? I am totally wanting a few different fabrics from them! If you can help me that would be awesome! Love your bathroom!
You are very impressive! This and the tortoise shell table! Love them both.
Such a great looking vanity!!!! Love furniture in the bathroom-ESPECIALLY for bathtime!!
Terrific makeover! I'd love to have space in my bathroom for furniture, but it's so tiny that I can pretty much reach across the room with my arms held out. Love the bright blue color! Thanks for sharing.
I love it!! as usual.
I absolutely LOVE the shape of that table!! I have been waiting for the right piece of furniture to pop up so i can try dipped legs!! I think i will keep an eye out for a leggy table like that!!
you are crazy talented! and always so detailed! it looks adorable as usual. and i seriously just had the same exact converstaion with myself the other day…about stop thinking and start doing…it really worked for me as well!! although i have to remind myself daily:) thank you for sharing all of your endless creative ideas!
Great job…as always!!….Crazy question for you– do you rent a storage space or where do you keep all of these awesome "finds" in your NYC apt?? Just wondering :)
Interesting project, Jenny. I am very confused with your color scheme though. You used that beautiful fabric, matched the bath mat, yet with the table, chair, towels you totally abandoned that color palette and went in a totally different direction?! What gives?
The perfect little thing! Well done! Again!
xoxo
You are spoiling us – two DIY posts in a row?! And both of them brilliant! Thanks for the peek at your genius. I hope knowing that it inspires so many people makes pausing for photos worth it!
Beautiful! Love how the two pieces compliment each other.
Jenny this is great! I was looking for the Perennial fabrics – I NEED the off white velvet. However, they are only to the trade, and I'm having some trouble finding anyone that sells them. Any ideas on where to look, who to contact?
Thanks!
Emily
Not a fan at all of furniture in the bathroom.
But you did a great job as you do with all your projects.
I'd prefer this in a bedroom or sitting room but to each their own.
Thanks for sharing. Your new motto is so brilliant & rings true to me.
you know how to change a tire too?! you are one multi-talented woman!
That's awesome. That vanity looks amazing!
xo
Sharon
Lovely!
Gorgeous. Black and white stripes are classic!
The piping makes the chair! I hear ya on turning off the brain – mine never stops. Sometime I literally have to yell out loud to myself "SHUT-UP!"
Great job! It was so smart to repair the vanity with wood filler! And I think I'm going to have to get a dremel :) It's great that the chair pushes in completely so you can still have room to move around. Beautiful job!
You are so crafty!! The vanity looks crazy different before and after. I absolutely love it!!
Absolutely beautiful! That was quite the transformation! Your blog is lovely by the way :)
Jennelise
you never cease to amaze me! i love the blue and orange together too :)
You are so creative!!! And always have the best manicures!!!!
your diy and reupholstery posts always give me the confidence i need to get started on my own! i seriously haven't found anyone else out there in the blog-world who can do the step-by-steps like you do. thank you for sharing!
(also…you gave me inspiration to rip up a seat i just reupholstered and re-do. the bunchy corners really irritate me, and i don't want to give myself away like that! :) )
I love this transformation. And the color.
My favorite thing about this post, though? Less thinking, more doing!
So pretty, I just think it would be better if instead of the towel holder there was a big mirror. :)