I’ve always loved the way that books make a home come alive. When we were planning on where to put all the books from our office in the loft, there was only really one place to put the Billys – the living room. So we bought four more sets of the extender shelves and spent a few days last fall “building in” our IKEA bookshelves.

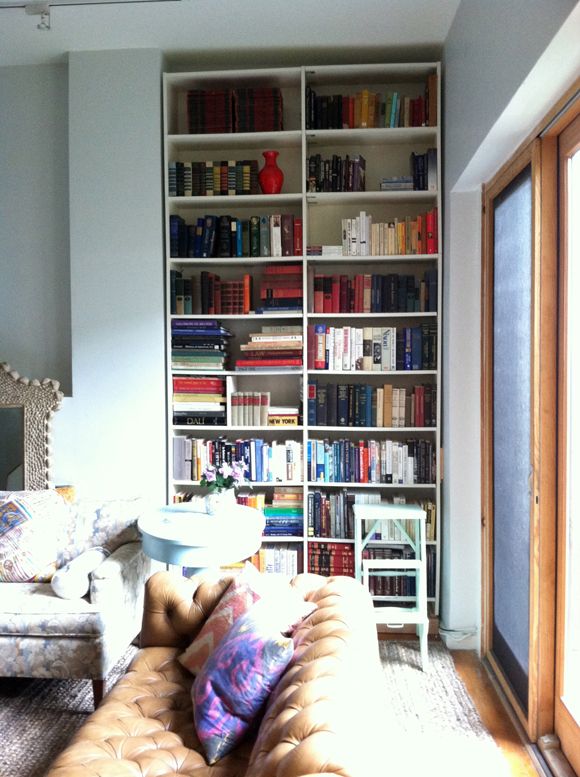
Here’s how the space looked on move in day. It looked like a giant H to me.

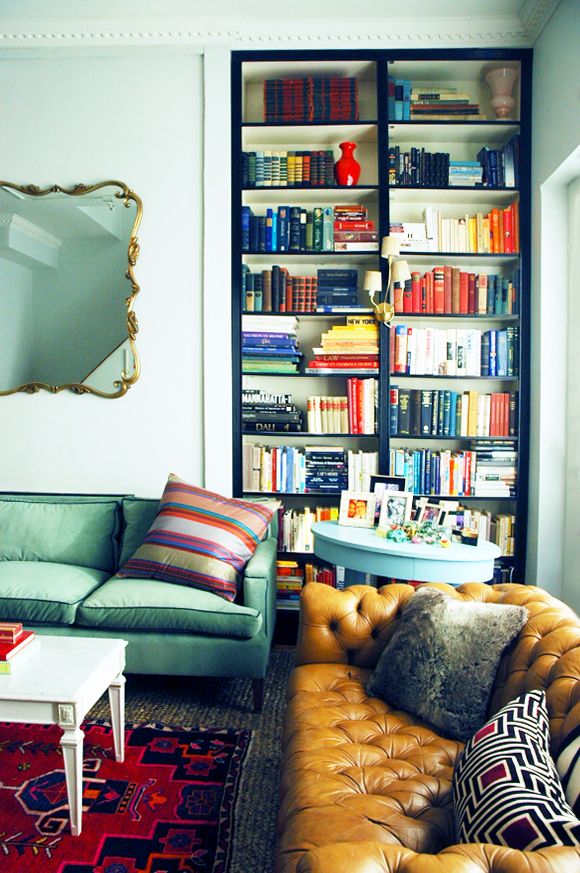
I love it all so much more now. That nook was the worst! Ready for all the details on how we filled the nook and built up and in the Billy bookshelves?


We all signed the inside of the wall. :)

Drywall was marked with chalk tape and cut with a razor blade knife.

And the first pieces went up and we happily said goodbye to the nook.

Once the drywall sheets were screwed into place, we taped the seams.

Then we went over the drywall and the tape with joint compound.

Meanwhile, after “wet sanding” the joint compound with the big grout sponge, we also started the crown moulding. Also, I’d love to point out the obvious here – that we should have taken down all the books first. They were a dusty mess after all the work we did! I just didn’t really have a place to put all of them before we started. I told you this was a spur of the moment project!

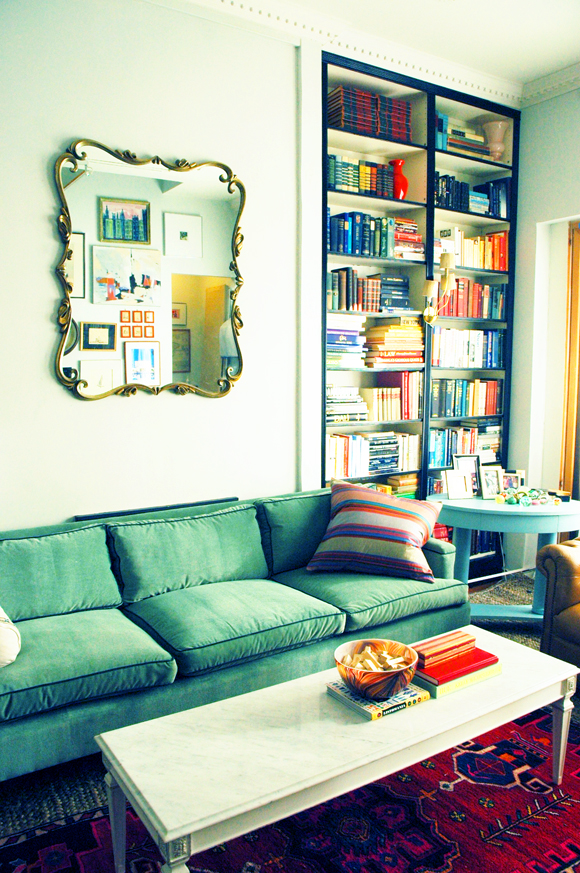
Probably my favorite part of the project was the footing of the shelves. Like I said, we sat the bookshelves on three 4x4s running lengthwise. This gave the bottom a lot of height.

Then we framed out the whole bottom with 2x8s, which gave the bookshelves a really chunky base and made them look less IKEA I think.

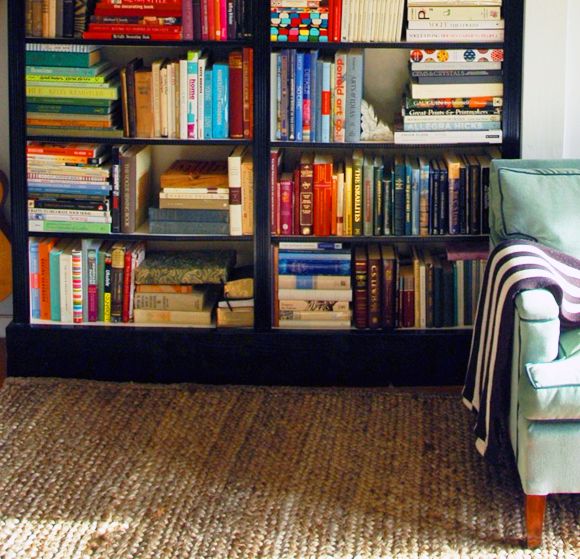
For the face of the bookshelves, we found this great small moulding at Home Depot too. We measured and cut everything to size and then sprayed it with a black gloss enamel.

It was so easy to add the moulding with my brad gun. We used thicker stripe moulding for all the vertical lines.


And also, to make a sofa back table to help hide the fireplace a little more and to hold a pair of lamps.


Absolutely beautiful! I love this. They look original to the house, especially with the dentil molding
You are so talented! Looks great!!
Gorgeous!!! Really lovely and inspiring!
Beautiful results, although I am wondering how you lifted the bookcases without removing the books. glad you're feeling better. CTD
Stunning! Good work on making these units look custom. Huge improvement over the space when you moved in.
Can I move in with you? I have to move my books out of the office/guest room to make it into a nursery/guest room and can't figure out where to put them. I am sure you would come up with a solution that looks amazing and not cluttered. Sigh. I will try and channel my inner Jenny!
Wow, Jenny! Such great details, looks like it's been there forever! I'm excited for the bookcase styling tips!
Thank you for posting how you made your Billy bookshelves look so solidly built-in. We are moving to a new home in a month and I'm thinking I might do this very look on a whole wall. I'll send you the pictures when I do. Thank you!! I just love your blog and the way you design everything. What an inspiring woman!
Love it! SO good!
Super gorgeous and impressive! You really are the master at this kind of stuff. I have been thinking about doing your arched billy hack for my office re-do but now you have given me new food for thought. Thank you for sharing your projects and for being so awesome.
YOU ARE A GENIUS!!!!!!!
truly stunning!
I love this! We are looking into getting some billies for our family room and this is perfect! I recently just started reading your blog and I have to say I LOVE your style so much! I aspire to make my home look as good as all the rooms you do ugh!
http://simpleprettythings.us/
Hi Jenny! I absolutely LOVE what you did with the Billy! I have a space in my apartment that's about 9 feet high and I've been dying to put a floor to ceiling bookshelf. I was thinking about the BIllY or maybe even stacking two Expedits on top of each other. Just out of curiousity, what is the height of your ceiling in that room? Those Billies look really tall – I didn't think they came in that height. Again – awesome job!
Antoni
Beautiful as usual. Can you let us know something about the great sconces you attached to the outside of the shelves? I want to do something similar to a library we have to give it a more finished look. I love your work!
Gorgeous, just gorgeous. I love the black and white contrast! So amazing!
Gorgeous, just gorgeous. I love the black and white contrast! So amazing!
You just amaze me! Wow!!!!! You have such a great eye. Your space looks GORGEOUS!
LOVE this and all the colors in that room!
Jenny – what a fabulous project! I may have a parson's table for you for behind the sofa. I've been meaning to refinish mine and now we've moved and I'm not sure it's working out in the new location. In fact I might have two lamps for you as well. Send me a message and I'll forward some pics before you decide to make the trek to new jersey to pick them up!
I LOVE your style!! It is very similar to mine. I'm sorry to tell you that I will be stealing some of your ideas!!
real estate McKinney TX
Jenny!! I've been to your site before but lost track of it!! I love your style and I'm so inspired!
After reading about how you had your sofa reupholstered, I got to thinking, maybe I could do that too?!? I don't want to spend $1500 on a sofa and I love older/vintage pieces so why not! Of course, I've only sewed a box cushion before but I bet I could do it, right?!?! lol
Crystal
amazing Jenny! your projects always leave me asking for more and more, anything you do is incredibly gorgeous and inspiring!
LOVE it. You make it look and sound so easy! Job well done- AGAIN!
Simply fabulous, big ups to the parents for all their help!!
books are our best friends even they create positivity around
i like the way you manage all books
petsmart
Love these shelves so much but I think I love your couch just as much, haha. Seriously, where did you get it? The fabric and color are dreamy.
This is absolutely FANTASTIC!!! I have a space on either side of my fireplace for bookcases and I was thinking about using Billy bookcases an adding molding. This is just wonderful! I love how you did it. It's nice to see that it can be done well!
Amazing! I love your initiative and creativity. As for leaving the books in the shelves while adding the moulding…totally something I would've done, I love to dive into a project without thinking of the obvious ;)
Marion
http://www.hivernage-nyc.com
I was just talking this weekend about wanting to take my Billy bookshelves out of my library and adding floor to ceiling shelves. This post is perfect inspiration!
I'm also interested in how you did your sconces on the bookshelves (is the wiring sent around the backs of the shelving before completing the black trim? is it permanent? wired into lightswitches or just switched at the base? DETAILS!
This looks incredible. Bravo!
I found your lovely blog via Cup Of Jo. Simply LOVE how you have transformed the billy bookcases, love the dark trim, really makes the inside stand out, beautiful!
i love this idea so much. what hard work went into this and the result is just absolutely stunning :)
http://www.lovefromberlin.net/
xx rae
This looks so amazing! I love how warm your entire living room feels. Bravo! xo
Thanks so much for your inspiration!!! We just finished our project and it looks stunning!!