Inspiration

Marbled Business Cards from MOO and Clay Leaf Card Holders

This post is brought to you by MOO! All opinions and images are my own. Thank you for supporting the sponsors that make LGN possible! :) This is a big week for us. I am heading to High Point market to meet with some furniture manufacturers we have been talking with about our first home…

This post is brought to you by MOO! All opinions and images are my own. Thank you for supporting the sponsors that make LGN possible! :)

Moo Leaf Bowls DIY-57

This is a big week for us. I am heading to High Point market to meet with some furniture manufacturers we have been talking with about our first home collection! Eeeeeeep!!!! I’m feeling all the feels as we work hard to make this dream a reality. One of the things on my to do list before leaving for North Carolina tomorrow was to get some new business cards printed. After seeing this post on SFGirlByBay, I was thrilled to get to work with MOO to design our new business cards and print shop marketing! I was in a hurry, so it really helps that they offer next day shipping.

5I5A8538 copy

5I5A8522 copy

5I5A8529 copy

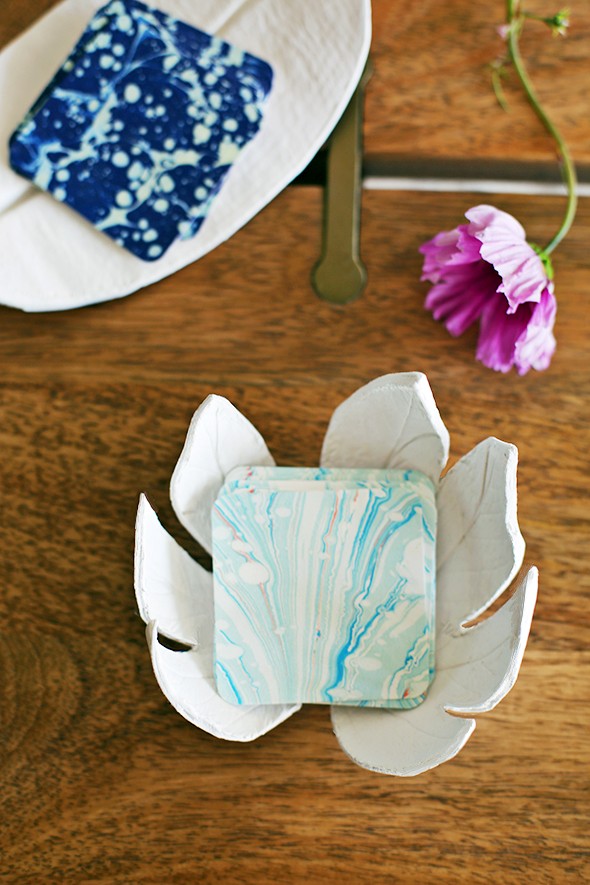
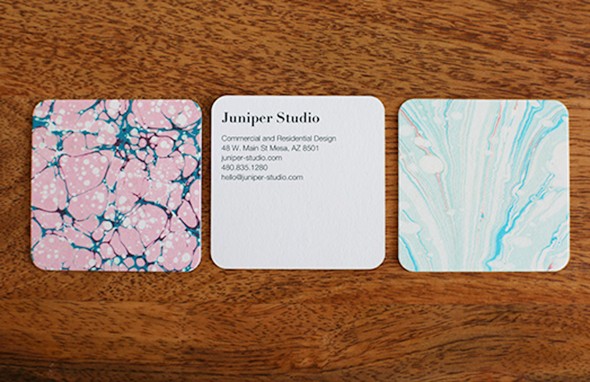
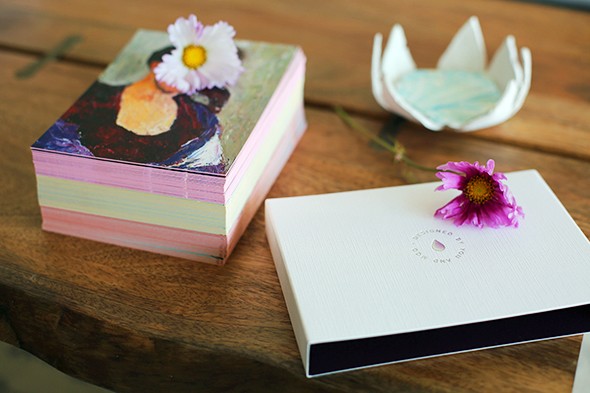
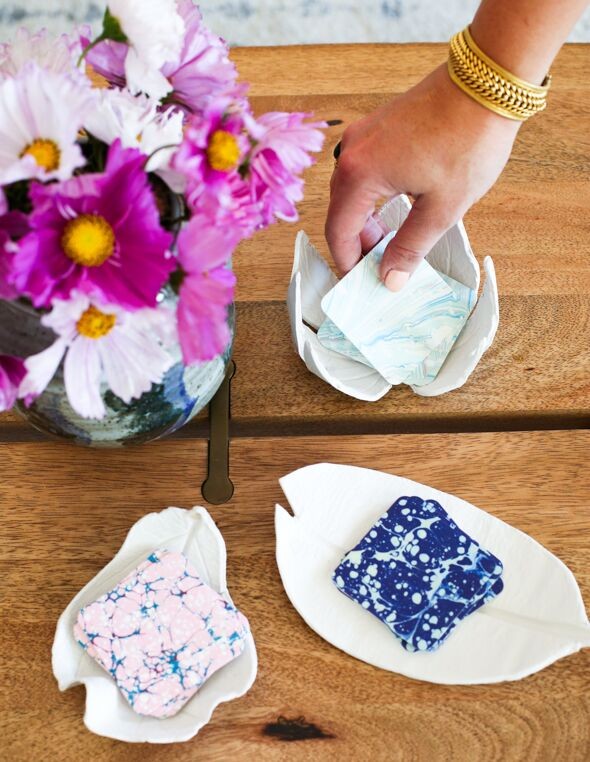
Their site is GENIUS and incredibly easy to use. Really, truly, even if you have zero graphic design experience, you can have the business cards (or the stationery, postcards, invitations…) of your dreams at a completely affordable price point. I thought I would want to design my own cards but as soon as I saw this marbled option in their design library, it was game over. Can you even? There are lots of different options, but I especially love the square size and the rounded corners on our cards! I chose their brand new Cotton Business Cards. The paper is made from recycled cotton t-shirt offcuts from the garment industry which would normally be thrown away. It’s a modern take on a cotton rag paper meaning that these cards aren’t only beautiful and high quality—they’re also tree free! Isn’t that cool?

5I5A8506 copy

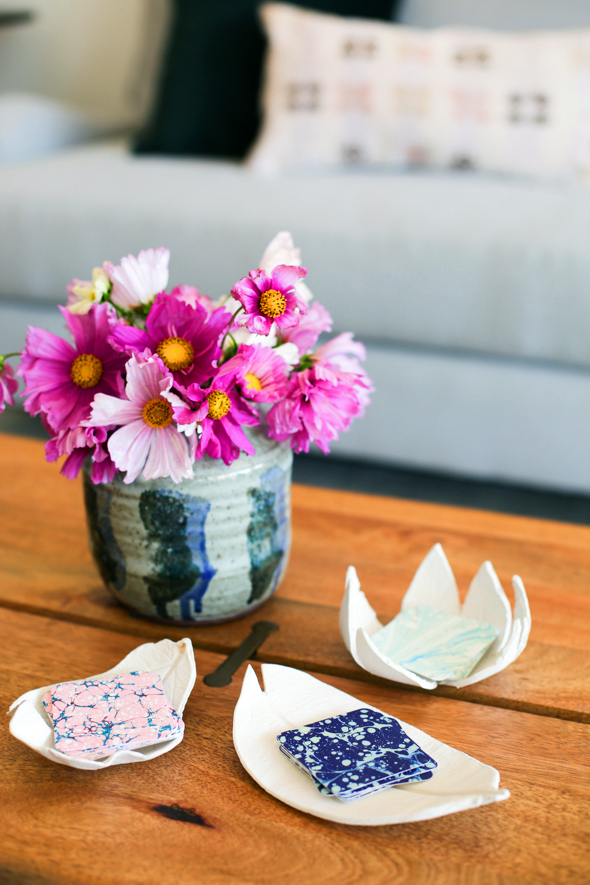
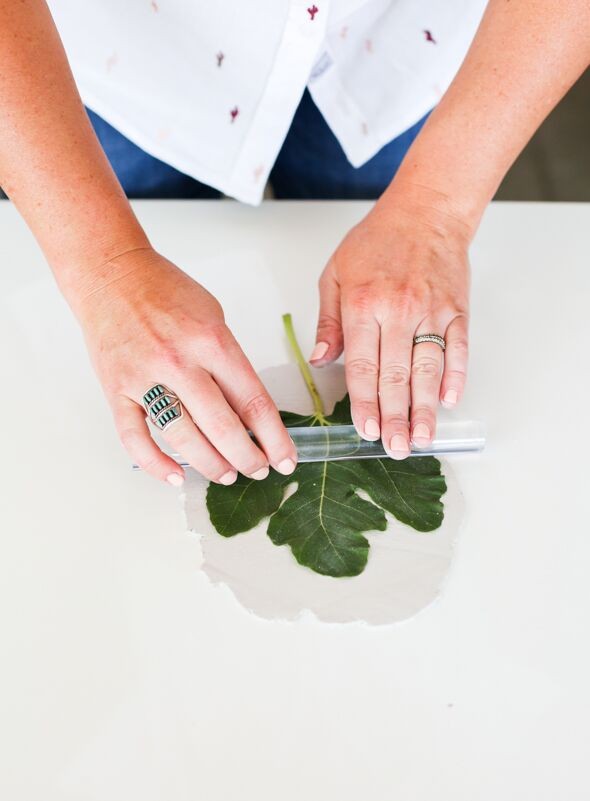
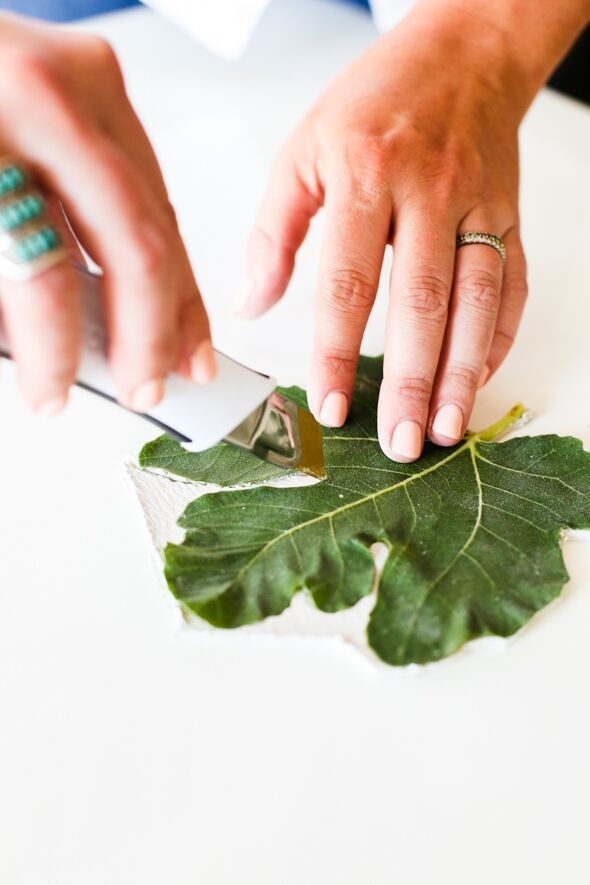
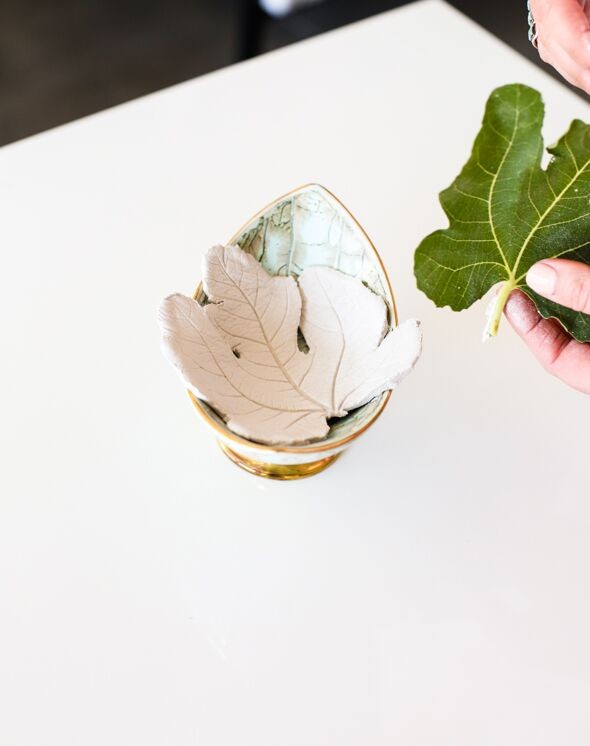
We used this super simple tutorial to make a few of these leaf-impression card holders to keep all around the studio. My daughters even made a few of these that we’re using – that’s how easy this tutorial is! Basically you use this air-dry clay (I like the bright white, though you can do any color you like!), roll out the clay to 1/4″ thickness using this roller, lay down a leaf with the veins facing down and roll the leaf into the clay pushing hard. You can cut around the leaf with scissors or an x-acto knife and then gently peel off the leaf. We let our clay leaves dry overnight in bowl to give them more of an organic shape. You can sand off any rough spots with a sanding block and you’re all done!

Moo Leaf Bowls DIY-3_preview

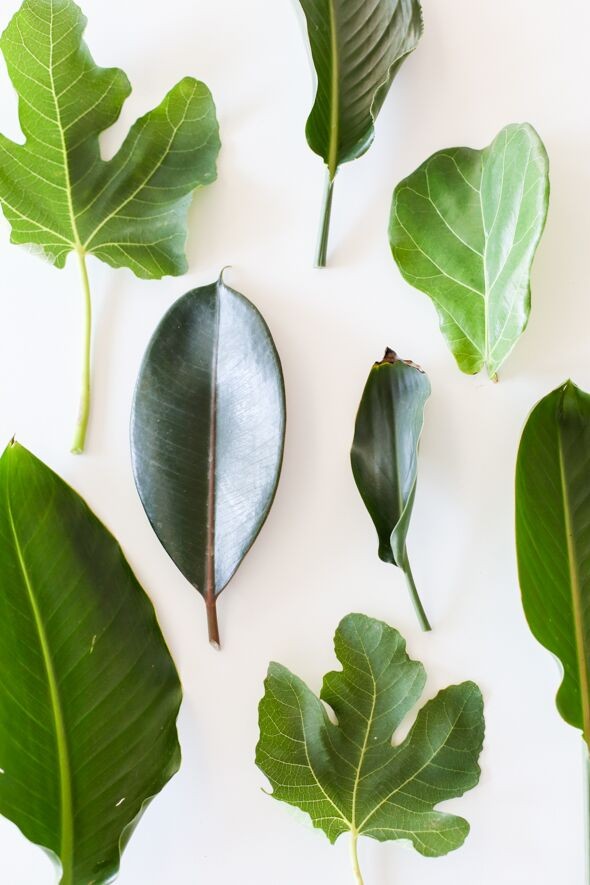
(the more veins in your leaves, the better!)

Moo Leaf Bowls DIY-14_preview

Moo Leaf Bowls DIY-25_preview

Moo Leaf Bowls DIY-34_preview

Moo Leaf Bowls DIY-55_preview

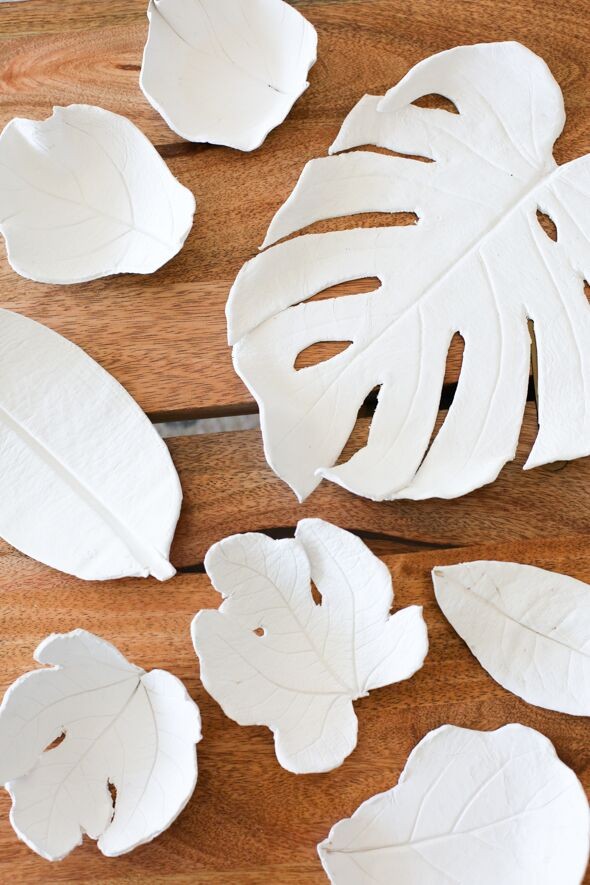
I especially love the big monstera leaf we used to make a card holder for our Jenny’s Print Shop 5×7″ take away postcards.

Moo Leaf Bowls DIY-53_preview

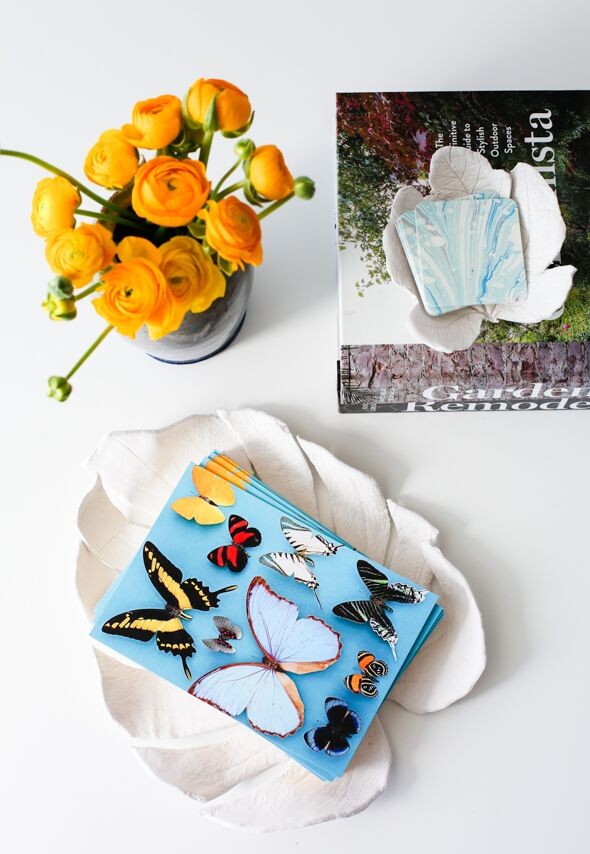
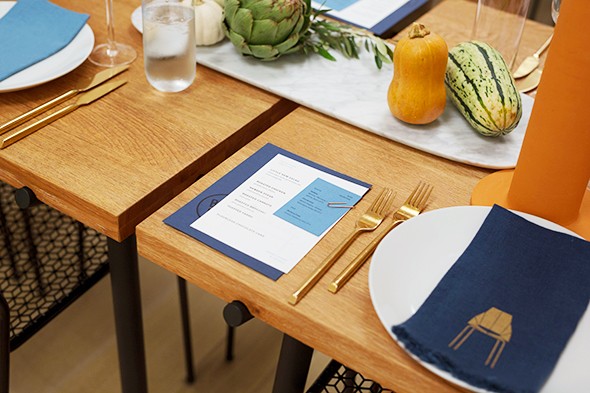
Aren’t these gorgeous? We chose MOO’s Luxe paper for these and they are SO THICK! And as part of the design process on MOO’s site, you get to choose a color for the edging of the post card. It’s the details that make the design!

5I5A8554 copy

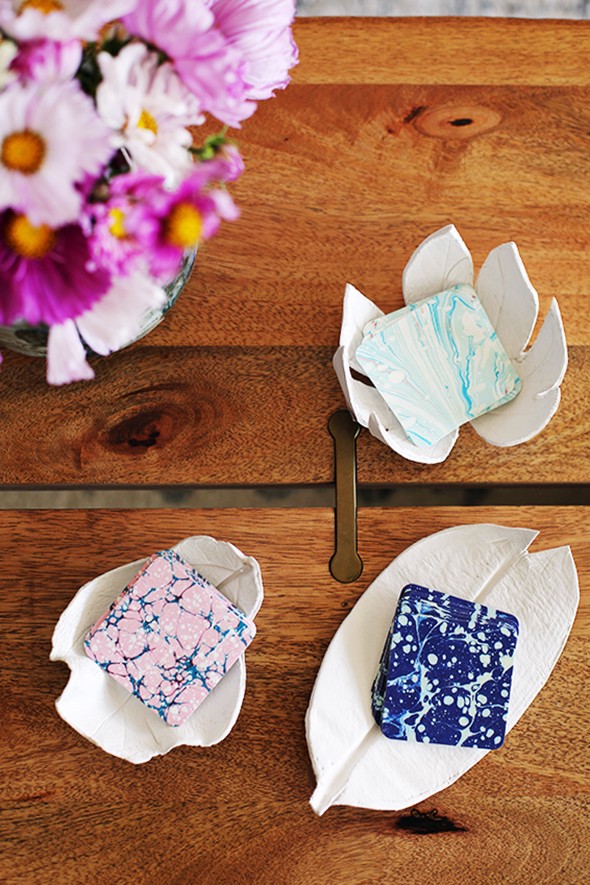
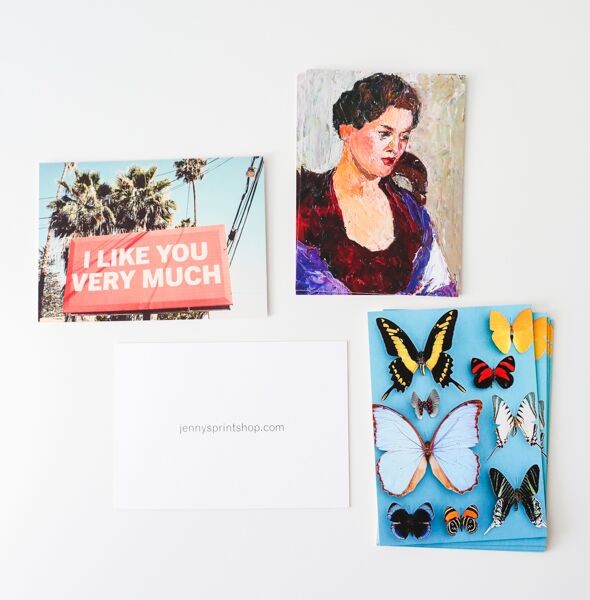
We had a few print shop favorites printed and I picked a different color for each print. I like the idea of giving these out to customers here at the shop. So come on down when we’re officially open so I can give you one of these beauties!! :)

5I5A8567 copy

Moo Leaf Bowls DIY-47_preview

I absolutely can’t wait to get to North Carolina tomorrow and start handing these out! Have you checked out the MOO site? I’d love to hear which of their designs is your favorite! And if you’re a brand new MOO customer use the code LITTLEGREENMOO at checkout for 15% off Cotton Business Cards! :)

Moo Leaf Bowls DIY-62_preview

Inspiration

One Room Challenge: Week 2 – Wallpaper Inspiration

It’s time for a One Room Challenge update!! :) Last week we mentioned that we were thinking about painting the beams in the #GentryProject master bedroom. Some of you voiced your concerns, but don’t worry! These beams aren’t real wood and they looked really awful in person. We had our painters paint them in a warm…

It’s time for a One Room Challenge update!! :) Last week we mentioned that we were thinking about painting the beams in the #GentryProject master bedroom. Some of you voiced your concerns, but don’t worry! These beams aren’t real wood and they looked really awful in person. We had our painters paint them in a warm gray tone and I think it was the right choice for the space. If feels so much more fresh in the room! (This is right after the first coat and before the painters did any clean up)

IMG_7938 (1)

When I started thinking about what kind of space we wanted to create, the idea kept popping up of wallpapering the room in a soft, peaceful and textural pattern.

17c41f83881c485be9ba918442bbe609

source

Screen Shot 2017-10-10 at 10.04.47 PM copy

source

b4b428eca51bdaef2821007c5dafdeb6

source

8ab86d066b7fde94318c65f21437e5f7

source

We knew we wanted to go with a warm, neutral wallpaper and Farrow & Ball (who is a participating sponsor of the ORC) has a lot to offer in that area! (Remember this wallpaper I picked for my entry? I still love it almost four years later!) We laid out our top six picks to help us decide which scale and pattern would be best for the room.

Farrow&Ball1  //  2  //  3  //  4  //  5  //  6

Okay, spill the beans. What would you pick here?? I have to admit, I’m most drawn to #1. I keep finding myself loving warmer tones lately – don’t you? I am loving taupes and beiges mixed with bright whites and black! SO GOOD. Here’s a little board we put together with the Jasmine paper and some other colors we’re loving for the room. What do you think of this start? I’m hoping it’s a soothing, peaceful space that is NOT AT ALL BORING!! :)

IMG_8209 (1) copy

——————————————–

Don’t forget to check in on the progress of the other ORC participants! So many exciting rooms this season!! xo

Boxwood Avenue  //  Coco & Jack  //  Shay Geyer  //  Design Manifest

Dwell with Dignity  //  The Makerista  //  Making it Lovely  //  Dabito

Old Home Love  //  The Painted House  //  Megan Pflug  //  The Pink Pagoda

Erica Reitman  //  Sacramento Street  //  Simply Grove  //  Jill Sorensen

Sugar & Cloth  //  BrittanyMakes  //  Waiting on Martha //  The House that Lars Built

Inspiration

DIY Black Fridge with Brass Pulls

Last week we posted our studio kitchenette reveal and everyone had so many questions about our DIY black fridge with the brass pulls!! When we started planning out our studio kitchen design we fell in love with the idea of this SMEG fridge, but not only is it unavailable in the US, it was way,…

FridgeDIY

Studio Kitchen Reveal-3_preview

Last week we posted our studio kitchenette reveal and everyone had so many questions about our DIY black fridge with the brass pulls!!

Studio Fridge-1

When we started planning out our studio kitchen design we fell in love with the idea of this SMEG fridge, but not only is it unavailable in the US, it was way, way out of our budget. We went on a mad hunt trying to find something similar, but there’s not much in the way of matte black appliances that cost less than a car.

31ca32bcbec3d66dc8c739b15ad45810

Studio Fridge Before-1

To make this project super budget friendly, we went with this apartment size fridge in stainless steel. We started by removing the logo in the top corner. Did you know you can just pull these off with a putty knife? Super simple and makes for a much more clean look!

Screen Shot 2017-10-10 at 3.00.08 PM

We first painted the fridge with an enamel paint, but the finish dried a little uneven. We ended up trying a coat of this chalk paint over the enamel and the finish was perfect! Smooth and completely matte – exactly what we had in mind. We used a foam roller to apply the paint, letting it dry between coats.

Studio Kitchen Painting Fridge-3

I really wanted big brass pulls but I also wanted to keep this fridge as budget friendly as possible. IKEA came to the rescue with these pulls (we also used them on our cabinets!). You will also need four washers and four short flat top machine screws for this project. Make sure that your screws fit flush into whatever pull you choose for this project. Pro tip – take the screws that come with your handles to the hardware store with you to ensure you get the right fit and length – you’ll need metric sized screws with the IKEA pulls!

Studio Fridge Before-3_preview

We tested out a bunch of gold spray paints (stay tuned for a post on that sometime soon!) to see what would look right for the space and this one was the perfect color and finish for our handles.

Studio Fridge Before-4_preview

Studio Kitchen Shelves-11_preview

We used this super heavy duty epoxy to glue the washer and the screw to the fridge where we wanted the top of the pull to sit.

Studio Kitchen Shelves-15_preview

Studio Kitchen Shelves-17_preview

After letting the epoxied washer + screw set up overnight, I twisted on the IKEA pull with the other washer and screw already screwed in flush and then epoxied that loose end in place. It should hold right from the get-go, but if you want some extra security you can use a few pieces of duct tape to hold the pull in place while the epoxy sets overnight.

Studio Fridge Hardware-4_preview

Studio Fridge Hardware-1_preview

Make sure you don’t twist it too far. Once you feel it starting to tighten up, stop there.

Studio Fridge-4_preview

For the freezer, you just repeat the same steps of epoxying on a washer + screw and then screwing on the pull and epoxying the other side in place! It sounds a million times more complicated than it is! The trick really is to letting the epoxy set up 100%. We did this project about a month ago and the handles are holding up wonderfully to our Diet Coke habits! :)


Studio Fridge-2
Studio Kitchen Reveal-3

I don’t think this is a project I would necessarily do on a brand new expensive fridge, but if you have an old fridge that you are trying to love again, I think this is a great project for you! :)
Studio Kitchen Reveal-41

Inspiration

Love Notes

In case you missed it, we are participating in the One Room Challenge this season!! We made all sorts of progress on the design plan for the Gentry master bedroom this week and I can’t wait to share all the detes. This week we shared some before photos, as well as our inspiration for the space…

IMG_8026 copy

In case you missed it, we are participating in the One Room Challenge this season!! We made all sorts of progress on the design plan for the Gentry master bedroom this week and I can’t wait to share all the detes. This week we shared some before photos, as well as our inspiration for the space here. Don’t forget to pop in every Wednesday for a weekly update!

Screen Shot 2017-10-05 at 3.42.34 PM

source

Speaking of the One Room Challenge, we are so excited to follow along with my (now IRL) friend Megan Pflug as she renovates the main living space of the Woodhouse Lodge. She recently purchased this A-frame hotel built in 1962 located in upstate New York! Can you even imagine? I’m equally stressed out and excited for her. What a dream! You can follow the progress of the entire lodge on her Instagram, @thewoodhouselodge.

Screen Shot 2017-10-05 at 3.29.20 PM

source

____________________________________

You know, Pinterest is great and everything (btw you can find me here), but phone screen shots are kind of my favorite thing. When I’m stuck somewhere without wifi, I love scrolling through my screen shots folder and it’s always like a little surprise remembering things that took my breath away! Here are a few of my favorites from this week!

Something about this pattern is completely mesmerizing to me! Also, I’m so drawn to warmer colors these days and this combo is really doing it for me!


IMG_3521

image

We’re hoping to do phase II of our home remodel this year, which will include the kitchen and a lot of exterior work including a new roof. I like the dark color of this beauty!

IMG_3450

image

Though I think we’re going to end up something a little closer to this asphalt plus metal porch combo for our farmhouse style home. I’m obsessed with all of the wood accents.

Screen Shot 2017-10-06 at 4.34.41 PM

image

We are REALLY hoping we can also afford to put in a pool this year! We’ve been saving for this remodel for about four years and I’d love to knock out as much as possible on our wish list. This pool here is completely my inspiration! I love the simple stone deck and the shallow area that would be perfect for younger kids. Total dream!

IMG_3515

image

Ohhhhhh those bar stools!!!!!!

IMG_3520

image

OBSESSED with the color on these built-ins!

IMG_3516

image

Love the demin-y inky woven fabric on this sofa!

IMG_3519

image

We have a cathedral ceiling in our kitchen and I like the idea of dropping the ceiling a few feet just at the top of the pitch and then adding beams. So unique!!

IMG_3513

image

A great reminder that if things feel extra hard with work or a project you’re doing, it might not mean there is something wrong with your job or the way your are doing your project! It could just mean that you need a nap. :)

IMG_3476

image

____________________________________

And finally!!! We scoured the internet for the best sales and deals this weekend so you don’t have to! There are a lot of Friends and Family sales as well as extra discounts, so be sure you check for any codes for extra savings!!

WS1

1  //  2  //  3  //  4  //  5  //  6  //  7  //  8  //  9

____________________________________

I hope you have the best weekend ever, friends! We’re heading into Fall Break with my kids and I can’t wait to cuddle them extra this week after all the craziness that’s been going on in the world. Love to you all. xo

Inspiration

Blu Dot Nomad Store Opening!

You might have seen on my Instagram stories that I got invited to come to NYC last week and help Blu Dot throw a dinner party to celebrate their new 12,000 sq foot store in NoMad! It was a total dream collaboration for me! I have been the hugest fan of Blu Dot products for…

_15A9735

_15A9389-2 copy

You might have seen on my Instagram stories that I got invited to come to NYC last week and help Blu Dot throw a dinner party to celebrate their new 12,000 sq foot store in NoMad! It was a total dream collaboration for me! I have been the hugest fan of Blu Dot products for years, so getting to party with the Blu Dot team and some blogging and magazine editor friends was pretty much my favorite thing.

_15A9620

_15A9228

It was amazing to get to see all of their furniture pieces up close too. I’ve been obsessing over their Toro sling chair and stools forever now and do you remember the Nook bed we used in Lucy’s bedroom? They released a new shade of pink and it is so, SO good!!

(PS Did you see Blu Dot is having their once-annual 20% off EVERYTHING sale right now!? Perfect timing!)

_15A9759

I’m also obsessed with this line of terra cotta vessels they sell. I love seeing such modern shapes in such a traditional material!

_15A9810

_15A9711

The store itself was bright and white and super inspiring! If you’re a New Yorker, you have to stop by! As of yesterday, the store is now officially OPEN! It’s on the corner of Madison and 29th in the NoMad neighborhood, which has become a total design district in the last couple of years especially. There are a ton of design offices and stores popping up everywhere!

_15A9440


_15A9680
_15A9697

Megan Pflug and Rebecca Atwood!! :) :)

_15A9690
_15A9668

Sarah from Shop Style and Jenna from Lunchpails and Lipstick

_15A9584

_15A9632

Jennifer and Georgie from J & G Design

_15A9553

The amazing Blu Dot team set up the most gorgeous dinner spread for us in their customer lounge area. See that gallery wall here? Those are all photographs of the original prototypes of their furniture pieces!! (You can see more on their Instagram feed) It was SO cool to see mock ups made from cardboard and fabric scraps and really rough wood and then to see the finished products out on the showroom floor was so cool. The Blu Dot co-founders were at the party and getting to hear the story of how they started their company 20 years ago was so inspiring!

_15A9548
_15A9579

It was such a great night and it was so fun to see so many friends who love Blu Dot as much as I do. New Yorkers, be sure to stop by the store! Here are some of our favorites Blu Dot pieces in the store and online:

BD1

1  //  2  //  3  //  4  //  5  //  6  //  7  //  8
BD2

1  //  2  //  3  //  4  //  5  //  6  //  7  //  8

Thank you to Blu Dot for sponsoring this collaboration! All opinions are my own. :)

Inspiration

One Room Challenge: Week 1

I know a lot of you love the One Room Challenge as much as I do and I am SUPER excited to share that I’ll be participating this season! Over the next six weeks we will be taking you along as we completely transform the master bedroom over at the Gentry Project. We will be posting…

ORC Fall 2017 - LARGE Fall 2017 One Room Challenge™ Designers (1)

I know a lot of you love the One Room Challenge as much as I do and I am SUPER excited to share that I’ll be participating this season! Over the next six weeks we will be taking you along as we completely transform the master bedroom over at the Gentry Project. We will be posting our progress every Wednesday, so be sure to check in each week!

BP (232)

This bedroom has already been a work in progress for quite some time. If you follow along on my Instagram stories, you might remember some of these super ugly before images!

BP (270)

BP (271)

BP (274)

BP (280)
BP (278)

BP (272)

The room looks CONSIDERABLY better just after demo, am I right?! We took out the carpet and removed the peeling wallpaper. And we changed the single-paned arched windows to squared-off energy efficient windows. Much better!

Gentry Demo-16

Here is the room in it’s current state.  The floors have been installed and we are pretty much ready to dive right in! We are considering painting the beams and I think that will help it feel a little more restful in here! What do you think?

Gentry Flooring-15

Gentry Flooring-14

While we want to create a soothing and serene master bedroom, I don’t want this space to be lacking in playfulness or texture. Here are the inspiration images we pulled for this challenge and a very loose concept for our floor plan. I can’t wait to get started!

LGN ORC Floor plan

5c55c7dcdb9199a508cda7b0d12765e1

source

4ba16919b5c1a6a79718550c37611b53

source

c617a0a7a62569fe3d2372bf235e88c0

source

5a5ebc27b681fc0d1485f8b1fda7b74d

source

169f2a48b8d7f7a715e1415169e04463

source

Make sure you follow along with all of the other participants!! All of us will be posting every Wednesday morning for the next six weeks, so don’t forget to click though and see all the rooms these talented friends will be tackling.!

Boxwood Avenue  //  Coco & Jack  //  Shay Geyer  //  Design Manifest

Dwell with Dignity  //  The Makerista  //  Making it Lovely  //  Dabito

Old Home Love  //  The Painted House  //  Megan Pflug  //  The Pink Pagoda

Erica Reitman  //  Sacramento Street  //  Simply Grove  //  Jill Sorensen

Sugar & Cloth  //  BrittanyMakes  //  Waiting on Martha //  The House that Lars Built

Inspiration

Studio Kitchen Reveal & Cabinet Painting Tutorial

You guys! We just finished our little studio kitchenette last week and I COULD NOT LOVE IT MORE!!! When we moved in to our new studio we knew we wanted to put in a small kitchenette – mostly just a small row of cabinets with a sink and a fridge. You probably remember when we…

Studio Kitchen Reveal-46

You guys! We just finished our little studio kitchenette last week and I COULD NOT LOVE IT MORE!!!

Studio Kitchen Reveal-22

Studio Kitchen Reveal-6

When we moved in to our new studio we knew we wanted to put in a small kitchenette – mostly just a small row of cabinets with a sink and a fridge.

Studio Kitchen Reveal-37

You probably remember when we got this space, the walls were yellowy cream and brown. Not totally my style :)

IMG_0565

IMG_0554

We started by white washing everything in here – the walls and even the ceilings got painted the perfect clean, sunny white hue, called Designer White (33-1). from Pratt & Lambert®. It is beautiful and so bright!! I was so impressed with the coverage of their Accolade® Interior Premium Paint & Primer. One coat of this paint and all that brown was covered!

Studio Kitchen Reveal-52

Once all the walls were a bright white, we started to feel adventurous! It seemed like a great opportunity to go a little bold with our cabinet color and green was the OBVIOUS choice!! :)

Kitchen Before-6 (1)

Kitchen Before-13 (1)

Kitchen Before-4

We used the amazing (and new)  Aquanamel™ Waterborne Alkyd Enamel paint from Pratt & Lambert for our white shaker cabinets and I couldn’t be happier with the results! If you are thinking of painting your cabinets, this low VOC paint, made specifically for use on cabinets, doors and trim, is a really great option and I will definitely be using it again! It is self-leveling, which means it will give you a super even and uniform finish.

Painting Cabinets-3

We started out with white ready-made shaker cabinets from a local company called Madera. We didn’t even need to sand or prime these before painting because Aquanamel has a primer built in!!

Painting Cabinets-2

The trick to painting your own cabinets is to apply super thin, light coats with a 4″ foam roller, letting the layers dry before starting the next. This will ensure you get a really even coat without drips or streaks!

Painting Cabinets-5

If you are thinking of using this paint on older cabinets, we recommend giving your cabinets a thorough cleaning and sand with a sanding block or a liquid sander before starting. Here’s what our cabinets looked like after one coat, but I knew the color was going to look amazing after another coat!

Painting Cabinets-1

The self-leveling paint makes it so you won’t really have brush marks – it really is so amazing! If you get a little heavy handed though and you end up having some drips, you can just use a sanding block to smooth any of that out!

FinalPainCabinets-1

Here’s what the cabinets looked like after two coats of Pratt & Lambert’s Aquanamel Waterborne Alkyd Enamel. SO pretty! The color we chose was Sierra Night (18-17). It’s the absolute perfect dark olive color!

FinalPainCabinets-4

FinalPainCabinets-9

We have a few separate posts coming later about our countertops, the DIY open shelving and how we made over our fridge so stay tuned for those posts! I love the contrast of colors here with the soft white honed marble counters and our matte black fixtures and fridge!

Kitchen Countertops Installed-5

Kitchen Countertops Installed-4

And here she is!! Our beautiful new kitchen!!

Studio Kitchen Reveal-5

Studio Kitchen Reveal-12


We had Lucent Light Shop make us these amazing wall sconces called the Studio Sconce!! They are exactly what we wanted for this space and we couldn’t be happier with how they turned out.

Studio Kitchen Reveal-13

baskets  //  round tray

Studio Kitchen Reveal-36

round cutting board  //  black plates  //  cabinet hardware 

I just can’t get enough of these new paint colors! That gorgeous, bright white paired with that perfect shade of green makes my heart skip a beat! It was so easy to make these simple cabinets look and feel so much more custom and expensive with the new paint job and hardware!

Studio Kitchen Reveal-32

planter  //  vase 

Studio Kitchen Reveal-21

white mugs  //  bowls

Studio Kitchen Reveal-20

salt cellar  //  butter keeper  //  white plates  //  splatter plates

Studio Kitchen Reveal-17

I hope you guys love this little makeover as much as we do! Do you have any questions about how to paint your own? It’s SO easy! :)

Studio Kitchen Reveal-42

rug (similar)  //  ASPENS print 

SK1

1  //  2  //  3  //  4  //  5  //  6  //  7  //  8  //  9

SK2

1  //  2  //  3  //  4  //  5  //  6  //  7  //  8  //  9

SOURCE LIST!

Cabinet Paint: Pratt & Lambert Aquanamel™ Waterborne Alkyd Enamel. Color is Sierra Night (33-1).

Wall Paint: Pratt & Lambert Accolade® Interior Premium Paint & Primer. Color is Designer White (33-1).

Cabinets: Madera

Counter tops: Honed Calacatta Marble from G3 Granite and Glass

Sconces: Lucent Lightshop

Island: Design by me and made by our carpenter

Island Baskets

Shelf and brackets: DIY (post coming soon!)

Black Pulls and Knobs

Black Faucet

Sink

Rug: Vintage, similar here

Black Floral Prints

Aspens Print

Bread Board

Black planter

Salt cellar

Butter keeper

White plates

Splatter plates

White mugs

Bowls

Vase 

Black plates

This post was brought to you in partnership with Pratt & Lambert® Paints! Thank you for supporting our sponsors!

Inspiration

Love Notes

Happy Friday! Another week has flown by! I’ve been traveling so much this month, we’re running a little behind on our posting schedule. I PROMISE that the studio kitchen reveal will go up in the next couple of days! Pinky promise. And as a show of good faith, I’ll give you this little sneak peek!!…

Happy Friday! Another week has flown by! I’ve been traveling so much this month, we’re running a little behind on our posting schedule. I PROMISE that the studio kitchen reveal will go up in the next couple of days! Pinky promise. And as a show of good faith, I’ll give you this little sneak peek!! :) :)

Studio Kitchen Reveal-20
We have about fifty photos to edit and the longest post ever to write, but it will be worth the wait!!

__________________________________

Sole Society-8

shoes  //  scarf  //  bag

RAINBOW print  //  TULIPS print

Sole Society sent me a few things from their beautiful new fall collection and since it’s been cooling down the tiiiiiiiiniest of bits the past few weeks, I’ve been feeling like scarves are completely appropriate now. :) I’m obsessed with this indigo plaid one! The weekender bag is probably my favorite thing they sent though. I used it when I went to Salt Lake and NYC this last week and it makes a great bag for the airport when you need to consolidate a few carry-ons!

Sole Society-10

scarf  //  bag  //  shoes //  sunglasses

Sole Society-3

Sole Society-4

tortoise glasses  //  amber glasses

Sole Society-5

boots  //  Poppies PRINT

Super excited to wear these velvet shoes with dresses and jeans alike this fall! That color is so pretty and so perfect for fall! They have lots of other great items here!

Sole Society-1

shoes  //  rug

__________________________________

Overstock Leather Couch-9

sofa  //  rug  //  lamp  // black pillow  //  white pillow

We picked up some new pillows for the Studio from Brooke at Sew and Cloth. We love supporting local businesses, and it doesn’t hurt when the pillows are this gorgeous!

(And isn’t that sofa kind of really great?! It was an Overstock find!)

Overstock Leather Couch-4

rug  //  chairs  //  sofa  //  lamp  //  black pillow

__________________________________

Speaking of local friends, do you follow our local design hero Wendy Doris of Dwelling Studio? She renovates historic homes all over Phoenix and she always does a great job, but I’ve especially loved following her#coronadoproject! This is such a beautiful house, it’s hard to believe it’s a flip!! Just look at that kitchen. I love the cabinet color, the hood design and the way the stone runs up the backsplash. Great job, Wendy!!

Screen Shot 2017-09-28 at 3.17.18 PM copy

source

Screen Shot 2017-09-28 at 3.08.30 PM copy

source

Screen Shot 2017-09-28 at 3.08.02 PM

source

IMG_9192

source

Screen Shot 2017-09-29 at 12.26.53 PM

source

__________________________________

We’re big fans of the Chris Loves Julia Podcast around here so we were so excited to hear them give a shoutout to Jenny’s Print Shop on this week’s episode!

Processed with VSCO with a6 preset

Here is ELEANOR styled on their beautiful shelves. I love that Julia used her home printer!! New art without even having to leave the house! Amazing! For the next few days we are offering 15% off any Jenny’s Print Shop purchases! Use code “WELCOMEFALL15”.

Screen Shot 2017-09-27 at 10.21.03 AM copy

Happiest of weekends to you, my friends! And thank you to Sole Society for sponsoring a portion of this post!

Inspiration

Love Notes

Hi friends! Fall is officially here!! Who else is excited to say goodbye to this ridiculously hot summer and hello to sweater weather!? I just got back from a trip to NYC and Connecticut and I’m coming home refreshed, inspired and happy, with a camera FULL of options for Jenny’s Print Shop. Can’t wait to share!…

IMG_3174

Hi friends! Fall is officially here!! Who else is excited to say goodbye to this ridiculously hot summer and hello to sweater weather!? I just got back from a trip to NYC and Connecticut and I’m coming home refreshed, inspired and happy, with a camera FULL of options for Jenny’s Print Shop. Can’t wait to share!

IMG_3273

Michael came with me on this trip and it was SO good to get some quiet time together to talk about life and work and to start to figure out some things. We went to museum after museum and talked while we walked. I left itching to get out my art supplies and make more time for creative work.

IMG_3329 copy

IMG_3226 copy

IMG_3242

_____________________________

Did you know you can get 15% off your first Framebridge print order from Jenny’s Print Shop using the code JENNY15. Awesome right? Designer Lindsey Frank used Framebridge to print and frame her ASPENS download for this project here above. I’m obsessed with the natural wood frame!

Screen Shot 2017-09-25 at 7.26.29 AM

source  //  ASPENS print

_____________________________

West Elm is currently running their Friends and Family Sale which is 20% off your entire purchase, including markdowns!! There are some seriously good deals to be had! Make sure you use the code FFSALE at checkout!

WE1

linen chair  //  floor lamp  //  pillow  //  cutting board

we2

nightstand  //  pillow  //  chair  //  vase

we3

side table  //  throw blanket  //  wall sconce  //  pillow

_____________________________

We are posting our studio kitchen reveal this week (!!!!!!) and I could not be more excited to show you what we came up with! There were some last minute changes to the backsplash and shelf design. We couldn’t end up doing any tile in the end (remember I was SO excited about the brass schluter idea!) but I think what we came up with in the end actually looks best! I know this is all pretty cryptic, but I will say this project from my friend Caitlin Creer was such an inspiration for making the shelf different and interesting! :)

Screen Shot 2017-09-26 at 8.15.36 AM

_____________________________

Have you seen these AMAZING chairs floating around the internet?? I’m super obsessed with them – especially the caned backs! Can you believe they are only $169 each? They keep selling out and then getting restocked weeks later, so if you love them as much as I do, you should snag one or two now! :)

target chair LGN

I love how Danielle Oakey uses one in her beautiful living room without the cushion on the back! You can see so much more of the beautiful caning! Her gorgeous pillow don’t hurt either! (Shop her pillow collection here!)

Screen Shot 2017-09-25 at 11.03.02 AM

Inspiration

Love Notes

Happy Monday, everyone! Sorry we are a little late with this week’s Love Notes post. Last Friday was a little crazy and I was in Salt Lake City for a really cool designer challenge at Overstock’s headquarters (stay tuned for more on that soon! And I PROMISE all the details and links on finished room will…

Simple Trash Can-8 copy

Happy Monday, everyone! Sorry we are a little late with this week’s Love Notes post. Last Friday was a little crazy and I was in Salt Lake City for a really cool designer challenge at Overstock’s headquarters (stay tuned for more on that soon! And I PROMISE all the details and links on finished room will be in the post. Especially that rug you all were dying over in my Insta stories!! :)

We are doing some shooting for Domino tomorrow so now we are hustling to wrap up some of our studio projects, including our kitchenette. Our new lighting from Lucent Light Shop arrived this week and we are SO excited to get these installed today!! They’re beautiful!

IMG_7326

IMG_7324

lucent cafe sconces

______________________

Things are really starting to come together at the Gentry Project. We had originally planned to do a cement tile backsplash in the kitchen, but it just kept feeling hard to pull the trigger. You know that feeling? When you’re trying to make a design choice and everything you’re looking at is falling a little flat? That usually means it’s time to go back to the drawing board. And I’m so glad we decided to rethink that range surround area – I can’t wait to show you the design! And the great news is now we are going to incorporate some pattern on the fireplace! The tile on the far right was our original pick for the kitchen, but maybe it’s not the right choice for the living room? I think we are leaning towards the tile on the far left (called Amalia Gris) so the color and pattern can stay on the more subtle side. Which would you pick?

IMG_7364

IMG_7363 copy

left tile  //  center tile  //  right tile

______________________

We made a trip to Anthropologie last week to pick up a few items for the studio. How cute is this little face planter that we are using to hold matches?!

5I5A6505 copy

face planter  //  gold candle  //  blue vase

We have used these hooks in other projects in the past and we just love them. I think these two are going to be used in our kitchenette. Won’t they look so pretty with our new gold wall lamps??

IMG_7382

Here are some of our current favorite items!

Untitled-2

1  //  2  //  3  //  4  //  5  //  6  //  7  //  8

World Market is offering 20%  online only through Friday!! We couldn’t resist these patterned kilim pillows or their new live edge coffee table that we put in the studio sitting area.

5I5A6527 copy

pillow  //  rug 

5I5A6535 copy

The coffee table is so pretty in real life. Check out that brass inlay on the top!!! So many heart eyes! And I can’t believe it’s only $230 with free shipping!

IMG_7398 copy

coffee table  //  rug 

Untitled-3

1   //   2  //   3  //  4  //  5  //  6


______________________

Have you been following along with House Seven Design as they take on their new remodel house? It is absolutely stunning and of course we’re loving how Anissa incorporated some Jenny’s Print Shop prints into the space!

Screen Shot 2017-09-14 at 10.27.41 AM

source

BLUE AGAVE print

Screen Shot 2017-09-14 at 10.28.37 AM

source

ASPENS print

Screen Shot 2017-09-14 at 10.29.39 AM

source

Screen Shot 2017-09-14 at 10.30.53 AM

source

Speaking of prints, we have been getting a ton of questions about framing. Framebridge is one of the best options out there if you are trying to get totally custom look with minimal hassle! All you have to do is upload your digital print to their site, pick a frame and mat option, and order! They are offering all first time customers 15% off their order when you use the code JENNYSPRINT15!!

PS – Don’t forget to enter the simplehuman giveaway in our last post!! We’re picking a winner in the next few days! xo

Inspiration

Floral Arranging 101 and a Give Away with simplehuman

***Giveaway winner has been selected! Thank you for entering! :) *** This post was brought to you in partnership with simplehuman. They gave us one of their new sensor open trash cans for the studio and another one to give away (details below!!)! Thank you for supporting the sponsors that help keep LGN going. :) Do…

***Giveaway winner has been selected! Thank you for entering! :) ***

This post was brought to you in partnership with simplehuman. They gave us one of their new sensor open trash cans for the studio and another one to give away (details below!!)! Thank you for supporting the sponsors that help keep LGN going. :)

Simple Trash Can-73

Do you have a list of back up jobs? Like, jobs you have in mind just in case your current job ever feels old or stale? I have two back ups, just in case this designer/shop owner thing doesn’t pan out. The first is a Labor and Delivery Nurse (because BABIES!!!) and the second would be a Florist. But given how much I really love interior design, and that I have four kids and that I also do my best to squeeze in as much florist moonlighting as possible around here, it might just be that I have the best of all worlds right now! :)

Simple Trash Can-13

We make between five and ten arrangements a week for styling our projects. So every Monday morning I go to the flower market and stock up. While our studio kitchen is under construction we set up a makeshift floral station using our beautiful new voice and motion sensor trash can from simplehuman and this standing desk we got in the IKEA as-is section. I didn’t notice until we got it back to the studio that part of the laminate had been torn off (eye roll). But I’ve always wanted to try the marble contact paper and this seemed like the perfect experiment. It was super easy to do and I love this little floral station now! We can just come over and grab whatever we need during the week for print shop shoots or client spaces. And our beautiful new trash can helps us keep the area clean and tidy! It comes in a ton of color and finish options, but I love our sleek white one!

Simple Trash Can-15

Simple Trash Can-38

Most of my arrangements end up being loose and more organic with lots of greenery. I thought you might like a little tutorial on my general approach to flower arranging here!

Simple Trash Can-4

Simple Trash Can-5

white vase  //  red vase

I almost always start with a floral frog or oasis to help keep the stems upright and in place, especially with bigger vessels.

Simple Trash Can-19

I always start with greenery as my foundation. I like to mix it up sometimes, but I pretty much always just want to use silver dollar eucalyptus. The bluey green color is my absolute favorite and the smell is amazing!! I use shears to cut the stems to size, so they hang a little long and loose. I’m also sure to remove the leaves that would be under water to help the arrangement last longer.

Simple Trash Can-25

One of my best tips is to keep a tidy work station and clean up as you go. You guys, our new simplehuman trash can opens when you say “OPEN CAN” (!!!!). I mean, we basically live like the Jetsons now!

Simple-Trashcan-GIF_2-

ANNE STREET print  //  HYACINTH print  //  rug

It also opens when you wave your hand near the lid and it will stay open if it senses you are still using it! Crazy right? This trash can has been so handy here at the floral station and I’ve become so obsessed that I got one for my kitchen at home. It’s awesome when the can is just open and ready for you to dump right in those drippy messes (like chicken! :/) that are just a regular part of meal prep. The germaphobe in me absolutely loves the touch-free element. And can we just talk about how gorgeous and sleek the can is? What a beauty!

Simple-Human-Trash-Can-trash-GIF

You can plug in the can or use batteries and there is a built-in liner storage compartment inside the can that I think is just the coolest thing!

IMG_7312

The next step for the flower arrangement after the greenery is to place a couple of your biggest flowers. I used blush dahlias as my base flowers here as well as couple of bright pink garden roses.

Simple Trash Can-27

Simple Trash Can-31

Simple Trash Can-34

A good trick for measuring what length you should cut your flowers to is to hold them upright and trim to the height of your vase. Remember that it’s always better to cut a little long and have to maybe come back to trim a little more stem off than to be stuck with a too-short stem and a flower that keeps sinking into your arrangement! (I like to snip the ends right into our new trash can! Here’s a little pro-tip for you though: no need to say “close can.” I was saying that for a while until I realized it closes automatically! Hahahhaha.)

Simple Trash Can-36

Simple Trash Can-41

After you establish a general shape with the big foundation flowers, I like to add color and texture and further define the shape of the arrangement with a couple of smaller flowers.

Simple Trash Can-61

I always like to add a touch of either black or really dark oxblood red to almost every arrangement for a little bit of contrast. These anemones do just the trick here!

Simple Trash Can-63

Tada!! All done! I would use something large like this for a big coffee table or an entry console. If we change the water every day, arrangements like this one can last for two weeks!

Simple Trash Can-84

Simple Trash Can-85

Tell me, what are you favorite floral arrangement tips? I’d love to compare notes! And if you’re not arranging flowers with an touch-free trash can near by, you’re not living!! :)

PS We decided to give one of these gorgeous automatic-open cans to you! YAY! To enter to win, just leave a comment on this post with your dream household invention or your favorite simplehuman product.

Thanks again to simplehuman for sponsoring this post!

Inspiration

Feeling Those Fall Vibes

Even though we are still consistently hitting 100+ degrees here in Arizona, the slow decline in temps (especially in the evenings!) and intensity of the sun has turned a corner and it feels like fall is far away still, but at least on her way! :) It could just be my wishful thinking, but all…

Even though we are still consistently hitting 100+ degrees here in Arizona, the slow decline in temps (especially in the evenings!) and intensity of the sun has turned a corner and it feels like fall is far away still, but at least on her way! :) It could just be my wishful thinking, but all I’m wearing, buying, thinking about lately is fall colors and textures.  Gimme all things camel leather, rust, oxblood, soft blush and a few dramatic pops of black thrown in!

af00b4141c6a6abf7ab34f61bb231a3c

source

9b756191cea390bb2711309ba7cbdcb8

source

eac95bda1cb6bfd96cbb6e605347731c

source

8aba4de83ebfcf26fb8d472deb40b1af

source

fall1

1  //  2  //  3  //  4  //  5  //  6  //  7  //  8

fall2

1  //  2  //  3  //  4  //  5  //  6  //  7  //  8

Has fall started to arrive where you live? I’m headed up to Salt Lake City for a work trip on Friday and I hear the leaves are juuuust starting to turn! :) I’m going to bring my camera and hopefully I’ll get a couple photos for the print shop!

PS This fall meme kills me every time! Hahahhaha.

This error message is only visible to WordPress admins
There has been a problem with your Instagram Feed.
© Jenny Komenda. All Rights Reserved.
Site by