DIY

Lucy’s Entry

You guys know how much I love picture ledge walls. I’ve posted about them HERE and HERE and in passing about a million times. I can’t think of a better way to display family photos that is more organized but still feels casual and organic. Before we came to do her home makeover, Lucy had a large…

IMG_8527 copy

You guys know how much I love picture ledge walls. I’ve posted about them HERE and HERE and in passing about a million times. I can’t think of a better way to display family photos that is more organized but still feels casual and organic.

Before we came to do her home makeover, Lucy had a large gallery wall of small photos in her entry, which was so sweet and fun, but she needed more storage/organization and something a little lighter for that small space.

IMG_6953

IKEA sells a GREAT picture ledge that even comes with a routered line for holding the frames more securely in place. It’s an amazing price at only $15 for a 45″ length, but for Lucy’s hallway, I wanted something a little more chunky that we could also use to install wall hooks.

IMG_6365

So I went to the hardware store and picked up a few 8′ lengths of primed pine in different widths. Here’s a quick sketch of all the pieces I used:

Screen Shot 2016-04-01 at 2.58.16 PM

I essentially used these exact instructions from one of my favorite Martha books but I used a pneumatic nail gun because it’s so simple and fast! Ana White also has a great tutorial.

MarthaScan
The basic idea is a bigger board acts as a base for both the ledge and the hooks. A medium sized board is the ledge and then two small boards act as the caps for the edge of the ledge and the bottom of the base. I think it is a clean and balanced look!

IMG_8541

Just like Martha suggested, we screwed the ledge right onto the wall. We used a stud-finder to make sure the shelf was secure (this $10 stud-finder is changing my life!) and a level (obvi!) before we committed.

The cast iron hooks are from Schoolhouse Electric. They are little sculptural works of art! We also screwed these directly into the wall through the wood of the ledge base. They’re not going anywhere!

IMG_8527

Before we came out for the install, Lucy sent us a dozen of her very favorite photos of her family members. Kate edited them to all have a similar look and feel with the high-contrast black and white, and then we had them printed at Costco. This little wall makes me so happy. I love that Lucy has a cheering section in her entry to greet her every day!
lucy_home_remodel_009
ENTRY SOURCES AT A GLANCE:

Paint color – Benjamin Moore Chantilly Lace (OC-65)

Hooks – Schoolhouse Electric Charter hook

Rag rug – two IKEA rugs stitched together!

Stool – Juniper Studio

Cashmere throw – Parachute Home

Frames – Target, IKEA and Aaron Brothers

Orange bag – Winter Session

Professional photos by Julia Robbs for Cup of Jo. Styling assistance by Kendra Smoot.

Bedrooms

Lucy’s Bedroom

One of our goals when working on Lucy’s bedroom redesign was to make it feel different from before, even drastically so. She was ready for this change. But most of all, we wanted her to feel relaxed and comfortable in her room. We wanted the look to be feminine and grown up and serene. Joanna originally…

IMG_8524

One of our goals when working on Lucy’s bedroom redesign was to make it feel different from before, even drastically so. She was ready for this change. But most of all, we wanted her to feel relaxed and comfortable in her room. We wanted the look to be feminine and grown up and serene. Joanna originally suggested the blush color (a color we both love for bedroom walls!) and Lucy was totally on board.

IMG_6956

IMG_6955

We chose Benjamin Moore’s Love and Happiness in an eggshell finish. I love the coral-y blush color! It’s not too intense – it just feels soft and cozy!

lucy_home_remodel_014

We knew most of the linens and textiles in the room would be white or neutral, so we thought the bed could be a really fun pop of color in here. We chose Blu Dot’s Nook bed in Poppy, which is a bright pinky-red in person. The quality of that bed is TOP NOTCH. I’d love to get one for myself in the blue color.

IMG_7087

Once we had the bed picked out, we looked around locally for nightstands to bring to California with us. We found these Danish beauties at Mathematica Modern at Zinneas (the same vendor who sold us the secretary weeks before) and we asked him if he had a mate to the version with the drawers. He did! And we LOVE them!

IMG_7197

They’re petite, but I love all the drawer storage. And the hairpin legs the seller added makes the height of the drawers a little easier to access. Somehow Mathematica always has a pair or two of these in their booth, so if you’re looking for something similar, it’s worth a call to Zinnea’s or an Instagram stalking session.

lucy_home_remodel_010

We wanted statement-making sconces that would help to brighten up Lucy’s room (remember, there was essentially no overhead lighting anywhere in the apartment) and I think these steel and brass sconces from Rejuvenation totally fit the bill! I love the masculine/industrial element they bring to the space.

IMG_8499

I think every room, especially a pink one, needs a little (or big) dose of black. I found this sweet little black leather slipper chair at a local shop here called Modern on Melrose. It is one of my favorite places to search for amazing mid-century treasures. The chair was designed by Milo Baughman. Did you know it’s pronounced My-low Boff-man not Mee-low Bow-man? I only learned that a year or two ago and have been feeling sheepish about it since. :)

IMG_6287

lucy_home_remodel_011 (1)

lucy_home_remodel_012

We wanted the art on Lucy’s walls to be on the softer side too. We found this sailboat photo print from Eventide Collective  that we all loved and felt like was such a peaceful image. The extra dose of white/soft colors is lovely in here, I think.

IMG_8497

The bleached jut rug was a steal from World Market and the color was perfect for layering on Lucy’s carpet. I love the sophisticated texture of a natural woven rug!

IMG_6513

IMG_8519

We chose super simple bedding from Parachute Home in the softest ice blue. It is SO lovely in person and super high-quality. I love, love, love how it pairs with the floral lumbar pillow we had custom made from Stuck on Hue. I bought the Moroccan pom-pom throw from Etsy.  IMG_8504

The block-printed curtain panels are a DIY (tutorial post coming up!) using IKEA’s Ritva curtain line – the very best curtains at IKEA! The price can’t be beat for the size of the panels, and the white color is bright and pretty and has a nice linen-look texture. I also really love that they come lined and with a drapery hook tape already sewn in the back! IKEA sells these three-prong hooks that slide right into pockets of the drapery tape and easily make a three-finger pleat that is ready to hang right on drapery hooks. Our curtain hardware is from West Elm. I love the touch of warmth from the brass in that rod!

IMG_8485

In the end, I think we were able to give Lucy a feminine, sophisticated new bedroom that feels comfortable and happy! She has texted me a few times to say that she is sleeping SO well in her new room, which is pretty much the most heart-warming thing I could imagine. :)

lucy_home_remodel_013

IMG_8512

BEDROOM SOURCES AT A GLANCE:

Wall color – Love and Happiness (1191) by Benjamin Moore
Bed (Edwards Poppy color) – Blu Dot
Floral Lumbar Pillow – Stuck on Hue
Jewelry Stand – Anthropologie
Gosling Lake by Kurt Tong – 20×200
Brass Rod – West Elm
Curtains – Custom hand-blocked
Bleached Jute Rug – World Market
Sconces – Rejuvenation for West Elm
Sail by Kati Dimoff – Eventide Collective
Custom Frame for Sail provided by Simply Framed

White Shams – Parachute Home

Powder Blue Duvet and Shams – Parachute Home
Dish – Schoolhouse Electric
Nightstands and black slipper chair –
Professional photos by Julia Robbs for Cup of Jo. Floral and Styling assistance by Kendra Smoot.
Additional photos by Jenny Komenda, Kate Lines and Kayla Taylor.
Inspiration

Lucy’s Dining Room

Lucy’s dining room is like a little treasure trove of vintage furniture finds! We lucked out (big time) on some of these! As a reminder, her dining room had some darker pieces that she was excited to move or to donate during her big home refresh. Here’s one of the first drawings we did while brainstorming ideas….

lucy_home_remodel_040 (1)
Lucy’s dining room is like a little treasure trove of vintage furniture finds! We lucked out (big time) on some of these! As a reminder, her dining room had some darker pieces that she was excited to move or to donate during her big home refresh.

IMG_6950

Here’s one of the first drawings we did while brainstorming ideas. A lot of these ideas ended up happening, but a few big things ended up changing, for sure! The scale of a few of the furniture pieces needed to be tweaked once we got the measurements of the space.

FullSizeRender (5)

lucy_home_remodel_008

lucy_home_remodel_004 (1)

The dining table was our first score here in Phoenix. Check out those crazy legs!

IMG_7201

The table top was not in great shape, but luckily I’ve had some experience with repairing cracked veneer with Bondo (here’s a little tutorial from another vintage table I fixed up that we still use in our studio).

IMG_6407

Once the Bondo had cured and been sanded smooth, we primed and painted the table Simply White in Benjamin Moore’s Advance line paint – our favorite for painting cabinets and furniture! We used the same paint in Classic Gray (probably my favorite light gray color ever) on this Lane credenza we got off Craigslist. The wood was pretty before, but it was really chipped on the side panels and there wasn’t much to do to salvage it. I love how paint transforms old furniture!

IMG_7196

Kayla scrubbed the hardware with Barkeeper’s Friend and it looks completely new! We tried Brasso first and it made the pulls all splotchy and weird but the BKF worked like magic! Usually one of the two works for me on different brass finishes – it just takes some experimenting!

IMG_7191

Lucy wanted more storage in her dining room and a little desk area to work. We found this perfect little Danish secretary that has a pull-out top and lots of drawers at a local shop called Zinnia’s from a seller called Mathematica Modern (a FAVORITE place to check for affordable MCM pieces!)

IMG_7199

IMG_7200

We cleaned it up with a little Danish Oil and it looks brand new in Lucy’s dining room!

lucy_home_remodel_007

And how amazing are those maps hanging above the secretary?? Jordan Ferney texted me while we were driving the U-haul to California and was like “I wish you were coming to SF this week so I could take you to this amazing flea market that only happens once a year” and I was like “GIRL I AM DRIVING TO SF RIGHT NOW!!” We met her at the White Elephant sale in Oakland and we scored lots of cool accessories and art especially, though there were tons of furniture pieces I wish I had had more room for!

IMG_7194

We got this amazing shipping map of the British Isles and we hung it next to one of Lucy’s favorite maps that we reframed in a vintage frame and mat we found at the White Elephant sale. I love how the colors work next to each other! It was like they were meant to be!

lucy_home_remodel_022
I also love how they play off the color of the Dash & Albert rug! How great is that grid pattern? I want this for my living room. It so soft and SO well-made (like all of the Annie Selke products!)

IMG_6340
IMG_6614
The dining chairs though – they take the cake for me!! The chairs we had originally ordered didn’t quite make it in time for the shoot. So we shopped around at local stores and tried to find a good replacement. We thought about these – a great size and quality for the price! We even bought four of them just to have on hand in case nothing else worked out.

IMG_6508

We had been checking Craigslist like crazy during the week, and while SF has THE MOST AMAZING Craigslist I’ve ever seen, nothing was quite fitting the bill. Then at the last possible moment, these babies popped up. Clouds parted. Angels sang.

Kate quickly ran into the city to pick them up before the shoot and they were perfectly perfect for the room. What luck, right?

IMG_7193

sanfrancisco_jenny-komenda-680x1020

The last pieces of the room came together quickly. We picked up a fiddle leaf fig tree at Home Depot…

IMG_6386

lucy_home_remodel_021

And we spray painted this IKEA chandelier white. It is SO great in that room. It hard to see in this photos, but I love the pattern it makes on the ceiling at night!

IMG_6585

IMG_6557

We hung the art last. The GIANT 40×60″ art print completely makes the whole room come together. We needed the warm color and texture in here, and Lucy loves natural themes in her art choices. This one jumped out to her immediately when we were sending her ideas and I’m so thrilled that Eventide Collective worked with us to print a custom size and Simply Framed did an amazing job with the clean, modern white frame! We also got the smaller leaning art print from Eventide Collective. I love the little hit of pink in here!
lucy_home_remodel_005

lucy_home_remodel_020 (1)

There were a lot of happy accidents that made this room come together! Pretty much every major piece in here ended up being different than what we planned for, but I think in the end, it works well with the living room design (which has a lot more going on). I like that the look in here is softer and a little more subtle!

Processed with VSCOcam with f2 preset

IMG_6596


SOURCES AT A GLANCE:

Wall Color – Chantilly Lace (2121-70) in eggshell by Benjamin Moore
Pink Wall print by Madelon Verdoorn – Eventide Collective
Grass Print by Brooke Schwab – Eventide Collective
Custom Frames – Simply Framed
Grid Rug – Dash & Albert
Blush Tray on secretary – Schoolhouse Electric
Paint color on vintage Lane credenza – Classic Gray (OC-23) in the Advance line by Benjamin Moore
Table, chairs and secretary – vintage, sourced by Juniper Studio
Paint color on vintage table top – Simply White (OC-117) in the Advance line by Benjamin Moore
Chandelier – IKEA Sinnerlig (spray painted Rustoleum Flat White Enamel – just the basket part, not the cord or mounting)
LR Sources in photos –
LR Wallpaper – Hygge & West Otomi
Moroccan Rug – West Elm
Blue Papa Bear Chair – Modernica
A huge thanks to Julia Robbs for the professional photos, Kendra Smoot for flowers and styling and Joanna Goddard for inviting our team to help with this amazing project! xo
Inspiration

Lucy’s Living Room Makeover

Though I had been a reader and fan for years before, Joanna Goddard and I became real-life friends in 2008. She had emailed me when we were still living in Delaware about coming up to the city to do a refresh on their West Village apartment. I remember the first time we met at her…

lucy_jenny-komenda_livingroom-680x1020

Though I had been a reader and fan for years before, Joanna Goddard and I became real-life friends in 2008. She had emailed me when we were still living in Delaware about coming up to the city to do a refresh on their West Village apartment. I remember the first time we met at her place for a design meeting. I was instantly in awe of her – she was as cool, smart, funny and interesting as she was in her writing.

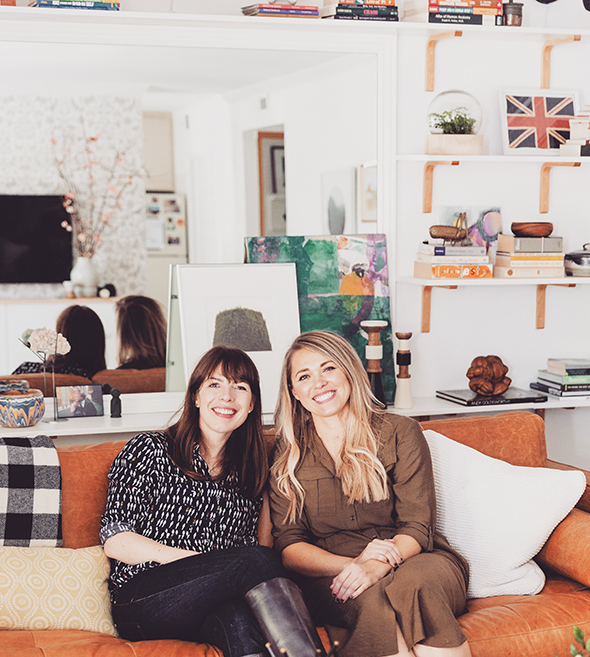
I had the exact same reaction when I met Joanna’s twin sister, Lucy, this month. They are obviously two different people, of course, but their kindness, quick humor, voices (!) and realness felt so similar to me. It was an absolute pleasure to get to know Lucy a little during the process of redecorating her Bay Area apartment.

You may have heard about Lucy’s story on Cup of Jo (or on Good Morning America or in the New York Times). Lucy’s husband, Paul Kalanithi, was diagnosed with late-stage cancer while finishing his neurology residency at Stanford Medical. Before he passed away last spring, he wrote an amazing, poignant book called When Breath Becomes Air. It is one of those books that forever changes your perspective on life and on dying. Lucy’s prologue was equally beautiful and thought-provoking (and will tear your heart into pieces).

IMG_8391

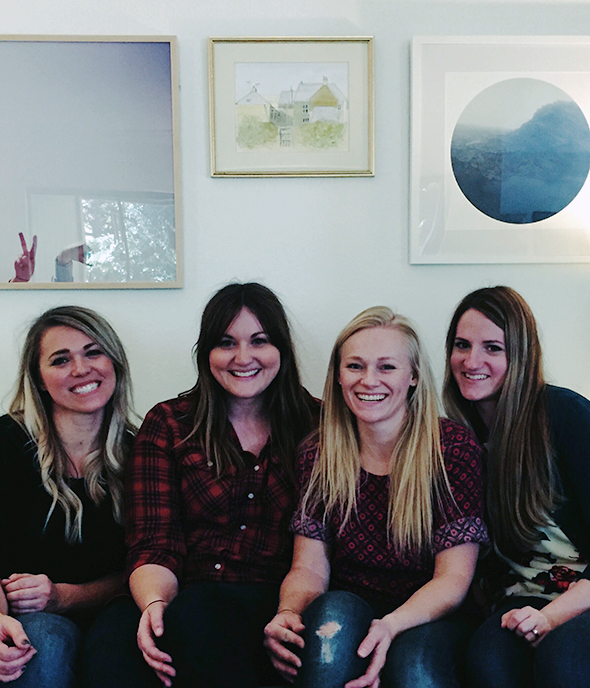
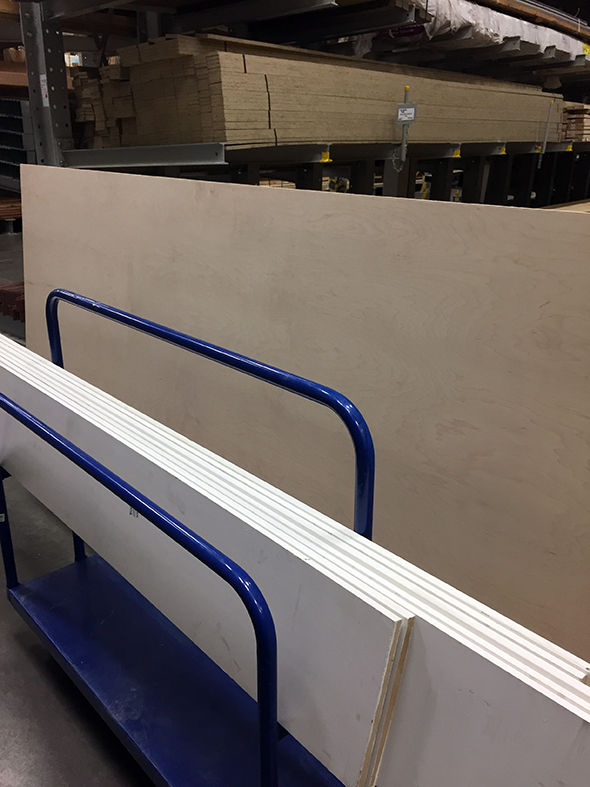
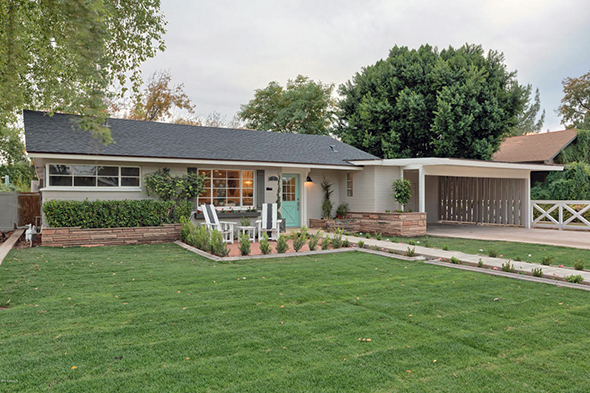
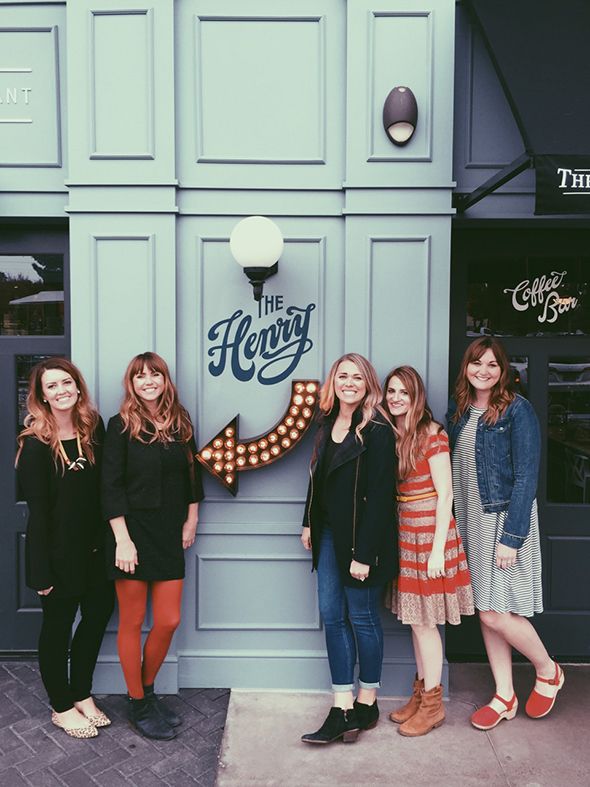
A few weeks ago, while Lucy was on the UK leg of the book tour, I loaded up a U-haul full of vintage furniture finds and DIY projects and drove to Northern California from Phoenix with a few women from my Juniper team, Kate and Kayla (my sister, Ali, flew in to join us later that week). We took this photo right before we left to go back home – exhausted and puffy-faced from all the tears! Gosh, I love these women so, so much. They are always very hard workers, but I was humbled by their selflessness and abounding energy on this project especially.

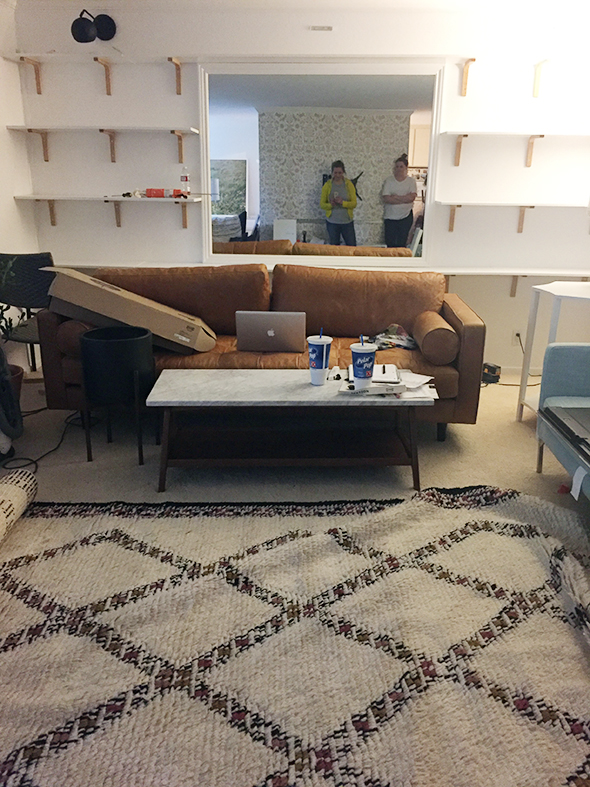
Lucy had sent us a house key, so we let ourselves in and got to work moving furniture and tools. Thankfully, Lucy and her sweet mother, Jean, had worked tirelessly to organize and clean out Lucy’s apartment before we got there so we would have a mostly blank slate when walking in. I know what a hard job that is without having the added emotion to the thing. Lucy was incredibly brave making decisions about her and Paul’s things. I loved that she was very clear about keeping things that mattered the most to her, and she showed immense strength while parting with others. I can’t imagine how hard that process must have been for her.

IMG_6948

livingroombefore-680x510

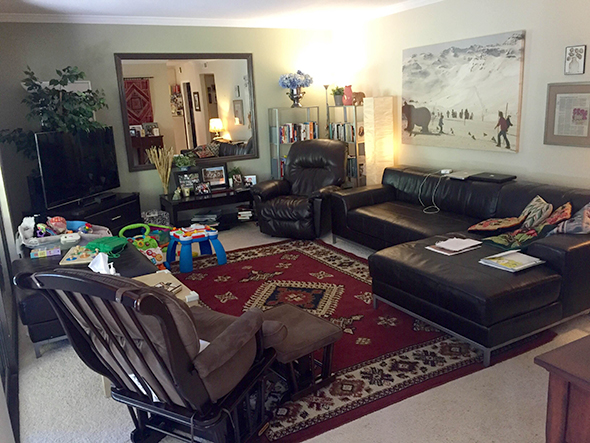
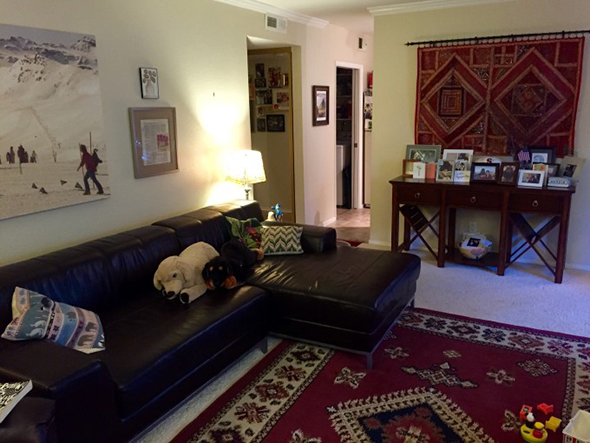
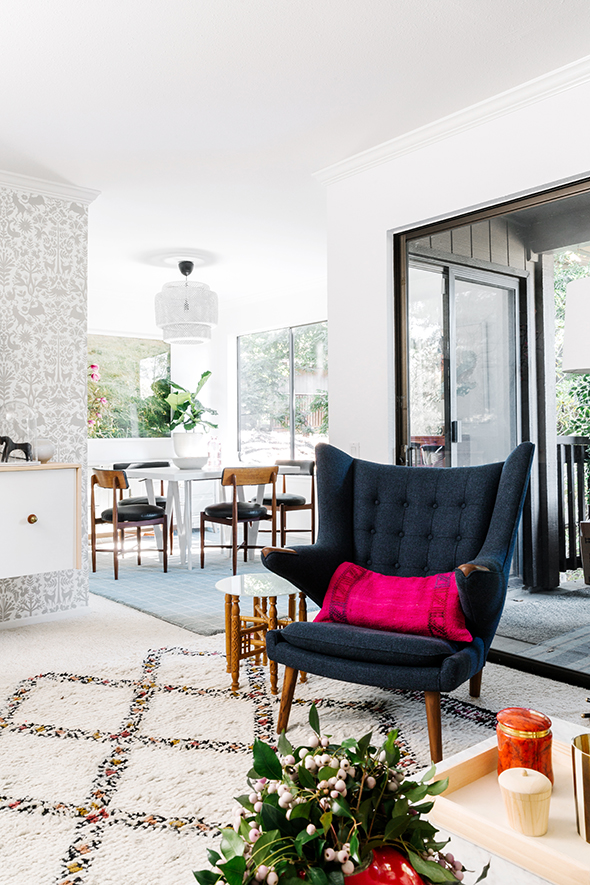
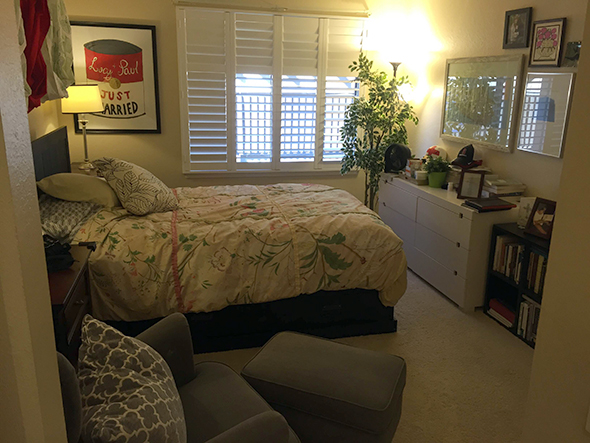
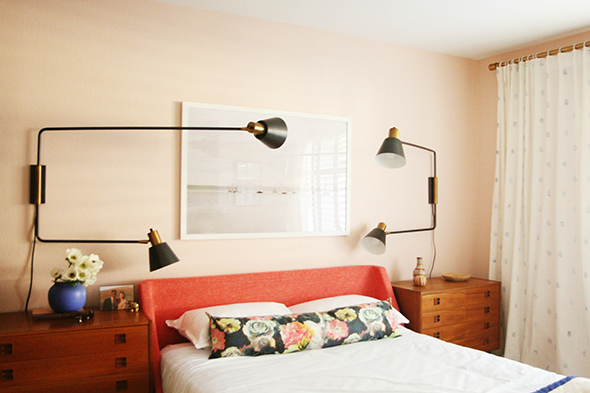
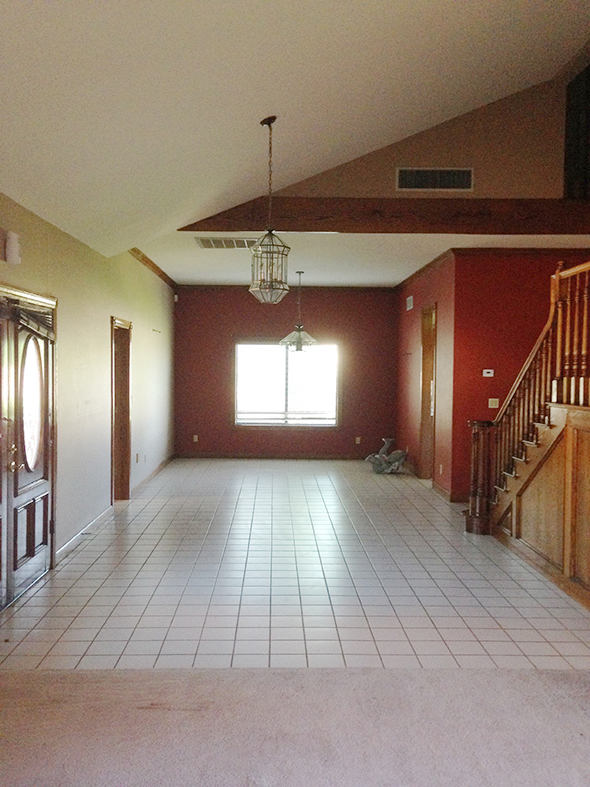
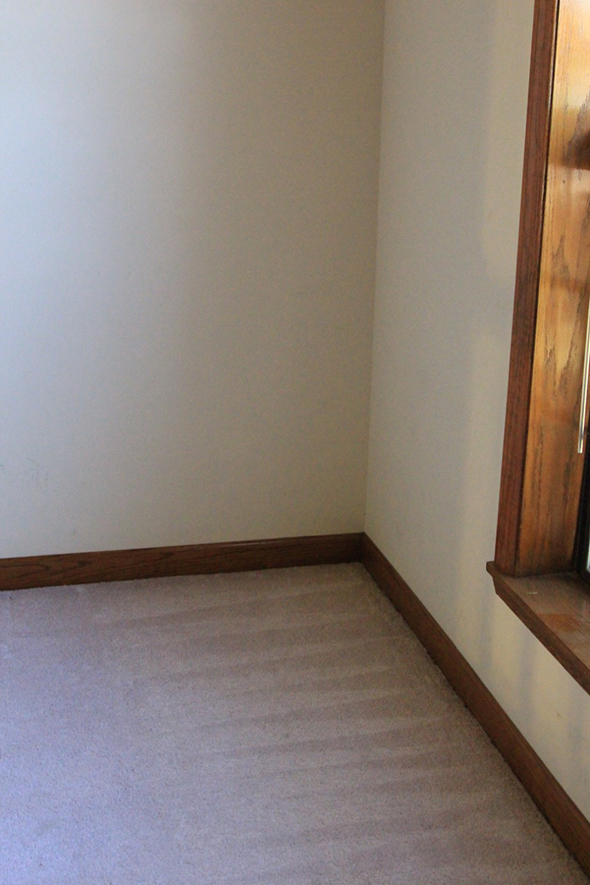
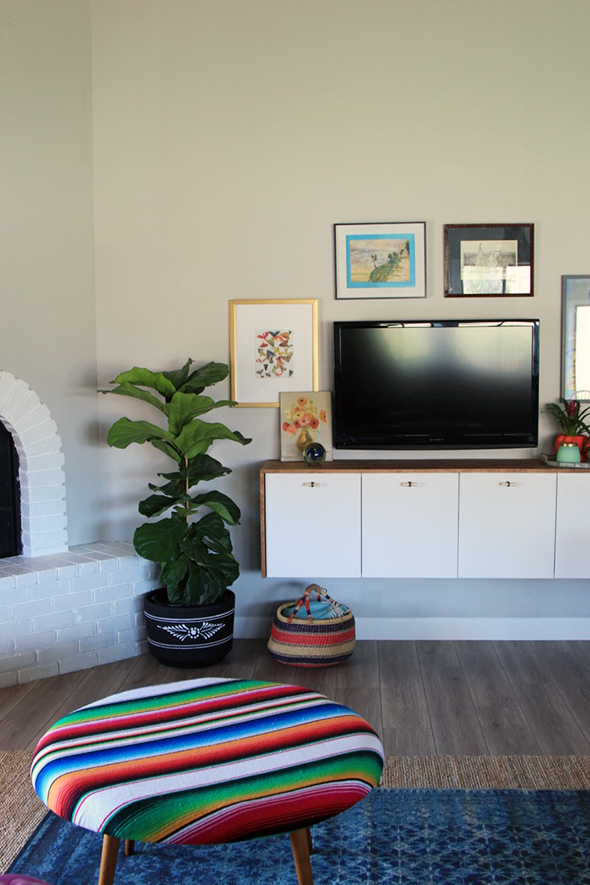
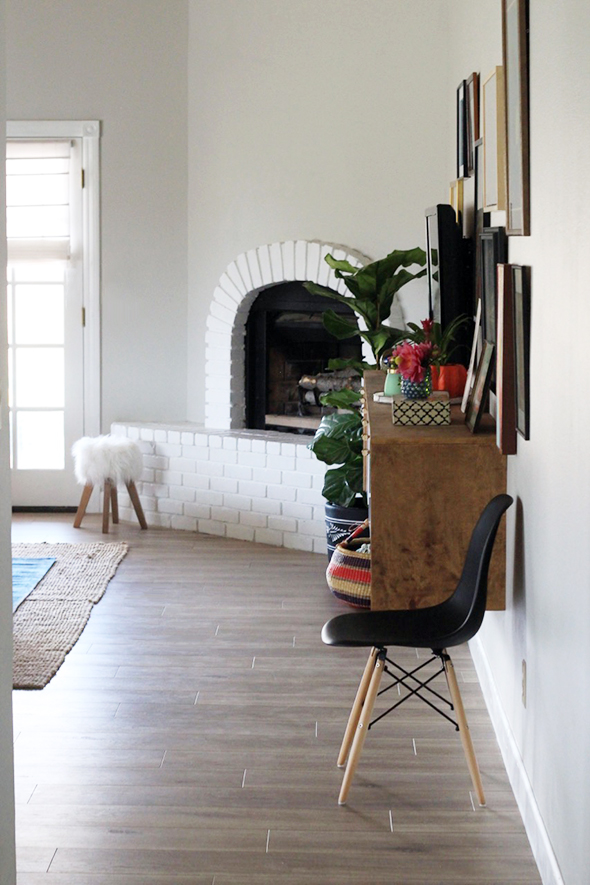
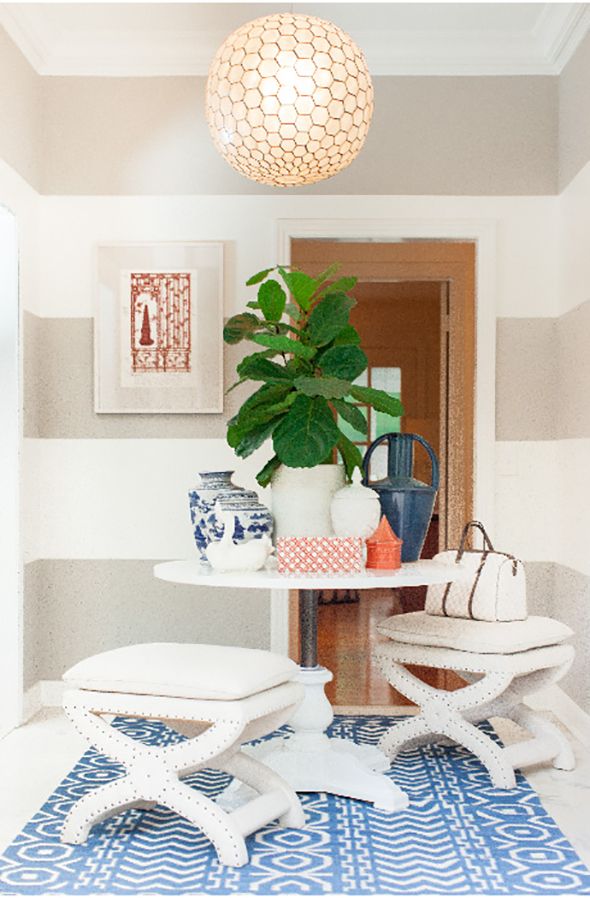
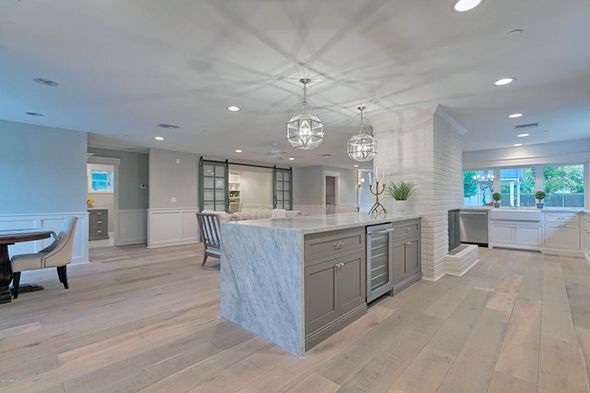
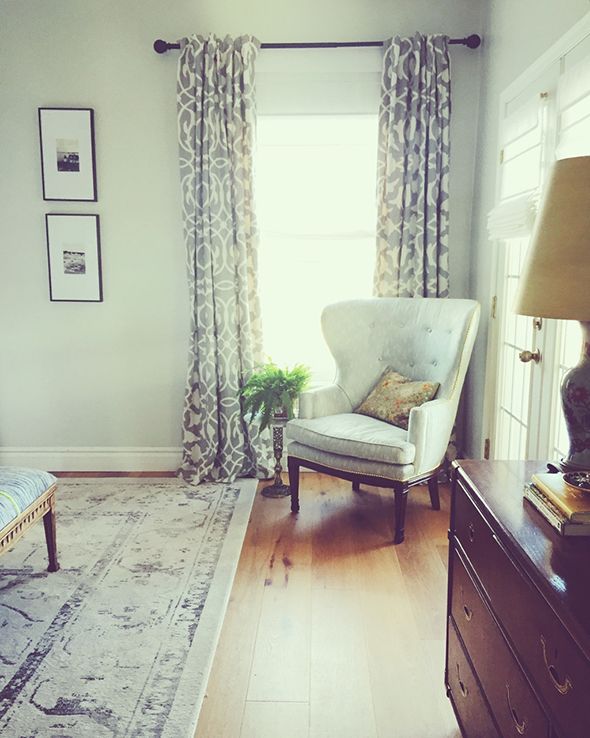
Here are some of the before images of Lucy’s living room. It was comfortable before, but Lucy was ready for a big change! During our calls, she said that she wanted her apartment to feel light, bright and nature-filled. So we had all the walls, ceiling and trim painted Benjamin Moore’s Chantilly Lace (OC-65). That alone brightened up her space SO MUCH!! She lives on the second floor, which is so pretty for all the tree foliage you get in the windows, but can sometimes make a space a little shadowy. Chantilly Lace has just a touch of warmth to it, so it is still a bright and clear white, but it has a beautiful soft glow that feels like sunshine. It’s my favorite white, hands down.

IMG_6484

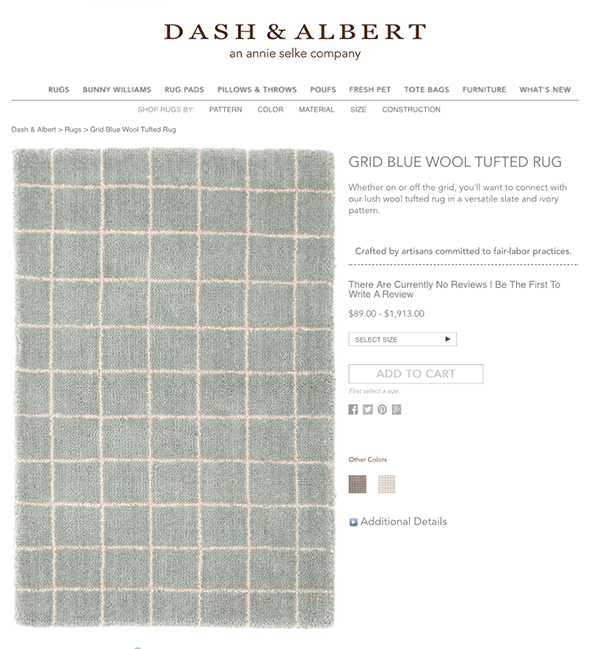
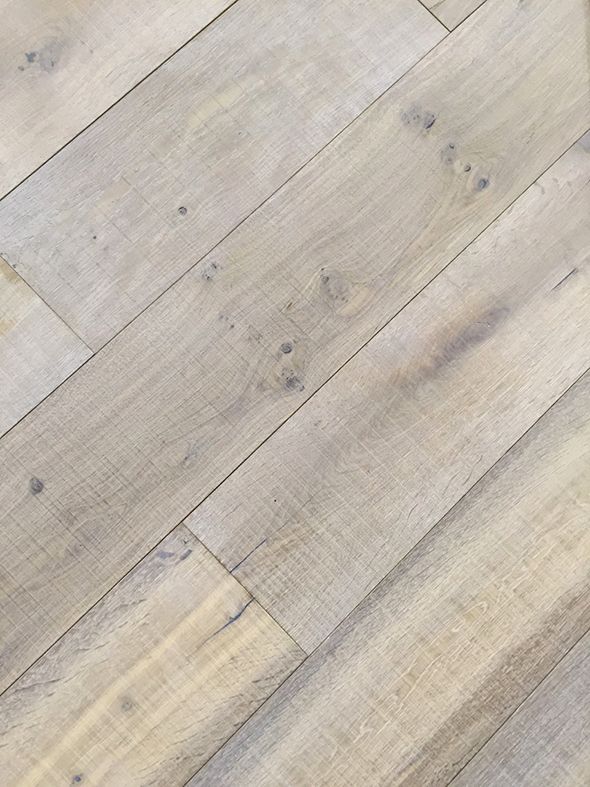
We also picked the wall color with the carpet in mind. Lucy would love to replace this eventually, but decided to keep the carpet for now. People always talk about wanting to coordinate wall colors with their furniture, which is all well and good, but it’s much more important to find a color that works best with the flooring! A gray paint color in here would have made her cream carpet look pink. A soft blue-green would have brought out the yellow tones. White is easy and happy and brings out the best of the colors in furniture and flooring alike!

lucy_home_remodel_001

So in addition to the challenge of keeping Lucy’s carpeting, we had a couple more design obstacles to overcome in the room. Whenever we start a project we like to ask two big questions: what works in here and what doesn’t? If you can figure out what parts of a room both bring your joy and really function well, and then you simply build on those things in your redesign, you will be in a great spot. Similarly, if you can really nail down the challenges/bummers in the room, you’ve essentially created a to-do list for yourself!

FullSizeRender (2)

FullSizeRender (5)

FullSizeRender (3)

FullSizeRender (4)

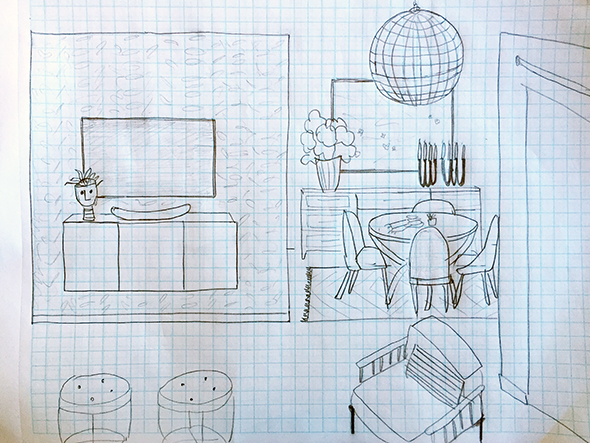
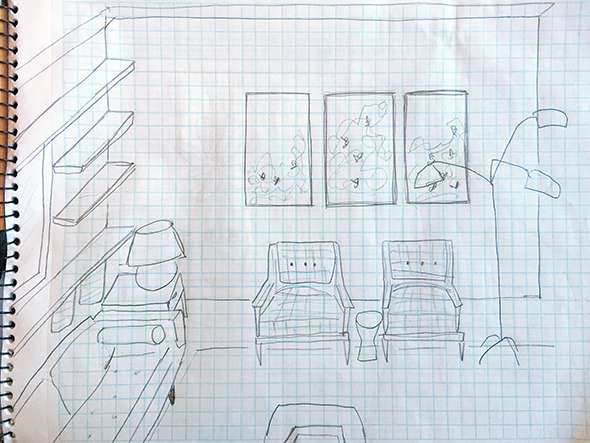
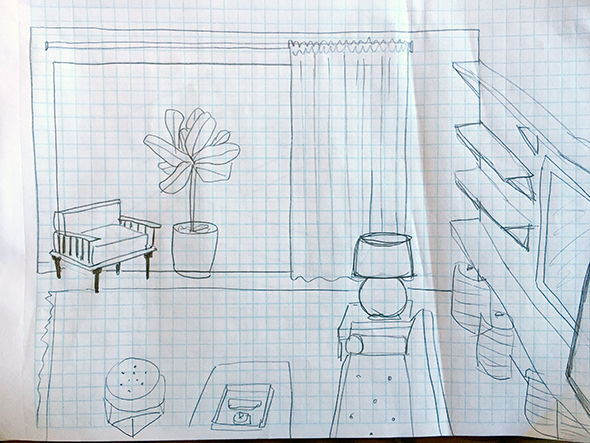
(these are some very early sketches before we had measurements for floor plans – it’s fun for me to remember what we initially planned on and what ended up needing to change!)

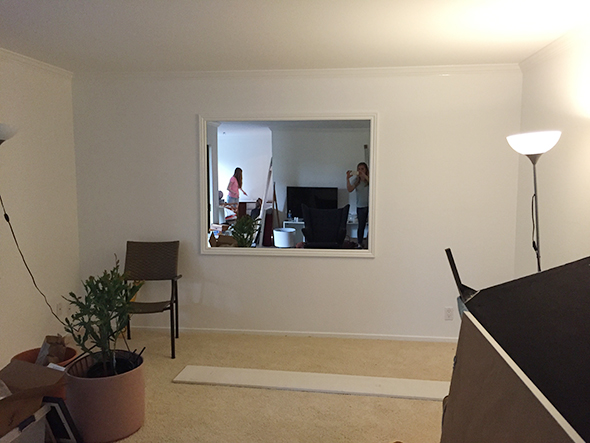
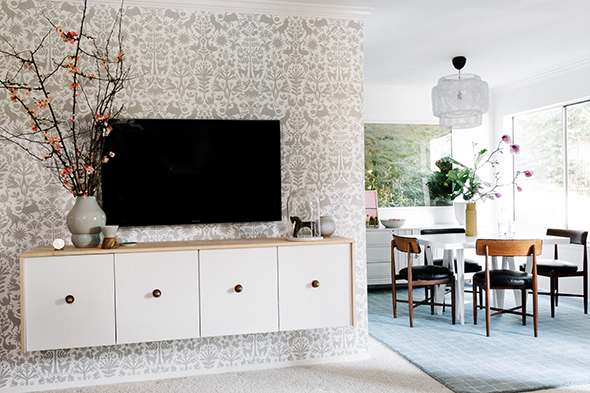
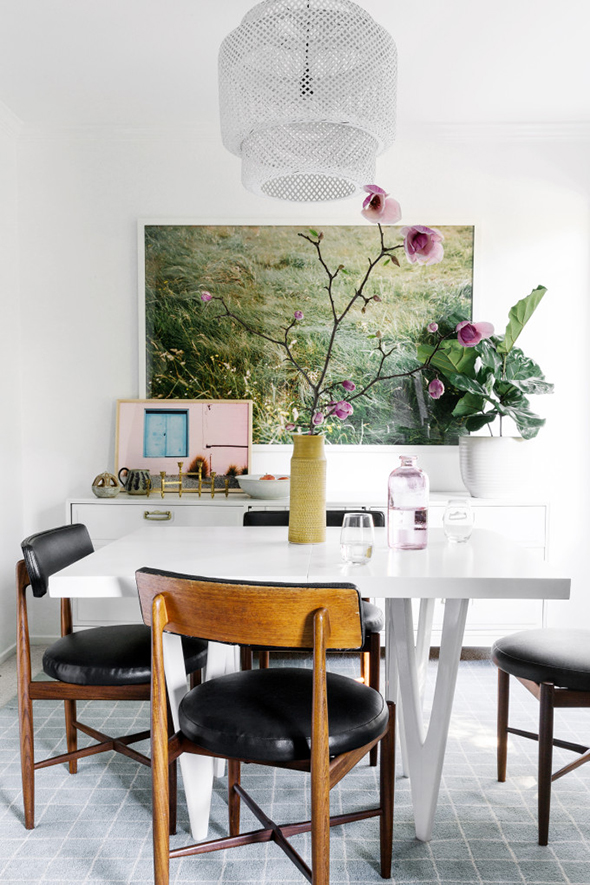
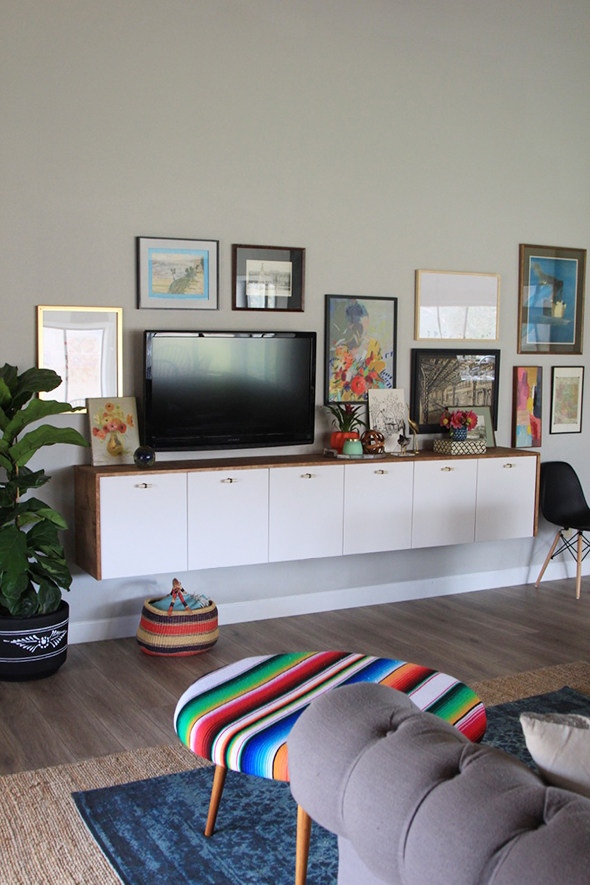
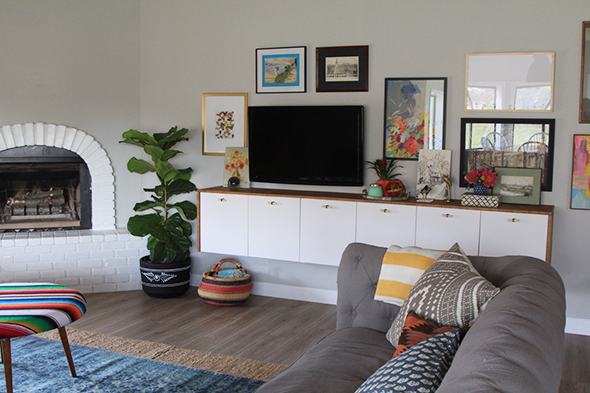
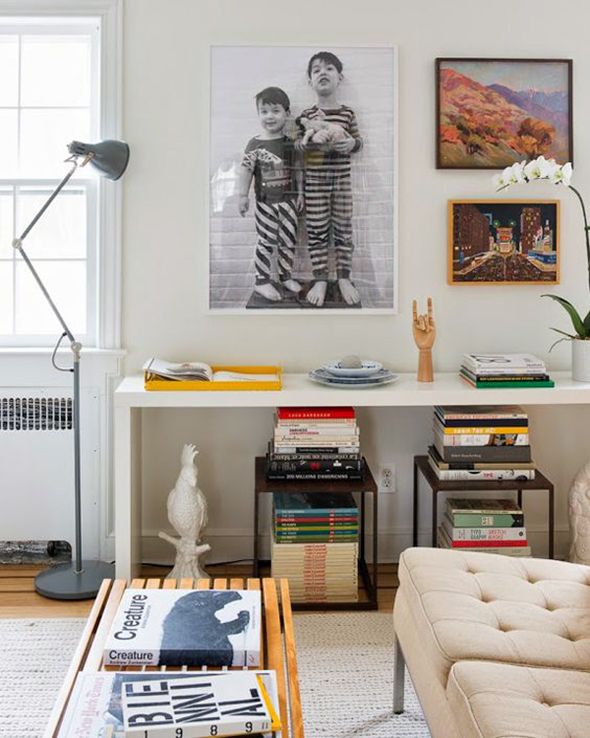
The big mirror on the back wall was on my Challenge list at first, but it was always on Lucy’s Joy list. She loved the light it brought into her living room. I loved the light too, but it was making the furniture layout tricky. Lucy originally had her TV in the back left corner of the room. When we decided to make the mirror a focal point of the room, and build it out with the shelving, it worked best to put the TV on the opposite side of the room, on the floating wall between the kitchen and the main living area.

IMG_8448

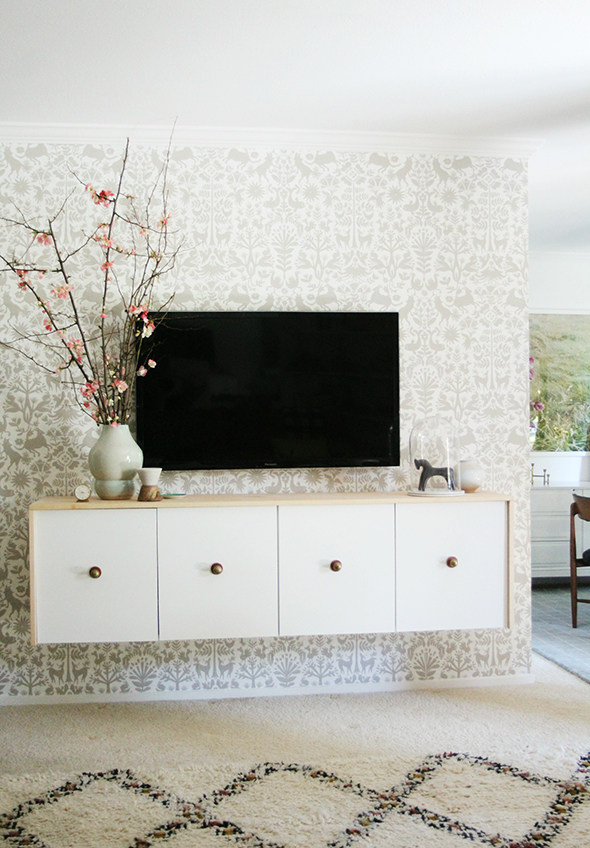
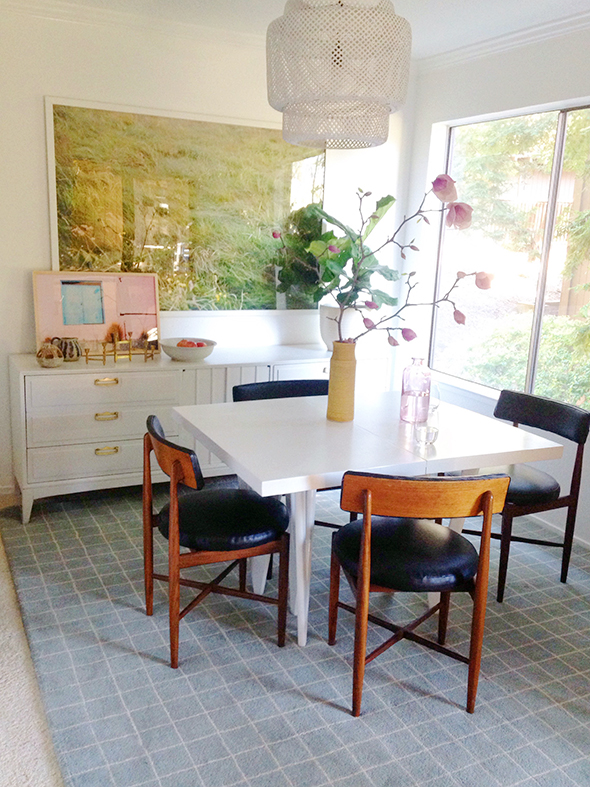
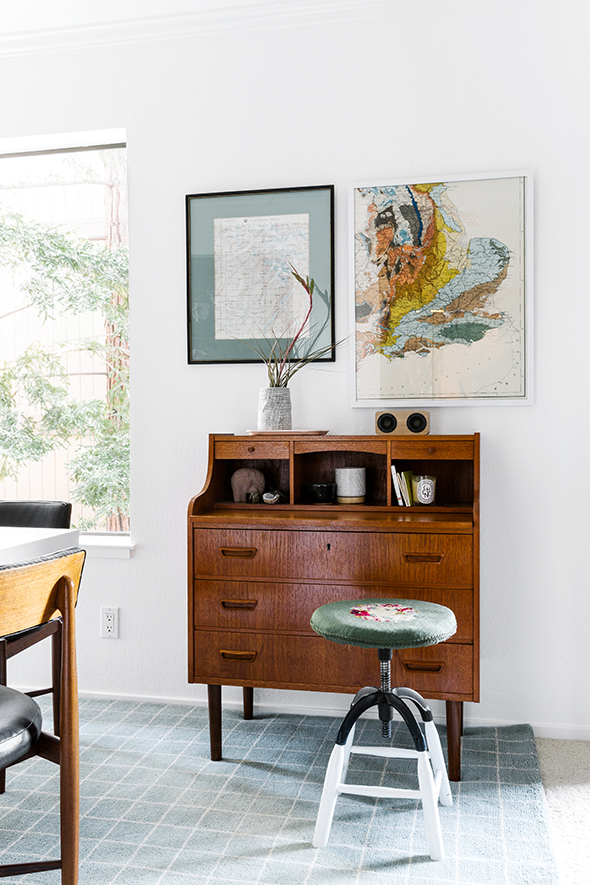
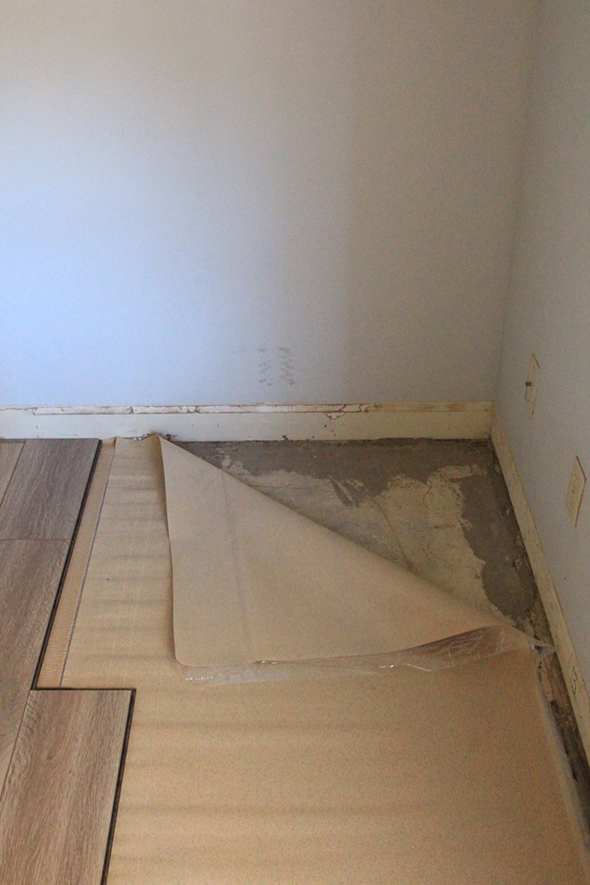
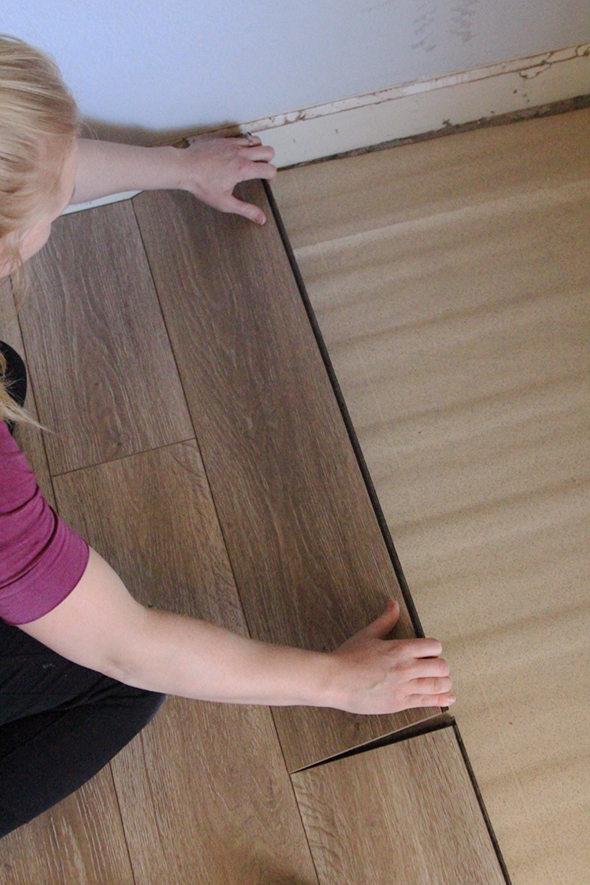
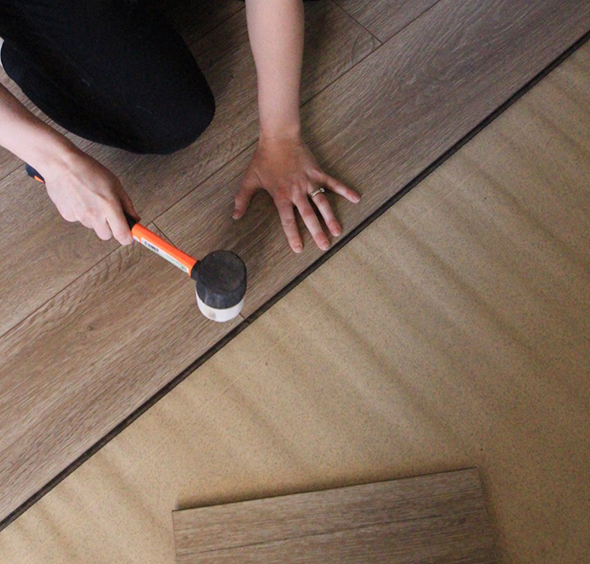
(removable wallpaper tiles available at Hygge & West! More info and installation tips to come for the wallpaper and the floating credenza!)

As soon as we had that figured out, it was easy to tackle some of the other items on the Challenge list:

There is no overhead lighting anywhere in the apartment other than the dining room, so we needed to add as many lighting sources as possible. We also wanted the carpet to blend in and to even coordinate with the design choices. We needed storage for books and toys and TV components. And we needed as much seating as Lucy had with her old sectional, but in a layout that worked better for the room.

IMG_6486

IMG_6399

IMG_6501

coffee table // rug

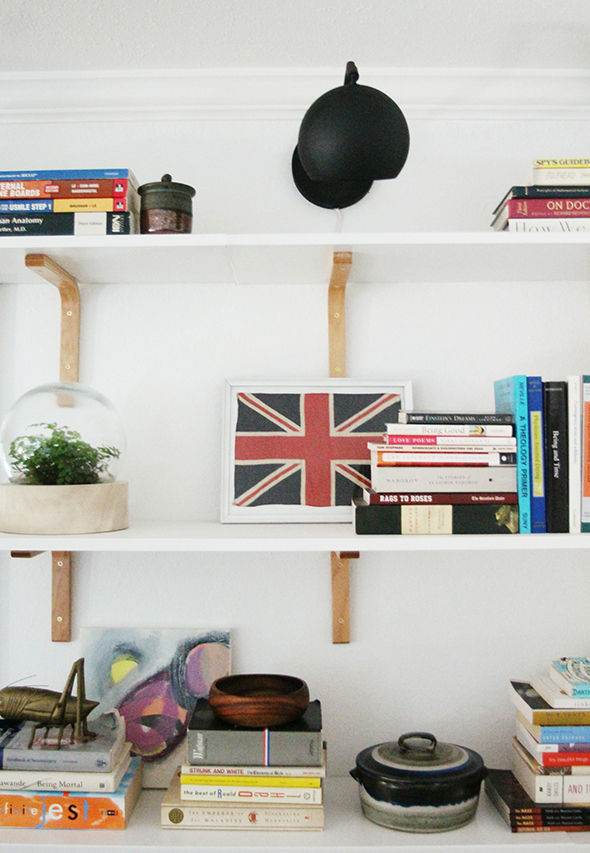
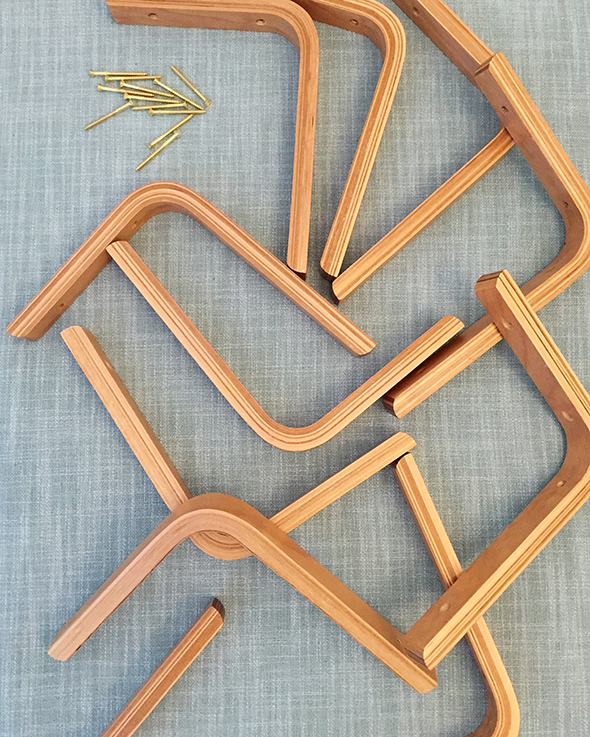
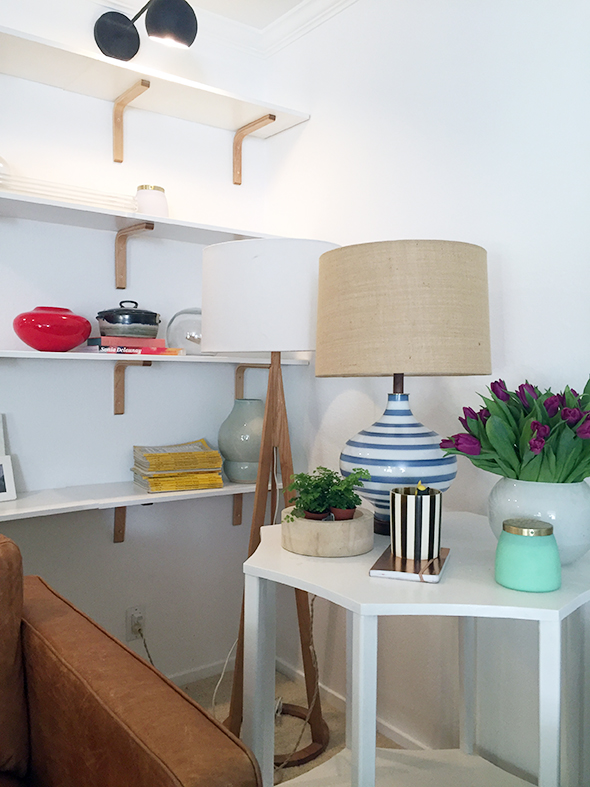
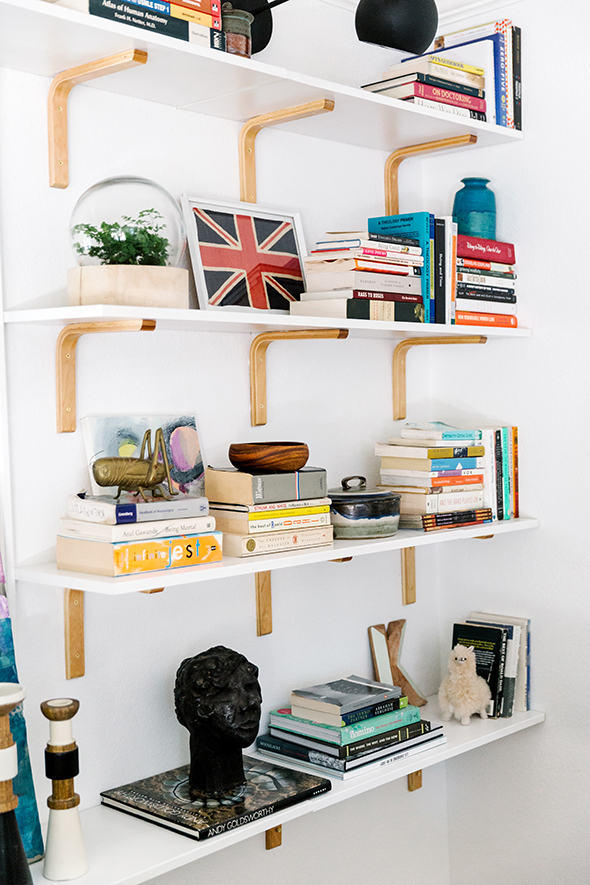
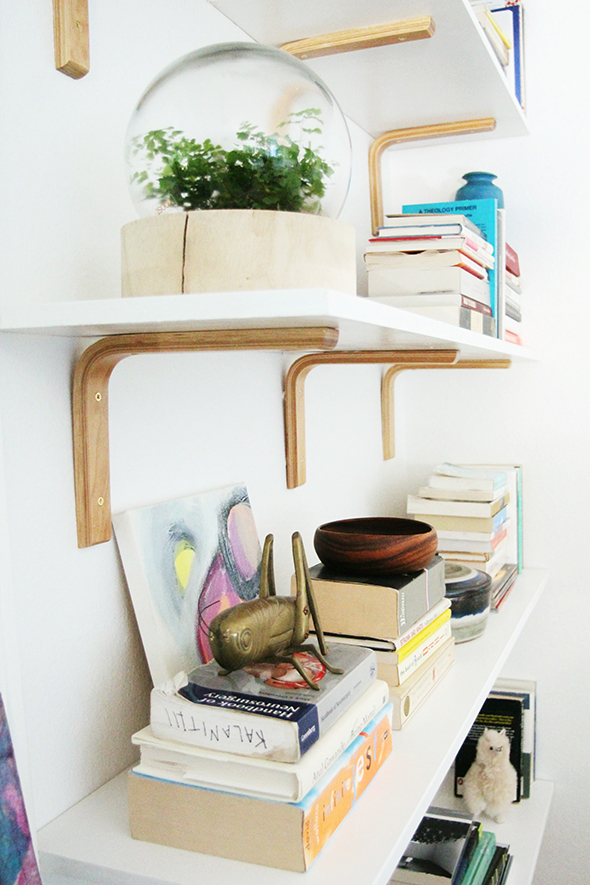
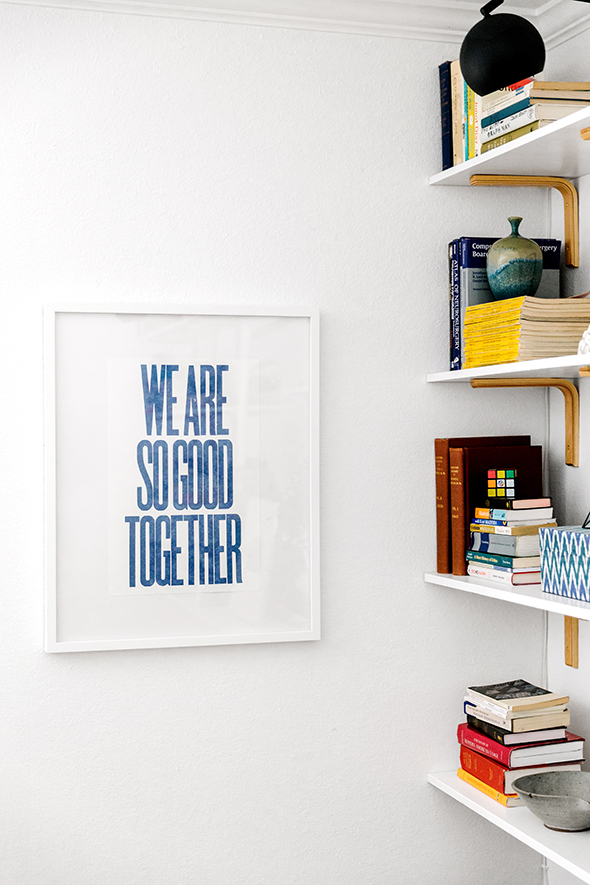
I found these amazing bent plywood shelf brackets on Amazon of all places (they’re sold out everywhere now, but keep an eye out for them – they were only $3 each and are super beautiful in person!!). It took almost a full day to very carefully mark out all the shelving and to install the heavy-duty wall anchors before hanging the shelves, but they’re my favorite! :)

IMG_6551

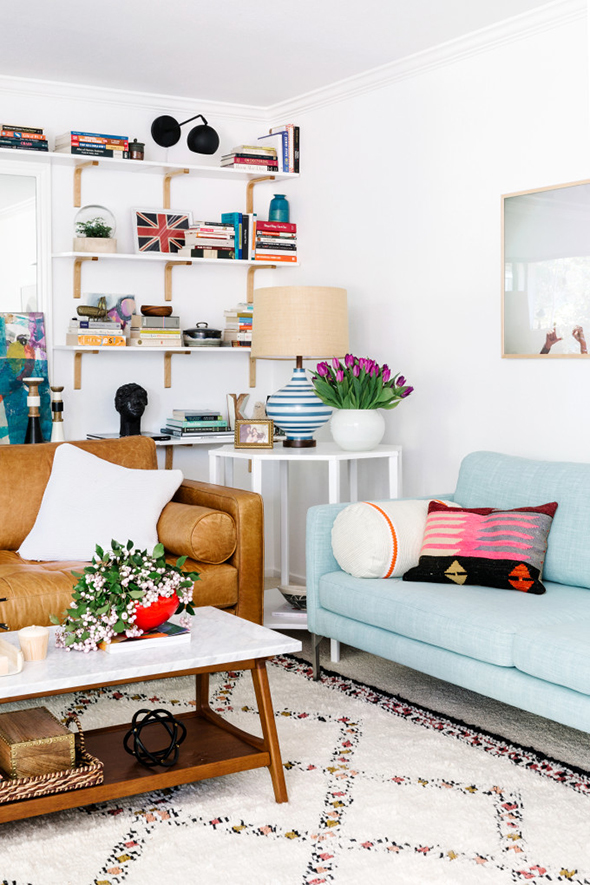
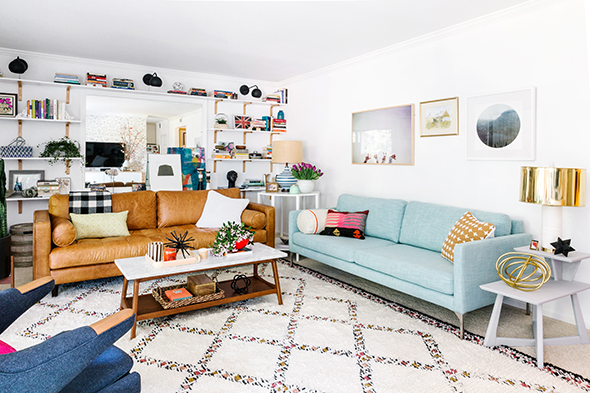
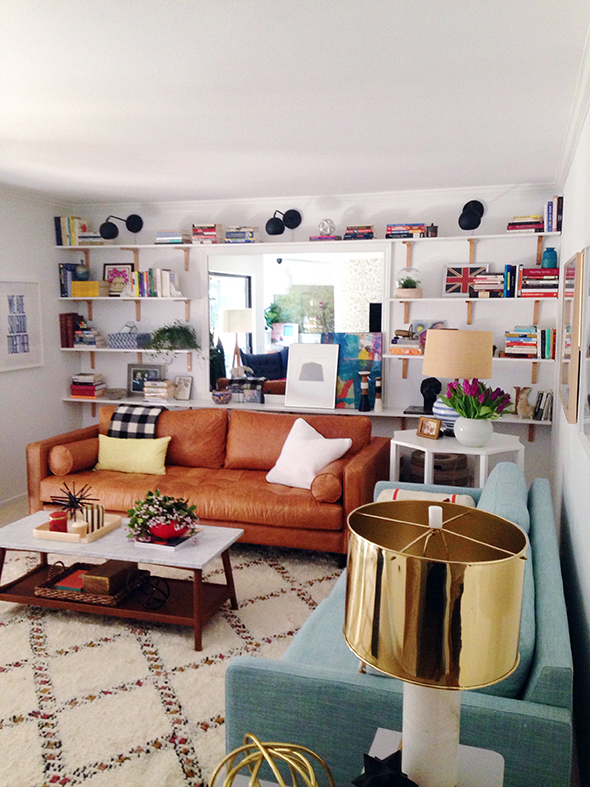
The bookshelf idea maximized a lot of our Joy list and crossed off a few Challenges as well! We were able to add three long arm sconces above the shelving (the lights look SO pretty when they’re on at night!), we made the mirror look purposeful, and added a TON of storage with these Land of Nod woven baskets. Lucy’s living room is really long, so it also helped to have the usable floor space pushed down toward the TV another foot. Even still, we had plenty of room to use two full size sofas in the space!

IMG_7192

brass and marble lamp

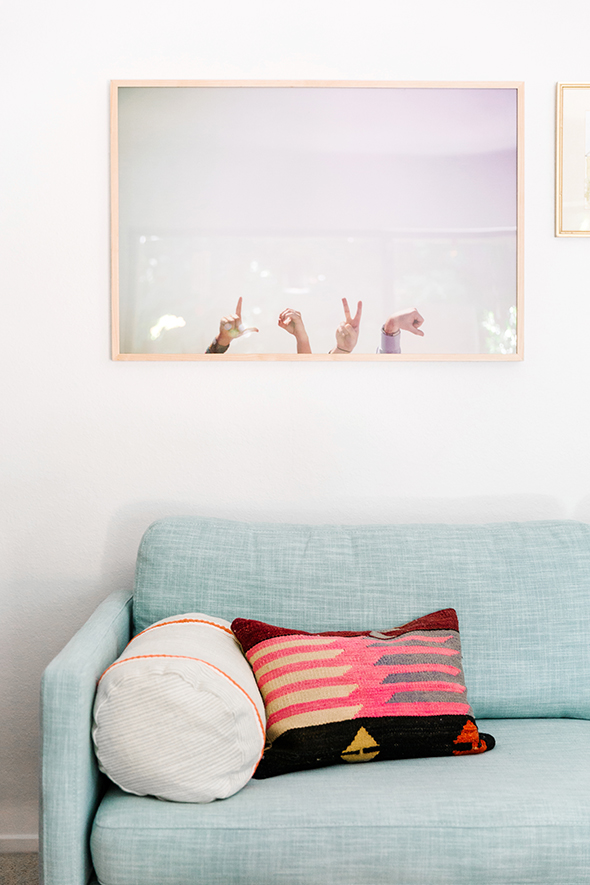
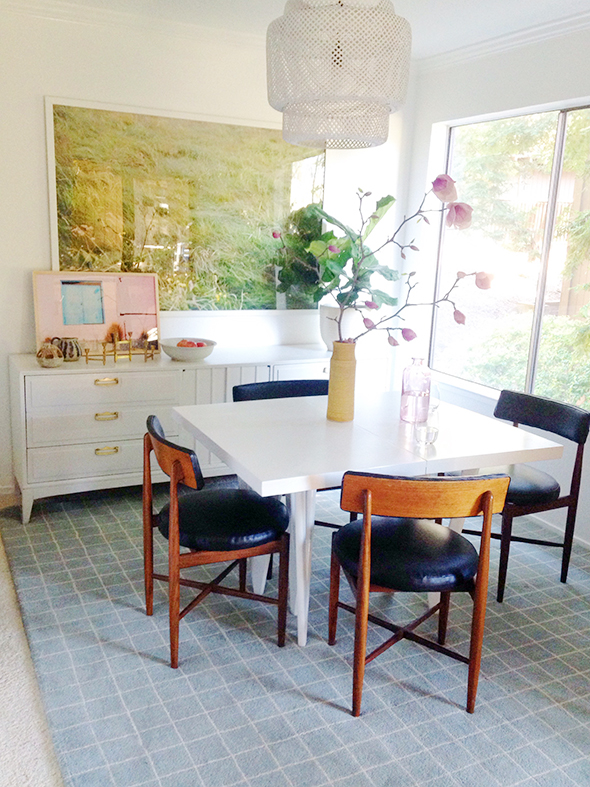
We chose two sofas from a company I’ve been dying to use for a while now – Bryght. And let me tell you, the quality blew me away. We used the Sven leather sofa (can you believe the price point for leather?!) and the Echo mint linen sofa and I LOVE how they look together!!

IMG_7188

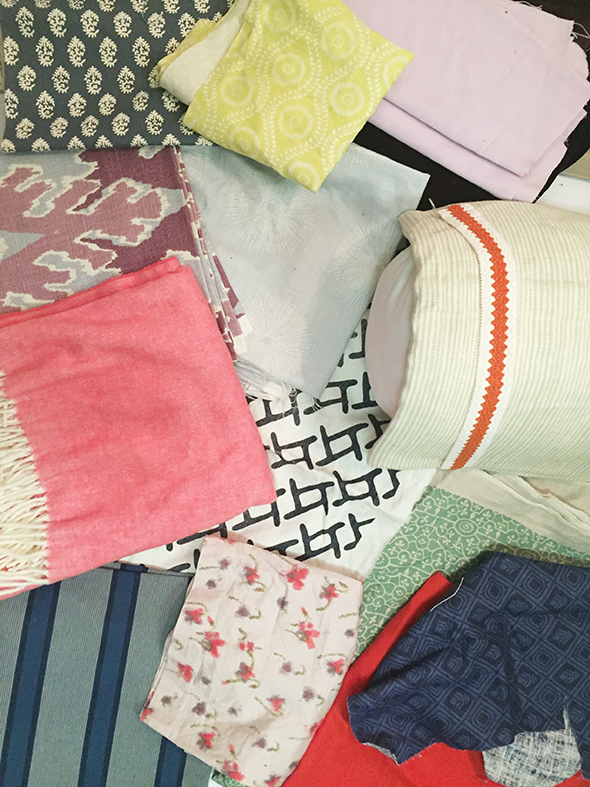
We had pulled some fabrics from my stash, before getting too far along in the design process, to figure out what color direction we were hoping to go with, and I think we got pretty close to our vision with the final results!

IMG_6331

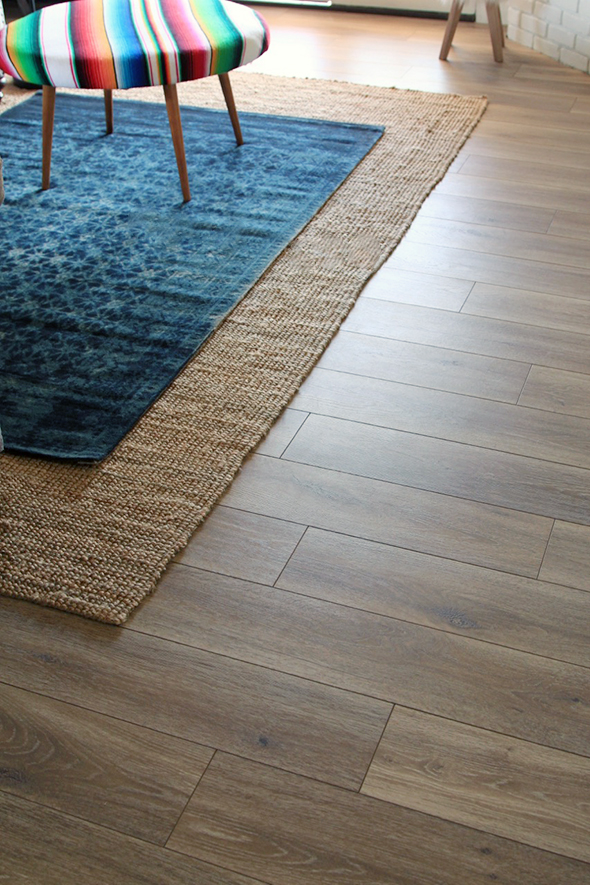
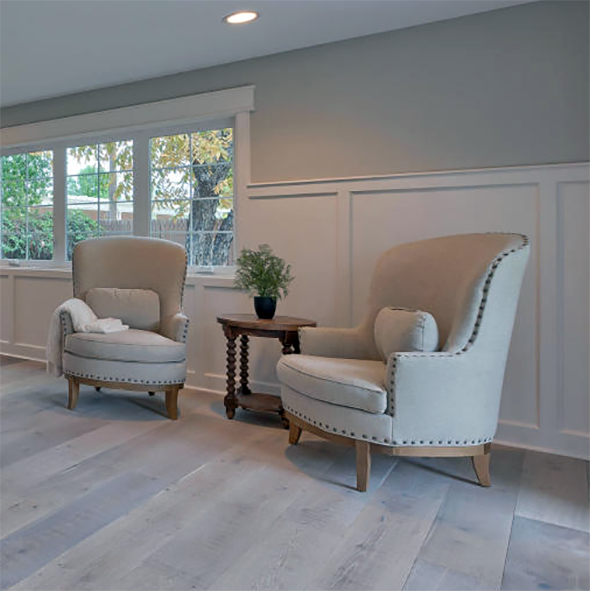
I love the navy and pink combo and the Papa Bear chair from Modernica turned out to be one of my favorite pieces in the room. It is SO INCREDIBLY COMFORTABLE. I love that it has such a sculptural shape! The Moroccan style rug from West Elm also goes on the favorites list. I have one of my own now, I loved it that much (and now it’s on super sale!!!).

lucy_home_remodel_004 (1)

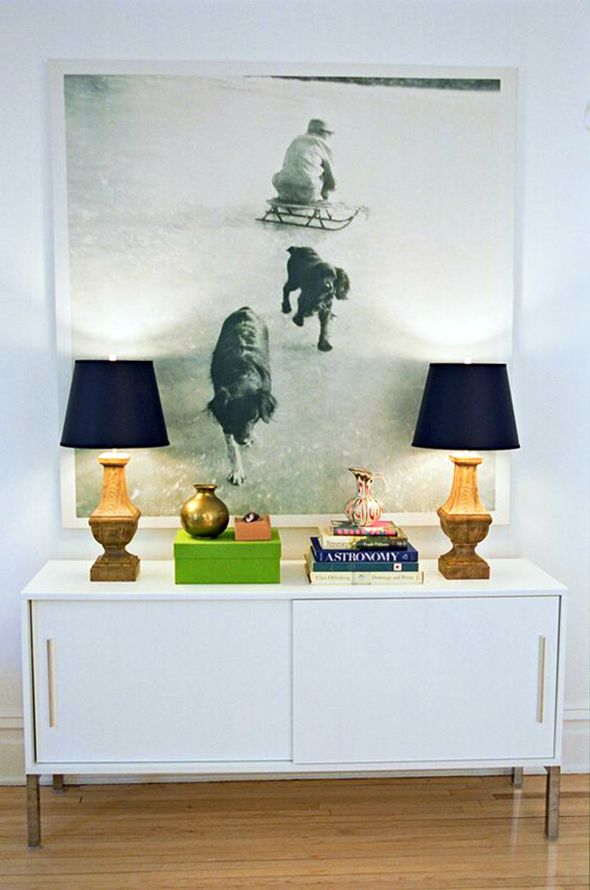
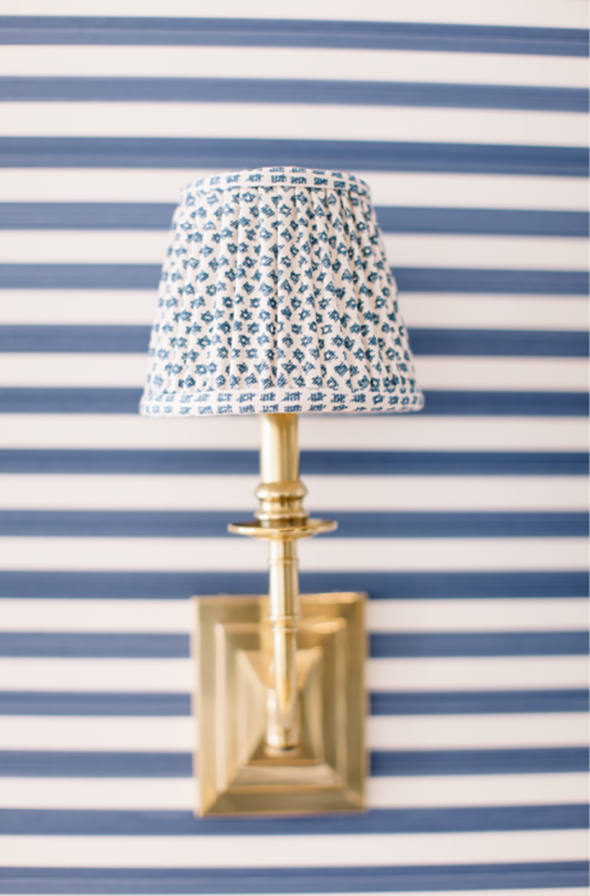
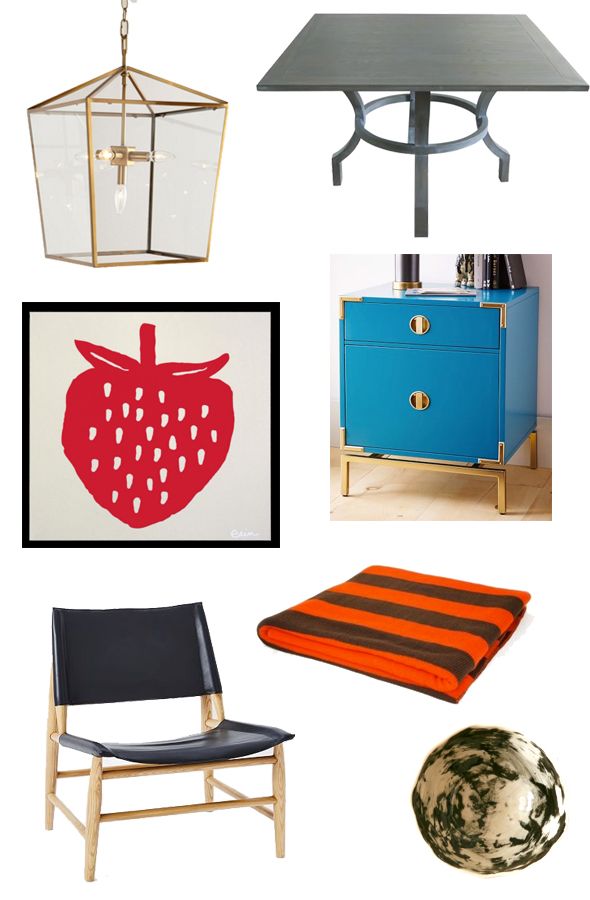
The styling part of the show is always my favorite. We had been collecting pieces for weeks to add in to the mix on Lucy’s shelves and tabletops! I feel like a house really starts to come alive when all the pretty things are unwrapped and put out. :) The blue and white stripe lamp is from Schoolhouse Electric and it’s also on my wish list now. Every millimeter of that lamp is gorgeous from the cord to the finial to the finish on the glass and of course the gorgeous shade! I wanted something special to sit on the white scalloped edge table I designed and had made here locally. We’re going to start selling furniture this year if all goes well and it would be fun to have a similar piece in the line up! :)

IMG_6532

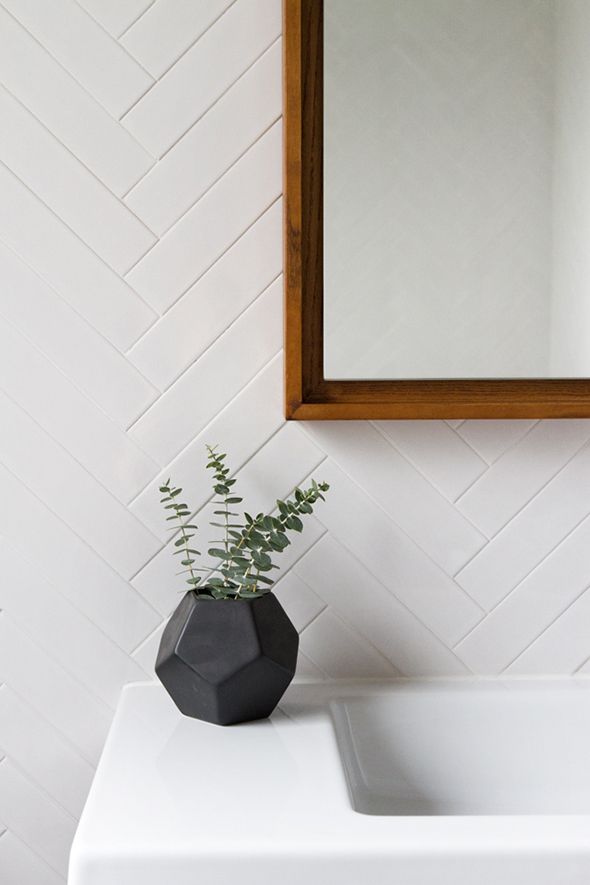
It’s been fun to go back and hunt for the before photos for this project, down to even the little vases and accessories we bought. I feel like a lot of happy blessings and coincidences happened and I love how it all came together in the end.

IMG_7198

lucy_home_remodel_023

Like that vintage Union Jack was a $5 junk store find. The shop owner had a bunch of flags from all different countries hanging up high. I asked about them and he said they had been hanging at a Boy Scout jamboree camp since the 50s! Cool right? Lucy’s family is from England and I thought if we framed the flag, it would be a fun and graphic addition to her shelves. (I also bought the Swedish flag for my house! :)

lucy_home_remodel_015

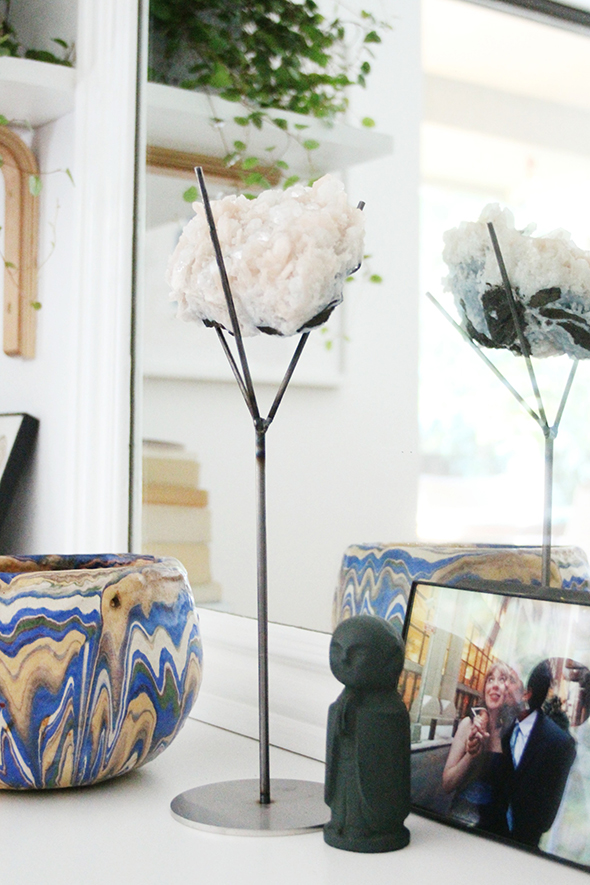
The gem stand is going to be for sale in our online shop soon! :)

IMG_8377

IMG_8384

IMG_8361

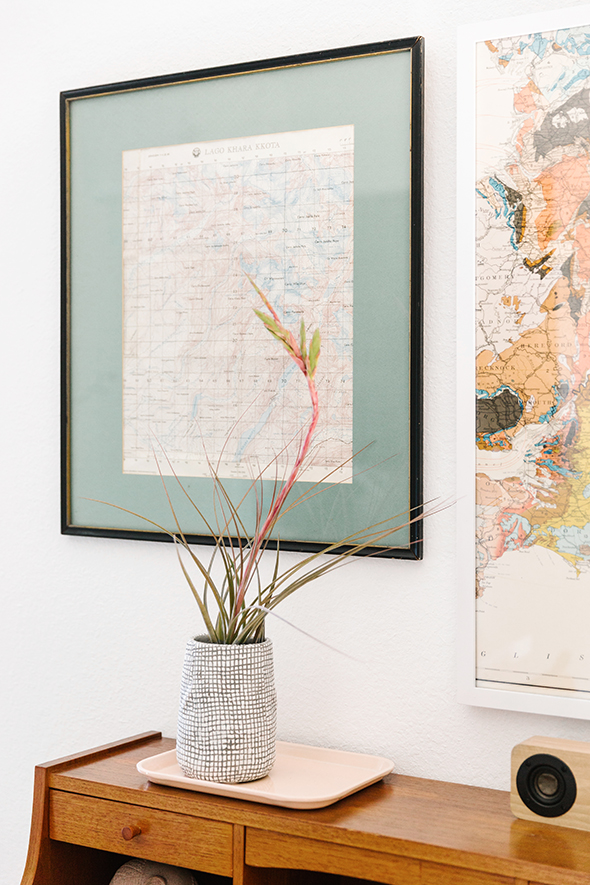
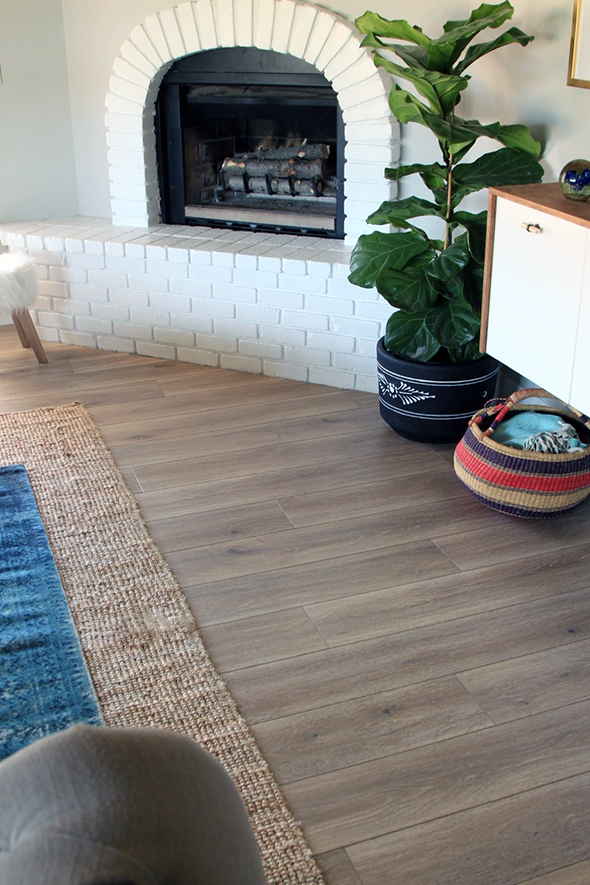
We got that beautiful little terrarium from Anthropologie and the fern inside it was bought at the coolest nursery ever in San Francisco called Flora Grubb Gardens. My friend, Jordan Ferney, took us around shopping on one of the days we were there and we found some really special pieces!

IMG_8368

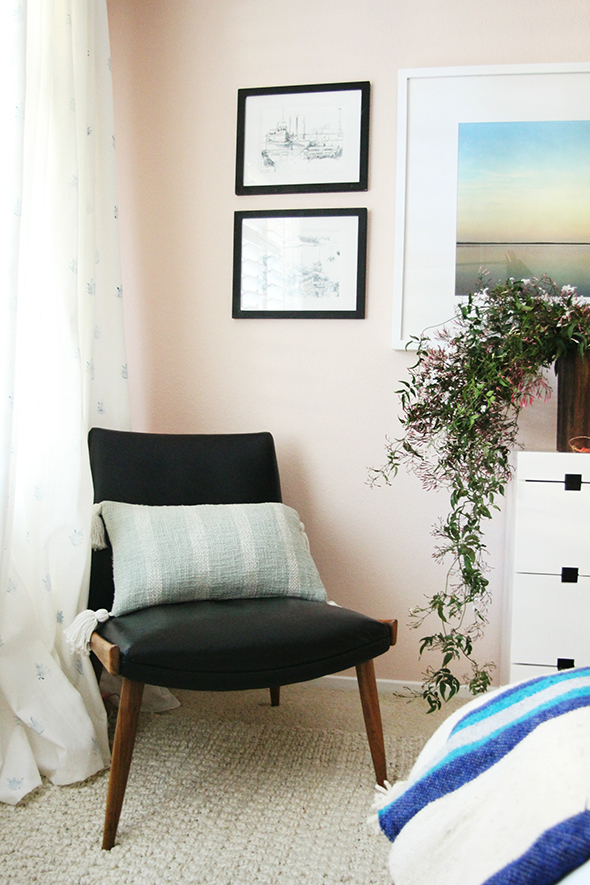
We collaborated with Lucy a lot on the art – something that I think is important in every project so that the homeowner feels very connected with what she will see on the walls every day. We hung many of her favorite pieces that she had before and we got some new prints as well. Lucy really loved this one from 20×200 because it reminded her of something Paul would say to her, and brought back good memories, but mostly it made Lucy think of her young daughter, Cady. She liked being reminded that they could do anything together as a great little team!

lucy_home_remodel_016

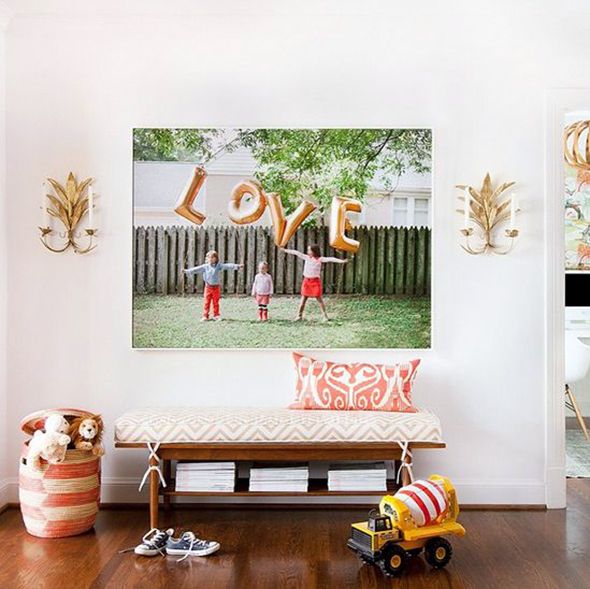
This LOVE print was from Max Wanger’s new Printshop and it is gorgeous! The colors!! So soft and dreamy!

lucy_home_remodel_019 (1)

I am so happy with how Lucy’s living room transformed before our eyes! We were so excited to show Lucy when she got back from her trip. She texted me when she pulled up to her building and we all went outside to meet her and Cady. There were already tears just upon finally getting to meet and hug this sweet woman! Then we brought her in to show her all the changes and the water works really started! I feel like interior design is a fun job, but it’s not always in the noble or even necessary category. But sometimes the idea of home as a healing place can be critical and even life-changing. It was an honor of a lifetime for me and my team to get to know Lucy and to be a small part of this chapter of her life.

IMG_7122

The full house tour and lots of my tips and behind-the-scenes thoughts from Lucy are on Cup of Jo and on my Instagram feed. I will be posting the process photos for each room, one by one. As always, thanks for your support and kindness!! xo

Professional photos above by Julia Robbs. Styling and floral assistance by Kendra Smoot. A HUGE thanks to my team and to Joanna and of course, to Lucy.


Inspiration

Water-Resistant Laminate Flooring

  About a month ago, my sister and her husband, who live right around the corner from us (remember this post?), decided it was time to replace their carpet and 80s white floor tile. Here’s what the house looked like when they bought it last year:     Their home has a pretty open layout,…

F&D LGN AQUAGUARD3


About a month ago, my sister and her husband, who live right around the corner from us (remember this post?), decided it was time to replace their carpet and 80s white floor tile. Here’s what the house looked like when they bought it last year:


IMG_0114

IMG_4504


Their home has a pretty open layout, so we set out to pick a laminate flooring option that not only looked beautiful in their living spaces but that could go in the kitchen and bathrooms too. They needed about 2000 sq ft of flooring for these main areas, so we also wanted something affordable. After this post on my favorite wood flooring picks from Floor & Decor, Ali and TJ started researching Aquaguard as a serious option. They really loved the price (only $2.99/sq ft!) and the color (they chose the Calico stain – a grayed brown midtone), but they were especially excited by the idea of their laminate being water resistant!
IMG_4782


After ordering a sample plank and testing it every which way by gauging it with nails, scratching it with a knife and then letting water sit on the plank for days at a time, we were all VERY impressed with how the Aquaguard held up to the abuse! The material itself feels so solid and well-made, but the color and pattern also are very forgiving!


IMG_7014

We picked up the laminate and let it sit (still boxed up) inside the house for a few days to acclimate while working on prepping the floors. All the tile demo and carpet removal actually took more time than the flooring install! Ali also patched the concrete cracks and divots with FeatherFinish and removed all the baseboards, which were later primed and painted bright white! The paint change alone made an ENORMOUS difference in the look and feel of the house!


IMG_3874


Ali and TJ also decided to invest in a really great, eco-friendly underlayment. Floor & Decor has this cool sample stand in their stores where you can tap a golf ball on the same flooring with different underlayments and its insane how much of a difference there is between the different underlayments and their sound-masking levels! There is absolutely no tapping or swooshing sound when you walk on these new floors!


IMG_3890


Another great thing about this particular underlayment is it comes in smaller rolls, which is incredibly DIY-friendly! Those huge, bulky rolls can be hard to manage but this one’s really easy to use – you just roll in out, lay a few rows of your laminate on top and then connect another layer of underlayment with the clear sticker adhesive strip. It couldn’t be simpler and I love that you don’t have to deal with any crazy glue!


IMG_4449

IMG_4456


The Aquaguard laminate itself is also incredibly simple to install. You just come in with the plank at an angle, line up the grooves until they sort of settle and click and then you lay the plank down and tap it into place with a rubber mallet. AND THAT’S IT!!


IMG_4472

IMG_4474


The only part maybe that is time-consuming is doing all the end cuts, but that’s going to come with every type of flooring install. And also like with other wood plank flooring, you’re going to want to stagger the planks so the seams are random. If you’re not careful about this, a pattern will start to emerge in the seams and you likely won’t be happy with the look.


IMG_4461

IMG_3901 copy


Here’s the finished look in Ali’s family room and breakfast nook! Doesn’t it look so light and pretty in here? Between the Aquaguard laminate and the bright white trim and fireplace, it feels like a brand new house!!

IMG_4925

IMG_4640

IMG_4668

I also love how the “Calico” color of the floors mixes with other wood tones in the room, like their piano, the wood paneling on the ceiling, the floating credenza waterfall and even the legs of the ottoman we upholstered with a serape. It’s an amazing stain color that goes with everything!

IMG_4545

IMG_4981

IMG_4903

IMG_4733


I also love how the floors look with the layered rugs! We bound two IKEA jute rugs together and layered this 5×8 Loloi rug on top. Aren’t the colors amazing? I love the overdyed pattern.


IMG_4582

IMG_4977

IMG_4589


We are so THRILLED with the Aquaguard laminate! It felt like a big undertaking to replace all the floors, but it wasn’t all that difficult for Ali and TJ to execute – and the pay off was huge. They are most excited about how the laminate is water-resistant. It’s holding up so well in their kitchen (which we’re tackling together soon!). :)
IMG_4553
IMG_4701

Floor & Decor is a well-loved partner of LGN! All opinions are my own.

Inspiration

New Site!!!

***UPDATE: Thank you guys for all the notes and emails about the font being too small, issues with leaving a comment and requests for bringing back the blog roll. I didn’t realize SO many of you used the blog roll like a makeshift RSS feed! We are taking your feedback to heart and will do…

***UPDATE: Thank you guys for all the notes and emails about the font being too small, issues with leaving a comment and requests for bringing back the blog roll. I didn’t realize SO many of you used the blog roll like a makeshift RSS feed! We are taking your feedback to heart and will do our best to make the new site more functional!! xo


Well, it’s been a long time coming, but littlegreennotebook.com is finally mi-i-ine!! Welcome to the new site! My talented friend, Angela Hardison, who also photographed this amazing print, was my designer extraordinaire/professional hand-holder. She did an amazing job, giving me exactly what I asked for – a simple, easy-to-navigate, searchable site.

Screen Shot 2016-03-08 at 7.51.12 PM


RIP old Chiang Mai Dragon header and Blogspot! You were good to me.


Screen Shot 2016-03-08 at 2.19.08 PM
Also, a HUGE thank you to my right-hand lady, Kate, who painstakingly went through all my old posts (1200+ of them!!) and retagged and edited every single one. We are still working on fleshing out some of the new site’s pages, but I hope you stick around and kick the tires a bit!


Most all of the content fit into these six categories (the icons change color when you hover over them!)

Screen Shot 2016-03-08 at 7.51.51 PM

Under the Browse the Notebook drop down menu at the top, we included a page called Inspiration by Color that lets you search for images and products of a certain color you might be looking for. Cool, right? If you’re looking for a round up of black bedrooms, or brass kitchen hardware, or favorite white paint colors, look no further than the color page!


insp by color LGN


The Inspiration by Room page is pretty self-explanatory, but has already turned out to be so helpful for me! I am getting ready to start my own kitchen reno and Pinterest feels like an ocean of inspiration lately. Like drinking from a fire hose!  But scrolling through my Kitchen inspiration page has been incredibly helpful! Not surprisingly, every image is exactly my taste! :) Hopefully you like some of them too!


INSP by ROOM LGN

And the DIY Supplies shopping page was SO fun to put together! We gathered up links to all of my favorite, tried-and-true products for DIYing in one place! Please let me know if you feel like I’m missing anything. I love trying new products!

Screen Shot 2016-03-08 at 8.01.29 PM

Also, don’t forget to check out the new site for my design company. Last year I renamed my business Juniper Studio and we have lots of big things coming to fruition in 2016. We are starting a local home rehabbing business (something VERY near and dear to my Mesa-loving heart!) as well as wrapping up several client projects that I can’t wait to share with you! We are also gearing up for a retail shop that will sell custom furniture, pillows and home accessories including beautiful art prints! Coming sooooooon! :)


Screen Shot 2016-03-08 at 8.03.01 PM

And finally – a quick note to say THANK YOU. I get overwhelmed with gratitude when I think of all the love and support and patience my readers have shown me over the years! Here’s to at least nine more years of design adventures!! xo

Uncategorized

Artsy Family Photo Inspiration

I am headed to the Bay area with my team this week for a very special home install. I am SO excited to share this project with you. We’ve been working very hard to get everything finished and I’ll be posting sneak peeks on Instagram all week, so be sure to follow along! image One…

I am headed to the Bay area with my team this week for a very special home install. I am SO excited to share this project with you. We’ve been working very hard to get everything finished and I’ll be posting sneak peeks on Instagram all week, so be sure to follow along!

 photo c44faefce574727f97e5b8ddd7ed4e48.jpg
One project that we’re doing for the entry is a big picture ledge/wall hooks combo. We collected about a dozen frames and will be printing out black and white family photos to display. I asked out client to send us all of her favorite more relaxed and candid shots of her family.
When the subjects aren’t necessarily looking right at the camera, or if the composition of the photo is really unique (like in the first image here), there’s a good chance the photo will feel more like art than just a traditional family photo hanging on the wall. Here are some of my favorite examples:
This one’s from Pencil and Paper Co. How GREAT is the mylar balloon idea!? The possibilities are endless here. So cool!
 photo 150d812e0a481eb0b6650f63a09b5bcb.jpg
Such a sweet tribute to mothers! I love the contrast here too with the black and white backgrounds.
 photo 604fc5d18c42187130cd4486923d967d.jpg
This photo was the homeowner’s grandpa! So cool and artsy, right? But still so personal. I really love it.
 photo 7836e4edcc3583ca845f3c3c50c63f90.jpg
I love these portraits shot against foliage. It’s a pretty way to incorporate the color and textures of nature as well as those sweet faces.
 photo 8b11a7d0ec3f251d3030f532823e27b2.jpg
I think the long horizontal formatting of these photos below is really fresh – and perfectly sized for that little wall.
 photo 161b68b44456ecca6043552f9c3a3f37.jpg
Every time I see this photo, I’m blown away. How cool to do an underwater family portrait!! You can grab a disposable camera for just a couple bucks here!
 photo ceeaec65692d0fe895686f0ae642888a.jpg
Graphic prints in clothing are a fun way to add pattern to your walls!
 photo 44007205754f27833aa747c5266ea429.jpg
When in doubt, just off-center your subject in the composition. And babies are always a good idea. :)
 photo ec11e5e71263d59cfd3c971fdfd8b650.jpg
PS Some more family photos and display inspiration!
 photo IMG_3636 1.jpg
Uncategorized

7 Ways to Help Cut Flowers Last Longer!

Valentine’s Day is right around the corner! It’s time to start thinking about what kind of flowers you’ll be sending to your loved ones! Since giving and getting flowers is pretty much one of my favorite things, I’ve done a lot of research on how to make arrangements last longer. There are all sorts of…

 photo 2IMG_4327 copy.jpg
Valentine’s Day is right around the corner! It’s time to start thinking about what kind of flowers you’ll be sending to your loved ones! Since giving and getting flowers is pretty much one of my favorite things, I’ve done a lot of research on how to make arrangements last longer. There are all sorts of crazy tips out there, but I feel like only a few of them actually work. I’ve partnered with my friends at The Bouqs Company, my favorite flower delivery service, to share my very best tips with you here as well as some of my favorite flower and vase combos below! (PS For the next week, receive 20% off your Bouqs.com order with the code VDAYBLOOMS!)

 photo IMG_4446 1.jpg

 photo IMG_4409.jpg

The first tip is probably the most important one –

TIP #1: BUY FRESHER FLOWERS

It makes sense, right? The faster those blooms get from the grower to your coffee table, the better! The Bouqs Company is a great resource because there is no middle man. The flowers are cut the day you order them, not just sitting in a floral wholesale warehouse! The eco-friendly Bouqs.com farms are on mineral-rich volcanic soil in Ecuador, where they follow strict responsible farming practices. Also I really love that they carry special flowers that can be harder to find – like ranunculus or the garden roses I have here in the post, as well as super cool accents like thistles and succulents!

 photo LGN BOUQS1.jpg

TIP #2: BLEACH YOUR VASE


You want to do everything you can to keep bacteria from growing in your arrangement. Cleaning out your vase beforehand with really hot, soapy water or even a light bleach solution will help a lot!

 photo IMG_4344.jpg


TIP #3: REMOVE THE LEAVES


A lot of people overlook this step. It’s really important to remove any leaves that sit below the water line, otherwise the leaves will rot and accelerate the bacteria growth and wilting process.

 photo IMG_4288.jpg


TIP #4: CUT THE STEMS AT AN ANGLE, UNDER WATER


Everyone knows that you should give your blooms a fresh cut before arranging them in your vase. But if you cut the stems at a long angle, the flower will be able to suck up more water. It also seems like the flower does better if the stem is submerged in water during the cut.

 photo IMG_4296.jpg


TIP #5 USE THE FLORAL FOOD PACKETS


In my experience, the little packets of floral preservative alone will double the life of any arrangement. The packets contain preservatives and anti-bacterial solutions that help keep the flowers happy and fresh. Don’t skip on the packets! I keep a stash of them in my pantry and use a full packet every time I change the water in my arrangements. I’ve gotten two packets with every delivery from The Bouqs Company, which I really appreciate!

 photo LGN BOUQS3.jpg
 photo IMG_4343.jpg


TIP #6: KEEP THE WATER COLD AND FRESH

Heat and bacteria are the enemies of fresh floral arrangements. It’s a good idea to fully change the water in your arrangement every two or three days. I have some friends that also put their arrangements in the fridge at night and that seems to work wonders for prolonging the life of the flowers, but that requires more thought and energy than I usually have at bedtime! So when I first cut my flowers and make my arrangements, I fill up my vase with ice first and then water (and the preservative packet). I add a few ice cubes every day or whenever I happen to think about it and I swear it works SO WELL! It’s just like keeping the flowers in a refrigerator!

 photo LGN BOUQS2.jpg
 photo IMG_4307.jpg


TIP #7: PLACE YOUR ARRANGEMENT IN THE RIGHT SPOT


I’ve read that you should never keep fresh flowers in the kitchen because fruits and veggies sitting on the counter emit gasses that speed up the wilting process. Interesting, right? Direct sunlight is also bad for cut flowers. If you want them to last longer, keep your flowers sitting in a shaded and cool area in your home.

 photo IMG_4422.jpg
 photo LGN BOUQS4.jpg

What tips would you add to my list? I’ve tried all the crazy ones – add a penny to your vase, use a crushed aspirin instead of the floral preservative, pour bleach in your vase water (!), but these ones above seem to work the best for me!

 photo IMG_4356.jpg

This post was sponsored by The Bouqs Company. Receive 20% off your order this week with the code VDAYBLOOMS!

Uncategorized

La Cornue and Inspiration from Nashville

So I don’t want to jinx it, but I found a La Cornue range on Craigslist for a great price (!!!) and I really, really want it for our kitchen remodel. It’s a bit of a drive from my house, but come ON! Wouldn’t you make an extra long road trip for one of these?…

So I don’t want to jinx it, but I found a La Cornue range on Craigslist for a great price (!!!) and I really, really want it for our kitchen remodel. It’s a bit of a drive from my house, but come ON! Wouldn’t you make an extra long road trip for one of these?

 photo Tyne-Portfolio-08-1024x751 copy_1.jpg
 photo 2Tyne-Portfolio-08-1024x751 copy.jpg
 photo 5836-Beauregard-05-1024x754_1.png

These images are from the portfolio of Pencil and Paper Co out of Nashville (a company and a city I totally have a crush on). Aside from the fact that the talented husband and wife design team seem to love La Cornue as much as I do, I’m obsessed with their preppy-modern style. Their interiors definitely have that great Southern look, but there’s an edge that’s super refreshing!

 photo Woodmont-Portfolio-02-1024x689.png
 photo Draper-James-Portfolio-13_2.png
 photo ranch 1_1.jpg
 photo Woodmont-Portfolio-01-1024x750.png

What I love most about their work is it seems so thoughtful, like every single detail was considered and executed beautifully, you know? I really admire that. What a gorgeous way to live a life – so deliberate and purposeful.

 photo ranch_1.jpg
 photo sunny-kitchen-1.jpg
 photo bb5872ef216e copy.jpg

There are a lot of accessories in many of their rooms, but nothing looks like junkie filler stuff. Just a lovely, well-traveled and collected vibe.

 photo happy-ranch-5_1.jpg

 photo steel-and-brass-french-stove-la-cornue-range-brass-swing-arm-pot-filler.jpg

 photo happy-ranch-4_2.jpg

 photo Draper-James-Portfolio-11_1.png

 photo 5833-Beauregard-02_1.jpg

 photo 5836-Beauregard-13-1024x754_1.png

 photo 5833-Beauregard-03_1.jpg

 photo sunny-kitchen-1 1_1.jpg

 photo 5833-Beauregard-2-02_1.jpg

So pretty right? Here are a few things that are oozing with that Pencil and Paper Co vibe!

 photo LGN PPCo 1.jpg
x bench  //  capiz chandelier  //  serape bracelet  //  red shibori chair  //  magic hands lino cut print  //  gold side table //  indigo pillows (pair!)

 photo LGN PPCo 4.jpg
tufted wingback  //  diamond jute rug  //  lavender brushstrokes lamp  //  beach print  //  $30(!!!!) black sconce  //  black and white embroidered pillow  //  hanging rattan chair
 photo LGN PPCo 3.jpg
Rothko print  //  woven seat chair  //  brass desk organizer  //  pink and white pom pom throw  //  blue shibori chair  //  red drip ginger jar  //  indigo pillow
 photo LGN PPCo 5.jpg
brass and steel mirror  //   Pendleton throw  //  blue planter stand  //  leather lion bookend  //  bistro stool  //  accordian sconce ($60!!!)
 photo LGN PPco 2.jpg
brass lantern  //  gray stain dining table  //   strawberry print  //  blue lacquered nightstand  //  red and black striped throw  //  black leather sling chair  //  pottery bowl

Uncategorized

Thoughts on Wood Flooring (and My Favorite Engineered Wood!)

My kids know that if the car makes a sudden U-turn, Mama found a new thrift store or saw an open house sign. :) A few months ago I flipped one of those big U’s and walked through this pretty home that was for sale in Mesa’s downtown historic district.  The house had recently been…

My kids know that if the car makes a sudden U-turn, Mama found a new thrift store or saw an open house sign. :) A few months ago I flipped one of those big U’s and walked through this pretty home that was for sale in Mesa’s downtown historic district. 

 photo 5200385_3_1 1_1.jpg
 photo 5200385_6_0 1.jpg
 photo 5200385_29_0.jpg

The house had recently been gut-renovated and was gorgeous in person! The cabinetry and millwork everywhere was especially TOP NOTCH. I wish these photos did them more justice!

 photo Screen Shot 2016-01-19 at 10.45.23 PM.png

 photo Screen Shot 2016-01-19 at 10.45.59 PM_1.png

 photo Screen Shot 2016-01-19 at 10.46.17 PM.png

The staging was so much more tame than my style, but it was really pretty and soft. Those bobbin chairs have my hearth though. They were from Home Goods apparently!

 photo Screen Shot 2016-01-19 at 10.44.14 PM.png

 photo 5200385_7_0 1.jpg

I also fell in love with the floors. So much so that I poked around on the instagram feed of Project Beautify, who had rehabbed the house, and discovered that the floors were from my favorite flooring place Floor & Decor!

 photo IMG_5776.jpg

 photo Screen Shot 2016-01-19 at 10.47.31 PM_1.png

 photo 5200385_32_0.jpg

Later that week I went and checked out the product in person. It’s called Montpellier and it’s an oiled French Oak in almost a 9″ wide plank. And it is only $5.49/sq ft! If you’ve ever shopped for wood flooring before you’ll know that price is pretty unreal for the size of those planks!

 photo IMG_5773 1_1.jpg

Floor & Decor has a great selection of every type of wood flooring – solid (including Timberclick!), engineered, laminate, and everything you need to install the floors yourself if you’re a DIYer.

It can be overwhelming to figure out what type of wood flooring is right for your house, but I always ask three questions that usually help narrow down the playing field:

1) Will the flooring be in a kitchen or bathroom? 

How terrified are you about the idea of potentially needing to pull up and repair areas effected by future leaks? If your answer is highly terrified, then you might want to consider a product like Aquaguard (which is a water-resistant laminate).

That said, I put engineered wood in kitchens and baths all the time. Rugs help a lot with day-to-day water spills and if a bigger issue happens, the wood can usually recover if the problem is caught the same day. I always suggest buying 50-100 sq ft of extra wood as a precautionary measure, just in case a few pieces have to be popped up and replaced down the road.

2) Wide or skinny planks?

Planks under 4 or 5″ wide are usually only found in solid woods anymore or unfinished engineered wood. Usually wider planks are more expensive, especially in solid wood. Once you’re looking beyond that 5″ width in solid wood, the prices start to get astronomically higher. If your budget needs to be under $14/sq ft and you are wanting a 7-9″ wide plank, you’ll definitely need to be looking at pre-finished engineered wood or laminate.

3) Most importantly, what is your existing subfloor? 

Solid wood is a great option if you already have a plywood subfloor (though you’ll want to get verification that it is level and does not need to be replaced before laying your beautiful new floors on top!).

And while I love the idea of being able to refinish a solid wood floor five or six times in it’s lifetime, I almost always recommend engineered wood, especially in places like Arizona, where most houses are built on concrete slab. Speaking from experience, it can be a very expensive and time-consuming process to add plywood subfloors to a slab foundation. Also it is comforting to know that engineered wood is a more stable product than solid wood, which means the planks are more resistant to changes in humidity and moisture levels.

 photo IMG_5786.jpg

Laminate is another great option. Every time I look at the latest offerings, I’m blown away. So many of them look very similar to engineered wood and often they are half the price! Just don’t skip on a good underlayment, which helps with the swooshing sound that old school laminate flooring is notorious for.

 photo IMG_5785.jpg

Here are a few of my favorite wood flooring picks from Floor & Decor. I usually prefer an ashy undertone to reds and pinks, but I don’t usually want anything too bluey-gray either. All of these are gorgeous in person – and super affordable!

 photo Floor and Decor Wood LGN.jpg
B – Bordeaux Oak Engineered Hard Wood – $5.49/sq ft
C – Oak Coffee Wirebrushed – $4.99/sq ft
E – Allegheny Oak Laminate – $2.29/sq ft

Do you have any great tips for picking a wood flooring? What type did you chose in the end? I’d love to hear!

A big thanks to Floor& Decor for partnering with us on this series. Read about wood-look tile here and accent tiles here!

Uncategorized

Rediscovering an Old Favorite Kitchen

We’re working on several kitchen projects for clients right now and I’m starting to figure out what I want to do for my own kitchen’s mini reno. I’ve been pinning up a storm, but sometimes Pinterest can make me feel a little uninspired and over stimulated at the same time. Do you ever feel that…

We’re working on several kitchen projects for clients right now and I’m starting to figure out what I want to do for my own kitchen’s mini reno. I’ve been pinning up a storm, but sometimes Pinterest can make me feel a little uninspired and over stimulated at the same time. Do you ever feel that way? So a few days ago I decided to pull out some of my old magazines just to switch things up a little.

 photo HH8 feb2012 LGN.jpg

A few dozen magazines later, I got to my February 2012 House and Home issue and rediscovered this kitchen, an old favorite for sure. Remember this spread? It’s everything I’m hoping to achieve with my kitchen update. It’s a little bit modern, a little farmhouse, and there’s lots of personality thrown in.  And for the first time, I realized those cabinets are IKEA! They look SO great here, don’t they? That brass hardware from Richelieu is pulling some serious weight!

 photo HH9 feb2012 LGN.jpg
The space looked pretty sad before the renovations. It was outdated and the layout was terrible.
 photo HH7 feb2012 LGN.jpg
The new layout makes the space look twice as big! It’s crazy how expensive this whole space looks. They built out the pantry cabinets a little bit so the (IKEA!) fridge would be flush with the fronts. I also like where they mounted the hardware on the tall side cabinets. And check out that waterfall edge on the island! You know how much I love that look
 photo HH4 feb 2012 LGN.jpg
 photo HH5 feb 2012 LGN.jpg
I love how they mixed inexpensive butcher block with the marble. It seems like this mix of low and super high-end was the secret here for the entire space. You might not normally expect to see a Barber Wilsons brass faucet in an IKEA kitchen, but I guess you can afford to spend thousands on faucets and hardware if you are spending only a third the cost of custom cabinetry. It’s a great trick – distract the eye with the shiny pretties and no one will notice the IKEA at first glance. And then they won’t care when they do figure it out! IKEA cabinets work and look great!
 photo HH feb 2012 LGN.jpg
Oh, and speaking of brass faucets, did you see this beauty from DeVol for Perrin and Rowe? Such a great price point and so similar to the much pricier one above.
 photo deVOL_Taps-_DSC7510-600x899.jpg
 photo deVOL_Taps-_DSC7509-600x400.jpg
I feel like the obvious showstopper in this kitchen though is the handpainted backsplash tile. I lurve it. 
 photo HH2 feb2012 LGN.jpg
The homeowner scanned in a sample tile and printed out multiple pages of the scan to tape up on her kitchen wall to make sure she could live with and commit to the pattern. Isn’t that a GENIUS idea? Just like with wallpaper, it’s easy to fall in love with a small sample, but it’s really the overall pulled back pattern that you’ll actually need to love!
 photo HH3 feb2012 LGN.jpg
This tile is from Walker Zanger (another high-end purchase). I love it. I think it’s a smart move to go with a more restrained pattern. I’m thinking of something like this similar cement tile for my kitchen backsplash maybe and printing out scanned in tiles to tape up on my kitchen wall was just added to my to-do list!
 photo Cement Tile LGN.jpg
Do you have an all-time favorite kitchen? I have about twenty, but this one is proving to still be an inspiration! Long live print publishing!! :)
 photo HH6 feb2012 LGN.jpg
images are my scans of House and Home February 2012
Uncategorized

Happening Lately: NYE 2016

Happy New Year, friends!! How are you? How was your holiday? I’m back in the saddle again today after taking the last two weeks off and I’m feeling rested and ready to tackle 2016! Before signing off, I threw a little offsite party for the women that work for me. I love these ladies to…

Happy New Year, friends!! How are you? How was your holiday? I’m back in the saddle again today after taking the last two weeks off and I’m feeling rested and ready to tackle 2016!

Before signing off, I threw a little offsite party for the women that work for me. I love these ladies to the moon and back. They have buckets of talent and they work tirelessly. I think we’re all really hitting our stride with client work and I’m so happy to share with you what we’ve been working on the past few months.

 photo IMG_5670.jpg
(left to right – Megan, Carolyn, moi, Kayla, Kate)

We went to one of our favorite restaurants, The Henry, to kick off the holiday. The food is yummy and so are the interiors!

 photo image10.jpg
 photo IMG_1242-0-1038x576.jpg
images

The bathroom has the prettiest tile and it was so fun to see the Kohler trough sink we’re using in one of our projects! It’s amazing!
 photo IMG_5671.jpg
 photo IMG_5673.jpg

I tried not to do any work during the break, but I had a Domino deadline to squeeze in before Christmas. I needed a biggish tree for the shoot and my girls helped me find a great kumquat tree at a local nursery. I planted it in a basket for the shoot and it was like a dream come true. :)

 photo IMG_5459.jpg
I also grabbed a flat of green and red succulents to give as neighbor gifts in hand-painted clay pots. I thought a break from sweet treats would be welcome for both my neighbors and me!
 photo IMG_5710.jpg

It’s so crazy to me that my sweet Evelyn is six years old now. This girlie has been nothing but pure joy since she showed up unannounced at home! We celebrated her birthday early this year (the 24th is always so jam-packed, poor thing!). We went to a trampoline park for her little party. Have you ever been to one? It is so much fun to do flips and obstacle courses, but Michael and I could barely walk the next day! So worth it. :)

 photo IMG_5640.jpg

We had a really great Christmas. It was pretty chill – we mostly just sat around with family and played games and ate, and bruised our tailbones trying to get the hang of that dang hoverboard. Somehow my girls all figured it out in about 0.3 seconds but it took me all day. :) We also tried to spend as much time outside as possible this year. We did a few little hikes, including to this area that was featured on Snippet and Ink. Aren’t our mountains beautiful here?

 photo IMG_5814.jpg
After Christmas, the girls headed up to my mom and dad’s house and Michael and I stayed home with Margot. We did some big organizing projects and made plans for a mini kitchen makeover that I want to do this year. It’s been more than two years since doing our semi-temporary fixes (like painting the floors and doing the concrete overlay on the countertops), and I’d like to invest in something a little nicer this year. We won’t be breaking any banks though. I found a practically new Viking fridge on Craigslist for an amazing deal (it was in a gym kitchen!) and the marble I’m looking at costs a fraction of the price of granite. Can’t wait to share all the details! 
We’re thinking of doing a slate floor in the kitchen, laying it right on top of the existing tile to make it flush with our wood floors. While I was out shopping for some good slate options and I found these new pretties at Floor & Decor. I loved these 4″ white marble hex tiles!
 photo IMG_5804.jpg

((Also, those Nikes above are my favorite errands-shoes right now. So, so comfortable!))

 photo Screen Shot 2016-01-04 at 9.29.30 PM.png
This elongated white marble herringbone tile is also SO GOOD. I’d love to use this on my kitchen backsplash, but I think I’m going to do a herringbone pattern for the floor tile. So maybe I could use the white in the studio bathroom then?
 photo IMG_5805.jpg
It’s hard to tell in my photos, but the scale is closer to the tile in this gorgeous bathroom.
 photo bathroom-vanity.jpg
 photo bathroom-renovation-sarahshermansamuel2.jpg
Michael and I headed up to my parents’ house in Snowflake for New Years. It’s so nice to have a place to easily get away to! We played in the snow with the girls and watched movies and did a little salvage yard shopping. There’s a place called Lamell’s in a nearby town, Linden, that takes a little bit of digging, but has some hidden treasures for sure!
 photo IMG_5876.jpg
 photo IMG_5864.jpg
The owner drives to farmhouses in the midwest and salvages beautiful old windows and doors to bring back and sell at his yard. I had a blast digging through these piles! I found a pair of 100 yr-old doors that I want to use for my pantry makeover for only $40! It was such a fun way to end the weekend.
 photo IMG_5877.jpg
I have big plans for 2016 and I’m SO excited to get going! Thanks for sticking around for another year! xo
 photo IMG_5880.jpg
This error message is only visible to WordPress admins
There has been a problem with your Instagram Feed.
© Jenny Komenda. All Rights Reserved.
Site by