
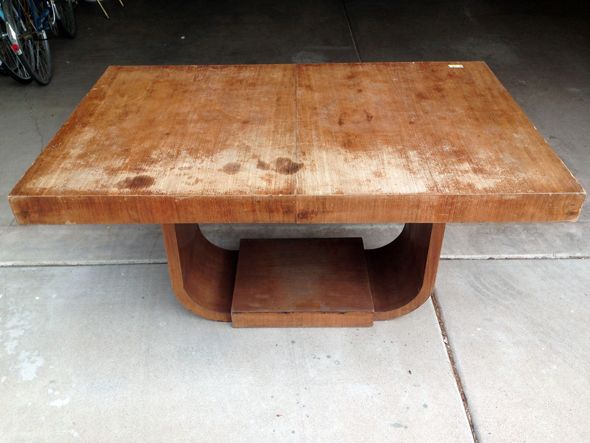
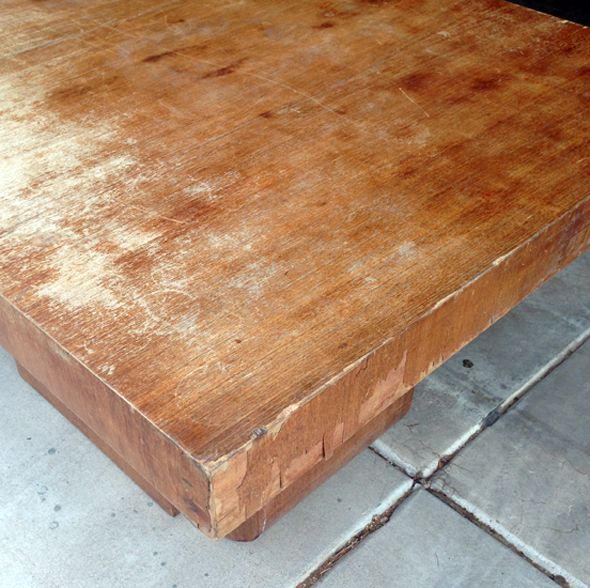
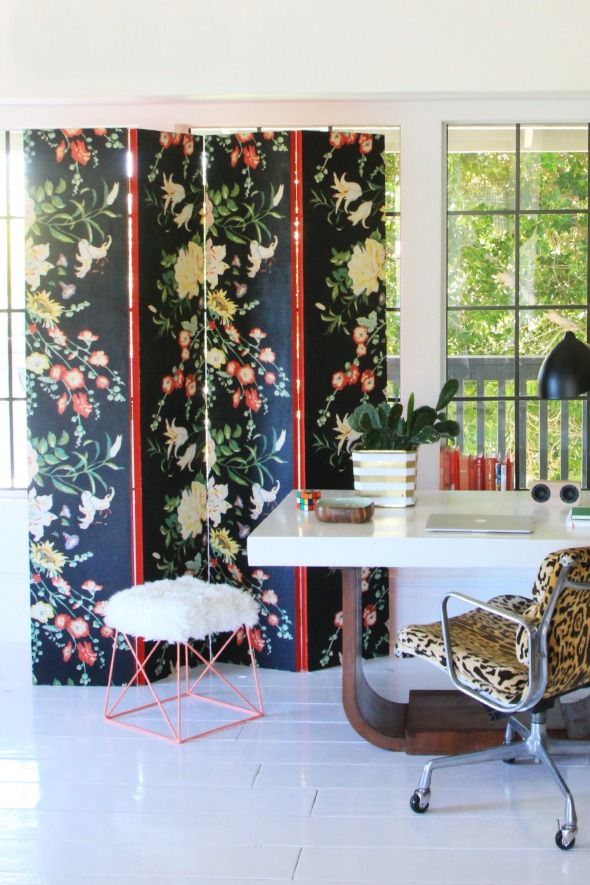
A few weeks ago I found a desk at Goodwill that was in not-so-great shape. The veneer on the table top was badly chipped and what was still there had pretty intense water rings and discoloration. The table base though, which is what really caught my eye in the first place, was in pretty decent shape, so I decided to buy the desk and cross my fingers that I could salvage the top.
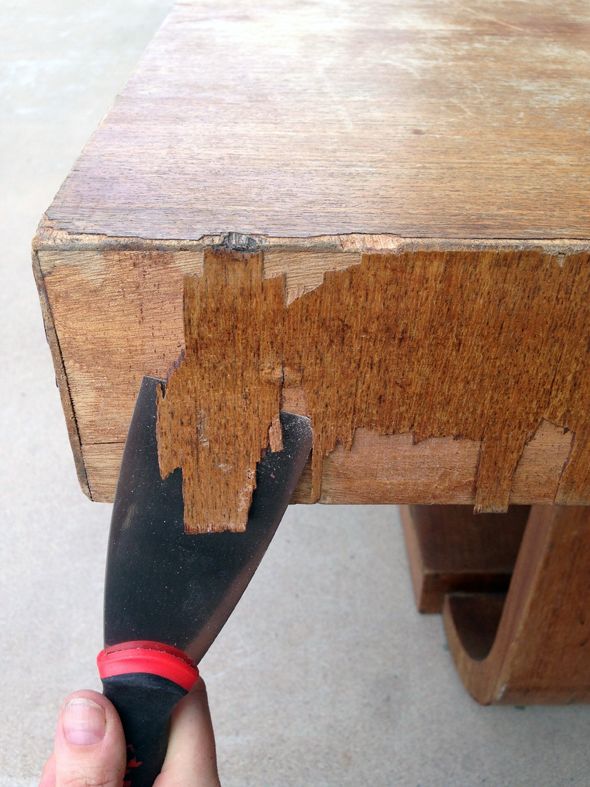
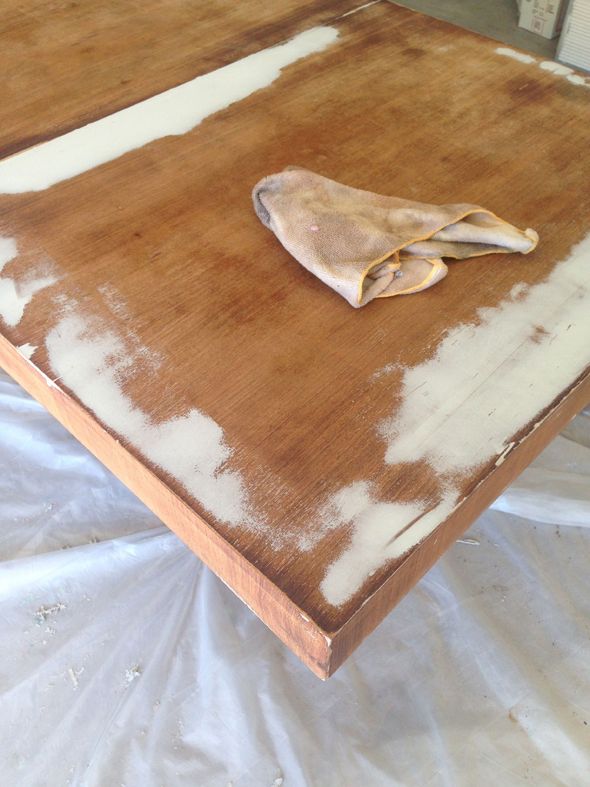
I took a closer look at the veneer when I got the desk home and quickly realized the only real choice I had was to remove the worst of the veneer and paint the top.
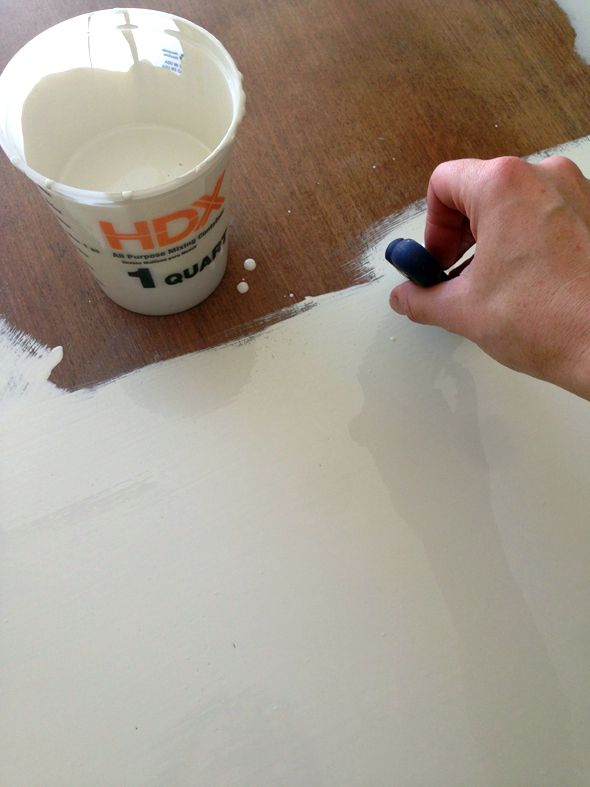
To make the surface as smooth and even as possible, I whipped up a couple batches of Bondo that I applied in thin coats.
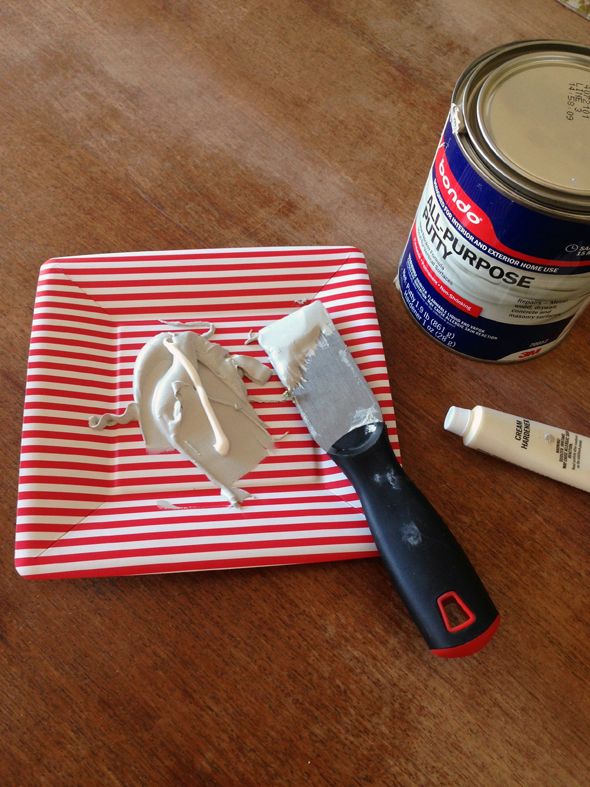
Bondo feels a little hardcore the first time you work with it (so, you know, maybe don’t try Bondo-ing an entire staircase like I did). It’s like epoxy in that you have to mix in a hardening cream and that you have only a few short minutes to apply the mixture before it starts to harden (also it has a very… distinctive smell). But, truly, it’s not that scary once you have a batch or two under your belt – and it repairs and seals like nothing out there.
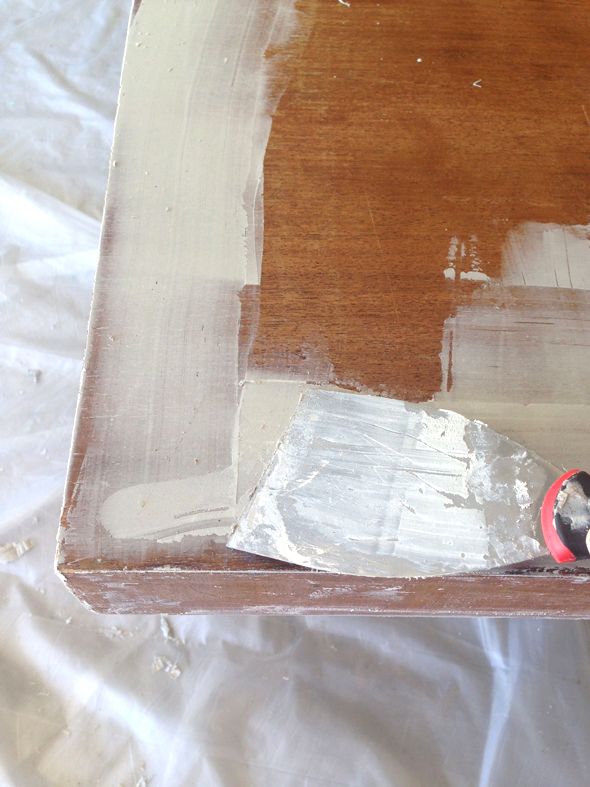
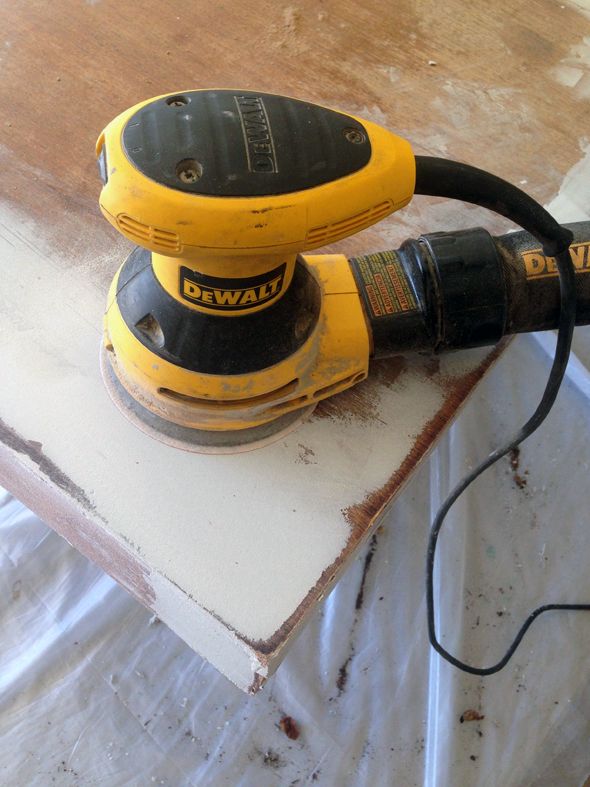
Bondo’s finish is so smooth, unlike wood filler, and so strong, unlike plaster or putty. It sands beautifully so it’s not that hard to just get a rough coat down and then sand away the extra until you have a smooth surface. Just remember it’s easier to sand down the Bondo than to try and apply a perfectly-perfect surface with a spatula in the first place.
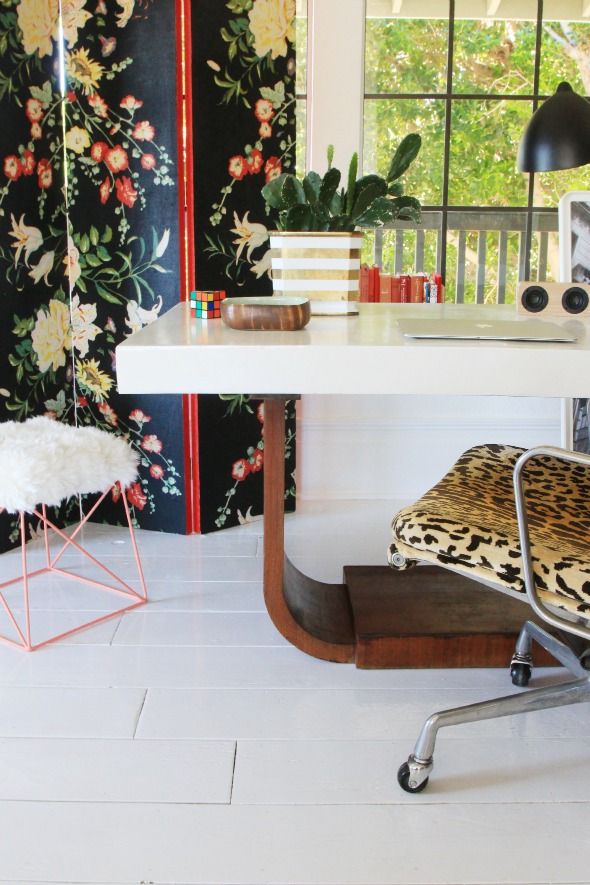
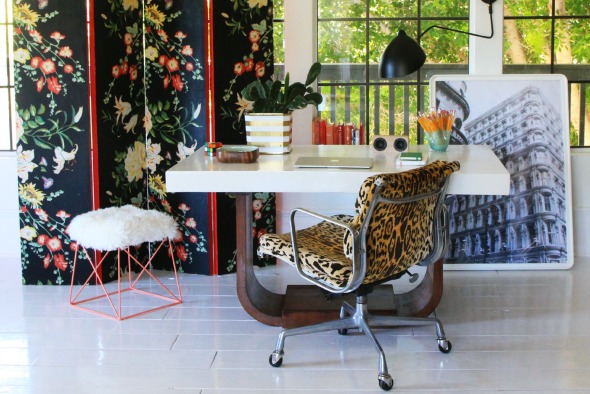
The wood base is still in “vintage condition” but it cleaned up pretty well with a quick wipe down of Restor-A-Finish on a rag and that was pretty much it! It’s so fun to have a new, super unique desk in my studio for almost no money!


I truly appreciate how you design on a budget and it looks like a million dollars. Lately all I've seen is super high end or homey crafty (IE looks DIY in a bad way) design. You are so inspiring! Instead of looking at Elle Decor and feeling depressed, I'm going to Goodwill and Home Depot!
Please write a book!!!!!!
I am so jealous of all the great vintage finds! Makes me want to plan a trip out there with a Uhall :)
Love the shape of that desk! I think painting the top of it white brings out the bottom more.
COOCOO FOR COCO
Love this! Gorgeous desk.
I love your style and table looks amazing as do the rest of your house.
So lovely!!
Wow! Beautiful! Thank you for the product information so we can do this kind of repair. One question If you have time to answer it: How long do you cure your oil finish before you use it? It seems no matter how long I wait, that things left in one place too long stick to it.
AMAZING! Thank you very much for the article on the vintage desk.
So gorgeous!! I used the rust oleum enamel on a little telephone table (after reading about it here on LGN) and the finish is flawless!! So smooth and shiny- love your work!
Oh my gosh, it looks so good! If I tried to do that, even following your instructions, I'm sure it wouldn't turn out as well! You're so good at this stuff, you make it look easy! Great job!
Oh my word, what a fabulous find and it looks amazing in your office.
You need to do a book. Always amazing!
You are so resourceful and creative! Lovely finish on your table, and I like your tips as you describe what you're doing.
Another inspirational DIY! Can you tell us pregnant ladies what type of mask/respirator you use when sanding and using oil paints? Thanks!
Awesome – get it with your power tools, girl!
Beautiful!
Great job! Consider using Abatron Wood Epoxy instead of Bondo. I've repaired wood surfaces w/ Bondo before and the patch eventually becomes apparent because it doesn't expand and contract the same as wood. Abatron is used extensively in historic preservation projects (and around my house!) because it adheres better. It even sands and takes paint like wood. (…and no I don't work for them. Just a happy customer!)
Gonna have to try this Bondo and oil paint. I find pieces with damaged veneer all the time at thrift stores, but I've never been sure how to repair it, so I've passed on lots of great shapes. No more! This is a great DIY fix to a popular problem.
This is stunning. Thank you for sharing all of your wonderful ideas and projects – you are so inspiring!
Ugh, Jenny! You are always doing EXACTLY what's on my to-do list. But before me, so I get to learn from you. I was sitting around thinking about how I was going to have to use wood filler on some veneer before I paint it high gloss. Bondo! And I've seen several of your projects where you use Rustoleum's enamel line and I'd planned to do it with no thought until my woodworking cousin told me, "Eh, enamel is for metal." But I guess your projects hold up just fine, so Rustoleum enamel it is.
I would LOVE for you to do a clean-up and disposal post about oils. I grew up in a latex-only house because my mom thought it was such a pain to clean up after oils. She mainly worked on walls, though, so it was fine. Now that I'm rehabbing my hand-me-down furniture, I need to expand my paint options. The guys at my local hardware store didn't have a clue about the proper way to clean up oil with mineral spirits and how to dispose of that stuff. Neither do I.
Looks fabulous! I have a side table that is a similar style and in similar condition. Call me crazy but I'm actually thinking of using one large marble tile to cover the top!
This looks amazing! I love it. Do you only use rust oleum paint? I've actually been trying to paint my dining room table using the tutorials you have previously posted, but I have brush marks everywhere! I'm using a valspar oil paint. I've had to sand down twice now, I must be doing something wrong, because it just is not working.
you are fascinating to me, seemingly never afraid to roll up your sleeves and get to work. this project is gorgeous, love the lines. what a score!
debra
It looks beautiful! Did you seal over the paint? I painted a vintage card table (turned bar cart) in the same kind of paint, and it has dings in it after only a year from minor wear.
Wow! You really brought life back into that beautifully shaped desk! Such a great find and such great work!
STUNNING! Thanks for sharing.
I LOVE this table. Thanks for all the tips! I'm currently assessing the veneer on a vintage dresser I purchased.
I love vintage, and the way you use it.
That desk is so beautiful! LOVE that base!!
One of the best refinishes ever – love it!
Beautiful and original! I'm still searching for my perfect desk find. Happy Nesting
That desk is gorgeous. When I would have walked right by it you saw an incredible desk. People would pay $1000+ for a one a kind desk like that .
My husband, who learned car body repair in his teens, uses bond to repair our french doors from doggie damage (scratches, chewing, etc). It is easy to do and looks like new – so much better than any other patching material.
Jenny-
I saw your ceiling medallion in a shot- love it! We are in the middle of putting one in with a new chandelier in our dining room, but I feel a little intimidated by painting it. It is fairly ornate. How did you paint yours? Any tips for installing one? I ordered ours from Wayfair and it came with no instructions. Thanks! Your tutorials are the best!
for best Online Jobs without any rejection, no time limit required, no investment requires, just spend few minutes and earn upto $35 daily
http://www.adsclickearning.com
Can I use oil based paints when I'm pregnant or do you use a mask? Or an assistant.
BTW, awesome find. It's soooo beautiful.
Beautiful! I love seeing how you spruce things up :)
Christa
http://www.gardeniasandmint.wordpress.com
Jenny- you are incredible! Your stuff never ceases to amaze. I see that you have a tab for DIY stuff….but at this point you've done so many different things to so many different items- have you ever thought about categorizing them? Like if someone finds a chair at a flea market they could go on your blog and see all the amazing things you've done to a chair? Maybe I'm missing something but I think it would be a useful way for people to stay inspired! Plus you always know the right products and DiY's can be so very overwhelming. Your house (and family) are gorgeous!!
Wow!! Such a great piece! I love the glossy white top – you recently inspired me to try rustoleum's pre mixed oil enamel, and I love it!
You have such a great talent for creating the "cozy appeal". I search for cozy decorations on a budget being an Army wife and really appreciate you taking the time to put this online !
Love it!