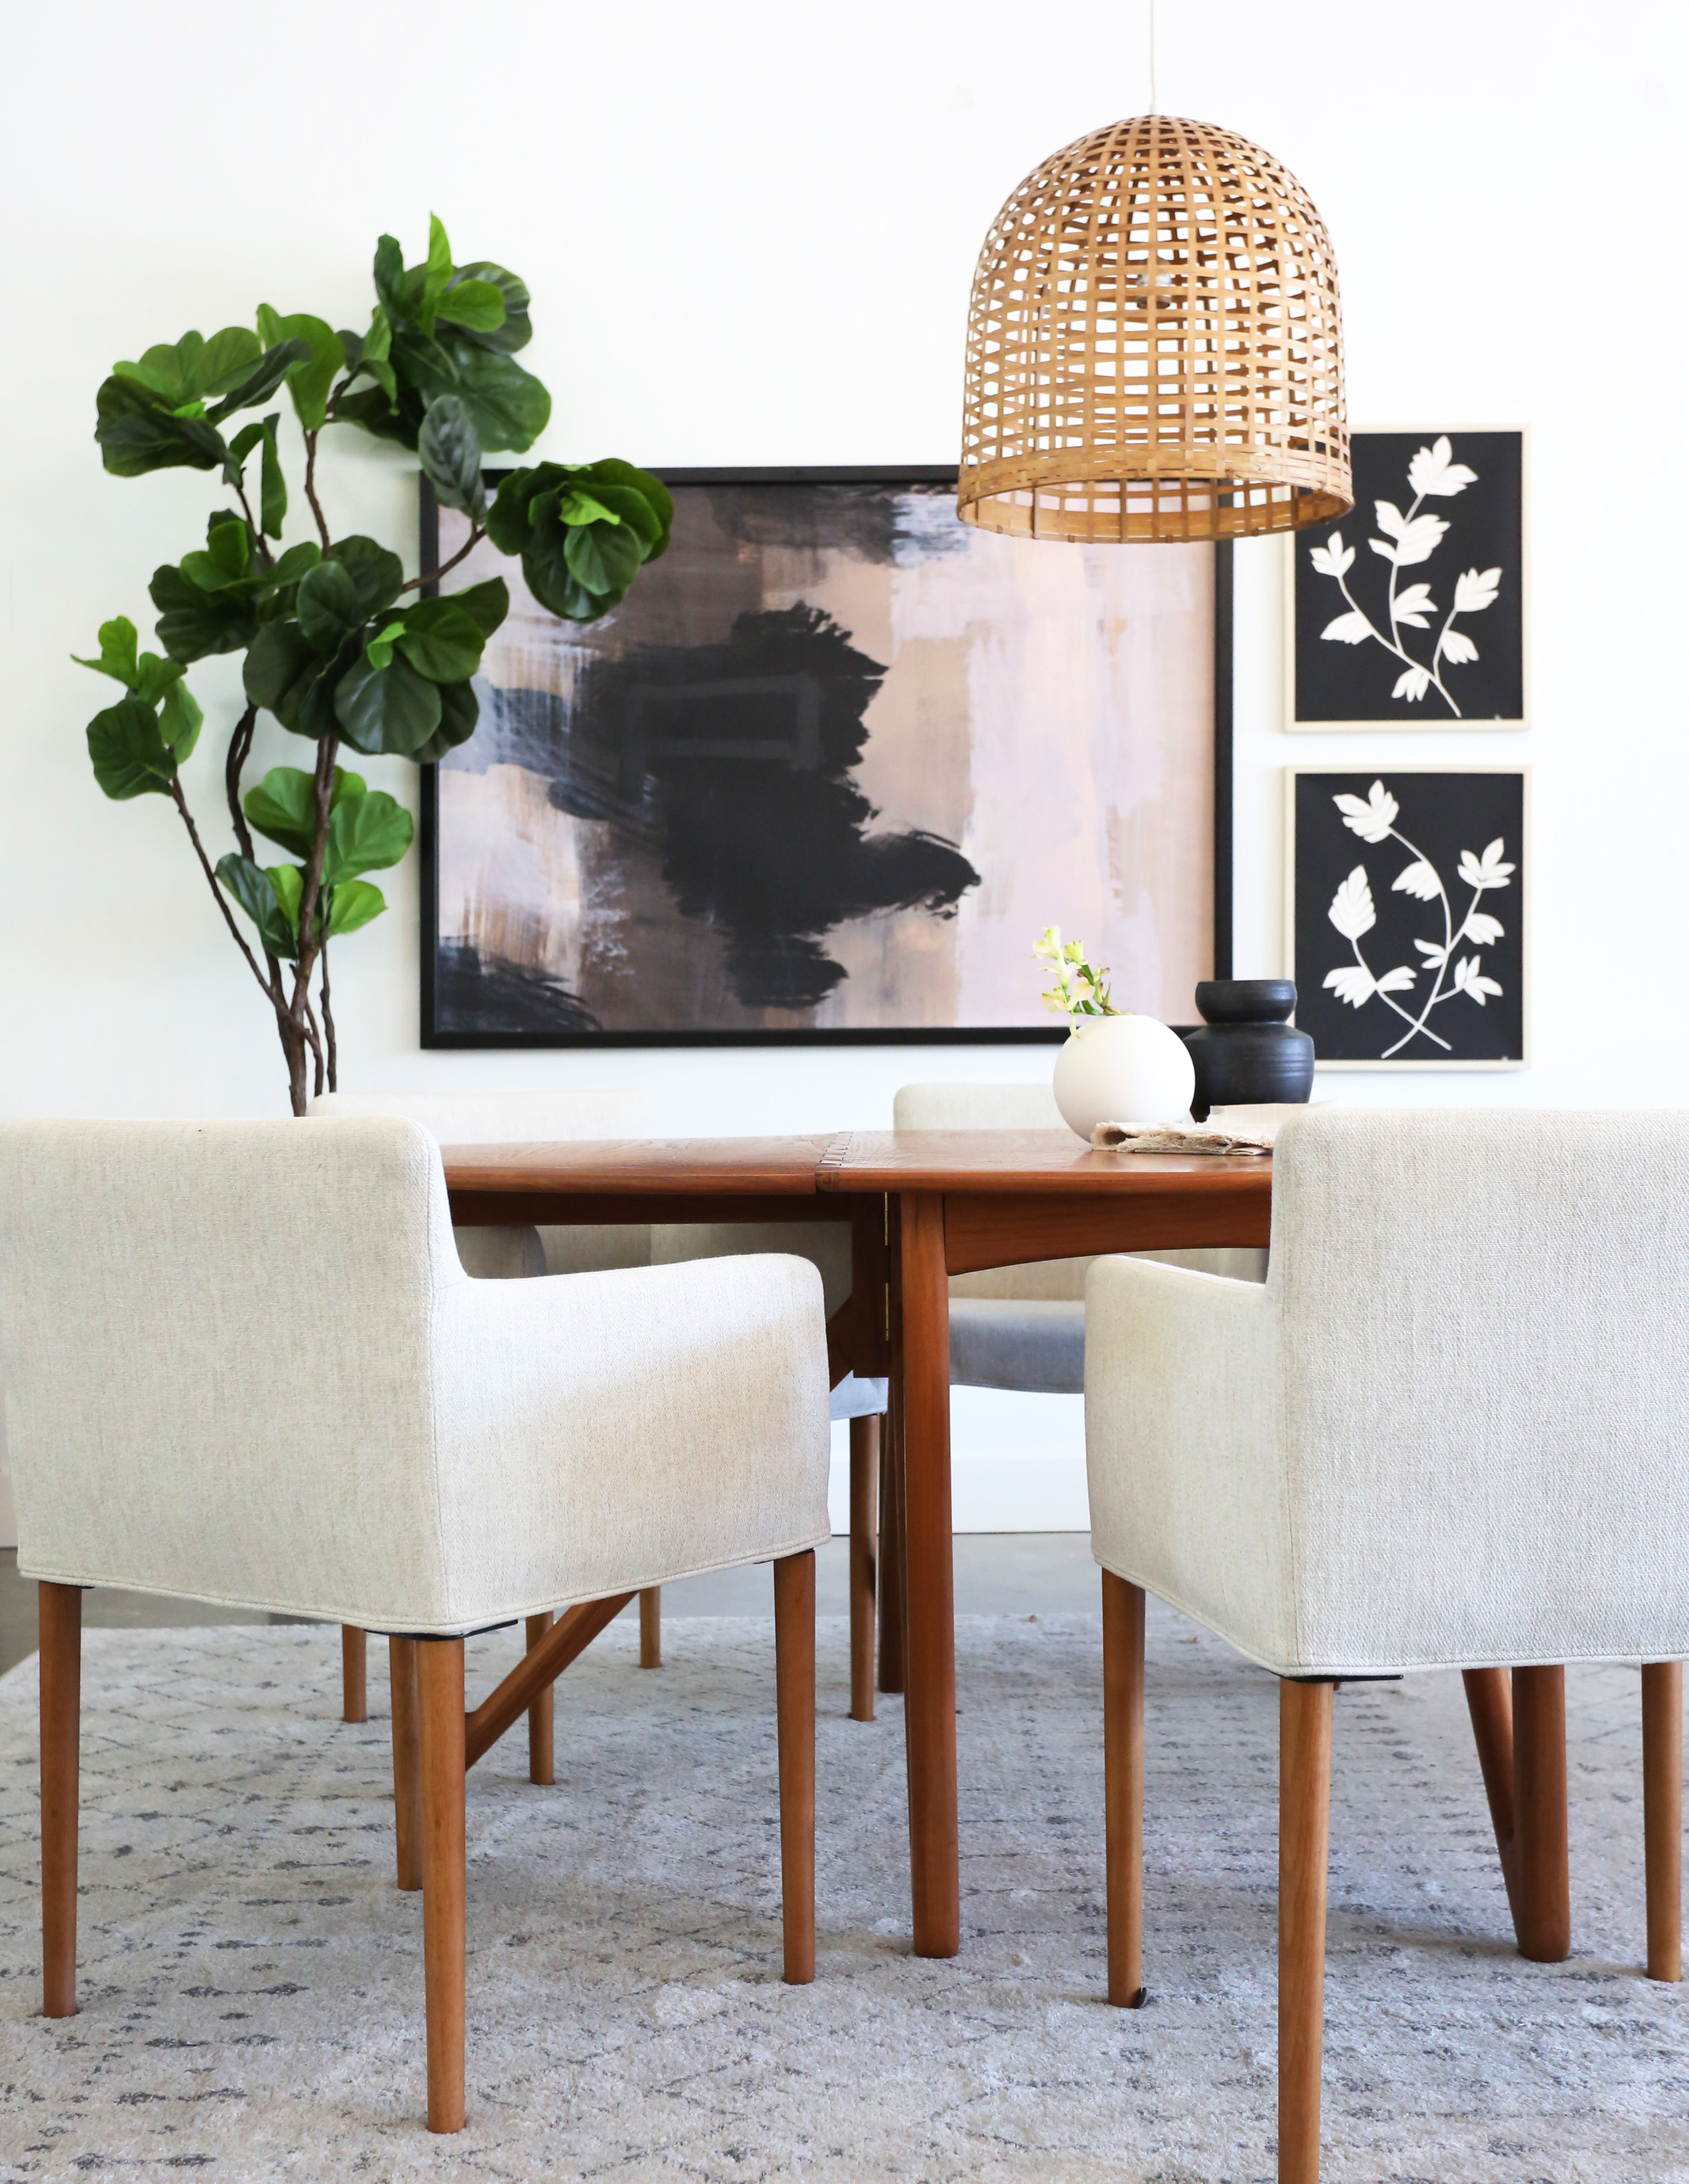
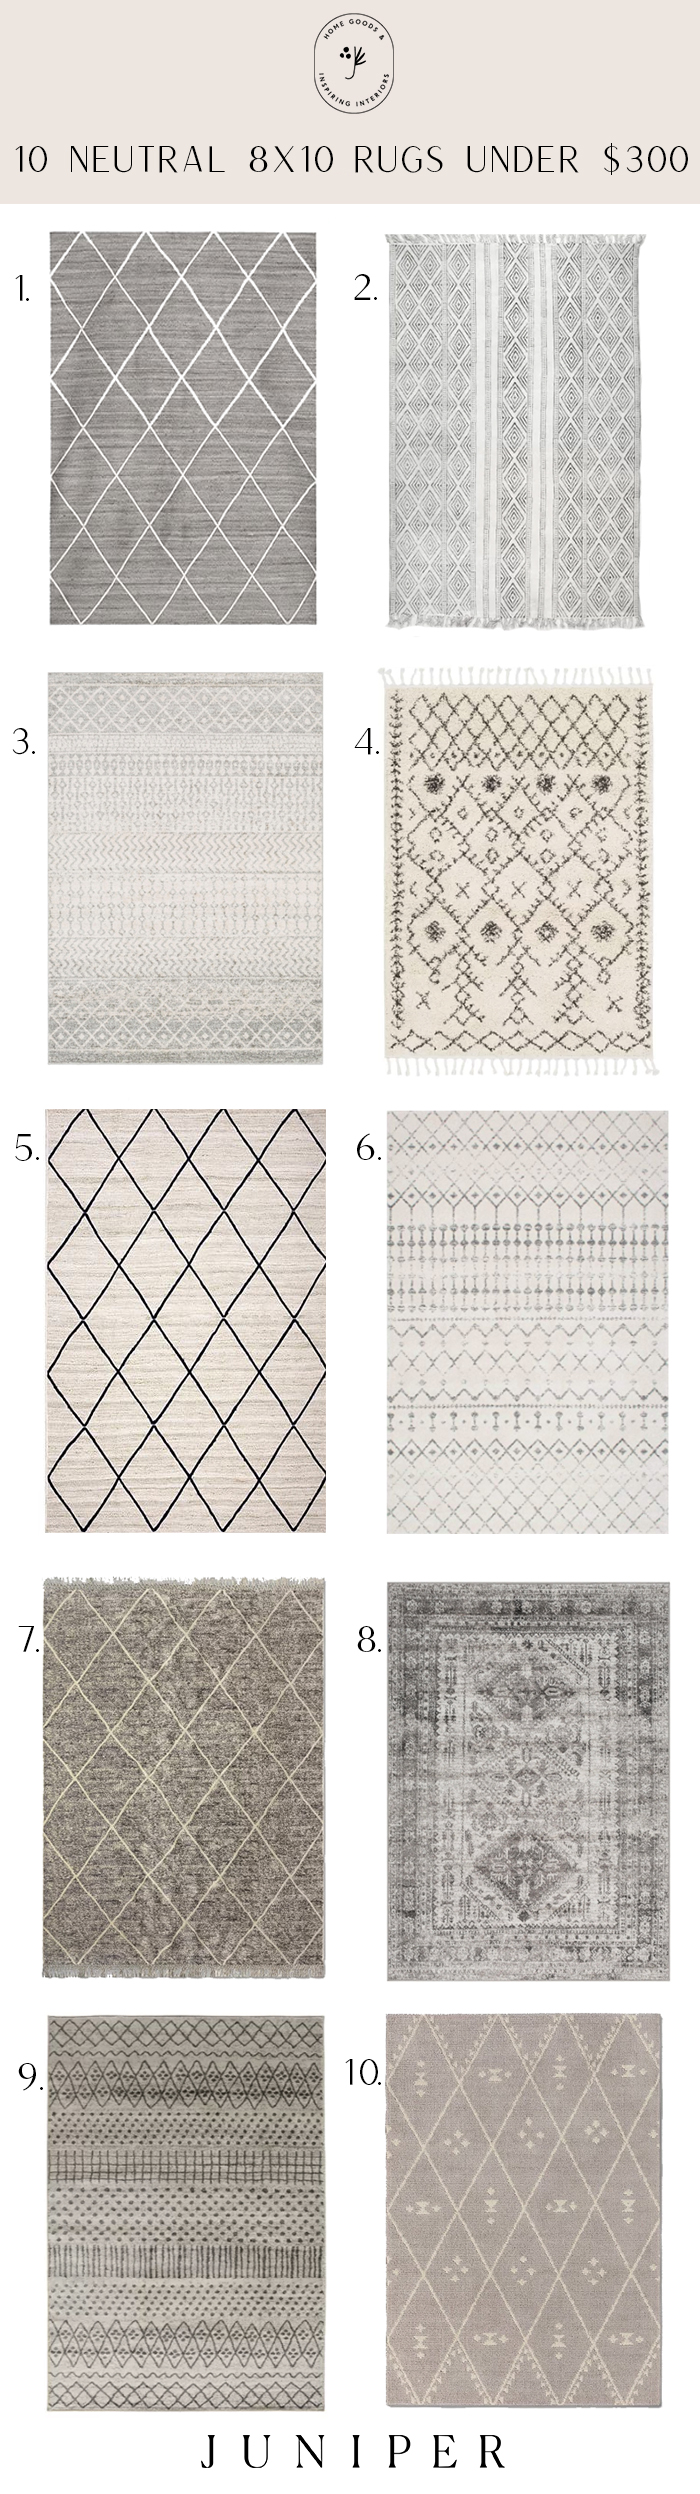
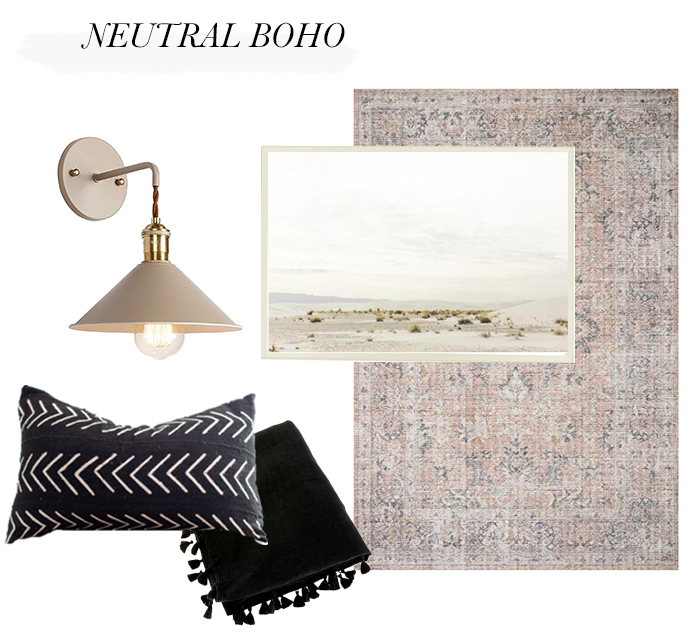
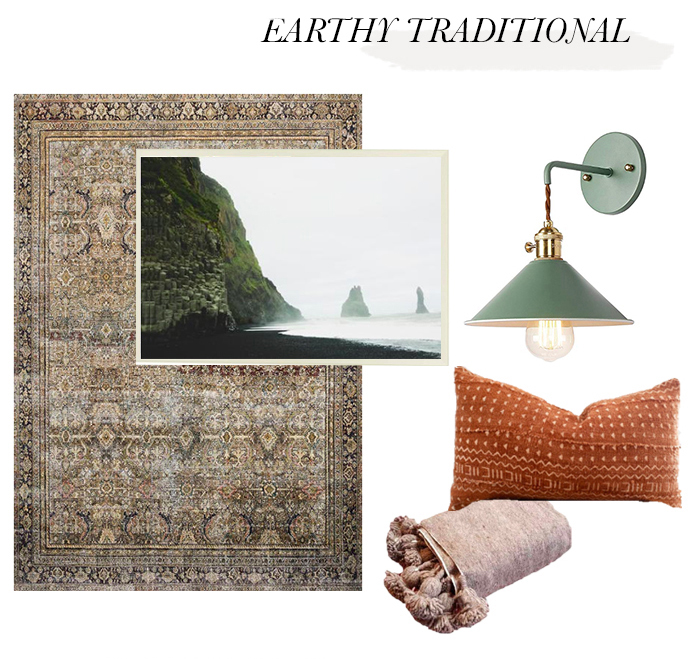
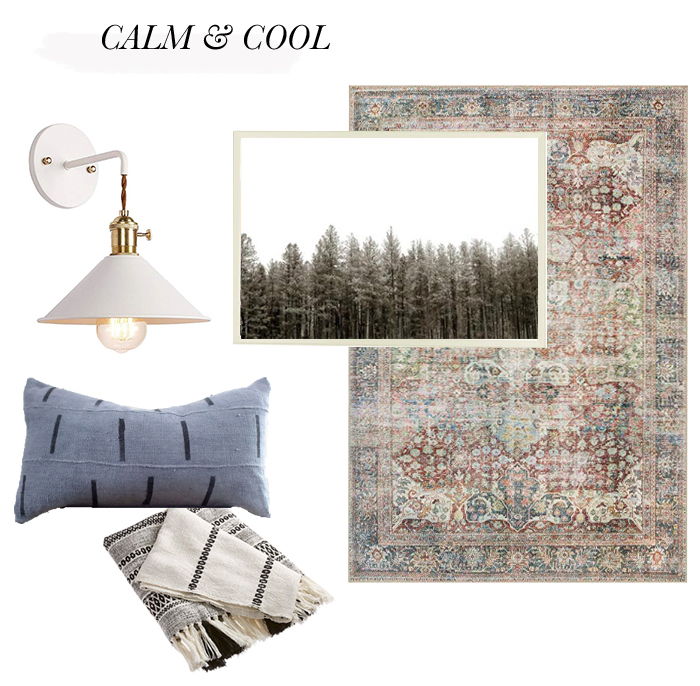
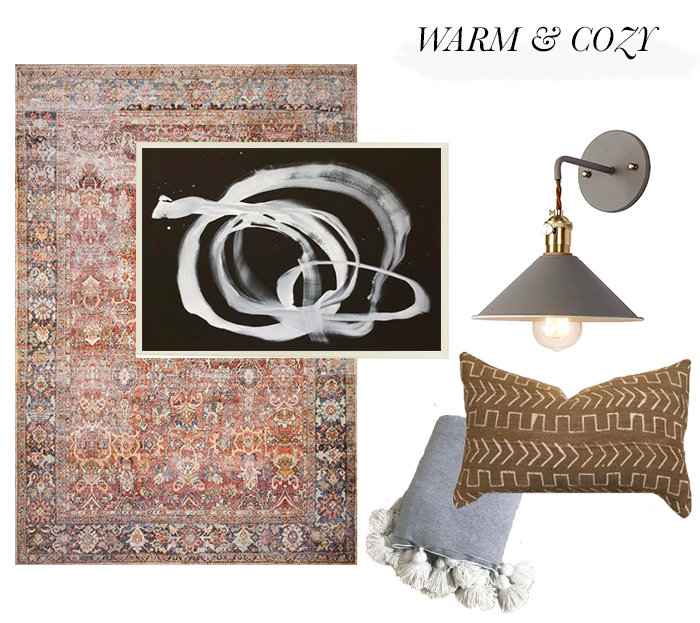
Finding the perfect rug for your space can be such a daunting task! If you are struggling with mixing color and pattern in your space, a neutral rug with lots of movement and texture can be a great place to start! A neutral base will give you the freedom to mix and match art, pillows…
Finding the perfect rug for your space can be such a daunting task! If you are struggling with mixing color and pattern in your space, a neutral rug with lots of movement and texture can be a great place to start! A neutral base will give you the freedom to mix and match art, pillows and curtains. We’ve rounded up 10 of our go-to neutral rugs below!
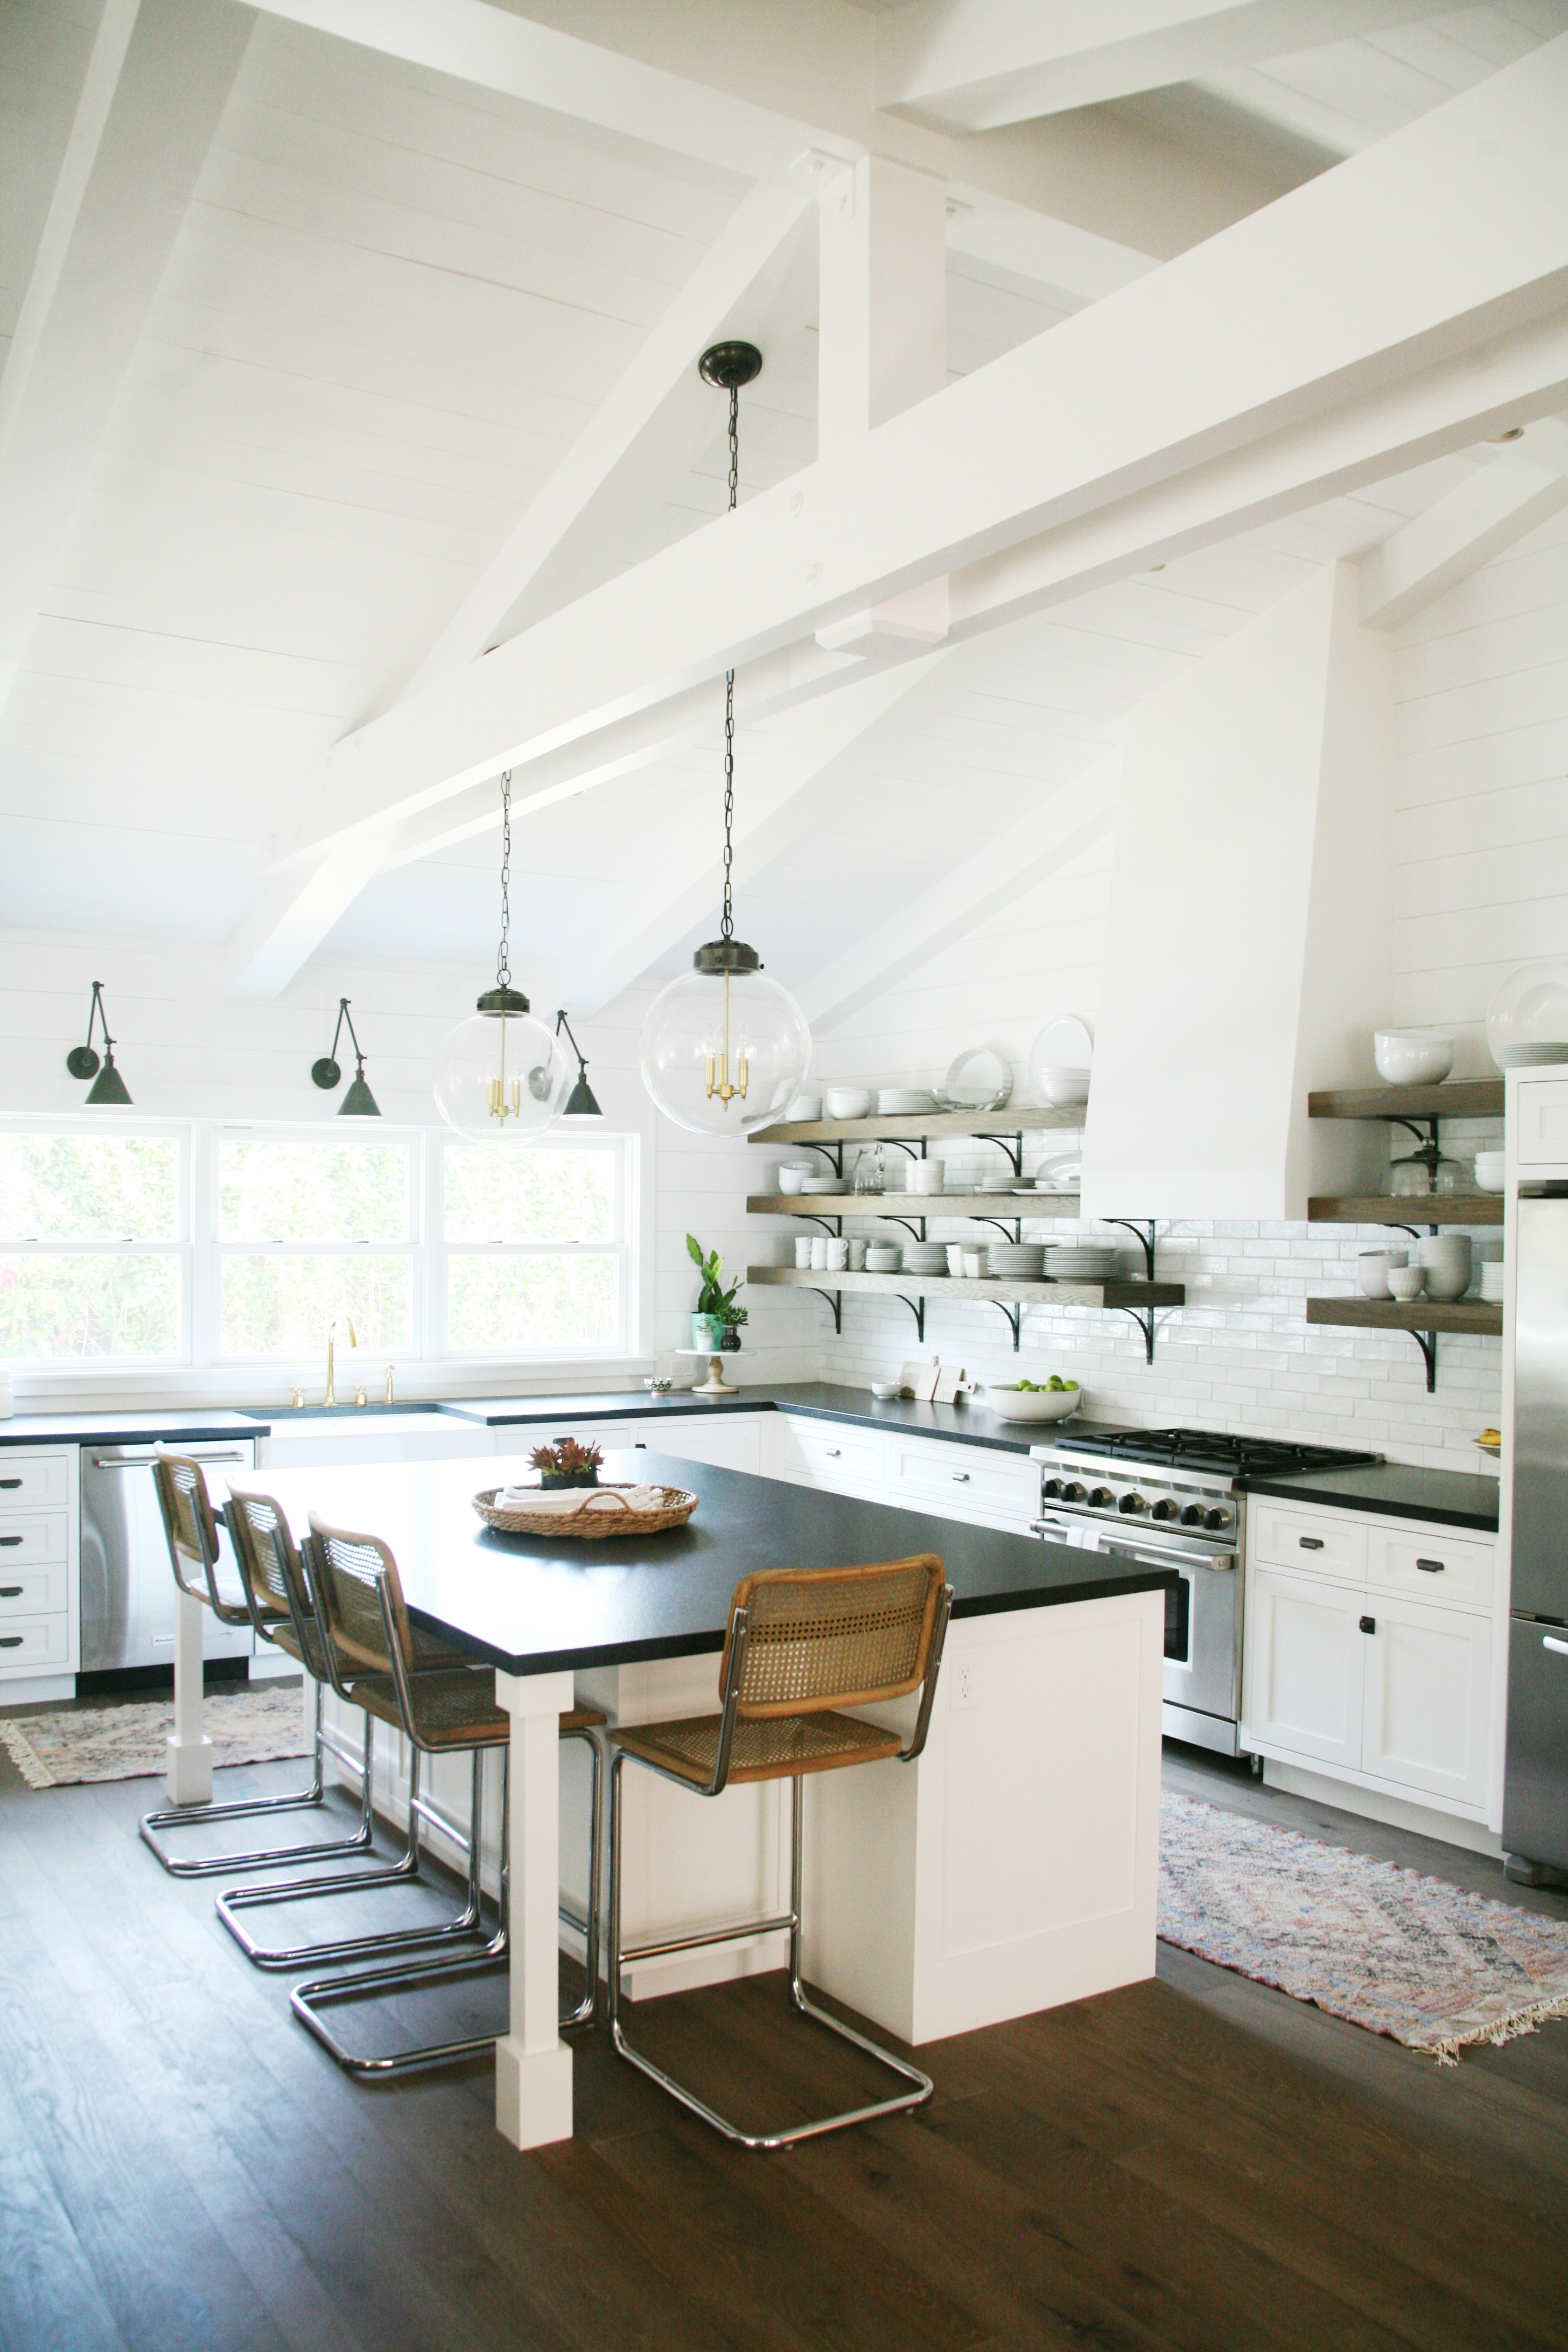
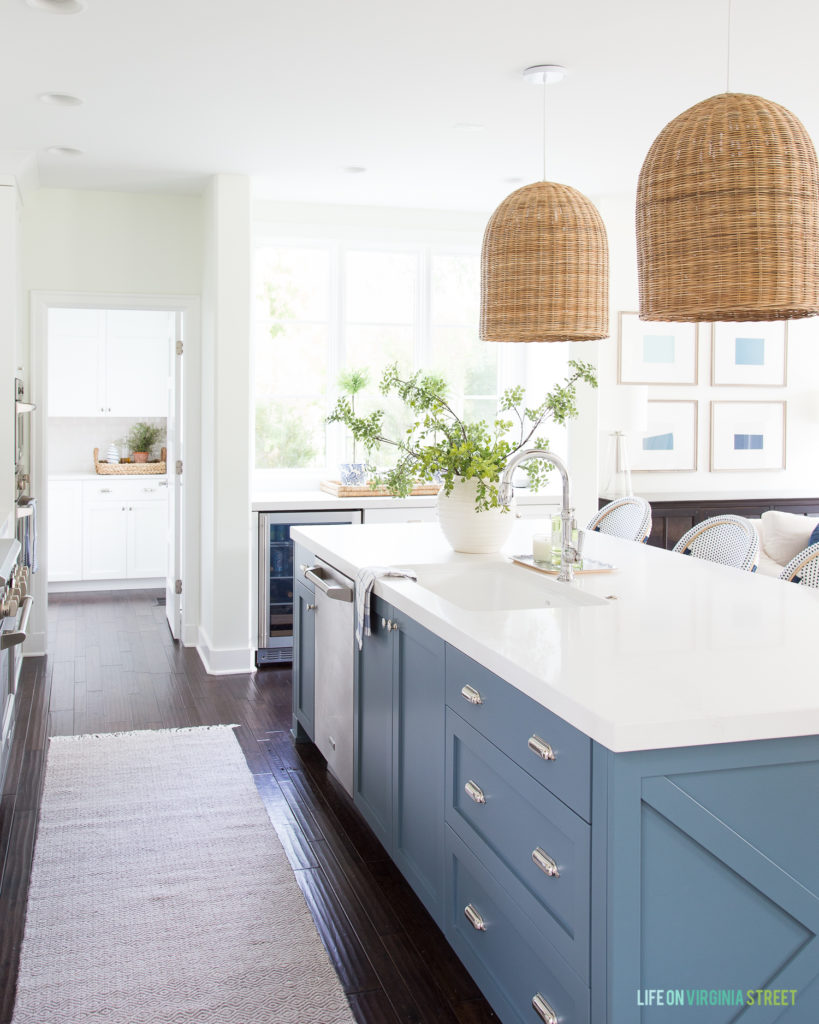
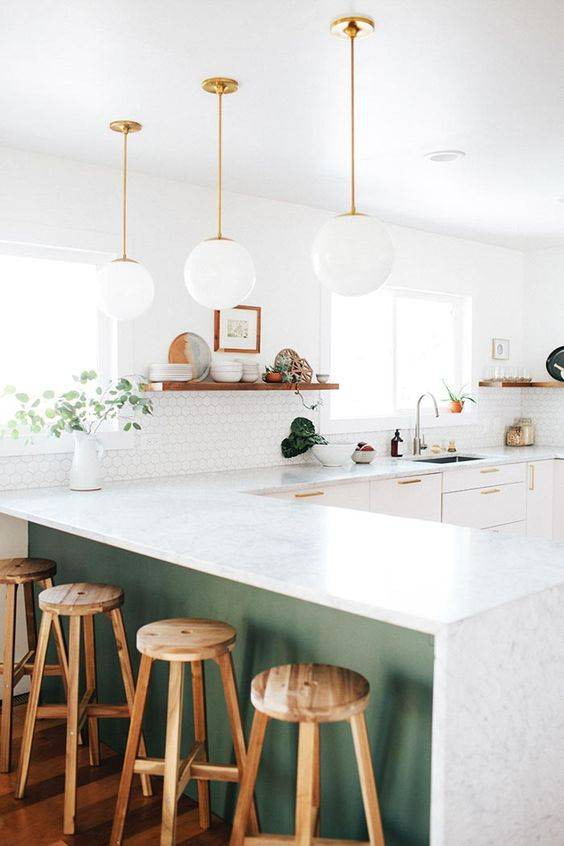
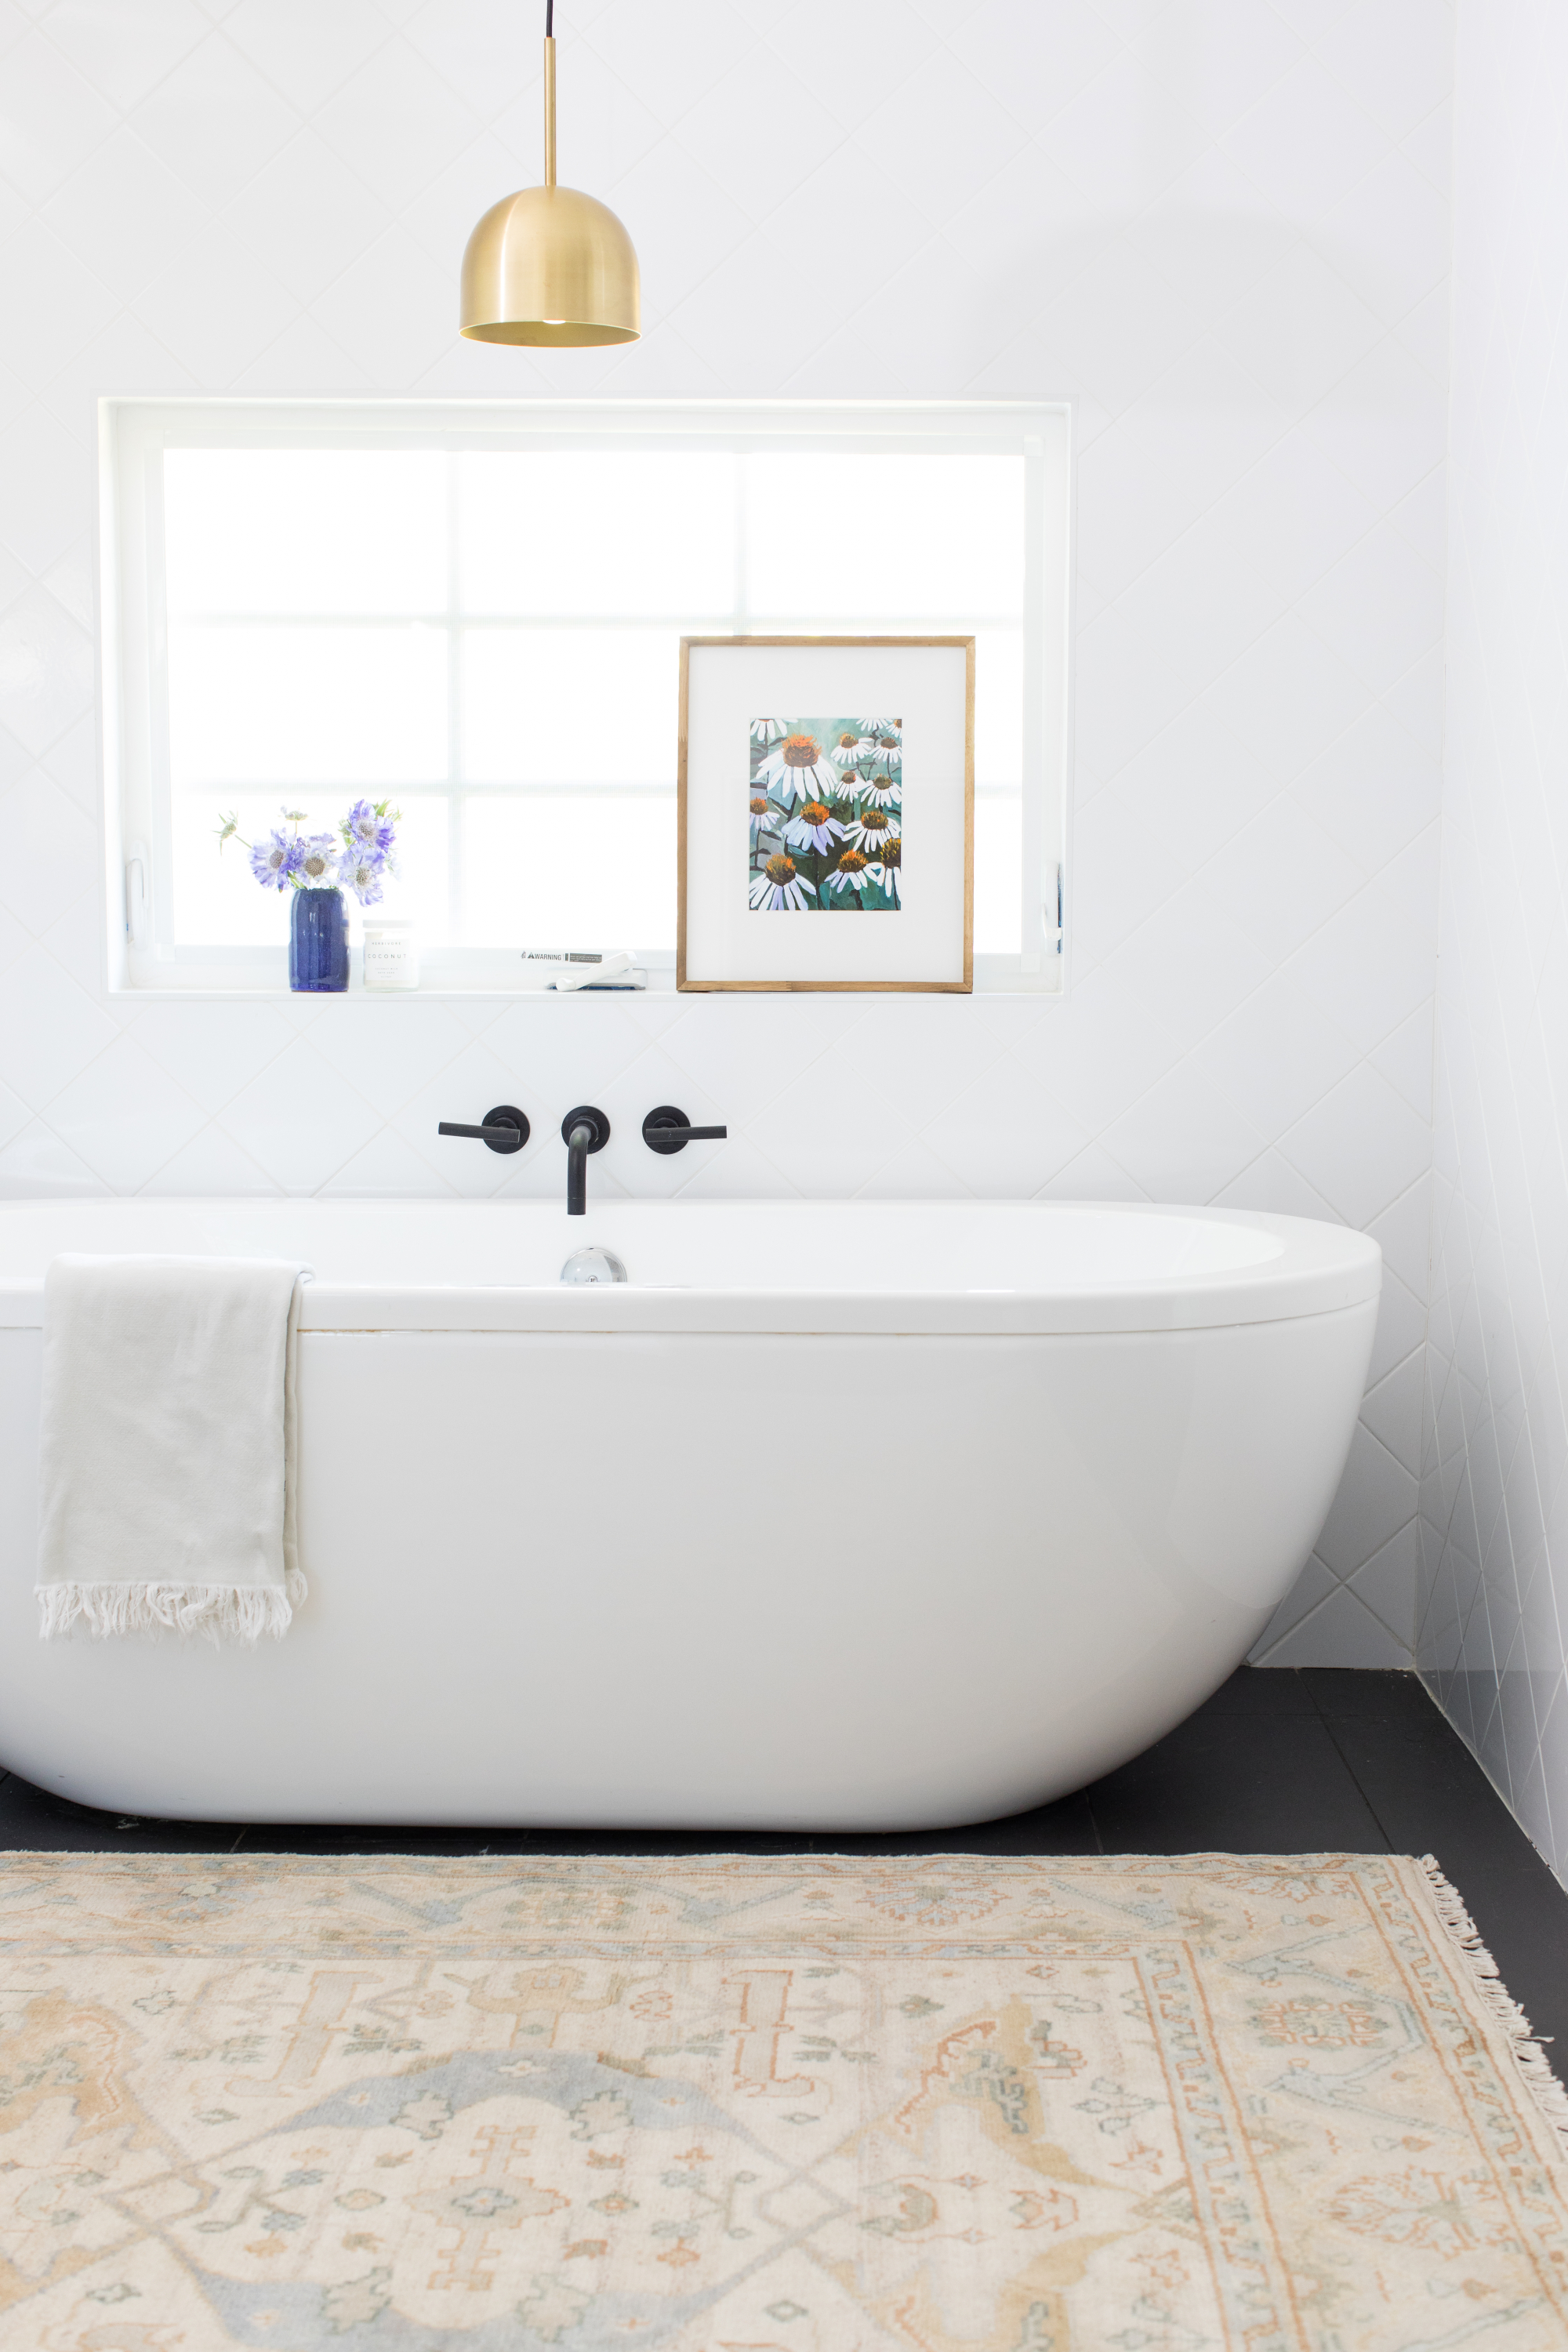
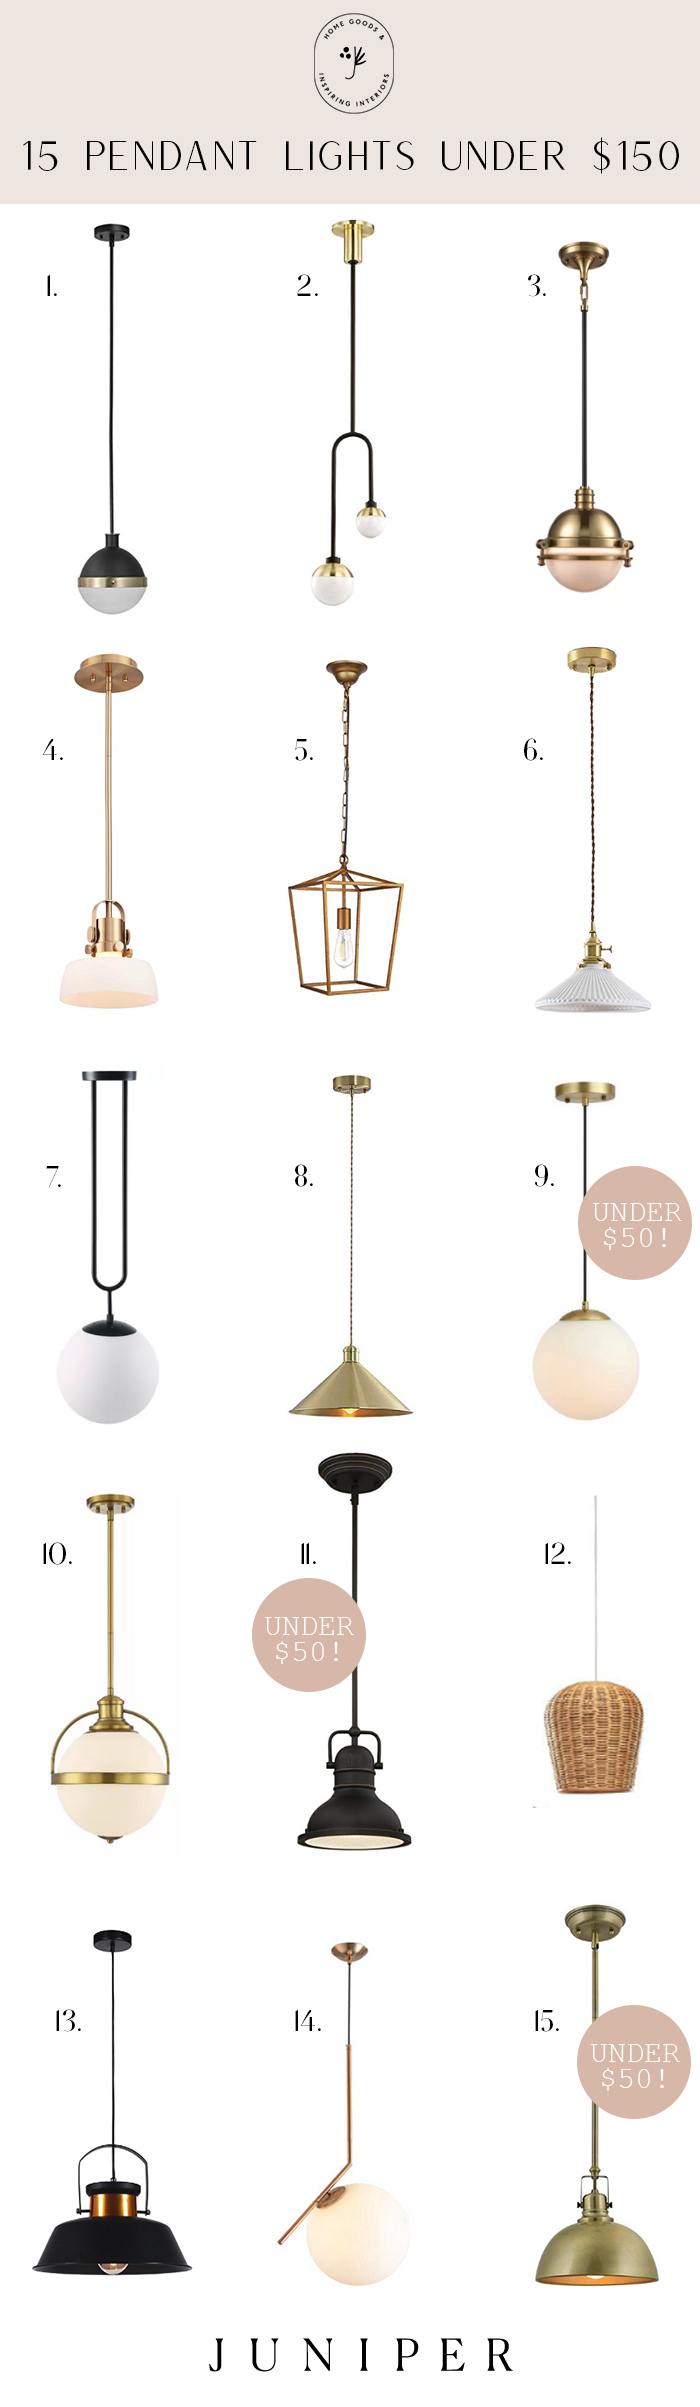
One of the quickest ways to update your kitchen is with new lighting. Pendant lights over an island or sink are a perfect place to start, and don’t have to break the bank either! We rounded up 15 of our favorites, including some under $50!!! source source Don’t feel limited to kitchens either. Adding a…
One of the quickest ways to update your kitchen is with new lighting. Pendant lights over an island or sink are a perfect place to start, and don’t have to break the bank either! We rounded up 15 of our favorites, including some under $50!!!
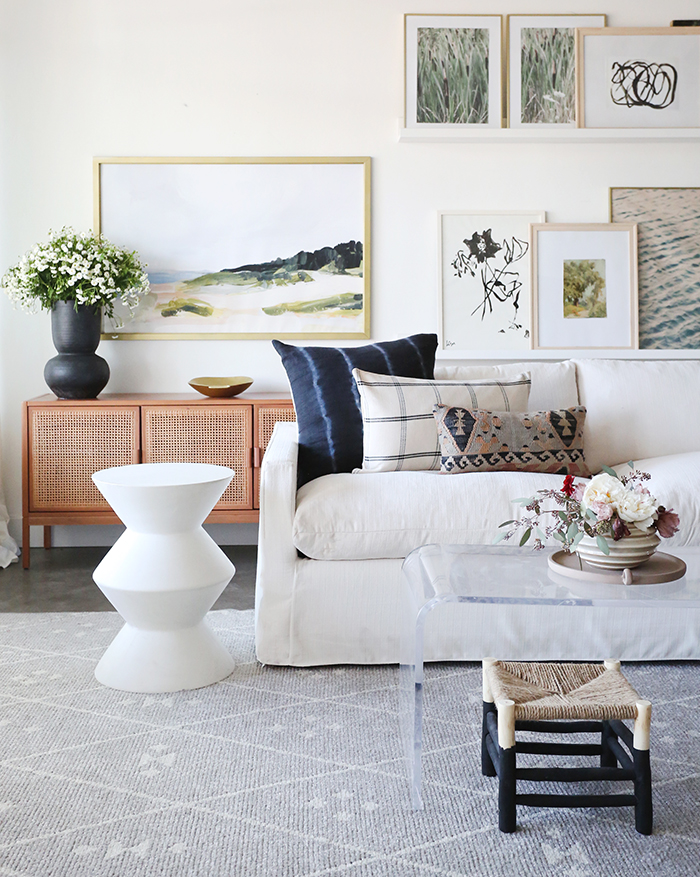
If you’re bored with your living room and need a quick and affordable fix, ditch the throw pillows that match your sofa and get a new set of unique pillows that add a TON of personality and texture! We’re big believers that design rules were made to be broken, but sometimes, when you’re feeling stuck…
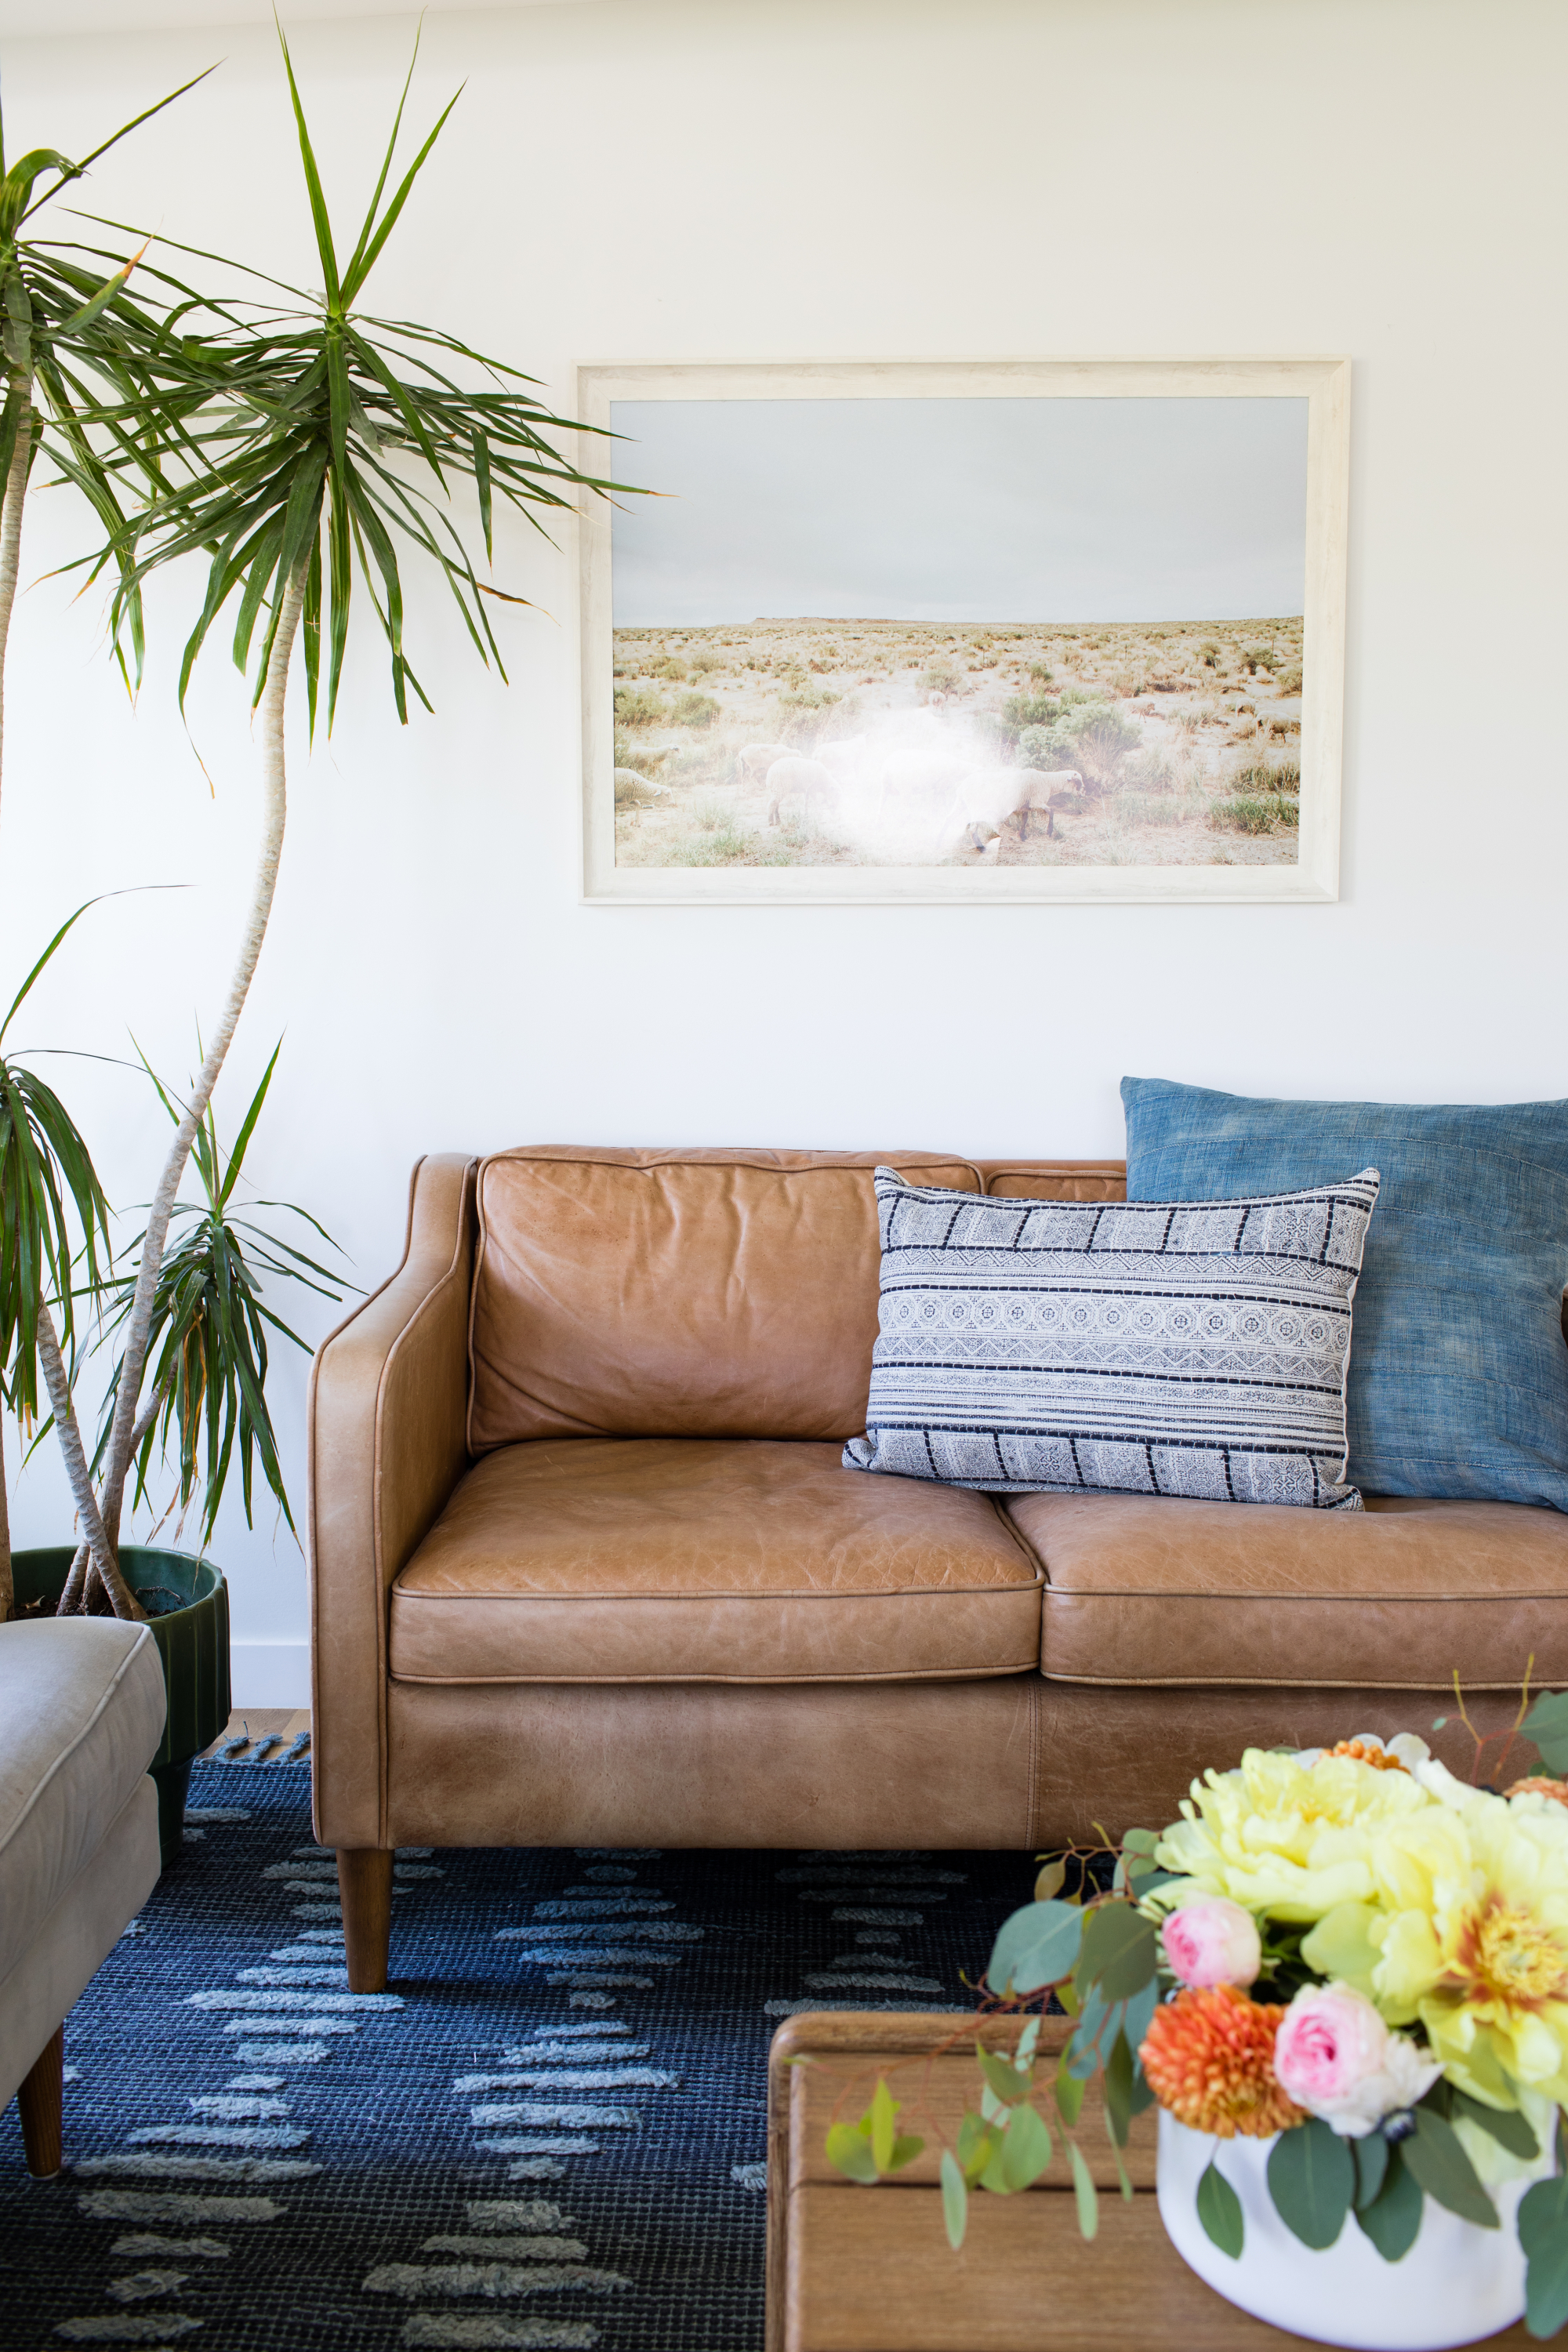
If you’re bored with your living room and need a quick and affordable fix, ditch the throw pillows that match your sofa and get a new set of unique pillows that add a TON of personality and texture! We’re big believers that design rules were made to be broken, but sometimes, when you’re feeling stuck with a space, rules and formulas can be really helpful.
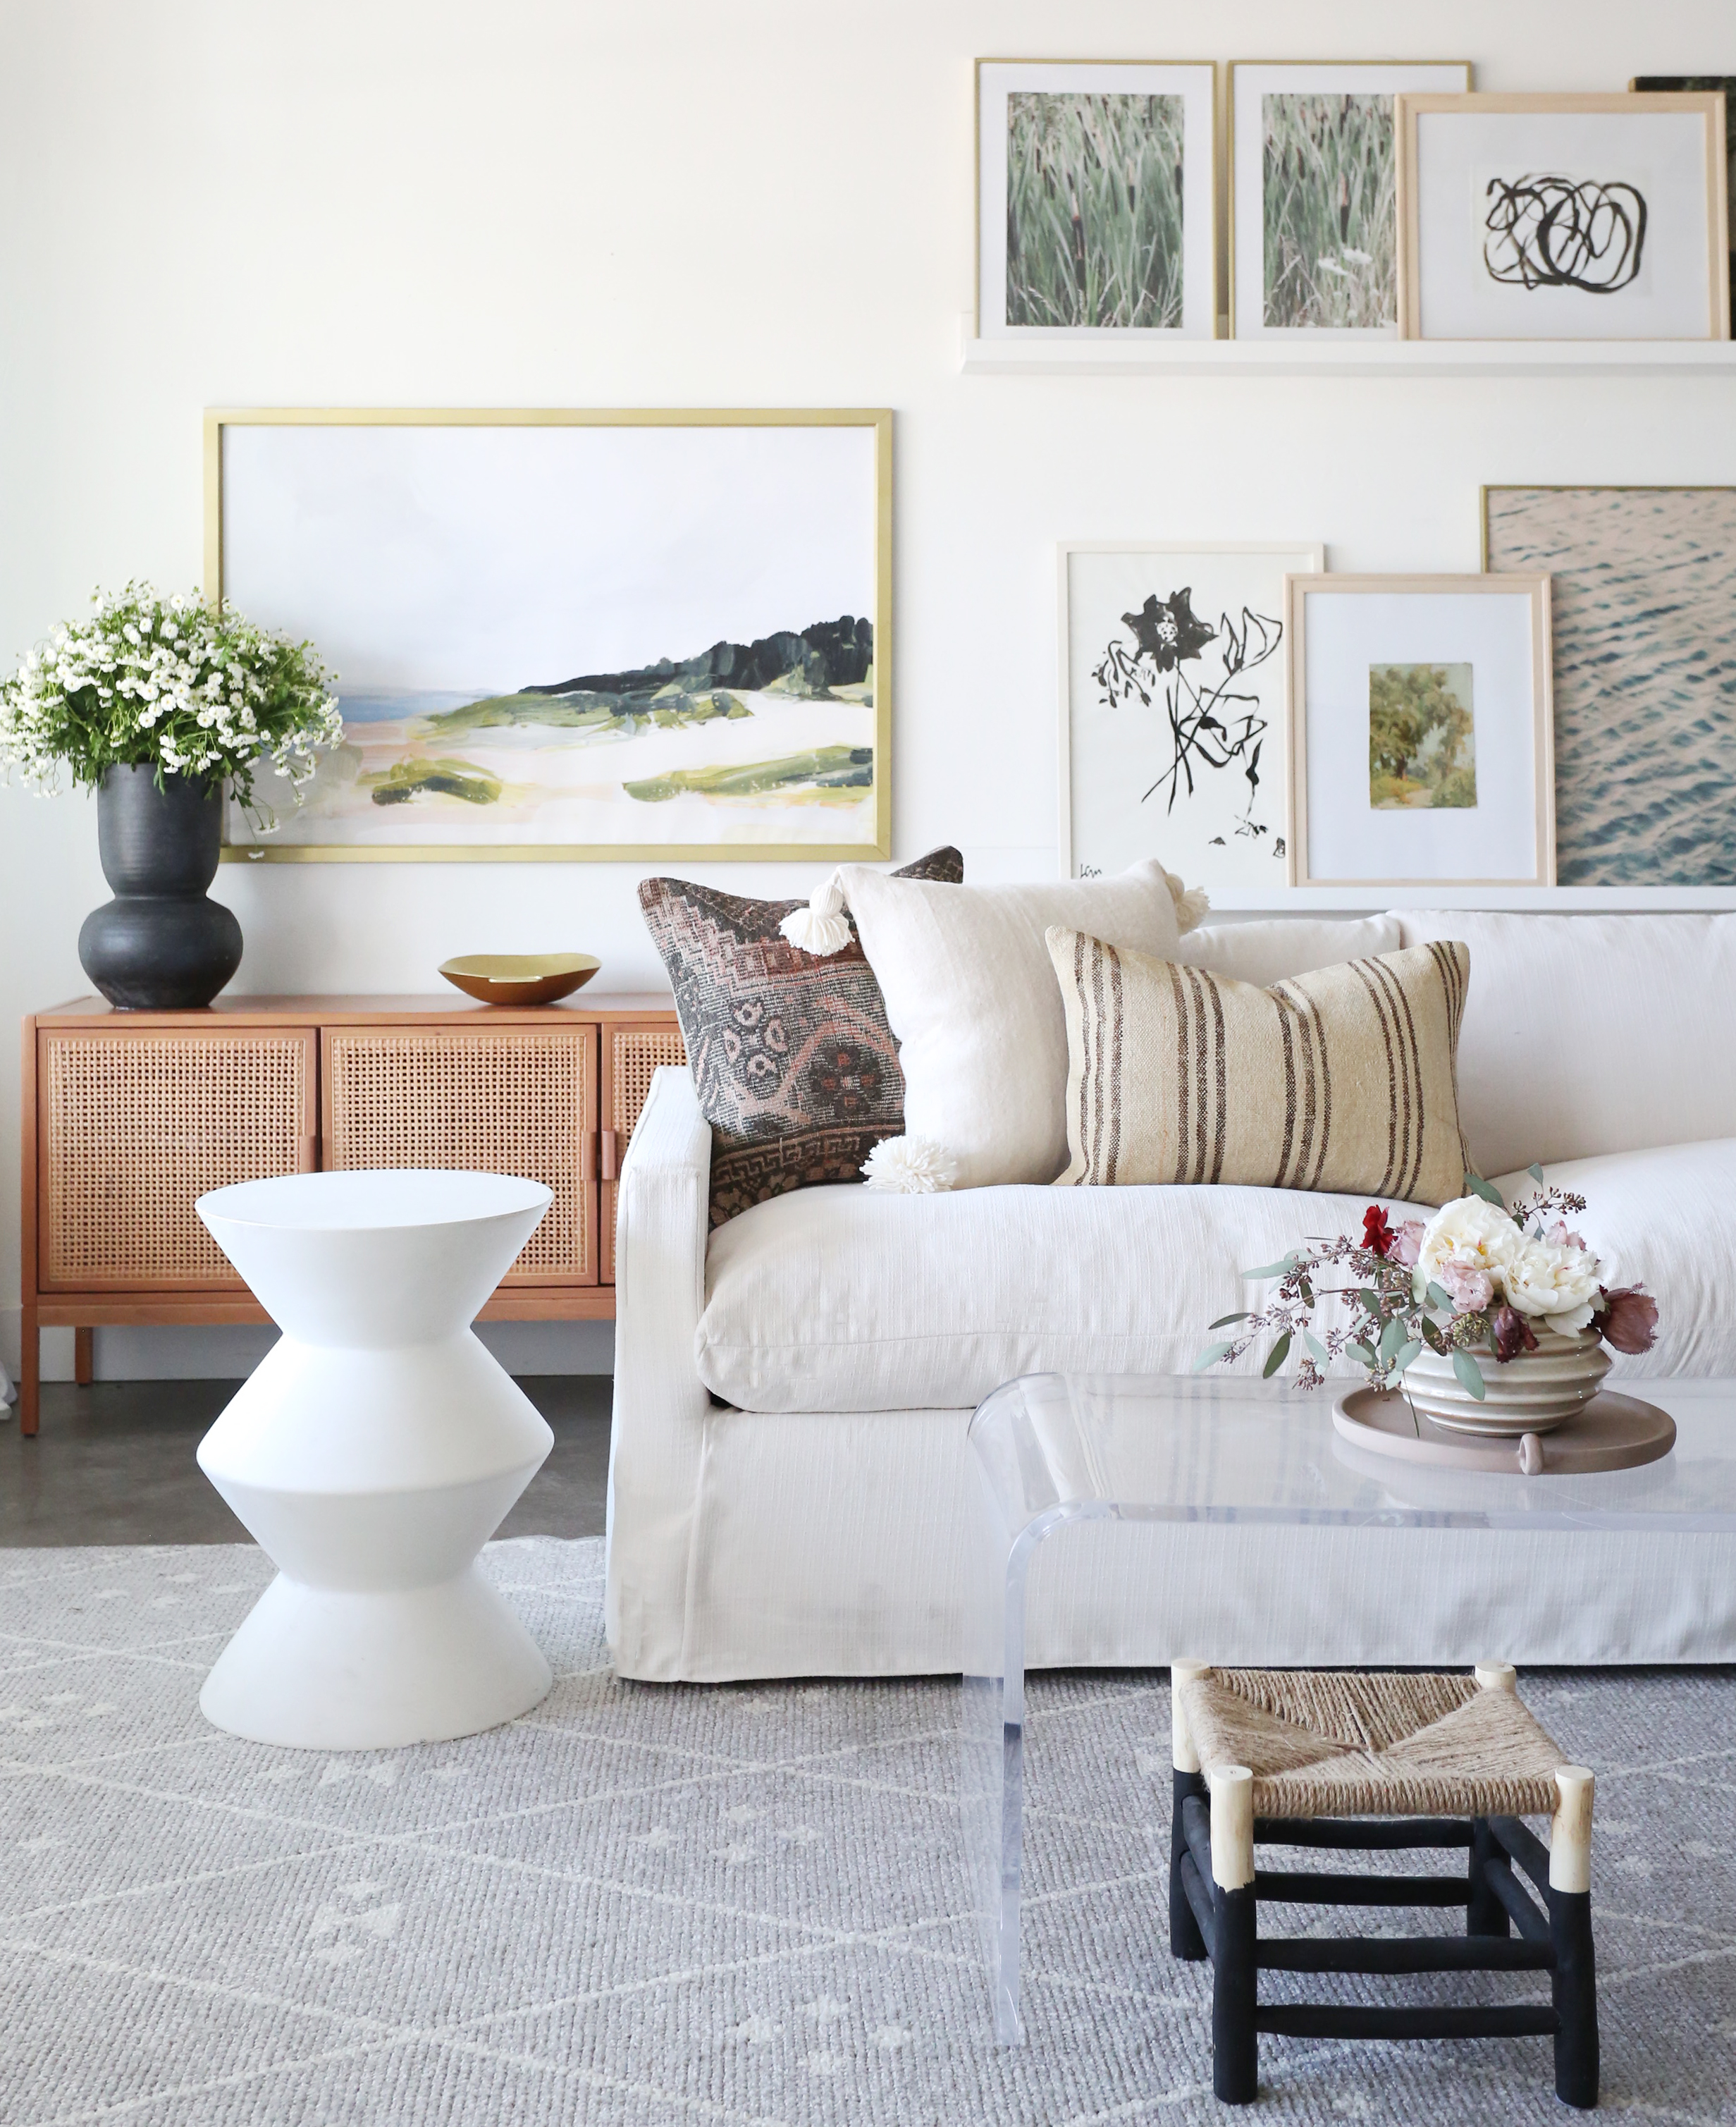
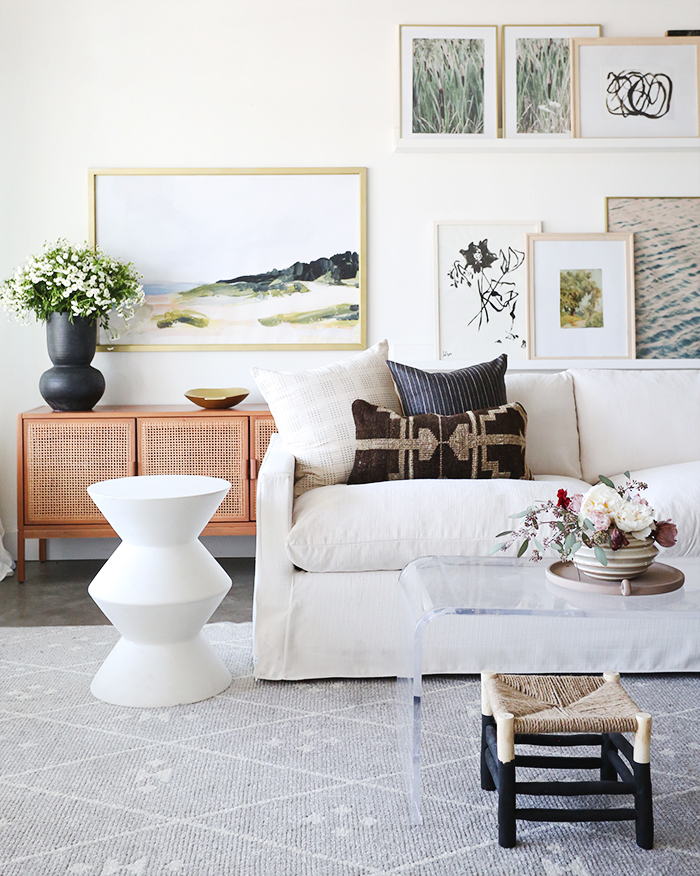
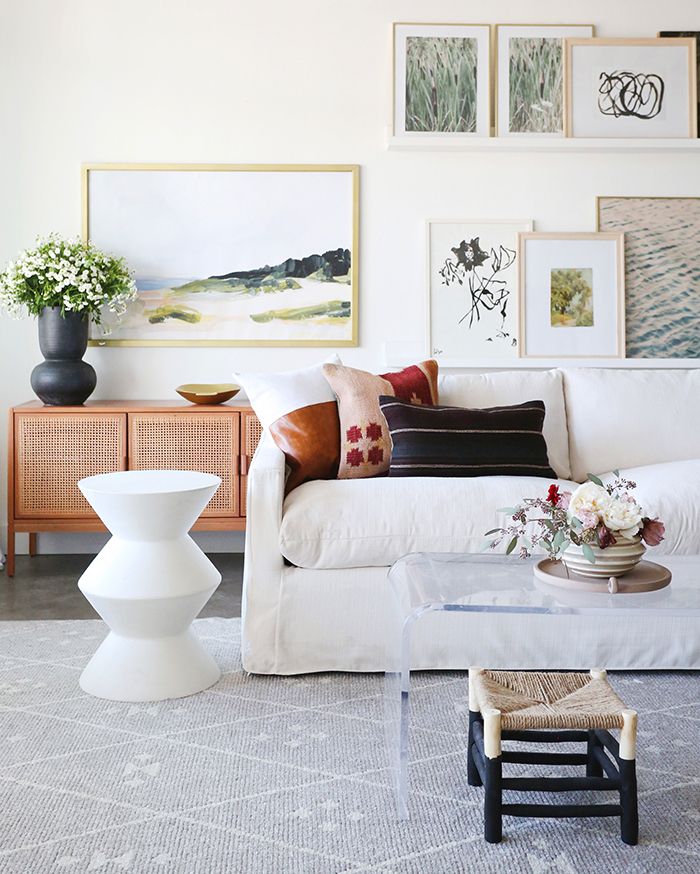
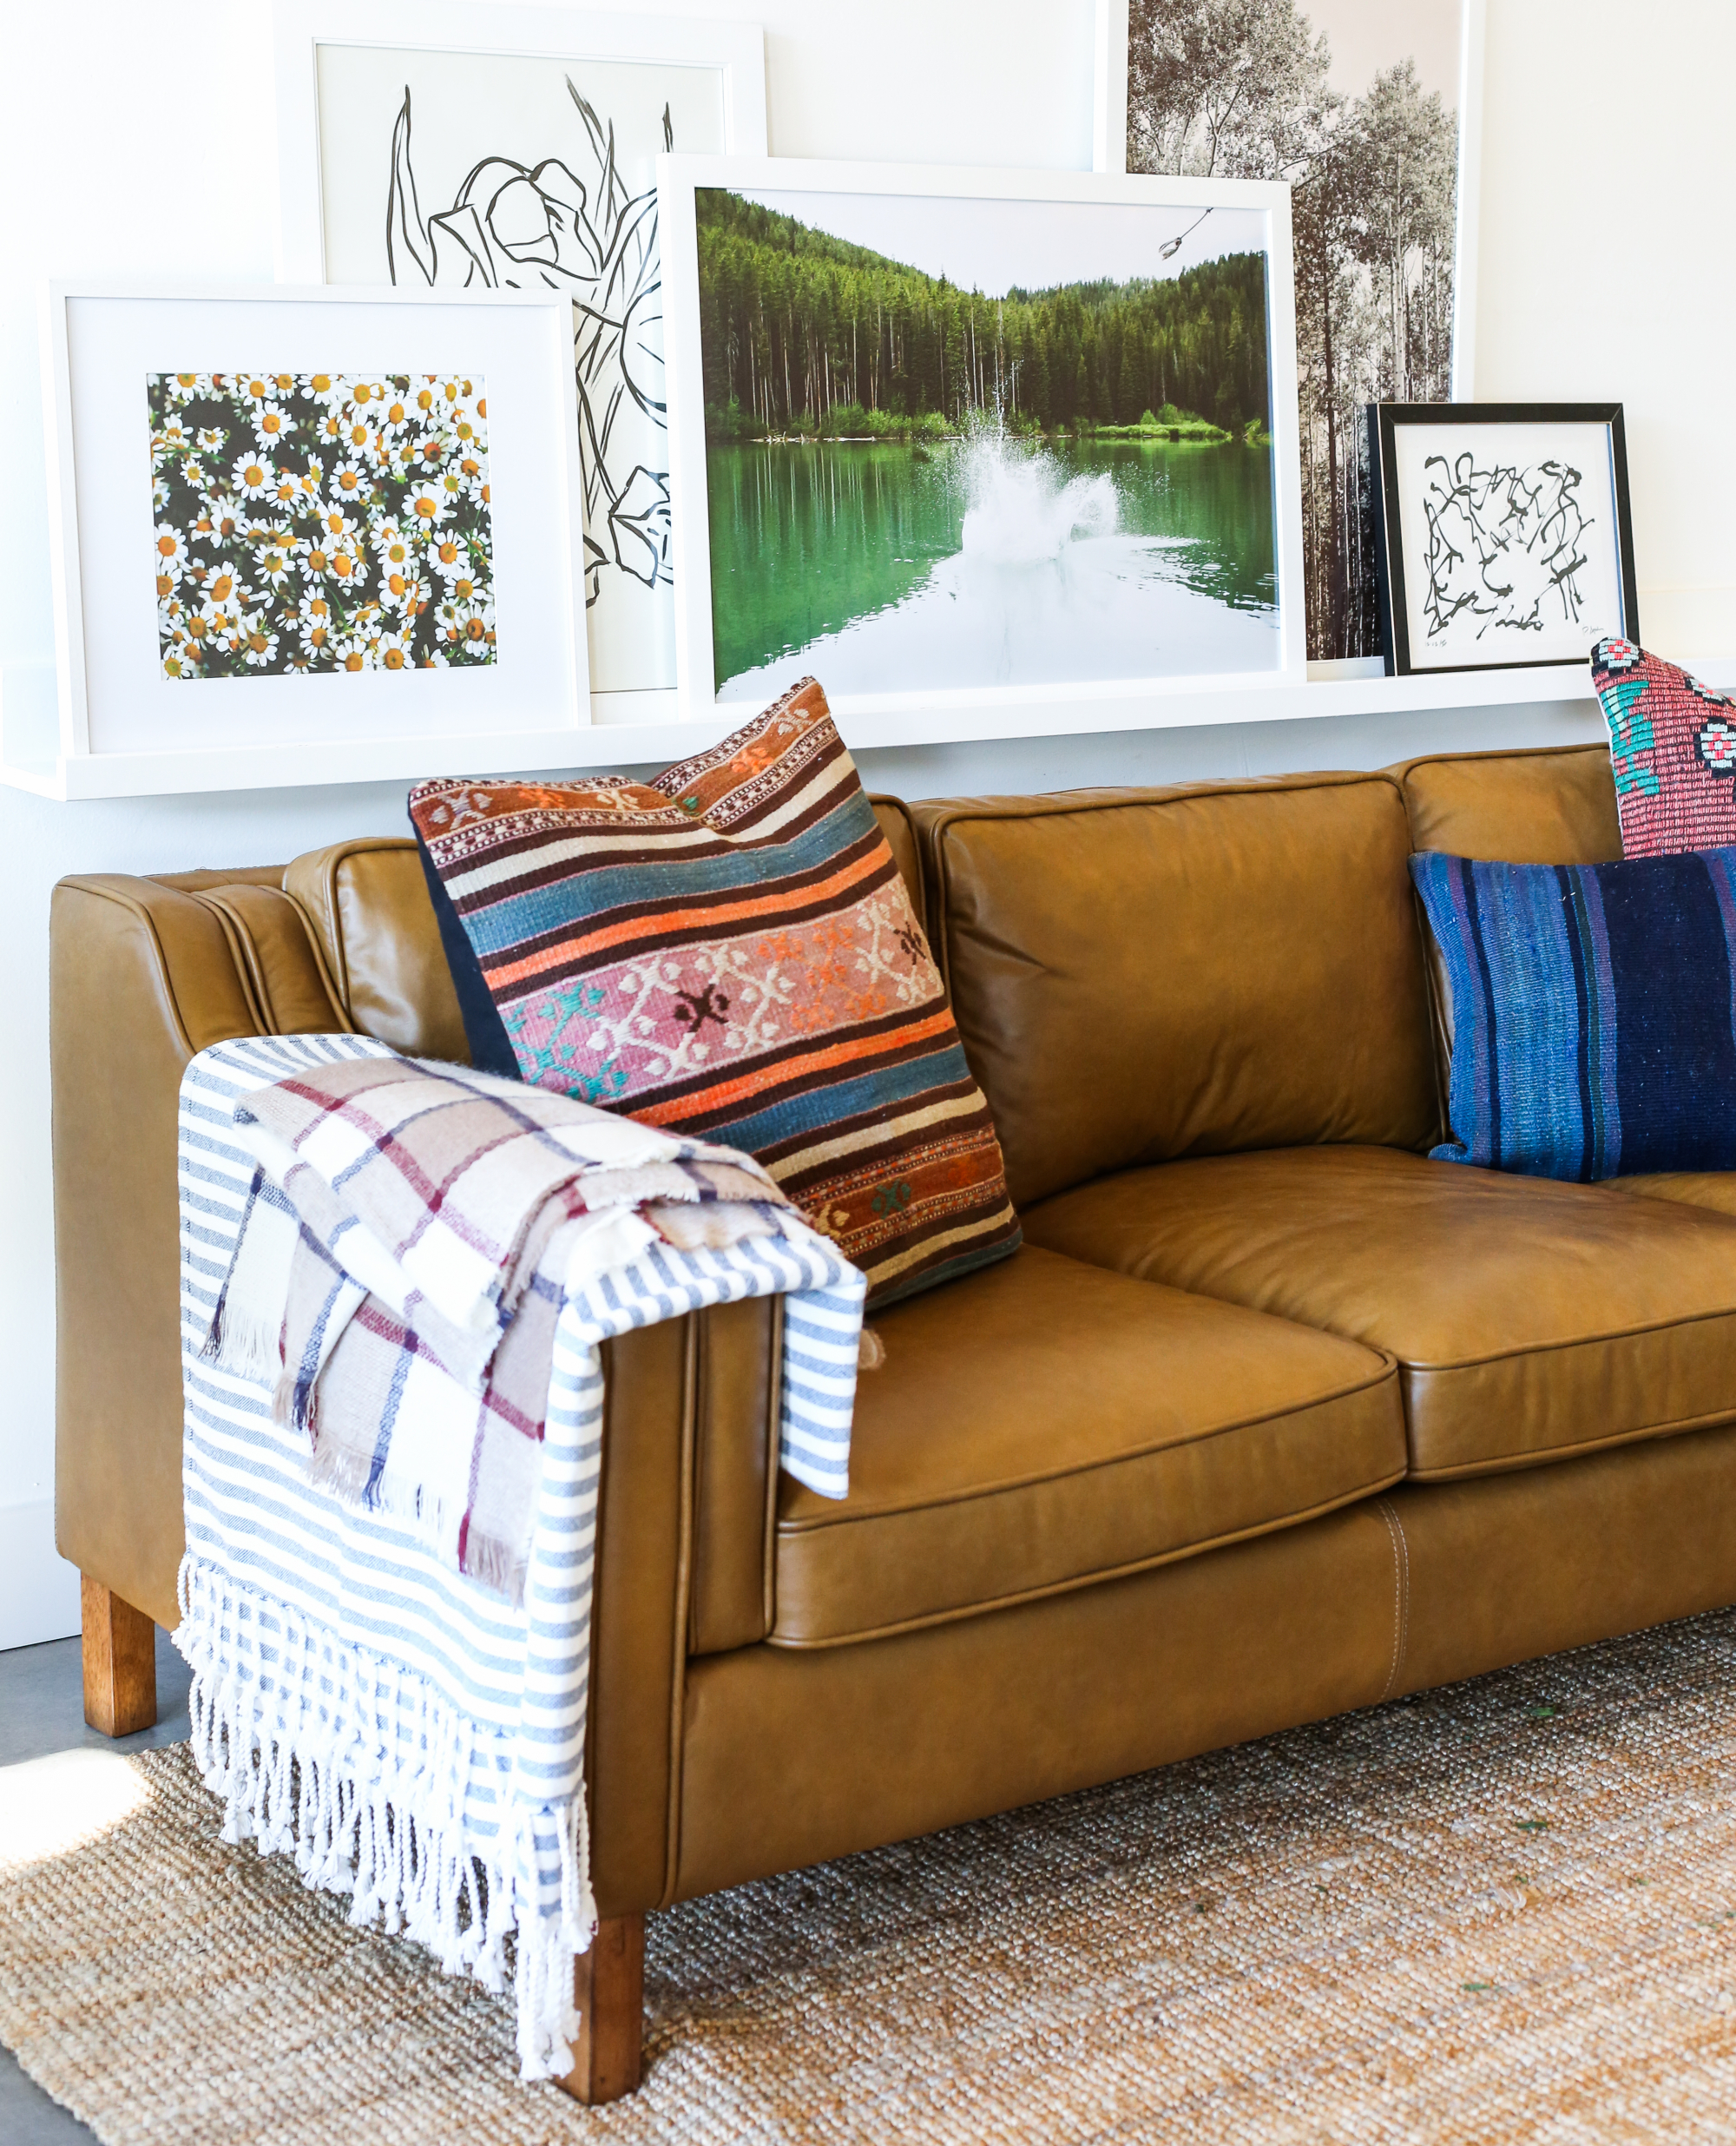
We get asked a lot about how we like to put pillows together on a sofa and while there are always exceptions, I’ve noticed my go-to arrangement is five pillows per sofa. Three on one side (usually a 24 or 22″ square, then a 22 or 20″ square, and finally a smaller accent lumbar layered in front). And then on the opposite side, I usually use two pillows layered in the square sizes. I leave off the lumbar on one side for some personality and wabi-sabi imbalance. I love symmetry in architecture and furniture arrangements, but I think accessories and pillows should be in odd numbers and feel a little more loose.
1. Mostly neutral color and pattern on one of the square pillows (20″, 22″, 24″ square) – This pillow should have little to no pattern and the background should be higher contrast in the black or white family (not gray or mid-tone – you need the contrast!)
2. Patterned pillow that has a lot of movement and this is usually where I use my color. I like vintage kilim pillows or fabric pillows in block prints best! This pattern adds life and color and an artful touch to your grouping. I also like to have at least one of the pillows in my grouping be vintage.
3. Stripes (or similar linear graphic patterns) round out the trifecta and help give some structure and balance. I love ticking stripes and stripes that are usually less than a finger’s width for pillow textiles.
*Bonus points for balancing tones in the grouping and lots of varied textures!
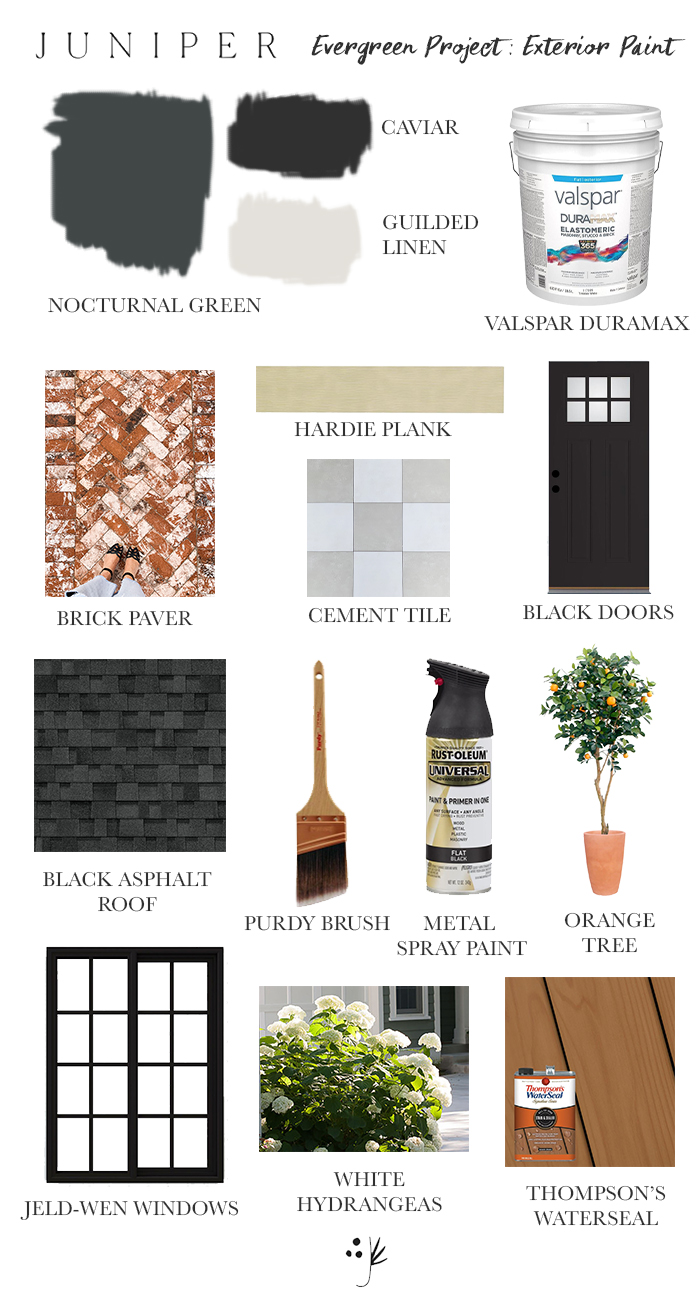
This series is sponsored by Lowe’s. We had a VERY exciting week at the Evergreen project! The exterior paint (Valspar Duramax from Lowe’s!) went up and all my dreams came true! Can you believe this transformation?! Valspar Nocturnal Green Valspar Gilded Linen HGTV Home by Sherwin Williams Cavier Valspar Duramax Exterior Paint for Siding and…
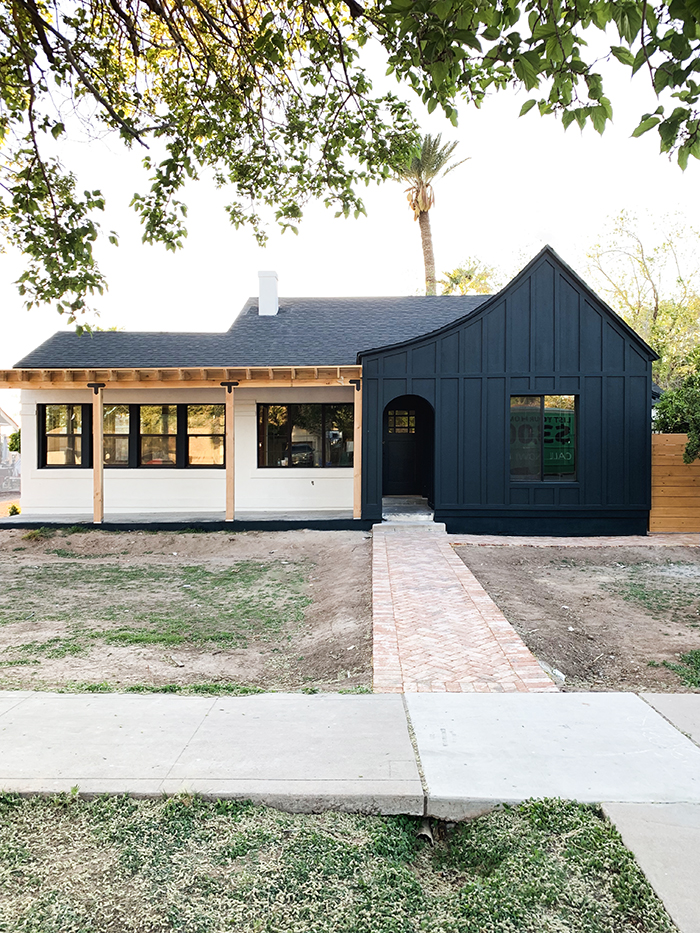
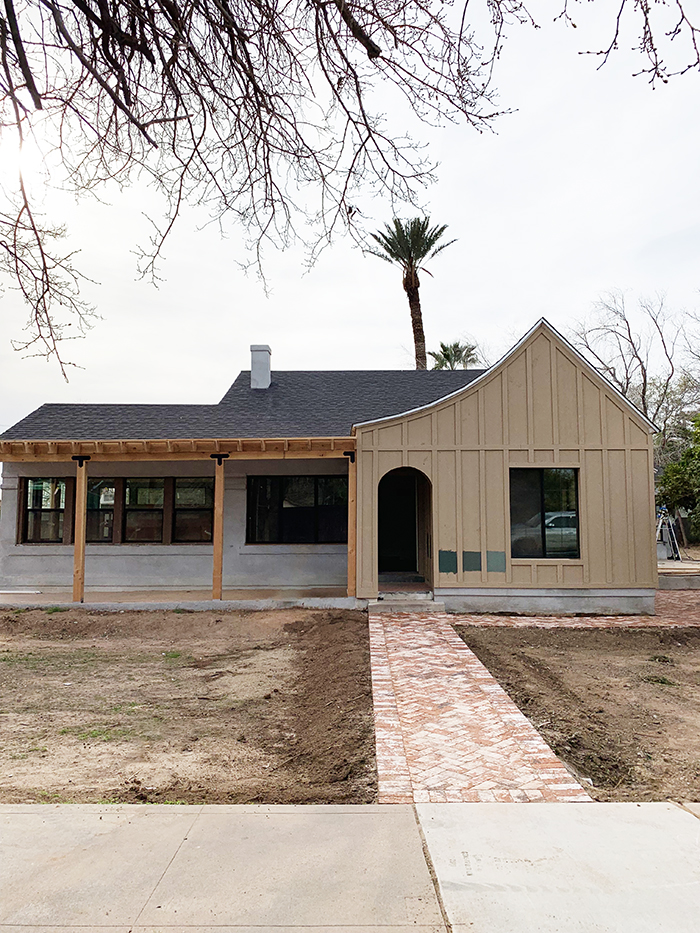
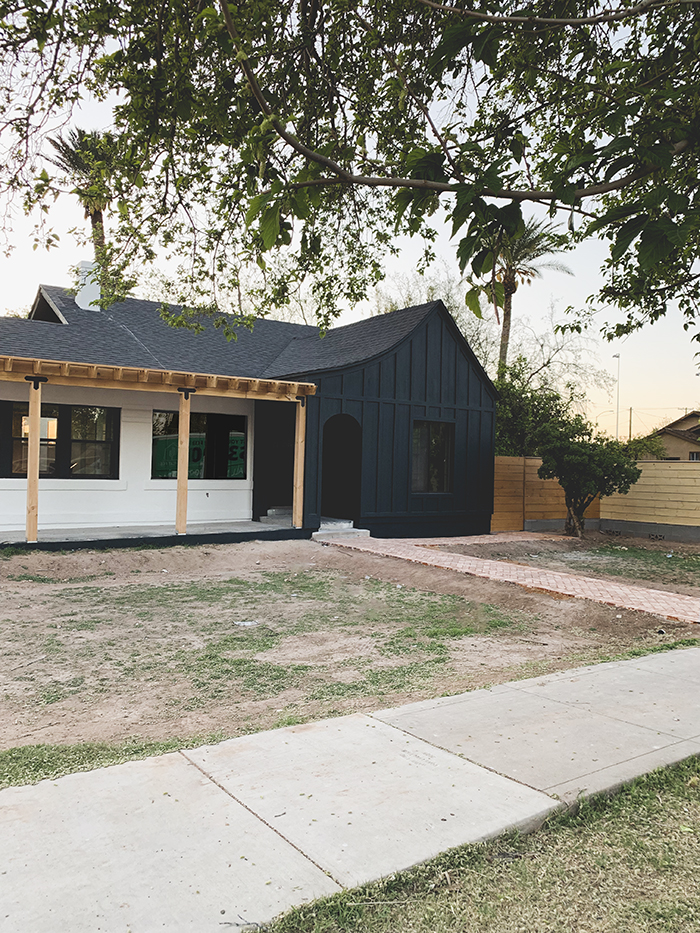
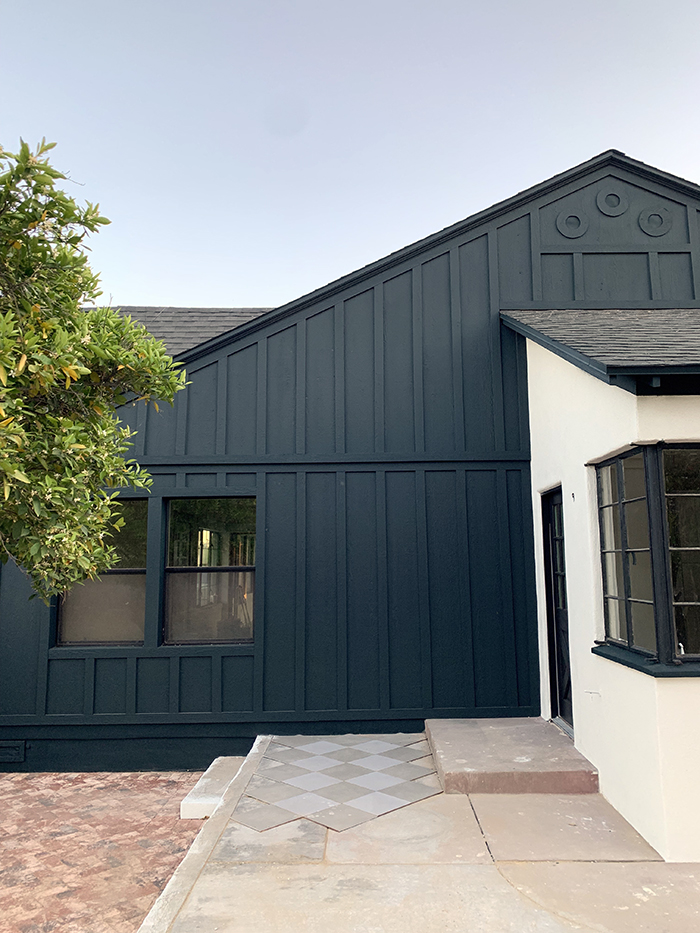
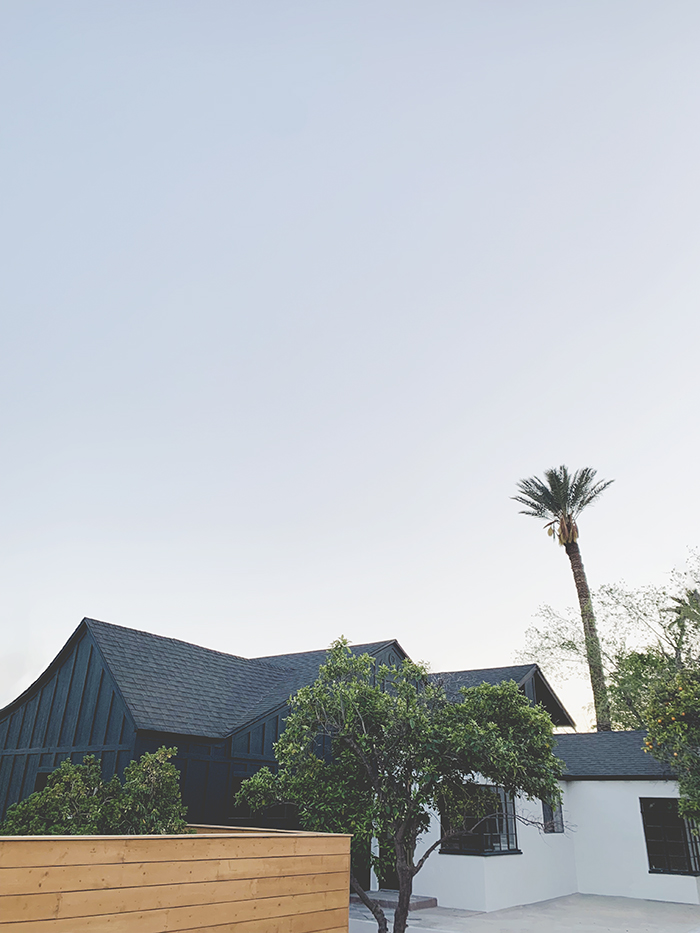
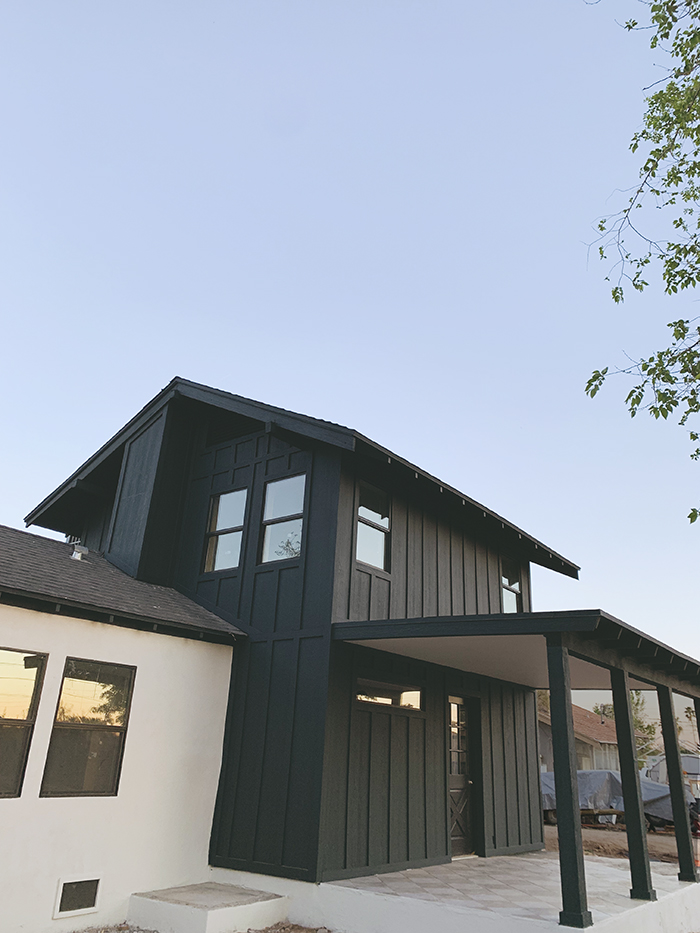
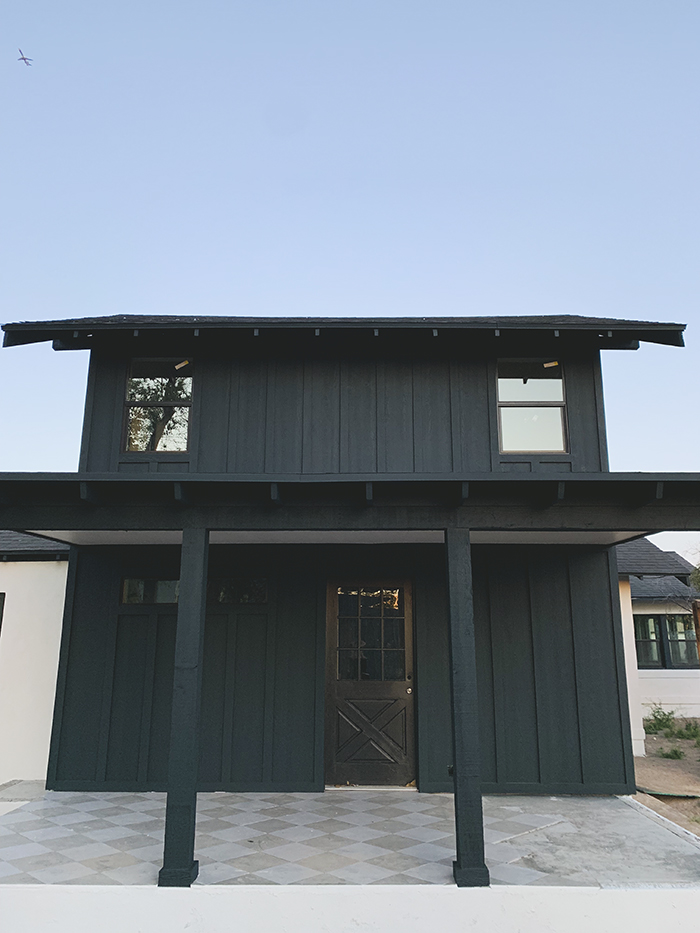
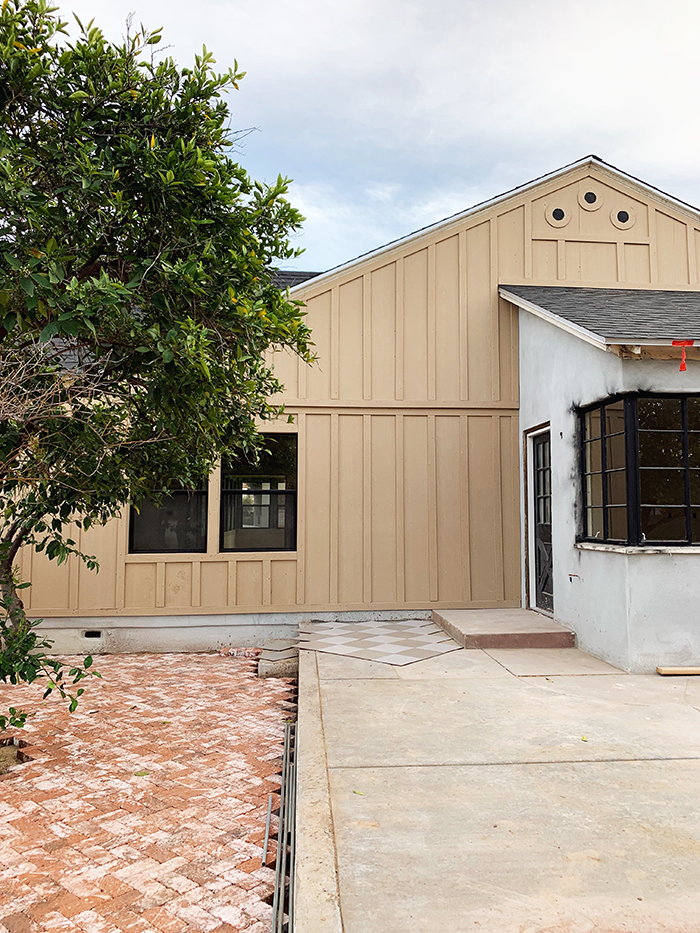
We had a VERY exciting week at the Evergreen project! The exterior paint (Valspar Duramax from Lowe’s!) went up and all my dreams came true! Can you believe this transformation?!
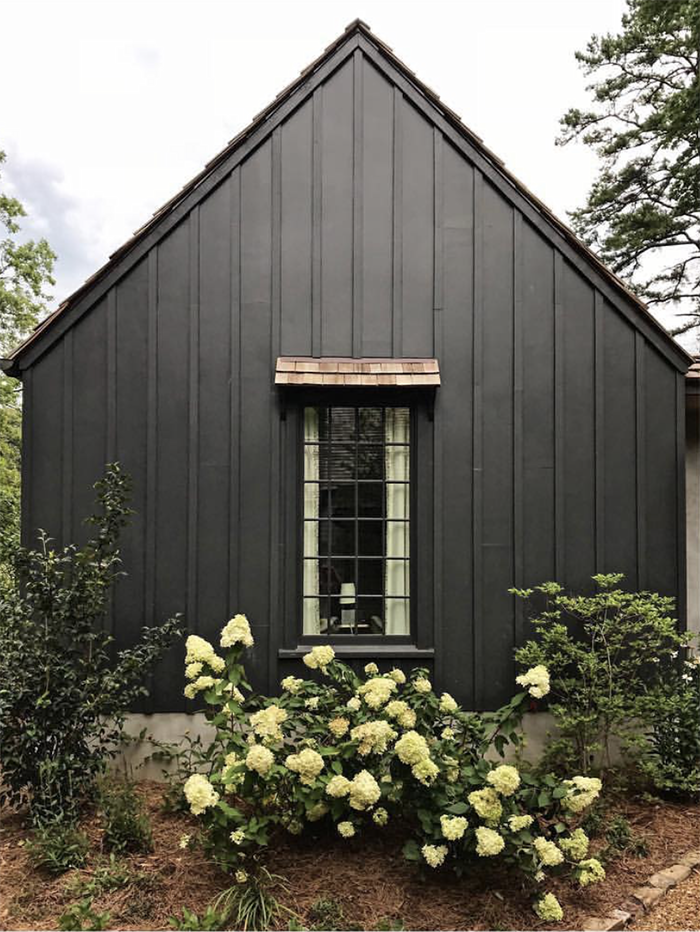
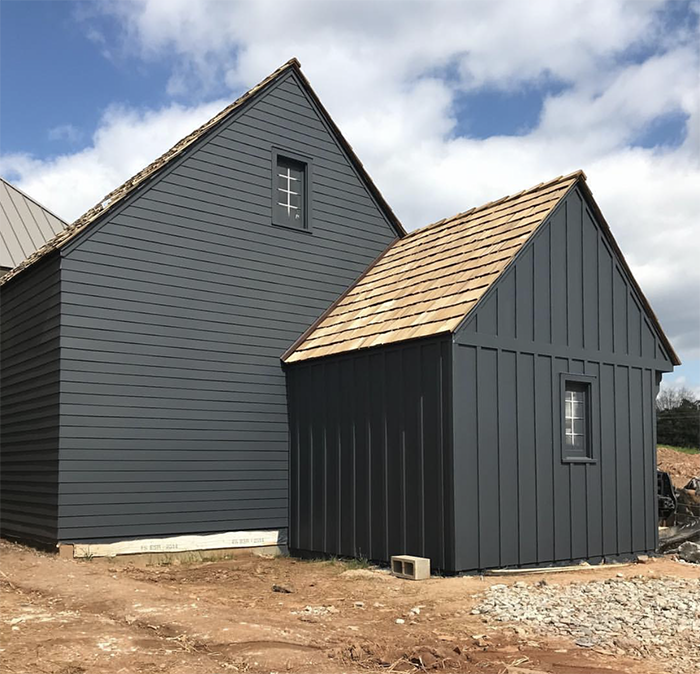
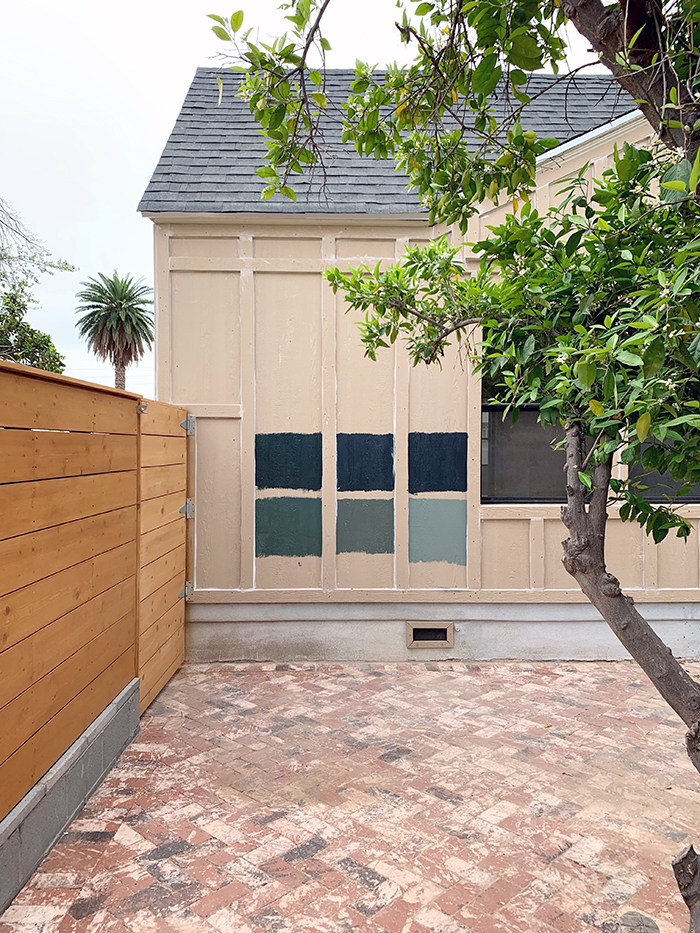
We had always planned on doing a two-toned exterior, but were thinking of a more mid-tone green on the board and batten. The day before the painters started I had a sudden change of heart and REALLY wanted to do a dark color on the siding! These exterior inspiration images from Atlanta designer Pam Sessions sealed the deal!
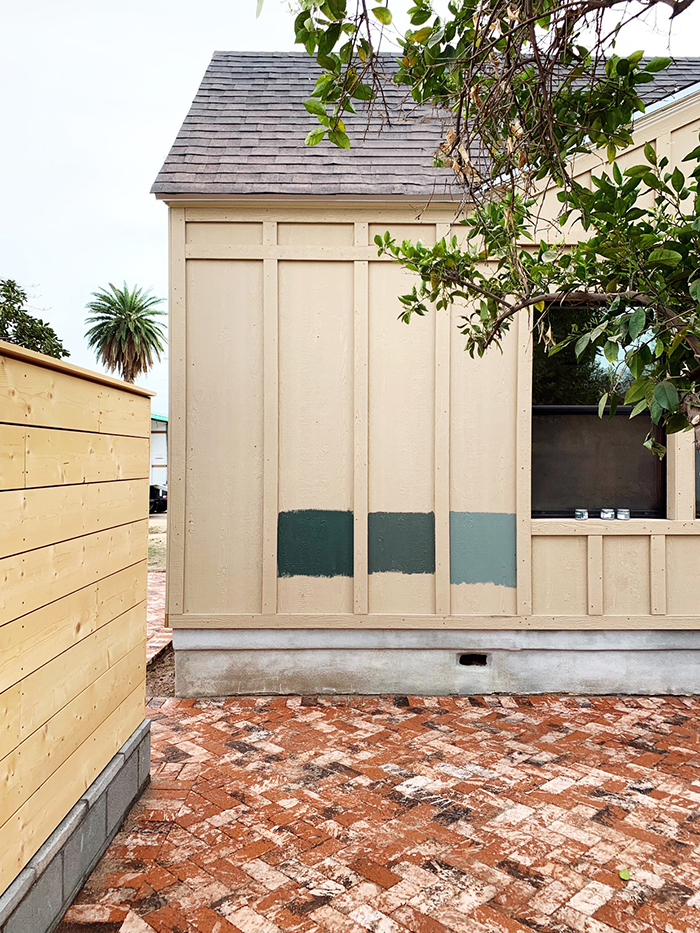
So I quickly ran to Lowe’s and picked up a few samples of dark green, almost black colors that I felt worked a little better with the reclaimed brick pavers. From left to right the colors here are Jasper, Forest Canopy and Nocturnal Green.
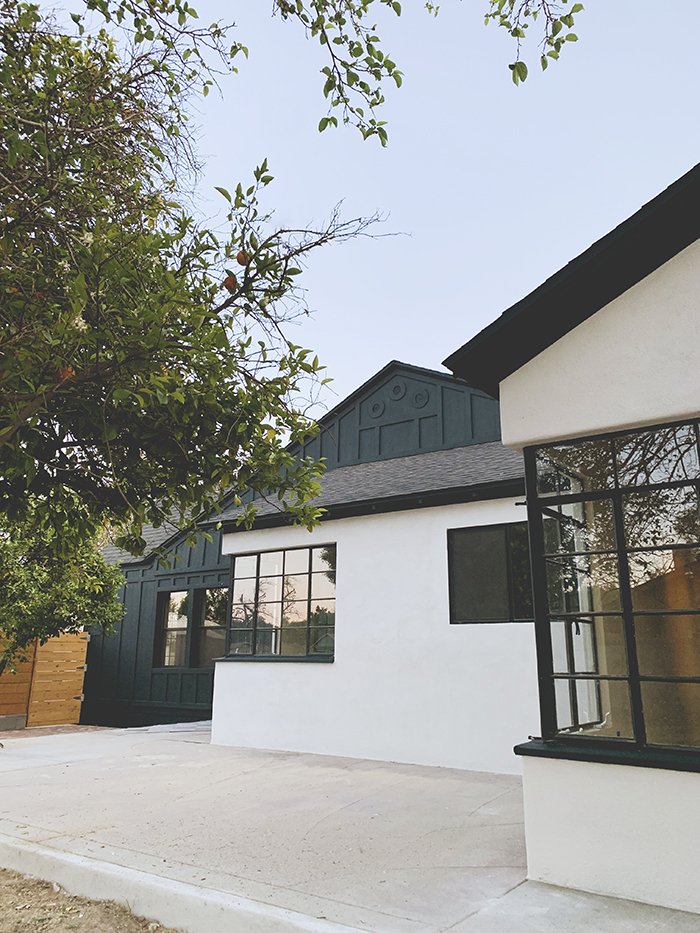
We picked a beautiful warm gray that reads as white, but I think will hide dust really well. The color is called Gilded Linen and we had it mixed in the Valspar for Lowe’s Duramax formula that is specifically made for stucco finishes. The painters mentioned they were so impressed with the coverage and I’m obsessed with the color.
I missed seeing the dark green paint getting sprayed live, but you can imagine my reaction when I pulled up to the house to have a meeting with the contractor to this gorgeous view! I LOVE IT.
Some of you wondered if the dark color would effect the inside temperature of the house in the hot Arizona summers. We have done dark exteriors here before and there is no interior temperature effect at all! The surface of the dark siding will of course be warmer to the touch than the white stucco, but there will be no difference whatsoever inside the house. One thing to note is that dark colors can fade a little faster than lighter colors and that’s why we were sure to use the Duramax paint from Lowe’s, which is fade resistant!
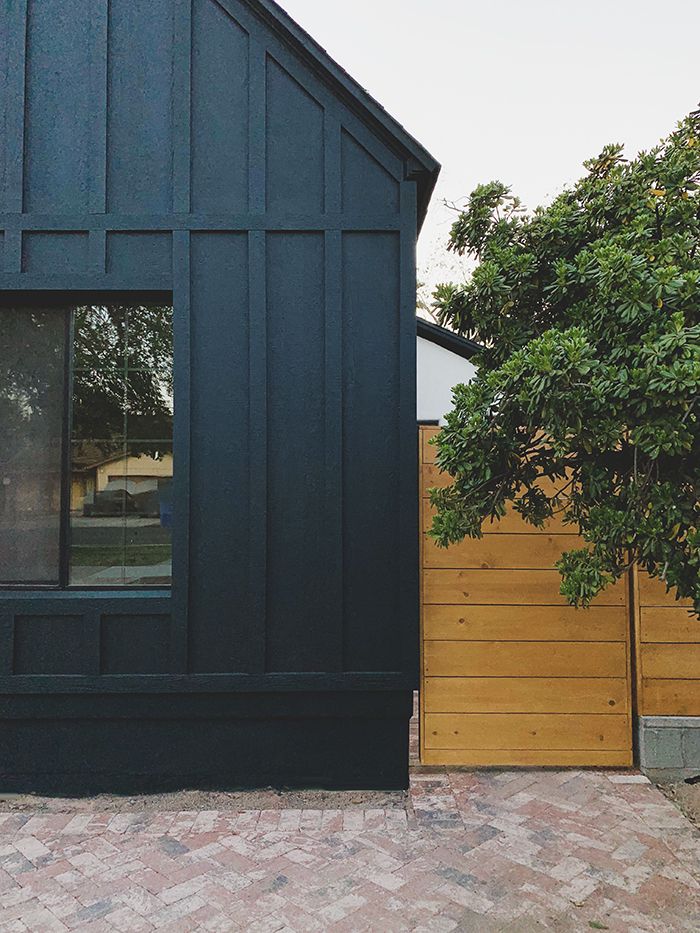
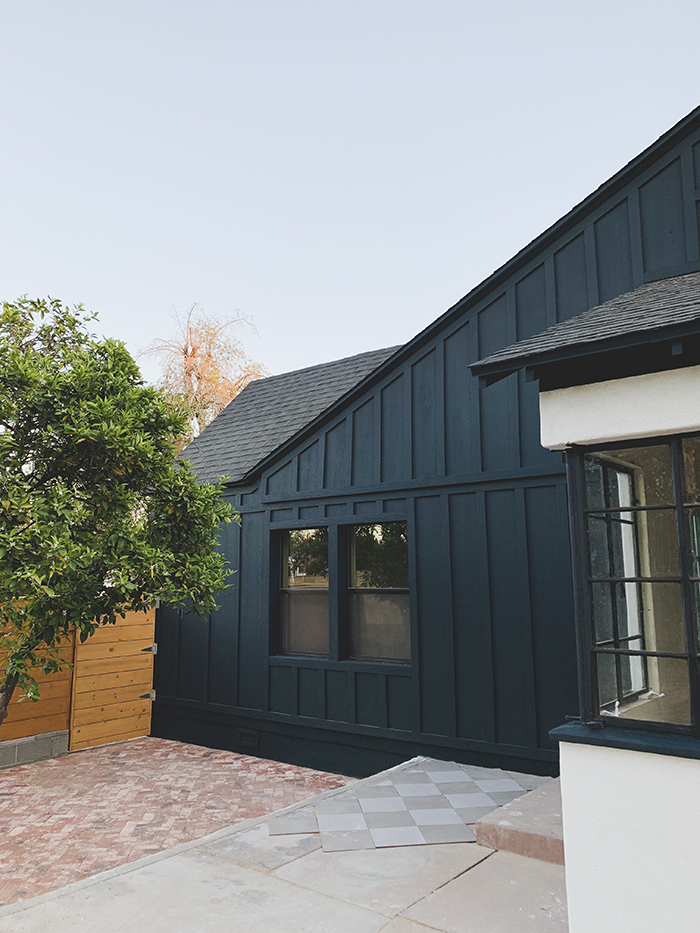
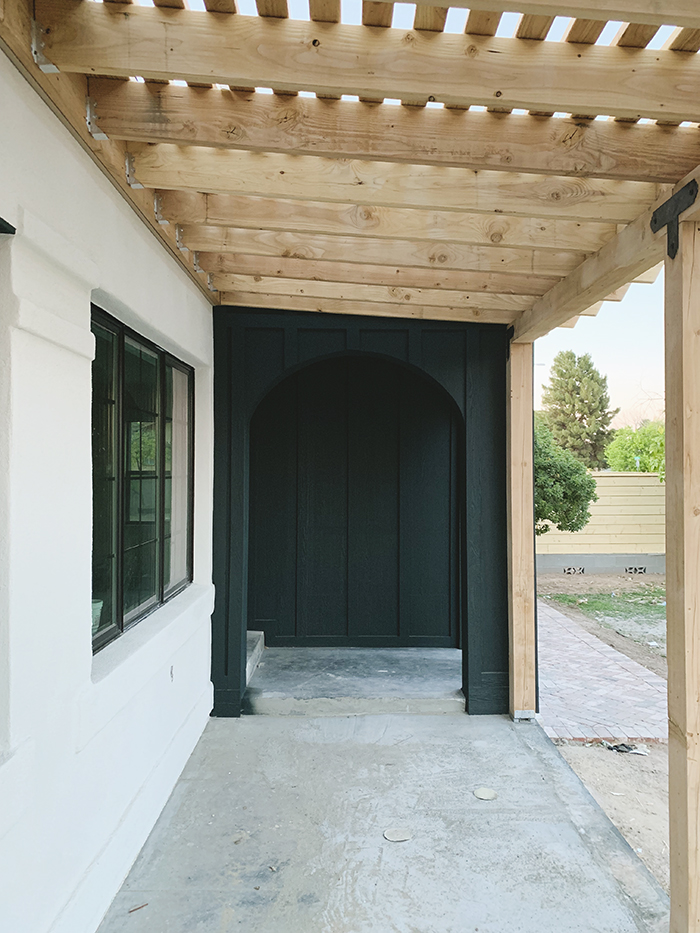
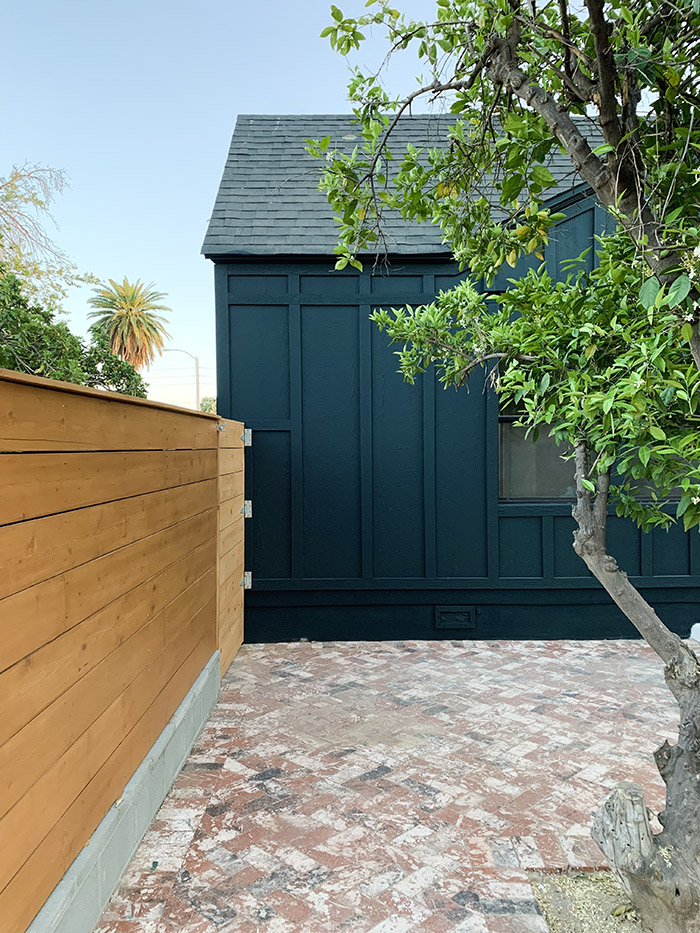
The board and batten was made using Hardie sheets and planks and I love how they add so much character and dimension to the exterior! And isn’t the fence stain color gorgeous with the new exterior? We used Thompson’s Waterseal on the wood fence (you can read more on the materials in this post). The stain and sealer in one is super fade resistant and is easy to reapply with just a roller! The painters aren’t finished with that project yet, but I love how it’s looking!
The new porch pergola is also getting stained next!
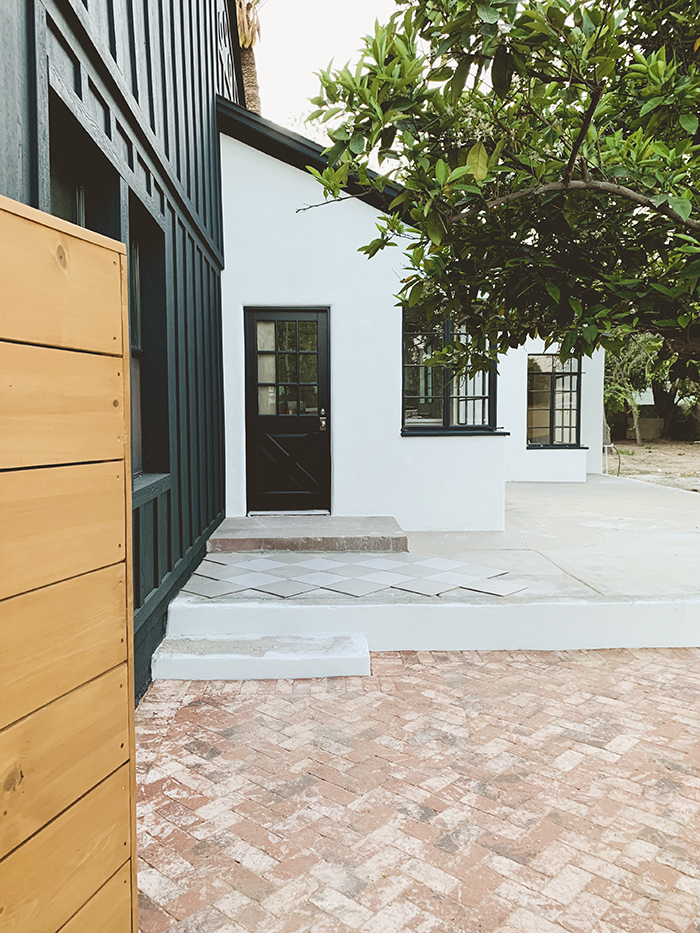
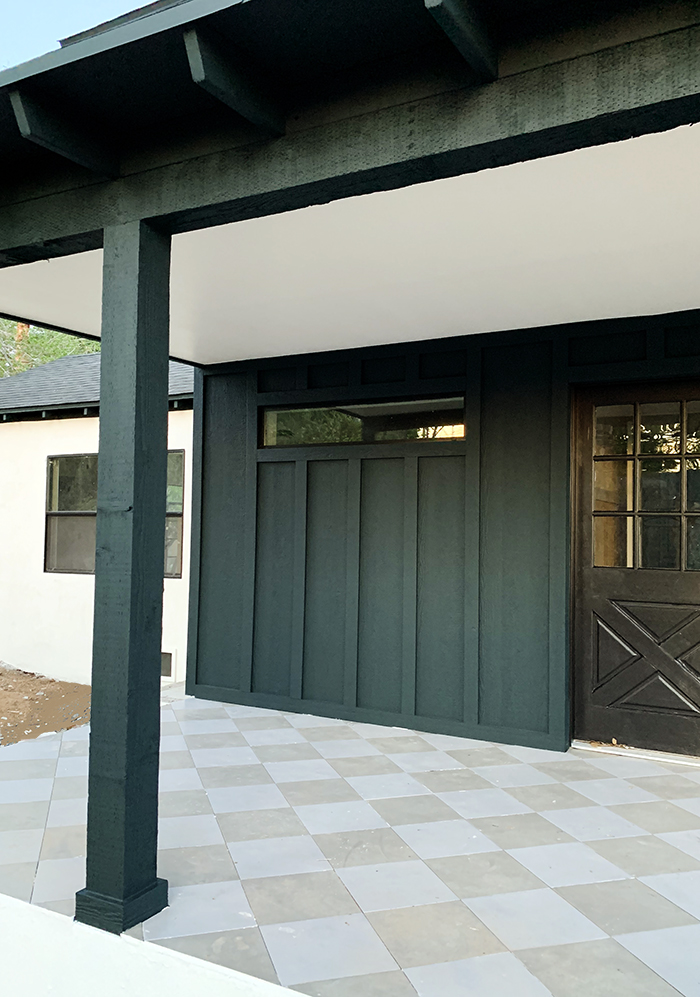
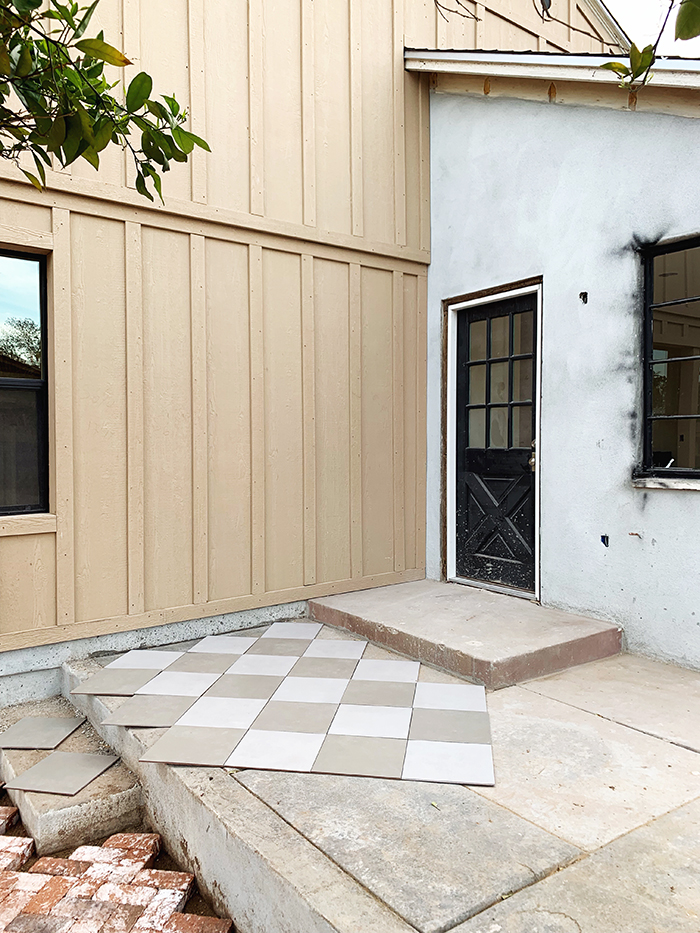
I love this side porch area where the stucco and the dark siding can both be seen with those gorgeous original corner windows. A lot of you asked how we were able to restore these beauties. We had to replace some of the glass and then we used this spray paint to help them match the new Jeld-Wen windows.
The next project is finishing up the checkerboard tile on all the porches! I LOVE the new house color with these inexpensive concrete and cement color tiles!
We are getting to the fun part of the remodel process where the design ideas start to come to real life and every one can breathe a sigh of relief that it’s all looking good! :) Can’t wait to get the sod in and some pretty plants!
1. Market Basket – We have a few of these beautiful baskets around the studio and they come handy daily! They’re basically like a beautiful version of the blue IKEA bag! :) 2. Textured Accent Table – We can’t believe this gorgeous side table is only $99! The organic finish and texture looks SO high…
1. Market Basket – We have a few of these beautiful baskets around the studio and they come handy daily! They’re basically like a beautiful version of the blue IKEA bag! :)
2. Textured Accent Table – We can’t believe this gorgeous side table is only $99! The organic finish and texture looks SO high end! We ordered one of these for the Evergreen house and I might need one for my house too!
3. Leather Sandals – Our favorite affordable natural leather sandals are BACK IN STOCK!!
4. Rattan Earrings – I’m on a roll with inexpensive earring finds! We’re all loving these $11 rattan earrings! They come in lots of cool shapes too.
6. Natural Wood Frame – We get asked about natural wood frames all the time and this one on Amazon is hands down our current favorite. See how it looks here without the glass with our gorgeous matte Juniper paper.
7. Amber Mugs – These mugs were another purchase for the Evergreen house. The rusty ochre color is our latest obsession!
8. Faux Asparagus Fern – On sale for $6.50! These are faux fern stems are soft and organic and perfect to pair with number 12 on our list!
9. Levi’s Ribcage Straight Jeans – Levi’s are becoming the studio uniform. We are all obsessed with the fit and price. They don’t have stretch, so it’s best to go up a size when ordering. I don’t wash mine until necessary and I air dry and the jeans only get better with time! I linked to my three favorite pairs here that have all but replaced my regular Madewell jeans rotation!
12. Black Terracotta Vase – YOU NEED THIS VASE. It is stunning (like, really, STUNNING) in person. It looks vintage, it’s huge and would be gorgeous on a kitchen island with greenery, an entry console table, a big coffee table. Really any and every room could use this sculptural beauty!
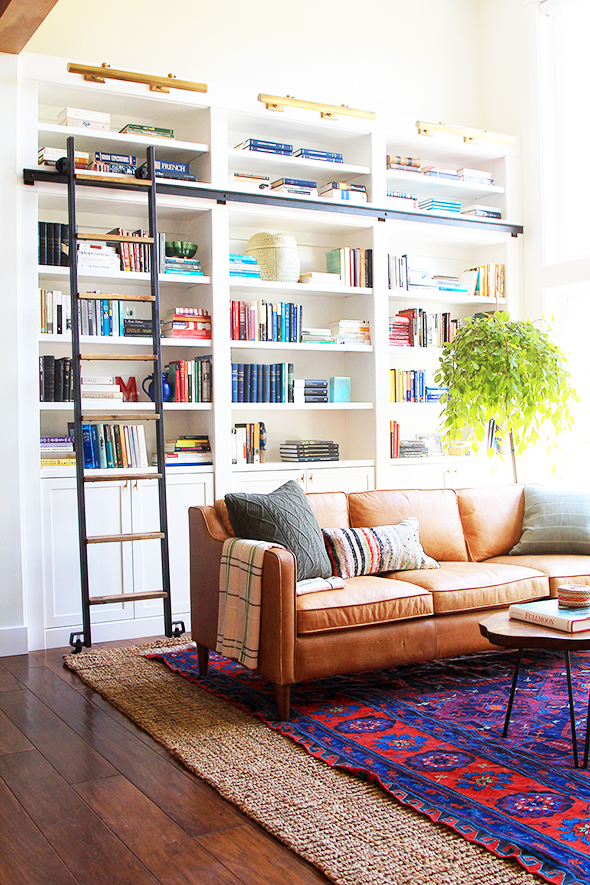
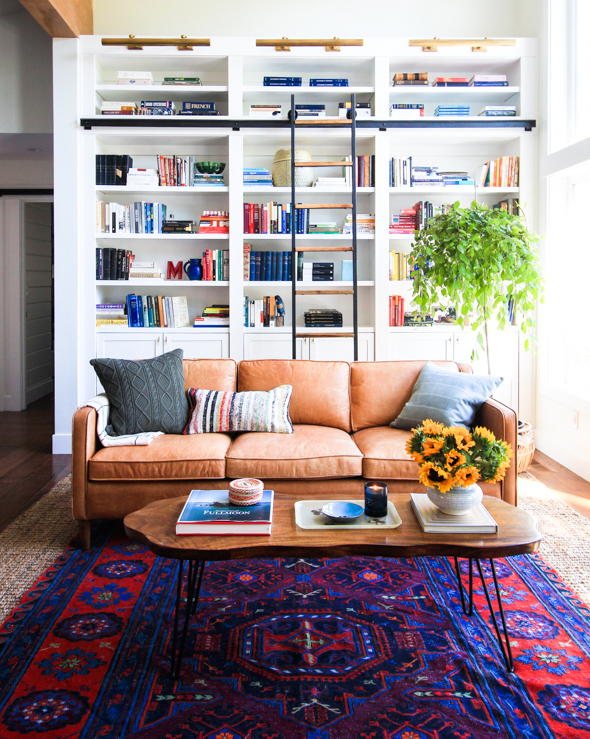
We have been on the hunt for sofas or a few upcoming projects and have been so impressed by some of the leather options on the market right now! We are still debating what kind of sofa we will be using in the Evergreen Project, but this tufted, metal-based version is a top contender…
We have been on the hunt for sofas or a few upcoming projects and have been so impressed by some of the leather options on the market right now! We are still debating what kind of sofa we will be using in the Evergreen Project, but this tufted, metal-based version is a top contender right now. You’ll never guess where it’s from!
I often get questions on the durability of leather sofas. We use this leather conditioner and it’s a total game changer! We also use Otter Wax to help protect the leather and keep it looking new for years!
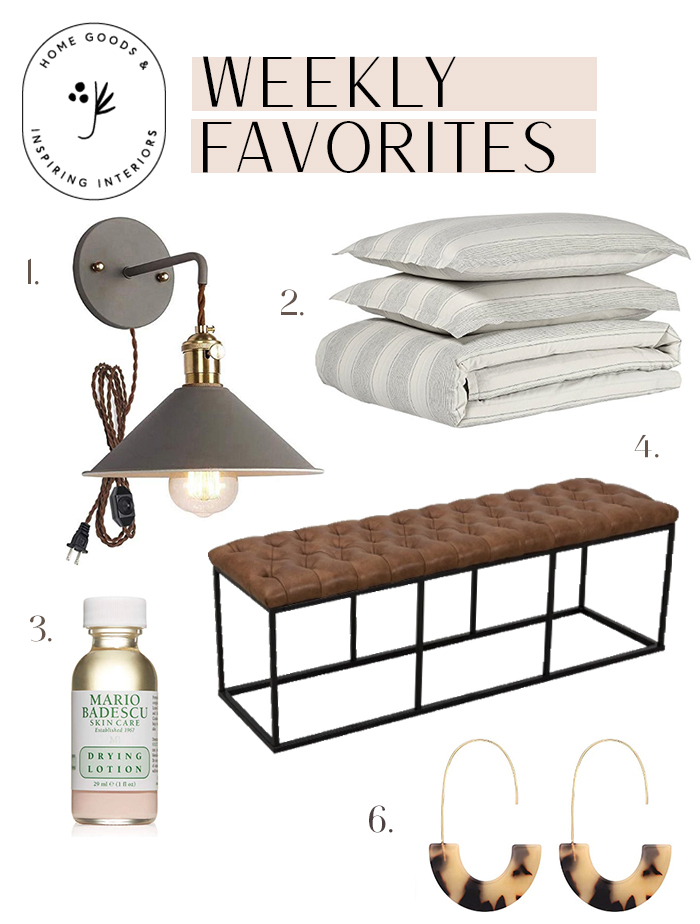
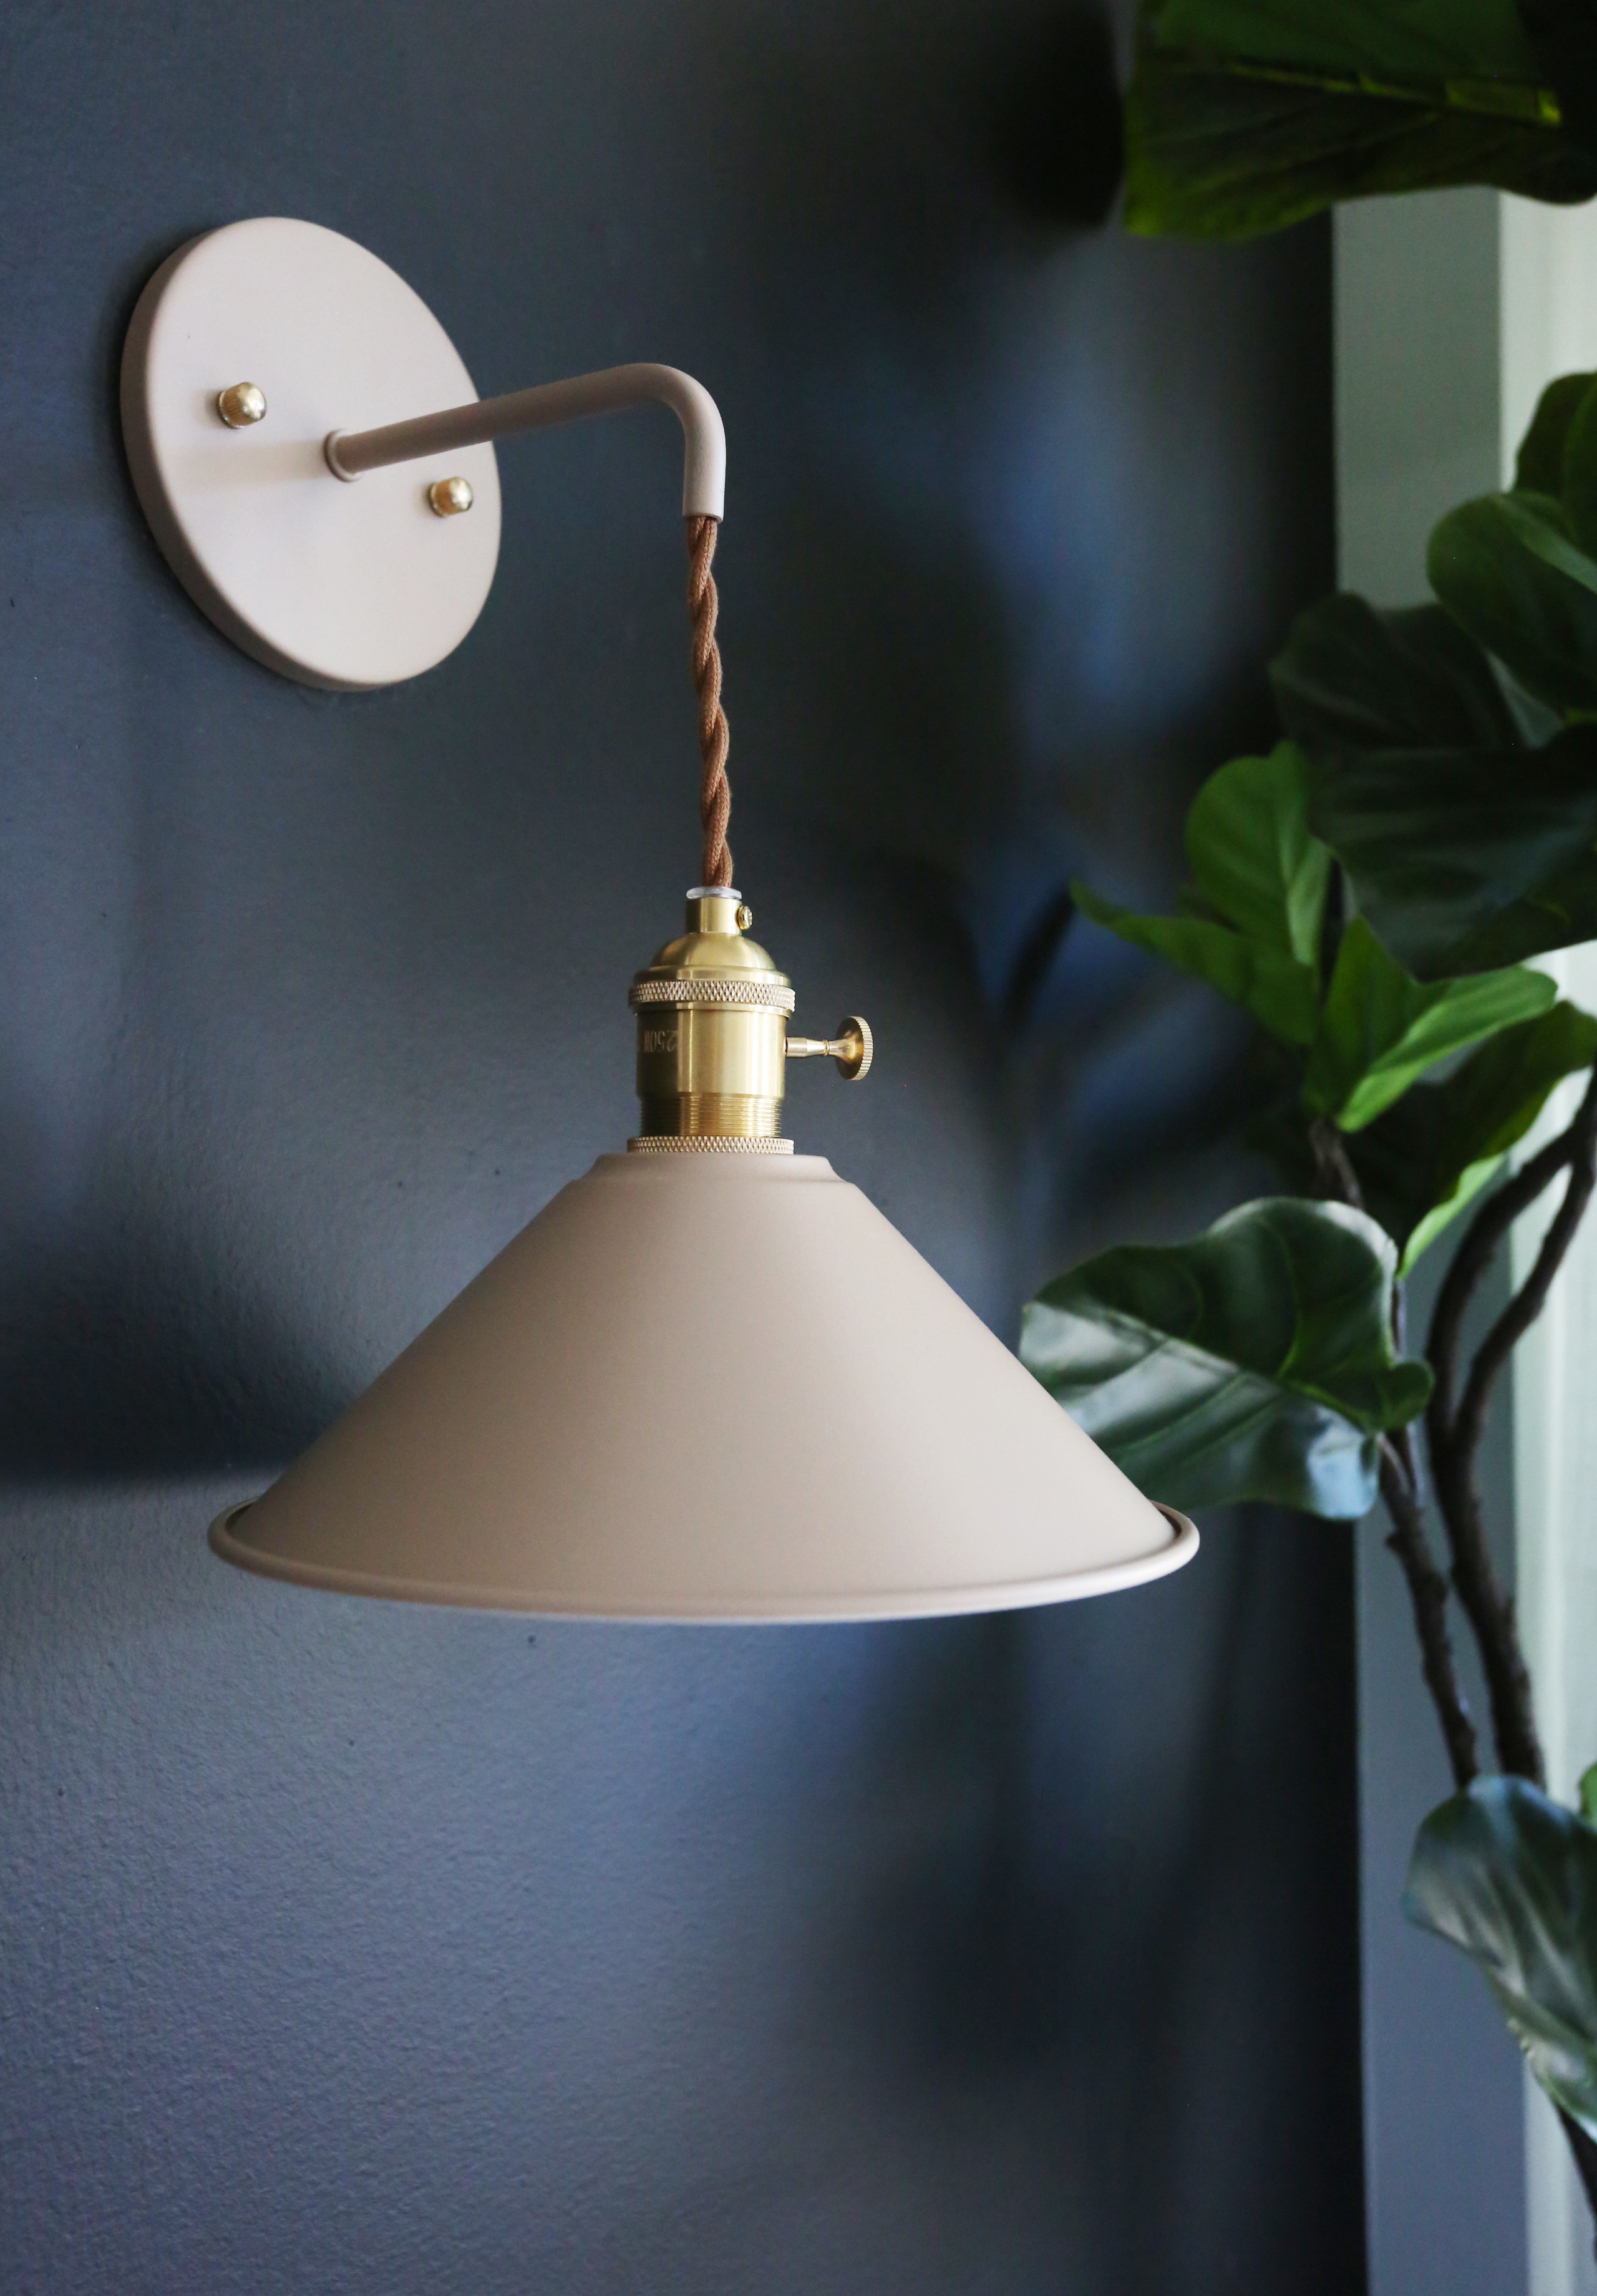
1. Plug-In Wall Sconce: We found these sconces on Amazon and seriously couldn’t believe the quality! They come in so many great colors. You can see how we styled them in this post! 2. Striped Linen Bedding: What screams spring more than fresh bedding? These tiny, neutral stripes will mix perfectly with…
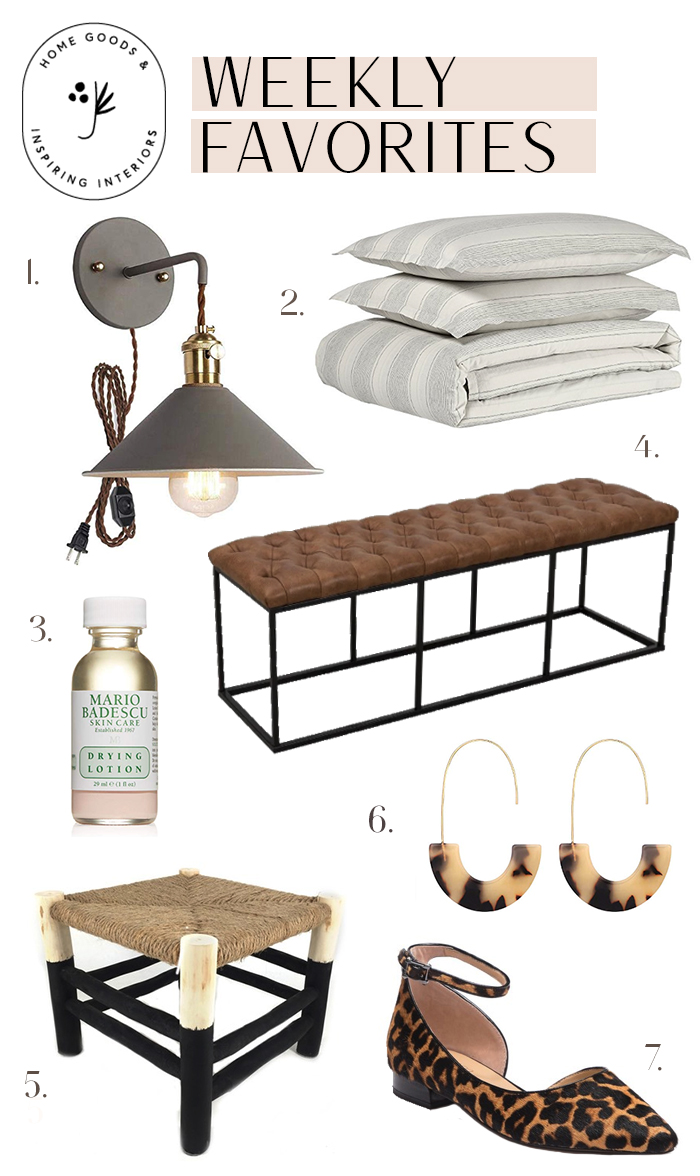
1. Plug-In Wall Sconce: We found these sconces on Amazon and seriously couldn’t believe the quality! They come in so many great colors. You can see how we styled them in this post!
2. Striped Linen Bedding: What screams spring more than fresh bedding? These tiny, neutral stripes will mix perfectly with any colored sheet set.
3. Drying Lotion: This is a Juniper Team favorite right now. We have all seen less breakouts and brighter, happier skin!
4. Leather Bench: Remember the leather benches we used in our Overstock Giveaway!? Everyone loved them, but they sold out really quickly. We were so excited to find this dupe. Added bonus that it is 1/4 the price of the original one!
5. Woven Wood Stool: How cute is this woven stool? This one is headed straight to the Evergreen House. Stay tuned to see how we style it!
6. Tortoise Earrings: Who knew Amazon had so many amazing earring options!? All your friends will think you picked these up from Madewell for triple the price!
Every room can use a good dose of greenery! It will make just about any space feel instantly brighter and more alive. I think it’s safe to say that most of us would prefer only using real plants in our homes, but sometimes it isn’t always the best option. Dark corners and high shelves can be…
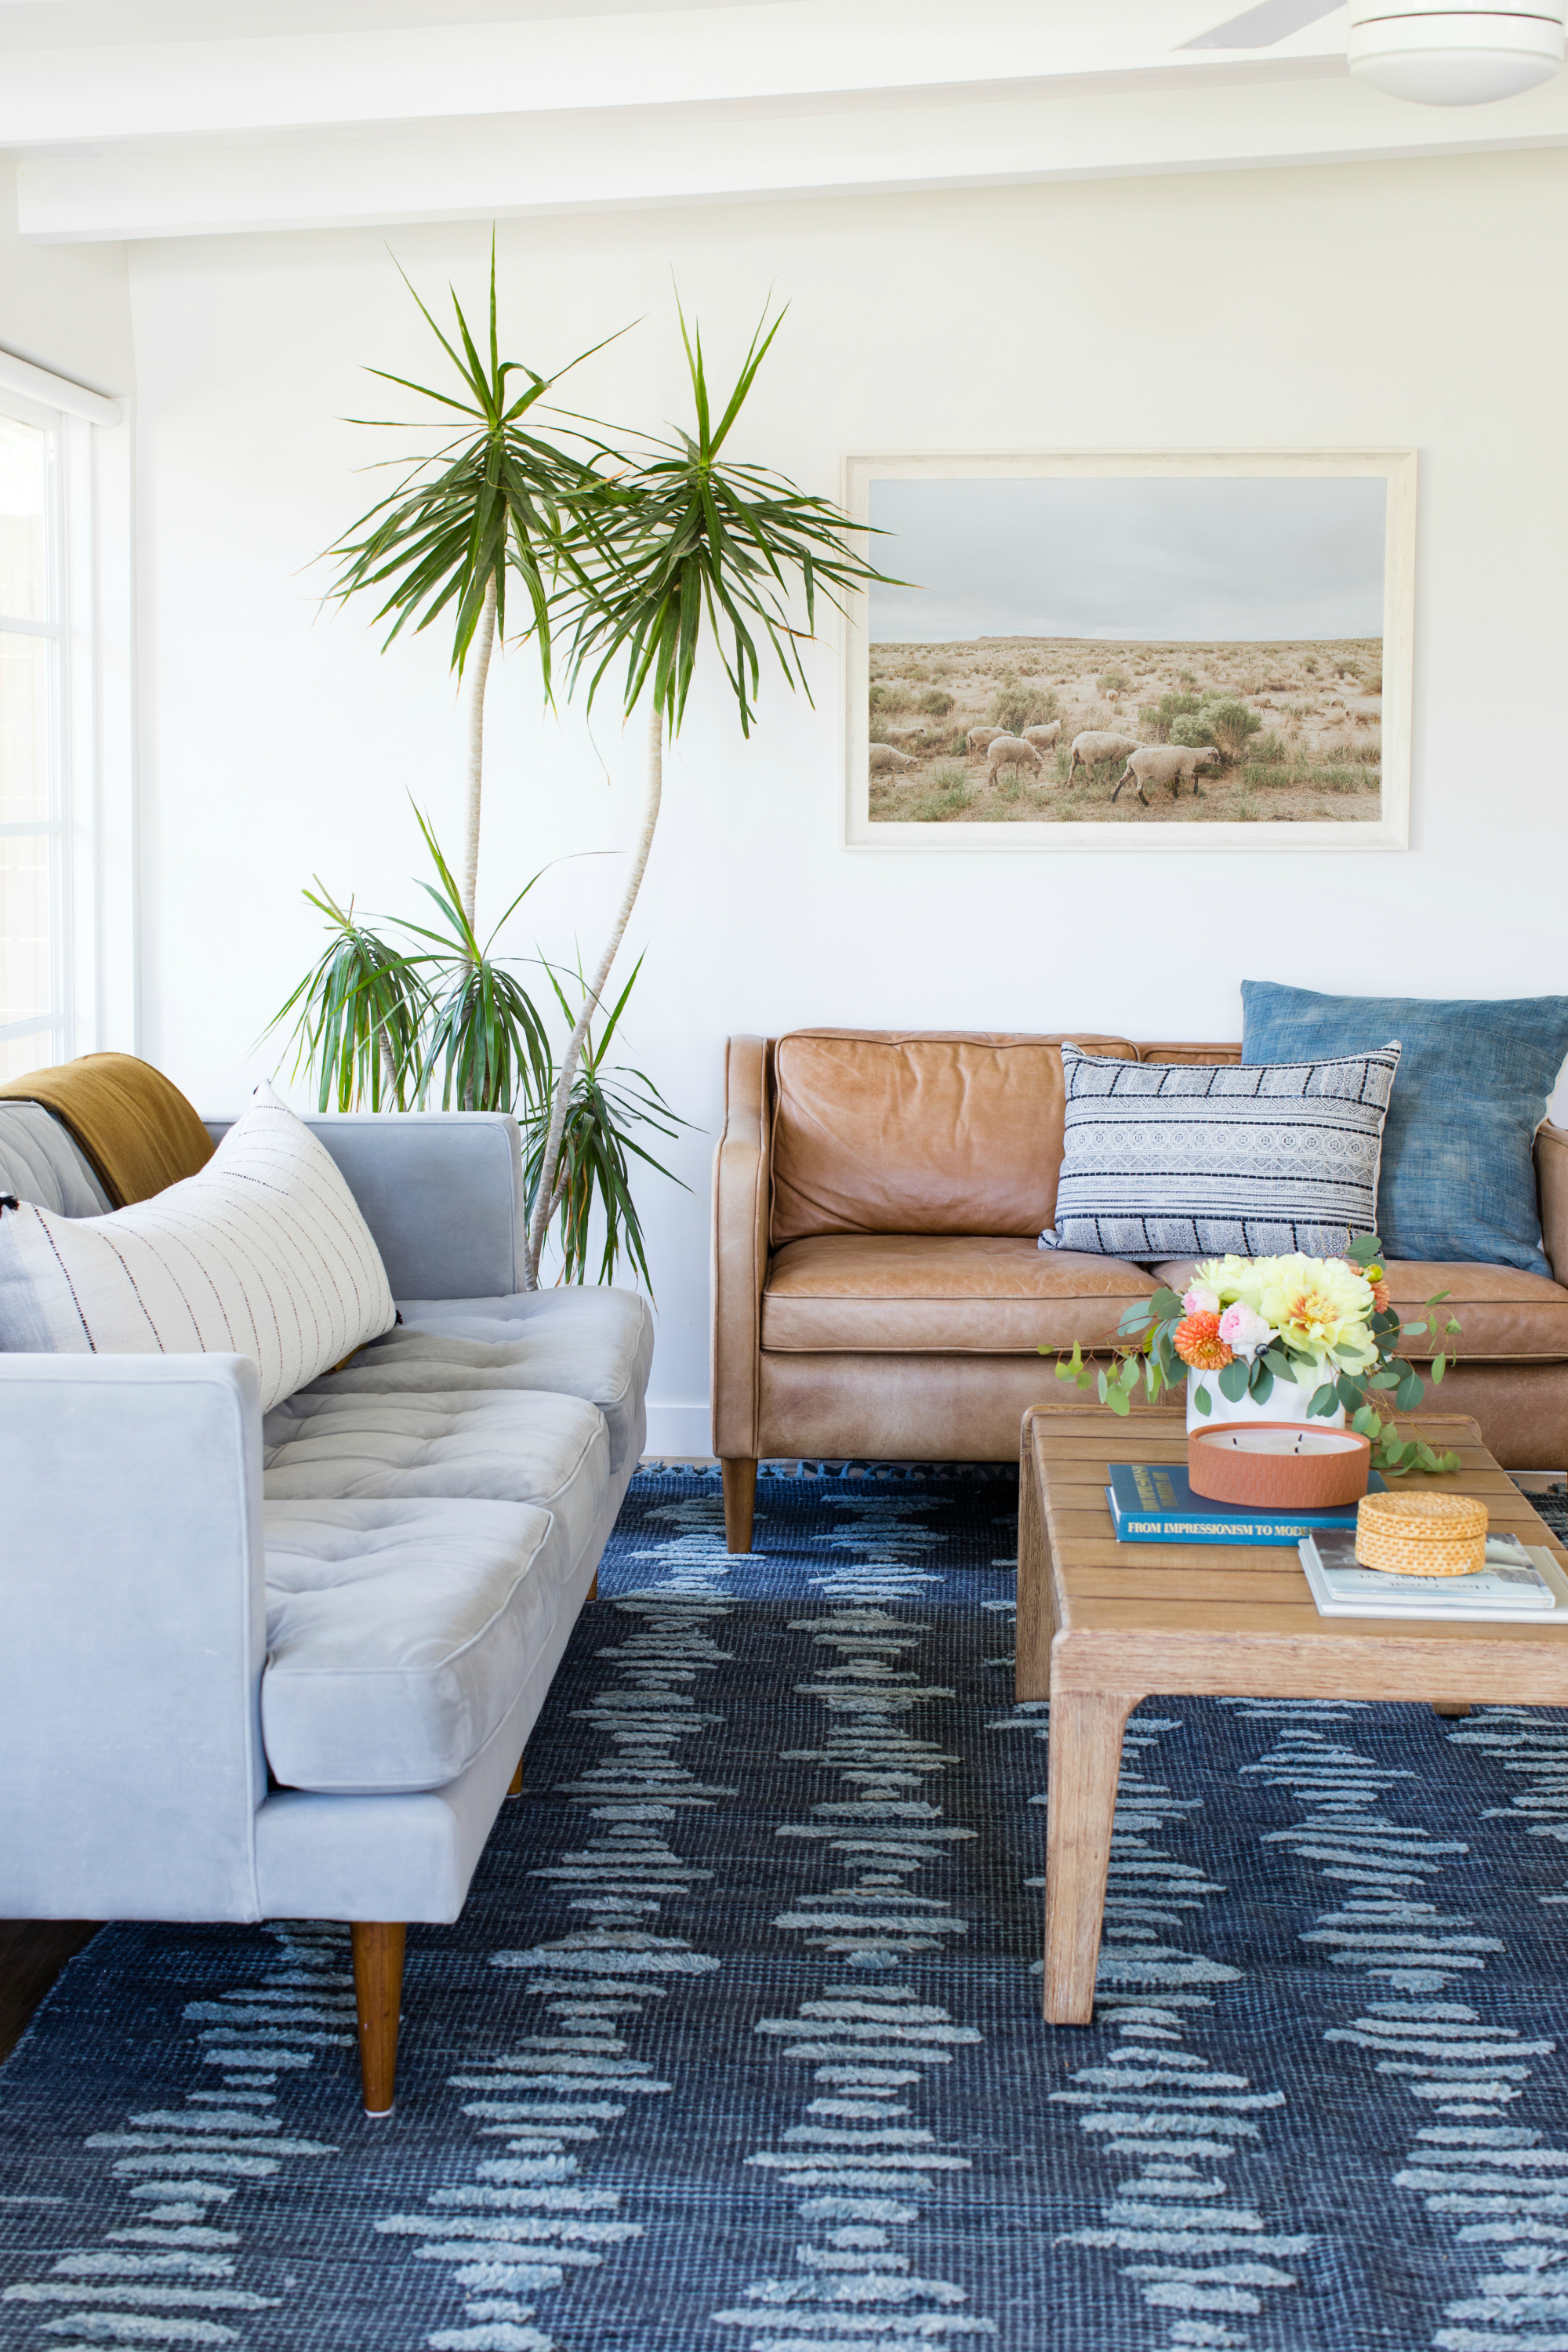
Every room can use a good dose of greenery! It will make just about any space feel instantly brighter and more alive. I think it’s safe to say that most of us would prefer only using real plants in our homes, but sometimes it isn’t always the best option. Dark corners and high shelves can be really problematic areas to keep real plants alive and thriving. We put together a list of our favorite faux plants and trees for all of the black thumbs out there. We also included some of our go-to live plants!! Do you have any favorites we should know about?!
The below photos feature a mix of faux and real plants. Can you guess which is which??
Our top tip for making faux trees and larger faux plants look more natural is proper “planting”. It’s much harder to spot a fake if you can’t see the faux dirt! We recommend placing the entire pot it came in into a larger planter or basket and covering it with either white landscape rock (available at hardware stores for about $5 for a large bag!) or dirt and moss. You can see all of our favorite planters here!
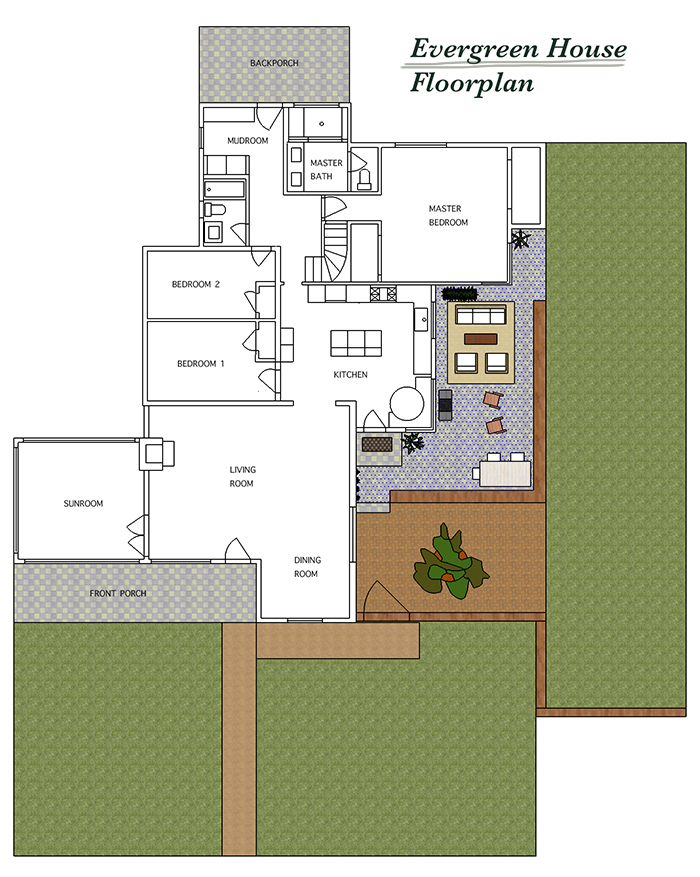
This post series is sponsored by Lowe’s Home Improvement. For about eight months of the year, Arizona has amazing weather for outdoor living! One of the things that I was most excited with about the Evergreen house is this great little porch area off the kitchen on the right side of the house. The side…
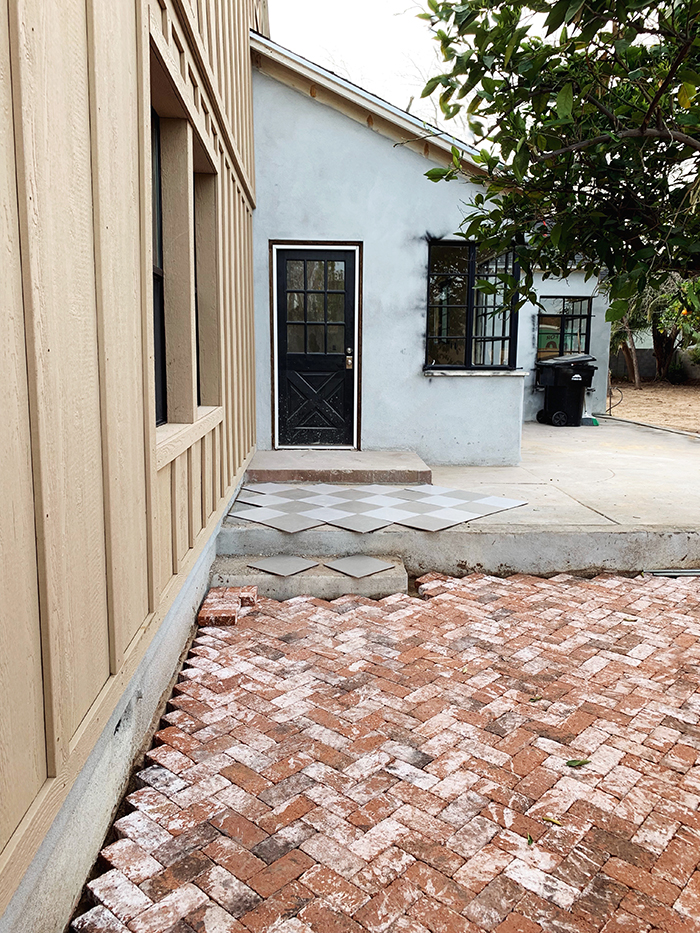
For about eight months of the year, Arizona has amazing weather for outdoor living! One of the things that I was most excited with about the Evergreen house is this great little porch area off the kitchen on the right side of the house.
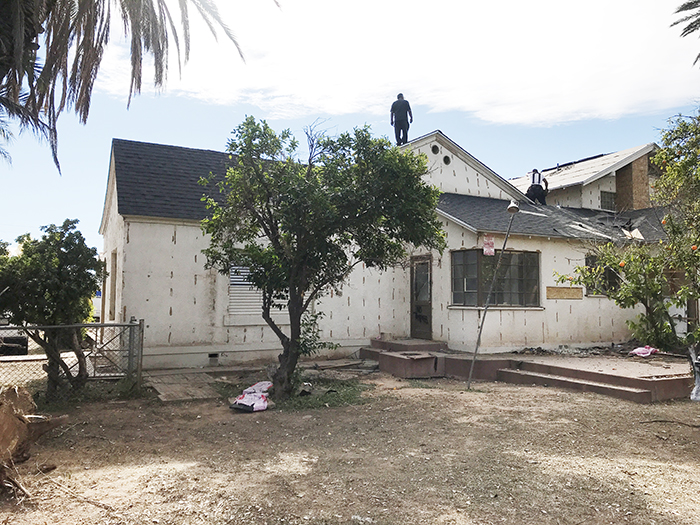
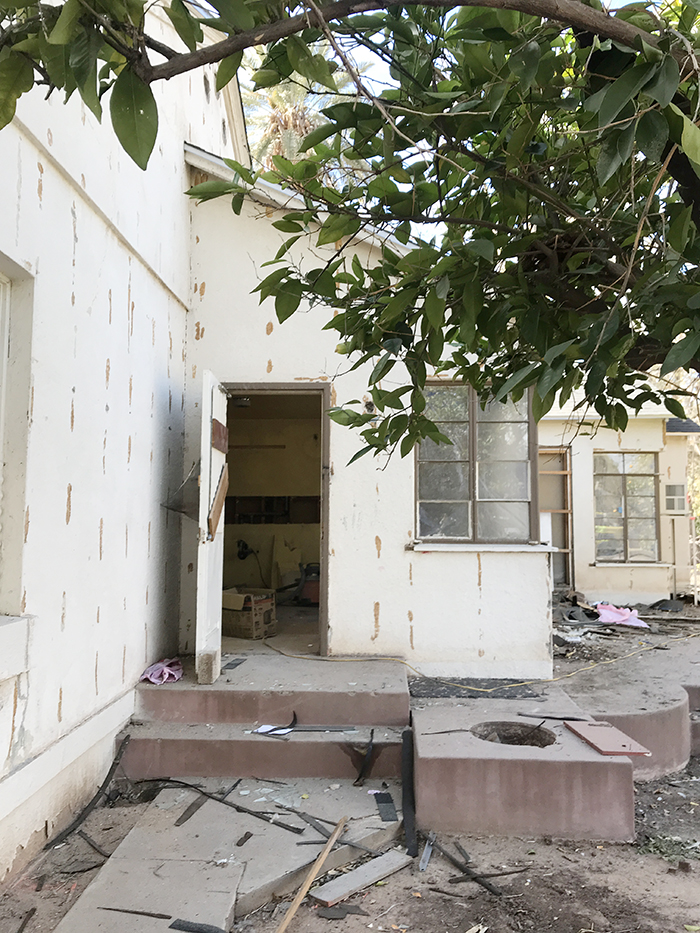
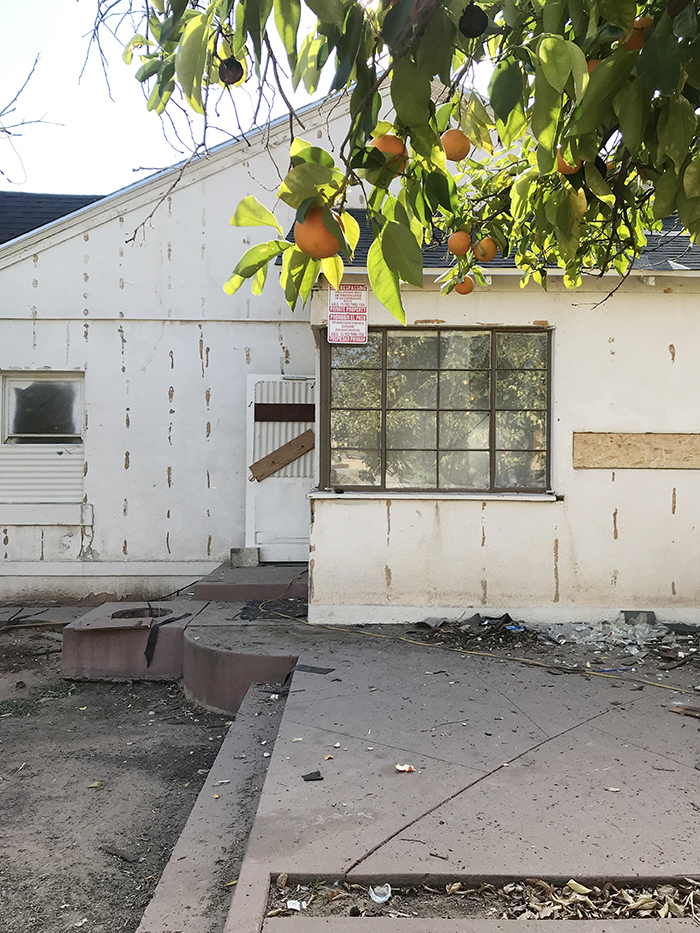
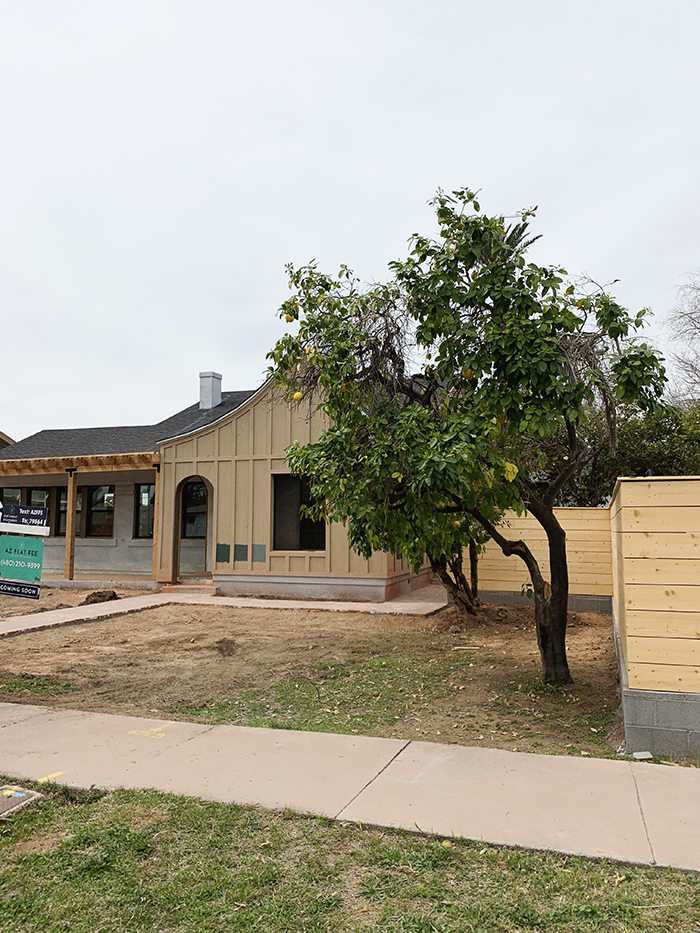
The side porch didn’t look all that amazing when we first toured the house, but I knew it had potential! It was smaller, with lots of awkward step, a giant hole for burning trash (!) and tons of dead, overgrown trees.
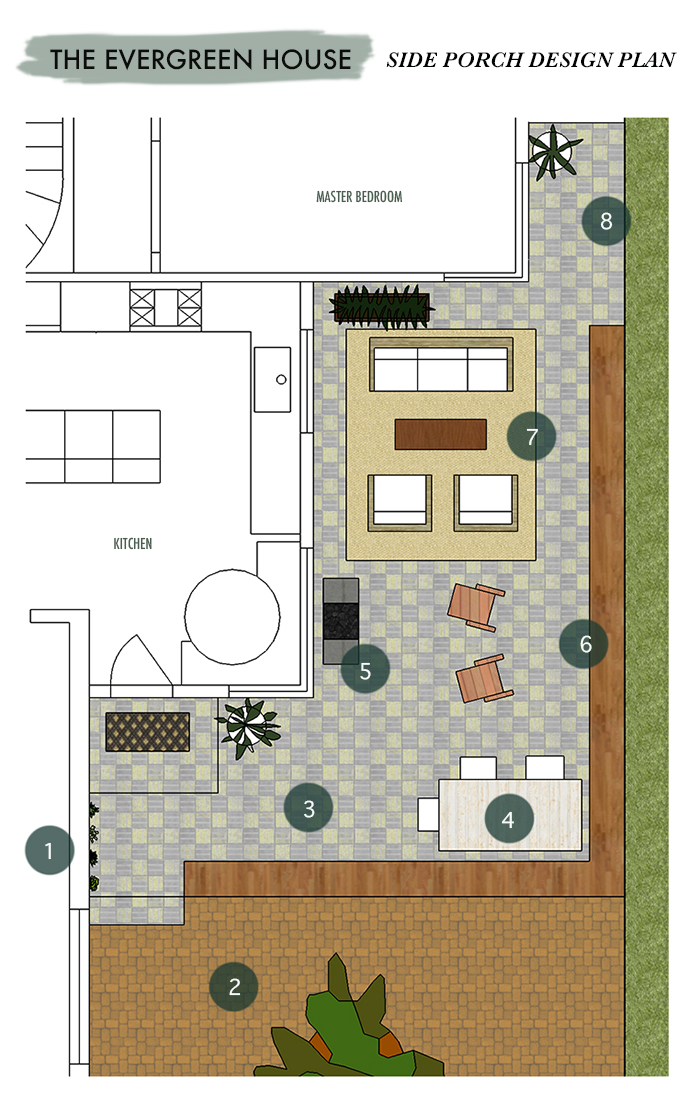
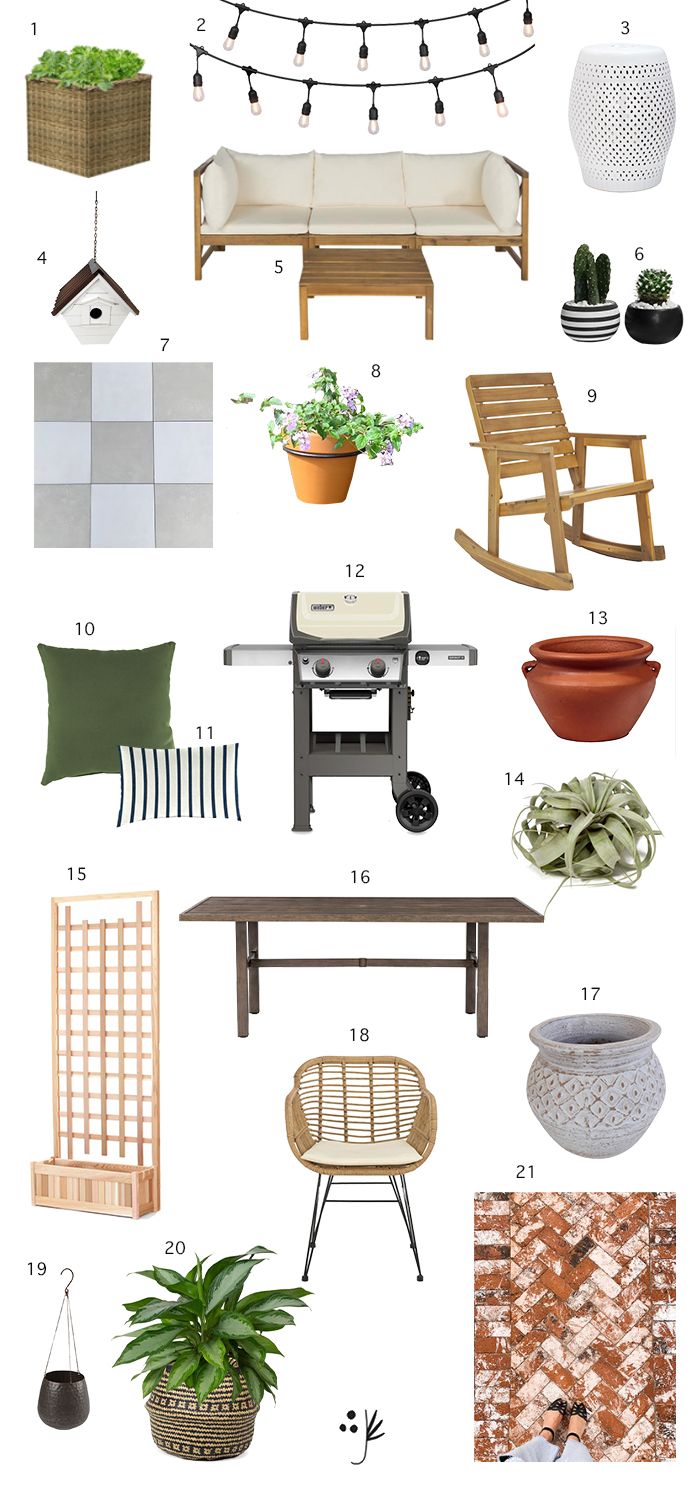
We’ve been working with Lowe’s on the exterior renovation of the Evergreen house and I was SO excited to tackle this side porch with all the gorgeous Lowe’s landscaping and outdoor living products! They have so many beautiful outdoor products in stock that have me soo excited for spring! Also pro tip: Lowe’s price matches so you know you’re always able to get the best deals when you shop in store! Here’s the plan I have for the porch layout:
5 – Grill // 6 – Built In Bench // 7 – Outdoor Seating Area // 8 – Step down to Grass Yard
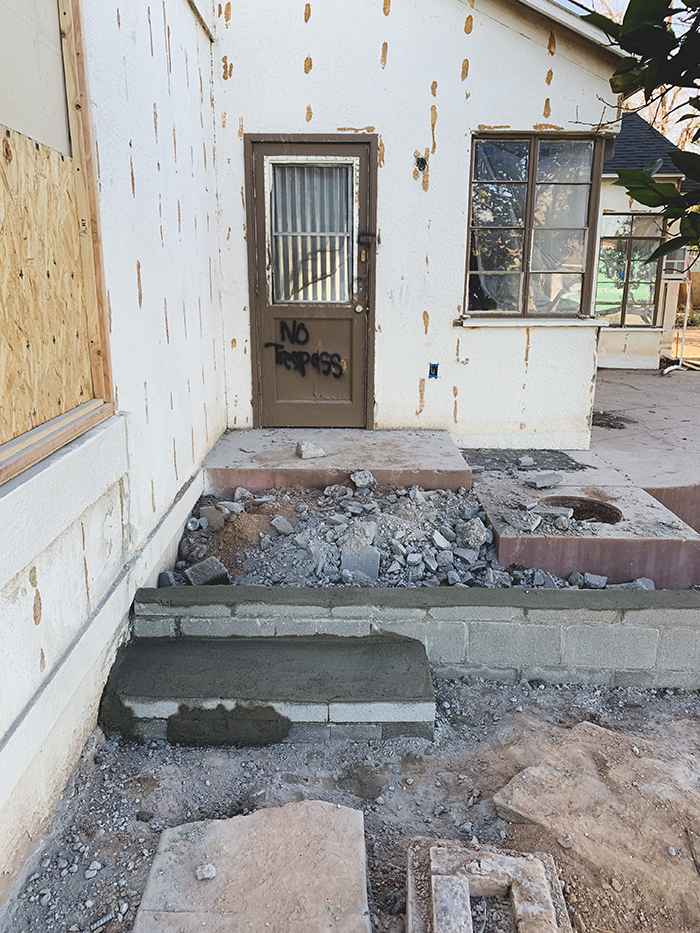
We ended up extending the porch quite a bit and I think the extra hosting space will be well worth the costs! To extend the porch my contractor poured a few support footers and then created a new slab perimeter with cinder block. They filled the new area with inert waste before pouring and filling with concrete to extend the slab a few feet in each direction.
Here’s what the side porch looks like today, all ready for paint and tile!
This porch faces north, which is a soft and indirect light, so it’s really perfect for evening hosting! Here are some of my picks for making this porch the ultimate in outdoor living. The goal is for this space to be super flexible and functional! Things I’m most excited about? The herb garden wall, the checkerboard floors and the trellis planters! This space is going to be so cute!
The tile is getting laid this week and the house is getting painted tomorrow! Things are moving quickly and I can’t wait to start bringing in furniture!
Spring is just a few days away and it has us craving more color and warmer tones in the bedroom! We love a dark, moody bedroom, especially in the winter, but we wanted to show you how to mix things up a bit, without having to change any major pieces in your space! We have…
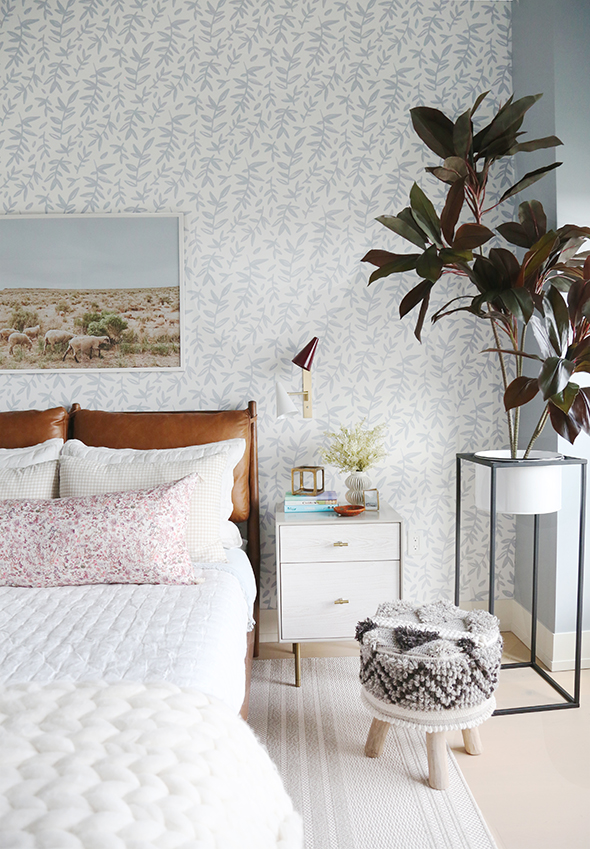
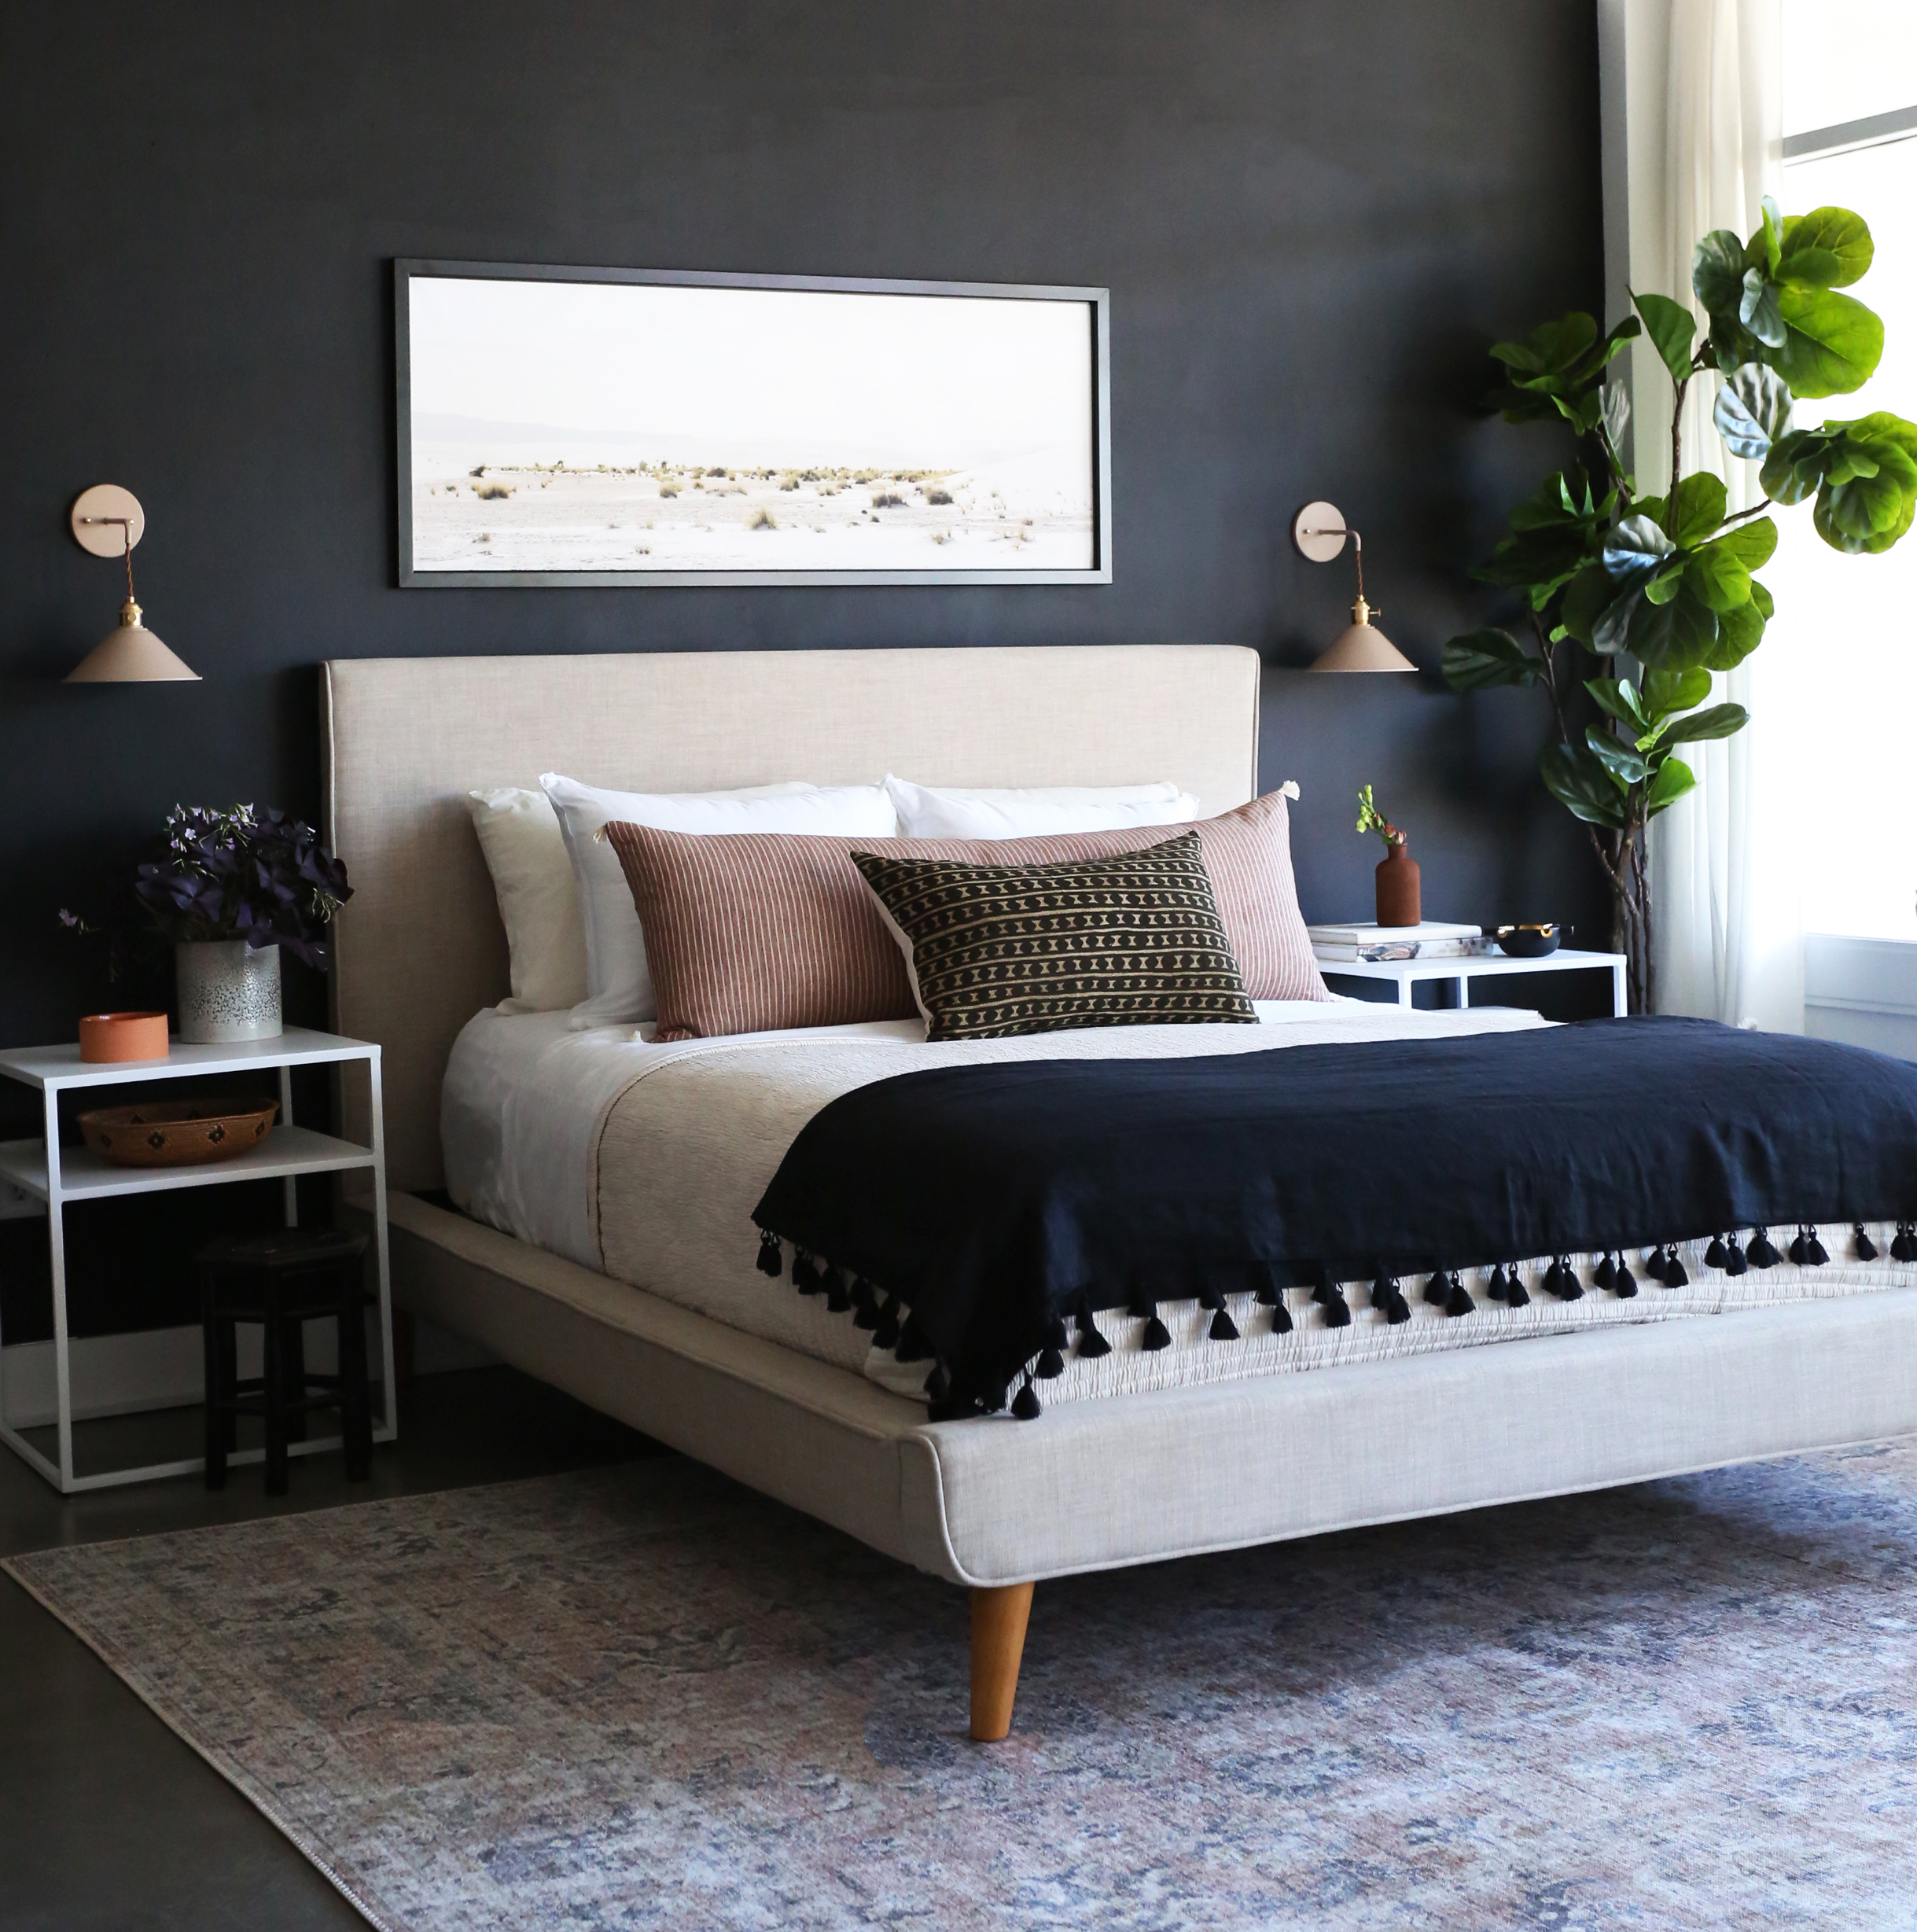
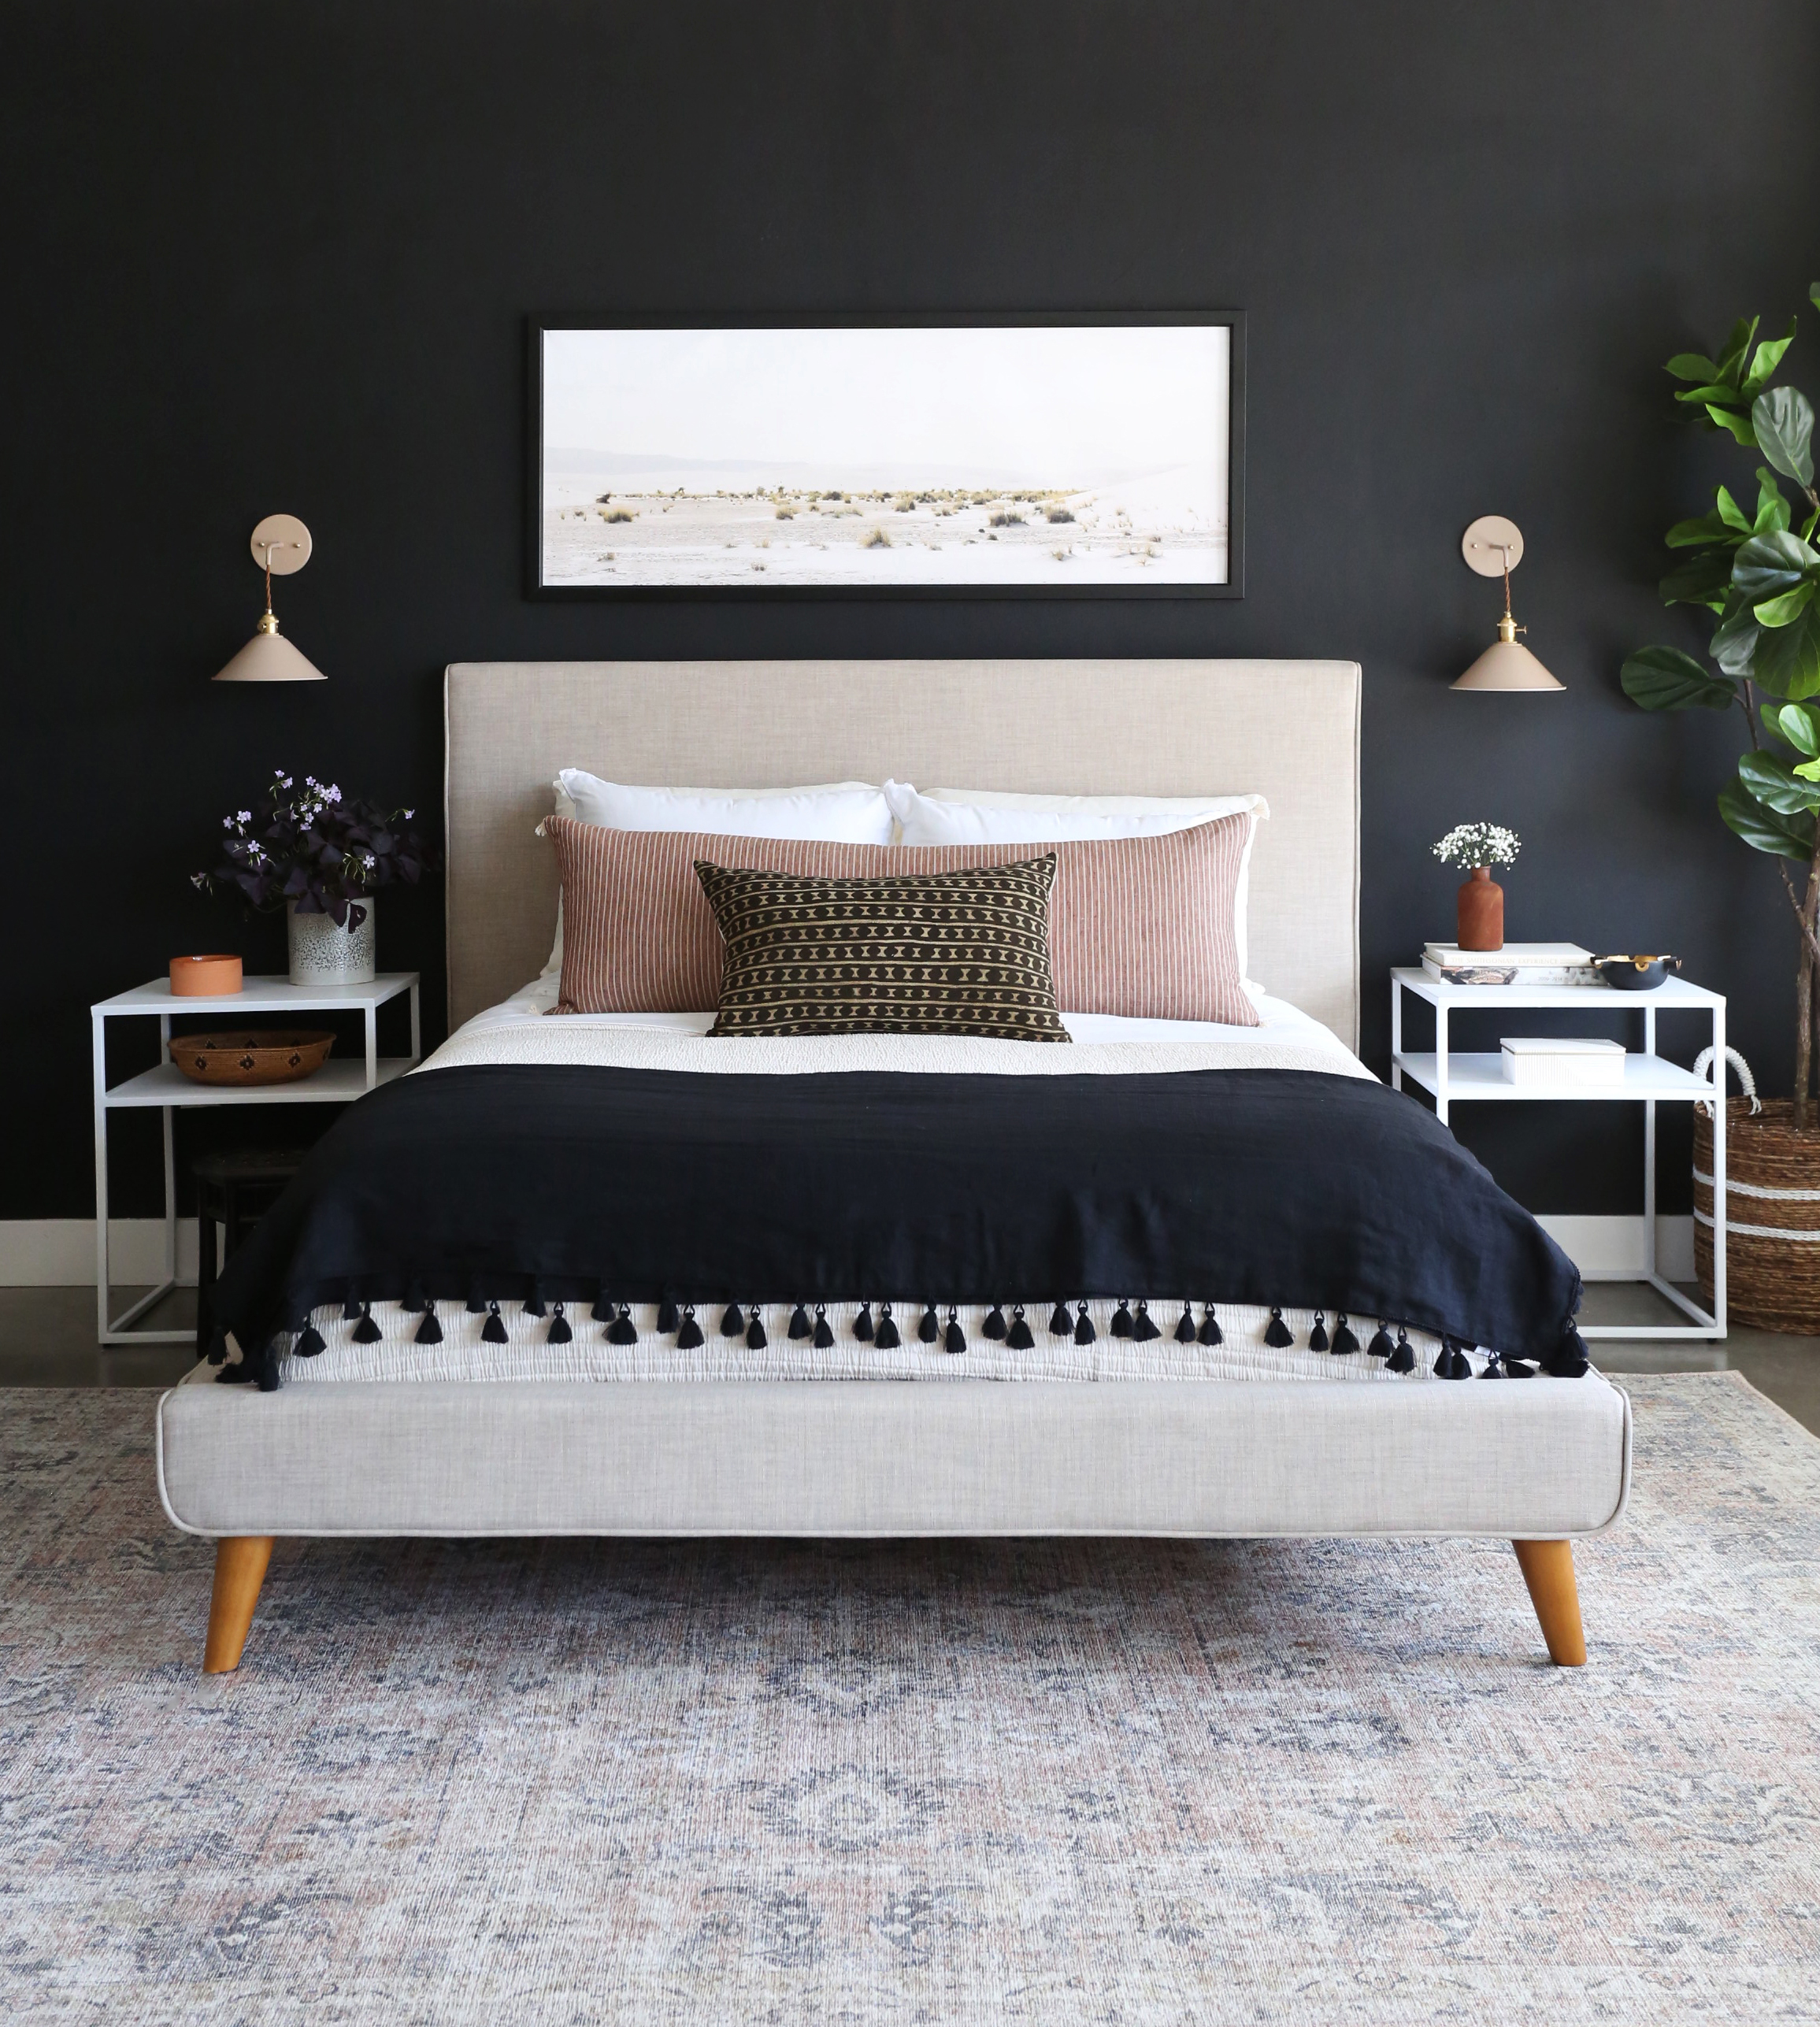
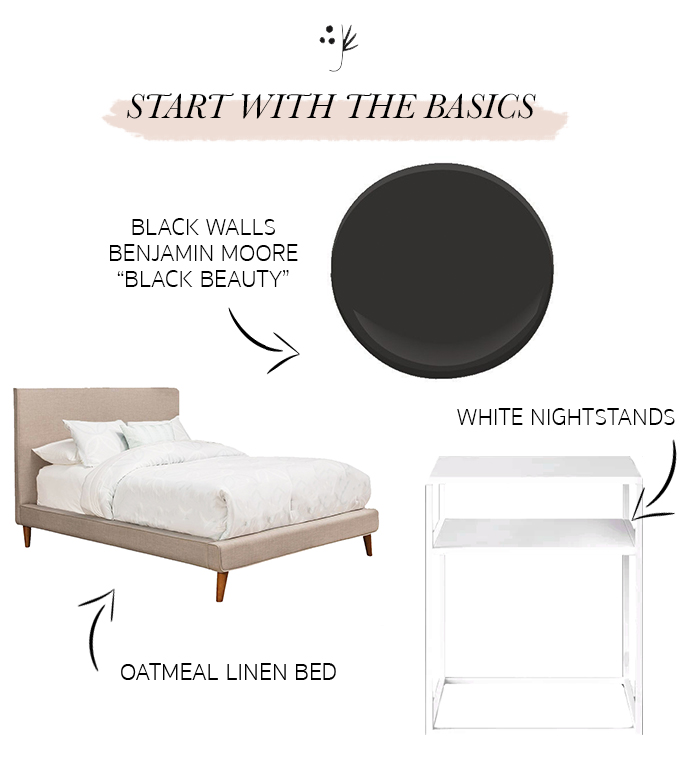
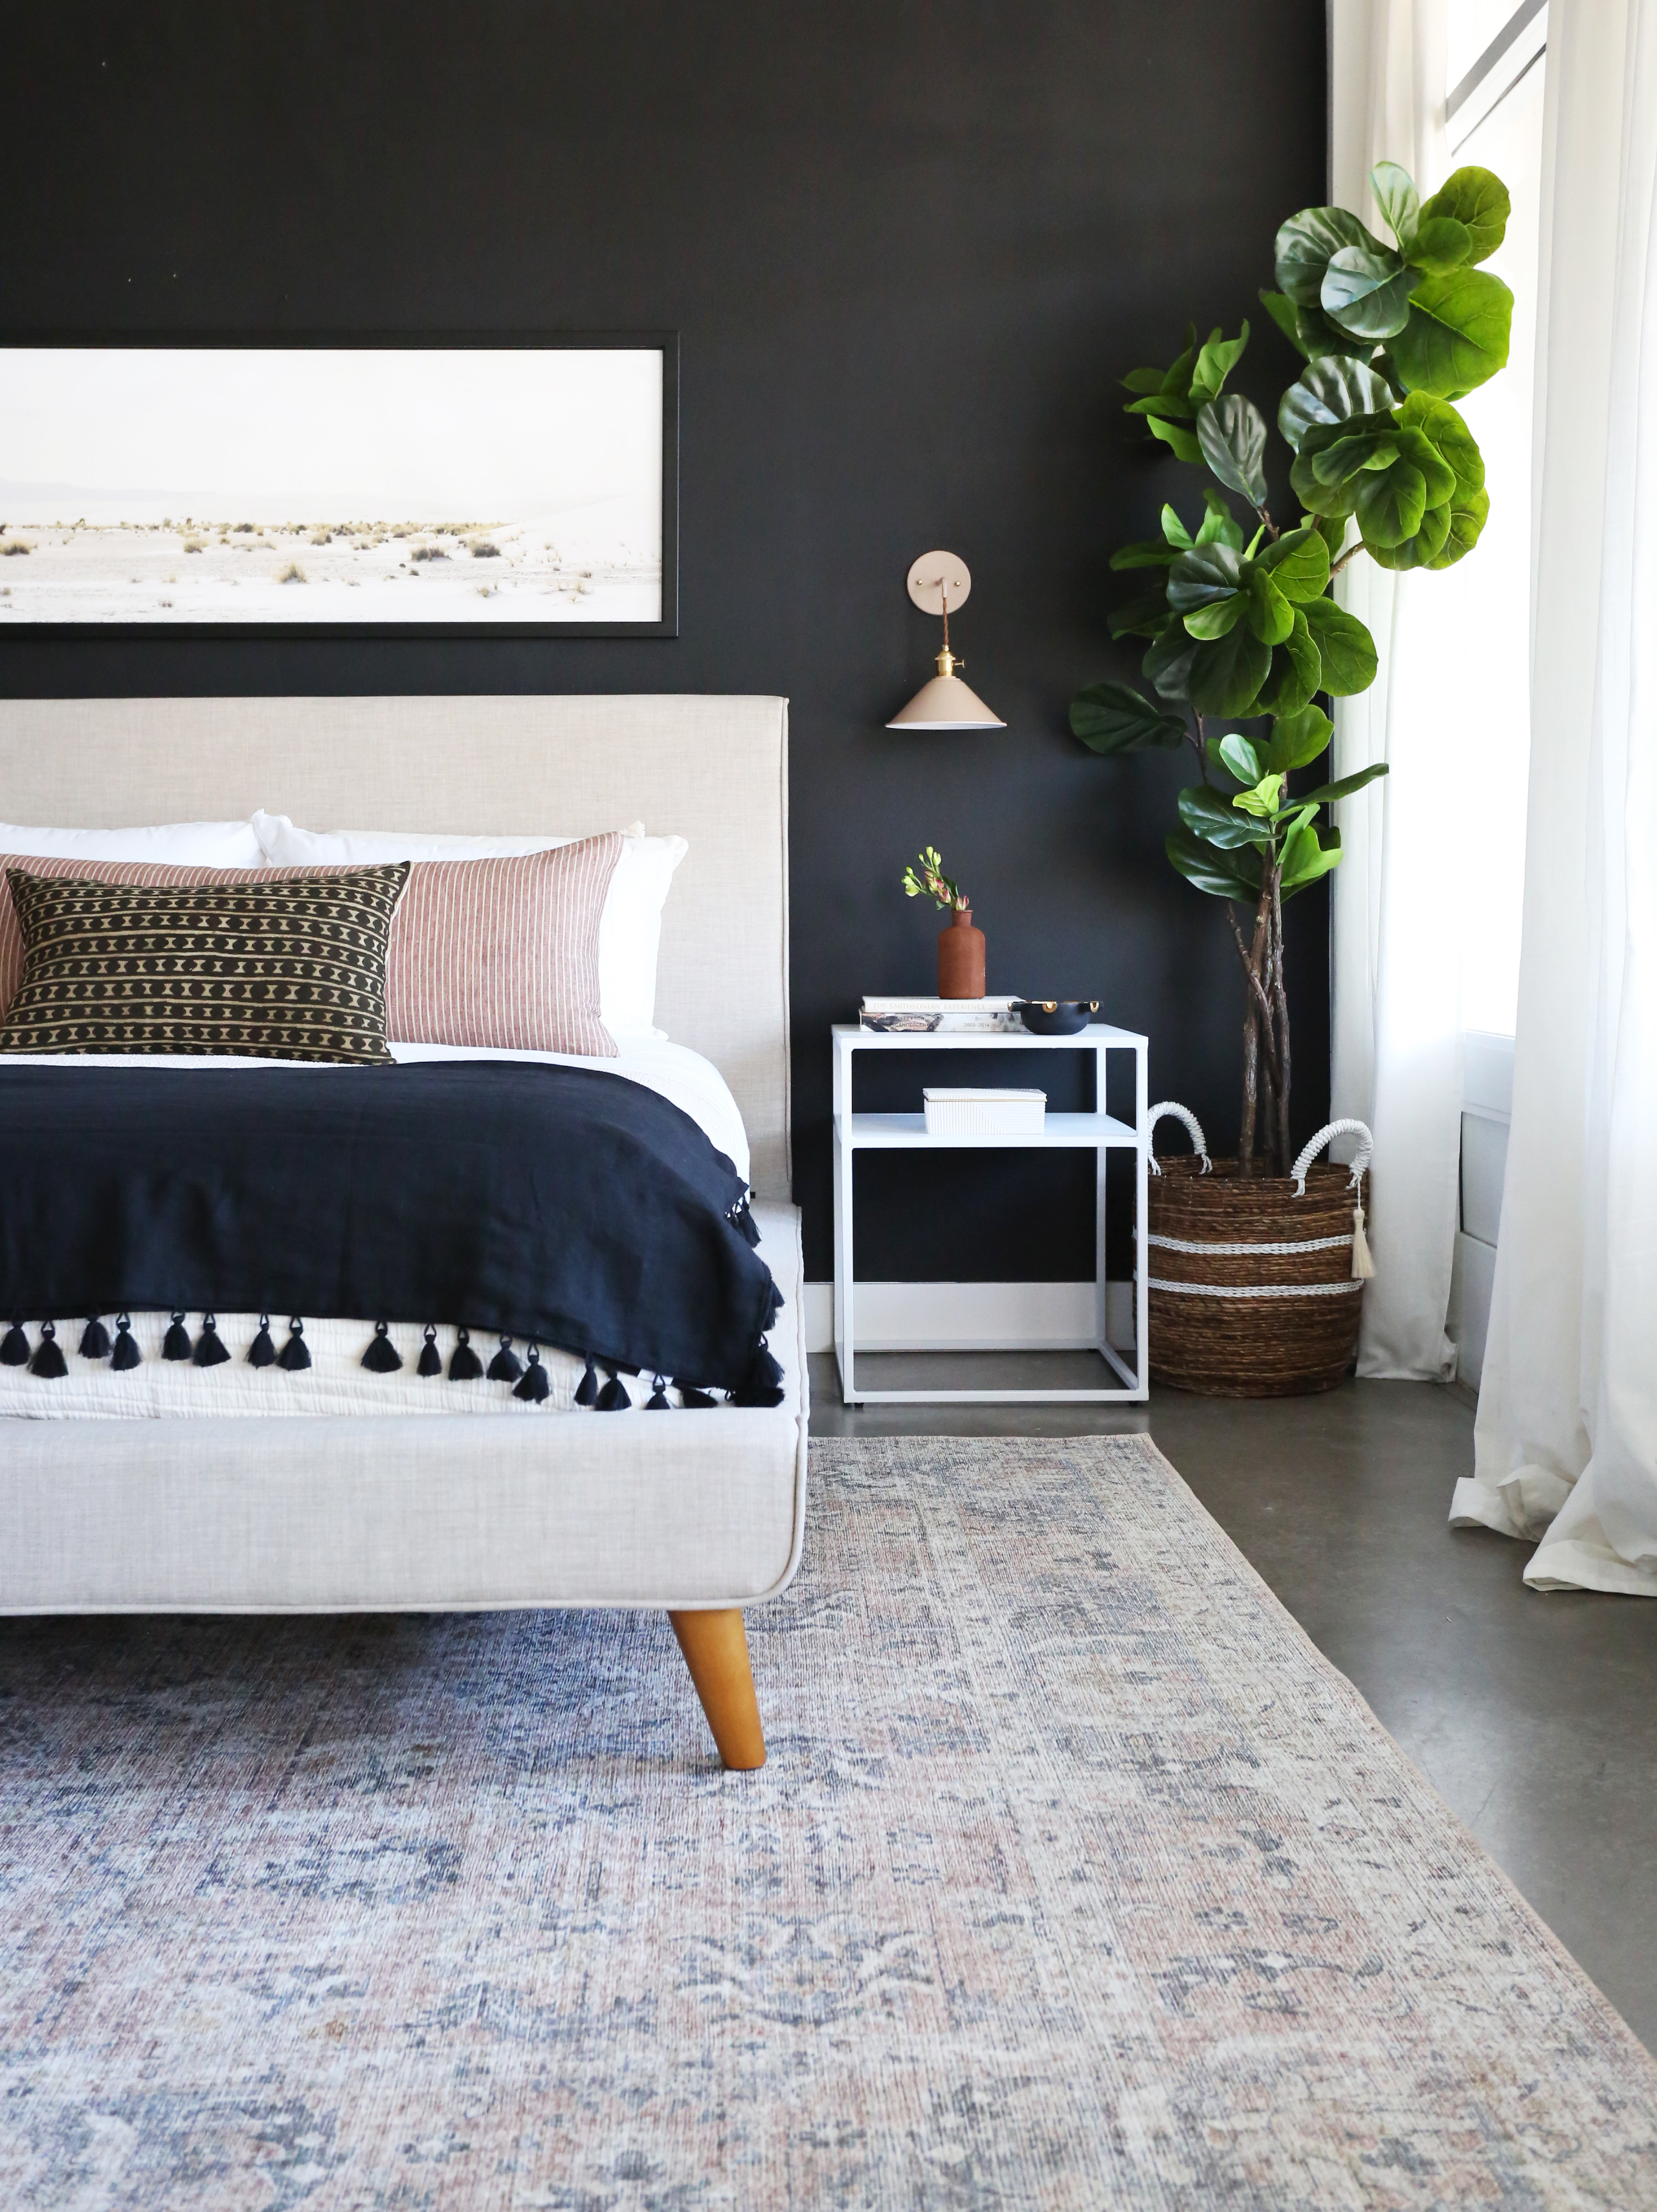
Spring is just a few days away and it has us craving more color and warmer tones in the bedroom! We love a dark, moody bedroom, especially in the winter, but we wanted to show you how to mix things up a bit, without having to change any major pieces in your space!
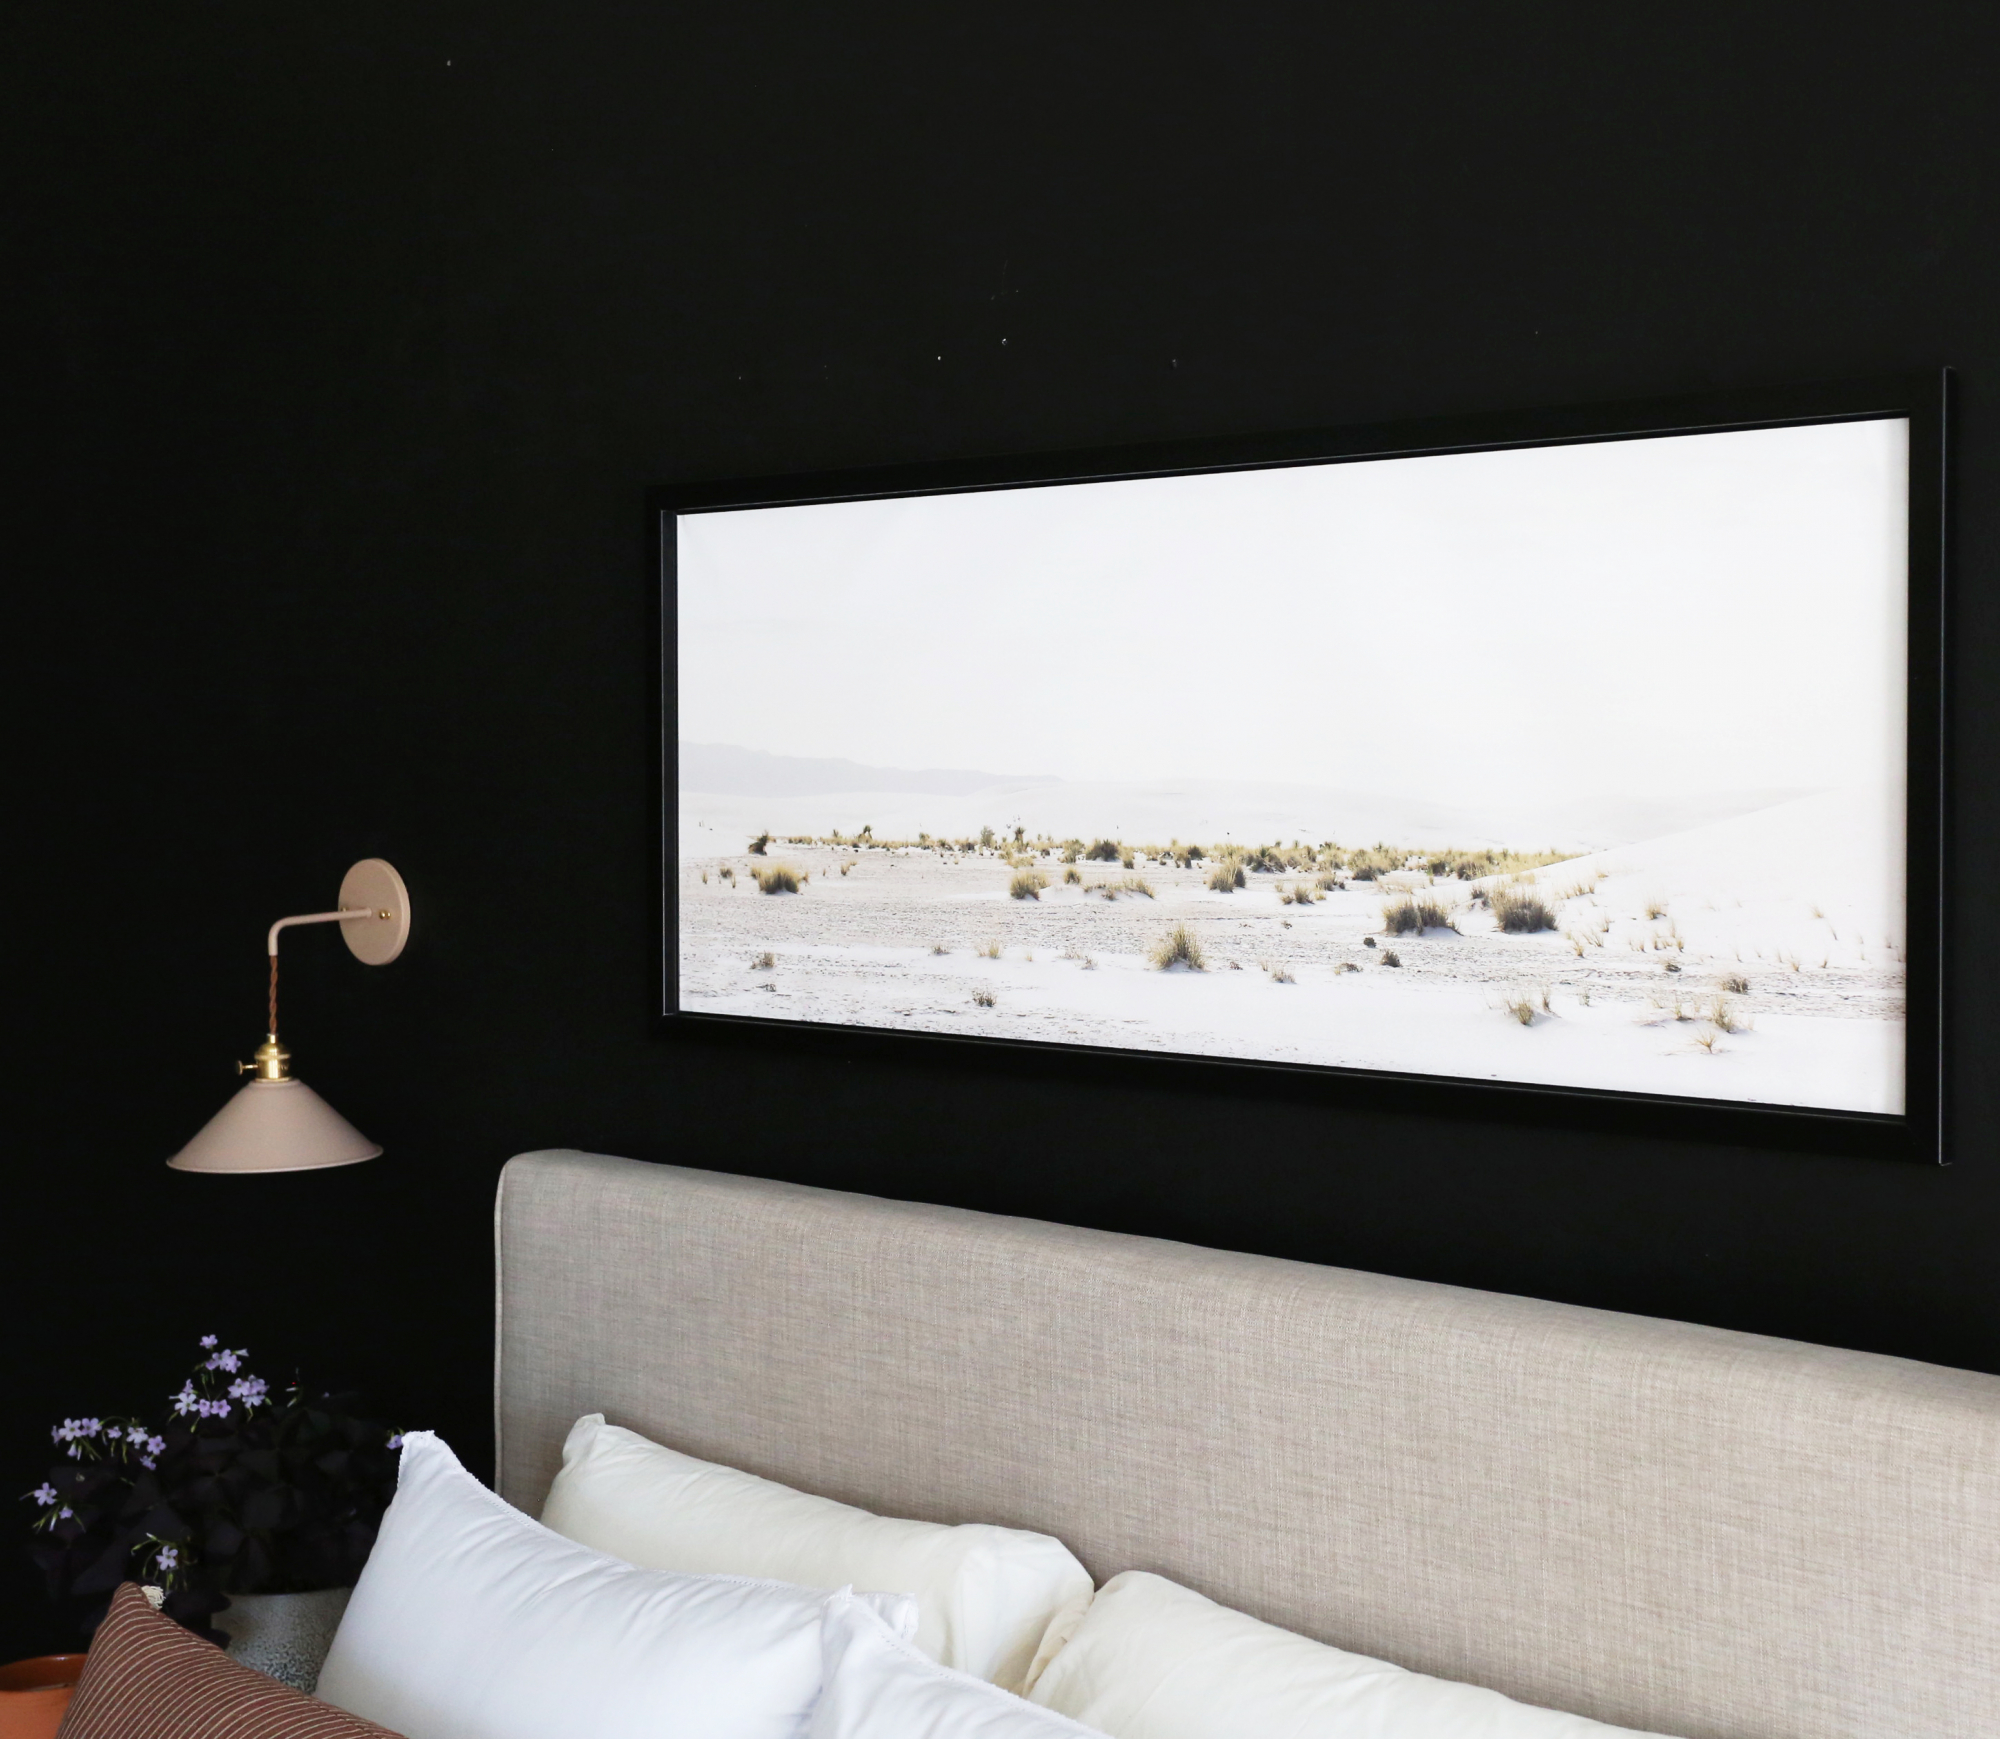
We have been on the hunt for beautiful, but affordable lighting for the Evergreen House. We stumbled upon these sconces and decided to order a pair to test them out. They are such an amazing find! Can you believe they are under $40?! The braided cord detail makes them look far more expensive than they actually are!
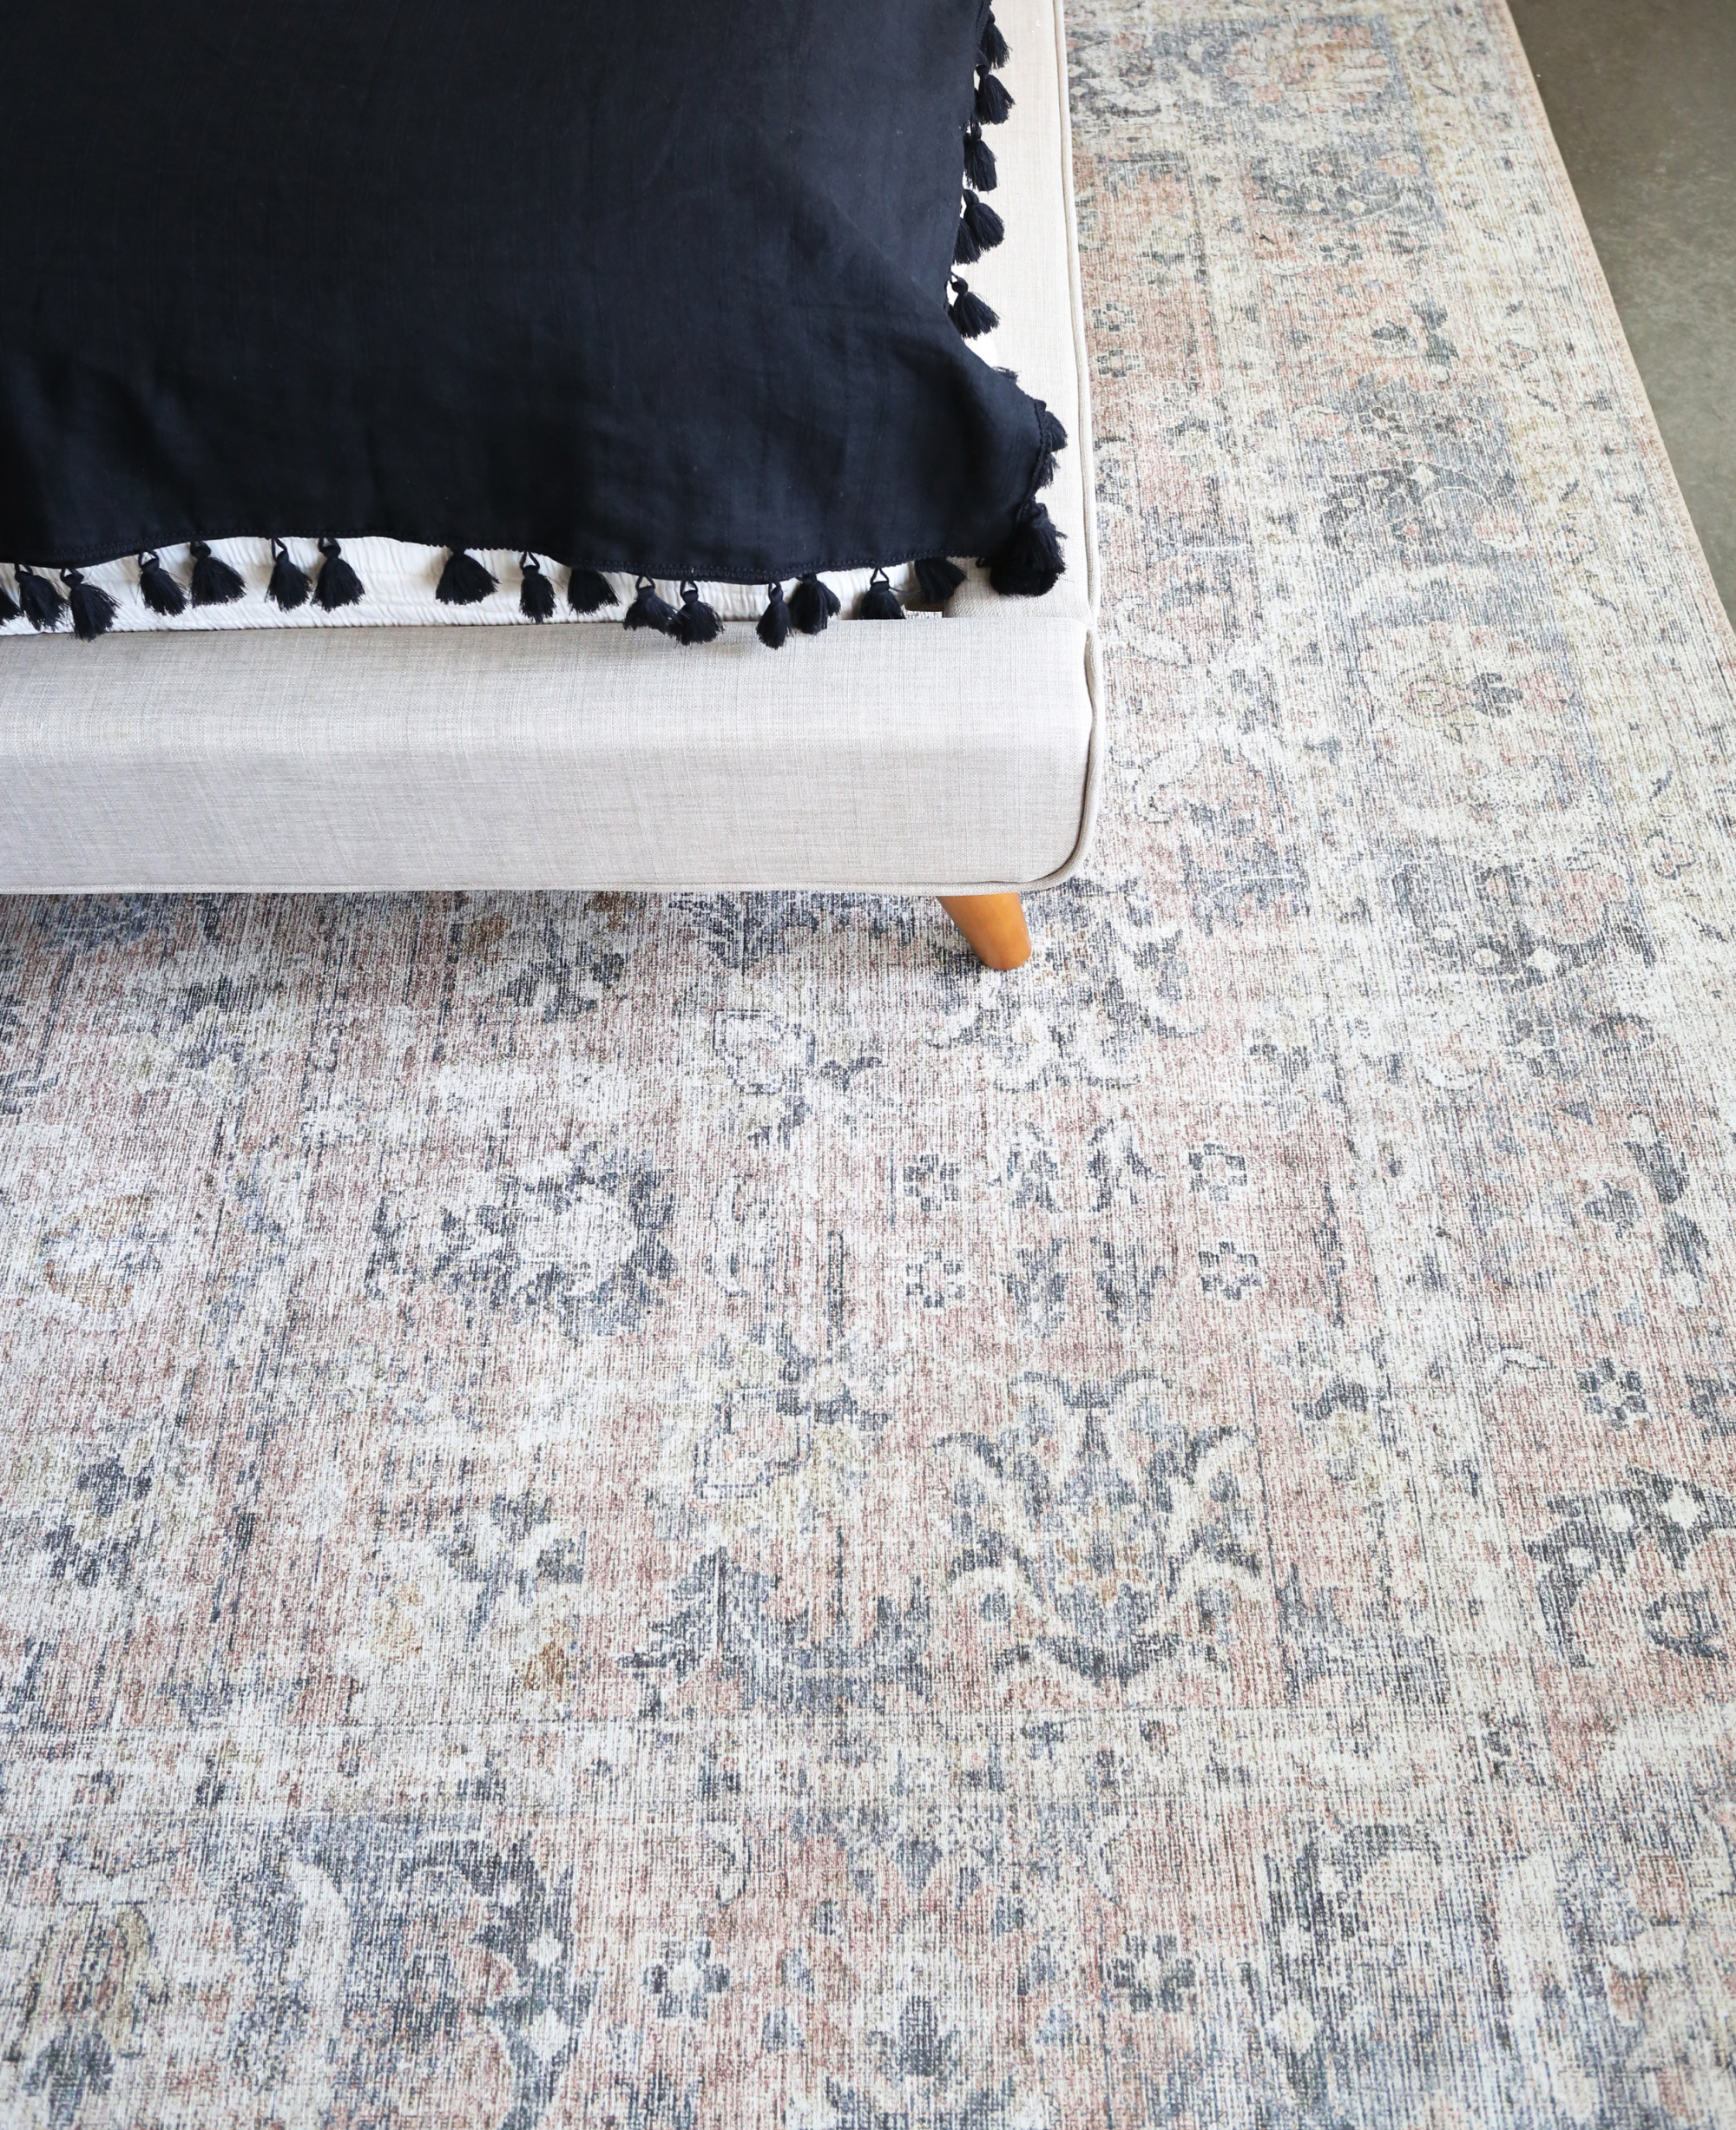
We have also been looking for some great new rugs, and have been sooo impressed by the new Loloi lines! They look just like a perfectly worn vintage rug, but with an amazingly soft texture. The price is also unbeatable! Here we used the Syke Rug in the Blush/Gray color way. We can’t wait for you to see which styles we will be using at Evergreen!
To update our room we kept all of the basics the same, but removed our heavy winter bedding and most of the accessories. Then we layered in our new rug, lumbar pillow, new sconces and a soft, linen throw blanket.
This post series is sponsored by Lowes. We are making amazing progress at the Evergreen house! The guys just started laying the floors inside and the exterior projects are starting to move quickly too! I shared some updates in my stories this week (these are saved in my Evergreen highlight!) and so many of you asked for more…
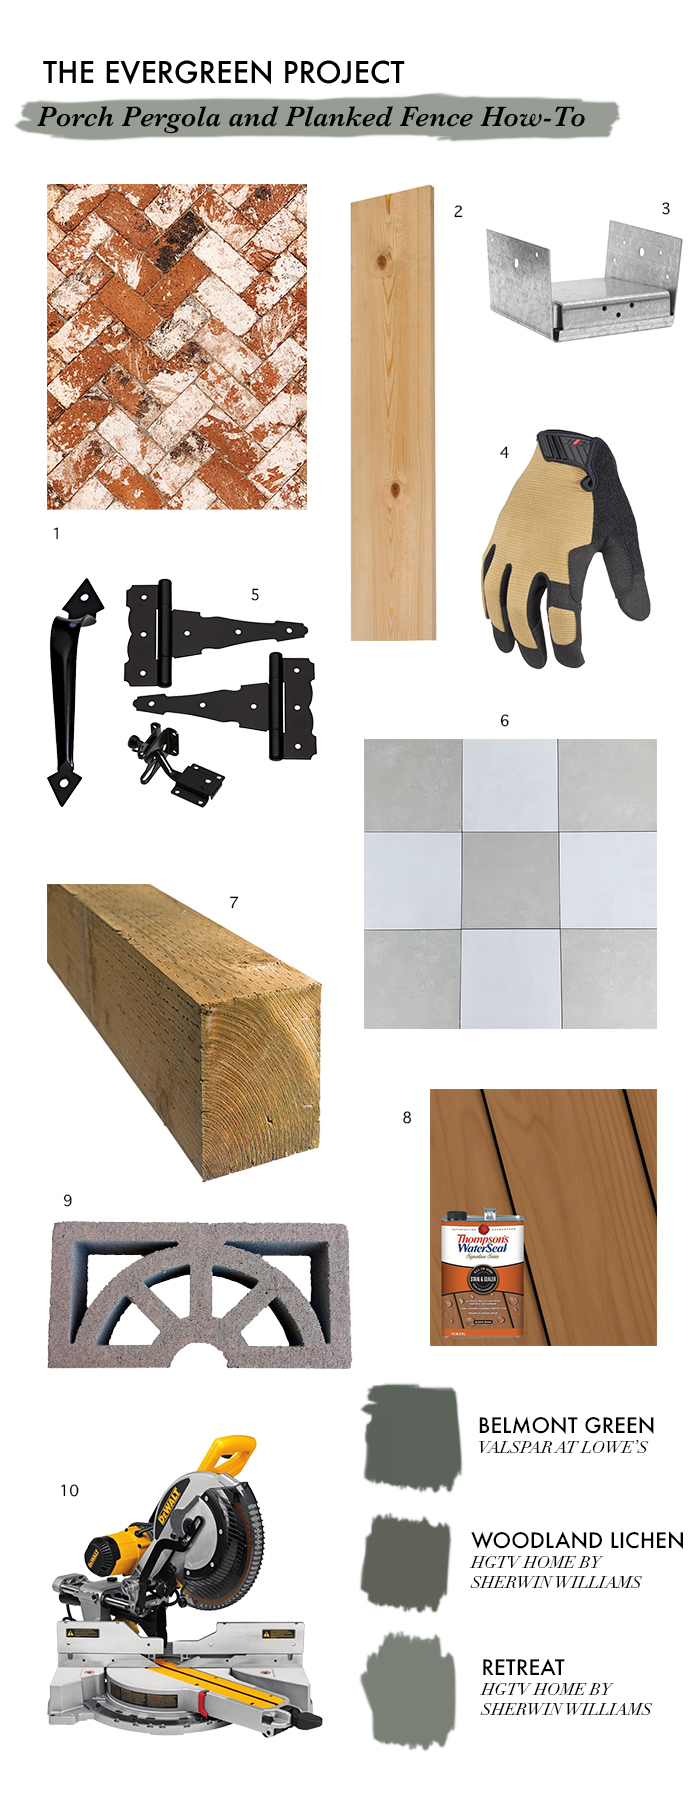
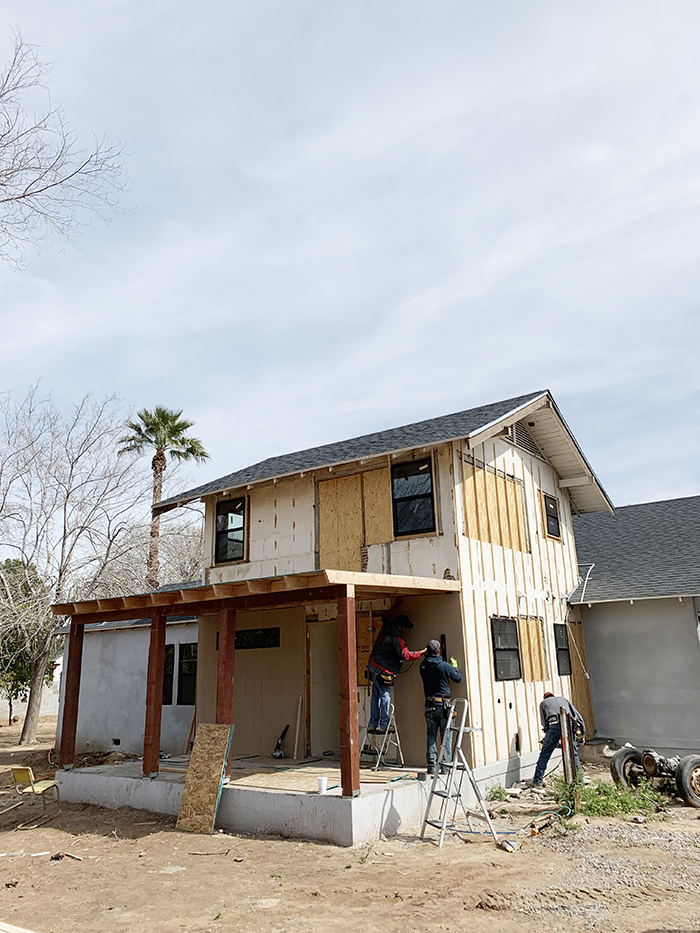
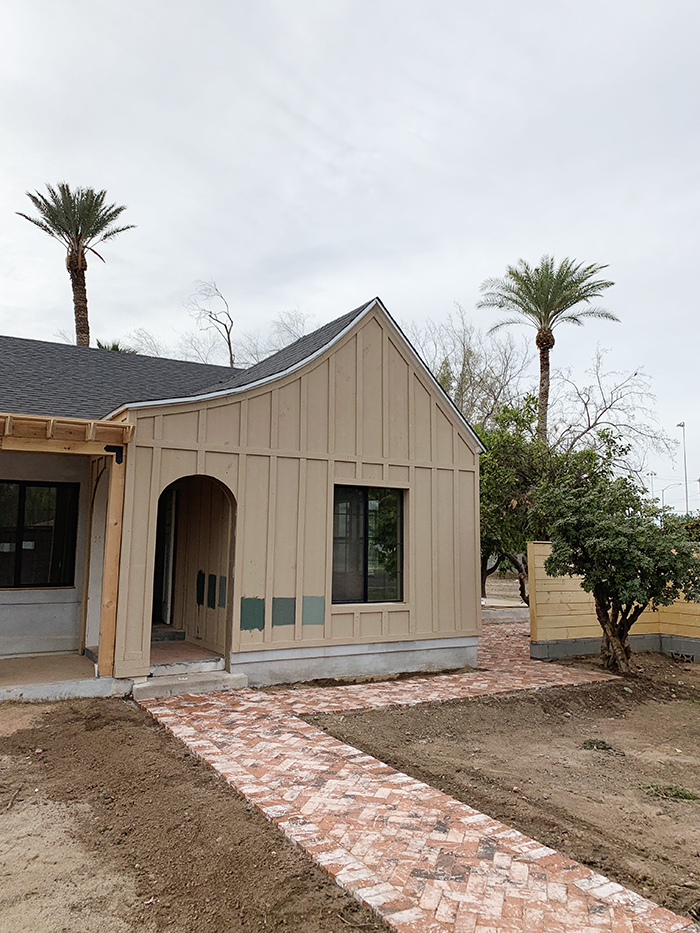
We are making amazing progress at the Evergreen house! The guys just started laying the floors inside and the exterior projects are starting to move quickly too! I shared some updates in my stories this week (these are saved in my Evergreen highlight!) and so many of you asked for more info on the how we built the planked fence and the porch pergola. We found everything used here at Lowes and they were SO helpful with quick delivery options! All of this lumber, the brick pavers and the tile were dropped off in the driveway, making it so easy for our contractor to stay on schedule. Many of you messaged me saying these sneak peeks made you so excited for spring to finally come where you live so you can do a refresh on your yard and exterior.. I love how easy Lowe’s makes it to completely transform an outdoor space for the coming warmer weather!
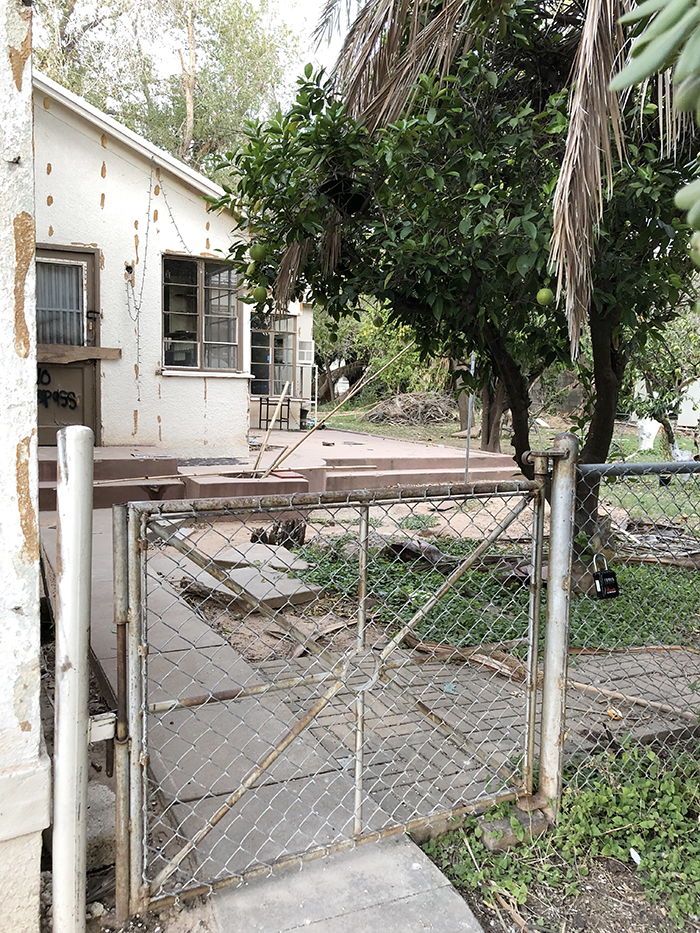
As a reminder, here are some photos showing how far we’ve come with this house in just a few short weeks!
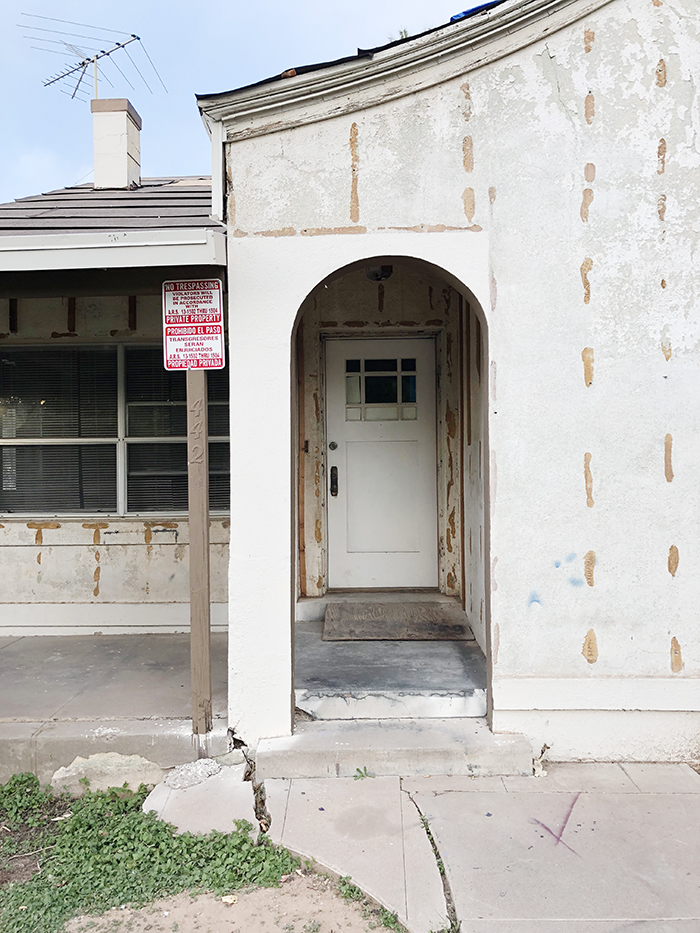
Side porch exterior BEFORE
Side porch exterior NOW
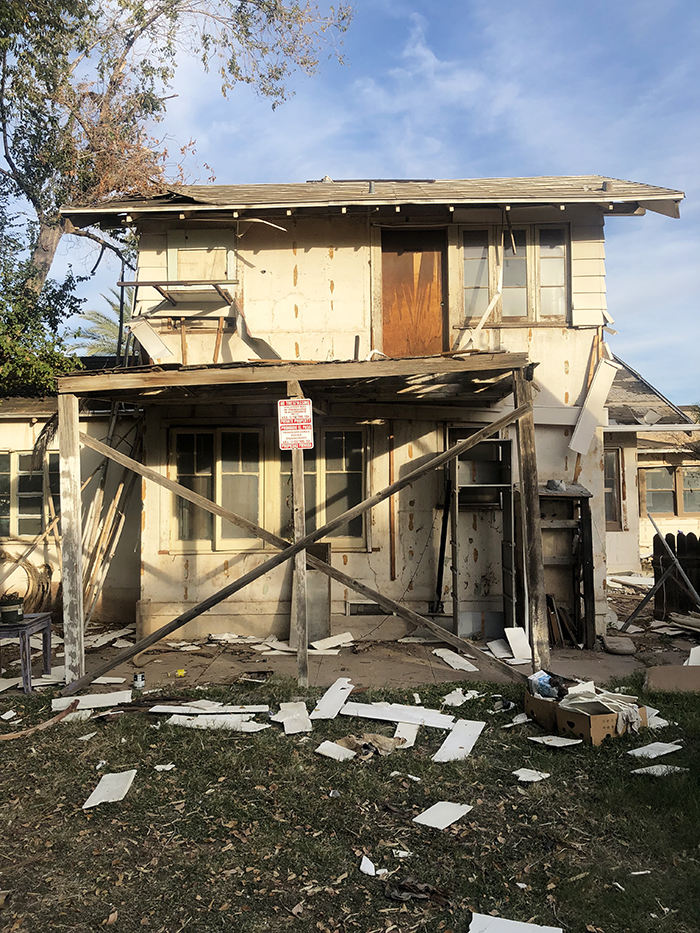
Back porch exterior BEFORE
Back porch exterior NOW
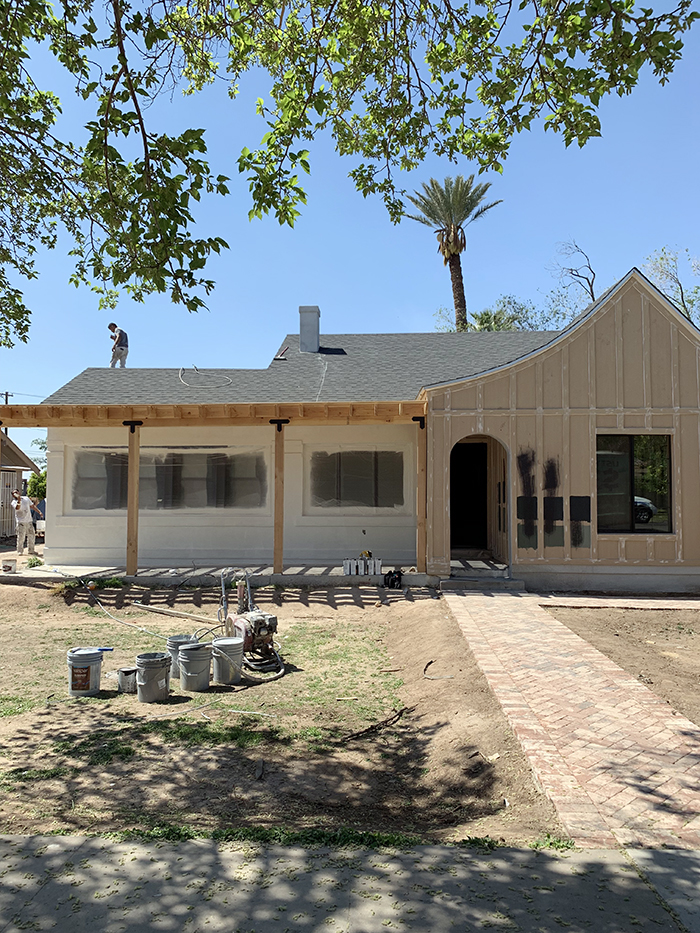
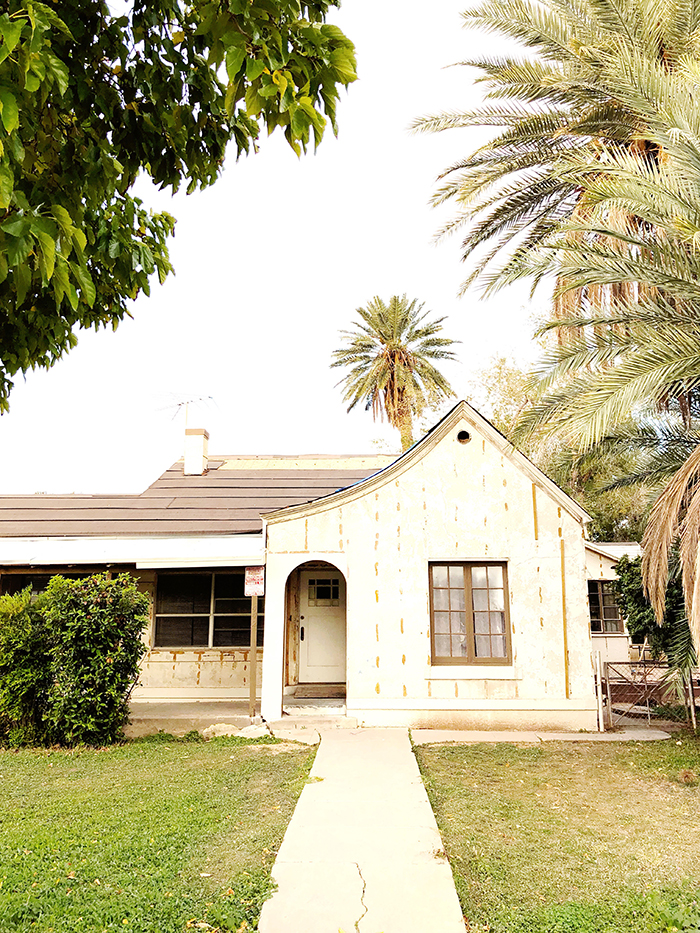
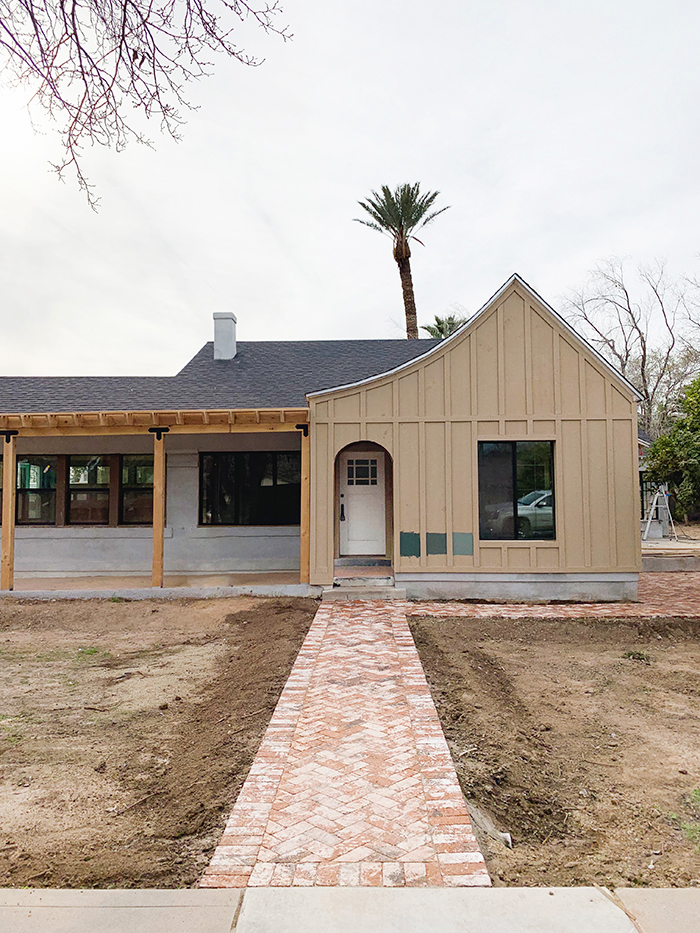
Front exterior BEFORE
Front exterior NOW
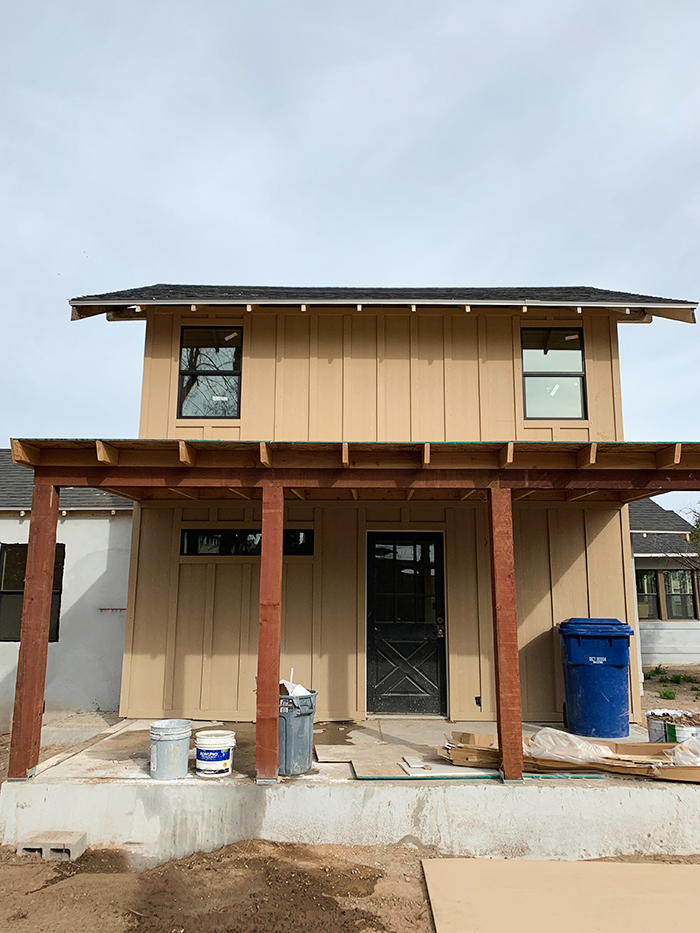
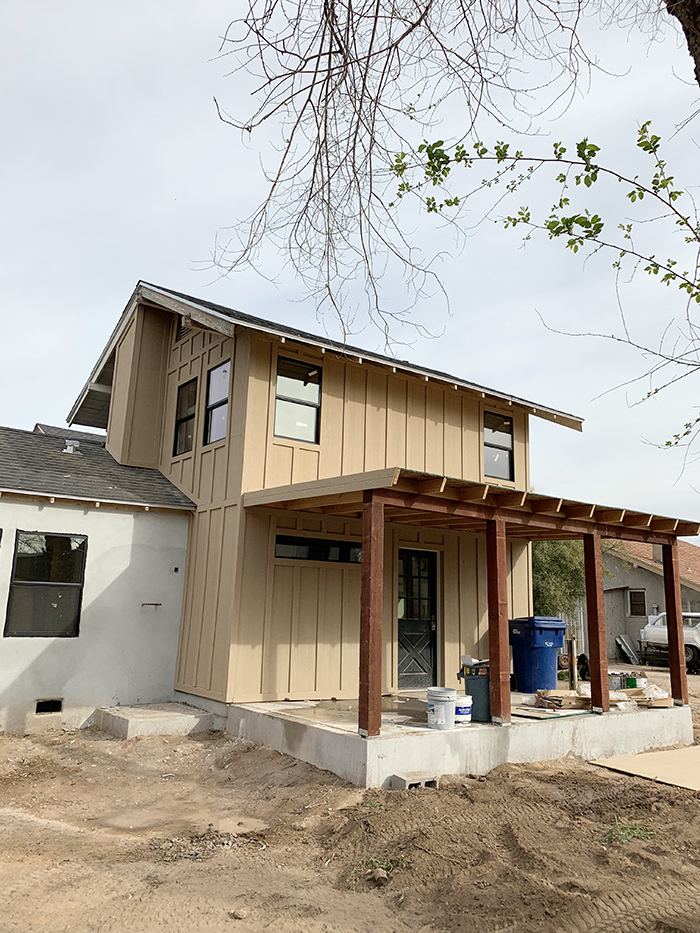
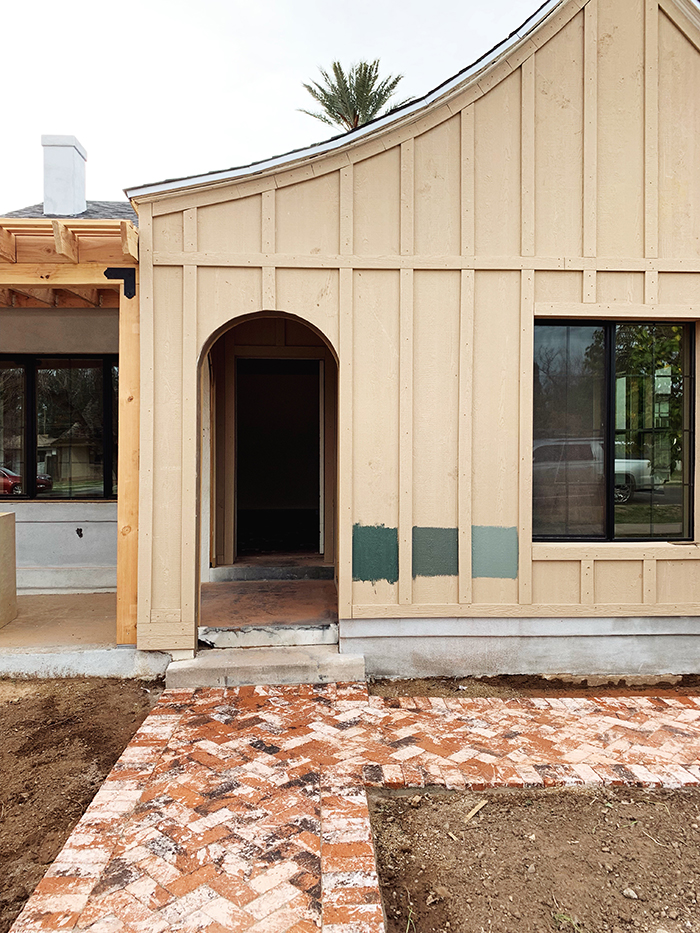
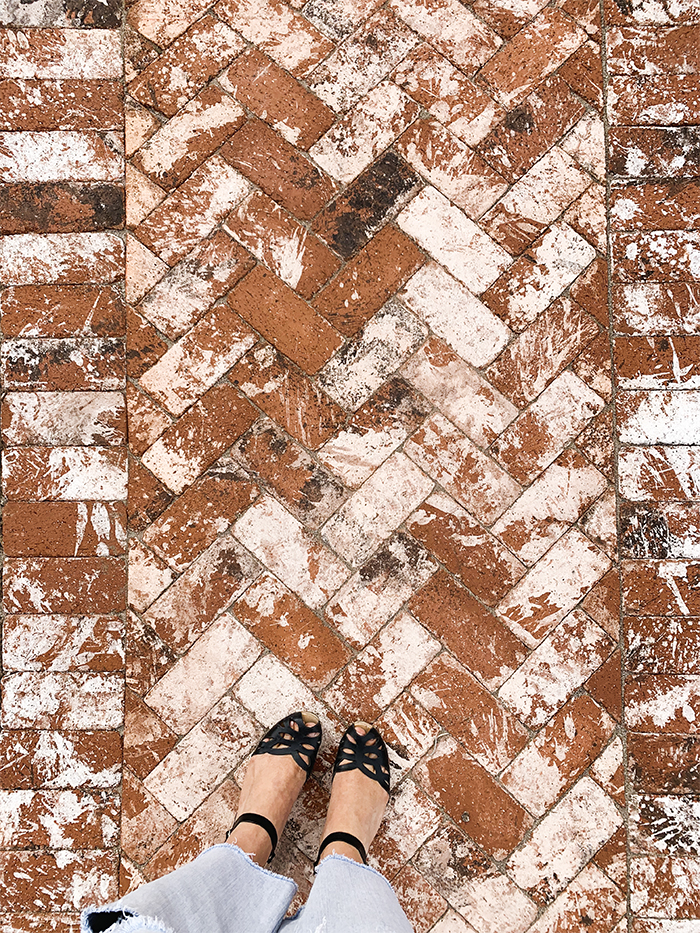
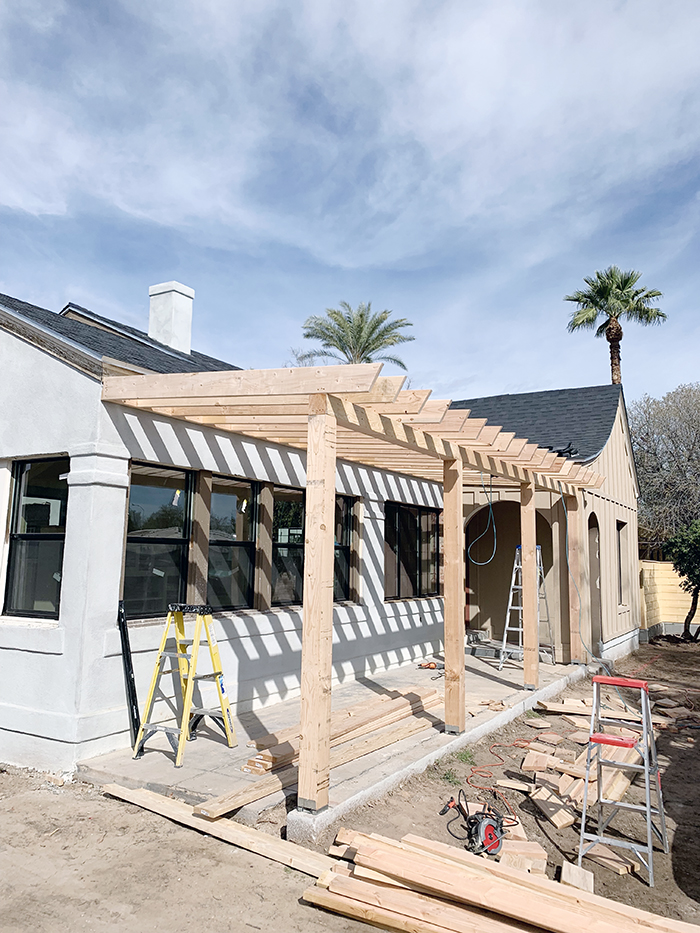
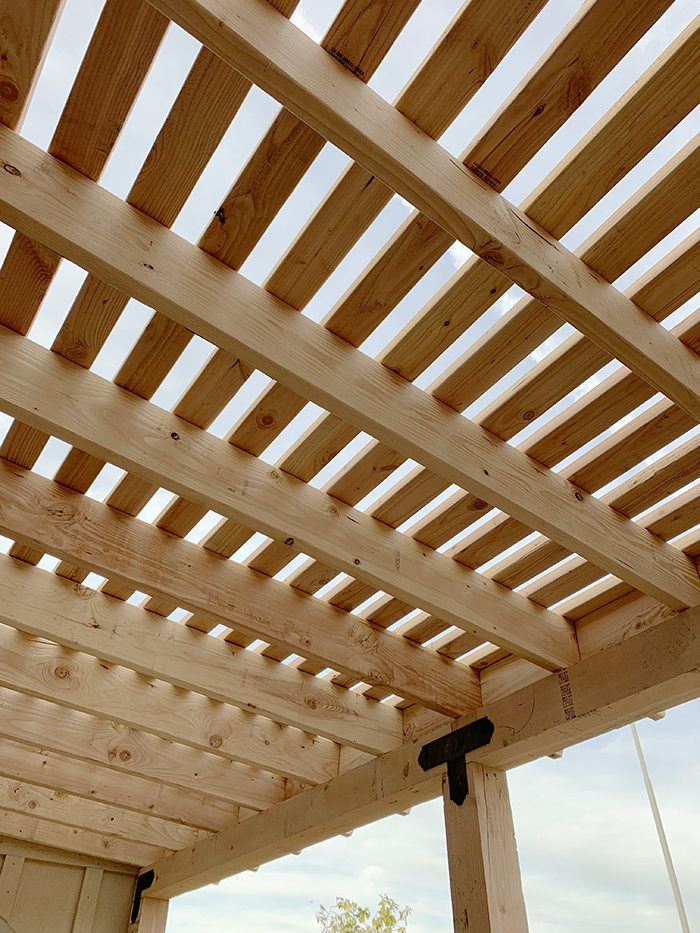
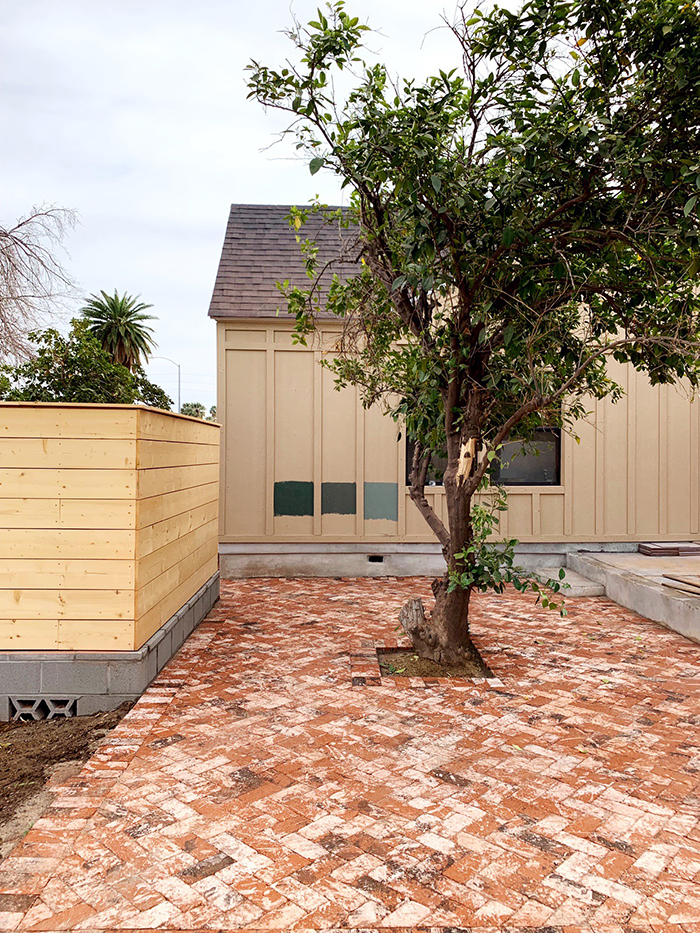
We’re getting there right?! I’m so excited about how everything is turning out! The reclaimed brick pavers are such a HUGE improvement on the old cracked and broken concrete pads! And those checkerboard tile floors are killing me! Here are a few close ups on the brand new pergola.
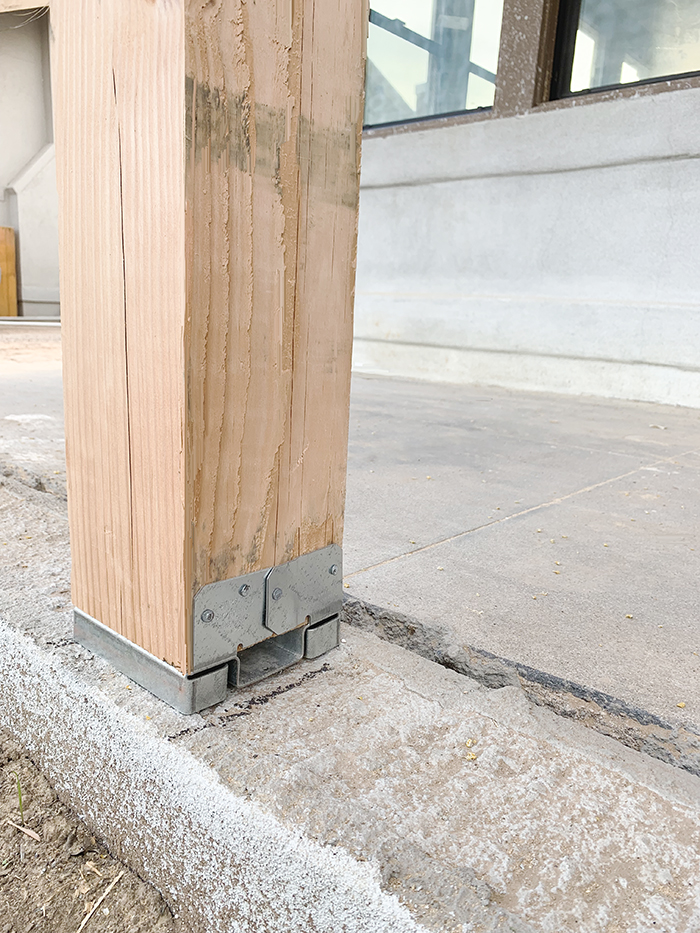
The key to building these porches was using these metal post bases to secure the 6×6 posts to the porch. The braces can be screwed to concrete, wood or tile!
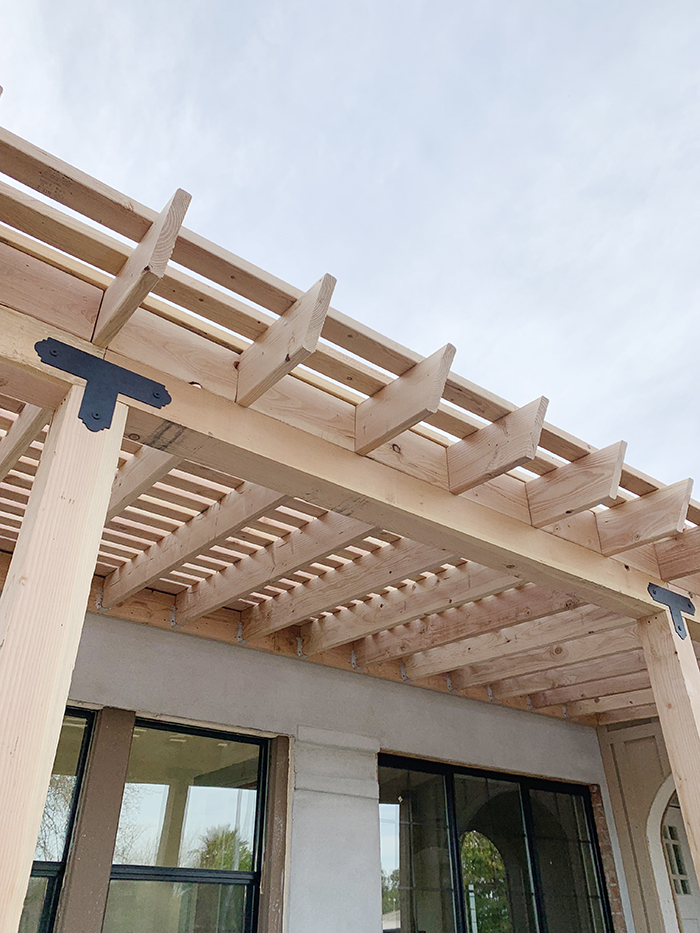
The general idea for building a porch pergola is you use 6×6 posts as the main base and 2×10’s are used as the cross beams. These can be miter cut on the ends to add some interesting angles. 2×4’s are the final layer on top. You can space these out however you want for more or less shade!
We’ll be using Thompson Stain and Sealer to help protect this wood! We’re planning to use the same stain and sealer on the planked fencing! Speaking of the fencing, I’m so glad all of you loved our design here as much as I do!
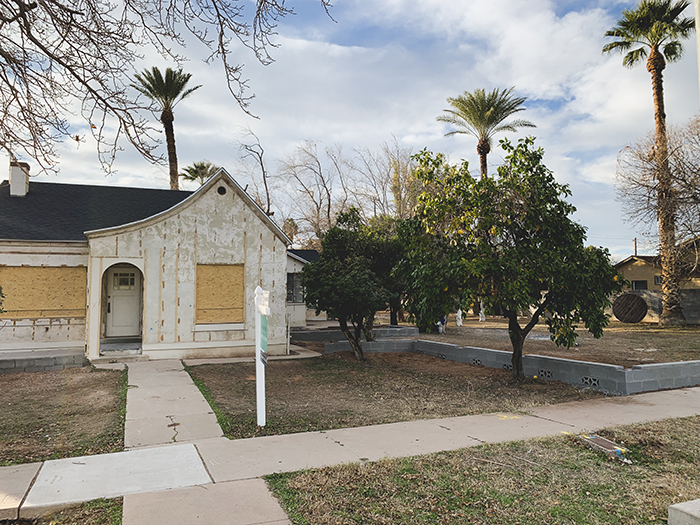
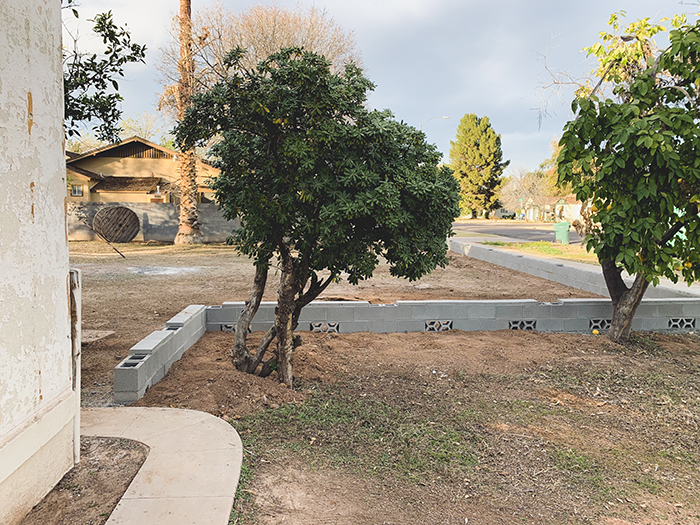
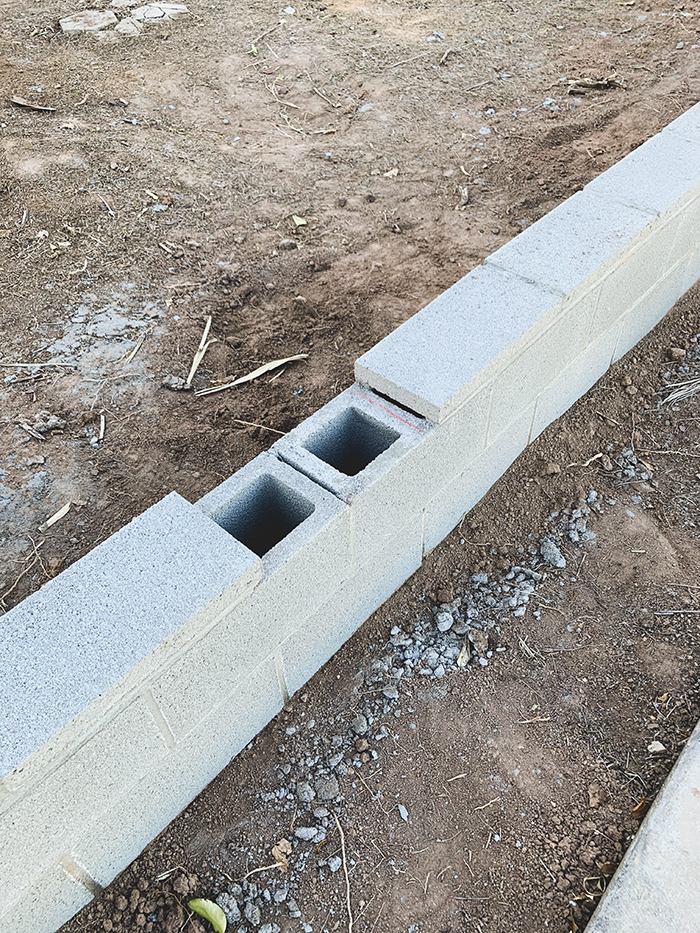
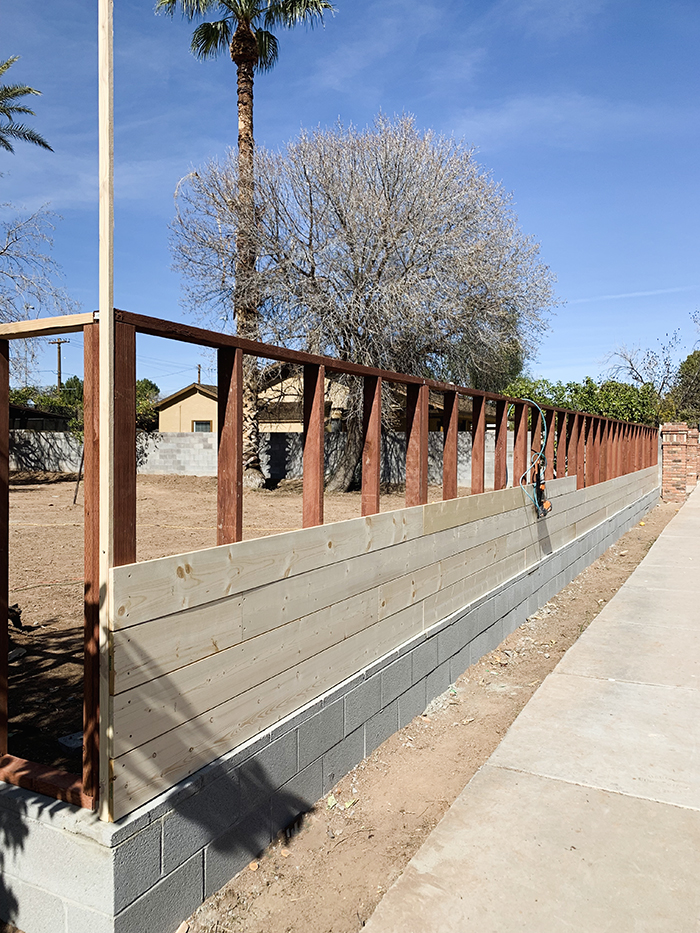
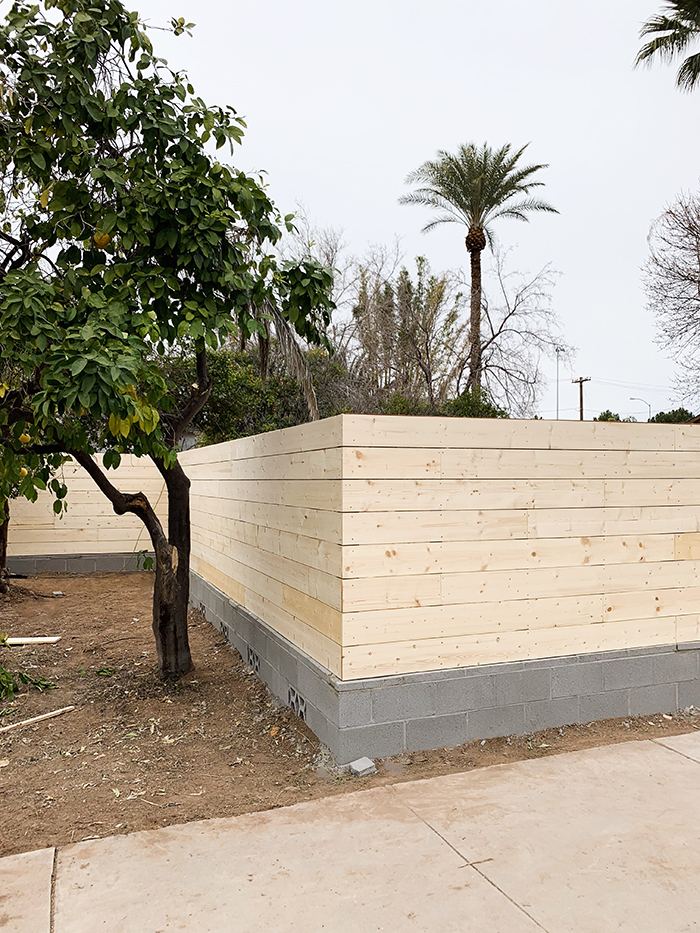
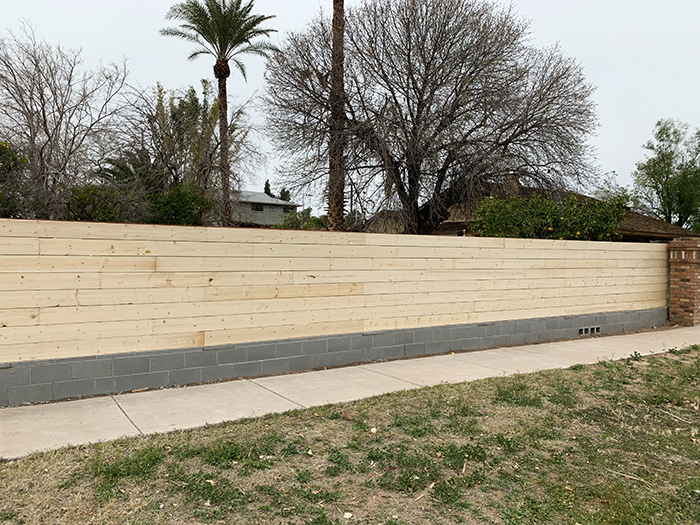
To build our fence, we first mapped everything out with two rows of cinder block. The perforated blocks are so the flood irrigation we get in the back yard can flow to the front yard, and the block in general is to keep the wood fence out of the irrigation water!
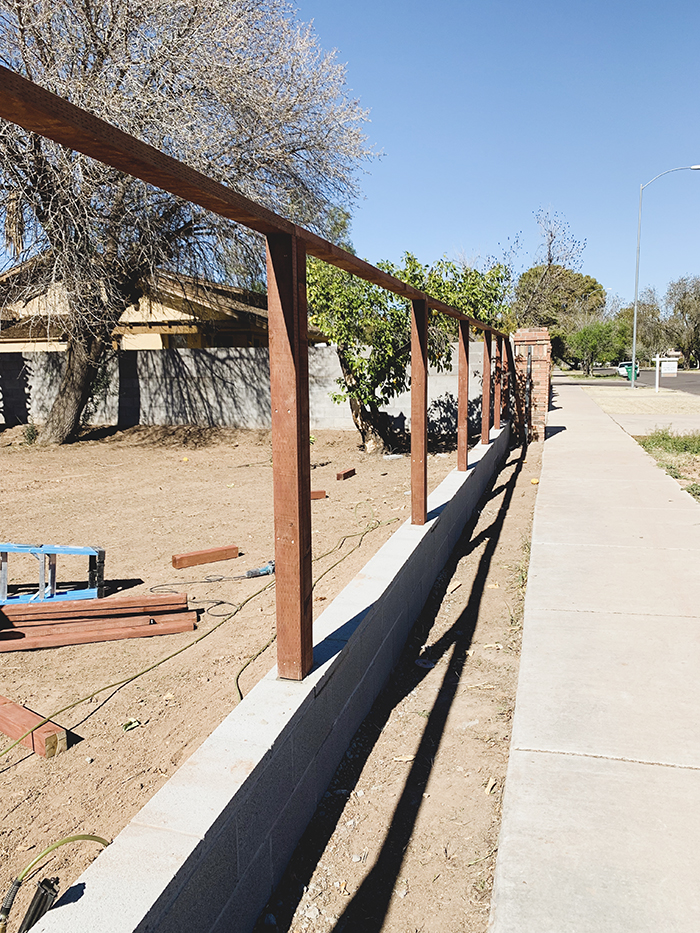
Every eight feet we left the top of the block open to receive 4×4 posts.
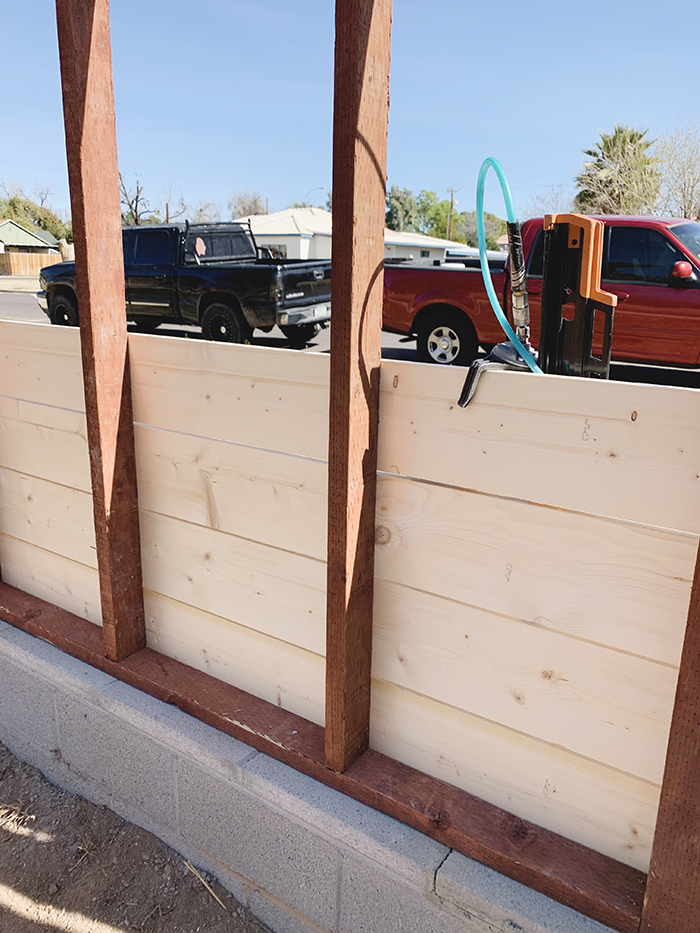
The contractor built a frame using 2x4s within the larger posts to give a good, sturdy structure to nail the 1×6 planks.
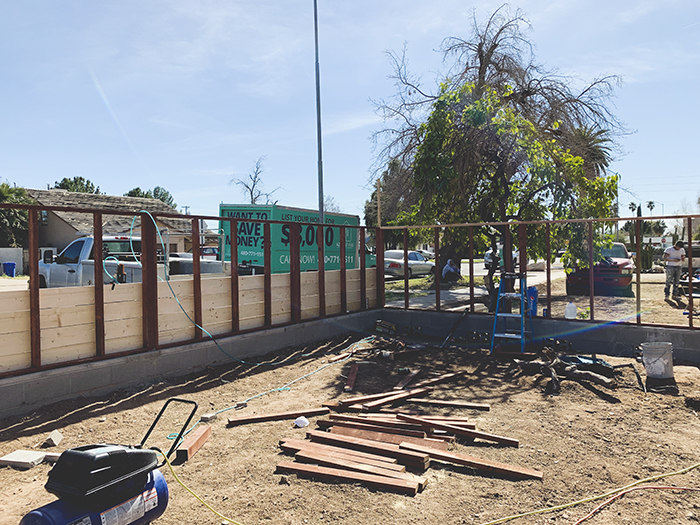
We left a 1/4″ seam between each plank and mitered the corners for a modern, clean look! I’m so excited to get this wood stained and put in some of our plantings!! I think it will be SO pretty with the green board and batten (if you look at the last photo you can see the final cut samples up on the siding)! Which of these colors are you most drawn to? Belmont Green, Woodland Lichen, or Retreat?
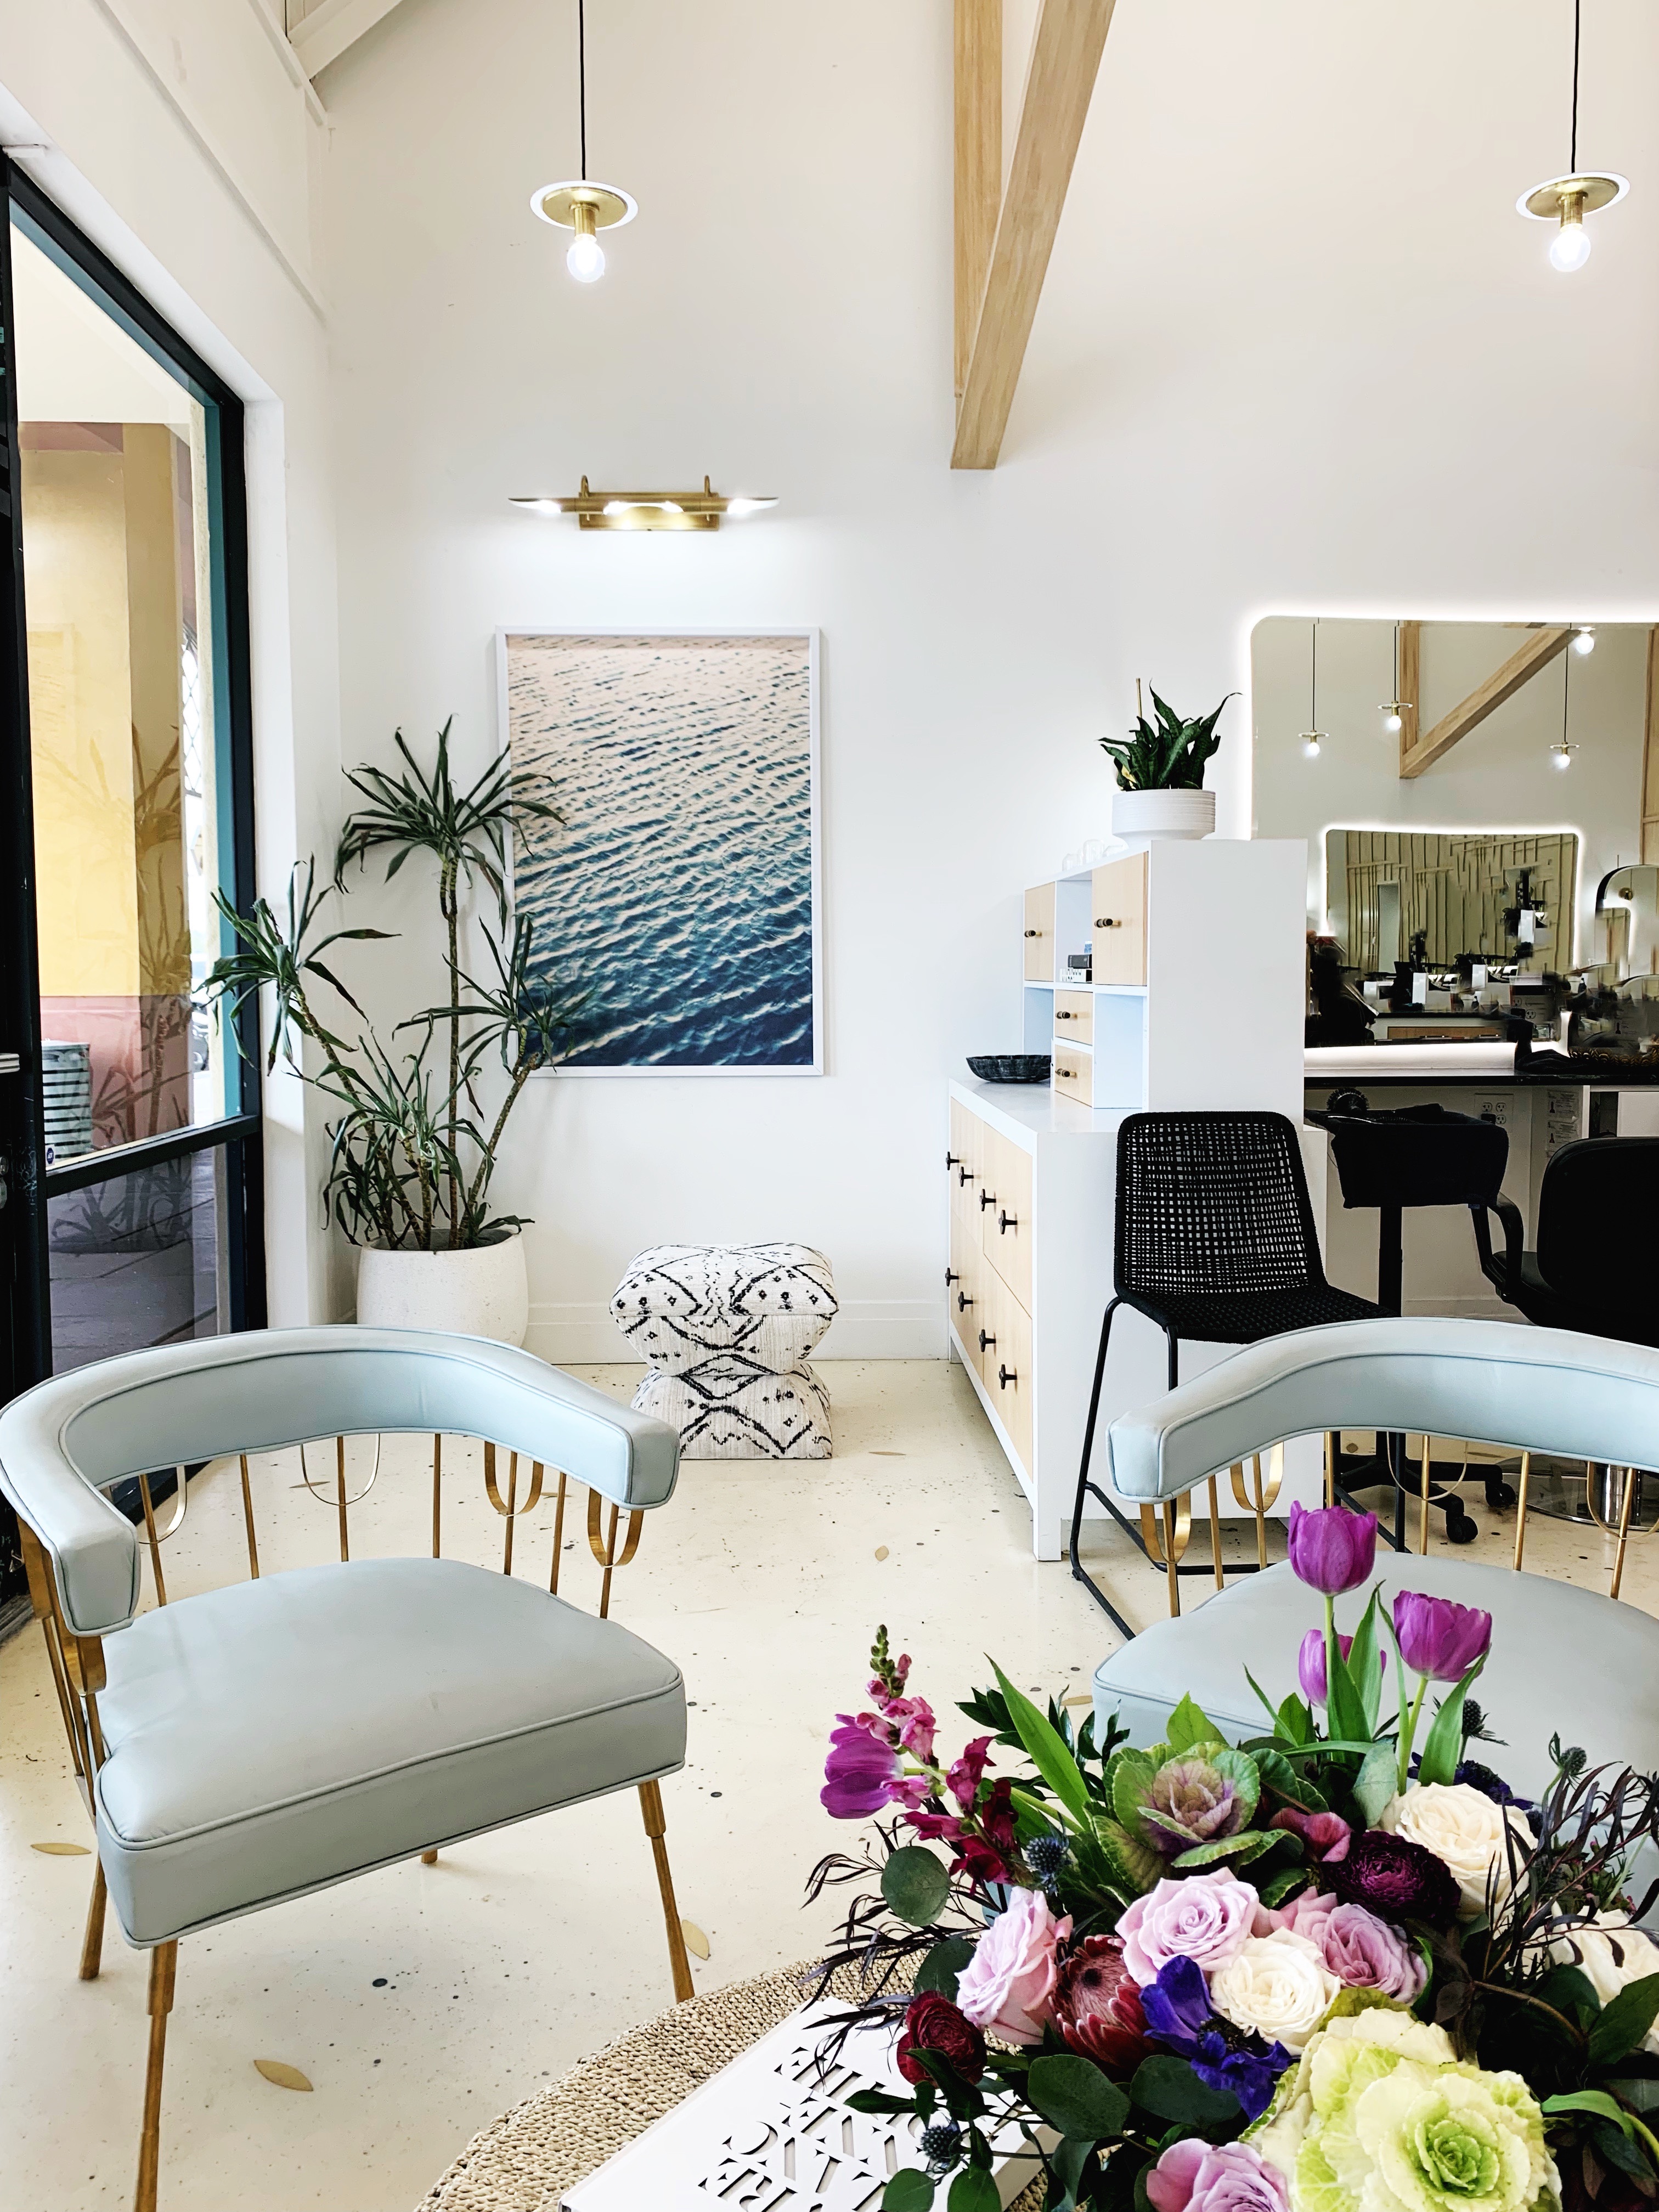
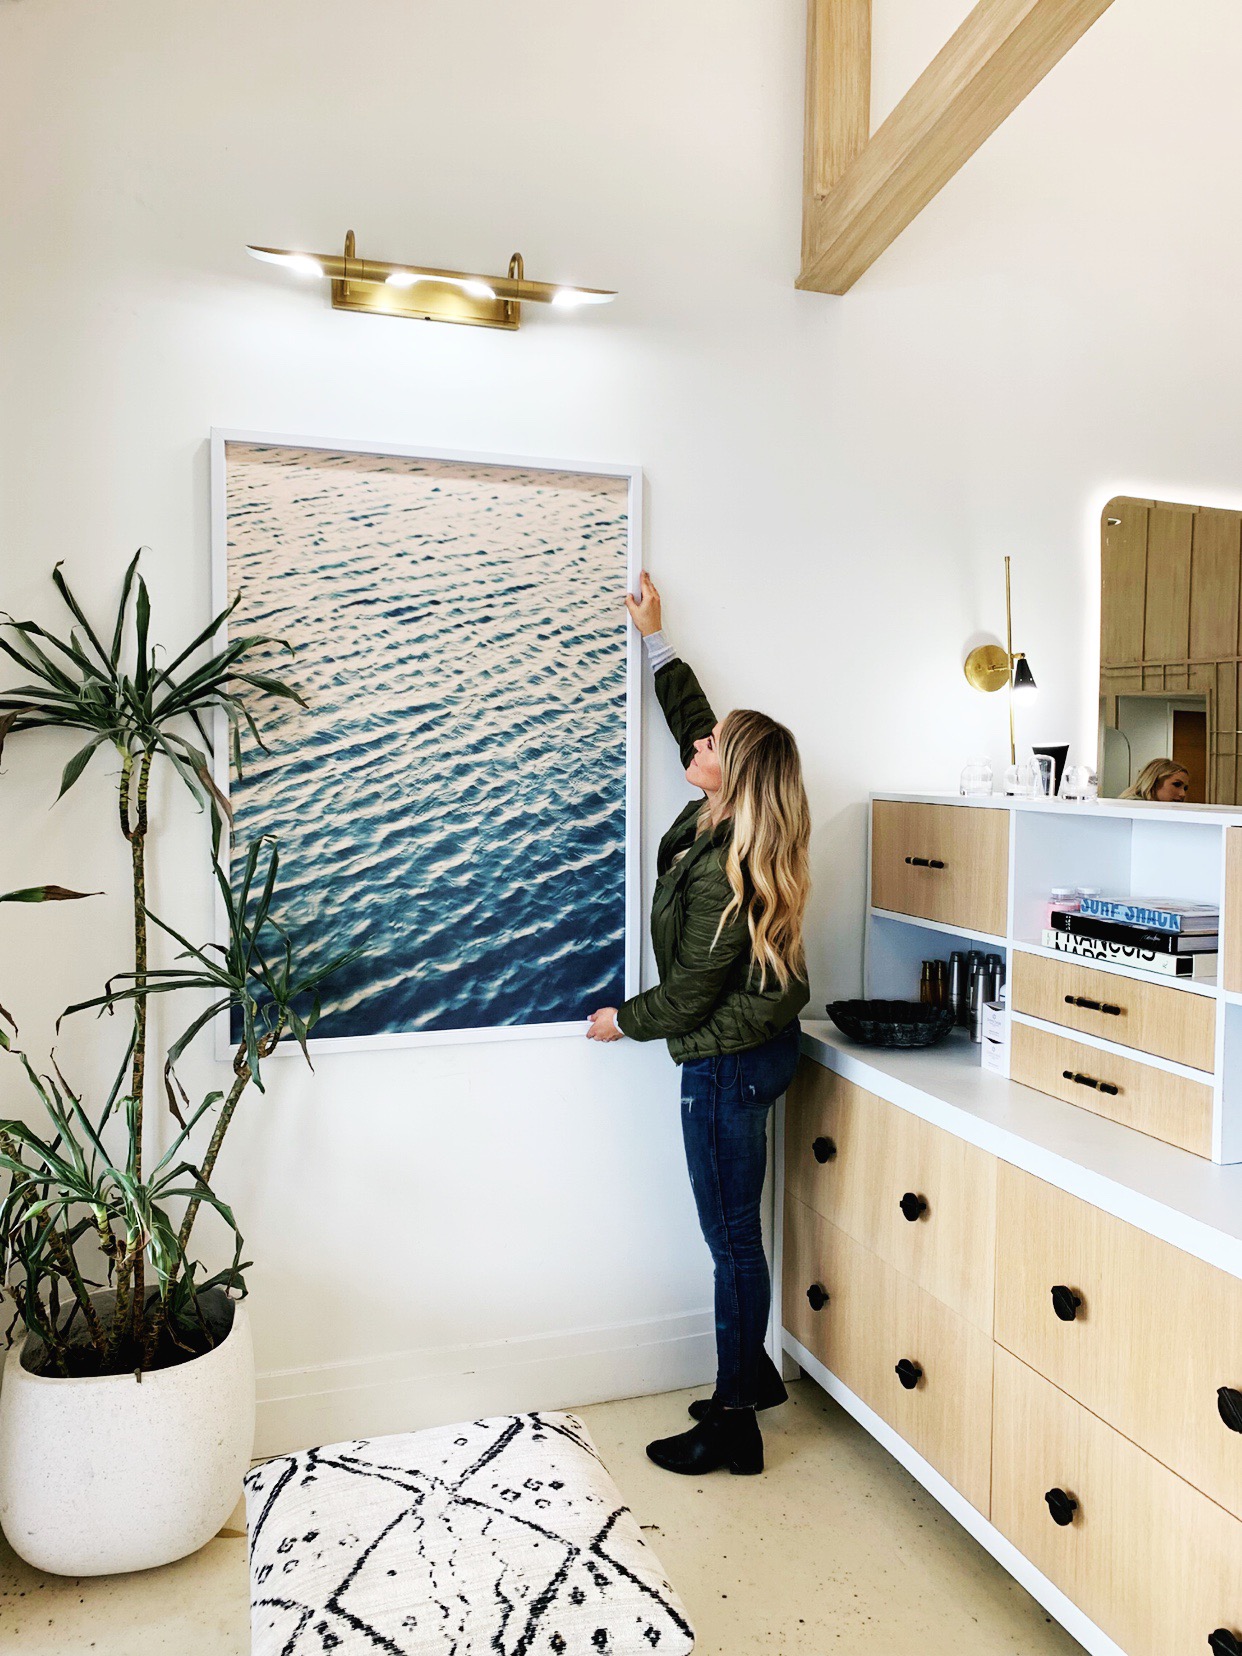
Last week I shared with you all on stories (which you can still see in my highlights!) how we framed and hung new art in my favorite salon here in Arizona, Habit Salon! My very talented designer friend, Christina Brian, did an AMAZING job designing this space and I was thrilled when she asked if…
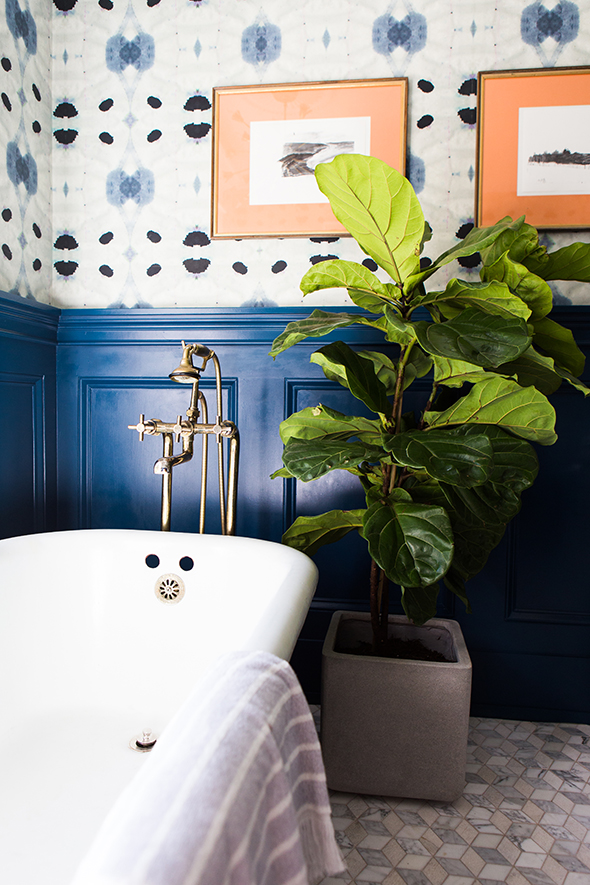
Last week I shared with you all on stories (which you can still see in my highlights!) how we framed and hung new art in my favorite salon here in Arizona, Habit Salon! My very talented designer friend, Christina Brian, did an AMAZING job designing this space and I was thrilled when she asked if we could help her hang some Juniper Print Shop art near the front of the salon.
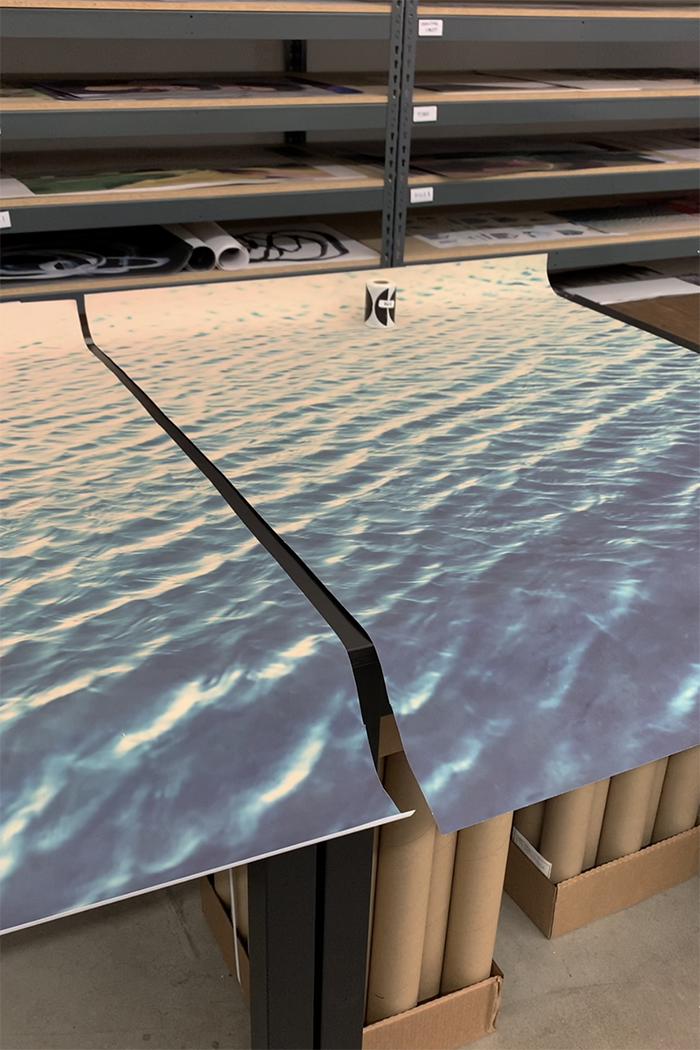
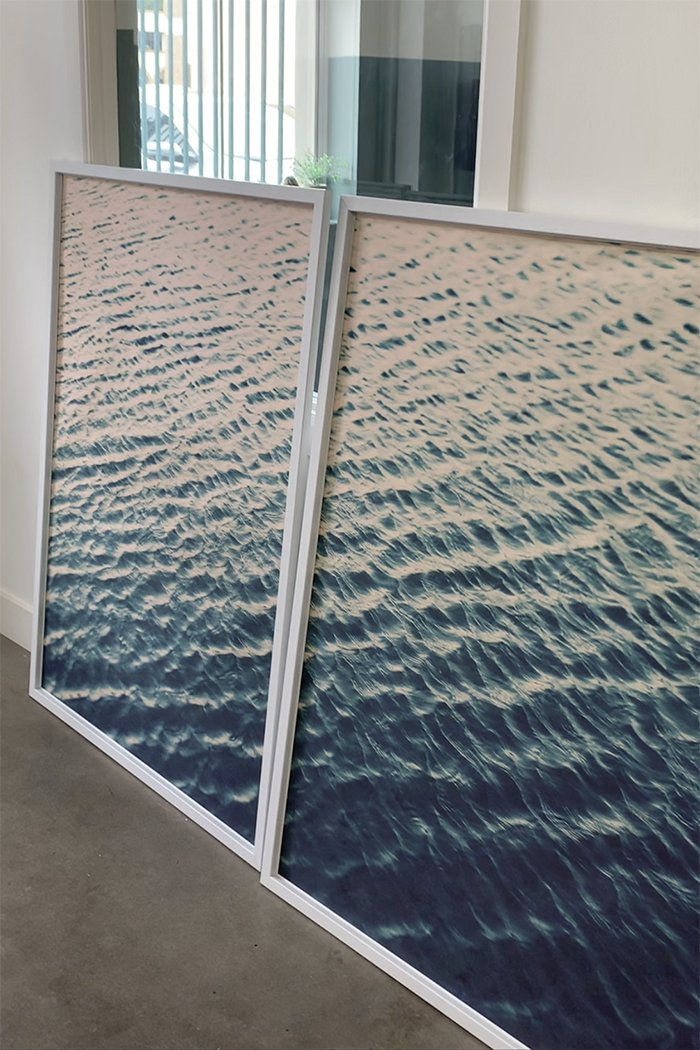
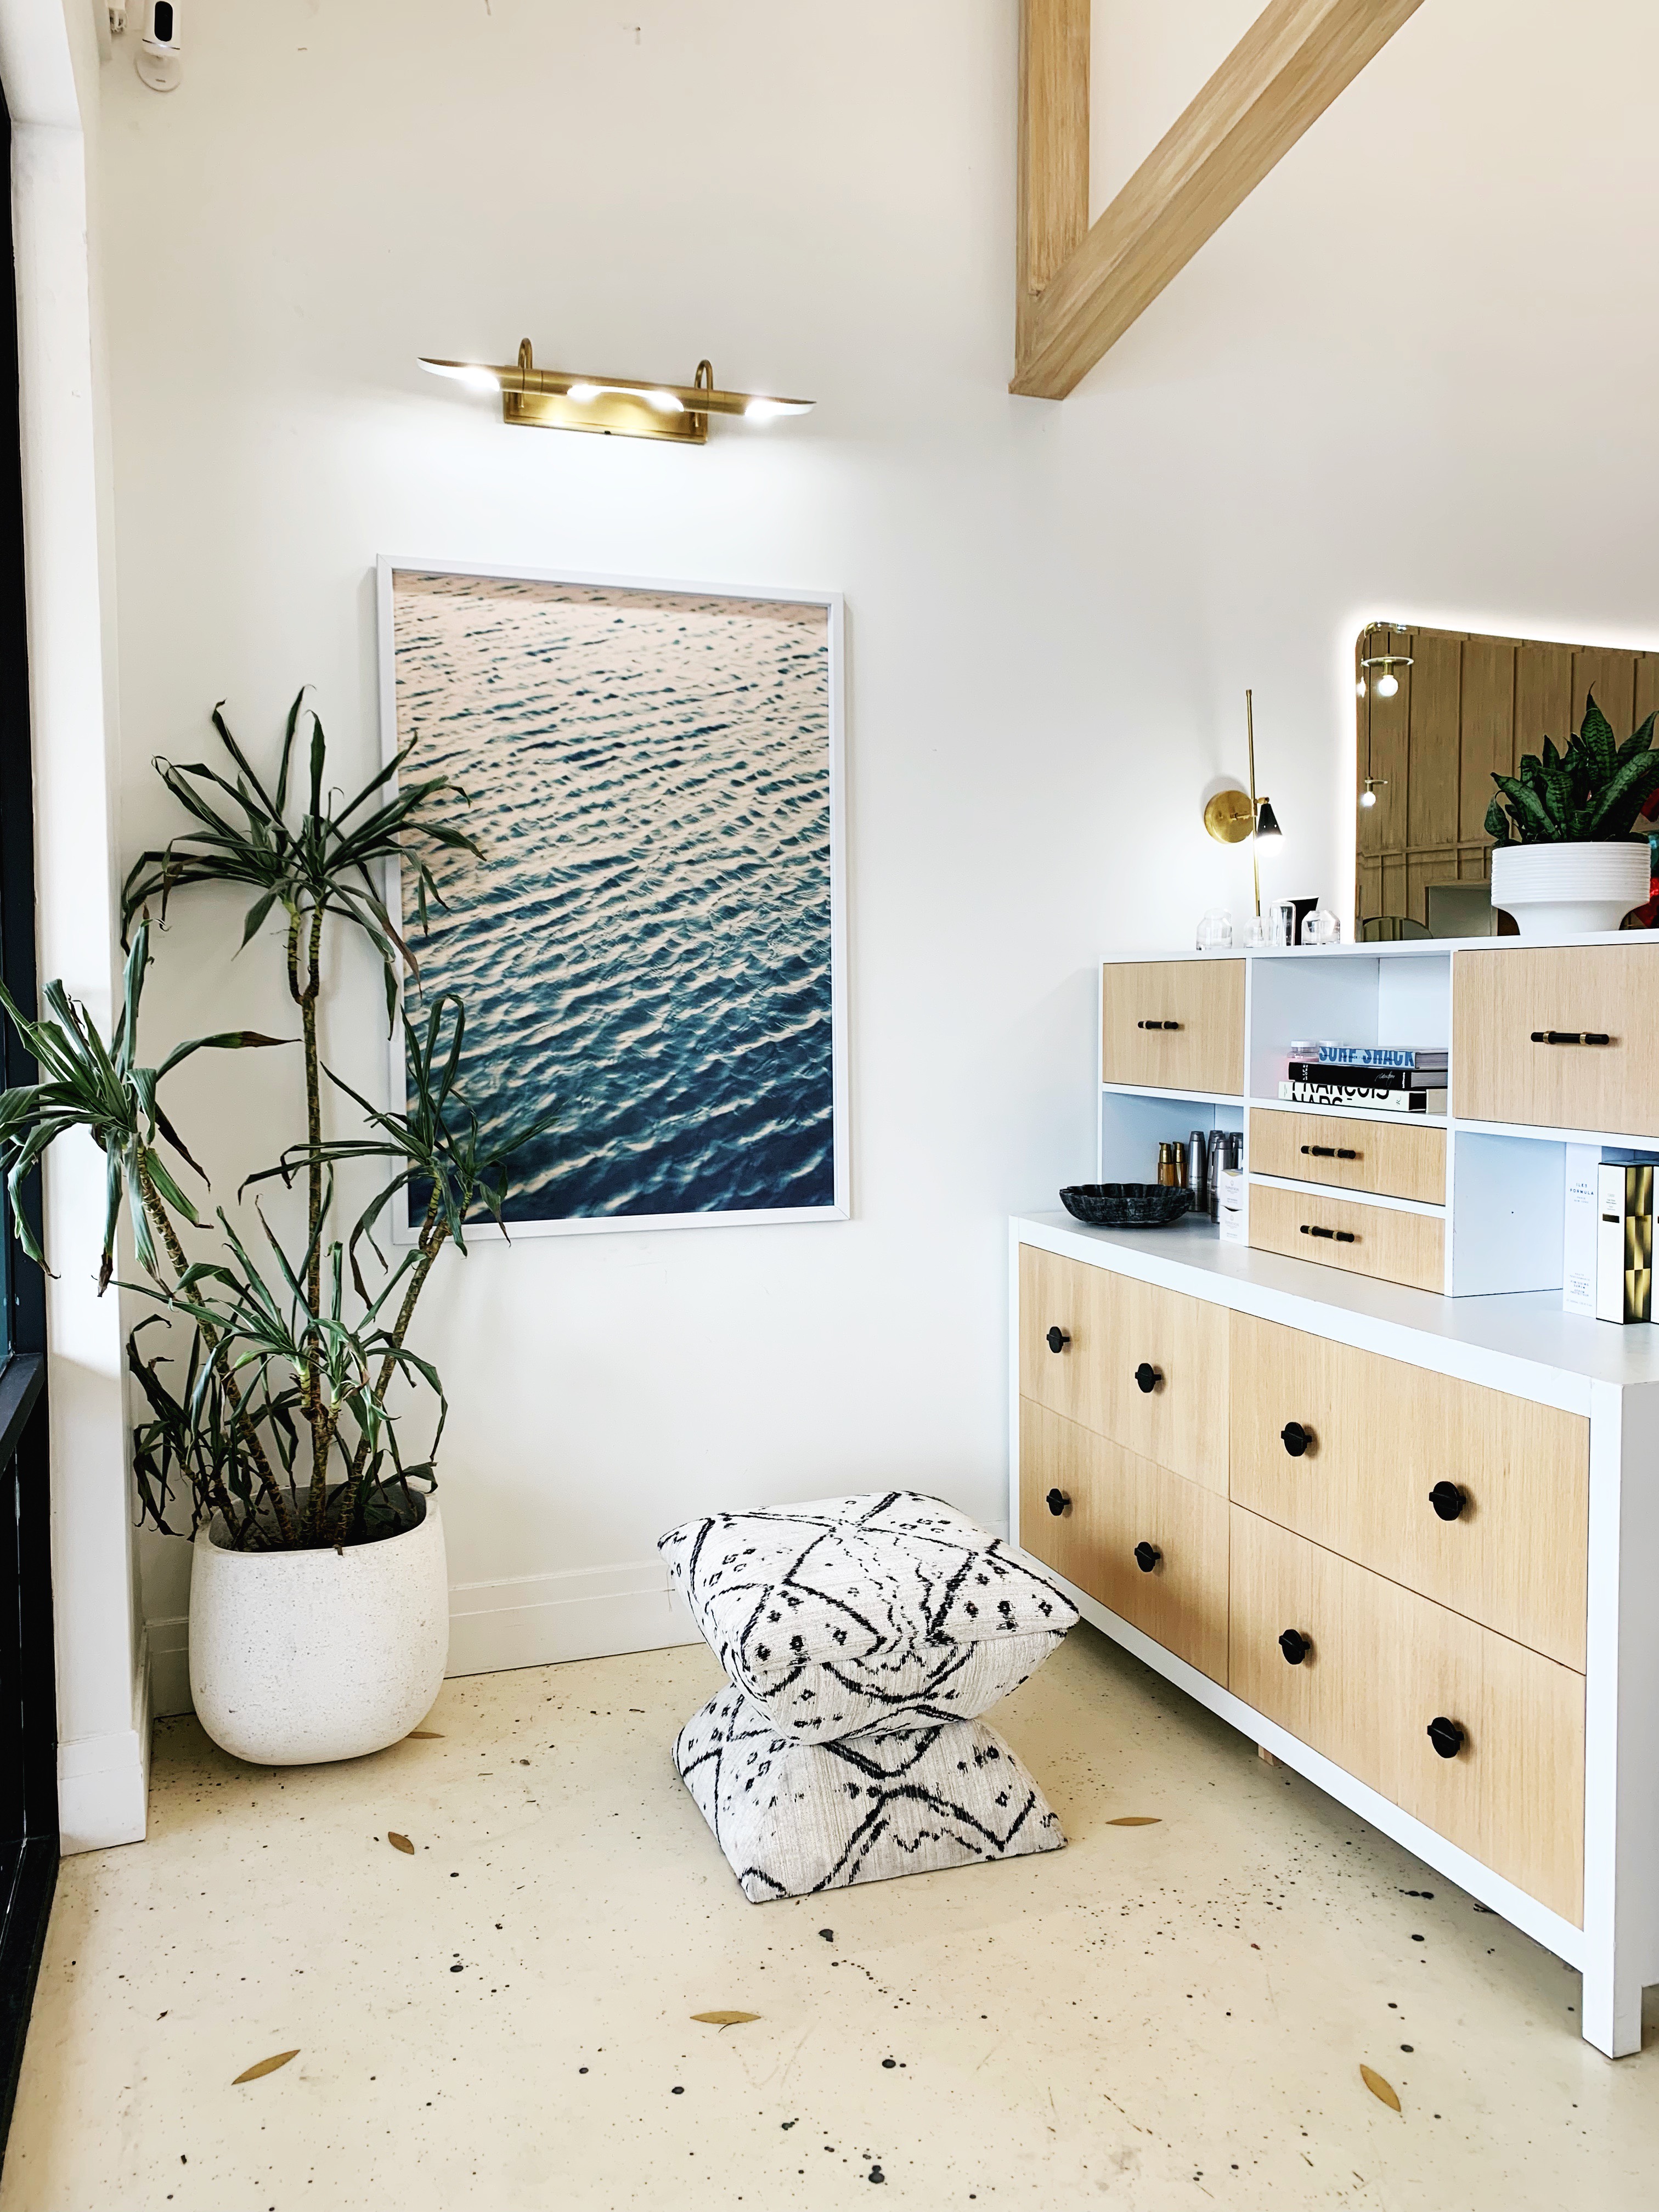
We saved a ton of money by cutting our WATER print in the 55×79″ size in half to make two 40×55″ prints! We hung one on each side of the salon and I love how it turned out!
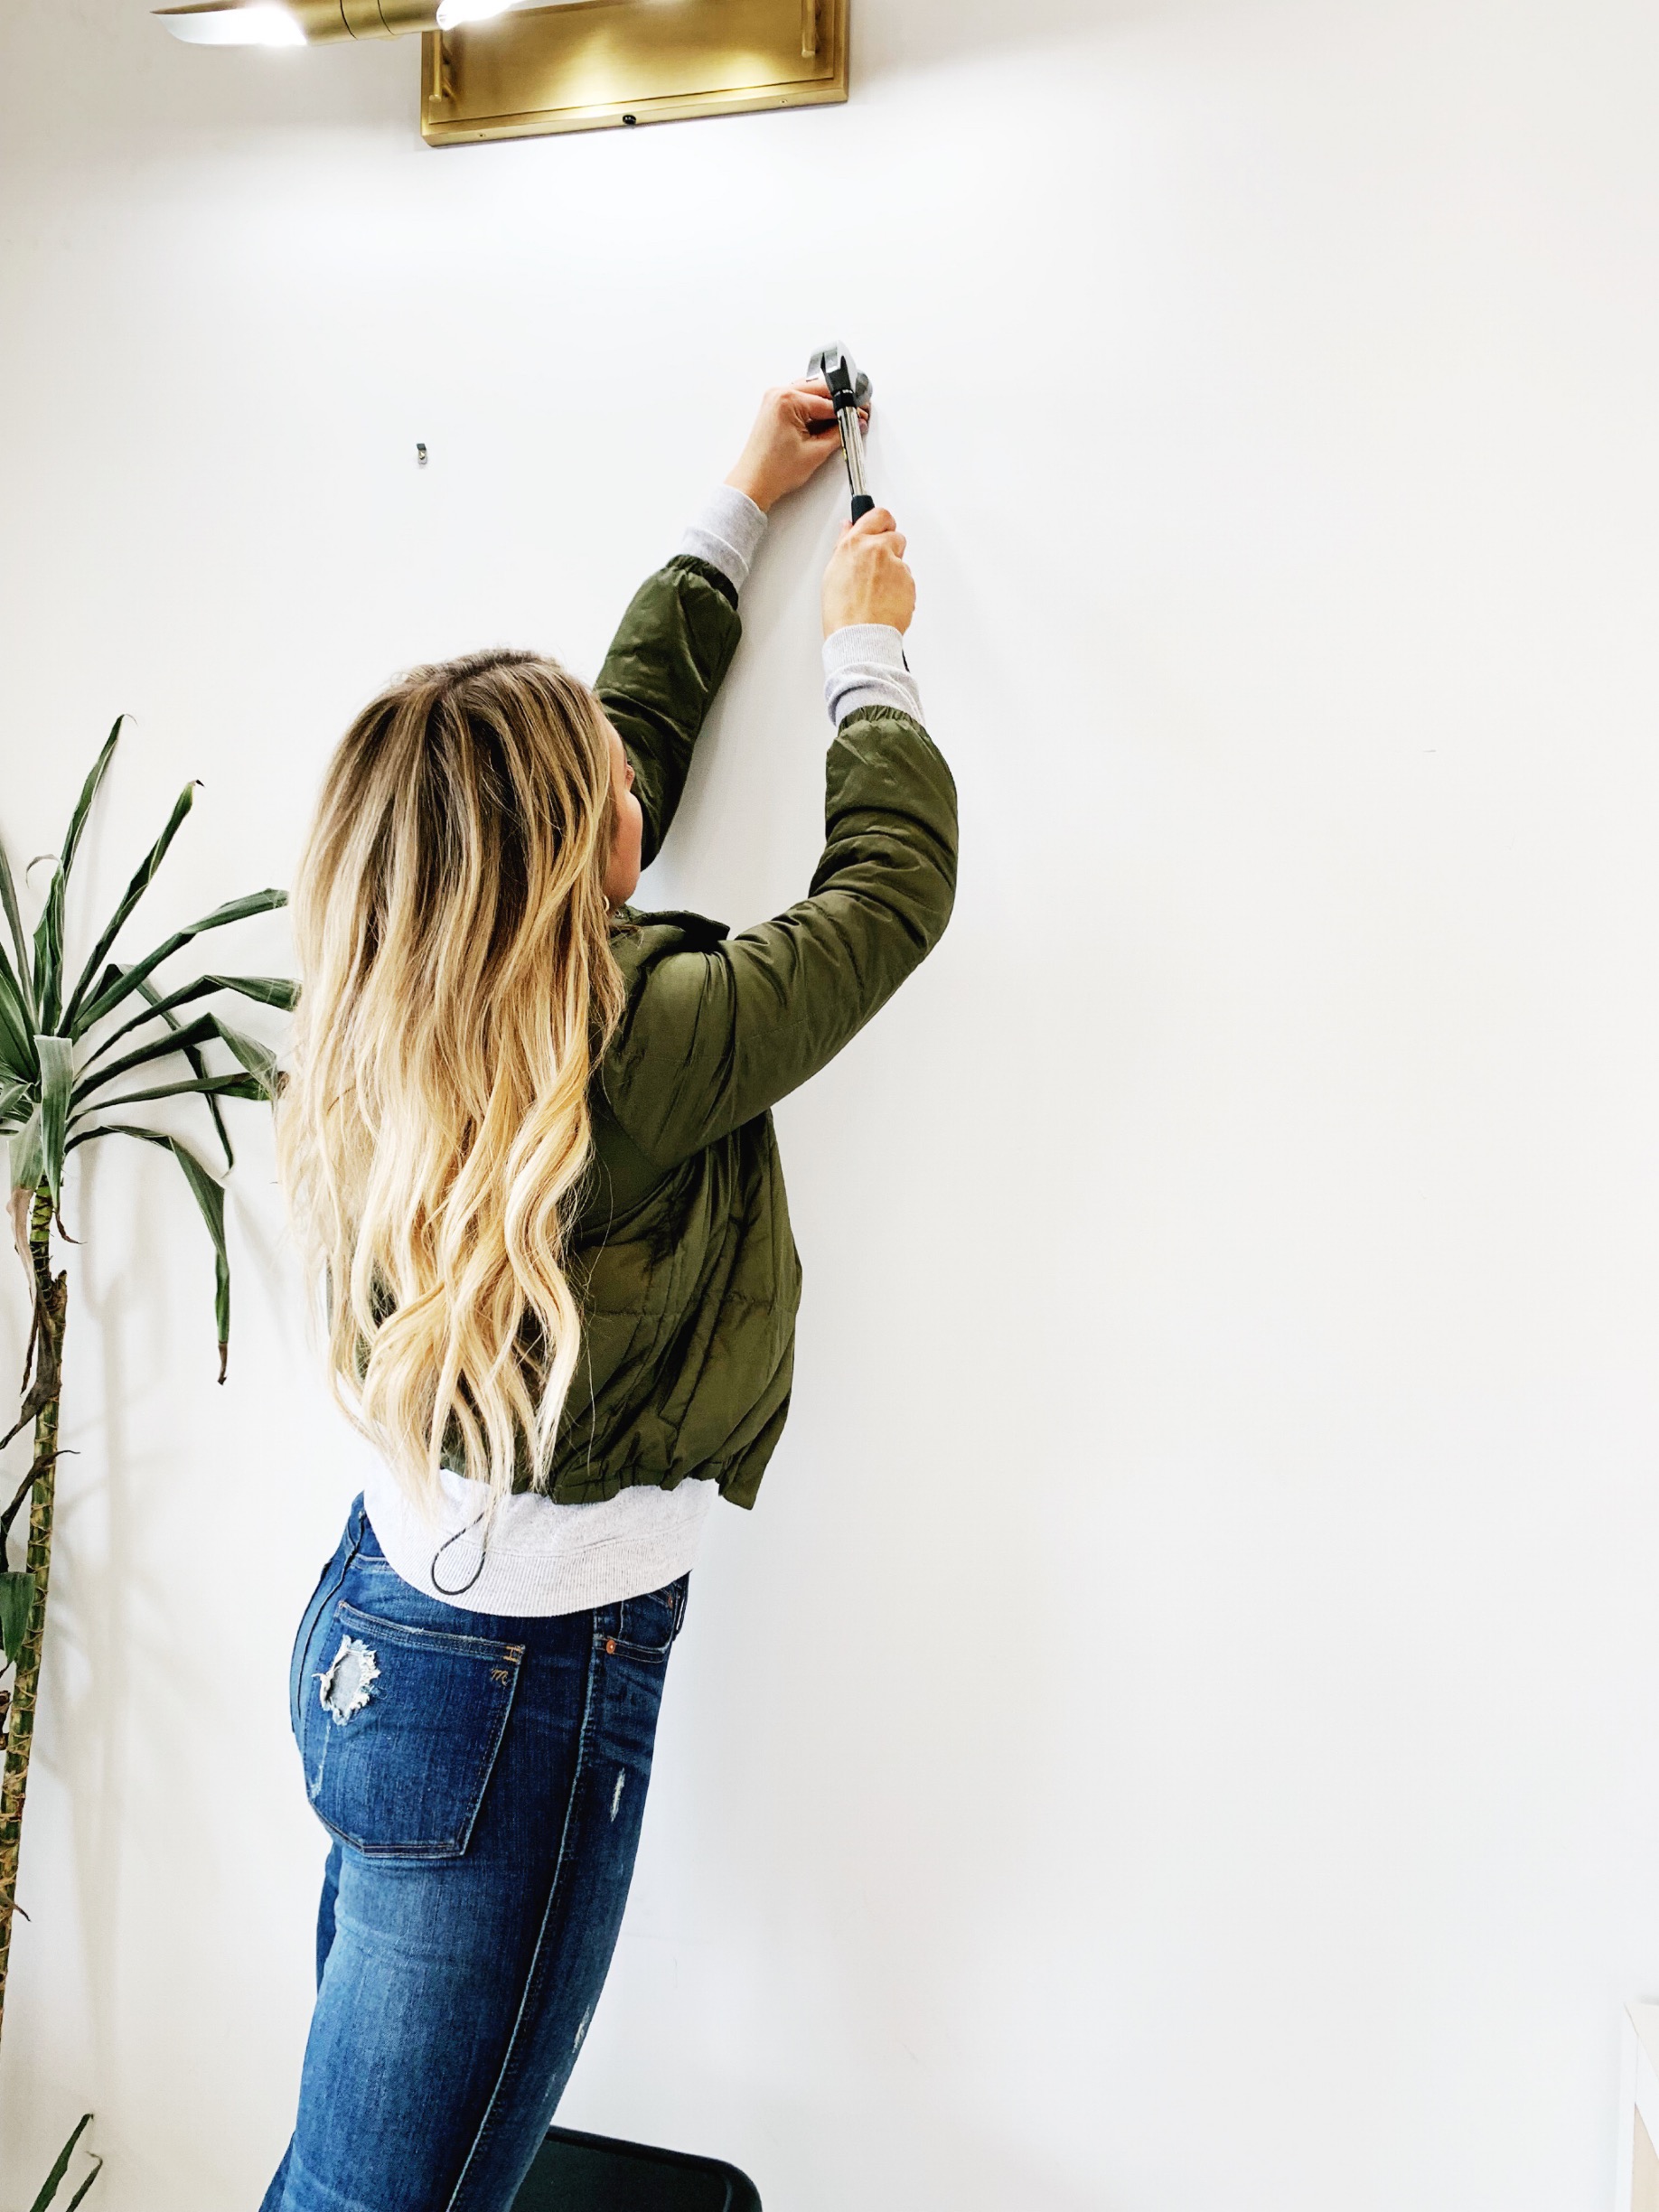
You can see the full tutorial on my Instagram Highlights called “Affordable Art” or you can check out the tutorial video we posted here that shows you step by step how to quickly and easily mount your Juniper prints in the IKEA Bjorksta frame. I love that for under $200 total you can have 80″ of framed art (or two 40×55″ pieces!)!
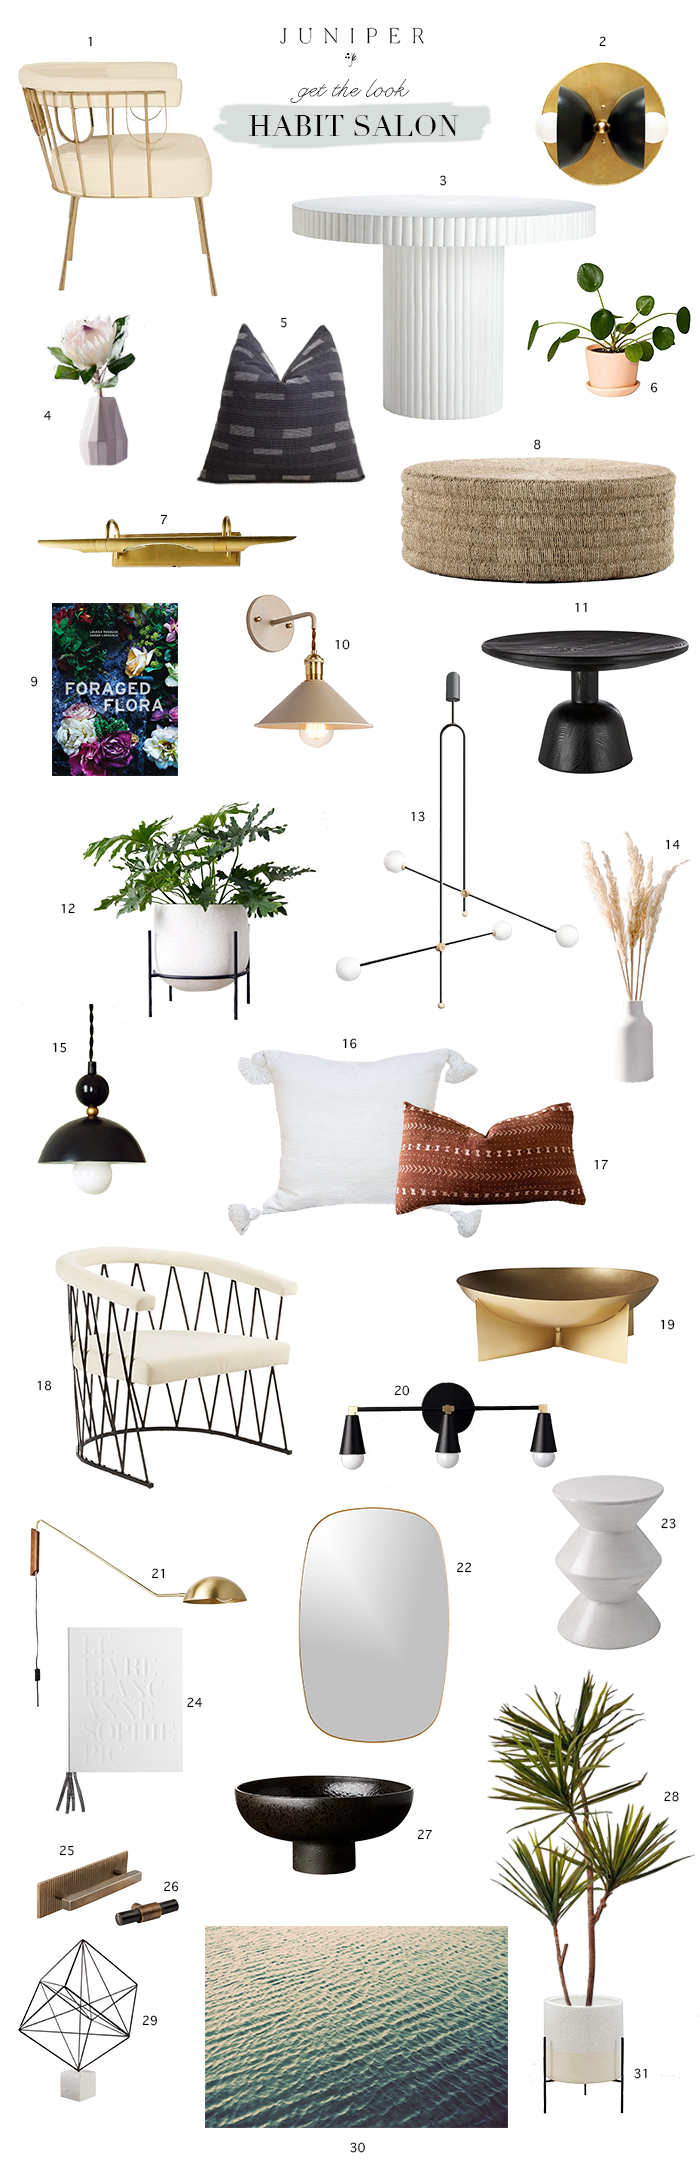
I know a lot of you are wondering where Christina bought a lot of her pieces here! Christina is the queen of custom, but I linked to a couple of her finds here and others that give a similar vibe! Didn’t she do an AMAZING JOB? I’m especially obsessed with the epoxy floors! Christina splattered the black paint drips and placed the brass slivers in the drying epoxy herself!


 1.
1. 


 1.
1. 


