Bedrooms

High Gloss Mag + Tia Zoldan

I went to the High Gloss Mag launch party last night and it was so fun to see some of my favorite blog friends. The premiere issue launched yesterday and I loved it. Of course Jamie’s house is unbelievably gorgeous and I loved the bachelorette pad Erin designed! It was also so fun to see…

I went to the High Gloss Mag launch party last night and it was so fun to see some of my favorite blog friends. The premiere issue launched yesterday and I loved it. Of course Jamie’s house is unbelievably gorgeous and I loved the bachelorette pad Erin designed!

It was also so fun to see Tia Zoldan’s house featured in this issue. Her home was a favorite among bloggers when it was featured in Cottage Living years ago. It was a treat to check out what Tia has kept over the years and what has changed. Shall we do a little comparison?

Tia’s old living room:

New living room:

Looks like pretty much everything is new in the living room. She might have reupholstered the chair in that amazing print. The arm looks the same. I like the furniture lay out in the newer version, with everything laid out on a 90 degree angle. Love the new art and the rug.

Old dining room:

New dining room:

Tia kept her farmhouse table and painted the armoire white. I miss those stripey end chairs!

Daughter’s old room:

Daughter’s new room:

I like both of these rooms for different reasons. It’s fun to see how this room has grown up with Tia’s daughter. The bed was painted white. The moulding was gilded. The curtains are more tailored, but the hardware is the same. I LOVE the suzani on the bed and the wall sconce.

Old kitchen:

New kitchen:

I love the new lighting and the new rug (though the old rug was really great too). I am head over heels for the chairs in the new version of the kitchen. And the herringbone patterned tile floors? So great. My very favorite change in here was probably the least expensive. That design genius, Tia, painted her back door a show-stopping blueish charcoal color.

It’s fun to see how a decorator’s tastes evolve, right? I think Tia’s home is lovely in all it’s phases.

**Also, did you know that Tia has a GREAT blog? She updates it often with images and products that inspire her. A must-read!**

Dining

Cards and Chairs

Two quick things: Firstly, Jordan rocks my world. She delivered a big ol’ stack of freshly pressed business cards to me at Alt and it was like Christmas, except Santa was a gorgeous and witty brunette in a cute floral dress. You can’t really tell in these photos, but the edges are a really bright…

Two quick things:

Firstly, Jordan rocks my world. She delivered a big ol’ stack of freshly pressed business cards to me at Alt and it was like Christmas, except Santa was a gorgeous and witty brunette in a cute floral dress.

You can’t really tell in these photos, but the edges are a really bright persimmon red. I love them.

Jordan’s letterpress business will be going strong while she lives abroad this year. She’ll be doing the designs herself and her talented business partner, Alexis, will do the printing. I couldn’t be happier with the quality of my cards.

Also, I had help designing my card layout and my new logo (see the JK blind emboss behind my new business name?). My professional site is finally going to launch soon. I’ll post more about that later, but I have been so incredibly happy with my designer, Eileen. If you need help with your site, shoot her an email here.

Second item of business:

Craigslist has been so good to me the past few weeks. Check out one of the pairs of chairs I got for almost nothing recently.

PS Want to be the happiest person for an hour or two? Type the word “pair” in your craigslist search box (either the furniture or antiques section) and all kinds of goodness shows up. It’s true. Everything is better in pairs.

These are going to be our host chairs for the DR table. They need some work, for sure. But a little paint and fabric will go a long way.

I’m thinking white frames and something in a bold but small-scale pattern for the fabric. Or maybe like acid yellow paint on the frames and solid black Sunbrella for the fabric? Maybe still a fun pattern on the chair backs…

Art

Colorful Matting

I love using colorful matting with artwork. It’s an easy change – you could obviously get new mat board cut, but consider painting out your white mat (I’ve had great success with those $1 bottles of craft paint), or maybe investing in a $30 mat cutter to experiment on your own. Also, I see vintage…

I love using colorful matting with artwork. It’s an easy change – you could obviously get new mat board cut, but consider painting out your white mat (I’ve had great success with those $1 bottles of craft paint), or maybe investing in a $30 mat cutter to experiment on your own. Also, I see vintage and antique artwork with colorful mats at flea markets all the time. Here’s a piece my client and I found at a flea market in Pennsylvania (or was it NJ, Sheila?).

One of my favorite colors – that emerald green! I think it’s so pretty with the black and gold accents.

I have a big art wall in my dining room. To mix it up a little I’ve been adding colorful mats to the group. Most of the frames have cream or white mats still, but I’d like to have four or five frames with colorful matting eventually.

I bought this piece at Housing Works for $10:

These pretty pink pictures were spotted at Alt in the ladies room at the Grand America.

Another pretty emerald green mat at a gallery near my house:

Furniture

Daybed with a Pop-Up Trundle

Remember this layout? Well, things have changed a lot, like they always do. In the office area, which is the bottom left room, we decided to have a long and narrow desk run the length of the windows so that we could put a murphy bed or a trundle bed where my huge partners desk…

Remember this layout?

Well, things have changed a lot, like they always do. In the office area, which is the bottom left room, we decided to have a long and narrow desk run the length of the windows so that we could put a murphy bed or a trundle bed where my huge partners desk used to sit.

I’m coming to realize that part of living in a big city is hosting an almost constant stream of house guests! I actually really love hosting though, so I don’t mind at all. I just wish we had a real bed for them that’s not of the leaky Aero variety.

Here’s an updated layout:

Turns out a Murphy bed would barely fit in the office space when pulled down. It was going to be so tight that the expense would have been wasted, I think. So, we are going the ‘daybed with a pop-up trundle’ route. Not my first choice, but after thinking about it for a few days, I’m sold on the idea. I’ve got two options right now, and I think I could make either one work great with a little elbow grease and some DIY spirit.

Option 1 is a curvy number, that could almost look Swedish. It reminds me a bit of the uber expensive Marston trundle bed from Restoration Hardware.

I’d paint it and do a cool mattress cover and skirt.

OR! I can get a simple pop up trundle frame and make upholstered sides to get this sort of look:


Armonia Decor, courtesy of the Glam Lamb

What’s your vote? Painted Swedish style or upholstered with a contrasting welt?

Blue

Easy Curtains Out of Sheets

Drapes can be really, really pricey. One of my favorite tricks it to use a king-sized flat sheet, cut in half to make two panels. Remember these sheets from Carlton Varney’s HSN line? They are sold out now (*UPDATE: I guess there are some sheets on eBay?), but check out what my girl Pam did…

Drapes can be really, really pricey. One of my favorite tricks it to use a king-sized flat sheet, cut in half to make two panels.

Remember these sheets from Carlton Varney’s HSN line?

They are sold out now (*UPDATE: I guess there are some sheets on eBay?), but check out what my girl Pam did with a king-sized set!

It’s the easiest project, really, all you do it cut a flat sheet in half and then use iron-on binding tape or a sewing machine to zip down the new edges you just made on the two panels.

Then you can cut holes in the the casing part of the flat sheet (the folded over part at the top) and thread the new panels in to your hardware.

Don’t forget to use the pillow cases too. Pam used hers to sew a changing pad cover.

Pam took things to a new level with her valances though (not to mention the pretty blue trim!). Love the way that turned out. Pam, we want a tutorial on the valences!! (seriously, let me know if you do a tutorial and I’ll update this post). ** TUTORIAL POSTED HERE**

Here are some fun sheet sets that would make for great curtain panels:

Horizontal gray stripes from West Elm.

Actually, all the new sheets at West Elm

This plaid would be really cool actually, if mixed with girlier elements in the room.

Water colored polkadots! So great for a kids space, with lots of white and solids in the rest of the room.

If you have two windows to dress, it would be easier to justify the cost of getting this duvet cover to split up into four panels. I think the pattern would be so cool as drapery!

Also, if you’re looking for cute, but really inexpensive, try Better Homes and Gardens line for Walmart. I think the twin sheet sets are about $12. Here are a few of my favorite patterns:

Love this red

And the blue and green is an old favorite of mine. (have to go in store for these)

Check out all these sweet options at Macy’s! $20 per flat sheet (which would make a nice, full panel)…

How lovely is this plum pattern, available for $10 at Kmart? I am really tempted here.

I also love this blue and gray, for a more subtle print.

Some obvious pointers –

-Get the largest sheets possible. The more fabric the better. Or, buy twin sheets, for each panel, like we talked about above.
– This is not always the most economical route, but if you don’t know how to sew well, and you have found a sheet pattern you love, this is a great option I think.
– Stick with cotton! Jersey knit drapes won’t work. :)

Musings

On How to Grow Your Blog…

Alt Summit was amazing. I can say with 100% honesty, it is so, SO worth the investment if you are interested in monetizing your blog or if you just want to be inspired to be a better blogger. Really – for the job opportunities alone. There was major networking happening all over. Plus! It was…

Alt Summit was amazing. I can say with 100% honesty, it is so, SO worth the investment if you are interested in monetizing your blog or if you just want to be inspired to be a better blogger. Really – for the job opportunities alone. There was major networking happening all over.

Plus! It was SO fun to finally meet almost all of my blogging friends in real life. If you’re on the fence about going next January, shoot me an email and I’ll do my best to pressure you further!

All images courtesy of the Alt 2011 Flickr stream

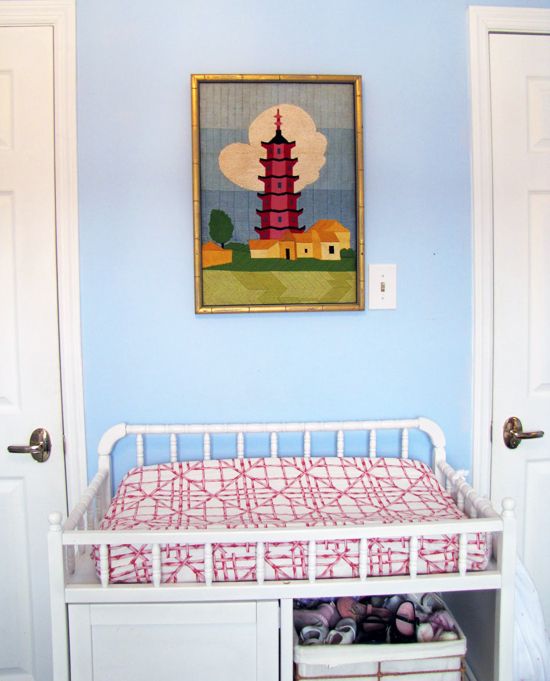
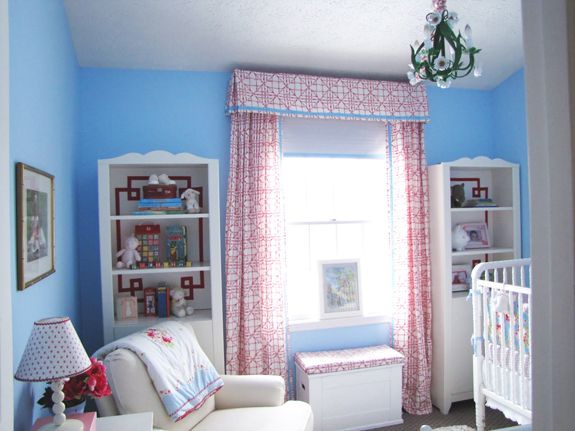
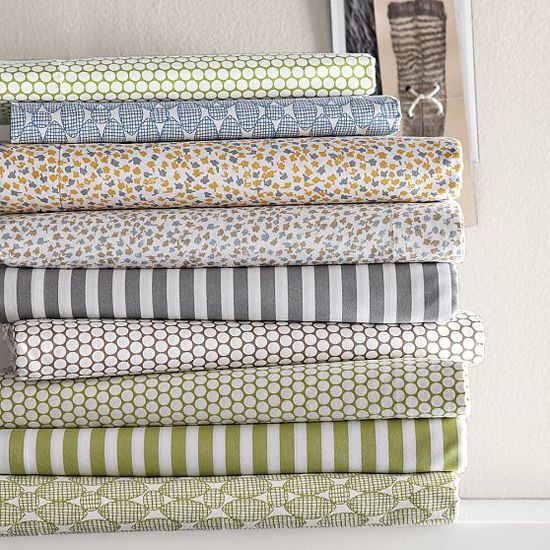
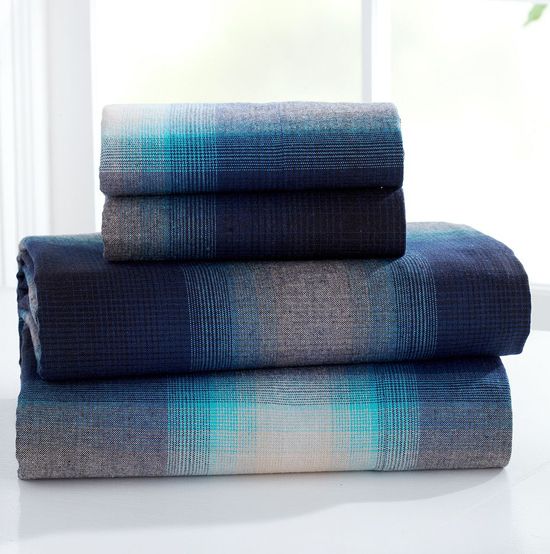
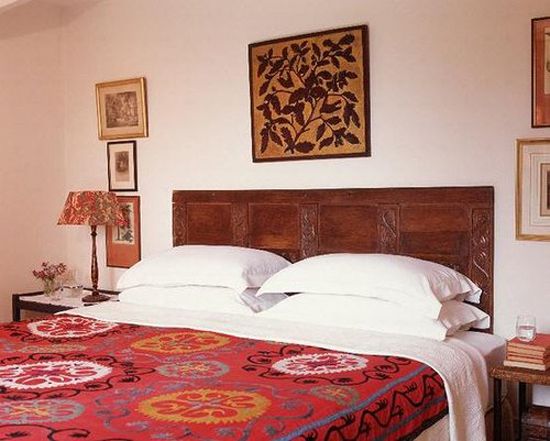
Lots of you asked for a recap on my presentation. I know not all of you readers are bloggers, and as I learned from my survey, only 2% of you have blogs that make you money. So, I apologize if the following is not very interesting. Come back tomorrow for a great post about using sheets as curtains! You’re in for a treat.

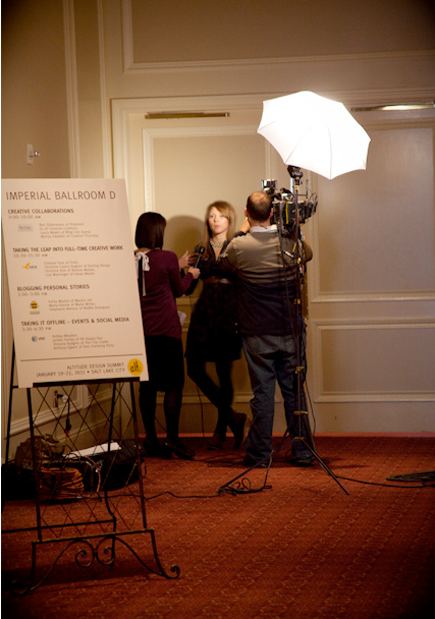
I spoke about building a blogging community on a panel with Meg from A Practical Wedding, Danielle from The Jealous Curator and Sarah from Babble. It was such a fun group of ladies. We all have very different blog communities and goals, so it was cool to learn from each other and to be able to speak from unique vantage points.


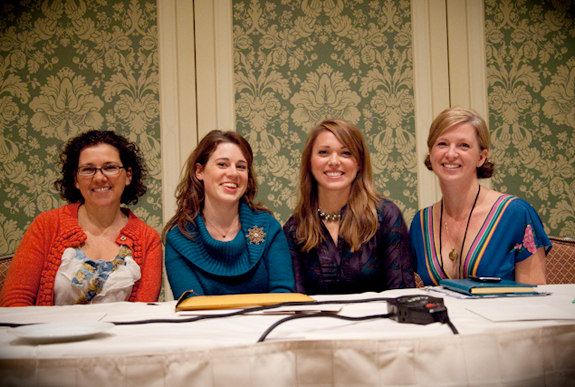
Sarah, Meg, me, and Danielle

It would take forever to write out everything I talked about in my presentation, but here’s an outline (still very long) of what I discussed for building traffic or developing a deeper more meaningful community on your blog. Kindly note that I do not consider myself an expert on building a blogging community. I developed the following ideas from talking with other bloggers, reading your survey responses and also a bit from my own adventures in blogging, which started in late 2007.

1. Preliminary idea: Set goals and maintain the right prospective. What is the end goal for writing a blog? The most traffic possible? A book deal? New friendships? New clients? Build your blog and develop your posts with your end goal in mind. Reevaluate often. “Am I getting closer to or further away from my goal?”

2. Part 1: Capture new readers

a) Most of you found my blog through a blog roll! So great! Let’s all share the blog love and keep up blog rolls of our own. If you are intimidated by the sheer number of people who want to be on your blog roll, consider having two – a favorites and a rotating (monthly or quarterly) list of new to you blogs.

b) Make your content buzzworthy so that other bloggers will want to share. What do I mean by buzzworthy?

i) Truly original content (try to post something completely yours at least once a week). Or at least put a really unique spin on the same photos that get recycled on blogs.

ii) Think about common problems (something someone would google to find out) and find solutions to those problems through your blog. “How to paint vintage furniture” or “How to sew pinch pleat drapes” or “How to shop at a flea market” etc.

iii) Start a conversation that other bloggers will want to continue. The two examples I used were Lauren’s Design Price Points post and Chelsea’s idea to stop complaining.

c) Get posted on a bigger blog. It’s hard to get a more golden ticket than that. A HUGE stream of traffic is your big chance. Submit never-before-seen projects to Design*Sponge or Apartment Therapy and see what happens. If they don’t bite, choose a big blog with your same aesthetic. Chances are, their readers will love your blog, too. Some words of wisdom though, from a gal who gets dozens of emails about this very thing every day:

i) If you’re using comments/tweets to get a blogger’s attention, make sure you have an interesting and unique sign-in name. And make your comments funny and sweet. Just be thoughtful.

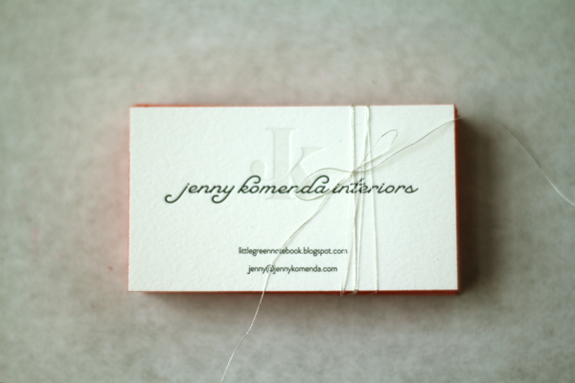
ii) Try to network offline. Go to blogger parties or conventions. Be friendly and pass out your business card!

iii) Speaking for myself, I would skip the urge to send an email to your favorite blogger just introducing yourself and your blog. Try to only email if you have something specific to share (like a post idea) or a question to ask. Use the blogger’s actual name, spelled correctly, and make the email as personal as possible. Don’t say:

“To whom it may concern,
Please post about my crocheted baby diaper covers available for sale in my etsy shop. I read your blog from start to finish so you owe me one. I can offer a give away for free shipping to one lucky shopper?
Let me know by noon. Thanks.”

Flattery (as long as it is sincere) gets you everywhere. I asked Joanna for a quote on this subject and she said the exact same thing! We also agreed that submissions should be more subtle. Don’t ask a blogger outright to post something.

Do say:

“Dear Jenny,
I love your blog. I open up LGN first thing in the morning every day. And I cried when I read the post about Evie’s birth! What a touching story.
I just wanted to share a project with you that I recently finished. I thought it would be right up your alley since I know how much you love ikat. Here’s a link to my Flickr stream.
Thanks for all the inspiration!
Love,
Kate.”

Nice, right? That would probably be my favorite email of the day! Remember that you catch more flies with honey…


Interviewing with a local SLC news channel, we talked a little about my new entry.

d) Consider guest posting on a complimentary blog (like, maybe I would post a flower arranging tutorial on a wedding blog). You’re capturing like-minded readers.

e) Keep the new readers on your site for a long first stay. Try to link back to old posts often. Put up your most successful posts in your side bar. Add a Link Within widget to the bottom of your posts. Expose the new readers to as much of your blog that first visit as possible so they can get a real vibe for your voice and your style.

f) Other things to consider: Don’t get too personal, but also don’t be too private. Readers want to know about your life within the context of your blog, no more, no less. Also, post as consistently as possible. I try my best to post Monday through Friday, with posts going live at 5:30 am EST. Also, try hard to avoid spelling and grammatical errors. None of us are perfect, but a little effort goes a long way here.

3. Part 2: Make those readers want to come back!

a) Understand your readers:

i) Who are your readers? What kind of content do they especially love? Or hate? When do they read your blog (morning? night? at the office?)? How did they find your blog? How many posts do they want to read per day?
Do a survey to answer these questions! Thousands of you filled out my survey and it was SO helpful and informative! If you’re just wanting basics though, you can find out the demographics of your readership on Alexa. My readers, not surprisingly, are mostly women, between the ages of 28 and 34, with children and with college educations.

b) Read other design blogs with your aesthetic to make sure you’re not overlapping on post ideas. There are so so many design blogs these days, I’m finding it’s easy to post about the same things, even if you’re trying to be original.

c) My husband and I talk about the idea of Blogger Capital a lot. If you think about your blog posting schedule as a bank account, and your posts as deposits and withdrawals, try your hardest to keep a positive balance on the account. For example, a post with 100% original content would be a major deposit. A post about a new sponsor could be a pretty big withdrawal if it wasn’t presented right, with no new take away information for your readers.

4. Finally, remember that blogging can sometimes get a little old. Life gets in the way. Or you’re simply feeling uninspired. Things that help me more forward:

a) My mantra is ‘I can’t do it all, but I can do a lot.’ I know I say this all of the time, but it makes me feel better every time I get overwhelmed with commitments (which, sadly, is a lot of the time. Don’t judge.). And actually, I’m most productive on the days I remind myself of my motto!

b) Focus back on those goals we already talked about. Want to know one of my big goals? I would love to write a big ol’ FAT book about decorating a house, from start to finish, top to bottom. Scrapbook style.

c) Celebrate what you’ve built! Remember when your blog readership consisted of you, your husband and your mom and dad? I sure do. It’s amazing how technology is providing a way for us to communicate with so many people every single day.

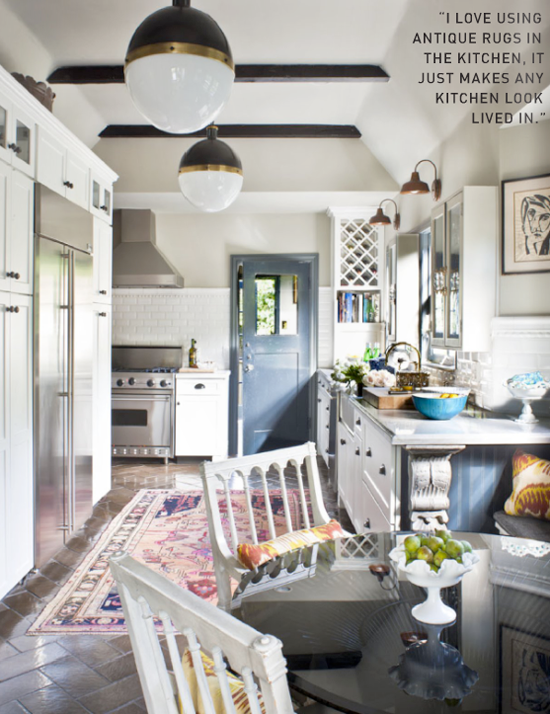
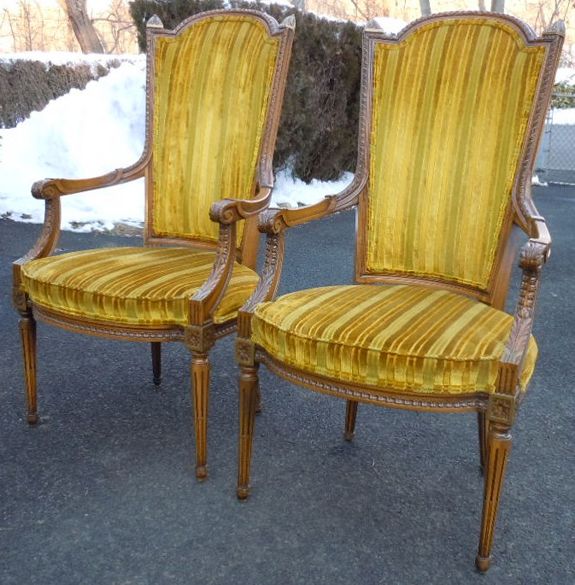
d) Remember what inspired you originally. I love interiors!! I always will. I still get all giddy when I flip through a new Elle Decor or when I walk in to a thrift store I haven’t visited in a while. Get back to basics and post about that common passion you share with your readers.

Musings

Make the world a softer place…

As a fabric junkie, I am thoroughly on board with upholstering anything and everything. Chair seat AND frame? Yes, please. as seen on Coco+Kelley Headboard AND night stand? Lovely. (I’m dying to try this myself. It can’t be too hard, right?) Christopher Maya P.S. A big shout out to the biggest LGN supporter around. Happy…

As a fabric junkie, I am thoroughly on board with upholstering anything and everything.

Chair seat AND frame? Yes, please.


as seen on Coco+Kelley

Headboard AND night stand? Lovely. (I’m dying to try this myself. It can’t be too hard, right?)

Christopher Maya

P.S. A big shout out to the biggest LGN supporter around. Happy birthday, Daddy. I love you.
Kitchen

Faux Bois Floors

Marianne from Haven and Home posted this image from Coastal Living recently, and I’m obsessed with a number of elements including but not limited to: 1) The great color on the ceiling. That light fixture is pretty killer too. 2) The mahogany counters that are sealed in glossy shellac. NICE. 3) And most of all,…

Marianne from Haven and Home posted this image from Coastal Living recently, and I’m obsessed with a number of elements including but not limited to:

1) The great color on the ceiling. That light fixture is pretty killer too.

2) The mahogany counters that are sealed in glossy shellac. NICE.

3) And most of all, the faux bois floors (obviously). You can get a similar look with this 5″ wood grain painting rocker (or the rollers might work well, too). I would probably put this fun treatment in a kids bathroom, a mudroom or a laundry room. Note that the paint colors are black and white. Such a graphic touch!

Why Don't You

Adios (and a sneak peek!)

If you’re reading this post first thing in the morning, I’ll be en route to SLC for Alt Design Summit. I’m super excited to learn how to be a better blogger and to meet some of my very favorite blogging friends! Will you be there? My panel is in the opening time slot. Please drop…

If you’re reading this post first thing in the morning, I’ll be en route to SLC for Alt Design Summit. I’m super excited to learn how to be a better blogger and to meet some of my very favorite blogging friends! Will you be there? My panel is in the opening time slot. Please drop by and say hi!

Okay, back to business. I was hoping to have a fun project from my house to share with you today, but the week got away from me. So, instead I have a little sneak peek!

Remember this post where I mentioned I wanted to find a big armoire to use for storage? Well, I found TWO!!

I bought the pair at Everything Goes, a really fun vintage furniture shop in Staten Island. These actually were part of a three-piece unit, but the center piece was an ugly shelving/entertainment center, so I asked the owner to sell me just the two end pieces. She gave me a great deal and even organized the delivery (yikes, these things weighed a TON).

The cabinets are filled with china sets and decorating accessories not currently in rotation. We’re definitely using these are storage units, not for display. We have them flanking our tv stand (which is actually just an old bookshelf that I’m going to skirt). I thought about replacing the glass with new mirror to hide all the storage and to brighten the room, but I couldn’t get on board with the idea of seeing a perfect reflection of myself vegging on the couch and watching trash reality shows. I thought about using that acid wash solution to antique the new mirrors, but that was a little cost-prohibitive. To save cash, I went ahead and silver leafed the backs of the original glass panes using the left overs from this project.

I’m debating between creamy white and sky blue for the paint color. It sort of depends on which rug I decide on. The silver leaf on the inside of the glass looks really great though. So far so good!


Domino


Windsor Smith


Windsor Smith

Alright, I’m signing off for the week. See you back here on Monday! (or see you at Alt?)

xx
jenny

Bedrooms

Kraft Paper Botanicals

I like that these botanical silhouettes are painted on brown paper – it has a warmer feel to it than white would. Martha Stewart for Valspar These would be a pretty easy DIY with some kraft paper and black acrylic paint. I would get the largest IKEA frame available, ditch the mat and cut the…

I like that these botanical silhouettes are painted on brown paper – it has a warmer feel to it than white would.


Martha Stewart for Valspar

These would be a pretty easy DIY with some kraft paper and black acrylic paint. I would get the largest IKEA frame available, ditch the mat and cut the kraft paper about an inch shorter than the frame on all sides. You’ll be able to see the edges of the paper, which will look really modern.

BHG
Utility Room

Laundry Room

Today, I’m taking some time out to reorganize my Grand Central Station – the utility room. It’s our laundry room/garage/pantry/gym/storage/broom closet and more. And it’s in bad shape. The goal is to not spend any money (or very little) and get the space prettier and way more functional. I loved this laundry room featured in…

Today, I’m taking some time out to reorganize my Grand Central Station – the utility room. It’s our laundry room/garage/pantry/gym/storage/broom closet and more. And it’s in bad shape.

The goal is to not spend any money (or very little) and get the space prettier and way more functional. I loved this laundry room featured in Canadian House and Home.

My favorite part is the Manuel Canovas Misia fabric on the sink skirt.

Here’s another image of the same room from a different shoot (via Design*Sponge). Looks so cheerful with the striped rug here. And I love getting to see the vintage map on the wall. It’s a great color – and why not have something fun to look at while you’re doing chores?

Furniture

New (Old) Dining Set

Guess what? In November I bought a vintage dining set off Craigslist from another decorator. We had been using that farmhouse style table for about two months, and it just wasn’t working in our space. It didn’t look or feel right to me. The biggest problem was the table top was not on the leg…

Guess what? In November I bought a vintage dining set off Craigslist from another decorator. We had been using that farmhouse style table for about two months, and it just wasn’t working in our space. It didn’t look or feel right to me. The biggest problem was the table top was not on the leg frame in the antique shop, so while I measured everything before buying, the top ended up sitting strangely high on the frame and made the finished height more than 32″, pushing 33″. It was uncomfortably high for me – even with the taller chairs I was using. I felt like a little kid at the table, which was weird. (Lily Tomlin style)

I was able to sell the farmhouse table for about what we paid for this new dining set, so I didn’t feel quite as bad/guilty as I would normally. Plus the seller threw in a really great pair of lamps that I’m also using in the dining area (on top of the red credenza!)

I love the inside of the black paper shades:

These are the seller’s photos of the set. The table is actually longer than the 8′ farmhouse table was! We can very comfortably seat eight and we’ve even had ten people over, which was also just fine.


Here are the things I love the best about the table:

The pedestal legs are so pretty! I especially love the casters.

I love the blond-ish wood against our white floors! I know it’s not really, but I love that it has an almost Biedermeier color to it.

The inlay on the table top is subtle and pretty, and of course I love the Greek key detail in the Klismos style chairs.

The seats are tooled black leather in sort of a patent finish, and are just the right amount of broken-in. They are unbelievably easy to clean and super comfortable!

I’m getting some upholstered host chairs in a fun pattern and am finishing the art above the table, so I’ll share photos of the dining set in situ when the other pieces are ready to show.

Happy weekend!
xx

This error message is only visible to WordPress admins
There has been a problem with your Instagram Feed.
© Jenny Komenda. All Rights Reserved.
Site by