
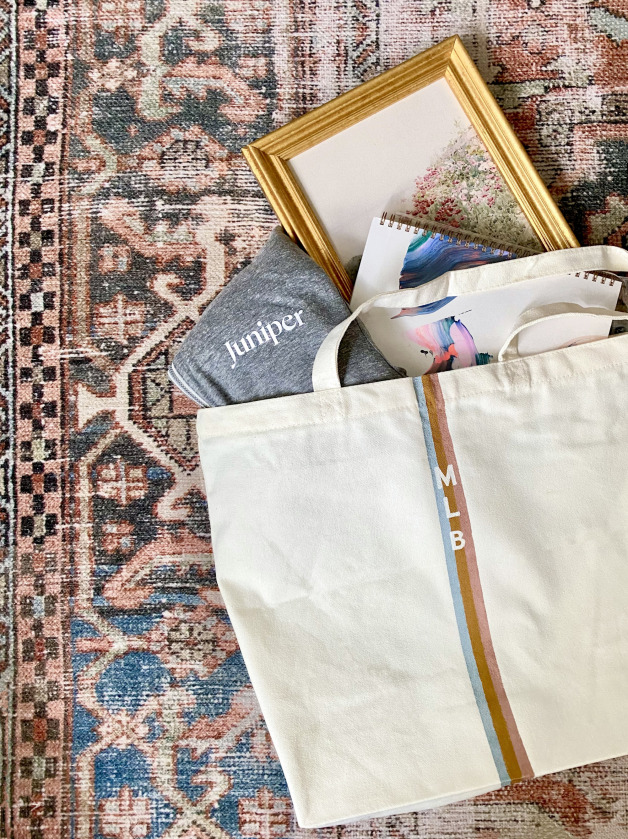
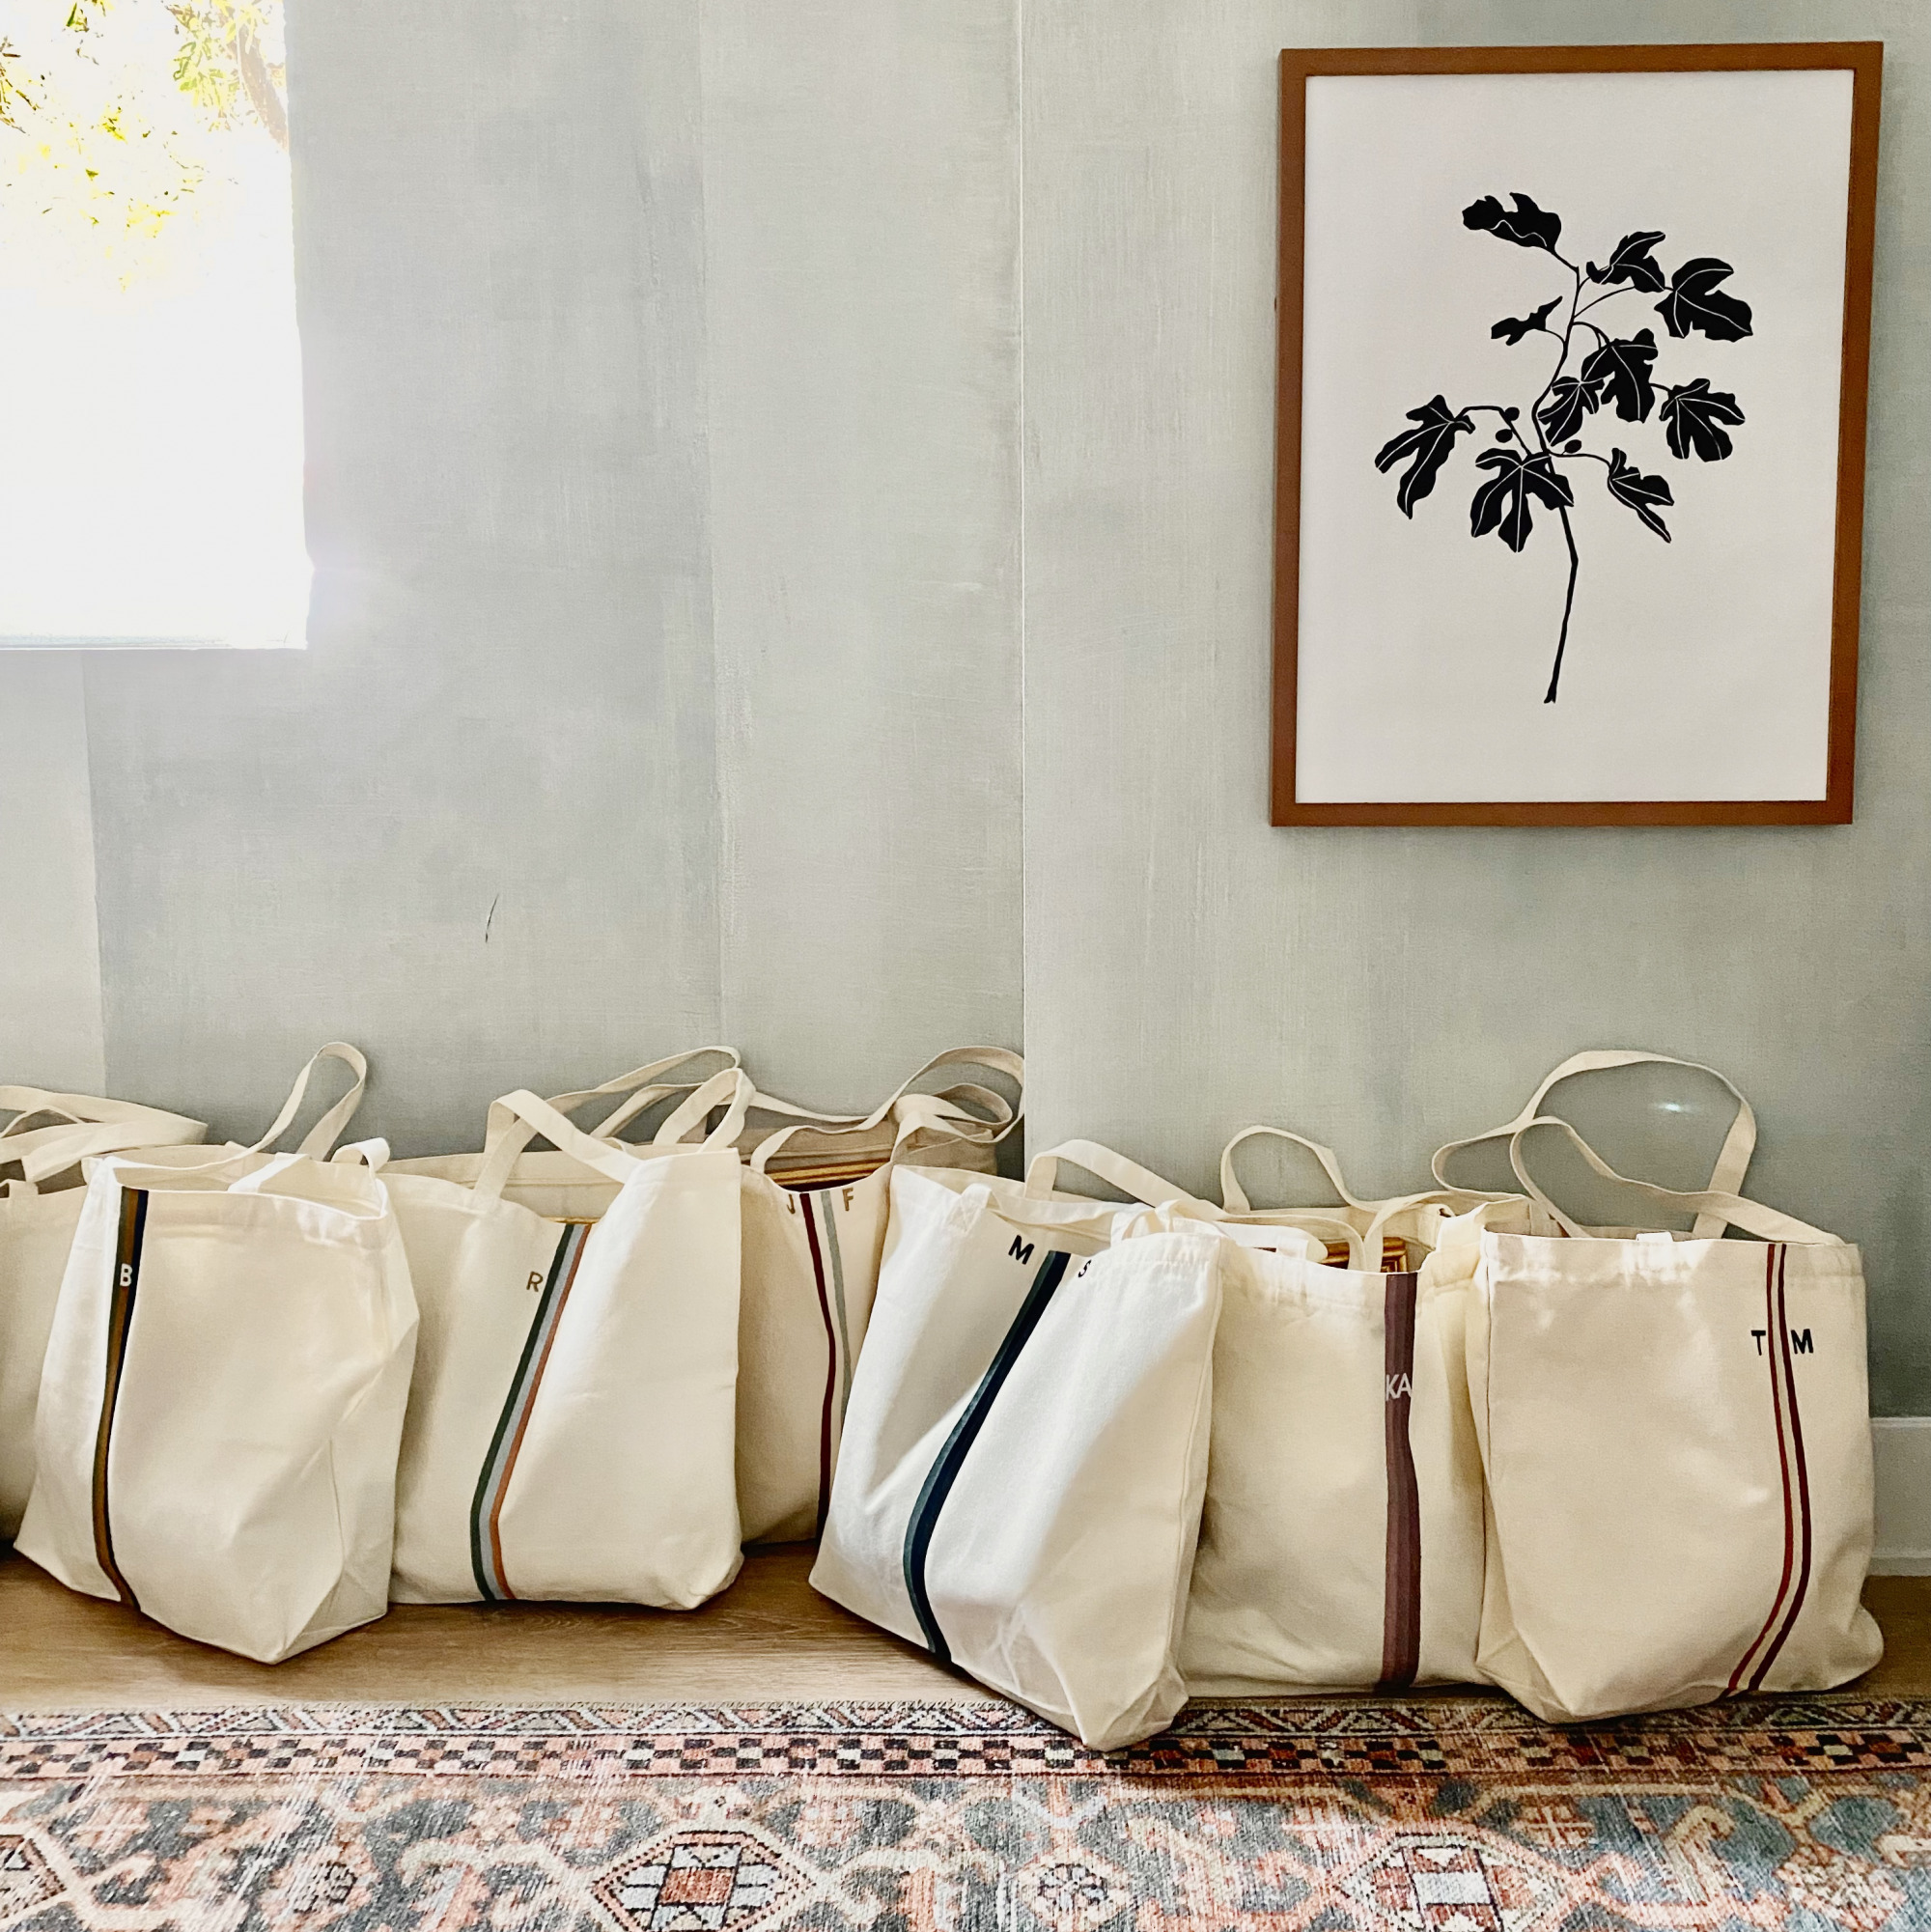
I wanted to do something fun and personal for our Juniper team for the holidays, and these monogrammed tote bags seemed like the perfect gift. They were fun, relatively simple, and they really are a gift that anyone can use and enjoy.
I walked through the basics of making these on my instagram stories, but figured dedicating a full blog post would be worth it, considering how many of you loved them!
Supplies Needed:
- Tote Bags
- 3/8 inch Painters Tape (or whatever size you want your stripes to be!)
- Matte Acrylic Craft Paint
- Round Sponge Brushes
- Stamps
- Ink Pad
- Fine Tip Markers
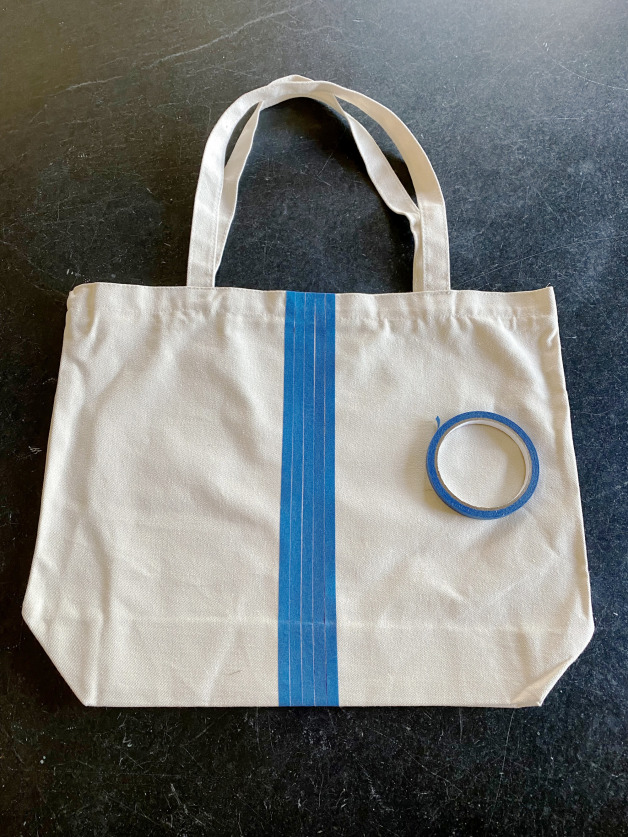
The first thing you will want to do is choose your colors (I found all of mine at my local Michaels- they had a huge variety). Any 3 coordinating colors will work great! Starting in the middle of the tote make five rows with your tape (I just eyeballed it, but it would be just as easy to measure). The fastest way to do this project is to remove tape rows 2 & 4, and paint them your desired colors. After those dry, re-tape over where you just painted, remove the tape from row 3 and then paint with your third color. Hang to dry, and you can then move on to stamping! However, this quick method does tend to create a little bit of bleeding under the paint, so you don’t get as crisp of lines.
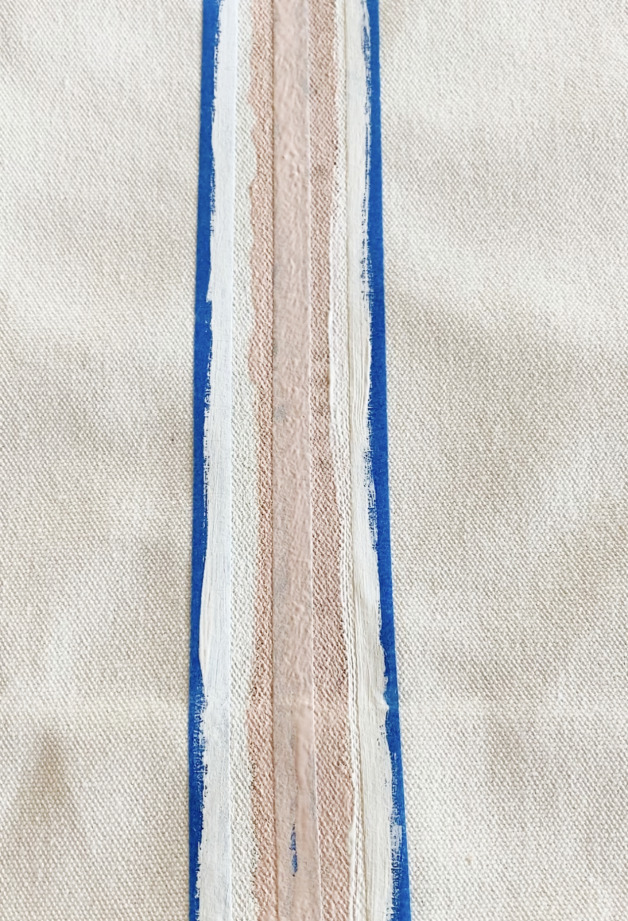
If you are willing to take a few extra steps, you can eliminate the bleeding and get nice, crisp lines! The secret to perfect lines is to seal the edge of the tape with whatever color is going UNDER the tape. Here, I am using this pretty blush color as my center stripe, so I used it to seal the edges of the center piece of tape. I sealed the edge of my outside tape lines with a cream color, to match the color of the rest of the bag. (This technique of sealing the edges works amazing for highly textured walls as well!)
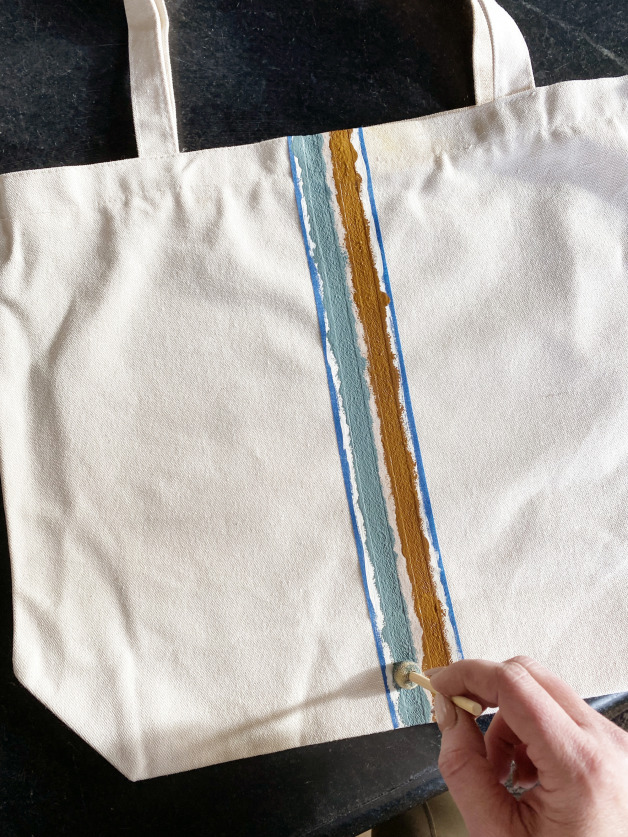
Now that the edges are sealed and the paint has dried, I can bring in the colors I am using for my two outside stripes. For the best results I found that you don’t want to overload your sponge brush with paint, and moving it up and down to dab the paint on works better than trying to “brush” side to side. Once these outside stripes are dry, you’ll tape over them again, and removed your center piece of tape to paint your center stripe.
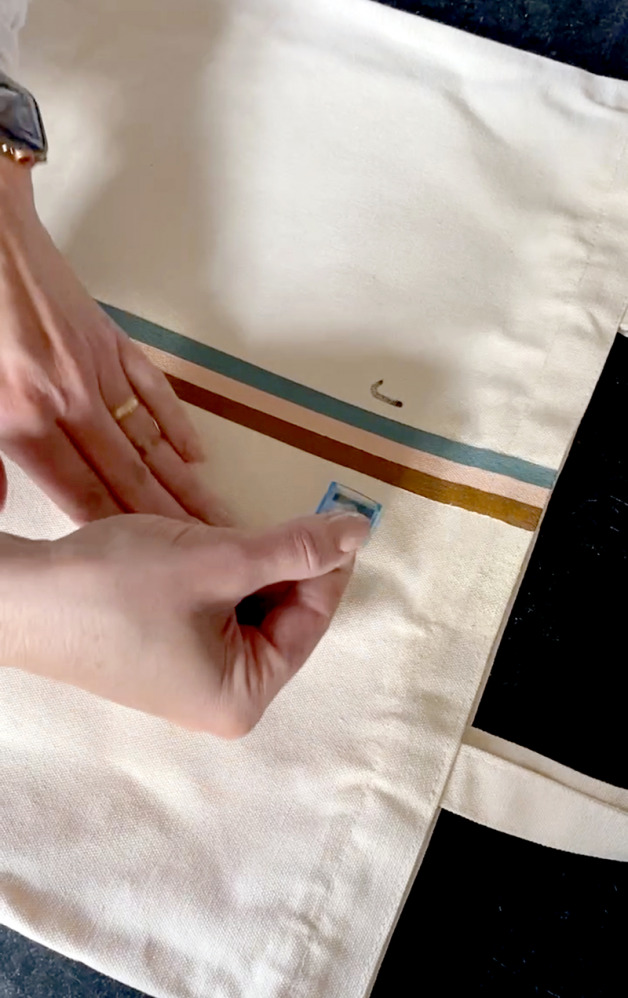
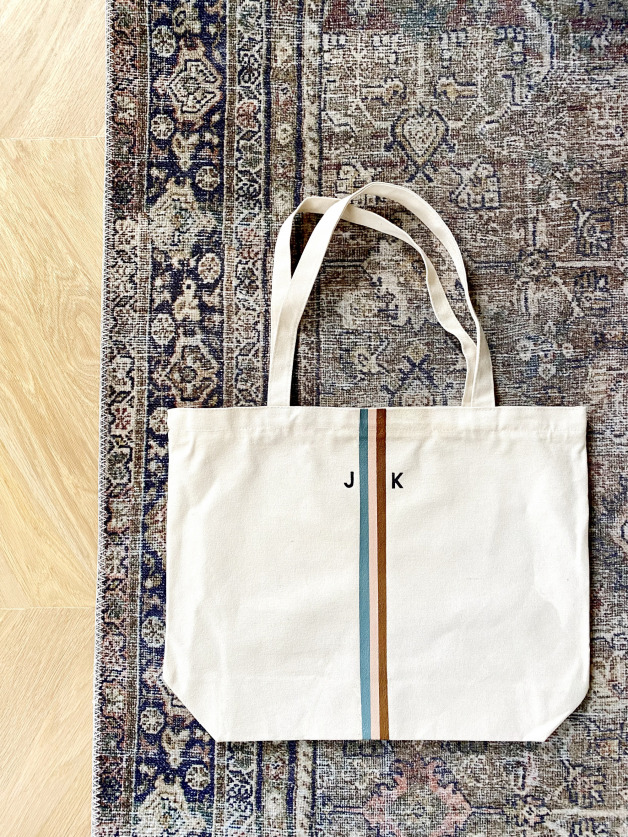
Once the paint is completely dry, you can peel off your tape, and admire your beautiful stripes! (If there was still some bleeding, you can just go back in with your paint brush and touch up those spots!) The next step is stamping your bag. I monogrammed mine with the initials of each team member, but you could really do anything with this! The stamps I used were perfect because of the clear back, so I could see exactly where I was placing them. I just used a regular permanent ink pad, and then went back with a fine-tip marker to fill in any spots in the lettering that needed to be darker!
I switched up the ink color and letter placement just depending on the bag to give each of them a custom look. There is SO much more that you could do or add to these bags, but I love the simple look of the stripes and initials. The best part of these is that you can fill them with ANYTHING! The zippered top makes them the perfect bag, no matter the occasion! These would be so fun to do with your kids, a church group, or to give out as a sweet Valentines gift!
Tote Bags // Painters Tape // Craft Paint // Sponge Brushes // Stamps // Ink Pad // Markers

