
This is the last week of the One Room Challenge and we are kicking it in to high gear over here! We are picking up a few final items and plan to install over the weekend! We are so excited to see this room finally come together!
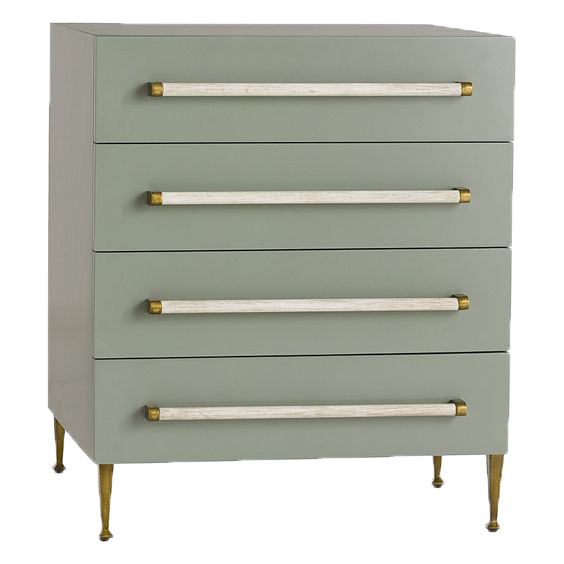
If you can remember back to our design plan, we had this Arteriors dresser as our inspiration. We fell in love with the color and and lines, but unfortunately it is no longer available.. not to mention it was super pricey. We had seen a few dowel pull dresser DIY’s floating around, but none of them totally fit the bill of what we were trying to do, so we came up with our own version!
![]()
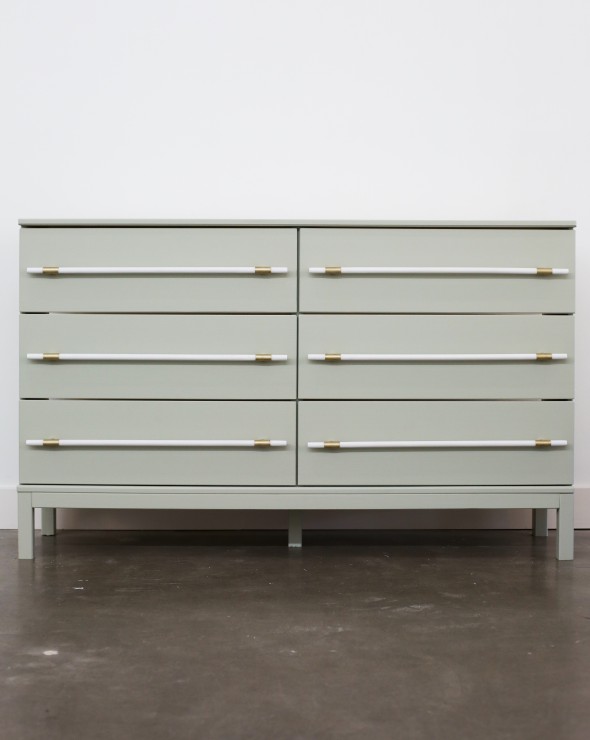
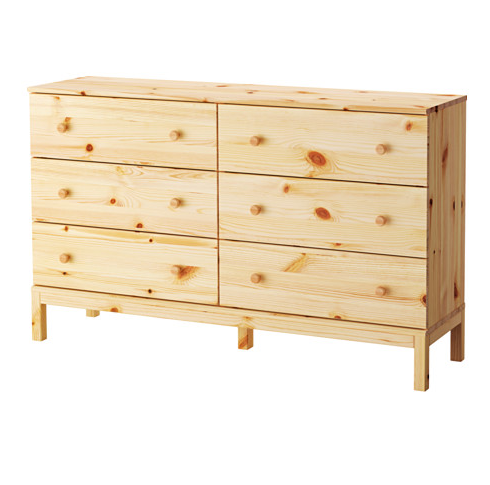
We picked up one of these dressers and built it to the specifications, leaving the knobs off. Since this is a natural wood piece, we primed over all of the knots to keep them from bleeding through the paint (make sure you use a primer that is says “stain blocker” on the can!). We also filled all of the pre-drilled knob holes. After priming, we painted the entire dresser the most beautiful shade of gray-green, Mizzle by Farrow & Ball.
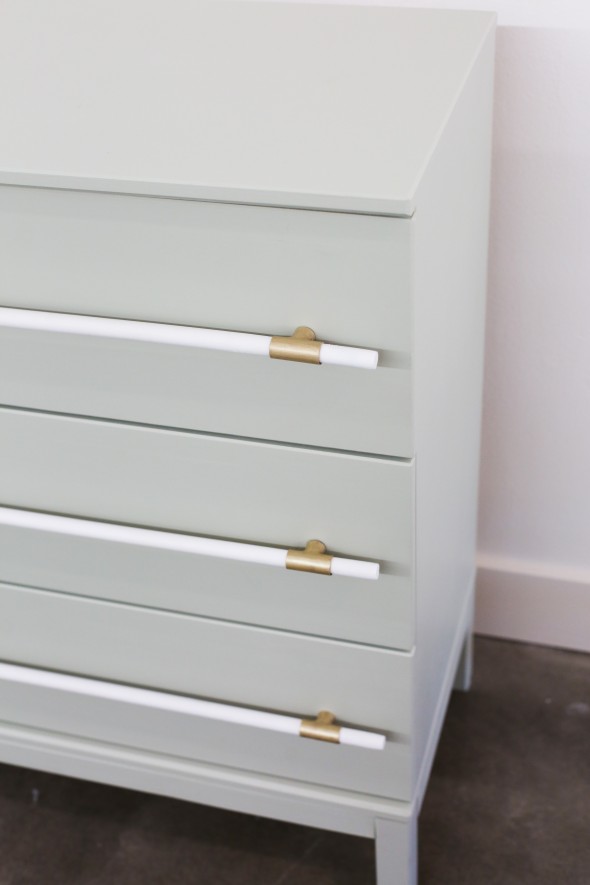
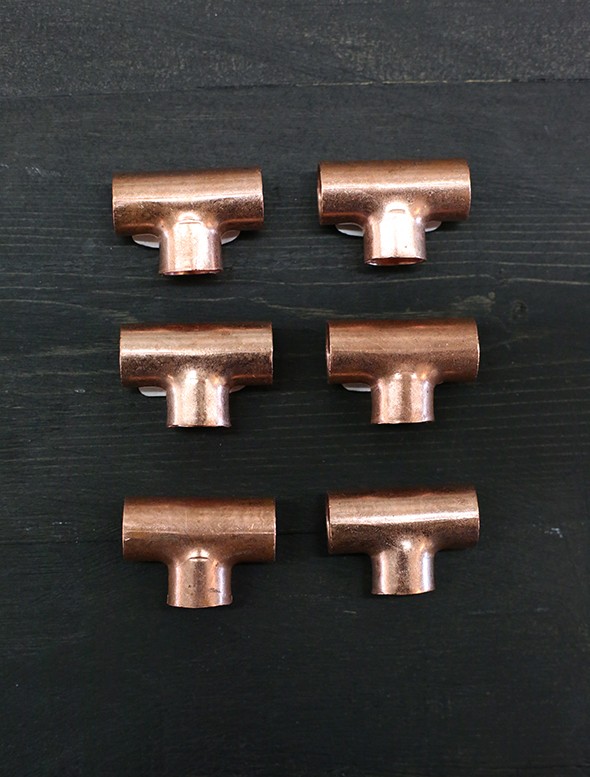
We wanted to keep the profile of the brackets super simple and and delicate, but we were struggling to find something that could work for this design. We searched literally every local hardware store for something that would work and we finally stumbled upon these 3/4″ copper connector pieces. We loved the profile, we just had to come up with a creative way to attach them to the drawer fronts.
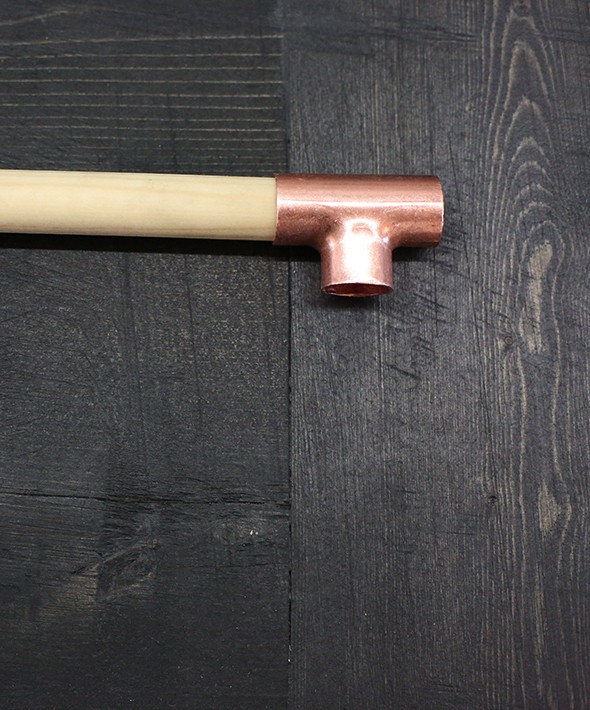
We got six wood dowels that fit perfectly into the copper pieces.
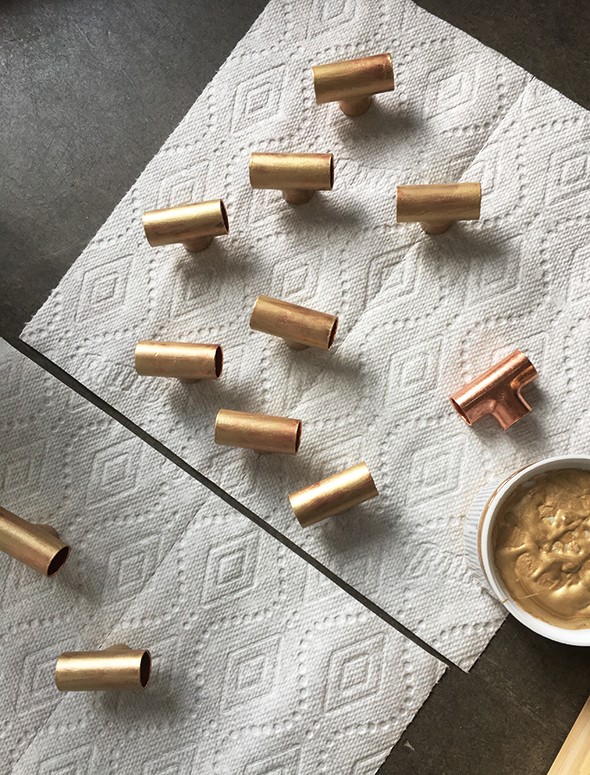
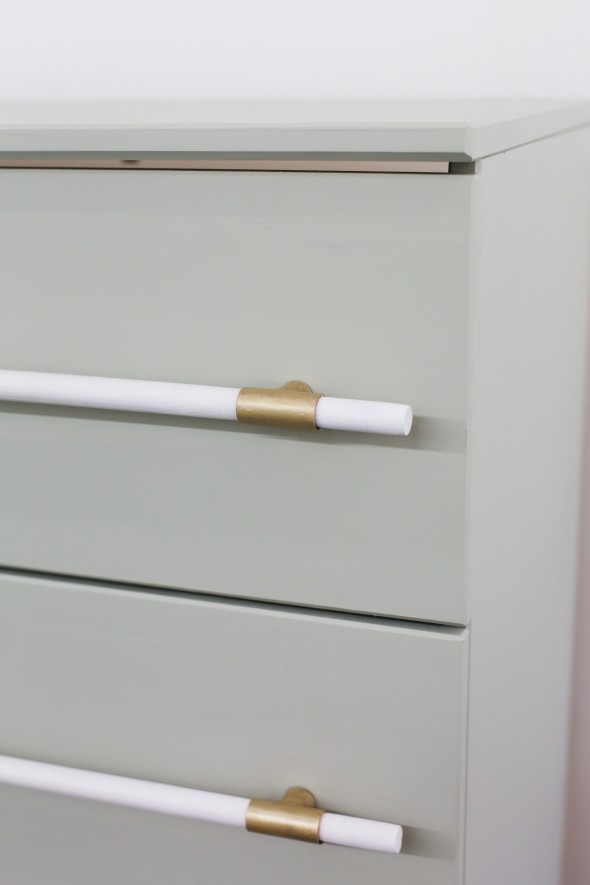
I thought about keeping the brackets copper, but I just love how the brass hardware works with the green color! So warm, so pretty! We just brushed on this metallic craft paint.
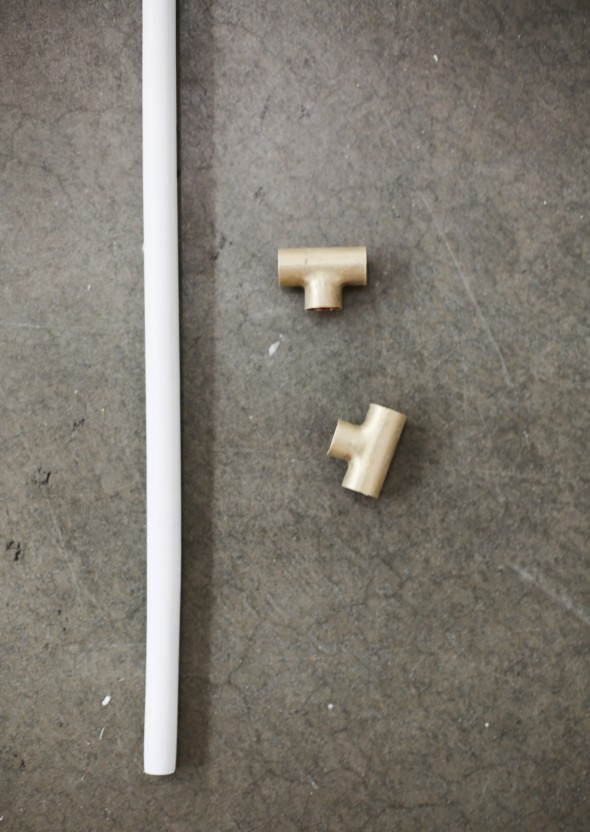
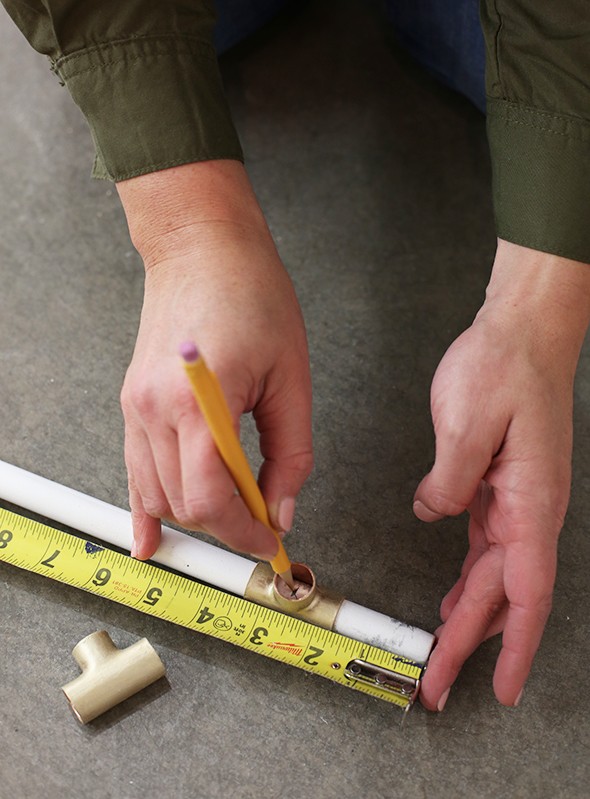
We cut the dowels 4 inches shorter than the length of each drawer and spray painted them white.
Once the dowels dried, we inserted them into the brackets. We measured two inches from the end of the dowel and made a mark in the hole so we could drill a pilot hole.
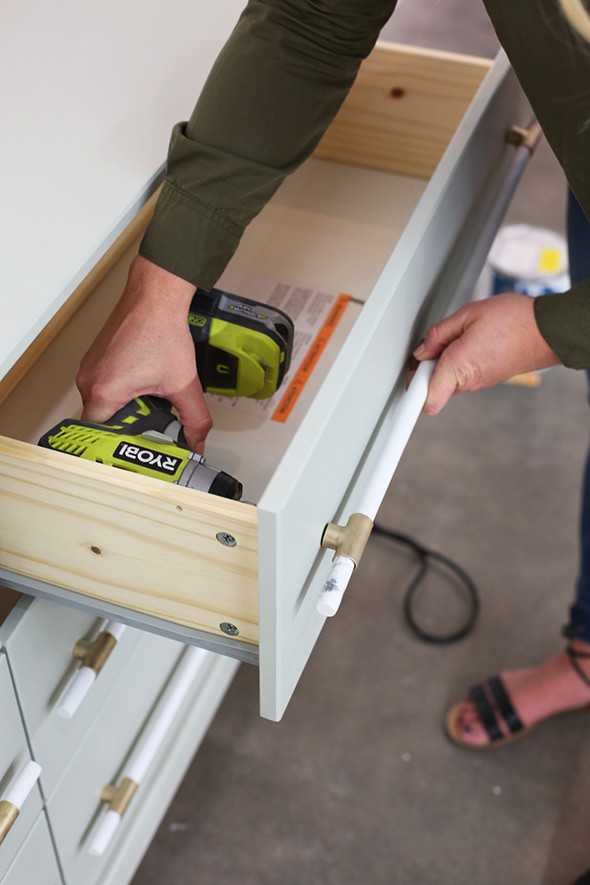
Once we had our pilot hole drilled, we lined up the dowels and screwed them in from the back side of the dresser.
We still need to put the back on the IKEA dresser so you can’t see through to the wall! But otherwise, I think this little DIY turned out great!

Check back next week to see this our final room reveal!! It’s going to be so pretty!
Did you miss out on any of our other One Room Challenge posts? Click the links below to catch up!
Week 1 // Week 2 // Week 3 // Week 4 // Week 5
————————————————————–
Boxwood Avenue // Coco & Jack // Shay Geyer // Design Manifest
Dwell with Dignity // The Makerista // Making it Lovely // Dabito
Old Home Love // The Painted House // Megan Pflug // The Pink Pagoda
Erica Reitman // Sacramento Street // Simply Grove // Jill Sorensen
Sugar & Cloth // BrittanyMakes // Waiting on Martha // The House that Lars Built


Looks gorgeous, Jenny! You are amazing! Can I ask, why didn’t you use the existing Ikea holes? Seems like it would be easier to keep the dowels lined up.. but maybe I am missing something. I haven’t had the courage to do my own Ikea hack yet, but I’ve been reading a lot about them and hope to dive in on something soon. Xo!
Wow! Wow! Very cool.
What product did you use to make the copper look like brass?
This is incredible! I’m so tempted to try this on my ikea dresser, but with the existing knob holes. Where did you end up finding the connecting copper pieces?
I love this! What did you use to paint the copper pieces? It looks like something other than spray paint? Thanks!
It’s just metallic craft paint! Here’s the link to the exact one!
http://bit.ly/2zHDAOy
You are killing it ! And a genius!
omg, you are a genius! That looks awesome!
Amazing Work and I just looks amazing and fabulous :)
Beautiful – and I plan on painting my yellow pine nightstands that color now! Was it just the F&B interior paint? How about the finish – estate emulsion, modern emulsion? I’m assuming it’s not full gloss. Thanks!
It’s Estate Emulsion! :)
How much paint did you need? Did you just order a sample?
This is where you shine! Looong-time follower here–from your days in Delaware–and your DIY idea, execution and tutorials have always been inspirational and accessible. This, just like all the others, is brilliant and totally doable. Well done!
Thank you Monika! :) We are having fun with this project! xo
I totally agree. You are the queen. I love that with all of your success and the fact that you are an actual professional designer you haven’t strayed too far from the creative solutions/diy stuff. It’s hard to relate to other blogs sometimes when it’s all high end all the time as they’ve gained more success and naturally larger budgets. You are so good at coming up with these elevated hacks/diys!!
I did this exact same project (different colors) a few years ago for my apartment, I was trying to mimic some pulls from rejuvenation that just aren’t in my budget. For some reason I couldn’t get dowels that fit all the way through the copper connectors without being way too small. Did you have to shave anything off the dowels? Or maybe I got the wrong kind of connector, there are so many to choose from it’s hard to find what you’re looking for!
I love this so much! What kind of screws did you end up using? Did the copper connectors stay secure with just a screw? Or is it wobbly?
Thank you!
I have the same question! How exactly did you attach the pull to the drawer? Would love more explanation!
That looks great! I couldn’t believe you were posting a pic of your hack vs. the real deal the other day on Instagram. It turned out so good!
Stunning! Have you thought about painting the legs or adding stone to the top? Can’t wait to see the final reveal. :)
This is genius!!! Love it!!!
This is so good Jenny! I’ve been trying to figure out a hack for natural wood dowel pull hack – I’m going to try to make this work
This is so brilliant and amazing. I’m so inspired!
Wow! A ridiculously impressive transformation.
Wowsers! You would never know this started as an IKEA dresser! I am thinking you might also be able to paint the ‘base’ a different color, even metallic?, if you wanted that look too! LOVE the handle hack!! I definitely thought those brackets WERE brass, metallic paints have come a long way in the last couple of years. Althoughyou are right, the copper is beautiful too for a different look. EXCELLENT DIY, as usual! Your DIYs never look DIY
This is awesome. Inspired me doin more diy in my practcal life. I am so inspired! :)
Looks amazing! Where did you find the copper pieces?