
I love all milk glass, but blue French opaline is my favorite. The color is so dreamy and looks beautiful in just about every space.
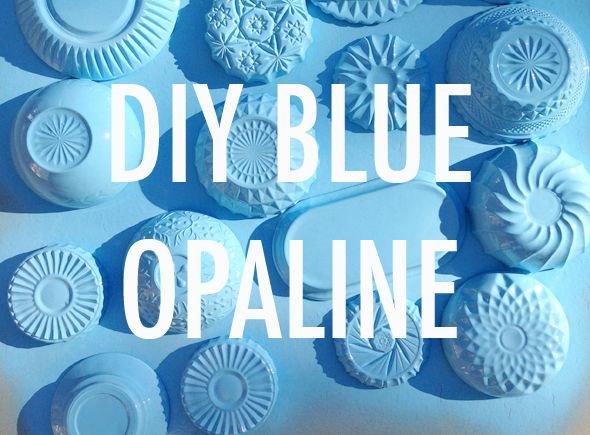
I’ve collected a few pieces here and there (this one and this one and even this little one on my desk are still favorites), but opaline is so dang expensive! I drool over collections like these below from Eddie Ross and the home of the owner of Juicy Couture.
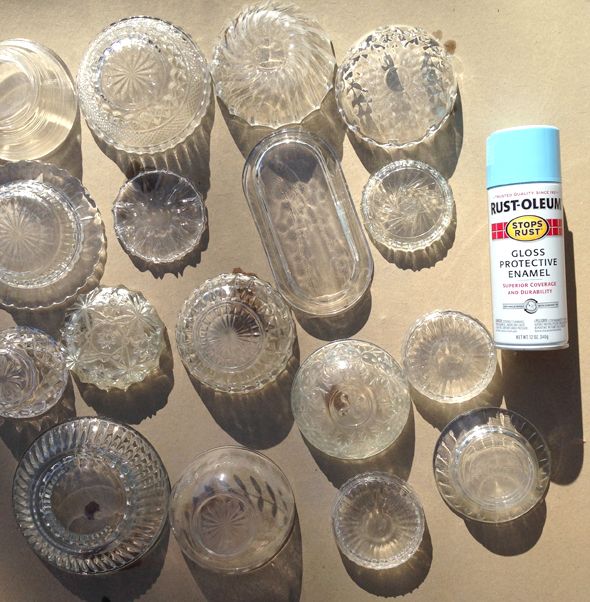
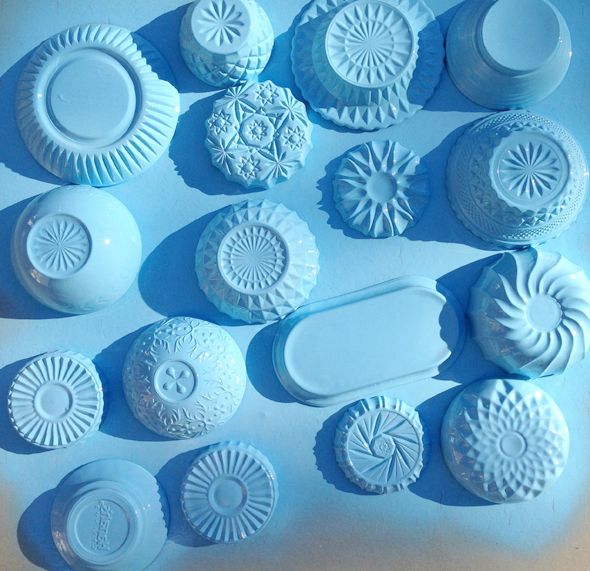
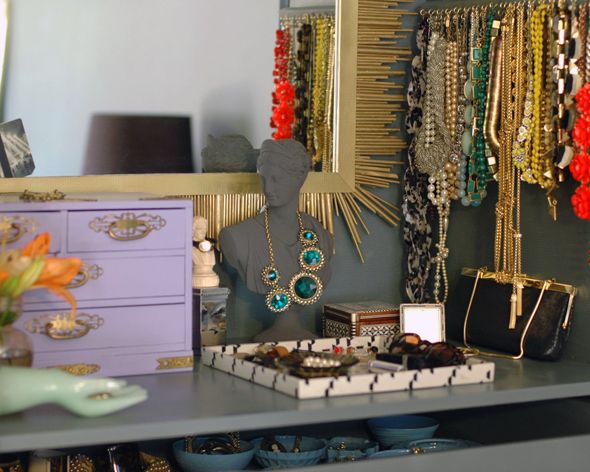
I decided to try my hand at recreating the look with a little spray paint for my wardrobe vanity’s jewelry drawer.
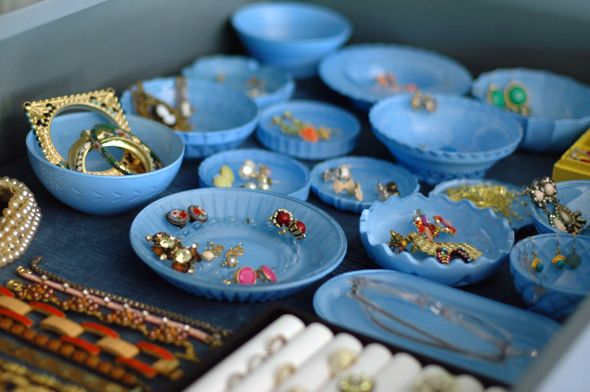
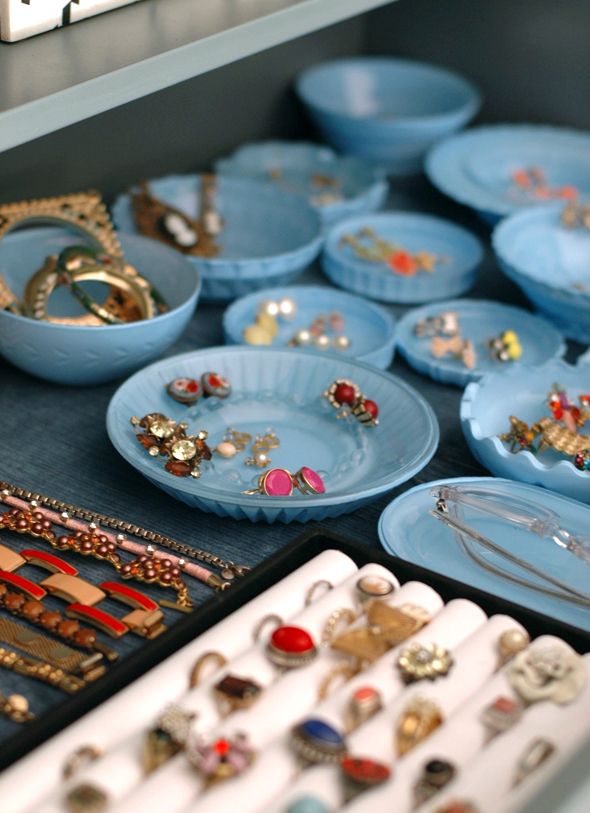
I went to Goodwill and picked up an assortment of clear glass dishes for about 50 cents each. I tried to get a good mix of shapes, sizes and patterns in the glass. Some of these are butter dishes, there are a lot of saucers and little bowls and even a few ashtrays.
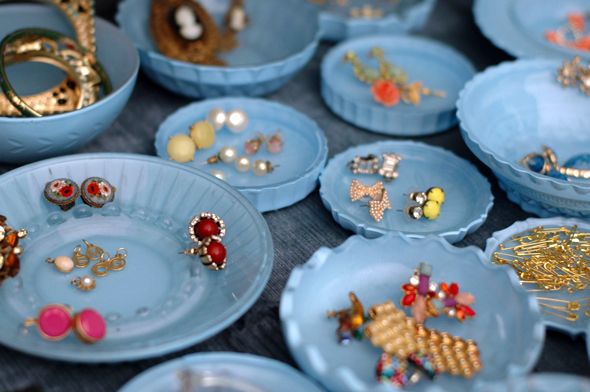
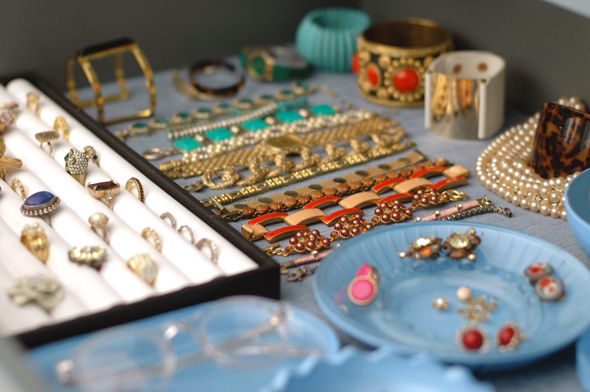
The ashtrays actually work the best for separating stud earrings and the little bowls with rims are perfect for hanging drop earrings with hooks.
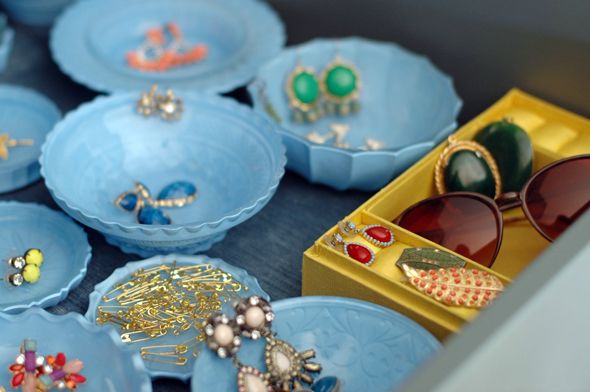
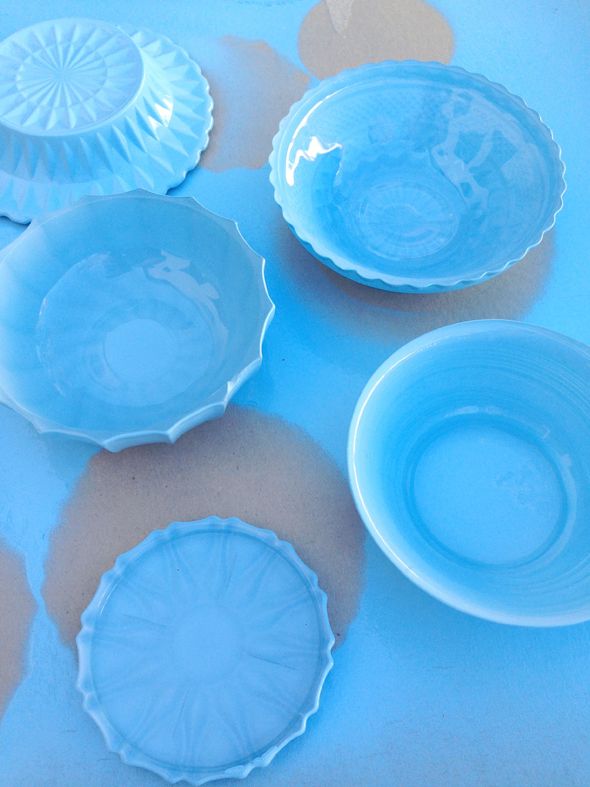
I love seeing the “opaline” dishes peeking out from the vanity drawer. The color is so pretty!


Your initiative always impresses. I'm staggered by how much you've managed to do in the valley house already. (I grew up with green opaline, and I've never cared for it. I'd happily swap it for matte-finish white or black Heath ceramics any day.)
So cute, Jenny! I'm always blown away by how much care you take with little moments like this around your rooms. I have a few theoretically swanky jewelry hangers on top of my dresser, but the overall impression is total messy chaos. You've inspired me to DIY up something nicer!
I love your faux-paline!
Those are really pretty! I need some little containers for my workbench. No reason I can't make them pretty, right?
Now i know why the little french box I found is selling for so much on ebay. Thanks to you, I can make it look like I have a collection. Did i miss where you gave the exact colour of paint? Thanks for another great tutorial.
Oh I love yur table, great job!
I'm loving this jewelry series. I've pinned a few things from every post so far. I really like the effect of spraying the underside only so that the inside is still "glass." Thanks for the inspiration.
I love how you only paint the underside of the glass. It has such an amazing effect!
http://www.fullbellywornsoles.com
Pretty! I want to head to the thrift shop so I can pick up my own glass dishes and try this!
I love how your constantly breathing new life into simple, inexpensive castaways to create an elegant look. Great inspirations!
So good Jenny! Your attention to detail always blows me away!
Love! So pretty!
Oh Jenny, if only you knew how much you've taught and inspired me. This is the only blog that I check daily. If your fun project posts weren't enough to prove that we could make great friends… the fact that we both have that tortoise shell/snow leopard-ish chain link necklace towards the back is definitely enough!
xoxo
Brittany
http://www.leopardandplaid.com
Jenny you are so creative, the dishes are gorgeous!! Bravo!
xoxo,
Karena
In with the Old: Jennifer Boles
Jenny,
I thought I wanted to come back as my dog, but no, I want to come back as you with all your energy and craftiness to create something clever with 50 cents and a can of paint. Seriously, you are amazing.
Again, do you sleep?
pve
That looks really pretty!
What a great idea! I absolutely love it! I am definitely pinning and creating some of my own.
Leslie
House on the Way
Ooh I was hoping those beauties were some jenny magic that I too could make!!!
Now if that purple jewelery box is an upcoming post….all my DIY wishes in this magicifuent project will come true!!!
You are so… Smart!!! I just love it. Definitely doing this.
You are so… Smart!!! I just love it. Definitely doing this.
so clever and beautiful!
Beautiful! You're so creative & crafty! :)
http://www.ahealthymrs.com
You are a genius!! Sooo pretty!
Another idea I love!
Love it! Please share the name of the paint, Can't wait to try this!
Is there an exact shade name for the blue spray paint or is it just called bright blue?
You are so SMART! Butter dish as glasses holder. Divine!
So, so pretty!
I didn't even notice those little blue dishes in your closet reveal post. Your eye for detail astounds me, Jenny. Well done!
Completely unrelated, but I'm on the hunt for a leather chair just like the one in your third picture! And my name is Heather so now I'm coveting that blanket as well :)
Noticed these on the first wardrobe reveal and was SO hoping there was a DIY project lurking!! These are fantastic and such a great and easy upcycle!
Really nice shade of BLUE!
You always know how to take the most simple things and make them stunning!
So pretty!! Oh my goodness, opaline glass is gorgeous- I can see why it is expensive. I think you did a great job recreating the look!
http://www.davenportdiy.com
I've sprayed some things matte black because I love basalt, but never thought of this. Brilliant!
The above commenter – "faux-paline" is also brilliant!
I wish you'd update more often!!!! I absolutely love your blog!
Can you share where you found the adorable initial charms in the dish with the hot pink studs.
I am so trying this! You always have such great ideas!
{www.thepinkzipper.blogspot.ca}
Thank you so much for posting this! I decided to steal your idea today! I bought the rustoleum copper spray and spray painted some clear glass finds from a local thrift store…fingers crossed that they look good tomorrow! You are so very creative! Thank you!
Just did this project and it turned out great! The one thing I will add is that the dishes that I painted while they rested on a paper dropcloth turned out so much better than when I used a plastic one. I think the paper absorbs some of the extra paint and doesn't allow it to pool around the rim. I couldn't believe how cute these turned out!
Hi Jenny – I never EVER ever ever ever ever comment- but you are a genius. pure and simple! i wish everyone in the damn world would put this much effort into their houses, i can't even imagine what that reality would look like. you inspire me to "shut up and create".
thank you!
Beautiful blog! I am interested in creating my own children’s stick-on earrings but I cannot find a diy tutorial anywhere for the adhesive. Does anyone know what can be safely used and how it can be made for later? I want to give as gifts. Thanks a bunch!