Thank you so much for your kind feedback on the Domino article! I’m so excited to start sharing the behind-the-scenes projects and ideas today!
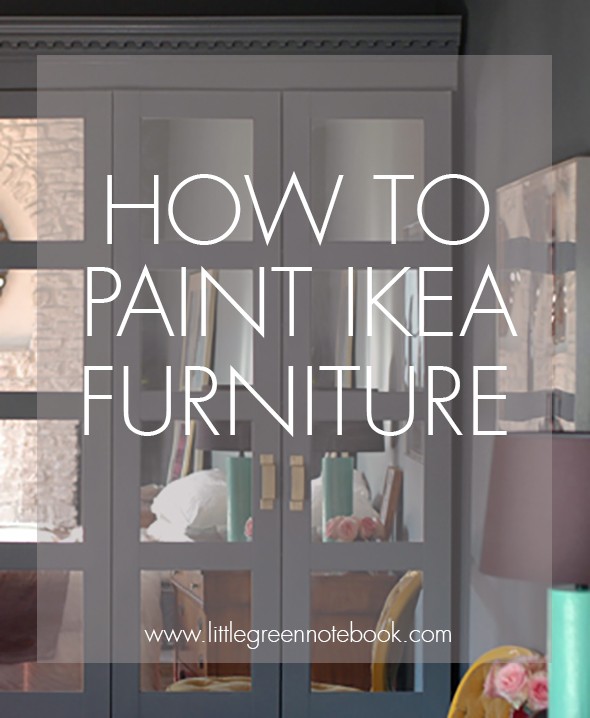
Pax wardrobes are incredibly versatile – they’re really the perfect blank canvas when it comes to organizational furniture. Not only are the affordable shells so basic and easy to customize, but then you also have all the handy shelves, drawers, baskets and other storage accessories made to fit the Pax at your finger tips.
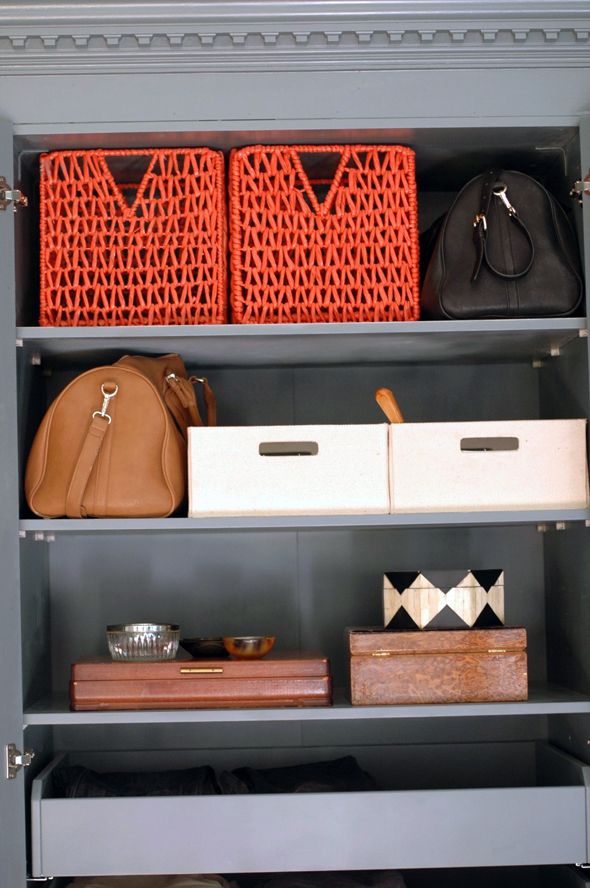
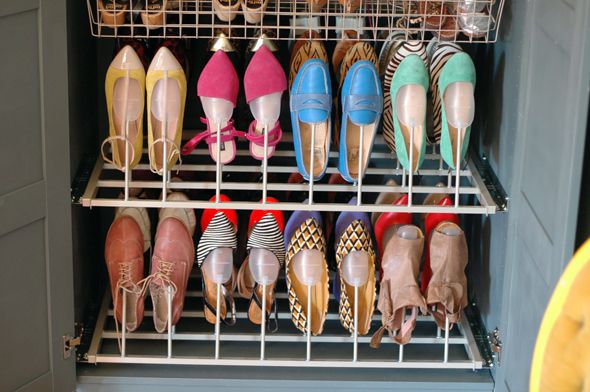
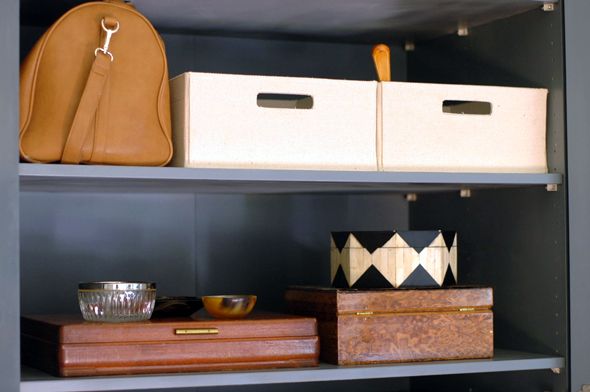
I am crazy over these shoe trees. Each pull-out shelf holds 16 pairs of shoes, which is nowhere near enough for this shoe-lover, but a couple of the shelves comes close to fitting my seasonal shoe needs! :)
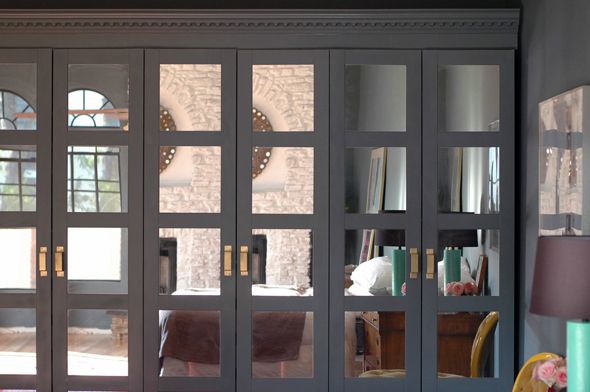
I love how much our Pax wardrobes store, and I’m thrilled that we were able to get a more custom look with just a few changes to the Pax frames. Painting probably took the most time and labor, but I think changing the color to match the walls was a key part of making these wardrobes look less IKEA and more custom.
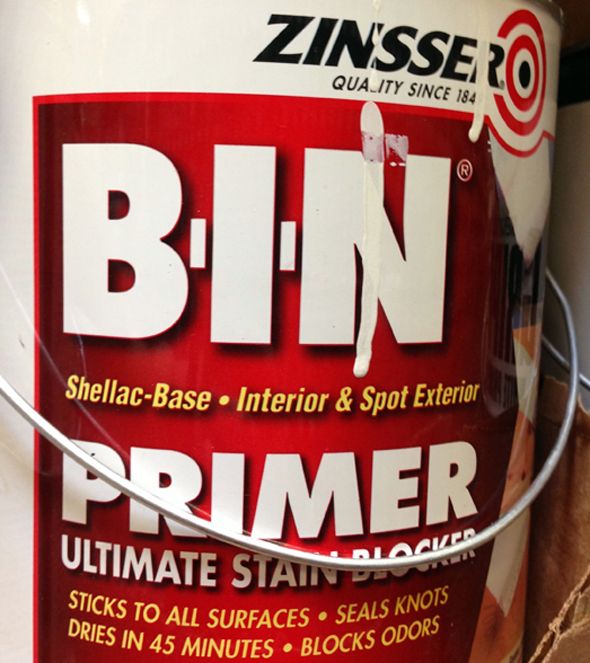
I’ve painted a lot of IKEA furniture in the past. Spray paint usually at least sticks and covers, but the paint will almost always chip off eventually without the right primer, which I didn’t know about until recently. With a coat or two of this miracle primer, you can layer on sprayed, rolled or brushed paint for the top coat, and it will stick – and stay – on your IKEA furniture!
The brand is Zinsser, but make sure you get the shellac-based version. It is formulated for use on laminate furniture, which most primers aren’t.
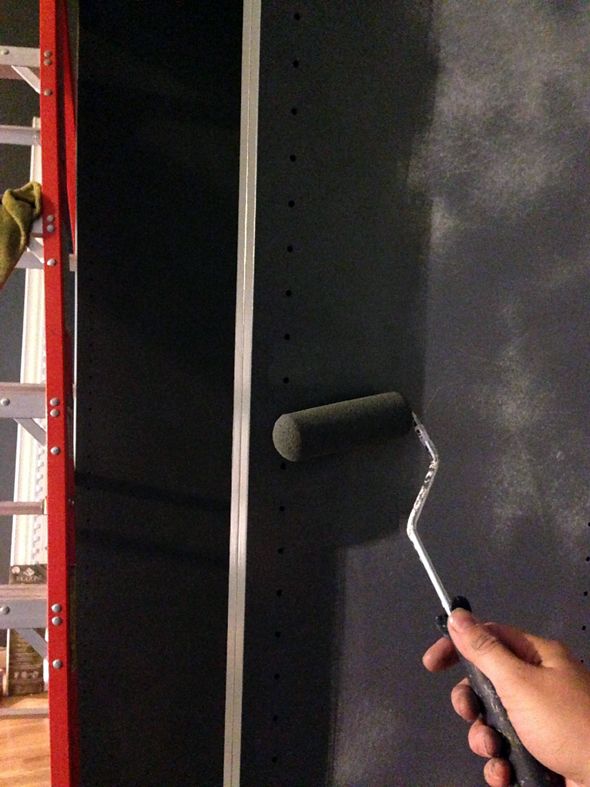
Whenever I’m priming a piece of furniture for a dark paint color, I ask the paint mixer to tint my primer. Usually it just ends up being a bluey-gray color, but it seems to help get a darker, truer color in the end when you’re not having to work to cover up the white primer.
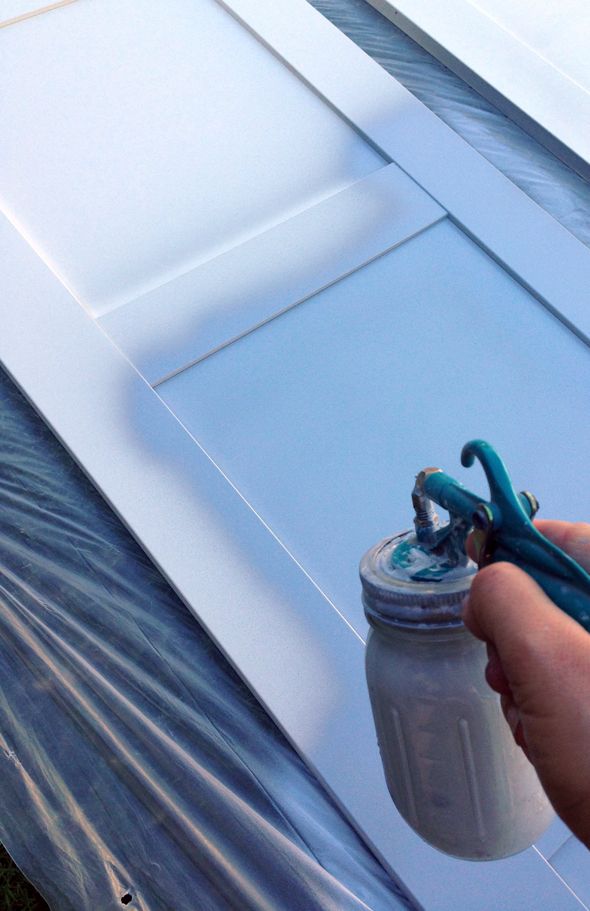
I recommend either rolling or spraying on the primer coat (to minimize brush marks and the need for heavy sanding). I still really recommend the Critter spray gun, but spraying primer with this gun doesn’t work as well as spraying regular paint. The finish gets almost a little dusty. I found that if I lightly sanded after spraying the dust practically fell off and left a smooth finish. It might have been quicker to roll on the primer here though.
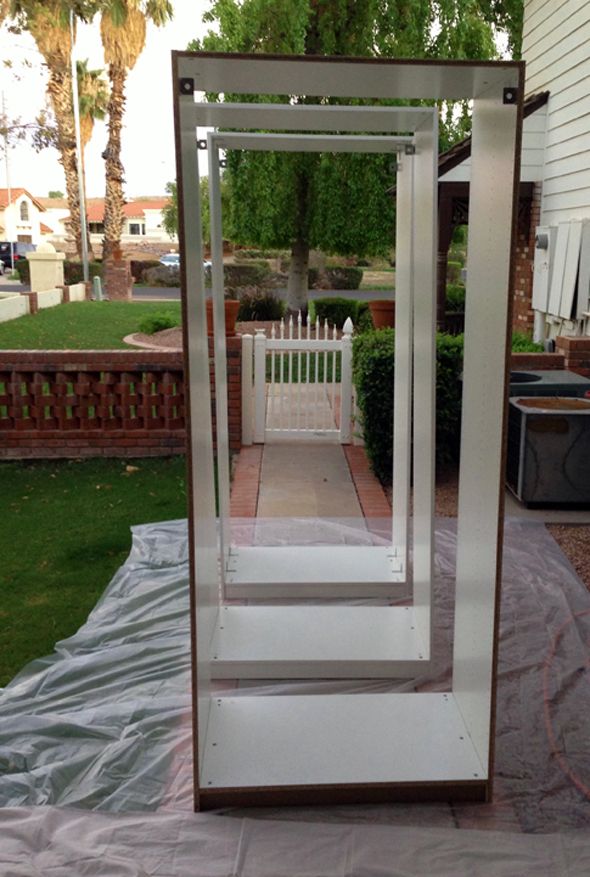
I think, whether rolling or spraying, it’s easiest to paint the furniture before it is completely assembled. You can get in all the nooks and crannies and to reach all the edges better when all the pieces are separate.
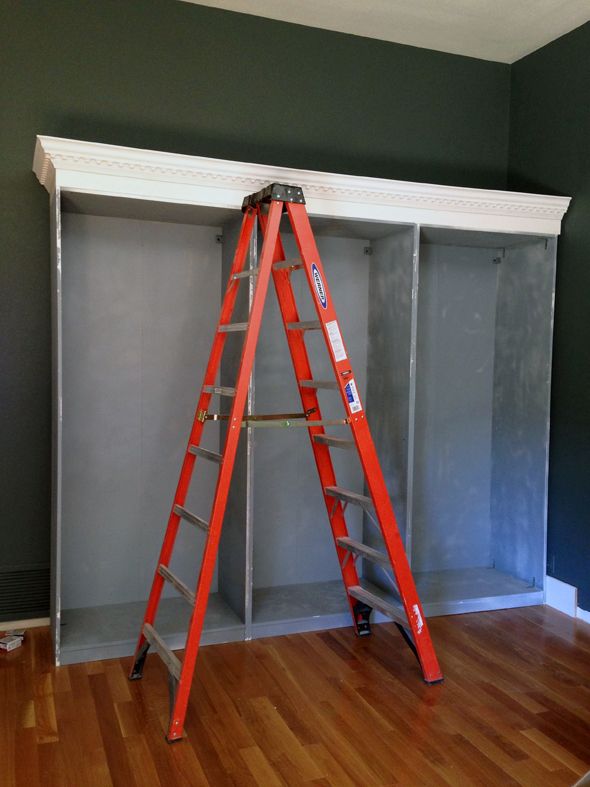
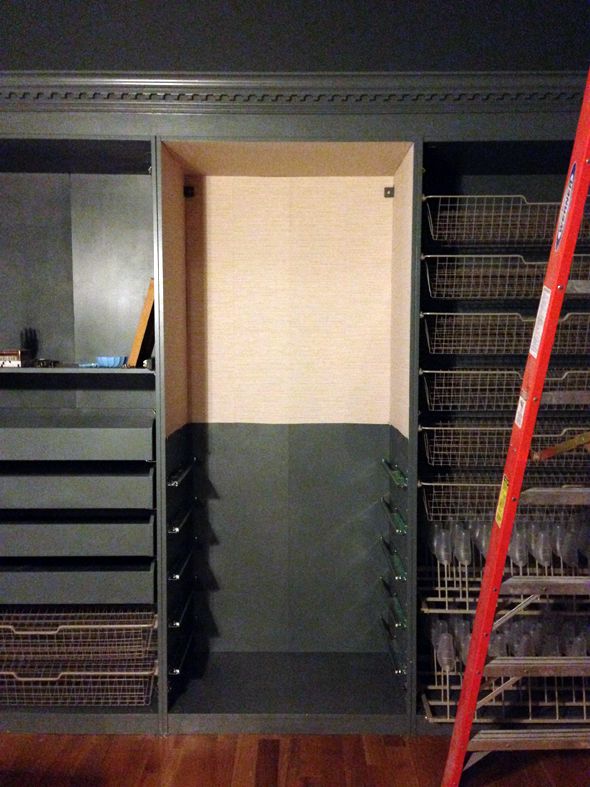
Once the frame was sprayed and it had a good sanding (why it looks so patchy here below), we screwed the units together and to the walls and then built up the top with a little box frame. Then we added crown moulding to the box (similar to
what we did here). This simple step added about 12″ of height the to Pax frames and instantly made the separate wardrobes look a lot more like a single piece of (giant) furniture.
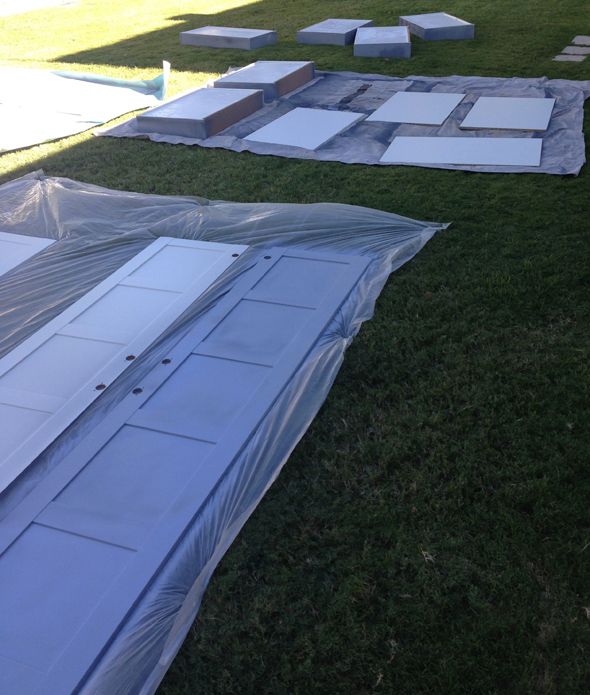
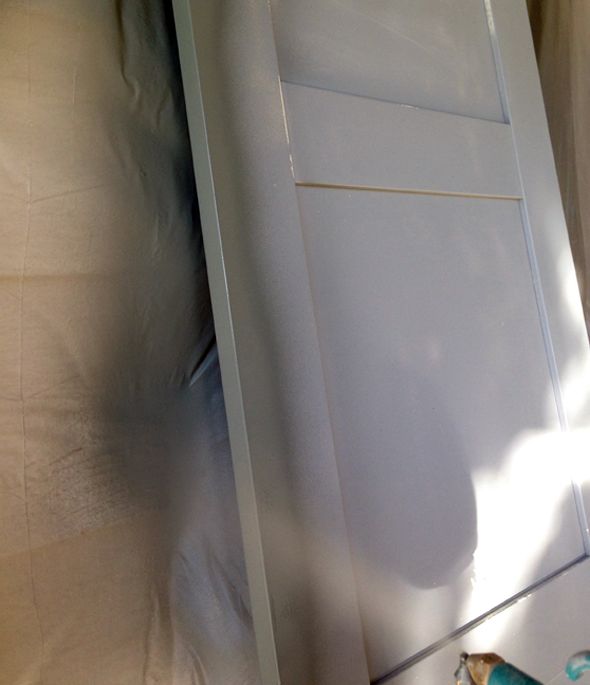
For the sake of time and ease, I sprayed all the doors and drawers and shelves outside with my
Critter sprayer and I rolled the wardrobe frames inside. I was interesting to see if there would be any huge differences in the rolled vs the sprayed finish.
I had to go back a do a little more hand sanding on the rolled paint and the sprayed paint looked a little more original and like a factory-finish, but honestly, both looked fine. So if you don’t have an air compressor and a spray gun,
foam mini-rollers are a great option for you. Just make sure you do several coats to blur out any roller lines.
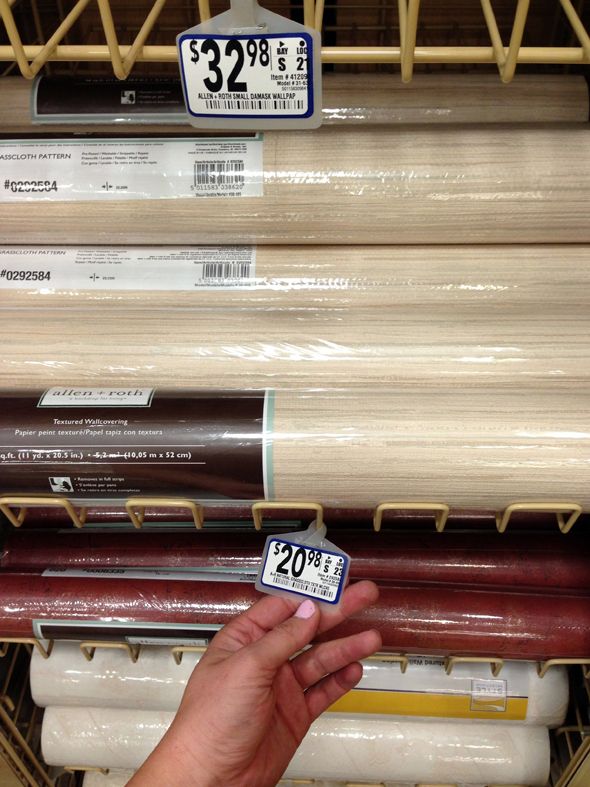
In my little vanity area in the center wardrobe, I wanted to add wallpaper to cover up the adjustable shelf holes, but I didn’t want any extra pattern or color (I knew my jewelry would be color enough!). I found this little roll of pre-pasted grasscloth look-alike at Lowes for about $20 and it seemed like an easy option.
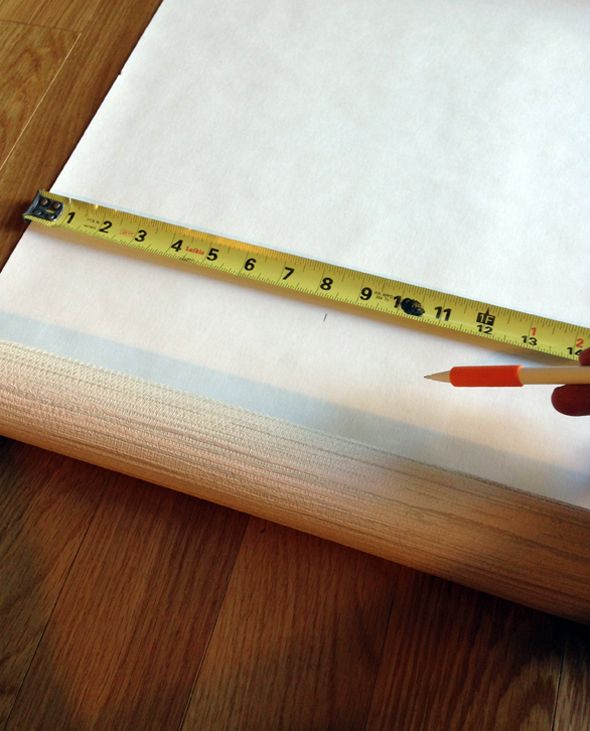
Most of the wallpapering I’ve done in the past has not been with pre-pasted paper. And wow, let me tell you – it is SO easy to wallpaper with this stuff. A million times easier than the paper that’s unpasted. For a smaller application like this, you can just mark all your pieces and cut them to size all at once.
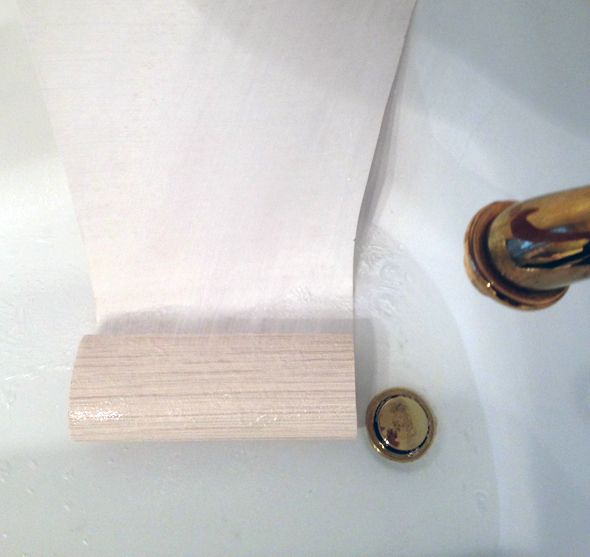
Then you get the paper wet and fold it in half for a few minutes while the paste softens. No need to get the paper too wet or you’ll have a huge mess on your floors and walls.
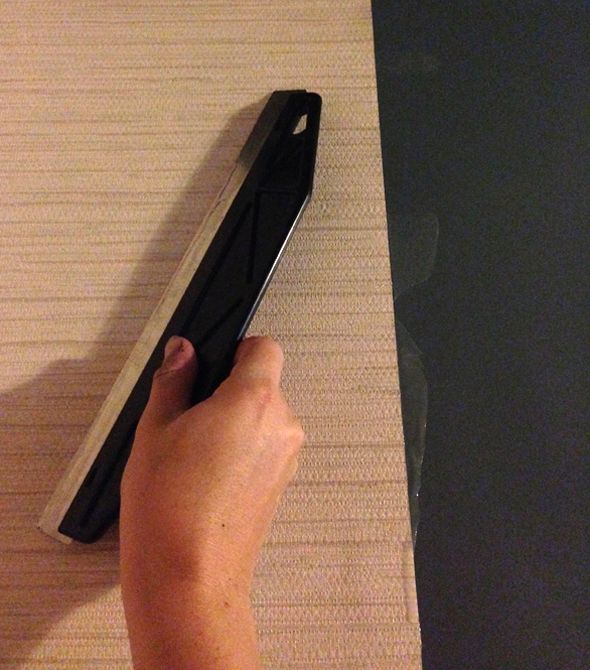
After you put the wallpaper up on the wall, use a large, flat spatula to pull out all of the air bubbles and extra paste (which you’ll need to wipe off with a wet rag as you go). If the spatula is large and if you work from the same edge and pull down and out with every swipe, you’ll have perfectly installed wallpaper in just a minute or two per sheet. It goes really fast with this pre-pasted stuff!
I used about half a roll for the vanity nook area and had more than enough to do the ceiling of the wardrobe too.
I rolled on the same paint (Benjamin Moore’s Advance line, tinted to Knoxville Gray) once the paper and paste had dried. I wish the finish look more like real grasscloth, but the texture is beautiful and subtle. I think it was worth the extra few steps to make the vanity look special.
—————-
So, I’ll be honest, while the steps of priming and painting all the surfaces in these three wardrobes were pretty easy on their own, it ended up being a lot of labor and it took several hours over the course of a few days to get everything covered and smooth. I love the finish and the color though, so I think it was worth it.


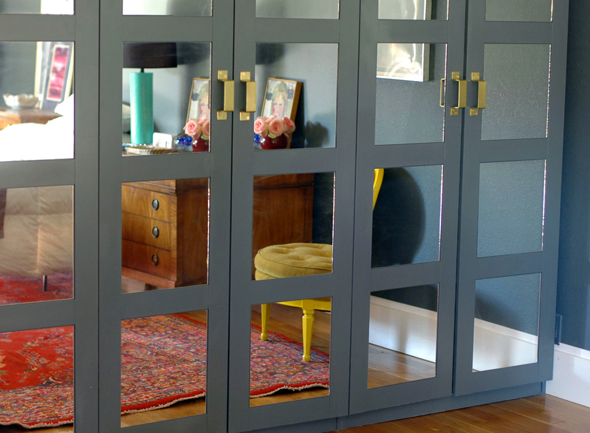
I too would like to know how the mirrors were installed
I talk about the process of gluing on the mirrors in this post: https://jennykomenda.com/2014/02/why-dont-you-make-fancy-credenza.html/
Are the mirrors 12″ square or an odd shape?
Hi, really appreciate your tutorial and product information for your projects – so helpful. How much do I need to spend on a compressor? the gun itself is affordable, but I can’t afford a pricy compressor. Suggestions? Thanks
I believe you can rent one at home depot or other similar stores.
You don’t need a compressor for these little jobs. Go to Home Depot or Harbor Freight and buy an airless Pai t sprayer. These little kits have everything you will need.
I like the Krause & Becker Airless Spray Lit.
Hi. Very nice job. I’m wondering, how have the paint and wallpaper have held up?
These look amazing! Did you use a latex or oil-based paint for the top coat? Thanks!
I am wondering the same thing! I don’t know if this question was answered yet…?
This is so nice! I love this idea!
Hi Jenny,
Your beautiful DiY on the Pax wardrobe has completely won me over and I’m getting one this weekend!
Could you please tell me where you got the mirrors?
Thank you!
Chelsea
Thank you so much for your tips… Very inspiring. I
believe you just shaved maybe $300 off of my project with these few quick tips.
I love this project!! I would prefer however to extend my wardrobe to the ceiling. If anyone has any ideas on how to use this same concept but make it taller I’d appreciate it.
If your ceiling is taller than 8 feet, you’re most likely going to have to go the custom route because the Pax System currently has a max height of 93 inches.
Cara Jenny,
il tuo armadio è stupendo! Grazie per aver condiviso questo progetto. Nella sezione DIY del mio blog lo mostrerò presto con il link al tuo post. Ciao da Roma Eleonora
Sadly, a gallon can of Zinsser BIN primer sealer is over $80 here in Toronto. I know it works really well, but we really get screwed over on the price vs. the U.S (almost double).
where did the handles come from? Love those.
Yes I would also love to know where you got those handles!
Thanks!
This is brilliant! Thanks so much for sharing.
Quick question… how did you fix the gold mirror inside the wardrobe to the back wall of the Pax?
I would love to know where you bought the door handles?
Hi,
I used this posting to get me tips on painting a pax. I used the primer, brushes, semi gloss paint. After waiting about 4 days we put started to put the drawers and door on. To our surprise the cabinet started peeling in some areas. I tried sanding those areas down (hadn’t sanded before) so we could put another layer of primer and paint but my husband told me it’d all strip in sheets. He was right!
What happened and did anyone else experience this?
You may have ended up with peeling due to the latex in the semi-gloss paint. :( Chalk-based paint would be less likely to peel. Better luck next time!
The door looks fantastic! Must have been some hard work there, eh? I tried to do some renovations by myself, but I usually just ended up calling http://thehomeexpert.uk/ and asking them to fix it :)
This is awesome! Where did you get that shoe tree shelf?? That’s amazing!
Can you tell me what level of shine you used in thek Knoxville grey paint? Satin or semi gloss? Thanks!
Do you have to prime before you stick on the wallpaper? Or can you put it directly on the laminate?
Where did you get that shoe tree shelf?? That’s amazing!
I can’t seem to find the doors. Where do the doors come from, and if from ikea, are they not available anymore?
Thank you for this. Where did you get the orange wire crates?
Where are those BEAUTIFUL red baskets from!?! Dying for them.
Hi Jenny,
Where did you find your shoe racks from as I can’t seem to find them anywhere.
I swear I’ve never left a comment on a blog before but I was so impressed by this. Well well WELL done!
Very helpful thank you
Hi, where did you get those amazing shoe trees? They look life-changing :) I would love to get them, or something similar. Thank you!