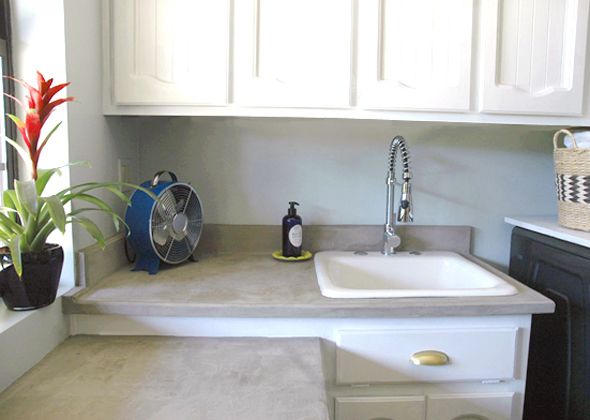
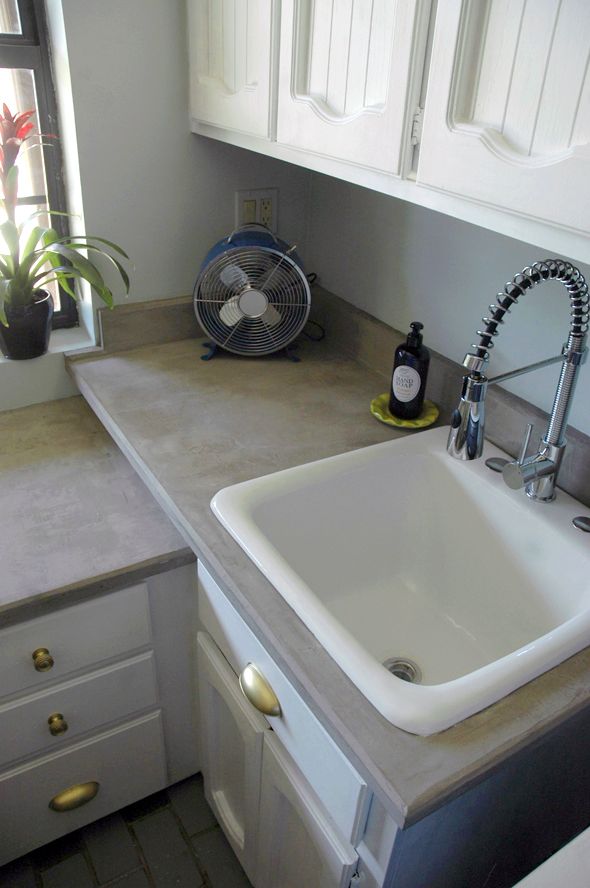
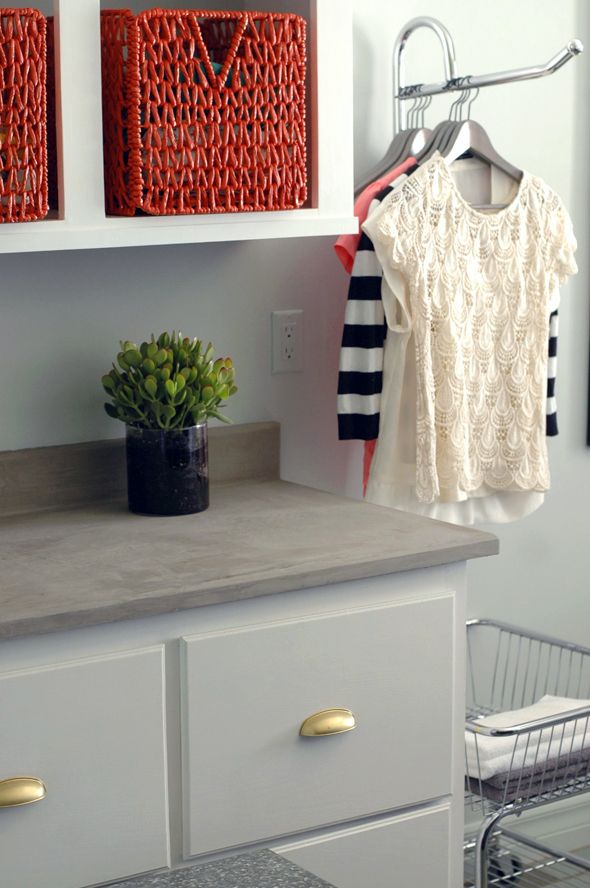
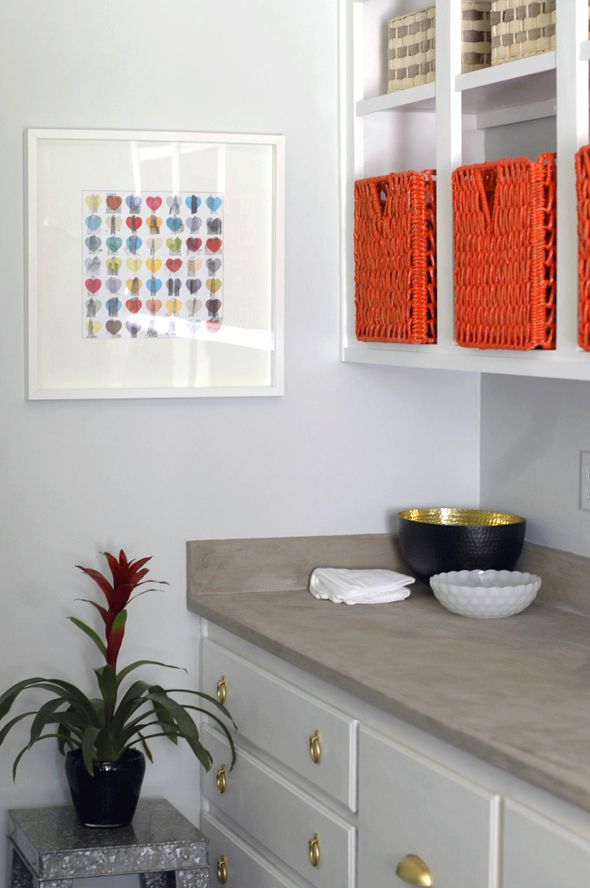
The most-requested tutorial from last week’s laundry room reveal was by far and away the concrete counters. Many of you asked if this treatment is durable enough for a kitchen. It definitely is! If you have laminate or formica counters and want something to get you by for a couple years until you can splurge on stone, this is a really great option. The best part is it costs about $15 and it’s incredibly easy to tackle as a solo project!
Let’s jump in…
There are a few of these concrete overlay tutorials floating around the web. I used this search on Pinterest to find the best ones (this one from Kara Paslay Designs was my favorite). You might want to look around yourself and find a tutorial that works with your existing countertops, though the concept is pretty much the same across the board.
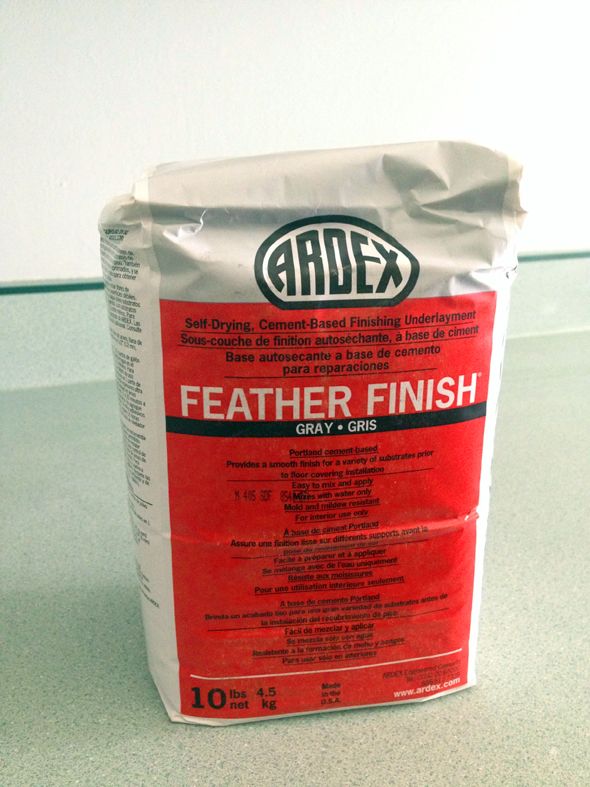
The hardest part (which is not all that hard) might be hunting down the concrete. The stuff you need to find is called Ardex Feather Finish. You can look on the Ardex website for local distributors, but it’s easiest to just call their toll-free line for the info. There were like six distributors in Phoenix, so I’m sure you’ll be able to find some in your area. A 10-pound bag cost me only $15 and I needed about half a bag for my laundry room. So cheap, right!?
I was talking to a contractor friend about this product (which is a concrete-PVC mixture I guess) and he said he uses it all the time and that everyone he know has been raving about this stuff for the past couple years – it layers on top of and easily binds to just about any surface. He said that any time you see a concrete floor in a retail space it’s more than likely this product, which made me feel good about it’s durability.
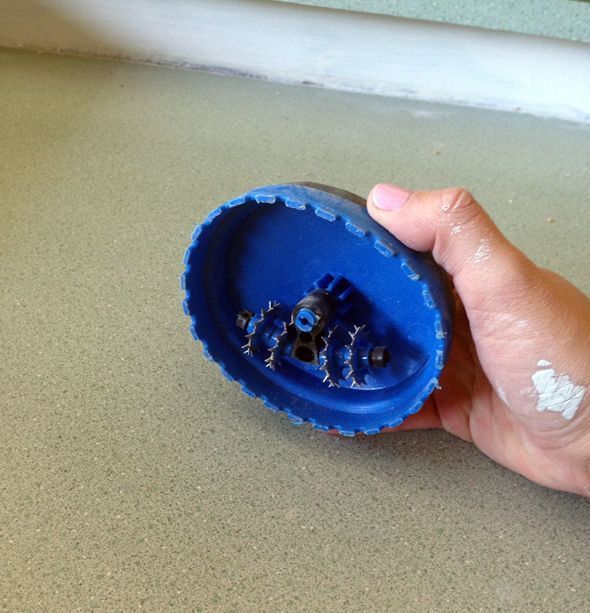
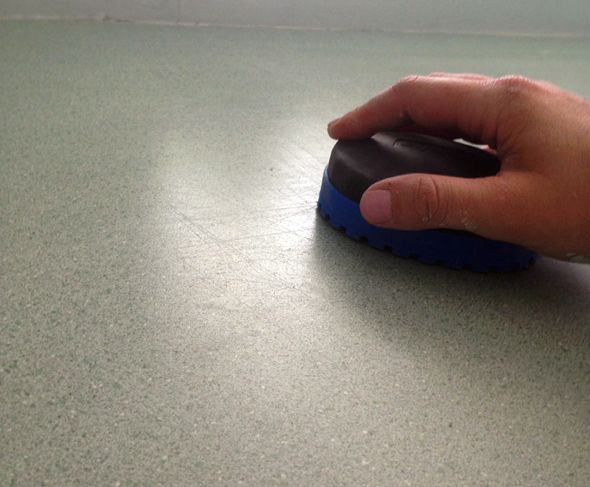
Even though the Feather Finish binds to flat surfaces, it’s a good idea to really rough up your old counters before layering on the concrete, just to be safe. I used a wallpaper scoring tool and that worked pretty well. I think even just a good sanding with course-grit sandpaper would work.
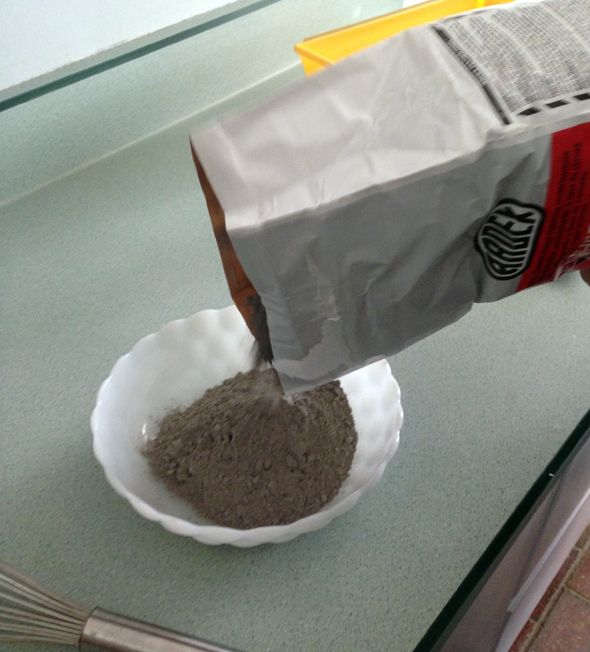
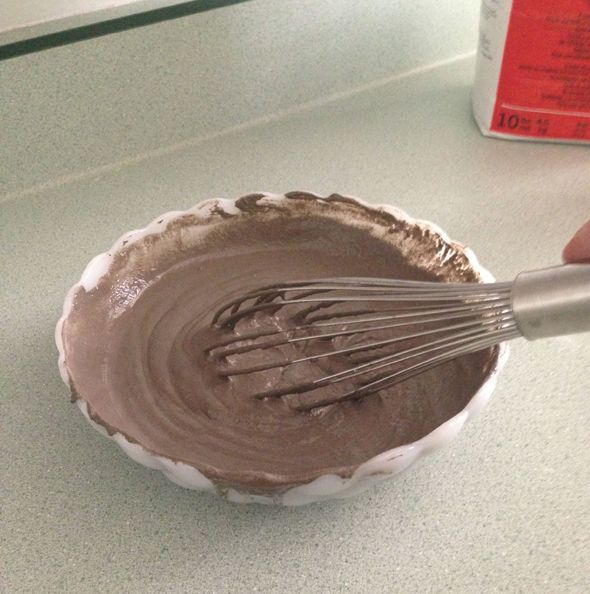
Once your surface is prepped, you just mix a small batch of concrete in a medium size bowl. There’s not really a formula, so I just added water from a cup until I got a good consistency. I think like a thick gravy is about what you’re shooting for.
You should follow the instructions on the back of the bag. You’re supposed to mix the concrete, let it sit for about 10 minutes to do a quick set and then mix it again before troweling on. It’s hard to mess this stuff up though, so don’t be intimidated by the idea of mixing concrete.
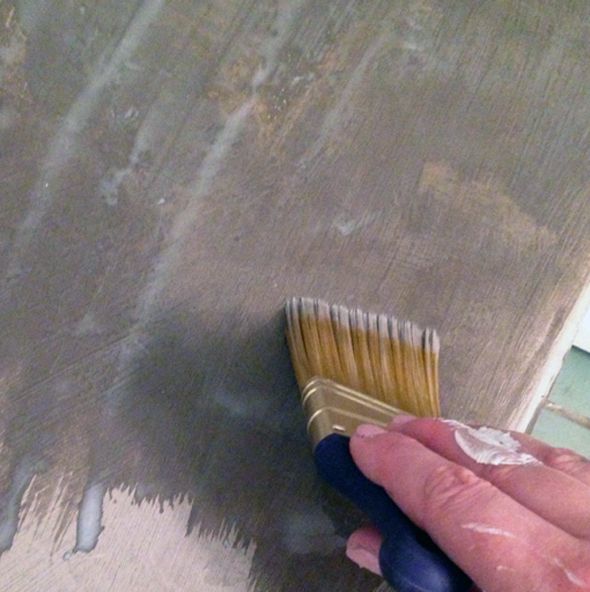
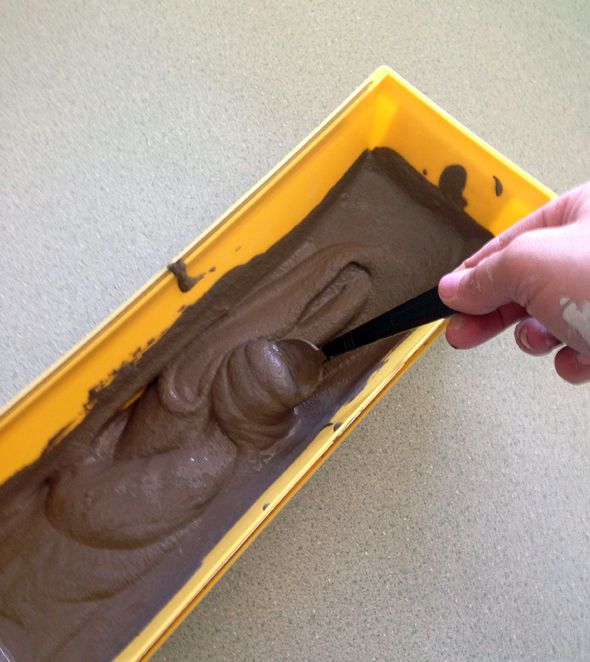
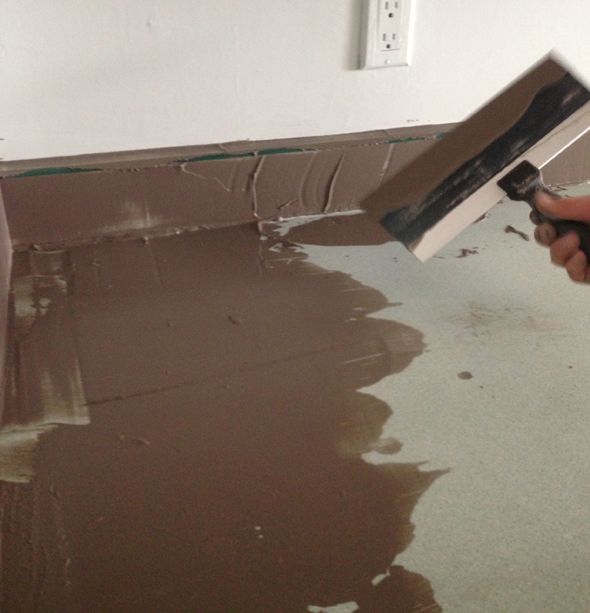
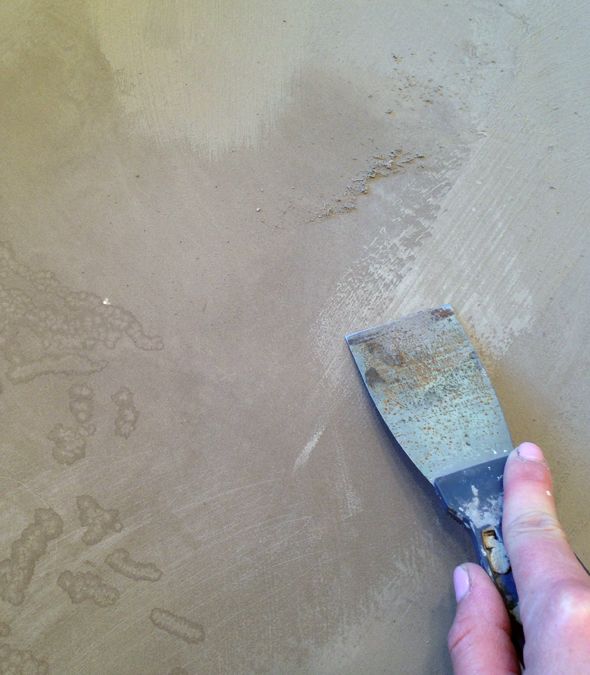
We used a long drywall knife to spread on the concrete mix. It is exactly like frosting a cake. If you can make a peanut butter sandwich, you can have concrete counters.
Just like with painting, the secret is to work in multiple thin layers. Try to keep trowel marks to a minimum, but don’t worry about each layer being perfect. You can sand off any imperfections later anyway.
This was when my first layer was about halfway dry. You can see I didn’t cover up all the green in my first layer, which was no big deal at all. I think I ended up doing three or four layers, but you can do as many as you want.
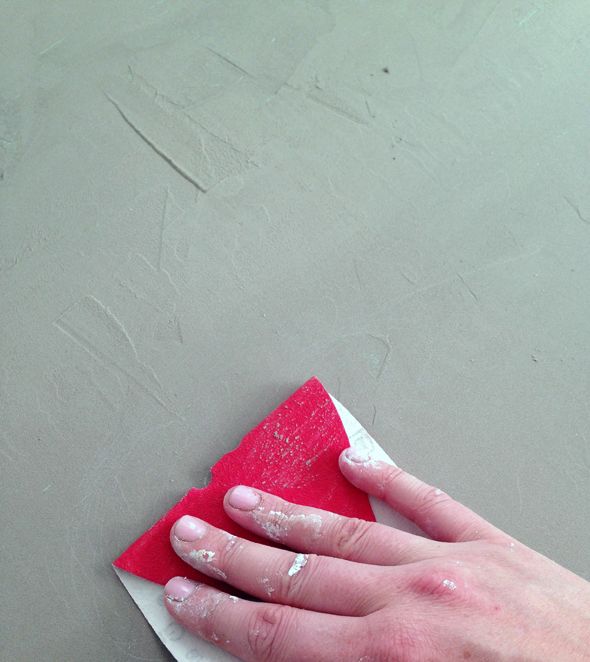
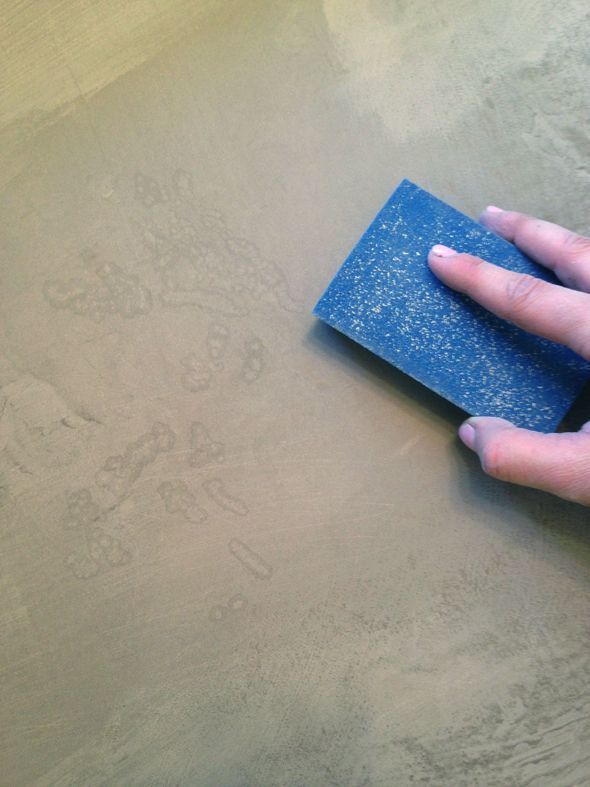
The secret to getting this stuff really tough is to give each layer a good sanding. I hand sanded the first two layers and used my electric sander for the last two. The sanding removes a lot of the soft stuff from the mixture and leaves you with a really hard surface that continues to harden over a day or two of drying.
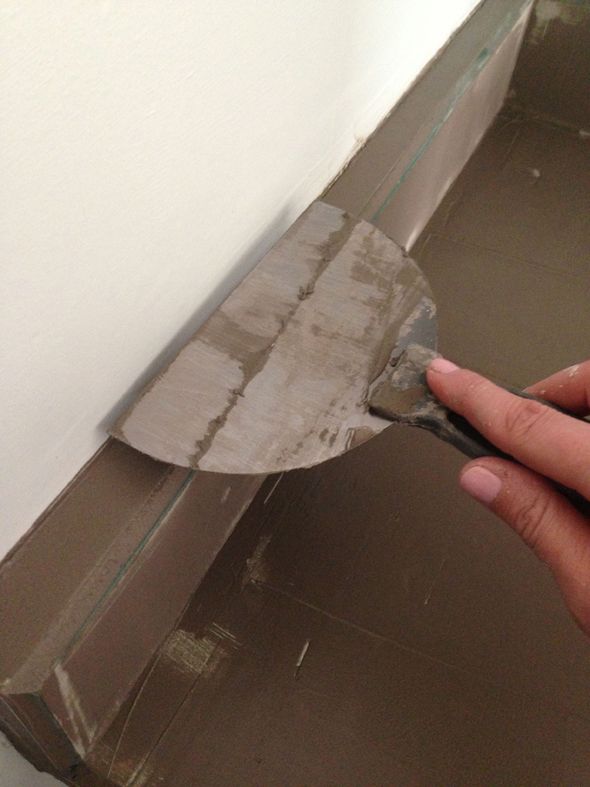
I used my little putty knife a lot too in the clean up process. I used it to sort of plane off bumps and wrinkles before sanding and to scrape down my walls.
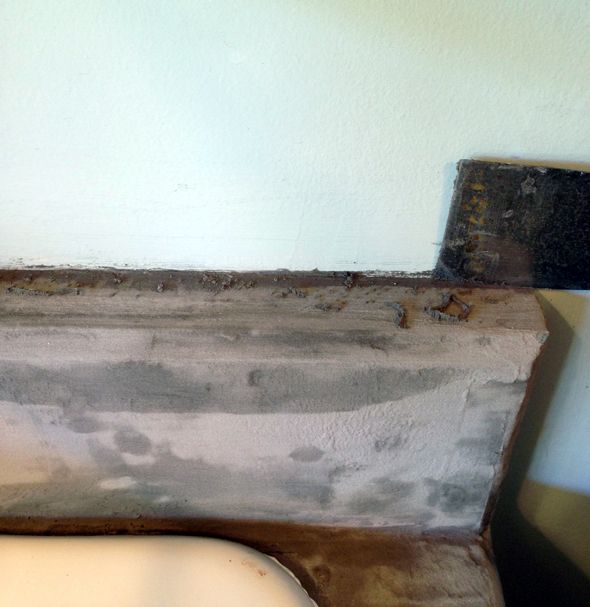
I also used it to score in a seam line anywhere there should have been an edge if the counters had been made of solid concrete slabs. I think this little step helped the look so much!
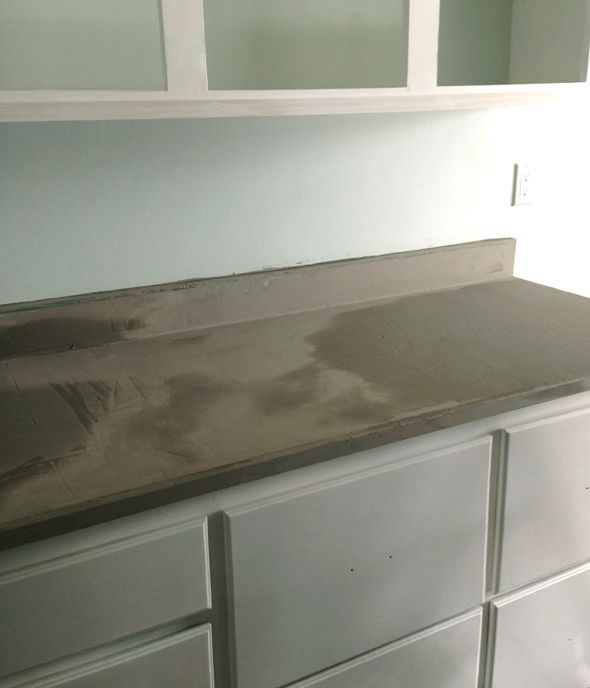
As the final layers go on and get their sanding, it is so fun to see the natural patterns and bubbles in the concrete emerge. I wanted to preserve that raw concrete look as much as possible.
I purposefully left some of my trowel knife marks to give the concrete some character, but you can make these as smooth as you like.
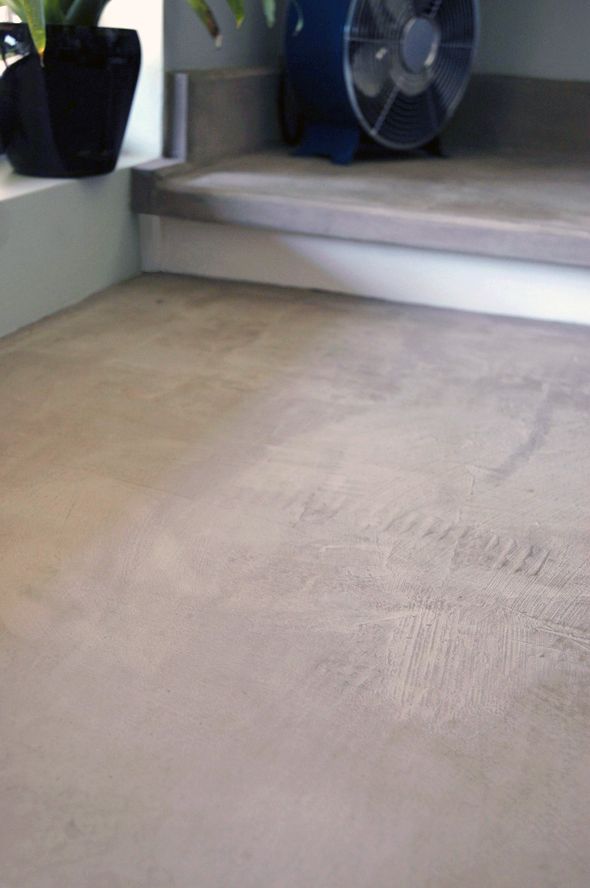
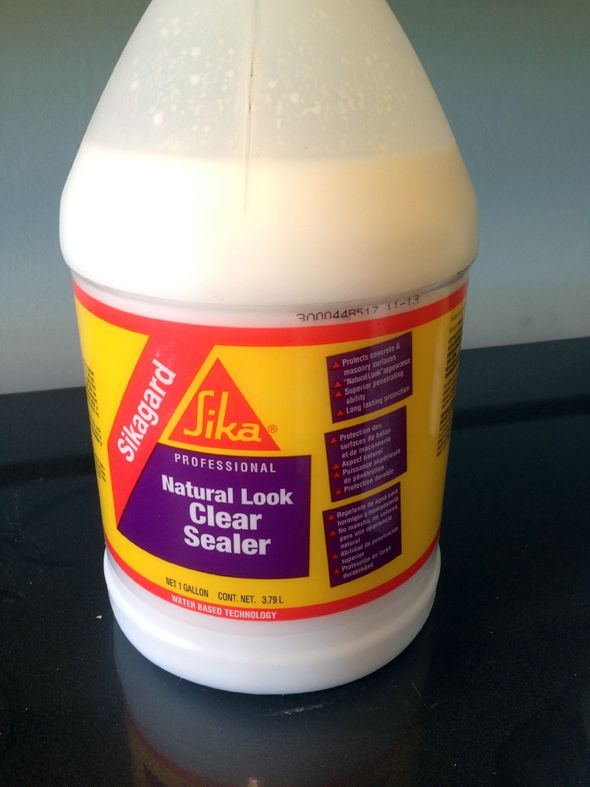
So to keep the natural concrete look and to keep the concrete really light, I used a matte finish sealer from the Home Depot. I think this one is a little more on the light-duty side. If my concrete gets wet, it darkens until it dries again (sort of like soapstone). It’s not soft when it’s wet though, it’s completely durable as far as I can tell. You might want to do some sealer experimenting if you’re trying this in your kitchen. I think the heavier sealer will make your counters permanently darker, but they will definitely keep all the moisture out.
I basically fully saturated my concrete with the sealer at least twice to really let the sealer seep down into the concrete.
I’ll probably reapply the sealer every year or so, but it’s been a couple weeks now of use and I still love these concrete counters. They are wearing really well. I spilled some detergent by the sink last week and was relieved that there was no staining or discoloration. Not that I expected there to be, but I have been a little skeptical that these counters could be so good while being so easy to DIY and so affordable. I’ll be sure to update you all if my opinion changes, but so far these are not at all too good to be true. Two thumbs way up for Ardex Feather Finish.
Update: Because I only recently made these counters for a limited-use space, it’s not 100% fair for me to recommend this method in a kitchen application. I don’t know how it would hold up with constant use. I think if I were you, I would buy a piece of plywood first and do a practice run. Maybe even cut the plywood to fit your countertop and live with it sitting on top of your old counters for a week or so to see how you like it. Kara Paslay Designs posted a similar tutorial here look like she and her husband know a lot about concrete (they teach a class on it) and they recommended this application for kitchens, so I know some people do it and like it. I think it’s worth a practice run first though for such a huge commitment! xo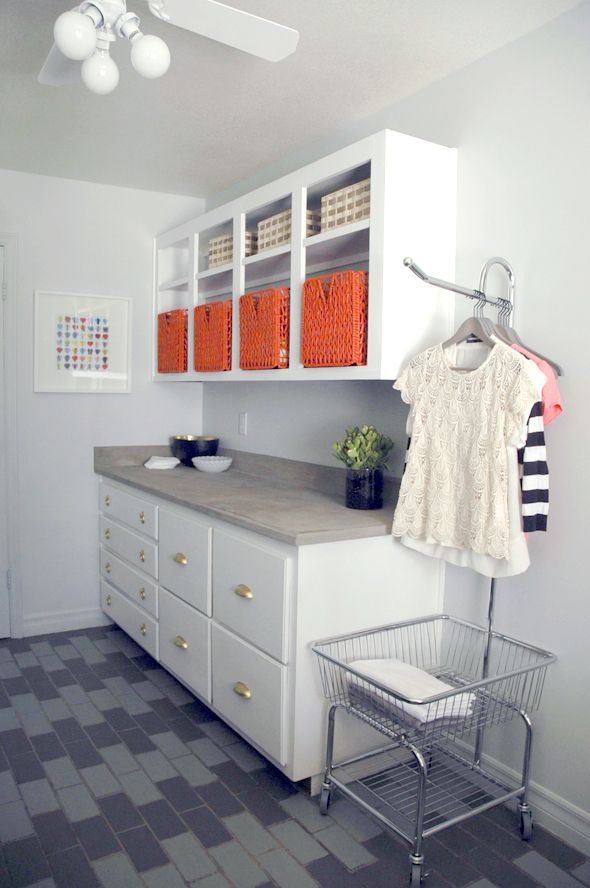


CaraG: We did remove the sink, which was a hassle because it weighs about 200 pounds. I think you could work around one if you really really needed to, but it's best to take it out first.
xo
Design_Fluff – I think you could lighten the concrete with white paint maybe? I haven't experimented more with this stuff, so I'm not the best person to ask. The Ardex people were really nice and helpful though. I bet you could call and ask. Also that tutorial I linked to in the post, those bloggers look like professional concrete people. Might be worth reaching out to them?
Good luck!
GraceHill, We stopped that the visible edge, but it would have been easy to continue around underneath. I didn't even consider that! :)
Sara Wetmore, There are a few very very tiny holes in our concrete countertops too. I think it might just be how concrete works?
I'm going to add this to the post right now, but I think before you change your kitchen counters, you should try a test on a piece of plywood to see if you like the look. It's a big expensive commitment and all DIYs seem to work better the second time anyway. I think it would be worth the practice! :)
xo
Marcy, I'm not sure how it would work on such a slick surface. It might be worth reaching out to the bloggers I linked to in the post. I think they are sort of concrete professionals. Best of luck! xo
It looks fantastic! I'm seriously thinking of doing this myself in our kitchen. I'm desperate for an update to our laminate counters but on a tight budget.
I just wanted to ask though, did you have to remove the sink? Or did you just work around it? Also, do you think it would work for counters that have a curved edge?
Can you stain the concrete white? Love this DIY!
Love this! We've been considering this in our kitchen as well. Our laminate is a bit thicker, but I think that will be fine. I was wondering, do you also do the underside of the overhang or just stop at the visible edge of the concrete?
They look fantastic. Amazing job! I have concrete counters in my kitchen that we made a few years ago, and I love the look but I'm finding that as trapped air bubbles pop it's leaving little holes on the surface. I worry about cleanliness sometimes given they're in the kitchen and food gets into the holes, plus I don't think I did the best job sealing them and it's starting to stain. I'd love to try this on top to add another layer and fill in the holes. Do you know if you can tint it? That was one feature of concrete counters that I loved – you can tint them any colour in the Benjamin Moore fan deck. Thanks so much for posting about this. I'm excited to give it a try!
Seriously great info and tutorial! You're so damn good! What a phenomenal product. Now to convince my husband that it is the answer to my kitchen counters for now.
Xo Nancy
Oh my gracious, do you ever make everything so easy and achievable. So very, very tempted to try this. And the best quote of the post?? "If you can make a peanut butter sandwich, you can have concrete counters." LOVE!
I've had this ARDEX feather finish countertop tutorial pinned for a long time now from a different blog and would love to try it maybe in one of our bathrooms. Seeing you use it makes me really want to try it ASAP. It looks so fabulous!
Brilliant!
WOW! It looks so great!! Of course now I'm wondering where I can use that in my house…hmmm….
These look amazing! I hate my laminate kitchen counter tops and you now have me seriously considering this quick fix.
hhttp://www.fullbellywornsoles.com
I really want to do this in my kitchen, but didn't realize it would be this easy or cheap! Thanks for the tips!!
Holy Moley this looks amazing!
At first, I wasn't entirely sure how I felt about this, but holy cow! I absolutely love how it came together!
And just like that, I know exactly what to do with our kitchen counters in this in-betweener house that I'm dying to sell. Thank you, thank you!
I love concrete counters! Our master bath has the faux "marble" counters (complete with gold-flecked swirls!) with molded sinks. Do you think this could work in that situation? We'd have to resurface the sinks as well, and I'm curious how the concrete would respond to constant soap & water exposure.
What a smart idea! I absolutely love this!!!
CaraG: We did remove the sink, which was a hassle because it weighs about 200 pounds. I think you could work around one if you really really needed to, but it's best to take it out first.
xo
Design_Fluff – I think you could lighten the concrete with white paint maybe? I haven't experimented more with this stuff, so I'm not the best person to ask. The Ardex people were really nice and helpful though. I bet you could call and ask. Also that tutorial I linked to in the post, those bloggers look like professional concrete people. Might be worth reaching out to them?
Good luck!
GraceHill, We stopped that the visible edge, but it would have been easy to continue around underneath. I didn't even consider that! :)
Sara Wetmore, There are a few very very tiny holes in our concrete countertops too. I think it might just be how concrete works?
I'm going to add this to the post right now, but I think before you change your kitchen counters, you should try a test on a piece of plywood to see if you like the look. It's a big expensive commitment and all DIYs seem to work better the second time anyway. I think it would be worth the practice! :)
xo
Marcy, I'm not sure how it would work on such a slick surface. It might be worth reaching out to the bloggers I linked to in the post. I think they are sort of concrete professionals. Best of luck! xo
Very cute. I wonder are there any other options for refinishing laminate counters. I like the look of concrete but it feels a little too modern for the look I'm going for in our new house. I'm also not crazy about the texture of real concrete (never really felt the applied stuff). I don't know if I'd want something cold and chalky on my kitchen counters, but maybe it doesn't feel that way. Either way, my laminate has to go.
$15 has never looked better. Thank you for sharing the process, too!
Holy smokes. That whole room is a glorious transformation. Well done, my friend. Love all of the touches of your personality in there as well.
Love this transformation! I've always been interested in concrete countertops – and you've made it look so easy! There is a small chance we are moving soon (into another rental, but this time it will be a house!) and the kitchen is atrocious, but the landlord is open to small renovations…we will definitely try try this if we make the move!
Can't wait to see what you will do with the rest of this home! I've enjoyed the virtual tour over the past few weeks so much…
what a great product! i am very impressed with how great it looks for that price! i'm sure your artistic abilities helped in the final product looking so lovely!
You are a freaking genius. I don't know how many times I'm going to say that?!?!?! I guess every single post!!! And fyi — this is the first DIY post where your nails weren't painted! :) You ARE working hard over there!!! xox
Oh, man this is great! I would LOVE to try this over my laminate counters. They have a rounded edge though. I wonder how it would work/look with that? I like how yours has flat edges.
Complete love. I'm also thinking of doing this in our kitchen (honestly, it can't be worse than the condition of our current laminate – yikes!). But yes, trying on plywood first seems like a really good idea, particularly for a non-expert DIY-er. Thank you so much for the great tutorial!
Looks great. I purchased the stuff to do this to my kitchen counter tops last weekend so it is one of the next projects on my list. You did a wonderful job!
Manda @ Our Wolf Den
WOW-Looks amazing! Such an affordable solution to cover laminate! Pinned to try later!
I love this so much! It looks great, and I LOVE how cheap and easy it was! So cool. Can't wait to hear how it holds up.
Great job! And it's sooooo cheap! After doing our kitchen I think this is the only way I can convince the mr. to tweak our bath. Thanks so much for sharing!!!
Great tutorial!
Where is the heart art from? I tried searching your blog for it with no luck. Thanks!
I'm definitely going to have to try this! I love DIYs that are easy, inexpensive, and make such a huge impact!
What a great idea for an in-between kitchen phase. We don't have the money for a full reno now, but I'd LOVE to ditch the laminate. Any idea how the concrete holds up to heat? Does this make it safe to put hot pans on the counter (with laminate underneath)?
SO obsessed!! What a great way to change up your home!
–Sayeh, The Office Stylist
Thank you! It really is a gift to follow someone like you who shares all your tricks and tips so freely.
What a great post! I recently purchased a home with awful dark brown laminate kitchen countertops. This is the answer I've been looking for! Thank you for your generosity in sharing your projects and skills. I have been a longtime fan of LGN, and it just keeps getting better!
Soooo onto this!! Have to check if this product would work over vintage kitchen tiles. Thanks for great project!!
Soooo onto this!! Have to check if this product would work over vintage kitchen tiles. Thanks for great project!!
I swear you continue to amaze me!
Love, love, love this!
Dying.
You're a genius.
Love it!!!!