I’ve mentioned before that one of the first things we did after moving in was pull out the horrible red commercial grade carpeting that covered most of the garden level (other than the floors in my office), including the stairs that go up to the living room.
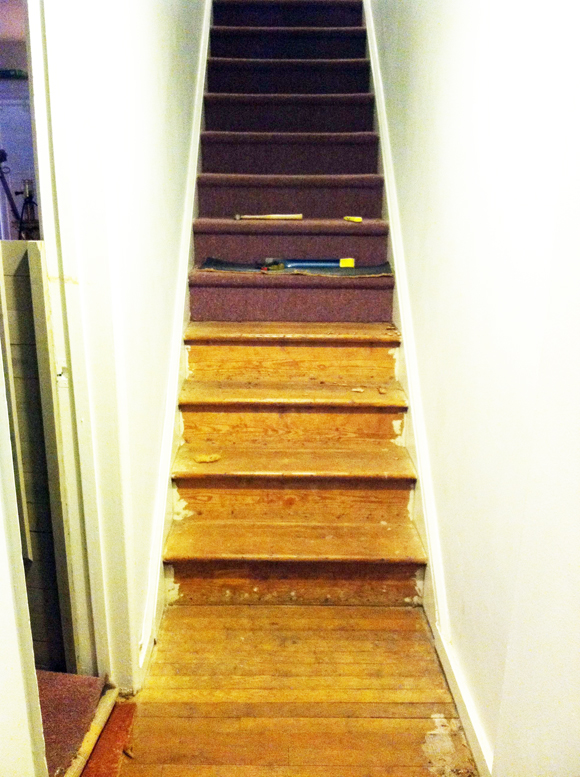
I loathed this carpet and we were relieved to see that the wood under the carpet was in salvageable condition in most places. But when we started pulling off the carpet on the stairs, we were in a different boat. The wood was full of holes and was covered in paint spills and brush marks.
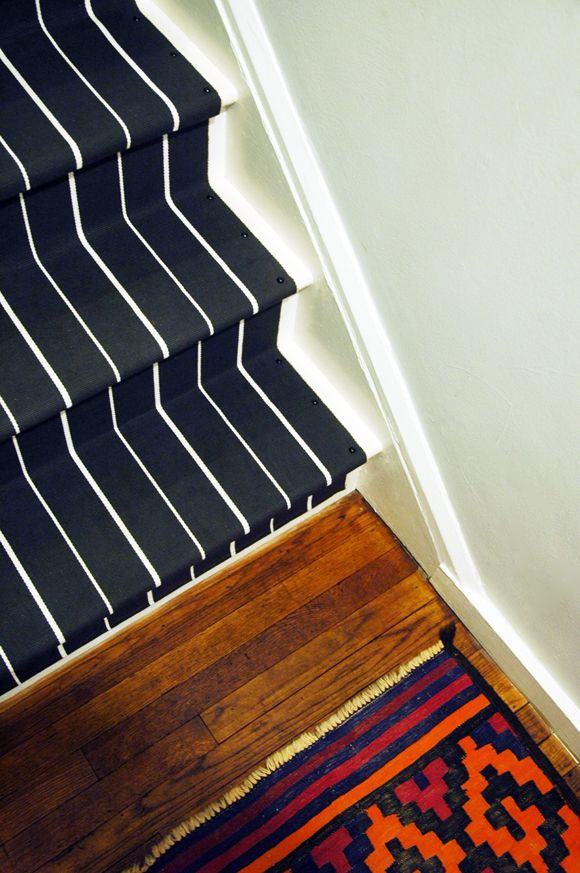
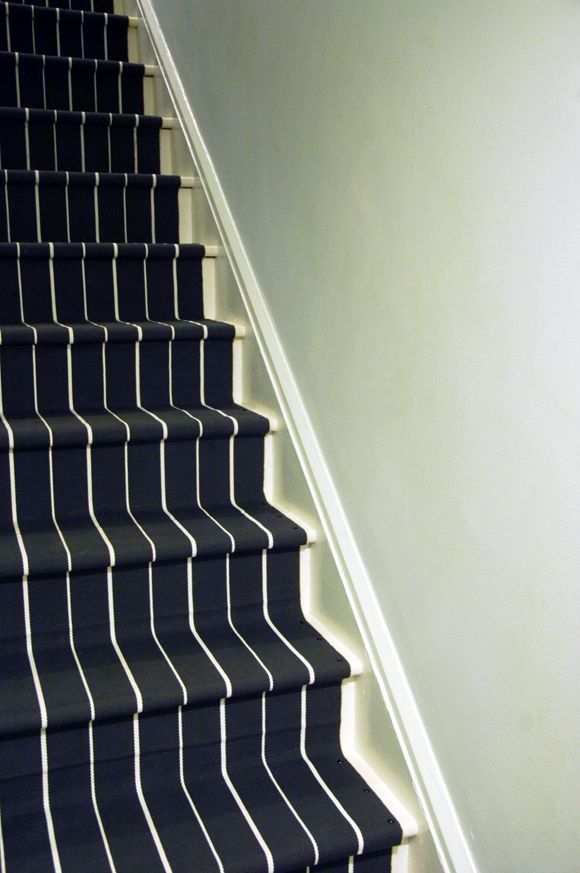
I like the look of a painted stair tread anyway, so I happily painted the stairs white (well, mostly…) before laying down the stair runner (which is really just a bunch of IKEA rugs)! Much better right?
Here’s the full run down:
I’ve come to love and appreciate the power of a sanding block in an old house. Everything in my house looks better after a good rub down with a sanding block! (it’ll clean up old bathroom tiles like you wouldn’t believe!) I cleaned up as much of bumps and the uneven parts here on the stairs as possible.

Then I primed and painted just the edges of each step. I was going to paint the whole width, but then I though it might be better to leave the wood in case the owner refinishes the floors in the future.

It’s CRAZY how much brighter and cleaner the stairwell felt with just those few inches of white paint!
Once the paint was dry, I pulled out a few of these rug grippers I had picked up at the doller store a few months earlier. I swear, the hoarder comes out in me when I go to dollar stores and Target’s dollar spot! Bad news. But it worked out for me in this instance.

This particular rug pad was the exact size as my stair’s tread and it was sticky on the top and bottom, so everything was really held in place.

When I ran out of the special rug pads, I move to a runner-sized non-sticky rug pad that I cut to size, and that also worked really great. To tell you the truth I can’t tell much of a difference between the stairs with the sticky rug pad and cheapie regular rug pad. So either works well.
So for the actual rug installation, I used four of
these runners from IKEA. They were $25 each and I could get about 3.5 steps done per runner. I started at the TOP of my stairs and used a
brad gun with 3/4″ brads to secure the runner to just the underside of the step lip.

I put in one brad every 2-3″ along the width of the stair tread. The rug pads helped the runner stay in place on the riser and the top of the tread, where there were no brads. When I got to the end of my runner, I trimmed off the rolled edge.
Without the rolled edge, it’s easier to layer the start of a new runner on top more seamlessly.
Then you just line up the rolled edge of the next runner and staple in place.

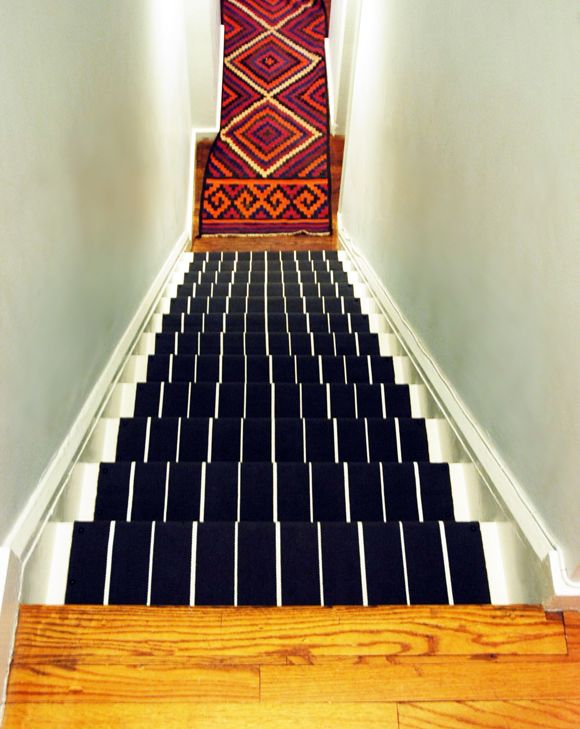
I’ll admit, I got a little sloppy when I was doing this project and I wasn’t super-duper exact with my lines. From the top of the stairs, you can see the stipes wander a little bit near the center. :( It’s not that bad in person, but in this photo, I pretty much want to pull out all the brads up to the middle portion and fix it this second. We’ll see how long it’ll last crooked I guess. Learn from my mistake! Measure your edges. Mark it out with chalk maybe to make it a little easier on yourself?
Anyway, the fourth runner was a little short. I could have bought a fifth runner and cut it up for just this bottom riser, but I decided I kind of liked the runner starting a little higher off the floor. I’m calling it a happy mistake. :)

Then to finish up the look and to make sure the runner were completely secure on the stairs, I used three black nail heads (just eye-balled) on each tread (none on the risers). I thought about doing brass, but I really like the tone on tone happening with the black nail head on the charcoal weave. It’s a more subtle look.

We’ve been loving our revamped stairs for a couple weeks now, and I am happy with the look and how it’s wearing! The dark shows less dirt than I was worried about, and the stairs are much safer now, and about a million times quieter.

One other thing we did was apply
Restor-A-Finish to all the floors that were under the old carpet, and they look SO much better. Much less dry. (compared to a few photos up)

I love seeing the stripes peeking into the living room. :)
So with the four runners, three packs of nail head trim and a couple dollar store rug pads, I think this project came in under $125.
PS the vintage runner in the hall was a flea market find. It’s really long and I was hoping I could use it as a stair runner originally, but we were about three feet too short. Bummer.


Fantastic!!!
You blog my mind. Every. Single. Time.
Truly, an incredible transformation! Mind. Blown. !!!
Great job! Looking at small brad nailers and impressed how this worked magic here.
Such an awesome transformation!
Genius, as always! How do you come up with these things?!
Also, I'm a total hoarder, you never know when you'll need it. We have a very little storage room here in Japan and you can barely open it but I will say, I've never needed to run to the store for odds and ends like packaging tape. :)
Thank you for this tutorial Jenny. Installing a runner is on my long list of to-dos, and I really appreciate all the details like the rug pad under the runner and the brad nails. Love the nailhead trim too – that is such a nice detail.
This is brilliant! Thanks for sharing all the steps (as usual)…I'd feel so proud of myself every time I walked down those stairs!
Amazing!!! Love the end result! Modern & chic
Xo edyta
http://Www.edytaandco.com/blog/
The stairs look much better. The white brightens up the look and the runner is unique. They also appear to be safer this way, which is important if they lead to the living room.
Loooooove this! I need to do this too!
You're a genious! It looks great.
This looks great! I'm actually thinking of doing the same thing with the main staircase of my home, but I was a bit hesitant to paint the stairs. Not anymore! Thanks for being such an awesome inspiration!
I'm in LOVE with it!
I love this runner! Thanks for the tutorial and the tips on why measuring is so needed especially with stripes!
What a great idea to use multiple of the same rug to create that stair runner, I wouldn't have thought of that!
Are the nail heads out over actual nails that you hammer into the stairs?