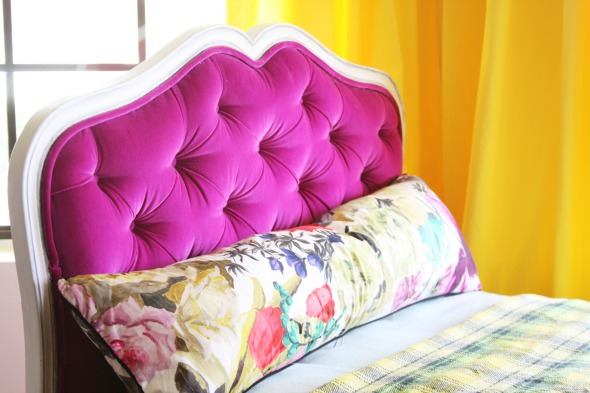
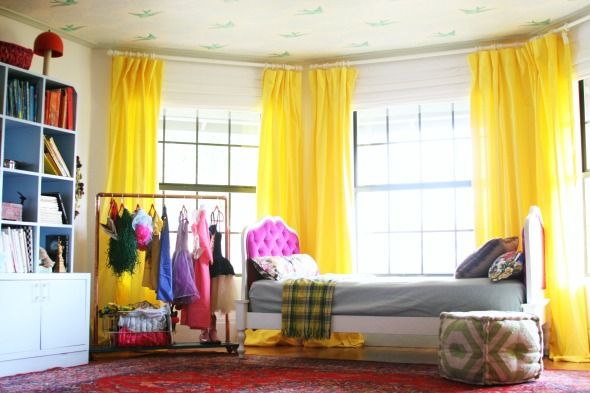
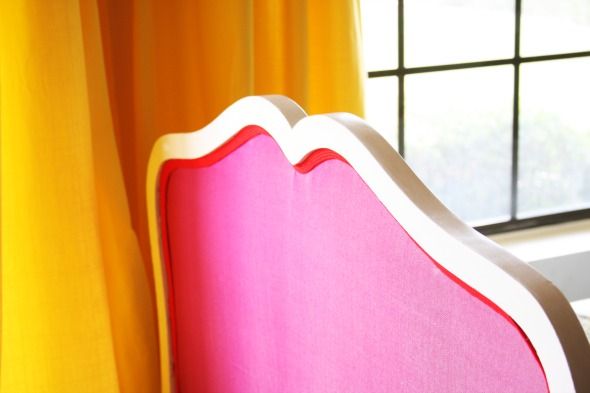
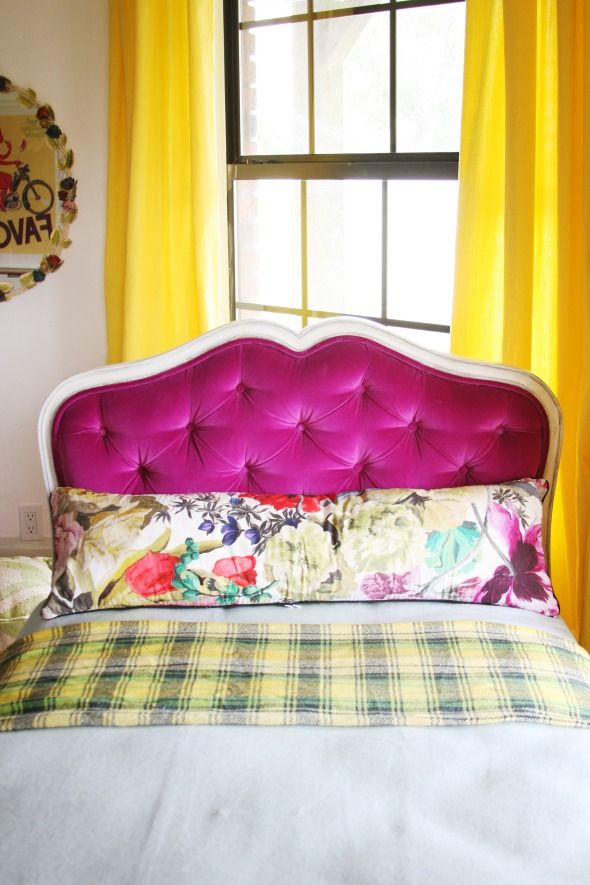
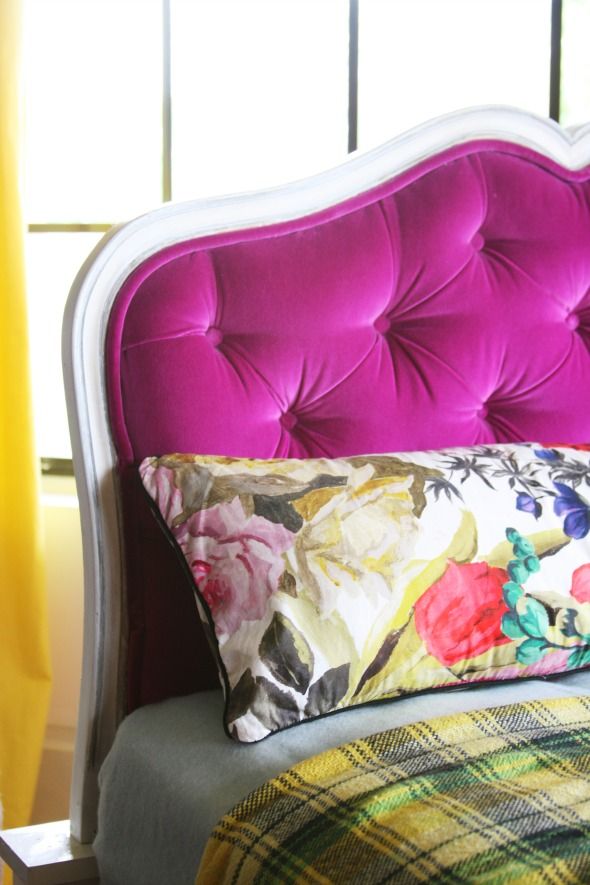
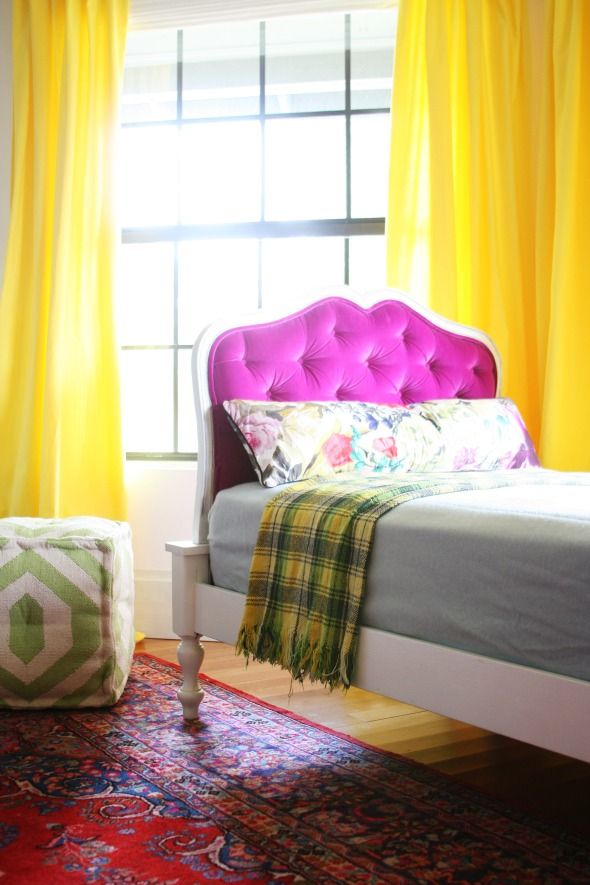
Remember this cute little magenta velvet headboard I made for the girls’ room when we lived in the loft? I finally got around to tufting the matching twin headboard before the Domino shoot so we could make the headboards the sides of a daybed for the playroom.

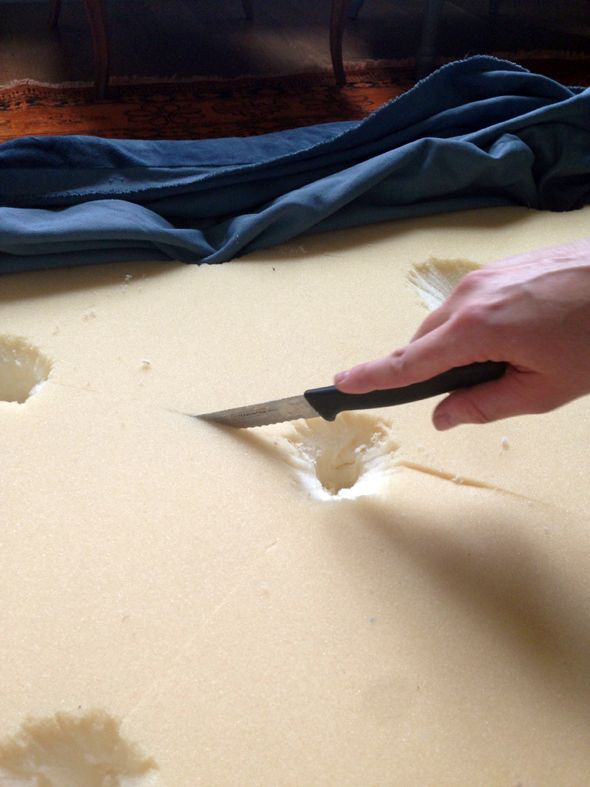
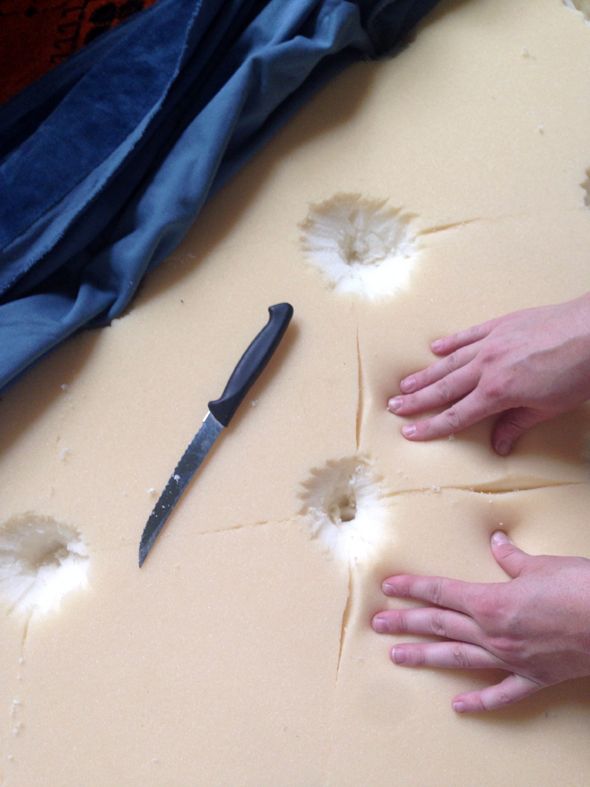
Like I’ve mentioned a million times before, we were in such a hurry to get everything done. In an attempt to make this project go a little faster (tufting isn’t all that hard… but it can be time consuming), I realized that I could completely bypass the whole threading-a-button-through-the-headboard-holes thing by just carefully screwing a wide-headed screw down in through the hole I had made in the foam.
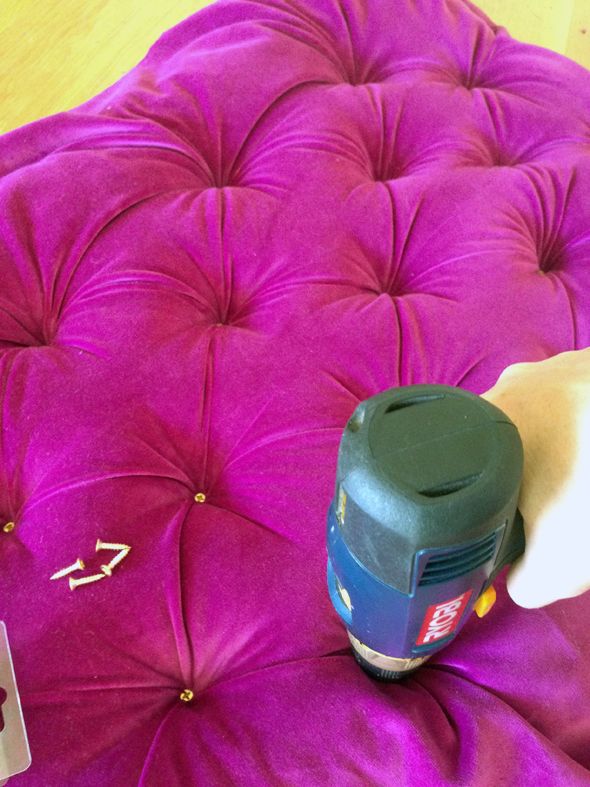
The only potentially tricky part is making sure you’re putting the screw in the exact right place. I ended up screwing in pilot holes before hand, so I all had to do was find the pilot hole (blindly) with the point of my screw before using the drill to put in the screw.
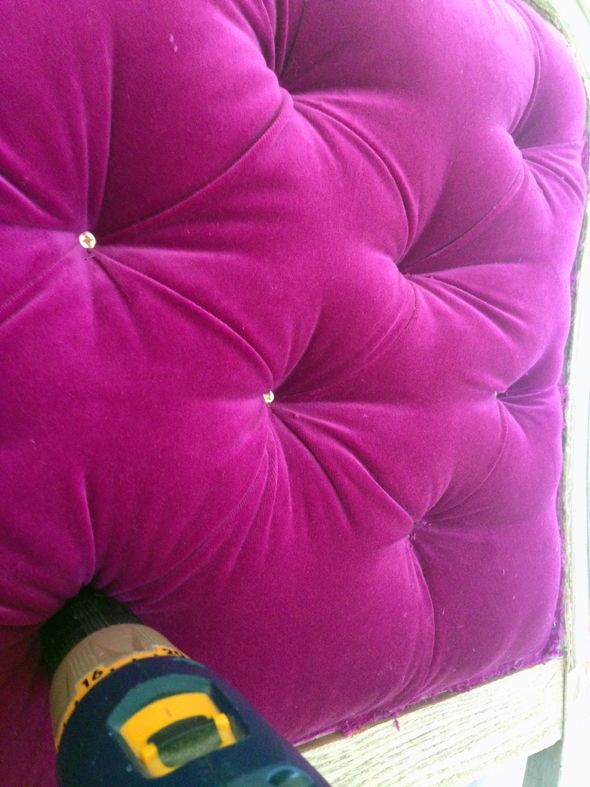
It’s important to use screws that aren’t too long (unless you wont see the back at all) and that have a wide enough head to hold back all the fabric from the tuft. I used a little bit of high-loft batting and linen in the same magenta color to back the headboard and cover any of the screw holes.
This little trick saved me literally hours of labor time! And it looks great! I just used fabritac to glue in the buttons into the tufts and I think now it would be hard for even me to tell which headboard was the one I spent more time on! :)
Oh! I also wanted to mention another little tufting trick I discovered a week or two ago. My sister, Ali, is about to have a sweet baby girl (yay!!) and she wanted to redo her bedroom before the baby came. We made a tufted headboard and the velvet we were using was a little thick and it was getting tricky to make the fabric not look too lumpy. I cut deep grooves into the foam and that made a little pocket for the fabric to sit into AND it made it super, super easy to get the diamond shape perfect and nearly wrinkle-free every single time.
Just a few little tips in case you’re hoping to tackle a tufting project soon! :)


That tip on cutting grooves in the foam is just WOW — I wish I had had that tip when I was tufting a round !(!) leather (!!) ottoman (!!!) a few months ago! What to do with the thick extra fabric was by far the toughest challenge.
(Jenny, I was actually so excited by your helpful tufting DIYs that I emailed you about it, but here's the link if anyone else would like to see: http://nzle.tumblr.com/post/78143250847/this-post-is-for-1-bluishorange-who-has)
I've been thinking about making a tufted headboard for our guest bed, so this is perfect! Turning a single bed into a daybed is such a great idea!
oh that little costume/dress up rack is darling! i can't wait to see more of the playroom – as i am sure you made it just adorable with all the extra girly glam touches!
Of course! Screwing in the tufts makes so much sense! Do u think if you put one of those little nut thingies on the other side of the plywood it would give extra protection from coming loose over time? Rock on, Jenny! Your house is looking so cool. By the way, I've been following your blog since way before you moved to New York and it is so fun watching all the cool stuff you do!
You would have to use a thin bolt to put a nut on it.
1st drilling a hole to thread the thin bolt through. You can not put nuts onto a regular pointed screw that I know of.
It’s called nuts and bolts, not nuts and screws :}
Great technique! Thanks for sharing :)
That cushion is gorgeous! Where's it from?
i love it! i have thought about redoing a couch of mine that's tufted but it makes me incredibly nervous.
you just blew my mind…! I've been wanting to tackle some chair backs but don't have a week of my life to spend trying to tuft them so this is something I need to try…! thanks Jenny!
Question: in a previous tufting tutorial you used pegboard. Did you use pegboard here or regular plywood?
This is insane!!!! It looks like you could have paid 1000's for that daybed. Crazy awesome magenta velvet – so luxe!!
so great! thanks for sharing! we are getting ready to tuft an ottoman for the living room. I would suggest using a washer along with the screw so that the fabric doesn't rip and pull through. It wouldn't be an issue on a headboard, but an ottoman that would get used a lot will see some serious action :)
Brilliant! You just made my life so much easier! Thank you thank you thank you!
So cool! What a great idea! Having no time sure has made you creative! Good job! Maybe I'll actually try tufting one of these days! Thanks!
The screws through the front to make the tufts is just genius. Suddenly I'm not feeling like putting off the tufting on the headboard my husband and I recently made. This trick would make it go so much quicker!!
Why haven't I thought of doing this? Ok, making a headboard NOW!
Those look great! I've tufted that way before. You can also use small washers with the screw to make the tuft.
I am loving all of your posts this week!! I have so enjoyed getting to see your beautiful home before it shows up in print in Domino!! It is all fantastic!! Kudos to you:-)
It looks absolutely wonderful! I never would have thought that was something I could try on my own. I love tufting and it is so expensive to have done. So glad I stopped by your lovely blog!
Jennelise
Yes I am going to do a tufting project soon! And I always think of this exact DIY tufted headboard of yours. So gorgeous.
Love that pink! What a great shortcut, I know how tedious threading those buttons can be. I was wondering did you have any problems with the fabric twisting with the screw? Or did you pre-cut that too?
From your photos I think have a DIY tip for you. An electric knife like you use for carving turkey/meats/bread works great on upholstery foam, cuts like butter and are only about $15 at the big box stores.
You are so handy, I never be able to make something like this, even close to yours…Your technique is very good :)
Home cleaning Ealing
Oh my gosh, Jenny. This is why we love you. Genius!!!
What a great room design I can't believe you made that photo. I know my teenage daughter has been asking for a canopy bed for some time, so I'll forward her this post.
Amazing Q Lin Bed for your Bedroom
Do you have any tips for determining pattern/placement for the tufts (esp for a queen size headboard)?
Genius. Thanks for sharing!
So, now I have to ask: what's with the daybed? Who made it? How? I assume it takes a twin-sized mattress? Did you use an existing frame or build it from scratch? Looks like there is a box spring there, no? Great as an extra guest bed, perhaps. Do spill the details…
Wow! Well done – how did you learn to do all that stuff?
Absolutely beautiful and THANK YOU for those tips!
I always take shortcuts when I tuft. But I use my electric staple gun instead of screws. The tufts have held up just fine, and it saves A LOT of time. That is a beautiful bed btw, great job.
That magenta is stunning! We have a built-in daybed in our playroom with some fun Guatemalan textile pillows I made with fabric I had collected when we lived there. I found a great black and cream ticking stripe daybed cover at Pottery Barn that really finishes off the look and it would be great with your magenta velvet. Check it out!
Thanks for the tips! You are truly awesome. Love the girls room! xo Nancy
Oh my heck! That is brilliant! I have an ottoman I tufted and the buttons have come loose. I'll see if I can give this a try. I will definitely do this next time! And there will be a next time because tufting is so fantastic.
Love the daybed!! Could you please share how you achieved the single cording. You refer to double cording on the navy chairs you did awhile back. Thanks
Hi. I adore the pillow. Where did you get it? Thanks for sharing your beautiful home
GENIOUS! I am soooo doing this!
You could also insert your screws through a washer before you screwed them into the fabric to make sure your fabric did not pull loose around the screws. That would also give you a little more room to glue your button on.
Absolutely beautiful blog. Have a look at this another online store for wooden home furniture Bangalore wih some amazing stuff from The ArmChair
im stealing that idea for sure.What did you use for buttons?do they sell fabric ones or did you cover your own?
Hi Colleen,
I made my own buttons to match! You can buy kits like the one I’ve linked below. It’s super easy to do!
http://bit.ly/2Lbp4Qf
I Liked It, I’ve have been wanting to do this for
a long time you’ve just made my day.Yesssss! Thank you.
WOW – having done the tufting for a coffee table by drilling holes and threading a needle up through the board and foam – this is genius! We are now going to make the king size headboard that we were going to buy to save us all that work! Yippie!
Can anyone help point me in the right direction- I’m having a hard time figuring out how to make a tufted board piece and attach it to the piece I am wanting. Example/ sides of a dresser. How would one attach the piece to the side after already doing the material and tufted work? Not sure if I’m even asking this correctly to make sense to others.