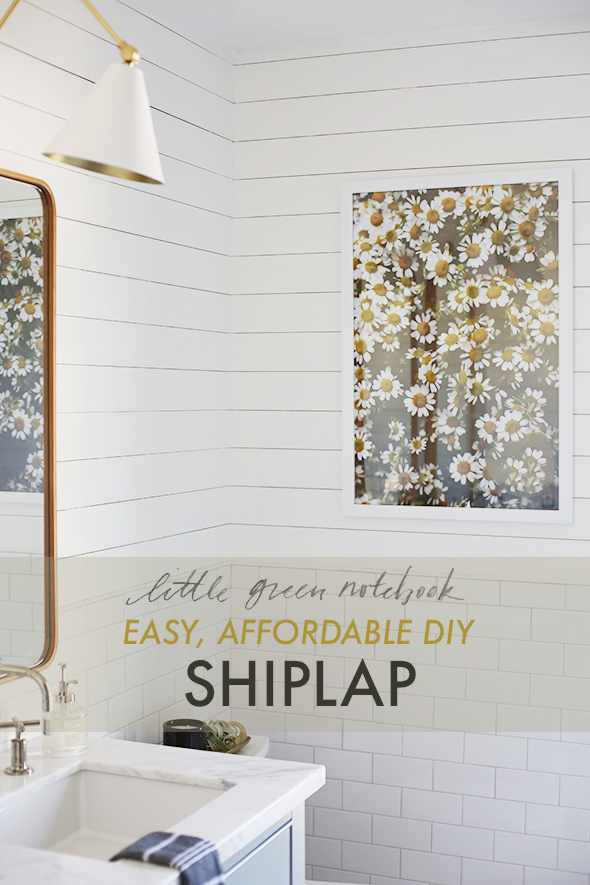
Thanks for all the sweet comments about the Girls Bathroom reveal! A lot of you have been asking for more details, especially on how we did the shiplap above the subway tile. I’m so excited to share this project! It’s cheap, easy to do and the results are so pretty!
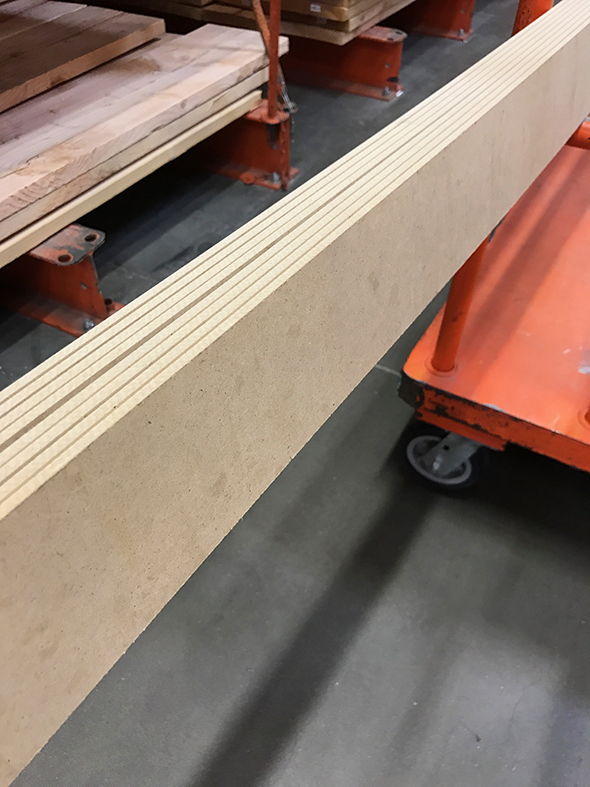
My sister and her husband were at Home Depot one day to get some melamine ripped down for a shiplap project in their mudroom and they stumbled on these pre-cut lengths of MDF called bender board in the plywood aisle. The display is pretty high up, so it’s not super noticeable.
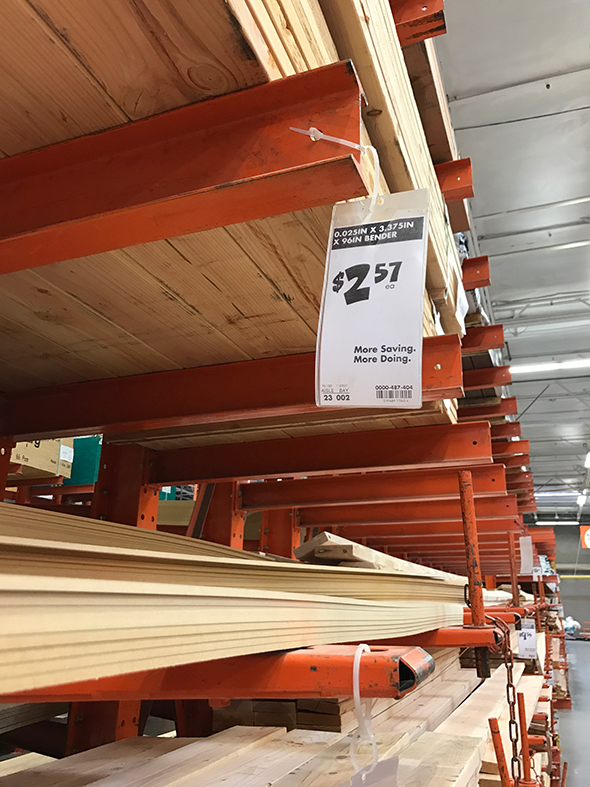
Each board is 3.75″ wide, 8′ long and about 1/4″ thick and is priced by the board. My Home Depot sold them for $2.57 each. I only needed about 32 boards for this bathroom project, and with nails and glue included, the total cost rolled in well under $100! SO affordable!
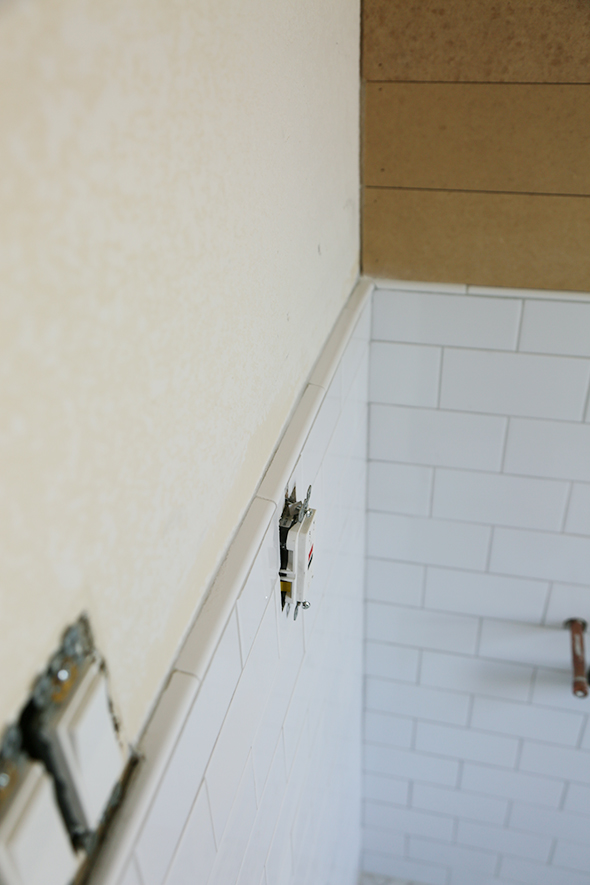
This shiplap is PERFECT for rooms where you aren’t starting from scratch – in fact I decided on the shiplap in part because I wanted to cover up the heavy texture on our old drywall. Because it is such a thin product you can lay it right over the existing drywall and butt it up against your tile and door and widow casings the same way I did here and it looks great!
You will need to invest in a few tools to do this project, but these are all handy to have around anyway. I have each of these and LOVE them:

Air Compressor // Dremel Saw-Max // Painter’s Tool // Miter Saw WITH LASER // Caulk gun //
Ergonomic Utility Knife // BEST caulk for trim! // Liquid Nails // 18 gauge brads // 18g Pneumatic Nail Gun
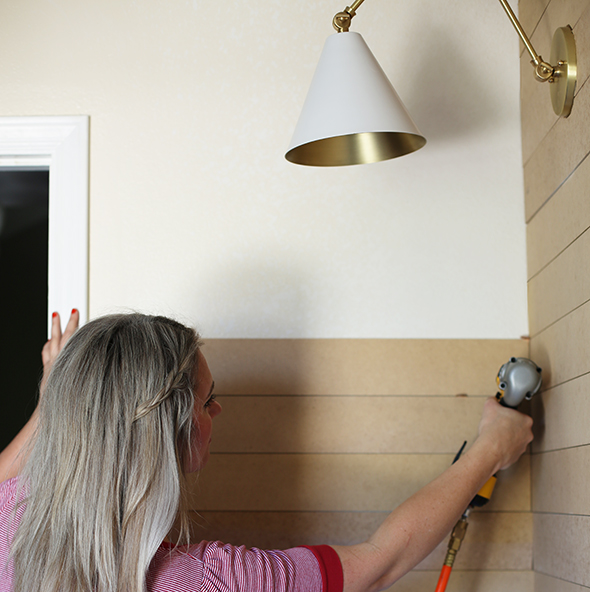
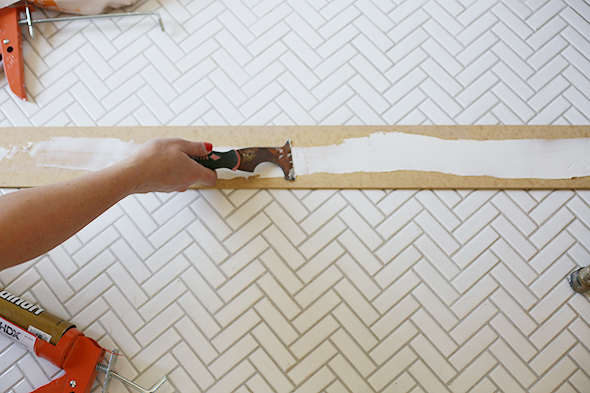
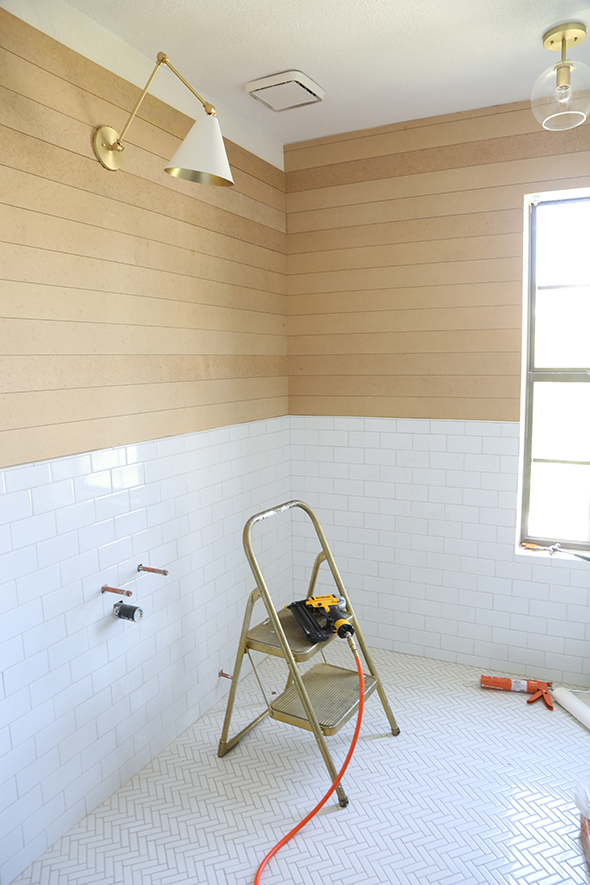
The installation is pretty straight forward. Start with the wall that is the most visible when you walk into the room, measure (twice) and then cut your first couple of planks using your miter saw. I used a bead of Liquid Nails that I smoothed out with my Painter’s Tool so that the plank would lay as flat as possible on the wall. Then I nailed the plank to the wall using my 18 gauge nail gun, trying to hit the studs as often as possible.
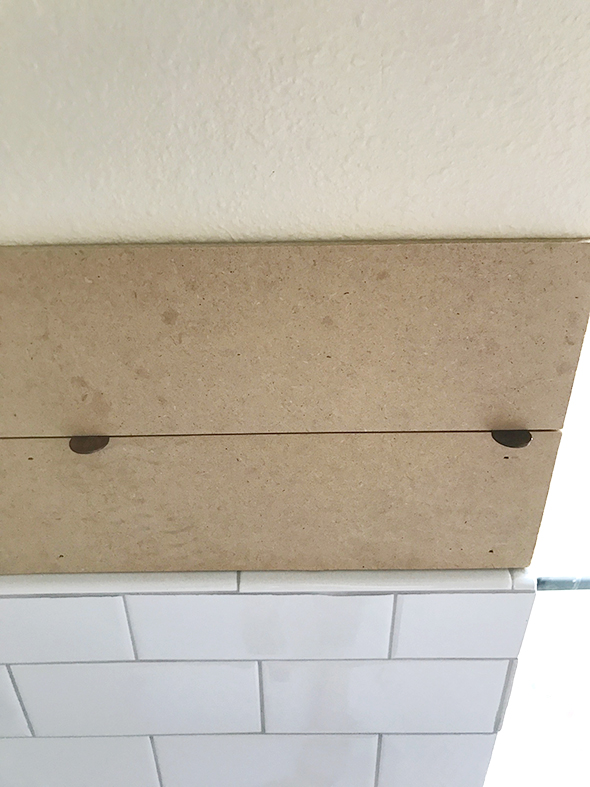
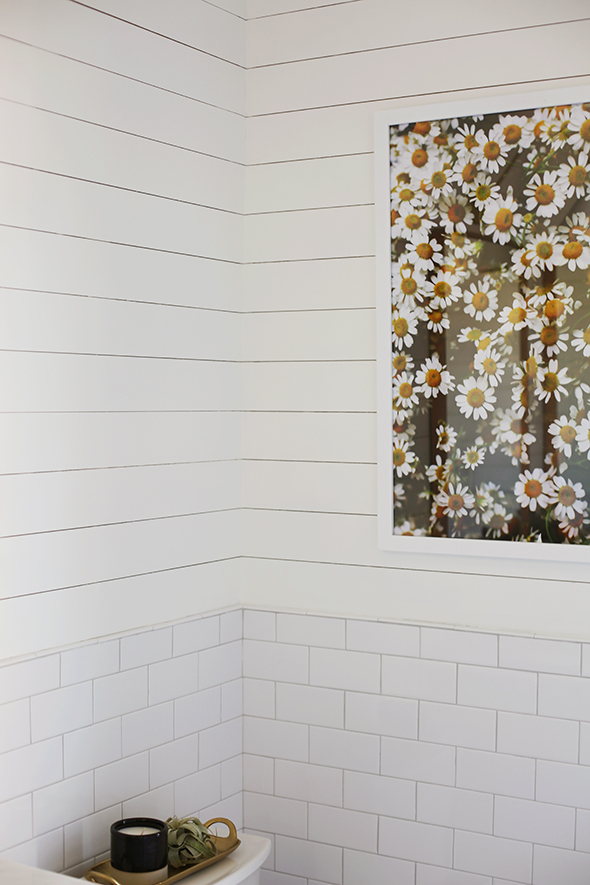
I started with a full board on top of the tile chair rail, knowing that that meant I would have a cut board at the top of the wall next to the ceiling. I think it’s better to have a full piece in the more visible areas.
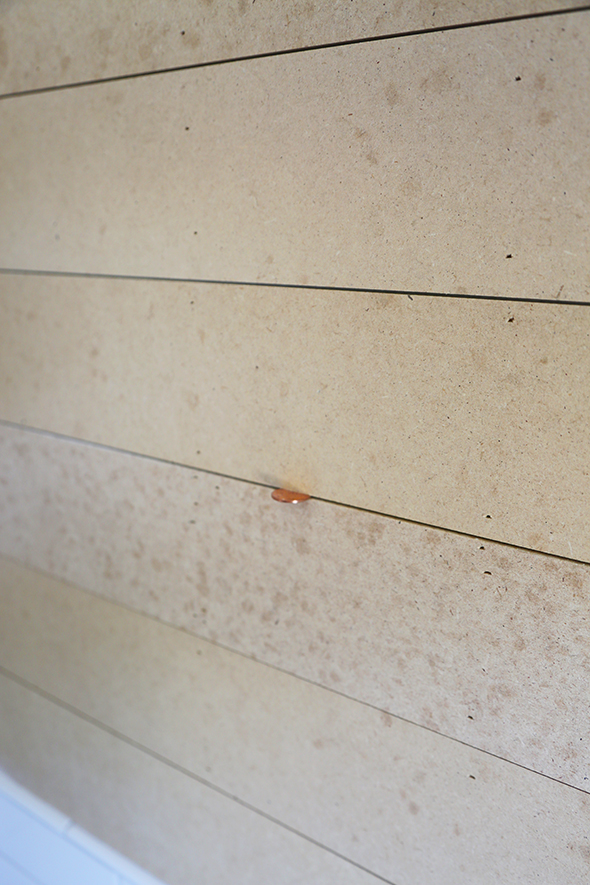
Most walls in older homes especially are not completely flush – ours are definitely a little bit wonky in here – but using a couple pennies as spacers will do the trick for keeping your lines consistent, even if your walls bow a little. And that’s the great news about these bender boards – they are MUCH more bendy and flexible than a typical wood plank you might usually use for shiplap, like a primed pine board or tongue and groove boards. Those are both close to 3/4″ thick and are more difficult to manipulate for a smaller “cosmetic” job like this one.
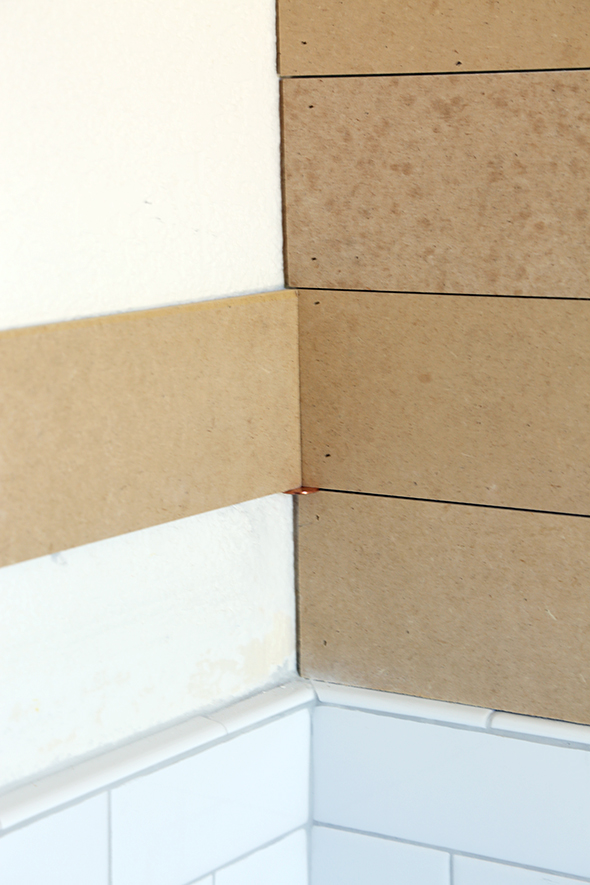
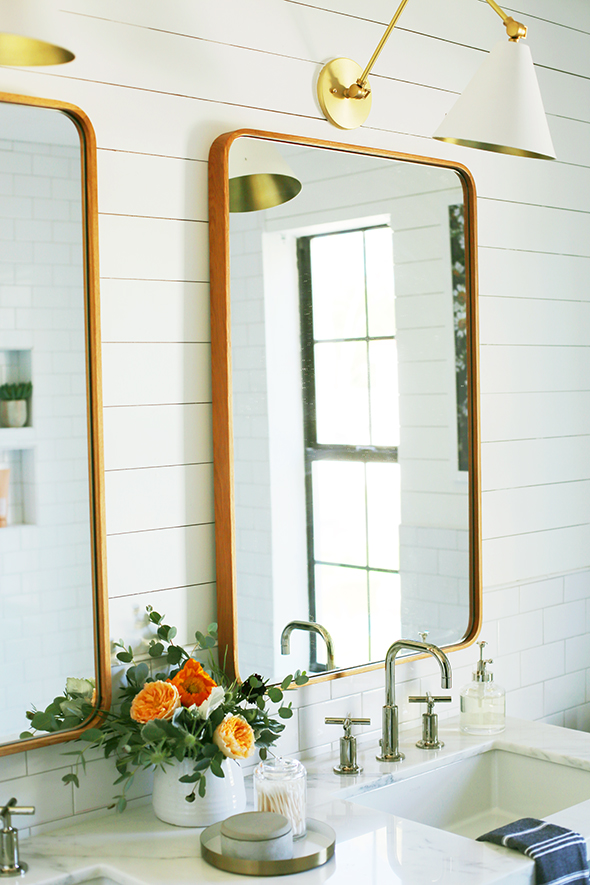
I think the corners are the most important thing to get perfect with a shiplap project. Thankfully I only had inside corners to deal with in this space, but if you are trying to do outside corners I think I would try to miter the ends if you’re handy with a saw. Otherwise I would just butt the two ends together and sand and caulk the joint lines really well, which is basically what I did here with my inside corners. I ran the back window wall plank all the way to the corner so the end of the board touched the vanity wall.
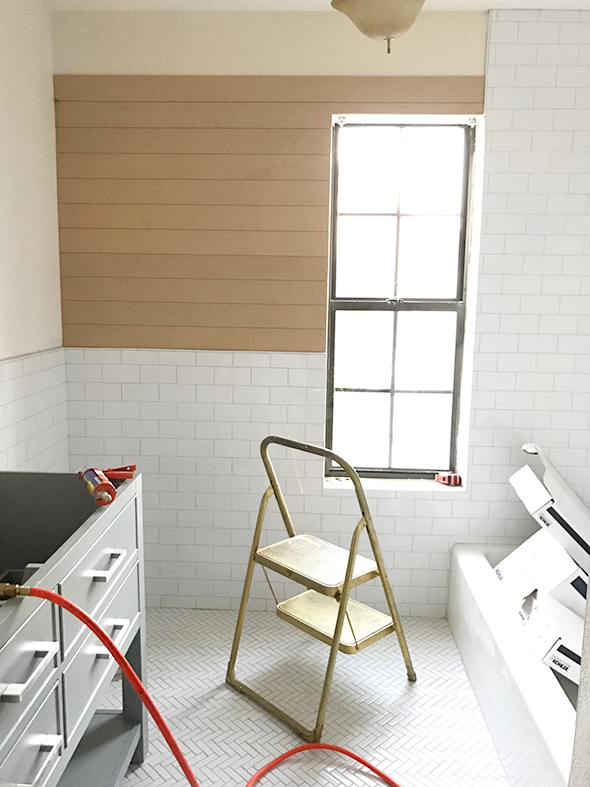
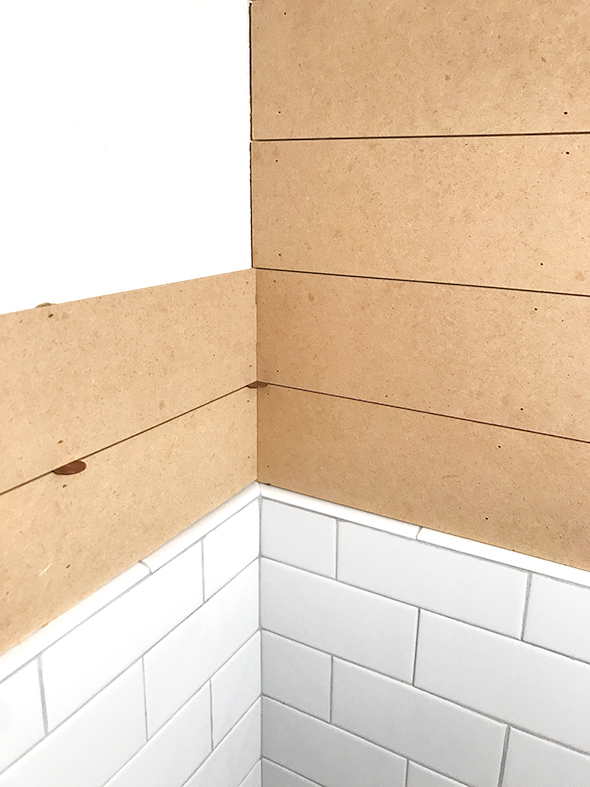
When I was completely finished with the window wall, I started the vanity wall boards on the SECOND plank, not the first, being really careful to make sure the joint lines were consistent across the corner angle from the window wall to the vanity wall.
After that second plank is installed, you can go back and add the first (bottom) plank. Doing the second plank first ensures that you are keeping your shiplap straight in relation to the lines you already committed to in your first wall installation, rather than the lines of your potentially crooked walls or uneven tile. On both the vanity wall and the door wall, I had to slightly notch and smooth out areas in the bottom plank that were hitting parts of our chair rail that stuck out just a hair. It’s INCREDIBLY easy for an 1/8″ joint line to get off if you’re not super careful!
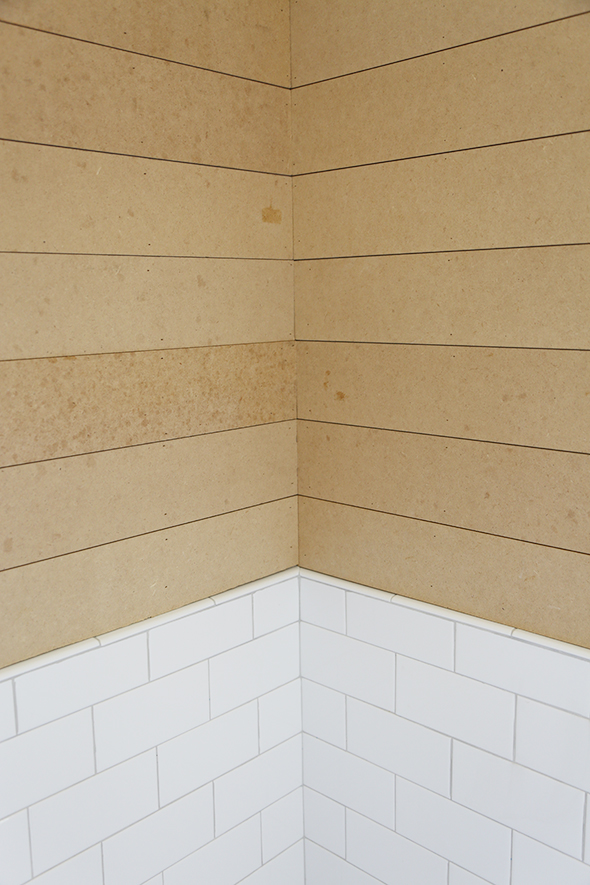
The bottom and top boards take a little more time, but all the planks in the middle are so easy and fast to install!
A Dremel Saw-Max works really well for cutting out those notches for your uneven tile, the outlets and switches and the half boards you’ll have at your ceiling.
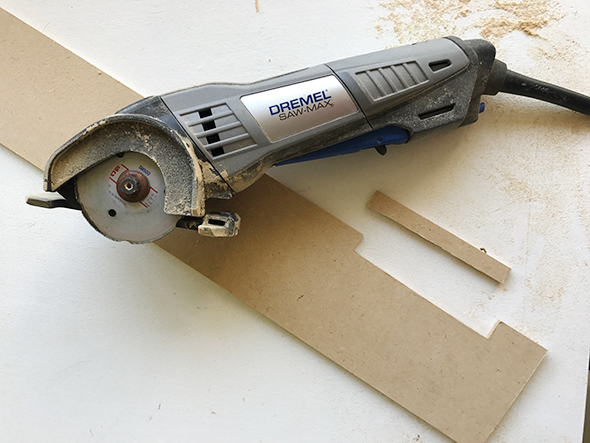
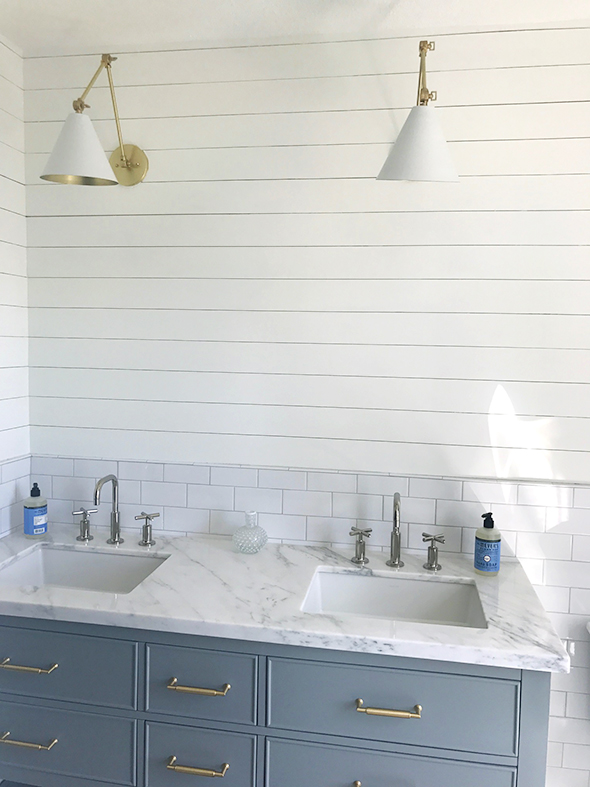
I also used the Saw-Max for cutting around the electrical box for these gorgeous Lucent Lightshop sconces.
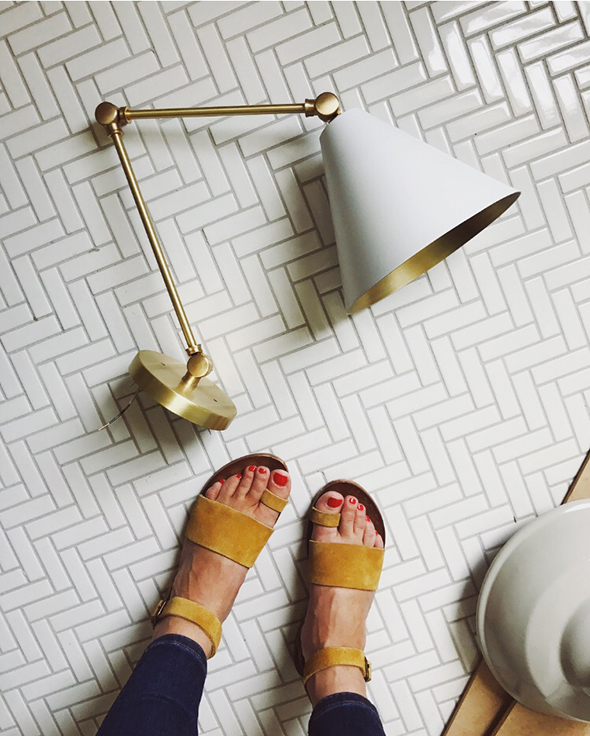
sconces (similar) // sandals (similar) // tile
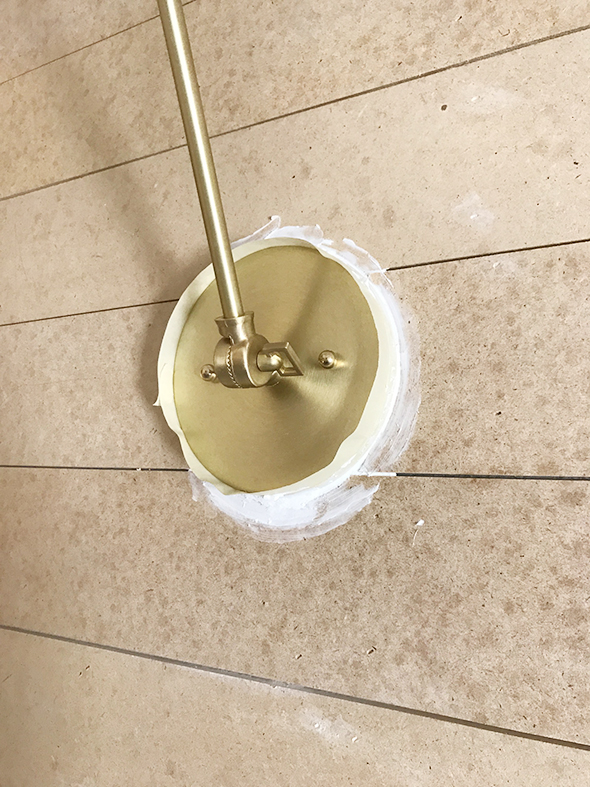
The cut lines were a little off in the end, but nothing a little caulk can’t fix! :)
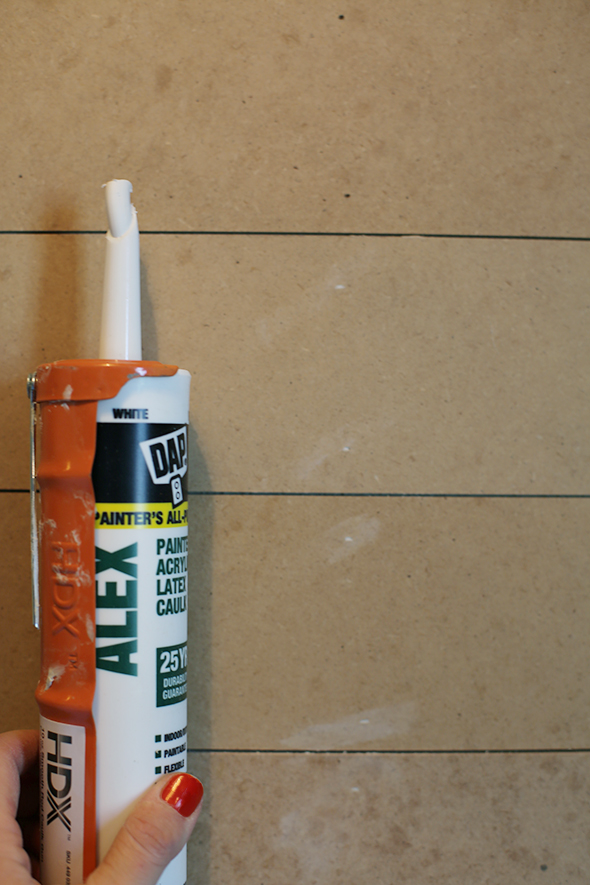
Speaking of caulk, I always use the Alex brand (NOT the plus version) because it cleans up so well and is so easy to use! You should only use a tiny bit in the nail holes and in the joints and gaps of the corners, top and bottom boards and then immediately wipe off any excess with a baby wipe or a damp cloth. If you do this right away, you won’t have to sand before painting!
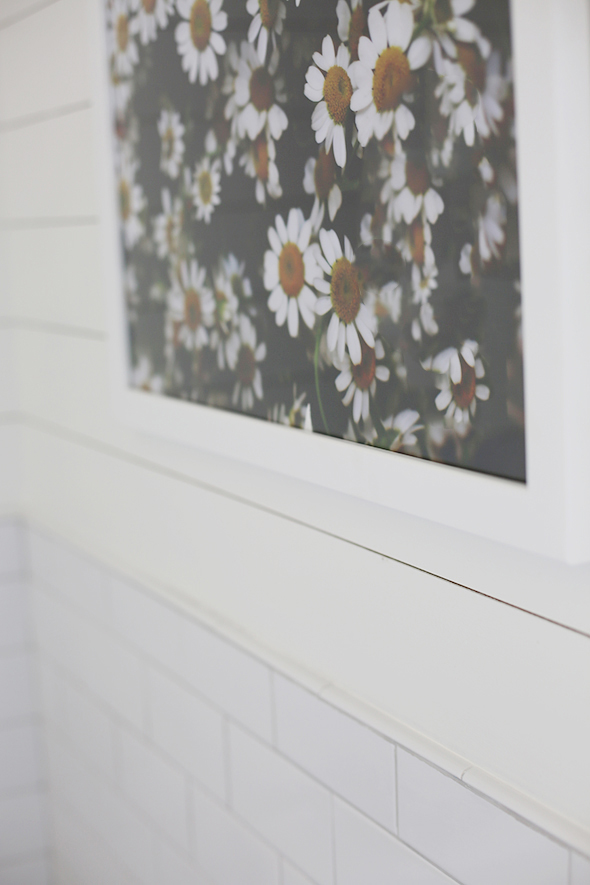
I used a foam roller to roll on a THIN coat of primer and then two VERY THIN coats of Benjamin Moore’s Chantilly Lace. I think if I were to do this project again, I would have sprayed or rolled the planks before installing them. It took a while to do so many thin coats and even then I had to use a utility knife (I love this one because it is more ergonomic with the angle!) to clean out the paint that still ended up in the joints. It not hard to do, it just took extra time.
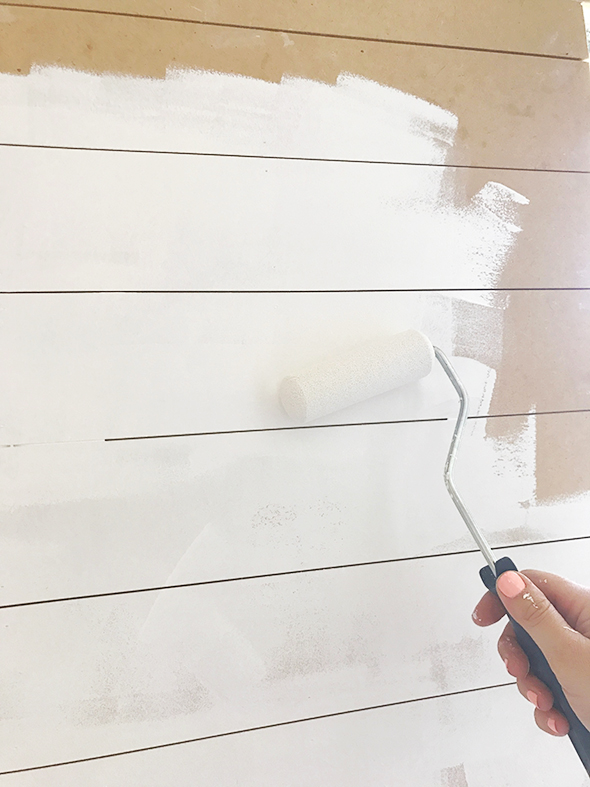
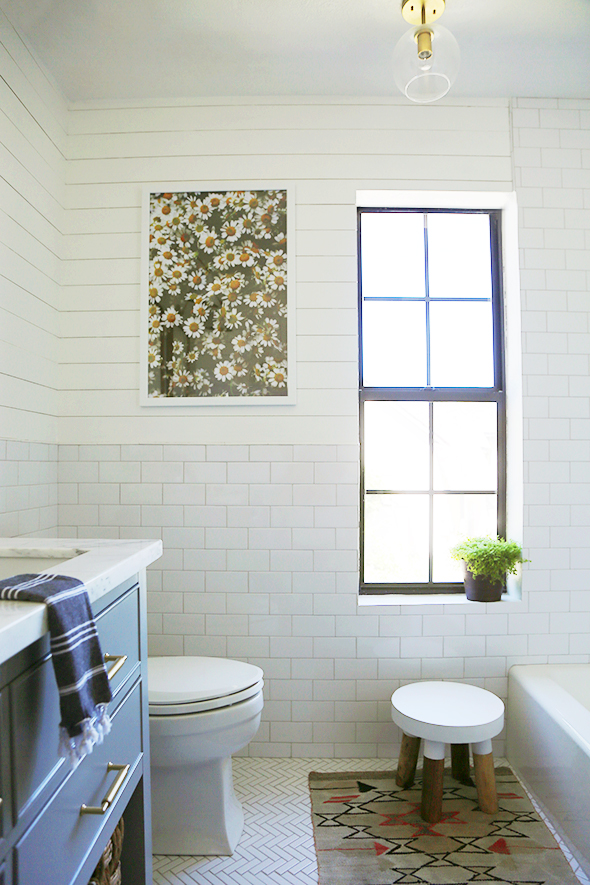
The bright white results are worth every second of work in the end though!
BEFORE – BEFORE
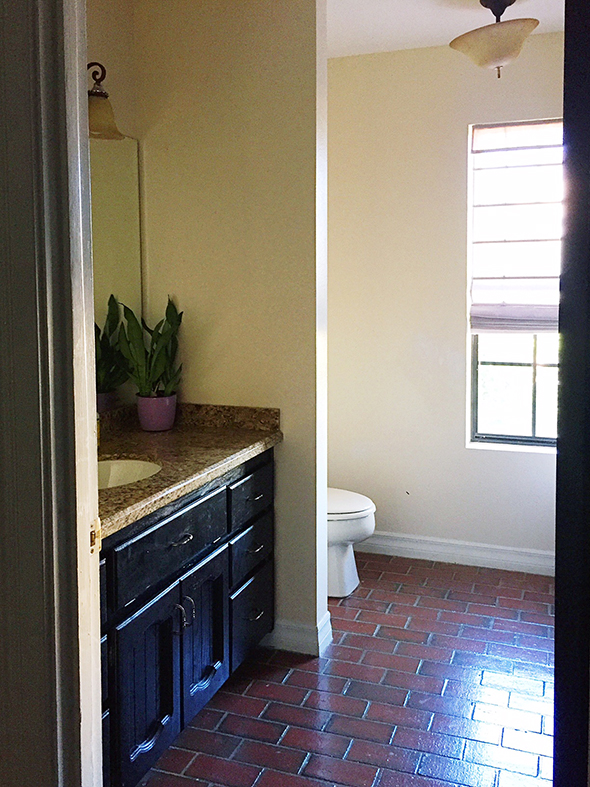
BEFORE
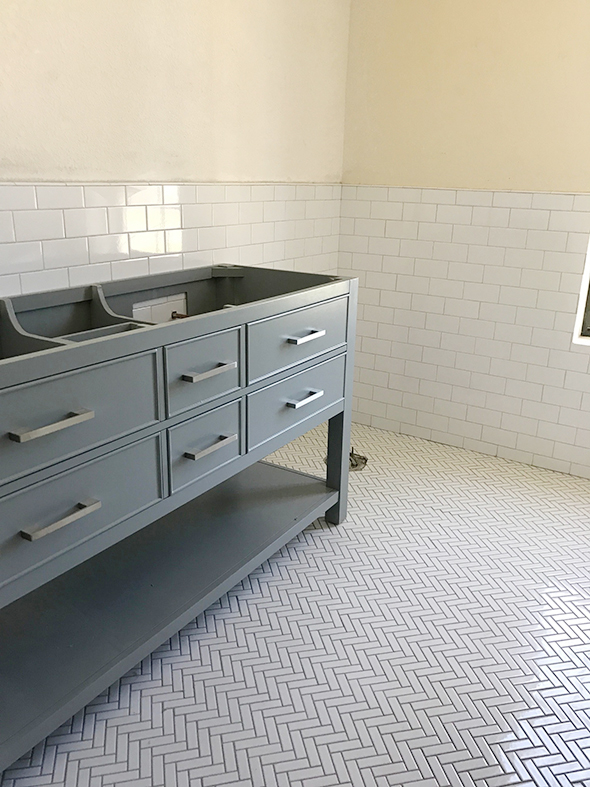
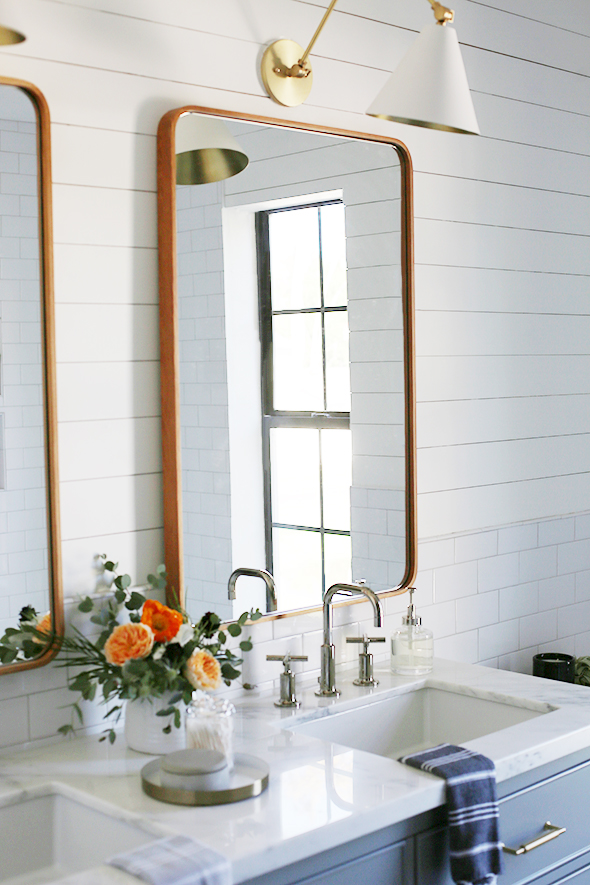
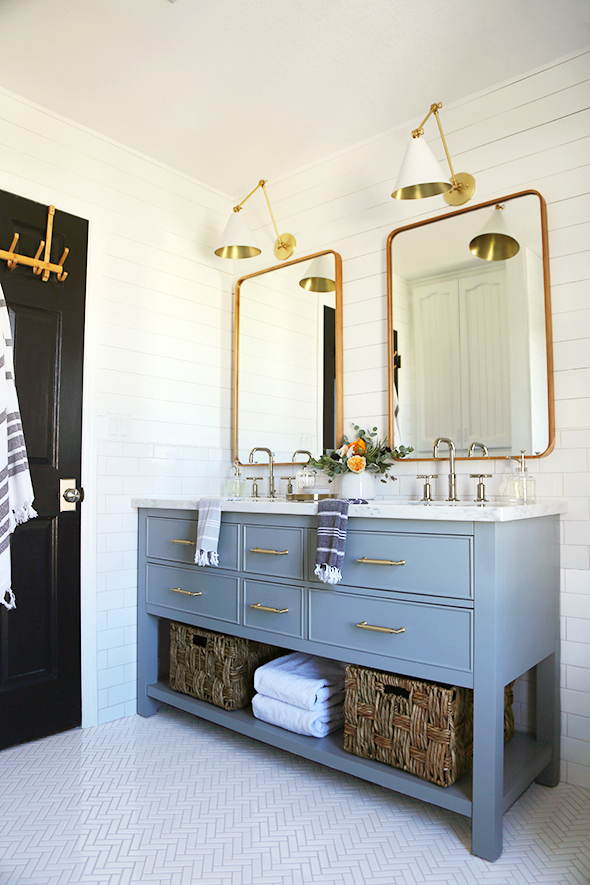
AFTER!
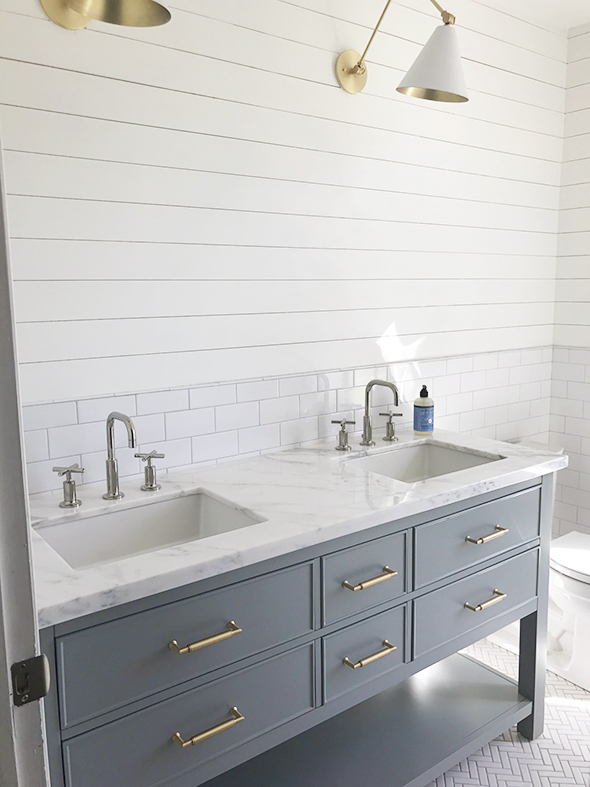
AFTER-AFTER!!

Here are the sources again for the space (including the baskets this time)! Please let me know if you guys have any questions about these steps in the comments! I’m so happy to help further clarify if there are confusing parts. xo
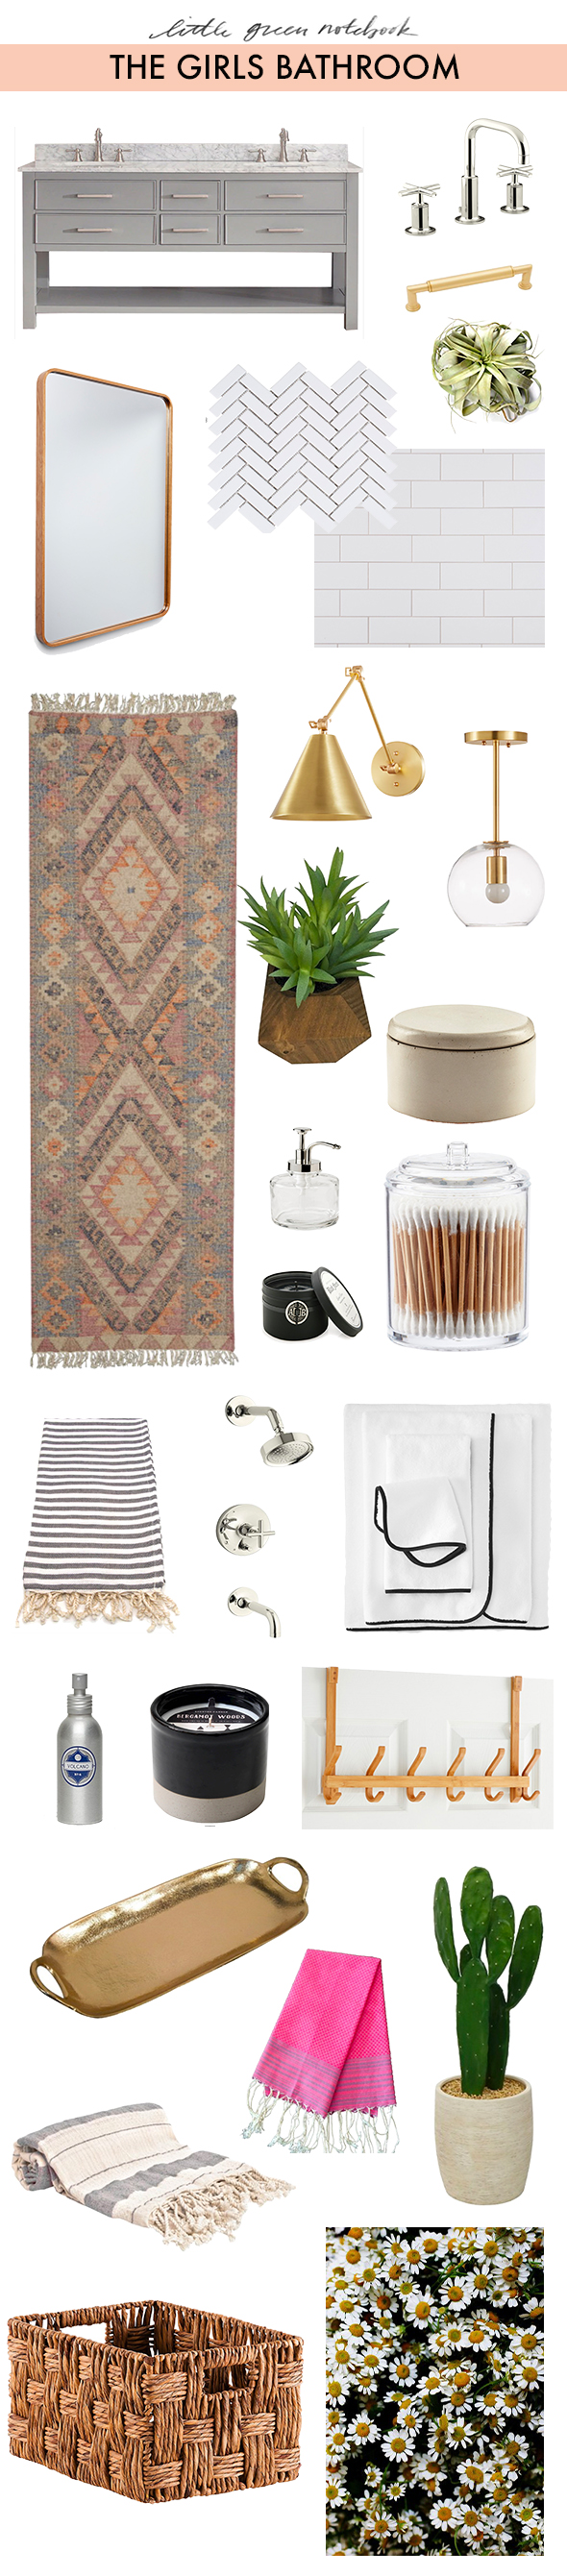
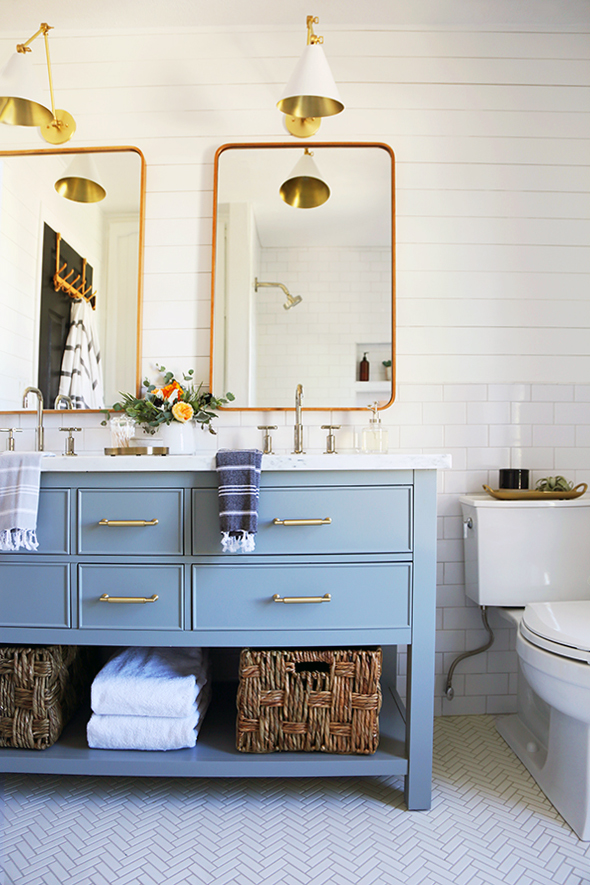
Vanity (similar)
(comes with or without stone – I bought mine without, though it may have been more cost effective in the end to buy it WITH!)
Kohler Purist Polished Nickel faucet
Satin Brass Drawer Pull (similar)
Rejuvenation Bentwood White Oak Mirror
Flatweave rug (I use and recommend this one ALL the time, but the one in our bathroom is vintage)
Brass Sconce (similar)
Brass and Glass Pendant (similar)
Faux Plant (similar)
Concrete jar (similar)
Black Forest Candle (smells SO GOOD)
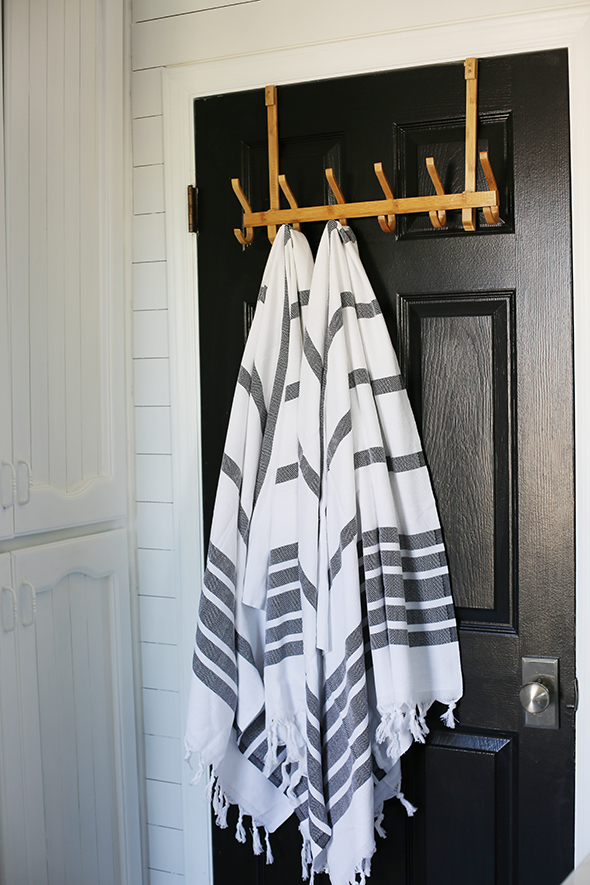
Black Bordered Towel Set (similar)
Bergamot Black Candle (the container makes a pretty planter once the candle is done burning!)
Wooden Over-the-door Towel Rack – similar (great for small bathrooms!)
Brass tray – similar (perfect for coralling toiletries)
Pink Turkish Towel (similar)
Turkish Bath Towel (similar)
Kohler Bellwether alcove bathtub
Paint Color – Benjamin Moore Chantilly Lace


Am I missing the link to the drawer pulls?
Links are live! Apologies for the delay! I didn’t realize they were missing. xo
Nothing is linked on my end, either….but LOVE everything, so hopefully links will be working again soon?
Everything is linked now! Sorry about that!
Hi Jenny! Thanks for sharing! What did you do about the exhaust fan/vent above the commode? We have one… and it’s ugly as sin. Yours was the same, and then *poof* gone! Is that Photo Shop magic, or is there a good market solution?
In my bath remodel we used a can light/fan combo. It’s been working great so far and it is way less ugly!
Photoshop! I meant to mention it in the post and clearly I forgot a lot of things yesterday! Ha. It looked so busy in the photos that I decided just to edit it out, but in person I think it is a necessary evil! I did paint it white to match the ceiling though and that helped!
We just had out bath vent fan installed (old house, never had one) and the electrician recommended placing it as close to the door as possible. The idea being that when you’re standing in the doorway or hall looking into the room you won’t be able to see that part of the ceiling. Ours ended up right over the toilet but only because it’s the first thing on your right when you enter. He similarly placed the smoke detectors in the bedrooms so you only see them in you’re in the room and looking toward the door.
That’s a GREAT tip! Thanks for sharing, Ryan!
I’ve read that it’s a good idea to paint your walls black before installing shiplap. That it helps accent the spacing between the boards. Not necessary?
Not necessary if you ask me! Though maybe if you are going to use this same (thin) product but you wanted a bigger joint line, something more like 1/4″, then you would probably need to have the black background to get the dimension and look of a thicker plank?
Will you please update the links/details for the product sources? I love, love, love those mirrors & lights!
I’m in the process of putting together a new bathroom, I love love this project! Where are the links for the lights and mirror?
Hi Carol,
Somehow all the links were deleted when I posted, but I put them back up this morning. Sorry about that! :)
All updated! So sorry Gwen! xo
Looks really good. We just did about 2,000 SF of walls in faux shiplap. If you have a way to rip plywood, it’s much cheaper to buy 1/4″ plywood. Price trade off for more labor. We had access to a table saw. Two hours and a shoulder workout later we’d ripped 70 sheets.
Forget the shiplap–where did you get those awesome sandals? ;)
Thanks, Kit! They’re from Nordstrom! I linked to them under the photo!
Hi! Love the bathroom remodel! Beautiful! I’m not sure the source list is working though? Would you be able to tell us the mirror source? :) Thanks!
Please, let us know how this works out in six months or a year. MDF is not supposed to be used in wet areas and I wonder how it’s going to hold up to the humidity of the bathroom.
I love the idea and would like to appropriate it if it works in damp areas, but I am too lazy to put in the effort if it just means I’ll have to rip it all off in six months.
MDF will be ok if it is painted and sealed well. You just don’t want to let water stand on the MDF or get splashed on it repeatedly. So, don’t use in the shower area or too close to sinks and near the floor if you are going to be wet mopping the floors.
I’m not worried about it because I primed and paint on two coats of semi-gloss! This bathroom doesn’t get crazy steamy either, but I will definitely let you know if there are issues. I talked with one of the contractors I work with a lot and he said it should be fine. MDF only bubbles if there is standing water for a long period of time or serious steam (like a kitchen dishwasher).
MDF probably isn’t idea if you want it to last forever. On the other hand, the flex of bender board makes it a good way to conceal warped walls for a few years until you’re ready to do a full reno — especially if pine is too rigid. The alternative would be vinyl and I’d only consider that on the ceiling where it can’t be found out by touch.
Jenny, please make the links work! I keep checking back but nothing is linked…
So sorry! Everything is linked now!!
The links for almost everything work in the previous post called The Girls Bathroom.
If anyone is considering a project using mdf, please do a little research on its toxicity, especially if you are going to cut it yourself. I personally wouldn’t use mdf. I am sensitive to chemicals, so I’m naturally concerned about these sorts of things. There may be a greener mdf option out there that doesn’t use formaldehyde, but I am not sure how readily available it is. Worth looking into though.
I had the same thoughts regarding the chemicals in MDF. Engineered wood often emits toxins which can make the air inside your home more dangerous than outdoor air pollution. The look is great and would love to know of a safer product alternative!
Can you use shiplap boards in a slanted ceiling in a over the garage room? I want to cover up the old fashion ceiling with the popcorn looking finish.
Most definitely!
Hello,
Did you send the boards before installing, or does this product not need it? The edges look very smooth.
No sanding necessary! They come ready to install!
I love that you have an option for not having to have plywood ripped down. I did that for a project and it worked, but I had to beg the guy at Home Depot to do it (which I’d rather not do). Your bathroom is gorgeous- you did an awesome job!
WOW.
This is remarkable – job well done – it’s unbelievable to see the before and afters and know they are the same space. Your girls must be over-the-top excited about this awesome renov!!!!!
You helped a lot. Thanks for all the great information!
Approximately how long did the shiplap take? Obviously you’re experienced so i would add more time if I was doing it, but I was just curious ;)
Hmmmm…It’s hard to say exactly because I did a little here and a little there, but I would say a couple hours total to install the planks. And then another couple hours to paint!
Hi: This looks really great–what do you think about using it on walls longer than 8′? I’m thinking the joints might not work so well.
It would work great! The joints are SUPER easy to caulk!
thank you–I kind of want to do it EVERYWHERE on my orange peel walls!
This is beautiful!!! Such a fabulous bathroom update!
Beautiful job! Your creativity and resourcefulness are amazing!
I have a practical question-what kind of curtain rod do you install and did you use a spring-action or a wall-mounted one? Thanks!
I went to Jenny’s Print Shop for the Chamomile Print and was blown away by your utterly charming painting collaboration with your daughter. Truly impressed and touched at what heart you put into your work.
This is absolutely stunning! Do you happen to remember what type of grout you used?
Hi Ashley! There’s a link in the previous post where I talk all about the tile and the grout. I think the color was Cobblestone and the brand was Mapei.
Thanks!
What a beautiful bathroom! I am wondering if you painted the vanity or if the color is the original color? It seems to have more blue undertones in your bathroom than on the Overstock website. Thanks!
Thanks, Jaclyn! I didn’t paint the vanity. It definitely has more blue undertones than the listing photos! A happy surprise for me when I got the piece! :)
Jenny,
I’ve been reading your blog for a long, long time. I just love your taste! This bathroom is beautiful!
Beautiful!! I am in the midst of my guest bathroom remodel and using many of the same elements you show here. And …. I’m totally crushing over that little stool! Where did you find that??
Love the bathroom! What do you plan on using for a shower curtain? I can’t find anything I like for my bathroom with similar design.
Thanks so much for sharing all of these great details! I didn’t see a reference the woven baskets that you’ve shown under the sink. Where did you get them?
The bathroom is beautiful! Since I have commitment issues (with Home Decor anyway), do you think you could have done the shiplap without using the liquid nails and just nailing at the studs? I’m thinking what if I change my mind down the road and want to remove the shiplap?
Also did you forget the include a link for the vanity top?
Hi Jenny!
This is amazing. Did you use semi-gloss paint? We just put shiplap in our den, and I’m wondering what paint finish you recommend for that type of room that doesn’t have moisture. Would you still use semi-gloss? Or would you use matte? We are using Chantilly Lace :)
Thanks for your help!
I would probably go for a satin then! Something with a little sheen to hold up to fingerprints and cleaning!
Oh my word, I LOVE this! I had a hard time seeing in the picture if your walls are the same as ours–we have really textured walls (picture badly done spray-on texture that got goopy from previous owners, mixed with some poorly patched wear and tear from when our home was a rental.) Do you think I’d need to do anything to prep my walls before putting this board up? We did skim coating ourselves (!!) in our main living areas, and that was such big project we can’t bear the thought of doing the same thing in our bedrooms. ;) This seems like a great solution if it can bend over textured walls. Also, how is the MDF holding up in the steamy bathroom/hot climate? Thanks so much for sharing! How fun for your girls to have such a darling bathroom! :)
Yes – we totally had highly textured walls in here too!! Shiplap is an easy and cheap solution!! The MDF is holding up really well! :)
Do you think these boards could be used to finish a basement ceiling? They wouldn’t be going over dry wall but just into the joists.
I just saw a picture of a plain closet door that was tricked out to look like a vintage one. I bet they used the same bender board you used to mimic Ship lap. (which was a great DIY that you shared) I saved a photo of it, but I didn’t see a place to share it on your web site.
They don’t sell that bender board anywhere in my area. :( so sad
What’s the paint color on the vanity cabinet?
Where did you get the baskets?
Just found out they don’t sell that bender board product on the East Coast. My carpenter is buying regular MDF and ripping it for me. Going a little wider at 4″ than the 3.75″
Love your girls’ bathroom…I’’m thinking you can give me advice? Suggestions for dealing with ugly stamped ceilings? Too expensive to have scraped and probably wouldn’t be smooth anyway, and too expensive (they’re in EVERY room!) to cover with drywall. Any ideas are appreciated!
I want to do this on just one wall of the bathroom. What do I do for the edges? Just make the cut as close as possible and then caulk? Thoughts?
Hi! We are going to attempt this project in our bathroom, and I’m curious what color grout did you do on the tile?
Hi! I am planning a very similar remodel of my master. I have one problem that you might be able to help me with. I am planning to install mirrors very similar to these over a half-shiplap wall. I’m wondering, how did you hang your mirror flush to the wall with that small amount of pencil tile protruding? Doesn’t it make your mirror angle slightly upward? Or, did you put a spacer behind your mirror?
I absolutely love this bathroom! I’m curious what white you used for the ceiling?
Hi there! Love it all! I am using the same herringbone tile. What color grout did you use please?
I think it was Warm Gray from Polyblend!