Kate and I have been working together for a few years now. She has a beautiful baby girl, who is just a few weeks older than Margot, so Kate mostly works from home now, but she still does a ton for me and my design business. She is just the best there is – she makes any project more beautiful and infinitely more FUN! Kate and her husband recently were ready to take on some kitchen projects and they were kind enough to document some of the process for our viewing pleasure. I love the cheerful results! Enjoy!
_________________________________
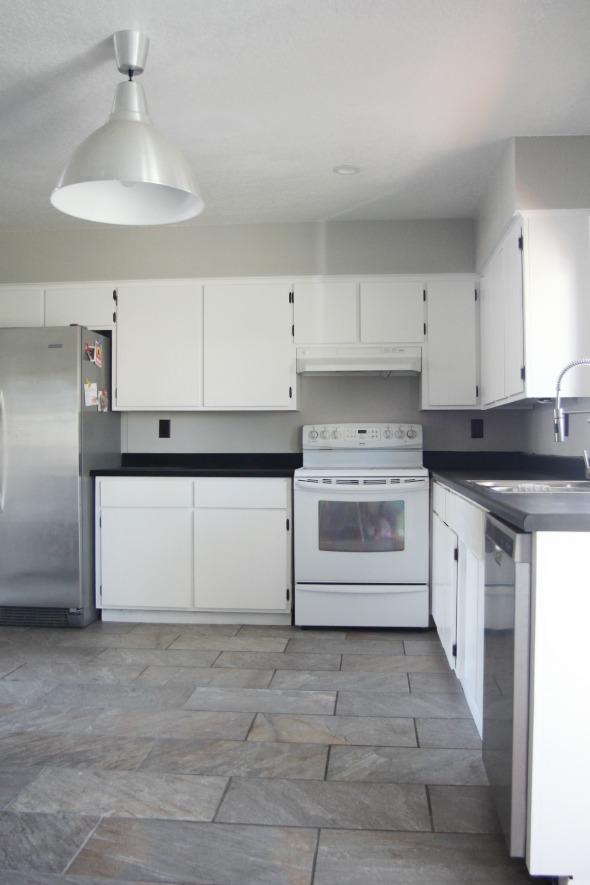
Hi! Kate here. We moved into our house 18 months ago and have been systematically tackling the renovations, room by room. Floors, popcorn ceilings, new fixtures, and a few walls knocked down. The kitchen was in pretty rough shape as you can tell, but a full-blown renovation wasn’t in the budget or timeframe.
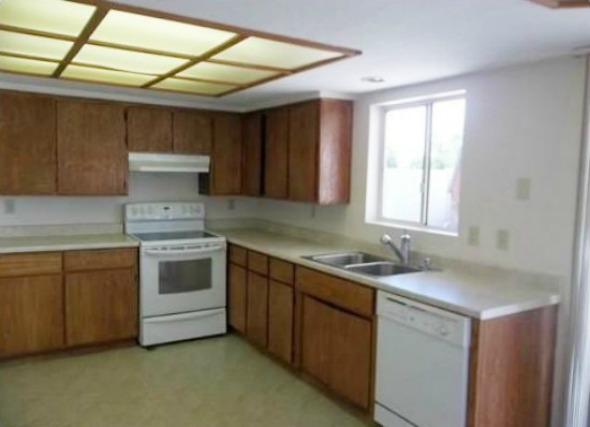
We raised the ceiling, painted walls and cupboards, ripped out one set of cupboards, painted our countertops (a post in itself!), laid a super inexpensive gray floor tile and there you have it- livable and neutral until we checked a few more pressing things off our to-do list. This is where we landed:
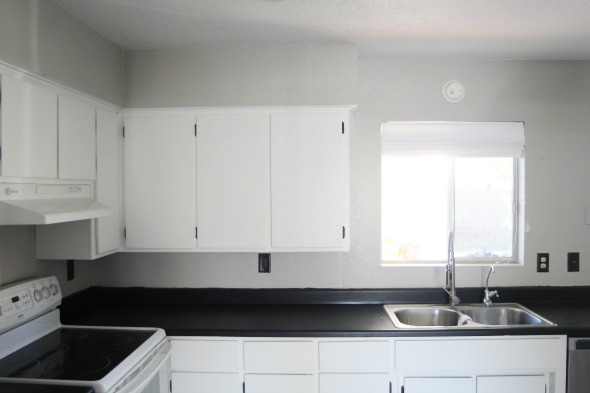
Since then, we finally got to a good spot with the rest of the house and yard and we set our sights on the kitchen! We brainstormed, Pinterest-ed, and talked through a hundred ideas with the main goal being that our kitchen needed character. Our next natural step was a backsplash. The space between our upper cabinets and counters is small (11 inches) not to mention our kitchen itself is pretty tiny so we knew we needed to find the right scale and layout with a tile. I love subway tile and I am drawn to simplicity and clean lines. But I knew I wanted something different in this house. Something fresh that I hadn’t seen a hundred times! **Pinterest, that’s your cue**
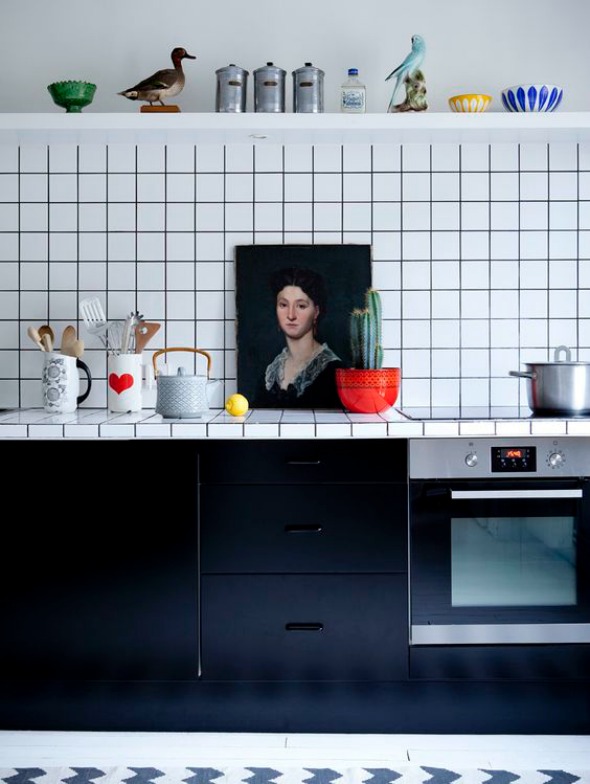

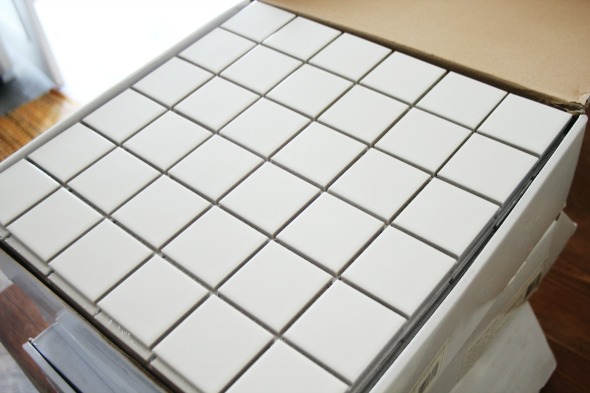
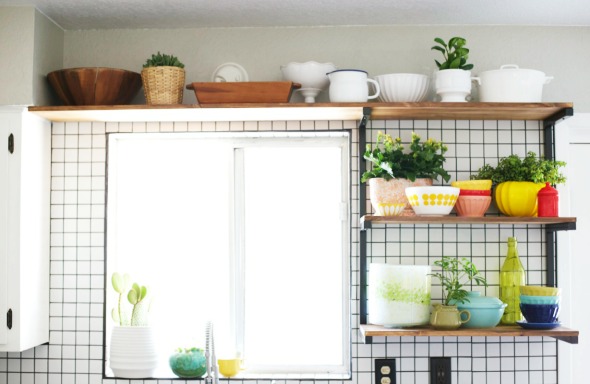
About five seconds after realizing my husband and I were both drawn to any tile in a grid pattern, we were on our way to Floor and Decor. We looked through all different sizes and shapes but ultimately decided to go with this 2″ square tile – we figured the scale would look best in our small space. The huge bonus is that square and subway tile are so well-priced! We spent under $200 for all of our materials at Floor & Decor!
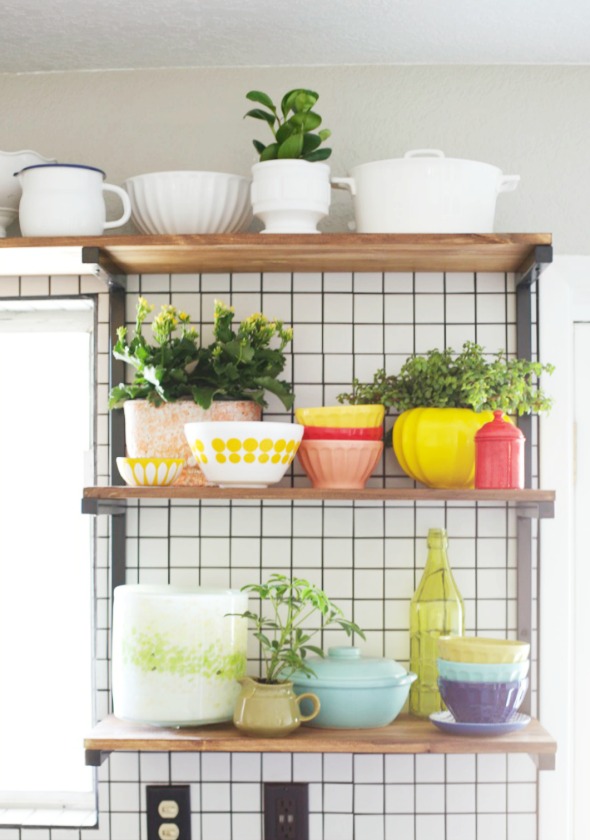
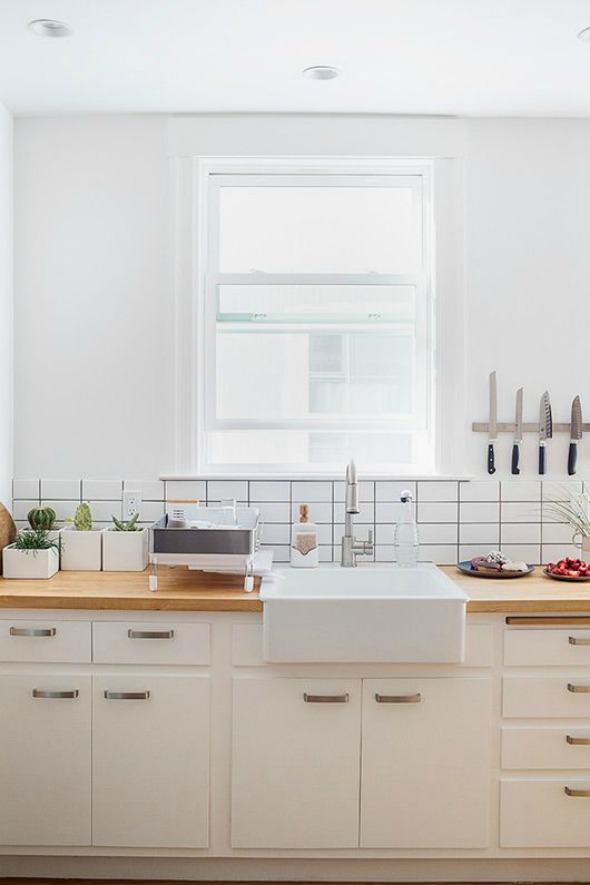
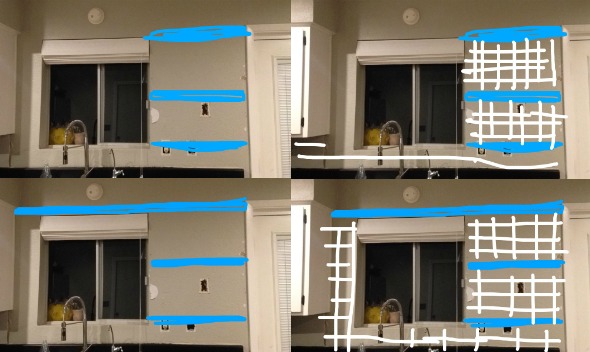
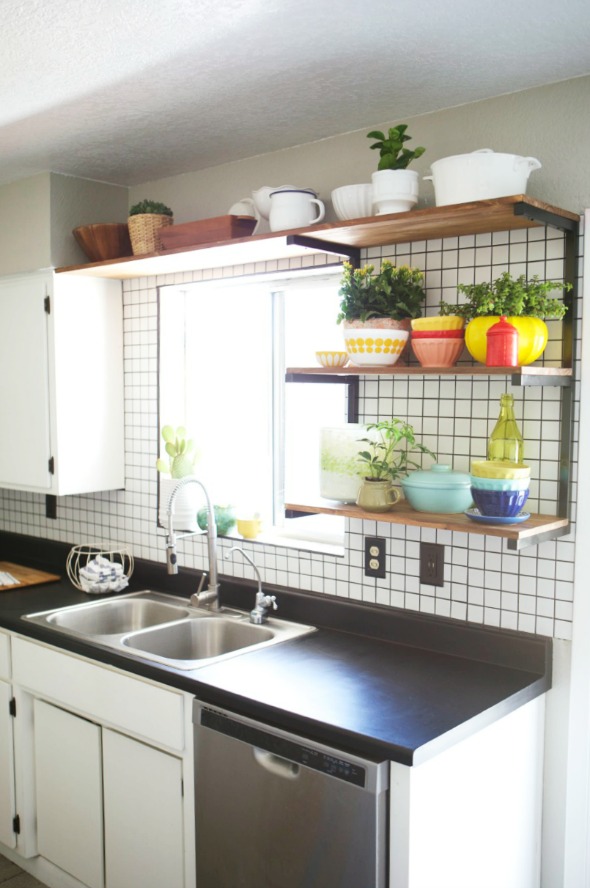
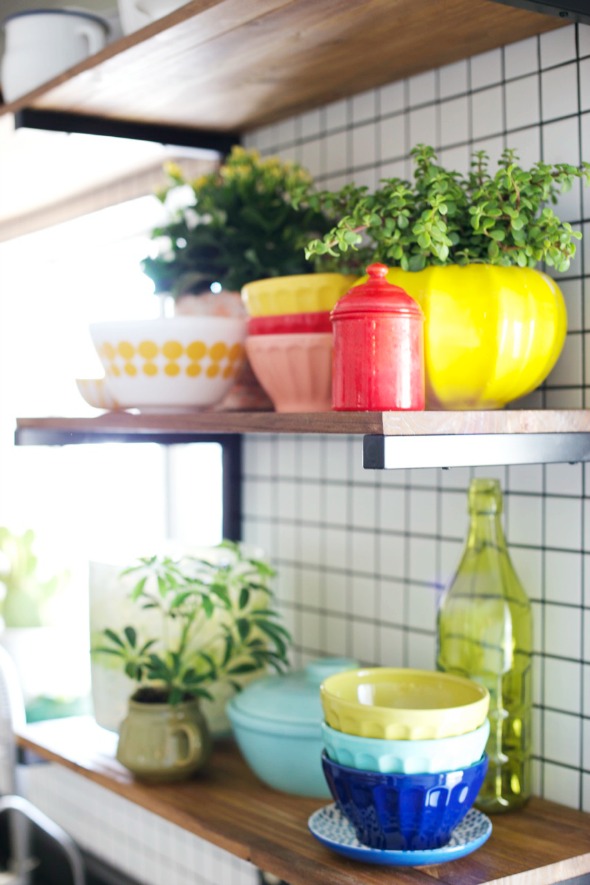
We also had a perfect empty space by our sink for some open shelving and I saw it as a chance to use more backsplash! Thanks to this very professional design drawing you see above (thank you, snapchat) we decided to just go for it and take the tile almost all the way up the wall.
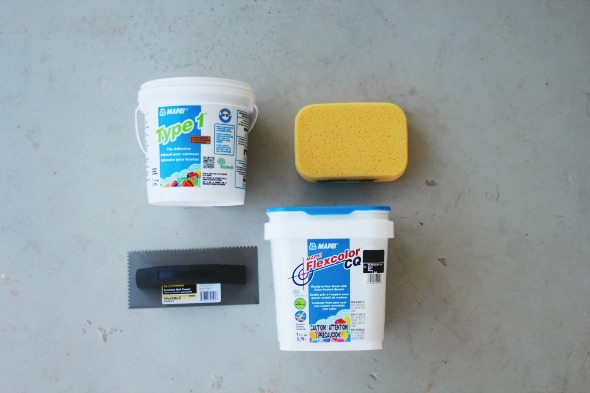
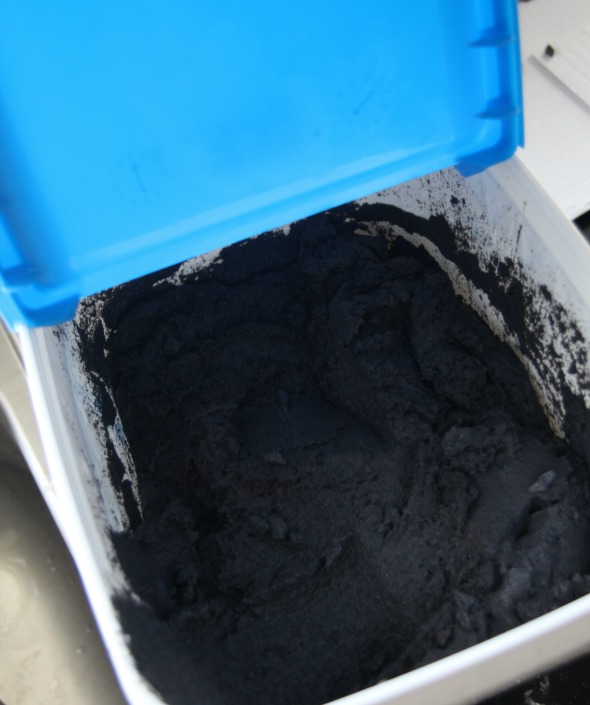
The folks at Floor & Decor were knowledgeable and helpful as we attempted to DIY this backsplash. We went with a pre-mixed thinset to save time and the mess of mixing. We also went with a premixed grout for a number of reasons. Pre-mixed grout has sealer, epoxy, and a water repeller mixed right in. It literally consolidates four steps with one easy mixture! The biggest reason for us though was color consistency. We wanted a true black grout and if we were worried there might be some color variation if we were mixing the batches ourselves.
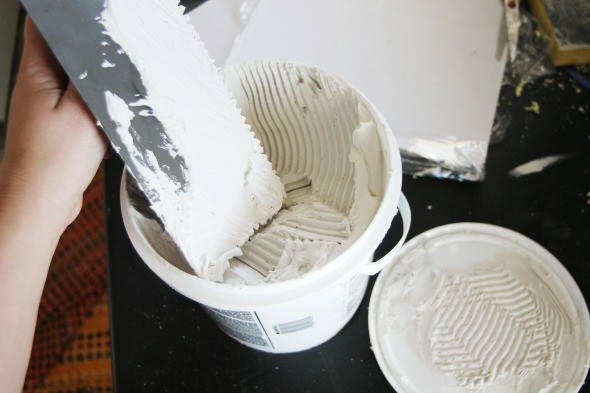
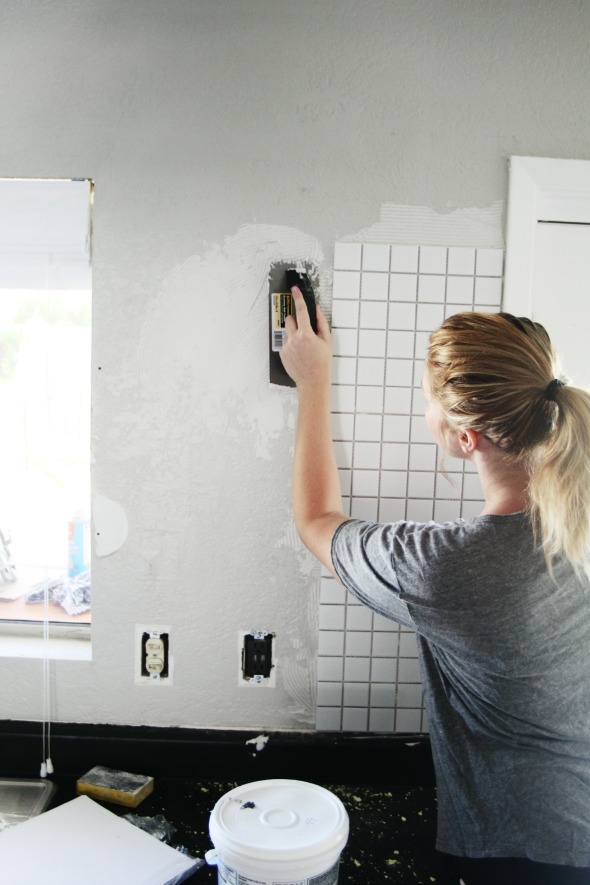
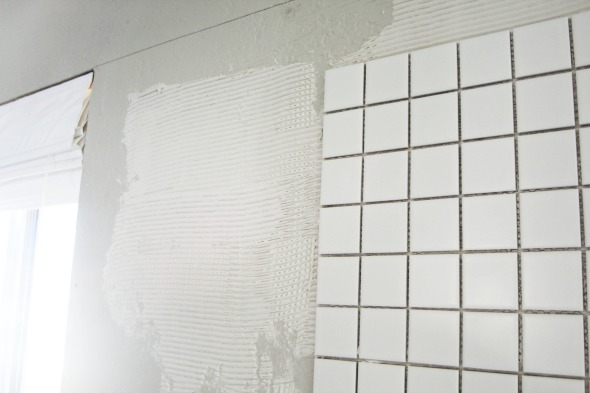
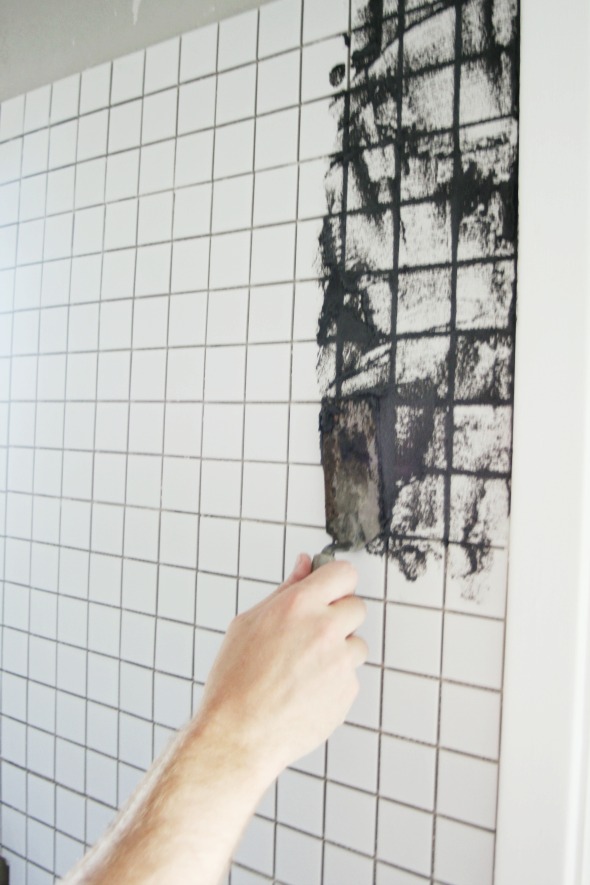
We used this 1/8” trowel to apply the thinset to the walls, using the smooth edge to apply and the notched edge to even out and hanging only one sheet of tile at a time. We figured out pretty quickly that we needed a pretty liberal spread of thinset and if it was evenly distributed, the tile held and didn’t budge. The working time with this was about 5-10 minutes, so we had some leeway to nudge a tile or two if they looked uneven.
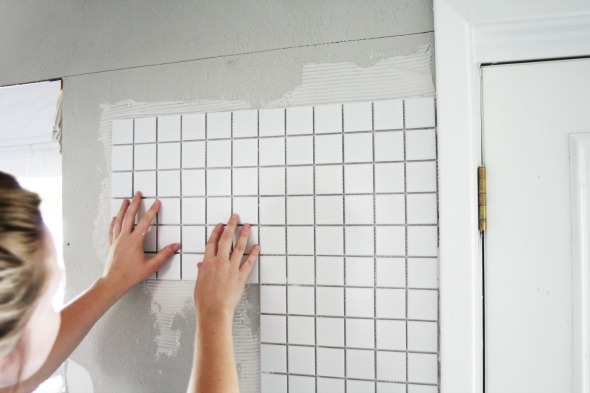
After applying the thinset on the wall, we lined the tile up and pressed firmly and evenly to adhere the tile to the thinset. Because our kitchen is old and very uneven, we eyeballed the spacing so we could adjust as needed. If you live in a newer house I would recommend using spacers– if nothing, to save yourself some time on this step!
Because we had quite a few cuts, we rented a table saw from Floor & Decor. Don’t worry – it’s about a million times easier to use than it looks! :) The friendly workers at the store can talk you through any questions you might have. They’re seriously so great to work with.

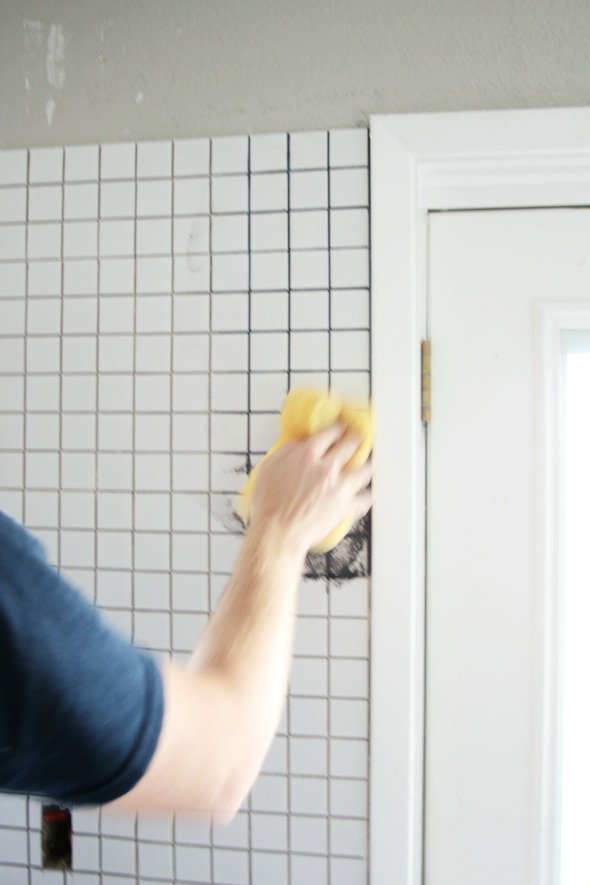
We waited a couple of hours to let the thinset dry completely before we came in with the grout. We applied the grout with a small trowel moving in small sections. It’s a good idea to wait a few minutes before you come in with a sponge and scrub the excess grout off the tile. Pro tip: change the water for your sponge often! It might feel like a bit of a hassle but will save you so much time as the excess grout comes off much easier with clean water. This step took the longest because we did the grout in small sections. But it was worth it for consistency and we never had to scrub the grout off the tile- it came right off.
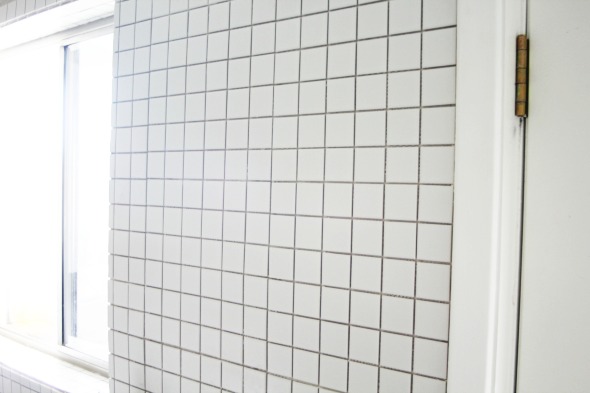
The finished product!!!! We couldn’t be happier with the backsplash! The shape, the dark grout, the simple, retro vibe- we love it all.
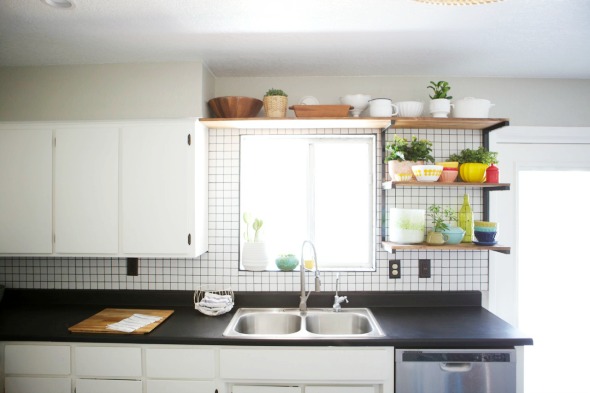
I’m glad that we were able to utilize more of the backsplash behind the shelves. Adding more tile was kind of an 11th hour decision and I’m so happy we went for it!
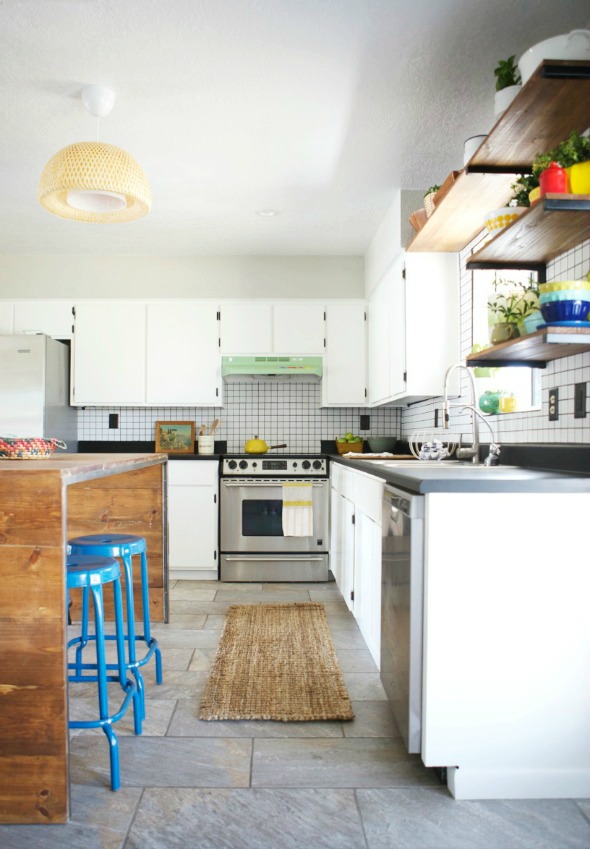
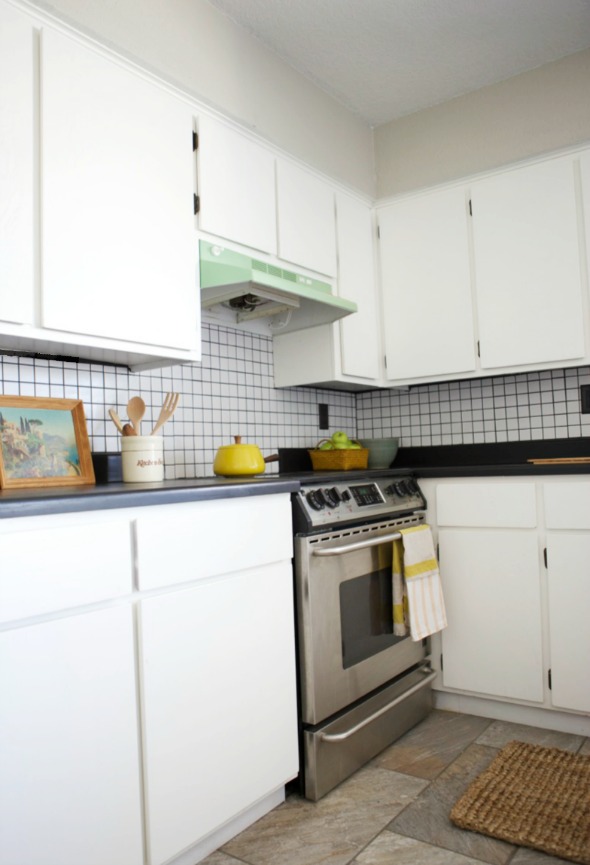
We found a steal of a deal on this new stove via Craigslist (the previous owner switched to gas and just wanted it gone!) and instead of buying a new vent hood when ours was working just fine- we spray painted our old one pistachio! I absolutely love this little pop of color!
We are so happy with our kitchen update! It makes the space feel so special and more of a reflection of our style. It was boring and neutral before and it felt like a flip house (which, to be honest, it was!), but now it is such a happy space! It makes me smile every time I walk in.
__________________________________
A big thanks to Kate and Landon for sharing their kitchen backsplash project with us! Floor & Decor is a beloved, long-term partner with LGN. We use their tile all the time and LOVE their price points! If you’re looking for some fun backsplash or bathroom tile check out these favorites we’ve used before and can’t wait to use again!
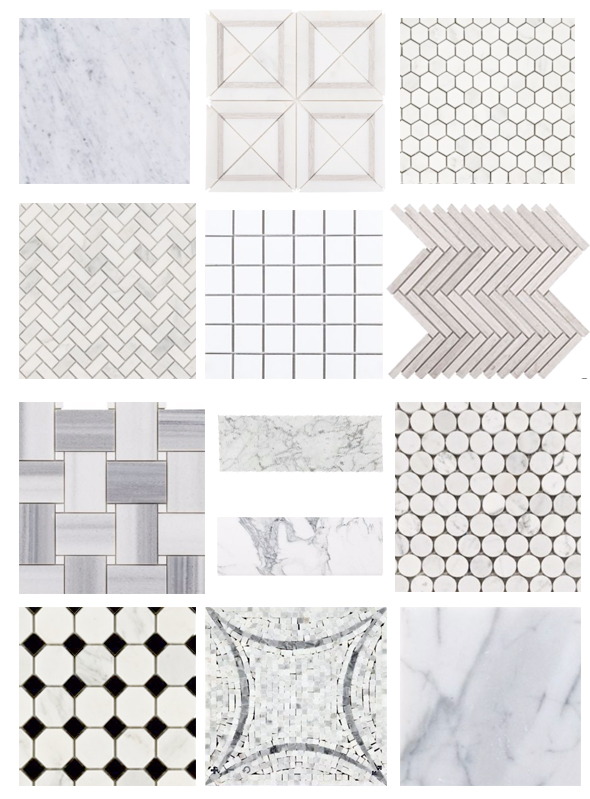
12×12″ honed carrara // square on square // 1″ hex // herringbone // 2″ grid // limestone chevron // basketweave // 12×24″ carrara // 4×12″ carrara // penny rounds // black and white // mosaic // 4×4″ honed squares


I love the open shelving. Was this custom made or do you have a source you can share?
I would love to know where the shelving is from too!
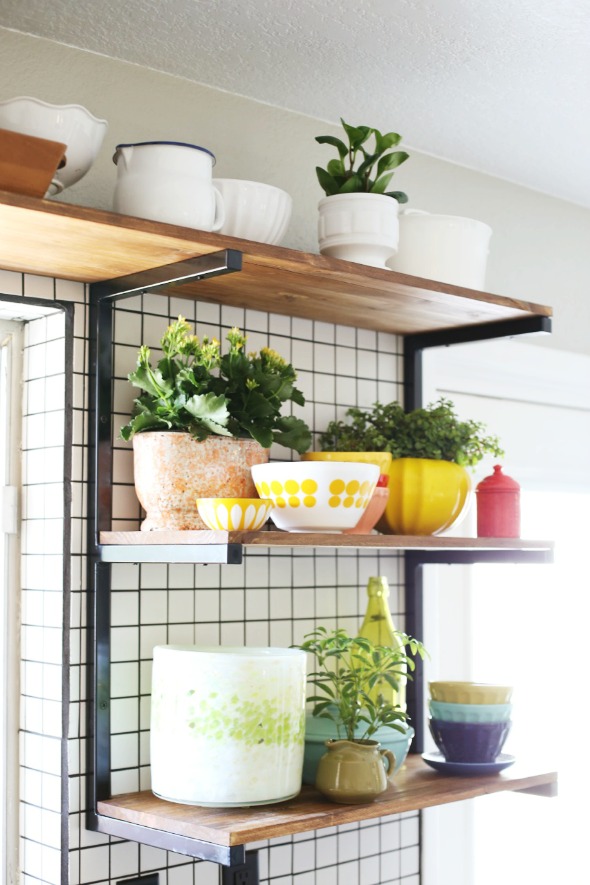
Hi guys! We made the shelves! My husband welded the frame and we cut the wood to size.
Ditto on the shelving! Thanks!
I’d love to know about the process of painting your countertops! Everything looks great
Would you tell us the dimensions of the shelves? I want to do open shelving, but I don’t know how deep they should be. Thanks! I love it!
The shelves are 11″ deep and work perfectly in our space!
love the shelves and being able to update your kitchen without getting rid of everything
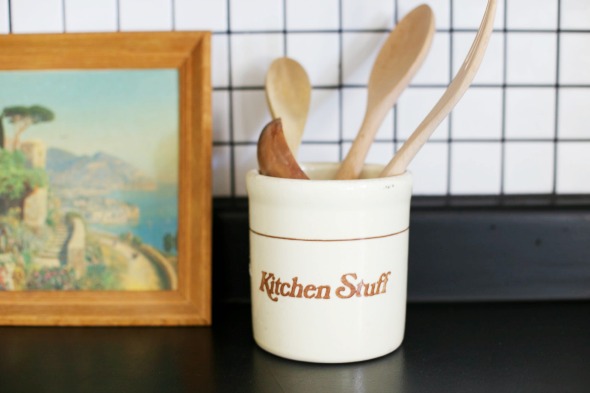
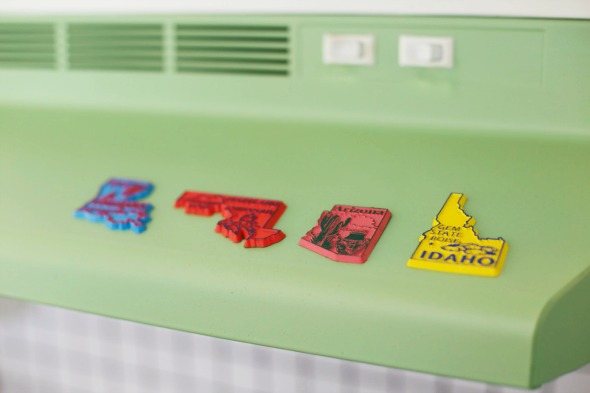
There’s something so delightfully 80’s about the grid tile, the retro “kitchen stuff” container, the pops of yellow on the open shelving. It reminds me of my best friend’s kitchen when I was growing up. I really love it!
“Delightfully 80’s” is my new kitchen motto!
Mine too! Three cheers for kitchens that make us happy!
Would LOVE to see a post about painting the countertops!
And pfft to people talking trash about the grout lines. Haters gonna hate.
Here, here, Susannah! I’m not cool with comments like that so I took them right down. If anyone has a problem with that, they can email me. :)
Kate and I will work on putting a post together on her countertops. They are SUPER awesome!
Yikes! Removing comments? I’ve been a loooooong-time reader (ever since you lived in an apartment in NY!) and comment only every-so-often but love seeing what you and your team do (your recent bathroom redo? – stunning!).
My comment was critical, because the work and design seem sub-par to your usual output, but by no means was it at all offensive or rude. Not everyone has to like everything that you do, and I’m not sure if it is entirely realistic (for your or your readers) to only have the “OMG, I LOVE IT!” comments.
Hey Liz!
Thanks for your note and for being a reader for so many years!
I only remove critical comments on posts that share work that is not my own. While I can see your point, I disagree with you. I believe that just because a blogger has made the choice to share his or her projects or the projects of her friends in a public forum does not mean that mean-spirited comments have to stay posted. I’m not saying everyone has to like everything I do or share, I just don’t think it’s okay to say rude things to my guests here on LGN. I know from almost a decade of personal experience how bad it feels to read bullying comments like your earlier one. Why would I want Kate to see that?
I’m not asking for only praise – I would have quit many years ago if that was the case – but I am asking for courtesy. If you don’t like something, please don’t comment. Please try to put yourself in the shoes of the person bravely offering up their ideas and photos of their personal spaces.
Feel free to email me if you have any more questions or concerns! Thanks!
Hey Liz!
My husband and I have renovated our house completely on our own over the past 1.5 years, and by doing so have stayed within our very modest budget! We are well aware of the hiccups in our kitchen and honestly, it makes us love it all the more= it’s a reminder of the hard work we did ourselves. A LOT of lessons were learned, but isn’t that was DIY is about? I’ll be the first to admit that I’m “sub-par” to Jenny, and because of that I so appreciate her featuring our project! The truth behind DIY is it takes a lot of time to get to Jenny’s level (she is insanely talented!) and things rarely look perfect. It’s easy to see these photos and pass on your critical opinion, but what you don’t see is the hours and hours we spent working on this. The blood, sweat, and tears that went into us changing a little part of OUR home. And the best part of it all is that we love it! Hopefully that provides you some context into this post!
Best,
Kate
This looks amazing! Great job! Way to get a look YOU love.
Thanks Amy!! I love that it’s such a fresh take on the subway tile look! It’s perfect for Kate’s house! xo
Thank you so much, Amy! We really do love it!
Congrats for tackling something that seems so daunting to most!
Tile work scares me! Especially around outlets and cabinets!
It is tough to do many things publicly these days, in our pinterest perfect world, and not get criticized…or come off looking like every one else! So good job on her staying true to her wants & needs. It may not be for everyone, but that’s ok too.
However, Im not sure how I feel about the “negative” comments being removed.
Unless they were scathing or crude (?) then maybe a little different perspective should be welcome???. Lauren Liess once posted about bloggers loving to give each other “rainbow enemas”…and finding it funny. Let’s all admit – It is great to get recognized for great work…and it should be ok to take “a little” criticism.
Just trying to stay balanced.
Hey Maurie!
I can definitely see your point (and Lauren’s – love her!), but I actually disagree pretty strongly! I want the comments on my blog to remain friendly and upbeat – just like I’m sure your comments would be if we were viewing this project in person. Little Green Notebook is my personal blog – this is not Refinery 29 or My Domaine or even Apartment Therapy. No huge staff here, just women working hard, balancing other jobs and families, sharing their personal spaces and projects and trying to cover expenses of those projects with the help of kind sponsors like Floor & Decor.
I think it is perfectly reasonable for me to remove comments that are insensitive and rude, in the same way that I would say something to defend a friend if she were insulted in person. I just don’t want my blog to feel scary and dramatic that way, you know? I think when readers demand that bloggers just “suck it up” and let the mean comments stay and poison the comments thread, all that is doing is making every good personal blogger out there quit sooner. It has happened over and over again and I think it’s sad that the world is missing out on seeing that great original content from real people with real budgets. I don’t want to quit. I like sharing projects. And I’m not ashamed to say that I like getting positive feedback on projects, too! Who wouldn’t like to hear their friends tell you you’ve done a good job on all your hard work?
Wow! Lots of feelings today, I guess! I am grateful for your note and for the respectful tone. I guess I just wanted to share my thoughts on the subject too. :) Thanks!
Jenny,
You are lovely (and I do follow…for a long time now:)!
Your reply shows you are a great friend to have…and I agree wholeheartedly that any rude comments should be, hopefully, kept to themselves.
I dont want you to think I was demanding that you do anything you dont want to on your blog…just stating that it is sometimes refreshing to hear differing perspectives…as long as they are kind! There’s no time for rude and cutting.
As I mentioned, I think it is SO great to see the other side of “pinterest perfect” – someone putting there own stamp on things and then putting it out there.
I wish I saw more of that…unfortunately then you have those who feel the need to point out all the short comings…just one reason I dont blog! Good God that would give people loads to talk about! ;)
Life is real, costs are high and mistake are many! So for most of us it is really hard to get all those pretty images under one roof – with “bandaids” needing to be done from time-to-time to hold us over until budgets allow. There are so many factor that go into a home and how we choose to decorate, or not decorate it!
Thank you for always give us refreshing ways to add to our homes!
Thank you, Maurie!! I SO appreciate your comments! Thank you for your thoughtfulness. xo
The island looks intriguing….I’m thinking that may have been another project. Could you tell us about that?
Agreed. Obsessed with the island Kate!
Lee and Tessa,
My husband made the island! He’s an incredible welder and has recently gotten into wood work and whipped it up. He’s pretty handy to have around. :) The shape of our kitchen is odd and we use this as both island and table and it’s worked great. Thanks for your kind words!
I would love to see more pics of the island too. What I can see I love! Looking for ways I could change my island. Thanks!
Nicely done! I still haven’t been brave enough to tile. You bloggers make it look so easy! Maybe someday…… Thanks for letting us into your home Kate! Hoping you do a counter tutorial too!
It’s coming up, Kelly! It has been a great place-holder while we save for new counters!
Hi Jenny and Kate,
I’m a long time reader and I love this project. It’s so reflective of everything I love about LGN– wonderful, approachable style and DIY ideas that encourage me to take the jump on scary projects.
Also wanted to send my support for deleting negative comments. Not every project/idea/DIY needs to meet the personal taste of every person in a blogs readership. Kate’s work here is amazing and I would be so thrilled to have this in my home! Imperfections tell a story and give character to our lives and homes.
Good on you Jenny for standing up for what’s right and important– people’s feelings and your personal integrity. Reading your responses has only encouraged me to continue to read and support what you and your team do.
Thanks for chiming in, Kaylee! I so appreciate the support and kind words!! xo
Kaylee!
Thank you so much for this! These imperfections tell quite a story (working as our 18 month old toddled in and out of the kitchen, 2 am work sessions, etc) Thanks for the comment and the support!
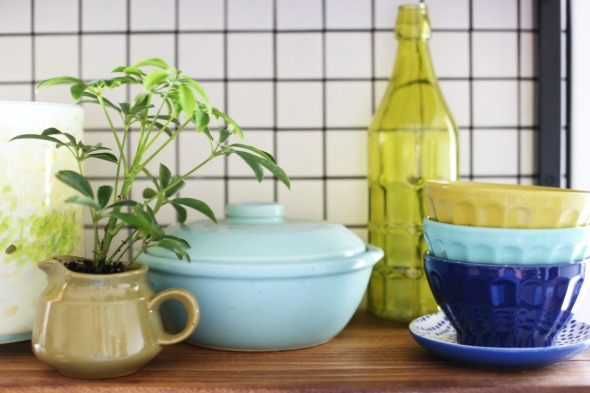
What a bold and brave woman to tackle that tile job! And it looks great! Well done. I love the personality in this kitchen and those planters, pots, and bowls on the shelves.
Thank you, Kate! Brave is one word…..
OMG! You rocked with your open cabinets, and your selected the perfect tiles to go with the open cabinet concept. I could have never came up with this beautiful combination. I guess that’s why you are the professional, and me, well I am just so greatful to all of the designers like yourself. Iovin your kitchen! Thanks for sharing.
Thank you for the sweet comment, Ivory!
I just don’t understand why people are expecting constant perfection??? We are all only human. And by the way, the backsplash looks damn good.
I’m a long time reader and I appreciate that the content on your blog is affordable and attainable. I can’t tell you how many ideas you have given me for my own home. I also appreciate the positive environment here. People will say anything when they have a computer screen to hide behind. Please, please stick to your guns and never quit. Your blog is my all time favorite. Seriously, no one is as creative and original as you are. :)
The kitchen is lovely, really, and a big inspiration. I don’t quite understand deleting the comments (though I didn’t see them before they were taken down). The first thing I thought when I saw the pictures was, Oh, I love the look of that little tile! And the second thing was, Oh, what a pity you can see above the stove where the sheets of tile are from the grout lines! That would drive me crazy! I think it’s just worth acknowledging that that’s what happens sometimes when you try to DIY little tiles that come on big sheets, and that if you’re a perfectionist, you should hire a pro for jobs like that or pick a different kind of tile. Because part of what these blogs are for are for other people to learn from going forward, right?
Agreed.
Tiles are HARD to get perfect. I didn’t notice the grid above the stove until it was pointed out. The great thing about this kitchen is the design concept, and for the owners, their personal achievement and the learning process.
Yes you can hire a professional but I remember having to argue with my tiler that I wanted the tiles lined up with the bath taps, as I didn’t want to be annoyed every time I took a bath. And remember Emily Henderson’s tiling that had big scallops of grout along the side of the bath?
In my own home the imperfections that I have noticed, I know and I don’t need telling. The imperfections that I haven’t noticed, please don’t tell me. I have enough to do already.
Sue! I love this comment! The comments that pointed out the uneven places in our tile haven’t upset me in the slightest because…yeah, I know. I live here. Ha! I’ll be the first to admit there are some mistakes, but like you said, the concept and execution is what worked for us right now. And we love it!
I’m a bit nervous about doing open shelving because I think it will constantly need cleaning. Kate, how are you finding it to be so far?
Hi Ramsey! I dust lightly every few days and when I water (about once a week) I’ll wipe the shelves down. I’m a bit of neat freak and these haven’t been a problem at all!
Love this! We are in the process of rehabbing our kitchen on the cheap til we save up for the big stuff too. Painting our cabinets now! I can’t wait for the counter post as we have cream laminate and are painting the upper cabinets white so I think they will look worse after. I’m curious about the floor too- we have jade green tile and our kitchen is huge so it will cost a fortune to replace. Is it real tile? Peel and stick? Do tell! And ps- my favorite part is the mint green hood!
Hey Stephanie, we actually bought the tile cheap from a friend who does tile. They had a bunch left over and we’re selling it for practically pennies. It’s is actually a fairly expensive tile that we just happened to find a great deal on. Check liquidation stores and even CL, this friend often sells tile that way!
Hey Stephanie, we actually bought the tile cheap from a friend who does tile. They had a bunch left over and were selling it for practically pennies. It’s is actually a fairly expensive tile that we just happened to find a great deal on. Check liquidation stores and even CL, this friend often sells tile that way!
If I were going to a friend’s house for dinner no way would I point out or ask questions about imperfections in her design or in the technical execution. BUT if I were going to her house specifically for design help and inspiration you can bet I’d want to know what worked, what didn’t, what things she wished she’d done differently, what things that worked better than she thought. I’d ask questions like: if one wants small tiles but is a newbie at tiling or tiling over old uneven walls would a grout that matches the tile be a better option than a contrasting grout? Would larger tiles go easier? Smaller grout lines? Bigger grout lines? Individual tiles as opposed to sheets? Adding a step beforehand by skim coating the walls smooth and even. All this I’d want to know if I were considering tackling my own tiling job. To this awesome DIYers credit she did mention that she recommended spacers if the walls were worth it and she stated she was pleased with the results. As she should be.
It seems like there’s a missing resource out there for those of us that want to DIY and that are more concerned with design than technical precision. While a site like This Old House will show you step by step how to exactly do things it won’t tell you where it’s ok to cut corners and which steps will get you to “good enough” and which steps you better not skip or you’ll regret it and possibly even ruin the project. A lot of the technical skills project resources on the web present things as there’s only one way to do something but we all know from the design sites we frequent that show a lot of DIYs (like this one and ones like design sponge and apartment therapy) that there’s a lot of leeway and like-wise a lot of variation in the final result. And I think that’s awesome.
Emily, thanks for your comment! I totally see your point! In fact, I was walking through a house with a friend just a few weeks ago and told her all my advice and thoughts on doing your own backsplash and what would have been easier, what turned out and what didn’t. Room for improvement if I do another DIY with LGN… I’ll talk about those things! Thanks for the input.
Thanks for reading my comment! Major shout out to your amazing husband and his welding skills. The design and execution of the shelves and island are top notch. Hot! Another DIY under your belts and you’ll be in major demand with all your friends and families wanting to tackle their own renos.
I agree with you, Jenny, regarding the criticism. I mean, anything can be labeled “constructive” and regardless, I don’t think that makes it okay unless someone is specifically asking for constructive criticism. I admire you for sticking up for your contributors and remaining true to your values. I have been reading LGN since its inception and have loved following along on your journey!
This kitchen could be in a European city apartment in Barcelona, London, or Berlin. I really love it. The black and white grid lines are a great backdrop for adding plants, bold colors, and wood. I found it refreshing to see an urban European look and I love that you painted the hood. Thanks for sharing.
Wow! So nice of you to say! Appreciate the kind words!
I got goosebumps and happy tears for you when I saw the before and after photos! Well done! Thanks for sharing. x
Kate! Your home looks so different from the before pictures! I love the grid pattern in your kitchen and the pistachio range. It looks so, so good. So glad you guys took this home and have it love and design!
Hi Kate and Jenny!
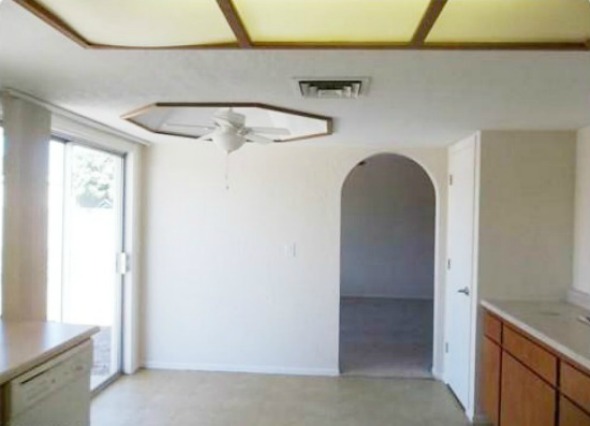
I noticed in the before photos that you had the same kitchen light situation that we currently have in our kitchen– the box light. Could you reply or post on what you did to re-plaster/ fix your lighting situation? Also interested in hearing about how you repainted your cabinets. Your kitchen is beautiful, and I love how you added personal touches to the space!
Hi Kim! So we kind of lucked out with the lighting situation. Whoever owned the home in the 80’s ADDED the box light and a false ceiling below the original ceiling. (Why?!?) So all we had to do was rip out the false ceiling and lights, add our can lights and fixture, patch the drywall, texture a few spots and paint! It was still a fair amount of work but much easier than we anticipated. If your box light it original I think you’ll have to rip it out and drywall the entire spot. Doable!!
When everything was ripped out of our kitchen we sprayed the cabinets with Ben Moore Advanced Paint. I’ve rolled with this paint t0o and it’s INCREDIBLE. I would 100% recommend spending the extra money and buying this type of paint. We’ve never had to touch up and our cupboards wipe clean with little effort.
Best of luck with your updates! And thank you for the kind words!
I am so happy to see a kitchen that is not just a blinding white space you see all over the internet! Tho my style is different than this kitchen, I think it is a beautiful, cheerful space. I love hearing when people work hard on their homes to make it “their own”.. great job on your kitchen! I really love your island!
Love it! I especially love the floor tile. That’s great you got a bargain. I’d love to look for something similar. Does it have a name or any keywords you can recommend to describe it? I’d appreciate it!
I LOVE the execution of this. I especially appreciate the shelf above the sink as a way to deal with the bulkhead next to it. The shelf virtually makes the bulkhead disappear, and it’s a great design tick for the eye.
I will say, it is WAY to 80’s for me. But what I have learned from my mom, is all that means is that I am old. There are certain design era’s, if you will, that we all live through and will, when we are older, refuse to put back into our homes. For my mom, when she redesigned her kitchen and living space, anytime I suggested anything from the late 60’s or early 70’s (you know, the vintage stuff I have in my house), she refused to even look at it. I have seen 80’s trends in design. It’s just not something I will do in my own home. And seeing this design so well executed just tells me that Kate is younger than me. And I think that is FANTASTIC! Never bad…just a reminder of how old I am.
amazing thanks for those photo
I need that floor tile! Could you please share the source?
I would also like to see how you painted your countertops! I have Formica counters, and don’t have the budget to replace with solid surface.
Wow. Such a HUGE differerence! What is up with those ceiling lights?? A place I rented had that type of light too, it’s terrivle. I’m incredibly impressed that you DIY’d the tile. That seems like such a big job!! The open shelving looks fantastic too.
I’m adding a vote to hear about the counter painting process!
Also– what color of white did you use on your cabinents? We just bought a house in Seattle that has a twinner kitchen that we are about to tackle (except we’ve got green laminate counters to contend with). Thanks!
Hi Kate,
My “hat is off” to you and yours…
I came here for inspiration and bravery to do a DIY tile project again after 15 years since my last attempt.
You have given me both and more.
I originally was looking to find out how to install a tile back splash AND install floating shelves atop the tiles. You’ve now given me the idea to keep the shelves within their own standing unit!
Thanks so much
I need that floor tile! Could you please share the source?
Wow, what a great turn out! My husband and I have been thinking about doing something similar and we are hoping for the same results. I would love to use red tiles rather than the white because it would go better with our kitchen. Thanks for sharing!
Love it! I especially love the floor tile.
Good post, I have a good idea for the kitchen backsplash decor, it is easy to install peel and stick tile, it is self-adhesive, just peel the back paper and stick the tiles on the wall, you can DIY mosaic decor the backsplash by yourself in a short time.
more info about the peel and stick kitchen backsplash, follow https://clevermosaics.com
A very good artcile, thanks so much for sharing, it is very useful to me.
Is there anyone interested in solar phone chargers?
This kitchen is SO what I would want in my house. Amazing job eyeballing the spacing, too. Wow.