
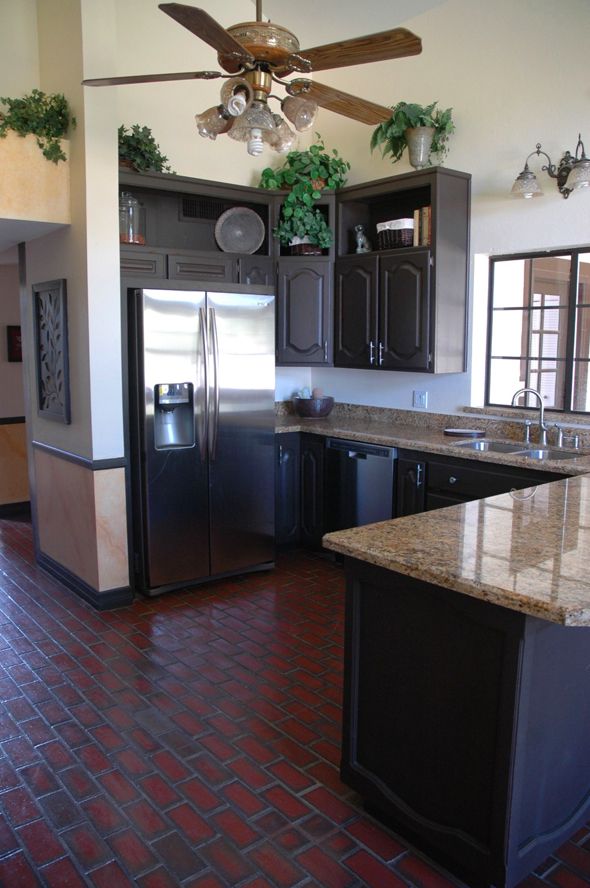
If you’ve been following along, you know we’ve gone back and forth a lot on what to do with this kitchen. Here are the posts, in case you’re in need of a catch up:
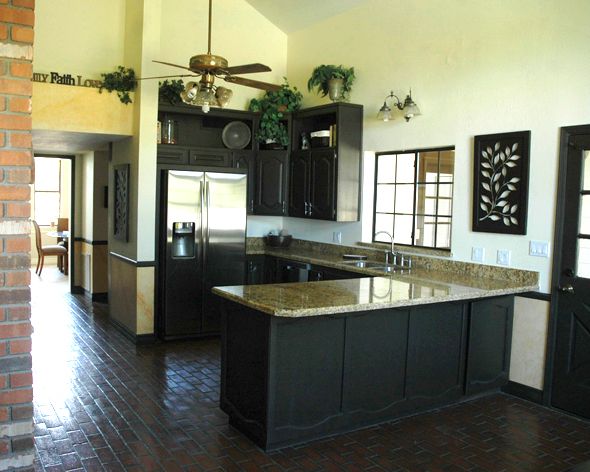
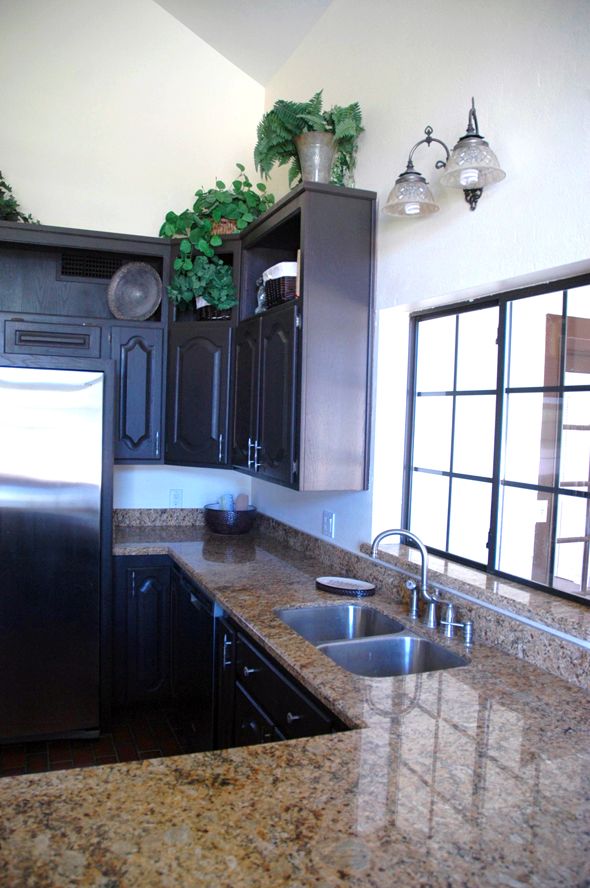
Kitchen Tour (right after we closed on the house)
Open Shelving Inspiration (before I decided on the single shelf look)
The Rough Initial Plans (only about 50% of this ended up happening!)
After painting out the floors and the brick range surround
A big recap of thoughts and plans and details on the Shaker-style cabinet DIY
Black concrete counters DIY and single shelf inspiration
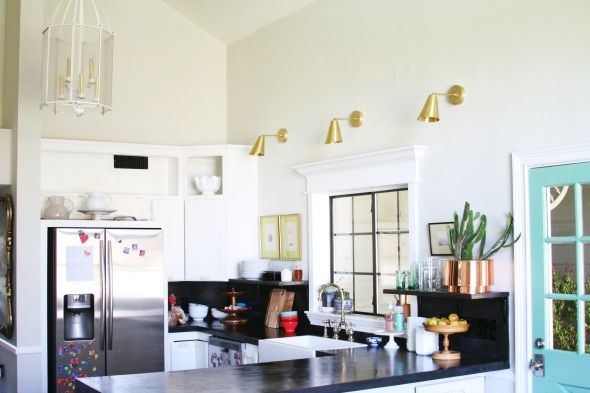
I finally decided though that we would just work with the existing layout and cabinets and use my favorite concrete overlay technique to make this kitchen work for us until we can do a big upgrade.
I’m still hoping for a full kitchen reno sometime down the road, but at least for now, the space feels clean and bright! DIY wins again! :) Here’s a little more on what we ended up doing and where I bought everything…
One of the splurges of the reno was this farmhouse sink from Signature Hardware. We had some sort of funny dimensions to work with and this one was the least expensive of the options that would fit right. I love the clean lines! I also bought the faucet from Signature Hardware and had a local plating company (Papago Plating) strip off the lacquer finish. I love it.
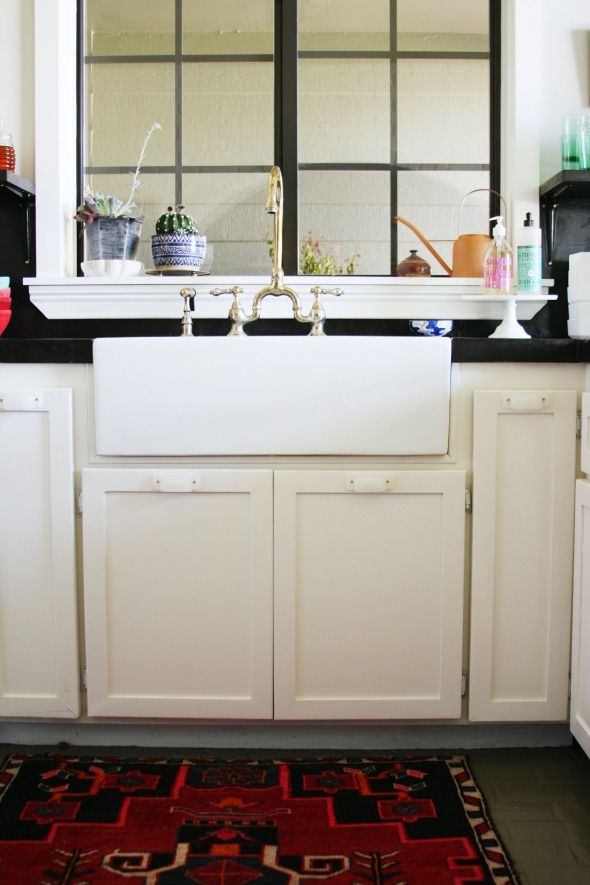
The black concrete counters are holding up really well and I love the dramatic look. The waterfall edge is so pretty, and I think with the creamy white cabinet color and the lighter gray on the floors (Ben Moore’s Galveston Gray), the black is not too dark for the space.
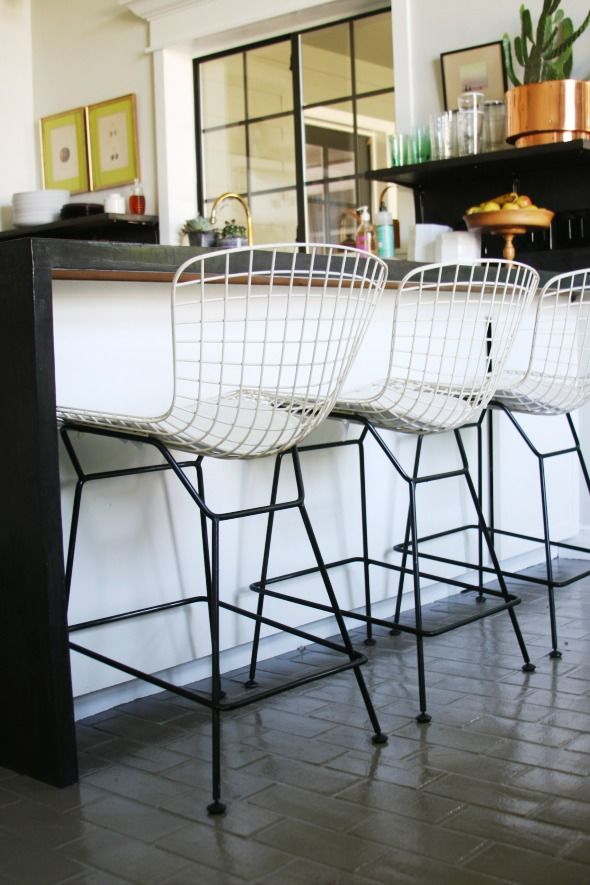
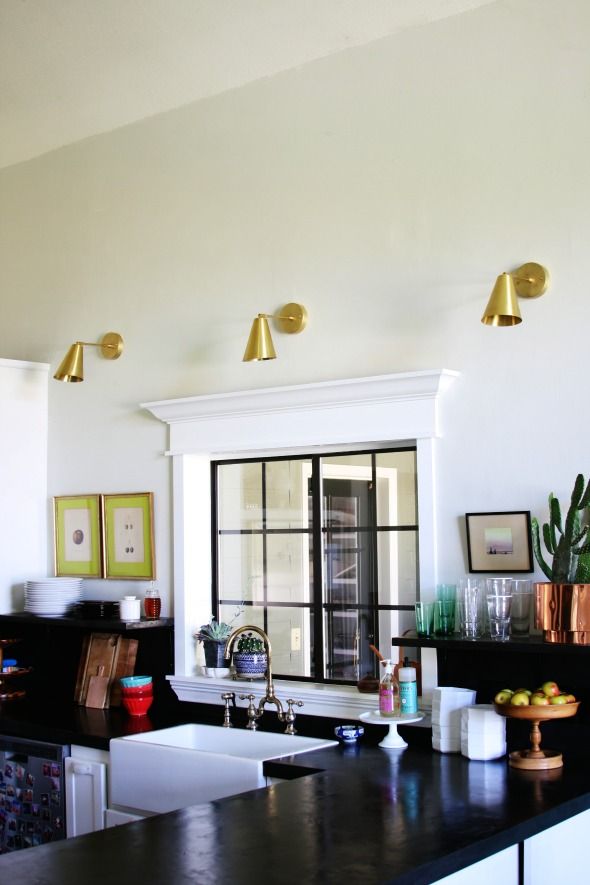
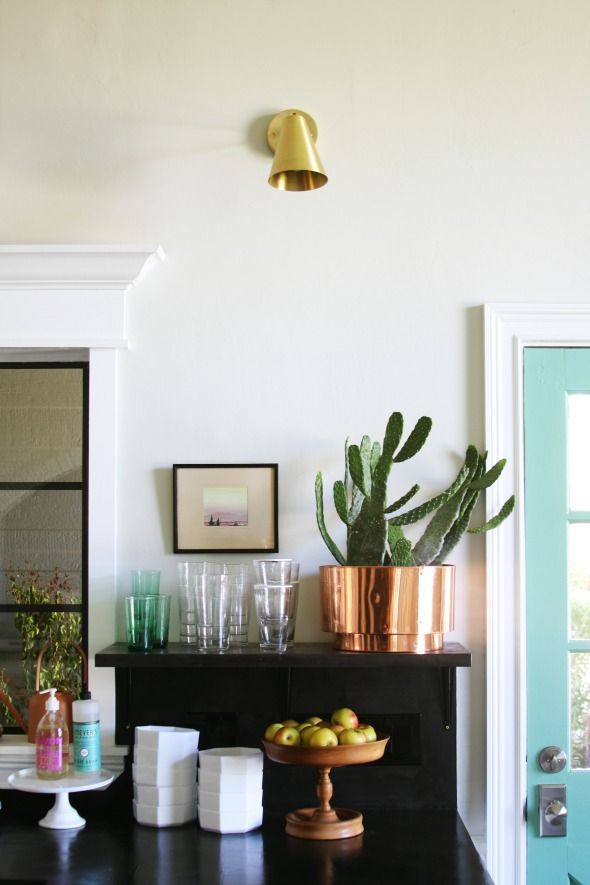
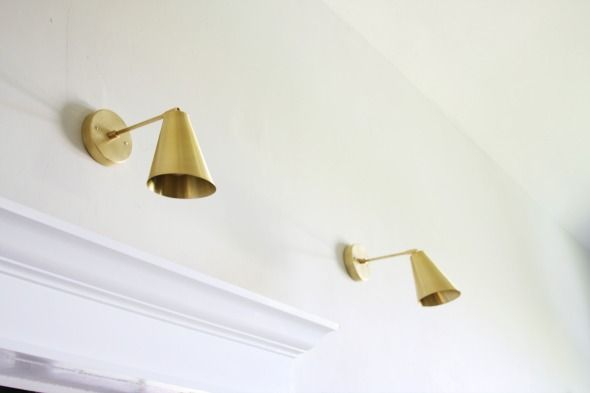
My favorite part though is the little shelf we built with pine boards that I covered in concrete too. I hung them with simple black gloss brackets from Home Deport with brass screws. I wanted the brackets to just sort of go away, which they do! The shelves are super sturdy though too. We have all sorts of heavy things on top (tons of plates on one side and a 20-lb cactus planter on the other!) and it’s sturdy as can be.
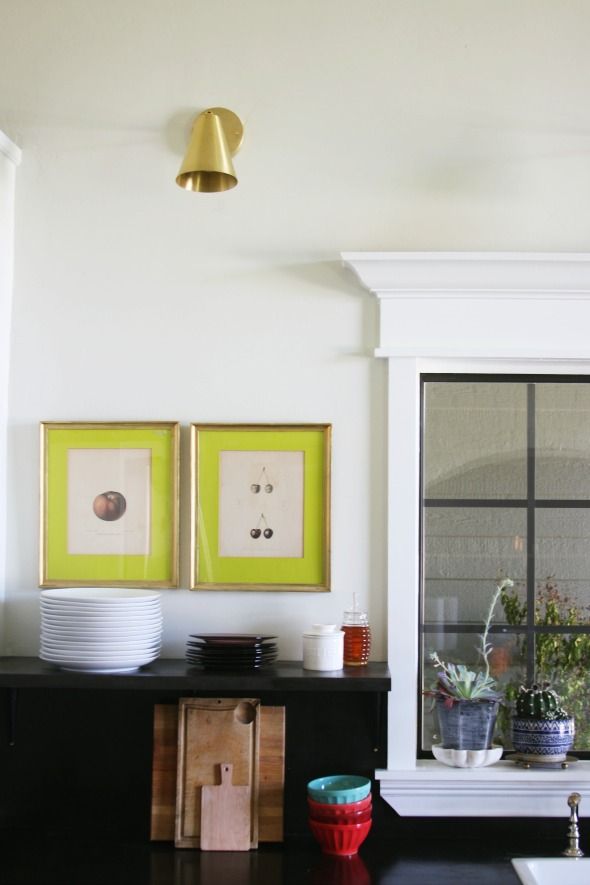
You can see in this photo too that we beefed up the trim on the doors and added trim to the windows (there was nothing there before). I LOVE how the trim addition completely changed the space!


amazing! i love it!!!!!!!!!!
I adore this. My favourite thing about your style is that the makeovers look like somebody actually lives in the space and uses it. Love the colours in here, it's beauitful!
This is so great! Pretty and functional and within reach. I think my favorite part is the aqua blue door…might need to borrow that for our kitchen back door. :)
A great kitchen makeover, it is now so light and looks like you will enjoy just being in that space. Great job and wonderful DIY ideas. What color are the walls and cabinets painted?
Gorgeous, Jenny! I love all the details you added to(and also subtracted from) the original. Your ability to reinvent what you already have is just amazing. Beautiful!! xx
Wow! What a cool transformation. The cabinets look great as do all the light fixtures. Enjoy!
Nice! Considering how huge your house is though, what a teeny tiny kitchen!!! So strange.
Great work! It looks fantastic! What a difference! Amazing job!
Not one to usually comment but …daaaaayyyyyyyuuummmmmm
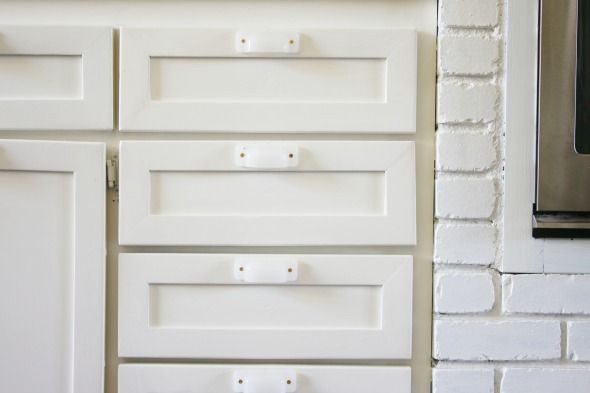
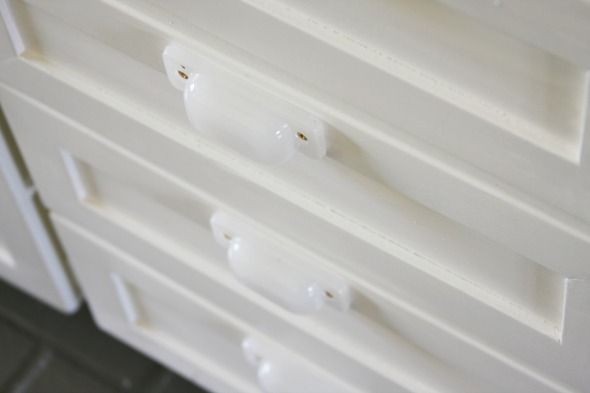
The milk glass bin pulls sound so charming! The photos don't do them justice, I'm sure. Thought they were plastic at first. I love how you always think outside the box and come out with an amazing space afterwards :)
I LOVE the work you did on this kitchen, I think its beautiful and such a great space. I wouldn't even bother with a reno, save the money and go on vacation instead!!
so great! no one would have ever guessed these are changes to just get you buy until the big reno!! super fantastic!! My favorite touches are the brass lights, window casing, flooring color & counters. nicely done!
A 'make use of what you have' makeover is my favorite kind! It's so light and bright and those three sconces – just dreamy! You have to be setting some kind of DIY record with all that you've done to this house! I've thoroughly enjoyed it. Always happy to see a new post from you!
Clearly not perfect, you said it!
Love it! I love that you make it work for your family and it looks like a family lives there! One question: have your floors scratched? I painted mine before we moved in and they look horrible. I'm wondering if I didn't use the right type of paint or something. We used porch and floor paint and it is chipping everywhere :(
Jenny–this looks amazing. You are such an inspiration. I literally got a Domino subscription just for your upcoming spread!
I've been wanting to try the black concrete method over my existing very old butcher block ever since your first tutorial. I've been waiting for the full reveal to go ahead and try :)
Do you think this method would work over butcher block if I really scuffed up the wood? Also, I've read elsewhere that the concrete tends to scratch, or if you're a big cook (like me), oil splatters from your stove will stain the surface. Are you encountering any of these problems?
Thank you so much! (PS–I can't believe the floor is painted! Looks awesome).
I really love the look of the dark counters with the white cabinets – a perfect balance of dark and light. And the aqua door is a fun pop of color! Nice work.
Really gorgeous. I wish I could unleash you on my house!
The trim is such a game changer.
I find the height of your ceilings so intimidating. Kudos to you for having the courage and vision to turn your house around. I've said it before but I'll say it again: SO excited to see the Domino spread!
The kitchen is beautiful – I love how you incorporate all of your diys (concrete on counters, shelving, painting the light fixtures) to make your home reflect you and your vision. The waterfall edge is my favorite "new" diy trick to (someday) try!
I'm so thrilled to see how great the re-faced cabinets look. We're in the process of buying a house with a kitchen full of cathedral cabinets, and it cheers me up to see that I can get a cleaner look without buying all new fronts. Was it a combination of the re-surfacing you did in your bathroom with the shaker fronts you did in the brownstone kitchen? Tutorial coming or just links to those? I shot this post off to my husband so fast! (As I do most of your reveals) to say "Look! What can be done!" Thanks for expanding possibilities for the rest of us.
Jenny – another hit out of the park! Ingenious move on stripping the lacquer off the faucet. What do you look in a faucet to know you can do that?
You are definitely the Queen of DIY!! You amaze me with your ideas & energy!! Would you mind sharing the paint color of your turquoise door? Love it !!
I LOVE LOVE LOVE this. I also have those hexagon bowls in black!!! Now that I see you have them, I think they are cool, again!
Your kitchen already looks like it has had a big upgrade! I love it. What color of turquoise did you paint the door? I've been thinking of painting my front door blue.
Great job, Jenny! It is another amazing LGN transformation! Kudos :-)
I really like the brass wall sconces!
I adore these kitchen!
Looks gorgeous and show us the stove area!
I'm sure you thrifted that amazing copper planter, but in case not, what's the source? Also would love the source for the beautiful wooden cake plate. Thanks! The counters are my favorite.
I'm interested to know why you switched from the large table to the smaller octagonal one (from the brownstone dining room right?). Does it fit the space better and allow for a more functional flow of traffic?
Hi Marci! The walls are painted Ben Moore's Titanium and the cabinets are Swiss Coffee.
ELT – Our floors scratch very little. I used Glidden's oil based porch and floor paint in gloss and I put it on in a very thick coat with a very wooly roller. It's stinky, but I think the thick layer helps a lot with durability!
Christina – Thank you!! I'm super excited about the feature. :) I think butcher block would work well under concrete. If you layer on the concrete enough times and sand off the soft material, you'll be left with really hard stuff that doesn't really scratch. Also the key is to use a really good sealer. I linked to one in the post I did called Black Concrete Counters. It was very expensive, but worth every penny. There are no water or oil stains anywhere.
Hi Em – I don't have plans for an additional tutorial on the cabinet fronts. I did the flipping and hardboard trick on the kitchen cabinets and then just adding that corner moulding with a pinner gun and some liquid nails. There was a lot of caulking and sanding involved too. Hope that helps!! Good luck with your cabinets! :)
Alexandra – Just look for a solid polished brass faucet and it can be stripped! The lacquer they used can't really be stripped with the stuff you and I have access to, so it's best to have a professional plater/metal worker do it. Mine was only about $30! :)
Hi Jenny,
Would you please share what parts (i.e. installation of sink, painting, removal of cabinets, etc) of the kitchen you paid outside contractors to do, and which sponsors (any parts, kitchen handles, etc) contributed or gave to you at a reduced price?
Eenie and Candice- I have a post coming up about the door, but the color is Farrow and Ball's Arsenic. It's SUCH a great color!
Jennifer – Yup, thrifted the copper planter! I love it.
Esther – We are using the long table on the back porch now. It fits that space much better and the hex table is more than enough for our family! :)
Nancy – We did have a professional hook up our sink (I know nothing about plumbing!) and the vent hood over the range. Thanks for pointing that out! Kate and I did the rest ourselves though! I promise I do my best to disclose sponsorships or work I did not do myself. Thanks!
Abigail – Thanks! The faucet was found at Signature Hardware! :)
C – There's a post I linked to at the top that shows how we tore out (and donated!) the granite and built plywood bases for the concrete countertops. The post is called Black Concrete Counters or something like that. You're right, it would have not worked AT ALL to put the concrete overlay on the stone.
xo
Hi Rhonda – In the list of links at the top of the post, there are lots of photos and all the info on what we did to the space. We did end up removing the granite, but at one point we were hoping to try and keep it and I was just going to have my stone guy come in and cut the granite back to accommodate the sink size. It's not that hard of a thing to do apparently.
xo
It looks adorable, I like it very much. There are so much light. Great job!
Carpet cleaners Beckenham
Milk glass? MILK GLASS?!?!? THIS IS WHY YOU ARE AMAZING!!! I would never, ever have thought of that and now I think it is the chicest thing I've ever seen. #JennyStrikesAgain!
I love this! It looks so fresh and modern!
Two questions
1.) That cactus planter WHERE did you find that!
2.) The sink looks brass? Where did you find that?
LOVE IT
Wow, you schooled that kitchen! Amazing.
Wow! Amazing transformation.
Quick question for you about the counters — how did you prep the existing counters to receive the concrete? It looks like they were not laminate so I am wondering if you sanded or scuffed them in some way before adding the concrete.
Many thanks!
Hi Marci! The walls are painted Ben Moore's Titanium and the cabinets are Swiss Coffee.
ELT – Our floors scratch very little. I used Glidden's oil based porch and floor paint in gloss and I put it on in a very thick coat with a very wooly roller. It's stinky, but I think the thick layer helps a lot with durability!
Christina – Thank you!! I'm super excited about the feature. :) I think butcher block would work well under concrete. If you layer on the concrete enough times and sand off the soft material, you'll be left with really hard stuff that doesn't really scratch. Also the key is to use a really good sealer. I linked to one in the post I did called Black Concrete Counters. It was very expensive, but worth every penny. There are no water or oil stains anywhere.
Hi Em – I don't have plans for an additional tutorial on the cabinet fronts. I did the flipping and hardboard trick on the kitchen cabinets and then just adding that corner moulding with a pinner gun and some liquid nails. There was a lot of caulking and sanding involved too. Hope that helps!! Good luck with your cabinets! :)
Alexandra – Just look for a solid polished brass faucet and it can be stripped! The lacquer they used can't really be stripped with the stuff you and I have access to, so it's best to have a professional plater/metal worker do it. Mine was only about $30! :)
As usual, absolutly lovely work! I love the black countertop, it's just so very cool! I have to say though even though you said the new cabinet pulls ar milk glass…..it looks like cheap plastic pulls to me. I'm sure the picture just doesn't do them justice though. Anyway, keep up the good work, your house is absolutly gorgeous.
Love the changes you made… How did you incorporate the farmhouse sink into the existing counters? Did you remove the granite?
Eenie and Candice- I have a post coming up about the door, but the color is Farrow and Ball's Arsenic. It's SUCH a great color!
Jennifer – Yup, thrifted the copper planter! I love it.
Esther – We are using the long table on the back porch now. It fits that space much better and the hex table is more than enough for our family! :)
Nancy – We did have a professional hook up our sink (I know nothing about plumbing!) and the vent hood over the range. Thanks for pointing that out! Kate and I did the rest ourselves though! I promise I do my best to disclose sponsorships or work I did not do myself. Thanks!
Abigail – Thanks! The faucet was found at Signature Hardware! :)
C – There's a post I linked to at the top that shows how we tore out (and donated!) the granite and built plywood bases for the concrete countertops. The post is called Black Concrete Counters or something like that. You're right, it would have not worked AT ALL to put the concrete overlay on the stone.
xo
Hi Rhonda – In the list of links at the top of the post, there are lots of photos and all the info on what we did to the space. We did end up removing the granite, but at one point we were hoping to try and keep it and I was just going to have my stone guy come in and cut the granite back to accommodate the sink size. It's not that hard of a thing to do apparently.
xo
Only you. You are amazing.
This is so beautiful! And as always I LOVE how you are able to use what you have. Amazing. So inspiring.
I'm completely head over heels for the sconces…just trying to figure out where I can put them that won't require tearing into the wall too much. The whole space is just incredible. Next house, I'm having black counter tops.
It's an interesting choice to do a significant amount of work to a kitchen you'll shortly be removing. I'm of the mind that I only want and can afford to do it once. Like when we did our kitchen (full gut) I could not find the calacatta I wanted, and rather than settle for carrara or whatever, I said I'd live with plywood until I could get The One. (got lucky and ended up finding it in time) I definitely do admire the obvious amount of time and effort you've expended in your kitchen and so glad you are happy with your results. We also got our (stainless) apron sink (Bates + Bates) from Signature Hardware! Both my husband and I say we shall NEVER go back to a non-apron sink … or a counter-height dishwasher. (probably hands-down the smartest choice in our remodel was having the dishwasher raised — whether it's being pregnant or a pinched sciatic nerve or just life, a raised dishwasher is BLISS!) Happy cooking. I think you're very brave to share, and I admire that.
Your stopgap kitchen is awesome! I want to attempt the concrete overlay and have one quick question, did you use just the sealer or the Cheng wax and polish too?