
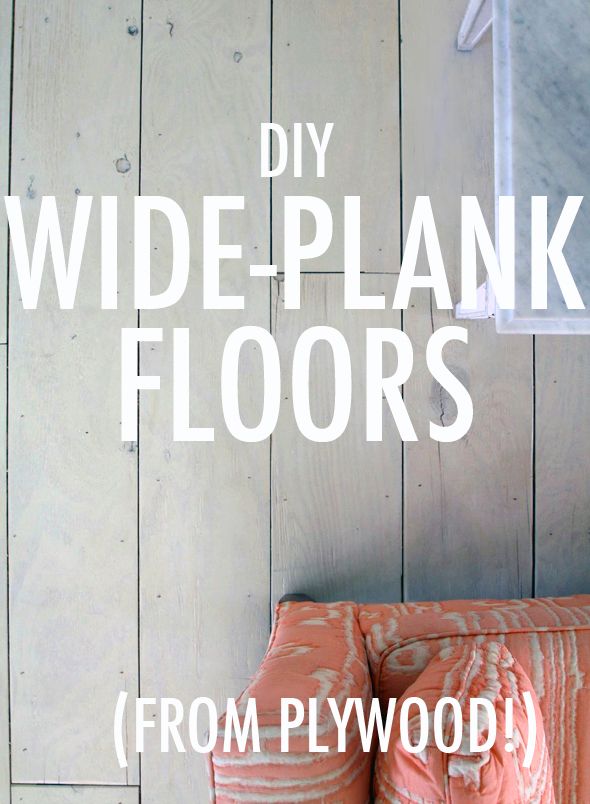
I really wanted old-looking white floors for our new studio space. I actually saw some interesting, beat-up knotty oak at Lumber Liquidators for a little more than a dollar per square foot, which is practically highway robbery when it comes to wood flooring prices. But it was only about 2″ wide and after laying all that tongue-and-groove flooring on the other side of our house this year, I decided to think outside the box and figure out a way to get wide-plank wood flooring to go in the studio for way, way less.
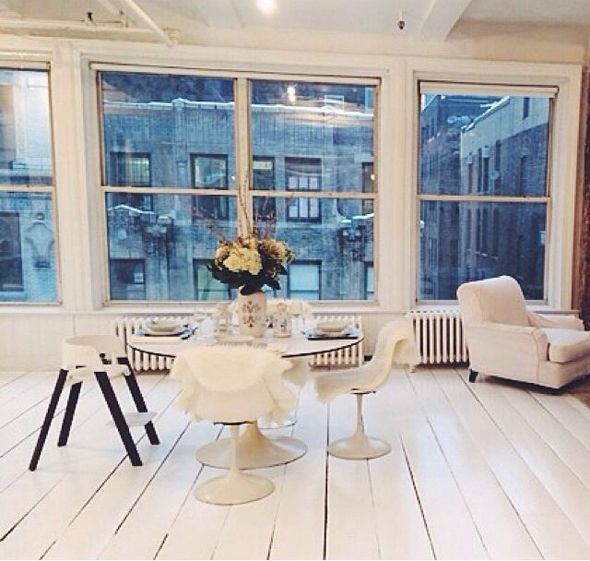
So there’s this really cool event space in Manhattan called Gary’s Loft that companies love to host parties at. One of the spaces is big and open and all white, with gorgeous, gappy wide-plank white wood floors. I loved going to parties at Gary’s.
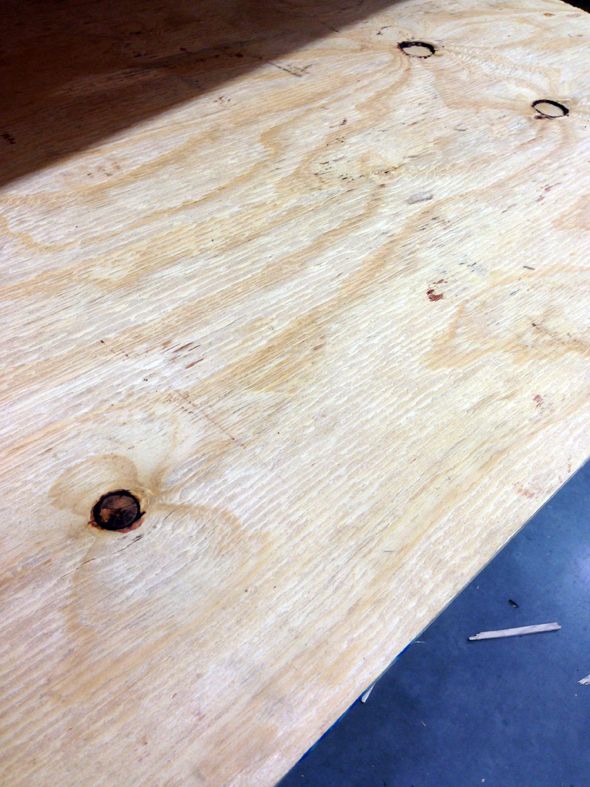
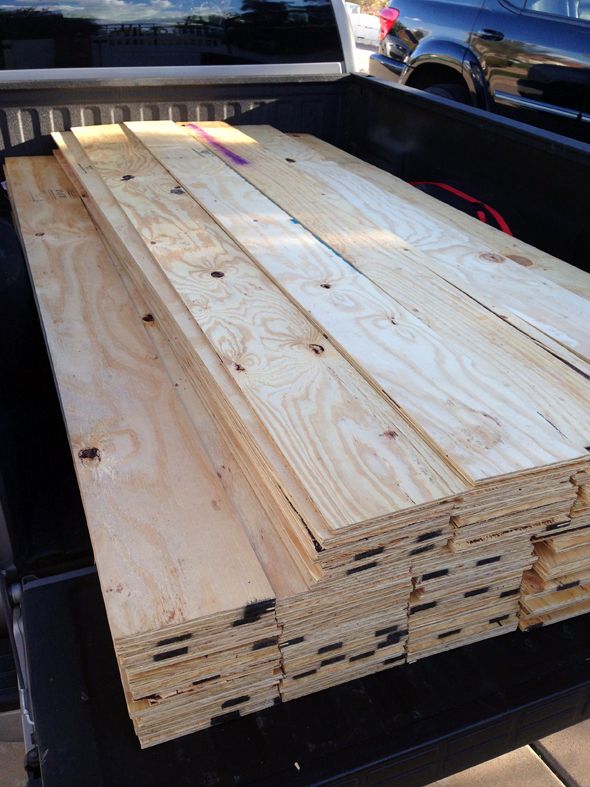
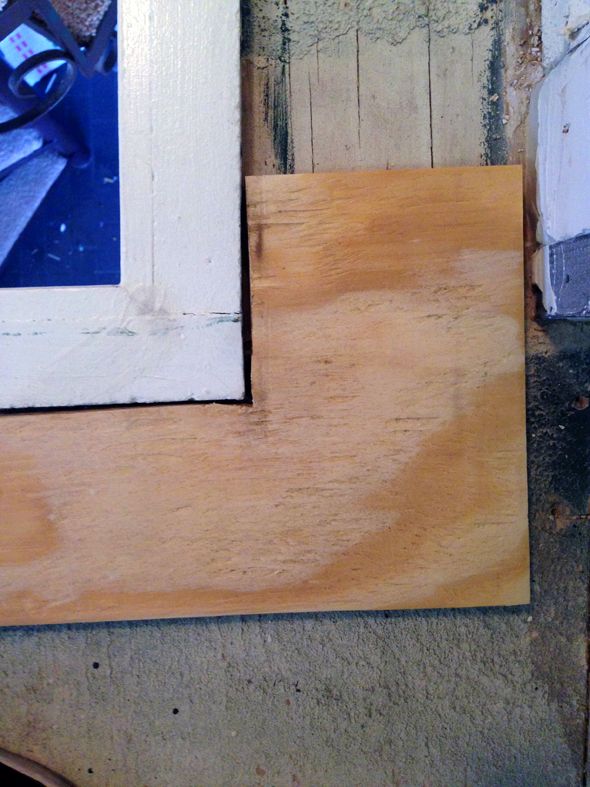
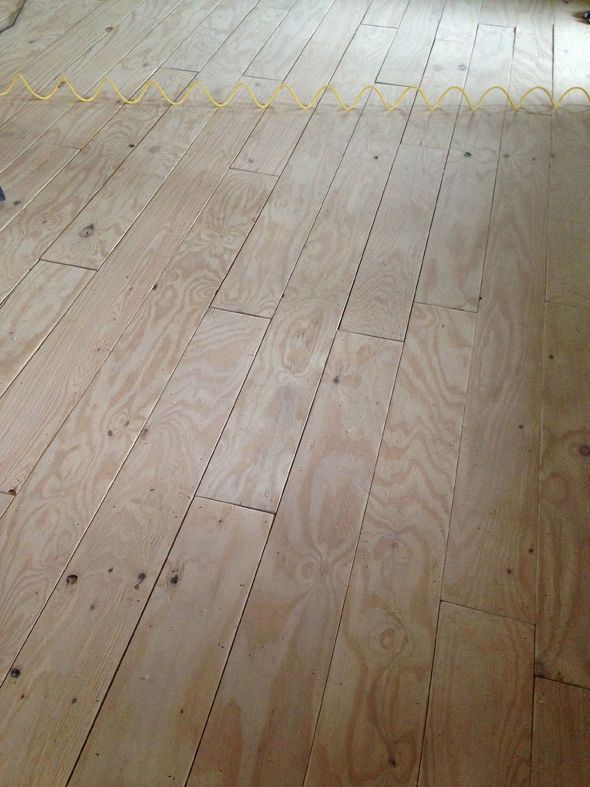
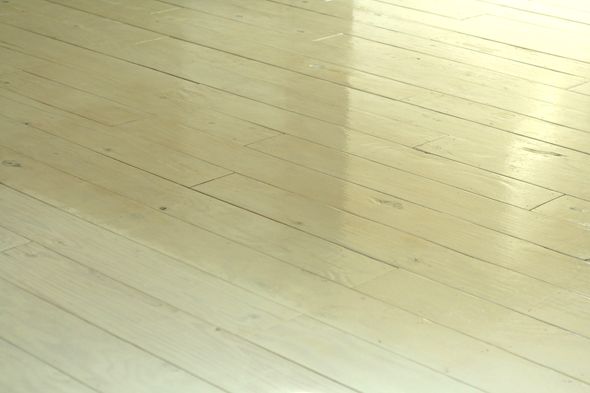
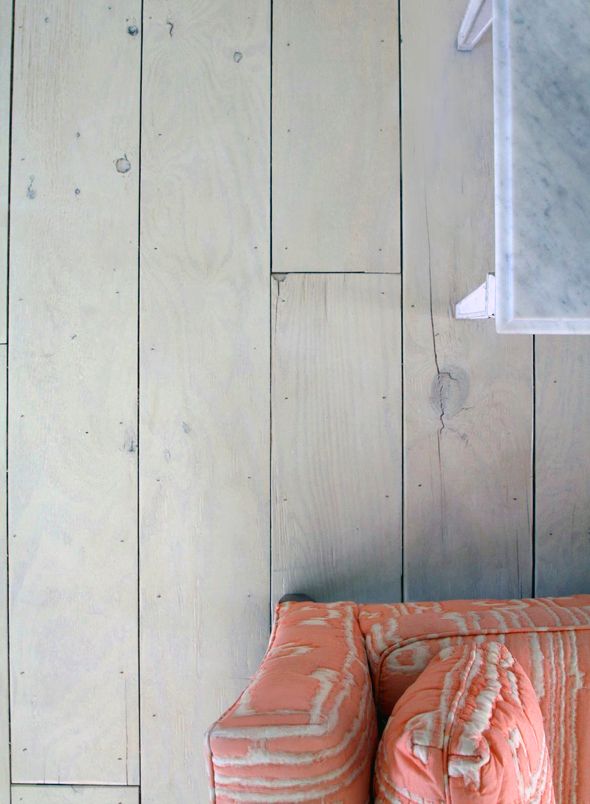
When I was planning my approach to the DIY, I had those gorgeous floors in mind. They were perfectly imperfect and all worn and full of character. I had the thought that cutting down and using plywood as the planks could achieve a similar, and even more rustic (in a good way) look. So I headed to the lumber section at my local Home Depot and found just the right plywood. It’s almost a half-inch thick and one side is more finished than the other.
Plywood sheets are 4×8′, which is 32 square feet. We needed to install about 800 square feet of flooring up in the studio space with the attached bedroom and balcony. Which meant we needed about 25 sheets of plywood. At less than $18 per sheet, my price per square foot came in at about 50 cents, which is complete insanity!
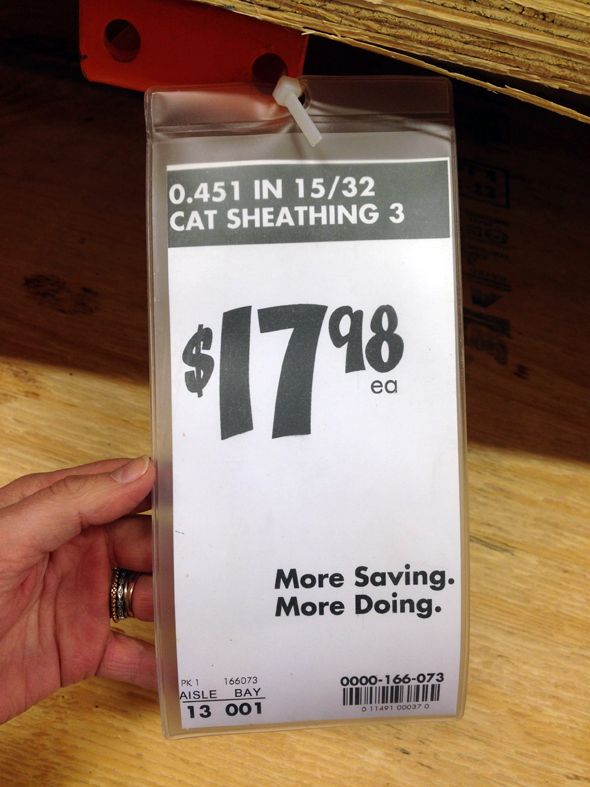
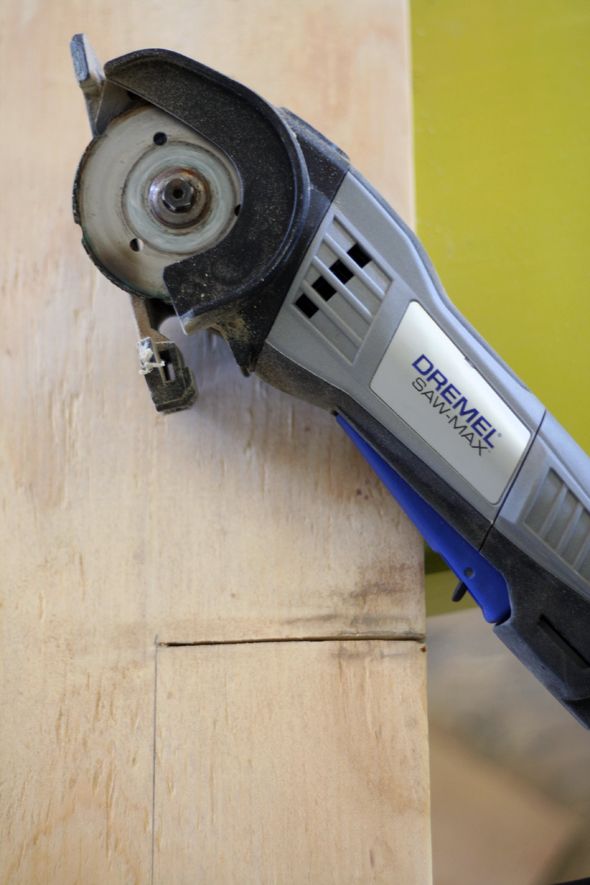
So, I found the plywood I wanted, took a photo of the price tag, and walked up to the customer service desk. I placed an order for 25 sheets and I asked for each sheet to be cut down into 8″ planks, lengthwise (which meant there was no waste – exactly six planks from each sheet). I’ll admit that I did get a few funny looks, but for the most part everyone at Home Depot was incredibly nice and accomodating, given the huge ask. I was more than prepared to pay 10 or even 25 cents per cut, like one of the guys in the lumber department suggested they might charge me at the order desk. I think I paid for cuts when I did the wall planking project in our mudroom, but this time there was no charge for all those cuts! I’m pretty sure it was because I was really flexible on timing and let them take as long as they wanted to get the order finished. And even then, it was less than 24 hours before they called to tell me my planks were ready to be picked up.
We borrowed a truck from my kind brother in law and he and the Home Depot guys helped us load up the 25 sheets of cut wood. The tricky part was then getting all the wood upstairs! These amazing gloves practically never left my hands during the two or so days I was installing the planks and moving them around. The gloves are thin, but really durable and they grip so well that you almost forget you’re wearing gloves at all. They’re my favorite brand I’ve used so far.
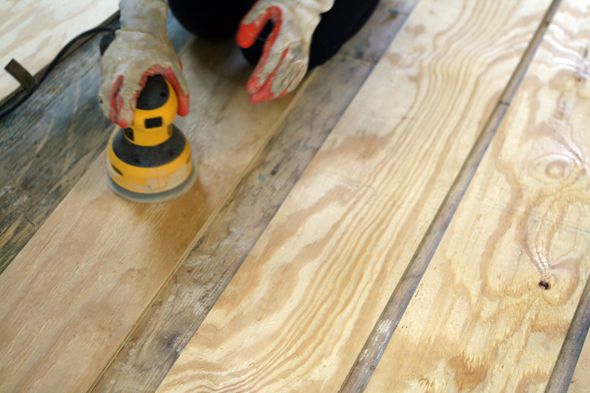
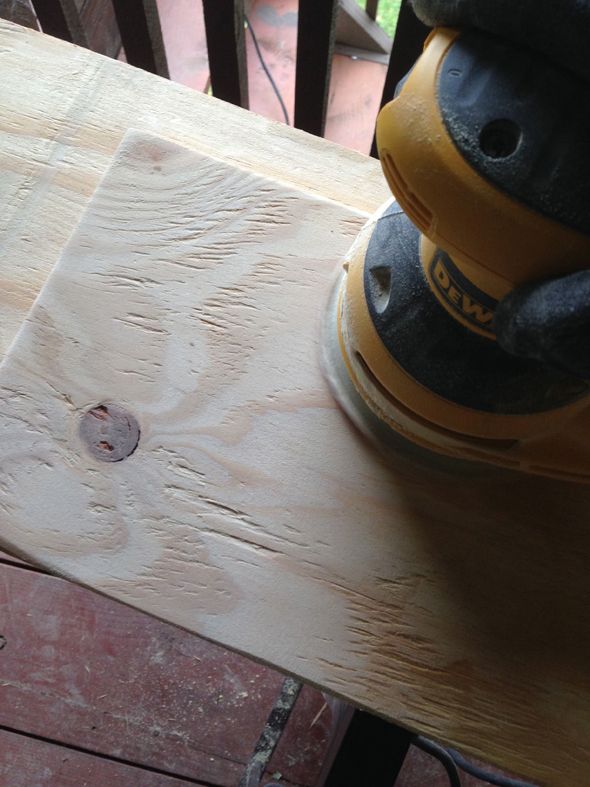
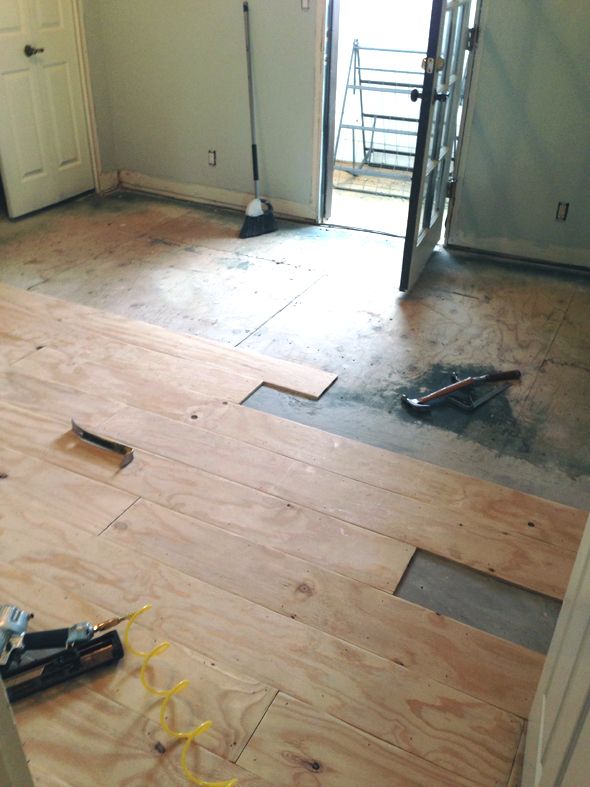
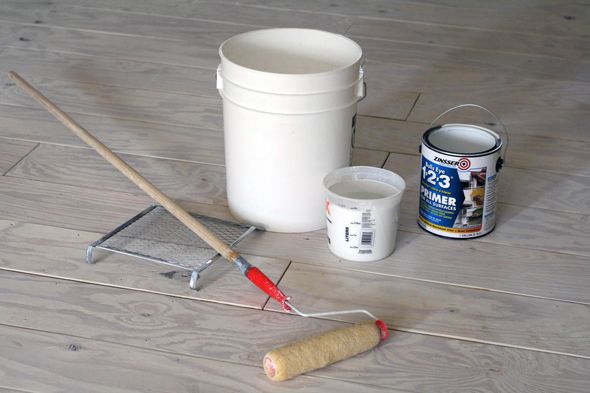
Once we had all the carpet removed and all the wood planks upstairs to the back porch, it was time to start the only tedious part of this project: all the sanding. It was actually pretty easy work, but it just took some time (actually about a minute and a half or two per plank, which really adds up). I asked Heather to sand while I was installing the planks, and usually the timing worked out well and we were able to keep a good pace.
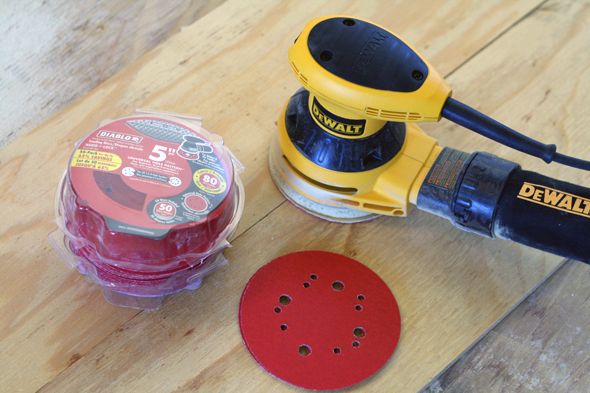
This new orbital sander has changed my LIFE. You guys, what have I been doing with my dorky little Mouse sander for all these years?! Orbital is where it’s at. Worth every last penny.
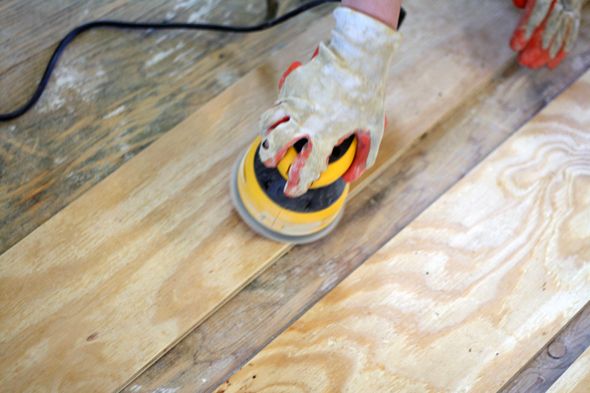
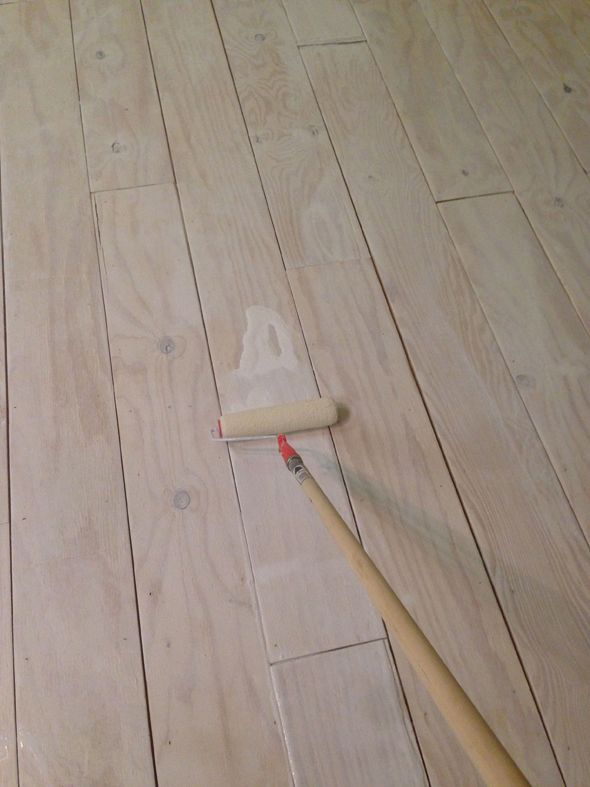
I bought a couple packages of the bulk 60-count course/removal sanding pads and they really worked fast on any rough parts or spray painted markings or splinters on the plywood planks. It worked out best to change the sanding pad every three or four planks. And I didn’t worry about getting every imperfection off – you’re just going for the obvious parts that look bad or like they could hurt a bare foot. We also sanded down the perimeter of every plank so that the edges were sort of beveled. I think this step made a huge difference in helping the planks look like they’re not just cut down plywood pieces.
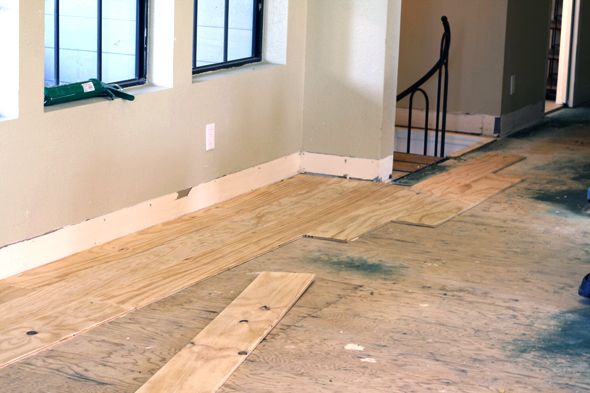
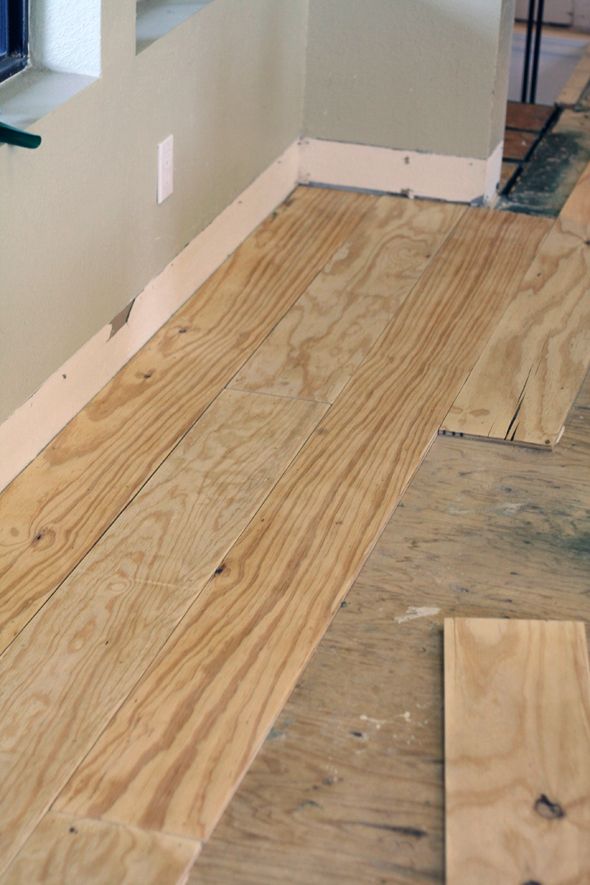
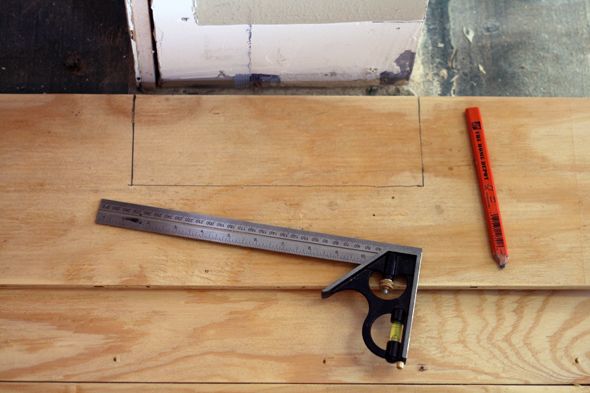
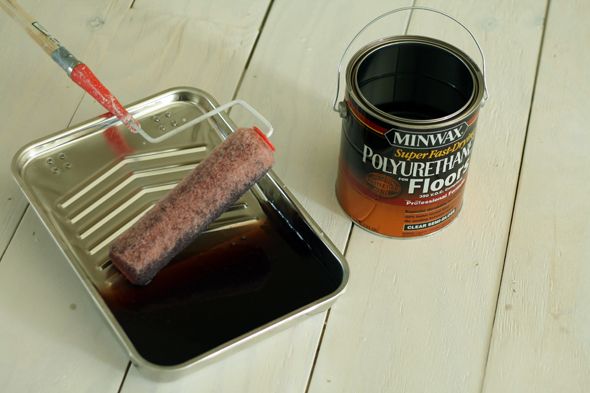
The installing part was so easy, especially when there weren’t additional cuts needed. You’ll want to start on the longest, straightest wall you have. Don’t start on a wall that requires a lot of cuts and notching out – your lines will get messy and crooked really fast. If you start your installation on a long, straight wall and just focus on maintaining even spacing, the planks will look great. You can use a ruler or t-square to help with spacing, but I felt comfortable eyeing it.
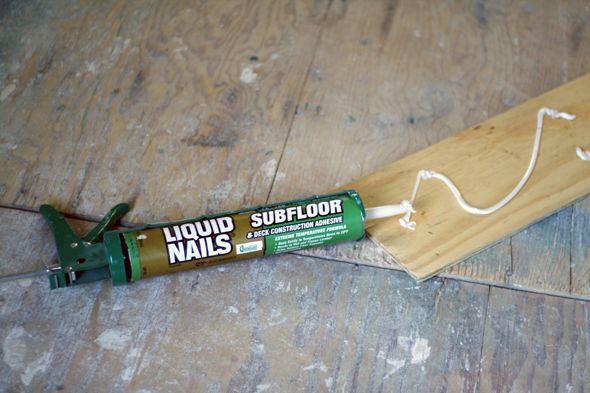
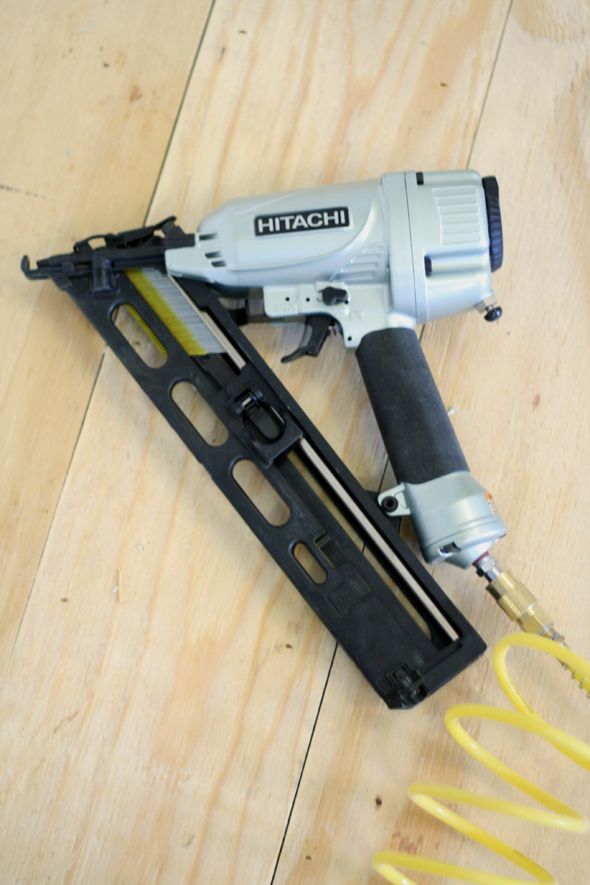
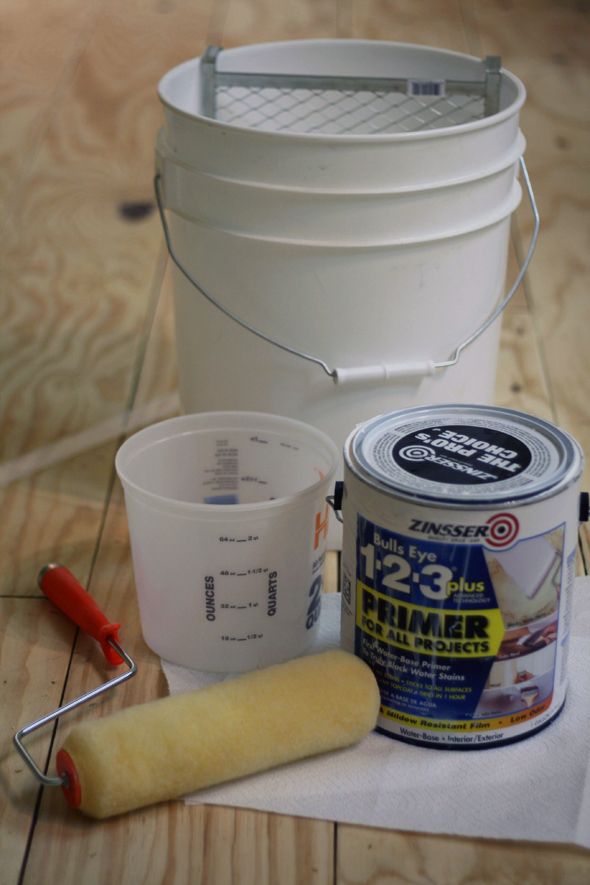
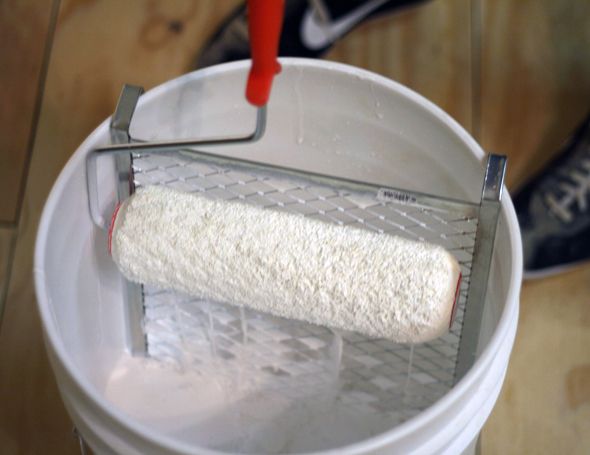
To lay the wood down, I first squiggled on to the back side of the planks a line of Subfloor Liquid Nails (in the big contractor size, using the oversized caulking gun). I went through at least a dozen of these tubes of glue – you’ll need a lot of it!


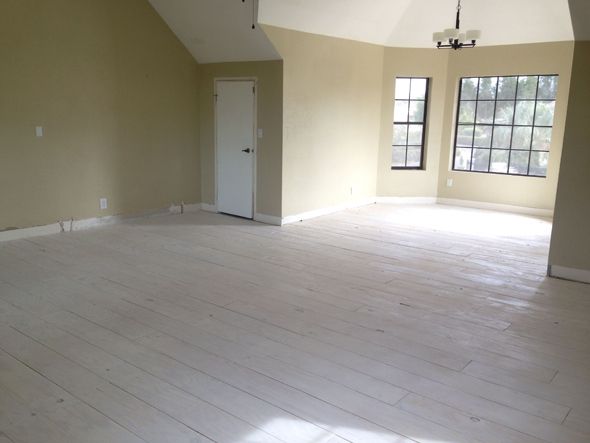
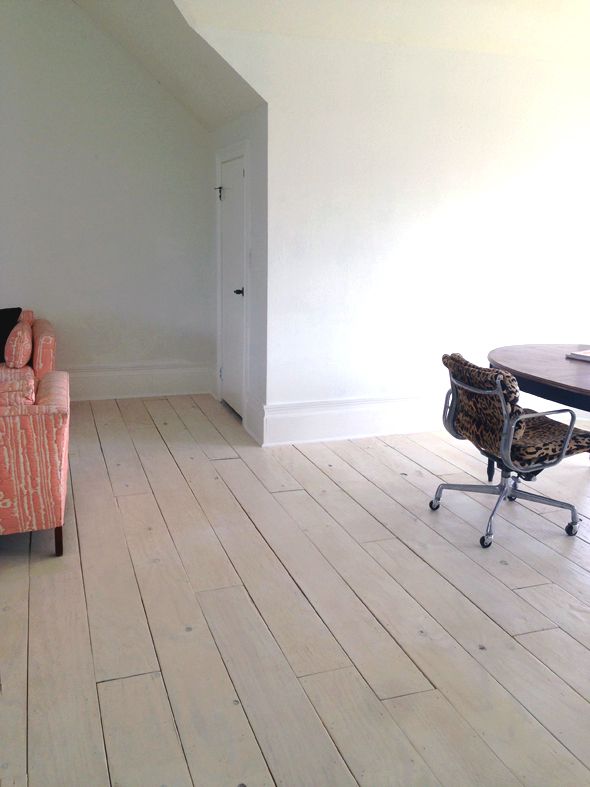
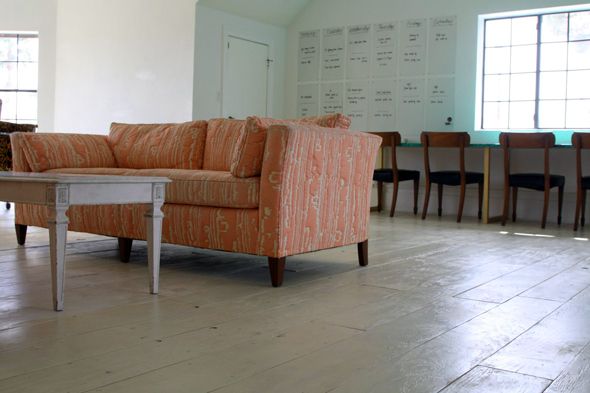
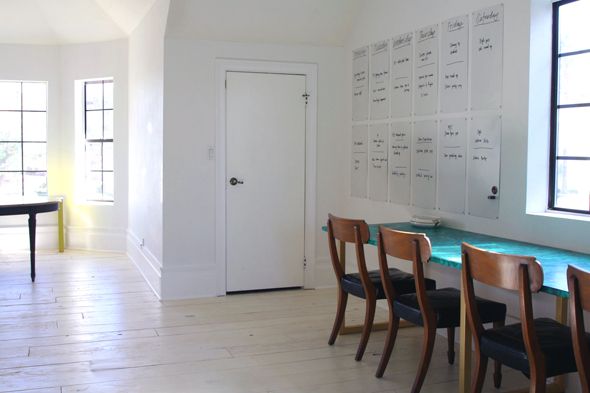
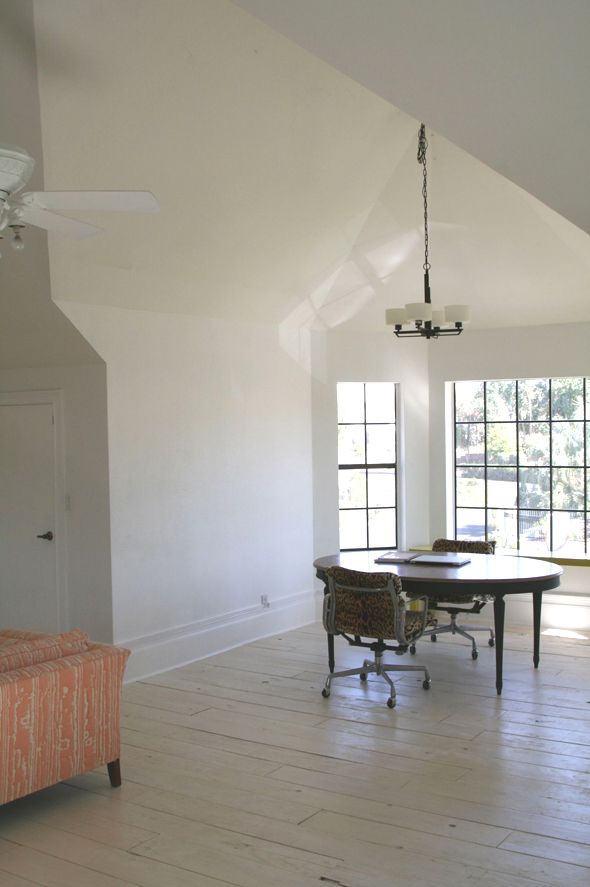
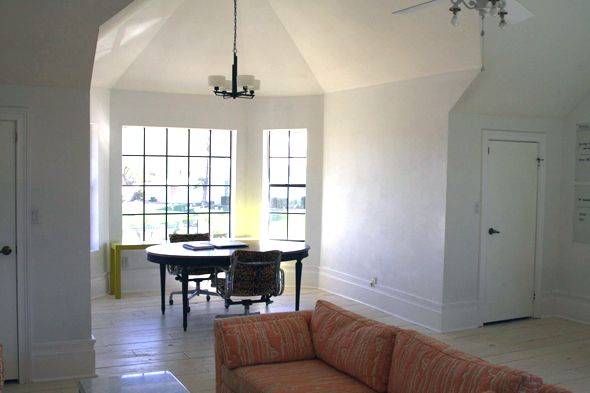
We haven’t even started decorating in here yet, but I LOVE how bright the space feels now! Remember how dark it was just a few short weeks ago?
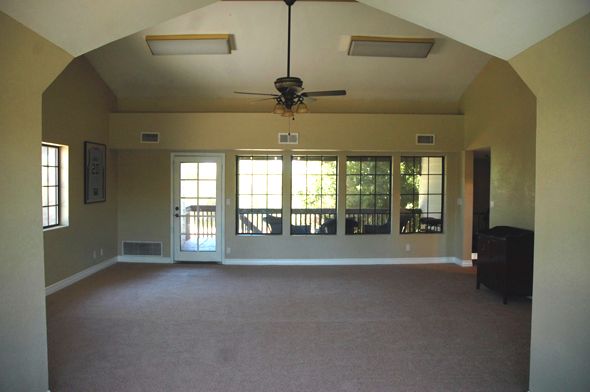
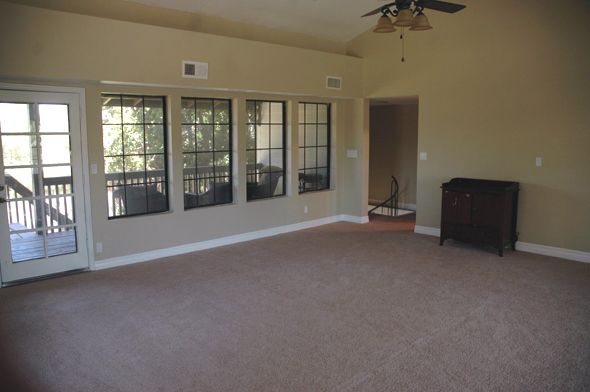
The floors have completely changed the way I feel about this space! Instant character!
And at only 50 cents a square foot for the plywood, it’s hard to find things to complain about. It’s a great look, especially for the price.

The studio is becoming a really lovely place to get work done and I know it will be perfect for photographing projects for the blog and book. We get great light in here all hours of the day and all the shades of white make the room just glow. :)
Now, on to the decorating!


wow! what an amazing space!! Love the floors who would have thought, you make it look so easy!
LOVE it.
Beautiful!! Love all the tonal and textural variations.
How does the plywood feel to walk on? Do you notice a difference compared to hardwood or pine floors?
There might be other tutorials out there Jenny, but nobody does it with your panache and style. The room looks fantastic. You ladies did an incredible job – again!
It's SO good. SO GOOD!!
You are such an inspiration! It looks great. Thank you for sharing. I also love seeing your furniture looking amazing in different homes. I live in a rental and it makes me feel better about buying nice furniture!
Totally in awe. I can't wait for you book!
wow. the floors look amazing! question, i recently moved into a place with unfinished pine tongue and groove on all the walls! i can't wait to paint it and originally i was going to do a white opaque look but i am loving the white wash look here. would you recommend that on a wall or would it be too busy?
I am IN LOVE with this floor! Only wish I had a space like yours to do the same thing. Fabulous job!!!
I too am wondering how this would hold up in a higher traffic area such as a living room. This is a brilliant idea! I would have never had the nerve to go for it. Also….. should one change their mind would it be a nightmare to floor over or un-install!
You are brilliant and the space is stunning even without decorations!
WOW! It looks outstanding. Great job, as always!
obsessed with how these floors turned out! you really have an eye my friend :) i'd love to hear about what you did for the moulding/trim, since you obviously upgraded/fixed it since the installation of the plywood floors. any go-to suggestions?
Very cool! I live in AZ as well and have a quick question. Did you or would you need to let these planks "breathe" or get acclimated in the space before laying? Or no. I know I've always heard this with wood floors so I thought I'd ask. Thanks!!
I never knew I could be envious of someone's plywood floors! These a beautiful and the price is so right!
This is genius!! Why don't more of us do this? It looks amazing! I'm so impressed.
I meeeaaaaannnnnnn……amazing! And you know what else is amazing? Those Brunschwig/Henredon settees with the Scalamandre le tigre Eames office chairs. It's like my head exploded a little when I saw those in the same room. With wide plank white washed floors. Just get. out. of. town!!!!!
Amazing! You have such great ideas (even if you feel like they aren't original) and you execute everything flawlessly. Glad to see you back in the swing of things and killing it!
THANK YOU THANK YOU THANK YOU!
Wow! Nailed it!
Gorgeous! This came out beautifully, can't wait to see it decorated!
xo
Christa
http://www.gardeniasandmint.wordpress.com
perfect restraint in the finish. you have such class! I want to move in there!
I am just astounded with how unconventional your design ideas are and the outcomes are spectacular. If I told someone I was going to put plywood flooring in my house I feel like I would get crazy looks. You do it and it looks stunning. I can't wait to see how you arrange finish designing the room. Great job! xoxo
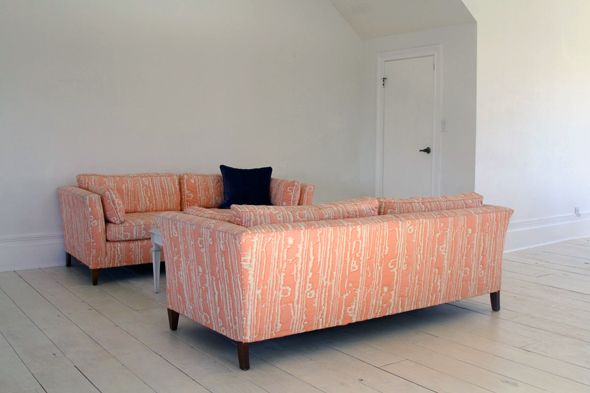
So impressed! This looks great!! And I sure do love that pair of sofas…
It looks amazing! And I think you may be right about the orbital sander…I need to upgrade :)
LOVE IT ALL! & super love that pic of Gary's, what a great space. what a great transformation & inspiring office space, Jenny!
This is such a serendipitous post! I was thinking just today of doing this version of a 'cheaper' floor in our main living space and wondered about cost and how to do it – and here we have it! I discovered your blog just last month and wish I'd been tuned in a little sooner(especially back in '09 when Domino left us). It's been so inspirational to go through your archives and see all the incredible things you've done! Now I just have to get up and DO!
Sorry, my comments posted multiple times, so I deleted them!
Jenny, this is incredible, as always. I have 4 sisters, and I always enlist them in my projects, so I love hearing about you and your sisters working together to do these fantastic things. Beautiful!
Floors are gorgeous! Great idea. Would you mind sharing the WALL paint color? Finding a great white is tricky!
Looks great.
I am wondering how you will clean these floors?
Do you worry about mold or warping , since you did not use a vapor barrier? Hope no coffee gets spilled or doggie accident happen.
Looks great!! So fresh and bright!
Wow! This is LEGIT DIY. I feel like I am a pretty capable do it yourselfer until I hear you talk about all the different power tools with such familiarity. And then I realize I know nothing :). I know there is more decorating to be done, but I really like the starkness of it. It looks intentional, very cool, and really compliments the ruggedness of the floors!
I love this. That is all.
This is just incredible. It's a room full of sunshine and rainbows! It's wonderful even in this simple state, but I am so excited to see how you will decorate it.
Your floors look great. I love the matching sofas in the room too. Since you have started out with painted floors, I think they will last. It seems that when you have stained flooring and then try to paint them, the paint doesn't adhere. I am a huge fan of renting the Home Depot truck for my Craigslist runs. For $19.95, you can't beat it!
This is beautiful! Do you think this application would be appropriate for a kitchen? Do you know of a paint that would also be water resistant in such a space?
I can't tell you how much I look forward to your posts. I always play it safe with my design but I am trying to add a some spunk to our home this time around. You have been a great inspiration. The floors look amazing and the room is spectacular. What a wonderful space to work.
ah-mah-zing job jenny. thanks for such an inspiring post. good luck on your book! i look forward to buying my own copy!
You did it again! The floors look amazing but I still can't get over those sofas. So beautiful. That fabric is to die for. Can't wait to see the studio come together. Wonderful work!
Wow, what an amazing look you've got going on! Love it. I actually just finished a plank wall in our master bath and had the same width variance issue so our gaps aren't all even either. No one else has really mentioned this problem (I'll be addressing it on my blog Monday) so I thought it was just me! Nice to know I'm not the only one. We actually really like the more random feel to the planks. More rustic!
Thanks for sharing!
You actually make this sound so uncomplicated and doable!!! And I cannot believe the price! I wonder if I can convince my husband that we can do this.
Absolutely stunning!
It looks amazing all done! You're amazing.
I want to do this so badly but can't get hubby on board yet. Maybe this will convince him.
You. Are. Crazy. AMAZING! I'm not sure if you'll get around to reading this comment, but do you have any tips on how to have patience in these kind of projects? Though I have the time and energy, I have such a hard time not getting distracted/bored/frustrated!!! You are a wonder woman, girl. Such an inspiration!
I would also love to know the wall color! Is it chantilly lace like the rest of the trim in your house?
this one really blew me away (into outer space). i can't believe how much you can carry such a vision and do it yourself from scratch. and i love how dorky excited you get about your tools. instead of gushing about spending extra money on a shu umera lash curler you endorse power tool. i love coming here and reading your latest reno. you totally rule!
Completely amazing!!! I love the way this turned out. I hope one day to have the guts to try some of the cool things you do!
Holy craziness! I've seen it on pinterest before but I didn't realize it could look so good! Love that you didn't go all white either. It keeps more character.