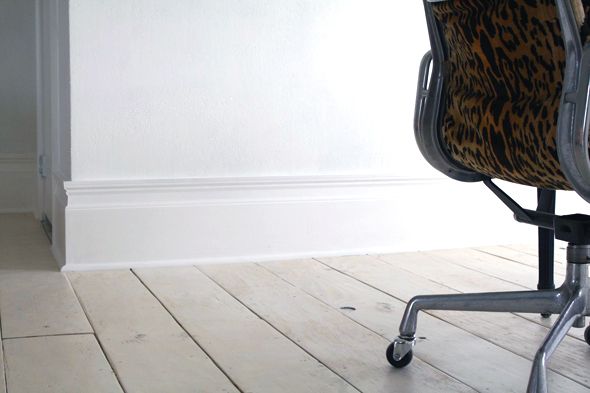
I love tall, chunky baseboards and I’m not ashamed to say it! :) Beefy floor boards = instant character in a room. Custom milled tall baseboards are insanely expensive though. Luckily it’s easy to replicate the look by layering a few pieces of much more affordable moulding. Here’s how:
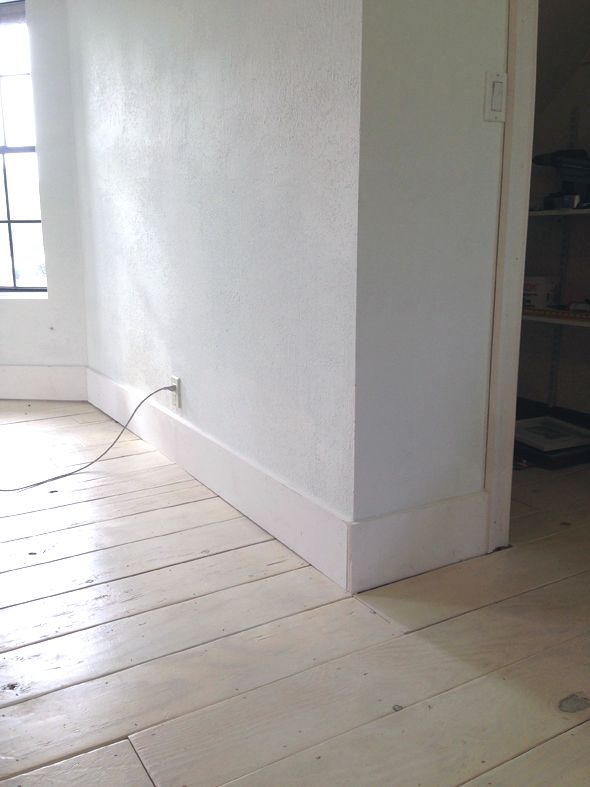
After we installed the plywood wide plank flooring, I started nailing up the 8″ primed pine boards that we used for baseboards in the rest of our house. These boards come in 12′ lengths and cost right about $20 each (so about $1.50 per linear foot). I loved the way they looked in the rest of the house, but in here, with the wide planks being basically the exact same width, the chunky floor board looked super dinky.
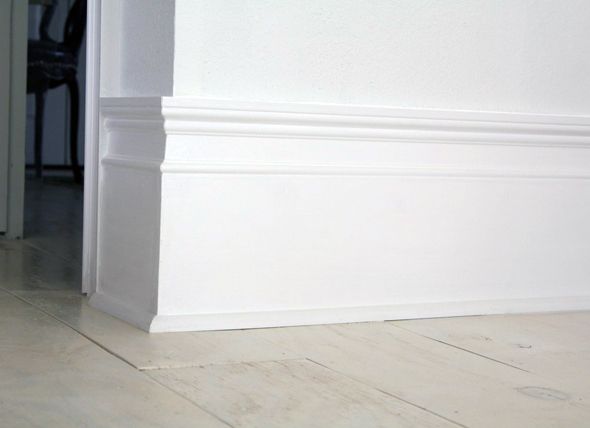
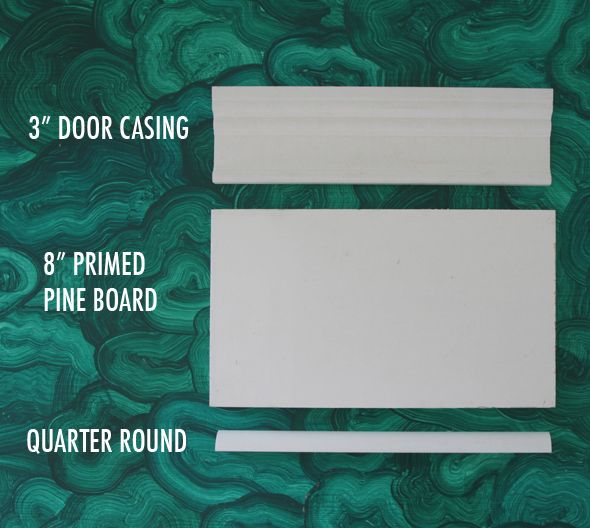
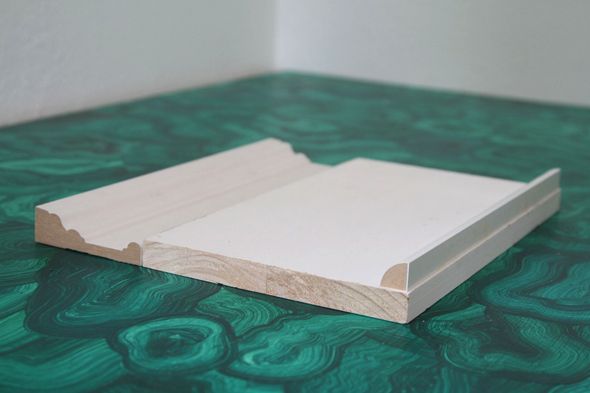
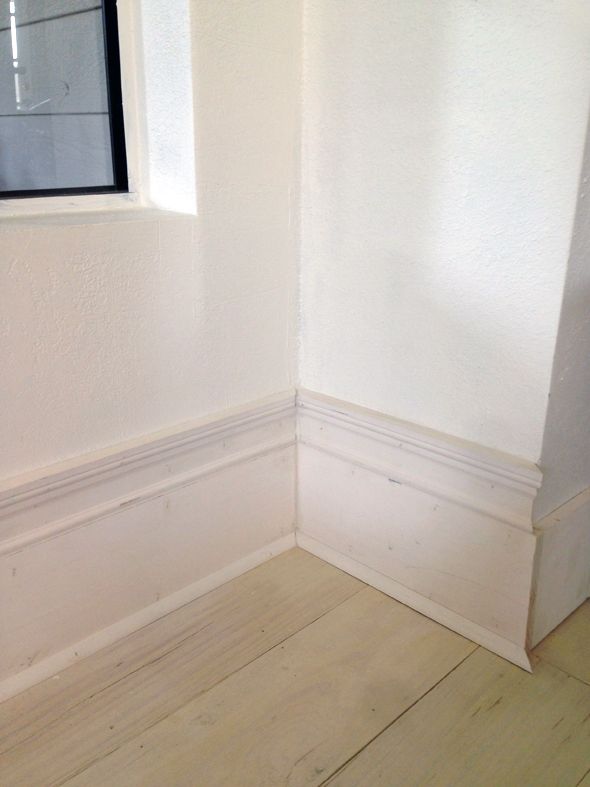
So I used some moulding I already had on hand to create a custom stack of trim. We layered on my door and window casing moulding on top and a simple quarter round trim on the bottom of the pine board.
Here’s a view of the profile:
Pretty, right? I love that it’s simple still.
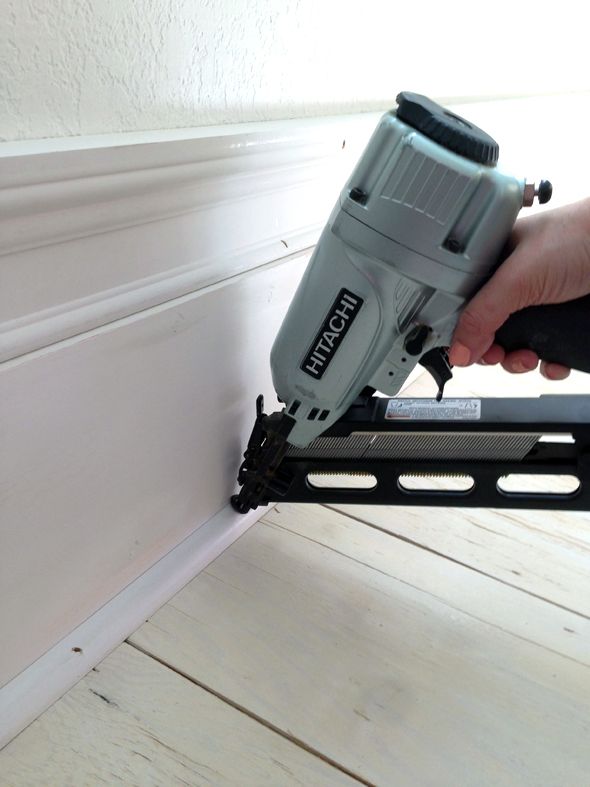
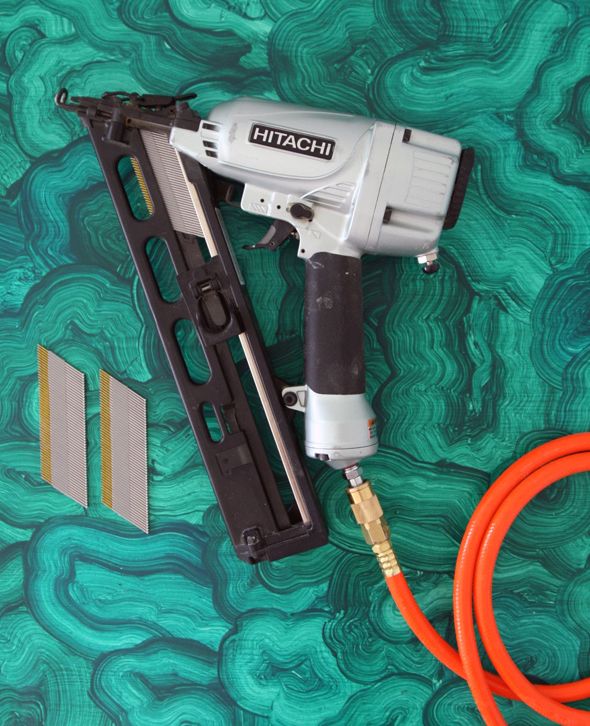
I used my new favorite finish nailer to install all the trim and it could not have been an easier process. The only tricky part was cutting out the notches for the outlets (of which there are many!), but my Dremel Saw made that just about as straight forward as could be.
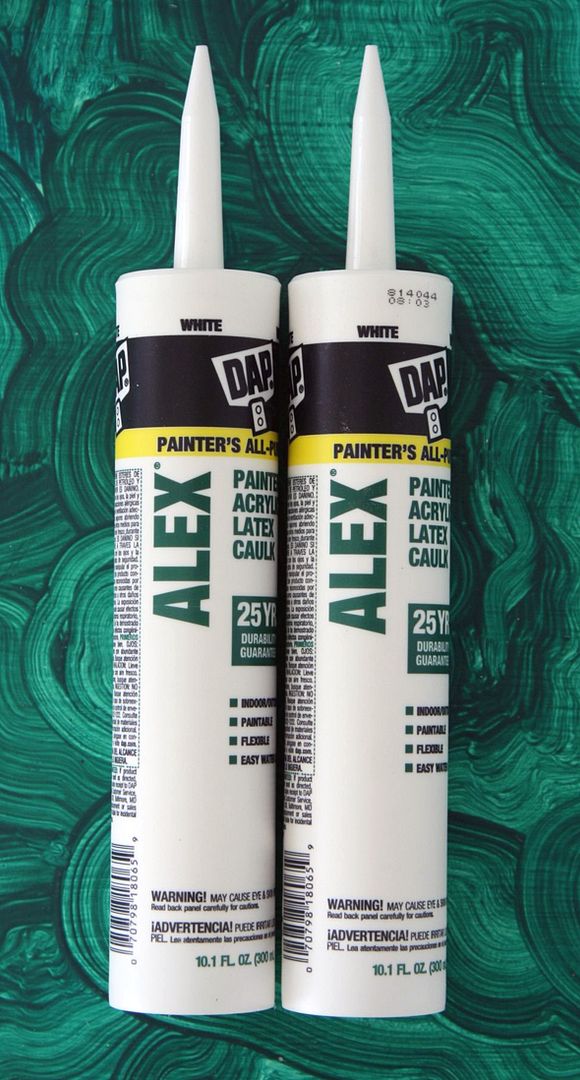
I used a miter saw for all the corner cuts and then lots and lots of caulking to fill in the gaps and cracks and nail holes before painting:
I am not the biggest fan of caulk with shiny silicone in it. This stuff though – the straight ALEX caulk (no PLUS) – is the very best for caulking trim work and prepping before painting.
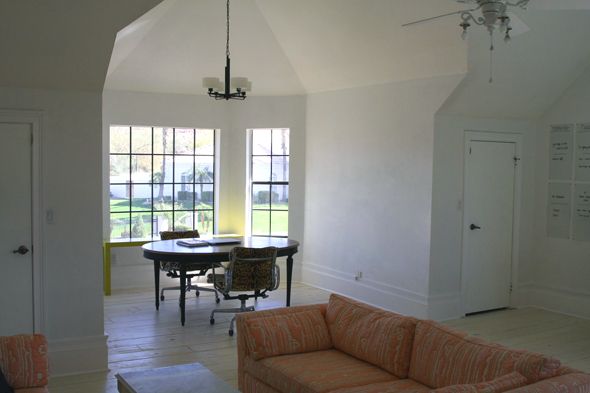
Once everything was installed, caulked and dried, we painted the moulding the same color as the walls (BM’s Chantilly Lace) in semi-gloss in the Advance line. So clean and new looking!!
The casing trim is also about $1.50 or so per linear foot and the quarter round is really, really inexpensive. Maybe $0.30/ft? So all in all, less than $5 per linear foot for 12″ high floor boards is a total steal! I really, really love how these baseboards turned out.


Hi Chabad!
I installed these floors by myself with some help from my sister and Kate! It's easy to do – especially if you have a second person to hold up the long boards while you nail and to keep the end of the tape measure where it's supposed to be!
A carpenter probably could have done a better job than I did in the bay window (all those weird angles!), but a little caulking covers up just about anything. :)
I think moulding and trim work often feels like something to be left for professionals, but it's a totally doable DIY if you have the right tools!
xo
Those are mega baseboards Jenny! Perfect for your large studio and I love the design of them.
I'm also admiring the addition of the leopard chairs I see in the space, are those a new find/diy?
I just love your new design space and how it's turning out.
Betsy
West of the Square Designs
Great idea Jenny! You never fail to inspire. Thanks for that : )
I love this! I can't wait to save some dollars and give this a try soon. Those kind of details are my favorite.
Moulding really makes a world of difference! Love those chairs!!
The magic continues! Once I am in any kind of "permanent" home, I can't wait to replicate.
xo Lily
http://whilemyboyfriendsaway.blogspot.com/
These are absolutely stunning. It really makes me want to yank out my existing floor boards and re-create this look. Bravo…again! :)
This room really looks amazing! I love the very raw feeling it has! Love your blog and all the great inspiration you provide!
Hi Jenny! I LOVE the floors and baseboards, but I have to ask you… did you do all that installation yourself? Or did you have a carpenter doing the bulk of it?
That looks fantastic!!! I loved the step by step tips as well. May have to add this to my to do list!
Hi Chabad!
I installed these floors by myself with some help from my sister and Kate! It's easy to do – especially if you have a second person to hold up the long boards while you nail and to keep the end of the tape measure where it's supposed to be!
A carpenter probably could have done a better job than I did in the bay window (all those weird angles!), but a little caulking covers up just about anything. :)
I think moulding and trim work often feels like something to be left for professionals, but it's a totally doable DIY if you have the right tools!
xo
The baseboards are wonderful. I would love to do that but I have small trim on my windows and doors and it would look funny. I would have to beef up everything and I don't think that I'm going to tackle that any time soon! Your workspace is looking amazing. What a great room!
Those are sooo BEA-U-TIFUL!
I am in love with this room! AND, I am about to install trim around my upper kitchen cupboards, so the tip on the caulking is very handy and timely!
Thanks for the baseboard inspiration, Jenny. I love the look you achieved with the extra tall baseboards but was wondering if you thought this look would work in rooms with only 8' ceilings? Is it too much?
Jenny the molding looks fabulous! I am happy to know this is a project you can do yourself. We have exceptional molding and I am happy to know if we leave our place we could install the same look without breaking the bank.
Muy BUEN!!
Mel
I agree Jenny…Alex caulk is the best for mouldings and millwork…I use it all the time. Love the freshness of the all white room!
Love those couches in that room. Lucky duck, what a steal.
These look fantastic! Loving how this room is coming along, so neutral and lovely!
xo
Christa
http://www.gardeniasandmint.wordpress.com
You are killing me softly with your carpentry skills. Your studio is what my dreams are made of. Love it.
This is a dream come true for me. So good!
I'm in love with everything you do. And so impressed you do it yourself. My husband has a lot of work to do based on all your projects that I need in my house :)
These are amazing! I hope, hope, HOPE I have a house I can pull this off in some day!
This looks FABULOUS! I plan to redo ALL the baseboards in our home, but with lower ceilings, I don't think I can go too chunky.
Holy cow Jenny!! You're a rockstar. Those look FABULOUS!!! What an amazing office! I love that you are such a hard worker, go-getter. Totally just so impressive.
Those are so great! And, a note of encouragement: my dad was a finish carpenter for most of his career and I saw him add height to many baseboards/shelving units this way!
I learned that layering is often a great and practical way to go around that expensive custom millinery.
They look great! I could totally see you painting those baseboards in some kind of neon color, or doing a funky black and white polka dot.
Hi Jenny! Thank you for the inspiration, since I plan to do something similar. To make my job even more easier, can you please add one more photo showing the cutting around the outlets?
Really love your blog and your style. Wish you and your family all the best in life! Hugs from Hungary
Beautiful! Thank you so much for sharing!
Plywood Manufacturer in India
How did you do the molding in the other parts of the house? It looks like more than a single piece of material. Thanks!
I love this! I work with skirting, and I’ve loved layered skirting in my home for years, I think it looks beautiful. The room has so much more character and charm.
Did you use different casing trim or is it just the camera angle of the pictures? In the top pic the door casing juts out slightly from the 8″ board. In another pic it shows the casing slightly recessed from the board. I like the look where the casing slightly juts out from the board and was curious what molding you used.
Hi- Could you please tell me the moulding (company) you used? Does the moulding have a piece number?
Thanks!
Lisa
I was wondering the same, I found an exact match at Home Depot online. Google; type in RB-03 primed moulding and you will see it.
Awesome and thanks! I have been looking for a solution to an 1893 home that I am refinishing. 9.5″ or so baseboards are not easy to come by. The door casing was a brilliant idea versus trying to join two straight pieces because it creates an intentional shadow line. Base mouldings just were not going to work because they are too simple and don’t replicate the era and return that it needed.
This is a brilliant idea! And now I don’t have to find exact replacement baseboards. Thank you!!!