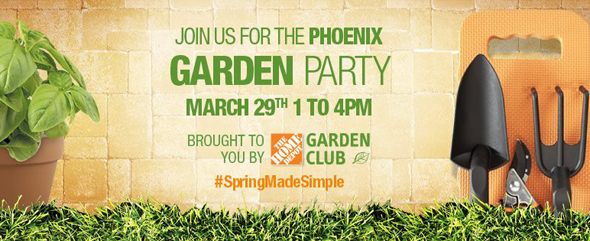
Oh man, I am getting SO excited for tomorrow’s big event! Local friends, are you coming to the Phoenix Garden Party that The Home Depot is putting on, hosted by yours truly? If you’re going to be anywhere near the Glendale Home Depot tomorrow (Saturday) starting at 1 pm, please drop by! The event is going to be amazing and so fun (and it’s FREE!). If you have a minute to RSVP, feel free to click on over here, but it’s not totally necessary. We would love to see any and all of you! I hope you can make it.

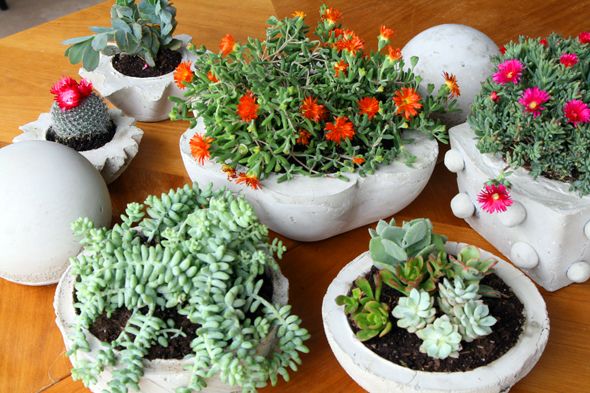
To get myself all geared up for the big party tomorrow, I’ve been doing some gardening projects around my house. You all know I’ve been dying to try a DIY concrete planter for a while now. Well, this was the week! I felt the call of the DIY and I answered it with a big ol’ bag of concrete.
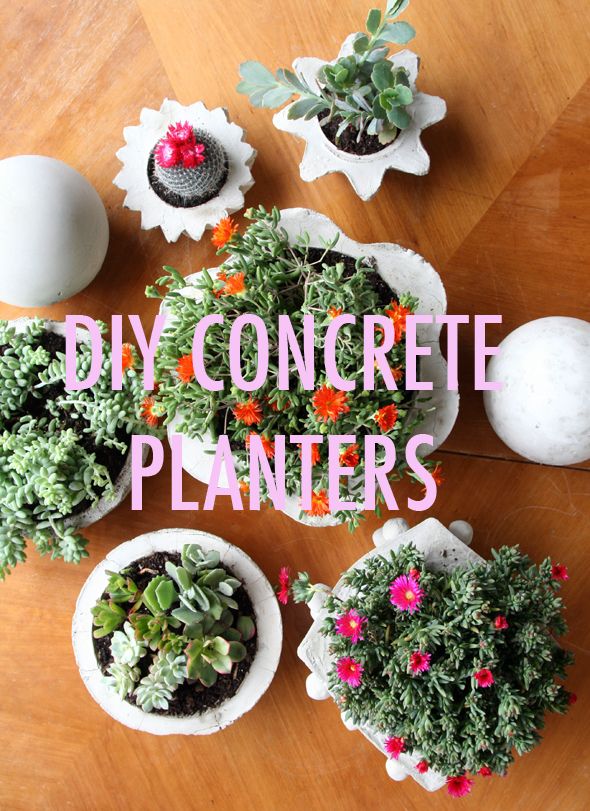
So before I jump in to the tutorial, a little word to the wise – you might as well make five (or ten!) planters if you’re going to the trouble (and mess) to make one. It’s only a marginal amount of more work to make multiples, and I think these would make really cool hostess or house warming gifts! So why not?
Here’s the pretty simple how-to:
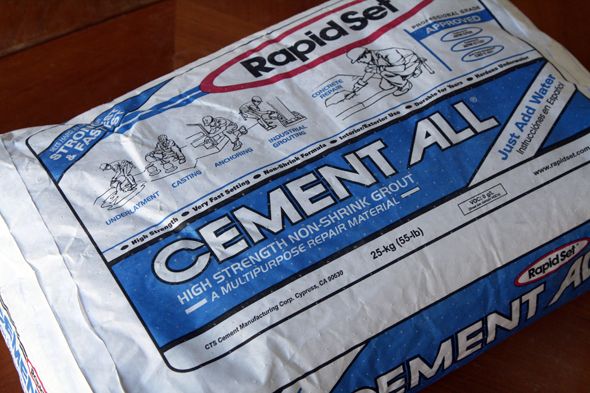
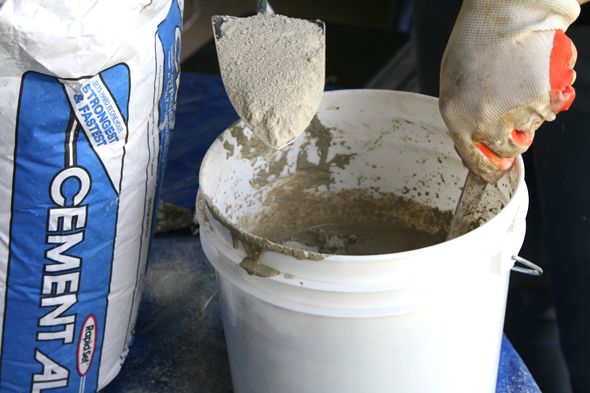
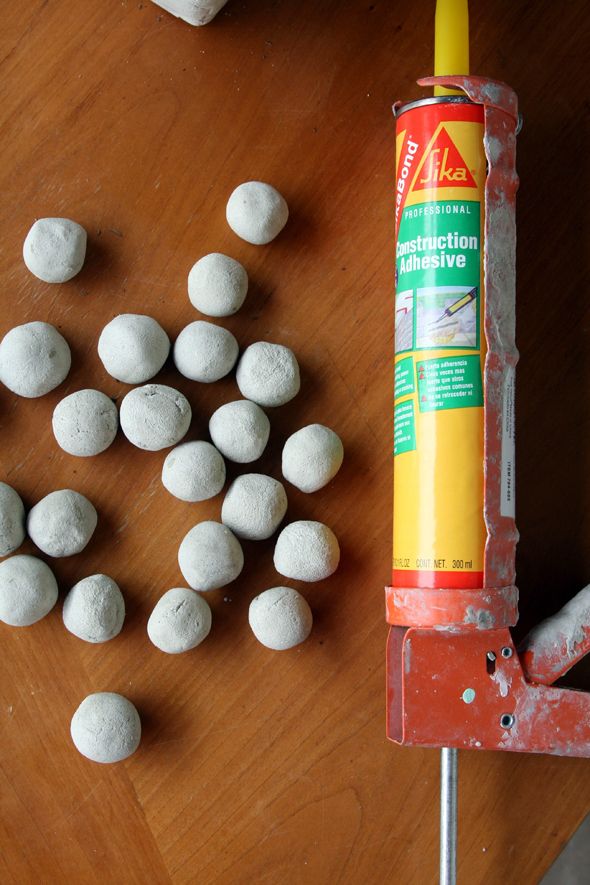
Most importantly, you’ll need a bag of this inexpensive, great and easy-to-mix concrete (huge thanks to my local Home Depot guy for recommending this particular brand. Dude knew his stuff!):
And you’ll need a lot of PLASTIC containers (metal will work – I used several – but wow, what a headache!). A little trip to my closest Goodwill store was pretty fruitful for container gathering!
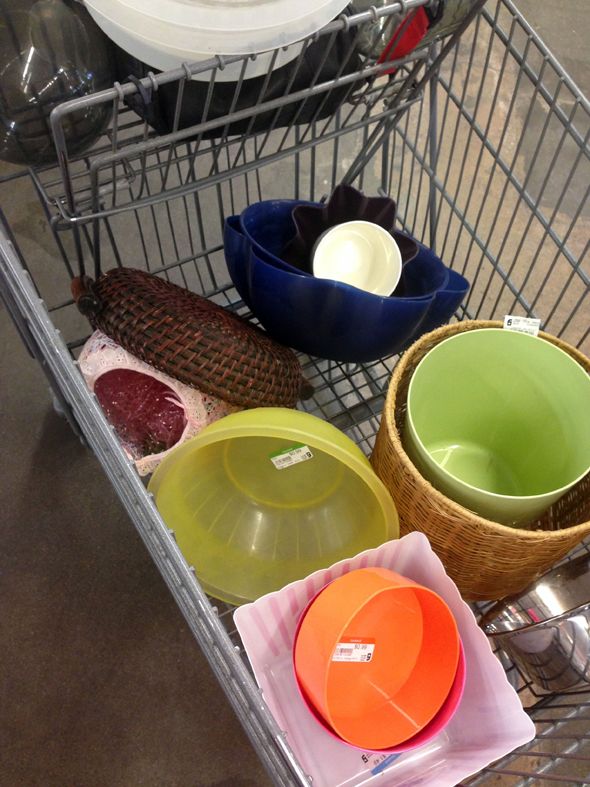
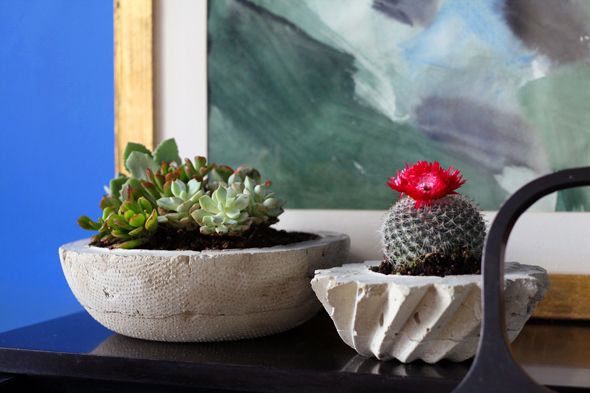
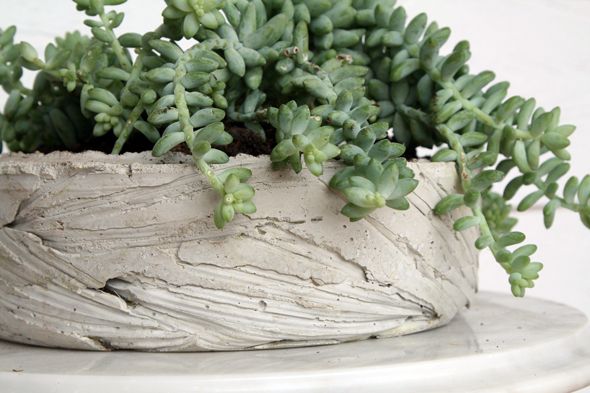
The trick is to find containers that have an interesting shape or pattern on the inside, so that the outside of your planter will have a cool imprint or shape. You’ll also want to find more simple containers that fit inside the bigger outer containers, but that leave at least an inch or two gap between the two.

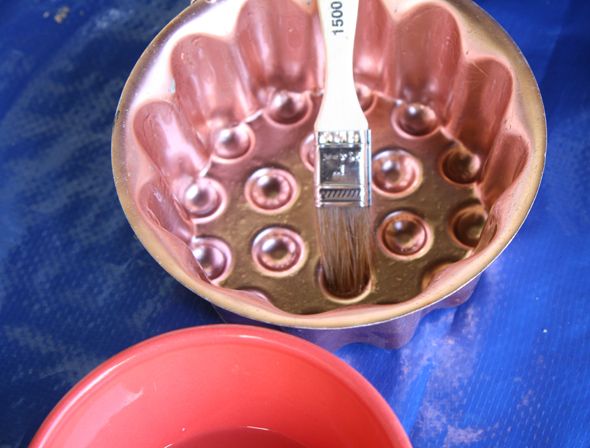
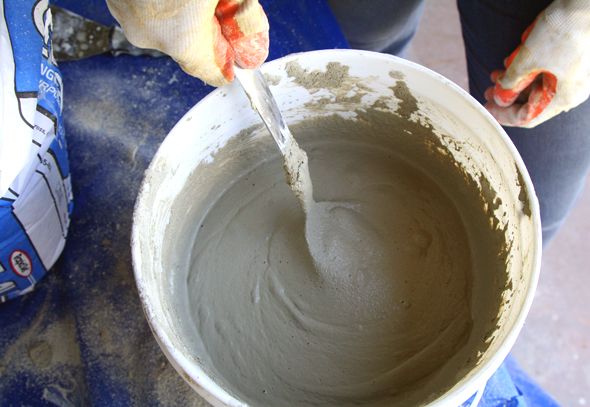
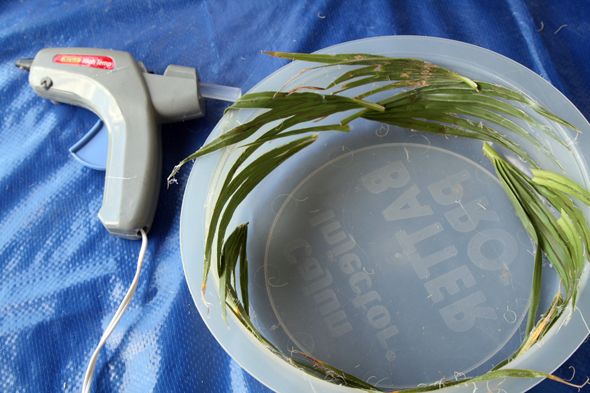
Then it’s time to mix the concrete, which might feel mildly terrifying, but I promise it’s super easy. You’ll want a garden trowel and long mixing utensil (I used an old metal serving spoon) and a 2.5 gallon bucket for mixing the concrete. Don’t forget to put everything on a big tarp or heavy drop cloth. This is definitely an outdoor project, and gloves and masks are a must.
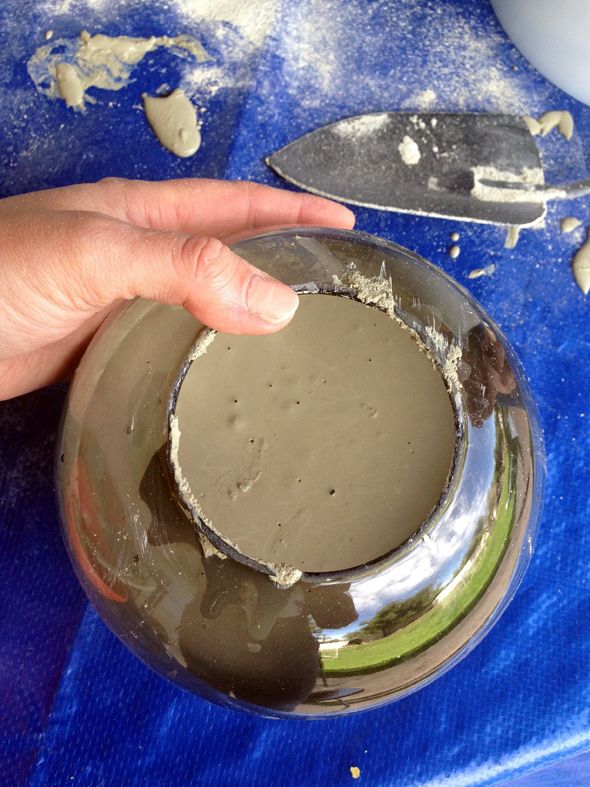
You’ll need to pour the bottoms of the planters first. If you want a drainage hole, stick in a dowel or cut a piece of cardboard tubing down like we did to the exact depth you want for the bottom of your planter, and pour concrete around that.
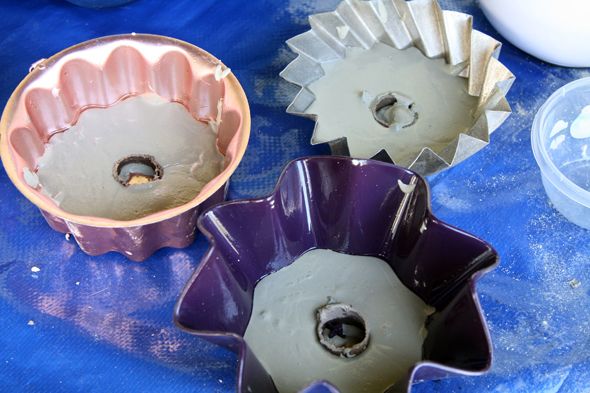
With this brand of concrete, which dries unbelievably fast, you’ll have to work quickly. Once the bottoms are poured, you put the inner container in the outer container, resting on top of your drainage hole form. And then while holding the inner container centered and in place, pour concrete in the space between the inner and outer containers to make the side walls of your planter. You can use a cup to help pour the concrete in, if needed.
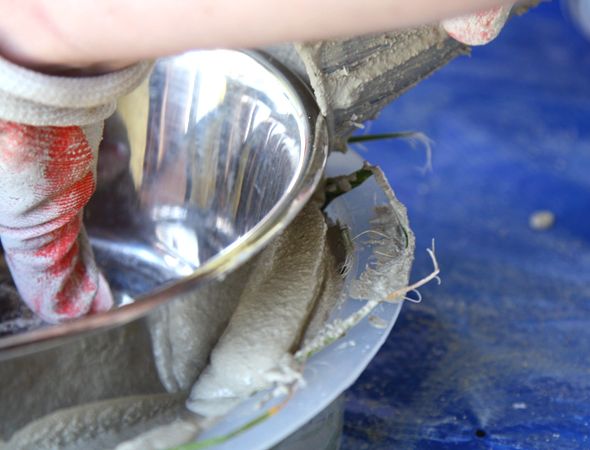
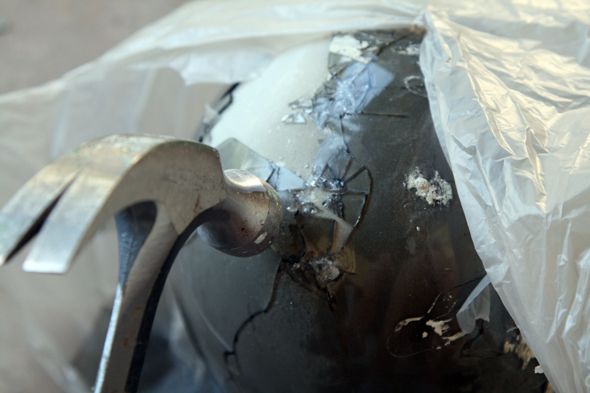
Sort of shimmying the container after pouring helps the concrete settle and smooth out beautifully. And a couple of soft drops on the table or ground helps air bubbles come to the surface. This specific concrete will be dry in, like, an hour or less (but be careful – it gets crazy HOT while it’s curing!). The planters will pretty much just plop right out of the container molds, especially the plastic ones. It’s awesome.
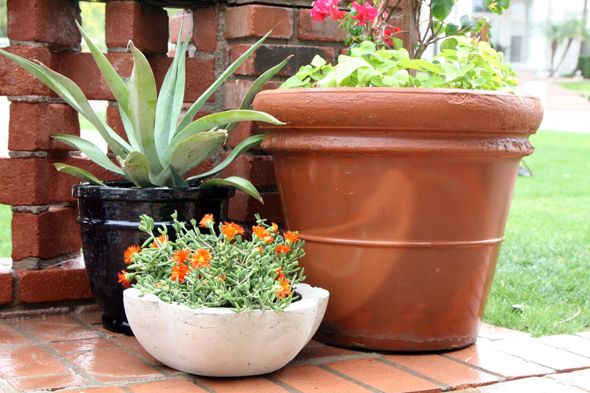
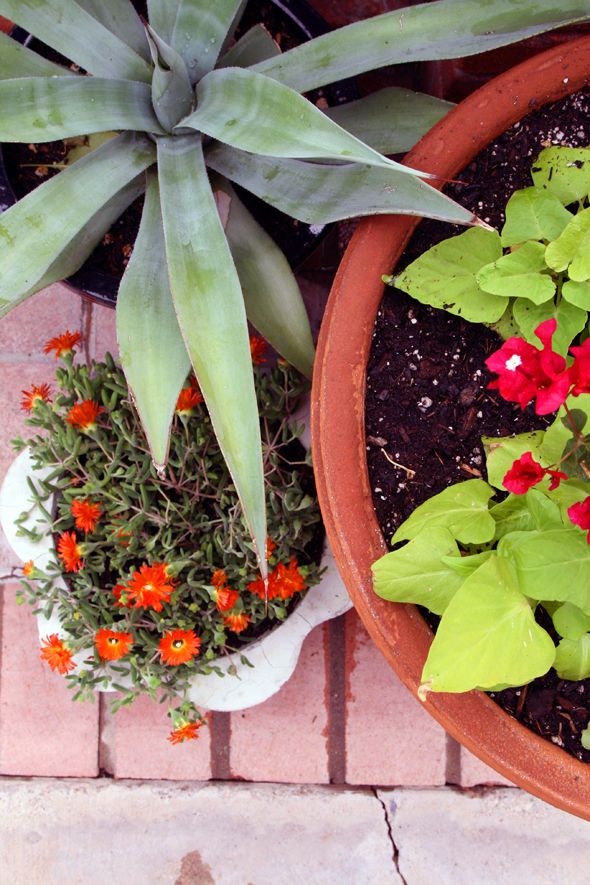
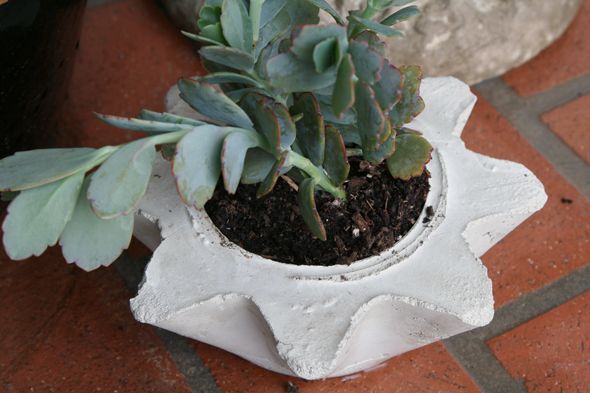
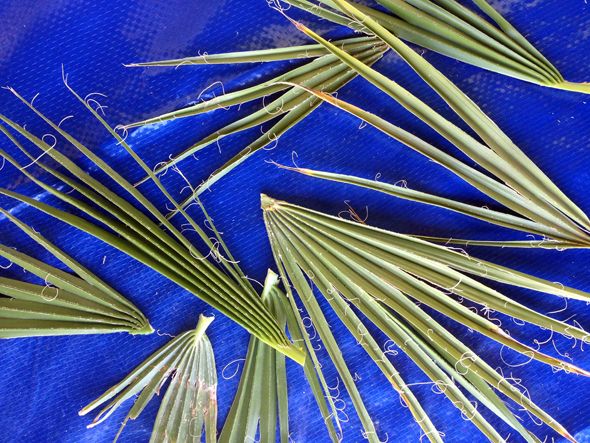
I started to get experimental after a few of the more simple planters. For one shallow container mold, I hot glued palm fronds to the sides of the outer container.
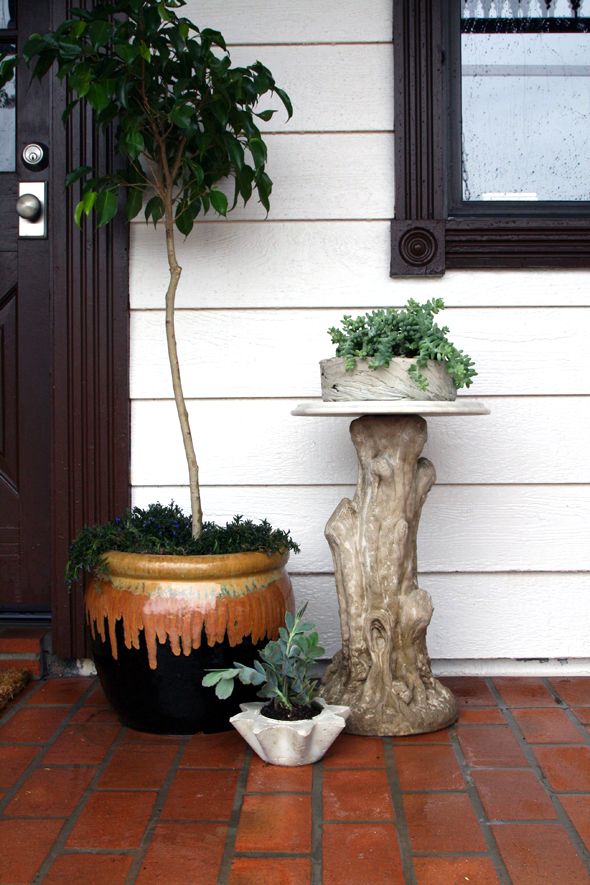
It’s sort of funky, and I like it. :)
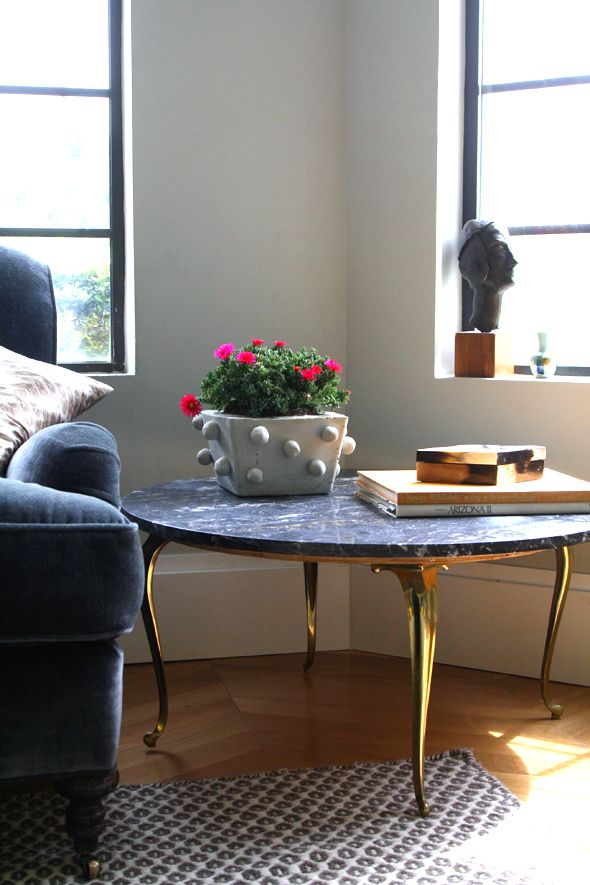
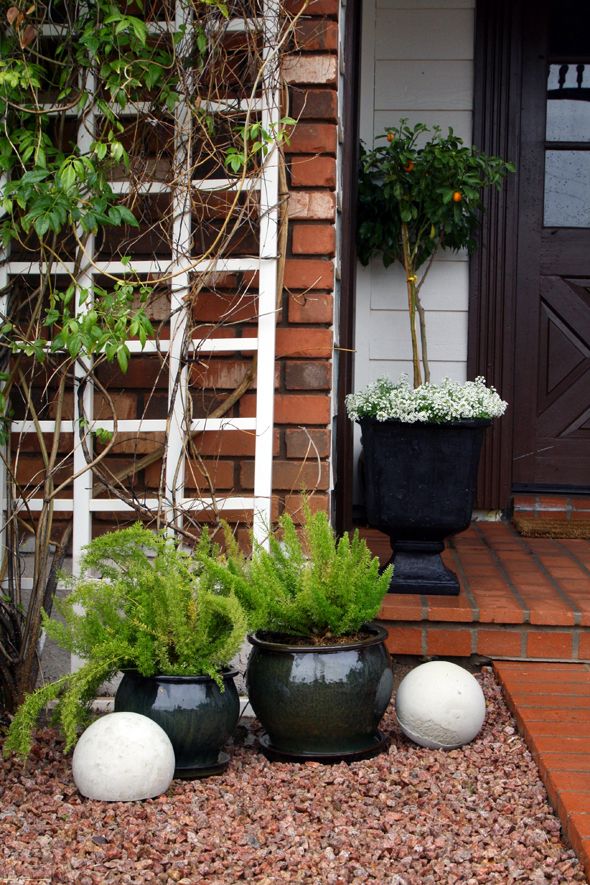
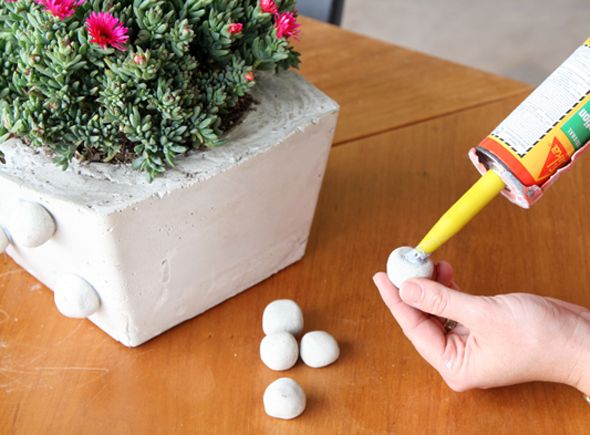
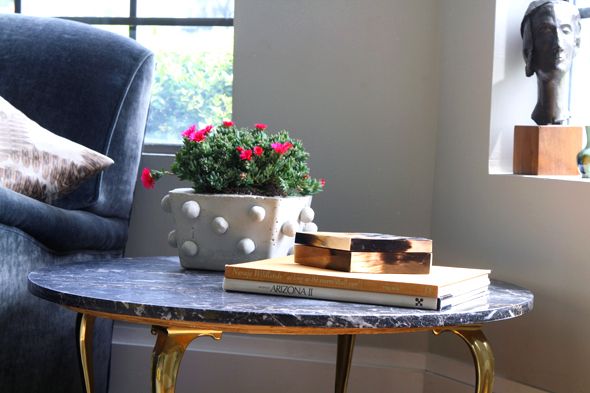
Everyone should have a concrete planter with nubbins. YOLO.
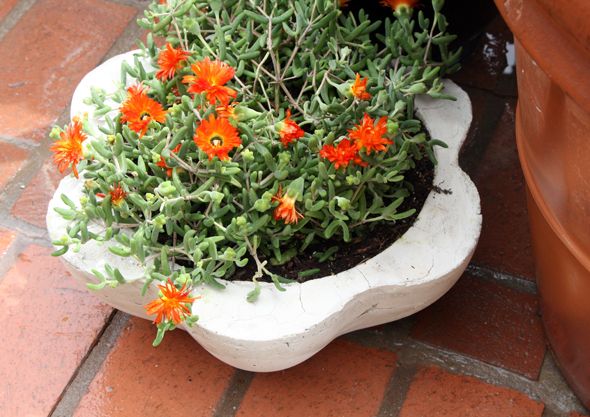
If you’re lucky enough to live in a place that actually gets moisture (slow single tear for myself), you can grow moss on your concrete planters with a little bit of moss from your yard thrown in a blender with buttermilk for a sec. You paint the mixture on the planters and the moss should grow pretty fast. I tried this in Brooklyn and was surprised at how well it worked on some too-new terracotta pots we had on the back porch.


So beautiful and creative! I'm in love with this DIY idea <3
http://hellovixi.blogspot.com/
Really fabulous! Another score for Team Jenny. :)
They look great! And really make me want to go out and make a few! Great job! Good luck at your event tomorrow.
Oh. my. word. What fun and cleverness! Love these guys and am inspired to create my own!
How many small planters do you think you could get from one bag of cement? I'm thinking this would be fun for a combined church activity for the women and teenage girls.
The palm planter is my favorite! I'm wanting to make a fireplace hearth with concrete someday!
Love how the effect is cute, industrial and shabby all at the same time. Maybe a thick coating of vaseline would work better for coating the inside of the moulds?
You are so creative!!!! Wonderful idea. Thank you!
Such a fun idea! They look fantastic!
xo
Christa
http://www.gardeniasandmint.wordpress.com
I wonder if someone has experimented with coloring the concrete recently? Back in the 40's, Surrealist Edward James built an unbelievable concrete "garden" in the interior of Mexico and experimented with coloring (Google Xilitla Mexico images). I visited in the early '90's. Back then, it was difficult to get to and the locals were forever beating back the encroaching jungle but it was still there as was much of the color. It's an inspirational site if you ever get down there (or have a chance to see the pictures).
There are a lot of different iron oxide powders you can add to concrete to make different colors. Here are some examples of a few:
https://www.gardenmolds.com/colorants/
I’m sure there are more out there. That’s just the site with which I’m familiar.
"YOLO" and "concrete all the things", love it! Yes I think I will!
Love these Jenny! My fave is the palm print. I have some purchased /glazed concrete planters from Anthro and my plants THRIVE in them (I think because the concrete keeps the roots moist). A hit inside and out.
Love these Jenny! My fave is the palm print. I have some purchased /glazed concrete planters from Anthro and my plants THRIVE in them (I think because the concrete keeps the roots moist). A hit inside and out.
Love these Jenny! My fave is the palm print. I have some purchased /glazed concrete planters from Anthro and my plants THRIVE in them (I think because the concrete keeps the roots moist). A hit inside and out.
Woah, these are awesome, and look like so much fun to make!
xo Lily
http://whilemyboyfriendsaway.blogspot.com/
Ooooh! Love. I have been planting up a storm and will have to try this. Paint those nubbins gold! Or gold leaf them!
LOVE these! I'm going to go container hunting today so I can try it out!
It's gonna rain this weekend here in nyc, if not, I would probably be working out in the garden and tempted to give this a dry.
Thanks for the inspiration!
You are incredible! How do you find time to do sooo much!! So impressive!!
I love this every bit as much now as I did when I first saw this idea! Especially the spheres. That is such a great DIY idea. Your concrete nubbins are adorable – kind of like pom-poms! Great idea with the palm fronds – it make a very cool pot. Great job!
I've been itching to make one of these…thanks for the tips! And I'm hosting the Dallas Garden Party…so excited to hear how yours goes!
concrete all the things haha, loved this diy!
These are awesome Jenny! Your blog inspires me to no end. These are on my current to do list. I too have a deep love for all things concrete. ;)
Speaking of concrete, I did our kitchen counters using the Ardex awhile back and they turned out amazing! They work perfectly in a kitchen. Check them out here:
http://www.thenestbook.com/2014/03/25/diy-idea-concrete-kitchen-counters/
Joanna
I love how creative you are! This looks like a fun project that can spruce up any garden.
Domicile37.blogspot.com
I so want to try this. We have a really nice 2 level deck that my husband built, and I wish it was just covered in planters, but they can be so expensive. Great alternative.
Omg those nubbins… you my dear have created a concrete dalek! Next step, world domination? ;)
Great job on the planters!
These are super awesome! The one with the palm leaves….ahhhh…my absolute favorite. Love, love, love! Thanks so much for sharing!
I did this last summer and I love how they turned out. But I definitely want to do it again with bigger pieces mine were small tabletop planters…I love the spheres!
http://cindyjespinoza.blogspot.com/2013/06/diy-cement-planters.html
You're posts are extraordinary! You inspire me so much! Thank you so much for sharing all you do :) xx
You blow my mind! This is AWESOME!!! I can't wait to try it and thanks so much for the moss tip!!!
How did you become such a DIY genius!?
Hi
Awesome ! i really found very informative article here and bookmarked this blog. Thank youSanta Barbara Green building
Genius, girl.. just genius! Nubs are the best!
I’m with you! Been contemplating doing this project for a couple of years now. Today is the day. Thanks for the inspiration!
Looks amazing. I need this in my office :)