
We decided to block out our weekend and we’ve got nothing planned but house projects! I am so excited to share one big one in particular (photos coming!), but one small project I want to tackle is making a second one of these little necklace holders I did for my first Domino article project.
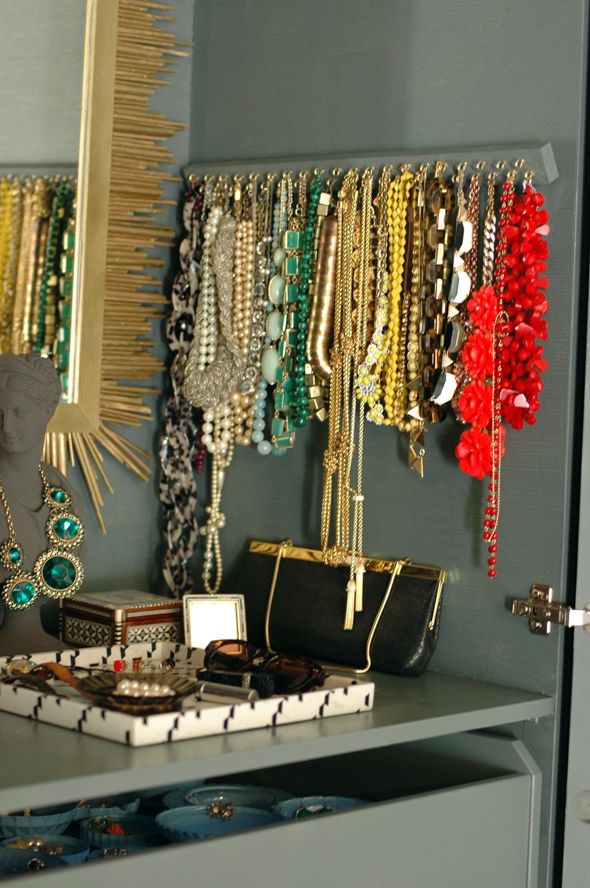
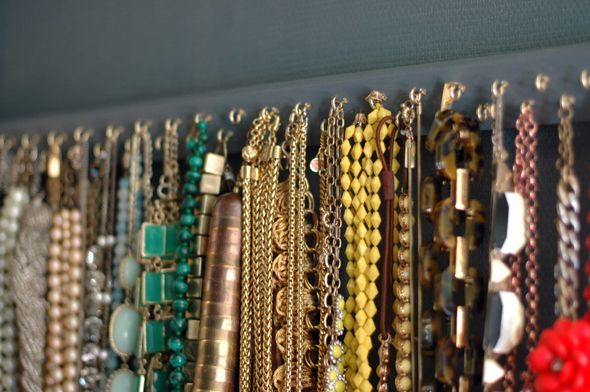
I’m running out of space and my necklaces are getting buried, which sort of defeats the purpose of the thing. The good news is it’s really, really easy to make one of these hangers and only takes a few minutes, so I can turn a second one of these out in 20 minutes or so.
My inspiration came from this photo below I saw on a cool site that just shares images of closets belonging to really stylish women. I can’t remember the name of the site though – do you know it?
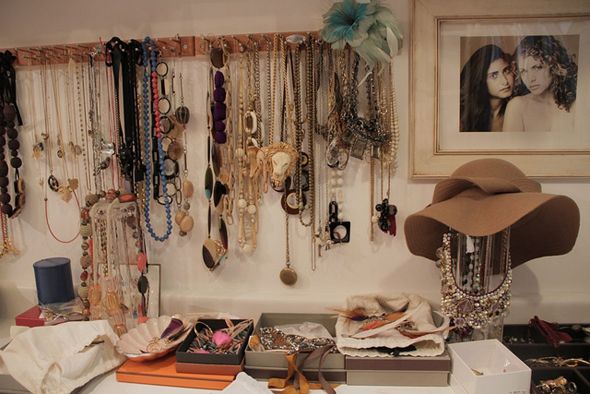
In this woman’s closet, she use a strip of wood and a series of nails tapped right in. This hanger would be like a five minute project!
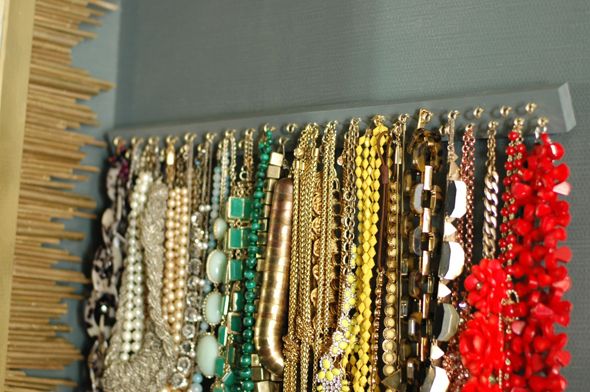
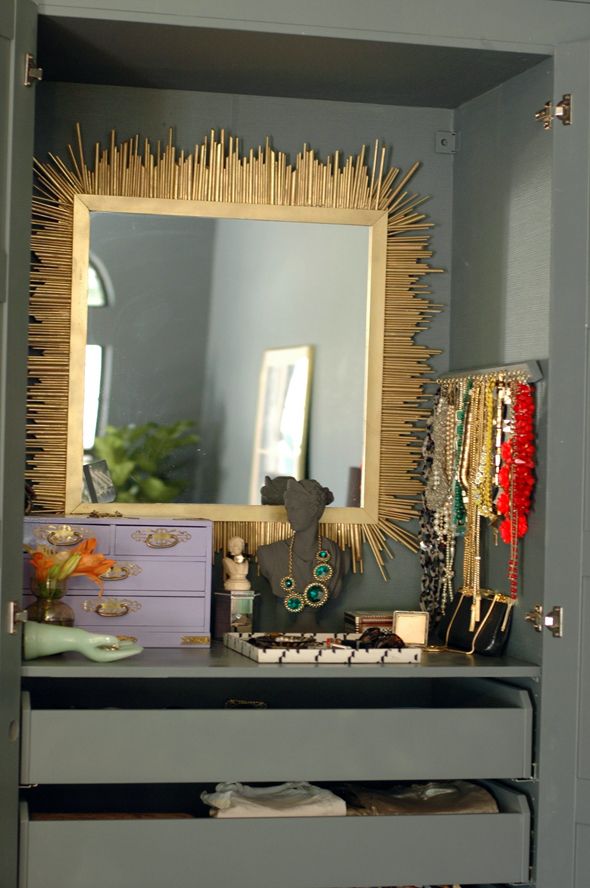
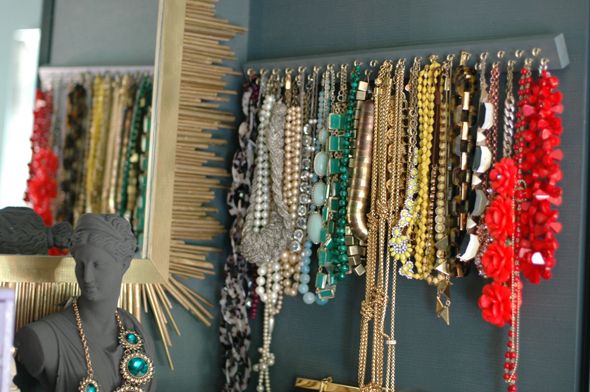
I wanted my necklace strip to be painted the same color as my wardrobe units (which is Benjamin Moore’s Knoxville Gray), and I wanted tiny brass hooks.
I had a scrap piece of wood laying around that was just the right size. I don’t have a photo of this, but I bought some of those picture hangers that you just tap right into wood or a frame. They sort of look like jagged teeth? They’re great and so easy to use. After installing those on the back, I painted a first coat on, then I marked out where the hooks would be on the front, spacing them about an inch apart and staggering the rows.
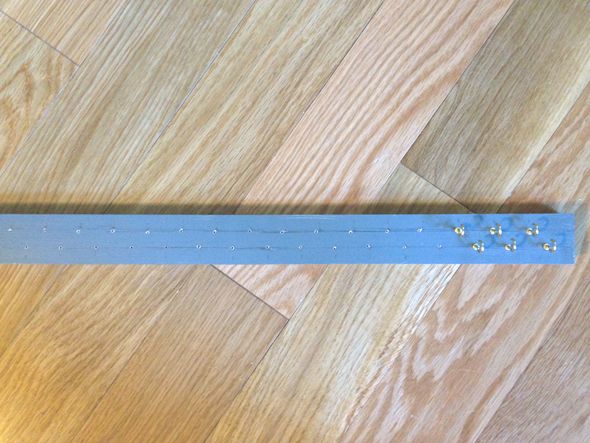
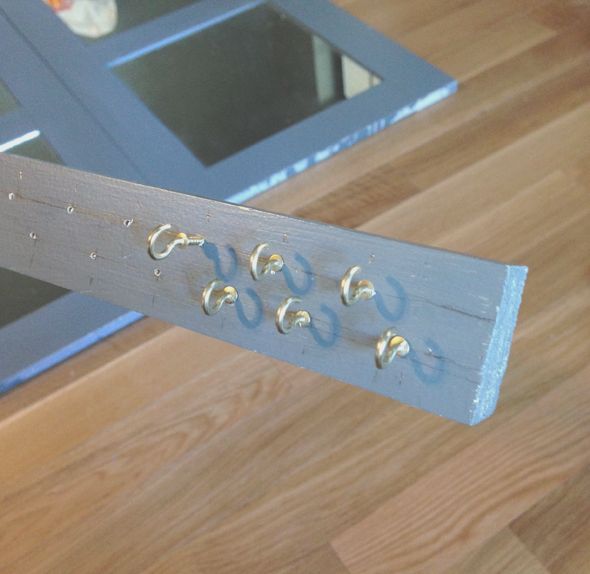
Then I drilled teeny tiny pilots holes with the smallest bit I have. This made screwing in the small hooks by hand about a million times easier!
I touched up the paint with a small brush and then hung the strip of hooks up on the wardrobe wall using the jagged teeth hangers.
The teeth hangers sort of make the strip tilt out a bit, but I kind of like the angle? Or at least it doesn’t bother me enough to figure out another way to hang the strip!
What plans do you guys have for the weekend? Any big projects? Here’s a sneak peek of what I’ve got going on… :)


My bathroom just had a face lift and I have been looking at adding in a place to hang jewelry. Thanks for the great inspiration!!! On the agenda this weekend is hopefully priming my kitchen so that I can paint it. Right now it is sunshine yellow and it has been bugging me since the day we moved in. I used to have a sunshine yellow bedroom and now I am not a fan of yellow on the walls…or at least not in a kitchen! So so excited to paint!
Oh the things a girl can do with a drill, some hardware and a little know-how! You inspire me :)
…As for weekend projects, I'm hoping to finish painting my kitchen cabinets, I'm 3+ weeks in and can't WAIT to wrap it up!
Looks fabulous! as pretty as ART! I can see another rom above that one soon! Have a great weekend. xo Nancy
That's gorgeous, but I'm confused – where is the second one hung? It looks like there's one there, not two?
I really didn't expect to see another post today. What a gift! Thank you.
This is so cute and lovely and works beautifully in the space. I actually made one quite similar for my necklaces and wanted to share a tip for any non-drill owners out there. Those little cup hooks also screw in quite easily if you nail a little guide hole with a small nail (and then pull it back out). Good luck crafters.
I really like the way it hangs forward. It seem like it would keep them from tangling. I actually have a few that are similar, but are just vintage tie/belt racks, the kind that have a double row that can swivel and fold flat. they're really cute and a great repurpose.
My guess for the website you mention is closetvisit.com.
This is a neat idea. I am going to do it. Thanks for sharing.
Yeah, I bet you got that image from Closet Visit! Love that site.
woman, you have too many necklaces!! ;) maybe send a few my way….?
I like you project, looks great.
I'm wondering if you're thinking of The Coveteur? It's not all closets, but I definitely remember seeing bloggers post closet inspiration from this source!
http://www.thecoveteur.com/closet/
I use a similar set-up for my necklaces. I bought 2 tie/belt holders at Menards and had my husband attach them to the wall in the closet. They are out of the way and so accessible!
I found the vintage photo on a blog titled Hello Lovely Studio….http://www.hellolovelystudio.com/2012/05/wearing-vintage-bling-5-fabulous.html
Great idea! It's nice to be able to have a visible inventory of your necklaces vs. having them in a jewelry box.
Great idea, although I don't have anywhere near the quantity of necklaces you have. I would probably use Command strips on each end, makes it flat against the wall, plus I try to avoid holes in the wall (of my rental).
Thanks for the inspiration!
Hi, I really appreciate your projects, you are a real artist. So I have a question about jewels storage: I have a lot of earrings and I am searching a way to hang them so that I can have a global view of them, because if they stay in the boxes or in the bags I don't remember them. I was thinking about something like a wooden tree to hang on the wall, but I am not good in artistic things. Do you have an idea?
Thank you and greetings from Italy!
I just found your blog (from the A Beautiful Mess concrete countertops post) and am already smitten with it! I've actually been looking for a creative way to hang necklaces for a while. Thanks for the inspiration–I will be back.
I love this.
I'm gonna try it.
Thank you!
Love this. And I think the website you're thinking of is closetvisit.com. One of my favorites.
xo
This is a great project! I think your necklaces hang prettier because it is not flush against the wall.
Anything strung on silk or cord (like pearls) , should be stored flat. Or they stretch. This looks great for the grab & go…
This is a much needed project for my accessories! Thanks for sharing~
I love this idea! So simple but the gold and grey make it pop. I'm running out of room myself and this will be perfect. Thanks for the inspiration.
This is totally awesome, Ashley! Pinning!
– Tasha @ Designer Trapped in a Lawyer's Body {www.designertrapped.com}
its from Deborah Kaplan's closet on the closet visit :)
So super easy yet so super chic! Great color in your closet.
Wow!! posted nice post about furniture which I was finding since long time .Really helpful and attractive for all kind of furniture lover .Today furniture is one kind of fashion and beauty for home .Hey readers ,you also can get exceptional service to collecting your home accents , wall art and also tosh furniture from decorise.com .
I have very many such attachments and I would love to find a Hanger manufacturers think of all kinds of small items for hanging.
Scotch velcro strips! That's what I used on mine!
This is such an interesting blog. You are very knowledgeable about this subject. Please check out my site.
uniquedesignsjewelry
Nice overall style in your wardrobe! I would also need something like this for all of my necklaces stashed in a box.