I feel like this might end up being the baby version of a tutorial on antiquing glass to look like aged mirror. I really like the results, but when I try it again, I think I’ll figure out a way to make the look a little more dramatic. So stay tuned for that.
If you like a more subtle look though, here are the easy, harsh-chemical-free steps…
You can do this to the underside of any glass you have. I tried it on my glass cabinet doors, but the possibilities are pretty endless: the underside of glass tabletops (you’d want to seal that), a regular picture frame with glass to be made into a mirror, interior french doors for privacy (I’d give the inside a fresh topcoat to match the doors though), glassware and ornaments for a mercury glass look, etc, etc.
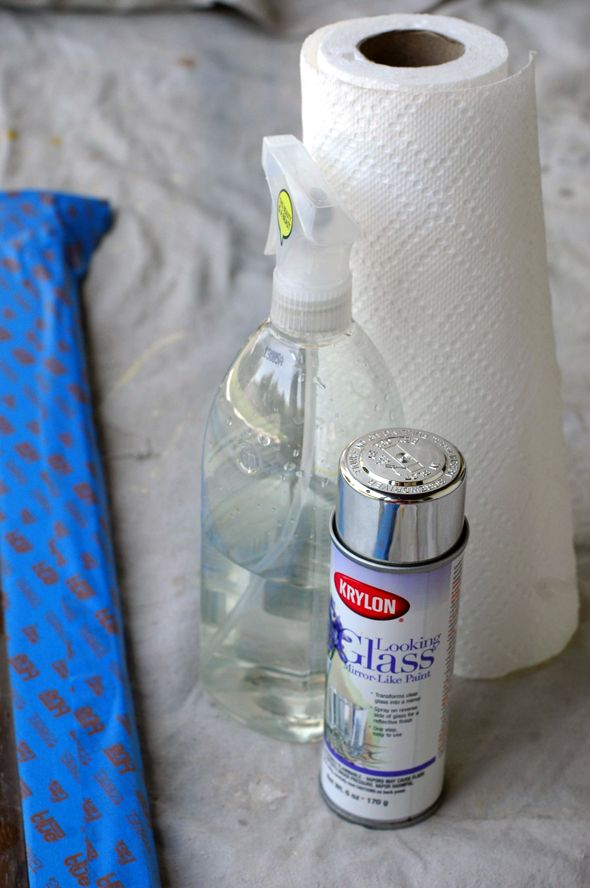
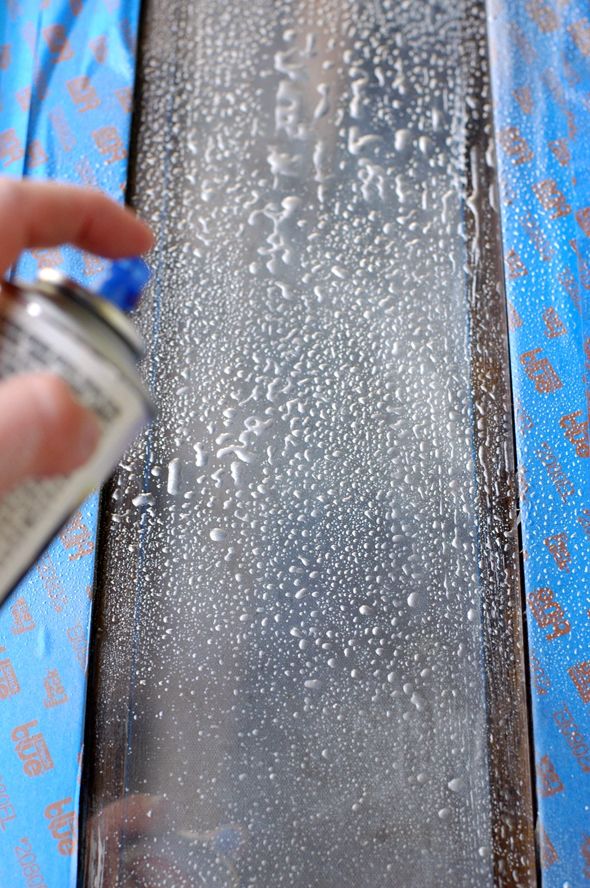
You’ll need only a few things to get started: Krylon’s Looking Glass spray paint (I found mine at Hobby Lobby – Michael’s stopped selling it), a half and half mixture of white vinegar and water in a spray bottle and some paper towels.
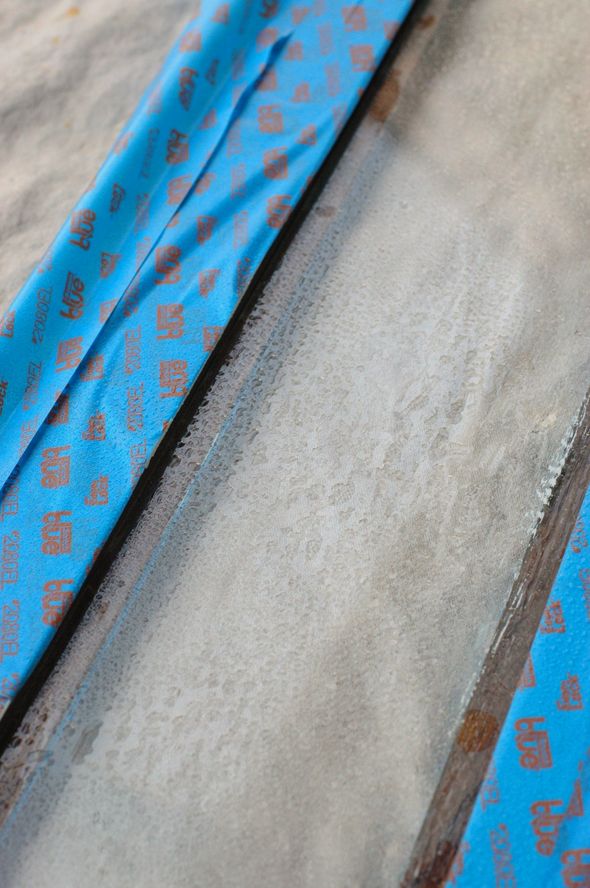
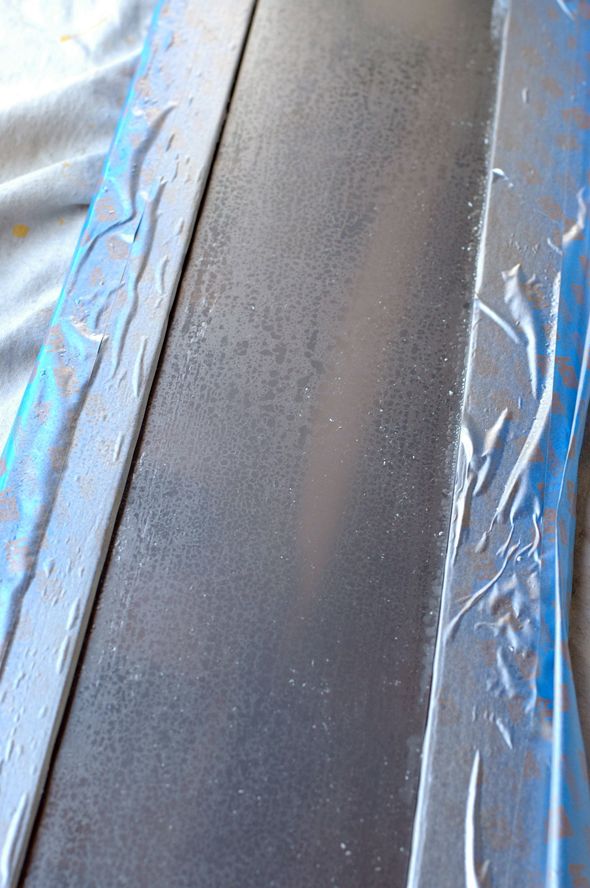
After taping off just the underside of the frame of my cabinet door, I lightly misted the vinegar mixture on the glass. If I could go back I would have really doused the glass the first round and especially focused on a few spots, rather than doing a uniform spray.
Then working quickly while the vinegar is still wet, spray the Looking Glass all over.
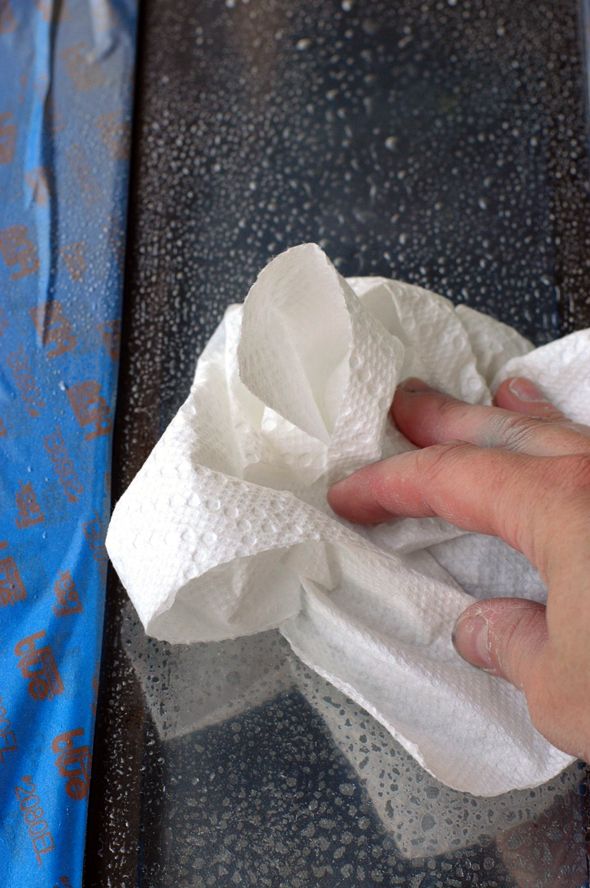
Wait a few seconds (maybe 10 or 15?) and then wipe off the glass.
You’ll be left with a cool, patchy look. I almost wish I had just stopped here and spray the whole thing black for a great contrast against the silvery mirrored spots, but you know, live and learn.
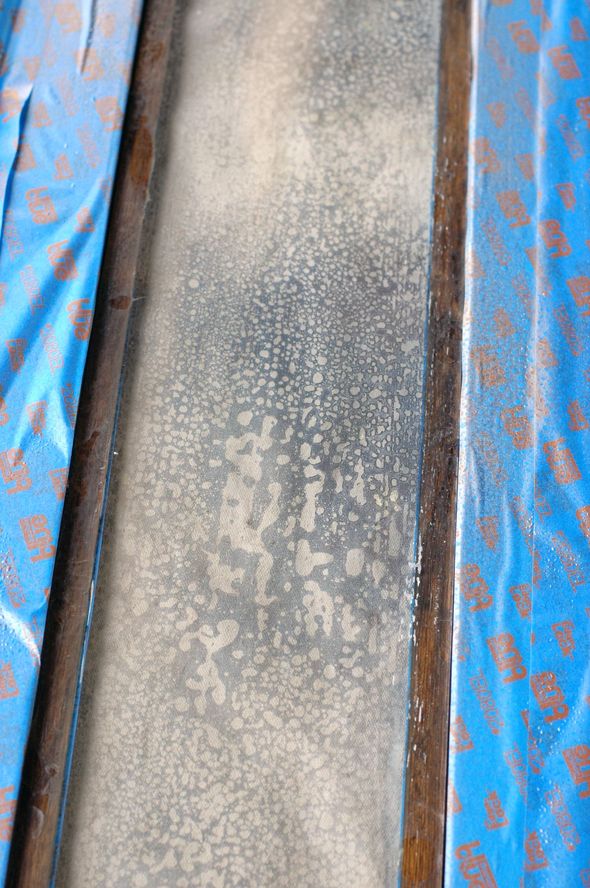
I sprayed another light mist layer of the vinegar mixture and repeated the layer of Looking Glass spray and wiped it down all again. This is what it looked like after the second round:
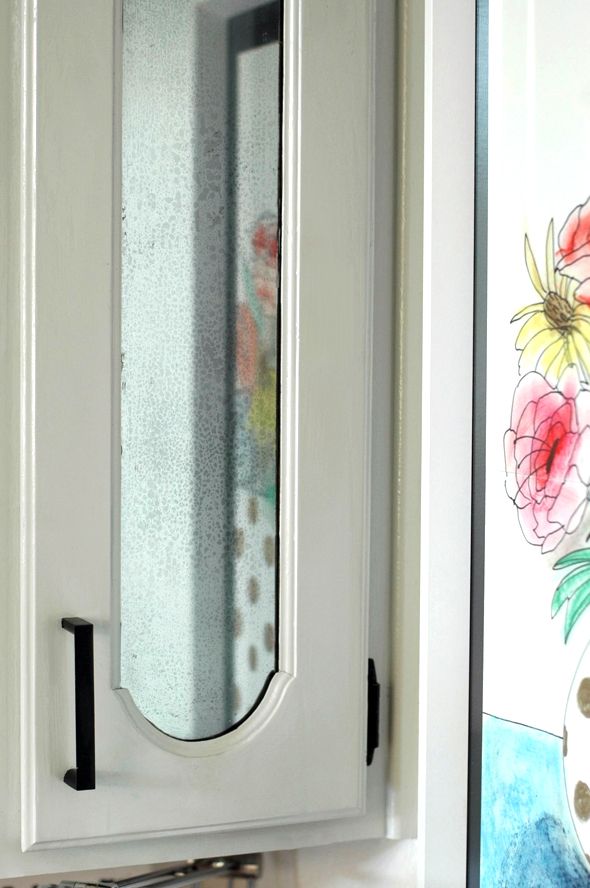
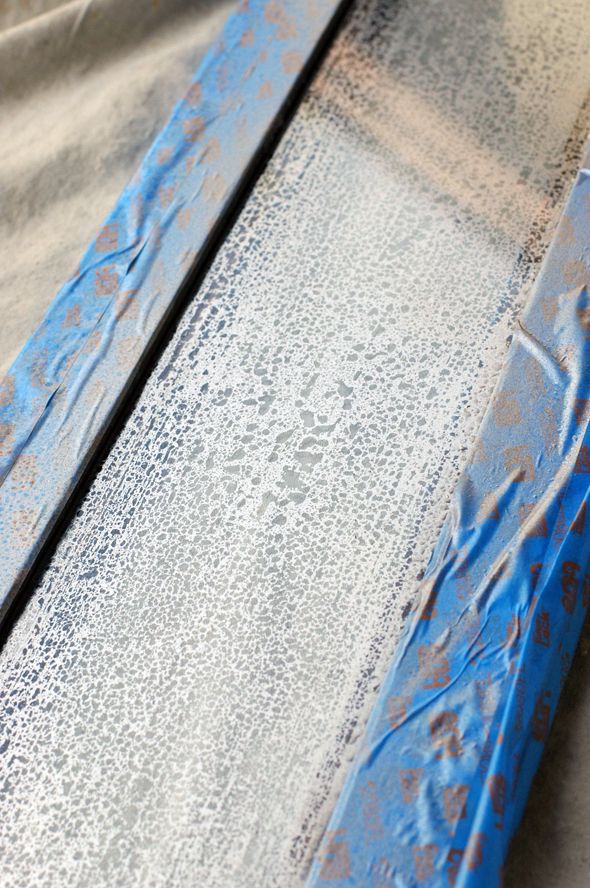
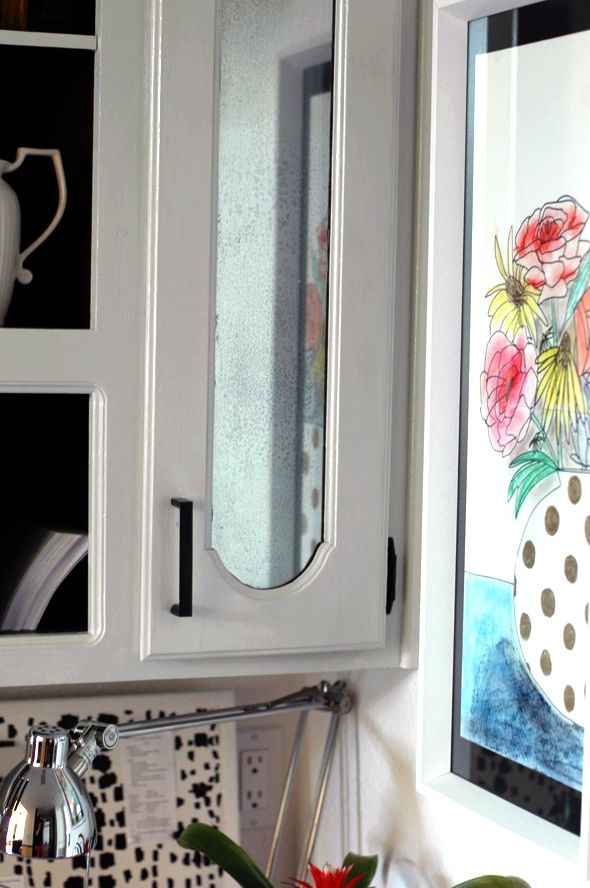
Pretty, right? Again, definitely should have stopped at this point. But I lightly misted the whole thing with just the Looking Glass spray as a final step.
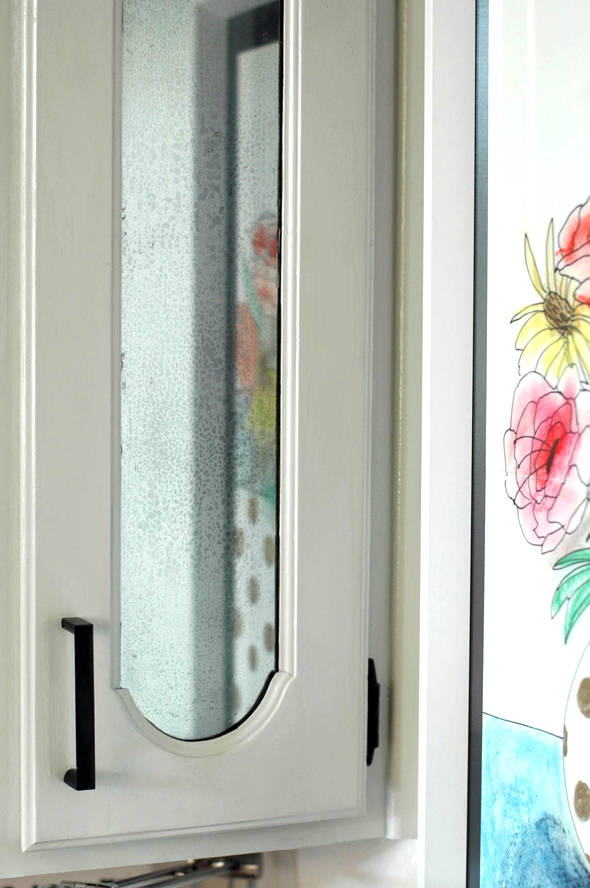
Even though I knew my mistake right away, I went ahead and repeated the steps for the matching door on the desk area cabinet, just so the two panes would match. I think it’s still really pretty though. So much better than the clear glass! It’s all sparkly and bright, just like real mirror. And I can actually use the cabinet for storage and not just pretty display stuff now. Total bonus.
When I tackle these big cabinet doors in a week or so, I’ll probably go a little more dramatic with the mirror. I’ll be sure to report back on how that goes.
Have you ever tried this project before? I’ve seen
other tutorials that use these steps on the outside of glassware, but the end finish is pretty textured, so I’d probably stick to doing just the inside or underside of your glass if you’re trying this on a bigger surface.


Did you let each coat dry completely in between, or did you immediately add the next layer while the previous was still wet?
Thanks for your fantastic tutorials and inspiration!
Jenny, great tutorial! I'm a little confused though, did you say you would of sprayed a layer of black paint??
Also, your mistake was not enough variation in the vinegar application? What should we do differently when trying this DIY?
Thanks!
I actually think this looks really cool. I like that the look is subtle. Cool DIY for sure. Curious to see how the second round will turn out!
http://www.fullbellywornsoles.com
I've been looking for someone to re-silver an antique mirror that I have, but everyone who does it is dead! (Yes, they said those exact words.) Even though no stripping is involved (the mirror backing just cleaned right off), no one does it. And I could pay someone to try to do a tiny mirror for a lot of money – but he's not even sure of his ability. I've found a solution! Thanks! :-)
I am going to try this, it looks great. {www.thepinkzipper.blogspot.ca}
I'm not ready to try this yet but I do appreciate the clear directions and the fact that no harsh chemicals were involved. I think black paint would have looked great.
Gail of DoodleNoodle Design,Flea & s
Stuff
Hi Jenny, I'm a huge fan of your blog! Just wanted to share some techniques that I discovered while using the Krylon Looking Glass spray for past projects. I actually sprayed the Looking Glass spray on first, then followed up by spraying the vinegar-water mixture once the paint dried. I let it sit for half a minute or so, then used a combination of terry cloth towel and dry bristle brush (tooth brush works great) to loosen up some of the paint. This gives it a more rustic mercury glass look. It definitely has a more dramatic look as more of the paint is scratched off. May be worth a try! Thank you for sharing your home with us! Keep up the amazing work!
Ooo! Looking forward to seeing how it works on the bigger doors. I have an glass door armoire in our bedroom that my husband has filled to the brim. I've been wanting something opaque to improve the view. Can't wait! Maybe I'll try it out on some old picture frame glass to try out different techniques before I commit.
Ooo! Looking forward to seeing how it works on the bigger doors. I have an glass door armoire in our bedroom that my husband has filled to the brim. I've been wanting something opaque to improve the view. Can't wait! Maybe I'll try it out on some old picture frame glass to try out different techniques before I commit.
hi jenny
another successful option is the brand new to the market amy howard mirror stripper, brilliant & easy!
featured in this months house beautiful
cheers!
debra
I have to ask about the window I see a sliver of in the photos! Is it stained glass? Did you create it? I LOVE it and am looking for something similar for our guest bathroom! Thanks, Jenny!
flowers backgrounds
We did this a couple of years ago. I wanted antique mirrors hung above our night stands. They are hard to find & very expensive. So I decided to give it a try on large pieces of mirror and I loved the look. However, we used harsh chemicals (paint striper).
Can't wait to see what you do with your corner cabinets.
Nan
I just did this for a topper on a dresser….I used the vinegar/water method but I mixed the blotting with a squish and twist kind of motion here and there. I also layered a bit of gold spray paint in some spots along with some flat black with the looking glass. I think I ended up doing 6-7 layers of varied paints. I then sprayed the whole think flat black. It turned out awesome! Don't hesitate to so the squish and twist. It really helped to make it more authentic looking! Good luck…it was one of the most fun DIYs I have done in awhile!
For my sister-in-law's wedding I did this technique on a bunch of flower vases. The problem with the vases is you get dripping since you can't lay it flat like a sheet of glass. This application works so much better when you can leave it flat!
I didn't try any vinegar, I just used water, but I could see where that would help. I love this look, but I bet spraying the back black the next time will make all the difference!
Light short bursts of spray keep the drips away. Found that out the hard way.
Already pinned it.
*looks around for bare glass in need of sparkle*
I can’t wait to try this on my old glass coffee table inserts.
CAN YOU DO THIS ON FROSTED GLASS?
IF SO WHAT TYPE OF LOOK WOULD YOU GET? I HAVE FROSTED GLASS PANELS IN MY KITCHEN CABINETS AND WANT TO USE THE PANELS IF POSSIBE
Can this be done on a sidelight of an entry door…will it look good from both inside and outside?
I tried another tutorial with the same process, but thought it was a little too subtle also. So I sprayed with vinegar mixture, then 2 lite coats of mirror spray paint. Then blotted and applied 1 lite coat of mirror spray paint, then 2 lite coats of black spray paint. I love the way it came out. Let me know if you try.
I cannot see the photos? How can I locate them or download them?