We’ve talked about it here before, but I could use the reminder myself: It’s always best to decorate in layers. Not everything in a room has to get done right away. And usually I like a room that’s been decorated slowly, over the course of many years, much more than a room that was done in a week. Ideas and pieces for a space will emerge over time because you’ll have the chance to actually live in and use the room.
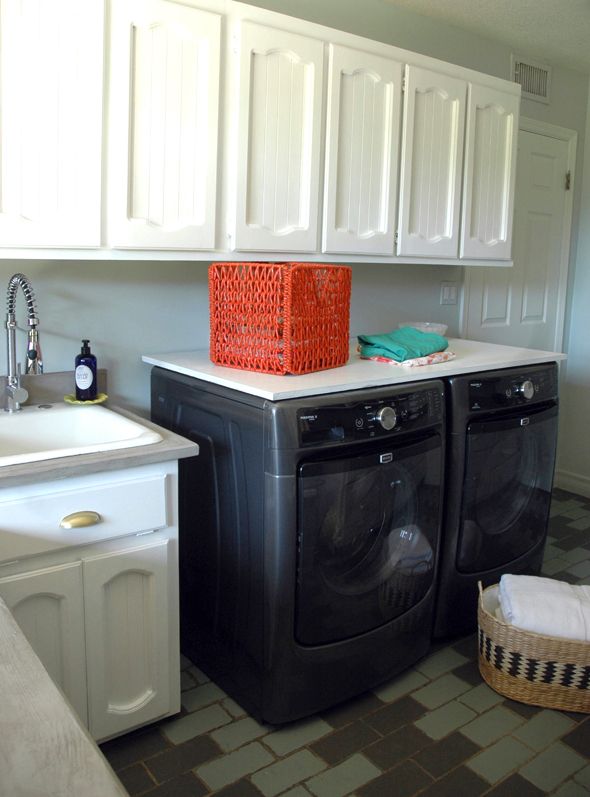
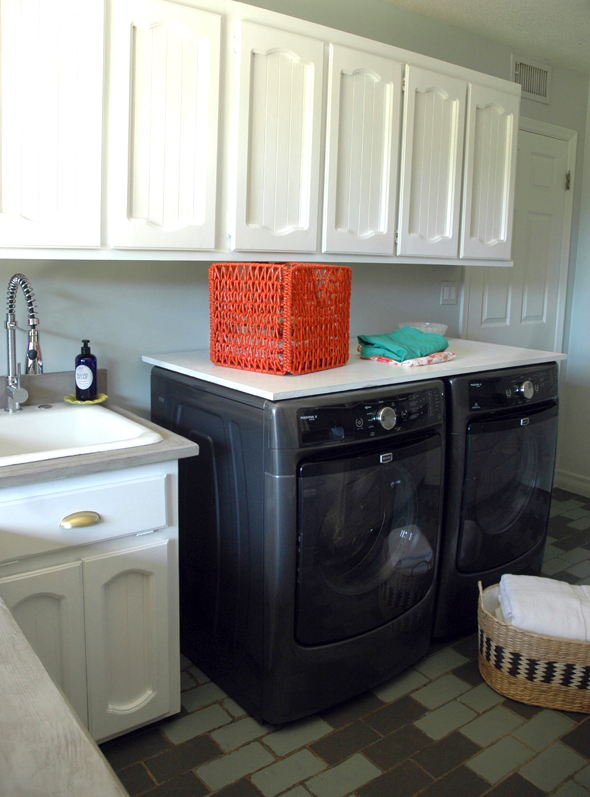
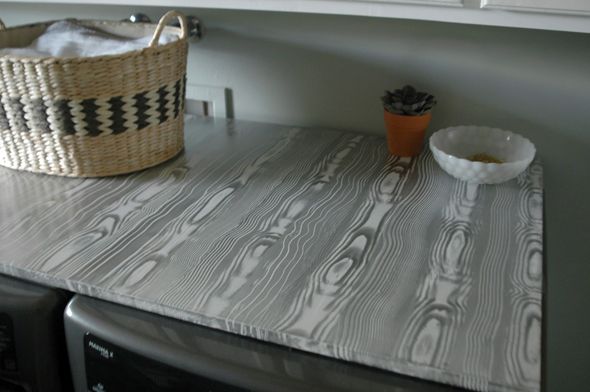
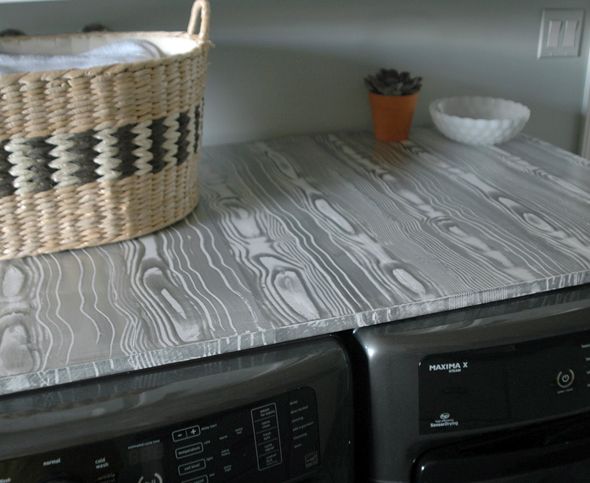
When I redid our laundry room, I wasn’t sure what I wanted to do with the laundry folding tabletop. I went to a stone yard and looked at marble and granite remnants, which were still too expensive for me to get right with, so I bought a piece of MDF and had it cut to fit the top of our new washer/dryer. I thought about painting it a bright color. Then I thought about painting it to match the appliances. Then I thought about doing a faux marbled/malachite pattern with white and gray paint (just like this), but I never got around to doing it. Then I stumbled across this post from my archives and I remembered how badly I’ve been wanting to do a faux bois paint treatment. There’s not any wood in our laundry room, except for the bamboo chair, so I thought it would be great to have something with an organic element and with lots of movement in the pattern.
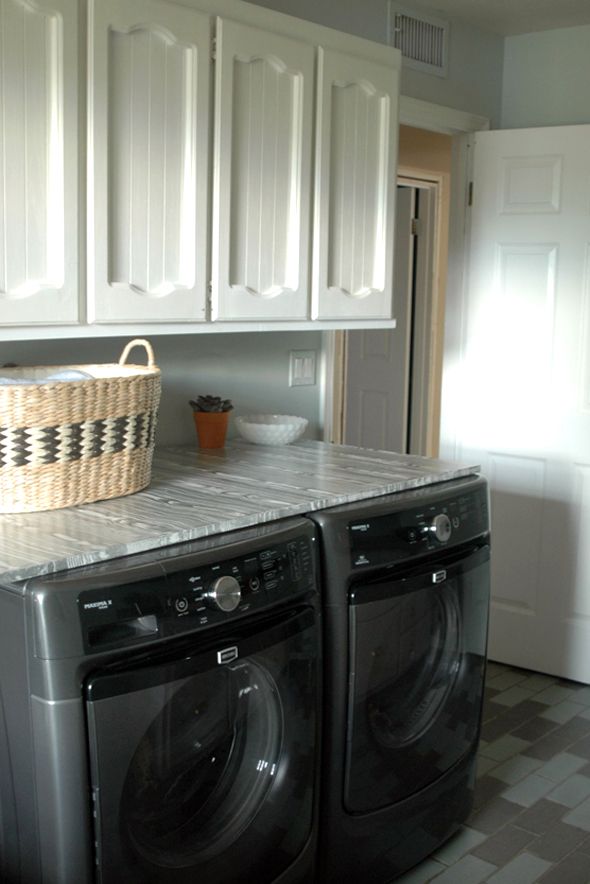
It’s crazy how the faux bois pattern addition makes the room feel so much more finished. And I know I always say this, but truly, painting a faux bois pattern is as easy as can be. If you can paint a straight line, you can do this project. Actually, scratch that! If your lines are a bit crooked or wavy – this project is totally perfect for you!
Here’s how…
The first step is to paint your base color. I used a glossy oil-based paint, but you can do any type of finish as long as there are no bumps in the surface.

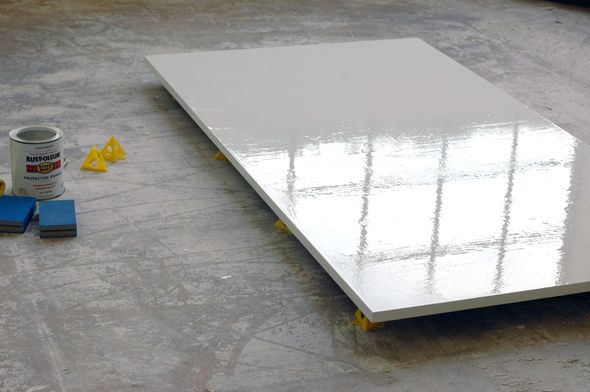
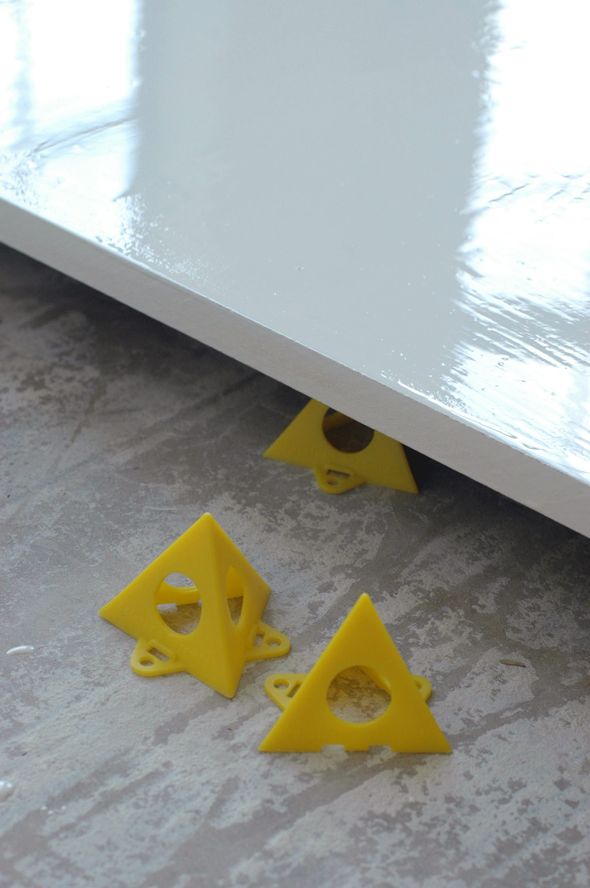
Did you notice my handy new Painter’s Pyramids here? They are so genius and help avoid that painted-edges-sticking-to-the-drop-cloth situation. And the best part is they make it so you can paint one side and immediately flip over to paint the other side. The pointy tops don’t really leave marks on the surface (they do however hurt, like, SO BAD if you step on them barefoot. Ouch.)
Once the base coat is fully dry, you mix the paint color you want to use for the “grain” part. If you’re using latex paint, you’ll want to mix one part paint with one part glaze and one part water. If you’re using oil-based paint like I did, you can use a mixture of one part paint with one part paint thinner or Penetrol. It should be very watery.
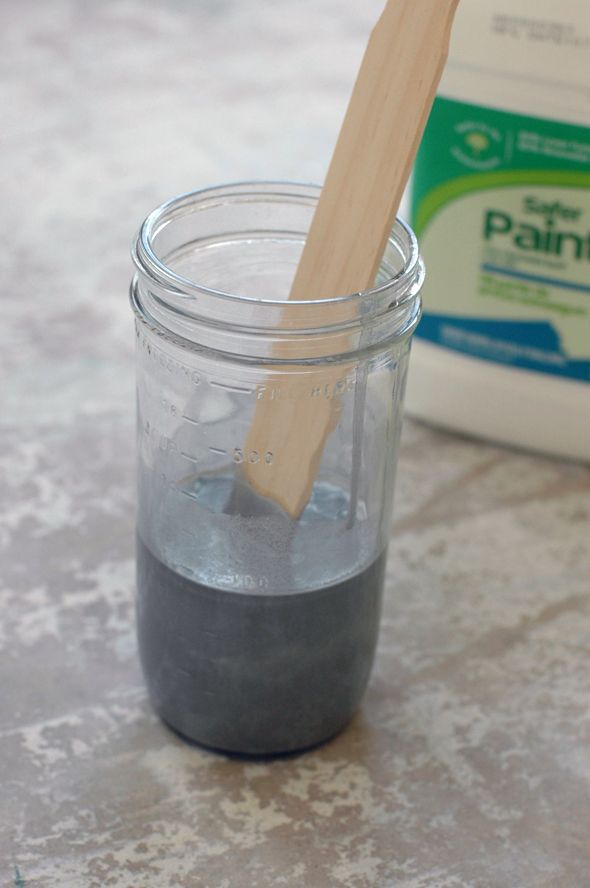
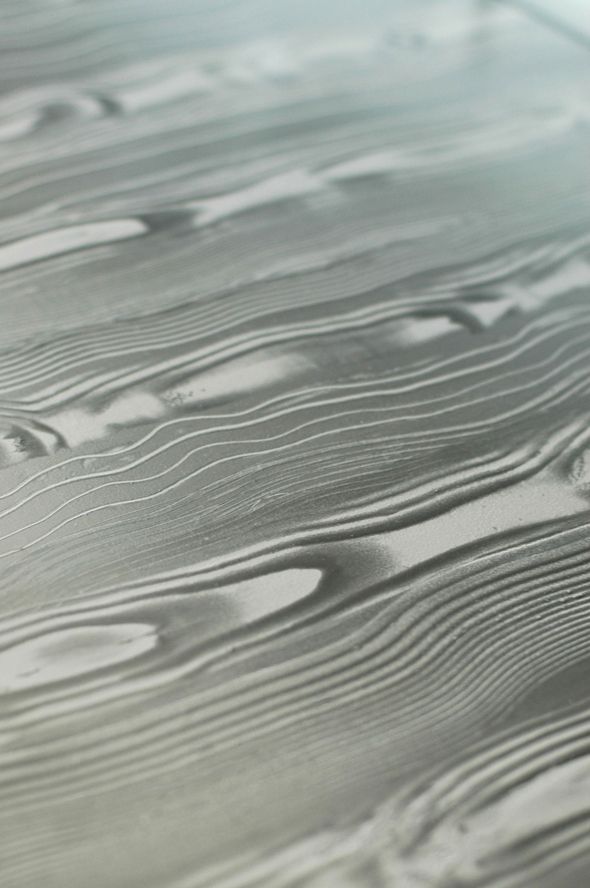
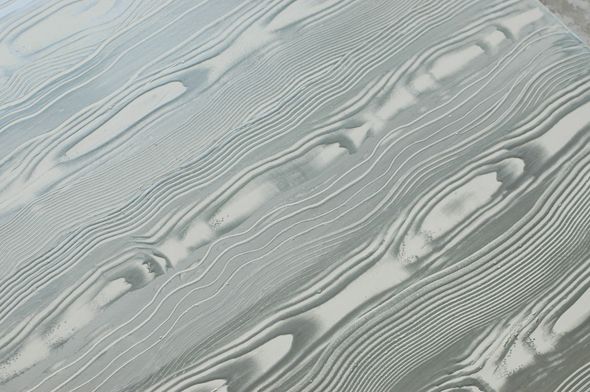
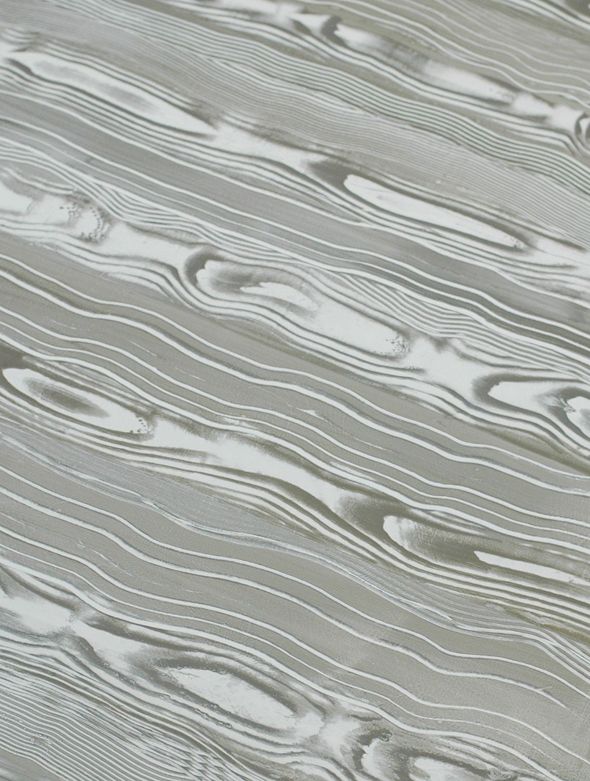
I used this slightly metallic Aluminum color by Rustoleum and I really liked it. I think it actually looked a little like mercury glass or liquid chrome and might be really cool for other applications where it hadn’t been thinned down. I’m excited to experiment more with the color.
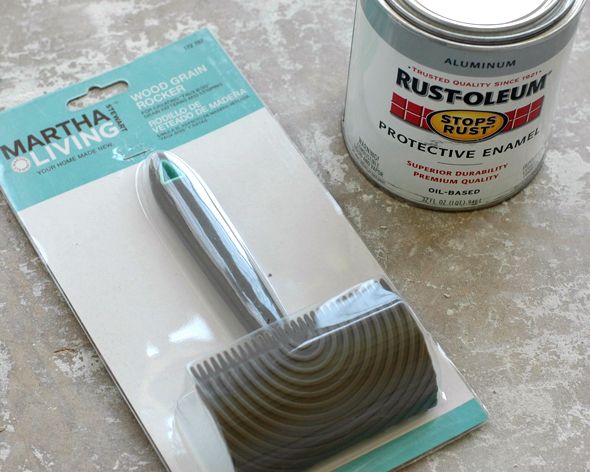
Then the most important thing you’ll need for this project is a wood grain rocker. You can buy them lots of places online, but Martha Stewart makes a good and affordable one that’s sold at The Home Depot. I don’t have a photo of the package here, but I also picked up one of her strie combs.
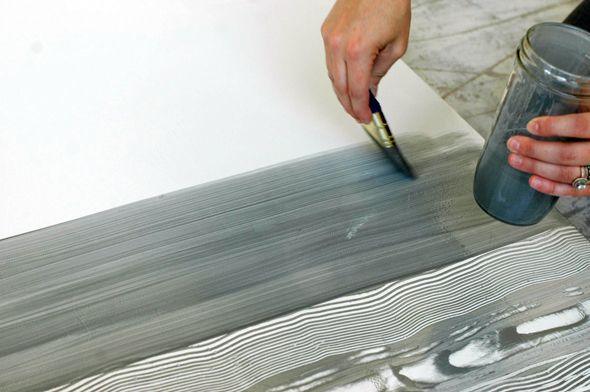
The approach is very simple. I used a 2″ angled brush to paint on a section of thinned paint in long strokes, the size of two or three widths of the wood graining tool. You most definitely wouldn’t want to paint the entire surface all at once – you want the glazed/thinned paint to be very wet still while you’re doing the faux bois technique. It’s important to work in sections, and to do the whole surface in one painting session though so that the lines sort of run together and blur into each other. Also, it’s nice that if you do a part that you don’t like, just brush right over it and try pulling the paint again.
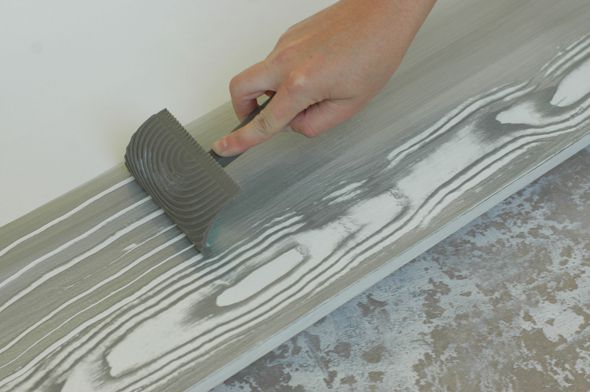
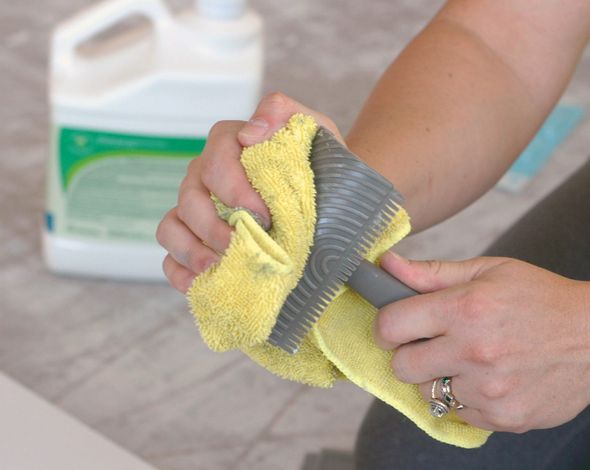
I alternated one row of using the wood graining rocker with a row of straight combing using the back edge of the rocking tool or the strie combs I bought (it looks good to alternate the pattern on the strie comb between the widely spaced comb (above) and the tightly space comb you can see in the photos below). Once you’ve pulled a row, make sure to wipe down your comb or wood grain rocker.
The technique for using the rocking tool is very easy – you just pull down and rock back and forth.
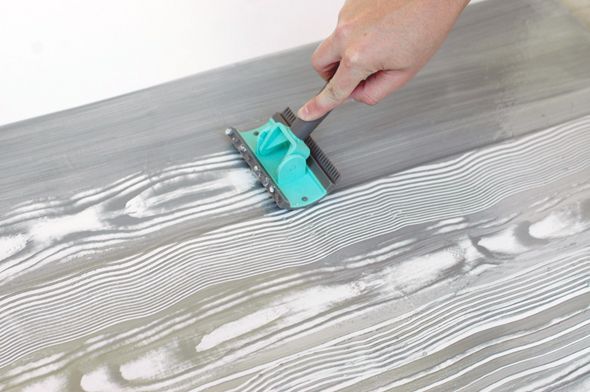
I tried to mix up the speed of my rocking so there would be some variation in the look of the grain lines with longer and shorter knots.
If you’re working on a flat surface like I was here, don’t forget to paint and pull the comb or rocker down onto the edges as well. This makes the pattern look a little more authentic to the eye.
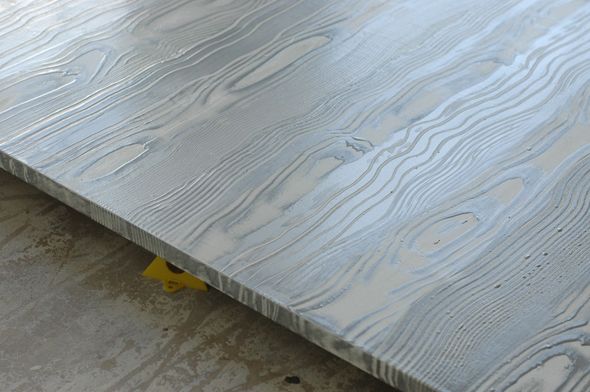
I’m such a fan of how this faux bois tool worked! It was an easy and really satisfying project. This technique would work so well on furniture pieces with really squared off and flat surfaces (hello, IKEA Lack series! I’m looking at you!) and it even wouldn’t be that hard to do entire walls once you’re comfortable with the technique. And now I’m wishing I had a little powder bath to do in the Valley house. :)


Nice and Simple info about Powder Coating Services and frames powder coating. If U want to know in detail about powder coating services
Thanks for sharing this awesome information with us.
I couldn’t see any of the photos. They wouldn’t open for me. Would you please send the pictures so I can see.ore clearly how to do this technique. I want to use it on a countertop & a cabinet. Thnx.
Ellen, I’m wondering if you did this on a countertop and how well it worked.
This is exactly what I was looking for before I try this technique on some “vintage” IKEA cabinets in my One Room
Challenge kitchen design. I’ll post the results on my Instagram! Thanks for the great instructions.
If you aren’t going to let us copy and cut and put into a personal word doc to follow instructions, then DON”T allow DIYAnywhere to share it!!!!!!!!!!!!!!!!!!!!!!!!!!!!!!!
Those marble designs are tremedously beautiful. Thanks!