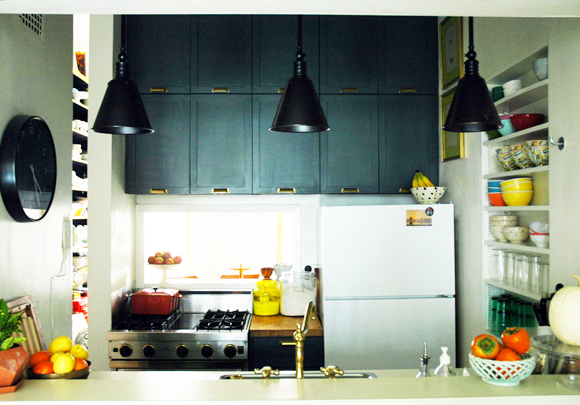
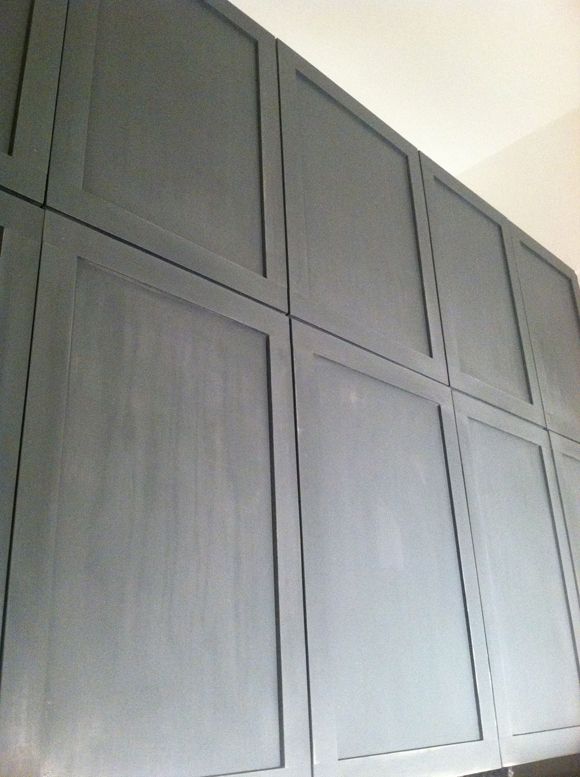
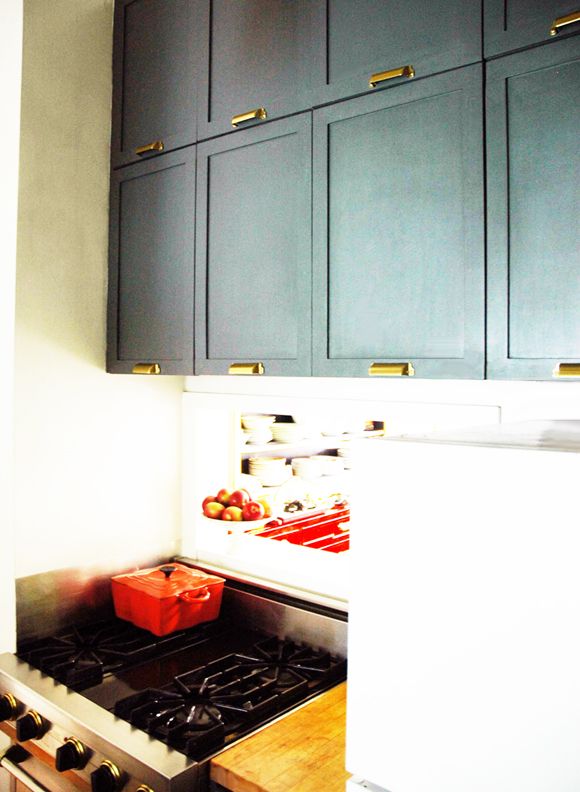
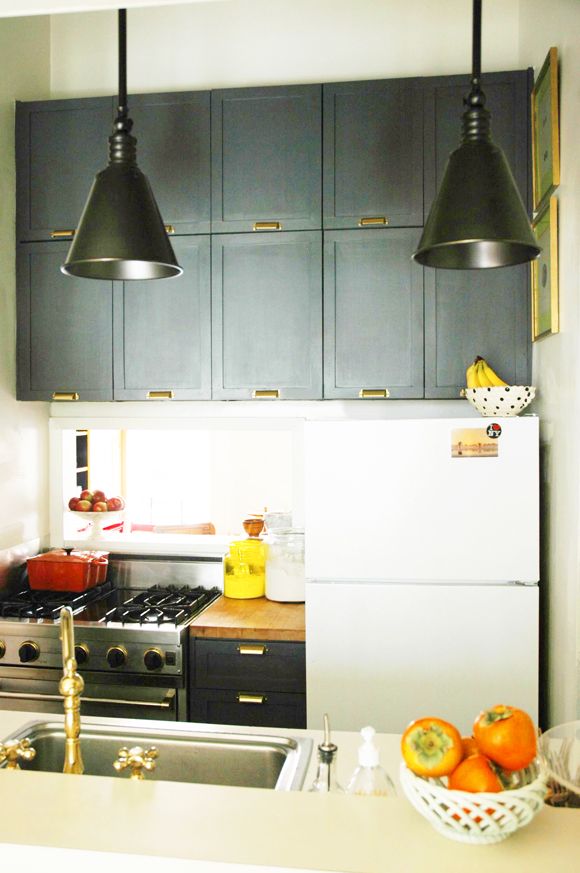
Hey-o! Look who has finished kitchen cabinets!
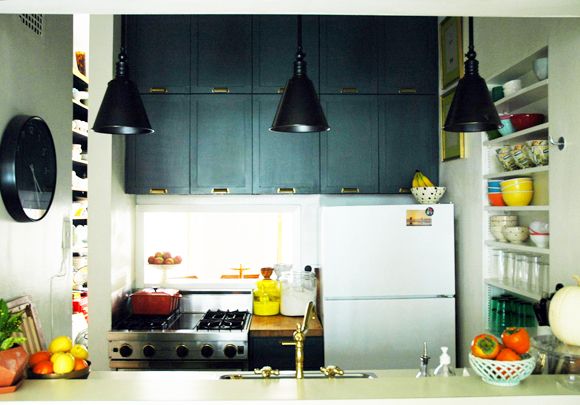
There really should be a big fat “IN PROGESS” slapped on the bottom of that photo because the space is far from done. Those white appliances are helping to brighten the space I guess, but… they’re so — white. Also, the floors need to get finished (you can see a little sneak peek here of the direction I’m going). I’m still thinking of that marble backsplash. And next spring I’m going to try making my own concrete counters for the sink side. But the good news is I won’t be incredibly embarrassed to host Thanksgiving here next week.
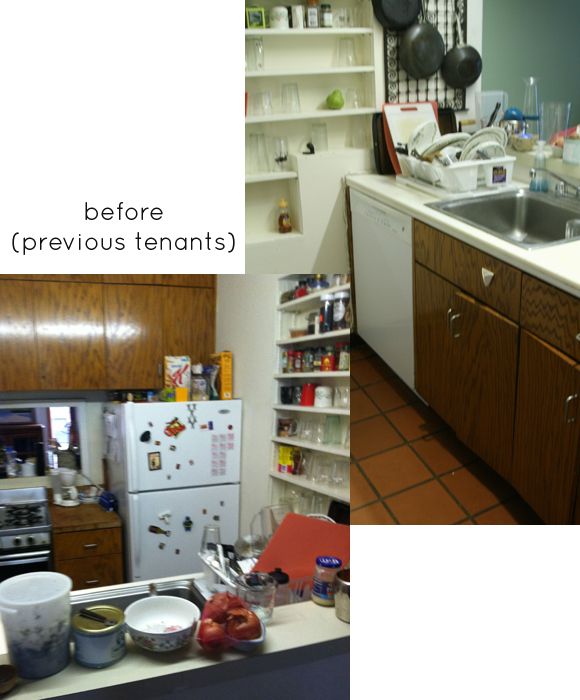
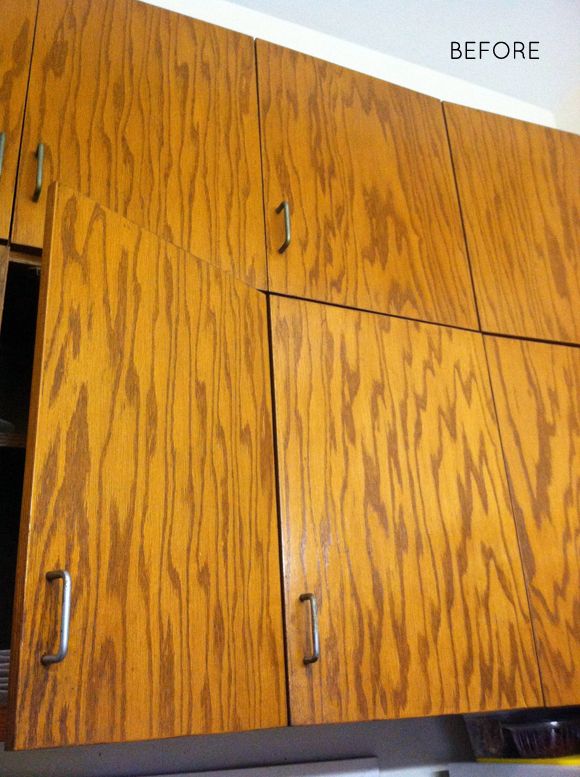
Whereas I would cry if visitors were going to be subjected to this:
So here’s the run down on how I finished these! I definitely learned some things along the way…
As a reminder, we started out with these heavily grained oak doors. (and here’s what I was going for)
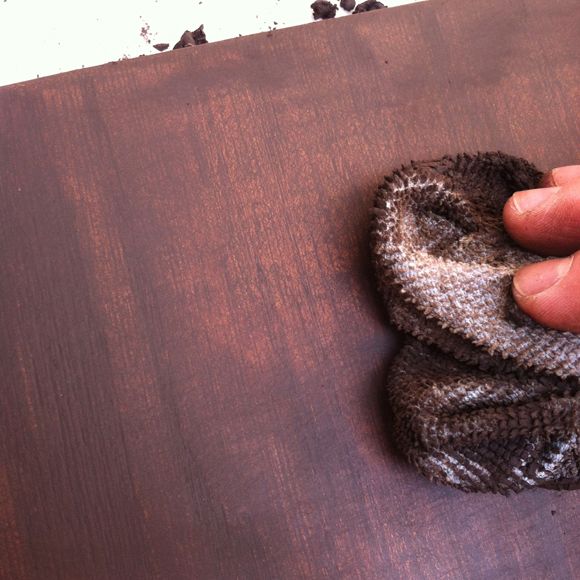
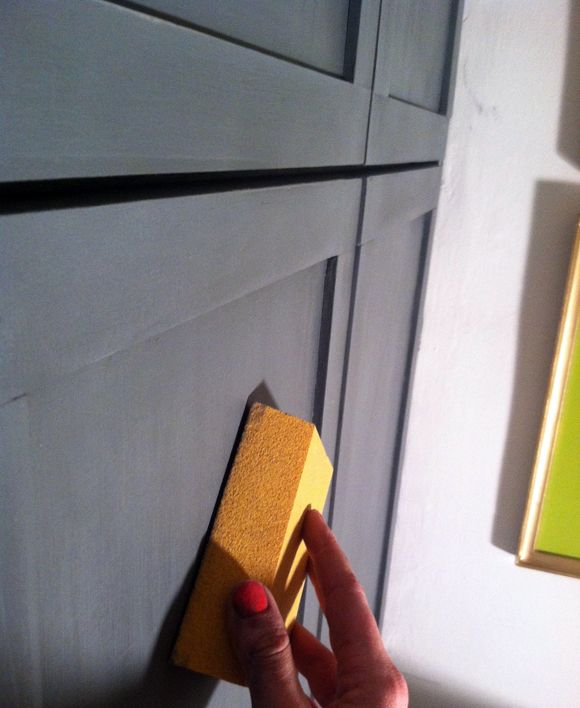
I sanded and filled them with grain filler,
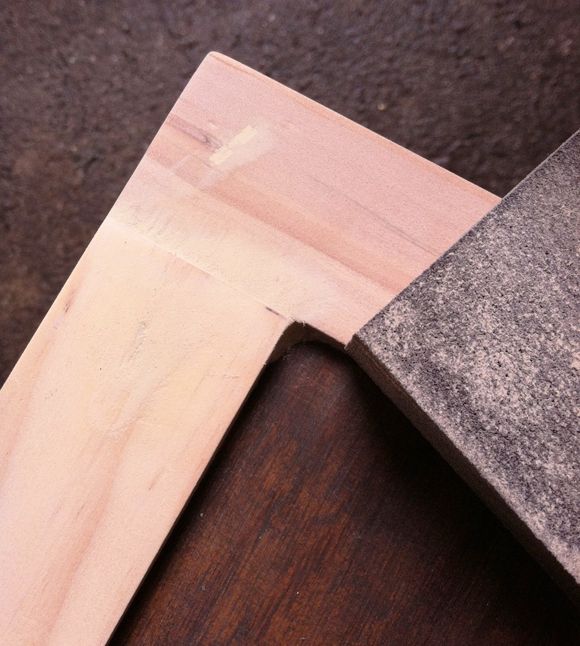
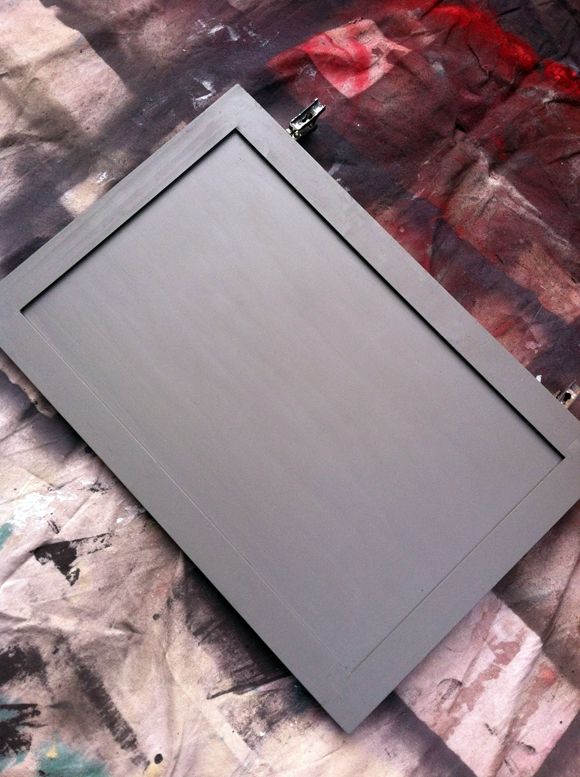
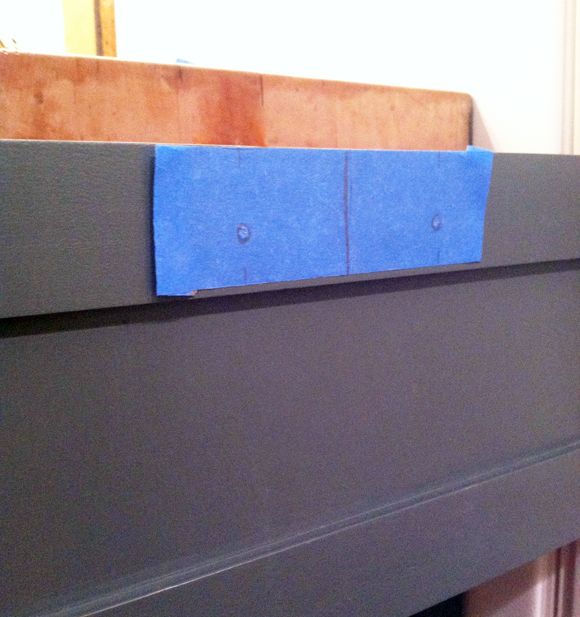
Then added flat trim moulding to the borders.
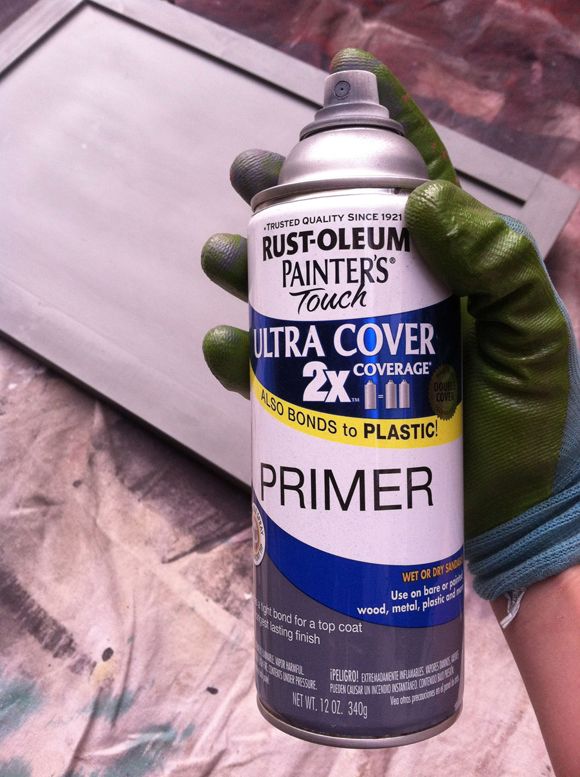
After sanding and wiping the doors down with a microfiber cloth, I sprayed them all with a dark Rustoleum primer. I sprayed the fronts and backs
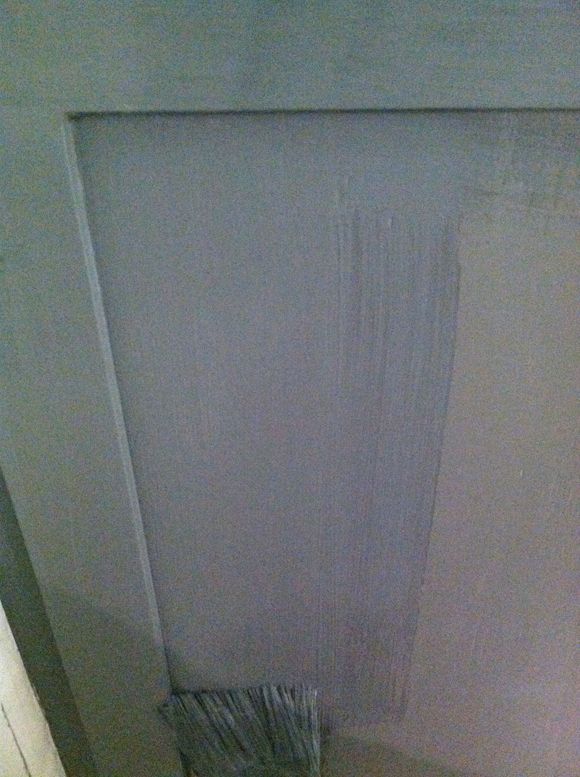
Here’s where things got a little experimental. I rolled on the first coat of paint (F&B Down Pipe) with a foam mini roller and that gave me a consistently smooth surface. Then I went back to touch up the inside corners of the moulding with my two-inch angled brush and I got a little cocky. I wanted to see how well I could do fully brushing the final coat. It turned out to be a bad idea. They looked very bad-DIY once everything had dried. I thought I had a steady hand, but I will definitely be sticking with foam rollers from here on out.


LOVE this! The hardware w paint is beautiful. Tempted to do in my own kitchen!
wonderful!!
The painted cabinets are such a huge improvement it is hard to find words to descrip. Well done Jenny!
Get it girl! These look bad to the bone. You are so inspiring, Jenny!
I ADORE what you have done with this kitchen. The finishes, the hardware, the colors. I want it! (Oh, I think the marble back splash you picked out would be the perfect addition)
You chose the perfect color for those cabinets paired with the brass hardware – I am in love! A really impressive makeover on a budget!
Marianne Brown
White + Gold Design
The cabinets look so awesome! It doesn't even seem like the same place as the "before."
What an incredible transformation! This space is so rich and luxurious now– goodness! It's amazing what a few new details, paint and a little love can do. I pinned this kitchen like crazy- such a beautiful job!
abodelove.com
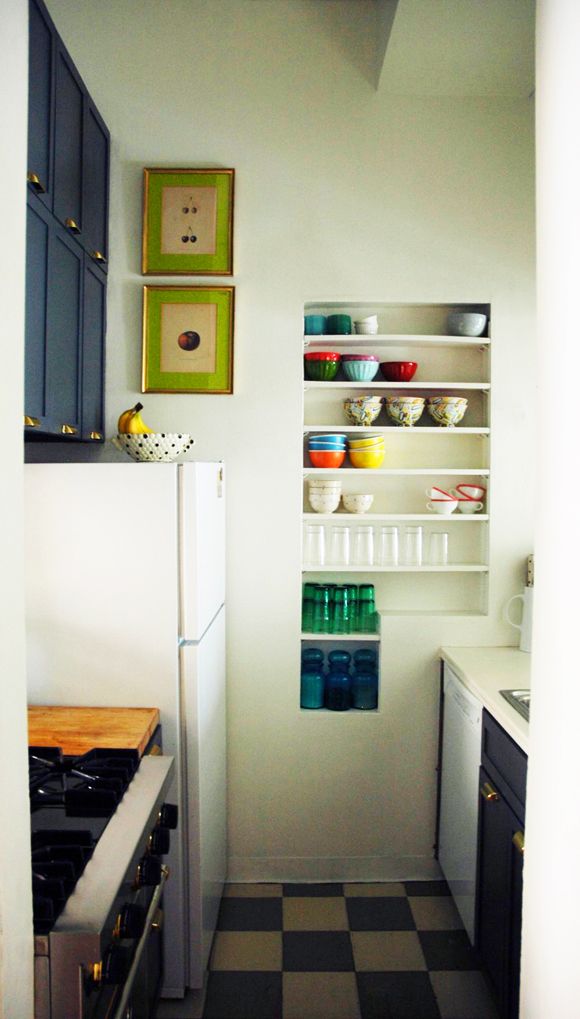
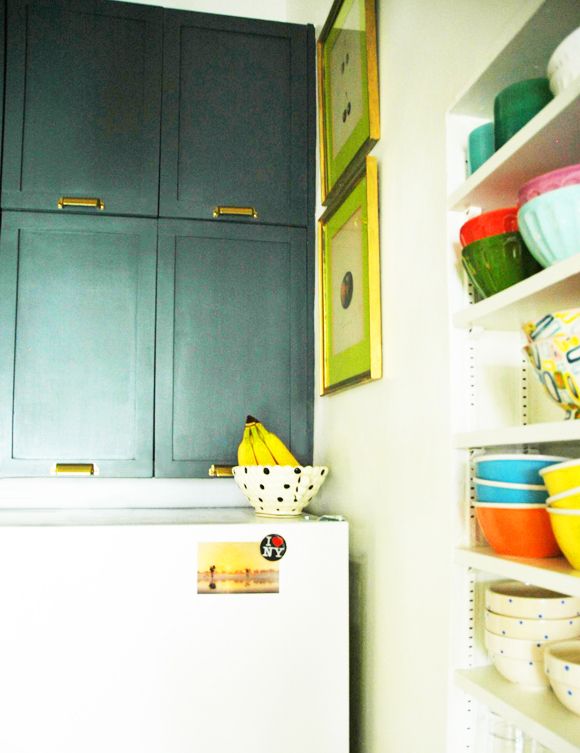
The cabinets look fantastic! I love the color you chose! I also love the built-ins in the wall! The decorations you put on them look so fun!
The cabinets look absolutely gorgeous. I love the Down Pipe with the new hardware…absolutely worth the hard work!
I had a thought: I remember you once blogged Nick Olsen's "decorated" fridge. If the appliances are going to go eventually, and you still feel they're too "white", how about covering the fridge with marbled paper or vintage wallpaper? Could be fun in the meantime :)
It looks great! I'm loving every corner of your new home and can't wait to see MORE!!
XO
stunning! I can't believe the before pictures – – you've given hope to renters everywhere!
What an amazing before and after! I wouldn't have believed it….wow!
I've been looking forward to this reveal! It's lovely!
Did you make a post about how you hung your pendants? Was there something there before, or did you have to create light boxes for them? I recently hung some pendants above my sink, but we have to plug them in. I have some ideas for creatively hiding the wires and getting a wireless switch for them, but I'd love to see what you did here if they aren't hardwired! :)
Wow! I love the hardware on your cabinets. I painted mine white last month http://leannamk.com/brighten-up/ which was a big investment for a rented apartment but the new look is totally worth it – now I'm not ashamed to have people over either!
Have you seen the new White Ice appliances? So mod, and still keeping that fresh effect.
These look FANTASTIC! So inspiring to see a project like this in a manageable and affordable DIY! Gives me hope that I too could pull something like this off!
Funny because I am doing the exact same treatment to my original 1960's lacquered wood cabinets. Except we are doing pale grey with dark hardware and butcher block counters. SO anyway, I was wondering what the arrangement was with your landlord – you rent, right? I mean obviously anything you are doing looks better and is adding value to the place but I've found it difficult in the past trying to convince an owner /landlord about that. Is it just a chance you take or do you get prior permission? Thanks!
Wow! These look fantastic! I also love the shelving in the wall.
How lucky to have double height cabinets, it makes up for not having a large kitchen. And it looks like there is even more room above, do you have any plans for this area?
Liz
These look incredible – what a transformation! Amazing work.
Looks great Jenny! Where did you source the pendants?
Absolutely love this! I just used Down Pipe as the first step in decorating my office, and it's a fantastic color. I'm doing brass accents as well. Your pulls looks so good against the dark color.
Here's my under-construction office in Down Pipe: http://www.gohausgo.com/2012/10/sugar-were-going-down-pipe/
Nicely done. Gorgeous color and I'm completely in love with the hardware.
holy cow! i love the end look, way to go!
Projects like this are while you have earned the title of DIY queen. I would NEVER believe the 'before' and 'after' were the same kitchen. Now, can you come over and glam up the cabinetry in my rental kitchen?
I am obsessed… you are the best. Seriously, THE best. This is incredible and so so beautiful!!!
These look amazing! Your landlord is very lucky to have you as a Tennant!
Jenny dear, you are an absolute genius. We all learn from every post you write. I've been on pins and needles to see the outcome on these and the photos did not disappoint! Your landlord must thank the stars everyday that you walked into his life.
This looks awesome! Love the cabinet color with the brass handles. Impressive work!
Jenny, I CANNOT believe that you did this on such a budget. You are totally my inspiration for my kitchen reno. We had to buy new faces, but we're painting everything ourselves. It is taking FOREVER. Did you not paint the cabinet boxes? Anyway, your kitchen looks beyond fabulous! Congrats!
Wow this looks amazing! Love your DIY-projects!
I so admire your patience and dedication to finishh a big job like this! Congrats – it looks gorgeous!
Anna (My Design Ethos)
WOW, WOW , WOW! Your kitchen looks so much better, I'm in awe for the vision you had for this. I just finished my cabinets as well, so i know what you went through :)
Wow, you are truly a creative and resourceful person. I have seen kitchens remodeled for thousands of dollars that don't look this good. Fantastic!
I wish you lived in my city, and I could hire you. :)
Incredible makeover, and incredible job. Just like everything else you do!
Agree with the above comment about papering your fridge. I saw a decoupaged London map fridge once that was really cool. But agree that the marble paper would be fantastic too. Unless you're doing the marble backsplash.
Can't wait to see what you come up with next!
I love the colors and the hardware and everything you've done so far. Though, I'll tell you, we have our cabinet handles centered on each door like you have there, and I.HATE.IT. It looks nicer, sure, but opening the cabinets is harder and generally frustrating. We're redoing our cabinet sometime soon and that one of the first things I'm changing. Good luck to you and I hope yours work better than mine!
You have more talent in one pinky than I have in my whole body!!!! WTG- they look fantastic :)
It looks amazing!! Good work! And that charcoal with the brass imperfect.
You are a magician! They look awesome!
Jenny, you KILLED it with this one. blown away.
I LOVE the dark cabinets with the gold hardware. You nailed it!
Jenny,
You've done it AGAIN.
You are absolutely amazing. Seriously.
Please tell me where you got that clock! It's so nice & clean! Incredible job on the cabinets :)
Stop it now….you really do know how to spruce up a place and way to go, just in time for Thanksgiving!
pve
This looks amazing. And who would have ever guessed they were the same basic cabinets? That's it – I'm ready to move to NYC to work for you and absorb some of your genius.
SQUEAL!! I am so excited! They look AMAZING!!! I get so excited to see you work your magic and this is such a magical transformation…excellent job! I love the brass hardware and the sink faucet. I love the color and the trim – everything!!! I'm jealous of the stove ;) WOW…only $100? Crazy!! You need your own HGTV show, girl ;)
Did I miss a post where you painted the floor tiles?
The cupboards look so beautiful. I wish I had the ability to put colors together like you!
Amazed by your skills. I bet your landlord feels like thy won the tenant jackpot!
Incredible job! It looks amazing and I am amazed at your DIY skills. Simply fabulous… thanks for sharing.
I have to copy what was said above, I can't believe those are the same cabinets!
Congratulations, you did an incredible job!