
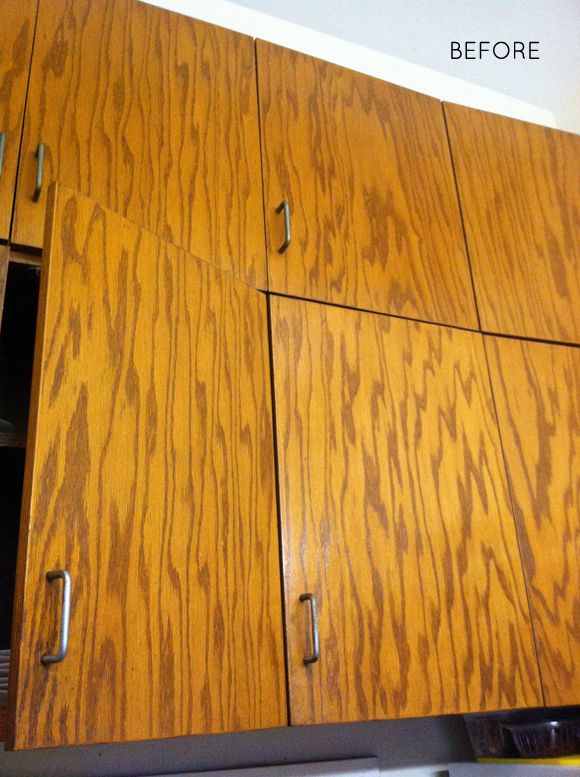
Last week I breathed a HUGE sigh of relief when I discovered trimming out the cabinets was much easier and much less stressful than I was worried it would be! (In case you missed it, I filled the heavily grained cabinet fronts here and the kitchen befores and inspiration images are here).
First I measured all the doors at once and had a huge list of measurements. Then I cut all the wood at once too (here’s the saw I love). A little tip here – when working with precise measurements like with crown moulding or any trim work, make sure you take the saw blade into account – don’t center your cut line on the blade. You’ll need to scoot the cut line over a little to make it so the edge of the blade just kisses your line.
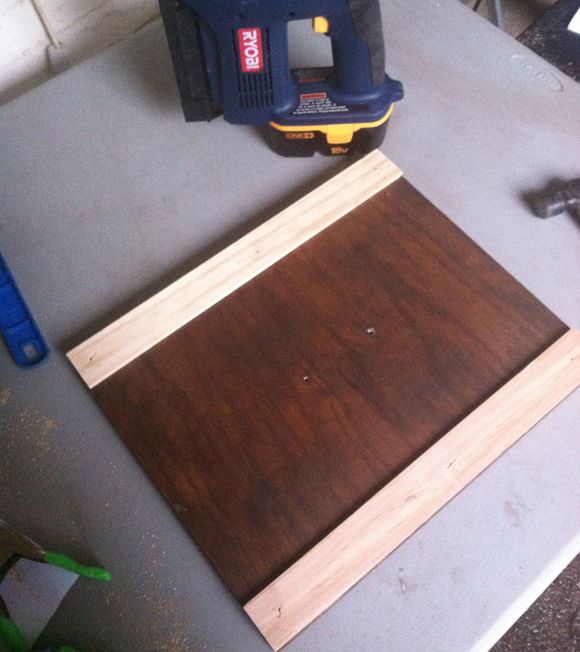
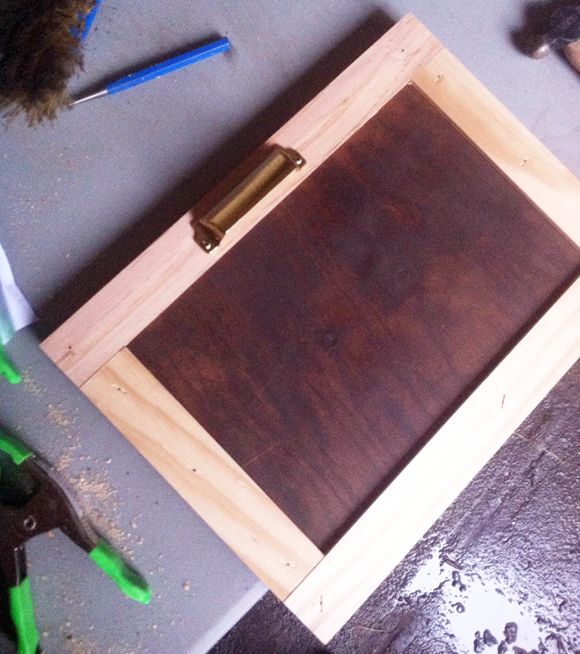
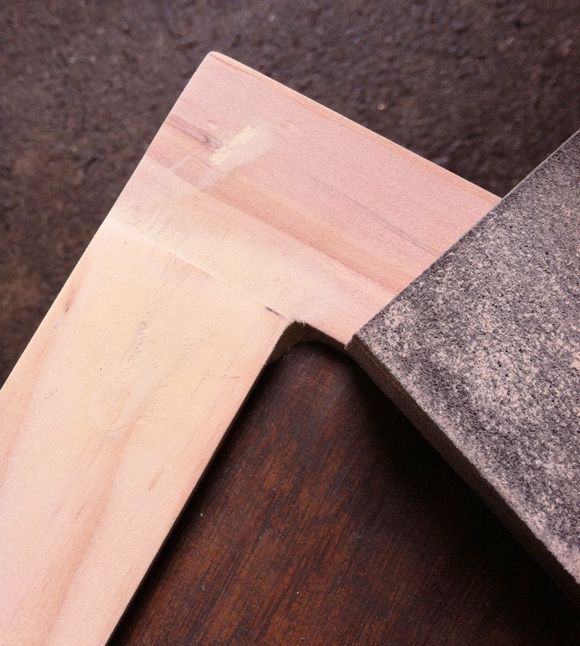
I thought a lot about whether I should do mitered corners, but ultimately I ended up going with straight cuts. It made my life a million times easier I think – after working on crown moulding inside, the last thing I wanted to do was more mitered cuts! I just had to subtract two of the trim widths to get the correct measurements for the side pieces.
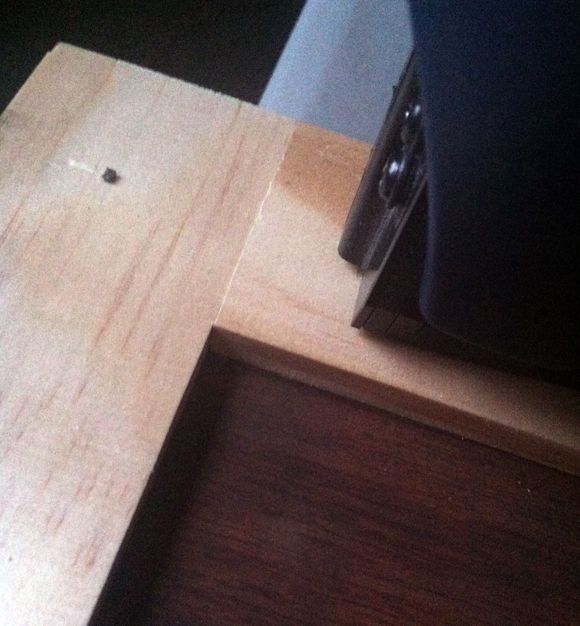
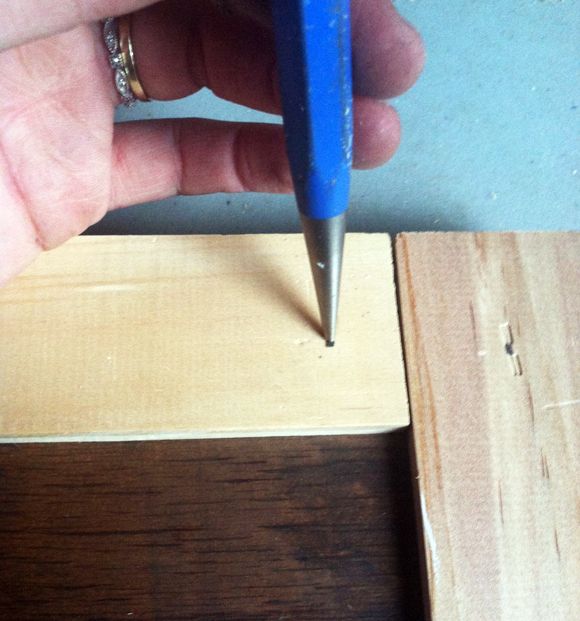
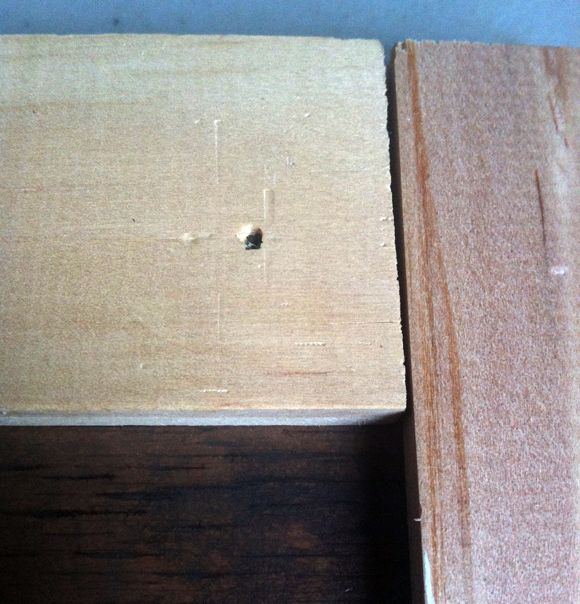
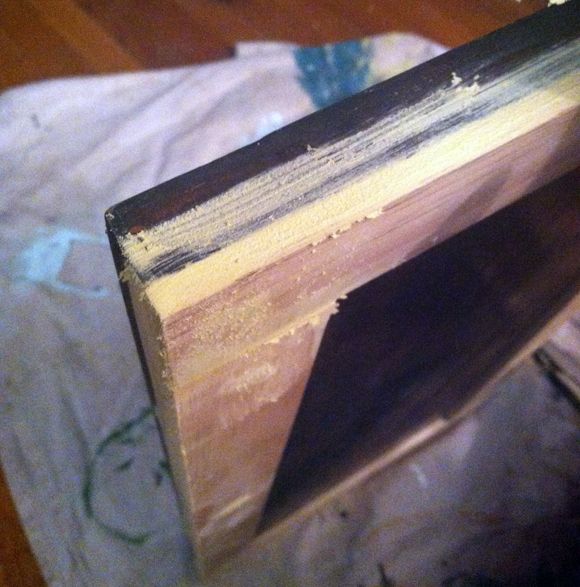
Once all the wood was cut, I used my brad gun to attach the trim. It took some playing with to figure out the right amount of pressure to use on the gun. If I pushed too hard, it dented the wood a little. If I just put a bit of pressure on the brad gun, the nail stuck out about 1/8″ and I was able to set it in. The little nail set hole is a million times easier to fill! Don’t dent that wood!
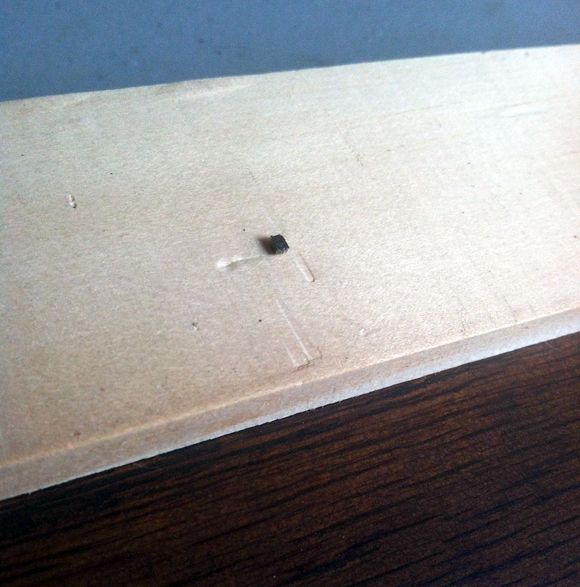
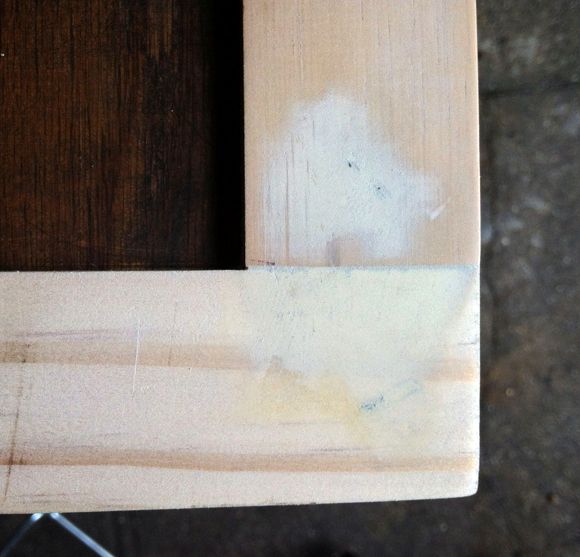
Most of my cuts were pretty precise, but every third cabinet or so, I had some gaps between the trim. It was no big deal at all though once I filled the gaps.
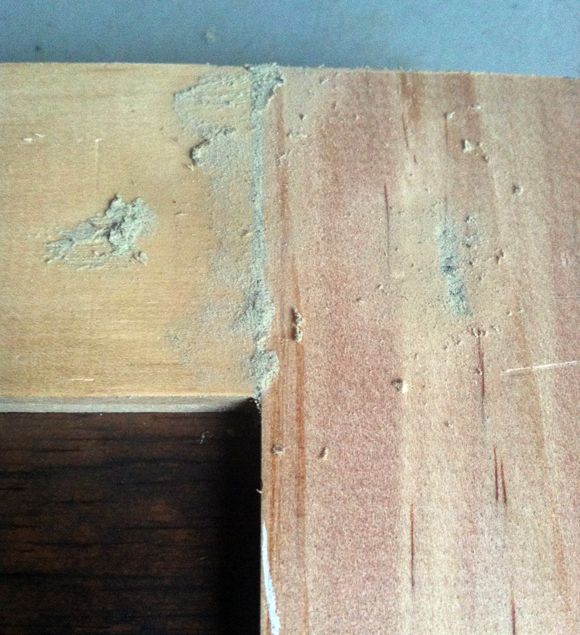
If there were any gaps on the outside lip of the cabinet fronts I filled those too.
I ended up using a full tube of this amazing, extra strength wood filler on my 20 cabinets and drawers. I found it was best to overfill and sand until smooth. You’re going to have to sand no matter what, so might as well get the filling done quickly and make sure you’re getting enough filler everywhere.


Can't wait to see the results! I'm sure they are gorgeous :)
ARGH – what a TEASE, Jenny!!
I even caught myself taking a little extra time before rolling to the next photo as I read your post only 'cause as I was über exited to see the finished result of those killer cabins! And then I HAVE TO WAIT! I.CAN'T.TAKE.IT!
GO GO GO JENNY! Ha ha ha!
Haha- totally thought we were getting some after photos! :) It's ok though, they look really great. That filler looks like it's awesome!
Great post! Can't wait to see the finished product as I plan to paint my kitchen cabinets next year.
I can't believe I'm this excited to see a stranger's kitchen cabinet doors. I appreciate the detailed progress shots, foggy or not!
These are going to amazing. I know people always tell you this, but I am truly amazed at your productivity with such a young family.
Wow! This is a crazy amount of work! You deserve a spa day after all this!
Cool! Drum roll…..
pve
This is a teaser post and I am on the edge of my seat in anticipation!
very much a tease post. I saw how you added the handles to the door too. Can't wait to see what else you did. We are doing our kitchen cabinets, but they are old cabinets that we just sanded and painted and put new handles on. Our kitchen will be very simple and rustic, but we are here in a small town in Patagonia so we do not need much! Love your blog, admire your ability to do so much, and be so positive and also very glad you are feeling better!
I'm constantly amazed at the things you do, wow!!
Two things,
1) Do you recommend that brad gun? I have an electric combo brad/staple gun and that thing has NEVER worked right- it fires out 1-4 staples/brads at a time!! Just makes me leery of others too.
2) Where do you store all your tools?? Especially when you were in the loft! It seems like you have every.single.tool you could possibly need- nail set, wow!
WOW! A lot of hard work but the cost savings and end result will be well worth it. Totally amazed with your handy woman work!
Definitely a teaser post! They are looking great so far!
I can't wait to see the results…that is a great tip about the saw blade. I only remember to take it into account about 50%. Sigh.
Our contractor didn't miter the trim on our new windows. His painter recommended auto bondo for filter. I filled, sanded, primed & painted. The trim turned out beautiful. Each window looked like the trim was one sold piece. Then the change of seasons arrived. Each contact point has cracked. I wish e would've used mitered corners. It would've been less work for me & would've allowed for expansion and contraction.
oooh, you little tease!
jo
I appreciate your way of demonstration and explaining the detailing procedure. I'm thinking about applying the same for my kitchen cabinets and I think its will be very grateful for me as well.
I appreciate your way of demonstration and explaining the detailing procedure. I'm thinking about applying the same for my kitchen cabinets and I think its will be very grateful for me as well.
I honestly don't know how you do it. Seriously, how did you learn to be so handy?? I could never do this stuff. Very impressed!
Wow, Jenny! It is looking so great already! Can't wait to see the next part! Way to go!
I am amazed at your talent, smarts, and hard work!
MD
Total TEASE! So excited to see how they turned out!
I love that your post makes it seem like, "oh, no big deal. I just re-did my kitchen. No Biggie."
You are so efficient! Excited to see priming and painting!! How do you fit your business in your remodel schedule? Just super curious how you manage it all?
I'm dying to do something like this in my straight from the 70's kitchen. Great diy with step by step pictures. i've been looking for a tutorial like this for a few weeks now!
just one question, what size wood did you use?
I see a deep spa manicure in your future–and well deserved, at that! This is crazy amount of work and I hope you're in this house a while. Fifteen years ago I moved into an old, big, hardwood-floored apartment that was in bad shape and fixed it up with the landlord's blessing. We lived there for ten years and saved up to buy a house. By the time we left the partment was so nice the owner of the builidng attempted to entice me with a move to the penthouse–5000 square feet–if I were willing to redo the space just as I'd done the apartment. We bought a house instead. Now, when I shovel or mow i wish I'd taken the penthouse… Looking forward to the next post. Paint on!
we all know the finished product will be amazing…but i just can't wait to see it! before & afters are my kryptonite!
Hi Jenny, This is looking wonderful! I have been wanting to do this to my cabinets too. What kind of wood did you use?
AAAH! I can't wait!!! :)
I'm on the edge of my seat for the next installment….
That is such a great, great idea – I can't wait to see how they come out. It really modernizes the cabinets! I have a client that has the same cabinets – but I couldn't even get her to let me paint them. Oh well – she's a bit up there age-wise, and she's done with a lot of decorating. I do more in her daughter's house (design and painting wise).
My expertise re cabinetry is adding crown molding to soffits above cabinetry and then faux wood graining the soffits and the molding to match the cabinet finish (especially if it's nice and in great condition). I've also added the crown molding above the soffits and painted and antiqued everything. It makes the cabinets look so much taller – more custom.
I am planning on doing a blog series of kitchen re-do's (and using more creativity than cash). I would love to include your cabinets in this. Let me know if this is OK?
Thanks…can't wait to see your finished kitchen cabinets!!
Linda
Jenny- you continue to amaze me. I still wont go near a saw. Then again I have a team of carpenters so I dont need to. Still, I have a lot of DIY's coming up and I'm going to look to you whenever I feel overwhelmed!
dying to see the end results! Hurry and post asap dang it.
This is exactly what I want to do in my kitchen..except my cabinet doors arent even real wood so it might not work :( I could enlist the hubby to built full doors though! hmm…anyway can't wait to see your results!!
I want to do the same thing in my kitchen! However, they are formica cabinets (80's) with oak trim at the top and bottom. The trim sticks up on the face of the cabinets by about 1/8"……I'm thinking I'm might be able to plane these off with a hand planer. Thank you for posting the tutorial…very helpful for my future project!
What type of wood did you use for the trim pieces?
I want to see the finished cabinets! Like, right now!