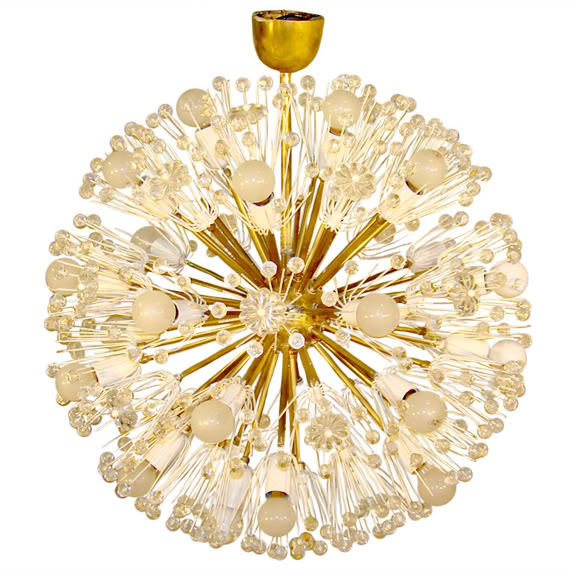
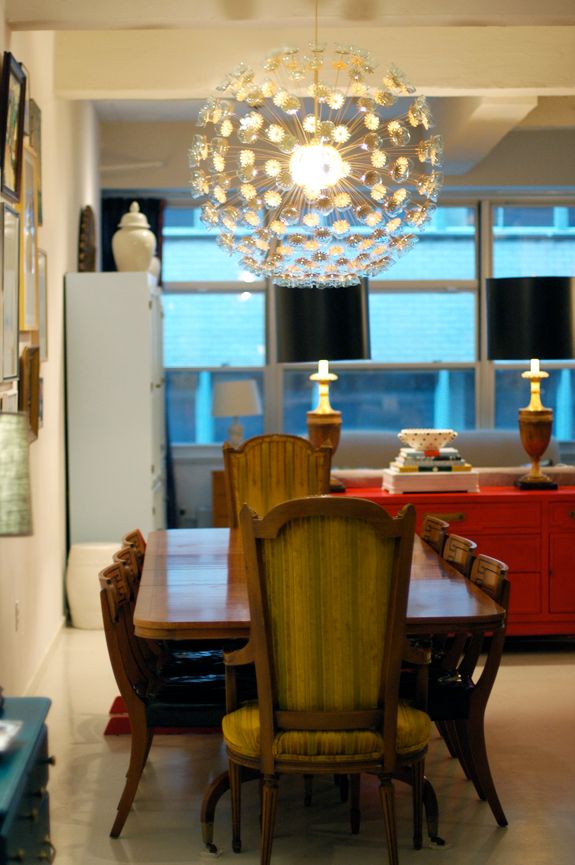
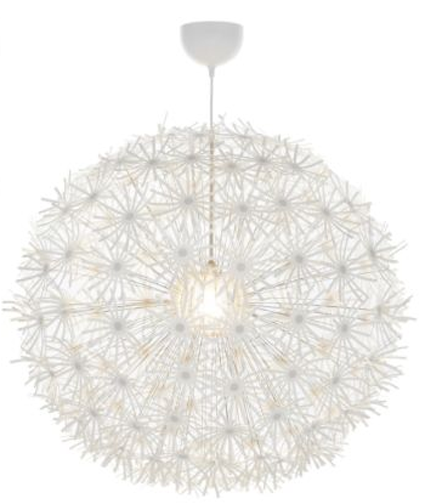
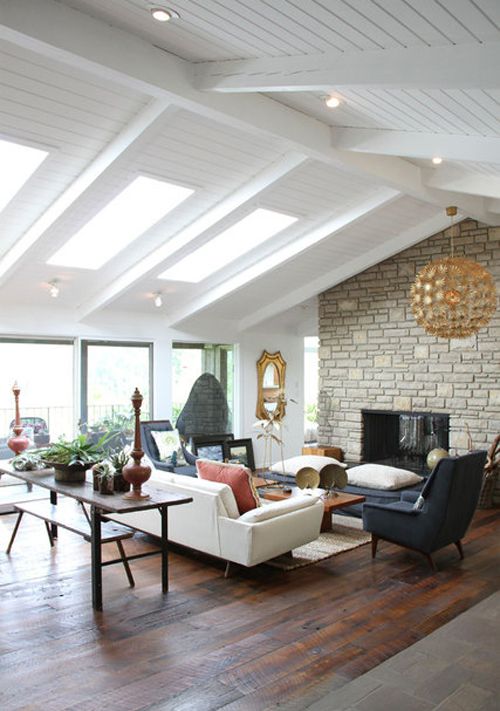
I’ve always dreamed of having a gorgeous sputnik chandelier, but they are usually on the smaller side and in the many thousands of dollars. I had planned on investing a little bit more of the house budget on the dining area’s light fixture because it would be basically the first thing you’d see when walking into our apartment. I wanted big and beautiful.
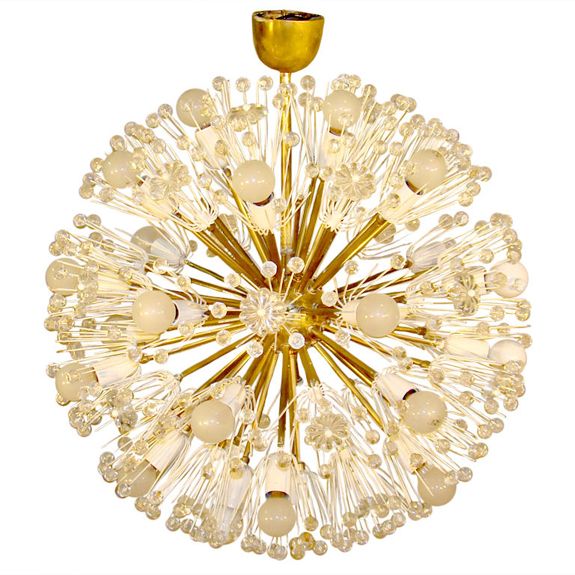
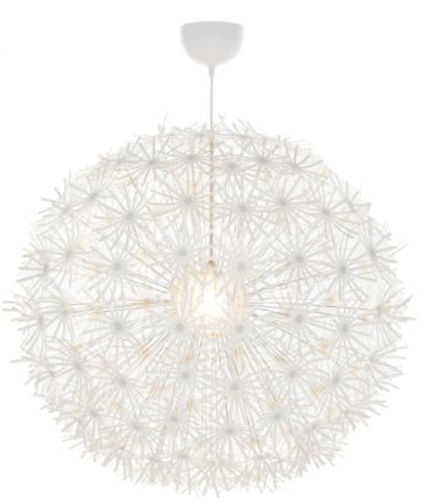
After deciding to buy the Gossip Girl sconces, I had sort of eaten up my lighting budget and needed to figure out something very inexpensive for the dining room. I thought the ubiquitous IKEA Maskros (which means dandelion in Swedish) might be a good base for a DIY sputnik.
I had some help from my Mom and Dad, who were in town visiting at the time. We busted out the entire project in a night and had the thing hung in the morning. I love projects like that!! (THANKS Mom and Dad! xo)
It’s a pretty simple project, with not a lot of tools required. I went with the 32″ diameter fixture because we have a big open space, but I would recommend the 22″ fixture (which is only $49!) for more traditional rooms.


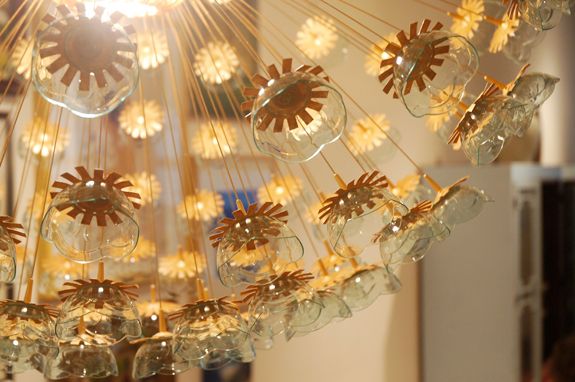
The white, plasticy paper flowers are about 5″ wide. This is totally personal preference, but the thing I don’t love the most about the Maskros in it’s original state is all the shadows the flowers create and I needed this fixture to be a functional light source first and foremost. So I played around a bit with the proportions to shorten the petals and decided I like a 2.5″ diameter best.

I used a clear (making it easy to find the center) plastic cup with a 2.5″ base to trace a circle on each of the flowers. A little tip: I find that projects with many steps of many multiples are done best and fastest by focusing on one step at a time. I traced all the flowers first. Then I cut all the flowers, etc. Don’t get ahead of yourself in the steps for the sake of accuracy and efficiency.


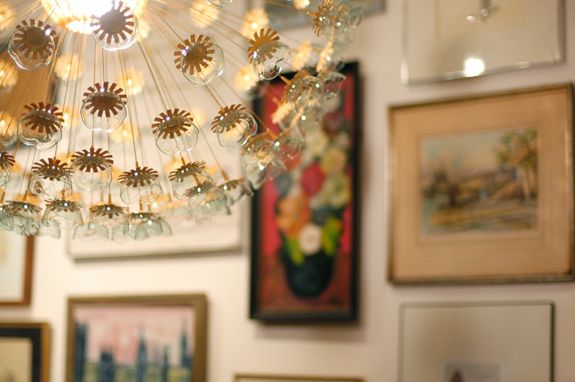
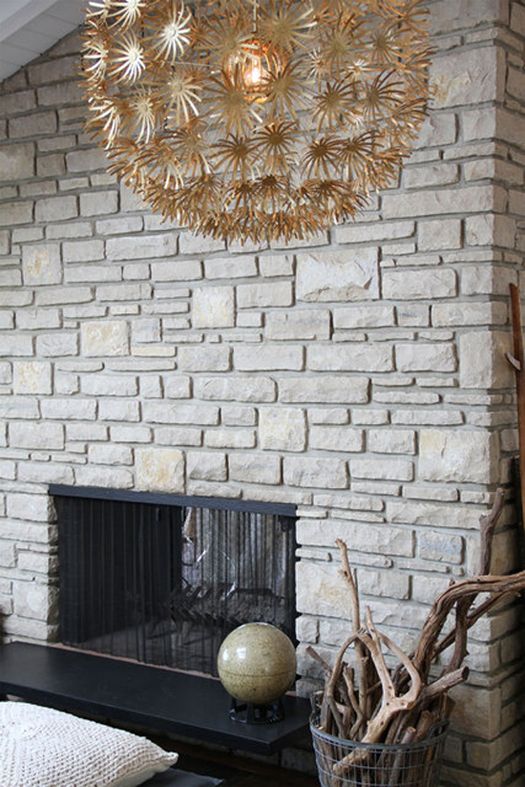
If the weather had been better and if I didn’t live in NYC, I totally would have spray painted the whole thing using Rustoleum’s metallic line in the Brass finish. But, I am actually really happy with the look of the hand painting. It didn’t take that long, and I think the end look is a little less flat than spray paint – more mottled, like real gilded metal.


Fabritac is hands down my favorite adhesive and it worked really well for this project. Super tight hold and a fast drying time. I needed only a small dollop on the bottom of each plate to attach the flower.


