Office

Copy Cat Design: Chic, Modern Desk

Colleen, who may have suckered me into buying a gingham dress, is back in action today with another killer copy cat post! I loved this room from Adore too! PS Colleen mentions Pinterest in her round up. Thought I would mention she is one of my favorite Pinners around. Follow her here. I have a…

Colleen, who may have suckered me into buying a gingham dress, is back in action today with another killer copy cat post! I loved this room from Adore too! PS Colleen mentions Pinterest in her round up. Thought I would mention she is one of my favorite Pinners around. Follow her here.

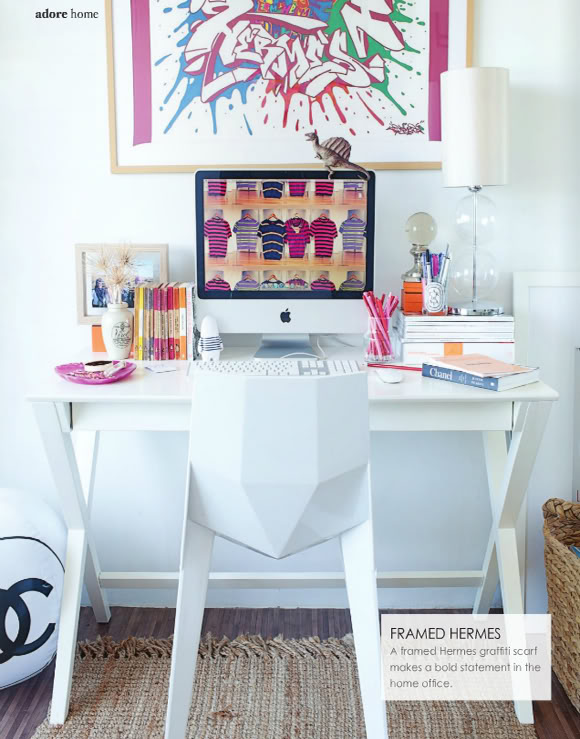
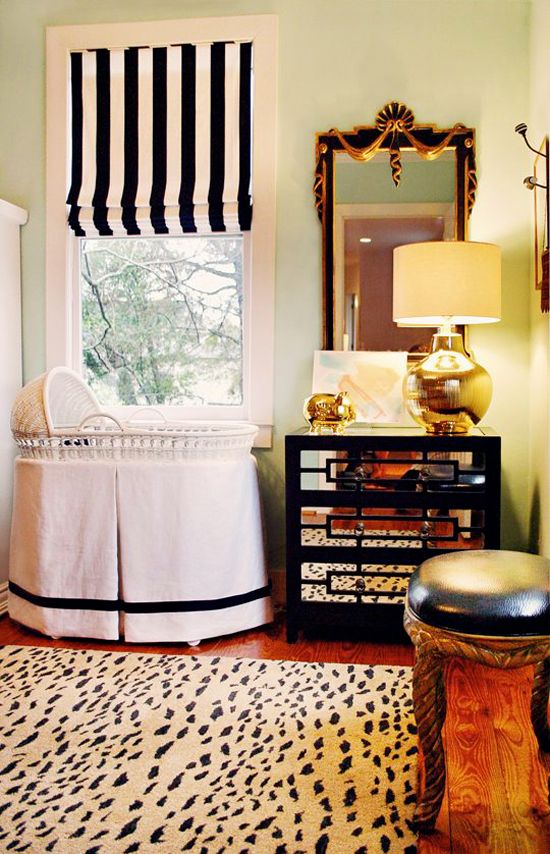
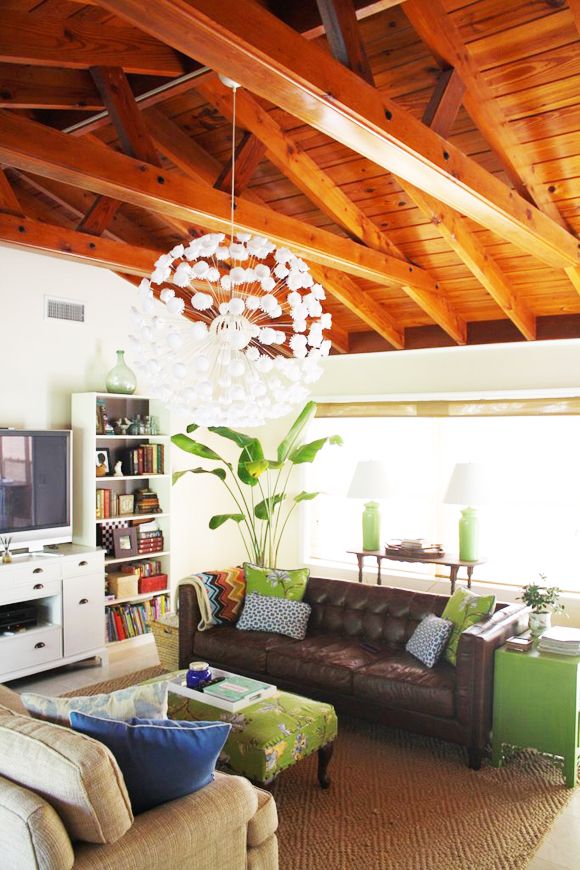
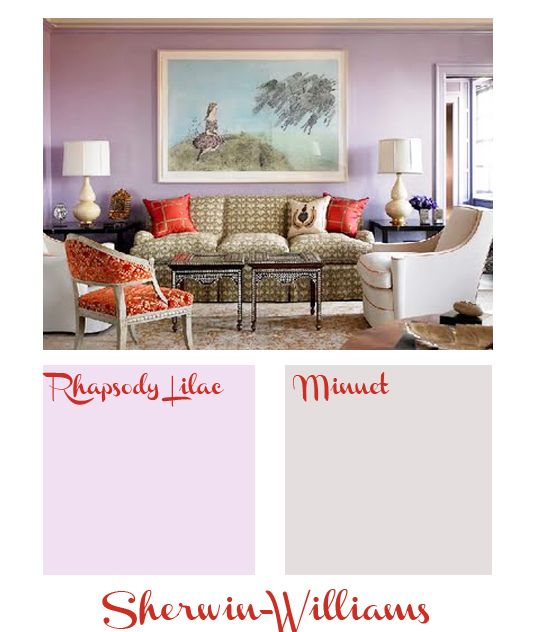
I have a confession. I really, really love office supplies. Walking into Container Store makes my knees buckle, and guys, I am not an organized person. So when I saw Claudia Stephenson’s Sydney office area in Adore magazine, I was a little smitten. 
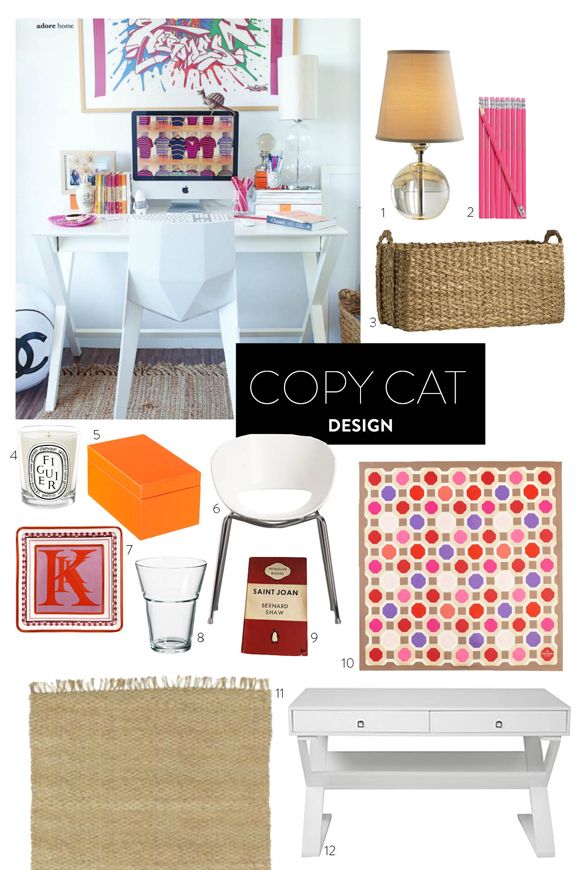
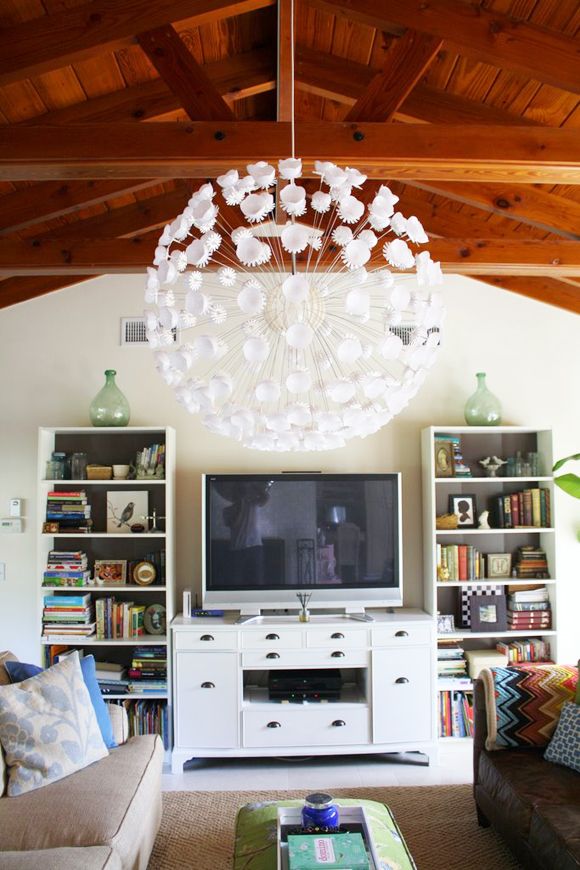
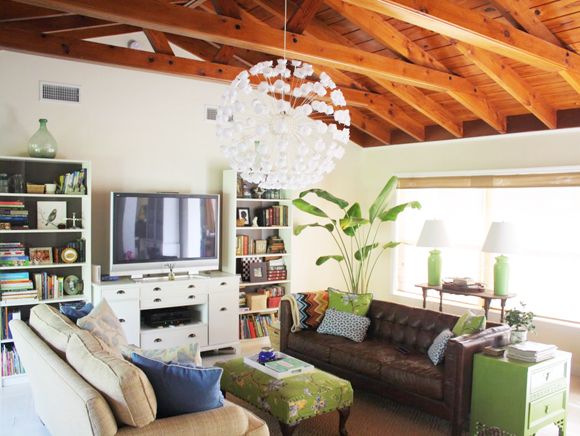
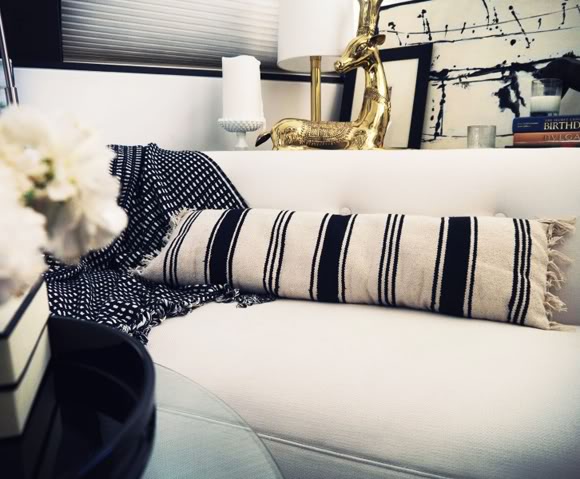
I love the glass ball lamp in the picture, but I’d settle for a lucite one too. Another option are these mini ball lamps–you get a pair for $220, which is quite the deal!
In my fantasy life, my pencils all match. The little things.
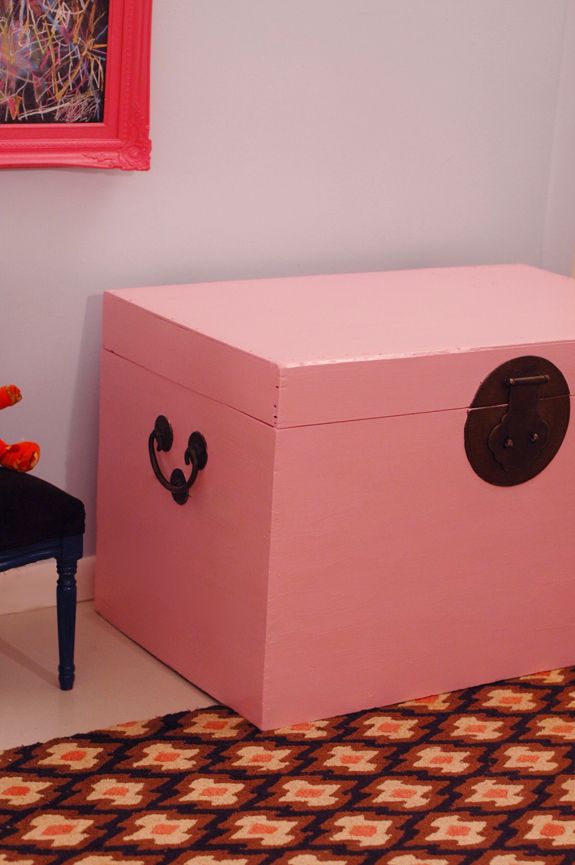
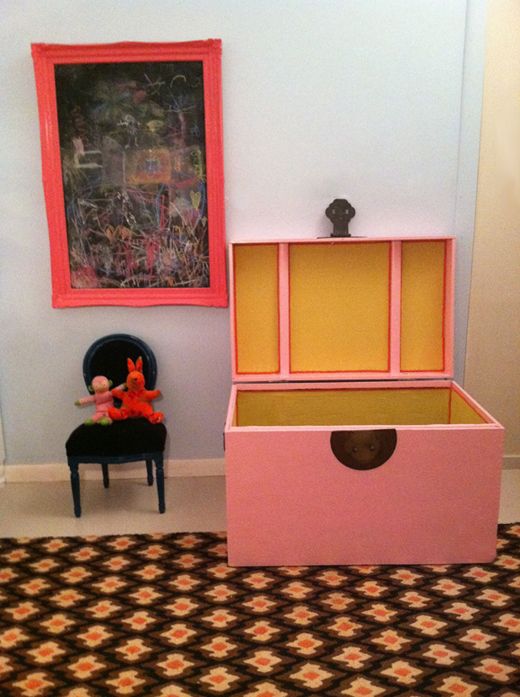
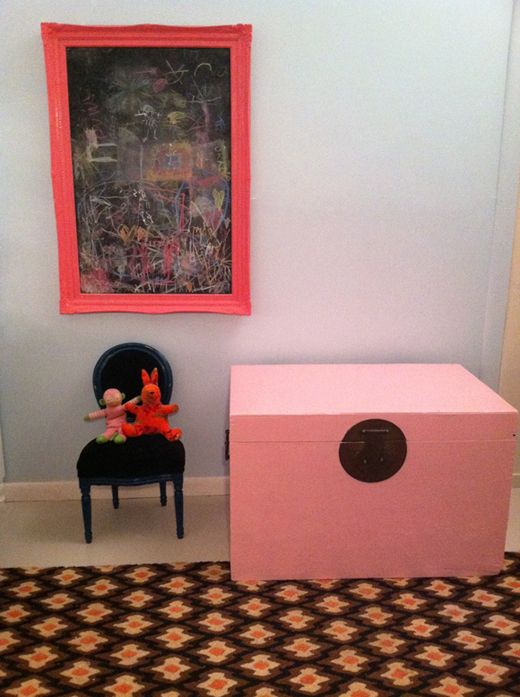
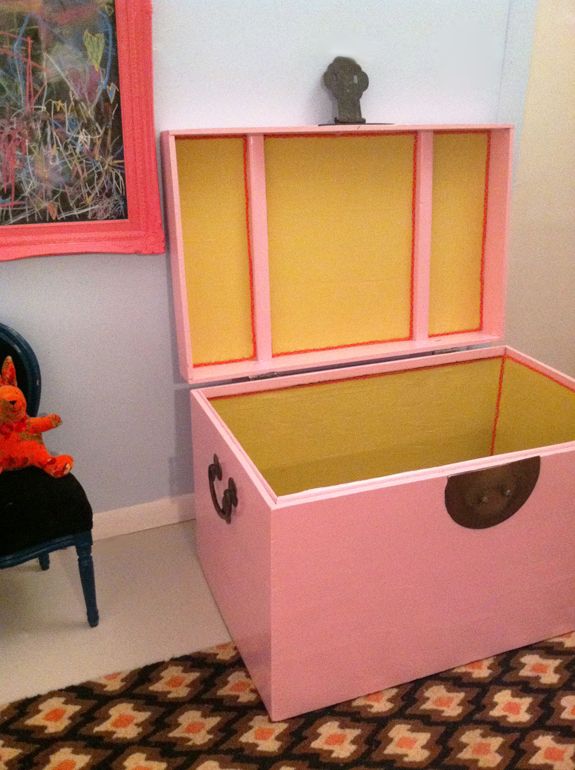
We should probably refrain from choosing bright pink for every storage container. Unless this is for a young girl, in which case I suggest you go wild. A simple, natural fiber storage basket adds just enough texture.
A little luxury for your workspace, that’s it!

Stash receipts and other not-so-pretty but necessary things.

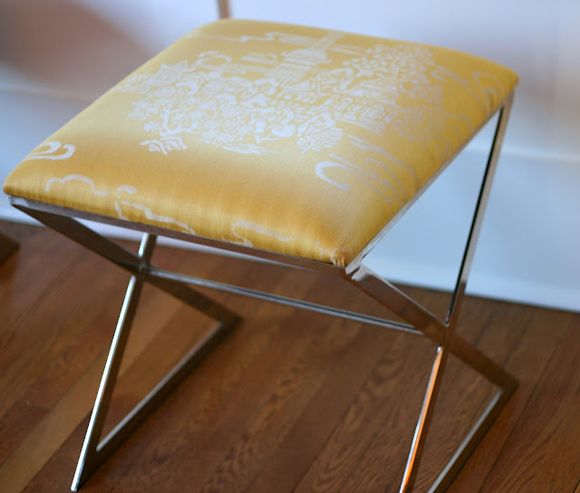
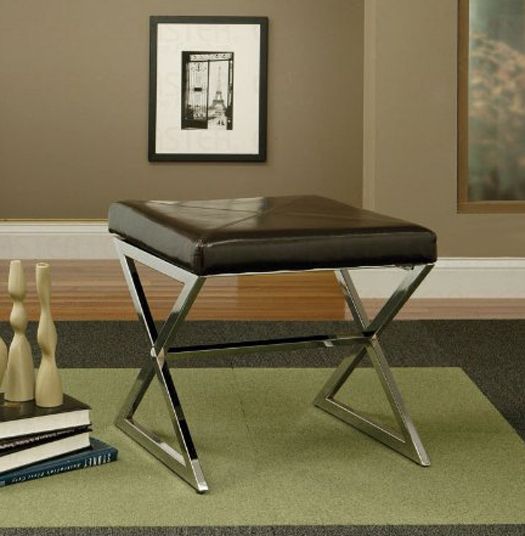
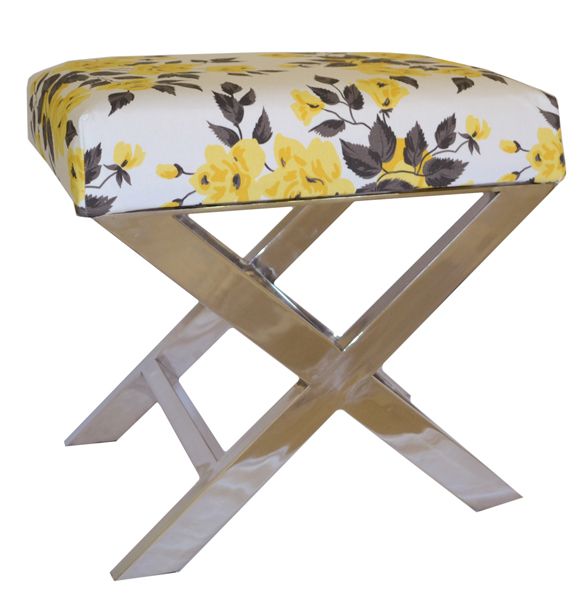
A little caveat: if you spend a significant amount of time at your desk, definitely invest in something more comfortable than a side chair. But plopping down for a little Pinterest session, I love this chair.
A place for the bits and bobs to live, like business cards.
Resist the temptation to buy a matching desk set and use non-office things, like votive holders, small vases, and drinking glasses, as pencil holders. 
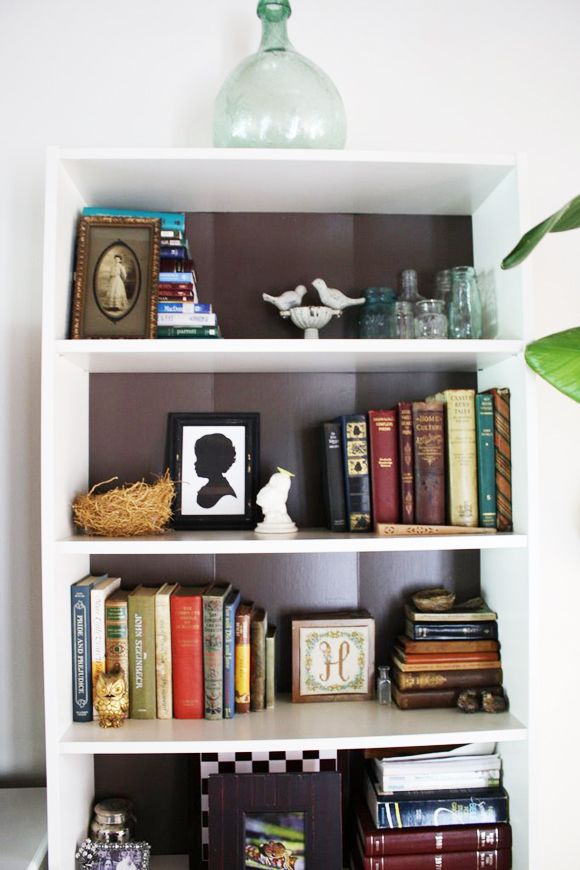
I dig the small collection of vintage Penguin editions in the image. Popping into used book stores is one of my favorite things, and you can always find some cool-looking covers.
Pretty square scarves make excellent art. This office uses a Hermes scarf, but I’m a little partial to this Kate Spade pattern!
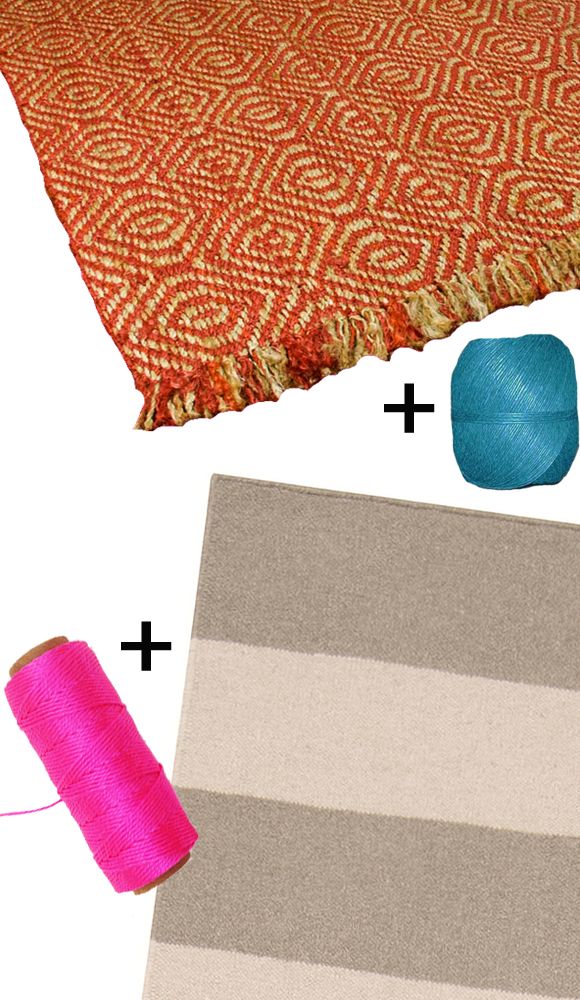
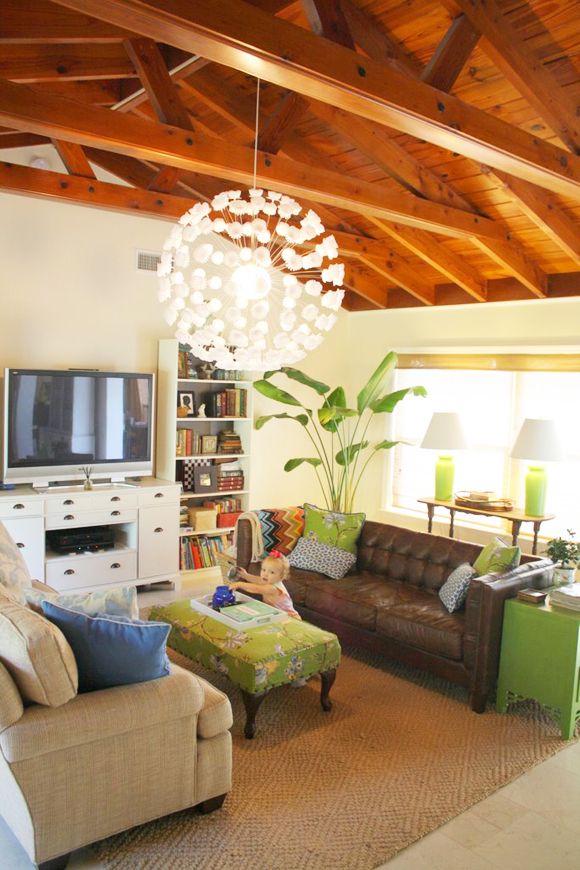
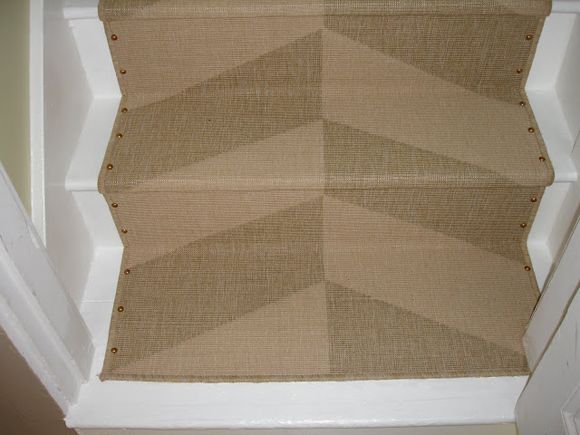
Ground all the color and slickness with a simple jute rug.
For an x-desk, I really like this one from Z Gallerie. But if you just want a simple white lacquer desk, nothing much beats the Parsons Desk from West Elm. 
Why Don't You

The Ties That Bind

I’ve been thinking a lot lately about the idea of binding together a handful of inexpensive/less expensive flat weave rugs to make a large custom size rug. I think the look would be super casual and boho. See how cool Amanda Peet’s rug looks? Here are a few less expensive small rugs and runners that…

I’ve been thinking a lot lately about the idea of binding together a handful of inexpensive/less expensive flat weave rugs to make a large custom size rug. I think the look would be super casual and boho. See how cool Amanda Peet’s rug looks?

Here are a few less expensive small rugs and runners that I think would look really great stitched together. Pricing listed below.

Overstock Patterned Sisal: $194 for four rugs to make an 8×10. This rug looks a little more on the rusty side in person. I’d love to see it paired with this pretty turquoise twine!
Overstock Nikolay Rug: Four runners makes an 8×10 for $374. And how perfect is the combo with neon pink twine?

IKEA Soften Rug: $150 for six rugs to make an 8×10. I think this would be a super dramatic and sophisticated look, with dark charcoal twine. I imagine it in a chic living room or a really cool office.
Pottery Barn Chindi Stripe : Make a 6×6′ rug to go under a round pedestal table for your breakfast nook. $236 for six rugs. (I really want this one!)

IKEA Andrup Rug: $140 for four rugs to make an 8×10. What a steal for a GREAT play room rug! I’m loving that sky blue jute twine!

West Elm Izmir Dhurrie: $206 to make a 5×7 rug. I would pair it with this neon yellow twine for a super cool little boys room rug. It’s outdoor material, so you can even hose it down! Keep some IKEA flokati throws handy for layered texture and comfort, though if you take a close look at all the images, the rug actually looks just like wool! I bet it’s softer than most outdoor rugs.

I can’t wait to try this idea out in our next place. It looks like such a simple over-under type stitch (blanket or whip stitch, maybe?). So very easy!
Kids Room

Skirted Bassinet

When I was pregnant with Evie, I meant to add a skirt to our simple white bassinet. I never quite got around to it before she was born, but if I had, it would look a lot like the one here. This lady NAILED it. Check out her whole nursery tour here and also a…

When I was pregnant with Evie, I meant to add a skirt to our simple white bassinet. I never quite got around to it before she was born, but if I had, it would look a lot like the one here. This lady NAILED it.

Check out her whole nursery tour here and also a few more photos on her blog.

PS Some people in the comments section of the Apt Therapy tour were all upset that this nursery is so grown-up looking. I think it’s lovely to have a more sophisticated space for children as long as everything is safe. And I think I feel that way especially about a nursery, since the parents will be the ones with the most vivid memories of time spent in that room! What do you think?

Furniture

If you’re scared of DIY upholstery…

I got this settee off craigslist a while back and when we bought the Chesterfield I didn’t really have a place for it. The old yellow silk upholstery on the frame was in pretty good shape, but the cushion was bad. The fabric was worn completely through and the feather cushion was a little wimpy…

I got this settee off craigslist a while back and when we bought the Chesterfield I didn’t really have a place for it. The old yellow silk upholstery on the frame was in pretty good shape, but the cushion was bad. The fabric was worn completely through and the feather cushion was a little wimpy and old, and just needed to be replaced.

We almost got rid of the settee but ended up keeping it and I’m so glad we did! I found this black cut velvet on white silk at Mood for $20 a yard and bought the whole bolt (ended up being a little over six yards, which will be *just* right).

My upholsterer quoted me $700 to redo the entire settee, but just to do the cushion (down-wrapped foam) was $250. This is such a great option for beginner DIY upholsterers or tired/lazy DIYers like me! Smoothing and stapling fabric against a frame is not that stressful, but sewing a cushion can get a little tricky!

Once I realized the new foam and feathers would cost me about $150 in materials, paying a professional a little extra to do the hard part was a no-brainer.

I’m hoping to get to the frame upholstery done this week. I pulled off some of the old welting and took out a few inches of staples yesterday to see what I was working with.

The wood is in pretty rough shape – lots of staple and nail damage from about 150 years of upholstery jobs. I might have to do some wood filling here or something.

I’m excited to get this one done and start enjoying the sofa again!
Furniture

If you're scared of DIY upholstery…

I got this settee off craigslist a while back and when we bought the Chesterfield I didn’t really have a place for it. The old yellow silk upholstery on the frame was in pretty good shape, but the cushion was bad. The fabric was worn completely through and the feather cushion was a little wimpy…

I got this settee off craigslist a while back and when we bought the Chesterfield I didn’t really have a place for it. The old yellow silk upholstery on the frame was in pretty good shape, but the cushion was bad. The fabric was worn completely through and the feather cushion was a little wimpy and old, and just needed to be replaced.

We almost got rid of the settee but ended up keeping it and I’m so glad we did! I found this black cut velvet on white silk at Mood for $20 a yard and bought the whole bolt (ended up being a little over six yards, which will be *just* right).

My upholsterer quoted me $700 to redo the entire settee, but just to do the cushion (down-wrapped foam) was $250. This is such a great option for beginner DIY upholsterers or tired/lazy DIYers like me! Smoothing and stapling fabric against a frame is not that stressful, but sewing a cushion can get a little tricky!

Once I realized the new foam and feathers would cost me about $150 in materials, paying a professional a little extra to do the hard part was a no-brainer.

I’m hoping to get to the frame upholstery done this week. I pulled off some of the old welting and took out a few inches of staples yesterday to see what I was working with.

The wood is in pretty rough shape – lots of staple and nail damage from about 150 years of upholstery jobs. I might have to do some wood filling here or something.

I’m excited to get this one done and start enjoying the sofa again!
Home Tours

Room Tours: Kristin’s Living Room (and white sputnik!)

Kristin has a lovely home in Florida with gorgeous beamed ceilings. She emailed me recently asking for advice on a chandelier and whether or not I thought my sputnik DIY would work in her space, with her wood beams. I suggested going with a white versions and I’m so thrilled with Kristin’s results. Don’t the…

Kristin has a lovely home in Florida with gorgeous beamed ceilings. She emailed me recently asking for advice on a chandelier and whether or not I thought my sputnik DIY would work in her space, with her wood beams. I suggested going with a white versions and I’m so thrilled with Kristin’s results. Don’t the white florets look like milk glass? Love! 

Here are some photos of her living room (and one of her breakfast nook – so cute!). Sources listed at the bottom.

sofa table – antique
woven tray on table – a gift from a shop in our town called Decorative Arts
green lamps – one of my favorite vintage finds
green end table – purchased for $8.00 from the Salvation Army and painted!  I love the greek key detailing
small chinoisserie planter – found at an antique store
chinoisserie bird coasters – purchased years ago at Anthropologie
brown leather tufted couch – the company is four hands but I purchased from Decorative Arts (this couch and I were love at first sight! :))
throw pillows on both couches – feather pillow same from T.J. Maxx and were recovered with fabric from Calico Corners
throw blanket – Missoni for Target (I was one of those crazy people that were lined up early in the morning at my local Target) :)
Ottoman – purchased at Home Goods, and reupholstered by my amazing friend Cori who first introduced me to LGN! (fabric from Calico Corners)
white mirrored tray on ottoman – Target and then we repainted it white
tweed couch – company unknown.  Purchased at a boutique home store in Tampa, Fl called Magnolia
Bookshelves – Billy Book cases of course!  Inspired by Jenny, we bought the white bookcases and then painted the backs in a dark brown color.  We then styled them with sentimental objects such as vintage books passed down from family, photos, a painting my husband made for me, silhouette of my son Hudson, etc…
T.V. stand in the middle of the bookshelves – we scored this piece at a garage sale…  It was formerly a buffet.  We repainted it off white to match the bookshelves, took one drawer out to accomodate the electronics and replaced the hardware.
little glass bottle with scent diffuser – Anthropologie
Large green glass jars on top of bookshelves – Decorative Arts
Area Rug – Diamond Jute from Pottery Barn
Children’s chairs – Pottery Barn Kids in Sherpa ( I think I sent you a picture of Harper enjoying it! )
Small table in between children’s chairs – a vintage find
Entry mahogony table – found this years ago at an antique store with knob and all!
lamp on table – vintage ginger jar lamp; shade from decorative arts
small dragonfly tray on entry table – John Derian tray
potted plant – Anthropologie
floor lamp next to children’s chairs – Pottery Barn
bird pictures on wall near children’s chairs – these are antique audobon prints.  I repainted the frames gold.
large wooden basket under entry table – antique basket found years ago at the Rennigars Antique show in Mt. Dora, Fl
the window woven roman shades throughout the room – custom made from Levelor.  
Mirror on fireplace – Honeycomb Mirror from Pier 1 (inspired by Jenny and February’s Southern Living).  I think that this mirror is even more gorgeous in person.  It’s beautiful!
Wooden duck on hearth – carved by my grandfather when I was a child
Chandelier – Ikea Maskros DIY (courtesy of Jenny and Little Green Notebook!) She recommended to keep the chandelier white and use the white fleur cups.  I love, love, love this light fixture!
Living Room

Room Tours: Kristin's Living Room (and white sputnik!)

Kristin has a lovely home in Florida with gorgeous beamed ceilings. She emailed me recently asking for advice on a chandelier and whether or not I thought my sputnik DIY would work in her space, with her wood beams. I suggested going with a white versions and I’m so thrilled with Kristin’s results. Don’t the…

Kristin has a lovely home in Florida with gorgeous beamed ceilings. She emailed me recently asking for advice on a chandelier and whether or not I thought my sputnik DIY would work in her space, with her wood beams. I suggested going with a white versions and I’m so thrilled with Kristin’s results. Don’t the white florets look like milk glass? Love! 

Here are some photos of her living room (and one of her breakfast nook – so cute!). Sources listed at the bottom.

sofa table – antique
woven tray on table – a gift from a shop in our town called Decorative Arts
green lamps – one of my favorite vintage finds
green end table – purchased for $8.00 from the Salvation Army and painted!  I love the greek key detailing
small chinoisserie planter – found at an antique store
chinoisserie bird coasters – purchased years ago at Anthropologie
brown leather tufted couch – the company is four hands but I purchased from Decorative Arts (this couch and I were love at first sight! :))
throw pillows on both couches – feather pillow same from T.J. Maxx and were recovered with fabric from Calico Corners
throw blanket – Missoni for Target (I was one of those crazy people that were lined up early in the morning at my local Target) :)
Ottoman – purchased at Home Goods, and reupholstered by my amazing friend Cori who first introduced me to LGN! (fabric from Calico Corners)
white mirrored tray on ottoman – Target and then we repainted it white
tweed couch – company unknown.  Purchased at a boutique home store in Tampa, Fl called Magnolia
Bookshelves – Billy Book cases of course!  Inspired by Jenny, we bought the white bookcases and then painted the backs in a dark brown color.  We then styled them with sentimental objects such as vintage books passed down from family, photos, a painting my husband made for me, silhouette of my son Hudson, etc…
T.V. stand in the middle of the bookshelves – we scored this piece at a garage sale…  It was formerly a buffet.  We repainted it off white to match the bookshelves, took one drawer out to accomodate the electronics and replaced the hardware.
little glass bottle with scent diffuser – Anthropologie
Large green glass jars on top of bookshelves – Decorative Arts
Area Rug – Diamond Jute from Pottery Barn
Children’s chairs – Pottery Barn Kids in Sherpa ( I think I sent you a picture of Harper enjoying it! )
Small table in between children’s chairs – a vintage find
Entry mahogony table – found this years ago at an antique store with knob and all!
lamp on table – vintage ginger jar lamp; shade from decorative arts
small dragonfly tray on entry table – John Derian tray
potted plant – Anthropologie
floor lamp next to children’s chairs – Pottery Barn
bird pictures on wall near children’s chairs – these are antique audobon prints.  I repainted the frames gold.
large wooden basket under entry table – antique basket found years ago at the Rennigars Antique show in Mt. Dora, Fl
the window woven roman shades throughout the room – custom made from Levelor.  
Mirror on fireplace – Honeycomb Mirror from Pier 1 (inspired by Jenny and February’s Southern Living).  I think that this mirror is even more gorgeous in person.  It’s beautiful!
Wooden duck on hearth – carved by my grandfather when I was a child
Chandelier – Ikea Maskros DIY (courtesy of Jenny and Little Green Notebook!) She recommended to keep the chandelier white and use the white fleur cups.  I love, love, love this light fixture!
Furniture

DIY Inlay Dresser

I love mother of pearl inlay furniture. The layer of texture it gives to a room is so COOL, but is it really worth the price tag? Larger pieces are several thousand dollars (sometimes more than $10,000 for repros!)   I bought this dresser at the flea market last fall for my girls bedroom. It…

I love mother of pearl inlay furniture. The layer of texture it gives to a room is so COOL, but is it really worth the price tag? Larger pieces are several thousand dollars (sometimes more than $10,000 for repros!)


I bought this dresser at the flea market last fall for my girls bedroom. It fit perfectly between their twin beds and made a great joint nightstand. I thought the size and shape made this piece a great candidate for an inlay DIY. I was super excited when Sherwin-Williams invited me to join a group of talented bloggers to spread the word about National Painting Week. Each of us was assigned a color and I was thrilled to get purple.


Inspired by the lilac wall color in this amazing Katie Ridder room, I chose Rhapsody Lilac for the main color of the dresser and Minuet for the highlights/faux inlay.
 

I used Sherwin-Williams waterborne interior alkyd enamel in both shades. It wears as well as full on oil-based paint, but cleans up like latex paint. It’s low VOC and there is hardly any smell, (though you’ll still want to keep your windows open or do the painting outside). It really is a great paint. It’s made for trim and doors, but the hard-wearing formula is awesome for furniture as well.


I lightly sanded the dresser and gave it two coats of Rhapsody Lilac in semi-gloss with a foam mini-roller. Once the base coats were fully dried, I took a glance at some inspiration inlay pieces online and just started doodling with an artists brush. I tried a couple different brushes and quickly discovered you only need one for this project – a 1/4″ wide angled artist’s brush. 

You can see on most of the real inlay pieces that the patterns are simple – a couple of circular stylized flowers with vines and simple leaves, all inside a border.
It feels like an intimidating project, but I found that the more relaxed you are, the better and more authentic the result is. I was over-thinking the design on the top of the dresser and that’s my least favorite section now.  Also, don’t go over the leaves twice. The real bone or mother of pearl inlay pieces have a lot of color variation, so you don’t want solid white design here either. The real inlay patterns are often not exact and are even a little crooked. Don’t worry about perfection here. No painters tape needed!
Here’s a little 10 second video to give you the sense of the speed of the project. It takes a couple hours probably to cover every surface with the doodling, but it feels like quick, light work.
Can you hear my kids chattering in the background? This was happening on the other side of dresser :)
Once all the big surface designs were done, I went back and added small leaf patterns to all the edges and sides. This was the fun part for me and the look really started coming together with the addition of the smaller patterns.
It doesn’t really matter what design you paint or where or how, the idea is just lots of movement and pattern, in varying shades of white. The result is folksy and pretty charming. Perfect for a child’s room!
Oh – and a quick note about the knobs. After I started the project I realized I would need new knobs to replace the super traditional brass pulls. I was planning to just pick up some of those round unfinished wood knobs, but then I remembered I had a bunch of these green glass knobs from the clearance section at TJ Maxx. They already had a flower design on the fronts, so I just painted those white.

I love the dimension the knobs give!
One of my girlfriends stopped by our place last week, coincidentally after some shopping at ABC where she saw lots of inlay furniture in pastel shades. She noticed the dresser as she walked past the girls room, gasped, said “Oh no you didn’t” as she ran up to get a closer look at the inlay. Trickery = Success! Insert evil laugh and tapping together of finger tips! 
Later my friend confessed she was pretty confused at the thought of me spending five grand at ABC. She said that’s not really my style, which I *think* I’ll take as a compliment. :)   I’m happy with the dresser, even though it’s clearly not perfect, and super glad I didn’t have to spend thousands to get the inlay look.  Especially for something in my kids’ room! 
 
Have you checked out the other National Painting Week participant projects? Tomorrow is Aicia and Bruno from Curbly, so be sure to pop over there in the morning.
Also, I just wanted to thank you guys for all the sweet comments and emails about our super sick Gracie girl. I’m happy to report she is on the upswing today. Thanks for the suggestions and for giving me a little time off to take care of her. Have a GREAT weekend! xoxo
Inspiration

Affordable X benches

Well, we’ve had a scary couple of days! The girls got strep last week. Grace’s was the worst and we thought at one point hers had moved to Scarlet Fever because she was pink from head to toe and so sick, but it turns out she has a horrible allergy to amoxicillin. She is having…

Well, we’ve had a scary couple of days! The girls got strep last week. Grace’s was the worst and we thought at one point hers had moved to Scarlet Fever because she was pink from head to toe and so sick, but it turns out she has a horrible allergy to amoxicillin. She is having a really rough week with the hives and swelling – I’ve never seen anything like it. Poor thing. Anyway, sorry for the silence here and apologies if I owe you an email. It actually feels really nice to sit down at the computer and take a break from sick kids. :/

I love this image above. Partly because I’m just head over heels for Jane Churchill’s Rossini fabric (sadly, now discontinued). But how easy would it be to recreate this look with a wood-base x bench from Target or amazon? These go from $50-150 usually and are easily customizable.
This longer X-bench ($116 from Overstock) is a great price and has lots of potential.
Add a fun pattern to the top like the ladies from Living Livelier did.
Oh my goodness. I love this orange/tweed combo!
And why not gold or silver leaf the legs?
Jan Showers

This bench has been tricked out dozens of times. It was available through Sears/Kmart for about $45 and is currently unavailable, but might come back. So keep an eye out!
Caitlin Creer used the Sears benches here:

And Camila did too, here:
And Shannon Berrey used them here, in this show house. Love the slip cover take!
The crafty sisters found their stools at target and added extra foam to the tops for more height. Love the trim too.
This blogger used the Target benches for her ikat version (I used that same fabric here in this project)
This bench is another great base option ($73 from Amazon).
I think this long bench ($128), or the first one above from Overstock, would look great tufted with nail head trim! Maybe white linen, brass nails and a soft gray paint on the legs?
I think you’d end up with something close to this bench from Dering Hall (worth several thousand!)
And if you’re looking for a little sparkle, take a look at what Naomi did with a scrap of Donghia fabric and a Worlds Away bench!
This chrome bench is only $99 and has a very similar feel to the World’s Away stool.
Love the boxed edge here.
And what would a post here be like without a floral option? Good ol Rubie Green.
bench available here
I’ve noticed designers sort of moving away from the ubiquitous fabric-covered legs version and I think legs with a cool shape or interesting paint treatment helps to keep the look fresh. That said, I don’t know that I’ll ever tire of the look completely. Feels pretty classic and I just love using benches – I put one or two in almost every room I decorate. They are super functional (extra seating in a living/dining room, a suitcase stand in a guest room, a nice place for parents to rest in a bathroom while bathing kids, etc). Benches also help add dimension and layering to a room.
Have you jazzed up an inexpensive x bench? Or do you have your eye on an affordable version?
Okay, back to disinfecting my whole house!
Musings

New Bergere Chairs

Now that we’re probably moving to a bigger space this summer (I’ll share news as soon I can – don’t want to jinx it!), I’m having a hard time passing up furniture deals. How could I not get these cute little chairs last weekend? They were only $175 for the pair and are surprisingly comfortable…

Now that we’re probably moving to a bigger space this summer (I’ll share news as soon I can – don’t want to jinx it!), I’m having a hard time passing up furniture deals. How could I not get these cute little chairs last weekend? They were only $175 for the pair and are surprisingly comfortable for their petite size. Wouldn’t these be perfect bedroom chairs?

The green fabric is super old and all snagged, so the chairs need new upholstery STAT. I’m thinking I’d like to do a more neutral fabric so I can go with something fun for our windows (maybe yellow drapes like these?).
I’m not usually into using a different fabric on chair backs, but I might like it here.
The first row below shows some paint options I’m considering for the frames. Links are listed below the round up. There’s a mix of high and low fabrics here. For the pricier Kelly Wearstler fabrics, always try checking eBay or etsy for yardages before paying the huge mark up online. These fabrics also often turn up at fabric outlets and in upholsterer’s remnant bins.
Do you have any gray or black/white patterns you’re really loving these days?
Paint colors:
1) Benjamin Moore Gunmetal 2) BM Gray Pinstripe 3) BM Silvery Milk 4) Sherwin-Williams Dorian Gray
Fabrics
Musings

IKEA Rugs

Hooray! The weekend is upon us! I hope you have lots of fun things planned. I’m going to try and squeeze in a trip to IKEA. Check out these two great projects using super affordable IKEA rugs: 1) The Glamourai used one of those like $3 throw rugs to make a super chic long lumbar…

Hooray! The weekend is upon us! I hope you have lots of fun things planned. I’m going to try and squeeze in a trip to IKEA. Check out these two great projects using super affordable IKEA rugs:

1) The Glamourai used one of those like $3 throw rugs to make a super chic long lumbar pillow. She just folded and whip-stitched up the side!
2) I love this stair runner DIY over at Loft and Cottage. Perfection with the nail head! And it’s hard to go wrong with the neutral pattern in the Hessum rugs. If you want something more colorful (Dash and Albert style) this runner is so great-looking in person.
Two other tried and true IKEA rugs for me have been the black and white striped flat weave and the Tarnby jute (only wish it were larger and a little softer!)
What are your favorites? And have you ever used an IKEA rug to make something extra special?
Furniture

Toy Box Redo

My approach to toy organization is pretty simple compared to the systems some of my super organized friends have. Books go on the shelf, small toys go in the fabric bins and large toys go in the big toy box. It’s been our system for ages and it works for us. The first toy box…

My approach to toy organization is pretty simple compared to the systems some of my super organized friends have. Books go on the shelf, small toys go in the fabric bins and large toys go in the big toy box. It’s been our system for ages and it works for us.

The first toy box we had was a clearance aisle find from TJ Maxx or Marshalls and it lasted us several years then finally kicked the bucket during the move to NYC (like, it broke in the truck I think). Then oddly enough the day we moved in, our neighbor across the hall was hauling this gigantic chinese chest out to the curb and I did the awkward – ‘Hi nice to meet you! What’s that? what are you doing with it? So you don’t want it any more?’ conversation. What a lousy first impression right? #embarrassing
Also embarrassing is that the chest has seen no improvements in almost two years other than an occasional wipe down. I know it doesn’t look it, but it is super clean, just very old and beat up.
I’ve been pumping out a couple projects for the girls room this week though, so the toy box finally got some attention yesterday. I wiped it down again, filled the (many) cracks with wood filler, and then painted it with Sherwin Williams’ In the Pink.
I finished the first coat of paint, stood back and had a weird deja vu moment. Then I suddenly remembered this image from Sibella Court/Vogue Living:
What the WHAT with that box color! It’s so weird how ideas seep into our subconscious!
Since the toy box lid is open 99% of the time, I wanted to do something fun with the lining of the trunk. I thought about just painting it a contrasting color, but I had a bunch of this chartruese linen on hand and I thought it looked so pretty with the pink. I got both the linen and the orange/magenta braid trim at SAS in Phoenix, AZ (one of the greatest bargain trim stores EVER – I practically clean them out each time we visit home).
Using my trusty staple gun, I just ran a line of straight staples along the top of the fabric inside the trunk, then along the left side, then I pulled tight and stapled down the right side. Then I pulled really tight and stapled along the bottom. (basically my approach to every upholstery project is the same)
It’s okay if your lines aren’t perfect – that’s what the trim is for. The goal here is tight fabric.
Once I finished the inside of the box, I did the three panel insets in the top of the lid too.
Then I used a little Magnatac to glue the trim on top of the staples. Magnatac is super-strength, so I think it will hold up well, but I’m also thinking about putting in a few small nails to keep the trim extra secure.
I love the way the toy box looks opened and closed now. I’m so sad I let this project go undone for so long.
I’m giving the glue a night to fully dry, so the girls will be able to enjoy another morning of toys all over the dining room floor. I guess this was a good project for spring break :)
This error message is only visible to WordPress admins
There has been a problem with your Instagram Feed.
© Jenny Komenda. All Rights Reserved.
Site by