Uncategorized

Xerographica, My New BFF

I don’t have the greenest thumb, so I try to stick with house plants that are very forgiving. I’ve discovered the easiest plant to care for of all is a Xerographica, or an air plant. They need only a little water once or twice a month and THEY DON’T NEED TO BE PLANTED! You can…

I don’t have the greenest thumb, so I try to stick with house plants that are very forgiving. I’ve discovered the easiest plant to care for of all is a Xerographica, or an air plant. They need only a little water once or twice a month and THEY DON’T NEED TO BE PLANTED! You can pick them up out of their container and move them to another spot or vessel without any mess. They’re basically the perfect plant for styling, especially with their soft sagey curly stems! So pretty! I bought a couple for my mom’s house and we put one in her kitchen and another in her guest bath
 photo IMG_0062.jpg
 photo IMG_0011.jpg
 photo IMG_9503.jpg
I like the ease of putting air plants in pretty little containers best, but there are some really cool ideas out there for displaying air plants in unique ways.

There are so many things to love about these plants – gorgeous, easy to care for, last forever, etc – but the icing on the cake is they are super cheap if you buy them at the right places! The teeny tiny ones cost almost nothing:

 photo IMG_3253.jpg

They grow fast, so don’t worry too much about paying for the bigger-sized plants at West Elm (which usually run $20-25 each), just grab a few of these inexpensive ones and bunch them together as they grow.

1 – 5 for $13  //  2 – Starter kit for $32  //  3 – 5 for $9  //  
4 – 1 pretty pink for $6  //  5 – 10 for $16  //  6 – Variety 12 for $20

Have you ventured into the world of air plants yet? I’d love to see how you’re using them!

Uncategorized

Five More Minutes – Hosting an Awards Show Party

Do you know what the best kind of party is? An awards-show-watching party! You get to spend a few hours with your favorite people AND there is built-in entertainment, and of course lots of lounging….and eating. :) We had a couple of friends over to watch the Emmy’s this weekend and I wanted to spruce…

Do you know what the best kind of party is? An awards-show-watching party! You get to spend a few hours with your favorite people AND there is built-in entertainment, and of course lots of lounging….and eating. :)

 photo IMG_1920.jpg

We had a couple of friends over to watch the Emmy’s this weekend and I wanted to spruce things up a little in our family room beforehand. I swung into Target on Saturday to shop their new *AMAZING* fall line, which I’m sure you’ve seen all over social media. It’s good, guys. Real good. I think it only takes a few key additions – and just about five minutes of effort – to make your home party-worthy! Here are my best party-prep tips:

 photo IMG_2150.jpg

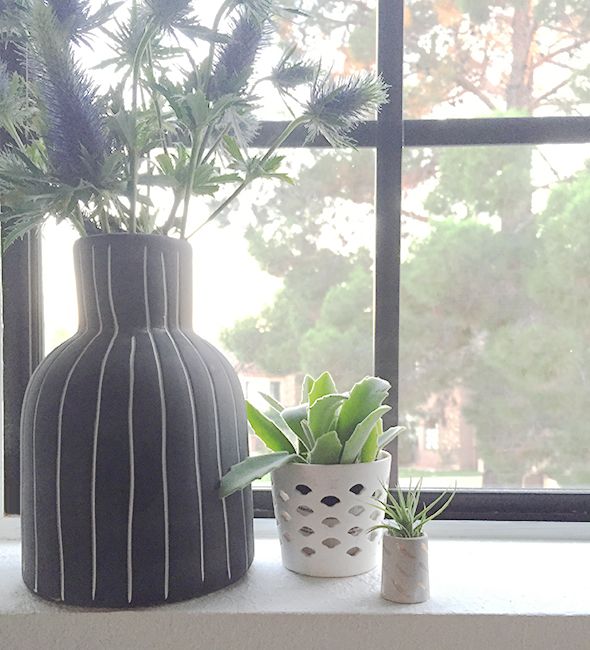
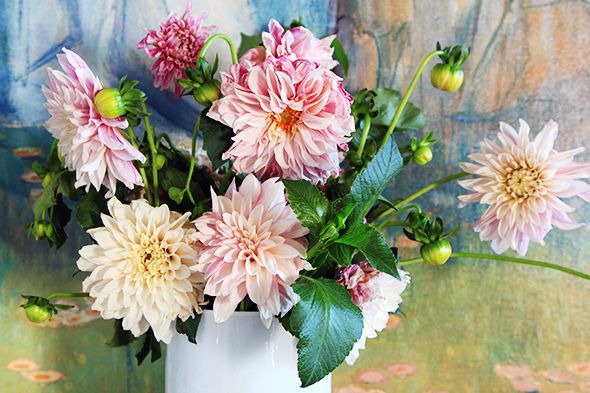
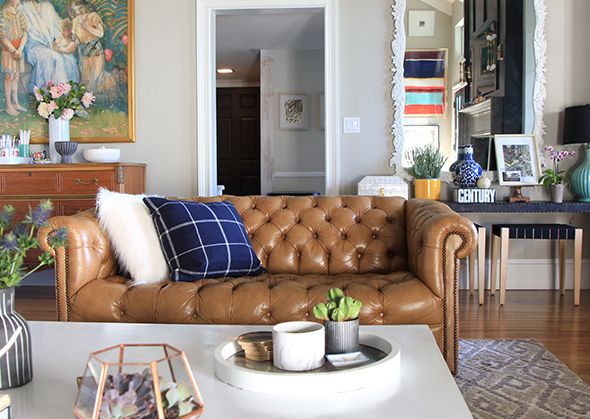
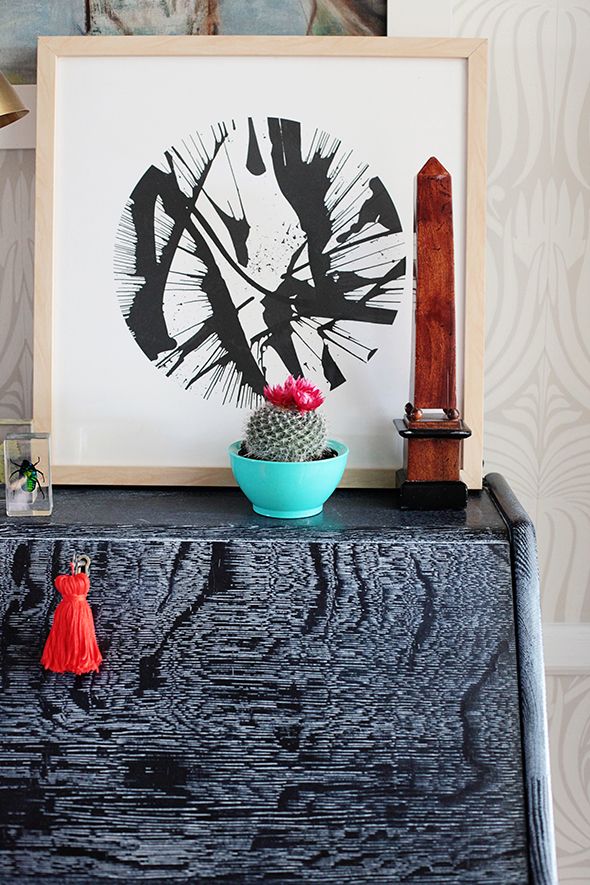
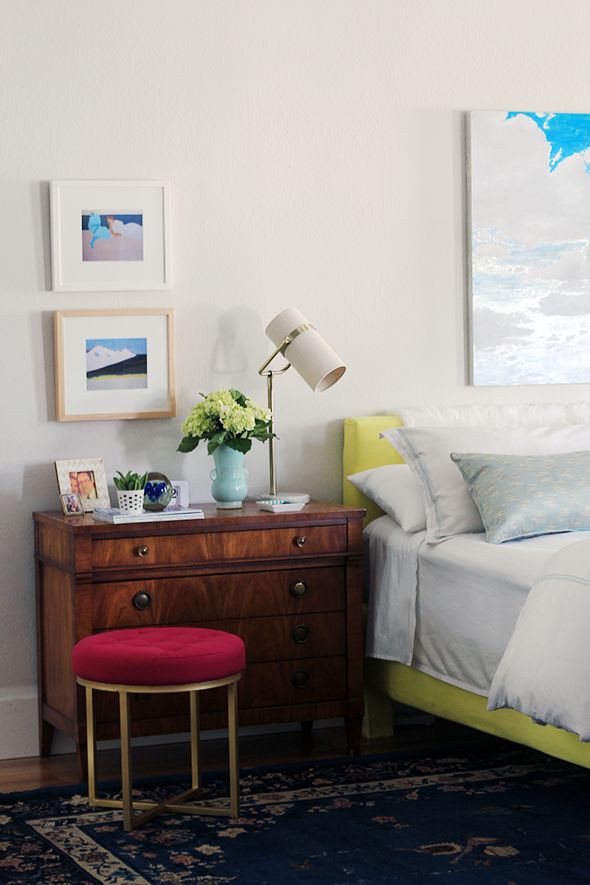
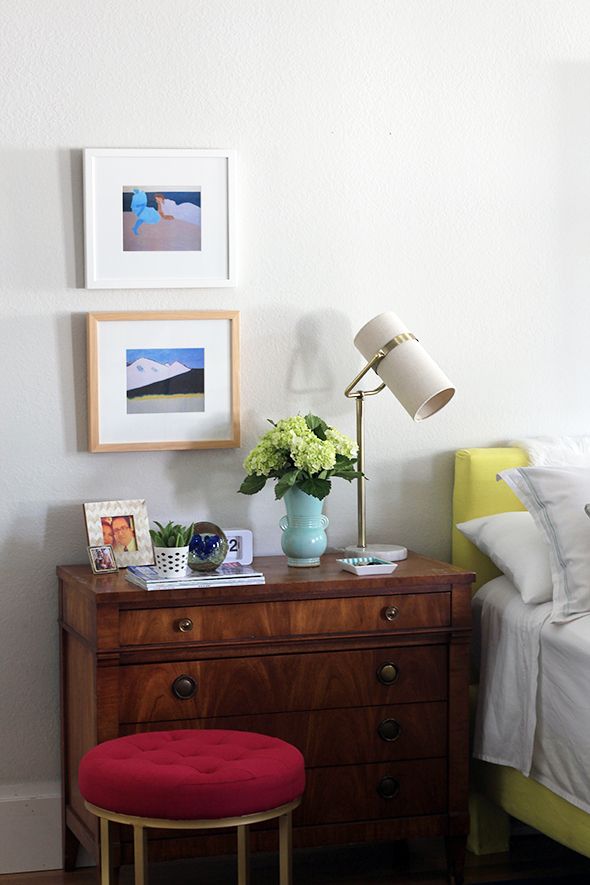
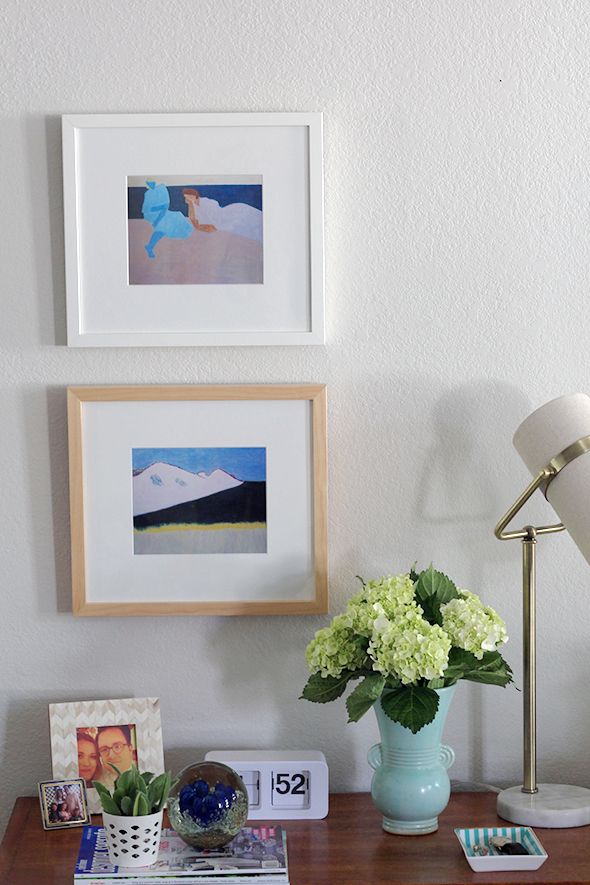
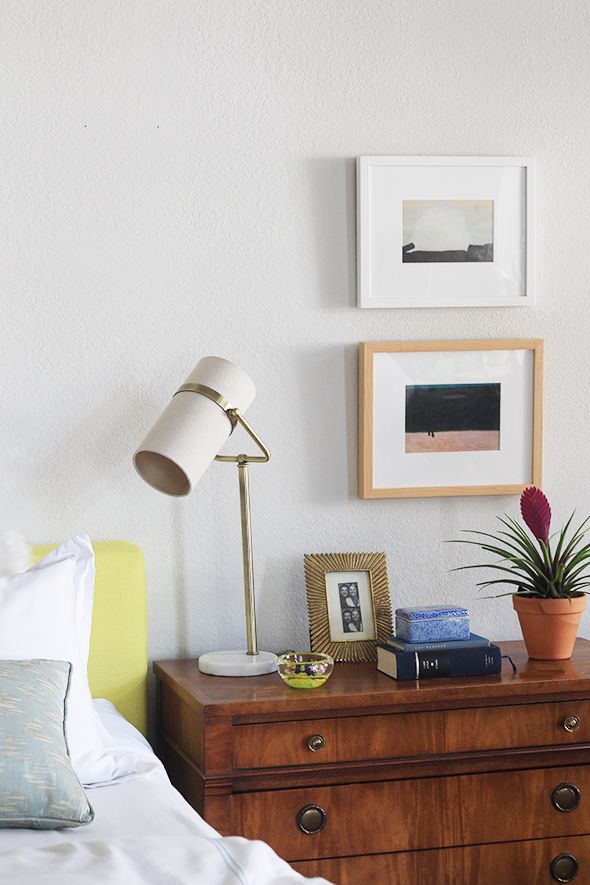
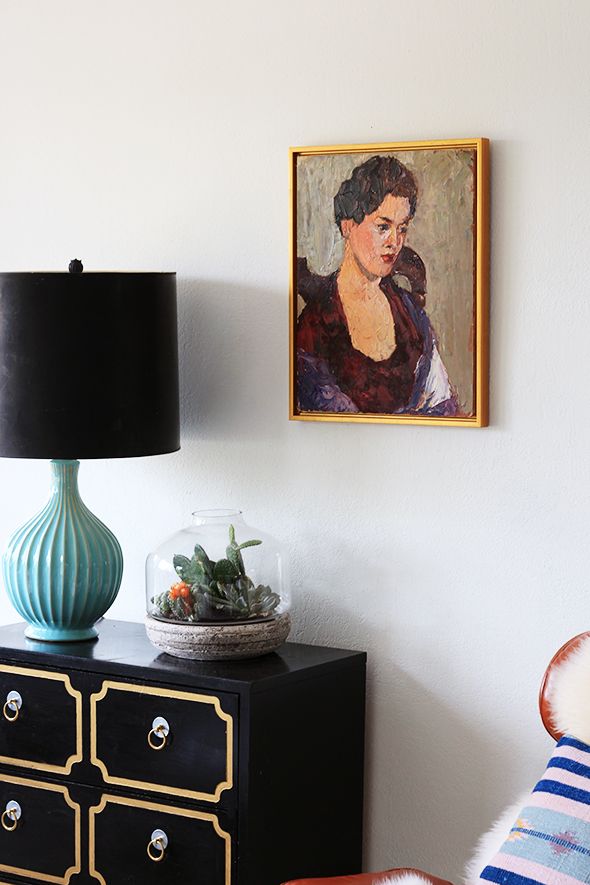
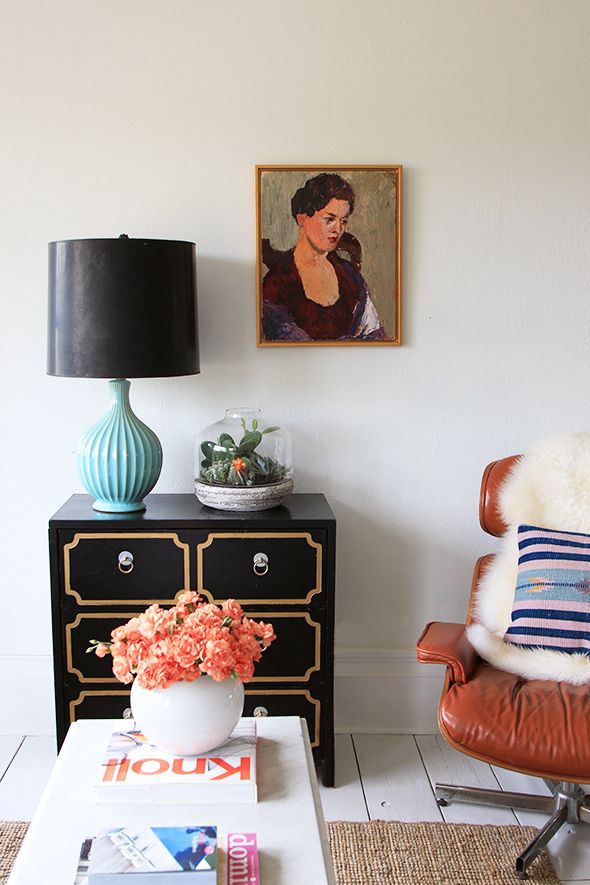
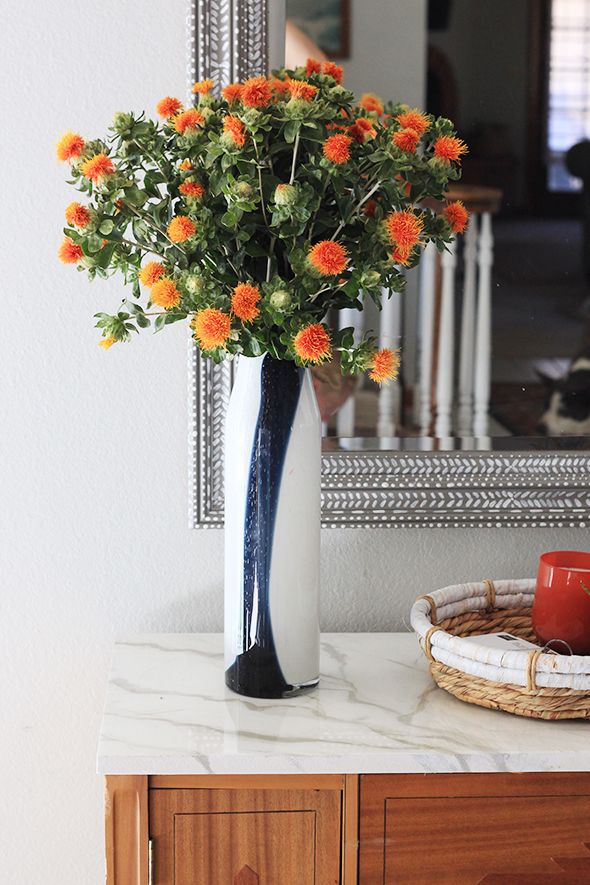
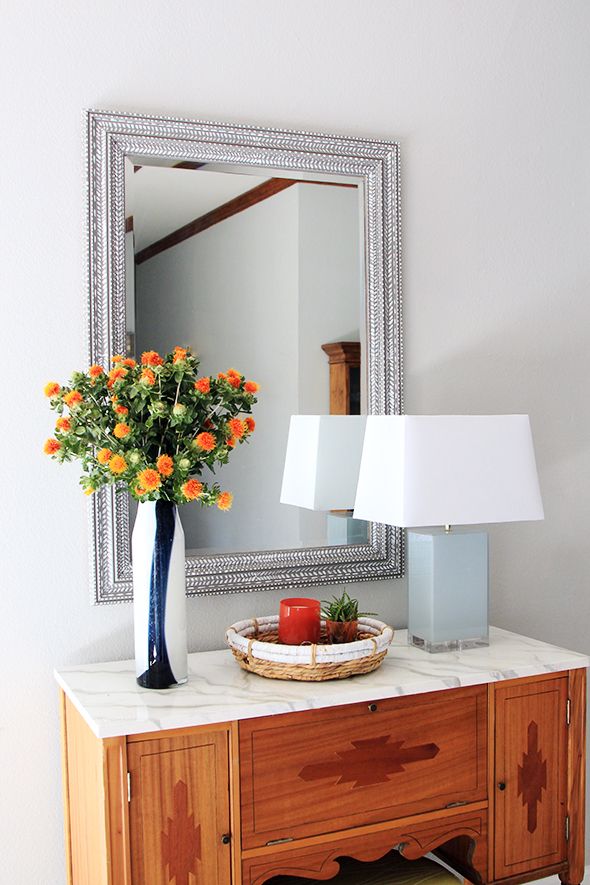
Tip #1: Splurge on fresh flowers

 photo IMG_1912.jpg

I grabbed some Dahlias for this big, tall white vase (on clearance!) and thistles (for this amazing vessel) on Friday and they make me SO happy. 
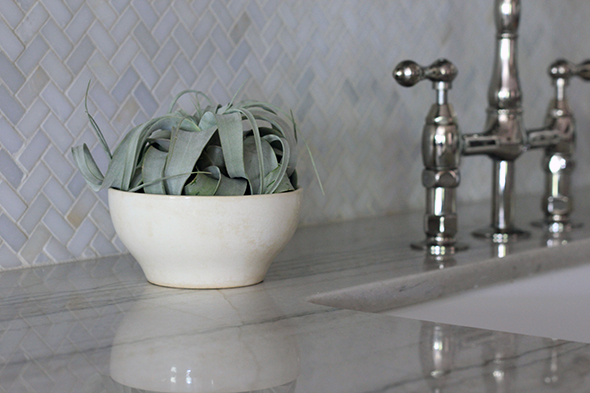
Michael teases me that I like to have people over just so I can go buy flowers guilt-free. It’s definitely only like 50% true though. I just know that whenever I am at a party at a friend’s house, it’s such a sweet surprise to see fresh flowers out! You know what I mean? It’s definitely not necessary, but it’s a very nice gesture, I think.

 photo IMG_1973.jpg

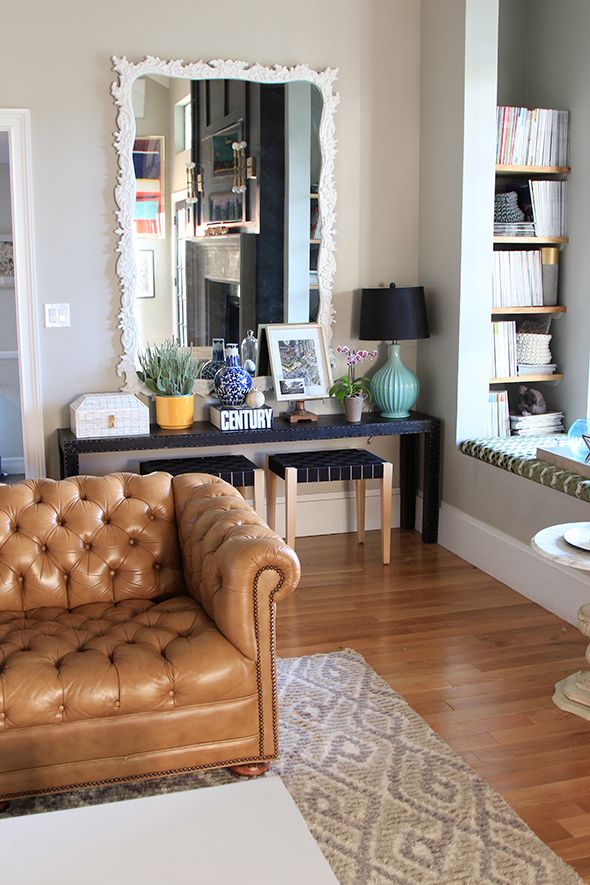
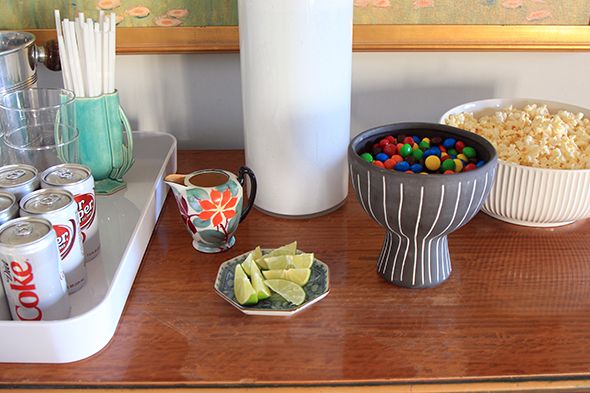
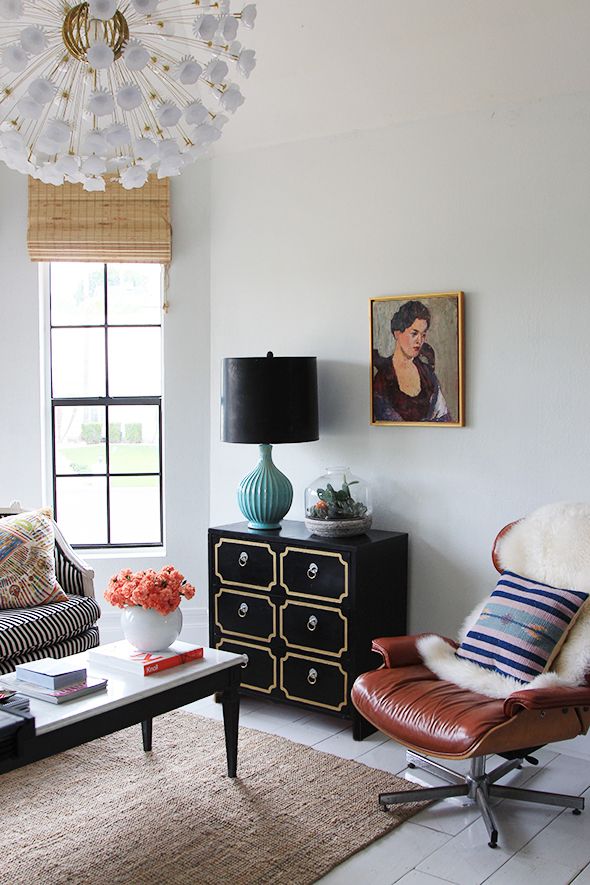
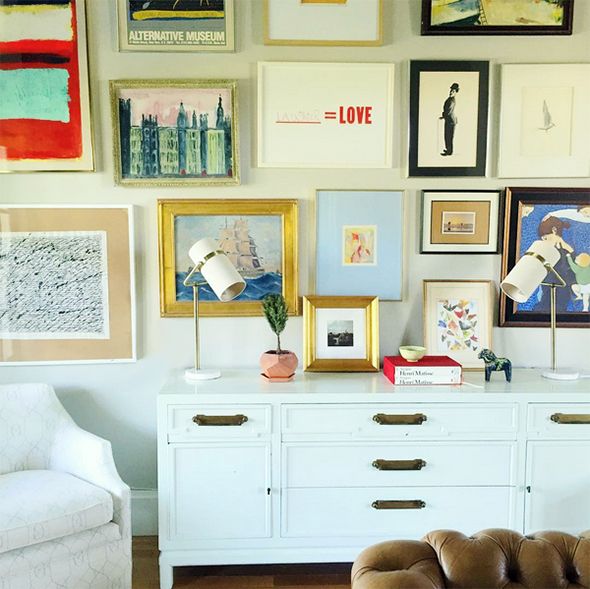
Tip #2: Set up a refreshment station

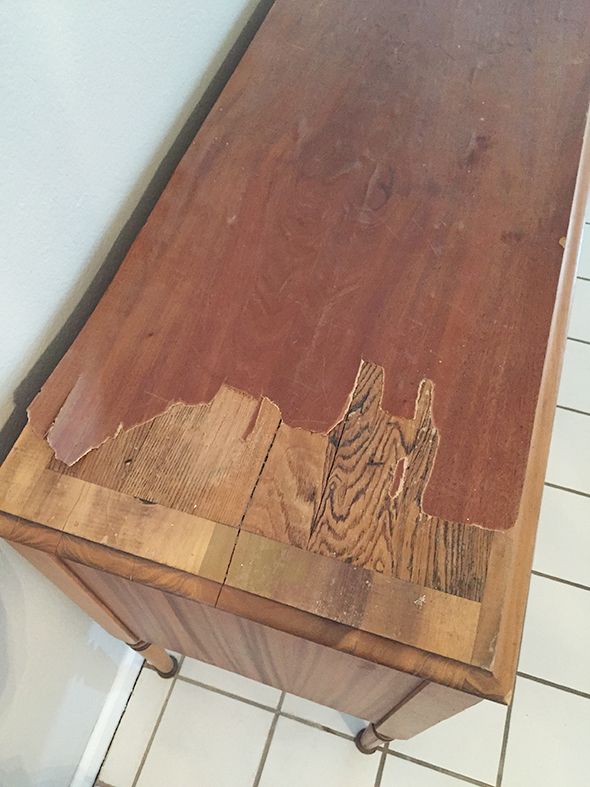
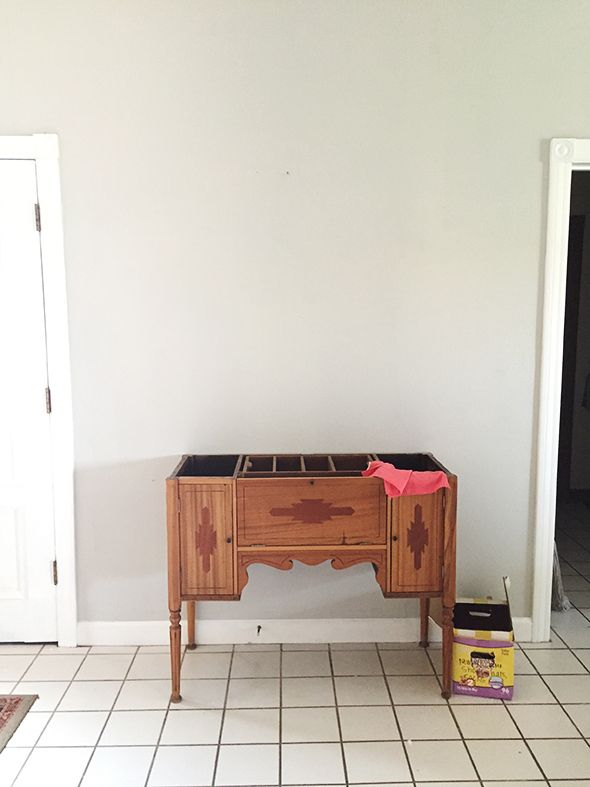
Let’s be real. Parties are mostly just a great excuse to eat delicious snacks, right? I wanted to keep it simple for us with this little refreshment station on our tiger wood chest right in our living room. This way no one had to venture into the kitchen for a refresh and potentially miss some especially juicy red carpet moment or Andy Samberg joke. I put out the mixings for Dirty Diet Coke (add pebble ice, a little coconut syrup, a dash of heavy cream and lime wedge or two) and a couple big bowls of homemade kettle corn (a new family favorite). It’s so easy to make it on the stove and it tastes SO much better than microwave popcorn.

 photo IMG_1914.jpg

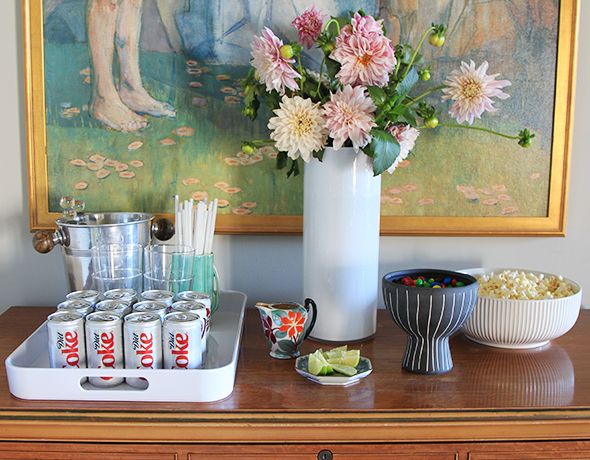
I heat up a few tablespoons of coconut oil in a big lidded pot with three kernels in the oil. As soon as the oil is hot enough to pop all three of the test kernels, I add a half cup of popcorn kernels and a quarter cup of sugar, and shake the pan until the popping starts to slow down. Add a little salt, and you’ll never go back to microwave popcorn again! This big, wide bowl is gorgeous and perfect for serving your sweet/salty masterpiece. And of course, a handful of peanut butter M&Ms makes life worth living, especially when served in such a pretty footed bowl!

 photo IMG_2041.jpg

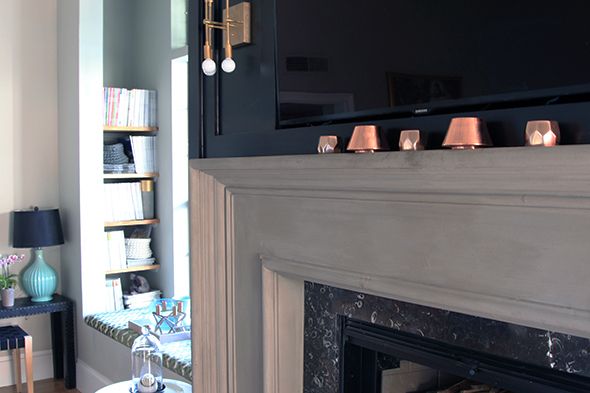
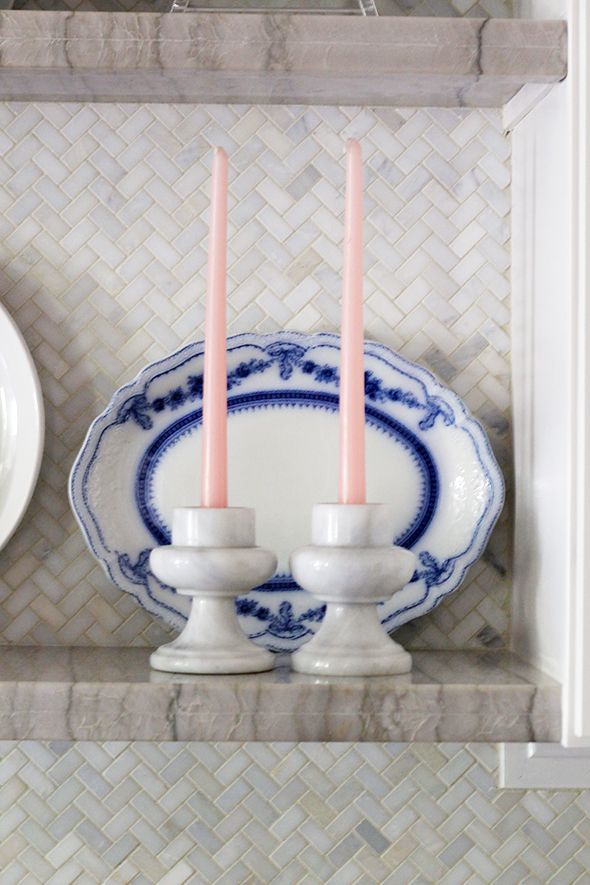
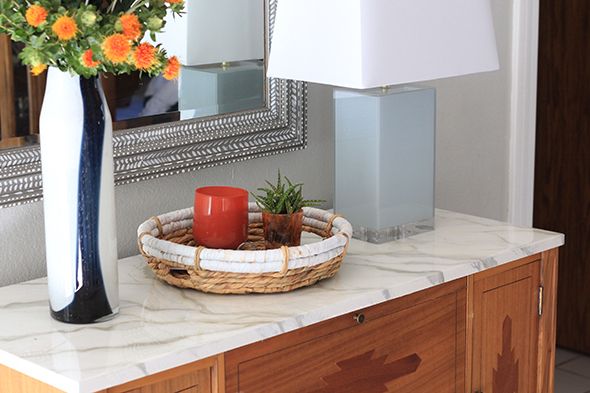
Tip #3: Burn your best candles

 photo IMG_2009.jpg
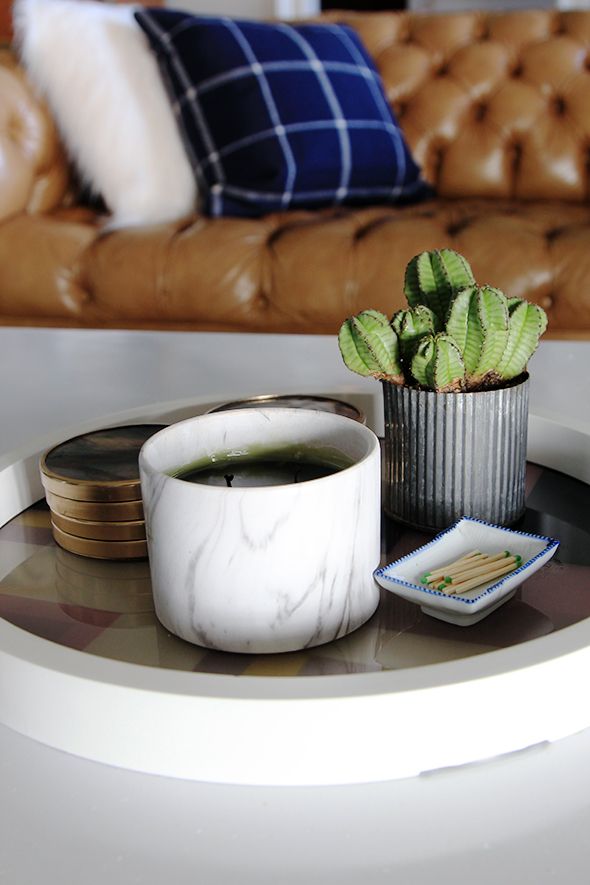
marble candle  //  tray

I’ll admit it. I am a recovering candle hoarder. In the past I’ve had a tendency to buy a special candle only to tuck it away in the cleaning closet, never to be burned or enjoyed. That was the old Jenny though! Now there is no candle safe when I’m around. Light ’em up! Breathe in deep the sweet scents!

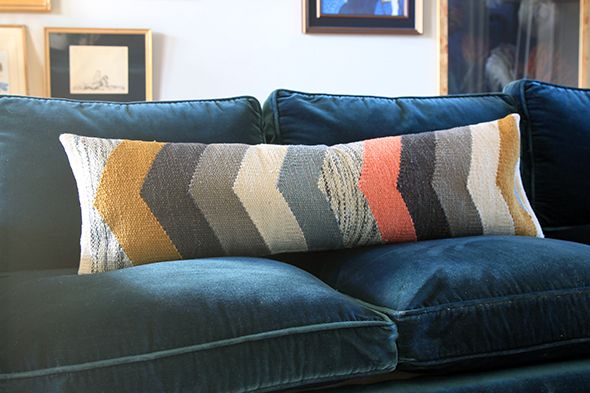
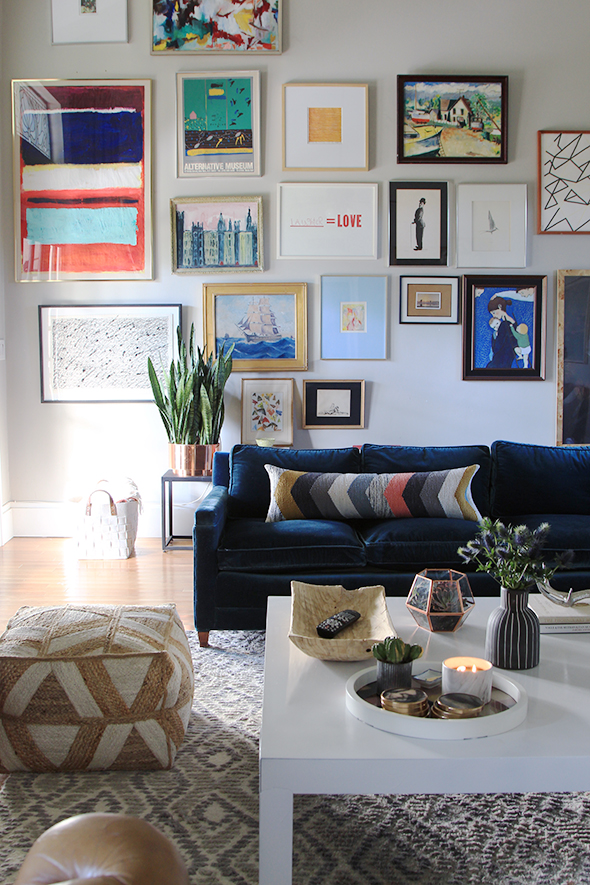
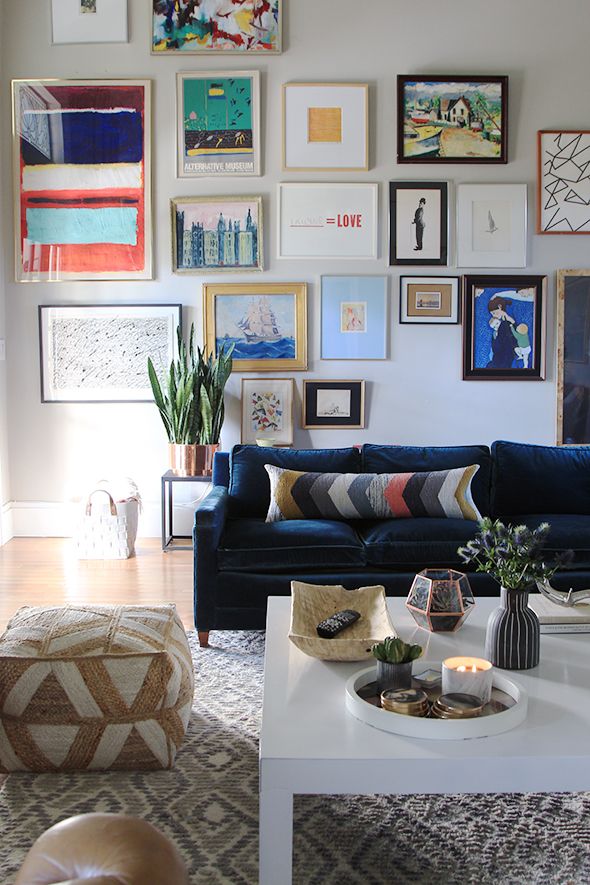
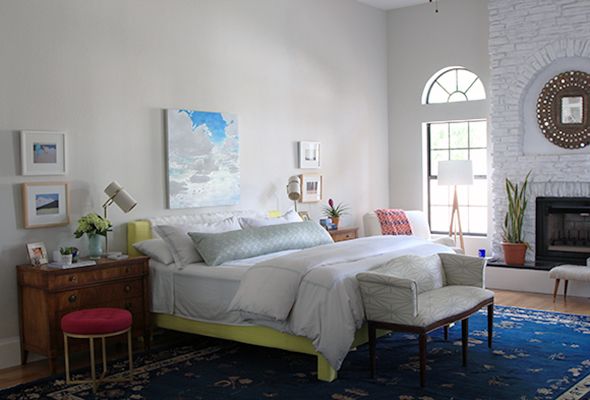
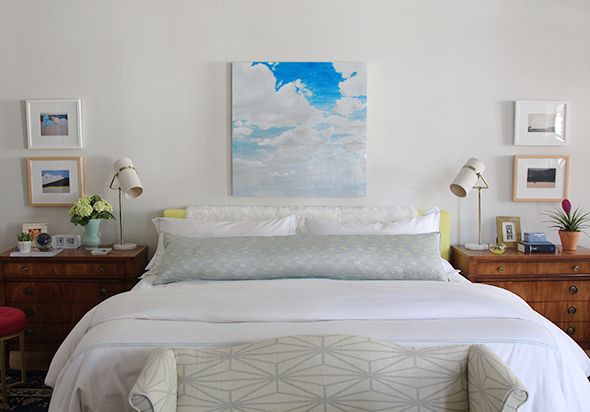
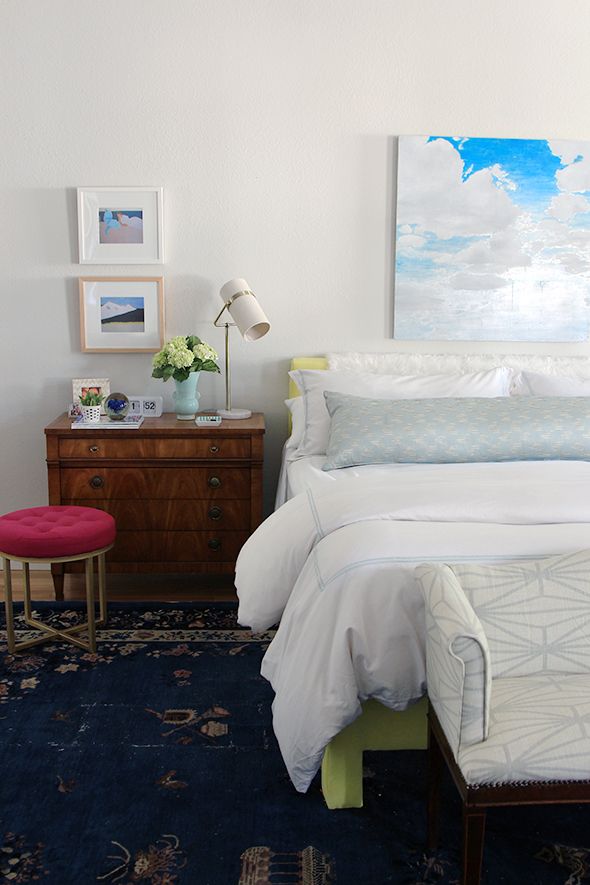
Tip #4: Keep your guests comfortable with extra pillows and foot stools!

 photo IMG_1956.jpg
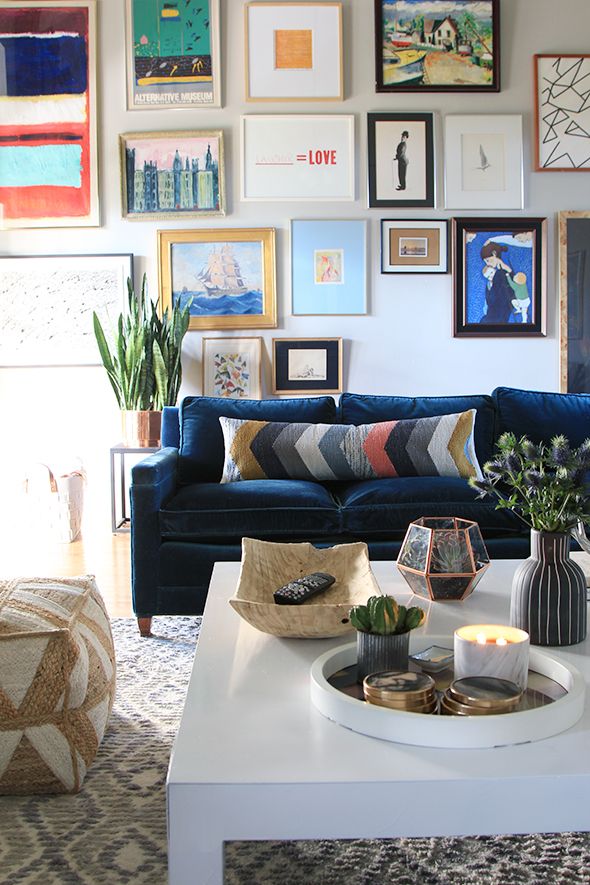
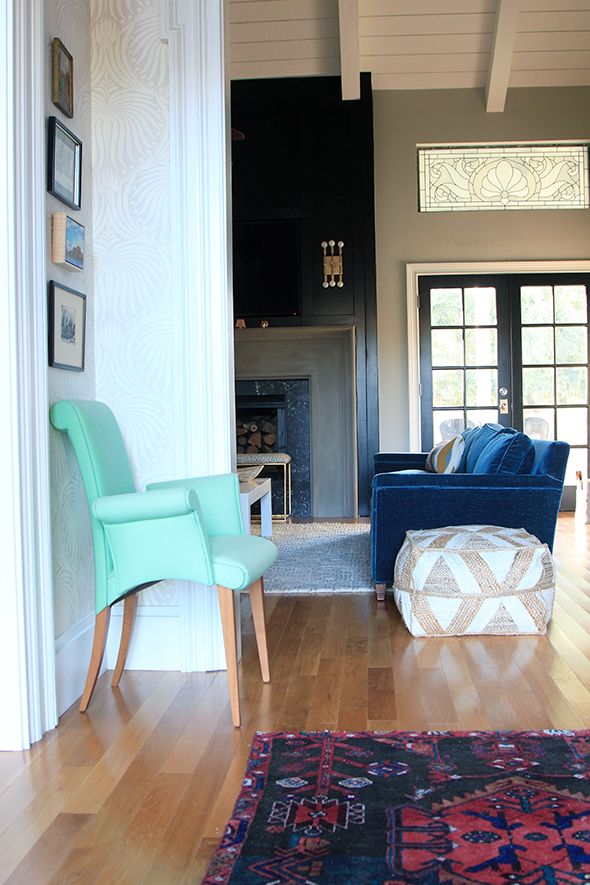
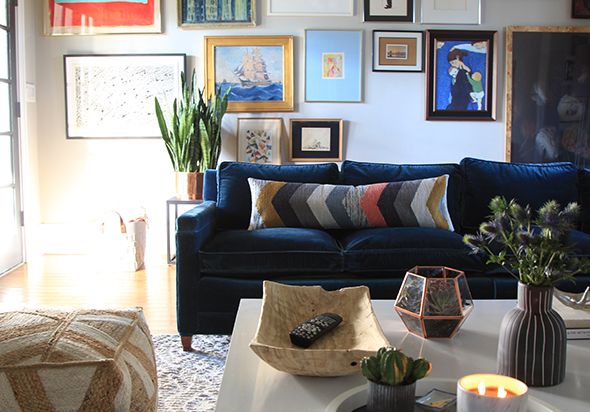
I really wanted a new bolster pillow for the blue velvet sofa so I whip-stitched together this adorable Nate Berkus throw rug to make a long pillow. It was the perfect size for an insert I already had on hand.
 photo IMG_2925.jpg

 photo IMG_2574.jpg

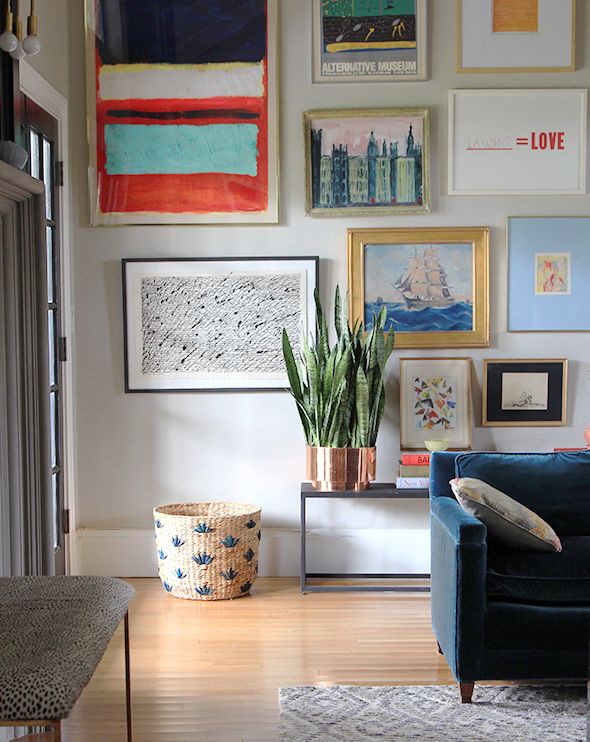
I really love how the color looks in our living room!

 photo IMG_1979.jpg

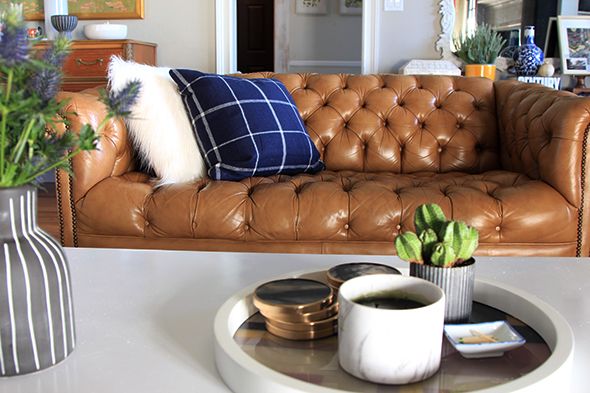
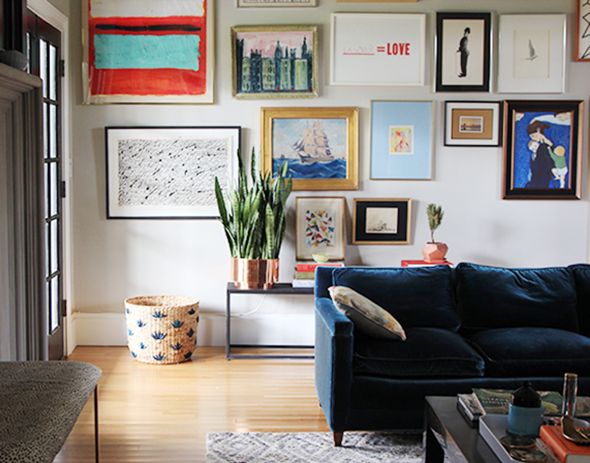
I also grabbed two new pillows for the chesterfield settee. A big part of me would love at least five of every thing in the new plaid line at Target, but for sure, I want to put these big, soft navy plaid pillows in every room in my house. They are so good! And I love how they pair with the faux fur pillow.
 photo IMG_2001.jpg
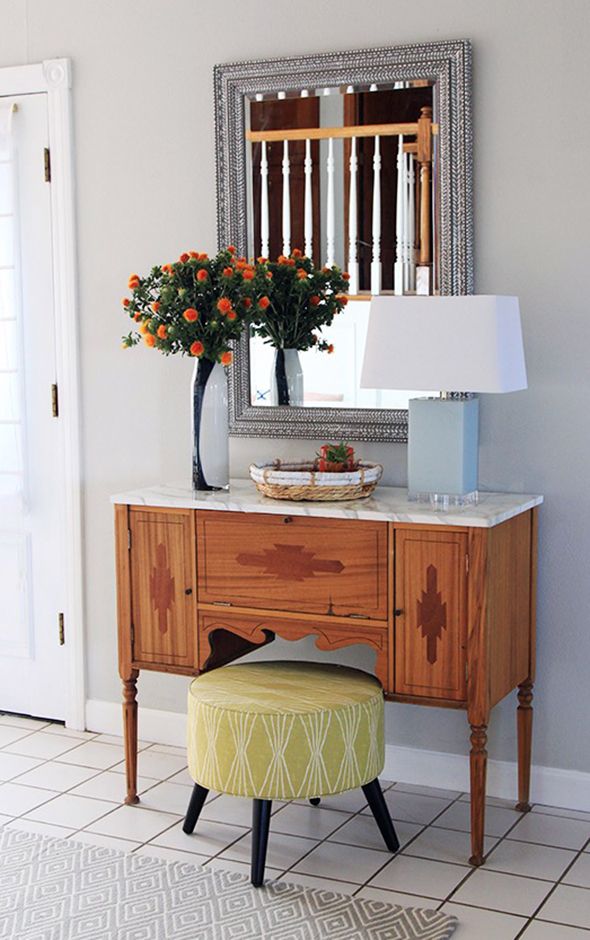
I always like to have little stools and ottomans floating around my living room. It’s nice to have a place to comfortably put up your feet – or even an extra place to sit in a pinch. This adorable pouf was on clearance (they have it in black and natural too – so cool!).
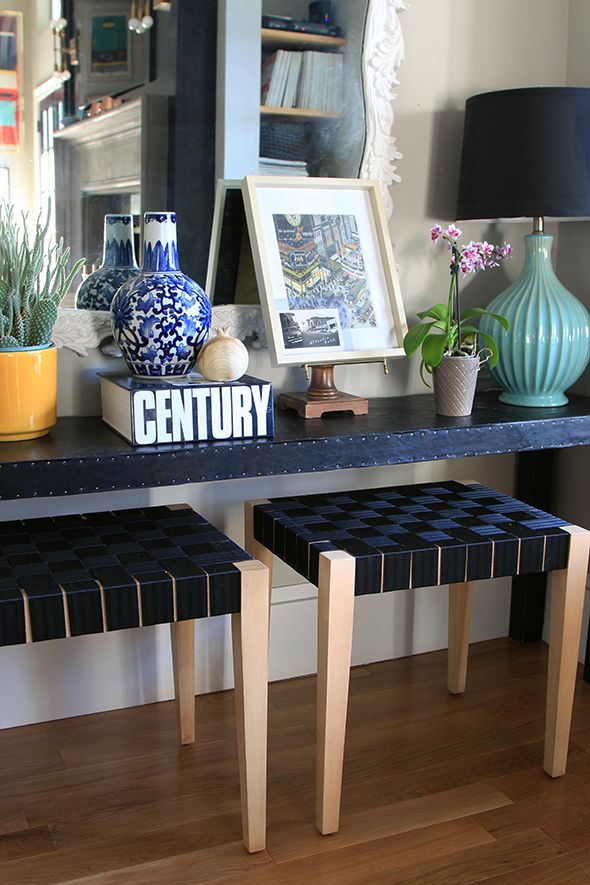
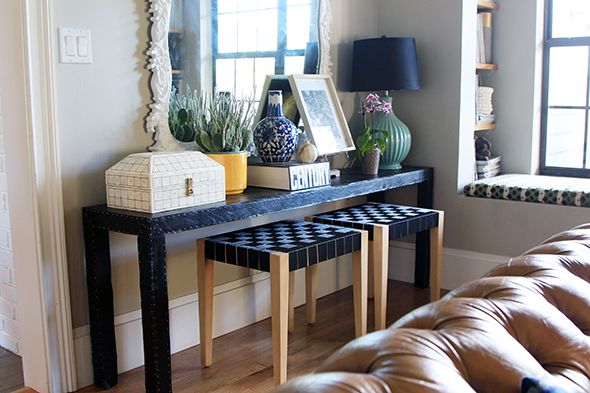
 photo IMG_2109.jpg
These little belt strap stools were on clearance too! I love the Jens Risom inspiration!
 photo IMG_2039.jpg
 photo IMG_2056.jpg

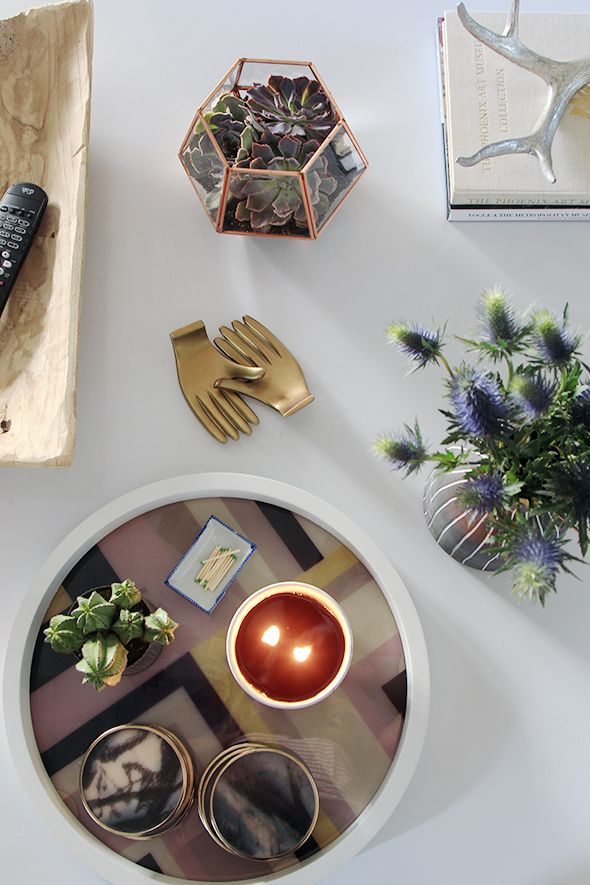
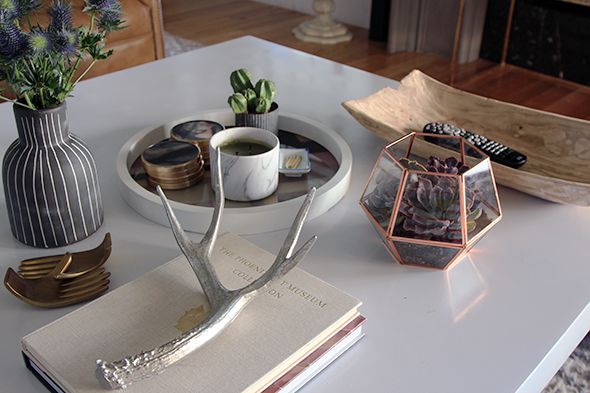
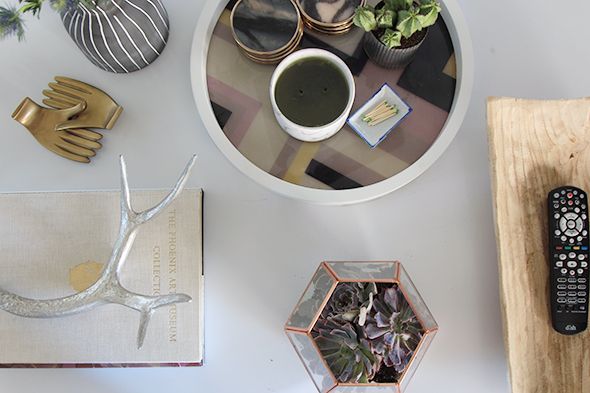
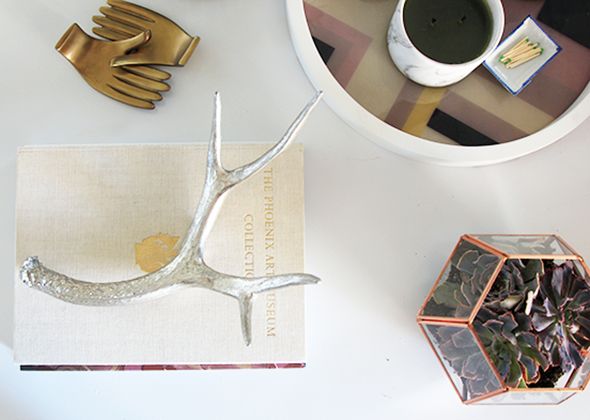
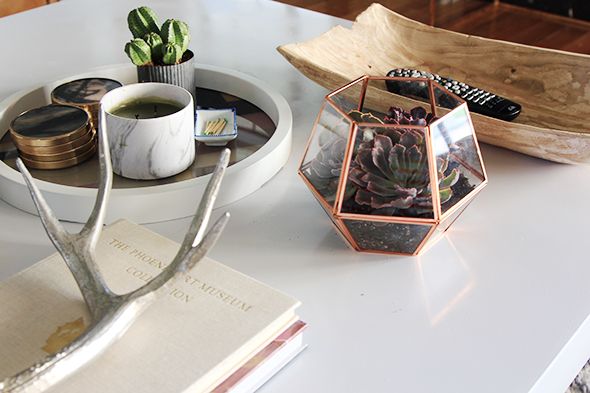
Tip #5: Free up some space on your coffee table

 photo IMG_2132.jpg

 photo IMG_2060.jpg

If you’re like me, you keep your coffee table loaded with books and magazines and all sorts of other bits and baubles. A party is a good time to clear everything away and get back to the essentials so there’s room for your guests to get comfortable and have a place to set down their drinks and snacks.

 photo IMG_2064.jpg

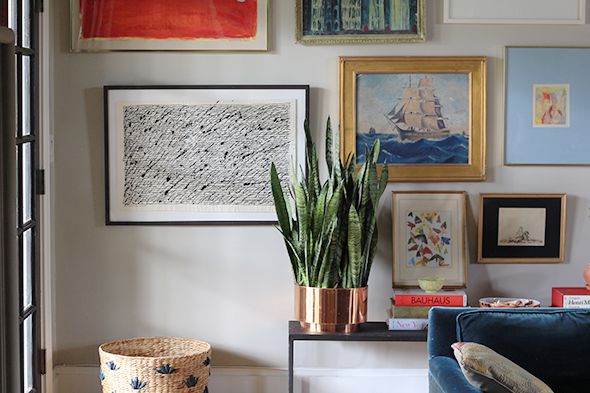
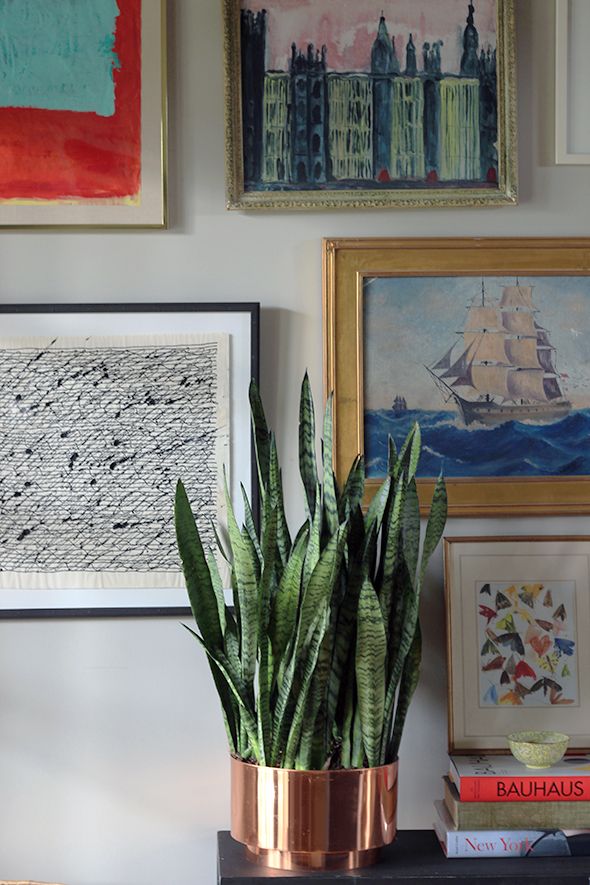
My coffee table is big, so my essentials included a beautiful wooden bowl to coral our remote, some emergency reading material (isn’t that guilded antler sitting on top cool?), a tray with a candle and coasters, a couple little plants and a flower arrangement. That copper-faceted planter is pretty much my new favorite thing.

 photo IMG_2127.jpg
What TV-watching party tips do you have? We only have a few shows that we watch religiously and Last Man on Earth is one of them, for sure. It is snort-laugh funny! The season premiere is this coming weekend, so I might just have to throw another party now that my living room’s all ready to go. :)
 photo IMG_1986.jpg

 photo IMG_1952.jpg

This post is brought to you by Target Style. Shop the new Home collection in stores and online.

Uncategorized

DIY Cerused Oak Secretary

The fall issue of Domino is on news stands now and my latest story is right after cover girl Mindy Kaling’s (adorable!) office feature. I was SO excited to get to share my transformation of this old tiger oak secretary. Remember this old thing? I had been debating whether or not to change the finish for a while,…

 photo LGN DIY CERUSED OAK.jpg
The fall issue of Domino is on news stands now and my latest story is right after cover girl Mindy Kaling’s (adorable!) office feature.
 photo IMG_2776.jpg
I was SO excited to get to share my transformation of this old tiger oak secretary. Remember this old thing?
 photo qqDSC_0550.jpg
I had been debating whether or not to change the finish for a while, but after seeing this beautiful cerused side table on 1st Dibs, I knew I could achieve a similar finish with a little research and some elbow grease.
 photo 1083978_l copy.jpg
I read about a million different articles about cerusing and liming oak furniture. It turns out that people have been doing basically the same steps for hundreds and hundreds of years! It’s not too hard to do and requires absolutely zero artistic ability. You’ll just need a piece of oak furniture – it has to be oak. And the more prominent the grain, the better.
 photo 2 - Brass Brush.jpg
The first step is to strip the wood of any stains or varnish. I used a gel stripper and a brass-bristled brush to gently scrub the wood in the direction of the grain. See how the soft brass bristles pull out the little bits of old dark stain from the grain?
 photo IMG_9387.jpg
If you’ve done it right, the grain marks will be open and clean and ready to fill with wax.

 photo IMG_9380.jpg

If you want the wood to be a natural finish, you can go ahead and skip this next step, but if you want the wood stained at all, you’ll need to use an aniline dye in lieu of a traditional stain that you can get at the hardware store. Dye will beautifully stain the wood without filling any of the grain. You can buy almost any color of dye online. I used the indigo shade for this project.

 photo IMG_9434.jpg

I just followed the instructions on the dye container and mixed a few teaspoons of the powder with some denatured alcohol before brushing it on the secretary.

 photo IMG_9421.jpg

 photo IMG_9439.jpg

It only takes a coat or two of the dye mixture to get a nice, deep color.

 photo IMG_9343.jpg

 photo IMG_9394.jpg

As the stain starts to dry on the wood, it gets lighter and sort of chalky. But the color deepens again when you seal it. I don’t have a photo of this step but it’s important to seal it with shellac before adding the liming wax. I like Zinsser’s shellac because it dries quickly and isn’t too thick.

 photo IMG_9397.jpg

After the shellac dries, the dyed wood will be a dark navy indigo color, and you’ll be ready for liming wax. This wax is my favorite.

 photo Jenny 14.jpg

The actual liming step is super easy – you just wipe the wax on with a soft cloth and then buff off the extra that’s sitting on top. You only want the white liming wax to be in the grain and none on top.

 photo Jenny 17.jpg

This is why it’s important to shellac the wood before using the cerusing wax. The wax won’t want to stay on the surface of the sealed wood as much, but it will be happy to hang out in the grain. Check out that beautiful pattern!

 photo Jenny 18.jpg

I really love how this project turned out. I think cerusing is such a fun way to show off the natural wood grain of vintage/antique oak pieces!

 photo Jenny 12 1.jpg

And the indigo stain is such a unique look too. I think color stains are perfect for this type of application. The secretary is such a fun statement piece now, sitting up in our landing by the girls rooms.

 photo IMG_1773.jpg

 photo Jenny 13.jpg

Don’t forget to check out the spread in the new Domino! xo
Uncategorized

Sprucing Up with Newly Framed Art

New art is like the secret weapon of redecorating. It instantly makes a tired room feel fresh and exciting – like putting on a new necklace with an old dress!  I’ve been wanting to make some changes to our bedroom and I had planned on buying a new bed, but the one I wanted to…

New art is like the secret weapon of redecorating. It instantly makes a tired room feel fresh and exciting – like putting on a new necklace with an old dress! 
 photo IMG_1594.jpg

I’ve been wanting to make some changes to our bedroom and I had planned on buying a new bed, but the one I wanted to order was discontinued. Big time bummer. I might have my metal guy make something for us this winter but in the meantime, as a quick fix, we painted the walls and decided to take down the desert panels. I knew different art would make the space feel new. I wanted something a little punchy, but in a much smaller size.

 photo IMG_1436.jpg
This Milton Avery book is a great one – chock full of beautiful, full-color prints. I found a second copy recently at a used book store for only a few dollars and snatched it right up. I used an X-acto knife to carefully cut out the pages I liked the most for my bedroom.

 photo IMG_1691.jpg
 photo IMG_1694.jpg
I’ve used Framebridge before to affordably frame some of my favorite art prints. They also offer this really cool service where you can upload your instagram photos and they’ll print and frame them for you and then ship them to you for free! I have done this for family gifts a few times now and it’s becoming a go-to for me! They have beautiful, modern frame choices and I knew I wanted to use them again to frame these Avery prints.

 photo IMG_1676.jpg
If you’re wanting to frame a piece you already have, Framebridge sends you pre-paid shipping supplies to send in your artwork. It couldn’t be easier! I popped my prints in the mail and the framed artwork came back so quickly! Check these beauties out:

 photo IMG_1450.jpg
 photo IMG_1468.jpg
I stacked a white frame on top of a natural one on each side of the bed and hung my favorite cloud painting by Tara Andris in the middle. I love the combo! I used to have the painting hanging on the other side of room above the dresser, but we recently decided to put a TV in our room. (Not so sure how I feel about that development… but at least the art on this side of the room looks pretty!)

 photo IMG_1547.jpg
 photo IMG_1538.jpg
 photo IMG_1504.jpg
 photo IMG_1565.jpg
It’s a fun change from what we had before, don’t you think?
 photo IMG_1594.jpg
 photo IMG_1553.jpg
While I was getting the Avery prints framed, I decided to take care of two more pieces I’ve been wanting to frame for ages now. One of them was this cool piece I bought at the Chelsea Flea Market a few years ago. It’s called ‘If Not Sound, Then Music is Feeling’ and Michael and I both really love that it looks like music notes.

 photo IMG_1696.jpg
 photo IMG_1627.jpg
 photo IMG_1658.jpg

I chose one of Framebridge’s new frame styles called the Bolton, which is made from oiled steel and has these really cool rivet details.

 photo IMG_1649.jpg
 photo IMG_1673.jpg

And after I mailed the piece in, the Framebridge team emailed me to say they actually recommended no mat and a float mount to accentuate the uneven edges of the piece. I love their attention to detail!

 photo IMG_1639.jpg
 photo IMG_1693.jpg
I think this frame is my new favorite – there’s just nothing like it! The finish is gorgeous and combines SO well with all of the vintage and antique frames in my gallery wall!
 photo IMG_1672.jpg


And since Framebridge also frames canvases, I sent in one of my favorite lady portraits. It kept getting knocked over where I had it on an easel and the edges were getting a little damaged.

 photo IMG_1684.jpg
 photo IMG_1690.jpg

It was a good time to get the portrait newly framed anyway because I’ve been planning to hang it up to the studio, which has been getting rearranged and redecorated, too, as our team grows. I don’t know who the real woman in the painting is, but she’s always reminded me of my Grandma Russell, who was a quiet hero in my life. Each time I look at this painting, I’m reminded that kindness is the most important thing. Such good energy for our office! :)

 photo IMG_1736.jpg
 photo IMG_1805.jpg
I love seeing her hanging up in our little sitting area, supervising our team meetings. :)

 photo IMG_1767.jpg

Isn’t the floating frame beautiful?! The bright gold looks like a million bucks with the warm green tones in the background of the painting.

 photo IMG_1739.jpg
 photo IMG_1789.jpg
Having these newly framed pieces hanging in our home is like a big breath of fresh air! I’m so happy that these familiar artworks have finally gotten the love and attention they deserve. :)


A big thanks to Framebridge for partnering with us on this post! Take 20% off your first order of $59 or more with the code LITTLEGREENNOTEBOOK20 (code expires 11/30/2015).
Uncategorized

Photo Ledges and Never Ending Love for Martha

It was Michael’s birthday this last weekend. He loves books more than just about anything (evidence), so we squeezed in a few stops to his favorite antique and used books stores as part of his b-day celebration.  I know. We’re party animals, what can I say?  While he was browsing the smarty pants sections, I…

It was Michael’s birthday this last weekend. He loves books more than just about anything (evidence), so we squeezed in a few stops to his favorite antique and used books stores as part of his b-day celebration. 
I know. We’re party animals, what can I say? 
While he was browsing the smarty pants sections, I found some cool, new-to-me art and design books. (I’m excited to share some of them with you in a couple of Book Club posts!) One of my favorite finds was a set of three books from Martha Stewart. They were published in the 90s (almost 20 years ago!!), but they feel incredibly fresh to me. I had to scan in this page to share with you. Girlfriend was DIYing picture ledges while I was still in high school.

I’ve been wanting to make a similar photo ledge wall in our house. We’ve been here for a few years now, and I’m ready to switch some things up a little, including taking down the gallery wall. I love having a place to share my favorite art finds, but I’m craving something more personal in here. I would love to print out and frame more family photos – mostly just candid shots.

 photo LGN Gallery Wall.jpg

We did something like this in my mom’s formal living room. We printed out old wedding portraits of our family members and baby pictures of the grandkids. And then we used two rows of two IKEA picture ledges and just caulked the seam in the middle.

 photo Screen Shot 2015-07-08 at 5.42.16 PM.png
I’d love to figure out a great low bookshelf or long wall-mounted credenza for underneath the ledges that I’m hoping to make for my living room. I moved the formerly red (also formerly white) and now pale mint credenza up to the studio, and I am missing having a big anchor piece in the room. I’ll have to figure something out there. I also bought a new rug that arrives this week and I’m going to paint our coffee table and do a few other quick-fixes. I’m most excited about this picture ledge project though! These are a few of my inspiration images:
 photo f5b740599a70557c433ad1ddd30647b4_1.jpg
 photo 8f676669faa6ae0c595477cf7c1a35c6.jpg
 photo 28f1296eefd1112096223f03e0cce950.jpg
 photo 8459d1280d013169ce4d47aa90bf2a24.jpg
 photo c35eab39e343b320b1568ed9819c7183 1.jpg
 photo e3fc725ba337165a34fbff88d2dc7c57.jpg
 photo IMG_6283.jpg
Can you even believe that Martha image though? There are so many goodies in that book series that I’d never seen before!
Uncategorized

Tips of the Trade: Kitchen Styling

A big kitchen with a lot of counter space can present a styling challenge. Too many things and the space will look cluttered quickly, but not enough accessories in a big space looks sparse and unfinished. It’s a fine line!  For the most part, I like countertops to be pretty clear but I think it’s…

 photo IMG_0276.jpg

A big kitchen with a lot of counter space can present a styling challenge. Too many things and the space will look cluttered quickly, but not enough accessories in a big space looks sparse and unfinished. It’s a fine line! 

 photo IMG_0174.jpg

 photo IMG_0030.jpg

For the most part, I like countertops to be pretty clear but I think it’s fun to add color and layers to open shelving. We had some extra quartzite from the counters in my parents kitchen and decided to use it for the open shelves in the dead space above the sink. When it was time to get my parent’s more settled in their new kitchen, I brought up a ton of accessories to play with and we also used a lot of family heirlooms that my mom has had for years.

 photo IMG_0750_2.jpg

Sometimes an empty shelf can feel like the most daunting thing. Where to start with the styling?? I have listed out the most basic of steps below, but I will say that one helpful tip is to know your shelf height before you start collecting styling items. You obviously don’t want items that are too tall to fit, but also be careful to not have too many too-small accessories. Sure, you can stack items to create height, but you want there to be several hero pieces that fill at least 2/3 of the height of your shelves. Paying attention to scale this way helps keep the shelves from getting too busy.

 photo IMG_0759.jpg

Big, white dishes are the perfect foundation pieces for kitchen shelf styling. I like a few oversized platters (these are from Target and Homegoods), a cake plate or two and a stack of mixing bowls.

 photo IMG_0761_2.jpg

After the big white pieces, I like to add in a few colorful, larger items, like a ginger jar, a flow blue platter and this special Lynne Millar painting I had framed in a pretty burlwood.

 photo IMG_0766_2.jpg

The next step is to fill in the layers with neutral pieces in interesting shapes. This helps things to not get too crazy with color. I added a vintage fluted bowl and a stack of my great grandmother’s off-white wedding china here.

 photo IMG_0768 1.jpg

Then we added a few smaller items – like marble candle holders and pink tapers, a little blue and white sugar bowl, and a pair of silver salt and pepper shakers. And we added the counter top accessories too. Bread boards are always a great idea (and look so pretty against stone counters) and a little bit of greenery is perfect for every room, including kitchens and bathrooms.

     photo IMG_0253 1.jpg
  

 photo IMG_0063.jpg

  photo IMG_0049.jpg   photo IMG_0036.jpg    

The best part of all is everything can be changed around easily! One of my favorite post-Sunday-dinner-clean-up activities is a good kitchen styling session! :) Here are some of my go-to pieces:

Mercer PlatterBone China Platter

Mixing Bowl,  CB2 Basket Bowl, Marble Cake Stands

Blue Tea Container, Jade Beater Bowl, Lynne Millar- Yellow Rose 1

Marble Salt and Pepper, Salt Cellar, Wood Candlesticks

Heritage Bread Board,  Iona Cheese Boards

Linen Market Dishtowels, Morandi Pitcher

What am I missing in this list? Do you have a favorite oversized white platter or bread board source?

Uncategorized

Our New Playhouse

If you ask our girls what they miss the most about NYC, our old playhouse in Brooklyn will most definitely get a mention. It’s been discussed MANY times in the past two years since we’ve moved – also the fact that we promised to build the girls a new one and hadn’t yet followed through…

 photo IMG_1111.jpg

If you ask our girls what they miss the most about NYC, our old playhouse in Brooklyn will most definitely get a mention. It’s been discussed MANY times in the past two years since we’ve moved – also the fact that we promised to build the girls a new one and hadn’t yet followed through on that. (Whoops!) They had done what we asked them to do and earned their part of the playhouse with extra chores all summer long, so Michael and I decided to tackle building it this month so they could enjoy it a little bit before school starts.

 photo IMG_1312.jpg

There are Amish playhouse kits that you can buy sort of piece meal depending on how customized you want your playhouse to be. We bought a bare bones version both for aesthetics and to help save on costs. We had to pick up a lot of our own materials this way, but I liked getting to choose the finishes!

 photo IMG_1215.jpg

We started by building the base out of 2x4s and 4x4s in a graveled area in our backyard. It had always been this strange little spot that we didn’t ever use or really know what to do with. I think maybe the previous owners parked an extra vehicle here or something since it’s not that far away from an RV gate? Not sure. But it worked perfectly as a spot for our playhouse since it’s close to the swing set, but away from the sprinklers.

 photo IMG_1662.jpg
Once the base of the playhouse was built, we made floors out of 1/4″ plywood cut down to 8″ strips (a thinner version of just what I did to make floors in the studio).


 photo IMG_1673.jpg
The walls of the house went up quickly (this is the bulk of what comes in the “kit”). The trusses and the roof took a little more work to get right. (I really wish we would have thought to pull out that rosemary bush in front of the big door beforehand! It was a pain to work around!)


 photo IMG_1768.jpg

Once we put on the felt paper for the roof, things started to feel real and exciting and the momentum really picked up! Pretty sure the girls were squealing at this point. :)
 photo IMG_1799.jpg

 photo IMG_1802.jpg

I didn’t want to just do asphalt shingles and actually went to a roofing supplier looking for a metal roof option so I could get that modern farmhouse style. But the price and convenience and look of the cedar shingles won me over in the end!

 photo IMG_1770.jpg

So now we’re going for a cape-meets-farmhouse-in-the-desert look. ;)
 photo IMG_1836.jpg
 photo IMG_1839.jpg
I put on the cedar shingles over the course of two mornings (with a big thanks to Heather for holding the ladder while I hung the top few rows!) using our pneumatic staple gun. It wasn’t too bad installing each shingle individually, just a little slow-going. I think it was totally worth it in the end. We paid a little more for the cedar shake shingles than asphalt, but it wasn’t as expensive as the original metal roof idea was. And I think, while I love metal roofs on houses, the metal would have made the playhouse look like a shed. Not good!
 photo IMG_1102.jpg
As you can see, the playhouse gets a good amount of hot Arizona sun during the day, so I wanted to make sure to use a good exterior paint on the outside of the playhouse. I’ve been working with BEHR on their interior paints (a big how to paint interior rooms post here, in case you missed it!), and I was excited to get to try their Marquee line for this project. It’s a great paint with great coverage, in the prettiest colors. I knew I wanted to go with a warm white on the main part of the house, but I thought about doing an accent color on the door and trim. There were a few incredible navy options that were really tempting me!
 photo IMG_1073.jpg
Colors from top left, going clockwise: Naturalism, Opera Glasses, Limousine Leather, Compass Blue, Curio, Statuesque, White Lie, Looking Glass (side note: aren’t those great color names!?)

 photo IMG_1087.jpg

I decided to go with ‘White Lie’ (MQ3-55) for the body of the house. True to BEHR’s promise, the Marquee exterior paint covered the old bad tan in just one coat!

 photo IMG_18733.jpg

I loved the all-white look so much, that I decided to hold off on an accent color for the doors and trim. I think it looks a little more modern this way, though it’s easy to go pick up a quart of paint in an accent color if we decide to ever go that route!
 photo IMG_1112.jpg
While the paint dried, I went to Home Depot and picked up some cinder blocks and pavers to make little stone steps and to curb out the new mulch we laid down after raking out the gravel.


 photo IMG_1890.jpg
 photo IMG_1826.jpg
I used cement glue to attach the pavers to the cinder block.

 photo IMG_1904.jpg photo IMG_1152.jpg

And then we added two trellises and white bougainvilleas to the side.


 photo IMG_1914.jpg
Bougainvillea in any color will always be a favorite of mine! The big blooms are so happy and the plants do so well in the heat here.

 photo IMG_1404.jpg photo IMG_1248.jpg

 photo IMG_1381.jpg


The girls helped me plant a few sweet potato vines in the planter boxes. I love their bright green color and they also do well in full sun.

 photo IMG_1402.jpg
I think they’re so pretty against the clean white paint color!
 photo IMG_1384.jpg

The inside of the playhouse is small, but still bigger than our last one – perfect for our growing girls.

 photo IMG_1398 1.jpg

My designer-mommy heart has been bursting with pride, watching them draw up floor plans and pick paint samples and fabric for little cafe curtains. Though I’m not so sure I’ll be giving them sign-off on horse wallpaper and pink floors. :)

 photo IMG_1161.jpg

I’d like to just paint everything in here white (same color and paint as the Marquee on the outside), so that it looks brighter inside. We’ll see if I can convince the girls to be satisfied with some horse art and maybe a painted-on pink rug or something. :)

 photo IMG_1393 1.jpg

I am SO glad we decided to build this playhouse! Before we started, I was really intimidated by the idea of doing this without professional help, and initially I wanted to hire a handy man, but Michael told me he thought we could handle it and that he really wanted the girls to see us building it for them, so I got over it. Some of my favorite childhood memories were spent in the tree house and the playhouses my dad and mom built for me and my brothers and sisters at the different places we lived growing up. I remember my parents working hard for us and feeling like it was SO cool that they could do tough things.

 photo IMG_1234.jpg

I feel like this was such a success and I’ve been giving us major pats on the back all week. It WAS hard, but we did it! And we had fun doing it. And I know we’ll be loving and using this playhouse for so many years to come. :)

 photo IMG_1253.jpg

 photo IMG_1318.jpg


This post is brought to you by BEHR. Color that’s True to Hue. If you feel it you can find it. Visit truetohue.behr.com

Uncategorized

On Getting Motivated

School started for my big girls this week. It felt like such a sneak attack! I’m having to play catch up a little this weekend to get organized and settled on the home front so we’re all set for the new schedule. This year’s been amazingly challenging. Not in a hard or sad way. I…

School started for my big girls this week. It felt like such a sneak attack! I’m having to play catch up a little this weekend to get organized and settled on the home front so we’re all set for the new schedule.

This year’s been amazingly challenging. Not in a hard or sad way. I feel so happy/blessed/lucky and oddly peaceful considering all the balls I’m juggling now. But sometimes during the particularly stressful weeks, the feeling of being overwhelmed will start to creep up on me and I’ve had to do everything I can to squash the emotion before it can start to take shape and kill my motivation. Isn’t motivation a funny mind game? One second I can be laying in bed in the morning, checking my emails on my phone, getting overwhelmed a little, and then proceed to make a million excuses for myself on why I should just call it in for the day (not a great feeling for 6 am). And then I’ll check Instagram and see something beautiful and new to me, or someone doing what they do well, with heart and passion, and suddenly I’m ready to hop out of bed and tackle my to do list with a vengeance!

 photo happy weekend.jpg

(Michael knows that any time I’m putting on shoes that tie, I mean business and stuff is going to get DONE! That usually means I’m wearing sneakers, but these cute sandals have a tie on them, and they’re crazy comfortable, so they count!)

What inspires you to get through the stressful days? I’ll admit it – sometimes I bribe myself with a little present. Like, if I buy myself a new candle, I’ll be about ten times more likely to give the house a good cleaning/organizing session. If I’m wearing new shoes, I’ll be more excited to go to the slab yard for the 20th time this week.

 photo WEEKEND LGN.jpg
candle (this one is amazing too!)  //  suede Vans  //   copper-handled baskets   
I’m already set for the weekend because I got a pretty fiddle leaf at Home Depot this week for only $37 and I found two of the West Elm bullet planter bases at an outlet place here called DownEast Home for about $25! Super score. I want to plant the fig tree in the bigger size base up in the studio, but I need to find a planter that fits the stand first.
 photo LGN FIGLEAF.jpg

What are you up to this weekend? Besides all the cleaning and organizing, we are finishing up a playhouse Michael and I have been building for the girls here and there over the past couple of weeks. Can’t wait to share! xo

Uncategorized

DIY Yarn-Wrapped Sconce Cords

I bought these sconces for cheap at Urban Outfitters a few years ago. They’re super cute and look much more expensive than they really are. I had painted the cords to match the walls of our guest room back then, but I wanted to reuse the sconces in Evie’s room and the dark forest green…

I bought these sconces for cheap at Urban Outfitters a few years ago. They’re super cute and look much more expensive than they really are. I had painted the cords to match the walls of our guest room back then, but I wanted to reuse the sconces in Evie’s room and the dark forest green color needed to be painted out or changed.

 photo IMG_0375.jpg
 photo IMG_0544.jpg

I’ve always loved Schoolhouse Electric’s cloth cord styles and thought I could do something similar here with just a dab of glue and a bit of colorful yarn.

 photo IMG_0444.jpg

You only need glue when you’re starting and ending, and the tighter you wrap the yarn, the better! I found it was helpful to wrap the yarn around a glue stick or a popsicle stick before wrapping the cord. It helps keep everything tight and untangled. Also, just to be safe, I didn’t wrap the cords all the way down to the plug (I left a good two feet unwrapped).

 photo IMG_1185.jpg

I love when simple projects make inexpensive finds look extra special! The project cost me nothing and I was happy to give new life to these sconces we’ve been storing for years! :)

 photo IMG_0412.jpg
Uncategorized

On Choosing Bathroom Tile

Shopping for tile just might be one of my favorite things. There are SO many great patterns, colors and materials out there! The only problem is that whenever I shop for tile at a design center I’m always blown away at the prices. It can really add up quickly! Then, earlier this year, when I…

Shopping for tile just might be one of my favorite things. There are SO many great patterns, colors and materials out there! The only problem is that whenever I shop for tile at a design center I’m always blown away at the prices. It can really add up quickly!

 photo LGN CHOOSING TILE.jpg

Then, earlier this year, when I started working on my parents remodel and we needed lots of tile, I stumbled into Floor & Decor for the first time. It took about 30 seconds of looking at their great marble tile inventory to realize that we were set! We literally bought every tile we used in the house at Floor & Decor! They had every style we envisioned for each of the bathrooms, the laundry room and the kitchen. And now I’m using their tile in a couple of client projects, too. It feels like my not-so-secret, secret source! :) The best part is they have all the tile in stock in their stores, so you can handpick the sheets or tile pieces you like the best (SO important when using stone, especially, with all the natural color and pattern variation!).

 photo IMG_1738.jpg

Their stores are HUGE and they carry almost every style of hard surface flooring (including wood) and decorative tile you can imagine. They also sell all of the supplies and tools you’ll need for installation. It’s a DIYer’s (and designer’s!) paradise.

 photo IMG_1739.jpg

Given how into Floor & Decor I’ve been these days, you can imagine how excited I was when they reached out to invite me to share some of my favorite tile selections with you! I’ve learned that because there are so many classic and on-trend options available, that’s a task easier said than done! But when it comes to choosing tile for a bathroom or kitchen backsplash, there’s a high likelihood I’ll be going with one of my three favorite tiling options: subway, penny and/or marble.

 photo IMG_1053.jpg

Subway tile is just about as classic as you can get! And don’t feel like you have to go with the standard running bond installation pattern! Think outside the box! (Here is a great reference sheet for pattern ideas.) I’m completely in love with this version of a herringbone pattern, rotated just a few degrees to give it a more modern feel!

 photo de10ff8851b30f49b8de73ff741034e4.jpg
Smitten Studio

Another way to make subway tile feel special is to make it more graphic with a really dark grout. I love the marble baseboard in this photo too.

 photo 2a3986d80f79f7558b0036ab93a96afe.jpg
Domino

 photo 6ed2892717b1489df13c203a32430491.jpg
source

Although, I will say that white grout is back with a vengeance! I think part of that is due to how far grout technology has come over the past few years. Floor & Decor carries a few great lines that don’t need to be sealed or re-sealed. Bring on the white grout!

 photo ddb8015f1313f1270688b422774df8e4.jpg
Mark Reilly

 photo 097504229fa73c4a823277f2b7e36214.jpg
Amber Interiors

 photo ec4a966e053dc6d91483771e1ad6331e.jpg
Design Sponge

One of the best things about subway tile is it’s super cheap – only 21 cents a piece! The beveled edge tile is a bit of an upgrade, but is still affordable at only 49 cents.

 photo IMG_1042 copy.jpg

The 4×4″ square is an absolute steal at 12 cents each!

 photo IMG_1038 copy1.jpg

It’s surprisingly chic for such an affordable material! How great does it look with this black hex tile? I think that is the secret to making subway tile look special – pairing it with something a little more unique!

 photo ded790bff5f7a69377a2326ad41566a9 1.jpg
source

Penny and hex tiles are another way to stretch your design dollar. These beautiful penny tiles are only $2.99/ft.

 photo IMG_1047.jpg

Just like with subway tile, you really can’t go wrong with white penny tile and gray grout! If you’re feeling adventurous, black penny with black grout is super modern and so dramatic!

 photo bathAnnaSpiro.png
Anna Spiro

 photo 0d5a98527a2cf251c28597a1f6e9fb51.jpg
Studio McGee

Some people worry about cleaning so much grout, but it’s really not that bad! I use this beast of a scrub brush on my tumbling block floor tile and it works great! I actually love all the grout in a bathroom – it makes the floors much safer to walk on when wet.

 photo cf6756a1c9cf7fb06ac437829c77dcfa.jpg
source

And don’t forget the idea of making your own patterns with hex or penny tiles!

 photo 2d3f2ff8288b69d81a68bdecf7f8643e.jpg

The marble tile section is where I spend most of my time shopping at F&D. The employees that work that section know me (and Margot) by name. :) We used this one in my Mom and Dad’s bathroom:

 photo IMG_1020 copy_1.jpg

And this one in their guest bath (after photos to come!):

 photo IMG_0973 copy_1.jpg

 photo IMG_0979 copy_1.jpg

And this beautiful mosaic marble in their game room bath:

 photo IMG_0972 copy_1.jpg

 photo IMG_9592.jpg

 photo 1IMG_9757.jpg

And this sweet marble mini herringbone tile for their kitchen backsplash. I love the texture of this tile!

 photo IMG_0964 copy_1.jpg

 photo IMG_0965 copy_1.jpg

 photo IMG_0014 copy.jpg

 photo IMG_0137 copy.jpg

I’ve been wanting to replace the tile in the studio bath and I’m toying with an idea my newest design team member, Megan, showed me on Pinterest for cutting down 12×12 marble tiles into smaller strips for a herringbone pattern. Wouldn’t that be a gorgeous look with these inexpensive honed carrara tiles?

 photo IMG_0960 copy_1.jpg

 photo IMG_0944 copy_1.jpg

 photo 70c6105ff2582753f3697842a6ccc259.jpg
Enjoy Co.

 photo 1f5b8bb97d76a293fef51463f9ce4cb3.jpg
Amy Sklar

 photo 3df1ef872dcb5abfabc33d7322bb05b4.jpg
Elements of Style

 photo 0c781831fc5fb9b4707f40d84d6ec192.jpg
Elements of Style

If that idea ends up being too labor intensive, my back-up plan is this gorgeous marble basketweave pattern. I am pretty obsessed with this one!

 photo IMG_1029 copy_1.jpg

Do you love tile as much as I do? Like consumes-your-every-waking-thought-and-dream amounts of love?? Which tile patterns are making your heart go pitter-patter lately? 
A big thanks to Floor & Decor for partnering with me on this flooring series! :) And if you’re interested in hiring our team to help you design your home, email me! We’re taking clients in Arizona and California.
Uncategorized

DIY Faux Marble

I love it when readers share their home projects with me! Recently Yael emailed me a link to her post on faux marbling. I loved how she used resin as a top layer – I felt like that really made the countertop look like stone! We needed a new top for the vintage credenza for…

I love it when readers share their home projects with me! Recently Yael emailed me a link to her post on faux marbling. I loved how she used resin as a top layer – I felt like that really made the countertop look like stone!

 photo IMG_0731 copy.jpg

We needed a new top for the vintage credenza for Ali’s house and this faux marble idea seemed like the perfect, super inexpensive solution!

 photo IMG_1393.jpg
 photo IMG_1398.jpg
 photo IMG_1495.jpg

I removed the old, beat up top and had a piece of 3/4″ MDF cut to the same size and painted it with white zinsser primer.

 photo IMG_1392.jpg

Then I collected my supplies based on Yael’s tutorial and this post from Gorgeous Shiny Things.
 photo IMG_0590.jpg

sea sponge  //  artist’s brushes  //  mixing containers and paint stirrers  //  feathering brush  //
  feather  //  clear latex glaze  //  resin
 photo IMG_1425.jpg

You’ll only need two paint colors for this project: black and white. You can mix in little bits of blue or brown to cool or warm up the gray if you want. Use the containers to mix up small batches of different shades of gray. You could just do this on a paper plate if you wanted and if you’re doing a small surface like mine.
 photo IMG_1427.jpg

Next you’ll want to cut your sea sponge down to a small piece and sponge on really loose veins. It’s a good idea to reference a couple of photos of marble on google images to help you understanding what real marble looks like. Something I noticed is that veins branch off from each other and usually don’t ever cross paths or create an X. 
 photo IMG_1445.jpg

You just sort of get into a rhythm of sponging on different colors and tones of the gray mixture and then feather the edges with your big soft brush.
 photo IMG_1450.jpg

Then you use an artist’s brush to drag in solid veins. I learned the the veins should be less curvy and more jagged. It’s also best to pull and twist the brush toward you. Also, don’t forget to continue the vein down over the edge.
 photo IMG_1453.jpg

After a while of playing with it, a marble-like pattern will (hopefully!) start to emerge. It’s a good idea to leave it and come back to it a few times, but don’t overwork the paint either. I probably should have stopped a little earlier, but I still like the end result.
 photo IMG_1462.jpg

The real secret is using a coat of resin on top of the faux marble painting. 
 photo IMG_1470.jpg

Like with any epoxy, you just mix the two bottles together and then spread quickly before the epoxy hardens.
 photo IMG_1473.jpg

You can use a plastic spatula to spread the epoxy, but I just used a paint stirrer. I used an entire quart here.
 photo IMG_1484.jpg
 photo IMG_1492.jpg

After a few hours, the resin will be dry to the touch and fully cured within two days. It’s a really cool product!

 photo IMG_0792.jpg

I love how this one turned out. I think the resin really takes the look to the next level. 

 photo IMG_0731.jpg

It’s not perfectly perfect (I think it gets better with some practice), but you just can’t beat the price of a little paint on a scrap piece of MDF! :)

 photo IMG_0768.jpg

 photo IMG_1536.jpg

If you have a project you would like to share on LGN, please email me a link! I would love to see your work! And thanks again to Yael! xo

Uncategorized

DIY Lucite Frame

When it came to figuring out art for Evie’s room (remember she requested butterflies?), I knew I wanted to try this great tutorial from Honey and Fitz. I’ve used oversized acrylic sheets for framing wallpaper before and I loved it, but I really like the look of double-paned acrylic rather than just the one sheet…

When it came to figuring out art for Evie’s room (remember she requested butterflies?), I knew I wanted to try this great tutorial from Honey and Fitz. I’ve used oversized acrylic sheets for framing wallpaper before and I loved it, but I really like the look of double-paned acrylic rather than just the one sheet against the wall.

 photo IMG_0570.jpg

I had no idea that you can buy smaller sheets of acrylic at Lowes! Such a helpful tip! I picked up four of these 30×36″ sheets for about $20 each and then I got started on the artwork with my girls.

 photo IMG_1243.jpg

I found this butterfly book at an antique book store (it can be found here too).

 photo IMG_8854.jpg
 photo IMG_8852.jpg
 photo IMG_8839.jpg

It has about 50 color plates of butterfly sketches that I referenced to draw random butterflies on two sheets of lilac colored art paper that I cut to be just a few inches shorter than the acrylic sheets.

 photo IMG_1340.jpg
I outlined the sketches in black sharpie and let the girls color them in however they wanted. My two older girls used acrylic paint and Evie went with markers.
 photo IMG_1347.jpg
 photo IMG_1343.jpg
 photo IMG_1350.jpg
After they finished coloring in the butterflies, I mounted the paper to the back acrylic sheet with double-sided tape and then marked where I wanted my screws to go. Then I heated an extra large nail with a long match until it was hot enough to melt the acrylic. This is a much easier way to make holes in the acrylic than screwing with a drill. Acrylic is pretty brittle and can break in the drilling process, but the hot nail is easy and pretty painless!

 photo IMG_1163.jpg

 photo IMG_1391.jpg

Then all you do is thread the holes with a 1/2″ long machine screw and a nut to sandwich the two boards together.

 photo IMG_1161.jpg

You can use picture hanging wire wrapped around the screw underneath the nut to hang your new frame.

 photo IMG_1168.jpg

The wire will show a little on the side middle screws, but it’s not really noticeable. 

 photo IMG_0549.jpg

I love how this project turned out and the girls really loved working on it with me! :)

 photo IMG_0534.jpg
 photo IMG_0495.jpg
This error message is only visible to WordPress admins
There has been a problem with your Instagram Feed.
© Jenny Komenda. All Rights Reserved.
Site by