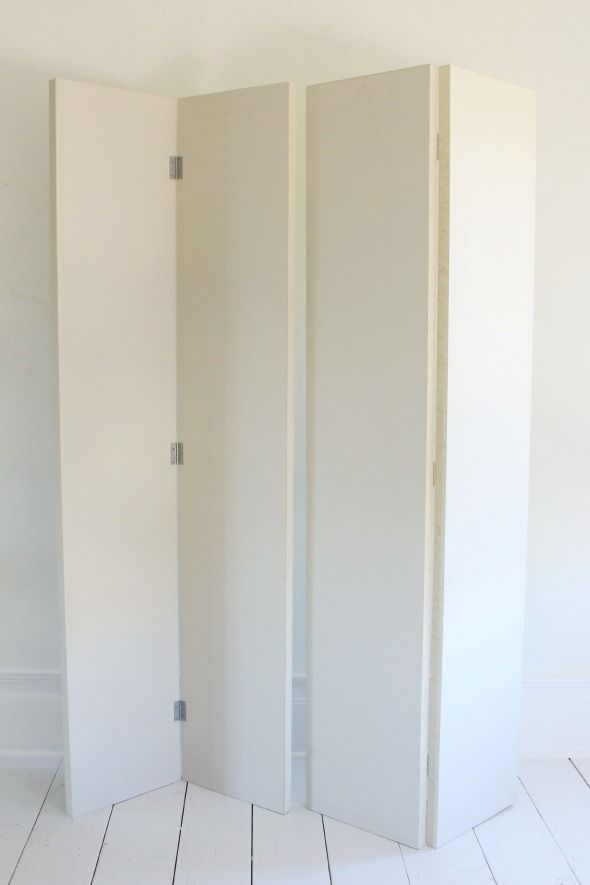
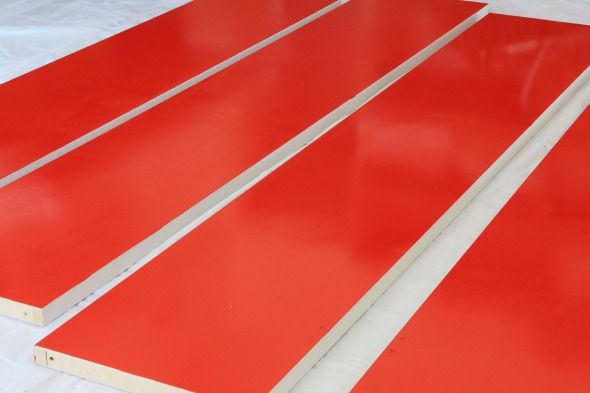
I got these flat masonite doors at Home Depot for $40, which was cheap enough, but looking back I probably should have checked Habit ReStore before buying new. They sell a ton of closet doors just like these for just a couple bucks usually.
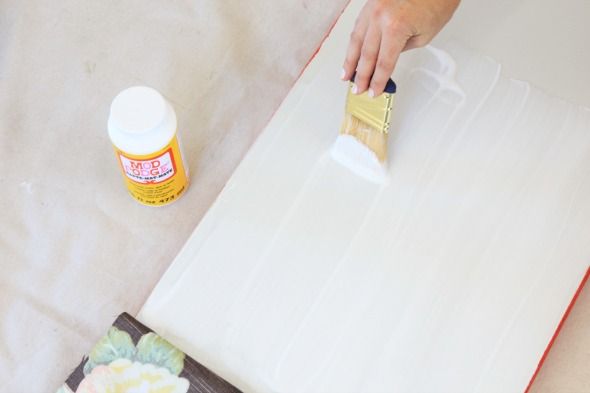
The masonite was pre-primed, so we rolled on a good coat of my forever-favorite Safety Red enamel paint as a first step.
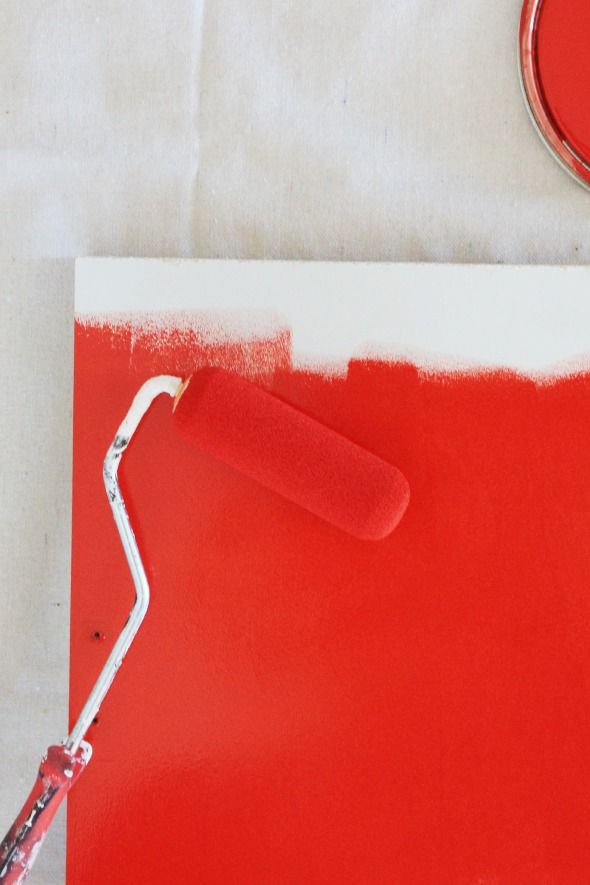
We rolled on the backs first and then all the edges. We left the fronts white for the floral fabric application.
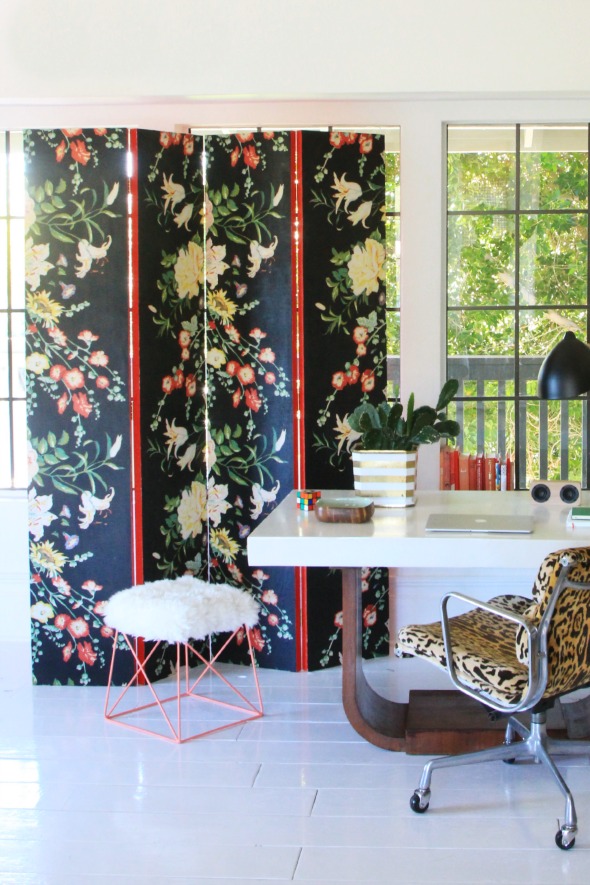
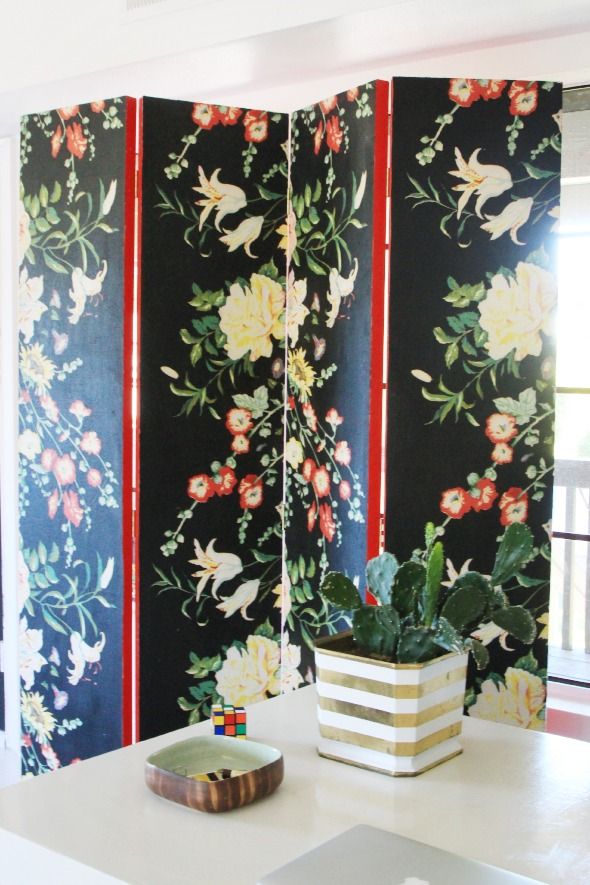
I had yards and yards of this pretty Brunschwig and Fils floral that was the perfect candidate for the decorative fronts of the screens. I should have taken a photo of the full width of the uncut fabric, but it’s basically a thick wall of florals in the center of the pattern, with lots of black negative space on the edges. Since each door panel is only 15″ wide, we were able to make the most of the black space (which felt a little more modern to me) and then create a new pattern with placement of the fabric repeats.
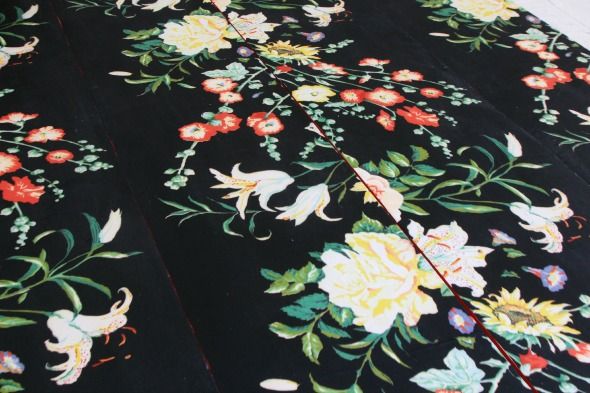
I wanted the fabric to look almost wallpapered, so we cut two sets of each pattern repeat, so there would be two sets of two matching doors.
The fabric decoupaged chair project worked out so well that I was quick to pull out the Mod Podge again on this project.
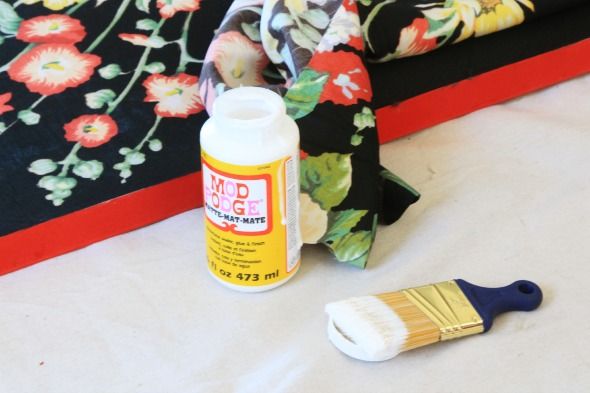
I brushed on an even, thick coat on the unpainted side of the doors, about two feet at a time.
I used the black edge as my guide and smoothed out the fabric as I went. It’s really important to get out all the air bubbles before the Mod Podge dries.
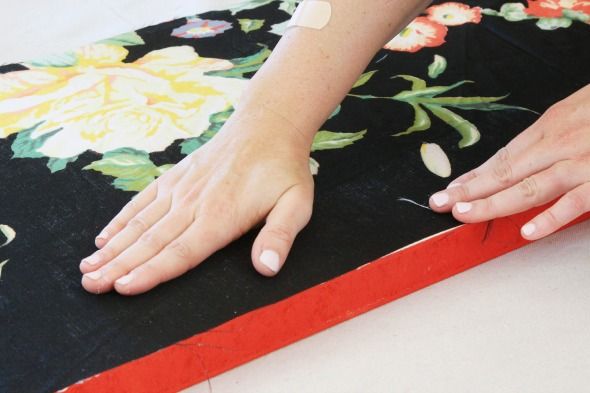
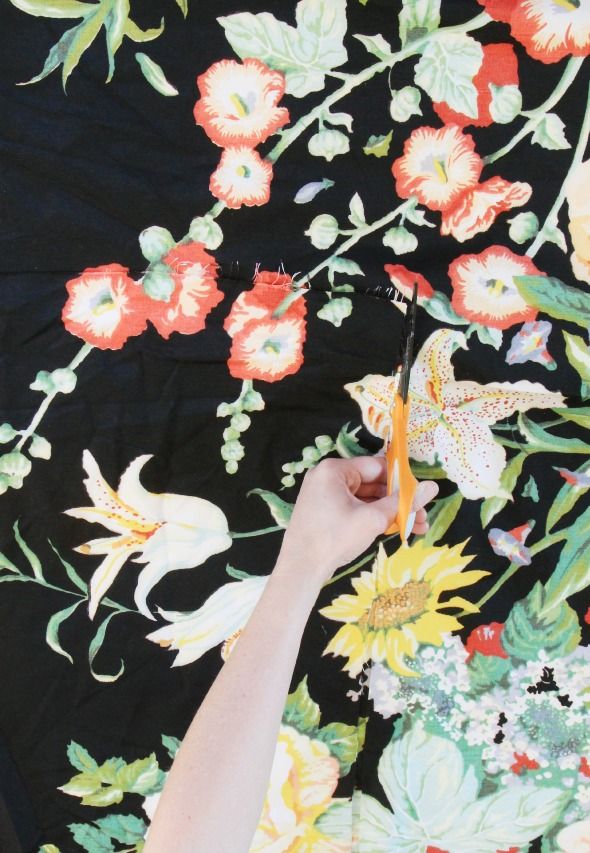
Once the fabric had dried a bit, I cleaned up the edges with an X-acto knife, just like with the chair project.
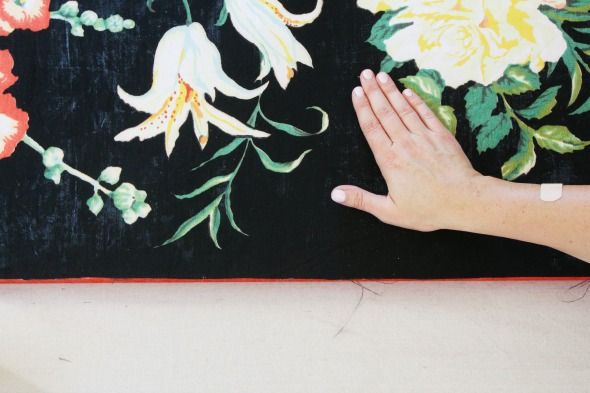
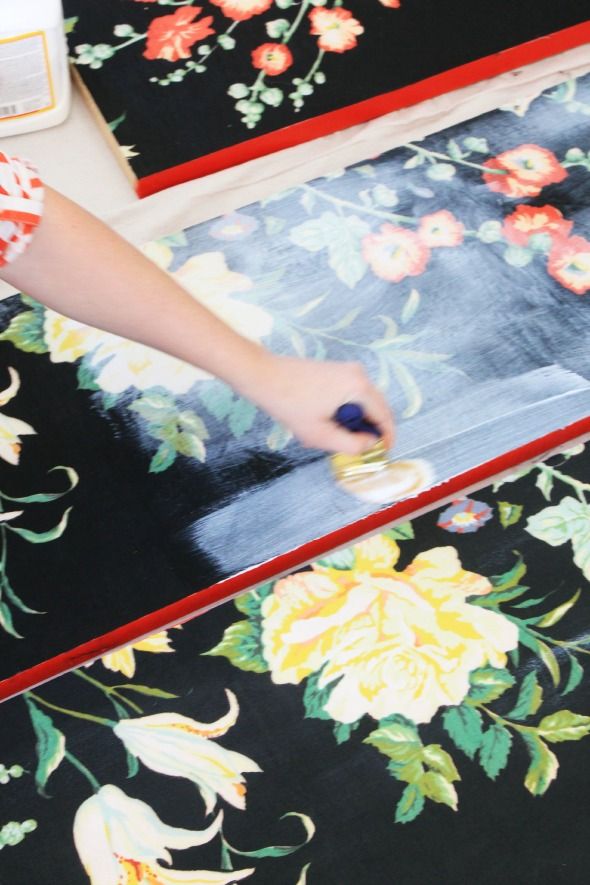
Then we brushed on a top coat of Mod Podge, to even out and seal the fabric, especially around the edges.
After the top coat had dried, we flipped the doors over and screwed in new brass hinges. Each pair got three hinges installed on the backs, just like this, with the spine of the hinge facing down:
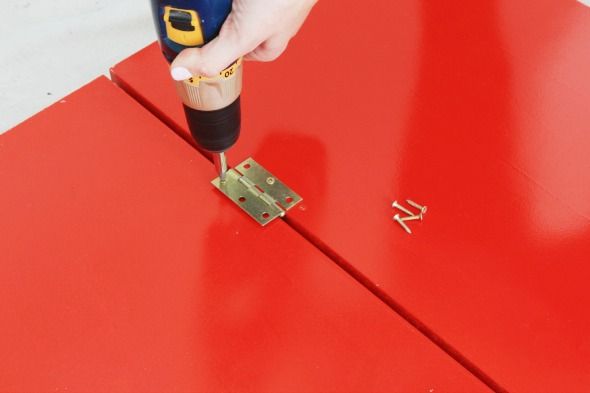
And then the two pairs were connected with three hinges installed inside the inner lip of the doors, so that the doors would zig and zag and fold correctly. Again, the hinge spine was facing down here.
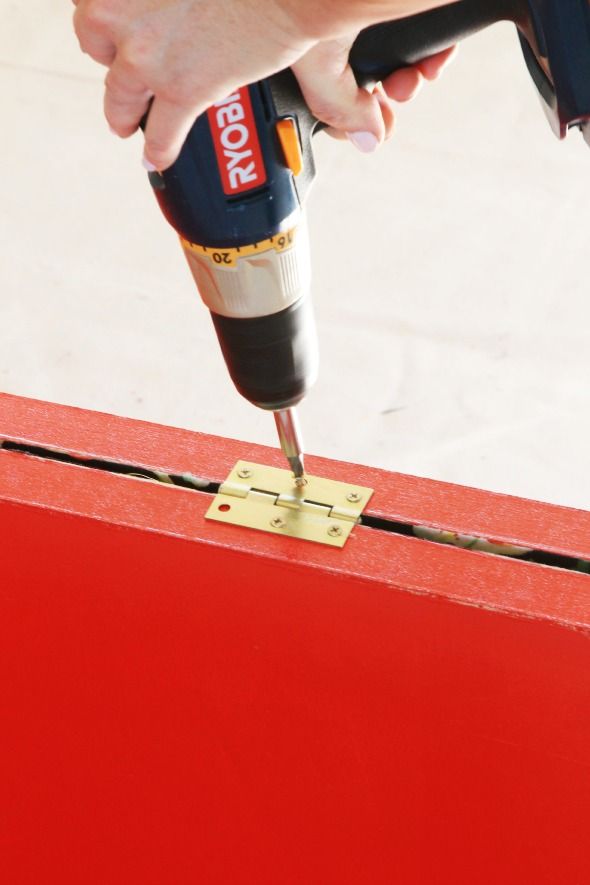
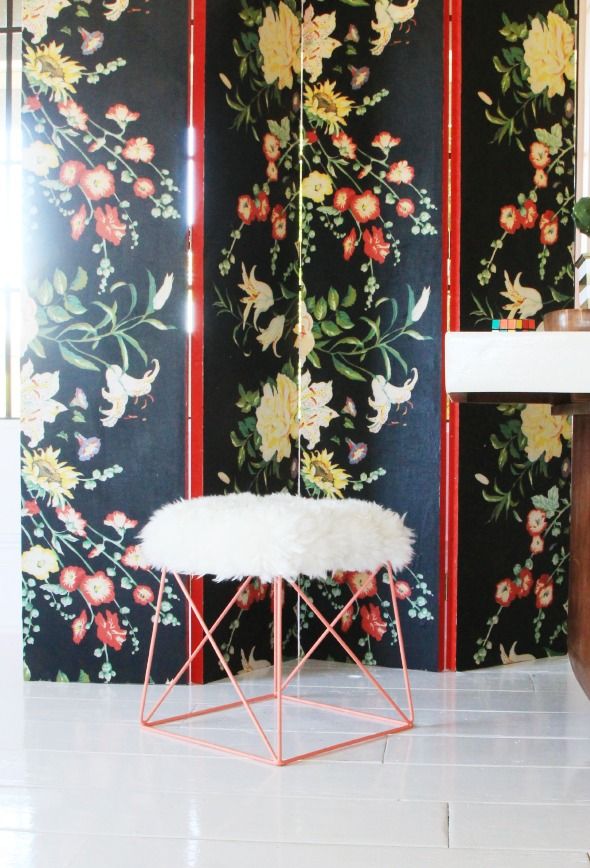
Isn’t the brass so pretty against the glossy red of the door backs?
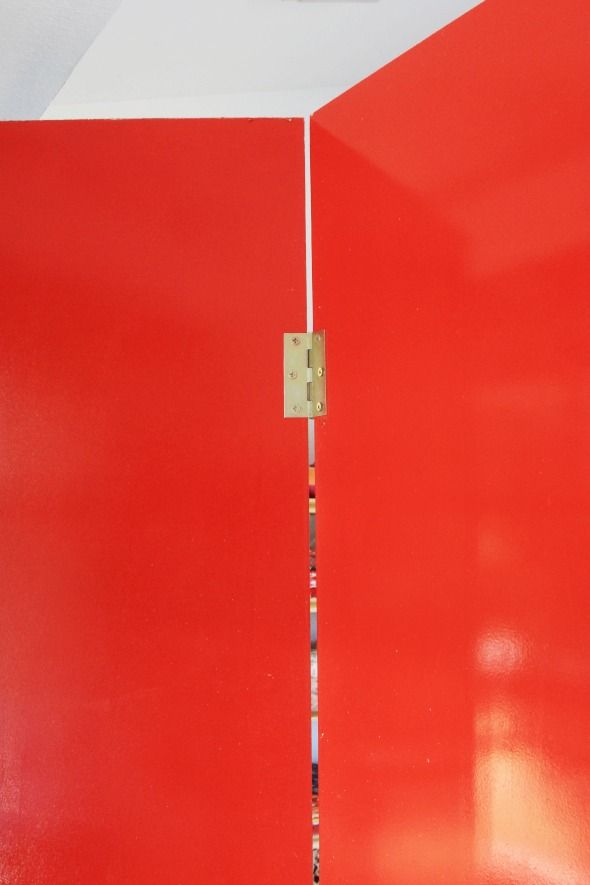
And the pop of red peeking out from behind the black floral is so striking!
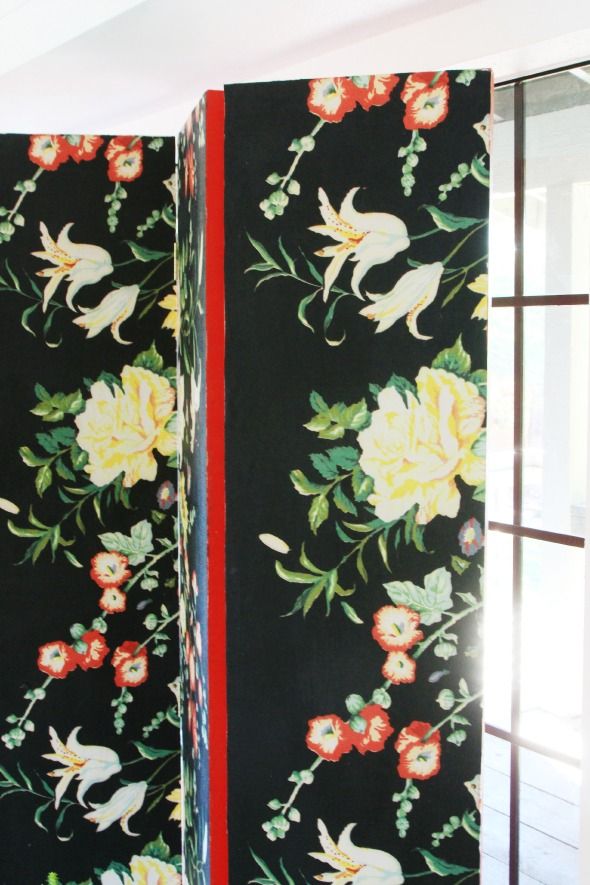
It’s hard to tell in these photos, but the top coat of Mod Podge made for a really dreamy, matte wash over the pattern. It is SO pretty.
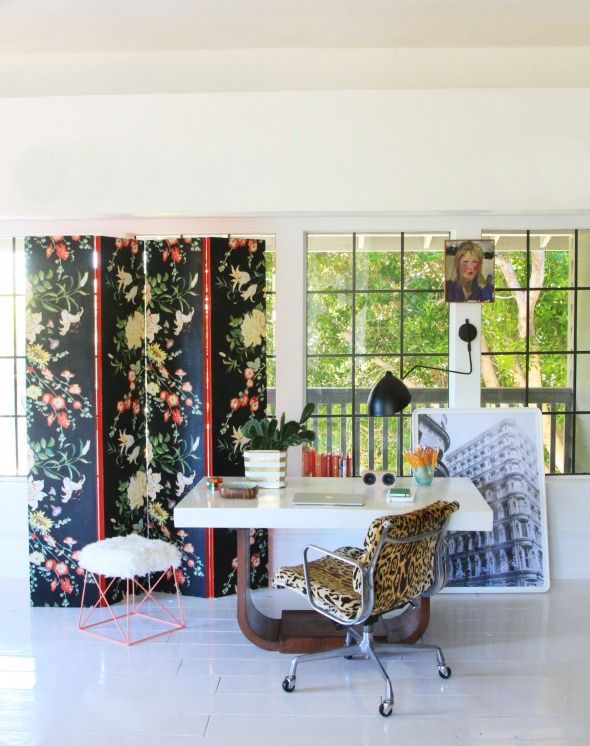
I really love the folding screen application, but I’m also thinking this would be a great way to dress up boring old bifold doors for a closet space! It’s a really cheap way to get a wallpaper look in a room without the cost, hassle and commitment.
Have you seen any other folding screen projects around lately? I’m looking around my house thinking of all the places that could use one. They’re so easy to make and so pretty! :)


This screen is stunning, Jenny! Who would have thought it could be as easy as you have described? Time to get shopping for some great fabric.
So cute! Once again your use of color is amazing
COOCOO FOR COCO
Fantastic screen! Waiting with bated breath, for the post on that amazing desk which is phenomenal in the final pictures!!!
As always, very impressed with your talent and handiwork.
You are so good at choosing and using such bold, beautiful colors without things looking overwhelming or obnoxious! I swear every time I try, I just can't pull it off. Wanna come live at my house for a while? ;)
I love it and I love your fabric choice.
Your desk looks amazing!!!! So jealous!!
Yes the doors are great, but THAT DESK!!!!! WOW JENNY!!!! Can't wait to hear about it and you transformed it so fast! Wow.
This is one of my favorite DIYs in a while – SO gorgeous. (Funny enough, I was actually thinking about you and Safety Red last night, dreaming up a new dresser for my son's room – ha!) This is really beautiful.
WOW! This is incredible, the fabric placement is perfect! That desk is insane.
Beautiful!
BOOM. That screen is so gorgeous, and the styling in the last photo is insane. If that were in Domino, that page would've been ripped out (for keeping, not destroying ;-) in like two seconds. :)
Jenny! The desk!! Can you do a post on how you transformed it. Oh, and the screens look amazing of course!
Love the paint and fabric combination.
Love the screen and the fur stool. What color did you use on the stool? I think I have the same ones … Would love to make mine look like this!!!
Yessssss!
Gorgeous! Love the floral. And…. the desk! Did you give the table a new top?! Cut it down?! Hope you plan on sharing all the juicy details. :) Love!!!
How many yards of fabric did you use?
Love this!
That is just gorgeous.
Beautiful result and another great tutorial. The red makes it! I'm on the bench about my screen…fabulous Scalmandre paper in a classic French garland motif. Your post may inspire me to head in a different direction. Thank you. P.S. This is also a wonderful thing to use as a window treatment. Sort of a modern update to the solid interior shutters seen in European stately homes.
That is fabulous!!! And you got such a good coat of paint on it. Can you share what brand of enamel paint you used? It's AWESOME!!!!! OH… and that fabric! Where is it from?
Ahhh!! So gorgeous. Love love love.
I didn't know Mod Podge could be used as a fabric adhesive. I recently used fabric glue to adhere fabric to the top of a faux leather poof…I'm wondering if Mod Podge would have been better?
You are amazing! I just emailed this to my husband asking him if he would take our doors down so I can do this! I told him you were my fave designer and he HAD to check out your blog!
That's SO gorgeous! I actually made a wallpapered one a few years ago (http://www.fermlivingshopblog.com/2013/01/feeling-festive.html), but this has me wanting to do a new one with more color :)
Love that fabric. But can we talk about that table?
I love it! The fabric choice was so perfect. It's such a striking, beautiful contrast against that gorgeous table/ desk.
I have had a bi-fold screen for years and done the opposing sides in seasonal tones. Right now I have one side for Summer in a creamy grass cloth with very subtle shades of pale blue and wheat mixed in. The opposite side is my Winter choice with a silk stripe of reds, grays and a subtle touch of orange. I currently use it as a dressing screen in a bedroom alcove where it offers privacy and hides my messy closet area but over the years it has found a spot in almost every room in my many different homes. When I'm in the mood for a change, I simply flip the screen.
I just have to leave a quick note – I was just scrolling through after your last update, and realized that these DIY folding screens of yours were in a dream I had last night. So crazy! I guess they made a strong impression!
Oh my God! I can't believe it this is so gorgeous!
I don't need screens but I gotta definitely try this on something. So super amazing!
WOW! This is such a great project!!! It is so inspiring – i want to do something like this ASAP!!! Love your color/fabric combo. it looks sooo expensive and lovely!!! xo megan
http://www.otomihome.com
The screen is so beautiful! Great idea!
xo
Christa
http://www.gardeniasandmint.wordpress.com
Ooh! We’re just buying a house with lots of these, on every closet door, bedrooms and coat closet combined! I wanted to replace them all with curtains, but this could be a great look for some of them. Thanks so much!
What a wonderful idea. Thank you for sharing .
Simple fast project , big impact for relatively small effort.
Great choice of fabric.
Flair and color .
Very nice indeed.