
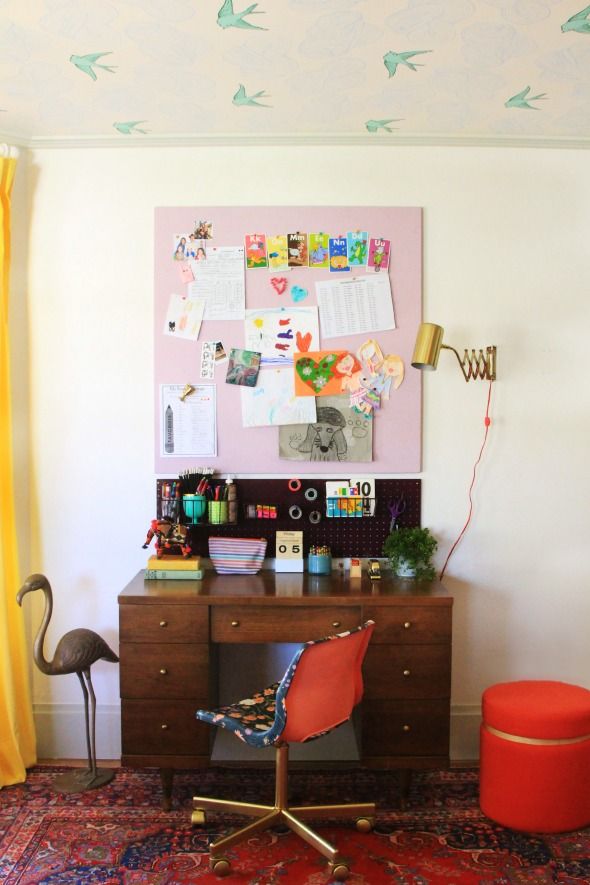
For our little homework station project, I wanted to find a really inexpensive option for the girls’ desk chair. I bought the vintage wood desk at a store called Another Man’s Junk here in Phoenix and I love it’s simple lines, but I wanted the chair to feel a little more fun and youthful. I poked around online trying to find a cheap upholstered office chair to recover in a pretty fabric when I stumbled on these $20 chairs at IKEA. I thought they would be a good candidate for a decoupage project (this one has really stuck in my brain!).
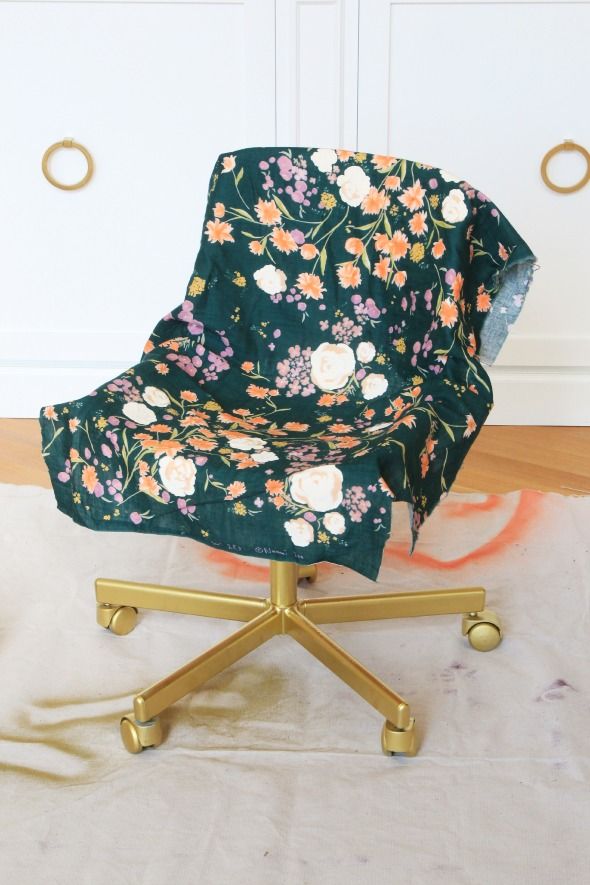
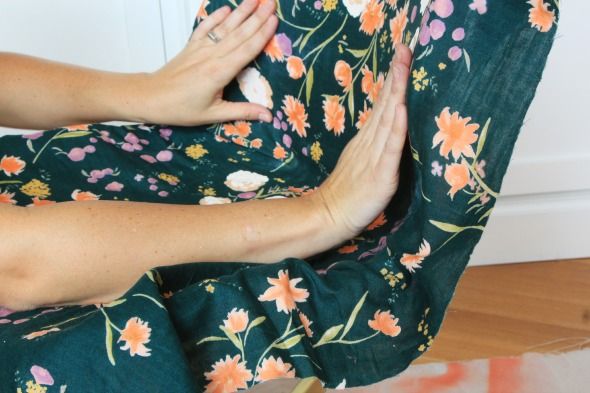
I pulled out some pretty, lightweight cotton fabric from my stash. I had bought several yards of this gauzy cotton Nani Iro for Kokka Fabrics at Purl Soho for a client project a few years ago. We ended up choosing another fabric, so I kept the yardage and I’m so glad I did! It worked perfectly here.
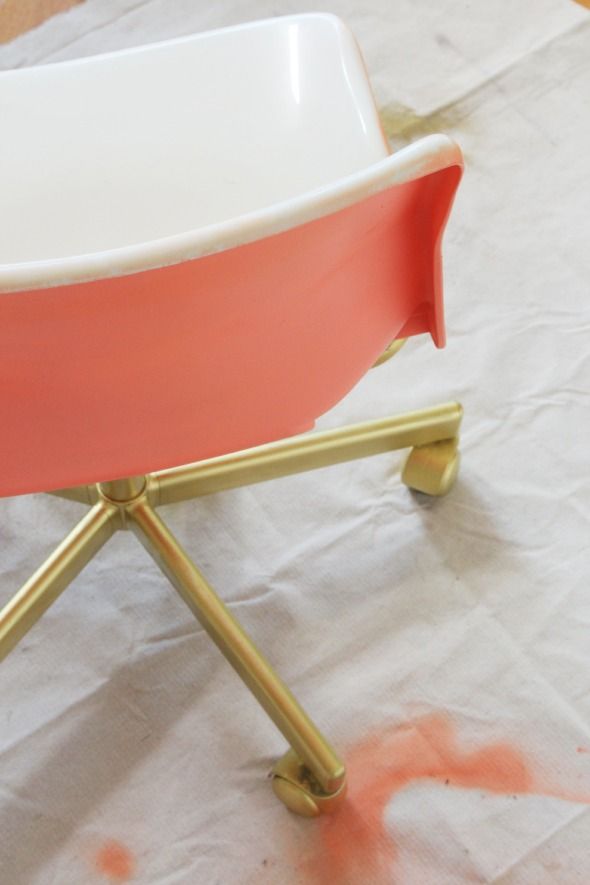
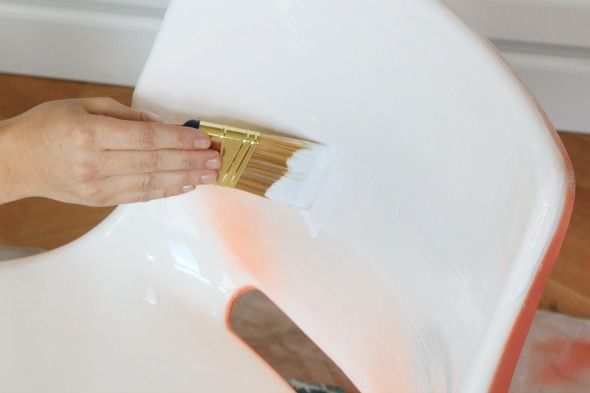
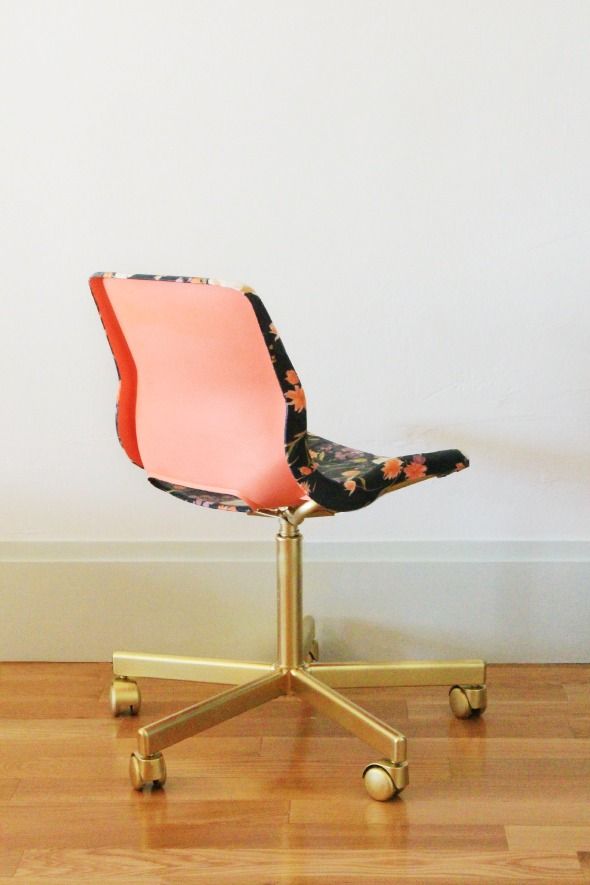
Before we started with the decoupage, we sprayed the chair legs gold with Design Master’s Gold Metal and the chair back with a coral spray paint from Krylon which is supposed to work on plastics (and seems to be doing a good job of holding up).
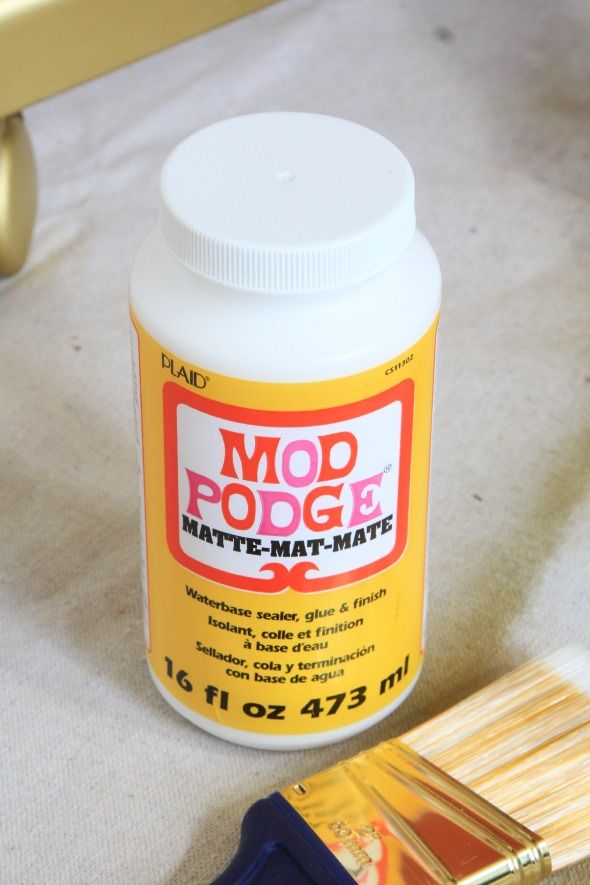
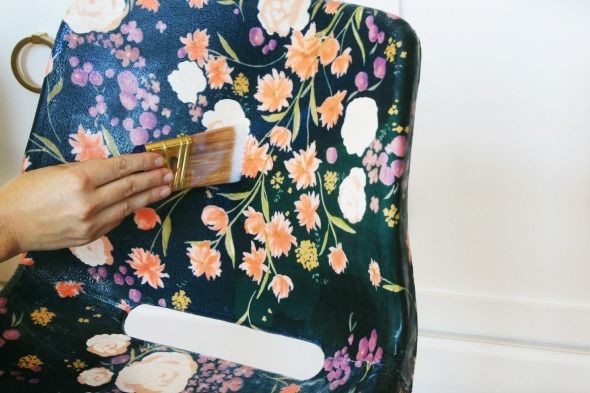
I started by brushing on a pretty generous coat of matte Mod Podge on just the front of the chair back. I left the edges of the seat alone for this part and just worried about the front face.
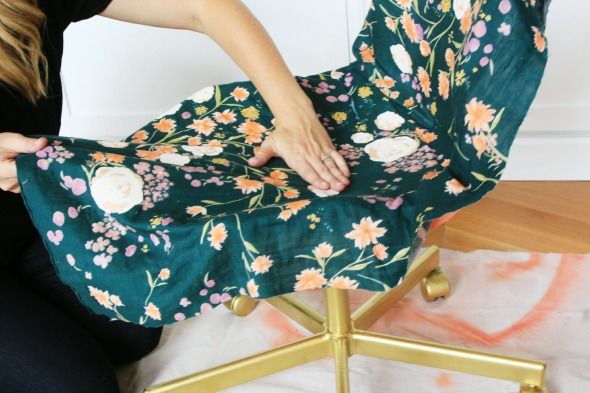
I had figured out the pattern placement and cut out a section of fabric before I started glueing that was several inches bigger than the chair on all sides. I carefully placed the fabric on top of the Mod Podge layer and used my hands to smooth out all the bumps and wrinkles. It takes some work and time, but it’s really not all that hard to get a taut, smooth surface with the fabric.
When the upper chair back was smooth, I repeated the same process on the chair seat. Again, I left the edges dry at this point and worried just about the big surfaces.
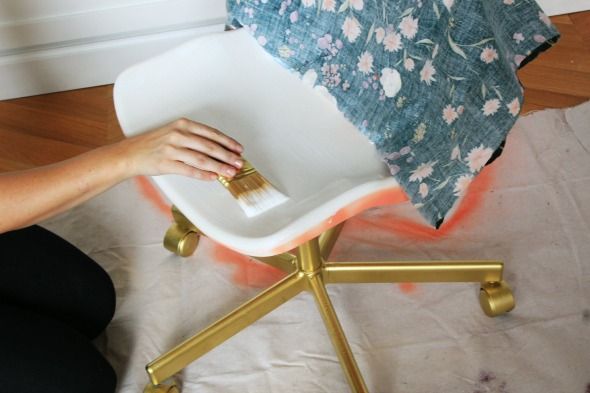
If you do this project using the same IKEA chair, you’ll want to leave just a bit of fabric bunched around the curve of the seat (where the little hole in the back is).
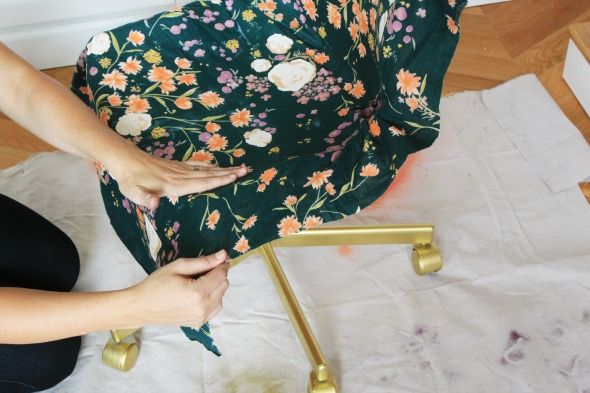
Once the seat and the seat back were all smooth, I trimmed the excess fabric a bit more, just to make things more manageable, and then I brushed Mod Podge onto the face of the edges and started the same process of smoothing.
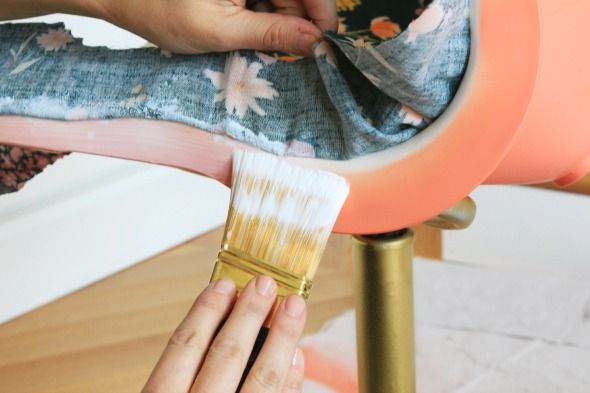
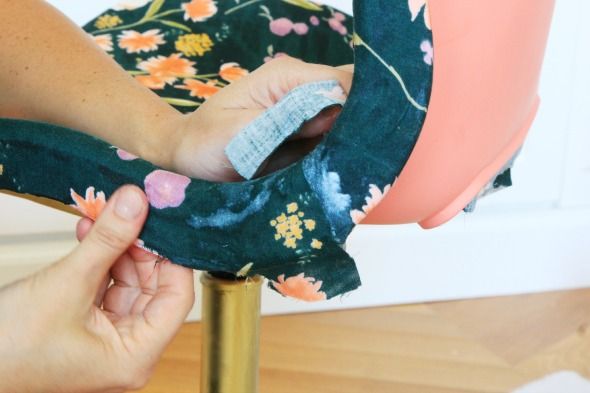
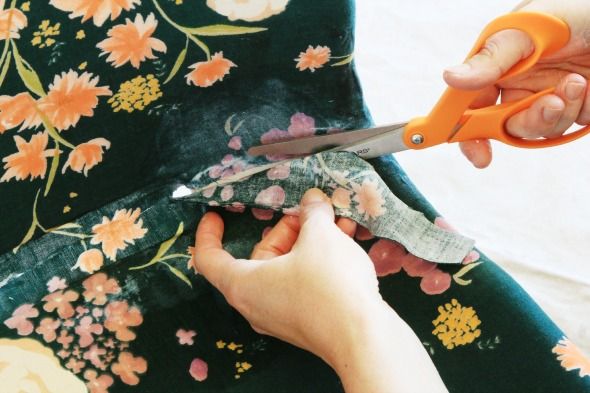
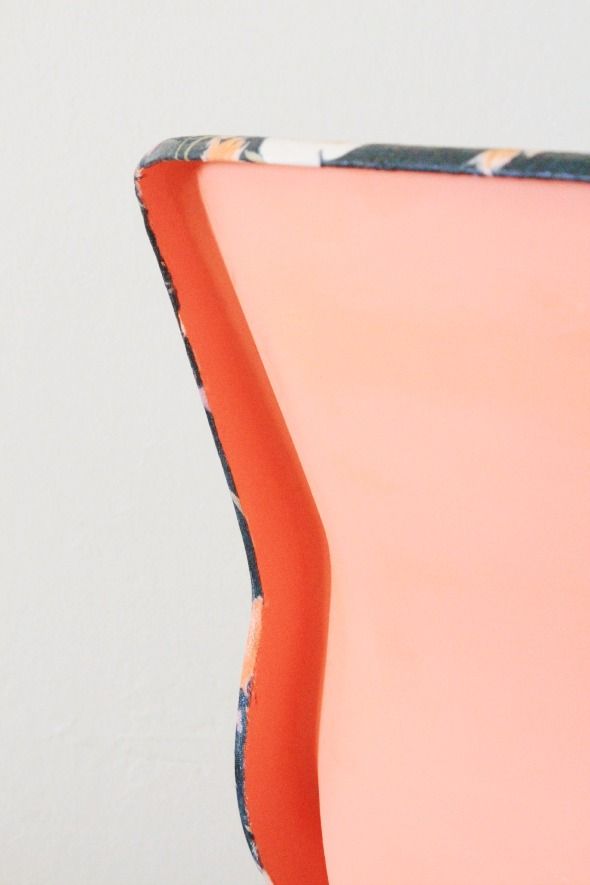
The corners and curves are really the only tricky part. I cut out some of the extra fabric in a triangle shape until the fabric sat perfectly smooth around the corner edge and then I glued it down with Mod Podge.

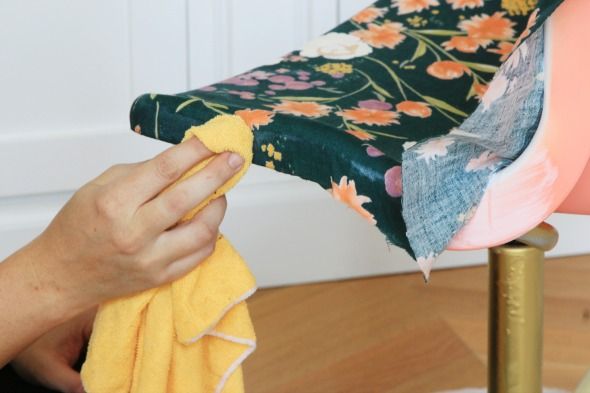
A damp cloth really helps smooth everything down and was a big help with the edges especially.
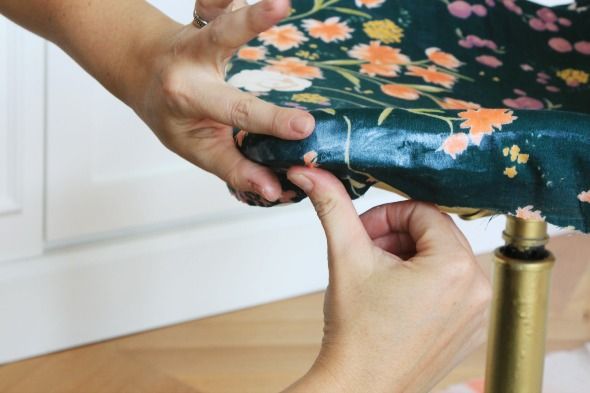
I cut away more fabric for the curve and the hole in the back of the chair before gluing the fabric down. Mod Podge is so easy to work with. It is so forgiving and can be repositioned for a long time.
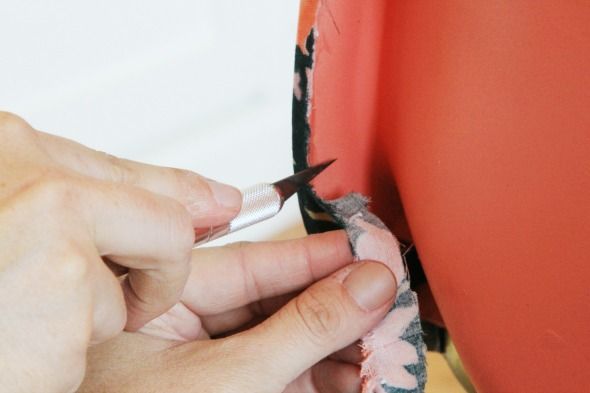
Once the Mod Podge had dried (about an hour or two later), I ran an X-acto knife down the inside edge of the back. And then I brush on another little bit of Mod Podge along the edge to help seal the fabric and prevent fraying.
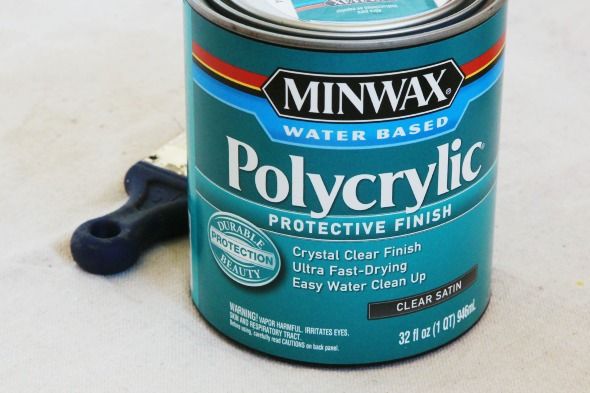
Once the whole chair was done and dry, I brushed on two thick coats of satin Polycrylic sealer on top of the fabric. This changed the look and feel of the fabric a bit – it sort of looks like laminated fabric now, or like the chair is made from a textured, printed plastic maybe? But the surface is solid and waterproof and easy to clean now, so I’m cool with it.
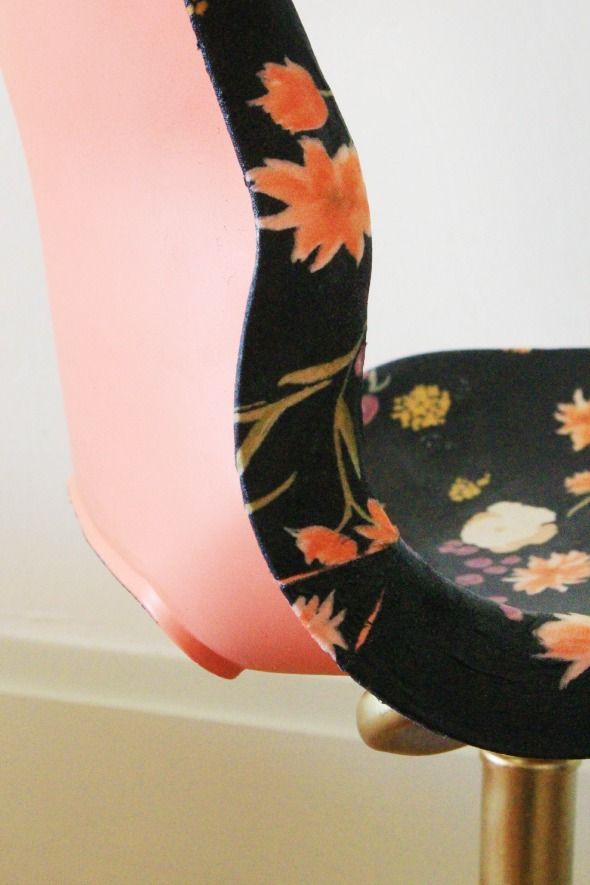
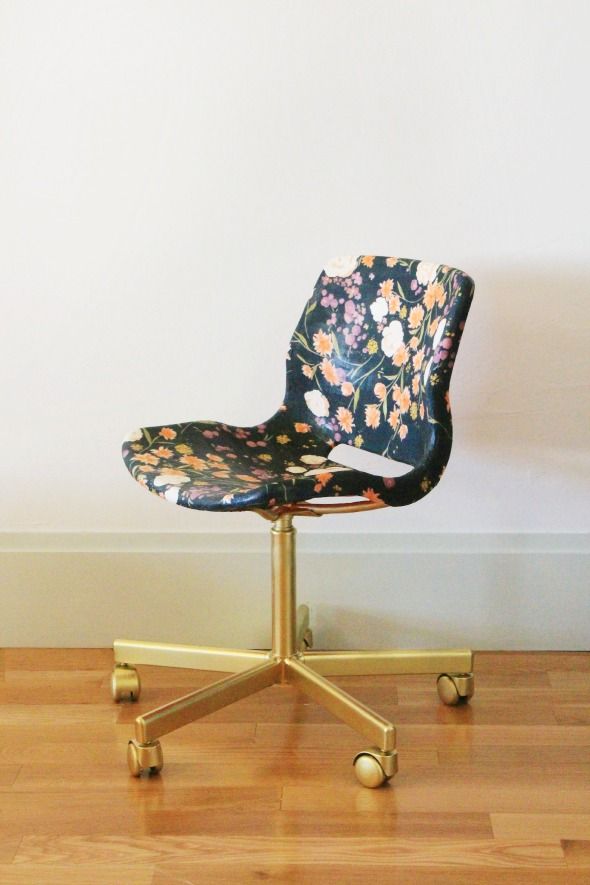
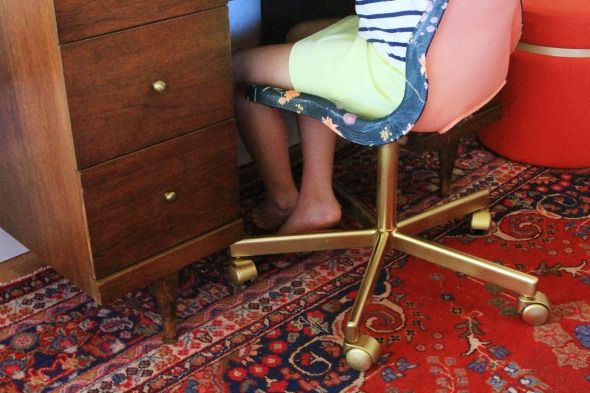
Still pretty cute, right? I love how it looks from the back especially, with the pop of coral!
It feels pretty indestructible and my girls love it. Win-win. :)


Adorable!
THUMBS UP – what a great idea.
Go Jenny!
I love this! Do you think it will hold up?
This might be one of my favourite projects you've ever done. I figured it must be modge podge – it looks awesome. Out of curiosity, do you think it was necessary to seal the fabric after or do you think it would have been fine without?
Your creativity knows no bounds… love everything you come up with and this adorable chair is no exception!
This is awesome, I love it. These would even look great as a set.
Such an awesome idea – and the poly on the chair is genius with kiddos around!
So cute! I never would have thought to use mod podge on furniture! Beautiful as always!
That is SO CUTE. And I love how the colors of the chair are mixing with the rug. You are amazing.
Jenny, you are simply amazing! The chair looks great–brilliant idea and impressive execution, per usual!
Seriously – how do you come up with this stuff…so cool!!!
Super cute and such a cleaver idea. That fabric is adorable :)
this project is so cool! it really opens up a million options by using fabric :)
Thank you, thank you for putting this up. I really would love to do this DIY.
I thought I recognized that fabric. LOVE Nano Iro gauze….so gorgeous. I think I will do this same thing to some knockoff plastic chairs that I have. If only I had that same three chair set up from Design Sponge. Soo great. Thanks for all the great DIY's Jenny. I should give you so much credit for helping me with my own old house. IT is was more inspired since I found your blog.
I found a desk like that for $35 but I couldn't get there first! :( I ended up finding something else for $30 not as nice but it does the trick. Thanks for reminding me about Hodge Podge–I was going to use fabric glue to stick fabric on a poof but I think Modge Podge would work better! Happy Nesting.
Do you see any reason decoupaging fabric wouldn't work on the walls inside of a closet? I have a few closets that are in need of an upgrade and the walls are too bumpy/crumbly for paint without a ton of work.
Can't believe thats an ikea chair!!
My eyes are darting around my apartment right now, looking for something to decoupage!
Love it! You are amazing and so inspiring! Thanks for sharing !
I am curious, did you spray paint that chair inside? I am horrible at spray painting but I wouldn't even know how to begin doing that inside with all the overspray.
Beautiful! How do you even think of all these things???? Brilliant
I love this! And this is very timely as I'm in the early stages of redesigning my almost 10-yr old daughter's room. I also would love more information on that peg board organization system…did you DIY that as well or find as is? I desperately need some help figuring out what to do with all of her 'craft supplies!!'
This honestly may be one of my favorite posts. So simple and manageable without spending a lot or having a lot of DIY experience. Thanks once again!
Love that fabric, and the decoupage is brilliant! -thepotatohouse.net
L O V E
I bought the vintage wood desk at a store called Another Man's Junk here in Phoenix and I love … kidsofficechairs.blogspot.com
A great blog and very helpfull post. I really like it.
Furniture Michigan
How has this chair held up?
Pretty good! There was a little bit of bubbling on one part that I didn’t repair fast enough and the fabric ripped a little. But I patched it and it looks fine again. :)
I LOVE THIS! I wish I was better at modpodge because floral is my favorite!
First time I’ve seen this done! Great idea and I think I can do it!.
Lovely job well done! I’ve been looking for a good tutorial with clear instructions and great photographs that help and you gave both. Thanks. I’m off to look at what else you have on here :)
Just tried clicking on the envelope sign at top of page to sign up to newsletter. I’m obvsiously missing something as it won’t let me do it so I’ve come back to do it here. Can’t wait to see your next posts. Thanks again.. Val
So pretty! Curious how well the gold stayed on the plastic caster wheels? Just as I was about to spray paint my own (black plastic to metallic gold) someone mentioned that the paint is going to wear off where the caster meets the floor. Did you have this problem?
Hi Jenny! I’ve loved this idea since I first saw it when you posted it many moons ago. Now, I’m in charge of a very low-budget makeover for a charity waiting room. There are currently a bunch of very colorful (dated!!) plastic stacking chairs that we don’t have funds to replace, and was hoping this idea would work. I’m hesitant that it won’t hold up though–any suggestions?? Thank you!!
GREAT IDEA!
THANK FOR SHARING
Such a lovely idea. I’m just wondering how long this chair lasted? Do you still have it today? Just cur7about the edges peeling or paint chipping on the plastic. Thank you
I’ve seen this done! Great idea and I think I can do it!.
Very good idea and interesting concept. I’ll consider to sell this kind of product in my country. Thank you
Super, I was looking for what you described. Thanks for the help !
Great! I also try to refresh my chair
So great with Under Chairn ….
Such a lovely idea.
Very good!
Nice job man
That’s pretty good. Nice job
nice