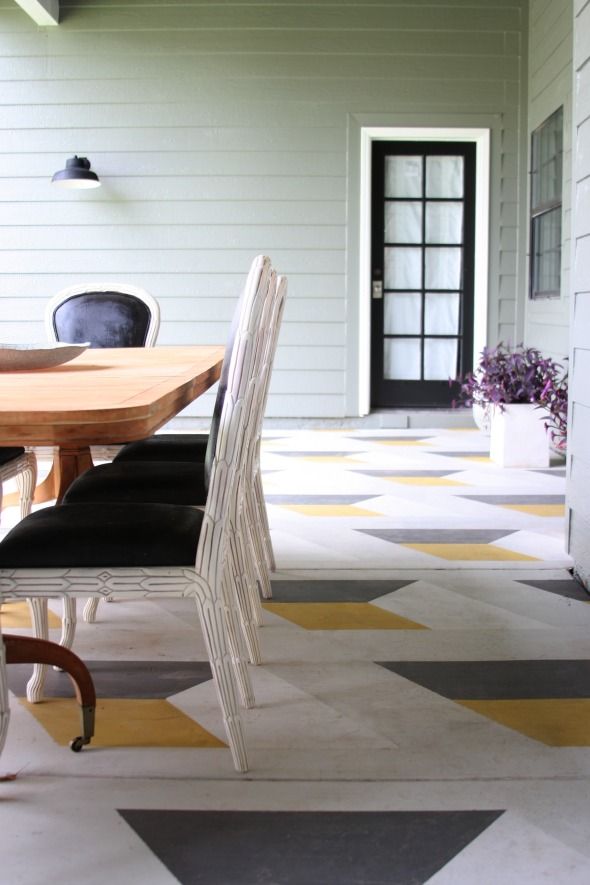
For the longest time, I’ve had plans to paint a geometric cube pattern on an exterior floor. I really hoped to get to do it on our balcony porch in Brooklyn, but we moved before the weather gave me a good chance to patch the cracked concrete. When we moved to the Valley house I thought this little back porch area we have just off the kitchen and living room would be the perfect chance to scratch that itch!
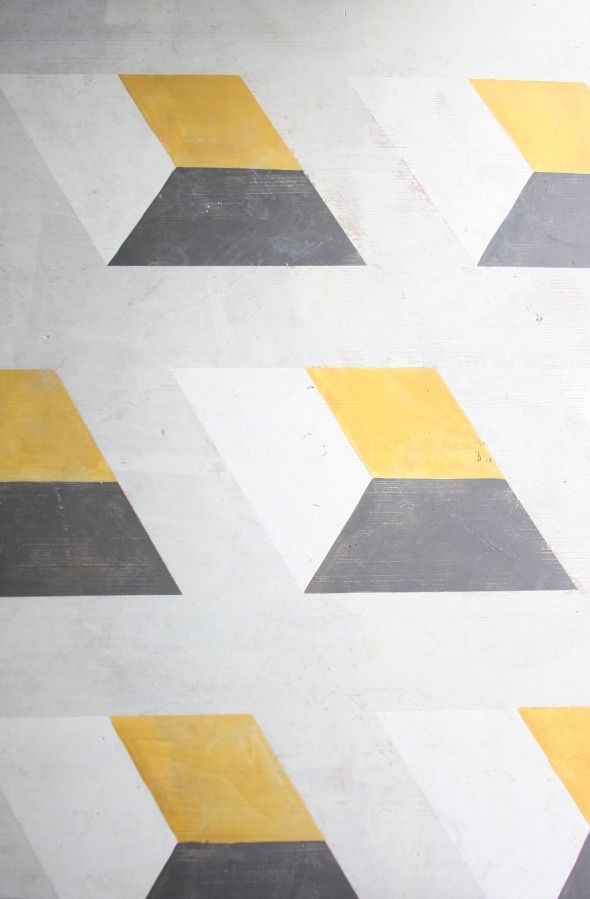
I ended up going with a tumbling block tile in the bathroom, so I wanted this pattern to feel different. I saved this image a while back and it felt like the perfect inspiration – the proportions seemed easy enough to recreate (which, WRONG. Triangles, you kill me!) and it seemed like it wouldn’t be too crazy on the eyes when painted on a large surface.
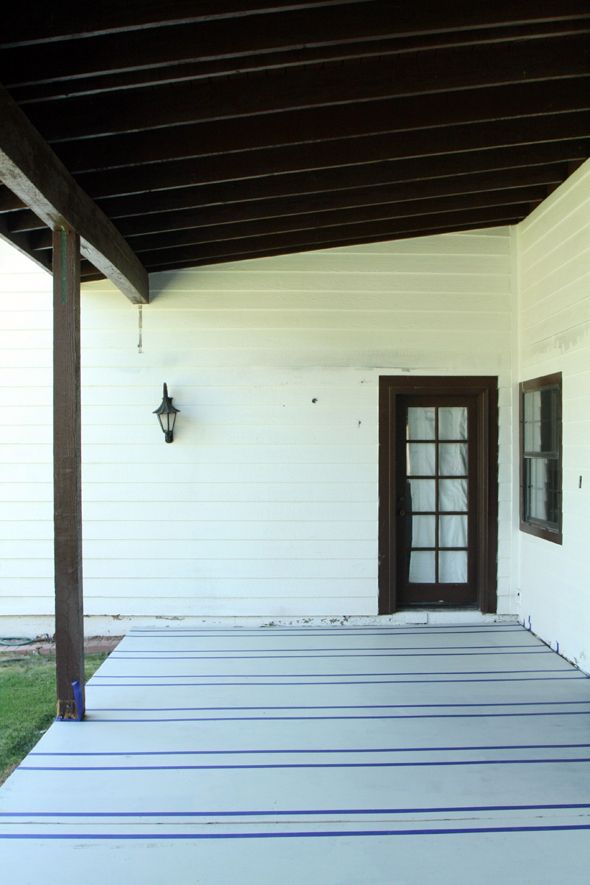
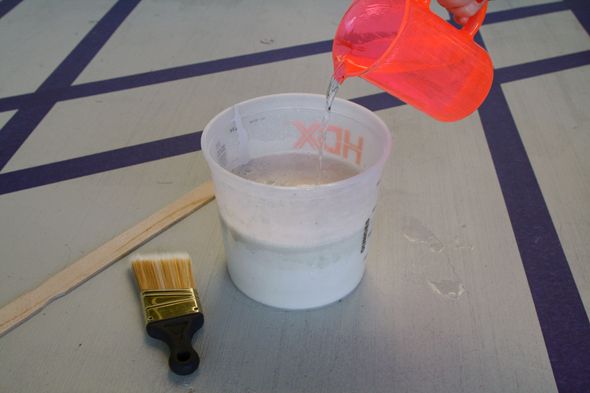
The first step was cleaning the concrete. We used a power wash sprayer to clean the old concrete and then we tried to not step on it before we got the first coat of water-based porch and floor paint down. I ended up watering down the paint because I wanted the finish to be a little mottled or translucent, so it almost, almost looked like a stain instead of paint. I mostly just didn’t want the solid, flat look of a painted floor. Not that I was trying to age it, but I also didn’t want the floor to look brand new and I think the watery paint helped get that look.
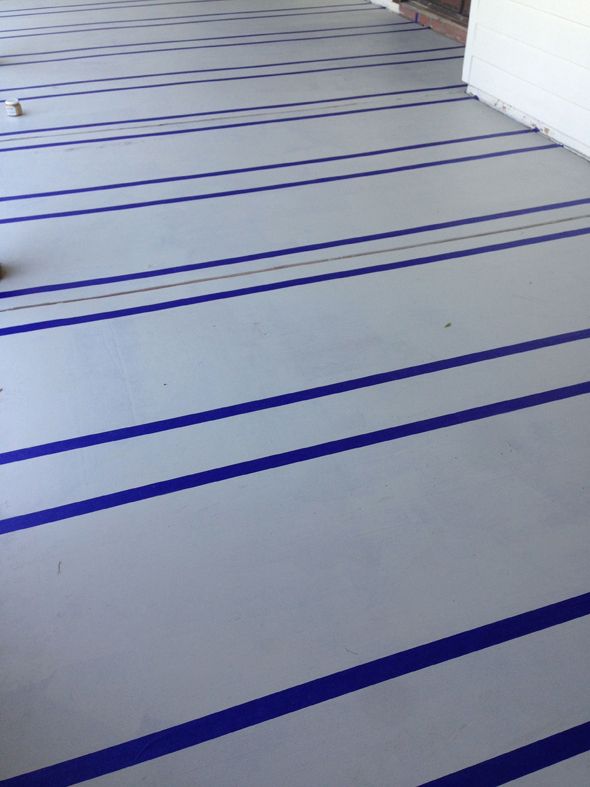
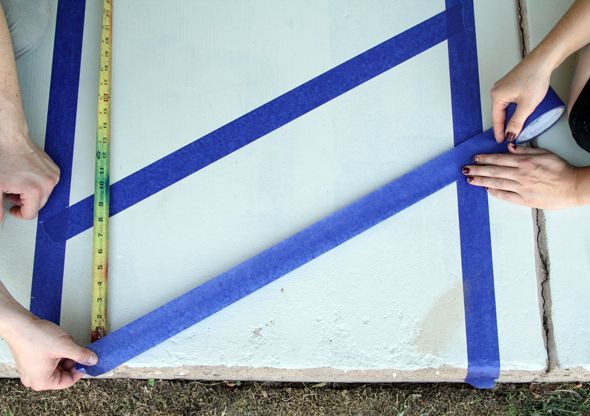
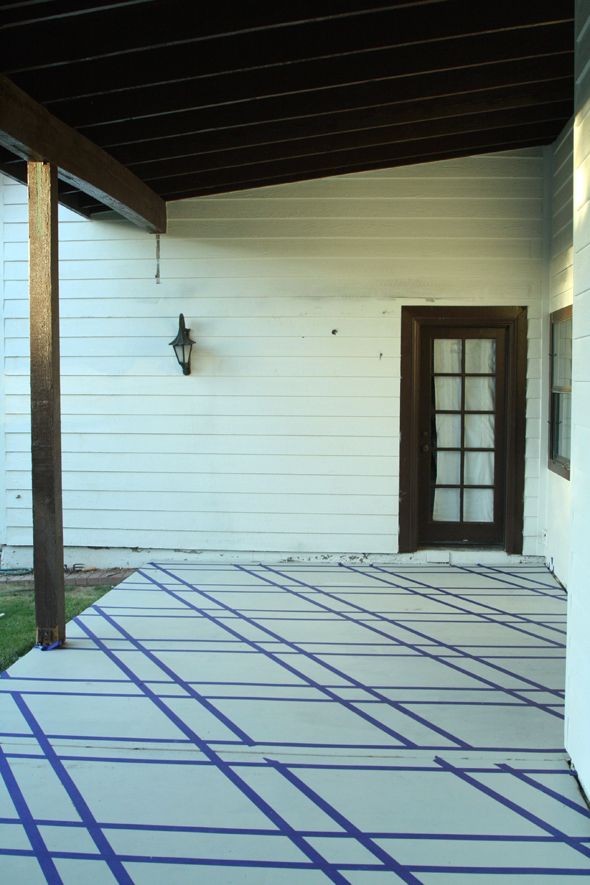
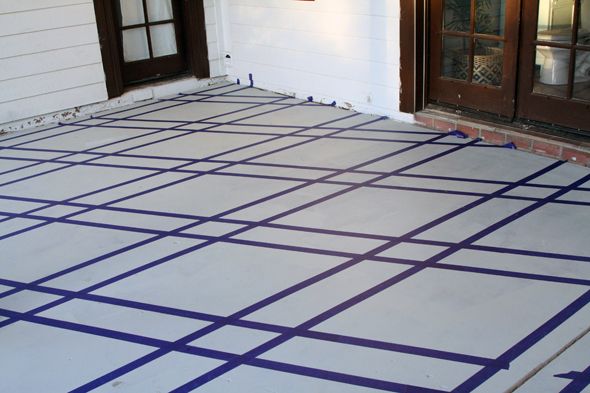
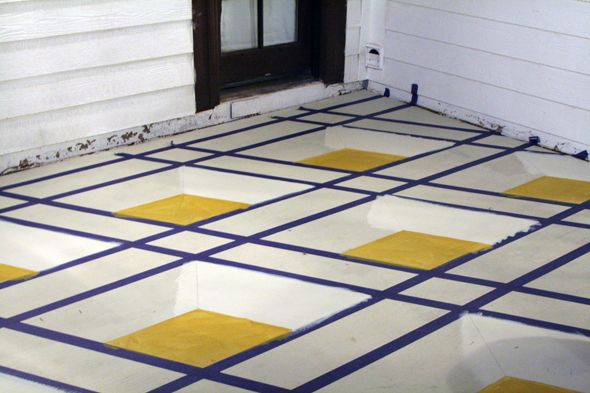
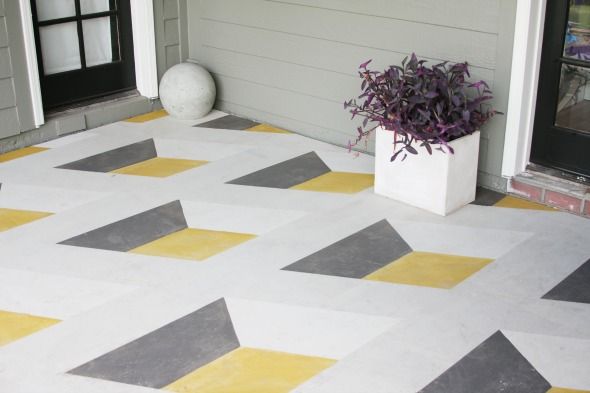
Then Kate and I worked to tape out the beginnings of the pattern. We knew we wanted the pattern to be on the larger side, so we made the main criss-cross pattern 12″ wide.
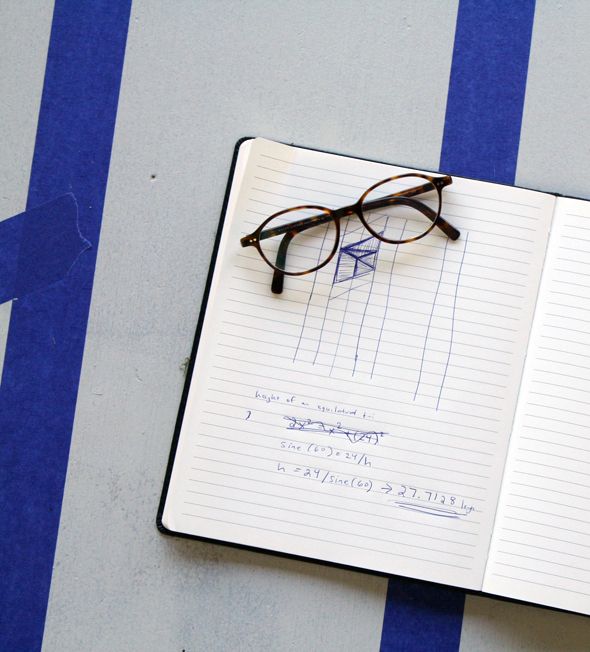
Then it was time to put our heads together and do some serious math. I don’t hate math at all, but I can’t remember a lot of what I learned in trig and calculus, but luckily my smart husband has a memory like a steel trap and he busted out some formulas that helped us figure out the right angles. The most helpful measurement ended up being the hypotenuse (which was a little under 27 and 3/4″). Once we had that line measurement, we could back our way into the distance between the other angles and lines and it was easy to mark and then lay down the diagonal lines of tape.
It felt a little tricky when we were in the thick of it, but it really wasn’t all that bad. I think I was just nervous because I knew every measurement had to be spot-on perfect for the pattern to look right.
Somehow I can’t find the photos of this part, but I divided the 27.71 hypotenuse number in half to figure out the dimensions of a diamond. I draw and cut out a diamond shape on poster board and used it like a stencil to trace out the smaller diamond in each of the larger diamonds. I also used a straight edge to make a line connecting the side point of the smaller diamond with the larger (you can see this in two photos down).
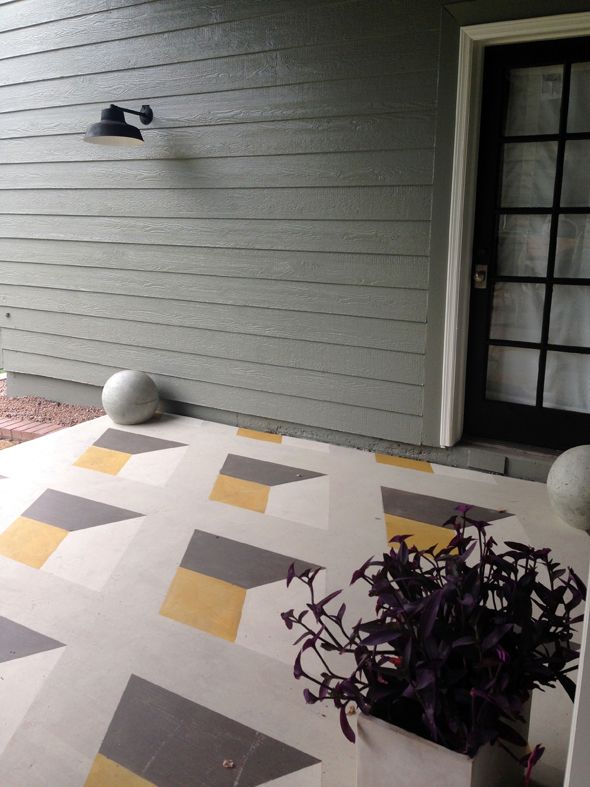
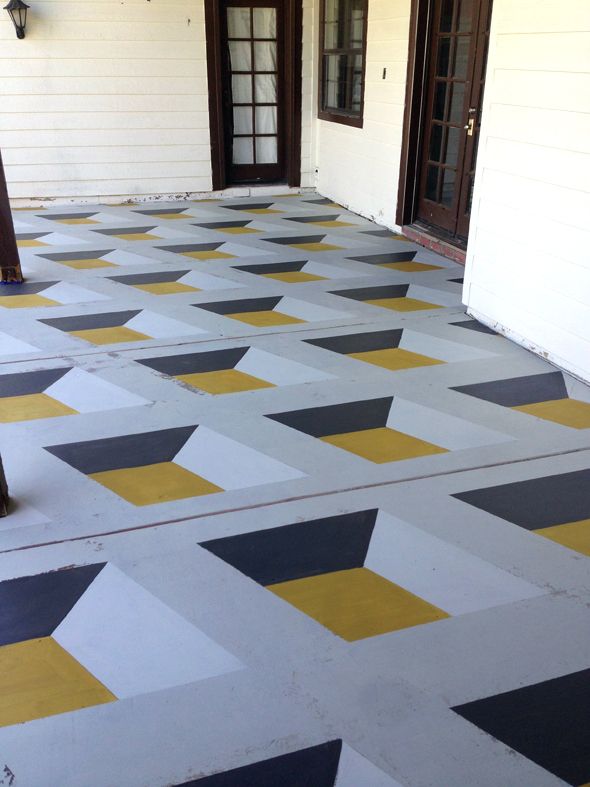
We watered down more porch and floor paint and filled in the shapes. We used Benjamin Moore’s Titanium on the background, the white is Swiss Coffee, the yellow is Ochre and the darkest gray is Martha Stewart’s Seal.
Kate and I have pretty steady painting hands, so I felt comfortable free-handing the lines, but it wouldn’t have been too hard to tape off the small shapes one by one for perfectly perfect lines.
There were some spots that the tape pulled off the bottom layer of paint, but I think that had more to do with the concrete prep than the paint or the tape. I could have easily just touched up the lines and called it good, which we did to a little of, but we used a light hand there and even ended up lightly sanding the whole floor to take some of that new edge off. (again, that was a personal preference thing).
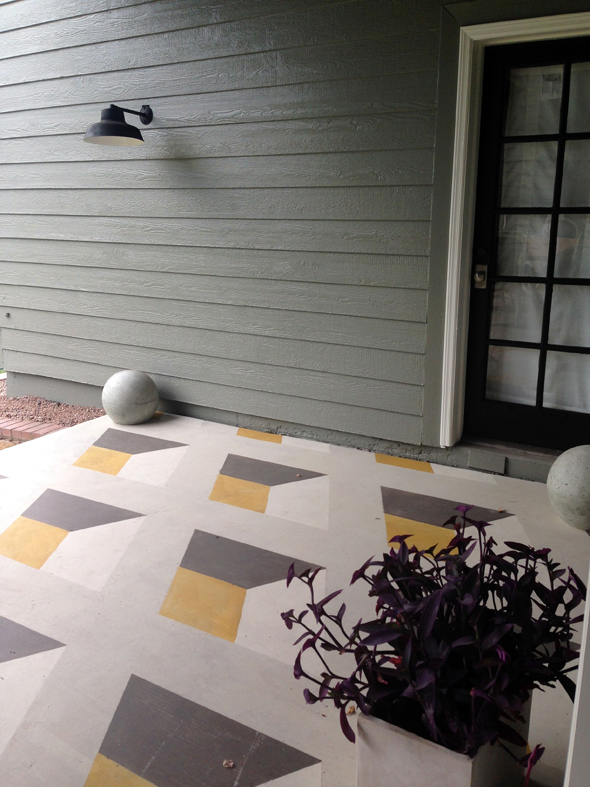
The result was just what I was hoping for. I know this floor is going to take a beating, so I didn’t want it to look too precious from the get-go. We put two coats of porch sealer on top, and so far no big problems with scraping or flaking, even in this 115 degree heat! :)
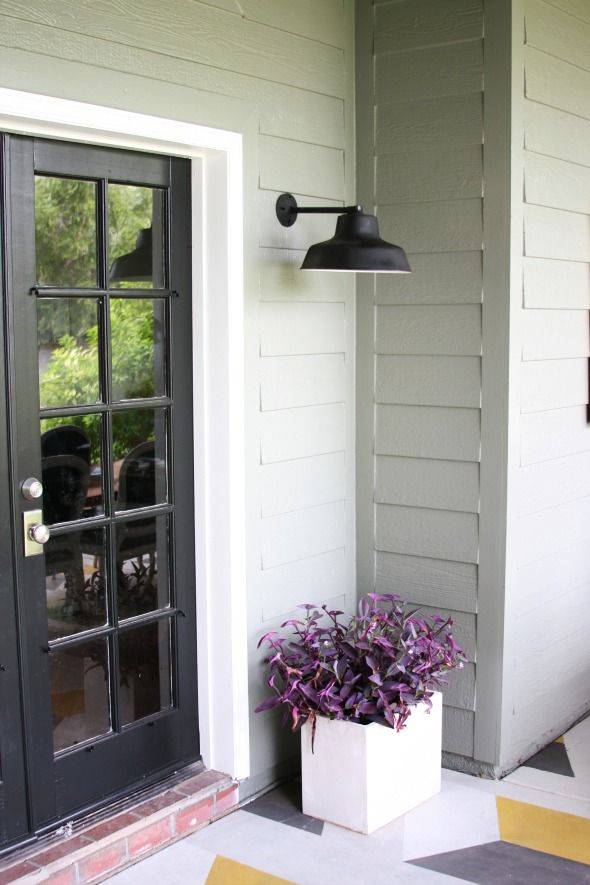
I love seeing the pattern peek through the living room doors, and the girls love playing a crazy version of hopscotch on the pattern. We’re excited for better weather too, when we can really start to enjoy the porch again and eat our meals outside. :)


Sorry guys – my triangle references were confusing. I just mean that the big rhombus is made of two equilateral triangles. Once we figured that out, it made it easy to figure out the math. :)
Whoa. Watch out for those holes! Major trickery on my eyes, and brilliantly done.
Non-stop amazing, that's what you are! Who knew a concrete pad could be beautiful?!
Stunning! You never fail to impress!
Looks AMAZING! PS-none of those shapes are triangles. They are trapezoids.
Wow. That is insane! Amazing idea and flawless execution. It looks awesome!
So cool! I love what you've done, as usual!
I'm wowed everyday! You are just amazing! How do you do all this? Do you sleep? And you think of so many original ideas. The floor is just beautiful. Also, can't wait to hear about those chairs. They look swoon-worthy too!
It's way too much a Monday for me to even THINK about that kind of math. High fives to your team for being willing to do the brain stretches! Looks excellent!
ag
That's amazing!
this is gorgeous! I hope to do something like this at my home someday!!
It looks so great and I was seriously tripped out by the picture that makes it look 3 dimensional, like you are going to fall in a hole. I've been thinking of painting the concrete on our patio with a design instead of getting a rug and this was great inspiration!
Jenny you are on a role!!!
1) Holy hard on my brain! Math is one thing. Math + ruler + level + tape = LGN Style Heroics
2) Holy 115 degrees!
3) Holy CHAIRS! I DIE A MILLION TIMES!
4) Obsessed with the concrete spheres too.
5) That floor is so much fun. And, it brings fun to all of the other designs around it (lights! planters! paint!)
Gorgeous! I don't remember anything from the math classes I took back in high school, so this project probably is not for me? I love the color scheme you chose.
PLEASE PLEASE source that great outdoor black light! I need two just like it. Oh, and the floor, it's amazing. Love the 3-D effect. Is it as trippy in person as in the photos? Great job!
Looks incredible! Beautiful job! It's a great, classic pattern!
The table! How did you get that finish? It looks fab.
Love the pattern even though it's a little trippy. No triangles though…
Sorry guys – my triangle references were confusing. I just mean that the big rhombus is made of two equilateral triangles. Once we figured that out, it made it easy to figure out the math. :)
I LOVE how your painted outside floor turned out!! The design and colors are just right and brightens up the space so much! Now it exudes warmth and personality! This DIY seems like a great inexpensive interior option for interior floors too! Great work, Jenny! :-)
I did the same pattern in my laundry room. Love how it turned out!
http://www.willscasa.com/2014/03/how-to-paint-concrete-floors-geometric/
sine and cosine! takes me way back. this should be the way to get girls to like trig and geometry: we may not have to figure out speeds of trains barreling towards each other but we can map out cool stenciled floors!
Awesome!
Thanks for sharing wonderful information, it is really nice information.
white-living-room-design-ideas
Love this! Awesome idea.
With the large-scale renovations and design happening in your house, these attention-to-detail projects you do just astound me! You really know how to take things to the next level Jenny! Brilliant!
You lost me on all that math, but boy am I impressed! You seem to have an endless supply of new and creative ideas! Love the look of the floor and that table and chair combination! The only thing I can't quite stomach is the thought of 115 degree heat!!!
That is so amazing! I love the trick of the eye and that humans are so smart to accomplish such feats. You must be so proud when you step out on that gorg porch! Love it!
Once again I am blown away by your creativity. I would have just thrown an outdoor rug on it and called it a day. I guess that's why I'm not a designer! Truly an impressive and unique idea. Love it.
I have always been impressed by your combination of creativity and accessibility and total like-ability…NOW I may quite simply be obsessed…YOU are amazing!
Absolutely gorgeous as always! You are my favorite designer/blogger! You never cease to amaze!
Leslie
House on the Way
SO. COOL.
Such a great idea!
I keep coming back to look at those awesome floors! And the chairs too! I'm obsessed with both! :)
i'm so impressed – this post is a perfect example of why little green notebook is my favorite blog and a huge inspiration as i launch into renovating my first house – thank you!
so so amazing. i think i would have screwed up the math!
This might be one of my most favorite projects after years of reading your blog! So simple but such a big impact. I love it.
Definitely my favorite project, and oh so inspiring! Thanks for never ceasing to amaze!
Brilliant! I would have never gotten the math part right. Bravo, another fabulous DIY project! I am very impressed. xo Nancy
You never cease to amaze! How you have the patience and persistence for these projects is beyond me, but so inspiring. Also…I need to know more about those dining chairs!!! I'm sure thrifted or something, but I'm crazy for them and still want to see/know more! :) :)
So freakin COOL…this is my favorite project yet! I wonder if I will be so daring in my nest. Happy Nesting/
Honestly. I just feel like you can do no wrong. Amazing.
Not just the amazing pattern, but the colors…so, so cool.
Awesome job! Could you tell us the source of that outdoor light? I love it, and I need one just like it. I've been hunting for a long time…Thanks!
This post on Reddit reminded me of your work on this project. http://imgur.com/a/ZkMfc
A simply gorgeous concrete floor. Love how you documented it too. I want to take up the carpet and similarly paint our bedroom floor, but the substrate is not concrete, some sort of adhesive particleboard I think – anyway just a pleasure reading and seeing your post!
Late to the party, here.
What was your water to paint ratio? Approximately?
Thanks!