
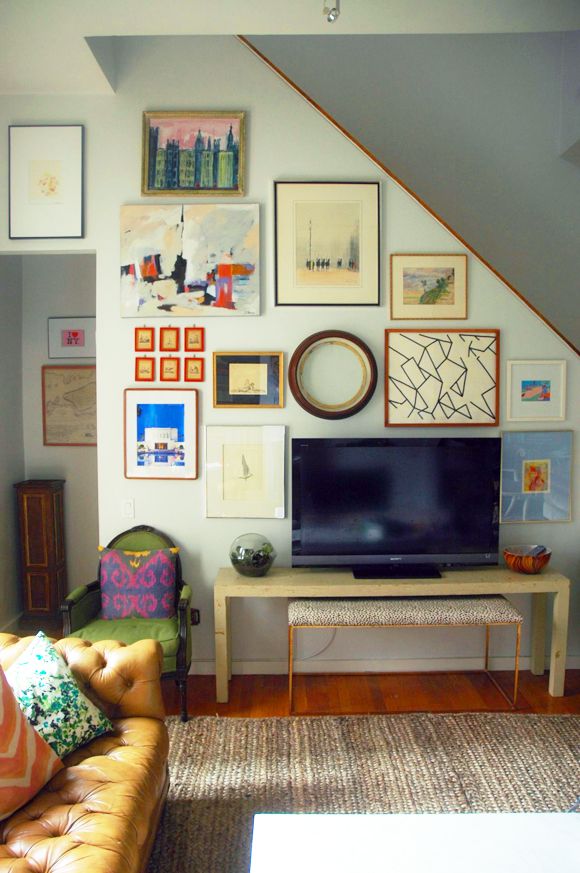
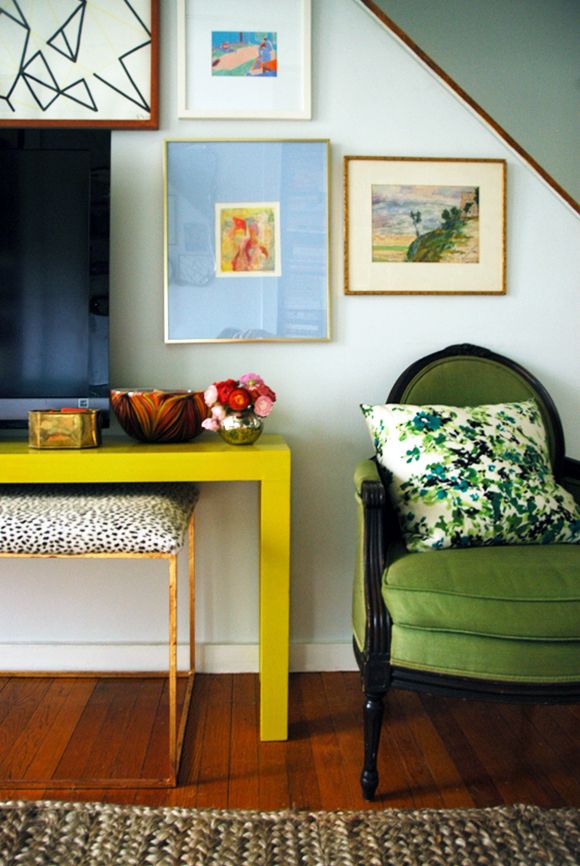
I picked up this vintage Parsons console at the flea market a while back and I’ve been meaning to redo it for ages. Well, I finally was able to cross the project off my house to-do list! I’m loving the bright acid yellow enamel in our living room. It looks pretty with the new sofa color.

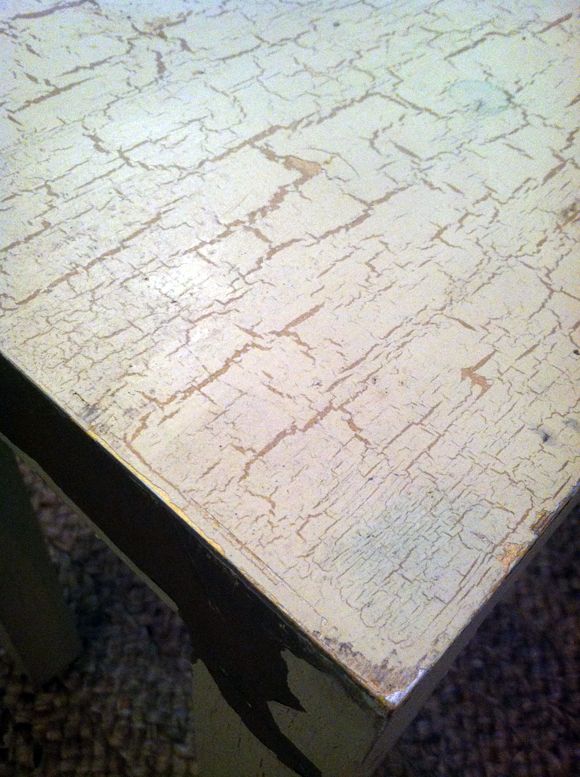
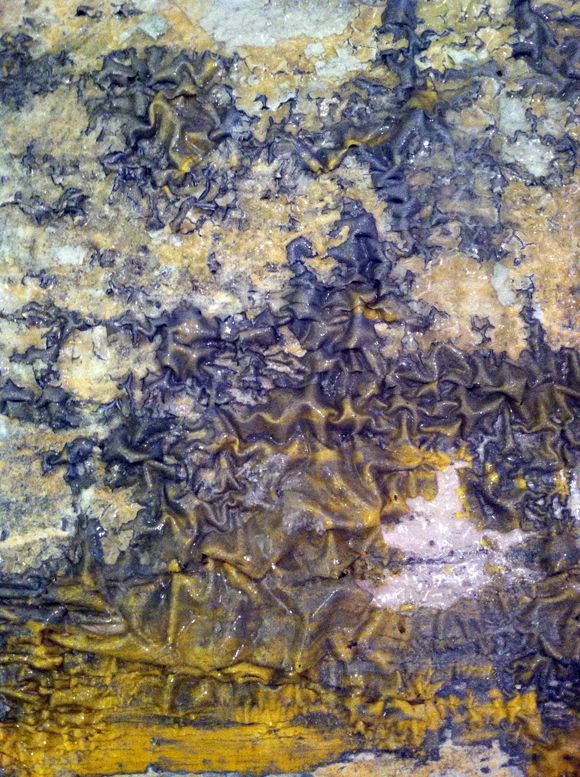
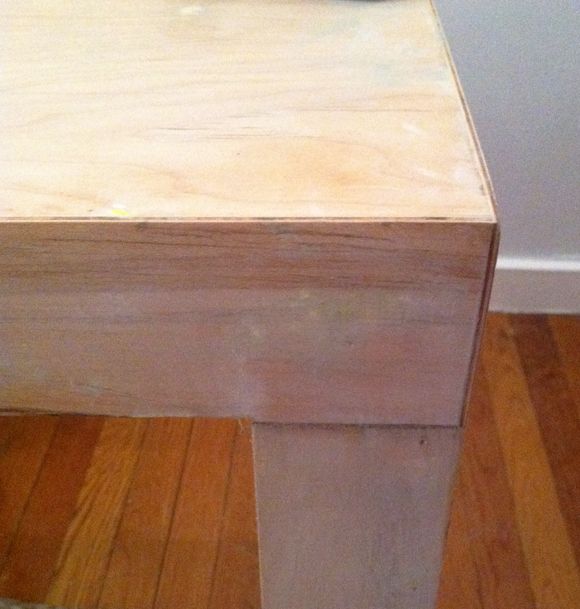
The old finish was not all too offensive from afar (this is why the table was not higher up on the to do list). Pretty neutral here, right?
But up close! BAD CRACKLE! NOOOooooooooooo!
Here’s the run down on how I stripped off at least 11 layers of paint and even some thoughts on painting with oil-based paints for that lacquered, enameled look.
I’ve used Klean-Strip Stripper and Citristrip before with great results. I happened to have some of both around for this project and I thought I’d figure out which one I like the best. I used the Klean-Strip for table top and the Citristrip for the legs.
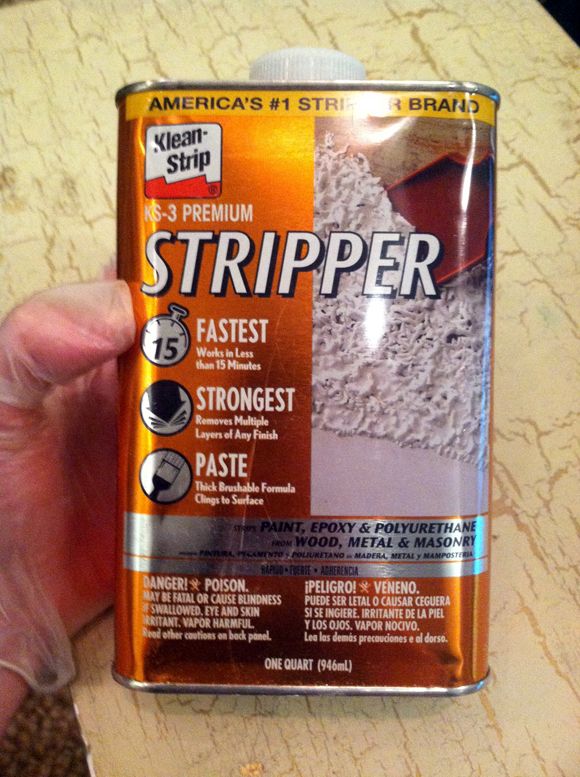
Klean-Strip is like MAJOR caustic. Use it only outside or in a very ventilated space. Keep kids and pets away, and definitely wear gloves. If you get any of the gel on you, you will know in about five seconds. Ouch!
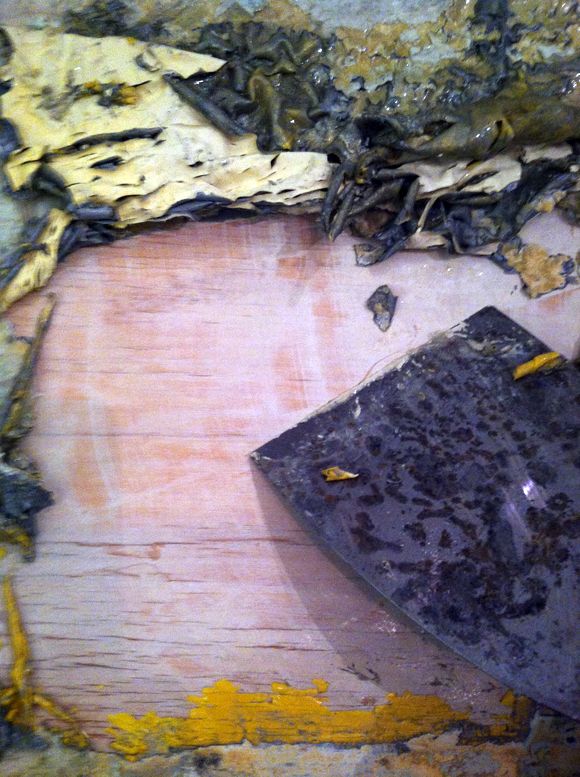
So you’re probably saying, “Jenny! Why would you use this product!?” And I’d say to you “Because I got stuff to DO!” This product works fast. In about 10 minutes, I scraped off the first few layers of paint. If I had waited another 10 minutes, it would have all bubbled completely and been ready to easily scrape up. I did end up putting on another quick layer of the gel and within 10 minutes that second layer was done. I should also mention that I don’t usually use a paint brush to apply the stripper, like the instructions suggest. Mostly because I don’t want to clean up a brush when I can use a putty knife just as easily (just like frosting a cake!), but also because the paint brush makes it harder to get a consistently thick gel coat. You’re shooting for about 1/8-1/4″ of stripper covering everything. If you’re stingy with the gel, you’ll be spending all sorts of time getting that old paint off.
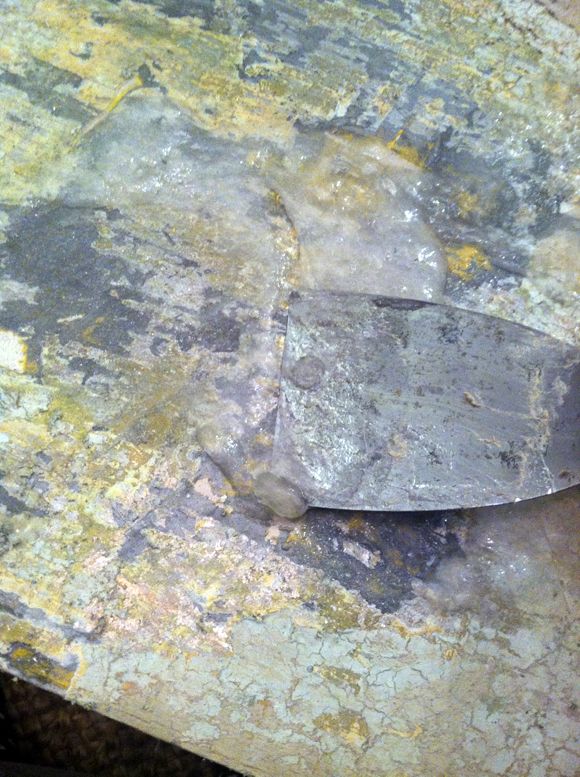
Here’s what the old paint should look like when it’s ready to scrape. Klean-Strip recommends scraping the old paint into a stainless steel bowl, letting the chemicals evaporate outside and then discarding the dried paint, which is what I did.
So, all in all, after 20-25 minutes of work using the Klean-Strip, the table top was down to raw wood. Not bad!
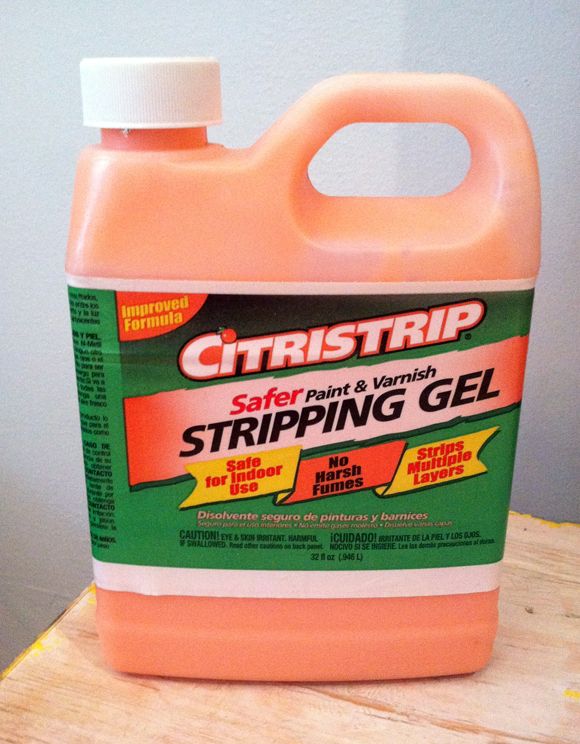
For the legs, I pulled out my Citristrip, which is not at all smelly (it actually smells like oranges a little bit), and can be used inside. I got some of this on my skin too accidentally and I didn’t even know! It makes me wonder how this stuff actually stripped off layer after layer of old paint, be it did! And it did it well!
So, the biggest bummer about Citristrip is it takes a while longer to bubble up the old paint. It took me about an hour and a half of waiting to get about 90% of the paint to release. And I went back and did some spot stripping to clean up some of the old paint that didn’t come up the first layer. I think the legs took about two hours, when all was said and done.
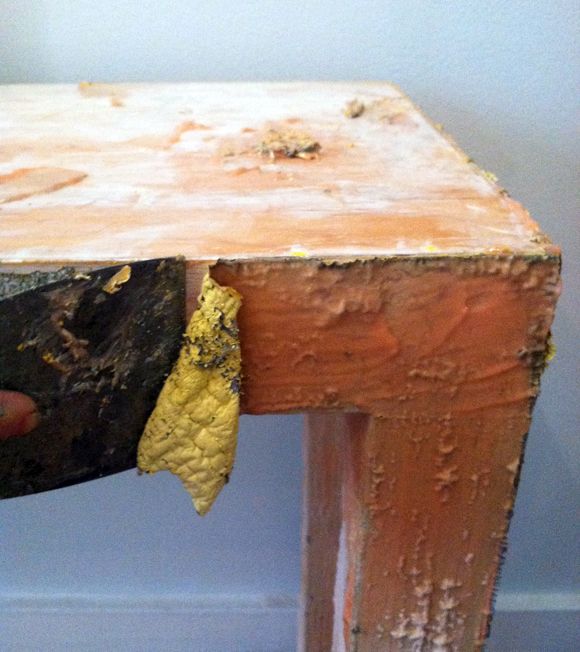
If you’re doing this right, there should be zero amount of intense scraping. Wait until the old paint is super soft and bubbly, and they it just falls off. It’s pretty crazy that in just a couple hours of easy work (most of that time was spent waiting), decades of paint jobs can be removed!
As far as a verdict goes between the two stripping gels, I think I’ll probably stick with Citrastrip in the future. It did its job really well and it’s easy to just do something else while you’re waiting the extra time. I figure if I don’t have the wiggle room in my schedule to wait an extra hour so I can avoid using super-toxic chemicals, there might be some bigger issues here. :)
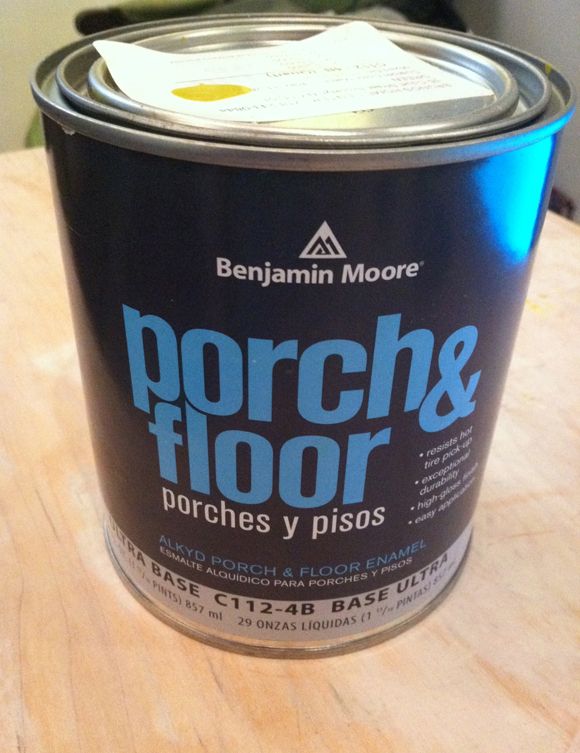
Now, as far as painting goes, I am completely converted to oil-based paints. Latex is for walls. Oil is for furniture and floors. If you ask for Porch and Floor paint (which is usually oil-based), or Door and Trim paint (which is usually a water-based alkyd), you can get any color you want mixed. I actually had my local hardware store mix a Home Depot color (update: the color is “Citronette” from the Home Decorators Collection by BEHR) in Benjamin Moore paints, which is the opposite of what I usually do! ha! :)
I used a two-inch brush to apply the paint. I don’t like using foam rollers usually for oil-based paints, but I think that might be a personal preference? The texture of oil-based paints just works really well with a brush. Basically, and I’m sure I’ve said this before, it’s just like putting on nail polish. It’s like you’re placing the paint. Once it’s put on, don’t mess with it. The brush marks will smooth out on their own. And if after the paint has fully dried (in about 24 hours) there are a couple of imperfections, you can sand or touch them up at that point.
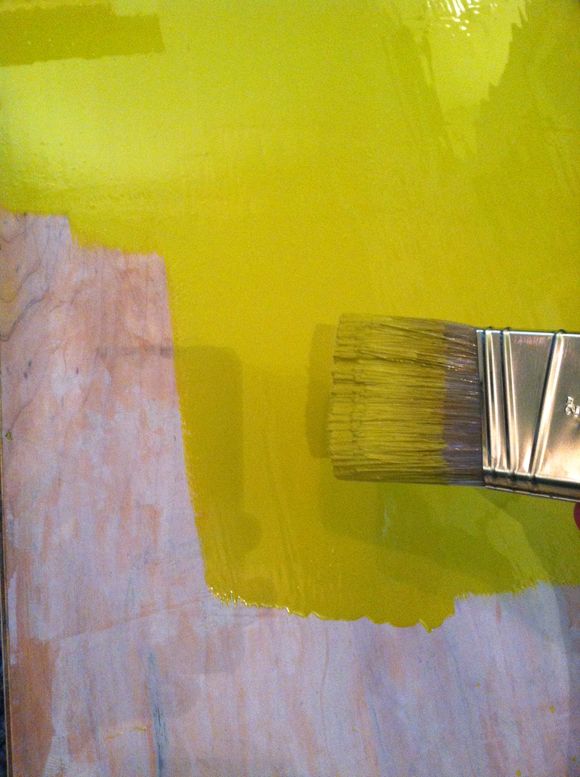
You can see here above that I work in sections. Each dip-and-one-side-wipe makes a roughly 4×8″ rectangle. If you just slightly overlap each rectangle, all the while resisting the urge to go back and touch up parts, and you’ll have a perfectly lacquered piece of furniture on your hands 24 hours later. Seriously, it’s like magic.
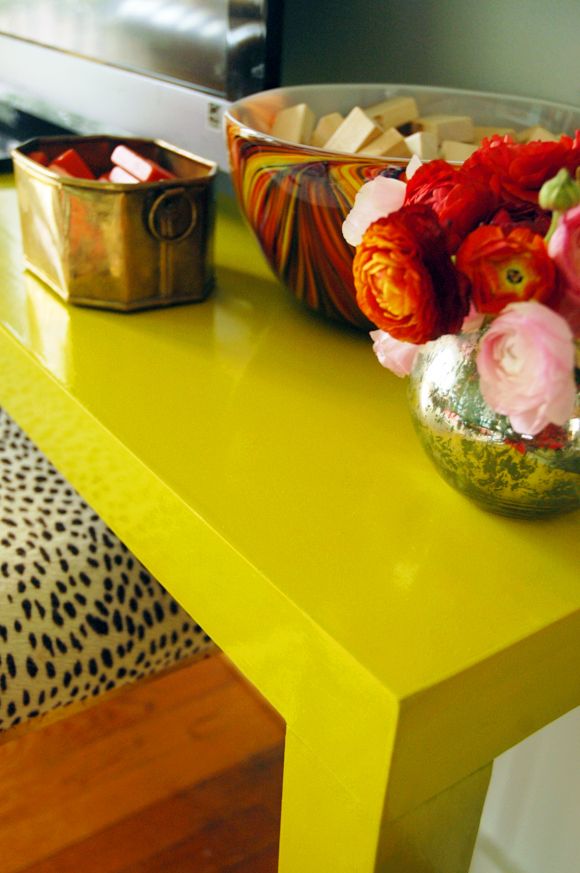
I love a punch of bright chartreuse in almost any room. It’s definitely one of my favorite colors.
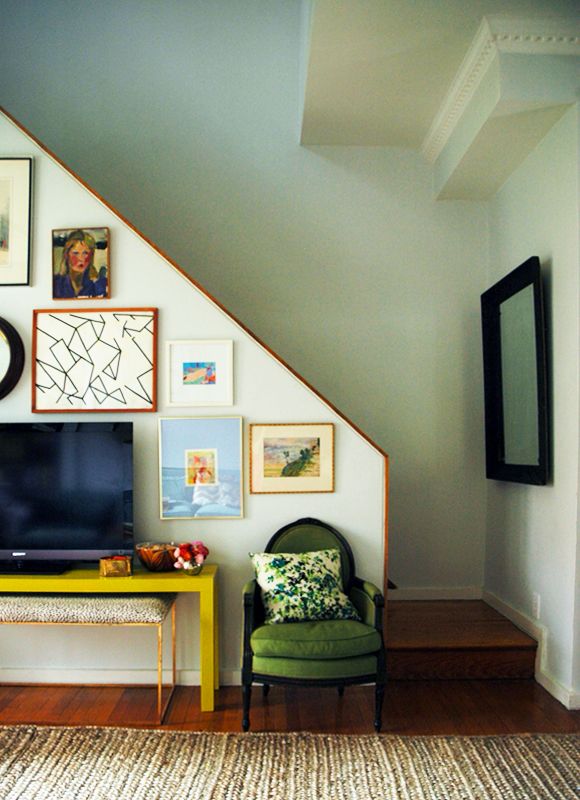
Ooh, also, on a whim I hung the Magnolia mirror that I painted with chalkboard paint on the little stair landing. I think I love it. It helps balance out the heaviness of the gallery wall a bit. Plus, the girls love it for fashion show purposes, which happen around here more often than I care to admit.


Surabhi! What a lovely comment! Thanks so much for that!!
I'm working on digging up the exact paint color now. I can't find the paint chip and I'm having trouble navigating Home Depot's paint page online. But, I *think* it was from their new Home Decorator's Modern line. There's only a handful of colors in the collection, including a really great almost neon purple that I've been dying to use.
xxxx
Gina – post coming up on how to hide cords! It's a good one!
x
Hi Allison!
The spotted bench is actually hair-on hide. Here's the info:
http://littlegreennotebook.blogspot.com/2012/07/how-to-upholster-bench-corners.html
xx
Liz – It's hard to say what you should do here, but if you did a high gloss, you should need to seal the finish. Especially if you did three full coats. How far apart did you space those coats? You probably needed a full week of outside, warm-weather drying time. With a fan blowing. I would probably sand down (lightly) some of the new dings and put a fourth coat on and leave it to dry for a couple of days. Wait til summer time! Good luck! x
Kathy, I used the same approach with the legs, though with vertical surfaces, you have to be careful of drips. I just put on a lighter coat. Another approach would have been to lay to table on it's back while I painted the legs. I didn't have more than one or two drippy parts on the legs though and since oil paint has such a long dry time, I pulled off the extra paint with my brush. The self-leveling still happens with these vertical surfaces for the most part.
xx
Thanks for the kind notes everyone!
Kathy –
One of the first things I always tell my clients is to throw out the notion that things have to match in a room or a home. I am a firm believer that if you really like a color, or a piece of furniture, or a fabric, you should use it in your home. The end result, over time, will be a house that looks exactly like you and your life, where you're going, where you've been. It will feel lived in and personal. I feel like matchy rooms can feel anonymous, you know? That totally works for some people and I think those rooms are still really pretty, but I like personal rooms more than pretty rooms.
As far as art goes, I've posted about a ton of great places to look: 20×200.com is amazing. Art.com is rebranding and they have a truly EPIC selection of prints and even some original works (found one of my favorite original vintage pieces on art.com actually!). Most of my art was found at flea markets, thrift stores and eBay. If you poke around on my site a little and find the tag "Art" there are lots of good links to sites and also some fun tutorials for DIY art. Hope that helps!
Kate/Katie – You're probably asking the wrong person because I'm a notoriously lazy refinisher. I hate, hate, hate sanding. Probably because I've lived in city apartments for most of my adult life. Dust gets everywhere! But! I think there is something to buying one or two of those handy sanding blocks in a fine grit and rubbing down the whole thing once or twice. It's not sooooo much the gloss that you need to worry about (especially if you're using an oil based paint), but more the oils, dirt and potential spills, etc that are sitting on top of the gloss. You know what I mean? They'll sort of hover under the new paint and that could mean problems later. A light sanding and/or a good cleaning with a TSP spray will do wonders for you!
ivyjeanne – Nope, I haven't touched those chairs yet. I got them from the flea market a year or so ago (I'm pretty sure I've posted about them before). I have this seriously FAB apricot silk velvet that I really want to reupholster them in, but I do sort of like the kelly green too. I wish the green fabric were in better shape. It's a little worn in person, but does the job for now!
xx
Beautiful! I have to ask, where are the wires? I have a T.V. on a similar table in my living room right now and I can't figure out what to do with the wires. I guess it might be easier without a cable box?
Thank you for sharing another great project. I love the punch of color to distract from the black box ;)
Beautiful Jenny! I love the look of the oil paint too, is the regular rustolium oil paint discontinued in the states like it is in Canada?
Love it – you have such a great eye, and I love the DIY details. I'm officially inspired!
Jenny you have done it again! Your decorating style appeals to me so much and I cant resist but to visit your blog everyday anticipating your posts. My favorites are glimpses into your own home. I love seeing your ever changing landscape which you bring together so masterfully. You don't know me and will will never meet but you are in my life every single day, what a crazy thought right!?
My dream is to one day show you my living room, which I have been working on for the past year, inspired by your blog and your fearless style.
Can I be ever so annoying and ask you for the exact paint color for the yellow chartreuse you used in this project. Yes I am going to go and completely copy you right now!
Many thanks
Surabhi
I second Surabhi – can you share the name of the chartreuse color you used? It's beyond fantastic. Please and thank you!
Surabhi! What a lovely comment! Thanks so much for that!!
I'm working on digging up the exact paint color now. I can't find the paint chip and I'm having trouble navigating Home Depot's paint page online. But, I *think* it was from their new Home Decorator's Modern line. There's only a handful of colors in the collection, including a really great almost neon purple that I've been dying to use.
xxxx
Such a perfect color and I definitely needed a tutorial on this! What tool would you use to get into the nooks and crannies of some pieces of vintage furniture?
@Gina – Could you attach it to the bottomof the table and tape the cords up or something?
Wonderful. I used to do decorative painting and furniture painting. One suggestion is to use a spray gun with the paint or a roller so you have no brush demarkations. (Unless of course you want brush marks) I do love that color. Fantastic fresh pop!
pve
Gina – post coming up on how to hide cords! It's a good one!
x
What a great how-to with beautiful results! I think chartreuse was meant for lacquer.
Amazing – I swear no one does a gallery wall of art like you do! Perfection with your table color!
Yay for using one of my favourite colours! I've been experimenting with paint strippers as well (for windows though which isn't so exciting). The one I've been using is horribly toxic so I think I'm going to look for something else.
Beautiful work as always Jenny xx
Anna (My Design Ethos)
Um the result is amazing and thank you for documenting the process and giving such great instructions! I'm not a DIYer but you explain it so well I think I can tackle a project like this. You're pretty amazing…
LOVE the table! Do you have a source for the animal print on the bench beneath? Any info so appreciated. Thanks.
Hi Allison!
The spotted bench is actually hair-on hide. Here's the info:
http://littlegreennotebook.blogspot.com/2012/07/how-to-upholster-bench-corners.html
xx
You are one patient and handy lady. It looks great!
It looks fabulous! I have a gorgeous parsons table i got at a thrift shop. i painted it white, but i'll remember this post if i ever want a bright lacquered look!
wow! that looks great :)
do you also use an oil-based primer? I just painted a dresser in high gloss latex and it looks great, but the paint never really fully cured after three coats so the finish indents & gets marks really easily. wondering if i could just add a coat of oil-based on top of the latex? but guessing it probably isn't that simple!
Thanks for this tutorial! It looks beautiful!
Hi Jenny, Your table looks amazing! I was just wondering whether you paint the vertical surfaces, like the legs, the same way you paint the top? Or do they have to be horizontal in order for the paint to self-level?
Liz – It's hard to say what you should do here, but if you did a high gloss, you should need to seal the finish. Especially if you did three full coats. How far apart did you space those coats? You probably needed a full week of outside, warm-weather drying time. With a fan blowing. I would probably sand down (lightly) some of the new dings and put a fourth coat on and leave it to dry for a couple of days. Wait til summer time! Good luck! x
Kathy, I used the same approach with the legs, though with vertical surfaces, you have to be careful of drips. I just put on a lighter coat. Another approach would have been to lay to table on it's back while I painted the legs. I didn't have more than one or two drippy parts on the legs though and since oil paint has such a long dry time, I pulled off the extra paint with my brush. The self-leveling still happens with these vertical surfaces for the most part.
xx
Great looking table. Happy to see you picked the less toxic chemical paint remover ;)
Man I dig that color!!!
I am so amazed at what you have done with that space. It all looks great. The console colour is such a perfect addition.
You did it again!!! I've been painting furniture for years with oil based paint–it's the best! My father in law recommended it and I recommend it to everyone.
I had been planning on trying out enamel for my next furniture painting job, based on your prior recommendations. While I love the easy clean-up of latex, I've noticed that it gets scratched easily, even with several coats of Polycrilic through my sprayer. This post was perfect, timing-wise!
Thanks so much for all of the tips! The results you got are fantastic, and i am inspired to start a project of my own. So goo to know how to apply the paint without wrecking it with my normally impatient urges to go over it. Looks great with all of your art. :)
That would be "good" not "goo". "Goo" would be the paint you are scraping off!
Hi Jenny…, I absolutely love your use of color in your home. I'm so afraid of color in my own home but you're totally inspiring me to add some. You truly have an eye for putting colors together and an eye for the finished product! I think that is what I lack. I would love to know your process for picking and putting colors that are so different together in rooms. To me when you look at them alone you think they wouldn't look good together but the way you put everything together is absolute beautiful !! Where does your artwork come from ?
thanks for the info. I've never stripped furniture before, and always wondered if the strippers really work like they say they will.
Sar=)
http://www.etsy.com/shop/owleyevintage
I cannot wait to see your post on how to hide cords! I have a lovely TV console, but all the black cords hanging down behind really ruin it.
Oh man, thanks for this! I've been meaning to paint a bedroom set we've had for ages. Because of you I was thinking about buying a gallon of the Rustoleum paint in black. I will trust your tricks, but I still have one question. The bedroom set is stained and has a now dull glossy finish on it. Do you think I can get by with using a deglosser before painting? Or should I sand? Thoughts? Thanks again!
Love it all! I really appreciate the tutorial and am loving that green chair with the new pillow! Did you redo that chair as well? I've followed your blog for some time now but don't remember seeing it.
That table is fantastic! I have a few pieces of furniture I've picked up from thrift stores but have been really nervous about how difficult it will be to strip the paint. Now you have inspired me to get moving! Thank you!
Thanks for the kind notes everyone!
Kathy –
One of the first things I always tell my clients is to throw out the notion that things have to match in a room or a home. I am a firm believer that if you really like a color, or a piece of furniture, or a fabric, you should use it in your home. The end result, over time, will be a house that looks exactly like you and your life, where you're going, where you've been. It will feel lived in and personal. I feel like matchy rooms can feel anonymous, you know? That totally works for some people and I think those rooms are still really pretty, but I like personal rooms more than pretty rooms.
As far as art goes, I've posted about a ton of great places to look: 20×200.com is amazing. Art.com is rebranding and they have a truly EPIC selection of prints and even some original works (found one of my favorite original vintage pieces on art.com actually!). Most of my art was found at flea markets, thrift stores and eBay. If you poke around on my site a little and find the tag "Art" there are lots of good links to sites and also some fun tutorials for DIY art. Hope that helps!
Kate/Katie – You're probably asking the wrong person because I'm a notoriously lazy refinisher. I hate, hate, hate sanding. Probably because I've lived in city apartments for most of my adult life. Dust gets everywhere! But! I think there is something to buying one or two of those handy sanding blocks in a fine grit and rubbing down the whole thing once or twice. It's not sooooo much the gloss that you need to worry about (especially if you're using an oil based paint), but more the oils, dirt and potential spills, etc that are sitting on top of the gloss. You know what I mean? They'll sort of hover under the new paint and that could mean problems later. A light sanding and/or a good cleaning with a TSP spray will do wonders for you!
ivyjeanne – Nope, I haven't touched those chairs yet. I got them from the flea market a year or so ago (I'm pretty sure I've posted about them before). I have this seriously FAB apricot silk velvet that I really want to reupholster them in, but I do sort of like the kelly green too. I wish the green fabric were in better shape. It's a little worn in person, but does the job for now!
xx
Hi Jenny. I was wondering if you add floetral in your oil based paints to help the paint strokes level out some more? I recently painted a vintage Drexel campaign style desk with Rustoleum's oil based paint and even though most of the brush strokes spread out, there still are some left. Should I have just done one stroke and left it? I am tempted to strip the top and repaint it!
Also, I'm obsessed with your blog. Its one of the first sites I visit everyday! Your parsons table looks great, it adds a really nice pop of color!
Hi!!
I love the colour you chose, it perfectly compliments the space!! I am so amazed how glossy and shiny the console looks, and I understand after only one coat?!?! You must be a paint wizard!!! Love, love the colour!! Can't wait to see how you hid the wires!!:)
Ozana
I love the color too! I really hope you are Able to figure out the color name and post it. I'm planning to paint a bed yellow when things warm up, and I think your color choice might be perfect for it. Thanks.
Thank you!
Aaahhhhh!! Looks fantastic! And, I am giddy over your suggestion on using floor and porch paint to get a custom enameled color. After I tried the Rustoleum Enamel on a few pieces there was no turning back, but I was bummed on their limited color selection. Thank you! Thank you!
http://diligentdesigner.blogspot.com/?m=0
I hate to be dense, and my only excuse is I'm in the middle of a detox, so … when you write that you work in a rectangle, do you keep the brush going the same direction? Or do you really do a rectangle. I'm thinking it's the former, but I haven't worked with oil based paints before and I have a hutch that is in dire need! Again, I apologize for the stupid question! :)
Jenny, do you always do multiple coats of paint when you use oils? Thanks!
Jenny,
You really are masterful at this stuff, and so inspiring to me. I love that color, and am just getting into oil base. Thanks for all your steps and thoroughness, and enjoy your beautiful piece. I know I do!
xo Nancy
Powellbrowerhome.com
Beautiful job yet again Jenny. Every piece you add to this room is so unexpected but totally you.
Looks great Jenny! i was wondering… could I use porch paint on my kitchen cabinets? would i have to completely strip the old paint or just sand it down? I am about to repaint them and love that the porch paint was self-leveling and glossy.