This content series is in partnership with smartwater. smartwater, simplicity is delicious. Click here to learn more.
I think it’s important to make offices feel comfortable and homey as possible – especially if they are in your home. They have to be functional first, of course, but the pretty requirement should be a close second in my book!!

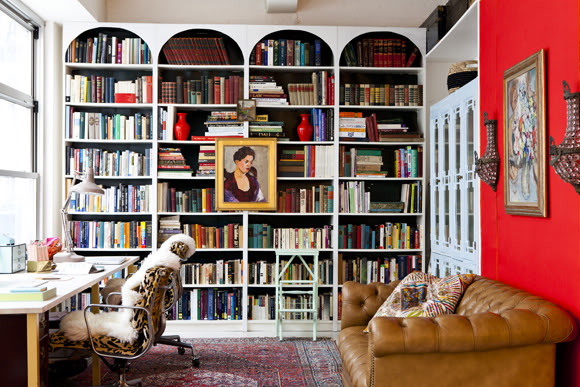
The home office in our loft was pretty with the wall of books, but the walls to the right of the shelves were not good looking for a long time. I had huge stacks of fabrics on open (wire!) shelving and a blank wall with some less-than-awesome visible drywall seams. Not cute. And I realized it was making me not want to work in there.

So, we moved the fretwork cabinets into the fabric nooks and put the fabric in my storage room since I didn’t need to get into it every day. (I’m actually thinking of selling a lot of it at the stoop sale I want to hold this month or next). We use the cabinets for storing accessories and magazines and some office supplies. They really fit well inside the wall space there too.

For the little accent wall though, I wanted to try something fun, but something that was easy and free. I had a couple yards of this tomato red linen from Graylines at the apartment already and I decided it would make the perfect accent wall.
The idea is really simple! You even follow my same general upholstery guidelines I diagrammed here (down about halfway through the post). The really important thing here is you need to staple as straight as possible. Using the moulding along the perimeter and a yard stick in the center is really helpful for getting straight lines. (Here’s a post on my favorite cheap stapler)
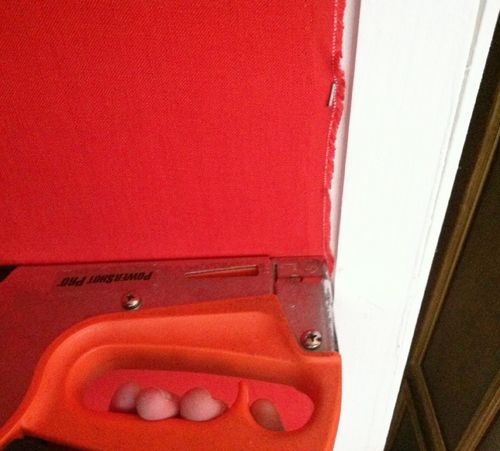
Because my wall was wider than a full width of fabric, I stapled a full width right in the middle of the wall and then went back to cover the sides with two smaller widths of fabric. For that smaller width, I started from the outside edge of the fabric and stapled up the full piece of fabric and then cut off the loose, remaining fabric. If you do it this way, you don’t have to measure at all.


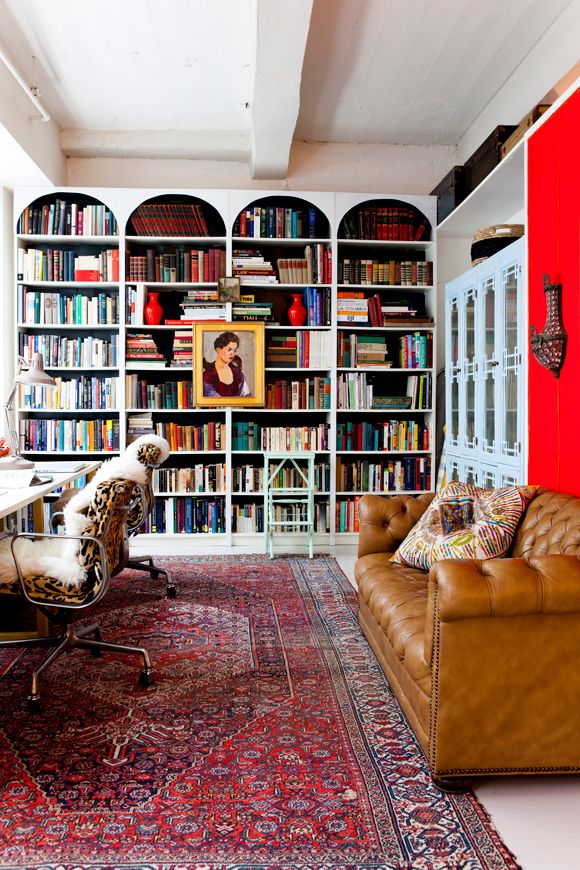
It was so fast, and it made the hugest difference in how I felt about that home office! I’m planning to upholster the walls in my bedroom (black linen!) instead of painting them. Won’t that be cozy? I’m really excited about the idea!


I just love our definition of chaos!
Love that DIY wall.
pve-
oops I meant to say your definition of chaos.
pve
What an easy DIY! The pop of red makes all the difference in that room!
I love the orange on red. Great look, great project as always. I have a wall that despereately needs this. Same sh*tty drywall situation. Thanks, J!
This will look pretty amazeballs in black too
This is a real definition of beauty.
Please, please, please post your stoop sale plans for us! Your local readers will ABSOLUTELY show up to buy your fabrics!
I bow down
I love the crystal sconce on the red fabric! Great look!
Love the wall! It's so fun to see this come back in style…my Grandmother use to do this because my Grandfather was in the military and they moved around a lot and this was a cheap and easy way to transform a room. Great job!
I love quick projects like this that make a huge difference. I've been scared to try the upholstered wall trend, but this might get me on the bandwagon!
You make everything look so easy! This looks fab!!
Can you use any fabric, do you think? Or just upholstry fabric?
Is there no worry of a fire hazard? I only ask because I'm thinking of doing this in my rental around radiators and in my kitchen and I was a little worried about the fabric catching fire.
Do the staple come out cleanly, meaning could you do this on the walls of a rental and keep your deposit?
I love fabric covered walls! The pop or red and orange look so happy. I have to mention one thing for your black linen, although being a designer, you've probably already thought of it. We covered a the back of a book shelf once and the weave wasn't tight enough so the light colored backing showed through the fabric. So check your fabric's thread count just to be on the safe side. Can't wait to see your bedroom results!
Oh that will be SO cozy! This looks great and much easier than I would have thought…. hm… wheels turning…
This post totally inspires me. I have a striped fabric that I absolutely love and have never had the heart to cut into it. Stapling it to a wall is a great idea and not a big commitment. I can take it with me down the road. Thanks so much for sharing! I'm just getting started with my own blog so I will link back to this post for others to see instructions (once I get it done). prettyrebellion.com
Love the red upholstered wall – and the bits of red added to the shelves – fun!
I always thought your red wall was paint! Upholstered walls, what a neat idea!
Thanks for posting this! I have been planning on upholstering out kitchen ceiling in black/cream ticking stripe with a self piping to cover up the ugly textured ceiling. I am so hoping this isnt a fire hazard or anything!
Love this! Thanks!
Gorgeous tomato colour – it just brings out so much life to your space. Although my favourite piece will always be that amazing camel leather Chesterfield, I'm very jealous! xx
Anna (My Design Ethos)
It looks really great! And the red wall adds such a touch of color and warmth….
laura
I have just got here through cococozy! I think this is truly amazing and I believe the bedroom will look perfect with the black linen.
I cannot find the following button, but I will put your blog in my blog roll list! I am loving it. Thanks for sharing.
Ines
perfect-home.blogspot.com
Colourful shelf nice interior design.Thanks for update the blog.
uczelnia
This would be great to hide flaws in our plaster walls too. And it gives such a nice pop to the room as well.
Beautiful, and lovely styling.
that is just gorgeous! i absolutely adore so much about it. the tufted leather sofa the painting on the bookcase, the rug . . .
I love it! One of my readers just directed me over to your blog, and I'm so glad they did!
My mind is already swimming with the possibilities of an upholstered wall in our new place…thank you!
OMW ! I am so jealous !!! A red fabric upholstered wall ?!!! Oh how inspiring that room must feel now !!! I am drooling …
Although it's not the focal point of your post, I love that you have a gorgeous wall of books, books, and more books. Not the upholstering isn't cool or anything! Thanks for sharing such a great room.
Best of luck w/the unpacking and decorating. I'm particularly interested in seeing how the kitchen cabinents come out since I too Pinned that kitchen umpteen time.
With regards to your old office, where did you find the wonderful rug and approx what size is it? I'm looking for something similar and tried Overstock, RugsUSA, Amazon, etc and can't find anything near it. I keep coming back to your images wondering where and how I can get a similar one. Will it be staying in the new place? If not – are you going to be selling it perhaps???!!!
That's such a good idea and I like the china dog, I saw one similar to that one the other day in an antique shop and can't stop thinking about it!
If you're thinking of getting rid of the fretwork cabinets, email me! I'll buy them for sure. a_hinch at yahoo
great ideas! and please keep us posted about the stoop sale, i live in the hood and am looking for some interesting fabrics!
I'm jealous the office looks fantastic!
Wow!! It was really awesome things done,These are the great and beautiful walls,Keep on posting the pictures.Thanks for sharing.
bc laser hair removal