I was really happy to use an antique dresser as a kitchen island in our apartment for the last year and a half. It’s worked really well. My only complaints were that the dresser was a couple inches too high and the drawers were a little sticky. When I found some replacement dressers for our bedroom, so it was time to try the DIY I had been dreaming of for months and I wanted to do the project for as little money as possible.

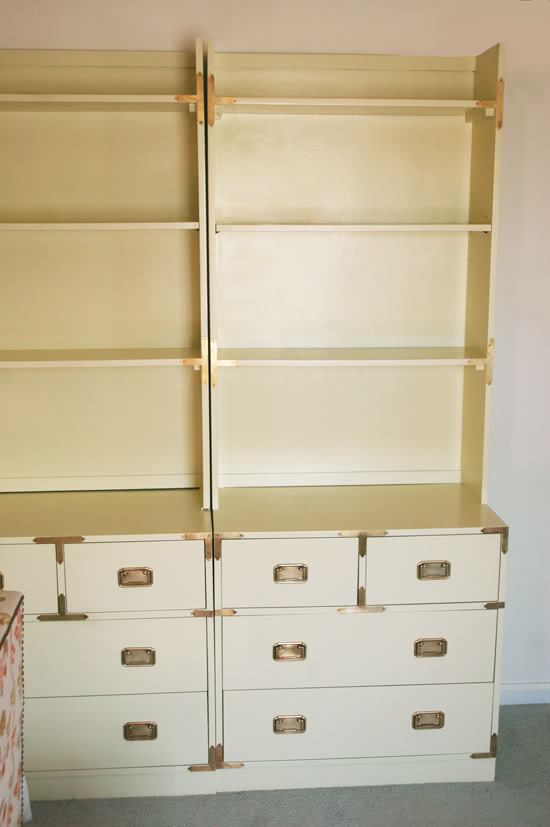
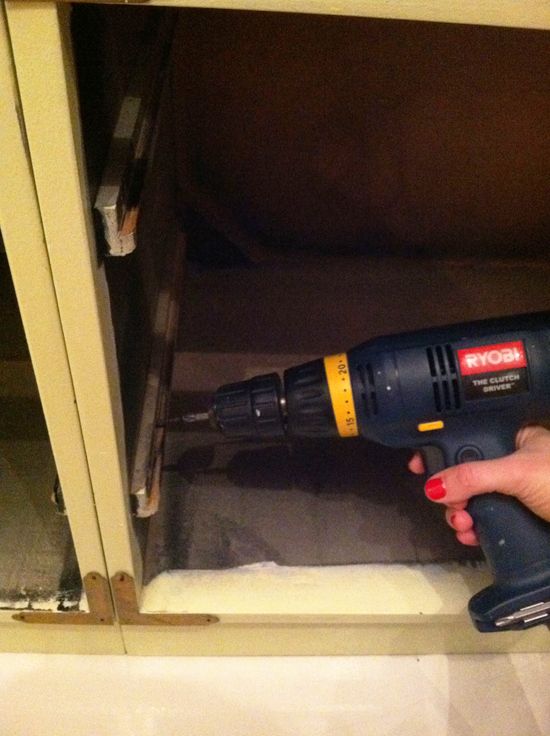
So to begin with I had a pair of campaign chests that were 31.5″ tall and 30 wide. I used a power drill and a handful of drywall screws (which are really sharp) to screw the two dressers together from the inside.
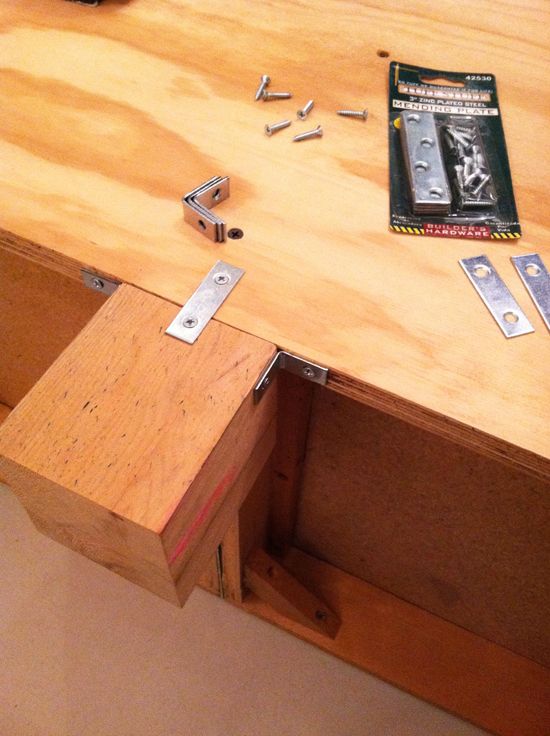
I had my local hardware store (Metropolitan Lumber) cut me a big piece of smooth plywood to fit the back of the connected dressers and also six 4″ tall legs from a 3″ wide post, all for less than $20. I asked them to be really exact with the measuring, which they really were. I did a little bit of wood filling and sanding to the legs first.

Then I attached the plywood and counter-sunk the screws so I could fill the holes and have a more seamless finish. The plywood backing helped the dressers to fit my marble top a little better and also helped keep the dressers better together structurally. Once the plywood was screwed on, I attached the legs using mending plates (a combination of corner and flat plates). I tried to sink these in as flat with the wood as possible.
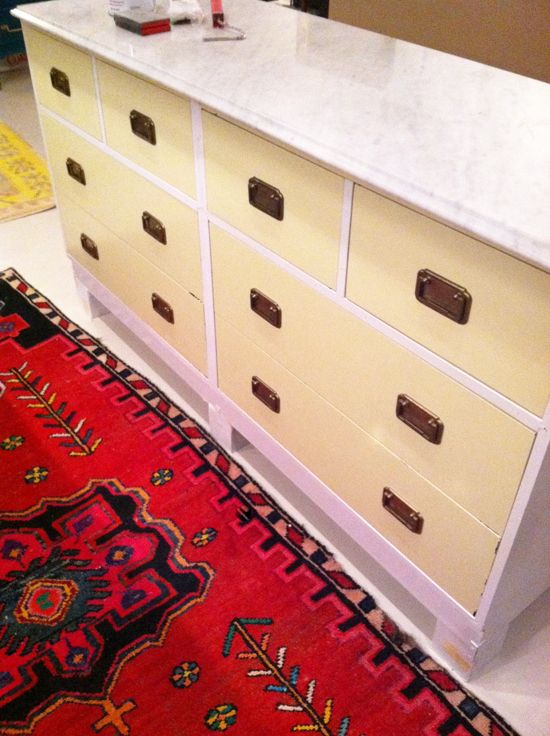
I started out with the plan to paint the new island white because I was sort of sick of having a dark colored island and thought white would be nice and bright in the space. I only had a chance to get one coat of white on the frame before I changed my mind. It was just too vanilla and boring.
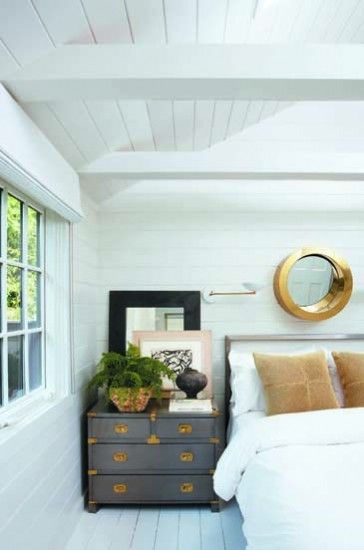
And I couldn’t get this image out of my head:
So I pulled out the Smoke Gray oil based paint from this project.
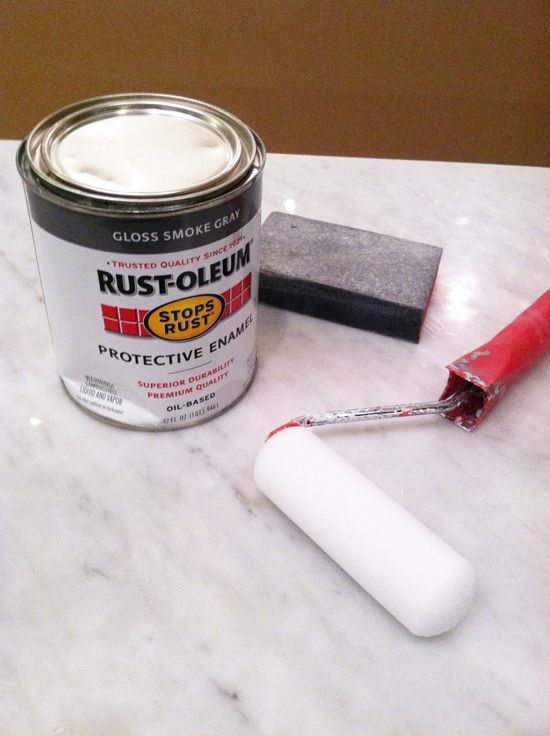
When I paint furniture, I always use a white foam roller and I do a sort of dry coat first and then I do a thicker second coat that really covers the old color. Sometimes you’ll need to do a light sanding between coats.
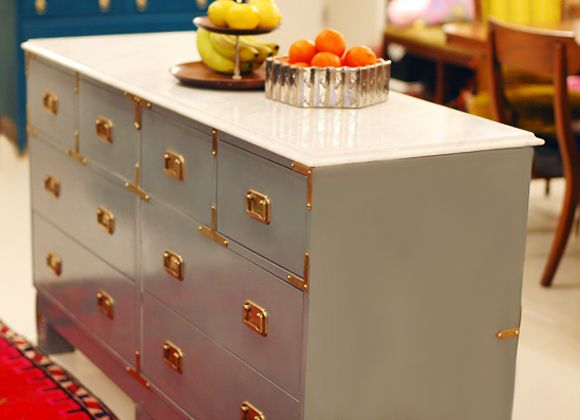
While the paint was drying I cleaned the pulls and plaques with Brass-O and discovered my mini nail head love.
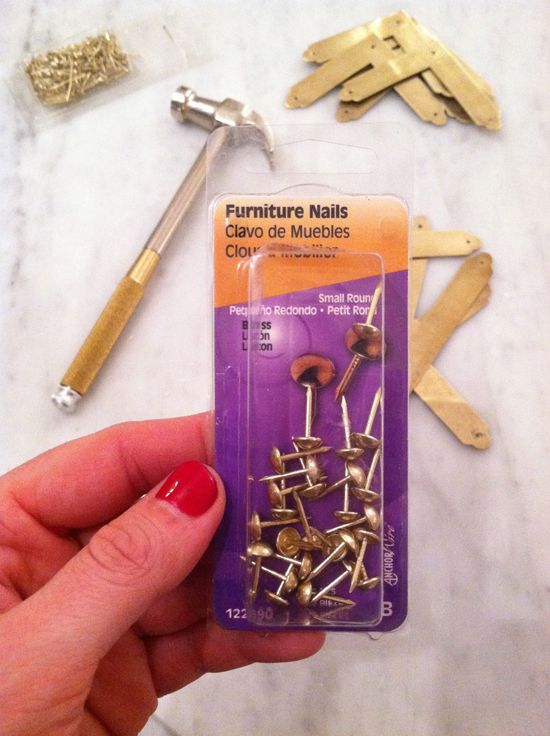
Since I didn’t want to spend any money on this project, I just worked with the hardware that I had from the dressers and the bookshelves (which have been recycled). I made the plaques stretch and put a little less on the front so there could be at least eight plaques on the back of the island.

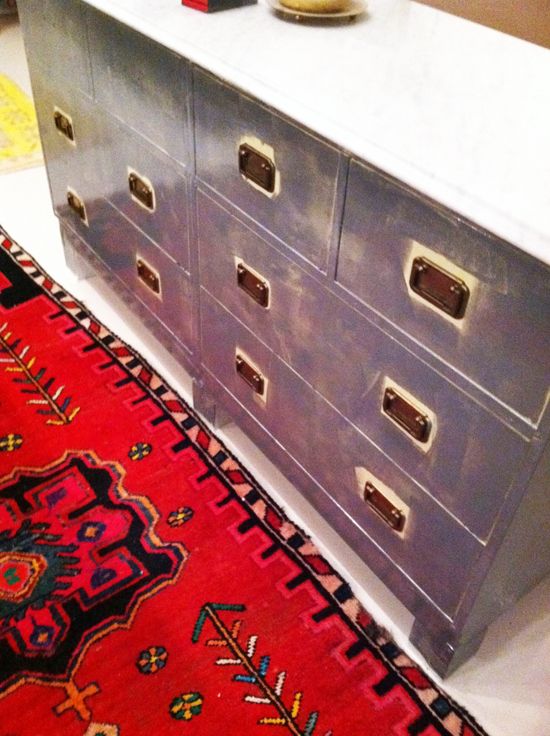
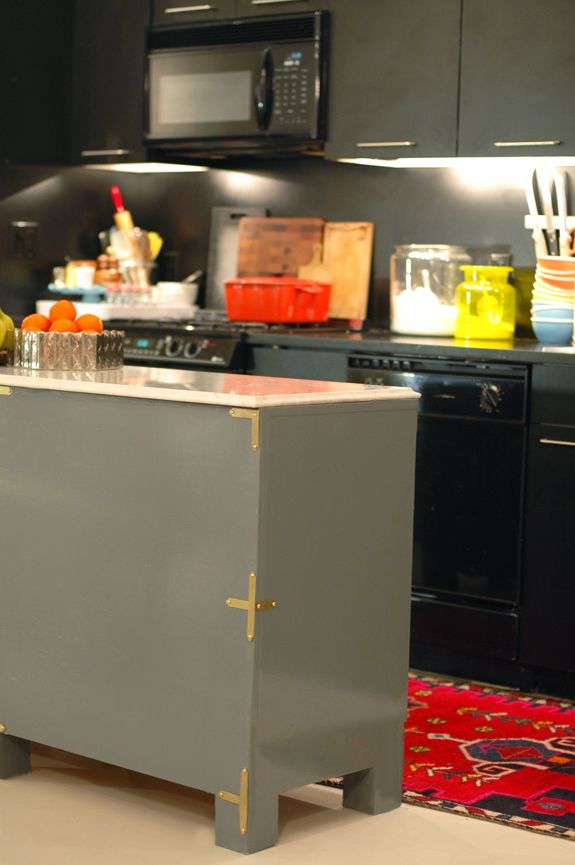
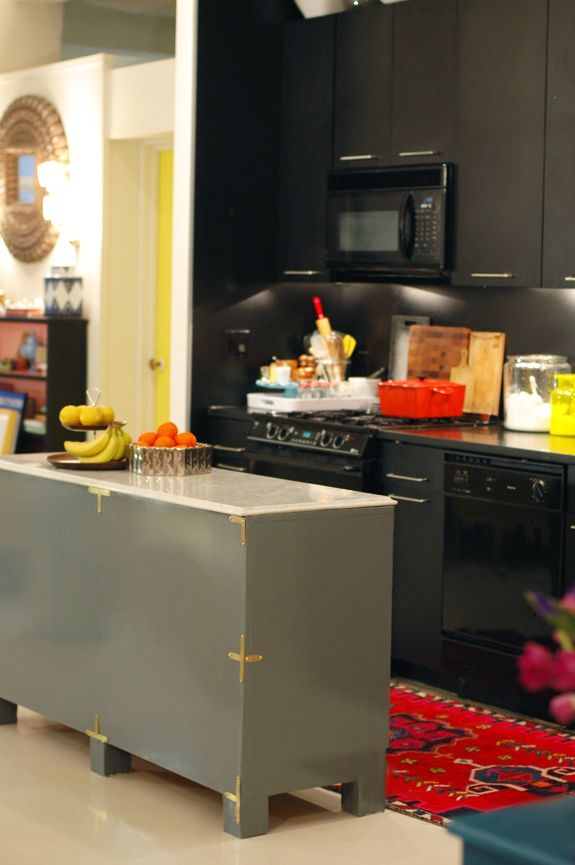
It’s not perfect, but I’m really loving it! I love the color with my black cabinets and white floors. And the glossy oil based enamel finish has been a dream to clean. Everything wipes right off. (It’s way more glossy than these photos show. You can see though in the picture above I’m wearing a hot pink shirt. Super glossy!)
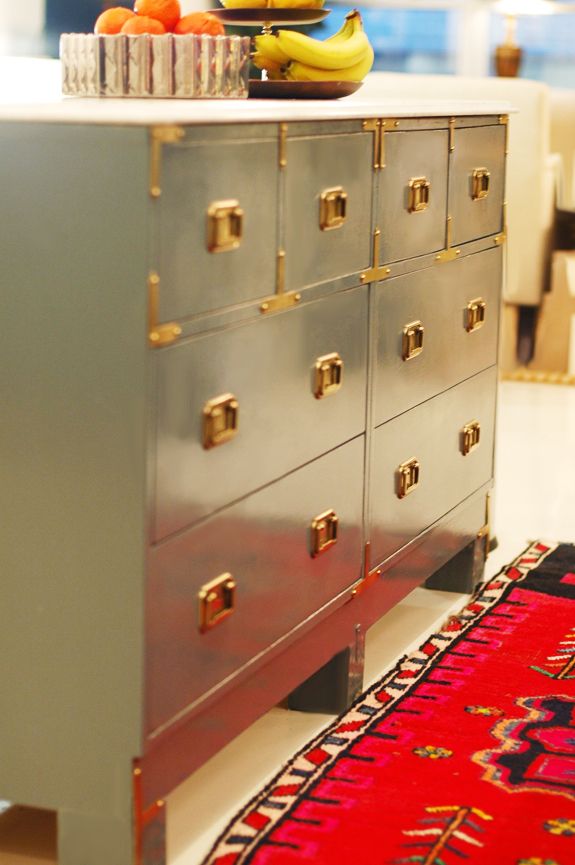
I might go back and order a few plaques for the sides, but I sort of like it a little more sparse. I don’t want to go overboard with the brass.

I sort of think the more substantial nail heads make the plaques a little chunkier anyway, so it’s okay there are less plaques.
Not only do I love the new look and color, but I LOVE the functionality. The much deeper drawers open and shut as smooth as buttah. And the top of the marble hits at exactly 36″ (standard counter height).
Do you have a unique kitchen island? I’m a big fan of islands.


Another home run Jenny!!! Wish I could add it to my post about repurposing things for kitchen islands – I already included the previous one you made! Love this even more!
Oh wow. It's beautiful! I love the color and the brass hardware (both the old and new)… really gorgeous. So glad you made it work!
This has to be one of the best Redo's I've seen! I absolutely love that smokey grey. We just sold our home and are currently looking for a new one. No doubt I'll have to rehab the kitchen and you've just given me the idea I needed!
I have the same question as Karen, how did you pull of the plaques? I have a campaign desk I want to paint and have been struggling on how to take them off!
http://www.enemyoftheaverage.wordpress.com
Hi guys! Thanks for the nice comments!
Jennifer – I painted right over the mending plates and then put the brass corners on top of the exposed ones. There ended up only be two exposed ones though, all the others were on the inside.
I just used a big flathead screw drive to get the original plates off for painting. It's super easy and does not warp the brass at all if you only pry right near the brads. Though, even if you sort of mess up and bend the brass, it lays flat right again once you tap in the brads on the chest again!
Hope that helps!
xx
Oh and I forgot about the counter questions –
Mom23, the angles are a little funny here and I should have adjusted before I took photos, but the top does fit, but there is absolutely no wiggle room! I used a salvaged piece of carrara from a vintage coffee table, so this fit would not have been my design. It was just me taking advantage of two pieces of vintage furniture I could refashion for almost no money. If I were paying for my contractor to make this island, it would have been 5-6k. It would have been gorgeous, but I'm happy with this close to free version for now!
Also, I didn't do anything to secure the marble top. It weighs a million pounds, so it doesn't slide at all.
Incredible!! It is perfect!!
You scare me. In a good way.
Love it! But most of all, LOVE your rug! Where'd you find it?….and please don't say a flea market….:
Jenny, you never cease to amaze me. Truly. This is beautiful, and I'm not even a huge fan of campaign! *gasp* LOVE. LOVE.
This is a great project! However, I have to confess that I think I actually preferred your previous island — the little legs were so adorable and the marble top seemed to match the piece better. But I totally get a girl's need for change and some functional drawers!
I can't believe that I never thought to do something like this before! It's such a great idea, using a dresser or in this case two dressers to make a kitchen island. It's genius!
What a beautiful job you have done…perfect!
wow. that's so freaking awesome!
This is one of the best DIY's I have seen. What a fantastic idea for an island, I love your gray and blue colours. (I too have recently come to love nailheads!)
you are a diy super star!!
you are a diy super star!!
This is fabulous! Great work! I know it probably doesn't make sense to flip it 180 degrees from a functional standpoint, but I think to have the most beautiful side be hidden most of the time is kind of sad. Can you jazz the back up a bit. It just looks so plain, especially knowing what is on the other side, especially if visitors to your home don't get to see that other side. You are seriously awesome & thank you for sharing all of your beautiful projects. The world would be a better place with more generous & beautiful people like you.
That looks great. Love the color choice. Maybe, when the hubby and I decide to redo our kitchen, I'll look back to this for inspiration.
What a transformation! I love it!
Inspiring as always. We have a butcher block island that my husband's parents made for us as part of a wedding gift. The wood came from very old trees from their family farm. It is a little more chunky than I ordinarily go for but it is so special because it was a labor of love. They designed it with the intention of putting heavy duty casters on the bottom but felt it would be too high. In the same post you will find a shot of a pelmet I made for my daughter's room based on your tutorial from way back when!
http://chezviviv.blogspot.com/2012/03/life-at-chez-v-details-are-everything.html
You are a genius! Im so impressed always by your creative do it yourself budget friendly projects… how do you come up with it and how do you find the time? Truly amazing work…
Cheers!
Avery
http://www.ornamentalhabit.com
Thought I would throw in my two cents. I loved seeing everyone's different islands, how fun! I liked the idea of using furniture for an island, like dressers, but we had the opposite problem, we had a really large space to fill that had to double as a dining space, so we installed a massive, 8x 4 ft. island that seats 8-14 people! I love it! You can check it out here:
http://www.11thandshannon.com/2011/12/house-tour-main-area.html
Shannon
Unbelievably great!
Inspired by your love of campaign style! I've been trolling Craigslist for a dresser to spif up!
Love it!
wow! love it! your blog is awesome!!
Your ingenuity is also inspiring, Janell
Like how you added the feet to make this a substantial island. Reusing something old and repurposing it to fit your needs is awesome. I didn't have enough money in my kitchen budget to order cabinets for my island, so I made one out of our old cabinets, trimmed them with beadboard and chunky trim. Couldn't be happier.
Gorgeous! I would love to add an island, but there's just not enough space for one in my kitchen- it would really block the flow to the table and the fridge. I love the smoke grey! My kitchen table is the same color. Just be careful not to scrub it with anything too rough (like the scrubbie side of a sponge) or there will be a little dull spot in the finish. I learned the hard way when I tried to scrub off some dried-on jelly :(
This is insanely gorgeous! I am getting ready to use some oil based paint on my campaign dresser and have never used it before. Did you use any type of protectant or top coat with the oil based paint? Thanks!
One idea is to make the back chalboard paint so your kids can sit and draw while you cook…