
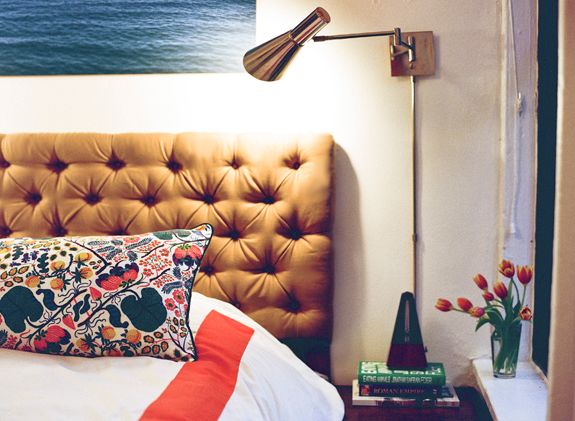
I’ve made a couple of diamond-tufted headboards now (Joanna’s was only my second though) and I feel like I have a pretty good sense of the easiest DIY approach now. For another tufted headboard tutorial I did, check out this post. I would say any upholstery job involving tufting is sort of an advanced DIY, but is this project definitely doable (maybe even fun?).
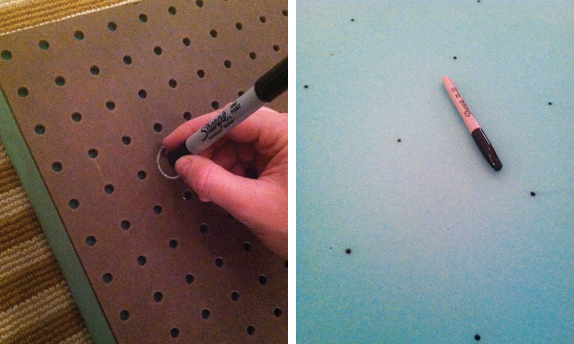
Gone are the days when I spend hours mapping out and drilling holes in plywood! I’ve been using pegboard and it is PERFECT for these headboard projects. Cheap, lightweight and sturdy enough. You’ll be hanging the pegboard on the wall so it’s okay that the board is not completely rigid.
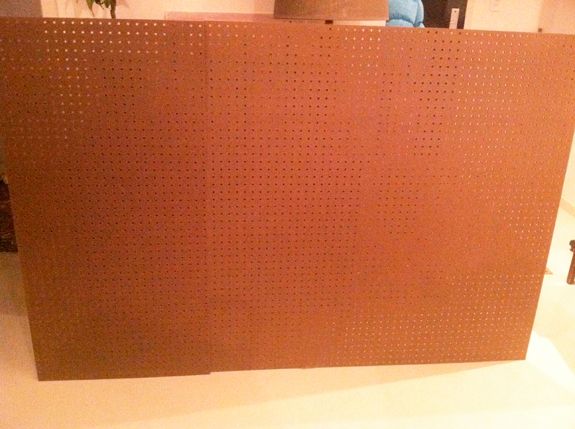
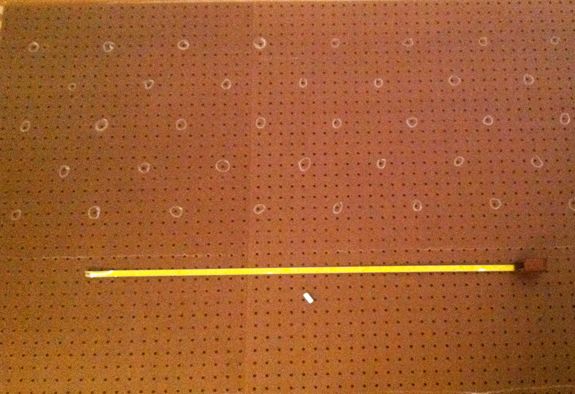
I had Home Depot cut down the board for me, so it was just the right size for Alex and Joanna’s queen bed. The holes on pegboard are 1″ apart. You do have to do a little math and mapping out to figure out your button placements, but once you have the formula down, it’s just a matter of counting it out and marking the holes with chalk.
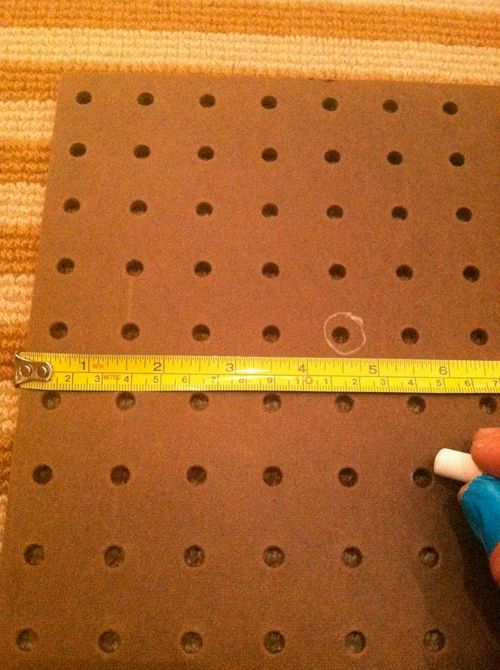
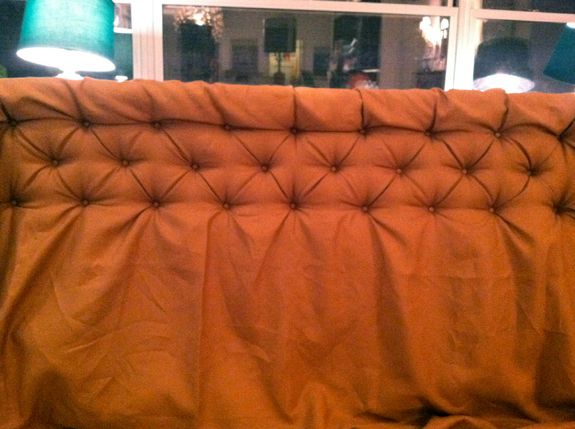
I had three rows of nine buttons and two rows of eight for a total of 45 tufts. (!) I wanted a lot of tufts though, so you could do less. I think it’s a good idea to look at inspiration images first and count the buttons on that headboard and estimate the spacing you’ll need for the look you’re after.
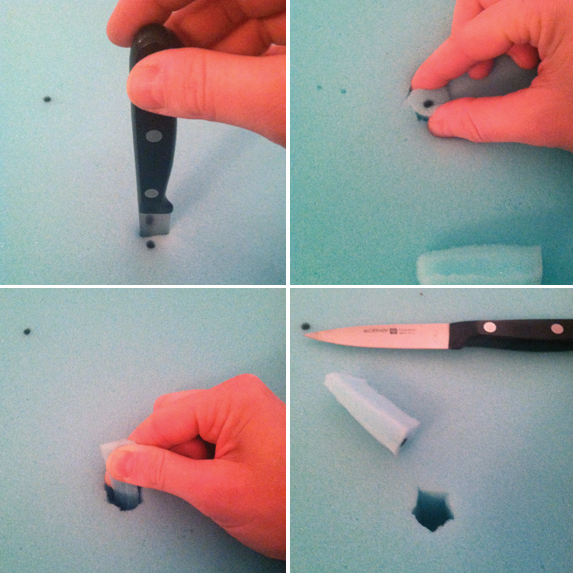
I purchased my 3″ upholstery foam at Joann’s with a 50% off coupon. I definitely recommend using exactly 3″ foam for this project. Otherwise the headboard will look thin and cheap. An important note – you only need enough foam to cover the top two-thrids or so of your pegboard. My foam was 24″ tall and my pegboard was 40″. The bottom part without the foam goes behind the bed.
So, to mark out your foam, lay the pegboard down perfectly on top of foam and use your registration marks and a sharpie.
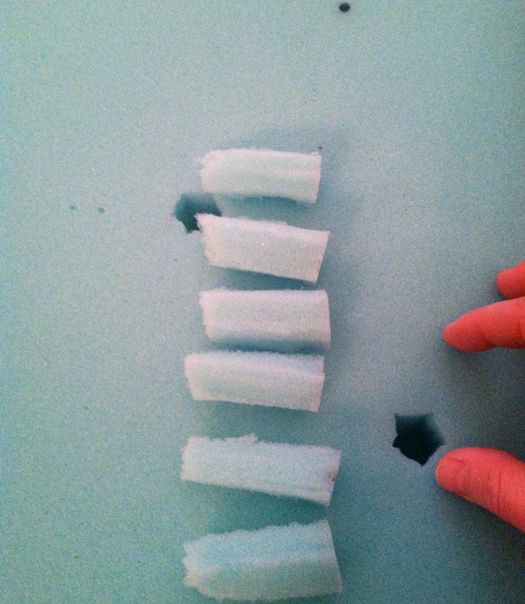
One of the secrets of getting deep tufts is removing the foam where the buttons go. My method is pretty lame – I just use a paring knife to cut a hole around the registration marks. You just grab the foam bit, twist and pull out.
You’ll fly through this step. It’s a fun and easy one.
See how the foam only covers the top two-thirds or so of the pegboard?

Secure the foam to the pegboard using spray adhesive.

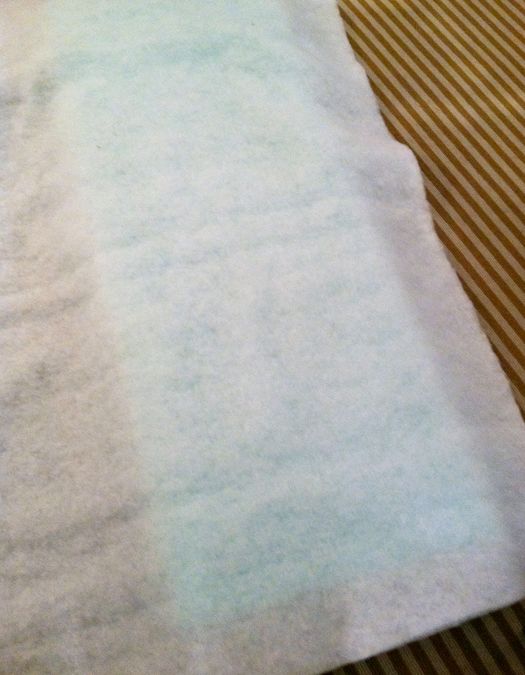
And lay down a sheet of high-loft batting on the top of your foam. The fabric goes on top of the batting.
**EDIT: A quick note about fabric. I used two yards of SOLID color fabric for this project. If you want to use a pattern (which I don’t really recommend for tufting, unless the scale is super small), you’ll have to piece together two or three panels of the fabric so that the piece is wide enough and so that the pattern matches up and runs the right way. Better yet, just use a solid fabric :) You can run the fabric horizontally (called railroading) and just get two yards and call it good.
PS You really will only need two yards for a queen size headboard. I was worried that the tufts would take up lots of extra fabric. Not at all. Maybe an extra couple inches total were needed for the whole headboard.
Here’s the part where you’ll need lots of buttons. You can buy button making kits and refills for just a few dollars (I used the 5/8″ size). It does take some time to make all the buttons though, so this would be a good place to enlist the help of a friend and get it done assembly style.
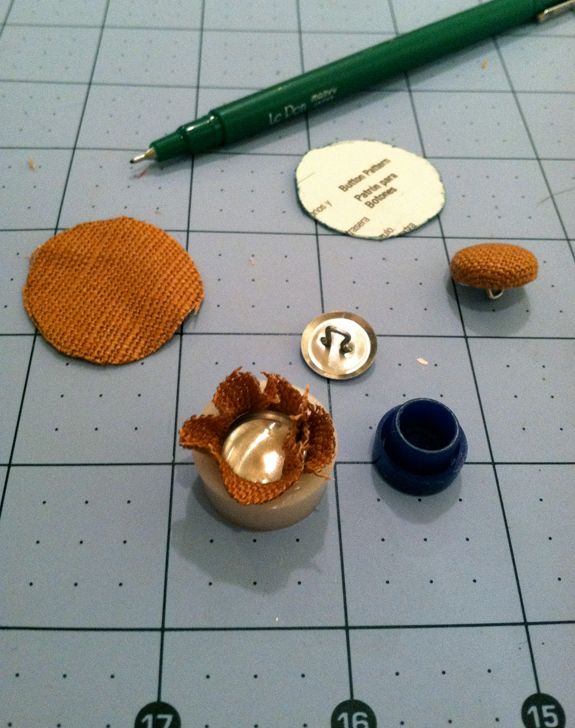
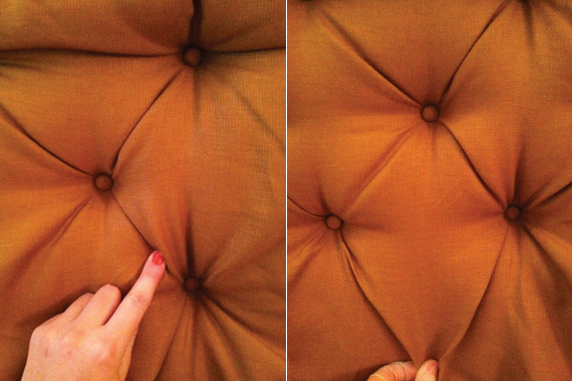
Using a long upholstery needle and doubled up upholstery grade thread (NOT the all-purpose stuff! This thread is more like twine), triple knot your button, and find your first button hole.
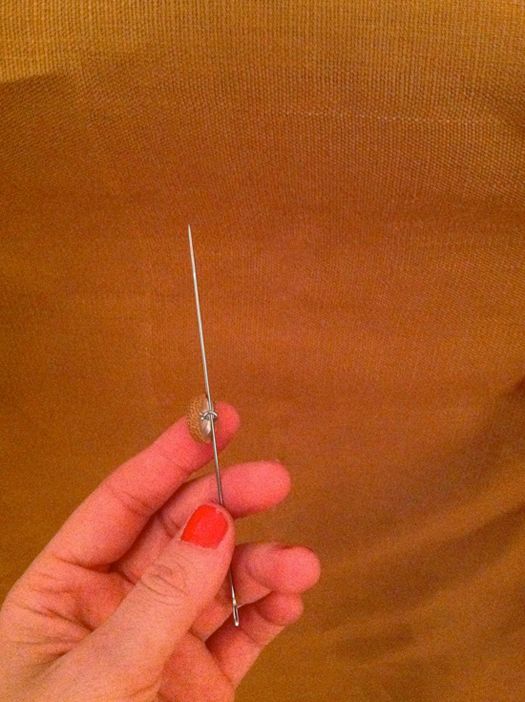
From the front of the headboard, push the needle through the fabric, batting, foam hole and pegboard hole, all the way out the back.
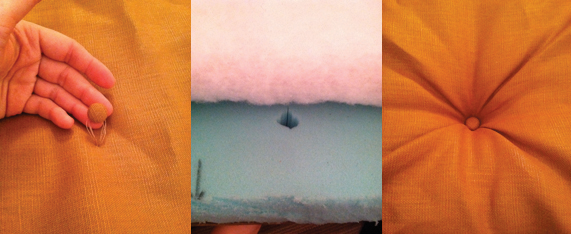
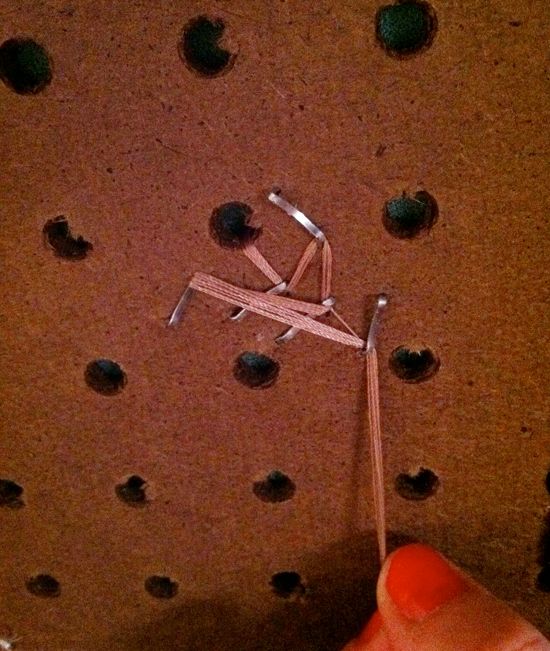
Pulling out and down as tight as you can, put a staple into the pegboard over the thread. But still keep pulling that thread to keep the tension. Put in a bunch of staples with the thread being pulled in different directions to secure that button in as deep as it can sit.
And your first tuft is done! You always want to start in the center and work your way out horizontally.

Be sure to leave the edges for last. I found it was taking me about an hour per row in the beginning. By the end I had it down to 20 minutes a row. Honestly though, my fingers were absolutely throbbing at this point! I busted this headboard out in a night and it would have been better to split up the tufting part into two nights, just to give my fingers a rest :)
Like any upholstery project, there is something to be said for keeping a soft hand and sort of artfully playing with the fabric. Especially when deciding where to place the button in the fabric and in getting the fabric to fold right. Play with the fabric and it will work with you. It’s absolutely begging to sit in a diamond shape if you help it along a little. :)
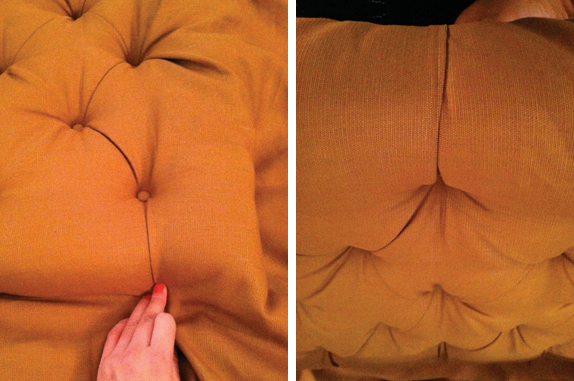
Once all the tufting is done, you’ll just need to finish off the edges. Don’t just roll the fabric back behind the pegboard and staple it down. The key to nice looking upholstery projects is all in the lines. Minimize the bumps and wrinkles! The fabric, especially along the edges should be flat and smooth. To make the edges of a headboard smooth, fold in a line going straight out from each tuft toward the perimeter. The fold takes care of all the excess fabric so that the edges can be smooth and taut and ready for you to staple down on the back side.
To finish the bottom of the headboard, where the foam ends, just push your staple gun up under the foam a little and run a row of staples along the whole front bottom. Then pull the fabric down over the bottom edge of the exposed pegboard, neatly fold behind and staple back, like you did with the other three edges of the headboard. And that’s it!
We screwed three D-rings into the back and used a couple Wall Dog screws in the wall to mount the headboard.
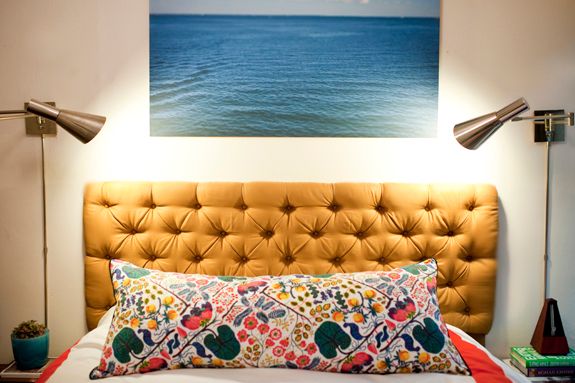
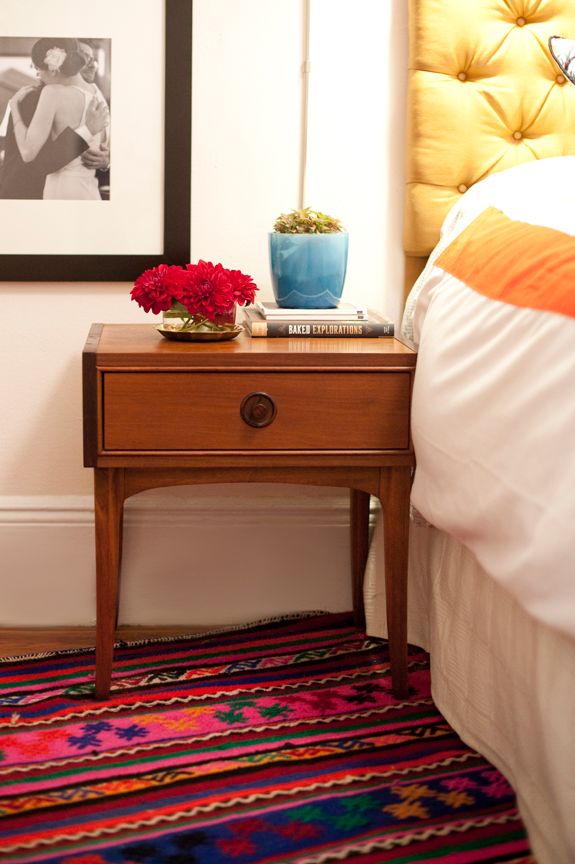
You can see in this shot how the foam only starts above the mattress. This way the mattress sort of sits into the headboard.
PS The camel linen is from Gray Line linen, from their Warsa line (only $9 a yard and it comes in all the colors under the rainbow).


Melissa – I think I use 3/8" staples. Try using a hammer to tap in the staples the rest of the way. If you do this, you'll only need to use three or four staples per tuft, since the staples will be in so snug. Hope that helps! Good luck!
Hi there! I used your tutorial to make my very first tufted headboard. Here's a link to it (we used a VERY bold pattern and bright buttons!)
http://nearlydomesticated.blogspot.com/2012/05/guest-room-complete-ish.html
ps. I linked to your blog in a previous post when the headboard was in progress (I hope that's okay)
Where did you get your buttons? I went to JoAnn's and they were $10 for only 14 buttons!
Where did you get your buttons? I went to JoAnn's and they were $10 for a pack of 14!
I love this tutorial! Just one question – You mention that your headboard is 40" tall, and that the foam is 24" of those inches – any idea how wide it was?
A queen mattress is 60" wide, so we did 63" on the headboard to give it a little wiggle room.
Good luck!
xx
I bought my button kits here in the fabric district somewhere. I think each button was like 15 cents. You should look around online, or start saving up those Joanns coupons!
I made this headboard a couple of weeks ago and it is FABULOUS! Your directions were perfect and such a great idea to use the pegboard. We already had a low, flat headboard so we just screwed the pegboard into the old headboard and added a little bit of light wood pieces to the back to make a brace. I did need a little more than 2 yards of fabric just to make sure I had enough to work with.
I haven't noticed the buttons loosening at all, but do I need to do anything else to secure the threads? I have seen a few places where people put hot glue in the holes…do you think that is worth it?
Hi Jenny, Thanks so much for this great tutorial. I made my own here:
http://involvingthesenses.blogspot.com/2012/06/diy-button-tufted-headboard.html
Love it! Will be trying this in green asap!
Such a great tutorial!! Thanks! I'm buying the supplies to make my own tomorrow! :)
How did you connect the pieces of pegboard together?
Hi,
Did you buy extra fabric to make the buttons or use the 2 yards purchased? Thanks and excited for this project!
Thanks for this tutorial! I just made one and it looks great. Some things I did differently: I called a small (like in his garage) upholstery store and he ended up letting me use his button making machine because I absolutely could not get the little kits to work. I also used a little round of cotton when tying it off. Meaning I pulled the tuft tight, and placed the cotton against the pegboard, and then I tied it off over the cotton. It worked really well and I didn’t have to use a staple gun. Finally, I made a simple frame out of 2×1’s so that I didn’t have to drill into my rental walls.
How much fabric would I need for a king size headboard.
Hi! I’m working on a very large headboard (56″x60″) and I cannot find fabric wide enough to cover the whole thing using just one piece. Will it work to piece two pieces of fabric together? Or will that look bad? Thank you! (I’m using an upholstery velvet fabric)
I was having the same delimina. Help!!
Hi! Do you know what the color is called of the warsa linen?
Hi, I am using an upholstery Wright Linen for my project and 3/4 inch coveted buttons. My question is how to get the buttons to work. The fabric is too thick to click the back on the button. I’ve tried hammering them, gluing them … nothing works. Any suggestions? Help!
I’m sure you are already done with this, but I thought I would share, in case anyone else has trouble. The best way that I have found is placing them on the ground and stepping on them with my heel, and just putting all of my weight on it and kind of jumping, while leaving my foot on there, if that makes sense. I do this at the final step, saves my thumbs from hurting too
Approx how long did this project take to complete?
Agree with this article, very informative. We can make our Upholstery looks like new by just changing fabric. Fabric quality and colors are also very important. I have just visited Rana Textiles Mills website and found beautiful and quality oriented fabric for upholstery over there. You can Buy Best Upholstery Fabric from here.
Best headboard tutorial I found! thanks Jenny!
FYI, in case anyone is still reading the comments.. a cheap[ way to get foam is to search your local craigslist for memory foam toppers. You can get twin size (sometimes new) memory foam toppers for way cheaper than Joann!! And even thicker than 3″ !
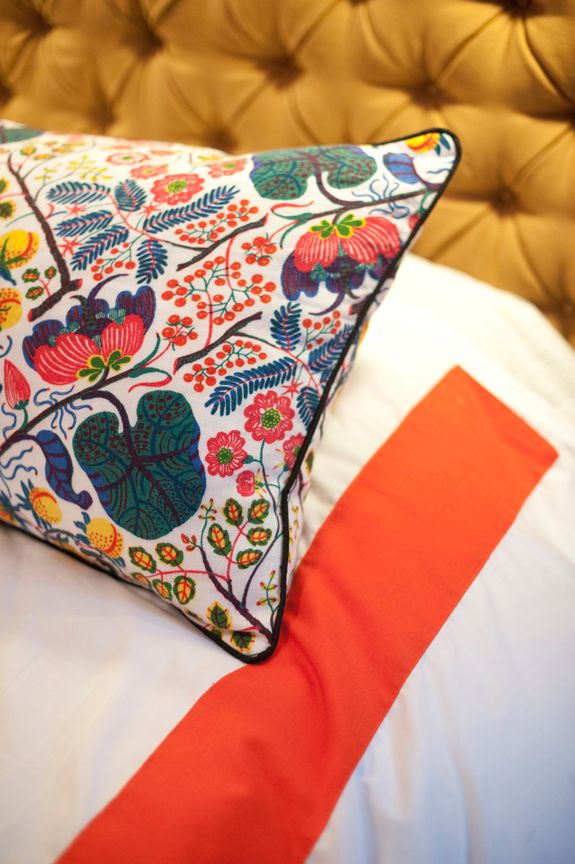
Can’t wait to try this project too! Also, love that floral pillow, any idea where I can get one of my own. Thanks for all the inspiration!!
Thank you for this tutorial. Your headboard is beautiful. You get 5 stars for writing such a detailed and informative set of instructions. Again, Thank You.
I really liked your post in which your all photographs are also very adorable. People can get some ideas for making an attractive mattress cover, thank you for sharing this post.