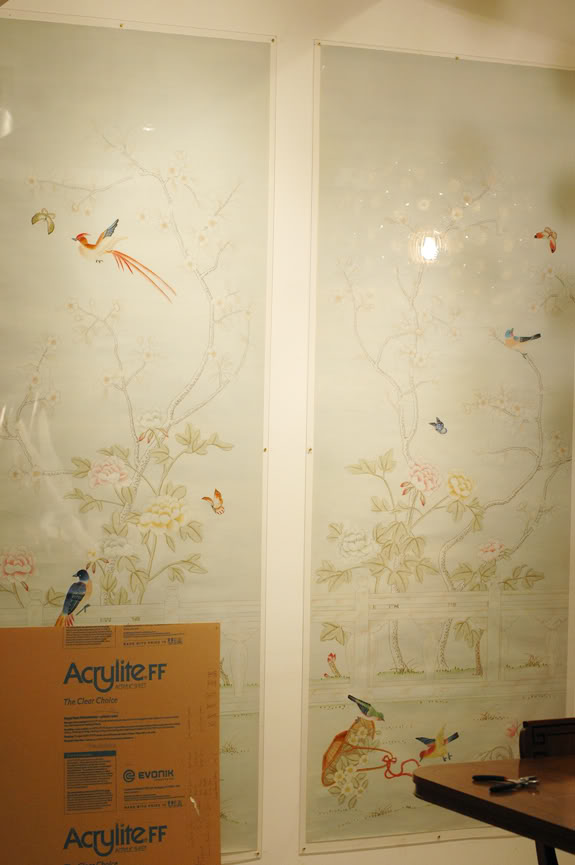
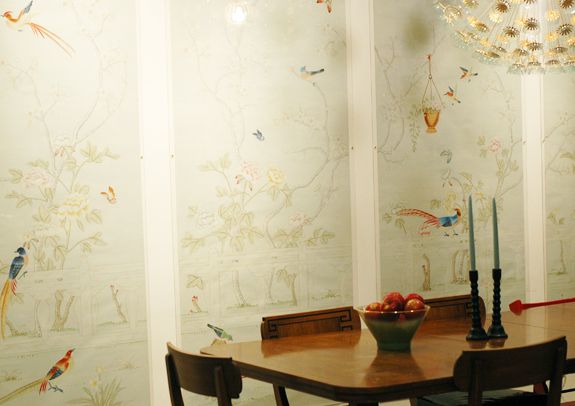
A while back I was gifted a set of hand-painted chinese wallpaper panels from this eBay store. They let you customize the background color (I sent in a Martha Stewart paint swatch that I liked – the color is Heavy Goose), and they let you choose which scene you’d like. I asked for the panels to be painted on PAPER (not silk, which is standard).
The panels are not inexpensive, but when you consider the cost of Gracie or DeGournay, these are down right affordable. I was planning for the panels to go in my bedroom and I wanted them to be more chill in color and pattern. Well, it turns out it didn’t work to hang the panels in our bedroom for a lot of (boring) reasons, so I’ve been storing them for about a year now. Recently though, we bought some new living room furniture and the whole apartment has been in a state of flux. It seemed like a good time to move the gallery wall to the living room and set up the chinois panels by the table.

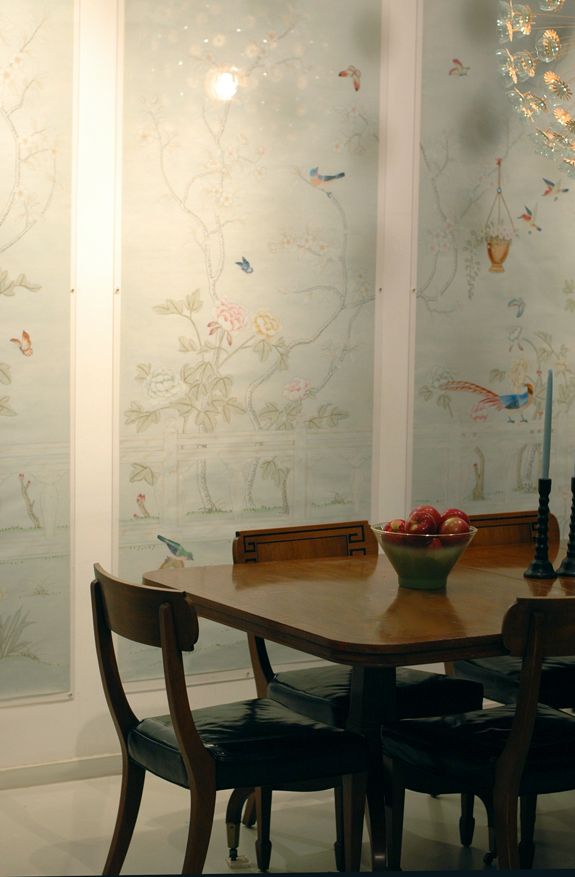
PS! If you try this yourself, I totally recommend butting up the acrylic sheets right next to each other rather than spacing them out the way I did. I wish we didn’t have to make space between the panels for electrical outlets. (oh, the sad realities of renting!)
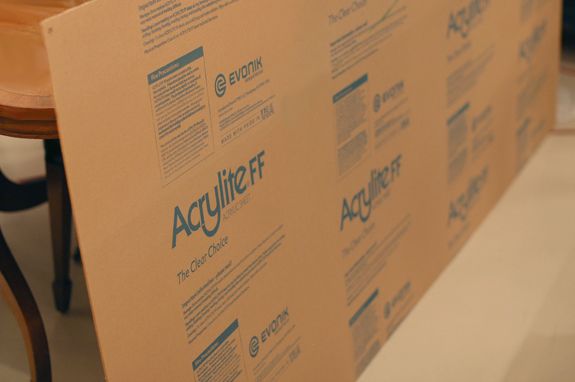
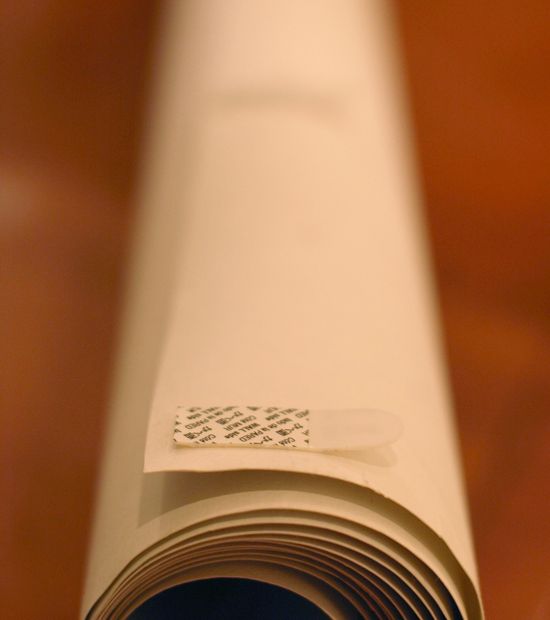
I knew I wanted to do acrylic on the framing of the panels, but I also wanted this project to be as cheap as possible. I ended up buying four sheets of 1/8″ plexiglass at Canal Street plastics for about $60 a sheet. I’m sure all you lucky suburbanites could find it for way cheaper though. I had them cut the sheets so there would be a 1″ border all around the almost 8′ long wall panels. The sheets come looking like this, wrapped in a paper film to protect the plexi.
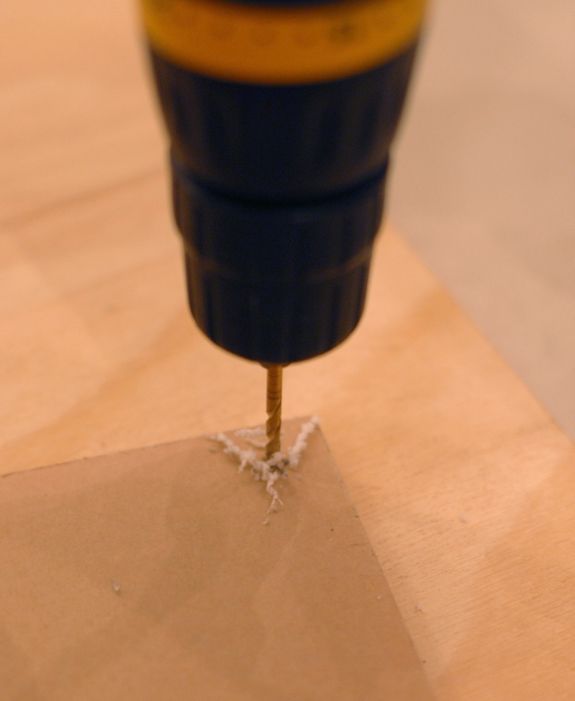
I drilled three holes along the top and bottom of the plexiglass, and then one on each side in the middle, for a total of eight holes per panel. The trick to drilling through plexi without cracking it is to use a small bit (1/8″ at most), drill slow and to put a piece of plywood underneath for added support. Also be sure to leave the paper film on during the drilling process.
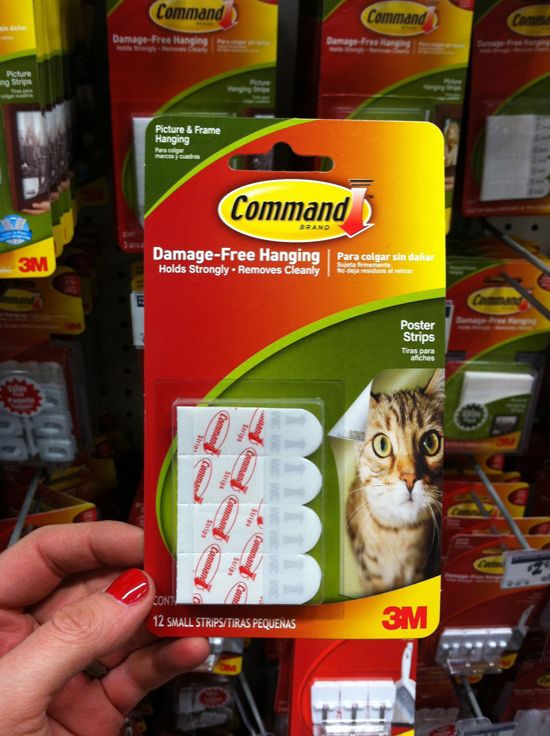
Once the holes were drilled, I hung the wallpaper panels directly to my walls using poster (NOT picture!) hanging strips. These are super thin and help the panels lay pretty flat against the wall. Also they are completely removable and won’t damage my walls or the paper panels.
I probably used 12 strips per panel (I bought the bulk pack of 48 strips) and made sure to stay close to the edges for the most part.
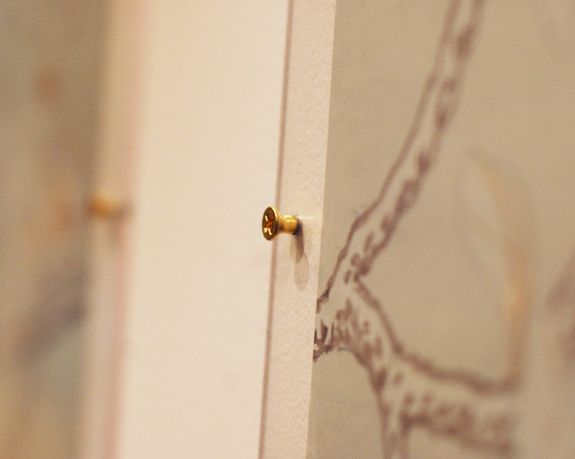
I went one panel at a time, first hanging the wallpaper (using a level!) and then mounting the acrylic directly on top of the wallpaper. I just used bright gold screws to mount the acrylic to the wall. I started out using wall anchors, but ditched those pretty quickly. The screws on their own were working really well. These screws I had on hand sort of had an unthreaded neck to them, so it would have been really tricky to drill them in all the way flush with the acrylic (and probably would have cracked the plexi), so I left them sticking out a bit, about a 1/4″, and I really like it actually!
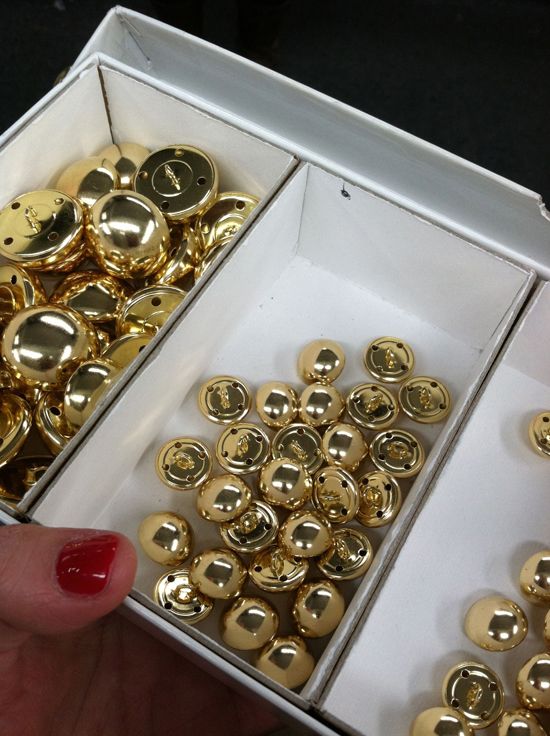
I had bought 24 of these big brassy buttons to epoxy to the tops of the screws to give it a more finished look, but I ended up not going that route. It looked a little overdone or something. I think the exposed screws somehow make the panels less stuffy maybe? Personal preference.
I just finished hanging these last night, so I’m still sort of letting the whole look settle in on me. I might end up changing some things, but for now I’m happy.
I’m working on another DIY for the dining room so I’ll share some wider-angle after shots when that project is done.
PS! If you try this yourself, I totally recommend butting up the acrylic sheets right next to each other rather than spacing them out the way I did. I wish we didn’t have to make space between the panels for electrical outlets. (oh, the sad realities of renting!)
How was your weekend? Michael is going to Brazil this week and I’m jealous. Also I’m not super excited about being a single mom all week. Hats off to those of you who do it solo all the time. You are much stronger than I!


I've been looking for oriental wall hangings (silk, calligraphy), I never thought to try wallpaper. Super idea, and great look. Can't wait to see the complete reveal.
This is beautiful. I did not know about poster tape.
They look amazing.
My hats off to single moms as well. I have been thinking about this a lot lately. My husband's work has been making changes to their computer system and he has been traveling a lot. By "a lot" I mean, he has been home 1 out of 4 weeks. In the midst of his travels I got a little thing called Pneumonia. I don't know how single moms do it.
Gorgeous! Great job with the framing and thanks for sharing the source for the panels!
Christina
Jenny,
Amazing idea–what a great way to preserve the panels and the brass screws look awesome!
Awesome in so many ways!
Jenny – Love this! Using the acrylic really allows you to focus on the panels. By the way, I tagged you in 11 questions. Hope you will play along.
They are beautiful!! And good luck this week. Here is hoping for early bed times and fast days.
Oooh la la! You've captured my heart in this dining room!
Your dining room looks beautiful! I love the acrylic panel idea. You are so creative and handy. Good luck with the girls this week.
Those panels are absolutely stunning! Thank you for sharing the source :)
I can't tell you how much I love what you did here. So, so many great ideas from you little lady! A daily visit to your blog is a like a brain tickler that gets me thinking creatively about how to solve for fixes with my own projects. This latest introduced me to poster tape! I might just abandon my current method of folded scotch tape for framing projects.
That looks very high end and expensive! Great Job!
What an amazing project, Jenny! And the panels are beautiful! I'm looking forward to seeing the rest of the changes you are making to your dining room.
Seriously? for REALZ? This looks fabulous! Personally, I really like the space between the panels… I think it's a little unexpected and makes it look less stuffy, like you mentioned about the screws. I think it's perfect :)
I love them! Clever DIY too, as usual!
Your new panels look great! I really like the spaces in between. I love every detail of the whole project.
Those are so pretty. I cannot wait to see all your changes.
Those are seriously gorgeous. And you are seriously kind for detailing all of these projects. You don't know what an angel you are to the rest of us!!
Love it! Gorgeous!
Wow, wow, wow!!!!! Hats off on this one because I really love it. From the pictures the spacing doesn't look bad at all BTW. That might end up being a poster art feature in my master bedroom for inexpensive art. I was going to do a canvas or acrylic art but no more!
these are gorgeous. I was looking for a Chinese screen or panels to hang above my sofa. I love these.
This is just amazing. I have been wondering how to incorporate my favourite wallpaper without having paper a whole wall. Brilliant!
This is really nice, Jenny, and your panels are so pretty.
I've been trying to figure out something similar for a wall at the end of a hall.
Thanks for the modern take and the inspiration!
Gorgeous. I like this more than your gallery are wall that you had before.
Wallpaper is making such a comeback….love the Asian theme here…..just great looking. Love the brass touches as well.
these look absolutely incredible – seriously, i'm coveting this idea! and i just saw your last post on your new rug…it's gorgeous!! i love it!
jenny, as usual, you're a genius! they are breathtaking.
This is gorgeous! It looks so professional! You could do the same look with so many different patterns! Thanks for sharing!
-Chrissy
http://gottahaveit0306.blogspot.com/
Very cool! those are so pretty, and I can't wait to see the full room shot. But how does your manicure always look so amazing?!?!?!? I never show a finger in my posts!
I feel you this week, my hubs used to be a professional musician and traveled all the time! I couldn't do it again.
Love it. Great job.
Great project!! I have been needing an inexpensive idea for filling up a large wall with artwork!
Beautiful. The art AND your nails. Do you think hanging fabric would work using this method?
I just wanted to say that your wall just looks so beautiful.
I love this look!
Hang in there! I have when my hubby leaves town for work too… lots of ice cream helps! :)
You consistently amaze me with your creativity and thriftiness. Those panels look fabulous. Now you'll have to figure out another project for those gold screw heads!
wow, Jenny you totally rocked this one!! look so amazing, expensive, and gorgeous in your space. can't wait to see the wide angle shots too!! you are so talented!
You need to write a book
Jenny, The panels look so pretty and delicate. looking foreward to the finished room.
Jenny this is so chic. Can't wait for the reveal!!!
Beautiful!!! I can't wait for the reveal. I love it when you change things up!
Absolutely beautiful.
I think this is my all time fave DIY- these are AH-MAAZING!!!
These look amazing! Great job!
Oh, Jenny. This is gorgeous! :)
I quite like the way the panels look with the gap actually :) very nice.
This is amazingly beautiful and what an addition to your dining room! Looks fab with your DIY Sputnik chandelier! Janell
Absolutely gorgeous!!
I love this project — it looks amazing! Tim is London this week so I'm a single mom too (although, only of one kiddo!). xoxoxo