
I’m sad this is the last post from Todd and Emily’s house! It’s been so fun to get the inside scoop on their decorating adventures! And thank you to Jessica from JJ Horton Photography for all the photos, except for the ones below that Todd and Emily just sent me here. This adorable play room is a recent addition to their home and I think the idea is genius! I would have LOVED a little play room under the stairs when I was a kid. It’s wasted space anyway, why not make it useful and fun? I’m definitely storing this idea away for the future!
Here’s Emily:
“When my father in law first visited us in our new home he suggested that we see what was under the stairs and build a play room. After two years of taking on other projects we never thought we could do ourselves, Todd felt ready to tackle a playroom under the stairs.
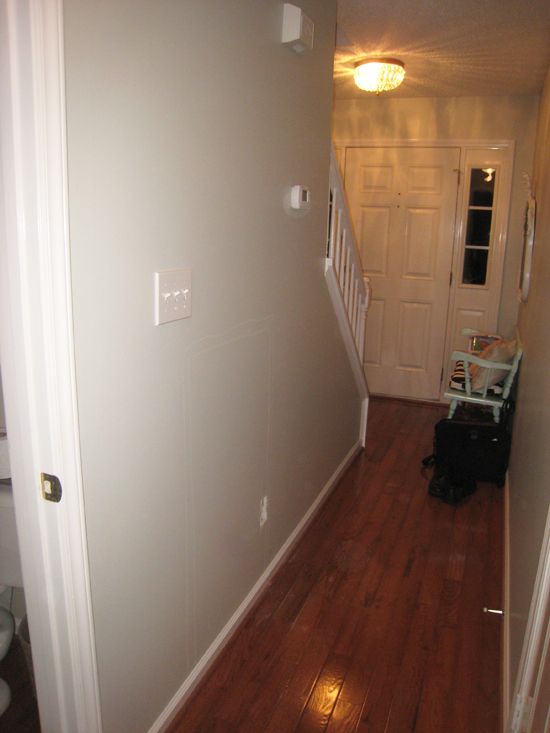
“He removed the outlet and stuck our camera through the opening to get an idea of what was under there. From what we could tell there was nothing, other than contractor debris and garbage from over 10 years ago. So we cut a hole in the wall and set in on removing a stud, installing the proper support for a load-bearing wall and began to plan the details.
“Knowing that a small door would be too tempting for little boys and their friends to play with (i.e. slam over and over again), we opted not to put a door on this little playroom. That decision also meant that we needed to extend the hardwoods instead of using carpet. This wasn’t too hard to do since we recently put hardwoods in our kitchen to match the rest of the house and already knew what kind and color we needed. It only took one box to cover this room.
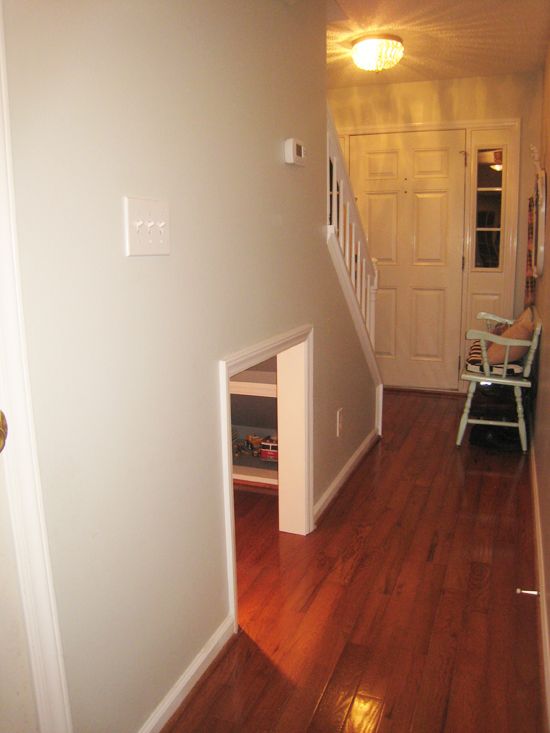
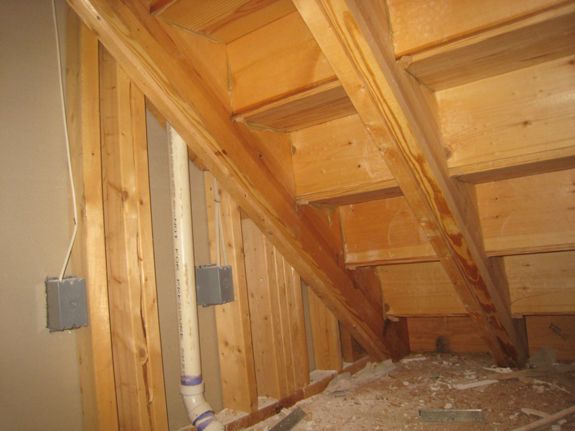
“We decided to build a cubby at the foot of the room as it slopes down into such a narrow space and we wanted to have a place to store toys and keep it organized since it is open to the hallway. We installed two small recessed lights, got all of the electrical work in place and hung the drywall.
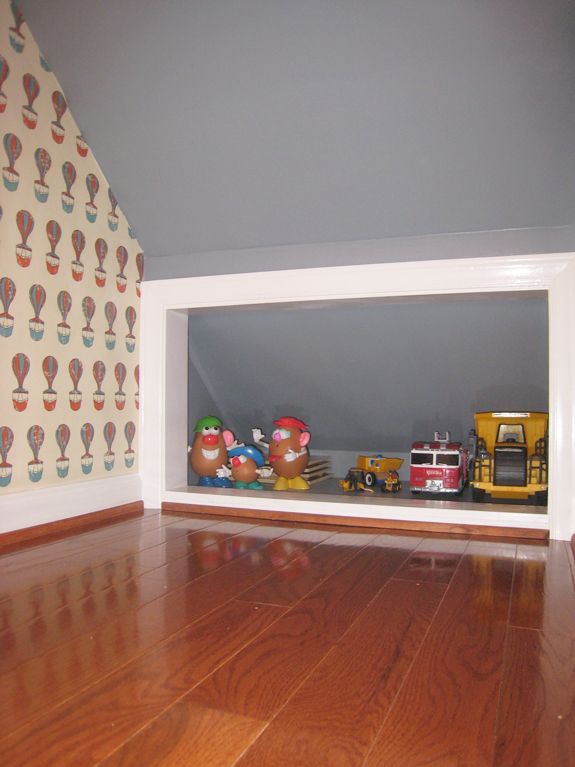
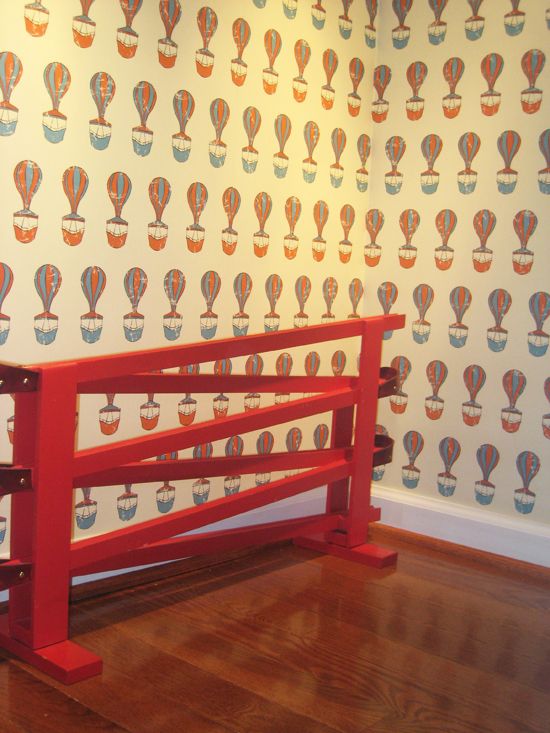
“Imagine my excitement when Todd was the first to mention that we should wall paper the room (he’s usually against wallpaper in any capacity, but liked the idea of hiding drywall imperfections). While Todd got busy building the room, I was busy looking at wallpapers. We considered a few and since it is such a small room and would only take one roll we looked at some pricier options. We ultimately decided on this wallpaper from Ferm Living. We painted the ceiling Benjamin Moore Sweatshirt Gray to break up the wallpaper and used this same gray inside the cubby.
“Before installing the wallpaper we primed the walls with a water based primer which is recommended. Since Home Depot got rid of their wallpaper section they didn’t have the exact primer that we saw online so we went with a gallon of this one. Parker was able to help with this part which he was more than happy to do. I went to Sherwin-Williams after we primed the walls to buy the supplies we would need to hang wall paper. While there I found out that Sherwin-Williams makes their own water-based primer for wall paper and it comes in a quart size for about $15. I wish we had gone there first, oh well.
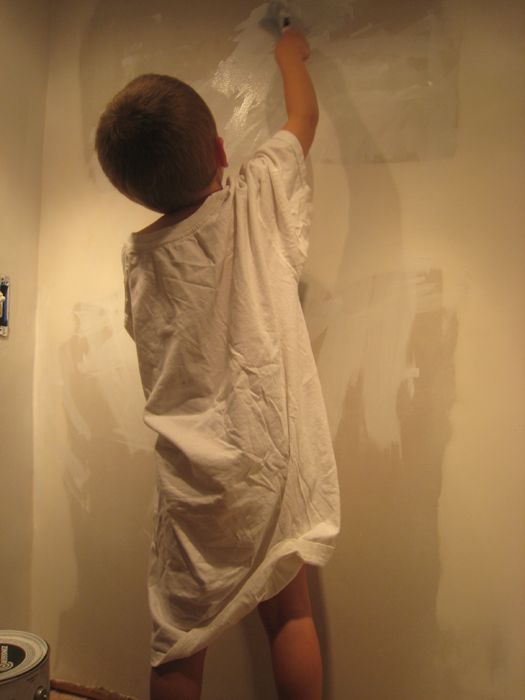
“Installing the wallpaper was an interesting experience. The first 10 minutes were frustrating as we tried to figure out the straight line of the wall. Walls and ceilings are never perfectly straight so you have to use a plumb (basically a weight you hang from a string attached to the ceiling) to find the perfect vertical line. You use this to make sure the first sheet is straight and then line each other piece up based on the first one. Corners are tricky (you can’t just wrap a sheet around or inside the corner) and there is a pretty detailed process involved. Thanks to some youtube videos we figured out one technique that made sense for the pattern in our paper and it worked pretty well. Of course, we picked a very hard room to wallpaper especially for our first try.
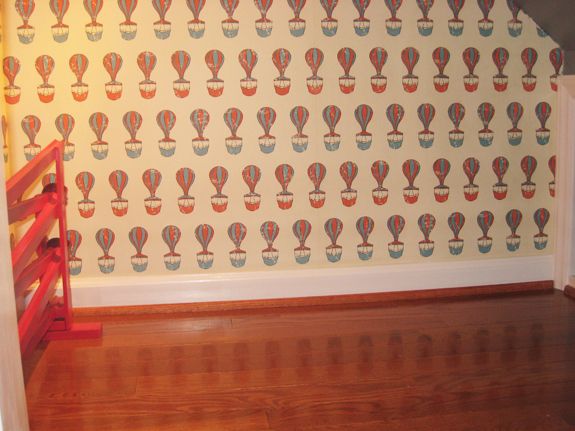
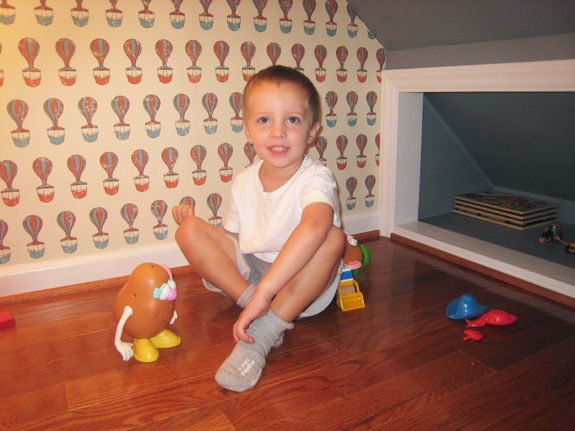
“We were surprised at how resilient the paper is. We chose a high quality paper so I’m assuming that helps but we would make creases in the smoothing out process that looked like they would never come out, but with a little reworking they always did. Overall, it turned out wonderful and I smile every time I walk by this little room which is probably 20 times a day. Parker loves showing it off to his friends and I like that it’s so close to the kitchen that I can hear the things they say when I’m in there.
“We originally planned on hanging a chalkboard that Todd built but when we put it against the wall I was surprised at how much I loved the wallpaper and didn’t want to cover it up with a big chalk board. Now, we’re thinking of making one of these so it won’t cover up the wall paper as much and doesn’t stick out in an already very small room.”


So sweet! What an amazing use of otherwise empty space! I love the wallpaper – the whole space has such personality.
xo Allison
Spicer + Bank
http://www.spicerandbank.blogspot.com
Thanks so much for allowing us to enter and stalk your home. I would be hiding out and showing that fun playroom to all my friends. A photo op there every year would be fun….soon one day they will be bringing dates…
pve
Jenny, I totally loved this entire house tour. Their house is just charming – and that room under the stairs is the perfect ending to the posting! Love it! I would love to see more house tours in the future, if your friends would allow it!
Jenny, I've loved this house tour so much! I feel like I kinda know Todd and Emily now, and I'm sad I don't get to keep seeing little bits of their life! (Is that weird?) Thanks so much for posting this great series!! xoxo
what a perfect project ! and perfect utilization of space ! the hot air balloon wall paper is a dream ! but is it weird that i can't stop thinking of true blood (crawl space)?
ps, http://amandamantes.blogspot.com !
The house tour was fabulous! Thanks for sharing!
I have so much enjoyed this house tour. It makes design feel very accessible. My very favorite part was when Emily said she went to Homegoods every Friday night after her kids went to bed. That's the only way to do it! I chuckle every time I think about that.
I'm sad to see this series come to an end! Emily and Todd, your home is so lovely- I've so enjoyed this peek into your space!
Love the little door opening and that you were able to use that wasted space. I've loved this house tour!
I love this idea! It's like a hidden playhouse harry potter style but much better.
-Ly
http://www.lyzhang.com
Oh my heavenly days. That is stunning! What a perfectly brilliant idea. Kids always love secret little hideaway places. What a super idea that is beautifully executed!
I would have died for one of those when I was younger!
What a sweet space, my little boy would love this. thanks for sharing!
This series has been so fun. Thank you for sharing your home with us, Emily and Todd. This play space might be my favorite element of your home. Such a unique nook for your children to enjoy!
I have enjoyed every room in their home. Thanks for sharing with us Emily and Todd! Great use of space under the stairs!
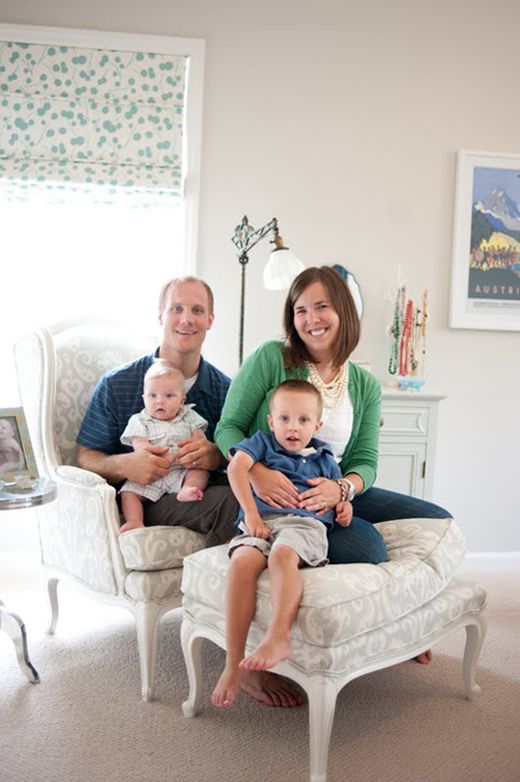
Oh wow I love that playroom! I would have definitely enjoyed that when I was little. Kids love having a place all their own and that's perfect. I have to say, though, the showstopper for me is that gorgeous chair and ottoman they're sitting on in the last photo. The fabric is amazing!
life in the married lane – a little blog full of inspiration!
that's so clever!!
where did you get the red marble track? I've been wanting one for many years.
Marie, it is handmade by my father in law. A reproduction of an old family toy from the 40's or 50's. Kids love love love it.
just wanted to say that i thoroughly enjoyed seeing your beautiful home. i'm so amazed you did this all yourself (with your husband's help!)–it's all very inspiring. i loved every detail.
love this! we have a room under our stairs that is already finished with a door. when we moved in in feb. we already knew it would end up being a playroom (whether the toys were in there or not!)
I'm looking for ideas about how to spruce it up and am looooving the wallpaper!
EMILY! I love this, everything about it, but what I loved most was getting to the end and seeing an old friend.
Beautiful home! Love the combination and blending of colors and textures! What paint color did you use in your foyer? Thanks for posting:)
We just completed a very similar playroom under the stairs at our townhome. We painted cedar shakes on the outside of it and used removable decals on the interior walls. Our grandchildren LOVE it!