Here are the other steps in this series: Part 1, Part 2, Part 3, Part 5
There are lots of ways to trim out a chair. Probably the easiest thing to do is buy a ready made welting or gimp. If you get something at the store in a contrasting color it looks less lame/generic. But if you’re up for it, I think a self welt is the best option. Double cord welting is awesome for DIY upholstery projects, because it covers a pretty wide area and makes sloppy stapling jobs look great.
Making your own double cord welting is actually pretty easy. Here are the simple steps:
Lay your fabric down and fold it at a 45 degree angle. Cut an inch or two in (depending on if you are doing single or double welting) along the diagonal angle (also called the bias). Cutting fabric on the bias makes it super stretchy – perfect for hugging all the curves of the chair.

You’ll need lots of piping, so cut plenty of strips.

I used the strips of fabric to stretch around the perimeter of chair parts to figure out generally how much cording I needed for each area (like the seat back, the chair bottom, the arms, etc.). You’ll need to piece the strips together to make cording long enough for each area. Just run a stitch down two pieces, one facing up, the other down, in a upside-down V.
You can buy unfinished cotton cording in all sizes at your local fabric store. It’s very inexpensive – usually ten or 25 cents a yard. I used about 40 yards for my two chairs.
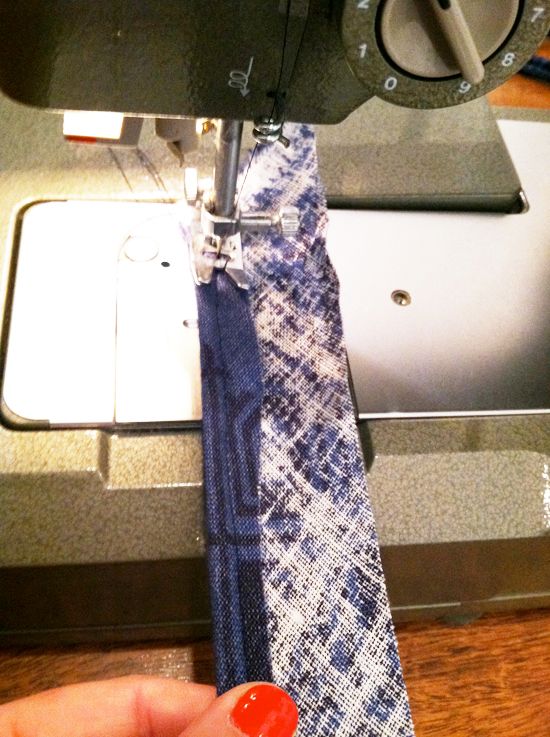
The basic idea is very easy. Lay the cording down on your long strip of fabric, fold over the strip and sew in a straight line about a 1/4″ inset. You can use a zipper foot here, but my regular walking foot was fine here.
Once that cording has been sewn in, lay down a second piece of cording and roll the whole thing over:
Then simply stitch down the middle, between the two pieces of cord.
When you’re finished sewing, trim off the extra fabric close to the seam and you’re done!
I used only Magna-tac to attach my welting to the chair frame. Like I mentioned earlier, the glue dries very fast and the hold is very sturdy. I worked in about 10″ lengths. I’d apply the glue directly to the cording, wait for just a few seconds for the drying process to get going, then then I pushed the cording down hard into the staples and gaps in the fabric.
While the glues dries very fast, it’s a good idea to keep coming back to push in the welting into place while you’re working on the rest of the chair. By the time you finish, everything will be securely glued and sitting where it’s supposed to!
It helps to really get in the grooves if you sort of pinch the cording together, almost in half.
The bias cut welting really does well with corners. It’s super easy to apply with all the stretch and give! If you don’t have enough fabric to make bias-cut piping, you can definitely make piping with strips of fabric cut on a straight edge, there will just be more wrinkles and it will be tricky to get your corners completely covered.
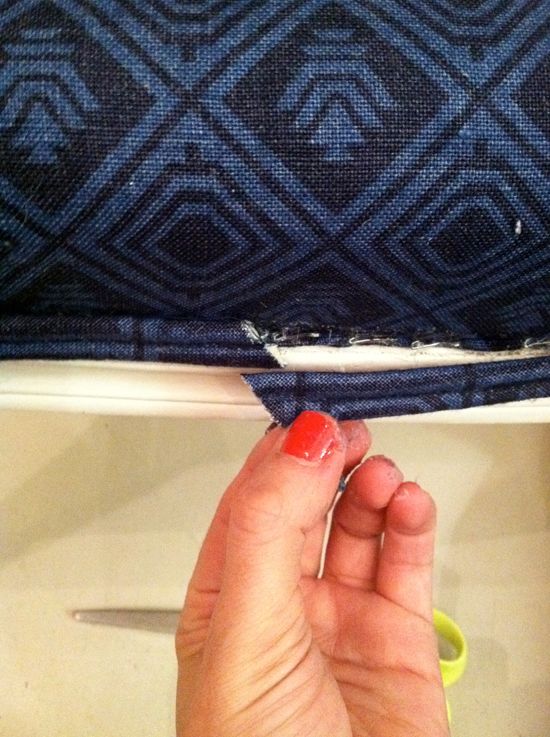
There are a couple ways to stop your welting. Probably the cleanest looking method is to roll under the edges, but my piping was too thick, so I just cut the start and stop pieces on an angle. I cut the stop piece a little long. This helped for squishing the cording together and covering up the white parts. I also glued the inside/cut edge of the cording.
Not completely noticeable, right?
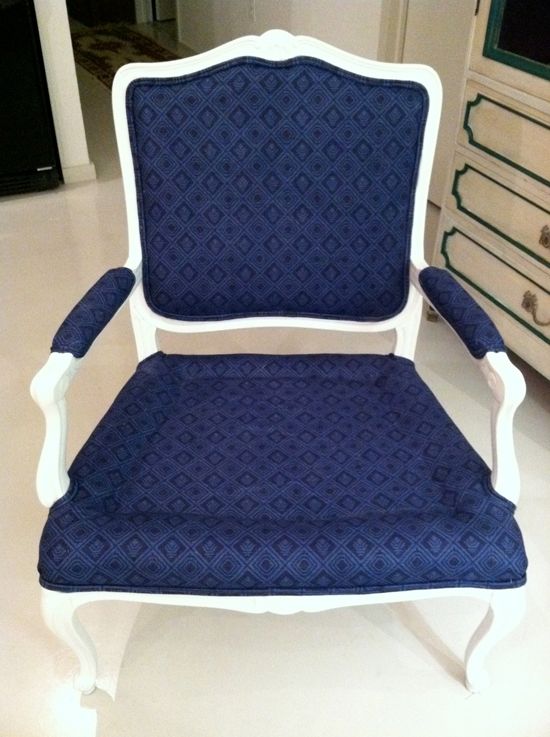
I love how upholstery projects absolutely come to life when the trim is added! Home stretch!
Last step is up next – sewing the cushion! Hint: if you can sew a pillow, you can make a cushion slip cover.


I love the fabric you used–it makes the chair look so regal!
Jenny, what size of cording did you used?
WOW. You are making me think it's not that hard…I'm tempted.
It looks great so far! I have to say that your upholstery tutorials have been the best ones I've seen! Maybe I'll get the nerve to try it myself now!
Amazing…you did all that?! Looks so great, and very inspiring!
This really looks incredible! You're so talented and creative. Can't wait to see the cushion.
Fashionable Collections
Your take on upholstering is spot on! You just have to take the leap and do it. Last summer I helped my niece redo her ugly overstuffed couch and loveseat with heavyweight gray POLAR FLEECE! It was amazingly easy to work with because and looks very "West Elm". Now the question I have about your welting project….how many glue gun burns did you get :)
Looks great! Thanks for the tutorial…I upholstered a similar chair using tacks and it took FOREVER, I wish I would've known about this! I can't wait to try it out!
You make this look so do-able! Now I'm feeling brave….
holy wow. now my only reservation is 'wasting' fabric if I mess up! I have a wing back chair I got fre at a yardsale that'd yelling for attention so it can be useable in my house! :)
thank you!
Loving this! Cording has always intimidated me! Your chair looks amazing and so well done. Looking forward to the cushion!
Thank you so much for this awesome tutorial!! I can't wait to try it out.. now just need to find some chairs! :) Yours looks amazing, by the way. I love that fabric!
I really appreciate your upholstering HOw to's ! I'm getting started to tackle one soon.
Caterine
730design.blogspot.com
Love it!!! I just bought a double welting foot for my sewing machine – and used it right away! You chair is looking great :)
Beautiful job! I love the white wood with the contrast of the navy fabric:). A fantastic tutorial!
Wow – this project is looking absolutely amazing. Thank you for the tutorial! You are an inspiration, Jenny!
one word: GORGEOUS!
It looks amazing. I am still not 100% I can do it, but I am inspired!
Thank you for your wonderful tutorial! I've reupholstered chairs in the past and have used decorative cording, not knowing how to sew double-cord welting – until now!
Awesome post!
Thank you so much for doing this! I'm just getting ready to start my first upholstery project and now I'm feeling much more hopeful :)
I am just so happy for this series of posts. You really do make it look easy. I got 2 upholstered chairs for free at a garage sale… so I will come back to these posts when I get the time to reupholster them. THANKS! They look fantastic too!
Pardon my french, but holy shit! Ive been working on my won chair redo and this was perfect timing! I could not wait to see how you finished this off since you stapled right over old fabric and on the front side of the chair. But it is BEAUTIFUL and I learned how to double welt in the process. Great job!
Oh my goodness! I wish I had your patience to reupholster a chair. It looks beautiful by the way. Can't wait to see the finished result!
~Kristy
http://www.idesignlove.com
Very excited about your tutorial. You're doing a fantastic job (and now I see all the mistakes I made on my sofa).
But when do we get to hear about Sarah and Tommy?! :D
WOW!!! and to think I paid to have mine done. It really looks great. That is such a skill to have in your back pocket. Great job
This is such an amazing DIY series. That trim looks incredible.
You are making me think it's not that hard. Impressive!
Silver MLM
I started my chair tonight and will trim it tomorrow! I will send a picture when it is done. Thank you SO so much for the tutorial.
Thanks for this lesson Jenny! It just solidifies the concept that having a well-designed home doesn't mean you have to have lots of money, just a creative mind and a "can do attitude." These chairs look so chic!
Doesn't it make you happy when a project REALLY turns out wonderfully! Great job…
Even though you make it look easy, I'm positive this is a project I could never do. You are so talented! I love your tutorials!
Hi Jenny,
Thanks very much for this tutorial. You are explaining each step so clearly, showing good pictures of the process and offering helpful tips. I appreciate all the work you've put into this and celebrate the beautiful results. BRAVA! BTW, it was exciting to see all your mentions in Better Homes & Gardens this month. Great publicity!
Love.
You make it all look so easy!
xo,
cristin
I can't thank you enough for this series! I learned so much and I know I'll be referring to these posts again and again. I'll be spreading the word as well.
They are sooooo beautiful!!! You did such a great job and you've inspired me to try it for myself!
Amazingly detailed tutorial and such beautiful results!! What is the fabric you are using??
You are amazing. Truly amazing!!
Lovely tutorial – I'm sending to my mom who has had a recovered chair minus the trim sitting about for quite some time…
One more trick on the ends meeting…if you cut the just the cording on the inside and pull it out then you can have the empty shell of the cording, can tuck it under and match it up in the same way you did. Folding under and you don't have the chance of the cut sections unraveling…I can take some pictures if that would make it clearer…
Okay you are officially amazing. You did a fabulous job and it is looking sooooo easy, which I really don't believe. Ha!
xoxo
Karena
Art by Karena
Come and join a very Fashionable Giveaway!
Love that fabric, who makes it?
And thank you for a wonderful tutorial. Almost everything I make is from a blog and I've learned so much and realized how much i can make!
en güzel sözler
http://www.fullguzelsozler.blogspot.com
mesaj sözleri
facebook sözleri 2011
aşk mesajları
http://www.fullguzelsozler.blogspot.com
full damar sözler
etkili sözler
http://www.fullguzelsozler.blogspot.com
Jenny, really great chair! I learned a great tip on ending welt when I took an upholstery class (Eliot School of Fine Arts in Jamaica Plains,its great!!!). Rip the seam just a few stitches at the end pull the fabric down to show some cording, and then cut a snip (1/4" or 1/2") of the cording off. Pull the fabric back up, fold under, and glue! You can do that at the beginning too, so then there is no exposed cording at all.
BTW, I first learned of your blog from a girl who was in my upholstery class. She always was saying "I don't know how that lady on Little Green Notebook does all these uphostery projects without having an instructor to teach her….Its amazing.
I am learning so much from this blog… Awesome. I can't wait to get going on some of this!
such great projects…
Such a great tutorial! Can't wait to try this!
nope too much work, I am just going to buy a new chair.
Wow Jenny! I haven't had much times for blogs in the past few months. To think of all I've missed on yours. You are absolutely amazing! And you're tempting me to try this at home. To think of the money I'd save. I love that I can go back to your blog and search any DYI project, that I have the nerve for, and find such fabulous detailed instructions. Love the fabric you chose too. xoxo
your instructions are so helpful, thank you! now i feel like i can maybe attempt this!
amazing only one word…………
Just found your blog and getting ready to tackle my own first up project. Your chairs are so beautiful and I am starting to be slightly more excited than nervous about this new task! Just wanted to say thank you so much for this blog…so, so helpful!
Andrea
I have a chair just like that one very old , but it had tacks not welding,the wood is too hard to nail them back in so I stopped. .Now after watching you make it I think it would be easier for me to do .What is you opinion ?Oh by the way you did a great job lovely fabric.