Here are the other parts of this series: Part 1, Part 3, Part 4, Part 5
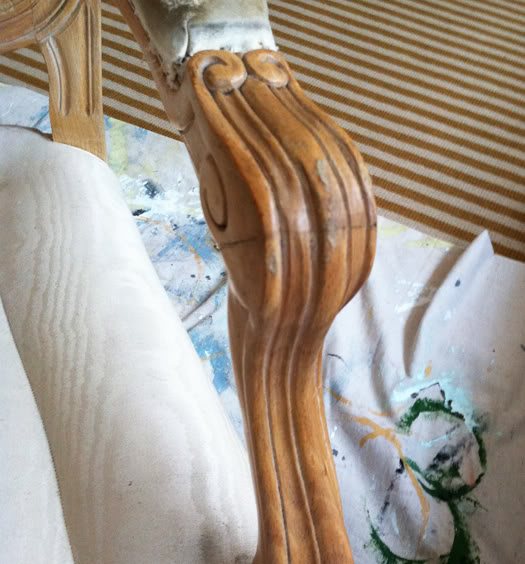
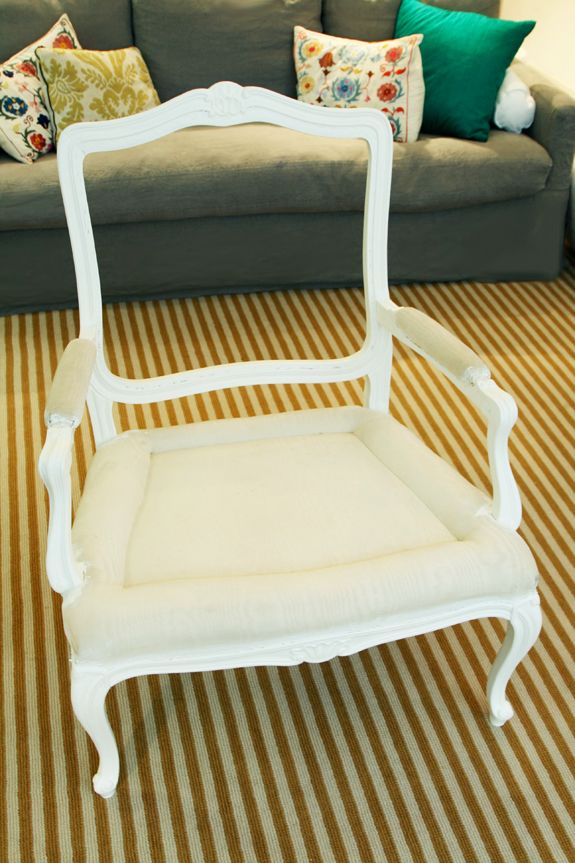
So now that we’ve stripped the chair of it’s trimming and most of the fabric, it’s time to paint the frame.
*Another quick disclaimer: there are so, so many methods for painting furniture and I’ve tried lots of them. This is just what works for me. Also, if we had a good place to easily spray paint these chairs, I definitely would have gone that route. Rustomleum’s Enamel line is hands down my favorite. Great colors, beautiful coverage and very durable.

Any time I’m painting an older piece of furniture I like to clean it first with TSP, which you can get at any hardware store.
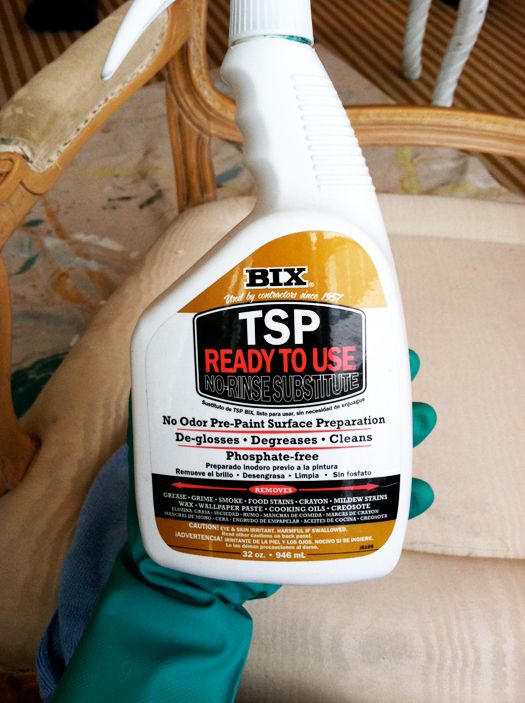
The basic idea is to spray the piece from top to bottom, let it sit for just a minute, and then wipe it down from top to bottom. It’s not a regular cleaner, it’s a chemical stripper, so use it carefully and according to the instructions. It’s worth the minor hassle for a really clean, grime-free surface.
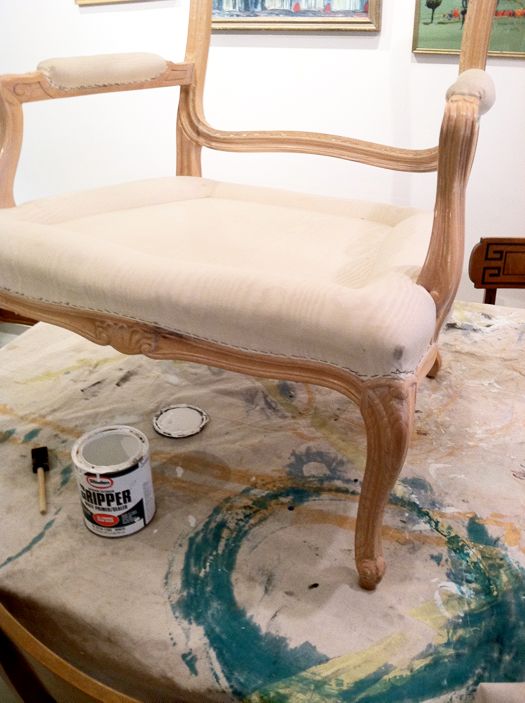
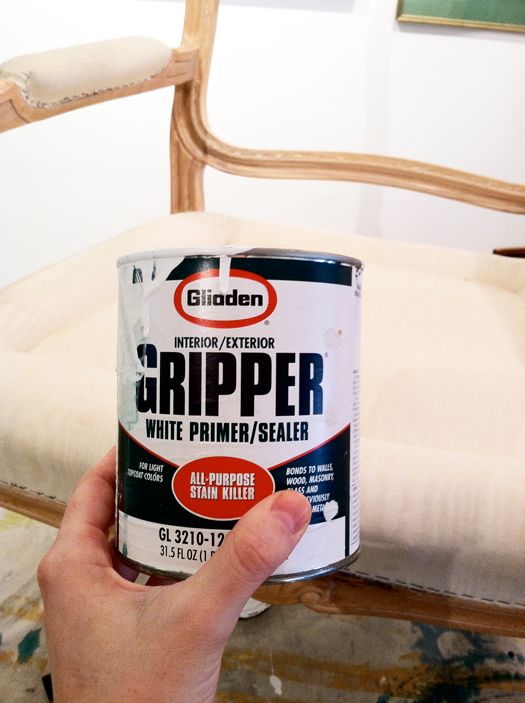
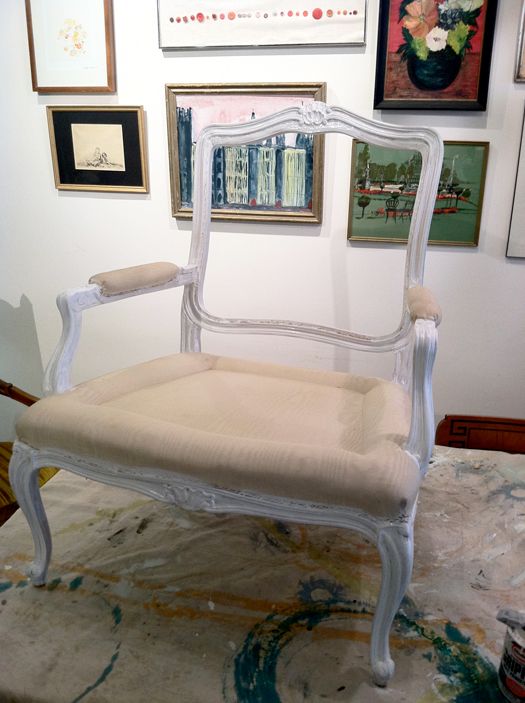
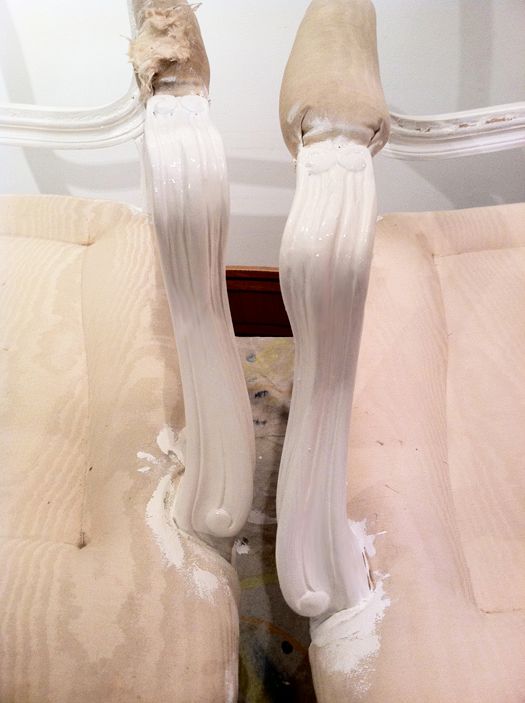
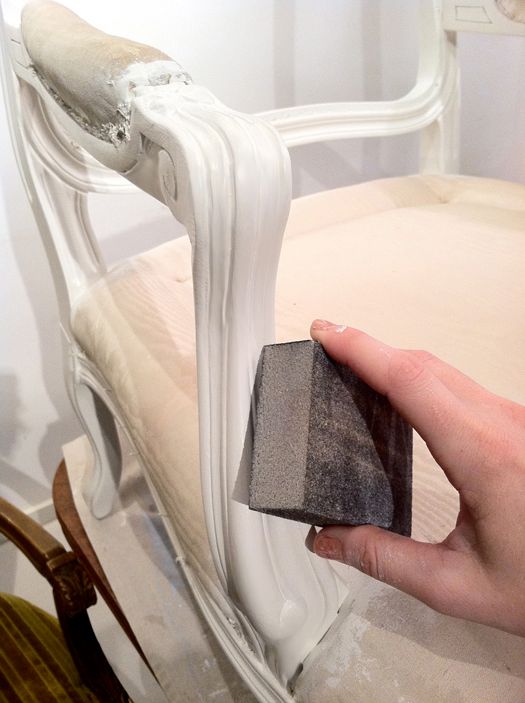
Even though I’m starting with a now-clean surface, I still need to prime the chair frames. I recommend priming almost every piece of furniture you paint. Especially high use pieces, or pieces that are in a high-traffic area. The good news is you can sort of just slap this coat of primer on – it doesn’t need to be perfect. I usually use Zinsser primer, but I had this Glidden Gripper on hand and I like it fine too. It’s not as thick as Zinsser, so it goes on a little easier, but doesn’t cover as well.
When I’m doing a primer coat, I never use my good paint brushes. I try to keep a little stock of foam and cheap 2″ brushes for jobs like these. I find that brushes never really clean up well after using them with primer (without using mineral spirits or paint thinner, which isn’t an option for garage/utility sink-less me), so I use these cheap brushes and then toss them after use.
Again, putting down the primer foundation should be a fast step. I brush on a quick, light layer. Both chairs took maybe 10 or 15 minutes to brush down. There are serious brush strokes and the wood stain underneath is definitely showing through, but it doesn’t matter in this step.
It only takes a couple hours for the light primer coat to full dry. Just enough time to go on a walk with the kids and my sister and sister in law. I haven’t mentioned that my gorgeous sister Heather (on the left) is staying with us for part of the summer. She has been such a fun partner in crime for the past couple of weeks and I love having her around! Also, my amazing and stunning sister in law, Kenzi, (on the right) is here in the city with her husband Matt for the summer. They are the BEST and I feel so lucky to have these ladies around to laugh with. They’ve both been jumping in to help with my kids while I’m juggling the craziest work load of my life. So many projects are wrapping up right now and I’m glad they are here to catch the balls I’m dropping. Love you girls!!

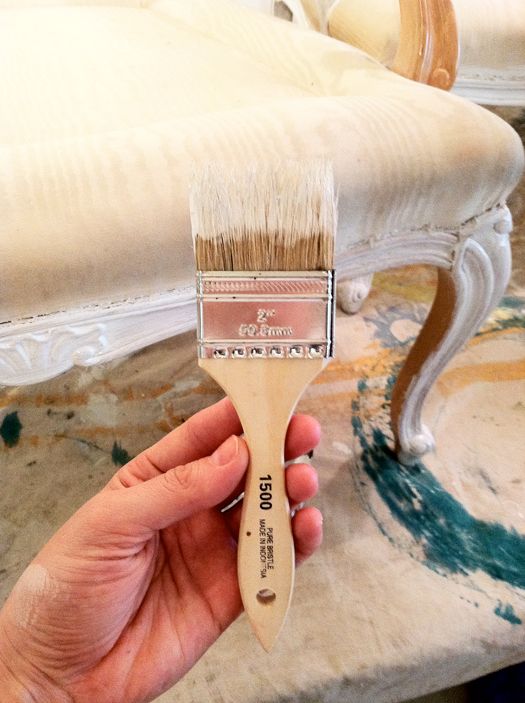
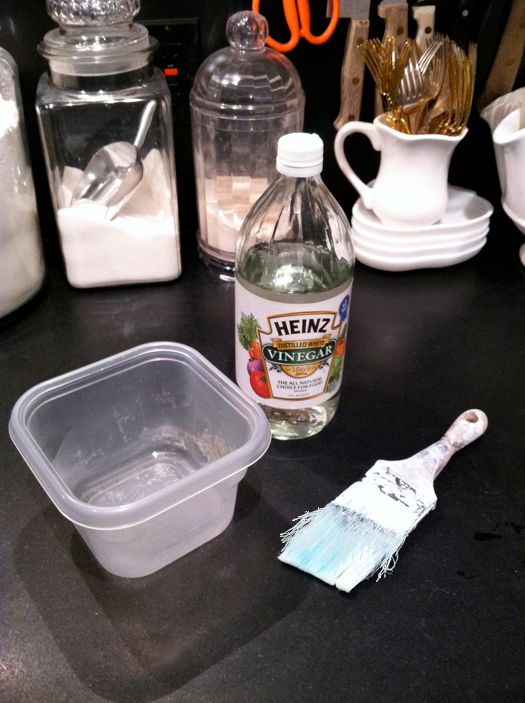
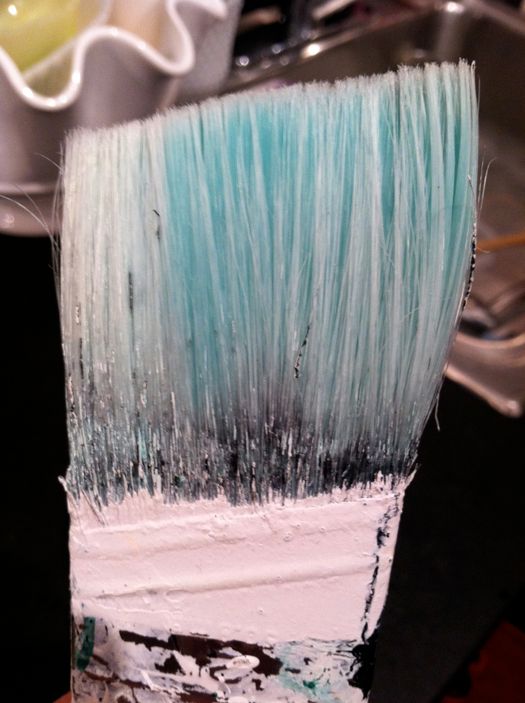
When we got home I started prepping the chairs for the first coat of paint. I forgot that I had left my favorite Purdy brushes at a client’s apartment, so I needed to clean up a good brush to use. This brand is called Zebra and I like them second to Purdy, but those are a couple dollars pricier.
Just enough time to do my hair and paint my nails so I could go meet Sarah Richardson and Tommy Smythe!! (more on that later)
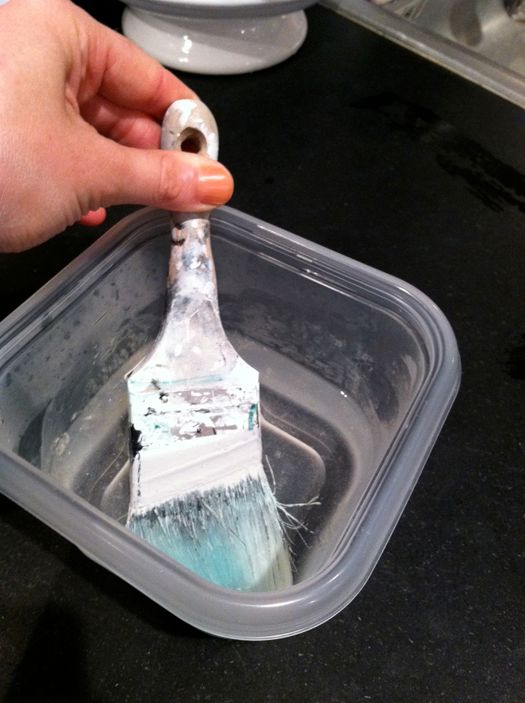
The hot vinegar really loosens up the paint and it washes off with hot soapy water. I just used a little bit of vinegar so that the bristles would be cleaned and soft, but you could probably soak the whole brush.
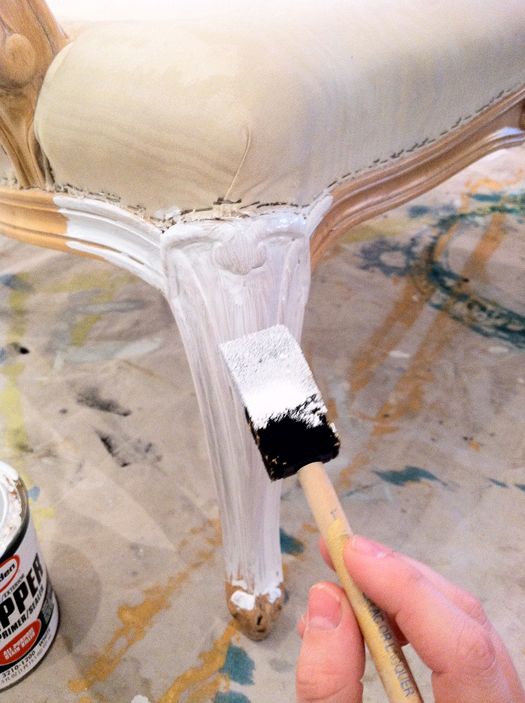
The key to brushing on a glossy paint to is to load the brush with a good amount of paint (not dripping, but not a dry brush either). Pick an area, like an arm or a leg, and stay focused on that area. Don’t wander! Start and the top and work you way down. Brush in long, smooth strokes. Once the paint is laid down, don’t touch it again until it dries! It is so tempting to just hop around, touch up here and there, but that completely messes up a paint job and things get all globby. You can touch up your misses later on during the second coat.
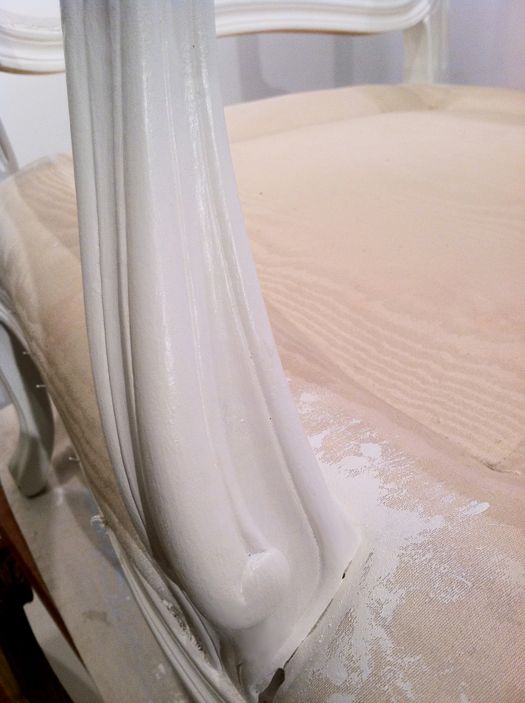
Also, I thought I would mention that I learned in the last year that if you do at least two coats of a GLOSSY paint, it’s not necessary to do a protective sealer like a poly or lacquer. I guess that additive in the glossy paints is basically like a polycrylic? Whatever the reason, fine by me! Less work! (but make sure you do that primer coat and use the paint+primer latex)
It stinks how latex paint sticks to nail polish. Manicure ruined!


Thank you, thank you, thank you for this Jenny! You just might give me the courage to reupholster a pair of old chairs I've had forever. That paint is gorgeous!
Thank you for posting this! I can't wait to see the chairs when they are finished! I just bought two chairs yesterday that i want to reupholster but I think it will take me a long time to work up the courage to actually attempt it!
Great tutorial! I love the way you make it all looks so easy and something that we all could try at home.
Good luck and looking forward to hearing about the Sarah Richardson meeting.
I'm loving this tutorial! Upholstery work with piping and all seems so intimidating to me, so I'm really looking forward to seeing the whole process unfold.
And how cool that you got to meet Sarah and Tommy!! She was the first designer that got me really excited about design years and years ago. Looking forward to hearing more about that.
this is the most useful info. Thank you!!!
I'm liking the look of this so far! Thanks for the tutorial! I needed it!
Hi Jenny, thanks for this great tutorial. I'm wondering if you have any thoughts on painting pieces that potentially have lead based paint on them? I just inherited a cool pair of mid-century modern side tables from my grandmother that I'd like to paint. The tops could use some sanding but I'm a little worried about the potential for lead-based paint. How do you handle this issue with your vintage furniture?
Hi Anne – Are the tables stained wood or painted? There are kits you can buy at home depot that test paint for lead. But, I've actually met with a lead tester guy here in the city (it's a BIG deal here), and he says it's actually not as huge of an issue as everyone makes it. Just wear a mask while sanding and clean up the dust well with a damp rag after sanding. It's only a problem if you ingest the paint/paint particles. And really, it has to be pretty big amounts to cause real harm especially as a non-pregnant adult. Those are just my two cents though, and you should do some research on your own and get that lead kit if you're feeling worried about the thing.
xx
You're killing me! I was so excited about the Sarah and Tommy thing I couldn't even read anymore about the upholstery. Can wait to hear about it!
Thanks so much for this! I just might have the courage to tackle my project now.
One question – Should you use Gripper before spraying with Rustoleum? And does the Rustoleum require a protective coating?
thank you for this wonderful tutorial, I so appreciate every little detail that sometimes get forgotten, but you include. (And can't wait to hear about Sarah and Tommy!!)
Good grief – you accomplish more in an afternoon than I accomplish in a month! I am really loving this series. Thanks so much for taking the time, it has been incredibly insightful.
oh my cliffhanger! you met with sarah richardson and tommy?! I can't wait to hear all about it. i've been reading your blog now for years and its my absolute favorite. thanks for the tutorial…actually, all your tutorials, they are so very helpful! you rock.
Thanks for the tips! The table has a painted top, but it's small, so I'll probably just do it outside and wear a mask while I do the little bit of sanding it needs. I would usually just use Behr's paint and primer in one for two coats and call it a day, but after reading your post today, I'm wondering if I should do an initial coat with some primer by itself…I wonder if that would provide any extra benefit in case it is lead-based paint underneath?
Jenny – I actually recently reupholstered a chair just like the one you have!! (minus the cushiony stuff on the arms).
I am not as experienced as you. It was actually my very first DIY project and I had a tough time figuring out how to reconstruct the back of the chair, so I am super interested to see what you do.
Here is my before and after:
http://fitandsplendor.com/2011/02/06/comfy-ing/
Your tips about how to paint with the glossy paint are perfect! I painted a high gloss (previously laminate) sideboard last year and I found the exact same technique (after much stuffing around). Slow and steady and make sure the brushstrokes are perfectly even. This is a great tutorial – thanks for posting it and I can't wait to see the finished product!
I'm so glad you're doing this! One of my new year's resolutions is to reupholster a chair so this is just perfect.
Hi,
I love your blog and look forward to reading it daily, I just bought a project chair and fabric so was thrilled with the timing of your tutorial. Now, I can hardly wait to get some tools and start my chair, right after I finish making my cheap hollow core doors look like panel doors. Thank you so much. Linda
Your post could not have come in a better time! Yesterday I bought my very first second-hand chair specifically for re-upholstery! Imagine my surprise to see your detailed post about the very process I am about to go through! I have selected a simple chair for my first time and I am planning to use a fabric I designed myself – So excited!!
Thanks SO much!
Hi Jenny,
As an avid follower of your blog I just wanted to say that I love your posts and to mention that I've just started my own blog. Please check it out if interested – visualmeringue.blogspot.com
Thanks!
Elaine.
Thanks for the Tutorial! I have been wanting to refinish a chair that I have, but have been reluctent because I have no clue what I am doing, lol
Are you kidding me? I love that you casually throw in to the post that you were off to meet with the Wonder Twins! I love Sarah and Tommy! This is a great tutorial series. Thanks for sharing.
Thank you so much! What a great tutorial and its giving me the courage to try, try again.
hey Jenny,
Thank so much for this tutorial! I am currently in the "rip all the staples out" stage or reupholstering a chair and Im about to loose my mind with all the staples! lol!
I'm a new blogger and you've been a great inspiration for me, so thank you! Melissa :)
http://livingbeautifullydiy.blogspot.com/
This tutorial is awesome, and meeting Sarah and Tommy!?!?!? WHOOO HOOO!
Hot vinegar? Wow, who knew!!! Thanks for the helpful hint.
Can't wait to hear about your adventure with Sarah and Tommy.
Excited to see what you're up to with Sarah and Tommy-I was lucky enough to intern for a couple weeks in with them while in school (back in 2007)for design-aren't they a blast?
Excited to see what you're up to with Sarah and Tommy-I was lucky enough to intern for a couple weeks in with them while in school (back in 2007)for design-aren't they a blast?
An awesomely helpful post!!
Where did you get that yellow striped rug? It's fab!!!
Thank you for this great post!!! I have only done a little chair and have not tried a chair with a back also:) This will help!!
I love the chairs! They would look fabulous with a bright geometric fabric! Do you already have a fabric picked out? I can't wait to see the finished product and to hear the details of your visit with Sarah and Tommy!
Whhhhaaaaat?!!! Sarah & Tommy?! I can't wait to find out.
Jenny, i am following along with you in this reupholstery journey…i cant wait for the next step!
I can't wait to see the chairs when they are finished! Thank you for this Jenny!
Silver MLM
Wow! I love this "tutorial". I have so many chairs I have purchased that I want to redo myself. Thanks for all the great tips! Oh, and I'm SO jealous that you've met Sarah and Tommy! They are my favorite! Her Cottage house is in the new Country Living we got in the mail yesterday. Love.Her! (sarahtoshreveport.com)
Thank you so much for this! I've been dying to paint the dark brown frames of my Louis chairs white for years, but I've been scared. The bad thing is that they've all ready been upholstered to my liking, so I'll have to be extremely careful. One question, does using the TSP take care of the sanding? Thanks, and I'm obsessed with your blog!
Thanks for this tutorial Jenny!!! If you do spray paint, is it necessary to primer first?
Great post, I learned a couple of things! Dying to hear more about Sarah & Tommy!!
Such a good tutorial! I wish I had read this a month ago! I painted some furniture a while ago, and I sanded first, but then just did the behr paint + primer instead of priming as a separate step. Now I'm worried my paint is going to scratch off, should I do a clear coat of finish on top?
Thanks, Jenny for the tutorial. Wondering what your feelings are on using oil-based paint on furniture? I've had bad luck with latex chipping – oil seems to penetrate the wood better but I realize it's got more fumes and is tougher to clean…
THANK YOU for the vinegar tip re: paintbrushes. My husband always lets the poor things dry with paint on. This is fantastic.
Wow! It's awesome blog post here. really very interesting for reading.Like those pictures.. I enjoyed it.
Thank you. I have a pair of stools that I want to paint but was scared until I read your blog. Thanks again.
Love these chairs, they have gorgeous shape!