Here are the other parts of this series: Part 1, Part 2, Part 4, Part 5
Also, I have been getting a lot of emails this week asking for advice on how to upholster different pieces. In all sincerity, I wish I had the time to help with all of your projects, but unfortunately, there is just not enough time in the day. I hope you’re able to figure out the projects on your own. Otherwise, I suggest consulting a professional or a friend with upholstery experience.
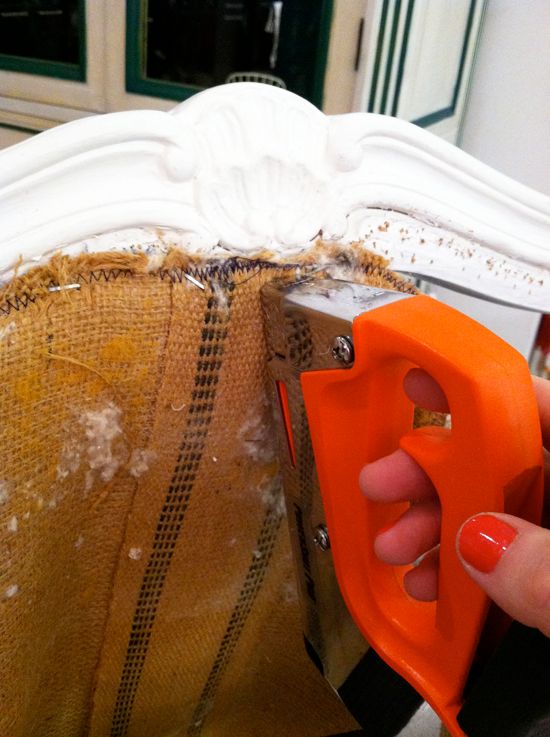
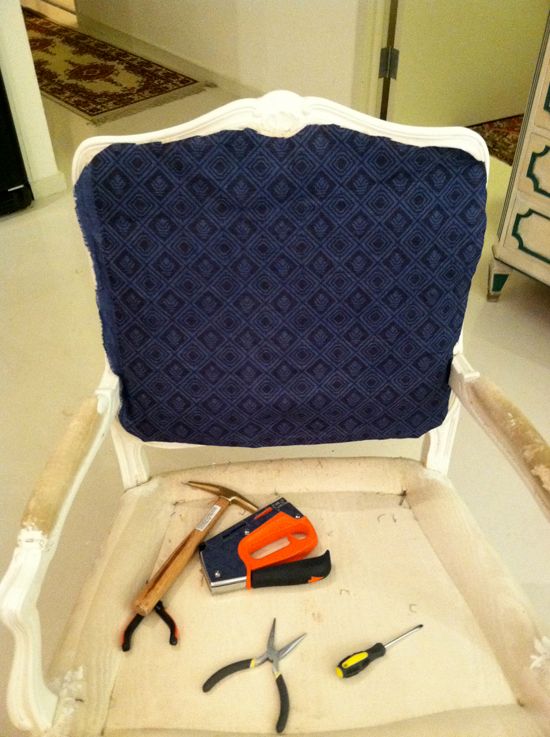
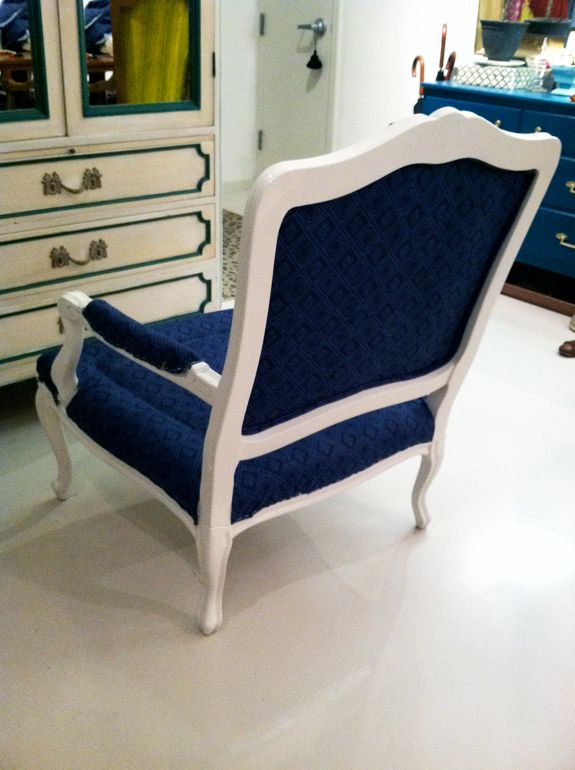
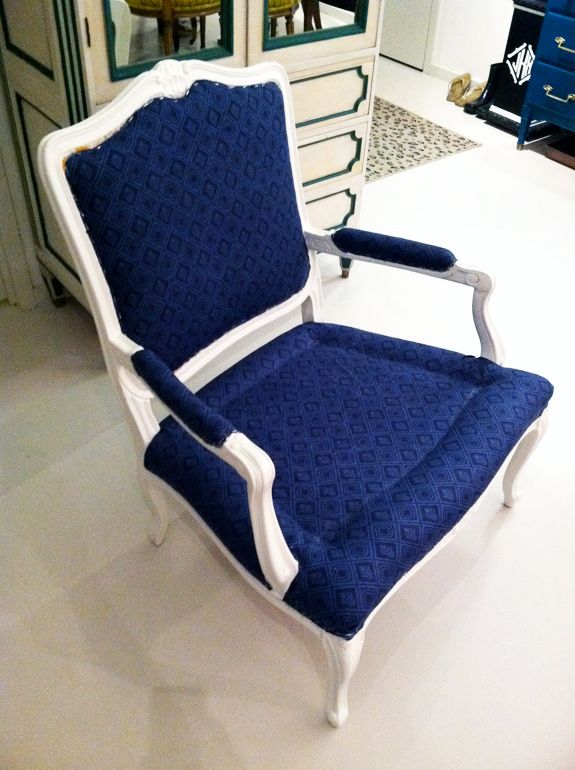
Alright! So, now that the chair has been stripped of it’s old fabric, cleaned and repainted, it’s time to staple the new fabric on.
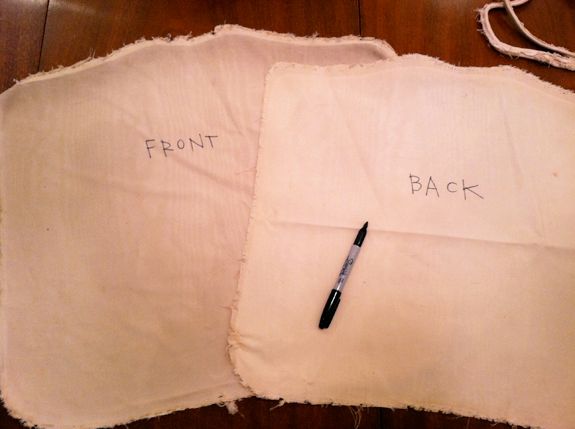
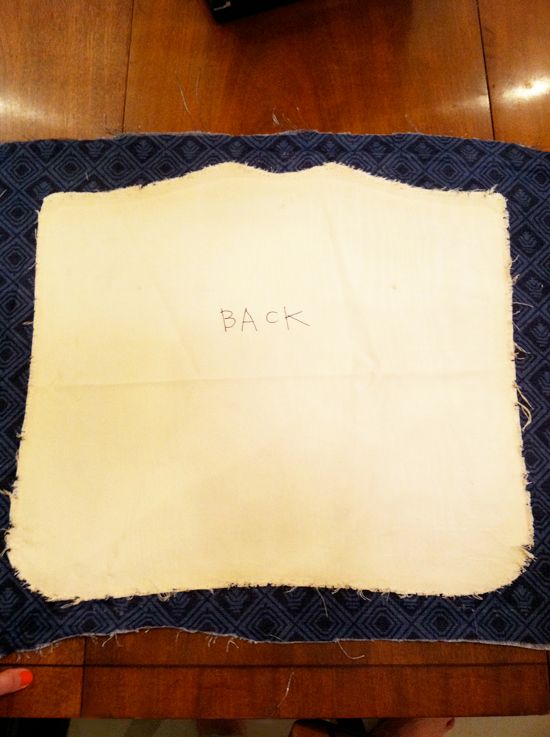
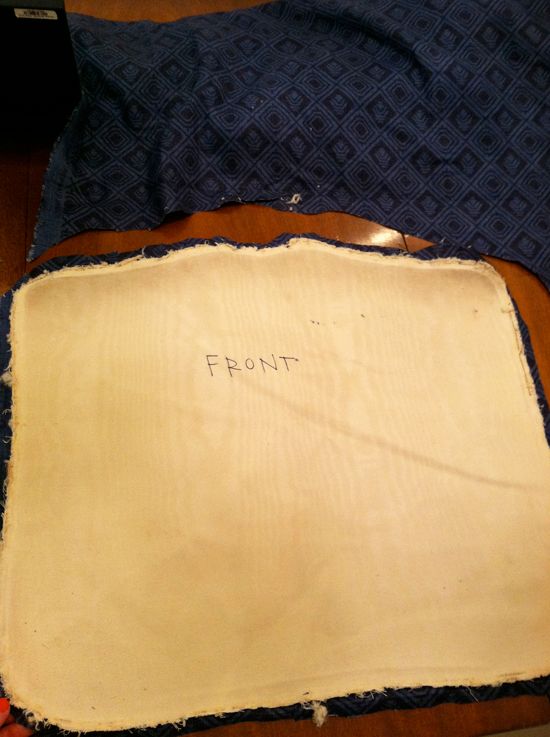
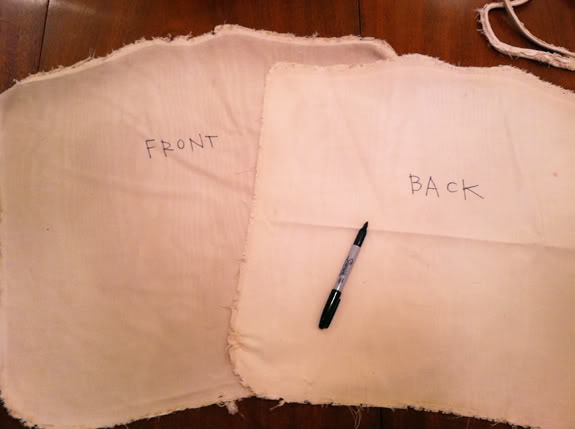
I forgot to say earlier that when you’re pulling apart the chair, be careful to not rip any of the old fabric. Use a sharpie to mark what pieces go where and use these as templates for cutting your new fabric.
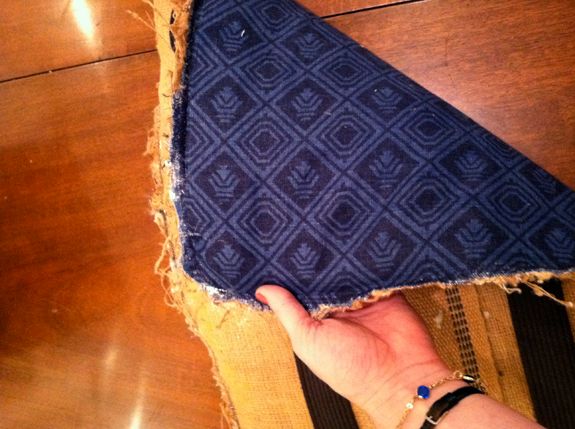
When you’re cutting your new fabric, pay special attention to the pattern. Line things up both vertically and horizontally so that the pattern is perfectly centered.
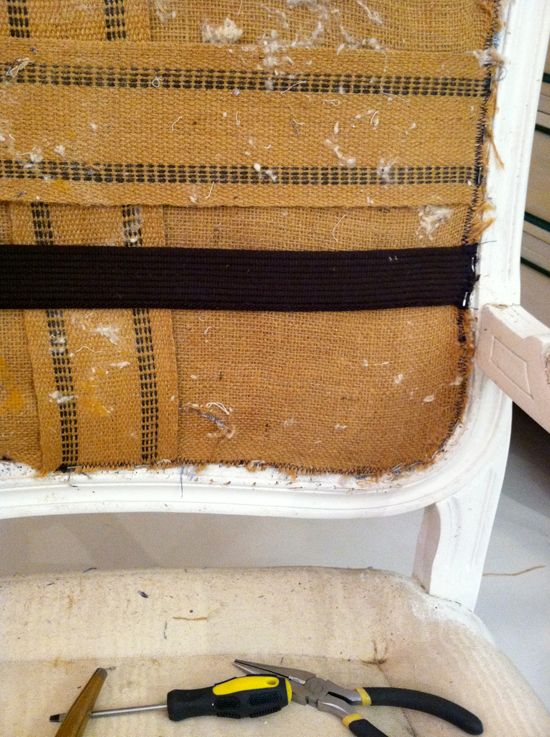
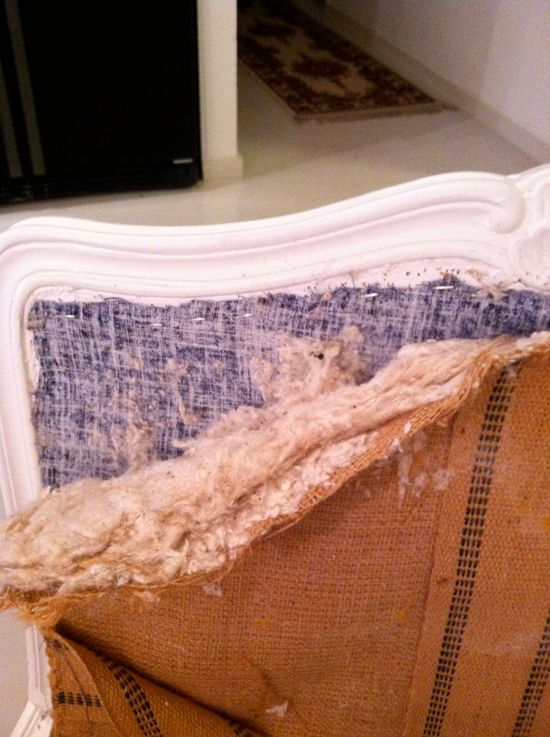
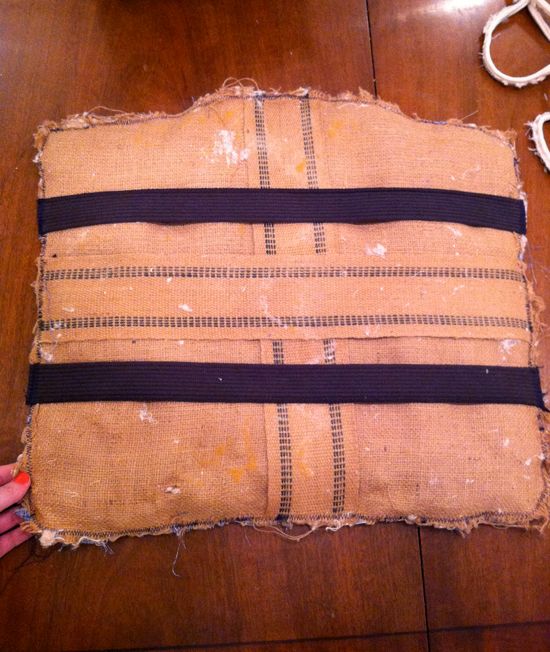
Like I mentioned earlier, if the insides of a piece are still in good shape, I like to save the money and hassle and just reuse. I was able to reuse all of my burlap and batting here, which was great. However, I did run into a problem with the amount of staples I was using.
There were so many layers of fabric to staple down to a very small lip on the frame, that I was starting to completely destroy the integrity of the wood (not good). The great news about upholstery project goof ups is they are almost always completely reversible. Put a staple in the wrong place? No problem. Pull it out and try again! The only reason upholstery should be considered a more advanced craft project, is it takes some ability to think outside the box a little. If you have some experience with diy projects and sewing, you can usually figure out solutions to the inevitable little problems that come up.
Like I mentioned yesterday, I had hoped that buying a new electric staple gun that used smaller, rounded staples would fix my problem. But the staple gun was really weak and was more frustrating than anything. So my mom and I did some outside the box thinking and decided take some steps that would reduce the number of staple layers from four to two.
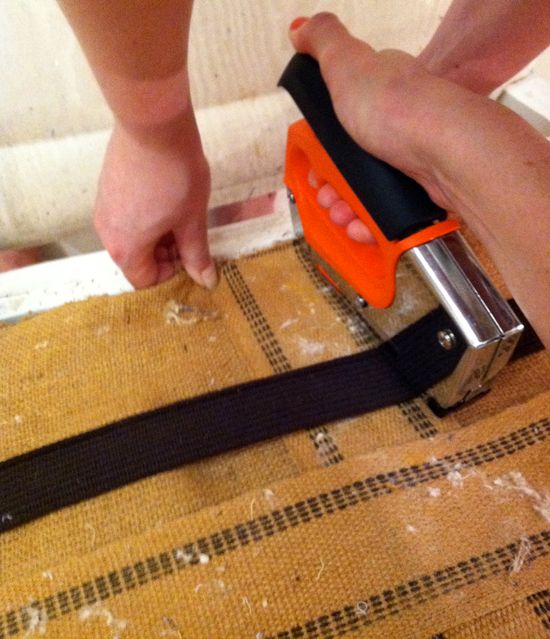
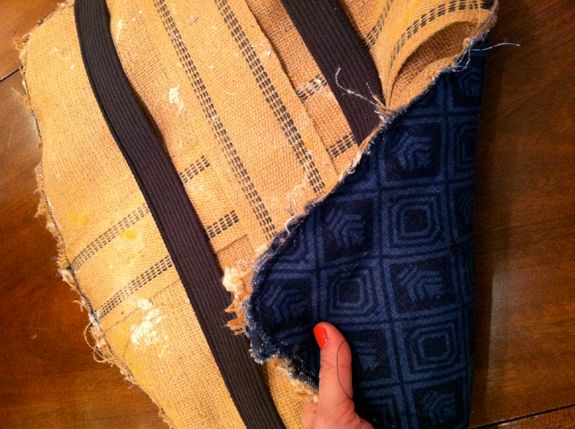
We used a big zigzag stitch on my sewing machine (the best model ever made ) to sew together and reinforce the edges of the back fabric piece, the batting, burlap and webbing. It was so easy and worked really well.
I should also note here that I added those two pieces of brown webbing. I don’t know if they were necessary, but I thought it might help give a little more support on the back (and it did!!).
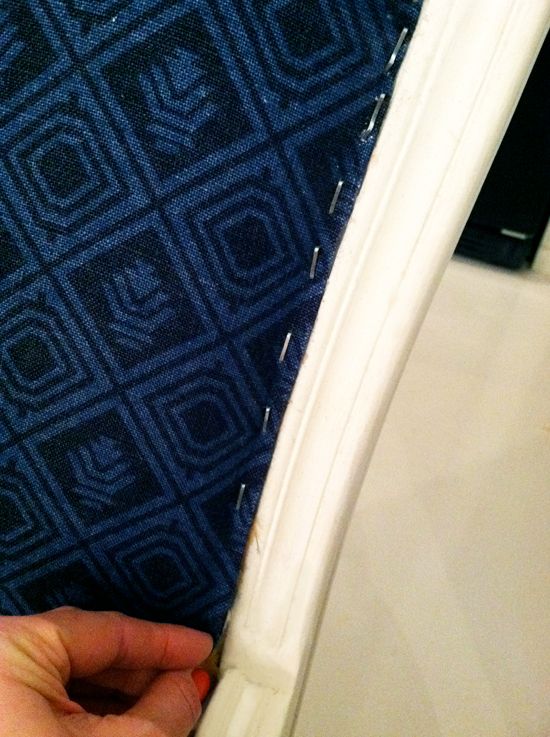
Once the support parts of the back were all sewn together for reinforcing, we stapled that piece in place. Remember, the key to a successful reupholstery job is to reference all those photos you took of the chair in it’s original state and as you were pulling it apart. Wherever possible, reconstruct the piece just as it was put together the first time. Don’t reinvent the wheel here!If you should get anything out of this post, this is it. Here is how I approach stapling the fabric in place for the perfect smoothness and tautness. I pretty much use this method on every surface I’ve ever upholstered:
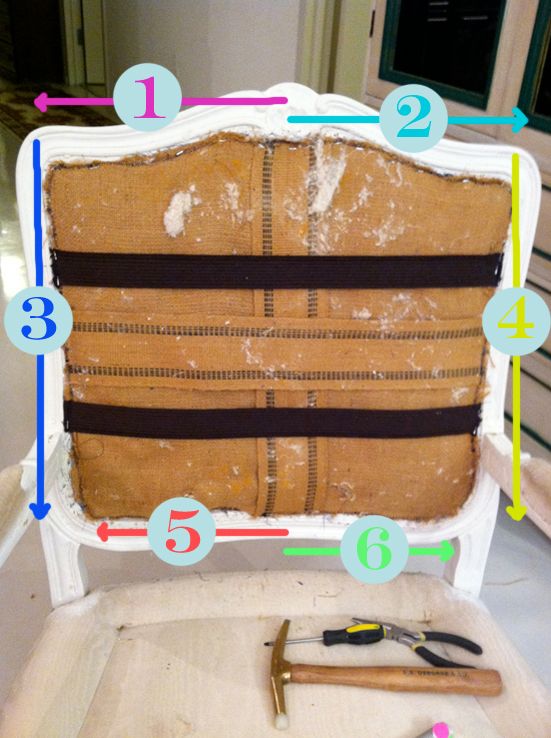
1. Put one staple in the center top of your project, hold the left side out very tightly and run a line of staples out to the edge of the top. I usually leave a one inch space between each staple at first, and then I come back and fill in the spaces with a staple. Be really thoughtful about each staple placement though. It’s easy to get sloppy and just put in a ton of staples, but that just ends up tearing up the frame and the fabric.
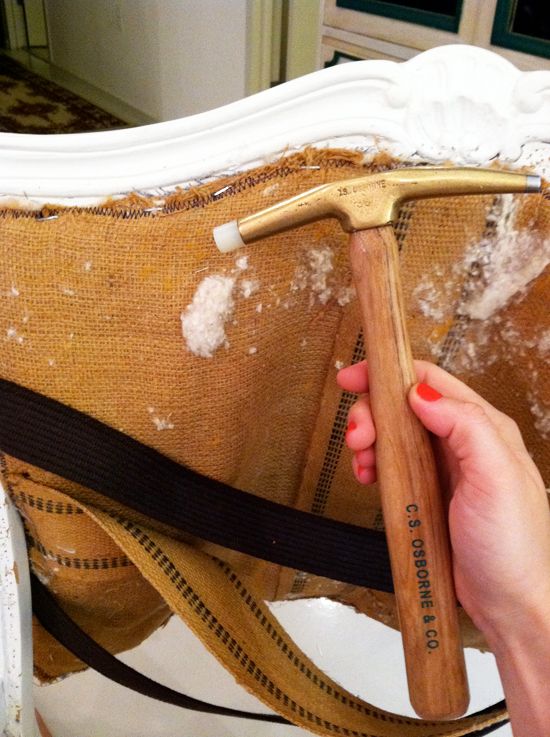
I LOVE this little tack hammer I got from
CS Osbourne. It’s perfect for quickly and quietly going over the staples and getting them completely flush with the frame. A regular hammer can tear up the wood and a mallet is usually too big, so these are great. I tack in the staples after every line of stapling, just to make sure the fabric stays where I placed it the first time.
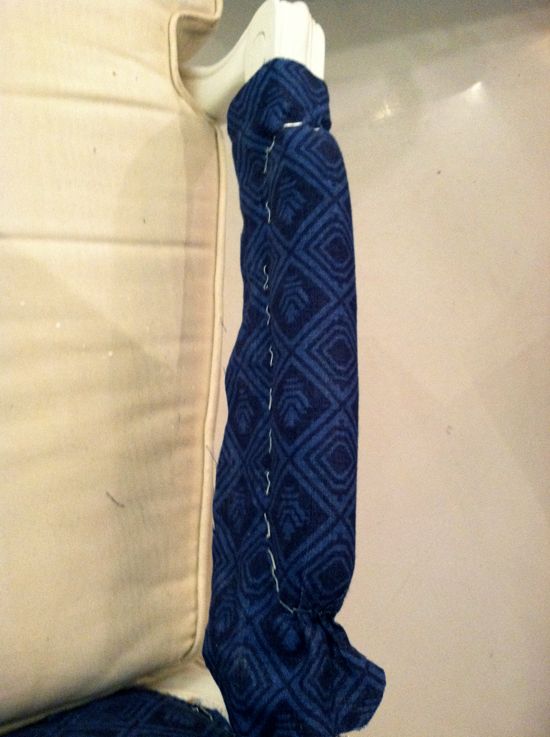
2. Start in the center again and hold the right side and staple moving to the right. Tack in staples.3. Now that the top piece has been centered and securely tacked in place, you have a great foundation. The next steps are all about pulling and getting the fabric smooth and very tight. Pulling down on the left side, I staple the left edge next, from top to bottom and then tack all those in.4. Pulling down and to the right, I staple down the right hand side and tack in the staples. Your fabric should be really tight at this point.
5. The last line along the bottom is probably where you’re going to need an extra set of hands. Have your helper pull down really hard and then staple in your center. Work out to the left with your helper moving and pulling down with you.
6. From the center again, work out to to the right. Your helper might have to use a pair of pliers for this last part. Again, you really want a tight pull here.
And those are the basic steps to stapling on the back piece. It’s really not that hard.
Once the back piece and the webbing were in place, I cut out the fabric for the front of the chair back, again using the old fabric template (don’t forget to line up the pattern!!). This time though, I gave myself about an inch of extra fabric to work with.
Okay, now for a little bit about upholstery adhesives. I have historically been a big fan of
E-6000 epoxy. It works wells and has a strong hold. But I don’t love how long it takes to dry (I get impatient holding and waiting) and once the first half of the metal tube is gone, I find it’s really hard to squeeze out the epoxy.I’m sure you know I am a HUGE fan of
Fabri-Tac
. Recently I started using this glue (also made by Beacon Adhesives) called
Magna-tac
. It is seriously amazing. It’s similar to Fabri-tac, but even better. It bonds fabric, wood, metal – just about anything.
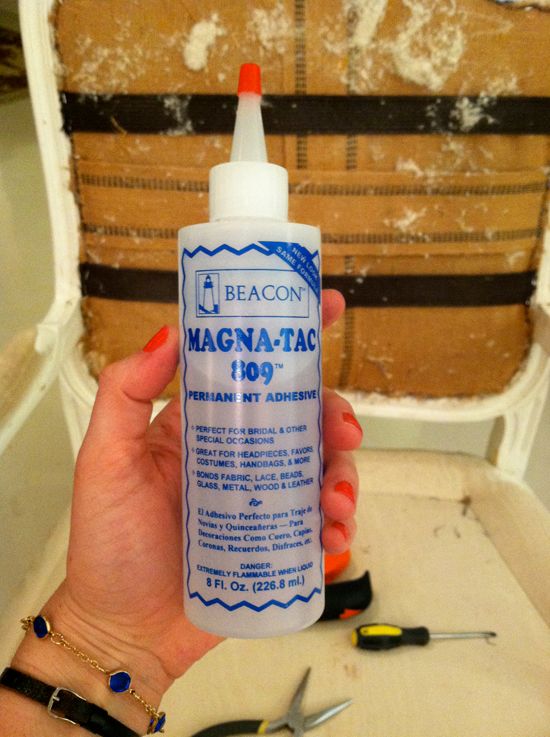
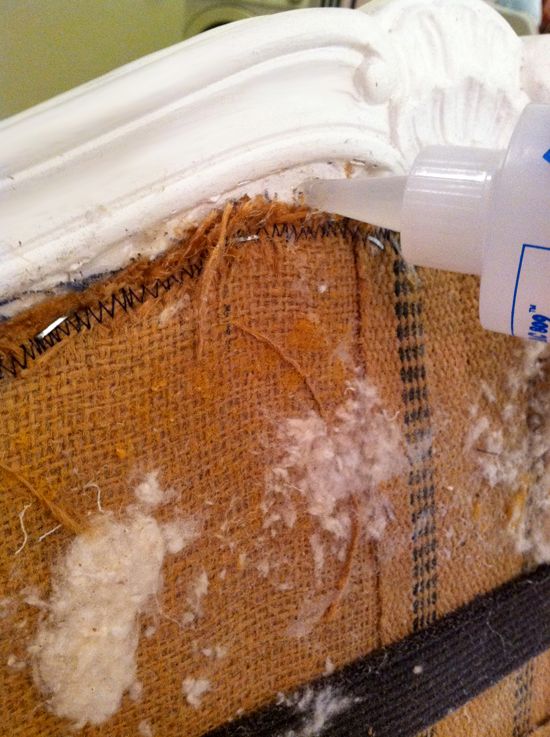
I used it a lot in this project to sort of reinforce pieces. I ran a line around the border of the back piece to help the next layer of foam and batting to stay put while I stapled.
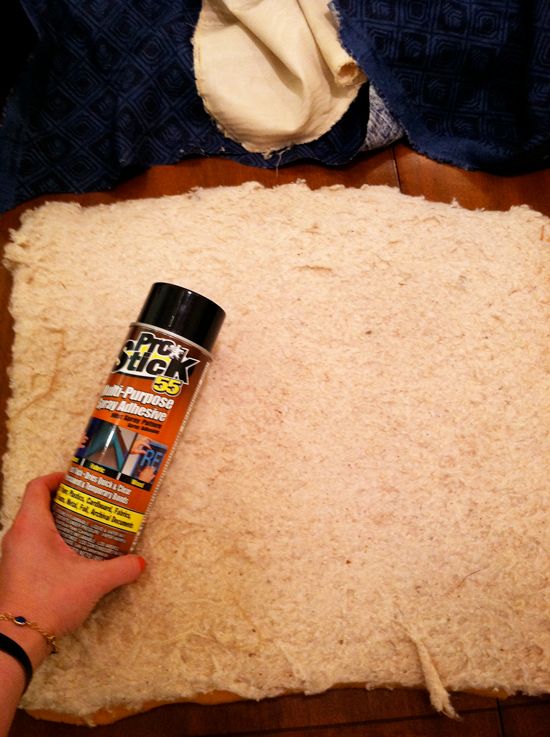
Another favorite adhesive is
Pro Stick spray glue. It is cheap and good. I spray this on the webbing layer and also on the second layer of foam and batting again to help everything stay put while I got the staples in place. You really don’t want things shifting around when you’re trying to match a pattern exactly.
After the Magna-tac and the spray glue, the next layer was pretty well stuck in place before I started stapling.
I followed the same stapling pattern for the second layer on the chair back, starting at the top in the center.You can see below that I rolled under the edge of the fabric (that’s why I cut it a little big). This helps to both keep the edges clean and not frayed, but it really helps to reinforce and strengthen the edges.So again, to recap, just roll under the edge about half an inch, center your pattern and place your first staple in the center. Continue rolling under, pulling tight and stapling and tacking in the same pattern outlined above.
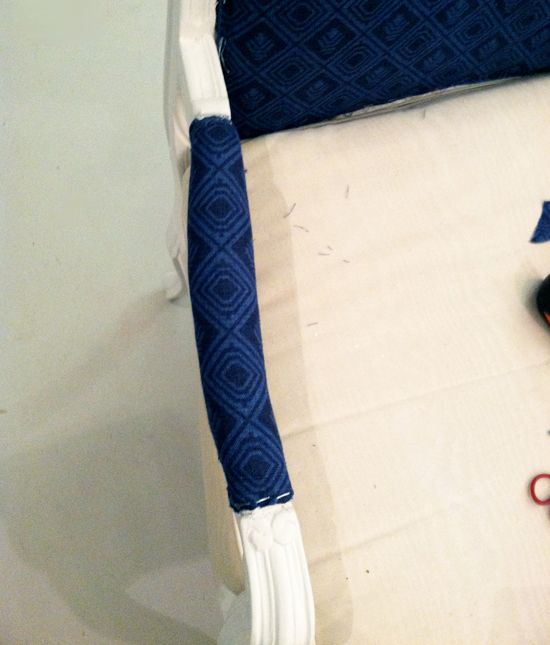
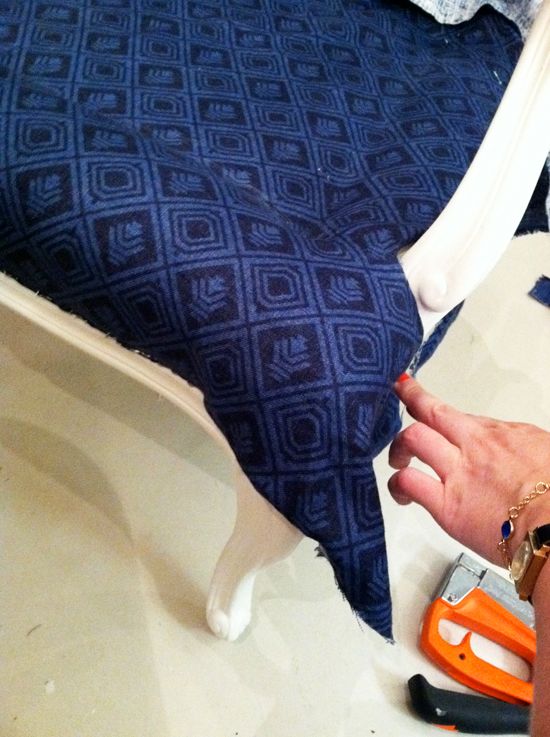
The arms are easy. Just cut out an oval a couple inches bigger on all sides. Pay close attention to to pattern though!

Follow the same stapling pattern rules above. Start at the center top and work you way around, pulling down the whole time. Get that fabric taut!
I was careful to run the pattern along the curve here (not straight) so that I could see the same design all along the top of the arm.Once the staples are tacked down, I used a small scissor to snip off the excess fabric.
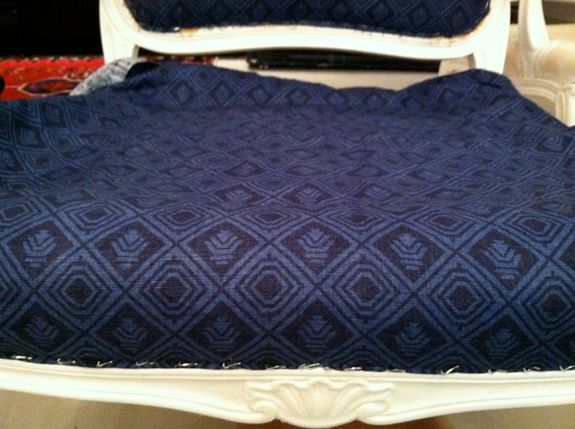
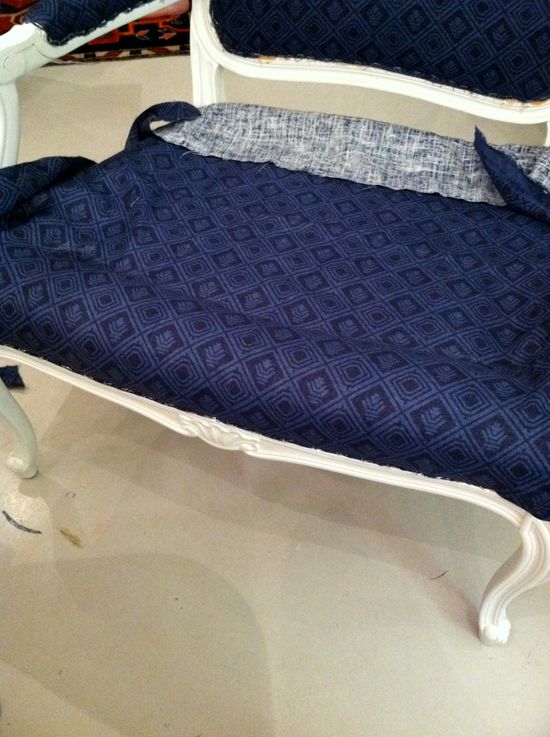
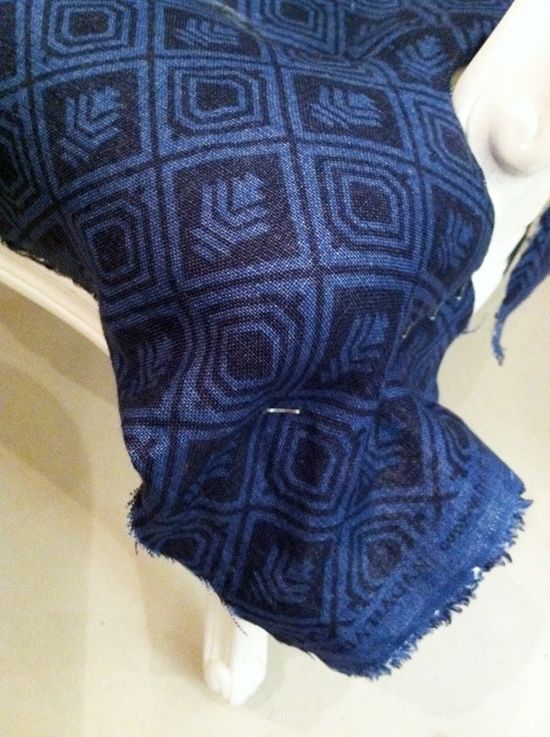
Next up is the bottom of the chair – the part that goes under the cushion. I draped some fabric over that part, carefully matching up the pattern, and cutting it a little longer than need, again so I could roll under the edges.
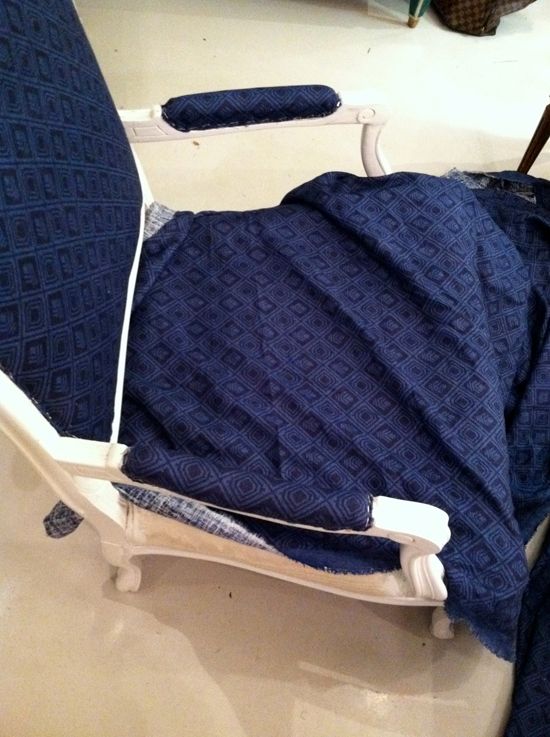
Follow those same stapling patterns. Top (or front in this case) center and working out to the edges, pulling tight the whole way. (see how the pattern lines up in the center here?)
Tack those staples in place and keep moving around and pulling tight! Leave the corners alone for now though until all the straight lines are done.
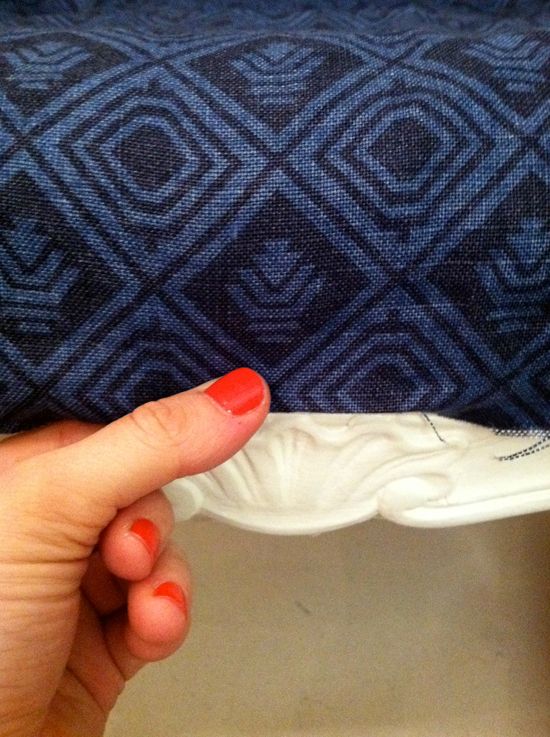
Here was another one of those outside-the-box thinking moments. The seat bottom was sewn in to place (one of the reasons I didn’t pull off the old fabric) and it sort of sloped down, so that if I just stapled and pulled tight there would be a space between the chair and the new fabric. I needed to connect the new fabric with the old seams. After I stapled down the front, I glued a line along the old seam and pulled the fabric down tightly into the seam area. Later I hand tacked the corners.
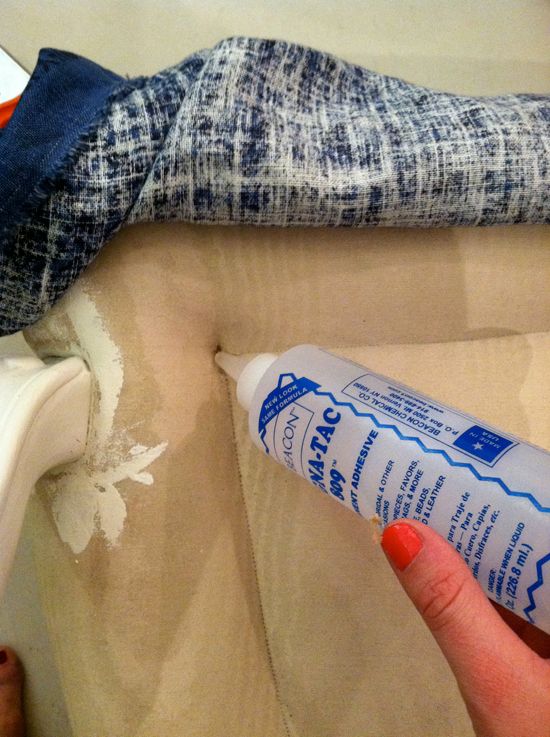
You can see how the fabric slopes in here and now fits inside the seams.
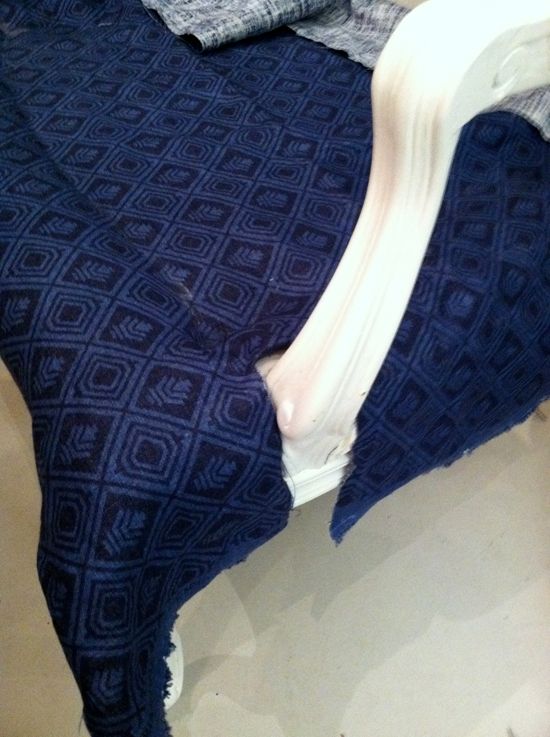
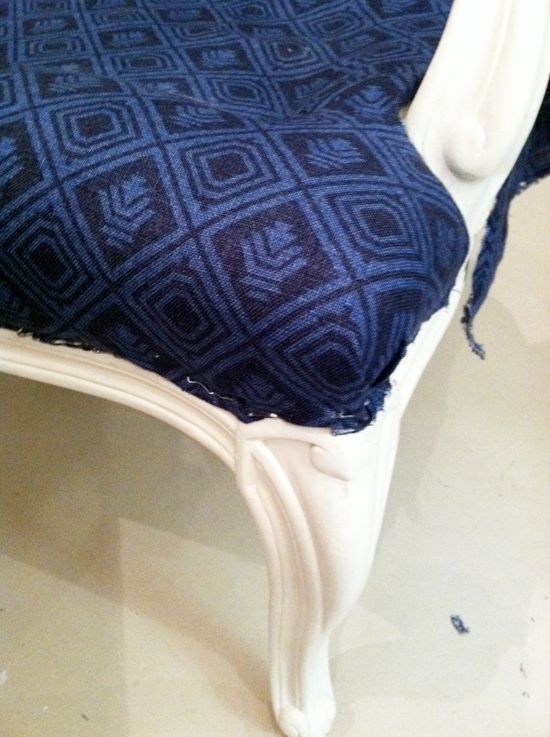
The legs seem like they would be sort of scary, but they are easy too. Just cut out a notch in the fabric, but again, just leave enough extra fabric to roll in the edges. No need to staple the fabric around the inside of the actual leg. Just do the bottom row like normal.
The rolled in edges will look clean and by pulling tight down on the bottom, there will be no lifting around the leg area. If you want to extra support you can run a line of magna-tac around the leg. And don’t worry too much about exactness here. The welting will help cover up the gaps.
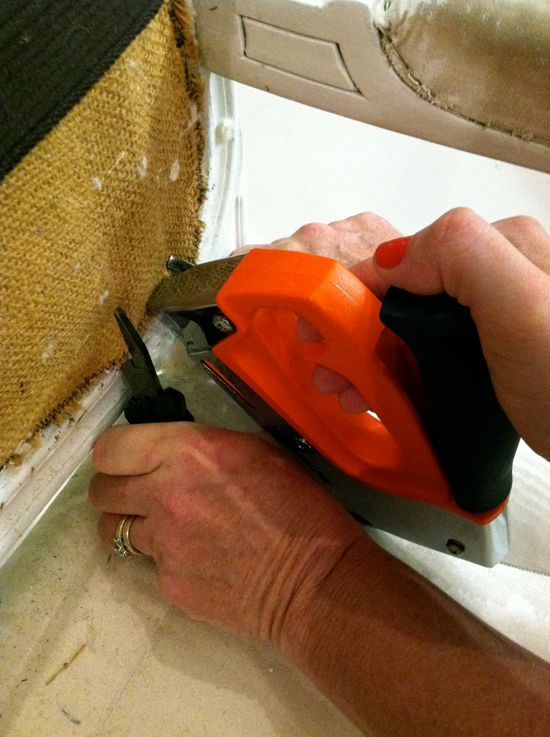
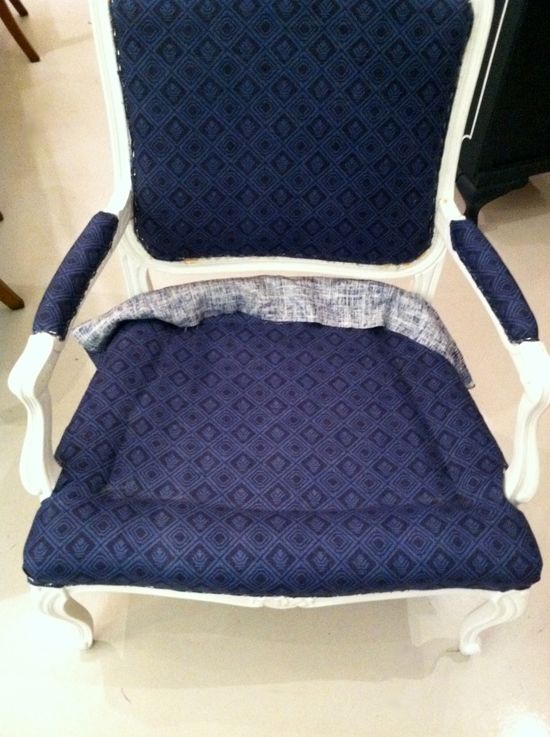
Once all the straight lines around the bottom have been stapled and tacked down, it’s time to do the corners. Again, reference the photos you took before. Here’s what the old corners looked like:
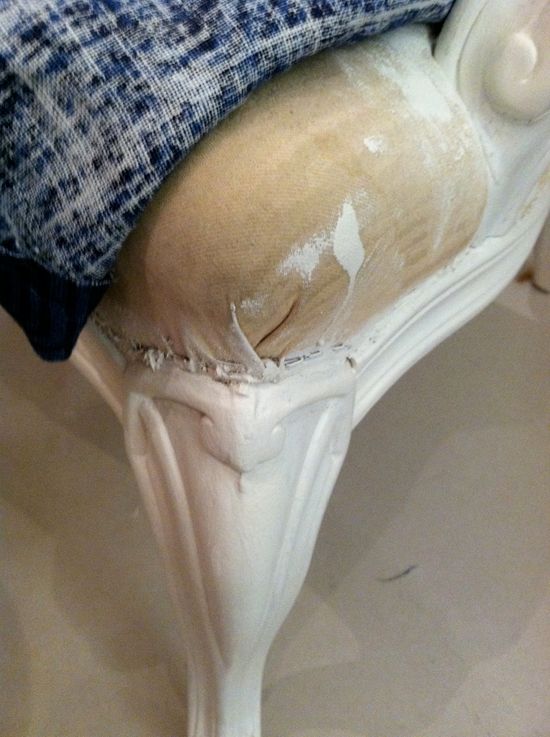
For a corner like this, just pull down the middle and put one staple in.
Then just like wrapping a present. fold in both corners and staple in again.
I finished up the front first because I had to glue down the other seam parts. Then I worked my way around to the sides and the back, cutting around the legs, rolling in, pulling tight, stapling and tacking.
And then the stapling part was done!
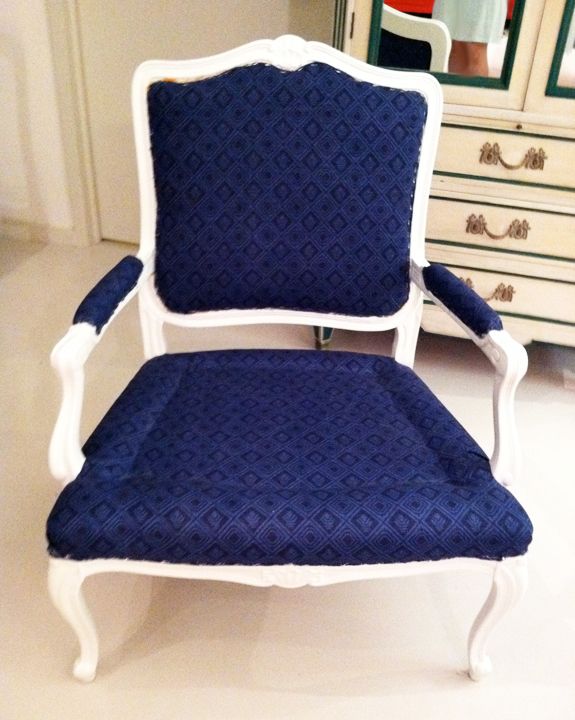
It’s really not as hard as it feels. It’s one of those projects where you can figure it out best when you’re just doing it. It will make sense as you’re pulling and stapling.
Next steps: how to make piping and apply it to the chair and how to make the cushion!


Wow, that is so comprehensive!!
Thanks so much for sharing, with difficult and complicated projects like this it's not often you get a competent designer to show you baby steps progress!
I love how much detail there is, thank you.
I'm loving this series! Such a great step-by-step. Thanks for all your work in documenting this for us and for your tips along the way.
Thank you so much for this series! My husband and I have been thinking about tackling an upholstery project at home together and this may just give us the guts to do it! I'll be sure to follow your instructions when we do.
You make it look so easy! My bf is sending me to an upholstery class for my birthday… while I'm hemming and hawing over picking a fabric, I may use your instructions on a practice chair first!
When I reupholstered my berger chairs, I left the fabric in big pieces, with the shapes of the old fabric traced on to them. That way I have the extra space to grab and pull on the fabric as I stapled along the frame. Then cut off the excess fabric afterward with a box cutter a.
I imagine it'd be hard to stretch the fabric on to the frame and staple (by yourself) if you cut it into shape first. But I guess that works for you since you appeared to have 3 HANDS!!!! ;) I always wish I could grow an extra pair (ehem of hands).
Sewing the batting into the out fabric is a great idea though.
And thanks for such a detailed post. Reupholstering is a lot of work already.
You make it look so easy Jenny! Thanks for the step by step tutorial and for passing on those helpful tips you learned along the way. I have a child's chair that I was going to send out for reupholstery, but you have me thinking I should give it a try myself!
looks great jenny!! your chairs look like my striped chairs cousins… love navy and white! can't wait to see the comfy cushions on. xo
Phew I am tired just reading this post…. Thanks for sharing this process with us!! It is amazing to see… :)
What a thoroughly helpful post. Thanks for taking the time to put it together!
Thanks so much for this. Great pics and instructions. I have two chairs that need to be reupholstered. I am so going to do this!
Thanks so much for the idea of gluing the fabric to the seams! I have chairs I've been wanting to re-upholster but that was the bit I was worried about. I'd like to see how well the glue holds up. Thanks again for this great series!
Great post(s)! I'm very much enjoying them as a beginner DIY upholsterer, and they're a great reference (as is your post with the pages from the book that show how much yardage you need for a piece of furniture!) I'm looking forward to what you do with finishing! (I need to make and attach some double welt cord to my Louis chair soon…)
Thank you!! I'm hoping to reupholster my own chair. Your detailed instructions are great!
Woah! You are really patient. I am so impressed with your skills!! This post has shown me to never lose my upholsterer's number and now I really respect his work more than ever before!!
Can't wait to see the finished project! You are so talented!
These look great! I too use the old fabric as a templete and also, as another poster noted, cut the fabric bigger all around so it is easier to pull. Then I trim it and run some elmers glue over the top for extra security from fraying. I was also taught to start in the center of each side and work out evenly to the corners. I love your fabric!
Cat
PS: http://www.modhomeec.com/ has wonderful upholstry tutorials from Shelly
I'm thoroughly enjoying this post. Looking forward to recovering mine, but I will not dare start it until you finish. Lucky for me, I've got a 50% deal at Lewis and Sheron Textiles and plan to purchase my new chair fabric! If I can save on my upholstery job by doing it myself, I'll have extra decorating dollars for other projects!
Thanks for taking the time to walk us through it all!
This is a great series! I am really enjoying each post. Such a great idea to sew those first layers together.
You have no idea how much I'm enjoying this whole process, thanks so much for such detailed explanation, I know it's a lot of work and it's highly appreciated ;)
This is such a great tutorial! Thanks so much for the in-depth instructions and wonderful pics.
I've passed up so many chairs because of the so-so upholstery but with your help I think I can do this!
OMG ~ I would have called my upholsterer hours ago! ; ).
You are just amazing! You're giving me the confidence to do an old chair I have which has faded in the sun. Since I get such great fabrics at DeBois Textiles in Baltimore, I know I can find a fabulous look.
Thanks for the inspiration!
I am obsessed with these posts Jenny! cant wait to tackle a chair of my own :)
Jenny! you are amazing. I might actually try this
I am amazed by all you do! Thanks for sharing this.
You have the best step-by-step tutorials! Thank you so much for sharing!
Wow, I could have used this step-by-step when I was attempting to recover an old chair I had (emphasis on "attempting"). This chair looks great! I've enjoyed following the process!
Looks great I recently tried my hand at reupholstering too! Do you have any tips on making double welting I'm stumped?
Here's what I've been working on:
http://4swirledpeas.blogspot.com/search/label/reupholstering
Wow, Jenny- it's looking so great! And speaking of looking great- how in the world do your nails look so good even in the middle of a upholstery project?!!
Jenny, This may be a question for 2 steps back, but how (and why) do you decide which parts to leave and which to take off completely? You left the seat and arms in tact, just removing the "final" fabric layer, but took the back completely apart. Was that because that's the only option for that kind of seat back? Or was that back damaged somehow? If you can do this, why not just take off the trim and put your new fabric directly on top of the old "final" fabric?
HEY Fellow DIY'ers check out this cool online site called ContractorsThriftStore.com
There were so many wonderful projects. I am always inspired by all the fabulous creativity in blogland.. thanks for sharing.
I'm reading through this series all at once, and I'm having trouble finding the part that goes after the one I've just finished reading (in this case, part 4). The next part to read isn't included in the "You Might Also Like" section at the end of your posts.
Will you please edit your "How To Reupholster A Chair" series and put a link at the end of each to the next part so we don't have to search for it? It'll help when I bookmark Part 1 for future reference.
Beautiful job! You have inspired me!
Wow, you sure made that look easy. For one brief brainless moment I thought, Hey I could do that! But I highly doubt it. Great job!
Jenny, You are a goddess! Thank you for the step-by-step to upholstery! It is, as I thought, hard work, but a project that we can do ourselves. Thanks for de-mystifying!!
Jenny, You are a goddess! Thank you for the step-by-step to upholstery! It is, as I thought, hard work, but a project that we can do ourselves. Thanks for de-mystifying!!
I have one of those chairs that I intend to recover, but have been procrastinating because it looks so complicated. After reading your tutorial, I see that it is even easier than other chairs that I’ve done. So, that’s going to be my next project and I can’t wait! This is an old post, but, if you haven’t already, you seriously need to get a compressor stapler. It makes stapling a breeze.
wow.. nice idea..I will try it. Thank you for sharing this innovative idea.
Your 5 part tutorial has been invaluable to me. I am reupholstering 2 chairs almost identical to these! I have a question regarding the seats of my chairs. Like yours, my chairs have the under seat base fabric “stitched ” to the underlayment and I can glue my new fabric to the existing fabric as you did but I have had to remove all the staples around the seat’s base. There were so many staples I was afraid I would not be able to staple the new fabric into wood. Do you think I could just tuck the old fabric up neatly, cover and staple on the new fabric or could I cut away some the old fabric maybe as far up as near the stitching? I can’t imagine that it would be a problem as the cushion will sit on top all of the base. Thoughts? FYI- I am covering my chairs with painter’s drop cloth canvas and the old fabric is a rusty red plaid that does not show through.