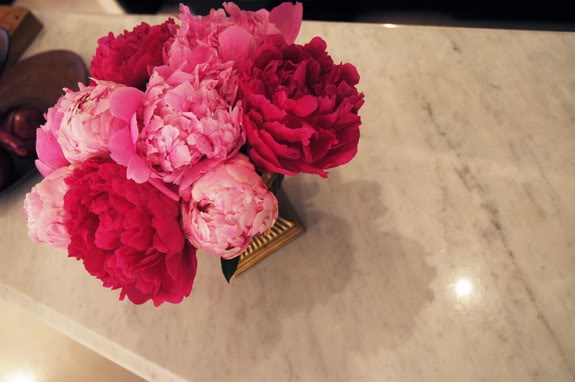
Last weekend was perfect. Mother’s Day was lovely – Michael and the girls surprised me with a necklace I’ve been eying for a while and a gorgeous bunch of peonies.

The arrangement was so pretty that I thought it was a good excuse to break out the camera and take some ‘after shots’ of my kitchen island that I’ve been meaning to share with you.
This old dresser was one of the very first things Michael and I bought as a married couple. We got it for almost nothing at a thrift store in Arizona. It’s been about 20 different colors over the years and the hardware’s changed a half dozen times. The top hutch piece was some I picked up a few years later at the Crate and Barrel outlet.


I got a piece of very inexpensive chipboard cut to size at Home Depot, and stapled and nailed it in place. Then I primed and painted the whole thing in BEHR’s Night Shade (it looks navy in the picture, but it actually has a lot of green in it).

The new paint helped the situation a lot. I knew I wanted to add moulding or something though to make the flat back more exciting. It’s one of the first things you see from our front door, so it was important for the detail to be sort of punchy and fun. I liked this paint treatment from House and Home and thought it would be a cinch to do something similar:

After doing a little sketch and planning out my measurements, I taped off all the straight lines.


WOW! What you manage to come up with…it's just amazing, really. Did you mention the marble top? Did you replace the original top with a marble slab?
You've got a great eye! I love your ideas, fo real!
I love your kitchen! Especially the combination of the island and the rug. Where is your rug from? I'm looking for something similar.
APJ
I LOVE this! What a beautiful color combo and those peonies are just gorgeous!
I love it! Someday I want an island and now I think I want this one! You always have the best before and afters.
I love what you did with your island. It looks great, the navy color looks fabulous, very different.
That is gorgeous, Jenny! I am always amazed at how creative and talented you are. You are such an inspiration.
Jenny this is stunning! Can I move in? No, but really…..? :) The peonies just about set me over the edge.
Really, that is just so genius. I love that you used a used piece and were so resourceful and creative without! Truly, great idea. Thank for sharing with us:) It looks fabulous in the kitchen!
Wow! I never cease to be amazed at the transformative powers of paint! It looks amazing!
You did a bang up job! I love the idea of navy in the kitchen – so classic!
I love this, Jenny! Did I miss the part about how you ended up with a marble top to your dresser though?
That idea of the painting detail on the back is genius! I knew there was a reason I can't stay away from your blog (c: And I'm so glad you had a lovely mother's day, fresh flowers will do it for me every time!
first off, i love peonies. my mother has a huge bush of them, and i won't be home this year to see (and smell!) them. i can practically smell these off the page.
second, that hutch turned out beautiful. it's amazing what you remake — you always can see the beauty in something so far ahead. v. cool.
You are amazing! There are so many things I admire about you and about this project – I really love your ability to see the potential in things. For me, this is far more gratifying then having endless cash.
Wow! I absolutely love this. Navy and black feels so modern and the white accent is just the icing on the cake! Great job.
Thank you for your information. I'll try to find it.
GOREGEOUS!!!!! I love it!
Really inspirationally beautiful!
LOVE IT!! We need a home tour of your new place soon!
girrrrllll I've been lookin' at this all day. You impress me! Love that greeny tealy navy paint color with the marble. Tasty dlite.
Beautiful! Job well done. I appreciate all the detail pictures rather than just a "before" and "after."
You are amazing! Love it!!
I, too, love the mix of navy with black. It would have been so easy to just do another shade of black…the navy is just right! Congratulations on such a great job! Did you add the marble top recently? It didn't look like it was in the picture with the hutch.
Love the idea of using a dresser as a kitchen island. I'm thinking of using this idea as well – just having trouble finding the perfect one! But yours looks great :)
Jenny! you = amazing!
this is the most clever idea I've seen on a blog in a while…and when I have a kitchen big enough for an island I will try it.
This is so incredible! I can't believe what the dresser looked like before, and of course those peonies are a beautiful touch. So glad I came across your blog :)
YOU are amazing. Thanks so much for sharing your creative work on the blog.
This project gave me inspiration to update I piece I have. It's a solid wood cabinet, the top folds open to make a large buffet. It was my grandmother's. Can't wait to get started….
Wow, Jenny it is gorgeous! The detailing on the island is beautiful and it looks perfect with the runner! Peonies are my favorite and need to get some in my home!
This is amazing! Wow!
i'd go for just a little grey veining in the white paint –
john in nc
Thanks for the info! Its the perfect shade of gray. Of course, I meant beautiful! (not beautiful?)
Well, I am FLOORED. Not just by the ingenuity of this project, but by your amazing kitchen with all its detailed and eclectic glory!
I love how all-wood furniture can be re-done so many times, yet still remains functional (you could never do that with the cheap laminate stuff made today!) Awesome project, it looks fantastic!
great work has been done!
I have a question about the dresser/Hutch combo. what color gray paint did you use for that, it looks great!
Simply wonderful….Thank you for sharing! Helps me think about what I have that could use an uplift.
It's just beautiful! From the pictures, I thought you had added some molding or wood trim. The painted detail is perfect – and very diy-able for the rest of us :)
Gorgeous! I love the blue and white and don't think you can ever be too nautical! Looks great!
Love it but my one question is when you attached the chip board with staples then painted it, did you just paint over the staples or hide them some how..
Just to let you know that I featured you on my blog. I was totally inspired by you {as always} because you can see something and make it happen!
Have a delightful day!
Jenn
Redberrybarn.blogspot.com
How did you get the lovely counter top on top of the dresser? How did you secure it?
This is amazing. I love it!
oh sweet sweet sweet sweet!!
Awesome Job! I was wondering how you did the curves. Great idea with the wine glass!
I love black and blue also. You make a fantastic choice and did a great job!
I have been looking for a used dresser to do something similar in my kitchen. So far no luck, but I'm bookmarking this for inspiration when I find one! Thanks.
Jenny, this is just an amazing transformation of a regular old dresser!! I love it so much, especially the painted detail. I hope you don't mind, I am featuring this project along with a couple of other DIYs on my blog today. Keep up the fabulous work!!
Nancy xo
Awesome! Did you replace the wooden top of the dresser with a granite one too (or something with the illusion of granite)? Where do you go for something like that?