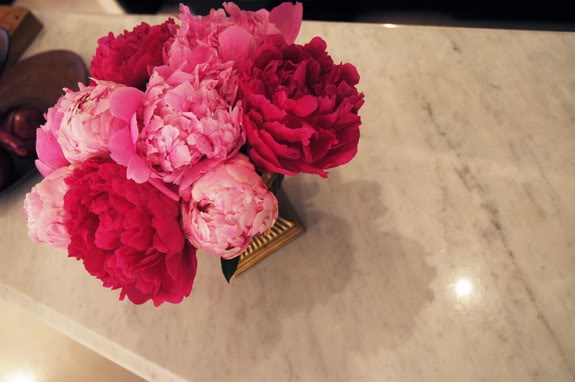
Last weekend was perfect. Mother’s Day was lovely – Michael and the girls surprised me with a necklace I’ve been eying for a while and a gorgeous bunch of peonies.

The arrangement was so pretty that I thought it was a good excuse to break out the camera and take some ‘after shots’ of my kitchen island that I’ve been meaning to share with you.
This old dresser was one of the very first things Michael and I bought as a married couple. We got it for almost nothing at a thrift store in Arizona. It’s been about 20 different colors over the years and the hardware’s changed a half dozen times. The top hutch piece was some I picked up a few years later at the Crate and Barrel outlet.


I got a piece of very inexpensive chipboard cut to size at Home Depot, and stapled and nailed it in place. Then I primed and painted the whole thing in BEHR’s Night Shade (it looks navy in the picture, but it actually has a lot of green in it).

The new paint helped the situation a lot. I knew I wanted to add moulding or something though to make the flat back more exciting. It’s one of the first things you see from our front door, so it was important for the detail to be sort of punchy and fun. I liked this paint treatment from House and Home and thought it would be a cinch to do something similar:

After doing a little sketch and planning out my measurements, I taped off all the straight lines.


I love it and love mixing black and blues – your runner is sweet and those peonies are too.
pve
This is GORGEOUS…love it! I've always shied away from painting stripes because I worry about bleeding. Your technique with laying down a base coat of the original color is genius. Off to scout out potential striping projects now… :)
Unbelievable Jenny!! Your detailing on the island is awesome and the mix of blue and blue with the oriental rug on the floor is beautiful!! Love it all!!
i've been giddy seeing the arrival of peonies here. the island (and rug) looks beautiful! thanks for sharing xo
well… can I just say pure perfection?!
This looks amazing!! Truly!! Loved the vision and the shade of navy looks perfect with the black cabinets. Love!
Oh wow, that is gorgeous and really unexpected. I love the shade of blue.
This looks fantastic – I'm amazed at the transformations you can achieve… Even the back of a cupboard isn't safe in it's mediocrity!
are you kidding!! love it. this is why i love your blog
WOW!! Amazing. I have such good memories of that furniture piece. I'm amazed at the transformation. You are a master!
That turned out great! You have such amazing ideas. I love them all.
LOVE this! And something as small as the paint the detailing really does make it work so much better.
Fantastic work Jenny! As usual, you are inventive and brave. This island is clearly an efficient use of your space, already-owned furniture *and* your talent!
I love it, so amazing! :)
Well done! Love your smart ways for great design!
Glad to hear your Mother's Day was wonderful!
xoxo
Love it! Did you have a custom piece of marble cut for the top?
What a clever girl!
I'm shocked at how good that looks! Might try that paint detail for the inside shelves of a white bookcase. Very nicely done.
Well Done!
what a great job! may I ask you. which kind of paint did you use for this kitchen island?
Oh it turned out so very pretty! I agree the detail is awesome and you are always so right on with the color selections!
Lovely Lovely…. You did a great job painting them all….
xxx
CEO
i don't know how you come up with this stuff! it looks amazing! did you have the marble top cut?
Wow -you are so talented! Love the mix of black, white, blue pink and of course a bit of gold… thanks for sharing!
I need about 1/3 of the creativity floating around in your brain on any given day ;)
Looks superb!
Fantastic! I found your blog a couple of weeks ago and read through all your archives – I love how you don't hestitate to paint anything!! And the tip about laying down a base coat of the background color to help avoid bleeding is awesome. Also, it helps to know that even the pros have to deal with bleeding, it makes me feel like less of a painter's tape failure. Thanks for all the wonderful inspiration! =D
Gorgeous, as always! I don't know how you come up with your ideas, Jenny, but I am super-envious of that brain of yours. :)
You are one clever lady. One of my favorite combinations is pink and cobalt and white, so pretty. Your dresser turned out great!! Kathysue
Beautiful job! Those pink peonies look gorgeous with the navy blue-great job!!
I LOVE this! Such a special piece that has been with y'all through it all. I love the marble top and the painted detail! Those peonies aren't bad either!
Incredible!!!! I love it!!!
That is very clever!
Now, that really cements the principal that furniture doesn't have to always line the walls.
Beautiful. Did you have the marble on top added for the island or was it an earlier addition when used as a dresser? Looks great.
So very fabulous! Love the marble top.
This is stunning–made my day complete! Great job!
This is amazing! You're so, so talented!
bananas good. I'd never think to combine navy with black, but it works so well!
Beautiful? What color is on the dresser/hutch from Crate and Barrel?
Cafenohut – I used Behr's Premium Plus (paint+primer) in Night Shade. I almost always use Behr paints and Benjamin Moore colors, but I really liked this night shade color from Behr.
Alexis – the last version of the dresser and hutch was painted in Martha's Bedford Gray. It's a great color that she uses a lot in her own homes. Works great with browns and blacks.
Thanks for the very sweet comments! I'll post about the marble top tomorrow. It's a fun story.
xoxoxo
You are a miracle worker!!!! I think I speak for a lot of us when I say, we would love more details! What type of paint, brush, prep work, drying time between coats, everything. I can tell you that when I paint furniture it doesn't look like that… you have some serious talent! It is a joy to watch you.
to die for…you're amazing. xo
Okay that kitchen is KILLER! I would have never used that was a dresser. The overall colors are also beautiful…..
Jenny,
Once again you have proven that you do not have to spend a ton of money to create something beautiful. I love how you continually repurpose furniture in different rooms, and just change the color. I also love that you create things, be it furniture, art, or just techniques that are accessable to everyone. You are talented beyond belief, and your willingness to share makes you all the more special.
P.S Love the peonies!
You are an inspiration. I always knew you were super creative- but I had no idea you were famous! I want to be just like you when I grow up and I've already found ideas on this blog I plan to steal. I'm reminded of when it seemed like I came home from school to a "new house" every day because my mom was always redecorating something. I loved it, and now that I'm out of school for the summer I can see myself doing it. Jason wont know what hit him! :)
Love ya,
your favorite cousin- Linnea
jenny- AWESOME! can you tell me where you got the runner in the kitchen? i am searching for something similiar for a hallway!
Love, love the island. I do have a question, though. How do you do all these projects with three little girls? I have a 2 and 3-year-old and I am trying to figure out how you get it all done. Any secrets?
Jenny,
WHY has no one snatched you up for a show yet?? Every time I log on your ideas are always so fresh and your color is stunning!!! You're a great talent.
Wow! I love this piece and am so inspired by your re-purposing of an old dresser. Simply perfect. And what better topper than a bushel of peonies, my absolute favorite. I keep staring at my peony bush wishing the bounty to bloom. Soon!
You might try this on your next striping project: http://frogtape.com/
It works awesome for clean, crisp lines every time.
Thanks for sharing this wonderful project.
best –
d @ plum
http://www.plumlife.typepad.com/
Brilliant ! Do you dream about project ideas all night long? So clever and so original!
Love how it turned out. And love seeing a little more unveil of your kitchen!