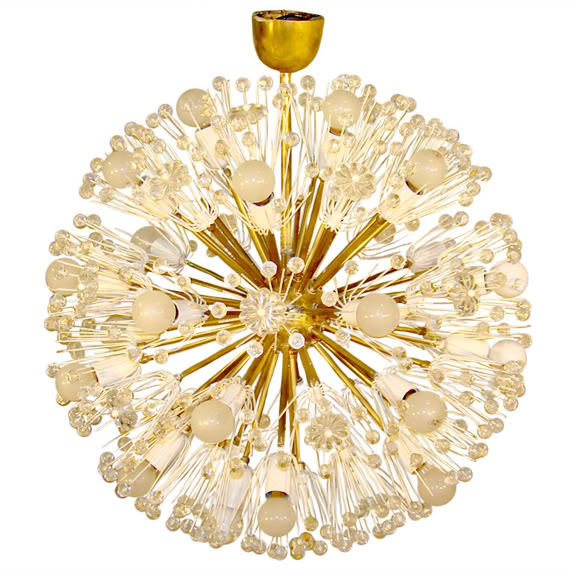
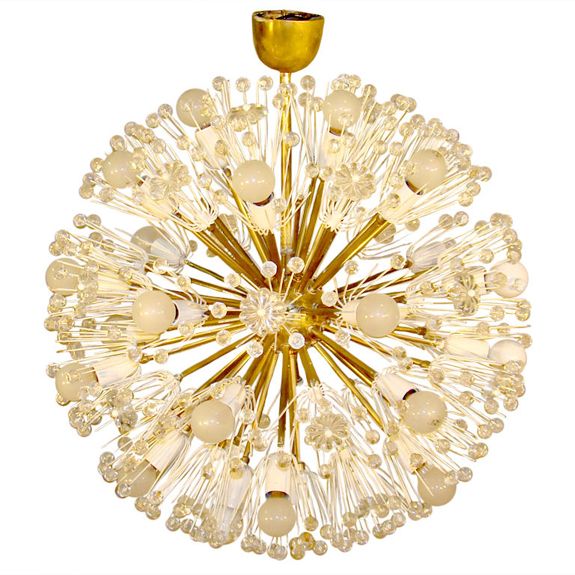
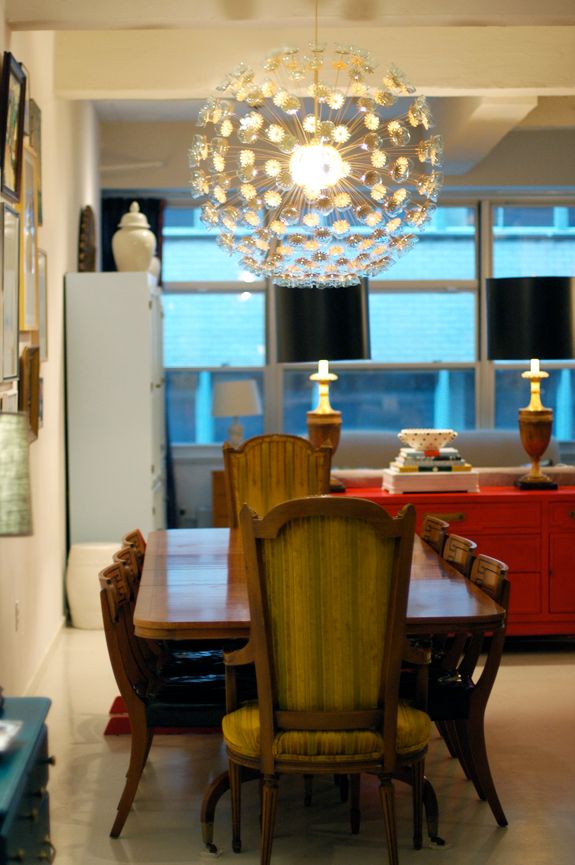
I’ve always dreamed of having a gorgeous sputnik chandelier, but they are usually on the smaller side and in the many thousands of dollars. I had planned on investing a little bit more of the house budget on the dining area’s light fixture because it would be basically the first thing you’d see when walking into our apartment. I wanted big and beautiful.
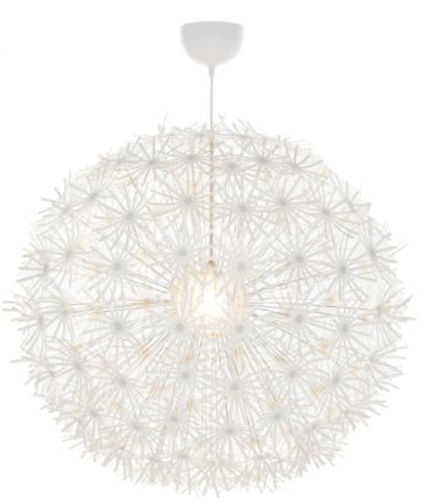
After deciding to buy the Gossip Girl sconces, I had sort of eaten up my lighting budget and needed to figure out something very inexpensive for the dining room. I thought the ubiquitous IKEA Maskros (which means dandelion in Swedish) might be a good base for a DIY sputnik.
I had some help from my Mom and Dad, who were in town visiting at the time. We busted out the entire project in a night and had the thing hung in the morning. I love projects like that!! (THANKS Mom and Dad! xo)
It’s a pretty simple project, with not a lot of tools required. I went with the 32″ diameter fixture because we have a big open space, but I would recommend the 22″ fixture (which is only $49!) for more traditional rooms.


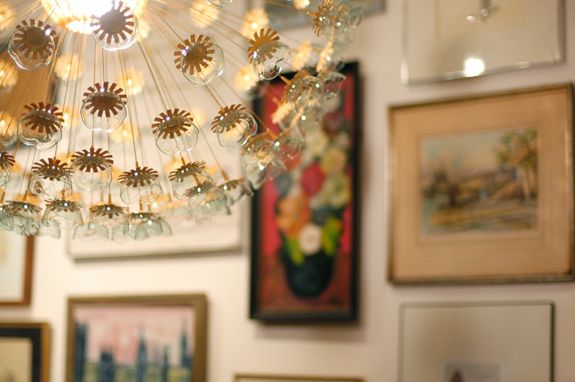
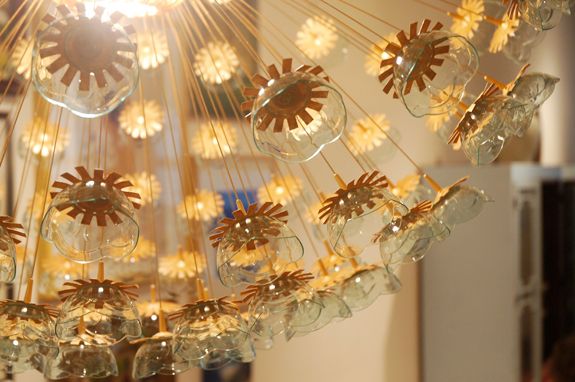
The white, plasticy paper flowers are about 5″ wide. This is totally personal preference, but the thing I don’t love the most about the Maskros in it’s original state is all the shadows the flowers create and I needed this fixture to be a functional light source first and foremost. So I played around a bit with the proportions to shorten the petals and decided I like a 2.5″ diameter best.

I used a clear (making it easy to find the center) plastic cup with a 2.5″ base to trace a circle on each of the flowers. A little tip: I find that projects with many steps of many multiples are done best and fastest by focusing on one step at a time. I traced all the flowers first. Then I cut all the flowers, etc. Don’t get ahead of yourself in the steps for the sake of accuracy and efficiency.


If the weather had been better and if I didn’t live in NYC, I totally would have spray painted the whole thing using Rustoleum’s metallic line in the Brass finish. But, I am actually really happy with the look of the hand painting. It didn’t take that long, and I think the end look is a little less flat than spray paint – more mottled, like real gilded metal.


Fabritac is hands down my favorite adhesive and it worked really well for this project. Super tight hold and a fast drying time. I needed only a small dollop on the bottom of each plate to attach the flower.


Wow, that is fantastic!
Ok, this is just beautiful. It's beautiful. That's all there is to it! You'd never recognize it as the regular Ikea fixture as much as you've dressed it up, and it suits your space so well. Bravo!
Jenny, you have done it again! A simply beautiful project on a sane budget. Your DIY projects are so great!
FANTASTIC! I thought I liked Amy Butler's version that was simple and muted gold. I think I like this one much more. It has such a great presence.
Wow,that's a great way to faux a Stejnar!! Amazing job.
You are so very creative! Thanks for sharing the project. However, it is your dining table I am drooling over – please could you share your source? Thanks!
I'm exhausted just looking at this, but very impressed! You are amazing at turning your ideas into reality!
FANTASTIC project! I really am always surprised how you manage these detail-oriented and time-consuming projects amidst parenting duties. Amazing time-management and creativity. The chandy is delicious. Brava!
I fainted when I saw this. OMG!!!!!!!!!!!!!!!!
You did it again, another brilliant DIY!!! It is beautiful! Thanks so much for sharing!
What an improvement on the original- and the yellow gold is just lovely! Fabulous project- looks a million dollars!
Ok, that is an amazing DIY. Seriously – so beautiful. I am also taken by the collage of art behind it. Definitely going into the inspiration file!
soooooo cuuuuuute!
That turned out very nicely, and as you said it doesn't scream IKEA now.
I love it!!!!
I can't believe how awesome this turned out. And you were so smart to cut down the flowers — it looks way more authentically mid-century this way. Great job!
Jaw on the ground. Amazing.
just like everyone else, i'm going to go pick my jaw up off the flor now. this is amazing! xox
this is absolute genius. i bow down.
Crazy good!!! Love the "twirl" shadows ,too. I was thinking that your parents light and your sister's button collage have a dot , circle theme :))
Great project Jenny! What I like best is that you got it done with the help of Mom, Dad, and Grace. It'll be so nice to admire your handiwork over family dinners.
Gorgeous Jenny! Very creative, I love the look you have created.
Nancy xo
Wow I am sooo impressed!!! You have the best DIY projects. What a perfect piece for that space.
http://www.kinistyle.com
Jenny, that is seriously the coolest IKEA hack I've ever seen. Well done!!
Oh my gosh Jenny. This is unreal. You are some sort of designing freak!!!! (in a GOOD way! ) You are simply amazing. You never cease to amaze me. The things you turn into beautiful treasures is really a gift. I can't believe this girl I knew in Boston is now an amazing design super star. (well, you always were a superstar, I'm just saying.)
I'm so glad you blog. It's one of the first I read in my google reader!!
xo
p.s. I like yours better than the sputnik chandelier. Both are pretty, but I like the overall look of yours better!
That's so great!! So dramatic! I just did a DIY of the round variety too!
That is amazing and how much patience do you have!!
You are a genius plain and simple!
Jenny, you are a genius. Positively brilliant.
I had to blog it:
http://thedesignjunkie.blogspot.com/2011/05/little-green-notebooks-diy-sputnik.html
(Did I tell you you're brilliant?)
It's so funny that you did this post! I was JUST at IKEA Saturday with the purpose of looking at that light. I just loved how it looked in Amy Butler's home that you blogged about the other day but once I saw it in person I had no clue how to transform it. Thank you so much for doing this, I'm sitting her going, "AHA! So THAT's what to do!"
Yay, I can't wait!!!
You are killing me with your brilliance! This is one of the best Ikea hacks ever.
Very cool light. I just have one question: is it hardwired? I'm looking for a light above my dining table, but I cant use a lamp that requires hardwiring.
Genius! Are the cups heavy? Or are they plastic?? Now what are you gonna do with all of the money you saved?
Looks great, wondered though if you had considered leaving some bigger flowers mixed in.
you are so creative!!
This is the best Ikea hack ever! Absolutely love it.
Jenny,
"Anonymous" asked it the fixture had to be hardwired. Even though we did it that way on this one, it could easily be hung from swag hooks in the ceiling and plugged into a wall outlet or have the cord covered in a flushmounted conduit. I hope this helps!
Love, Dad
This is so ridiculous amazing. Definitley copying you when I have a big enough apartment to actually fit a chandelier! Lol
Wow!!!! What an amazing project! I don't know how you come up with all these great ideas.
This is unreal!! It sent my own mind racing with ideas. You are wonderfully creative :)
Simply…STUNNING!!!
great idea! i've seen that ikea chandelier a couple places before but never with a fresh new take on the out-of-the-box lamp. great work!
I have no words. This is one of the most amazing projects I've seen. Brilliant.
I love the way you customized this!
Fabulous DIY – it looks amazing! Hope you're posting this on the IKEA Hackers blog too …
You are AMAZING! I'm so impressed with your creativity, diligence and ability to decorate with little ones puttering about. Well done! The light looks amazing!
It doesn't even look like the Ikea light fixture anymore. People wouldn't know unless you told them, which you just did :) Love this!
Brilliant! I love a good IKEA hack and this is one of the best I have seen. I haven't got anywhere to put a lamp like this and it makes me pout.
ok that is the coolest diy redo i have seen in a while, I love the whole sputnik vibe… great thinking and great job! Dee