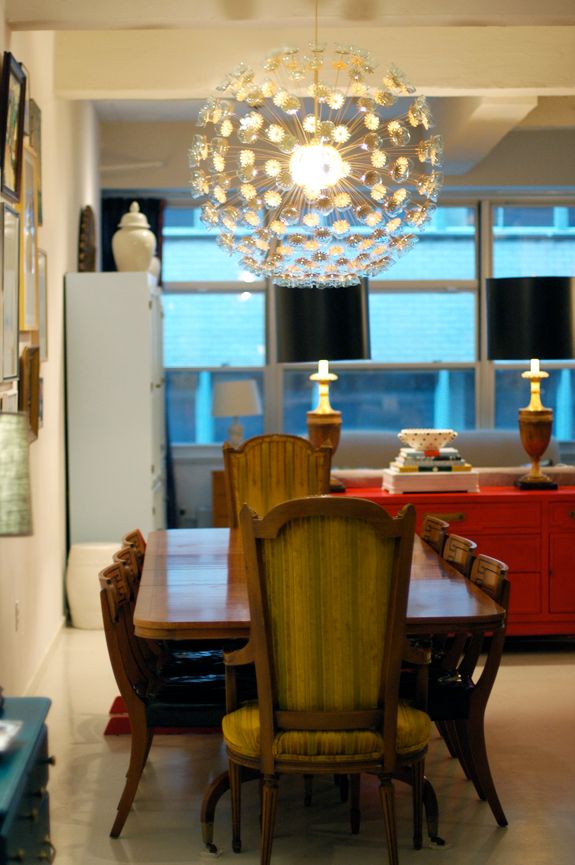
I’ve always dreamed of having a gorgeous sputnik chandelier, but they are usually on the smaller side and in the many thousands of dollars. I had planned on investing a little bit more of the house budget on the dining area’s light fixture because it would be basically the first thing you’d see when walking into our apartment. I wanted big and beautiful.
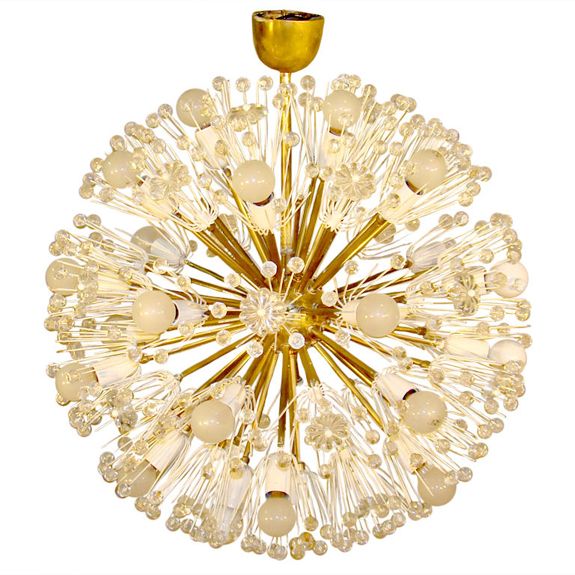
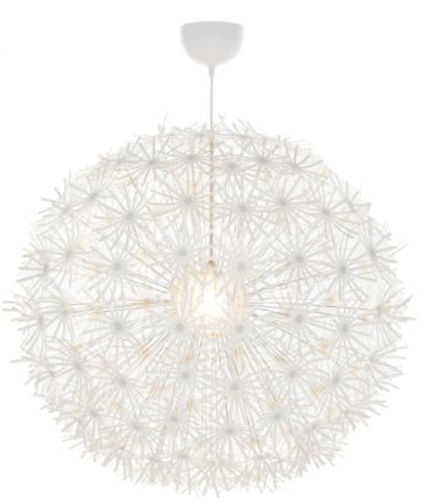
After deciding to buy the Gossip Girl sconces, I had sort of eaten up my lighting budget and needed to figure out something very inexpensive for the dining room. I thought the ubiquitous IKEA Maskros (which means dandelion in Swedish) might be a good base for a DIY sputnik.
I had some help from my Mom and Dad, who were in town visiting at the time. We busted out the entire project in a night and had the thing hung in the morning. I love projects like that!! (THANKS Mom and Dad! xo)
It’s a pretty simple project, with not a lot of tools required. I went with the 32″ diameter fixture because we have a big open space, but I would recommend the 22″ fixture (which is only $49!) for more traditional rooms.

The white, plasticy paper flowers are about 5″ wide. This is totally personal preference, but the thing I don’t love the most about the Maskros in it’s original state is all the shadows the flowers create and I needed this fixture to be a functional light source first and foremost. So I played around a bit with the proportions to shorten the petals and decided I like a 2.5″ diameter best.

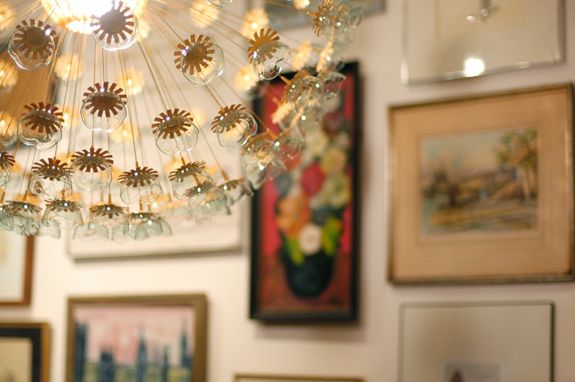
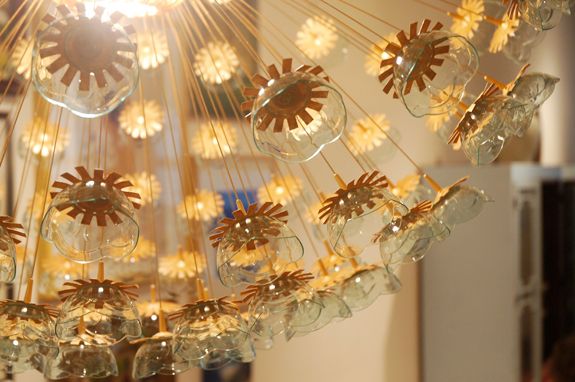
I used a clear (making it easy to find the center) plastic cup with a 2.5″ base to trace a circle on each of the flowers. A little tip: I find that projects with many steps of many multiples are done best and fastest by focusing on one step at a time. I traced all the flowers first. Then I cut all the flowers, etc. Don’t get ahead of yourself in the steps for the sake of accuracy and efficiency.


If the weather had been better and if I didn’t live in NYC, I totally would have spray painted the whole thing using Rustoleum’s metallic line in the Brass finish. But, I am actually really happy with the look of the hand painting. It didn’t take that long, and I think the end look is a little less flat than spray paint – more mottled, like real gilded metal.


Fabritac is hands down my favorite adhesive and it worked really well for this project. Super tight hold and a fast drying time. I needed only a small dollop on the bottom of each plate to attach the flower.







Oh my gosh! Brilliant DIY – you are so creative. Fantastic idea – would also be beautiful in silver! thanks for sharing all of the steps!
xo Allison
Spicer + Bank
http://www.spicerandbank.blogspot.com
Really really beautiful!!! What a great project, thanks for sharing!
:)
Ingrid
I love it! I didn't think anything could make me like that particular light fixture again, but this does.
Wow!! It looks great!!! I love your gallery wall by the way! :)
Really, what do you eat for breakfast? You have more energy than anyone I know….and certainly you light up blog land in such inspiring ways!
Love that light! Love to order one….
pve
Amazing!! It looks absolutely great !
This is phenomenal. I never would have thought about cutting down the sunbursts like that. I'm thinking of getting this fixture for my dining room as well but need to keep it white. I'm thinking that I'll definitely cut down the diameter of the flowers after seeing yours though. Beautiful!
Amuse cups?! Seriously? Never in a million years would I have come up with that one but it's brilliant. Great hack!
Wow,you are just as patient as you are creative…proven with this amazing light fixture. I'm still admiring the button collection post too.
GENIUS AS ALWAYS!!!!!!!!!!
THIS IS LIKE SO AWESOME!
SERIOUSLY!!
You did such a great job. Innovative and totally worthy!
Can I ask a question?
Where did you find those fetching black lampshades on the console?
Rashon aka Mr. Goodwill Hunting
Amazing!
This has got to be one of my all-time favorite diy projects from the entire internet! You are so talented and creative! LOVE it!
Another one knocked out of the park, Jenny!
How lucky that you have parents' who are into this stuff and willing to help. Let's not forget the little helpers too :)
wow, that is totally a statement piece- I love how it came out! The polka dots on the walls are so fun!
W.O.W. Way to "make it your own" as Paula Abdul would say. :) It looks fantastic!
Completely and utterly gorgeous!!! Well done, girl! (and assistants)
Jenny! I think this is all I ever write on here, but it is AMAZING!
This is simply awesome!! It turned out so beautiful.
Wonderful job – it looks amazing! Great work :)
Looks gorgeous! You are absolutely the queen of designer DIYs!
This is absolutely amazing…can't believe you came up with this idea!! I always love coming over to see what you've created ~
WOW girl! that truly is amazing! and it truly looks like a high-end piece. I would have never had the patience to hand paint all that-I would have speed through it with spray paint and it would have probably ended up being a severe DIY disaster!
Kuddos to you!!
Thank you for the very clear, step-by-step photos and instructions. This is a very inspiring project.
Jenny that is such a creative and cool idea…I LOVE it!!
holy awesome-ness! you never cease to amaze me with your creative and inspiring ideas! thanks, jenny!!
You are SO cool. Seriously. Awesome.
Jenny you just took Ikea to a whole new level! Love the creativity…keep it coming!
This is amazing! What a creative idea! It looks great and very original! I'm gonna have to leave this up on my computer all day so I can keep coming back to look at it….
That is amazing – love it when I find other ladies inspired by Gossip Girl!
this is unbelievably creative!
How Awesome!! Love it!
I love it! Great way to make that light more your style
Fabulous job!
Way to go! That's one cool light :)
Love it! If I weren't renting I would do this to my dining room in a heartbeat! Great idea.
Holy cow, Jenny! You have the BEST DIY projects. Thanks for sharing. It looks spectacular!
Awesome DIY! Thanks for sharing, it's really pretty!
A-MAZE-ING! You are so clever!!!!
That looks great!! Sweet Ikea hack. How fun to have your parents help, too. Love it!!
Brilliant. I was never too crazy about the Maskros. With the hack, the chandelier looks truly one of a kind and elegant. Thank you so much for sharing the step by step instructions. You are so generous.
Amazing… looks so glamorous… such a great idea!
xo
AHHHHHH-MAZING! LOVE it. And the post about the rug website too?? This is the best blog Monday ever.
You are amazing! This is amazing and totally brilliant- I am in awe- seriously!!!! WOW!
So beautiful! The little clear dishes really add dimension.
Wow it looks great! Will have to attempt it myself!
What a fun project! Love Ikea hacks!
Not to be nit picky but Maskros is actually Swedish for dandelion not daffodil.
Fantastic Ikea hack! such a great idea when the budget is not there.
*bisous*
Dane
Very cool! The only thing I don't like about that IKEA fixture is that it is paper and looks cheap up close. I saw someone else had spray-painted it all gold, but I prefer your choice of adding the cups.