Do you love the look of fabric shades but don’t want to fork over the cash?
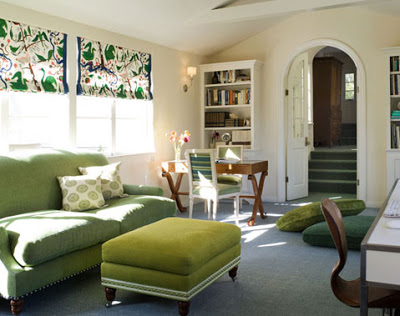
 design by Coddington Design, via Desire to Inspire
Shades can often cost you an arm and a leg (especially custom fabric shades). When my cheap white IKEA shades were safety-recalled, I decided to figure out a way to repurpose the old {ugly} mini blinds that had previously hung in our bedroom windows. The result was better and easier than expected, not to mention even cheaper than the cost of new IKEA shades.
Here are the basic instructions. If you need more details, feel free to comment or email.
–Supplies–
Tape measure
Scissors
Fabritac (or comparable fabric glue – NOT HOT GLUE!)
Mini blinds (like the $3 Target mini blinds)
Fabric (yardage depends on the size of your window)
Trim (optional)
1. Measure you windows carefully. Then do some math and figure out how many folds you want in your shade. I like the look of a fold every 9 inches, which meant I only needed 6 slats for my small windows.

2. Let out the blinds all the way, making them the longest they can be. Carefully cut away all of the thin tilting/ladder-like strings, being very careful not to cut the thicker lift cord. I simply ran my scissors along the top of the slats, cutting away the tilt strings and avoiding the lift string altogether.
3. Take out the plastic plugs from the bottom of the miniblinds and remove and put aside the thick bottom slat piece (you’ll need this later). Then simply pull off most of the slats, while leaving the few you’ll need for the folds of the shade. Like I mentioned before, I only needed six slats for my shade.

4. Make sure the blinds are still let out all the way. Measure carefully and reinstall the thick bottom slat so that the length of your window and the full length of the shade are roughly the same. I decided to make my shade about 1″ longer than my window measurement. Just to make sure it would be long enough.
Trim the extra cord away off the bottom.
Now cut out your fabric, using the shade skeleton as your pattern and leaving a 2.5 inch (or so) border on all sides.
5. Congrats! You’re done with the hard part! You should have something that looks like this:
 It’s time to start gluing.
6. Start with the top of the shade. Fold over and glue the fabric together to make a clean edge and glue that to the front of the big top rail mount. **NOTE: Do not glue the folded hem to the very ends of the rail mount. You need to be able to slip the rail into the wall-mounted brackets, so the fabric needs to stay unglued on the very ends.
7. Measure 9″ (or your preferred fold length) from the top of the rail. Adjust and glue a slat into place. Continue all the way down, gluing the slats to the fabric. I glued the rounded, convex side of the slat to the fabric so there was more slat-to-fabric contact. Make sure not to glue the lift cord to the slats or the fabric.
8. Glue, turn in and glue again the three other sides of the shade to finish off all the edges. Let it all dry.
9. (Optional) Glue on some trim to the bottom slat. I picked up some super, super tiny ball trim at JoAnn’s for less than $1 a yard. (only needed one yard)

10. Hang up the shades just like hanging up mini blinds. The cord still functions the same way and, as long as you didn’t glue the lift cord to your slats or fabric, the shade should lift and fold beautifully.
Here’s my finished shade. The fabric is a blue-gray burlap that I bought a while back on eBay for about $6.50 a yard. I think I used about a yard and a half total for two shades, but I have small windows.

I’m happy with the look of the burlap. The dark color helps with light control (it filters), but I still feel like the room is bright and cheerful when the shades are down. It’s a good balance for me. Some of you might want to add black-out fabric to the backs of your shade to completely block out the light. It’d be like living in a hotel.

Please let me know if you need clarification or elaboration. And don’t forget to send me pictures if you make your own shades! I’d love to see them!


Found this on Lifehacker- you are a genius!!! I'm going to try this!
Have you ever covered the front and back so you have a "pretty" side facing the outsife of the house? I want to do this in my kitchen window but it face the front porch…. THANKS!
ever watch ice age….I'm reminded of the part where Sid the sloth say…"I'm a genius" cute lisp and all!
…Your a genius!
this is awesome. Thank you!
I love the idea of making my own shades as we rent.
What I don't understand is the shade pattern you refer to. Please, send help!
i'm so happy to have lovely shades now instead of my ratty, dirty miniblinds! see mine here:
http://spontaneousgeneration.typepad.com/spontaneous-generation/2009/07/deminiblinding-my-windows.html
Thanks God for computers and someone that thinks like me. With the least expense possible in mind I thought making them with my existing mini blinds would be great. Now I have step by step instructions on how to do it! THANKS ever so much!!!
Has anyone figured out if you can or how to attach muslin to the back of the shade so you can't see the working parts from the view from outside? I've seen Jennifer's how-to on the blackout fabric on her blog, so I'm worried I'll have results that are similar to her first attempt if I try to glue muslin to the back…
Just finished one of these, but I sewed 2 different pieces of fabric together, one a plaid pink and green and the other a green and white striped fabric. I turned the fabric inside out and glued the pieces of blind to the fabric (I did not have to make hems all around since it was sewn). Then I painted the slats pink, the color (or mostly the color) of the fabric with craft acrylic paint. I had read on other websites that people have used acrylic paint on vinyl mini blinds. I am so happy I found this blog. Thank you so much for your ingenuity.
Will this work for thicker blinds? I have odd sized windows that require custom blinds. In my baby girl's room our old dog destroyed several slats of blinds so Id love to repurpose them. They are about 4 inches wide compared to a miniblind which is like 1 inch. What do you think?
Brilliant! Thank you for sharing this tutorial!
Your blog is fabulous!
And, you're apparently becoming famous for this hack. I am intrigued…but I'm not so handy.
Could this project be done with vinyl 2 in blinds or do you think that would be too thick? I have my eye on a thicker fabric anyway and I was also worried about the flimsier blinds holding up.
Can you email me some pictures of the blinds up close. I am not sure that I understand what strings to cut and how you leave the slats you want to keep.
Thanks,
Christin
sorry, my email is christinc21@hotmail.com
I was just complaining to my husband today that all of our hideous mini blinds had to hit the trash…only to find a link to your project on whipup.
I am SO excited! Thank you so much for sharing this GENIUS idea.
I LOVE this idea – now if I wouldn't have thrown out all those old shades!!
This is one of the best ideas ever!!! Thank you so much for posting this tutorial, I LOVE the end result! (and I hate plastic miniblinds!)
Time to get to work cutting and pasting….
This is GENIUS!!! Thank you so, so much for sharing.
Here is my "after" http://mckinneyliving.blogspot.com/2009/08/woodworking-and-shade-making.html
They are a bit saggy in the middle, but I think I will do better next time.
Thank you again!!
We just took down some old blinds because they were falling apart. This is wonderful! Thank you so much for this.
Actually I realized I made mine WAY too long but luckily these are EASY to fix and tweak until you get them just right!
http://mckinneyliving.blogspot.com/2009/08/shade-update.html
I love this project. What a great idea. I will be trying it this week to solve a two year issue with out back door. Thanks for sharing!
I loooove this project. Thank you for posting, as I have ELEVEN windows in my bedroom with those crazy mini-blinds, and I've lived in this house for 4 years now without an affordable solution. Just made my first one yesterday, and it turned out beautifully. Can't wait to finish this room. Thank you, thank you!!!
I'm speechless! As is said many times here, "genius" is the only word I can mutter. I'm really hoping my husband trusts me to tear about his office mini blinds. I was researching creative, budget-friendly solutions to the most uncreative window treatment–mini blinds–and came across your blog. Recycling, repurposing, redecorating…awesome!
this is brilliant!
I love my blinds! I do have one question. I finished them about 24hrs ago and the glue line is still showing on the outside. Does the fabric glue dry invisible – eventually? If not, is there a way to clean it up on the outside?
If you save the slats you can make ones for different seasons or holidays, instead of glue at the top I used, double sided tape, and goo gone when it was time change out. I store the unused ones with the decorations for each holiday. I have fall ones up now,
Thanks so much for the idea, I love having different shades for each time of the year.
Those who have to leave the blinds on the outside of the window due to the restrictions of their condo…. Try this. Take the fabric and safety pin it to the "ladder" cord that holds the slats in place. Do this at regular intervals. Then test it by opening and closing the blinds. If it works the way you want, you can stitch the fabric carefully to the ladder so that it isn't too obvious.
I just love the way you think, this is so creative. Now if only I can DO it, that's the question. Pray for me, I hope so. What a totally cool idea.
~ Charlie
Oh how I heart these!!!!!! I love these type of shades in those beautiful Pottery Barn type fabrics,but I live in a rental and I'm not shelling out big bucks for window treatments that might not fit another house.
But these are so perfect and now I want to do them in every single room!!
Thanks so much for this tutorial! I made a couple shades and they turned out wonderfully! Pictures here: http://www.flickr.com/photos/ahartman/3951367137/
Sweet god, this is an awesome project! I've been looking for something quick and cheap to do with my apartment's default blinds, and this was just the ticket. I love your aesthetic – I found you after months of reading design blogs that were very nice, but not quite me. Thanks!
Thank you for this amazing tip!!!!!! Here are my results from replacing 3 disgusting mini-blinds for $7 each! Extreme Makeover: Mini-Blind Edition
This is a great idea! Are there any suggestions for apt renters that cannot remove their ugly mini blinds?
For example, is there any way to make a cover that just sticks over the existing blinds? I have very large drafty windows surrounded by interior brick. The existing blinds were mounted by the landlord inside the window frame. The blinds are too large to remove, and I don't want to mess with drilling holes into the brick as a renter. Any ideas are appreciated! Thanks.
What a great idea! I've been looking for a pattern to make roman shades to replace the ugly mini blinds left behind when we bought our first house (on windows AND French doors)! This is exactly the type of project I needed (little cost) to transform our windows (and a few doors!) – I'll be putting a link to your project in my blog (http://firsttimefancy.blog.com/) – which is where I'll share my final product!
Thanks!
THANK YOU FOR THIS POST!!!! You are absolutely a genius.
Would you consider starting a flickr (or something similar) group where folks can post pics of their finished projects from this how-to? It would be so cool to see the ideas others have! :)
This is a great project….I'm assuming it should work just as well for a window that is 5.5" wide?
I'm going to have to reread a few times to make sure I"m understanding all the lingo and instructions…:)
Wow!!! just read about roman blinds today as was going to toss them.Like gifted designs said i will have to refer to instructions a few times.Let me know how it goes gifted.
Barb
Okay,all measured and organized and my fabric wont adhere to my blinds any ideas besides fabric glue??
I love this idea! I am curious, are the remaining miniblind strips hidden if I were to make this and just pull cord a few inches. I figure I will have blinds up most of the time so I don't care if they show at night since it's dark.
Thank you so much for this idea. I LOVE it!!!!!
This is a fantastic idea, and I hope to try it in my bedroom. Is it possible to put blackout liner behind the fabric?
I am SO glad you posted this! I just finished making my roman shades out of my blinds! Thanks for the great tutorial. You can check mine out at http://frugalhomeideas.blogspot.com
I construct Roman shades from scratch using boards and eyescrews. For the novice, this is an excellent suggestion. It takes away the hard part and leaves the fun part, no special tool needed; re-using an otherwise useless piece of trash. I have miniblinds I want to replace and I think I'll try your way on them! Thanks for the great pictures and instructions.
What a wonderful idea!!I rent so I;ll have to figure out a little bit different way to connect the fabric to the blinds.
maybe a pretty stripe that i could sew around the slate.?
thanks!
OMG YOU ARE A GENIUS. ITS LATE RIGHT NOW BUT FIRST THING IN THE MORNING I AM GOING TO GET STARTED ON THIS. I WILL PROBABLY DREAM ABOUT IT ALL NIGHT. THANKS SOOOO MUCH!!!!!!!
You posted this almost a year ago (how the time flies!), but I just spent my evening making shades for our master bedroom. They're fabulous! Thanks so much for the idea and tutorial. You are too fab for words.
You are brilliant!
The shades in our bedroom just fell apart. I love this idea.
Kathy
What a Godsend your idea is! I just came across this recently and am so excited to rescue my many ugly apartment miniblinds! Thanks so much for your ingenuity!! And it's got the nerve to be cheap, too!!
I just did this for my windows 72" wide by 48" long. It looks fantastic! I do have a couple of suggestions. If you can sew at all, it is very easy to turn the raw edges under and stitch. This is much more precise and easier than gluing. Also, put protective plastic under the project when gluing – I used newspaper under my first attempt and the fumes from the glue went through and damaged my table. For wide windows like mine,it really helped to have 2 people to turn the slats once glued. The glue sets up very quickly and you really only have one chance to get it right! Great project. I am impressed.
AWESOME!!! Very detailed advice, and I am going to give this a try for a few of my smaller windows. Thanks again~
I used your tutorial and it worked great! Check out the results in my nursery pictures:
http://littlewillow.com/2010/01/14/the-nursery-finally/