This afternoon we finished the Domino shoot! I’m so excited to share all the projects we did to get the house ready for this spread. We did a few DIY lighting projects and I love how they turned out. And actually, for Phoenix locals, I’ve partnered with the Home Depot to make this project and to host a DIY lighting workshop on July 12 from 10-11:30am. You can register for a spot at the TEMPE (Baseline) location here. I hope you can come! I’ve attended a couple of DIY Workshops before (the one on tile was SO helpful!) and they’re always a good time. I’m excited to help lead this one where we’ll be talking about lighting trends – it will be super casual and hopefully a lot of fun. :)
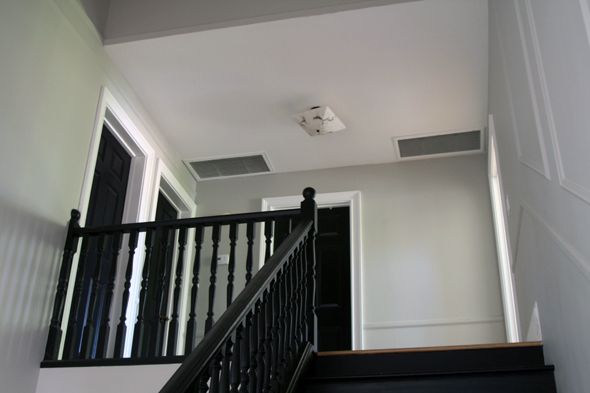
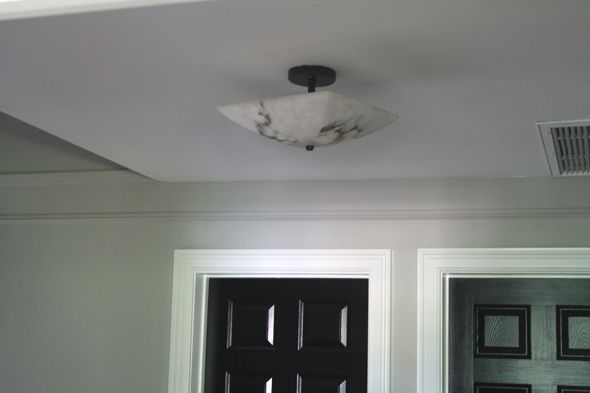
So for this lighting DIY, I desperately needed a new fixture for the upstairs landing. The old one was a big bummer, and after splurging on a new Arteriors chandelier for the entry, I didn’t want to spend hardly anything on this light. I remembered posting this idea years ago and it felt like the perfect quick solution for our landing light!
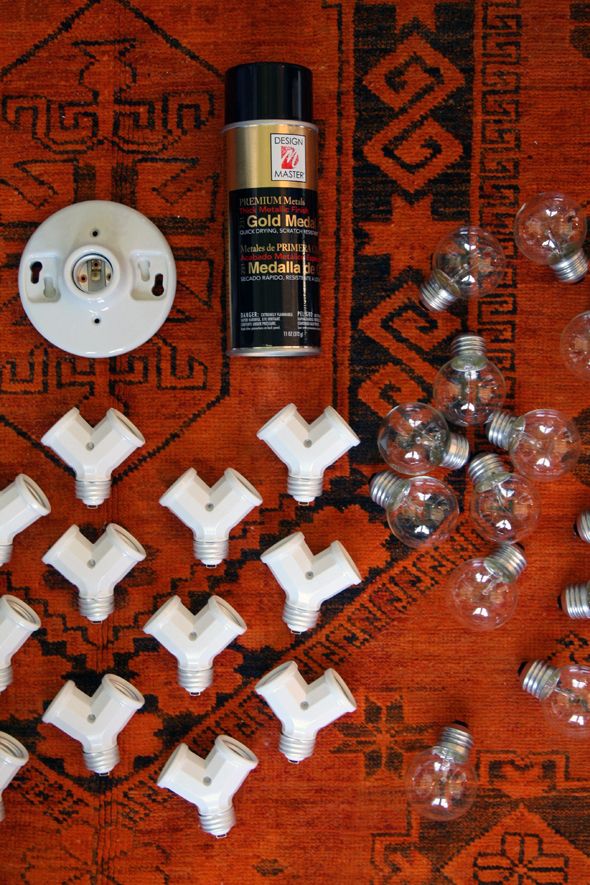
I picked up 12 socket splitters at Home Depot. They were about a buck each, in the electrical aisle by all the outlet and switches. In the same aisle, you can find a simple porcelain canopy socket for about two dollars.
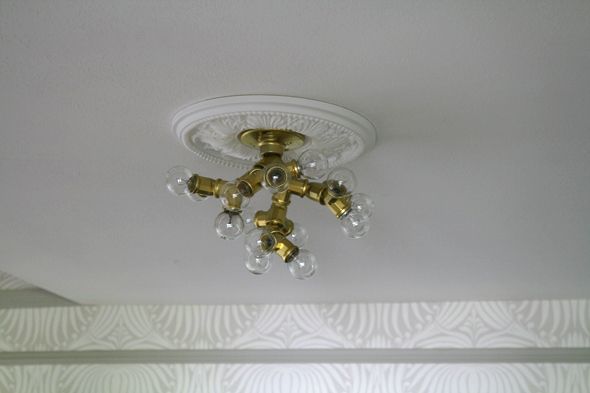
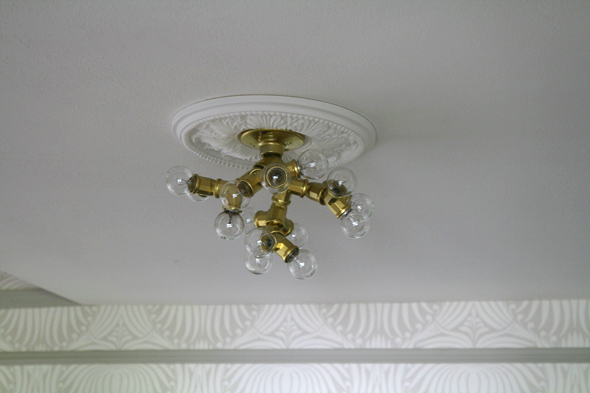
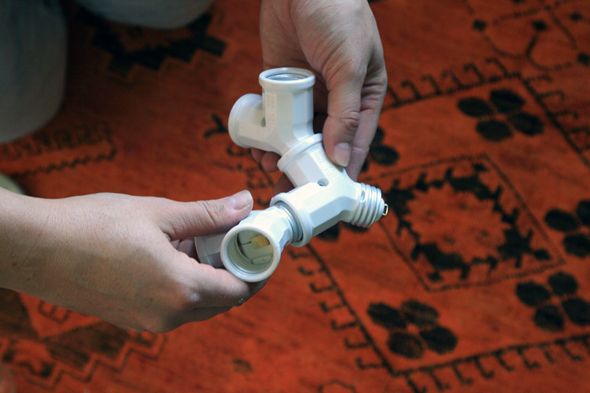
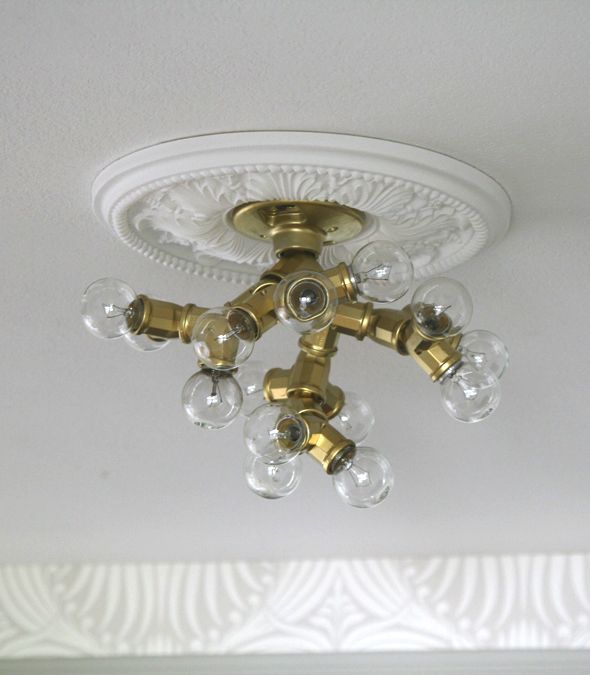
After taking all the stickers off, I screwed in the sockets and figured out the overall shape I wanted for the light. What I love about this project is you can shape the light however you want. You can make it more organic and branch-like or you can keep it pretty compact like I did. The ceiling on our landing is not super high, so I needed to keep the fixture short.
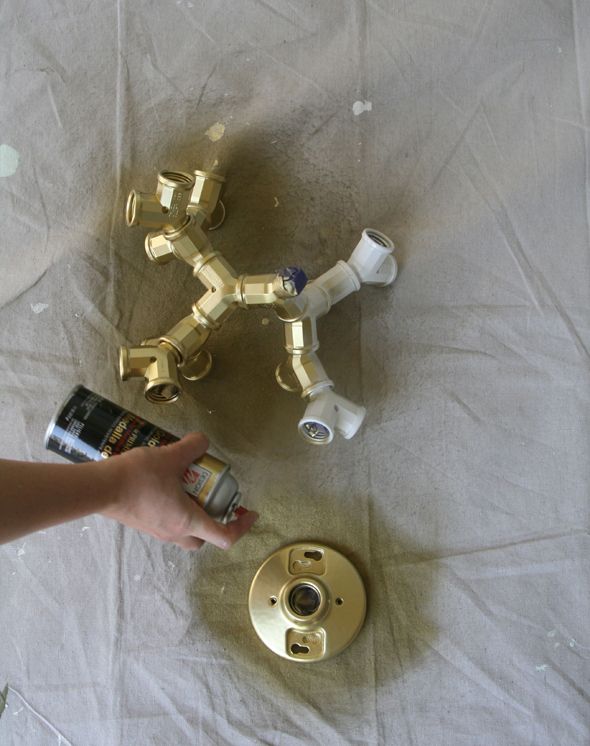
I spray painted the canopy and the assembled fixture (which is easier to spray when it’s put together) and I used a little painters tape to protect all the electrical parts. After two good coats and drying time, the light was ready to install.
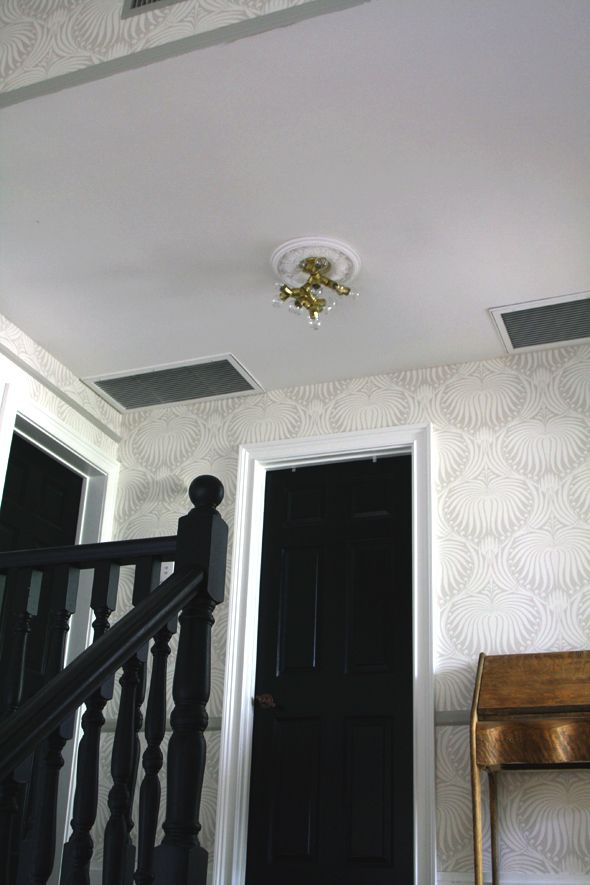
I also ended up buying a ceiling medallion from Home Depot. I like the way it finishes off the fixture and makes it look a little more fancy. I think it’s so pretty to mix really traditional things with more modern ones.
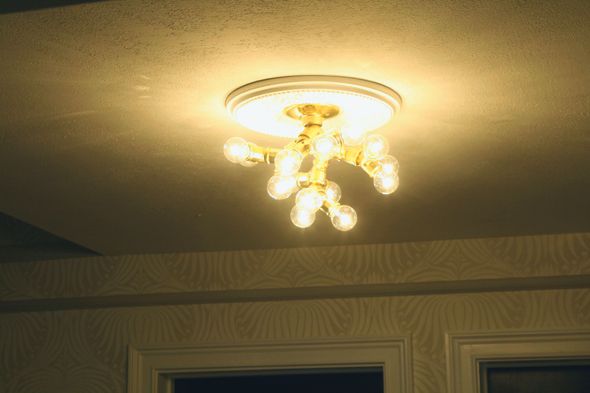
Twelve of the splitters makes a pretty good-sized fixture that produces quite a bit of light. I used I think fourteen 25-watt bulbs. It’s so sparkly! :)
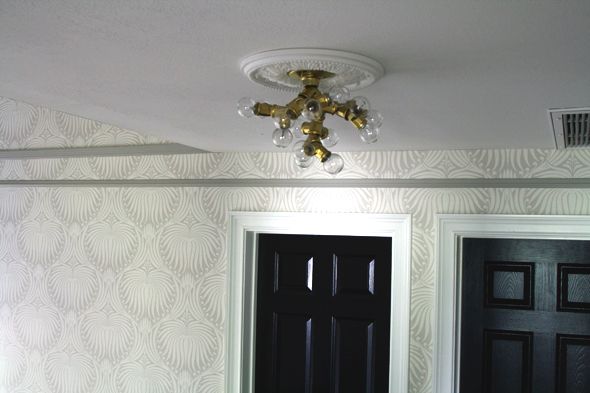
And I LOVE how it looks with our new wallpaper! Such a quick and cheap project, but I am so happy with how it turned out!
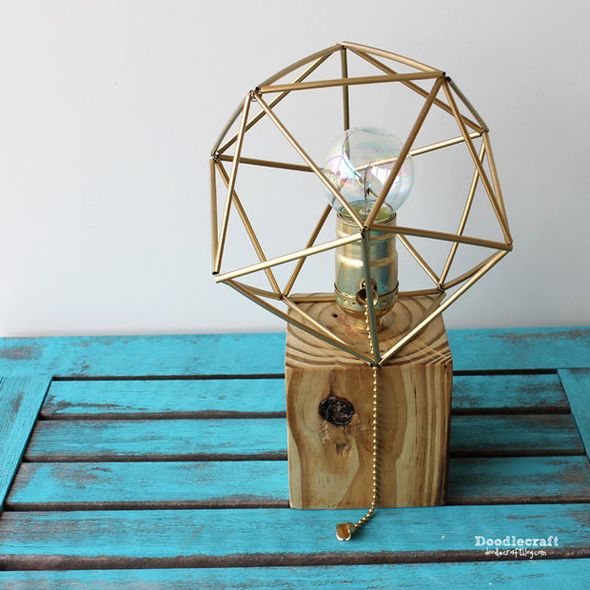
PS The people at The Home Depot who invited me to host this upcoming DIY workshop sent me
a link to a lighting contest they did with Instructables.com. The winning project was this pretty
reclaimed wood lamp. That geometric shade is made from straws! Very cool!


Your light with a change is perfection. I love the style of this vintage chair. Your room is lovely and very serene.
apartment-decoration
It looks very strange but I like it:)
Fulham Carpet cleaning
Your new F&B wallpaper with the black doors look amazing!
Great idea! Now I'm thinking of doing something like this as part of a ceiling fan for my son's room.
The light looks fab! (The original definitely was a "bummer"!) Can't wait for the Domino spread. Your DIY workshop *almost* makes me think being in Phoenix in July is a good idea!
You are so inventive Jenny! It is a true gift! Love the light, LOVE the wallpaper!
I love the color combination jenny and the light is so pretty ! Which lication are u teaching at ? I hope to make it ?
Per usual, awesome job!!
x Lily
http://whilemyboyfriendsaway.blogspot.com/
Love, love LOVE the light fixture! I clicked on the Home Depot link. There are several Phoenix locations listed. Will you be at the Camelback store? Thank you so much.
Which phoenix Home Depot will you be at? I want to know which store to sign up at! And by the way, I can't wait to see your house (and new built in bookshelves) in domino!
Ah what a fun light, makes me curious about the larger branch like version you suggested!
Ha!! I actually found your original post on this light yesterday and went and bought the parts!! Kismet, perhaps?
xox
So cool! I have considered making sconces in a similar manner but with metal. I never considered painting the white! So smart. Thanks for sharing!
This is so timely! I've been looking for a light and this is exactly, exactly what I want to do.
I am dying to see the Domino spread. When will they publish it?
You are a mindreader . I've been collecting splitters to do this same thing (inspired by Abaline bar in Red Hook) and have been trying to figure out how to pull off a medallion in a rental…but the gold takes it to another level. Total motivation to finally make this happen in our bedroom.
Wonderful Light!
Quick question, did you have to pull wiring through to each individual light socket? Or just wire at the base and it picks up? I would love to try this in my home just not sure about the wiring part. Thanks for your reply and sharing this!
How the heck do I pin this great light idea? I really want to try this…
Deb- I think you would just wire the porcelain canopy then the splitters just screw in.
I want to live in AZ so bad just so I can go to these HD workshops you teach. I love your style and have been thinking of doing something similar in my hallway, now I know it'll look fab. Abstract sputnik, kinda.
I adore this! Are you at all worried about the wattage (it looks like you end up having about 5X the draw from the main attachment than what it's rated for?) or it blowing?
Thanks for posting this great lighting idea! I purchased all the splitters I could find and made a smaller version and sprayed it out black. The only 25W bulbs that I could find are larger vanity globes, but it still looks great. There so are many variations possible– love it!
So so super super cool!! thanks for yet another awesome idea i hope to one day use!
Hi Guys!
The Home Depot workshop is at the Tempe location. Sorry for the confusion!
Deb- The canopy is the part that is hardwired in – all the other sockets are screwed in just like lightbulbs!
xo
Hi Guys!
The Home Depot workshop is at the Tempe location. Sorry for the confusion!
Deb- The canopy is the part that is hardwired in – all the other sockets are screwed in just like lightbulbs!
xo
I hope you know I am subscribing to Domino just to see your house tour…
Very cool Jenny! I wish I could attend your workshop- I am wild about making light fixtures! Love your sparkle in the hallway. Can't wait to see your Domino feature! xo Nancy
Is there a risk of this blowing with all of those light bulbs? Or did you already have an electrician check to make sure it is OK?
Here's the exact address of the workshop. I guess there are two Tempe Home Depots! :)
Tempe store #489
1330 W Baseline Road
Tempe, AZ 85283
Here's the exact address of the workshop. I guess there are two Tempe Home Depots! :)
Tempe store #489
1330 W Baseline Road
Tempe, AZ 85283
Hi Portia –
I'll dig up my receipts and try to verify, but I'm pretty sure the Y-sockets were less than $1! I'll update the post if that's not the case though! Thanks for letting me know! Even if I'm off, I still think $40 is a steal for such a pretty light. :) xo
Jenny, the cost of those twin socket splitters at my Home Depot (Pittsburgh) and every other Depot I can find online is $2.49. I even checked the Depot in Prescott, Arizona and they were still $2.49. There aren't two sizes that I'm aware of so I'm not sure that the 15 Watt small clear bulbs would fit into the splitter sockets. The porcelain ceiling fixture is more like $4 something.
I'm not sure whether your Home Depot gave you a discount or what but you might want to correct the prices so your readers don't go nuts trying to do this fixture for $20. By my rough estimate, it's going to cost around $40 when the light bulbs are included.
Absolutely genius!
Hi Portia –
I'll dig up my receipts and try to verify, but I'm pretty sure the Y-sockets were less than $1! I'll update the post if that's not the case though! Thanks for letting me know! Even if I'm off, I still think $40 is a steal for such a pretty light. :) xo
Jenny, Home Depot employees are able to markdown items up to a total of $50. Since the whole light fixture was probably less than this (and it is a bargain, I agree), I'm guessing they just discounted every item by 50% for you.
Your blog gets a lot of traffic and is good advertising for them so it's understandable but will probably still be confusing to your readers.
I just made this fixture. Thanks for the tips! It looks great. It did cost exactly twice as much as the price you quote, so I think Home Depot must have given you a 50% off discount. But it's still a great deal!
Hi Jenny,
I tried this light fixture with great results, but I made a couple mistakes along the way that I thought might be worth sharing. In a nutshell I live in an old home and the (12) 25w bulbs I used in the original iteration of the light were just too much for my electrical system. The breaker in my electrical panel blew because I overloaded the branch circuit with the 12 bulbs. It turns out that 7 bulbs works just fine, but we needed to replace the blown breaker. (BTW the breakers in my panel are so old and out of date that they hard to find and the replacement breaker cost $36. Live and learn, right?). So I just wanted to put out an FYI to others who might want to try this with older homes: error on the side of less wattage. Luckily my dad provided direction to fix the problem (he is SOO handy…the original DIY'r of everything) and my husband did some quick calculations and replaced the breaker for me. The finishes light really looks fabulous. You can't even tell its a little smaller than I had originally planned :)
So two years later…I’m showing off my version of Jenny’s Branch Light at theycallherflipper.com